
St. Kilian chapel – Baptismal Font – part 1
I hope everyone had a nice Christmas and a happy New Year. Mine was pretty good, I found out that I am going to be a grandfather. I also took a drive up to Saint Kilian’s church last week and dropped off the first three pieces of furniture, then got some dimensions and requests for more pieces. So It is time to get back to work…
The next piece of furniture for the Saint Kilian chapel is going to be a baptismal font. This is the design that I came up with: FONT PARTS.pdf
There are a few things in the design that I need to figure out as I go, mostly joinery of the octagonal joints, but that is the fun part. On my last couple of pieces, I used the Festool Domino , but I think I want to explore a few more options on this project.
There are a lot of parts to this font, so I think I am going to start with the top section that houses the bowl. The side walls that create the base of this top section are 1-1/2″ thick. I want this section to be thicker so that I have more surface area for the joints that have to be glued up.

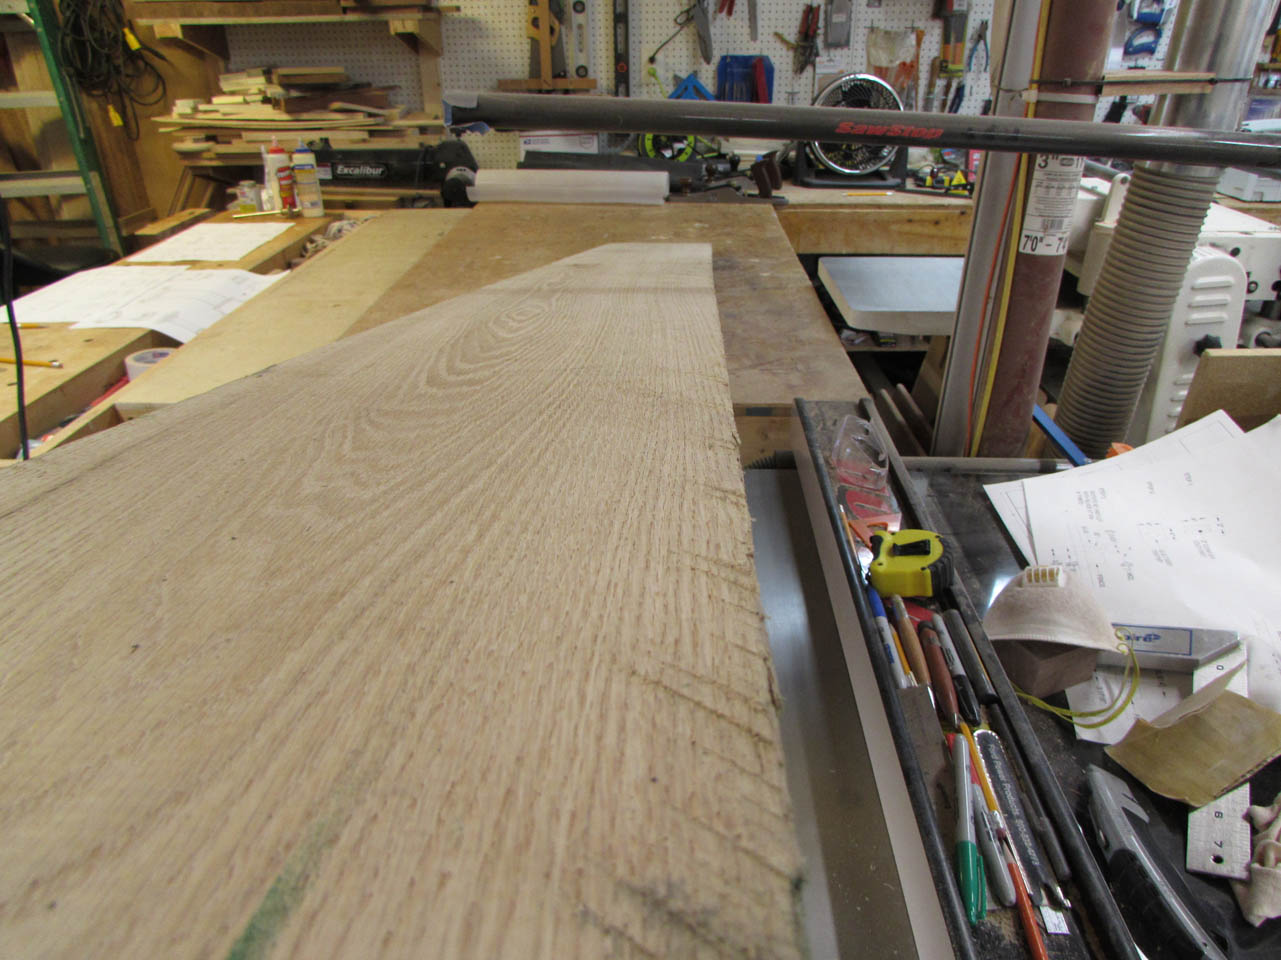
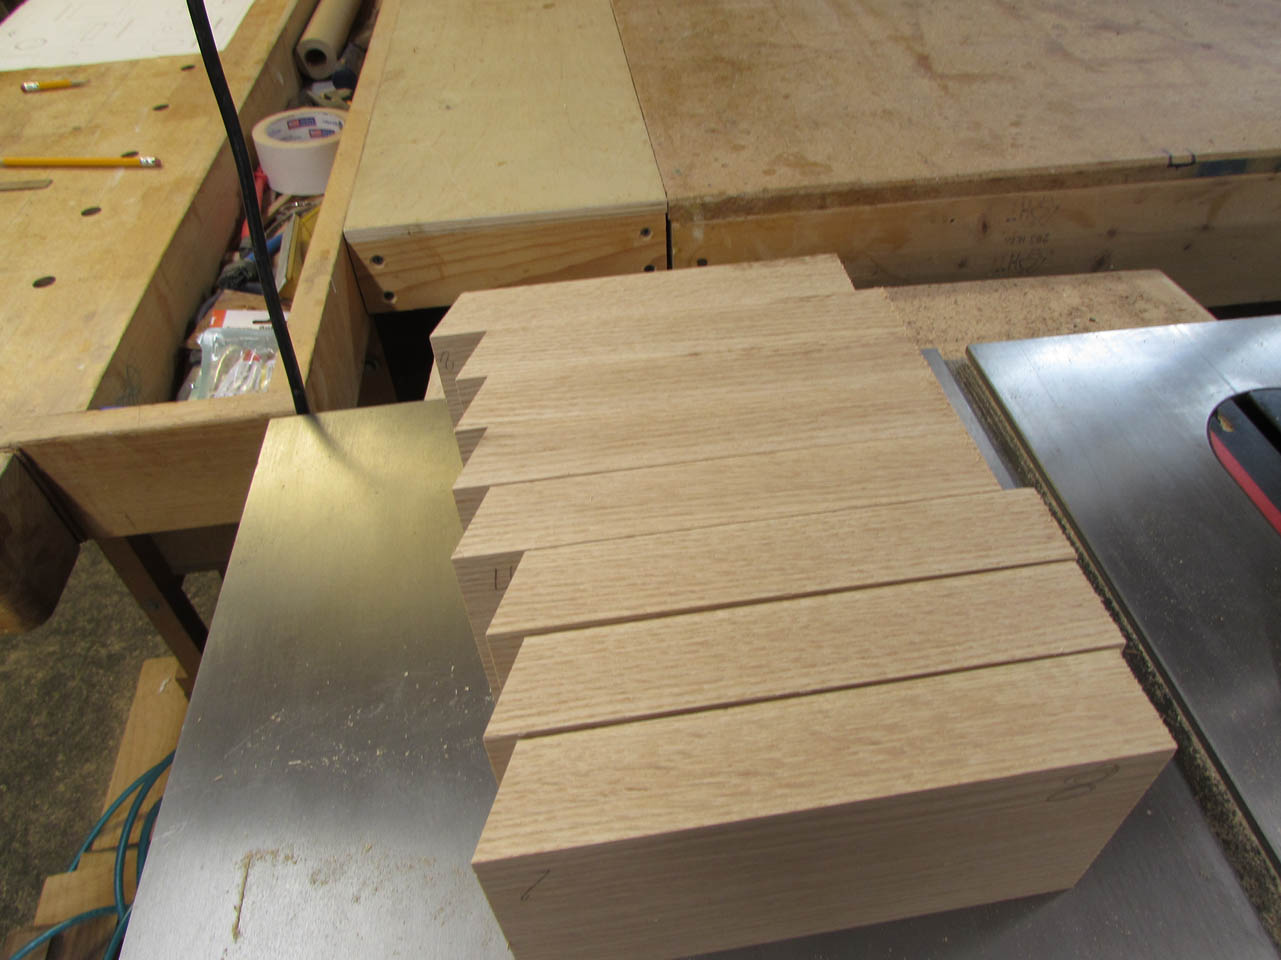
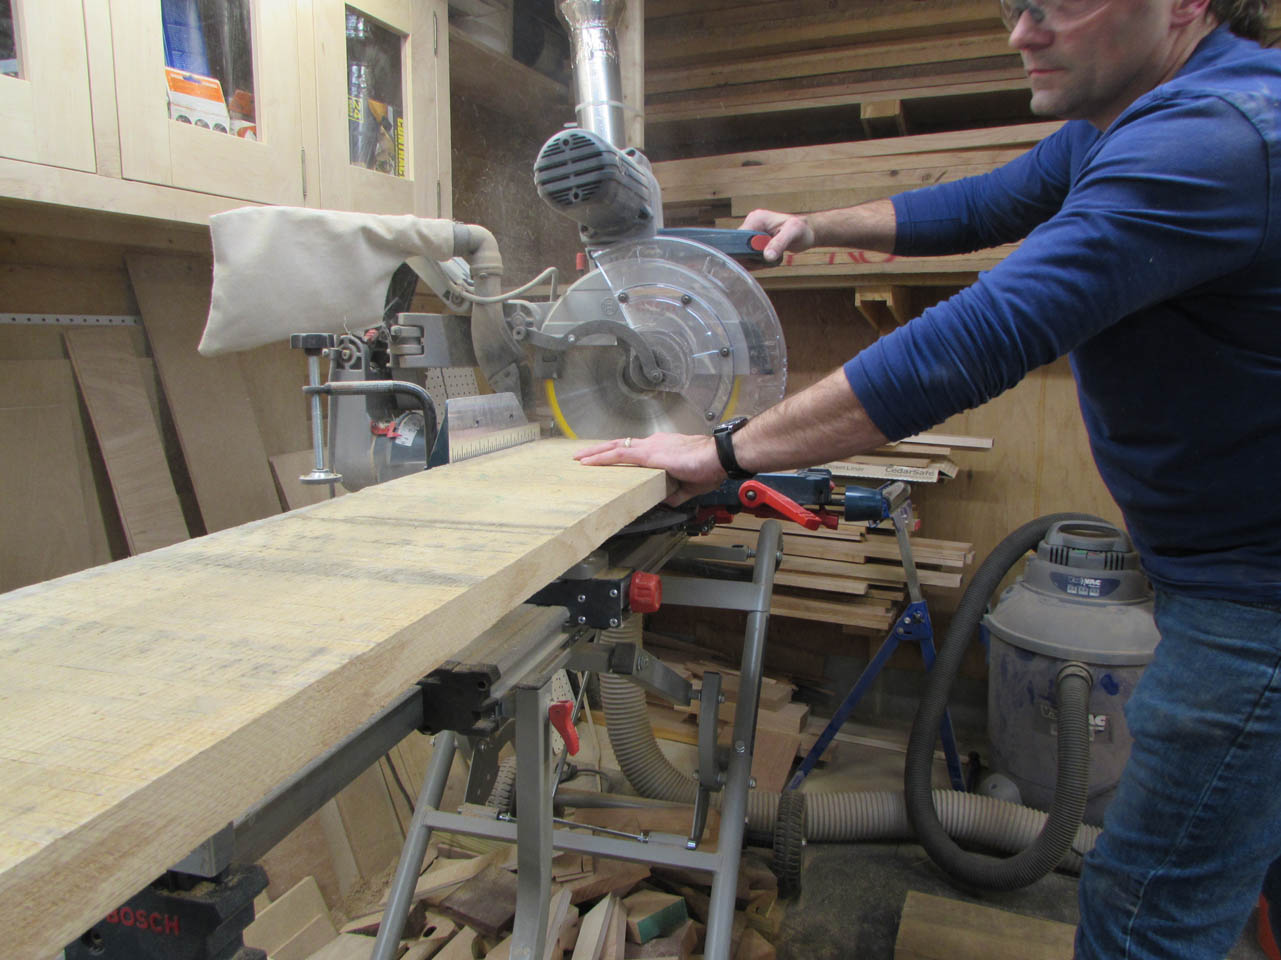
I start by jointing the edge of a 7′ long piece of 6\4 red oak, then I ripped it down to about 4″ wide. I deliberately selected the side that has very boring, straight-line grain, because I want it to wrap around the bowl and look continuous. Any fancy, swirly grain would just be difficult to line up.
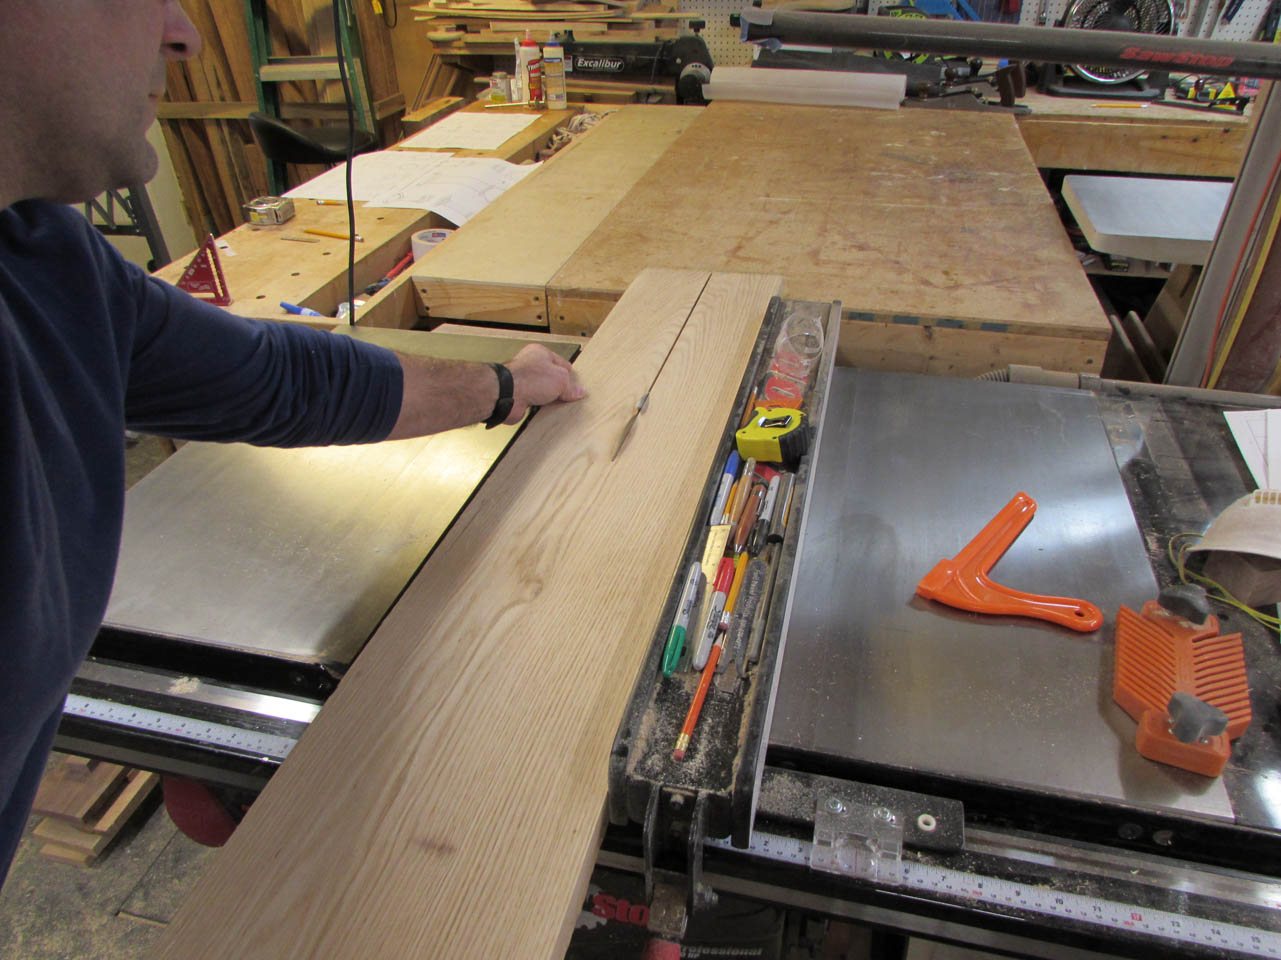
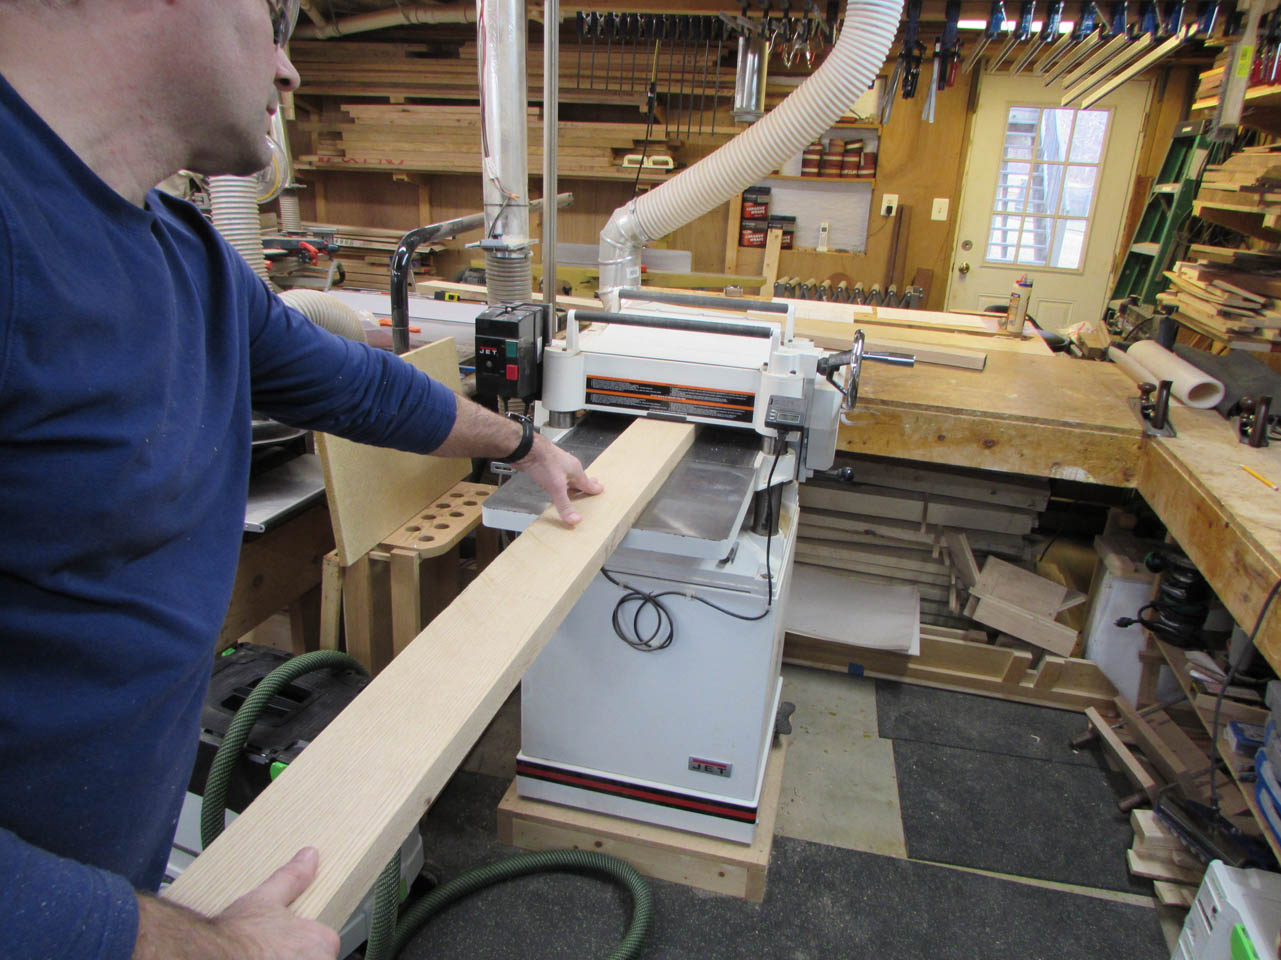
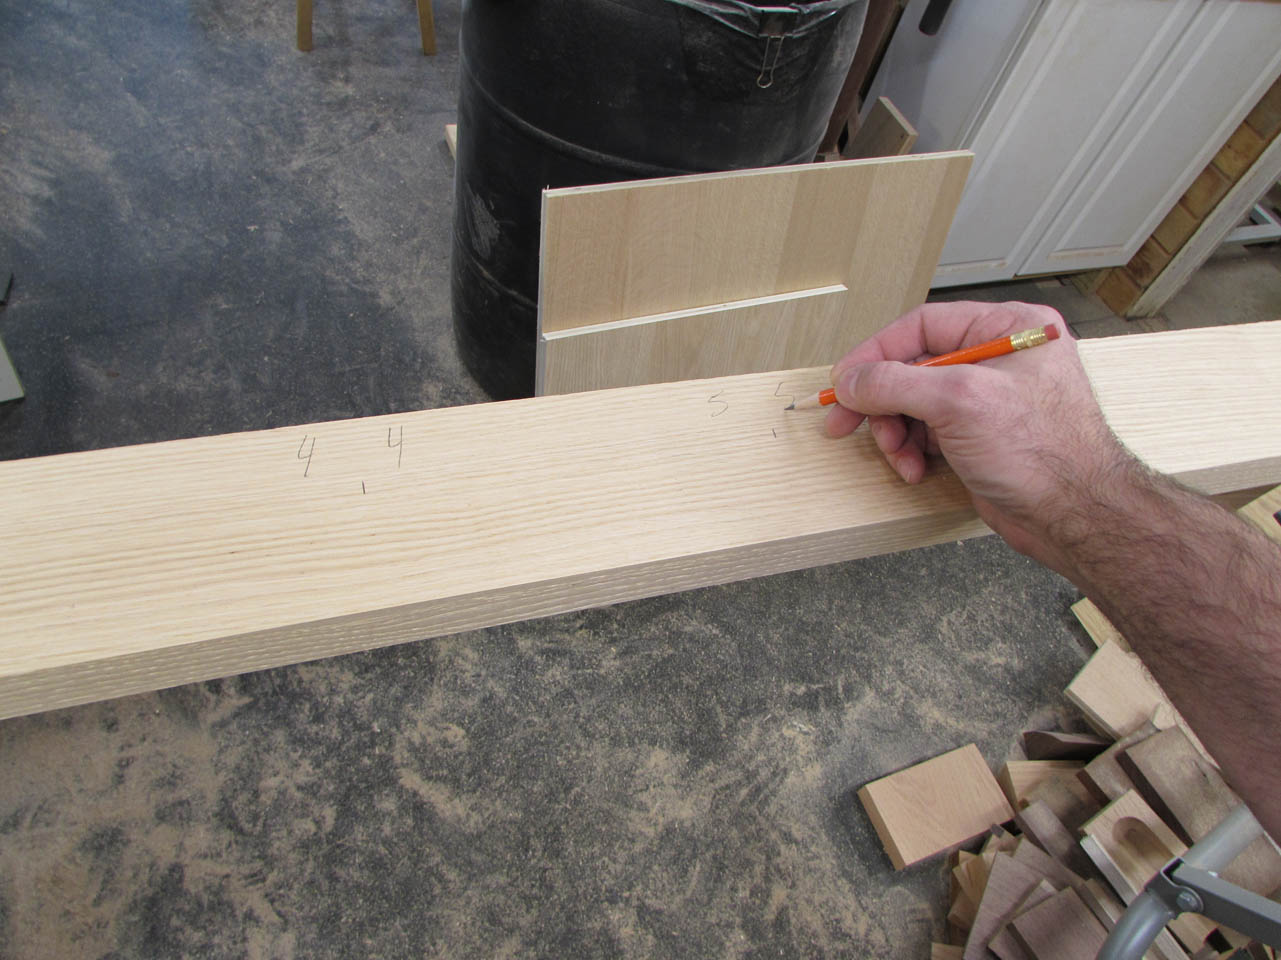
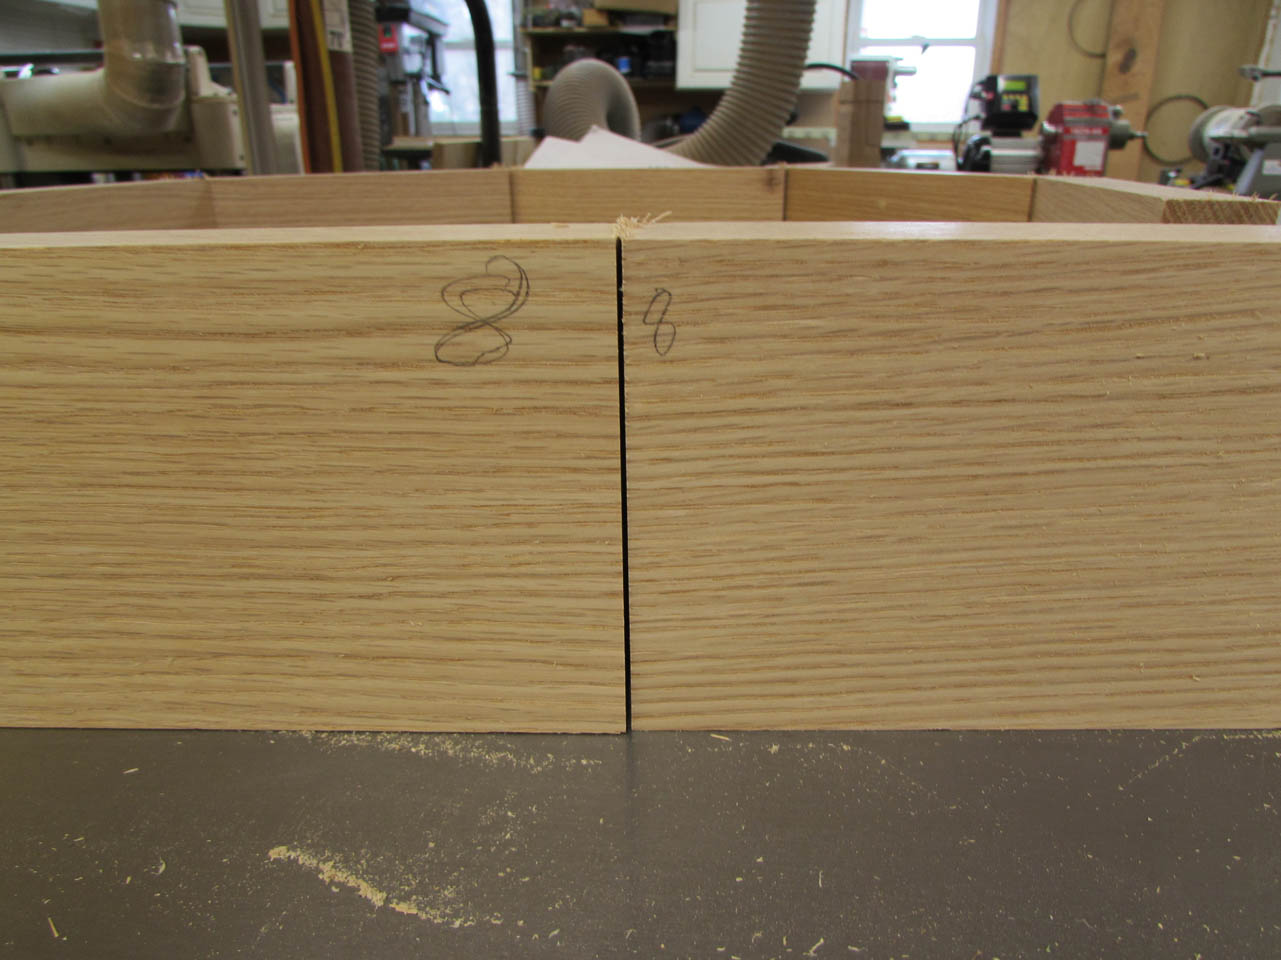
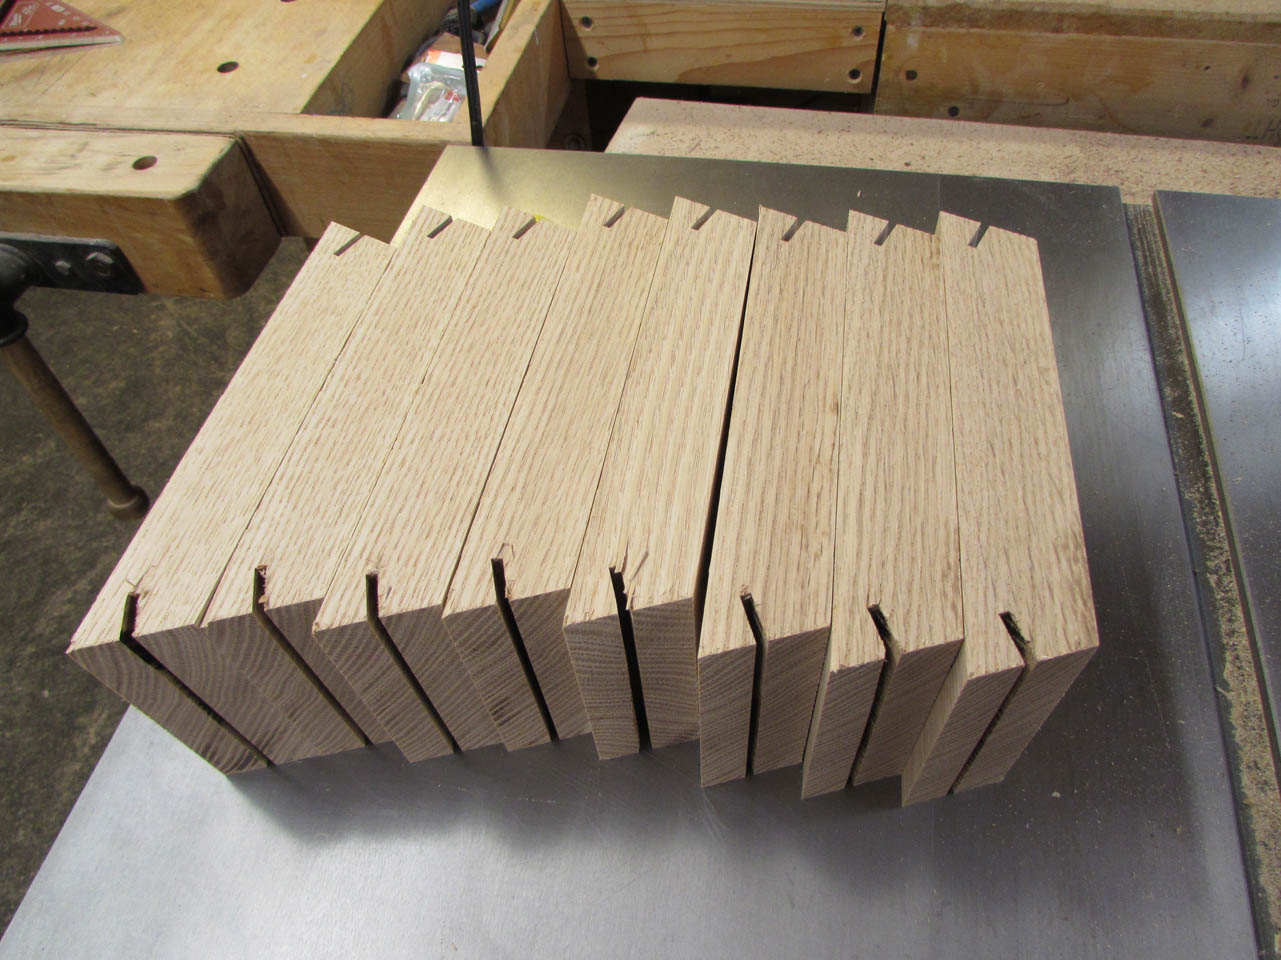
After planing the board down to the desired thickness, I laid out marks for all eight pieces and marked each end with a number so they could be matched back up later.
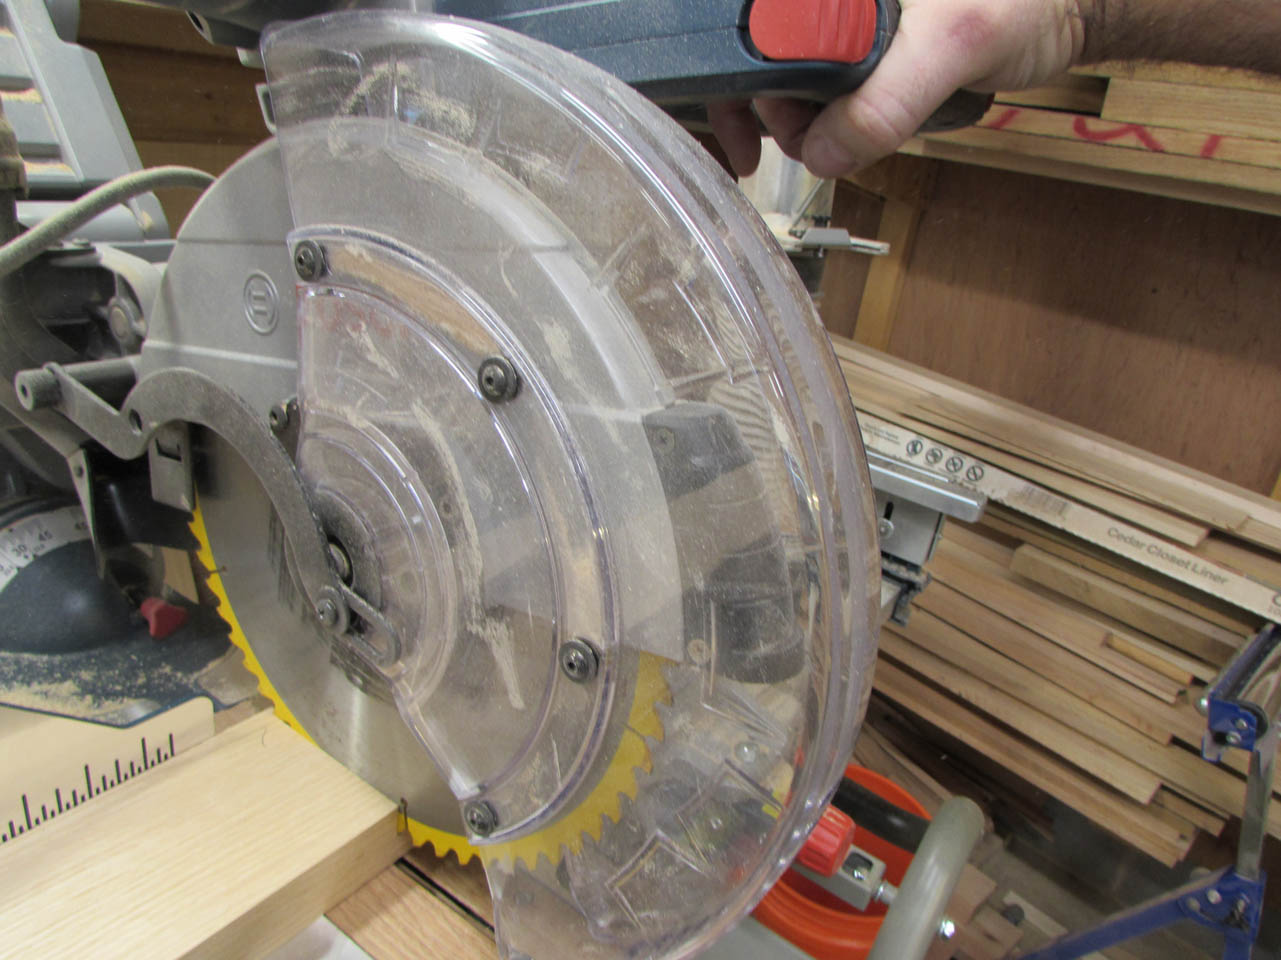
Then I cut out all eight pieces on my miter saw.

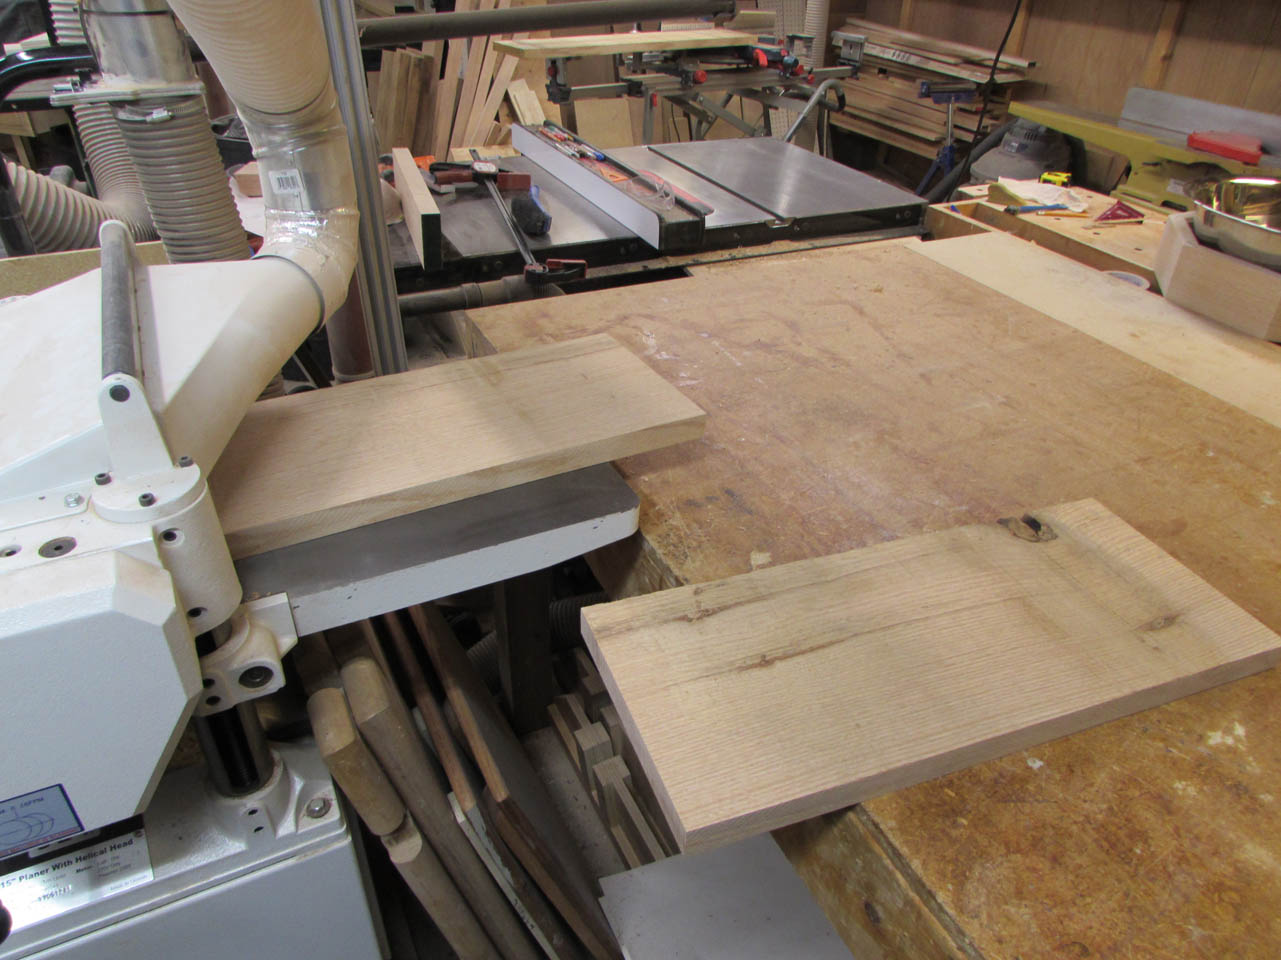
Using the straight grain keeps the grain pretty generic. Even when connecting the opposite ends together, the grain seems to match pretty well.
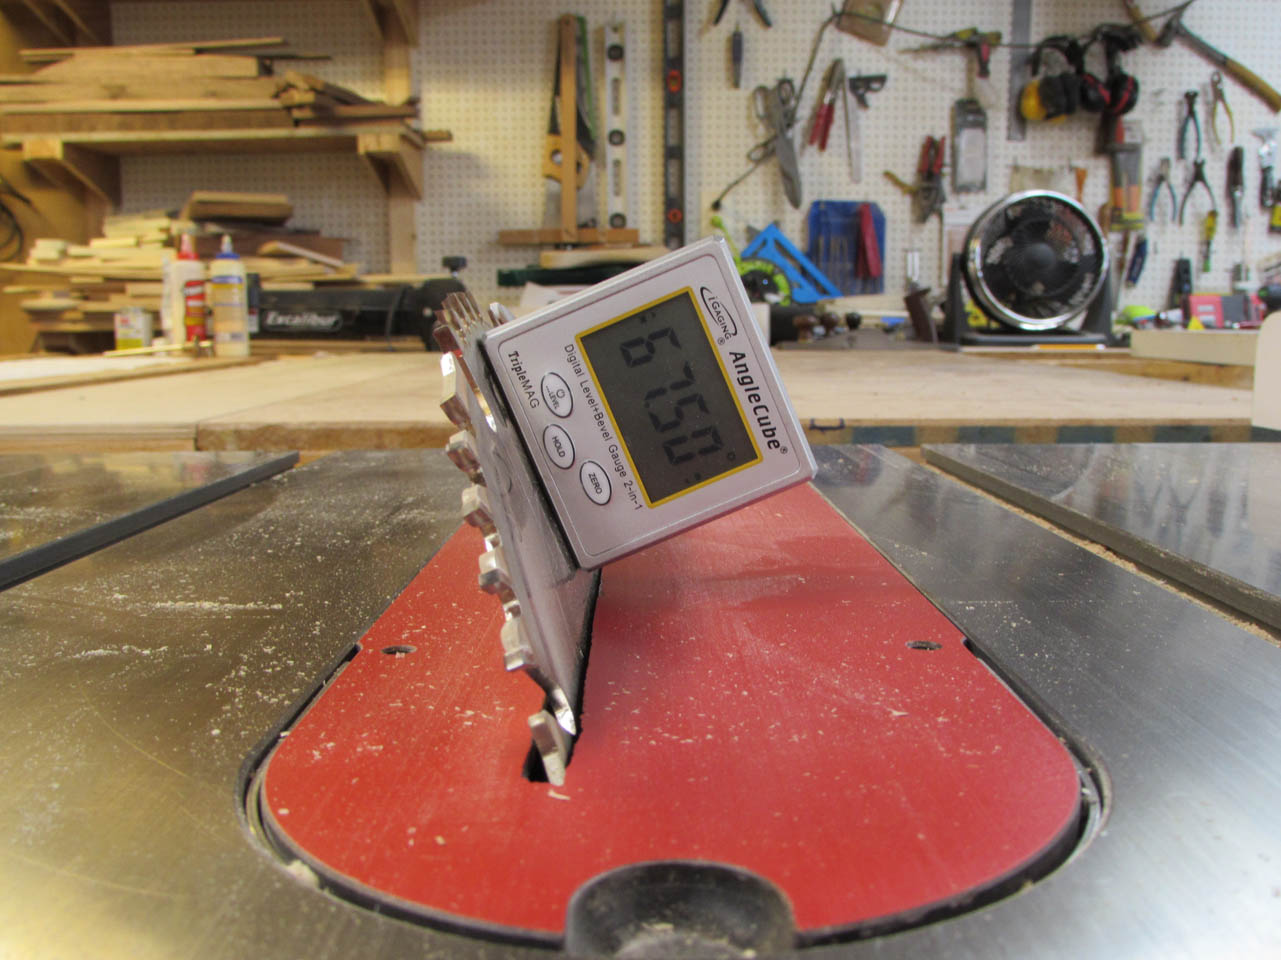
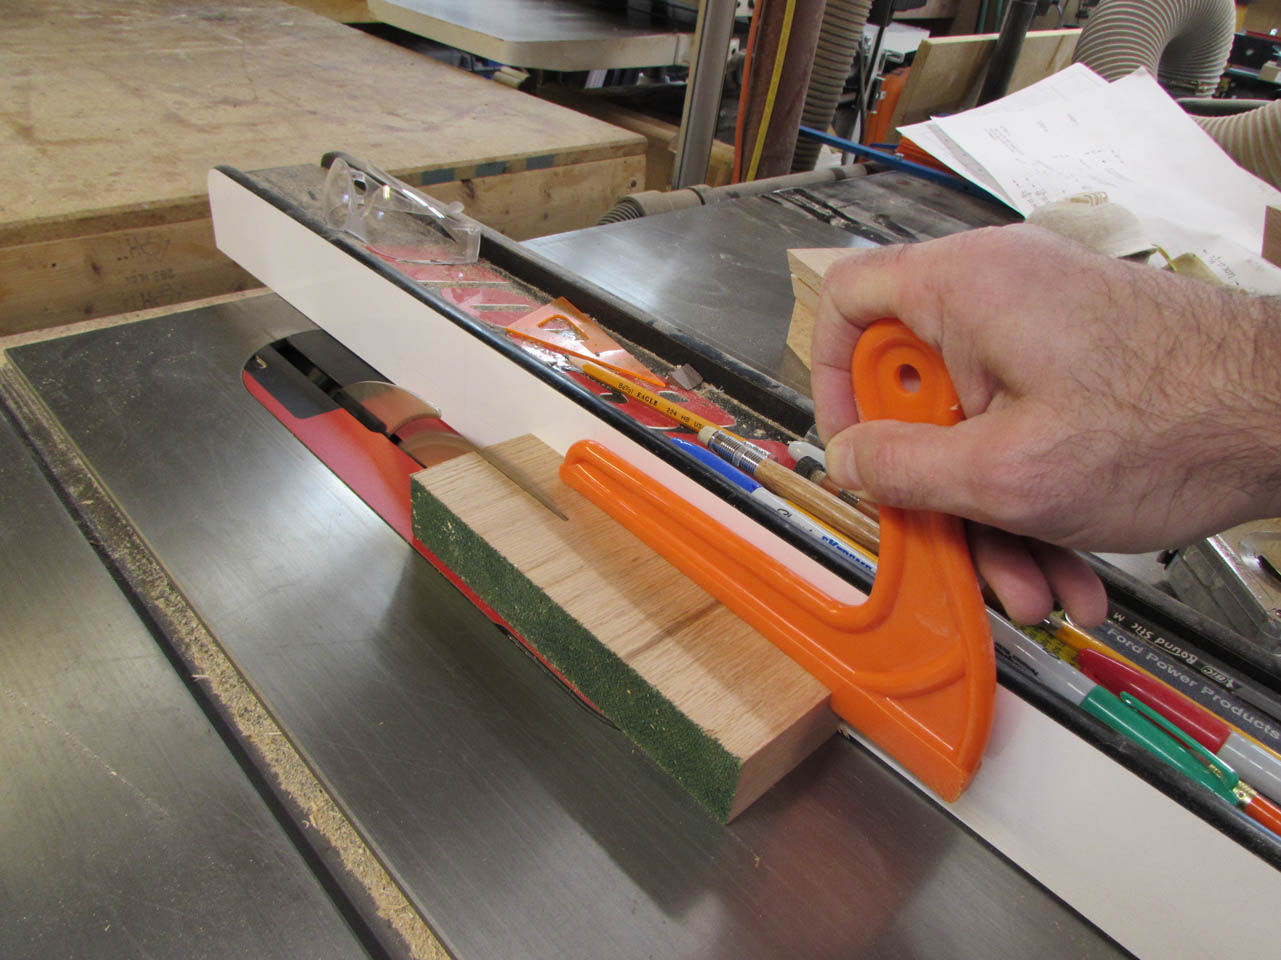
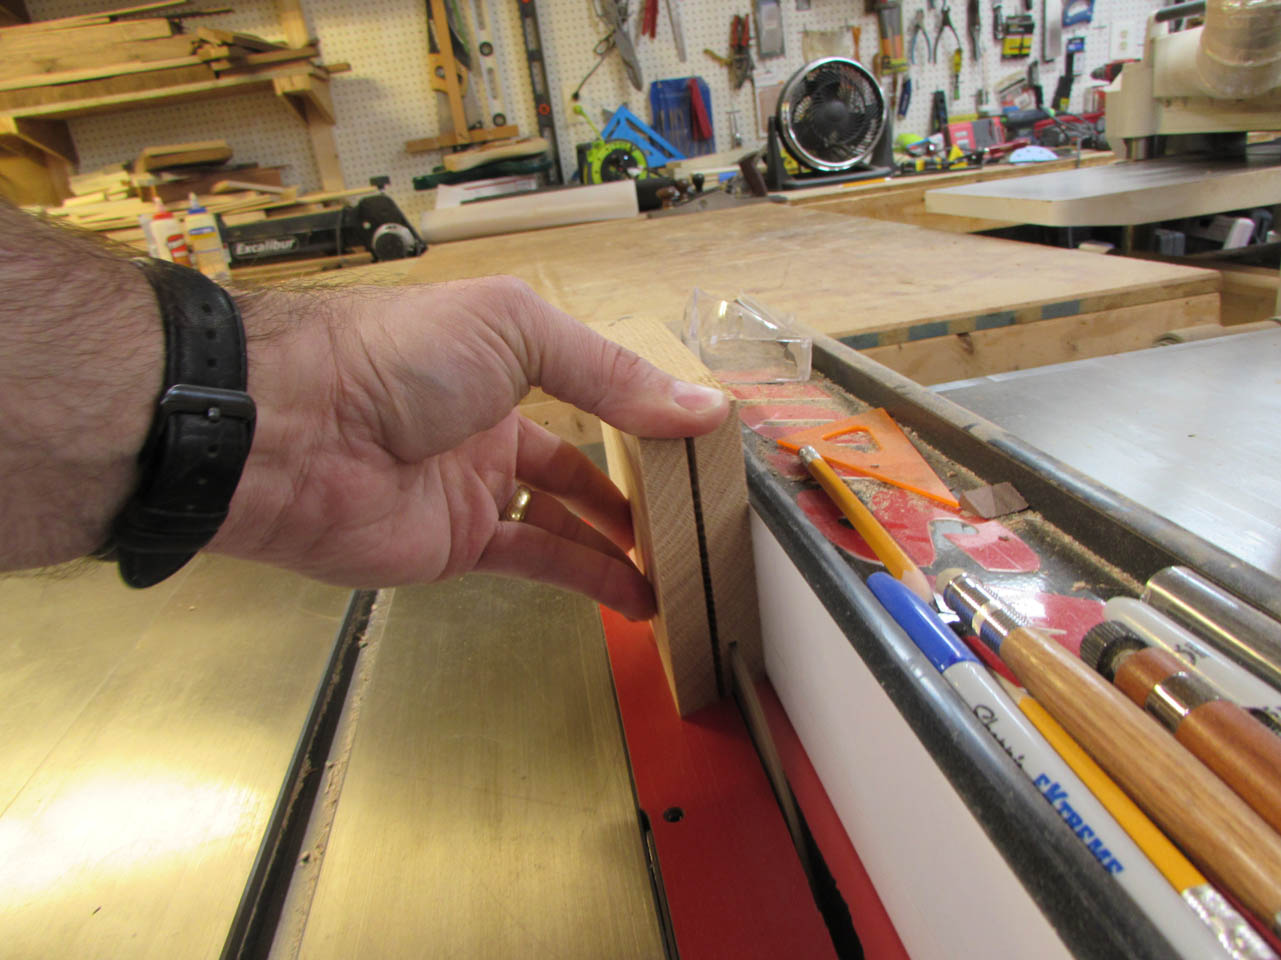
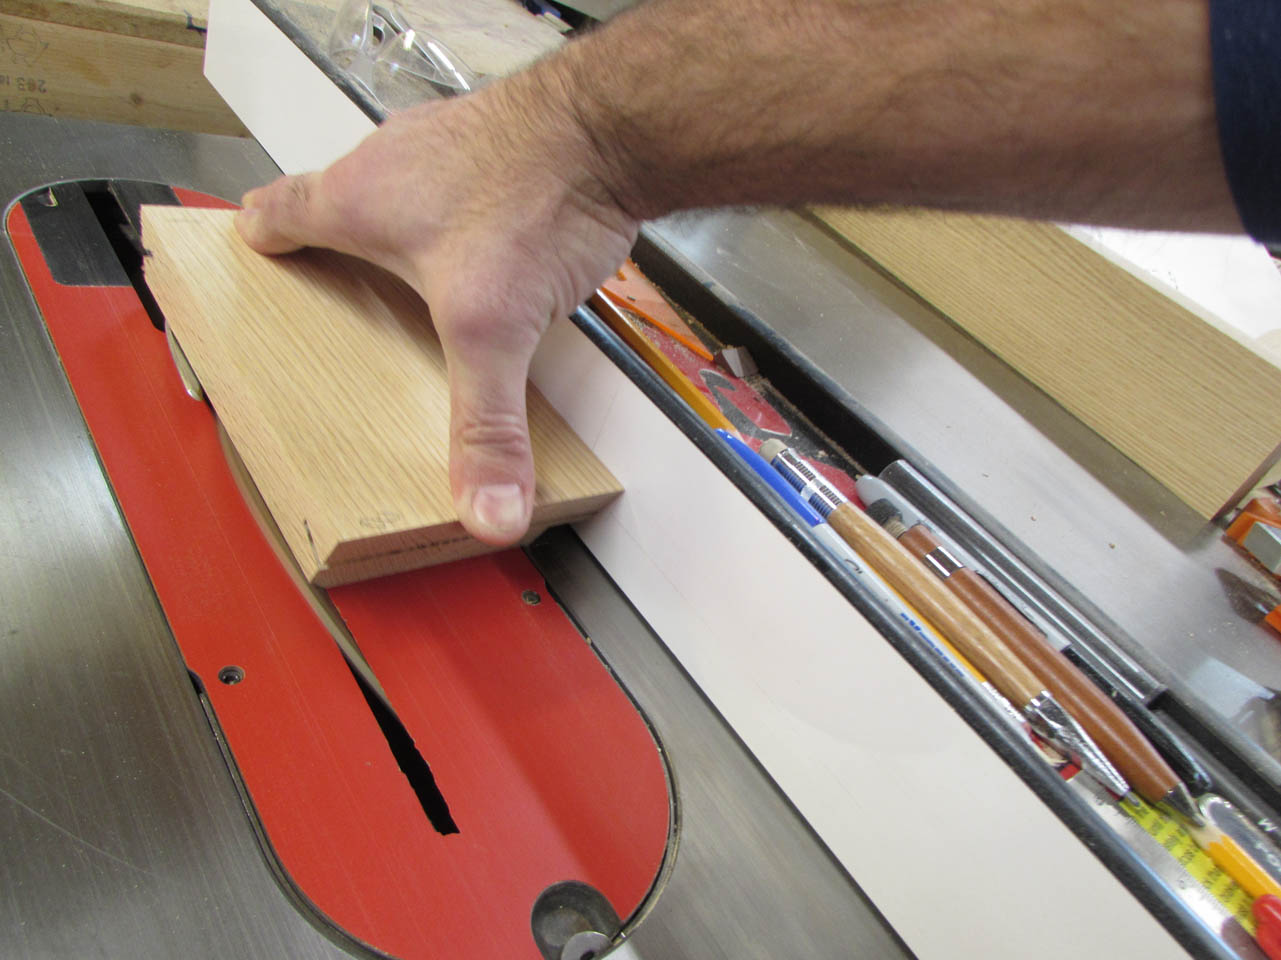
Then I set my table saw blade to 67.5° and cut off the first angle from each section.
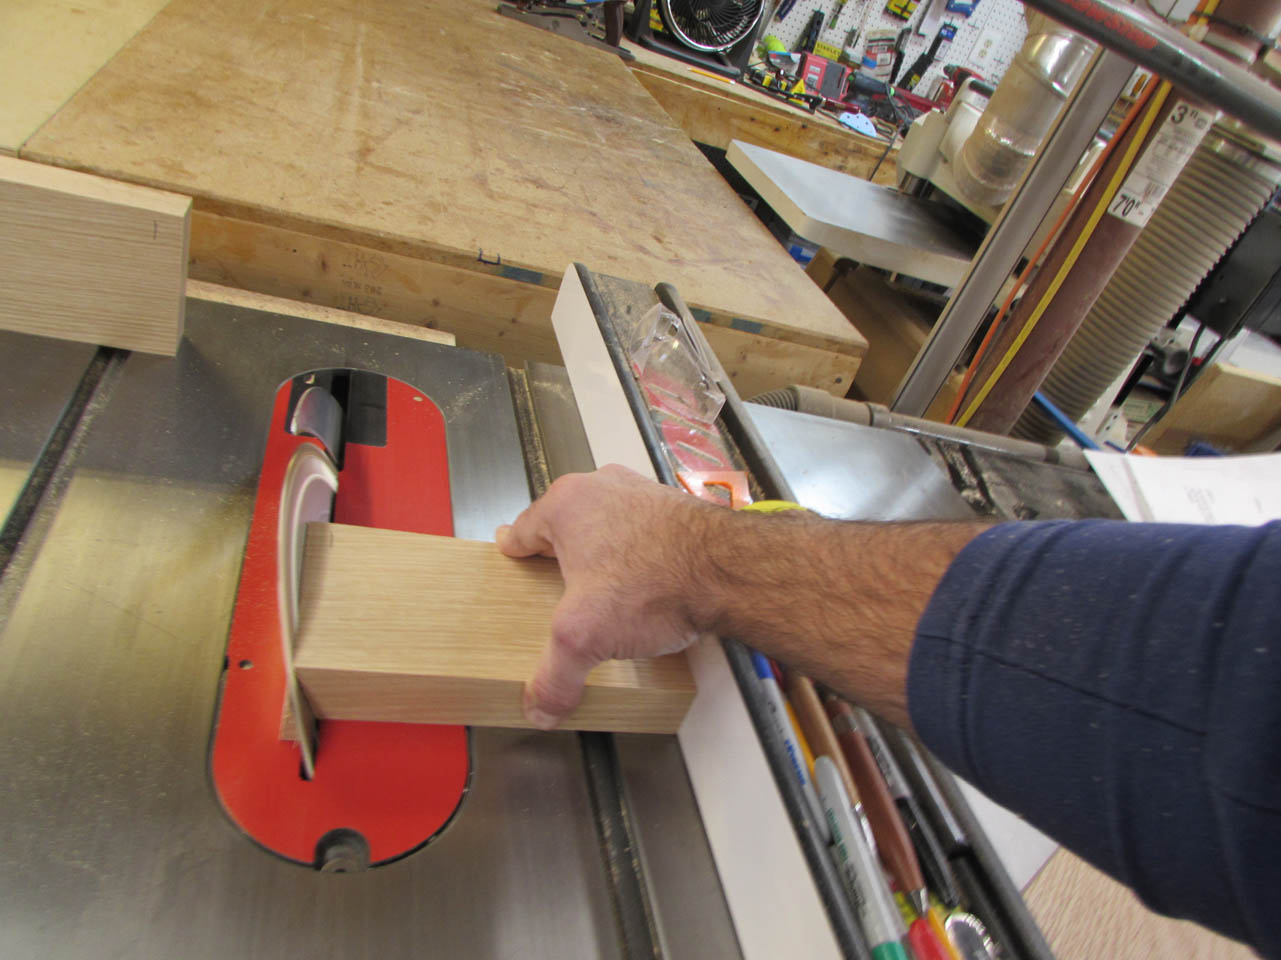
I adjusted the fence in a little then cut the opposite end as well.

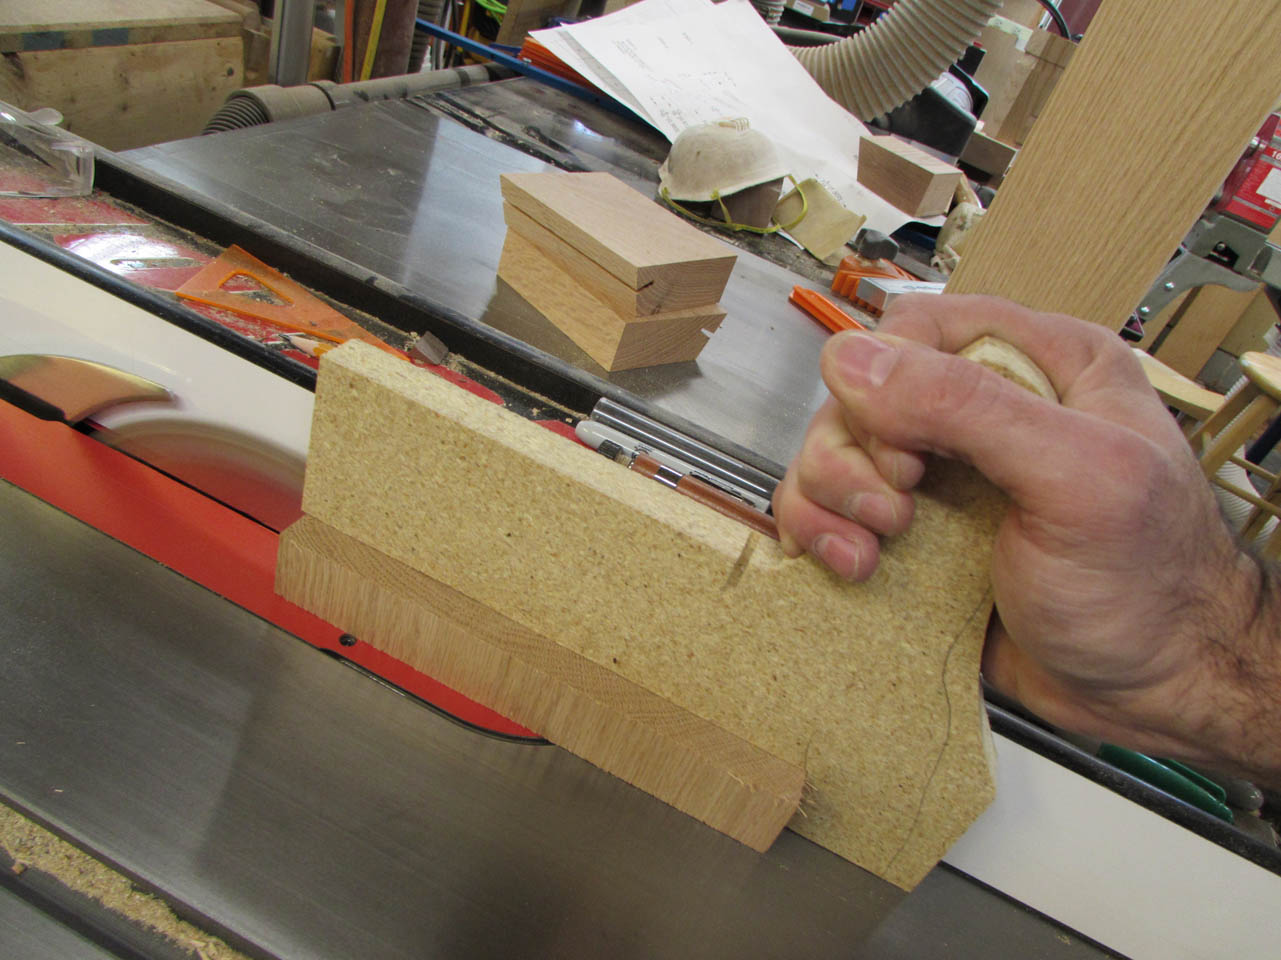
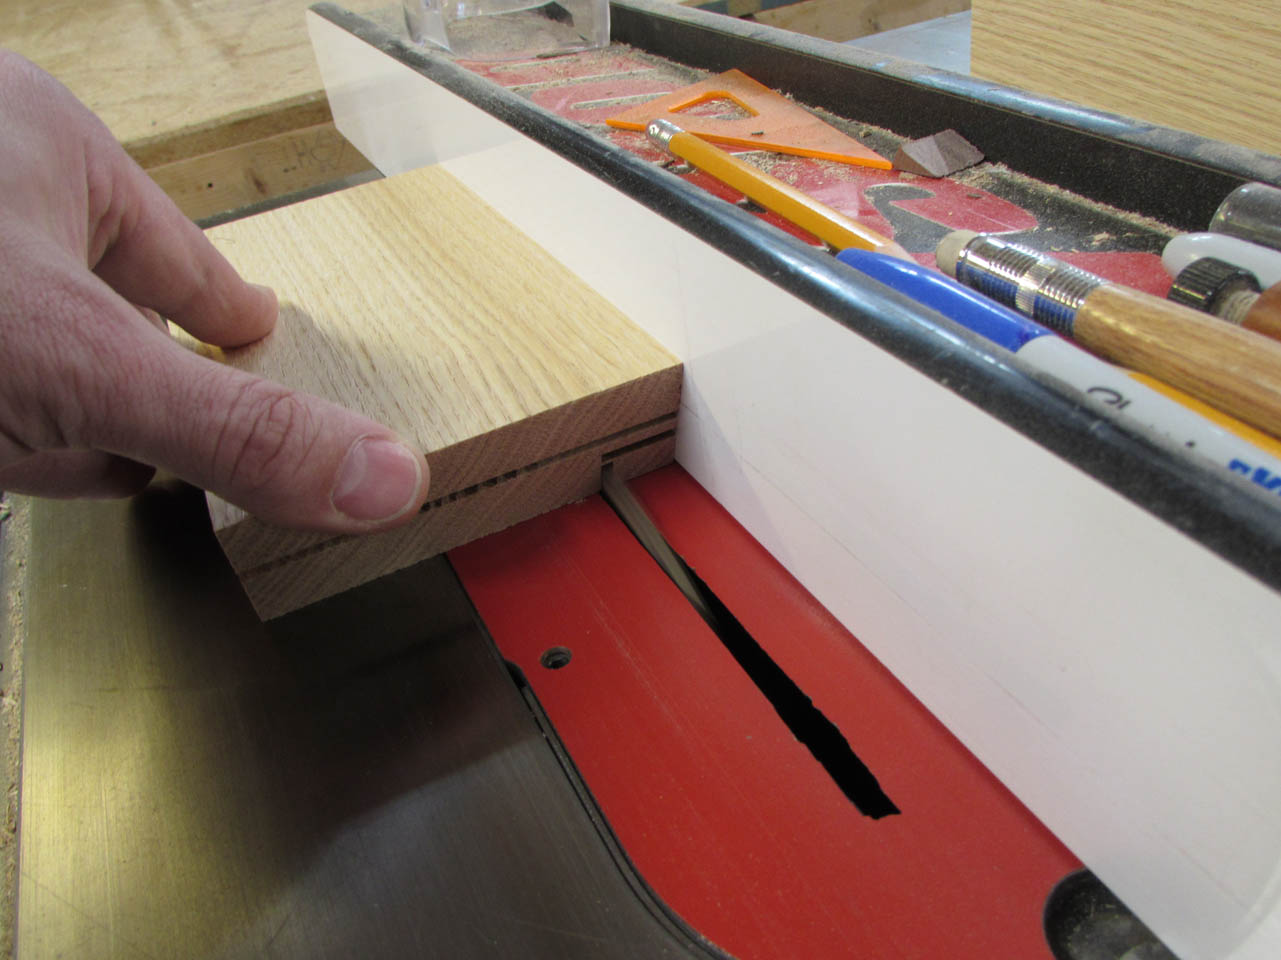
This is one of the joints where I wanted to experiment a little. As I was cutting the bevels on the ends, it occurred to me that I could flip the board on end and adjust the fence to get a perpendicular cut into the face of the bevel.

I made a couple of sample pieces and cut the test cuts into them.
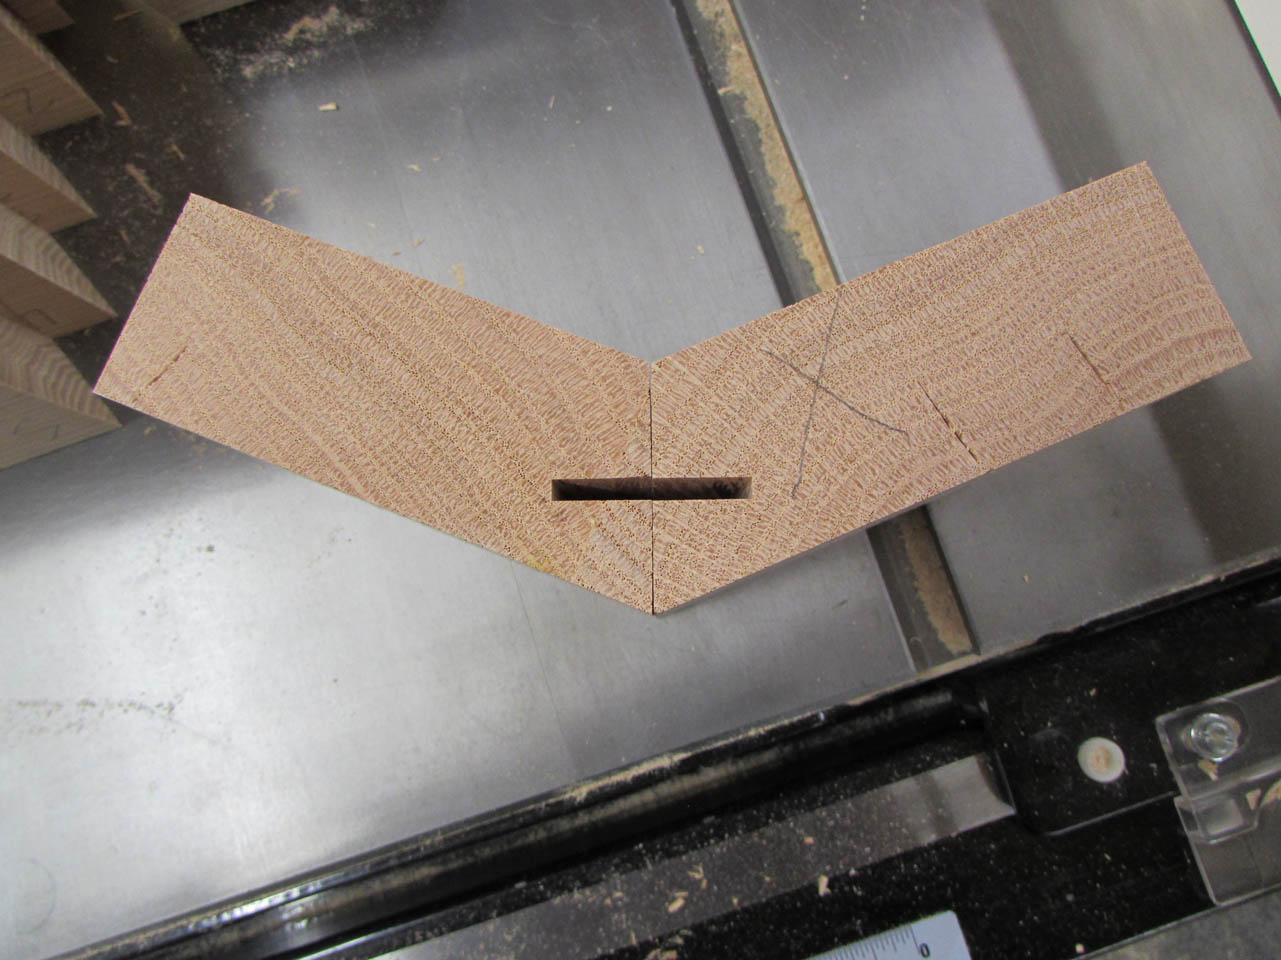
This would be perfect for connecting the joint with a spline.

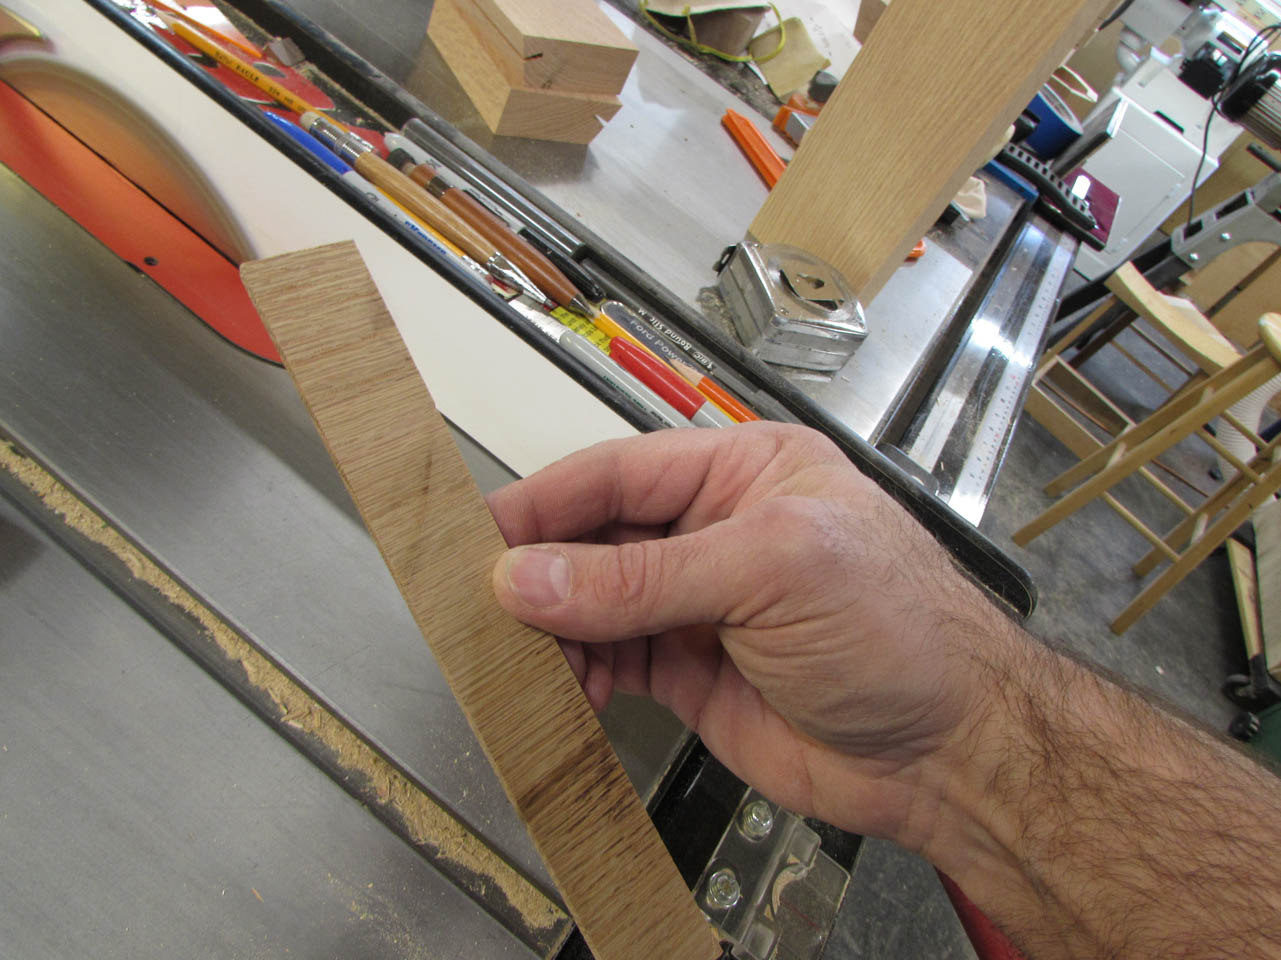
All I need to do is cut a strip 1″ wide that has the grain running perpendicular to the sides.
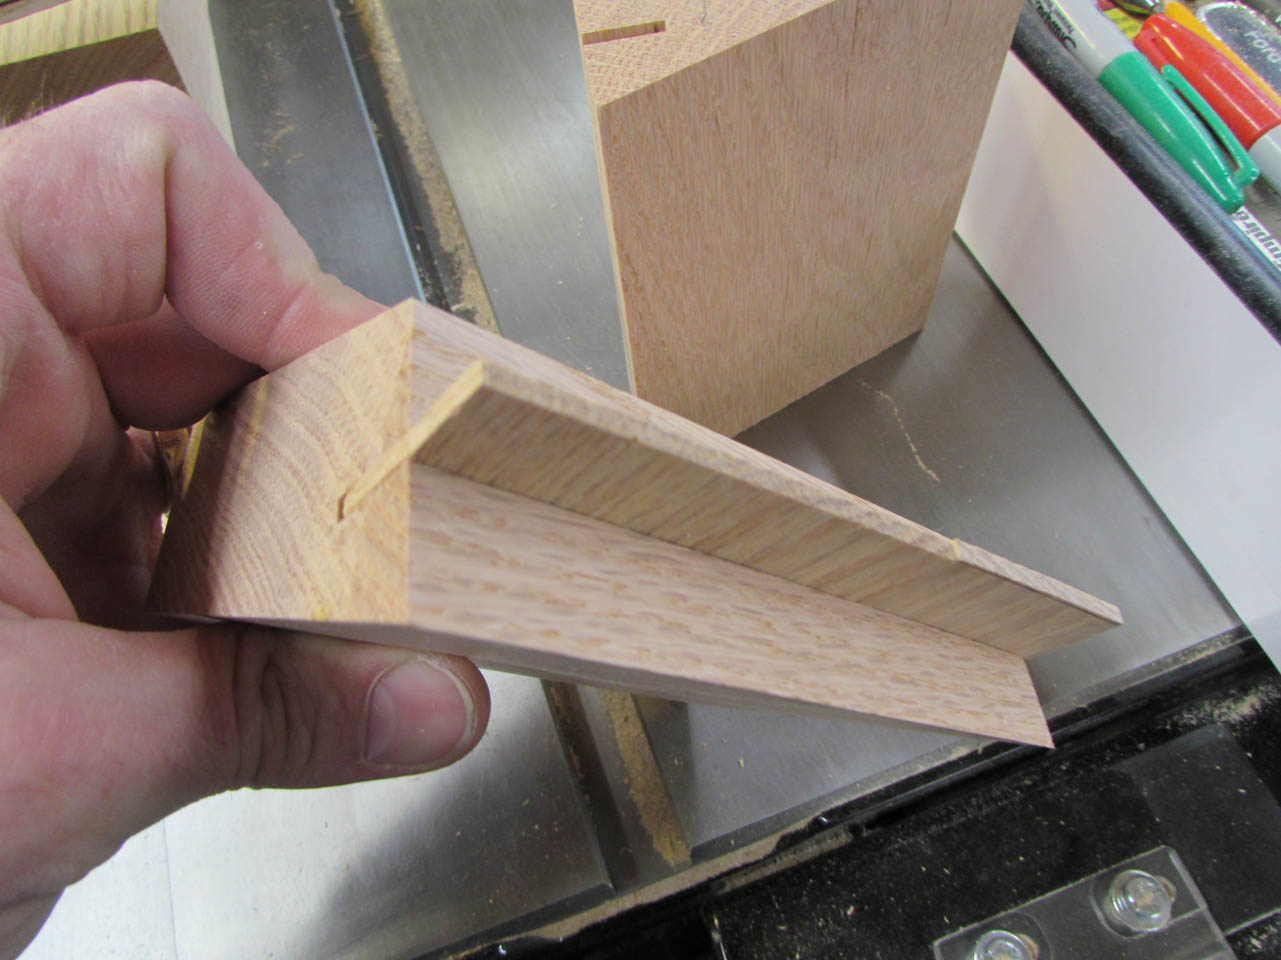
I cut the spline cut into all of the beveled edges.
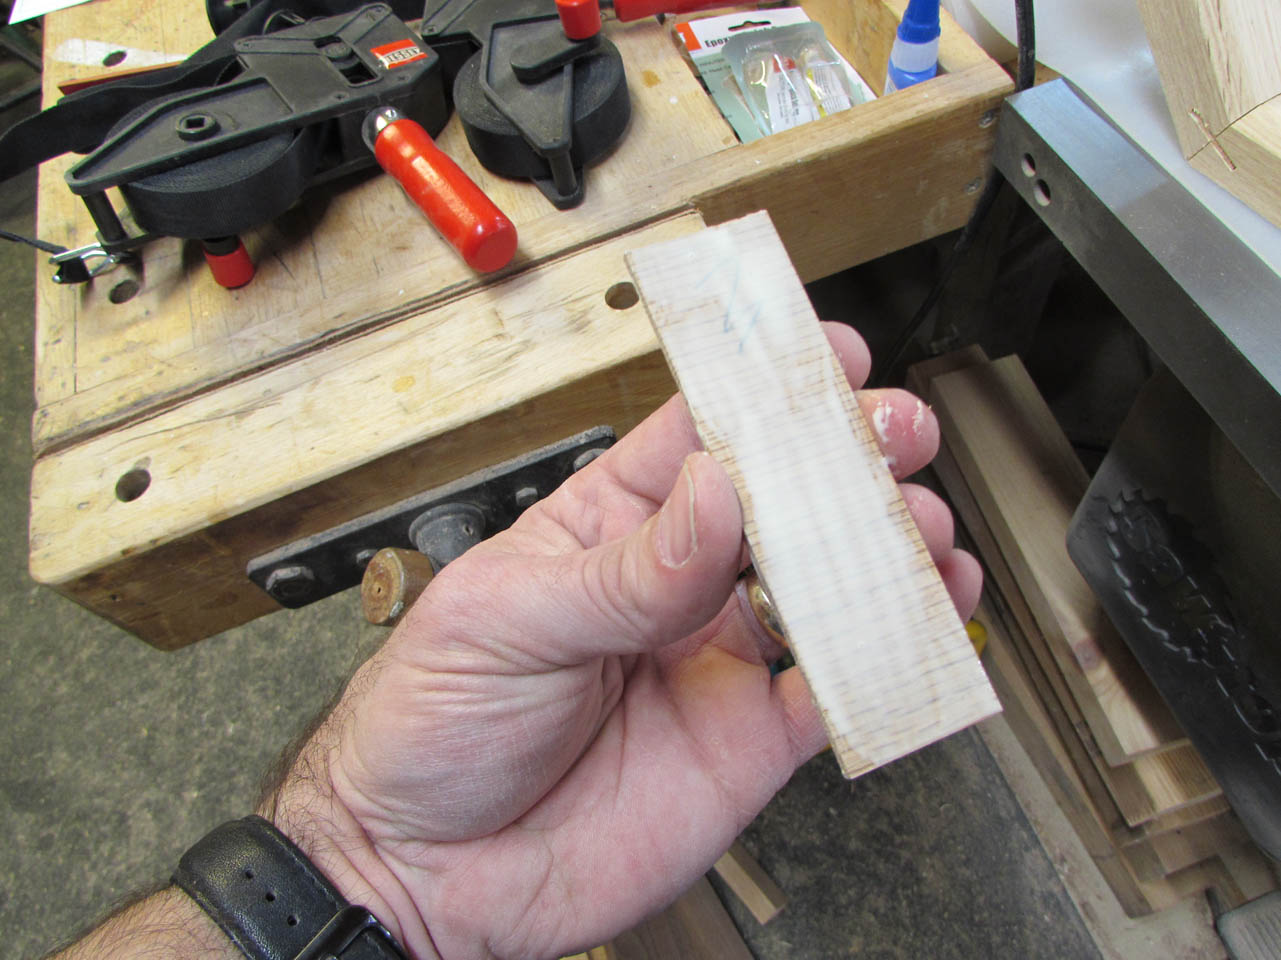
Then I found an off-cut and cut a 1″ wide chunk for slicing down to 1/8″ thick pieces.
I made a sacrificial push stick to make the thin cuts.
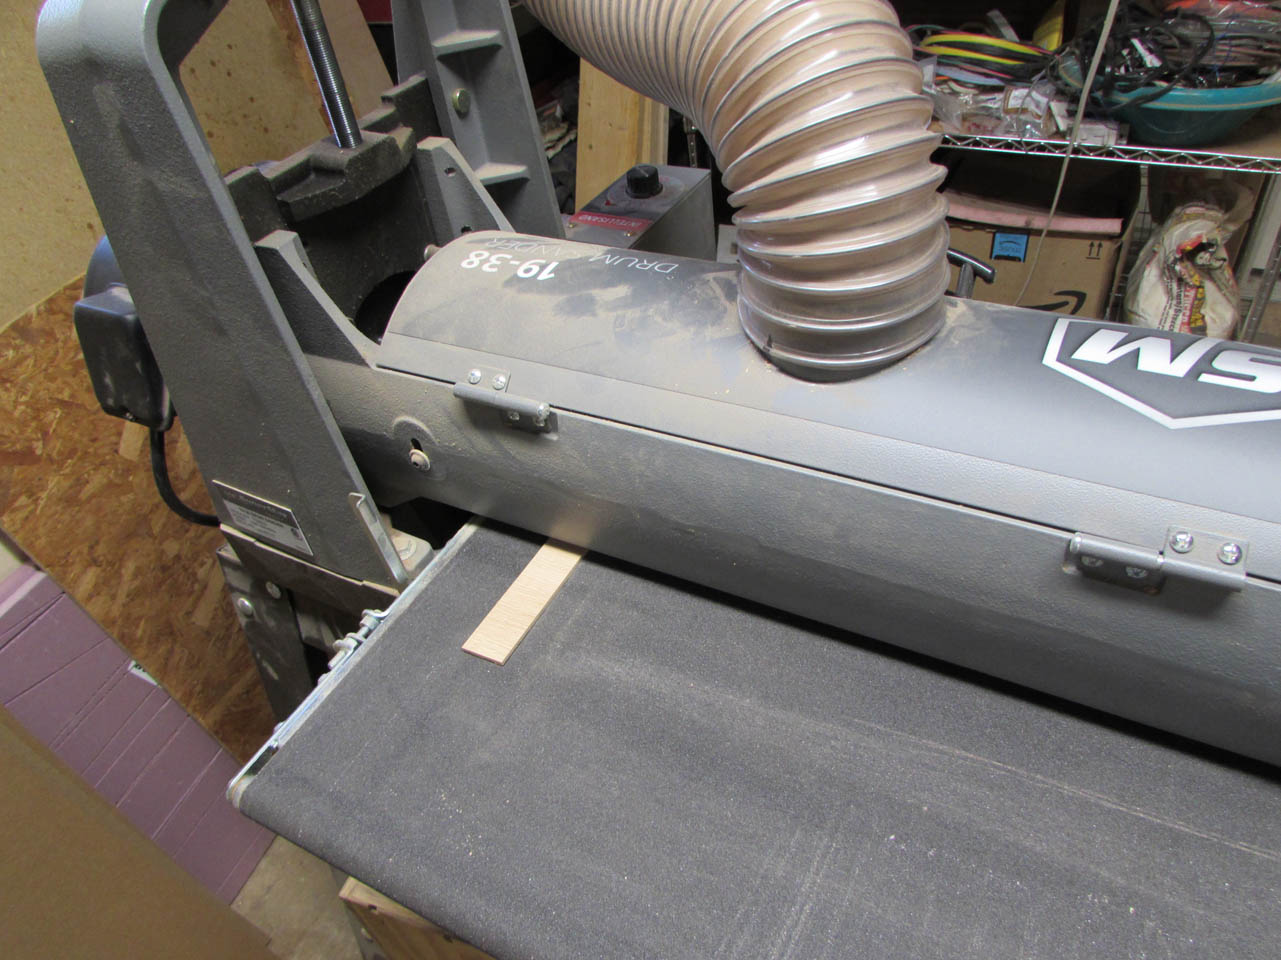
This block is 8″ long so I cut four slices then ran them through my drum sander to thin them down to the exact thickness.
Then I cut each of the 8″ pieces in half to be a 4″ long spline and did a test fit.

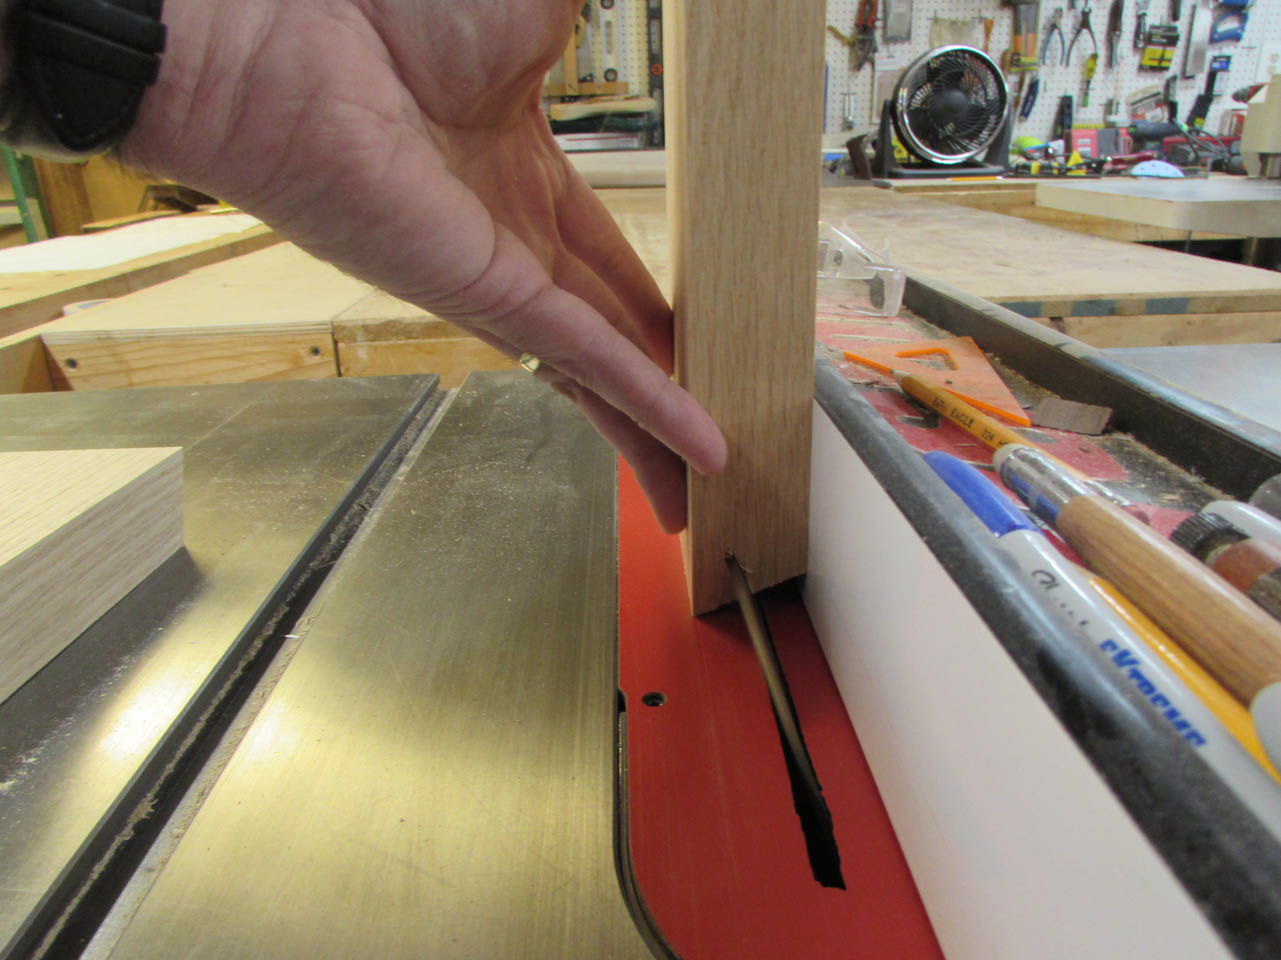
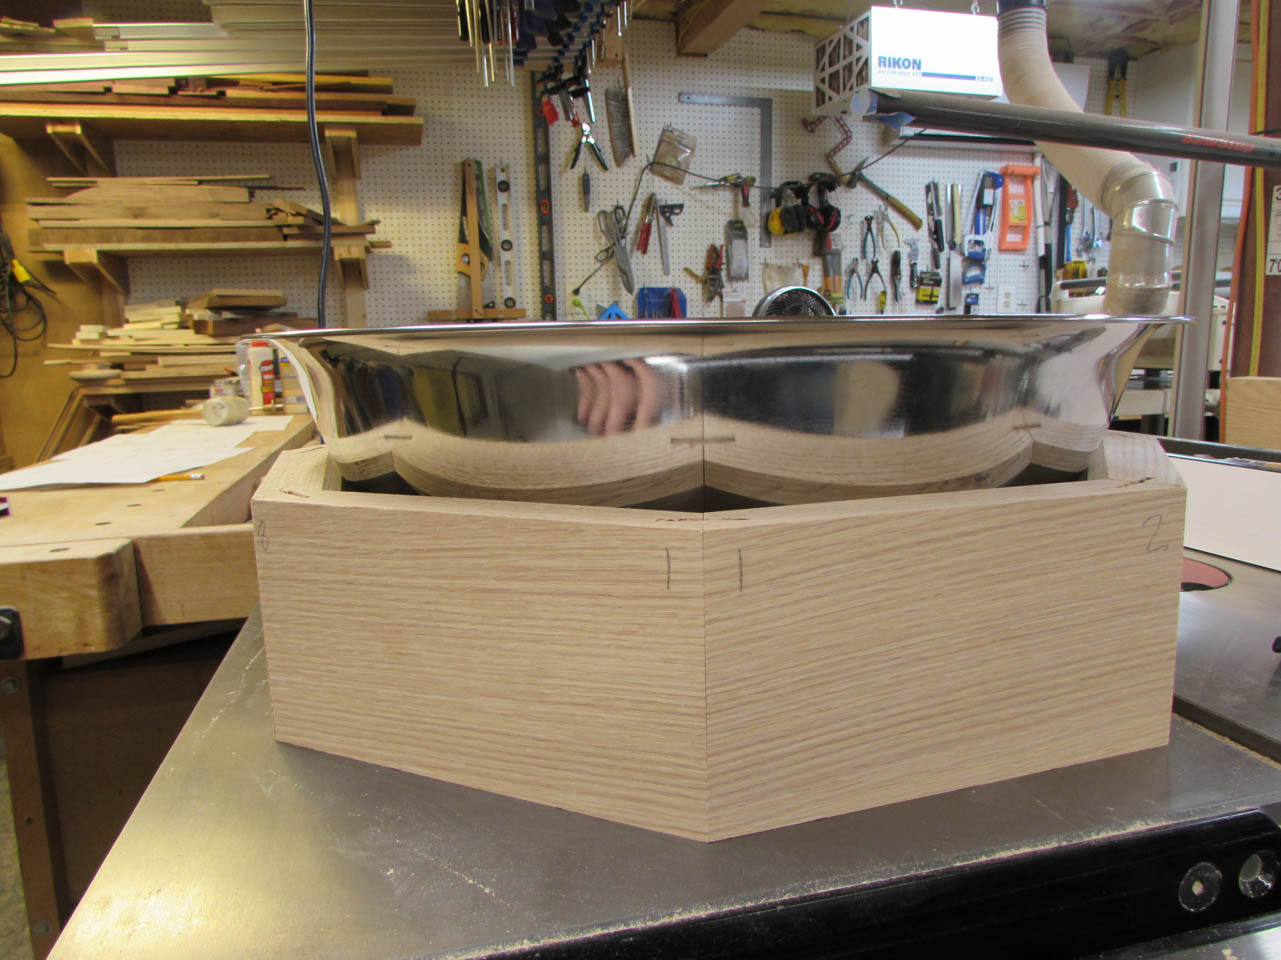
The dry-fit was successful so I took everything apart and set the table saw up to cut the rabbet on the bottom of the side pieces.
After that was cut away, I cut a small chamfer along the top, inside edge to allow clearance for the bowl.

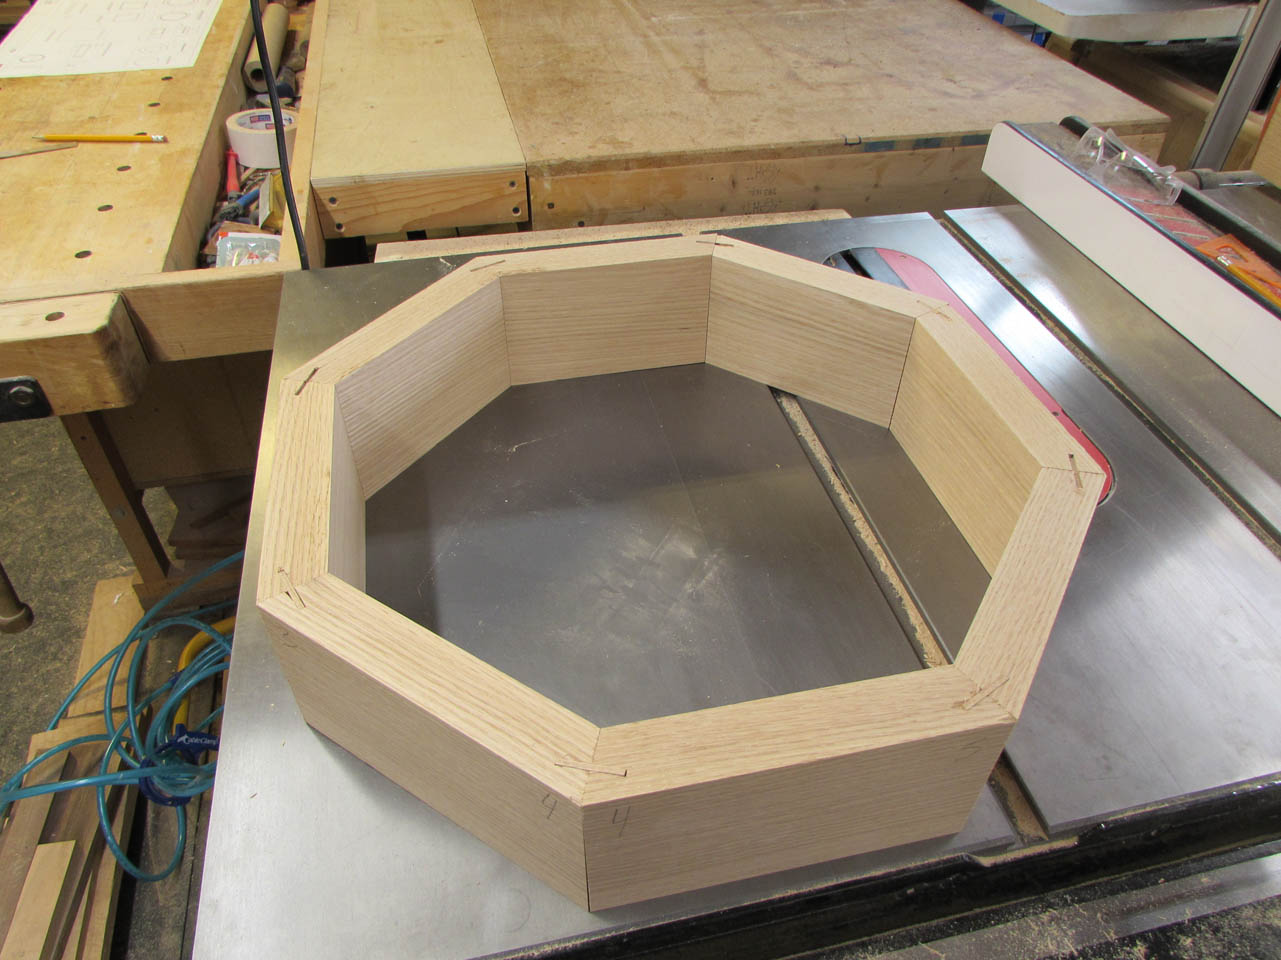
After making the same cuts on all eight pieces, I reassembled everything and did a test fit of the bowl to make sure there was clearance all the way around.
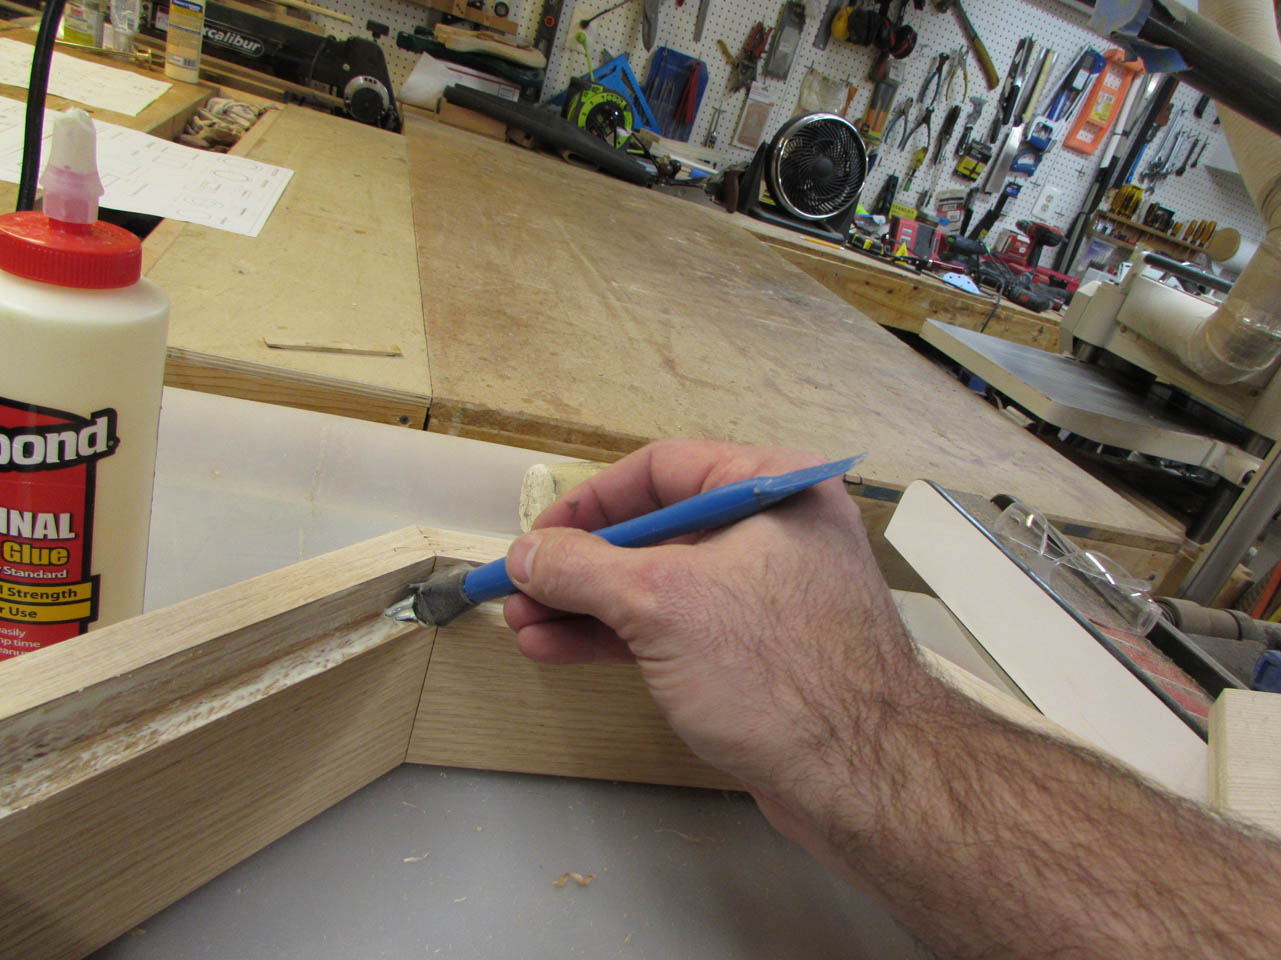
Everything looked good so it was time to start the glue-up of this section.

Working as quickly as I could, I brushed glue onto the bevels as well as the spline.
I assembled one section at a time, then quickly moved on to the next, trying to do all eight joints before the glue started to set.
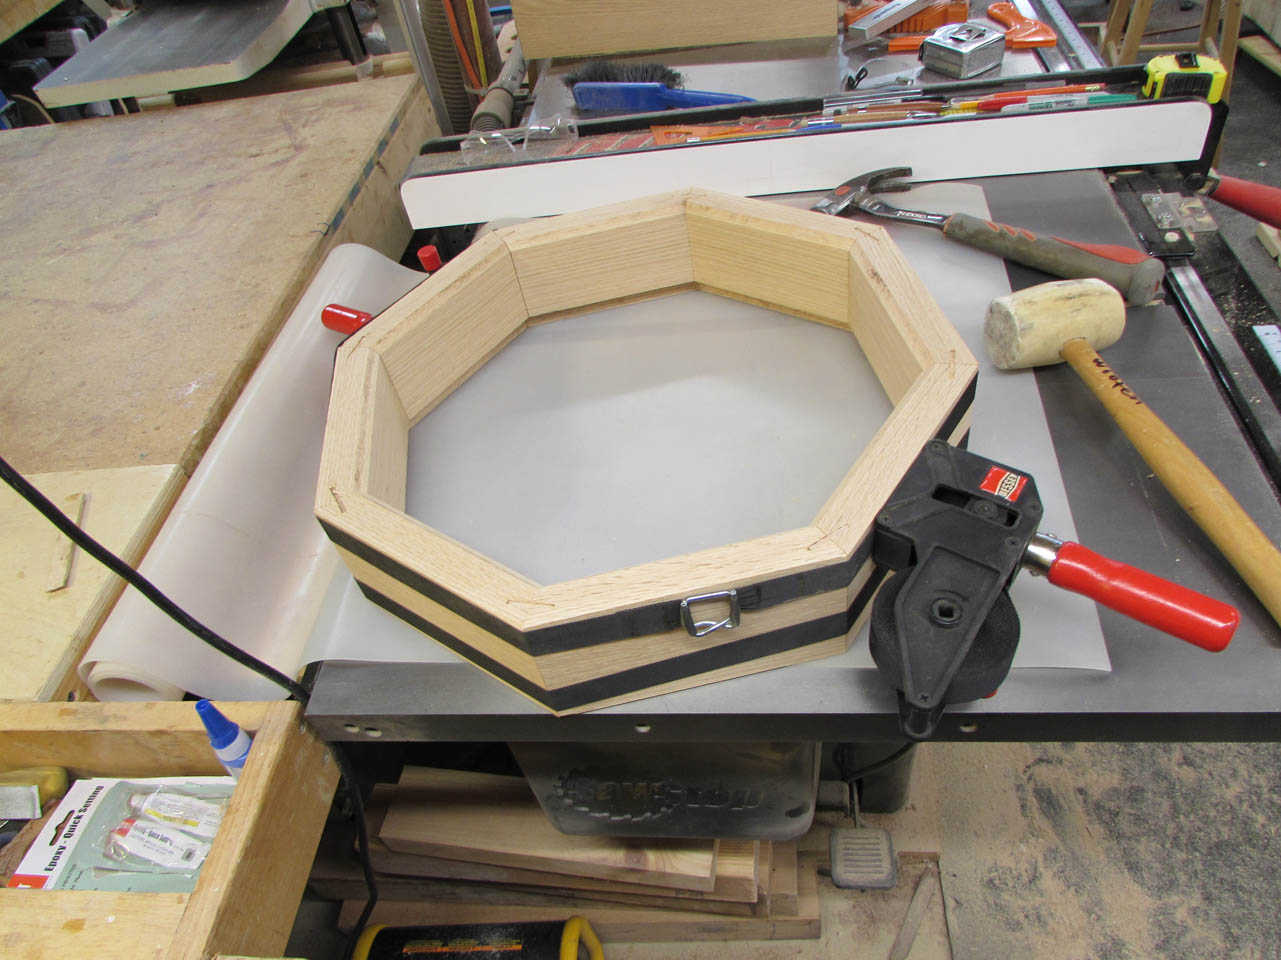
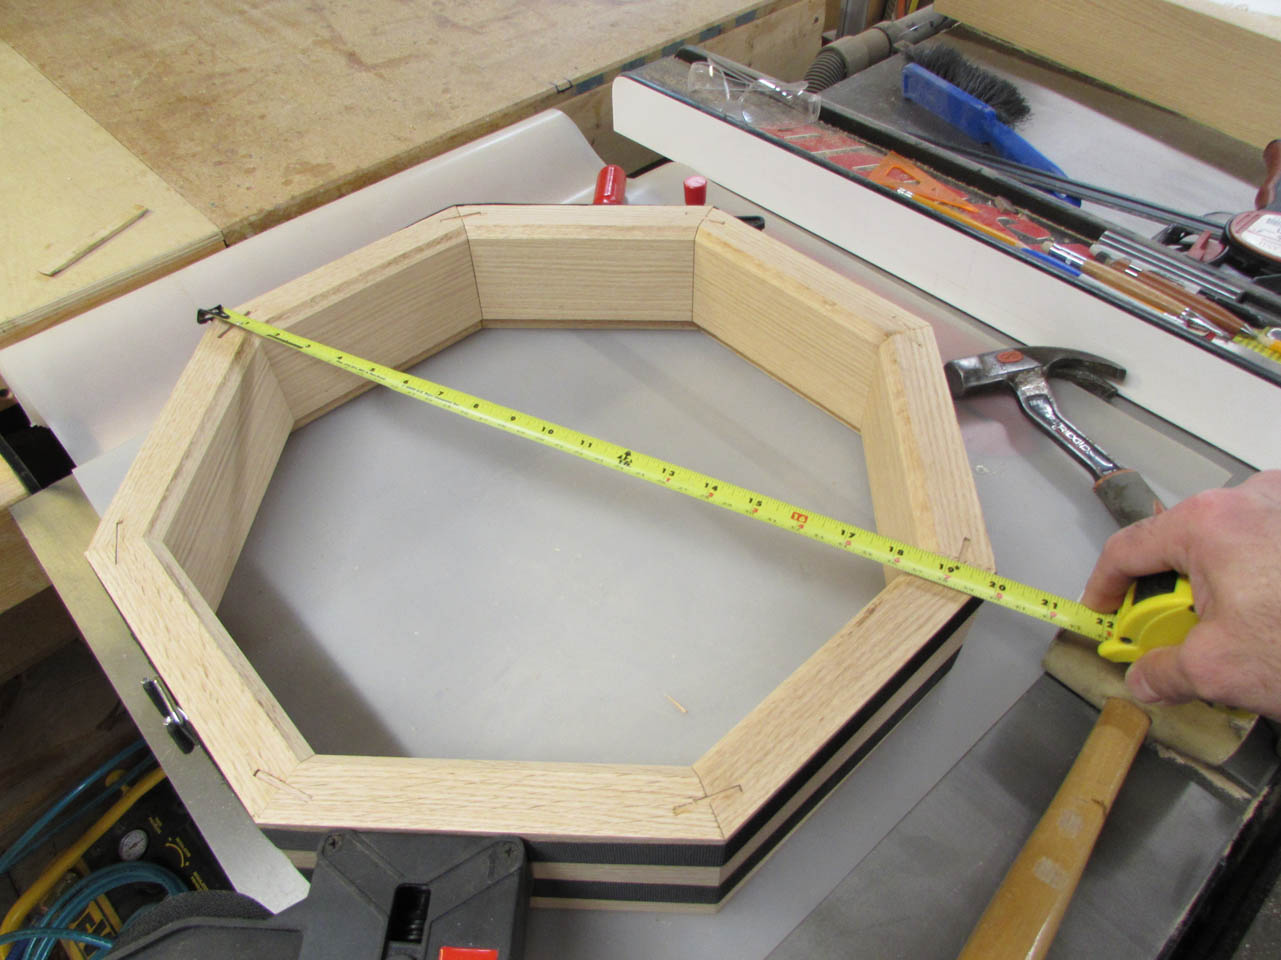
Then I wrapped two band straps around the top and bottom, and tightened them as tight as I could. I double-checked to make sure the dimensions across the corners all matched.
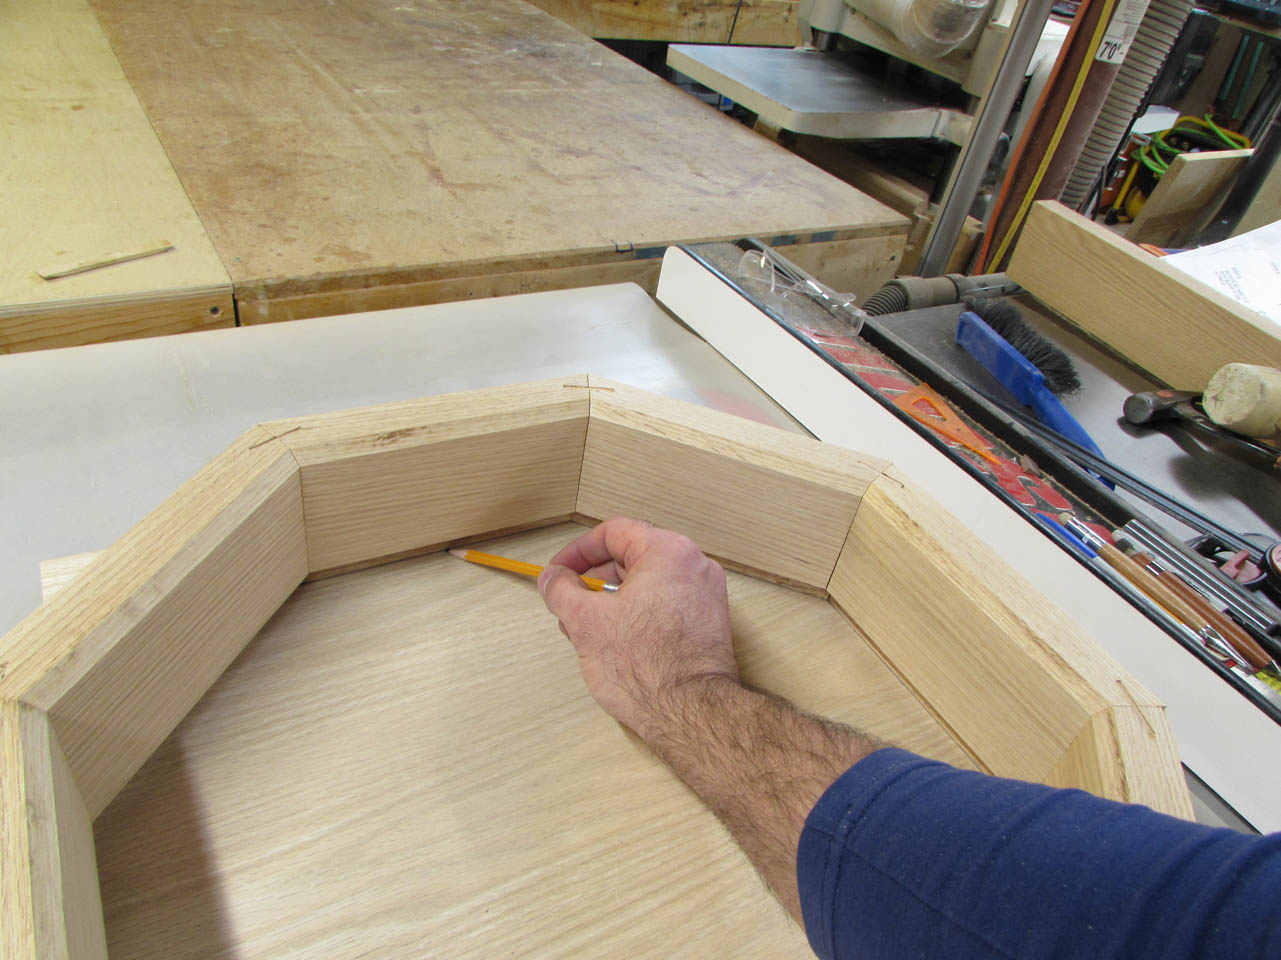
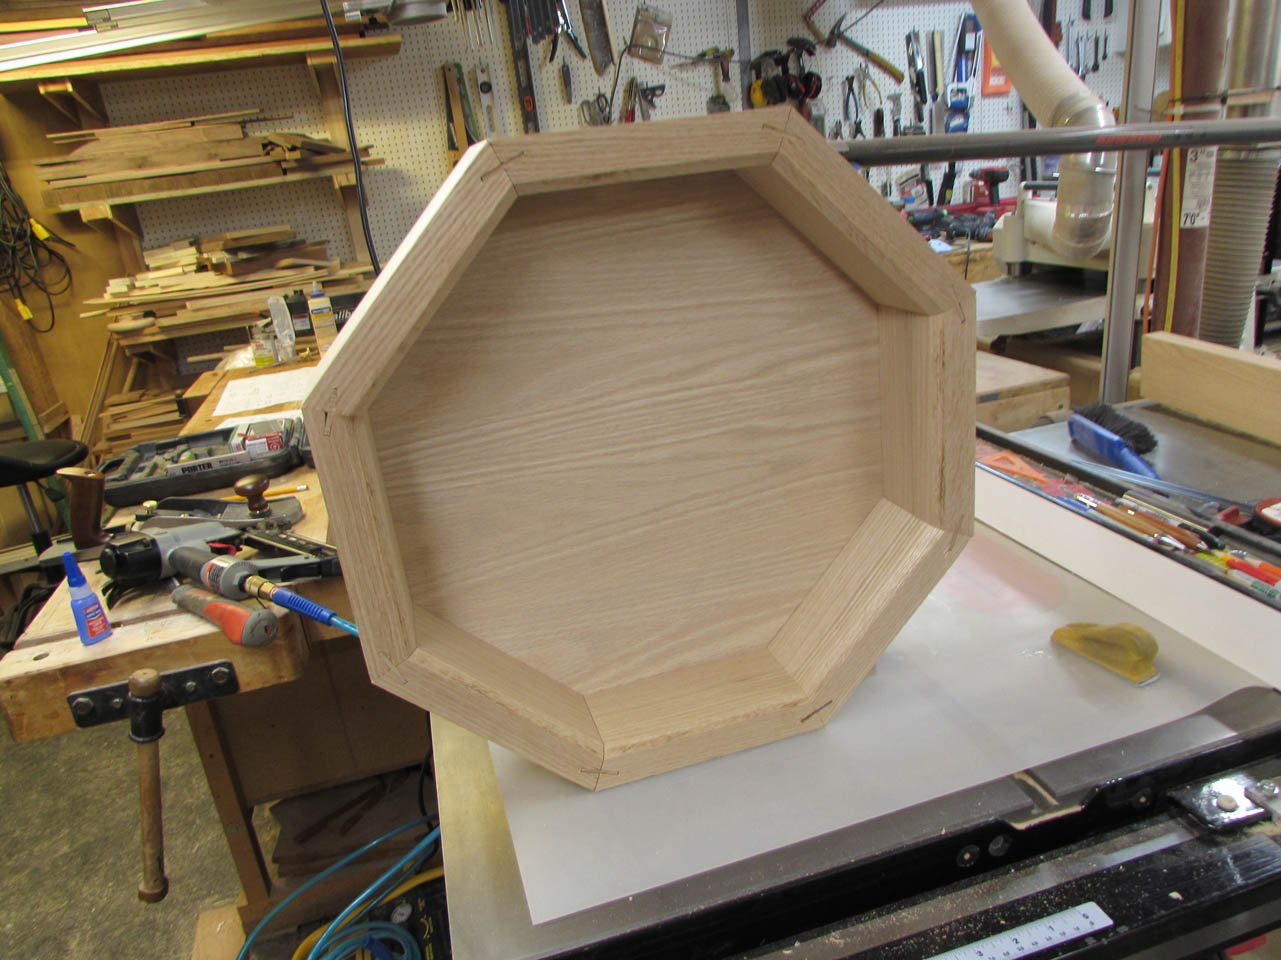
Once dried, I set the ring onto a piece of plywood and traced the bottom for a cut line. Then I carefully cut the plywood out on the band saw.

I used my block plane to smooth the rough cut edges down till everything fit.


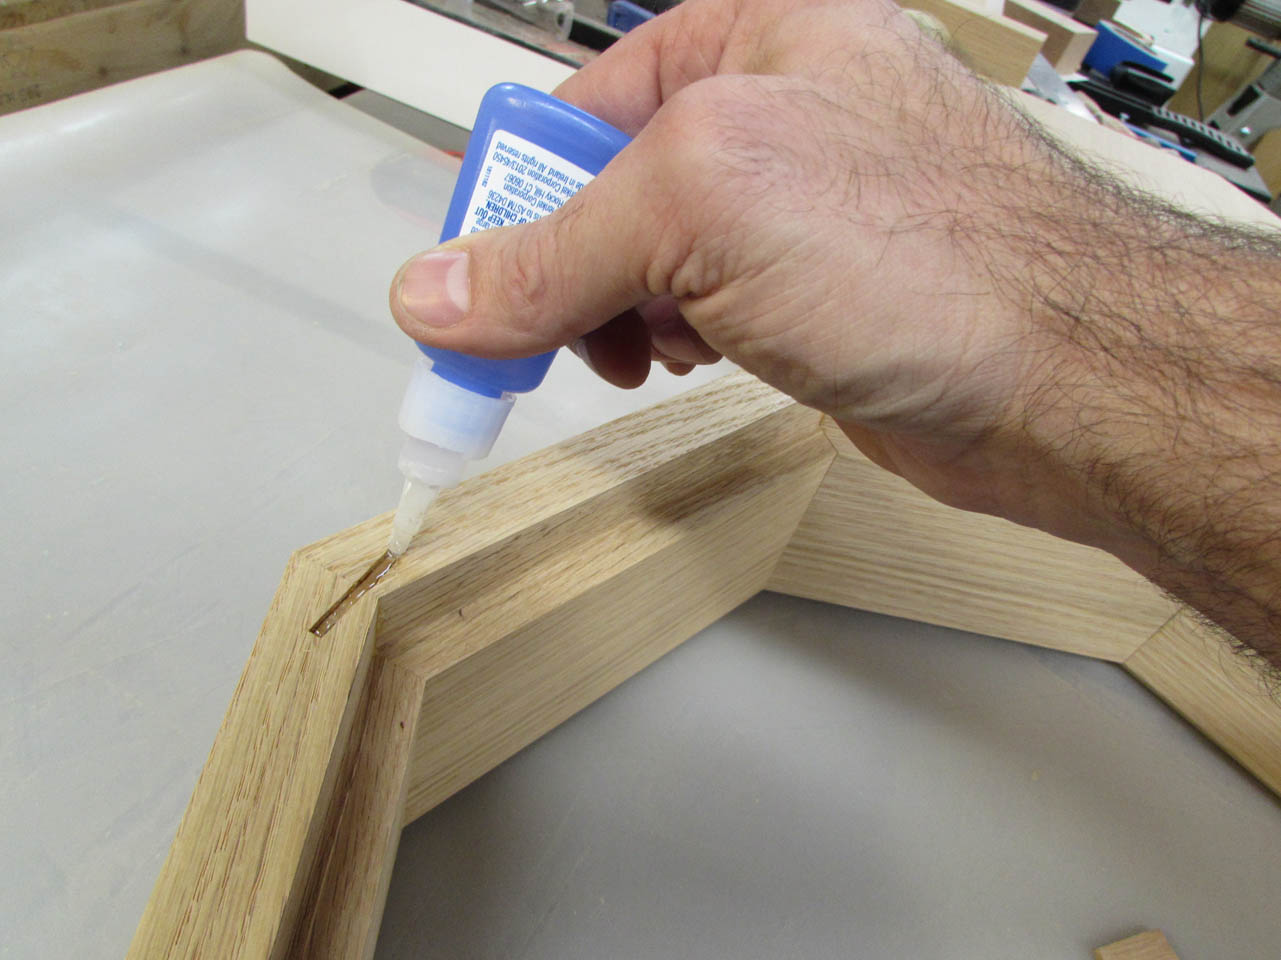
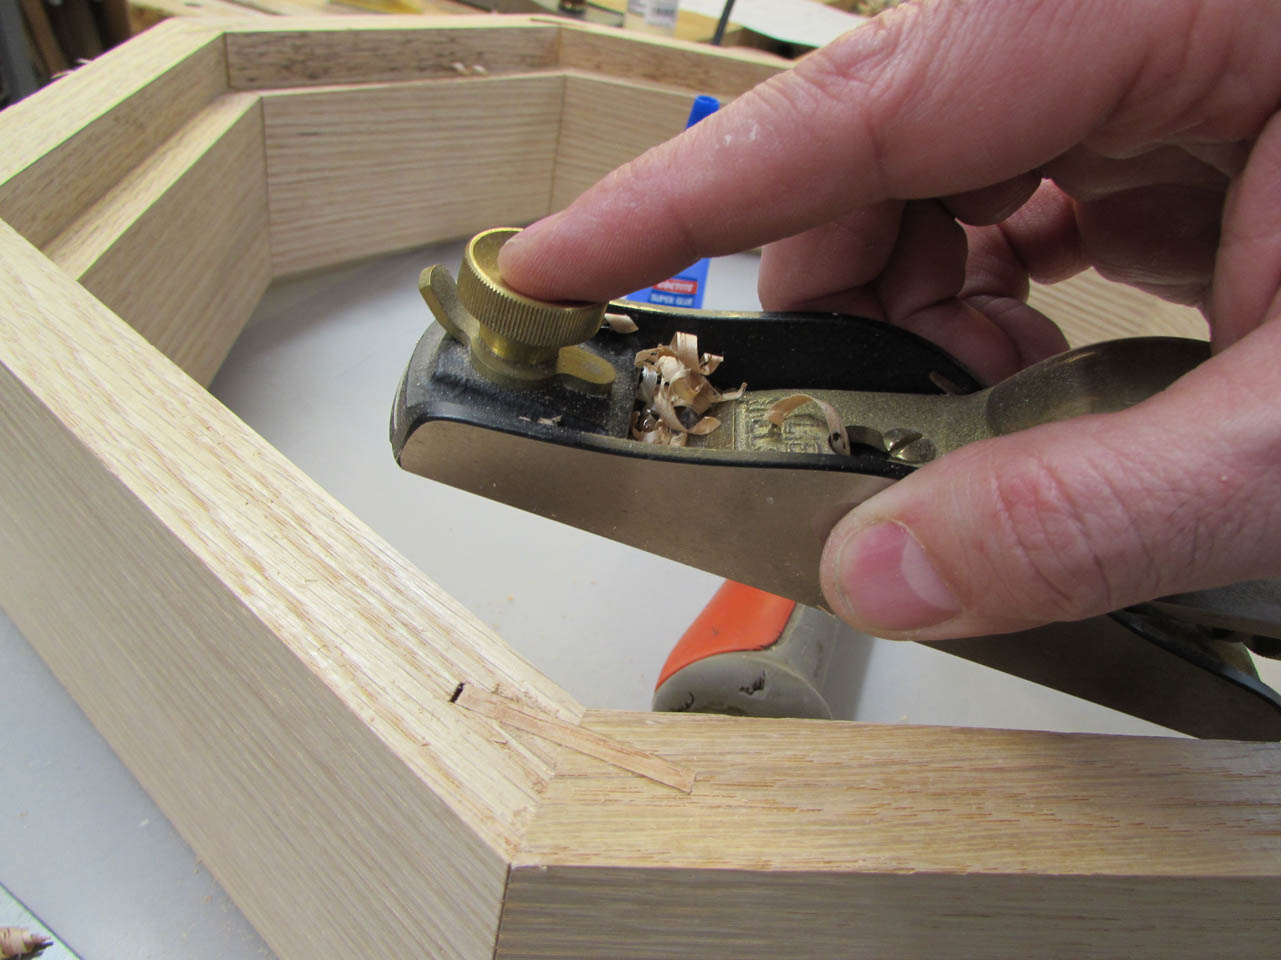
Some of my splines did not get pushed all the way to the bottom so I added a bit of CA glue and made some plugs to fill the gap.
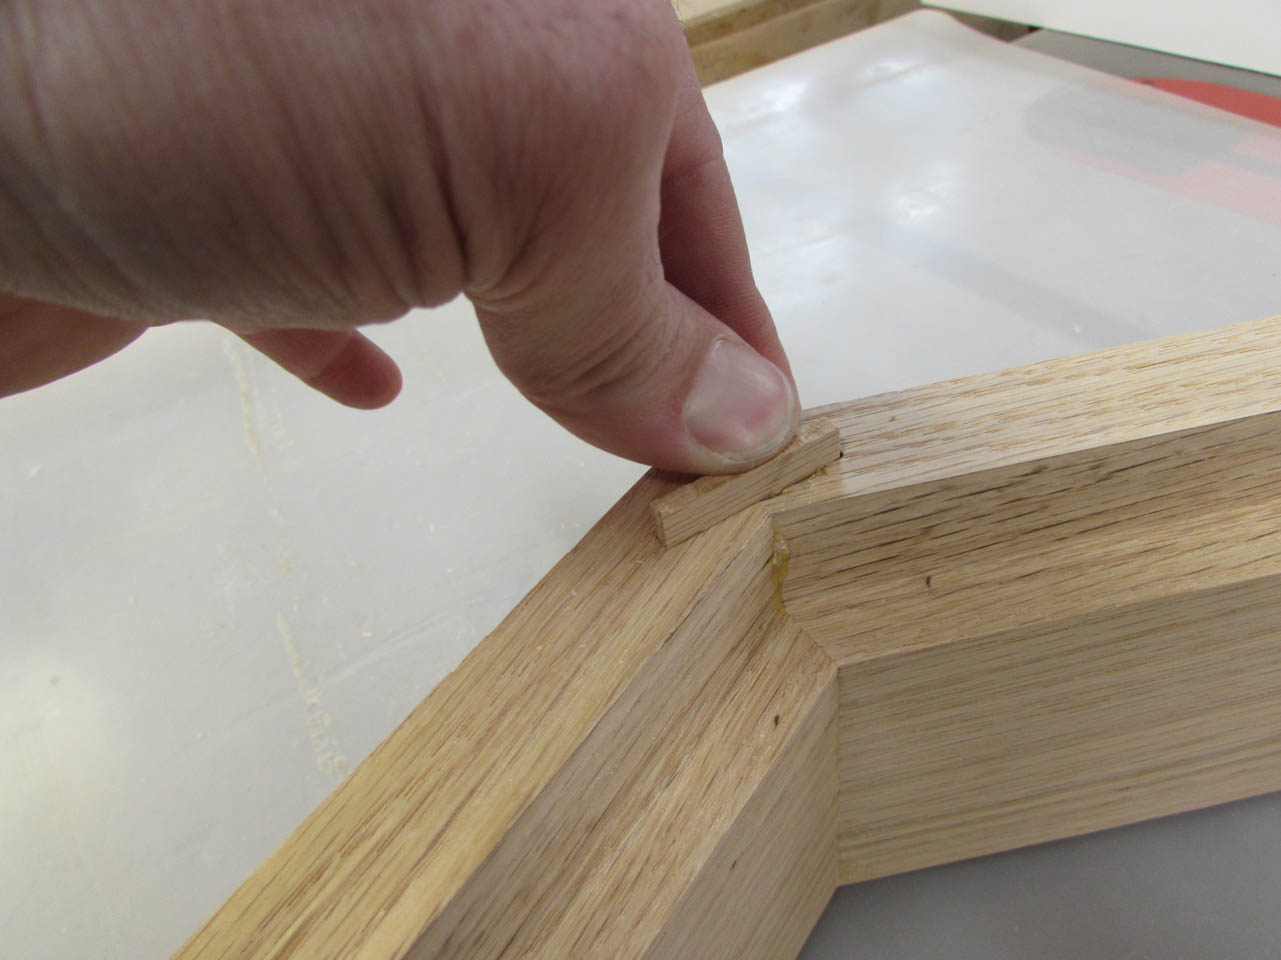
In a minute or two after everything was dry, I used my pull-cut saw to cut the plugs down.
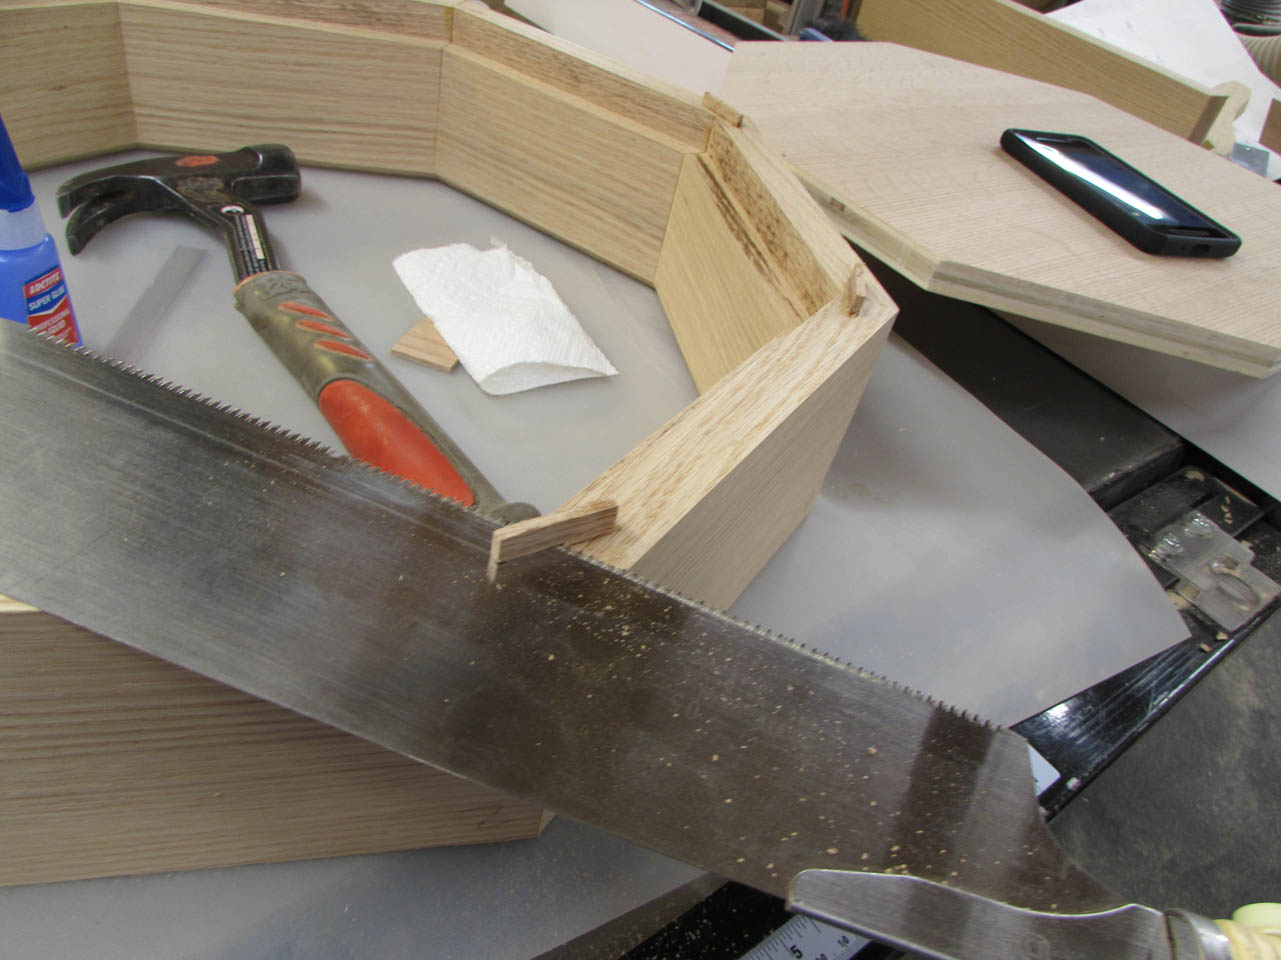
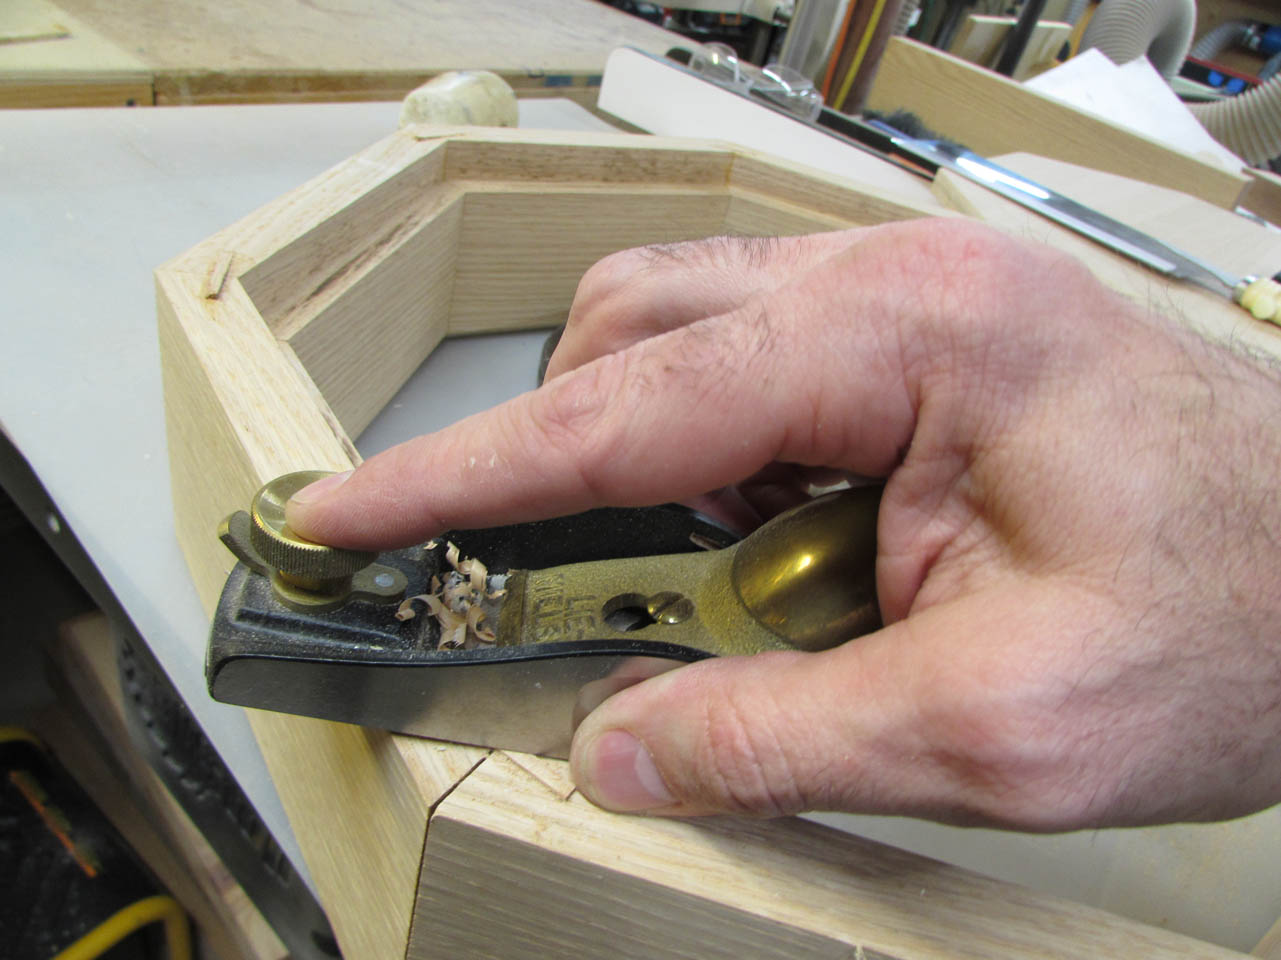
Then I used my block plane to make them flush.
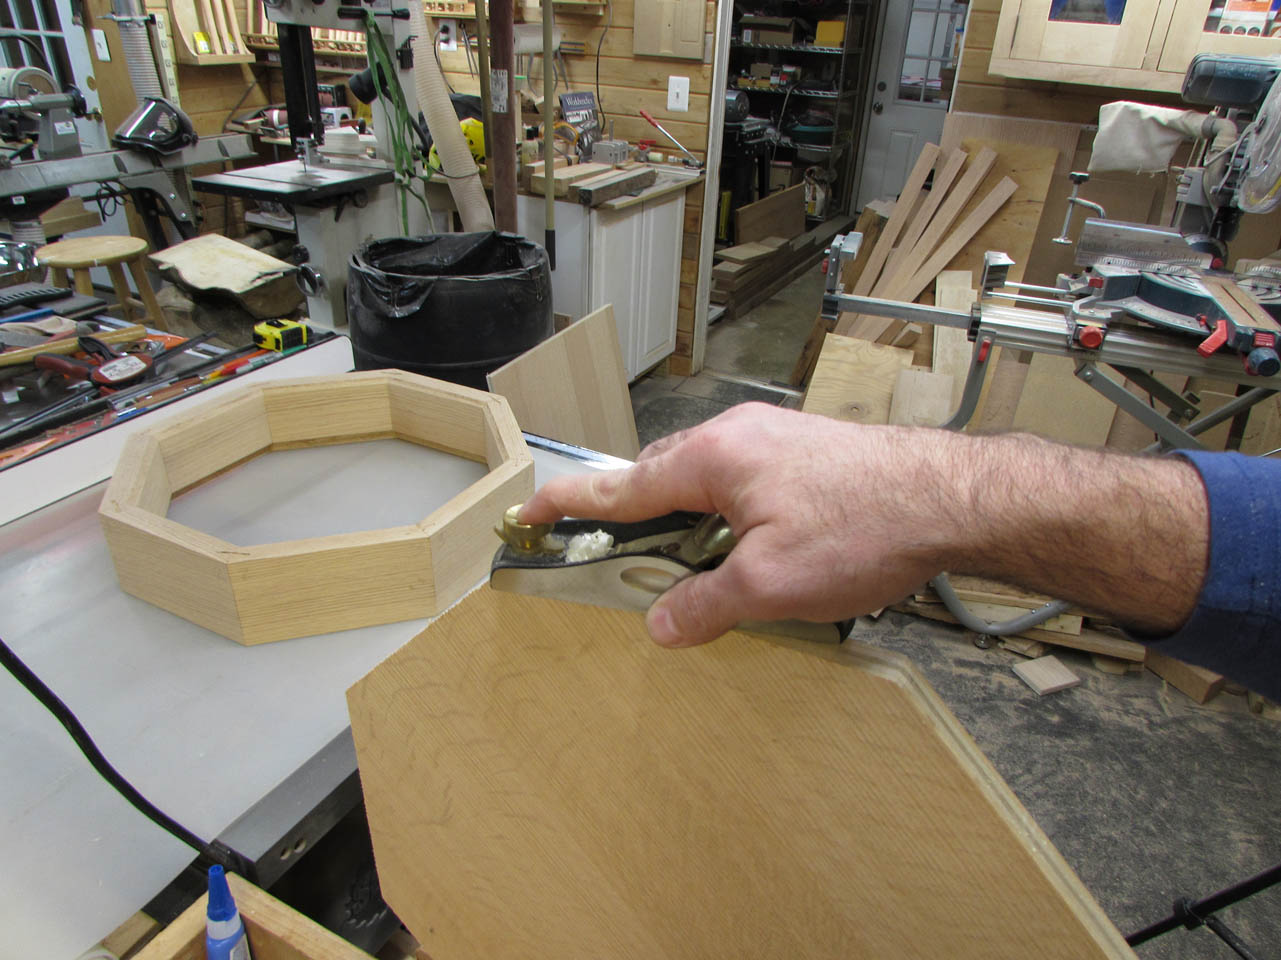
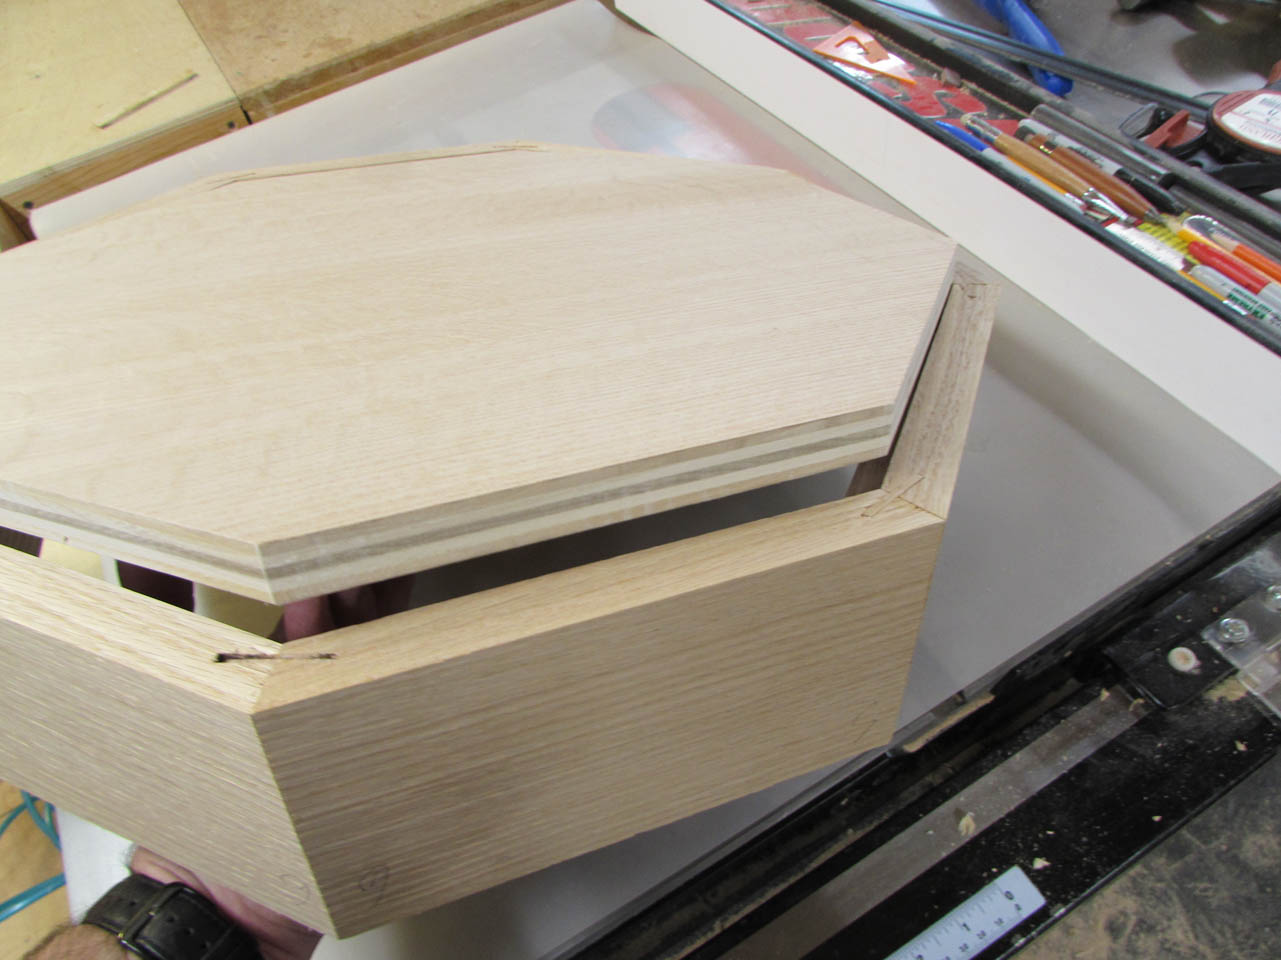
Next I applied wood glue to the rabbet and inserted the plywood and nailed it into place.
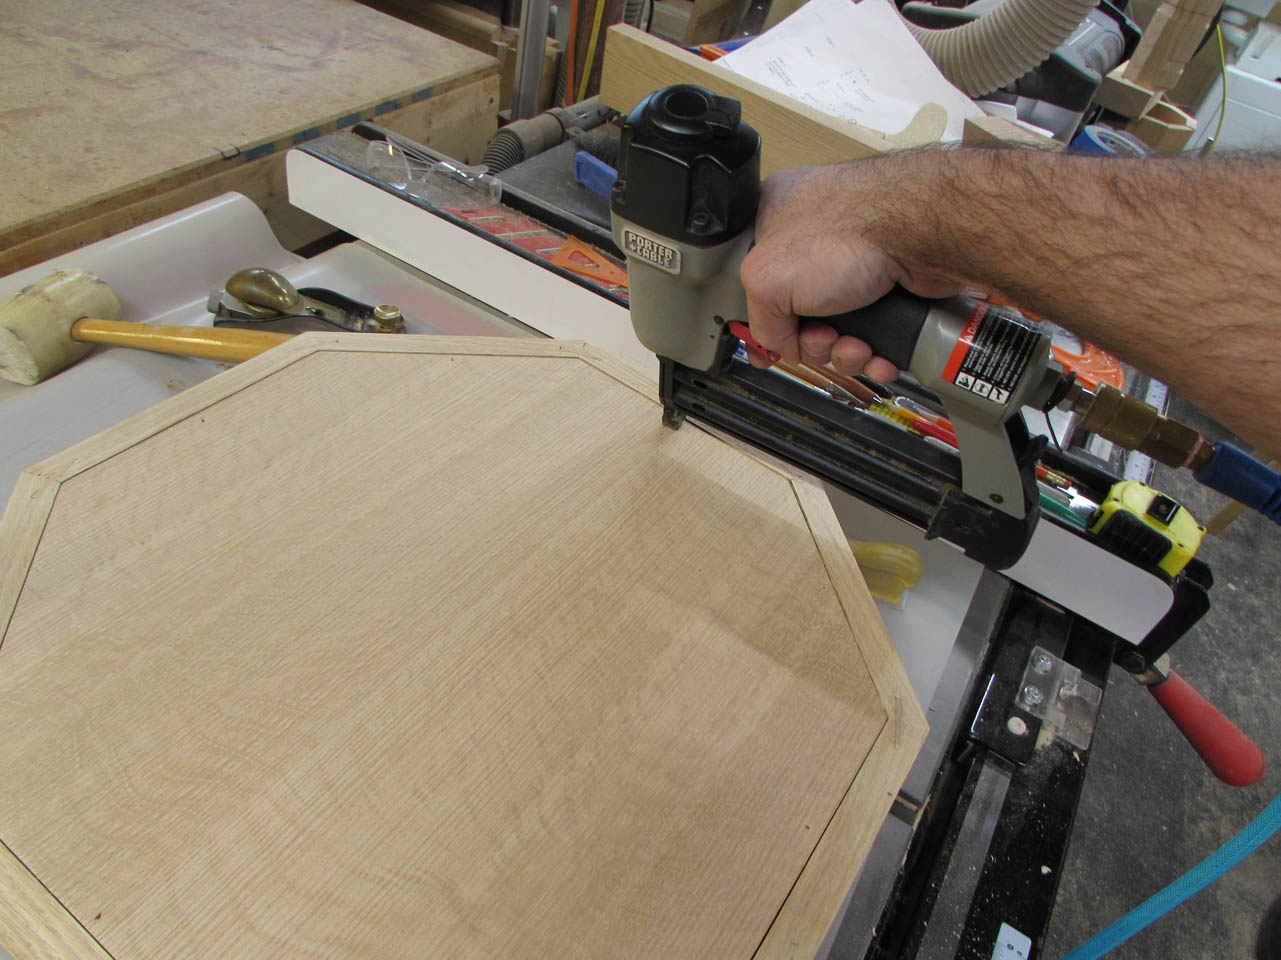
First piece complete.
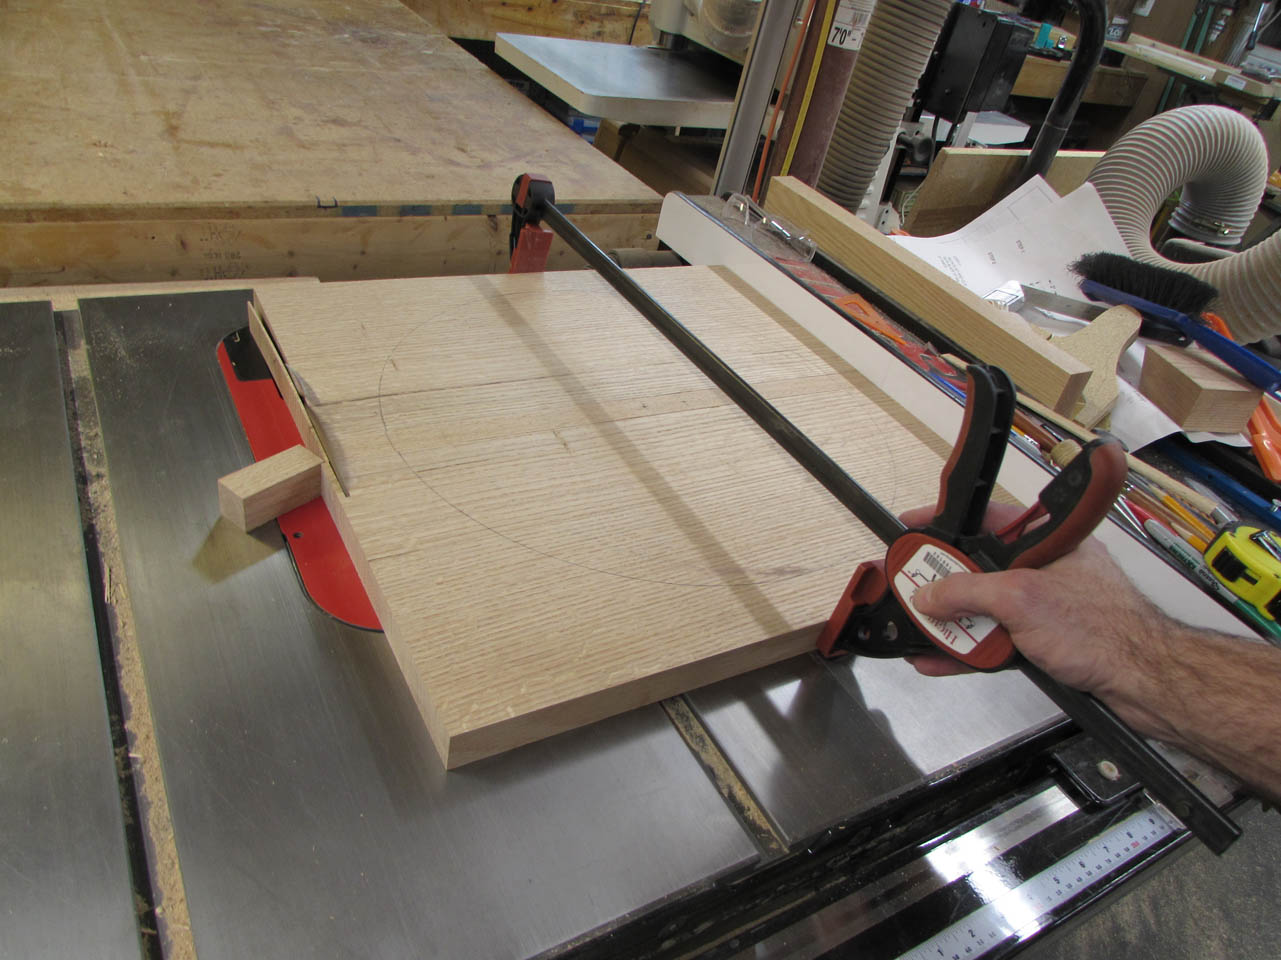
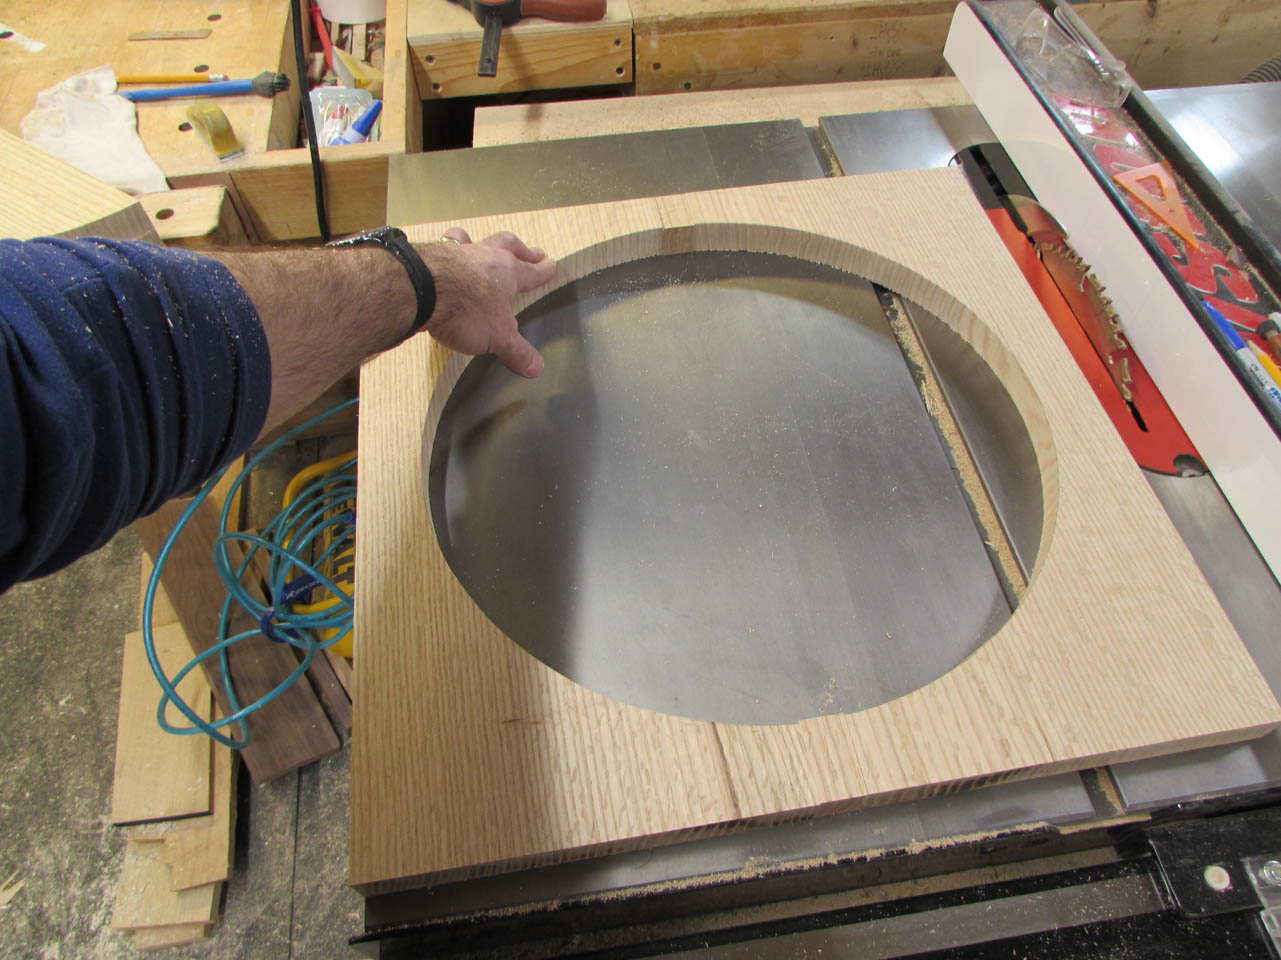
For the next level up, I need to cut down some 5\4 to make a panel with a hole in the center.
I planed both sides down to the desired thickness, then added a strip in the center and drew a 17″ diameter circle.

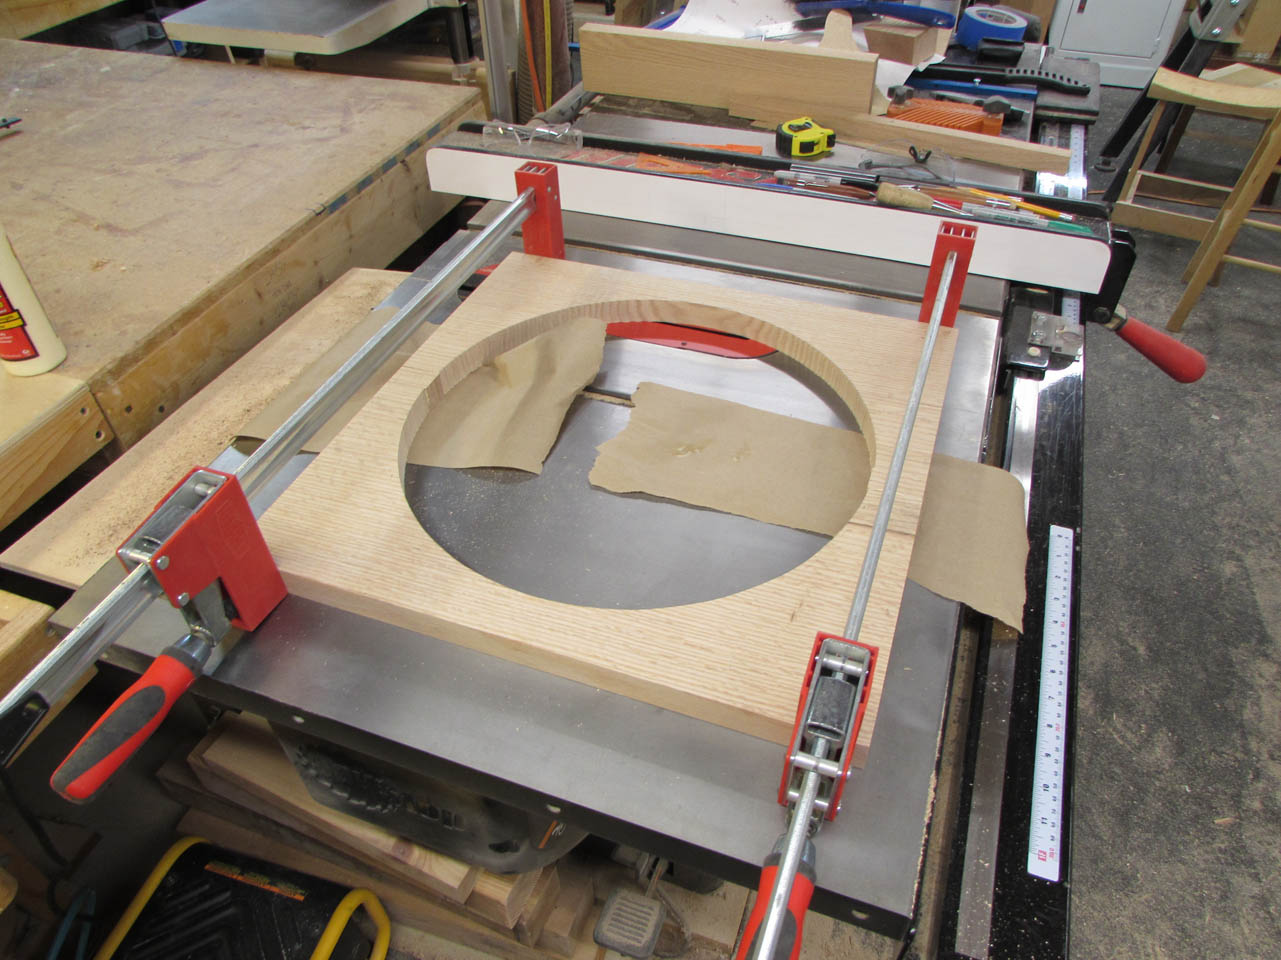
With the assembly still clamped together, I cut both sides to their correct length.
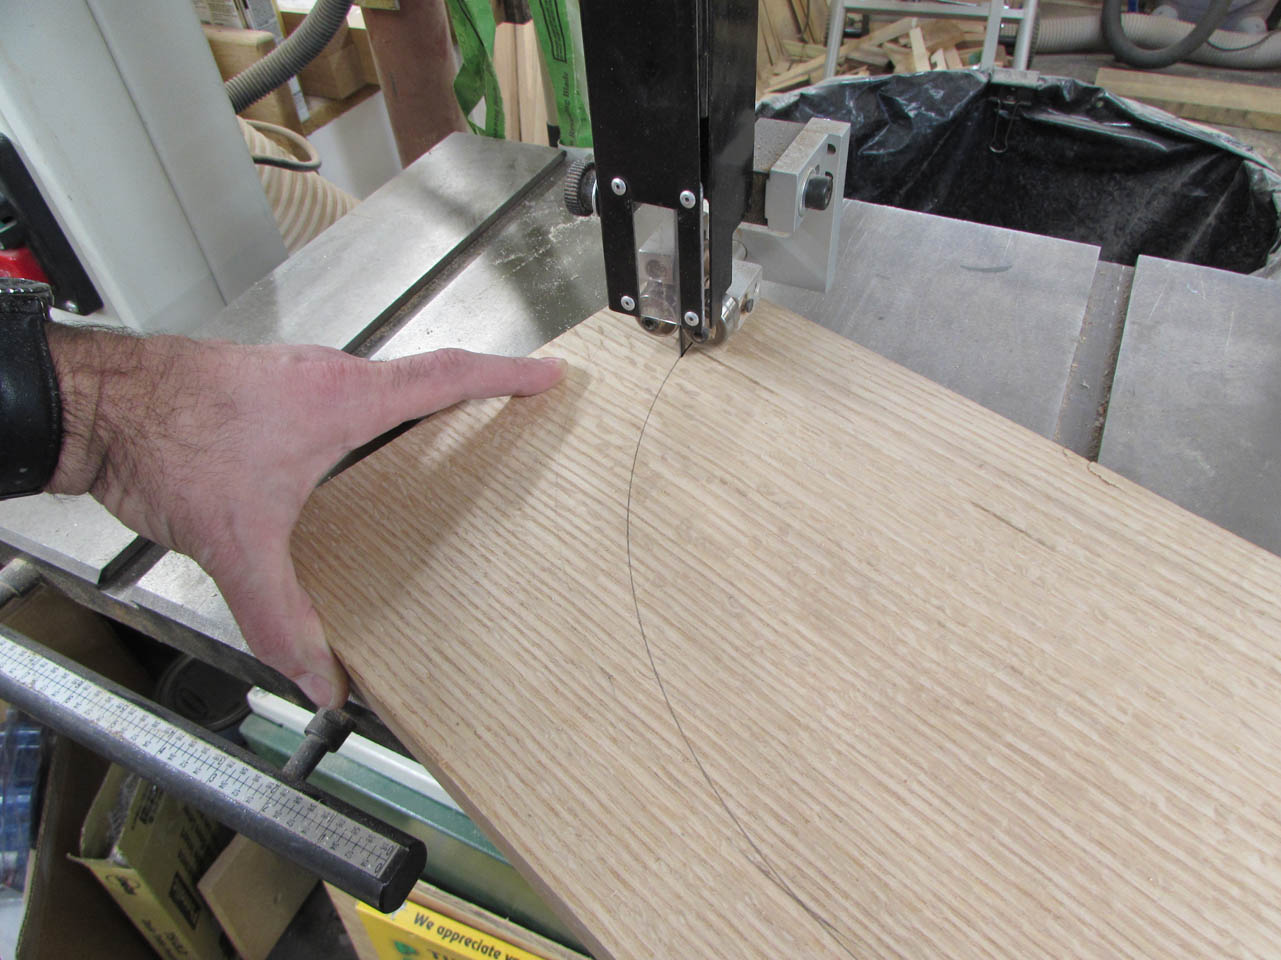
Then I separated both halves and cut out the center.

To match the grain better than the spacer piece I had in the middle, I cut a new piece form the center scrap.
After I cut the new center blocks down to size, I applied some glue to them and clamped the assembly up.

When this piece is dry, I will check the fit of the bowl and cut a chamfer along the inside edge if needed for clearance, then cut the corners off to create an octagon.
But for now, it is getting late so I am going to call it a night.
