
Maple & Purpleheart crib – day 5
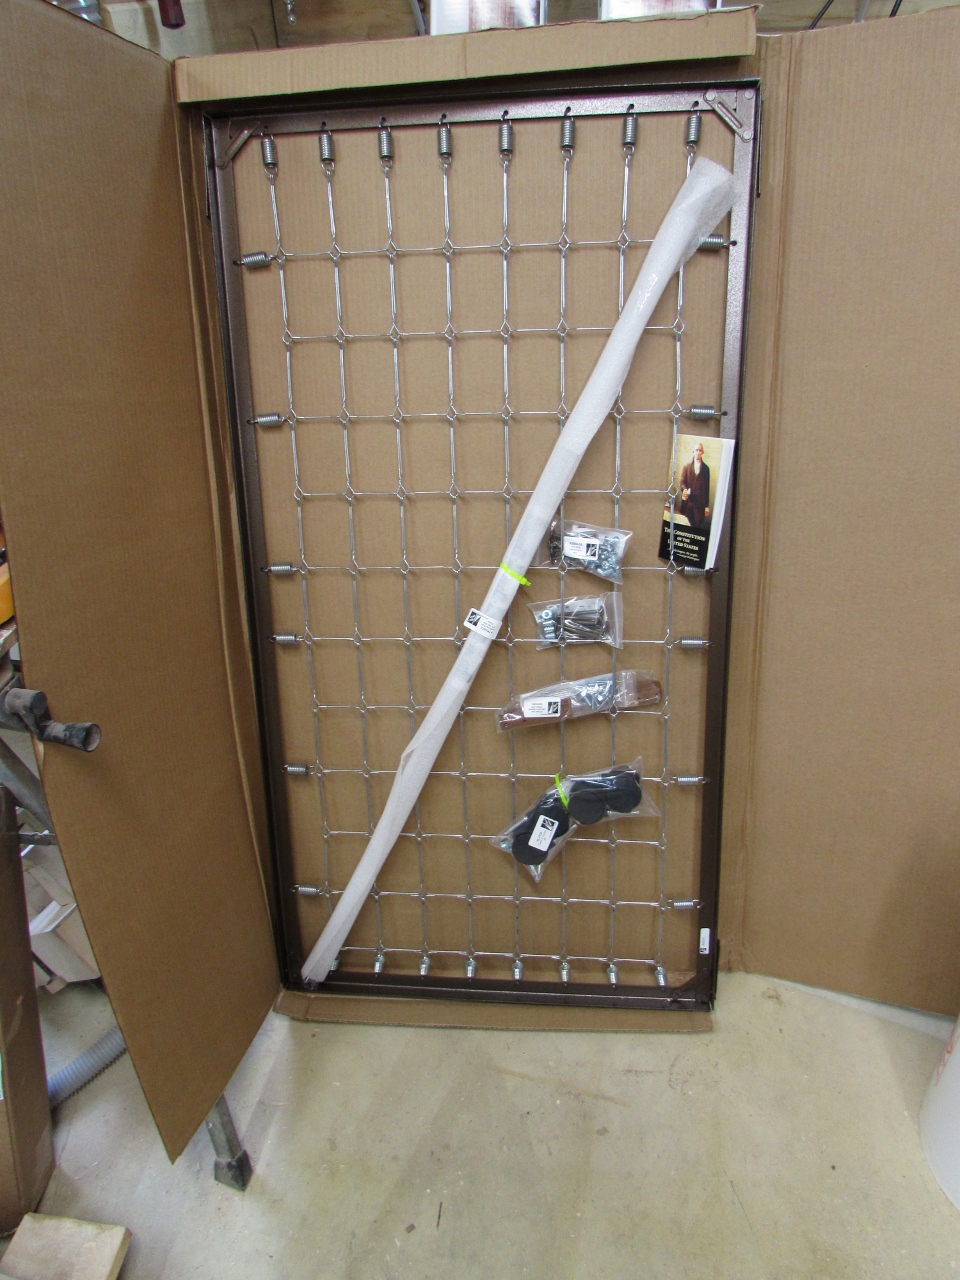
Before I can finish up with the sides, I need to locate and mount some hardware. I decided to buy a mattress spring frame, as opposed to building a frame, because I thought it would be easier for a single person to adjust. All the adjustable wood frames I was coming up with, seemed like they would be awkward and probably require two people. After a bit of searching, on the web, I found there was a limited selection available. The best option seemed to be from Products America. I think the frame alone was about $80. It was $100 for the kit, so I opted for that. The kit contained bolts and inserts, teething rail caps, wheels, the bed frame, adjustment brackets, and a pocket US constitution. I think they take their “Made in America” products very seriously.

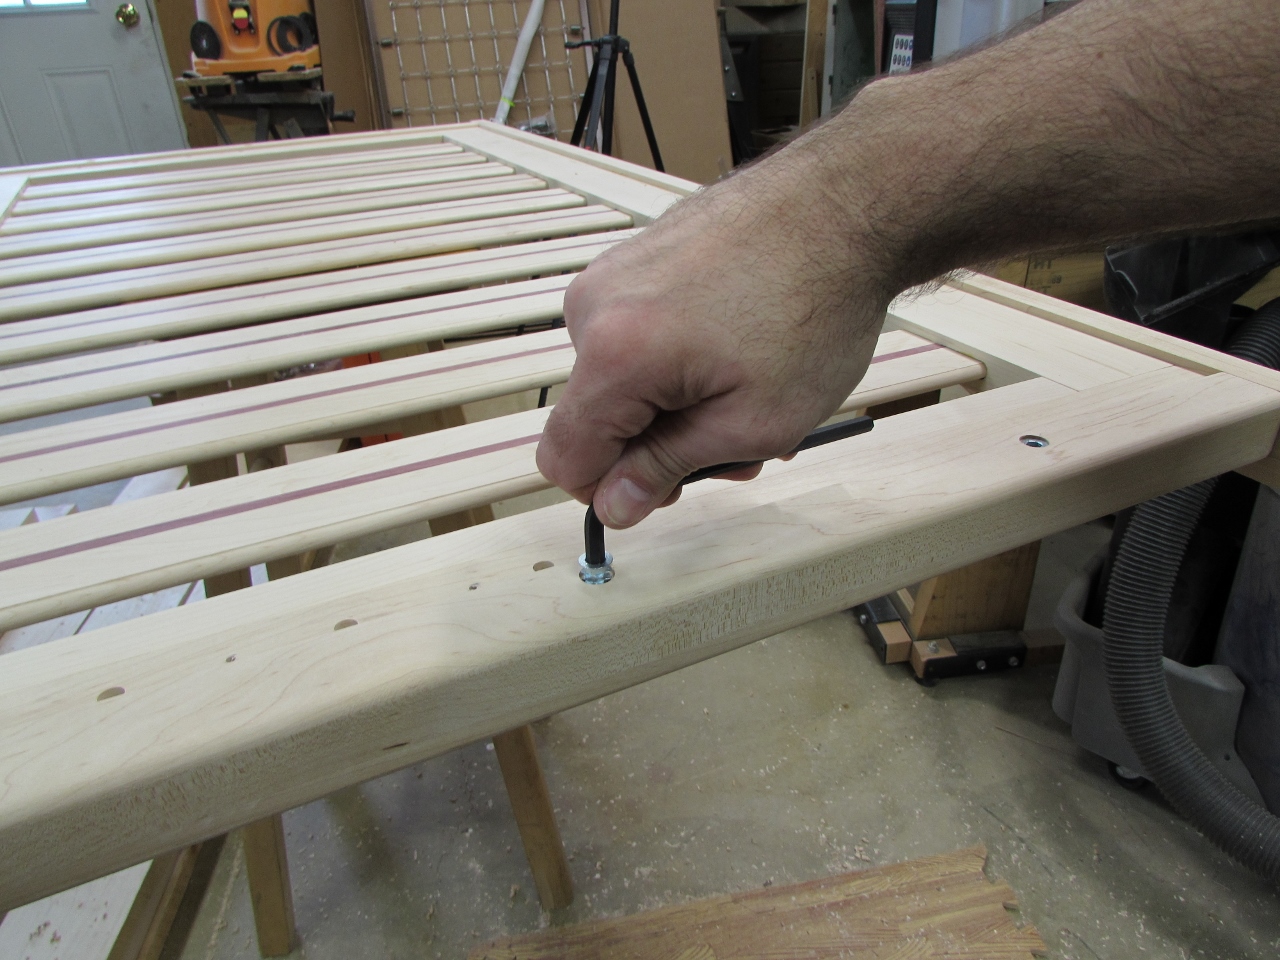
To figure out where I was going to place the bolts, I clamped a side to the front.

First thing I noticed was they shipped me two packs of long bolts instead of the second pack being short bolts. I should have measured the bolts prior to cutting my side frames. I would have made the 1″ thick, front and rear frames 1-1/8″ wide. The bolts are just a bit too long.

I realized that I didn’t need the whole side attached, just the front frame piece. I also needed to locate the adjustment bracket.

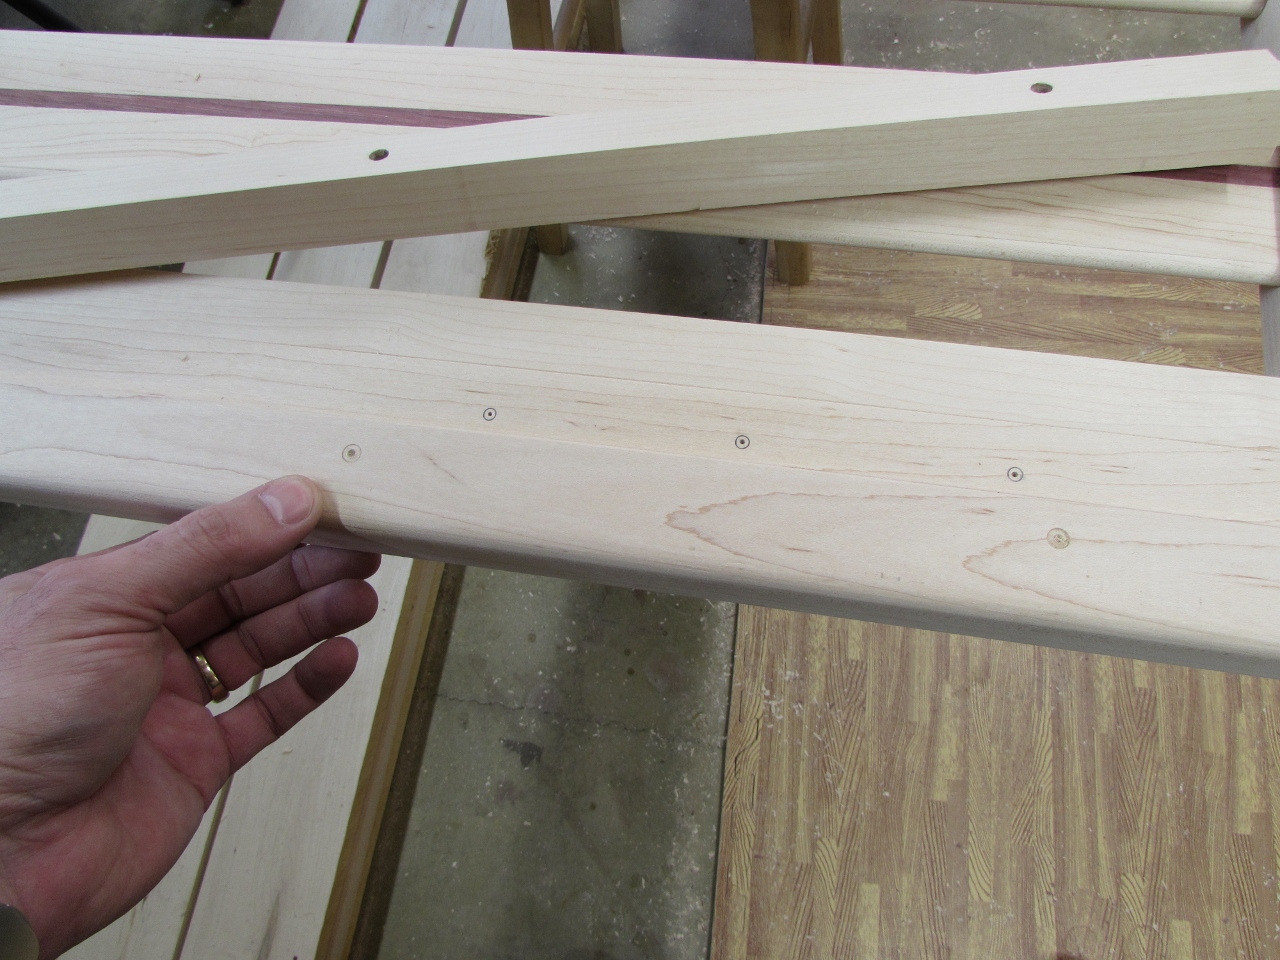
I slid the bracket up against the side rail, then measured down 16″ from the top rail to the top hole. This was not a random dimension, I actually calculated how low the frame would hang, then added 5″ for the mattress. At the highest setting, the mattress should be about 14″ down. Once located, I marked the holes. There are three smaller holes for mounting the bracket, and there are four larger holes for mounting the frame with a bolt. The bolt holes will need clearance behind them, and the mounting holes will need pilot holes.

Before marking the bolt locations, I wanted to experiment with installing the threaded inserts. The hardware came with no instructions, and I know inserts can split wood if the hole is too small, so it is always better to experiment. These inserts have a hex hole in the top to make installing a lot easier than the slotted types, that I have had to use in the past. I drilled a couple of holes, to find a good size for the insert.
Problem! Products America was nice enough to include the hex wrench for installing the bolt, but not for the insert. Everybody has a set or six lying around, no problem, right? Wrong. Their 100% made in America product requires a 6mm hex wrench. I have half a dozen different sets of hex wrenches, but apparently not a single one of them is metric! After scouring my shop and my son’s tool boxes, I had an inspiration. Every single one of my large power tools, American or not, was made in China. Every one of them came with a handful of wrenches for minor adjustments. They typically get thrown into the bag with the instructions that we all save, but never look at again… I pulled out my SawStop manual, and out plopped a set of metric hex wrenches. Behold, a 6mm wrench to tighten the stupid inserts. The American government has been trying to convince us that we should move to the metric system, since the 1970’s and very few Americans have even considered it. You can’t buy wood in metric sizes, and I have never met a contractor or carpenter that measures with a metric measuring tape. Why would a “Made in America” company have Imperial 1/4″-20 inserts installed with a 6mm metric wrench?
Anyway, half an hour later, wrench in hand, I was able to install the insert. Please note, I deliberately placed the included copy of the US constitution, in the picture. After all, it came with my metric inserts… Please note, I really don’t have a problem with the Metric system, I just don’t have many metric tools, so I found it a little frustrating. You know what? That is probably why we don’t export many products, that require assembly, to other countries. They don’t have any English wrenches!


Ok, where was I?
I laid out the bolt locations on one of the front frame pieces, then clamped the other one to it for drilling.

If I drill them together, they should be interchangeable, so I don’t have to keep track of which goes where. I drilled a 1/4″ through hole that was just large enough for the bolt to pass through.


I clamped the frame piece in place, then used my 1/4″ forstner bit to poke a center point onto the front.
I drilled the pilot holes for the adjustable bracket, using a piece of tape to mark the depth. I put a lot of work into the front, I don’t need to drill through the face…
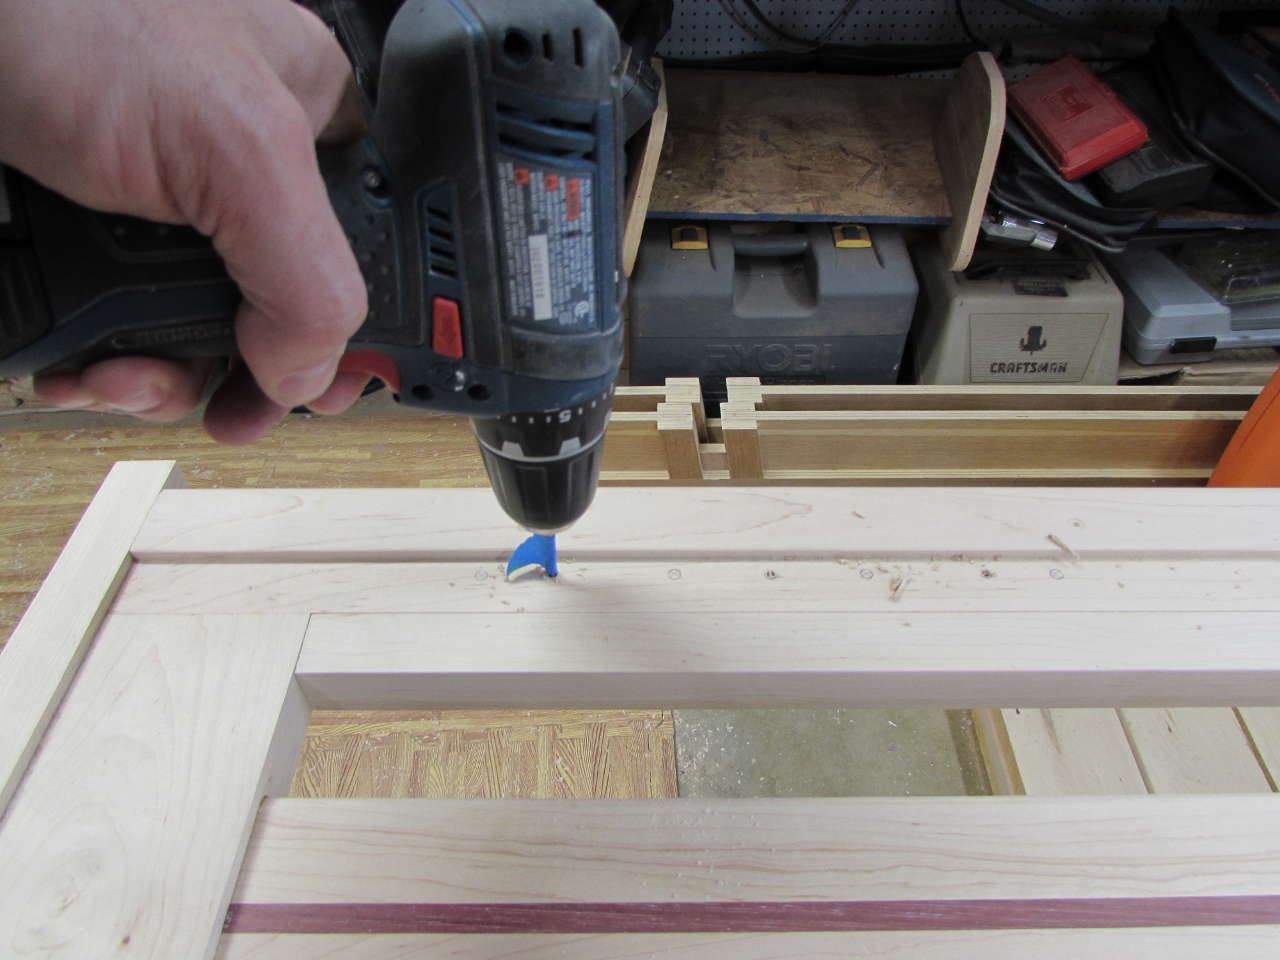
Next, I used a 5/16″ bit to make the clearance holes for the adjustment bolt, at all four locations.


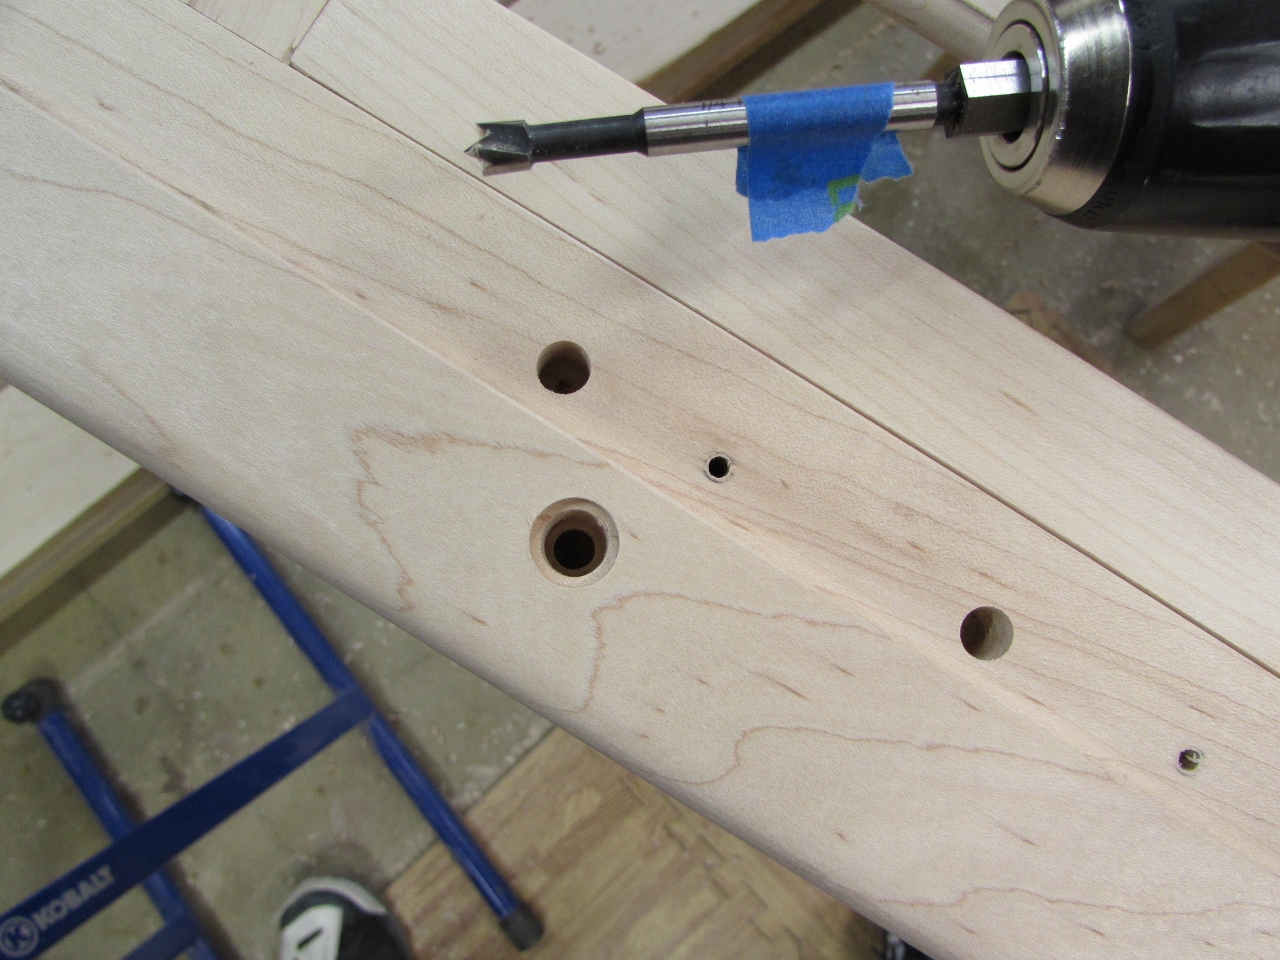
Then I moved to the outside rail and drilled a 1/2″ hole about 1/16″ deep to recess the rim of the insert. Using the center point, I stepped down to a 3/8″ bit and drilled about 1/2″ deep to create the hole for the insert. Finally, I drilled a 1/4″ diameter hole as clearance for the bolts. I made sure to mark the depth of them as well.
I installed all six inserts, on the front frame, and even though I knew they were too long, I ran a bolt in anyway. Who knows? Maybe it shrunk to a metric length… It didn’t, still too long. Time to modify some bolts…


I normally cut my bolts down, in a vice, with a hacksaw, but these bolts have such a nice oiled bronze finish, that I didn’t want to scratch them in the vice. Hmm, perhaps it was a bit over-kill, but I clamped my angle grinder in a vice and plugged it in. Instant grinding wheel. I wrapped a piece of leather around the bolt, and clamped my vice grips tightly around them, then ground away about 3/16″ off the tip.
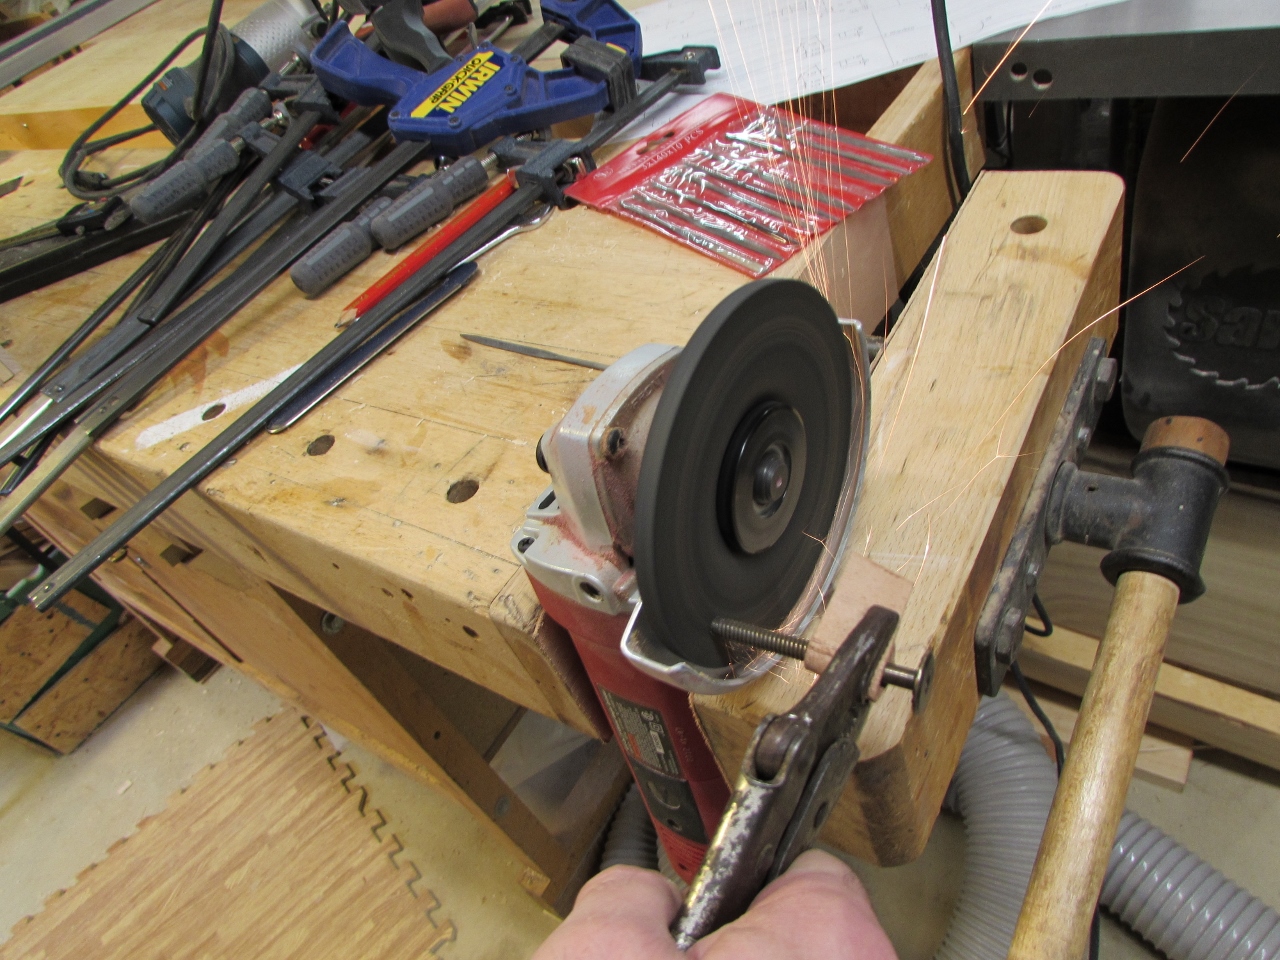
It worked, and quickly too. I would recommend waiting to pick off the burrs, that tip is hot, and may burn a couple of thread marks into your finger tip. Not that I would know… I decided to lay the ground bolts on the concrete floor to cool as I ground the rest.

Since the tip was pretty funky now, I got out my jeweler’s files and reshaped the threads.

I used a Stainless steel, 1/4″ nut to help test and straighten the threads. Stainless is harder than the mild steel of the bolt, so it worked well.

It took a lot longer than I planned, but all the bolts thread in well. In hind-sight, I should have threaded the nut onto the bolt first, before grinding. It would have been easier to reshape the threads by just unscrewing the nut. Also, it would probably have been smarter to use a Dremel tool with a thin cut-off wheel, but I don’t get to use my angle grinder too often…

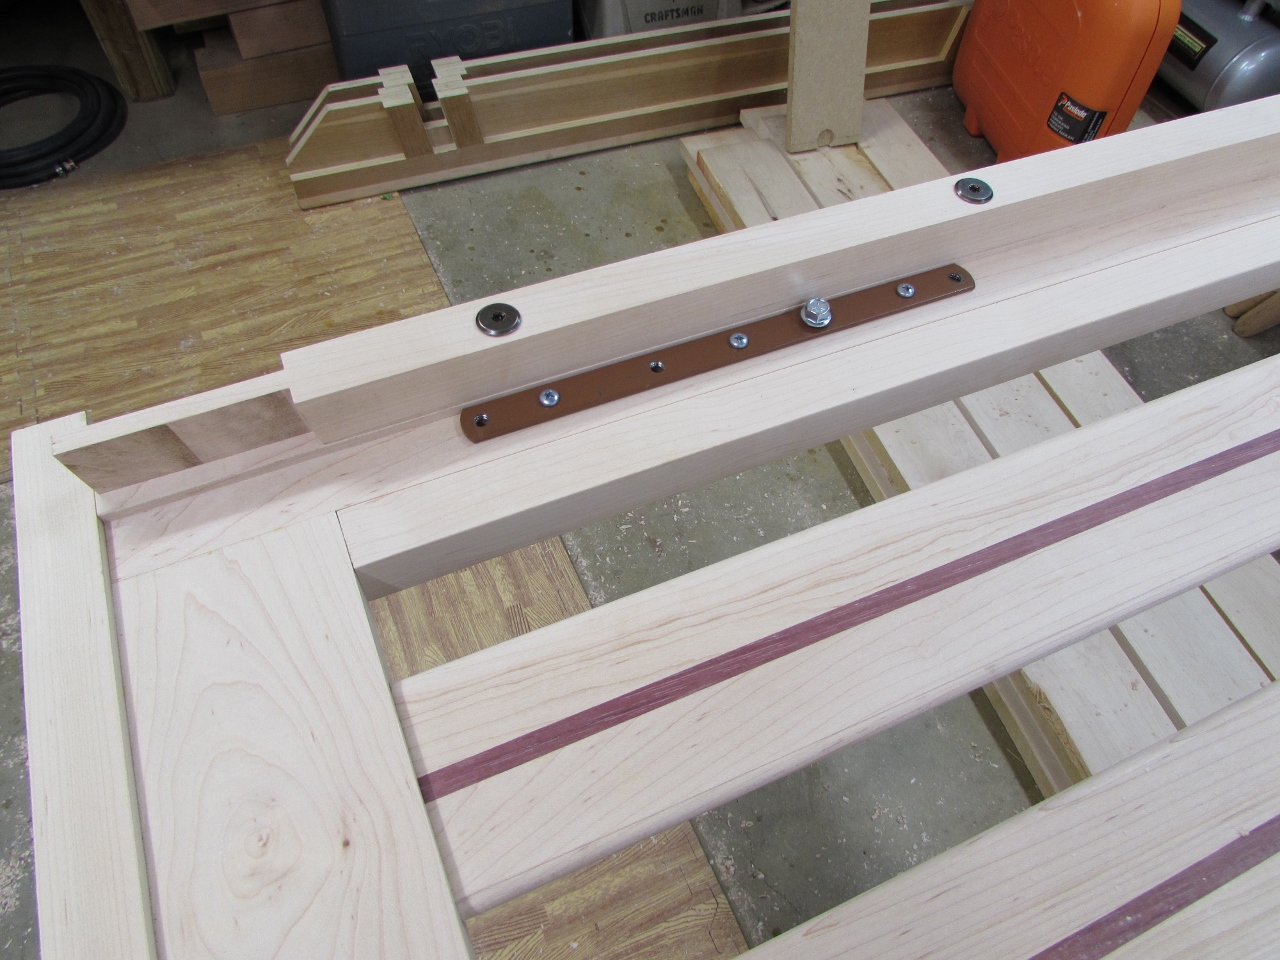
Front hardware installed, finally. One side note: The bolts are now just short enough to fit into the hole, without the first slat being in the way. I originally planned to feed the bolt through before glueing up the side, now it won’t be a problem.
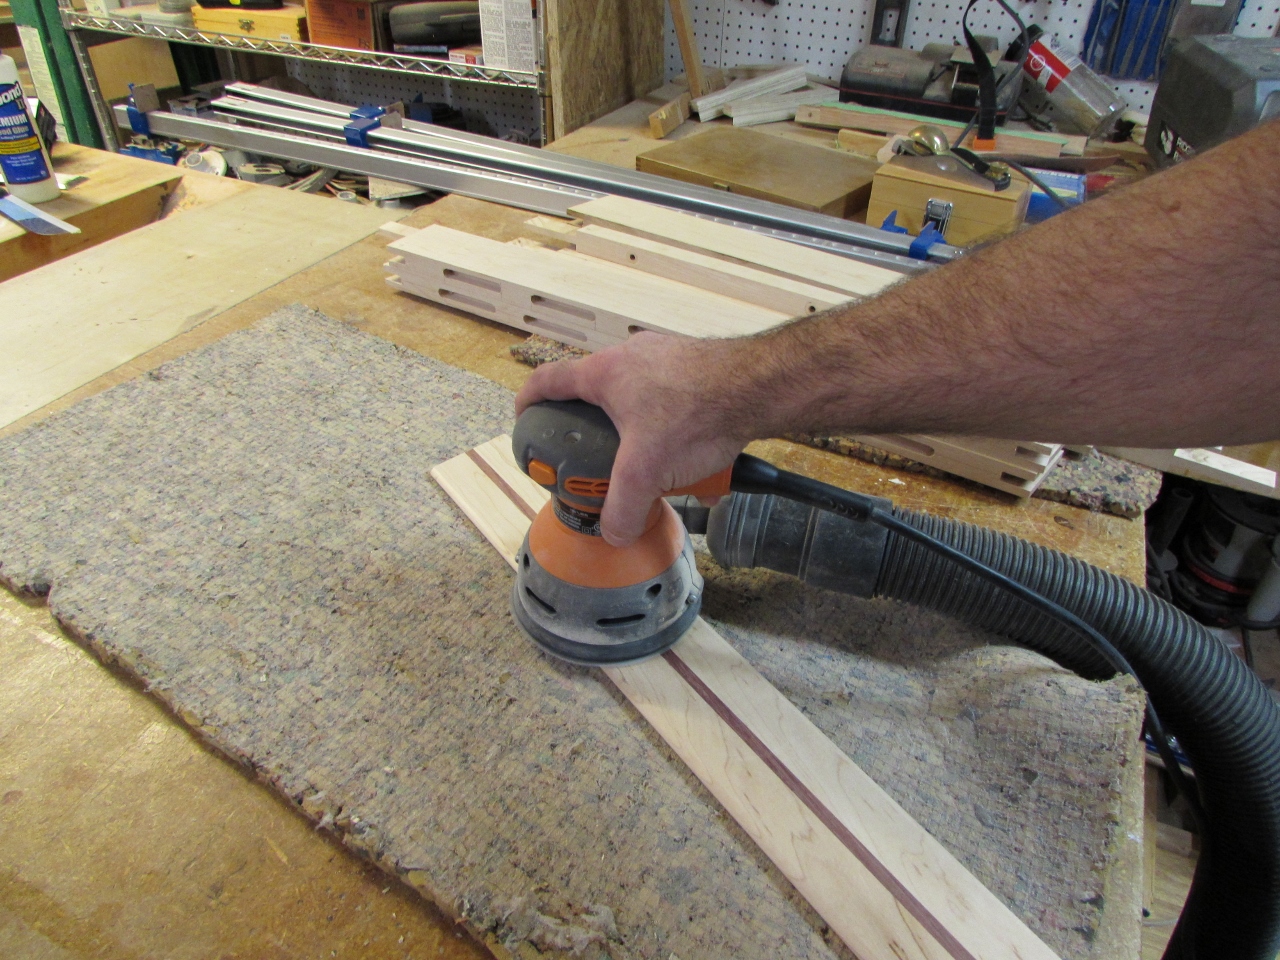
With that fun over, it was time to start sanding the sides.

An hour or so later, that was done as well.

I almost forgot the top and bottom rails. They were still on the table saw. I planed them down and sanded them as well. Then I cut the two bottom ones off square, and applied the required 8 degree angle to the top rails.

It doesn’t look like much, but all of that took about eight hours (would have been seven if it were all English hardware…).

I can’t glue up the sides just yet, I still need to repeat all of the same steps, with the hardware installation, on the back. (Which reminds me, I really should start drawing that up…) I did reassemble everything to get a feel for how the crib was shaping up. Three sides down, and one to go. And feet, can’t forget the feet…

Looking good! My beef with metric is usually working on cars. Most GM cars that I’ve worked on have an odd combination of both metric and English bolts. I’m fine with English tools, but if I already have my socket set out there, don’t make me go back in to get a metric set! Be consistent, at least!
Looking great, Thanks for the tips and details to watch for. Oh by the way I really hate using both the english and mertic at the same time on the same project. At one time i was a QC inspector, I travel around North and South America trying to figure out why no one could make that part for your car, washing machine or lawn mower. The main reason a lot of the people south of Texas could not read english. Oh did i tell you all the paperwork and drawing notes where in english. Go figure !!! To beat all some of these plants made parts for the auto makers and for lawn mowers…Man thanks for your blog I really enjoy reading it !!!!!!!!!
Thanks for the kind words. I love it when someone can use the info.