
Statue bases – day 1
I haven’t been in the shop much this past month or so. Even though my shop is nicely heated, I just kind of got a bit lazy this time of year. Perhaps it is all the snow shoveling…
My project list has been waiting for me though. Next on the list is another set of statue bases similar to the last set that I made.

Base model
The main box is essentially a cube of plywood with several layers of trim wrapped around it. Here is the profile of the last set I made.
BASE PROFILE.pdf
This set of bases will be a little different. They will require additional support in the center, since they will each have a 5′ tall marble statue of an angle mounted on top of them. Each statue weighs about 1,000 pounds.

Ripping plywood down to size
Since the core of the base is the box, I will start with that. I ripped some full sheets of 3/4″ oak plywood to the proper height with my track saw, then ripped them to width on my table saw. Always making sure that the plywood cuts were square. I have been having trouble with plywood not being square, when I purchase it.

Final sizing on the table saw

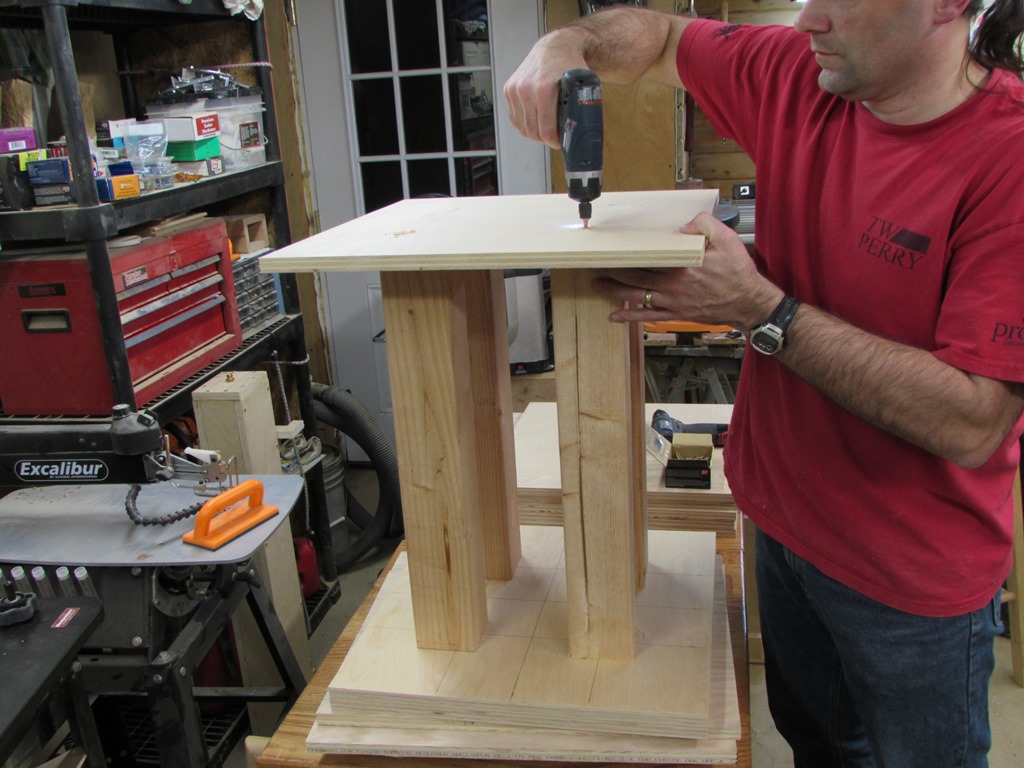
Laying out post locations
I laid out the locations of my support columns on the top and bottom panels, then cut a couple of 4″x4″ boards to match the height of my box sides exactly.

4″x4″ posts for supports
I lined the posts up with my marks and screwed a 2-1/2″ wood screw into the top end of each one.
Assembling the top to the support posts
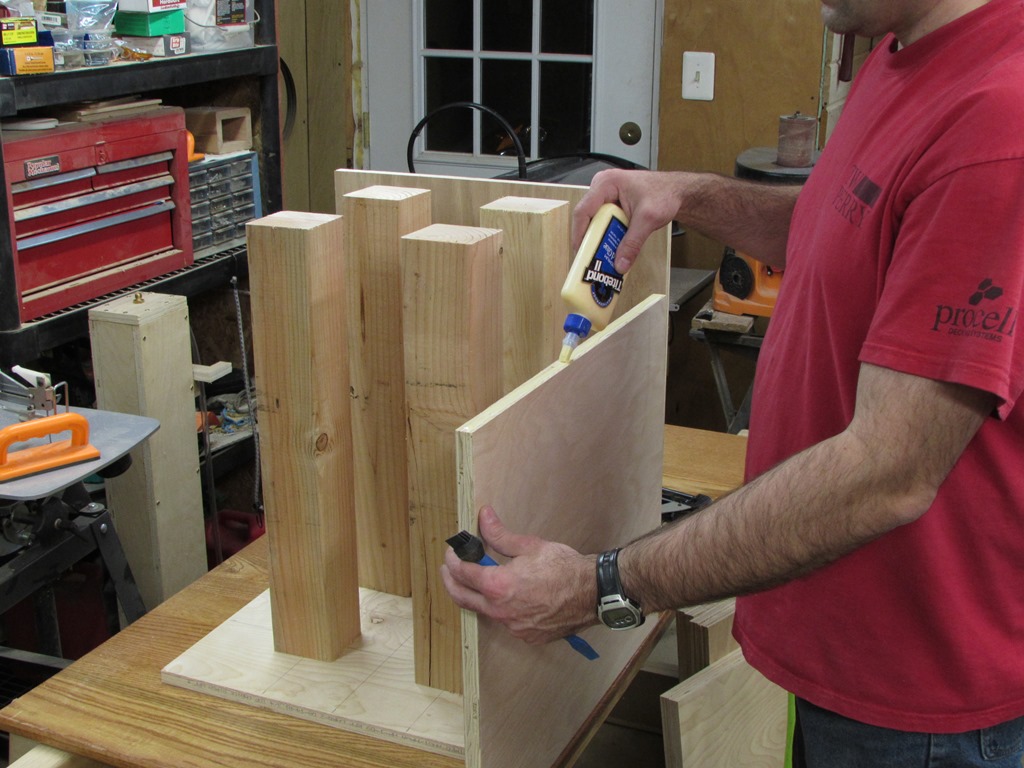
Applying glue to the sides
Flipping the assembly over, I glued and nailed the sides of the box together with my 18 ga brad nailer.

Nailing the sides together

Attaching the bottom
I squared up the sides and attached the top, then put a screw into each support post from this side as well.
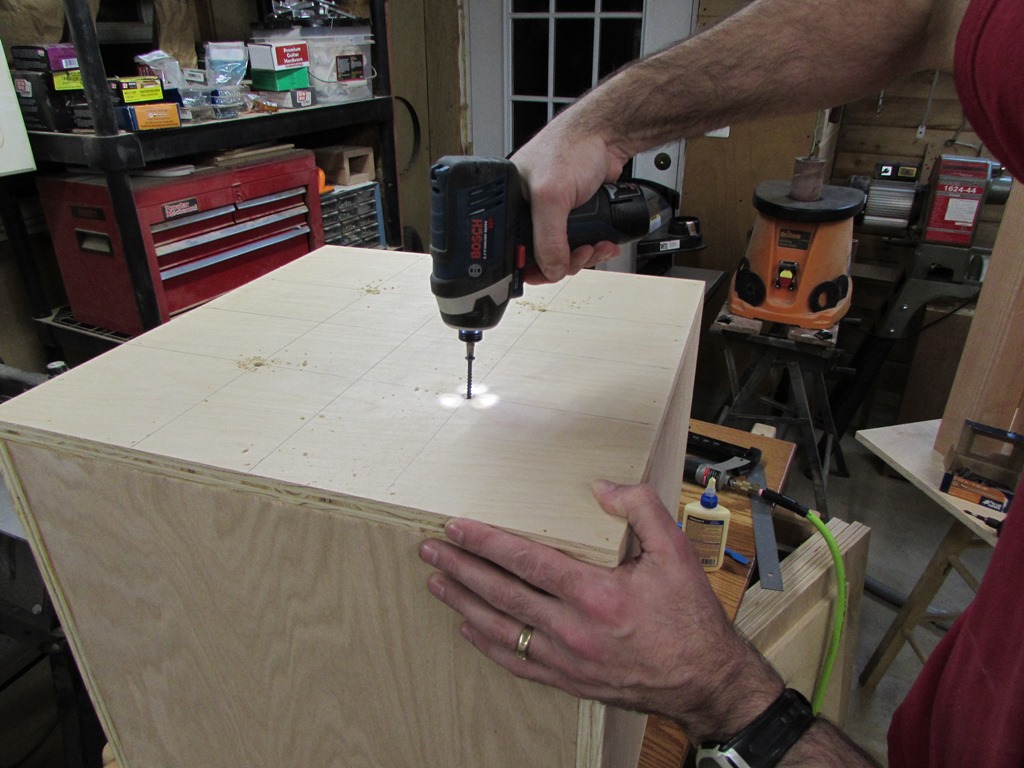
Screwing the bottom to the support posts

Inner boxes complete
With both boxes complete, I moved on to milling down this large pile of wood to make the various trim pieces.

The wood for the next two projects
I started by ripping my boards down to size on the table saw. None of the pieces need to be longer than 24″, but I am attempting to mill as much as I can in the 8′ length so when I miter it, the grain will be matched and hopefully appear to flow around the boxes.
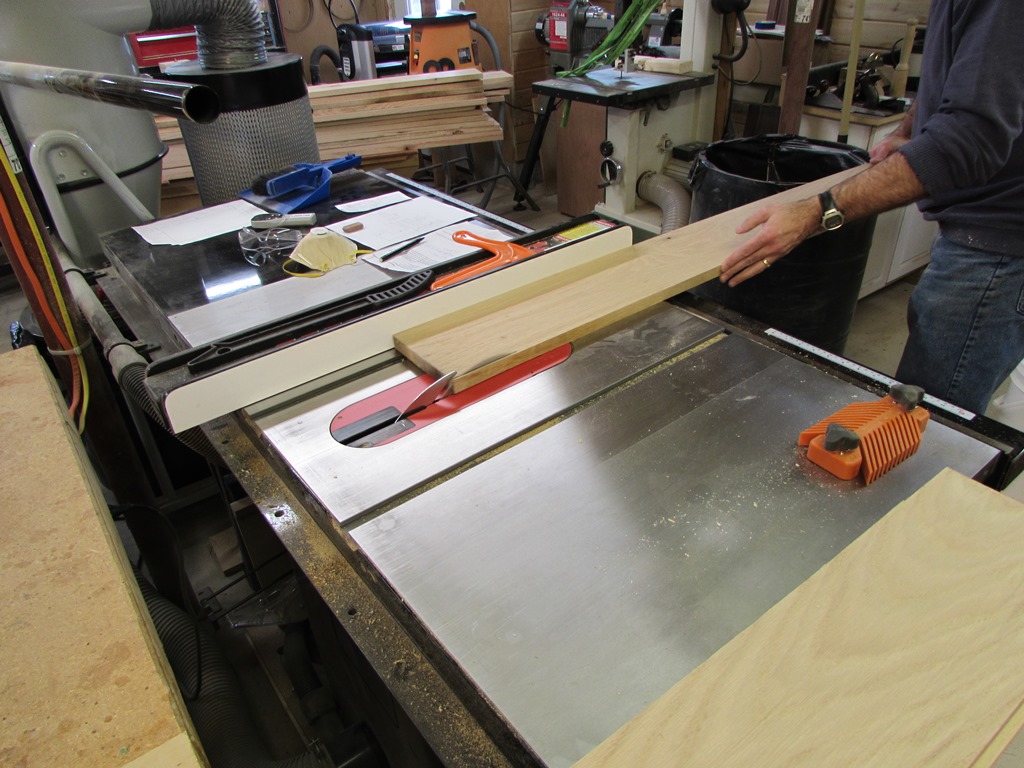
Ripping the stock to width
As I started running the wider boards through my planer, I determined that it was time to change the blades.

Planing down to 3/4″
My Rigid bench-top planer probably has the easiest blades to change out. You simply loosen the series of nuts along each blade and swap out the blades. They are precisely designed to drop right into place with no adjustments required.
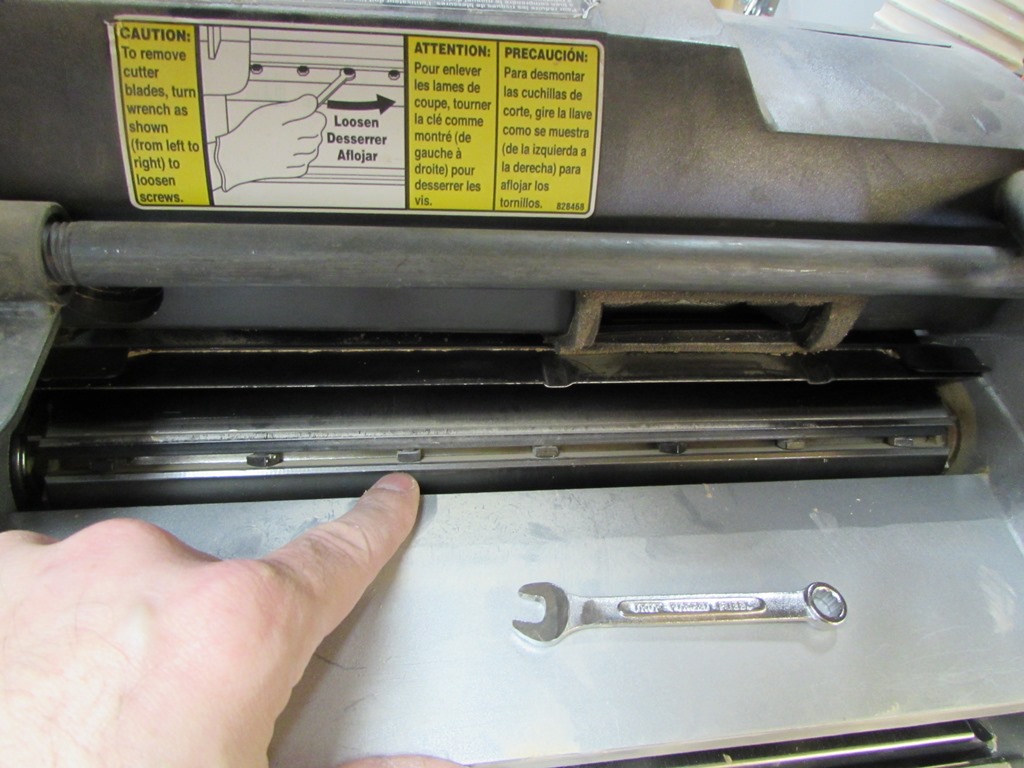
Need to replace the blades
The only problem I have is the exposed blade. On more than one occasion, I have slipped with the wrench and slammed my thumb into the exposed blade. It was not pretty and I really felt stupid the second time I did it, even prepared, I still sliced off a big chunk of thumb. Now I use a series of wood blocks to hide the blade. I use different size blocks and move them from nut to nut as I go. I am happy to say that I haven’t sliced off any more parts since I started using this method.
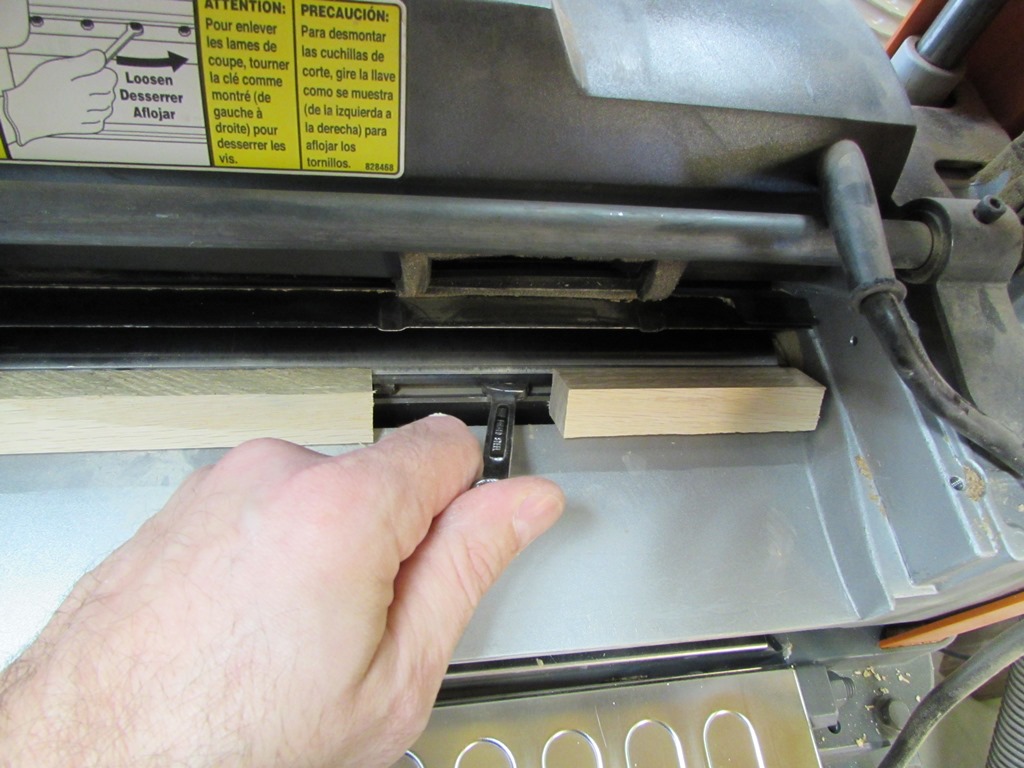
Safest way I have found
The planer also comes with a nifty magnetic tool designed for the removal and installation of the blades so you don’t accidentally slice your hand .
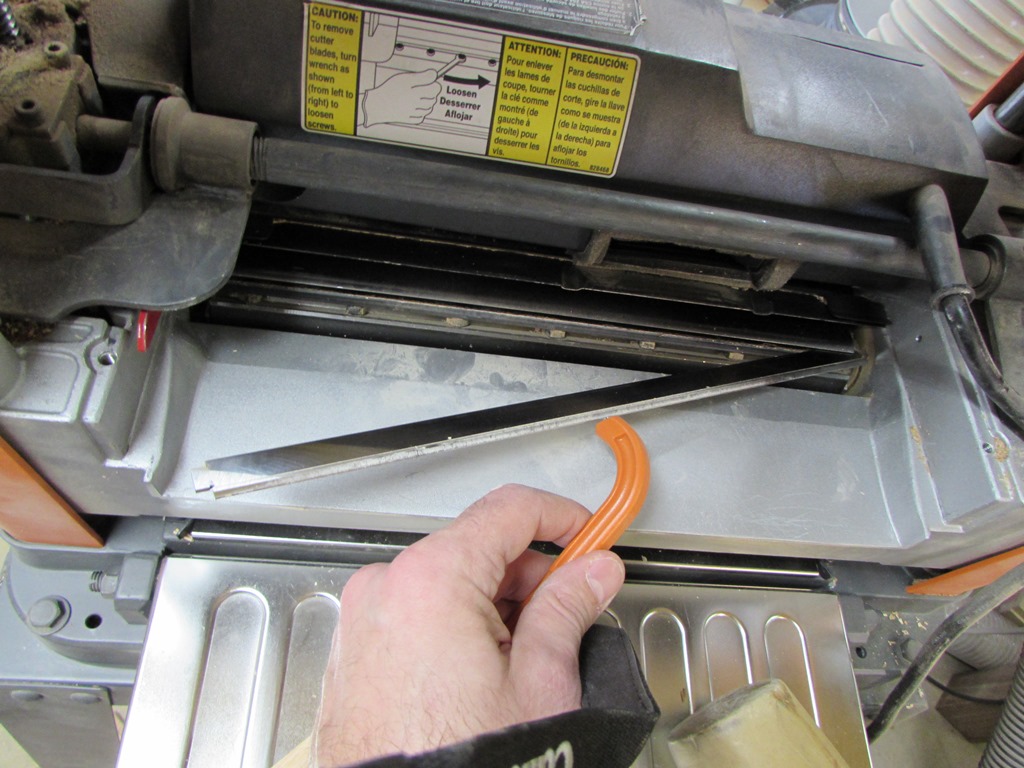
Remove and replace with a magnet

Re-sawing to save the planer blades
Once that was done, my planer preformed a lot better. I have a couple pieces that needed to be taken down to 1/2″ thick, so I re-sawed a majority of the wood away on my table saw, then finished the sizing on the planer.

Planing down the rest of the stock
It was a busy weekend, so I kept popping down to the shop for an hour or two to mill another batch. Normally I will try to set aside a day to get all the milling done, but I think my feet and back prefer this method instead. That concrete floor is hard on you…

Trim boards all milled and ready for molding
Hopefully I will be able to get down to the shop throughout the week and get the profiles cut on the trim boards.
