
White oak park bench slats
I have gotten a lot of inquires from people wanting to buy replacement slats. If you would rather buy them instead of building your own, check out my friend Bryan: Atkins and Sons park bench slats. Anyone interested in building your own, please continue reading.
It seems like there are a lot of people who have an old park bench just hanging around. They are nice and fairly comfortable, but after 10 or 15 years, they start falling apart. From time to time, I get a request from someone to build them a new set. I just got one of those this week, so I thought I would put up another post about making them.

An old park bench
I think most of these park benches were originally manufactured with teak or a similar, weather resistant wood. I am using white oak for this set. White oak tends to hold up well in the weather, though if untreated, it will turn grey when exposed to a lot of rain. Since they will be sat upon as well as exposed to the weather, I found a couple of really nice quarter-sawn oak boards. The quarter-sawn should be the strongest and most dimensionally stable choice.

Quarter-sawn white oak
I cut the boards a few inches longer than required, then ripped nine slats at 2-1/8″ wide.

Ripping down the 2-1/8″ slats
Next, I ripped three more at 1-3/8″ wide, to replicate the size of the original slats.

Ripping down the 1-3/8″ slats

Planing the slats down to 5/8″ thick
I used my planer to take all of the slats down to 5/8″ thick, then put four or five through, at a time, on their sides, to joint the edges.

Gang jointing the sides
After all the pieces were planed to the correct size, I cut the length down to 48″ exactly. I cut them longer, originally, to accommodated any snipe that may occur in the planing process.

Cutting all the slats down to 48″ long

Locating and attaching my jig
I made a simple jig the first time that I made these. The entire purpose of the jig is to locate the mounting holes in the exact same location on each end of each board. I screwed the jig to my drill press table, after I located the bit in the old hole. I drilled a test hole and was unhappy with the slat. The drill bit kept trying to lift the board as I was retracting the bit.
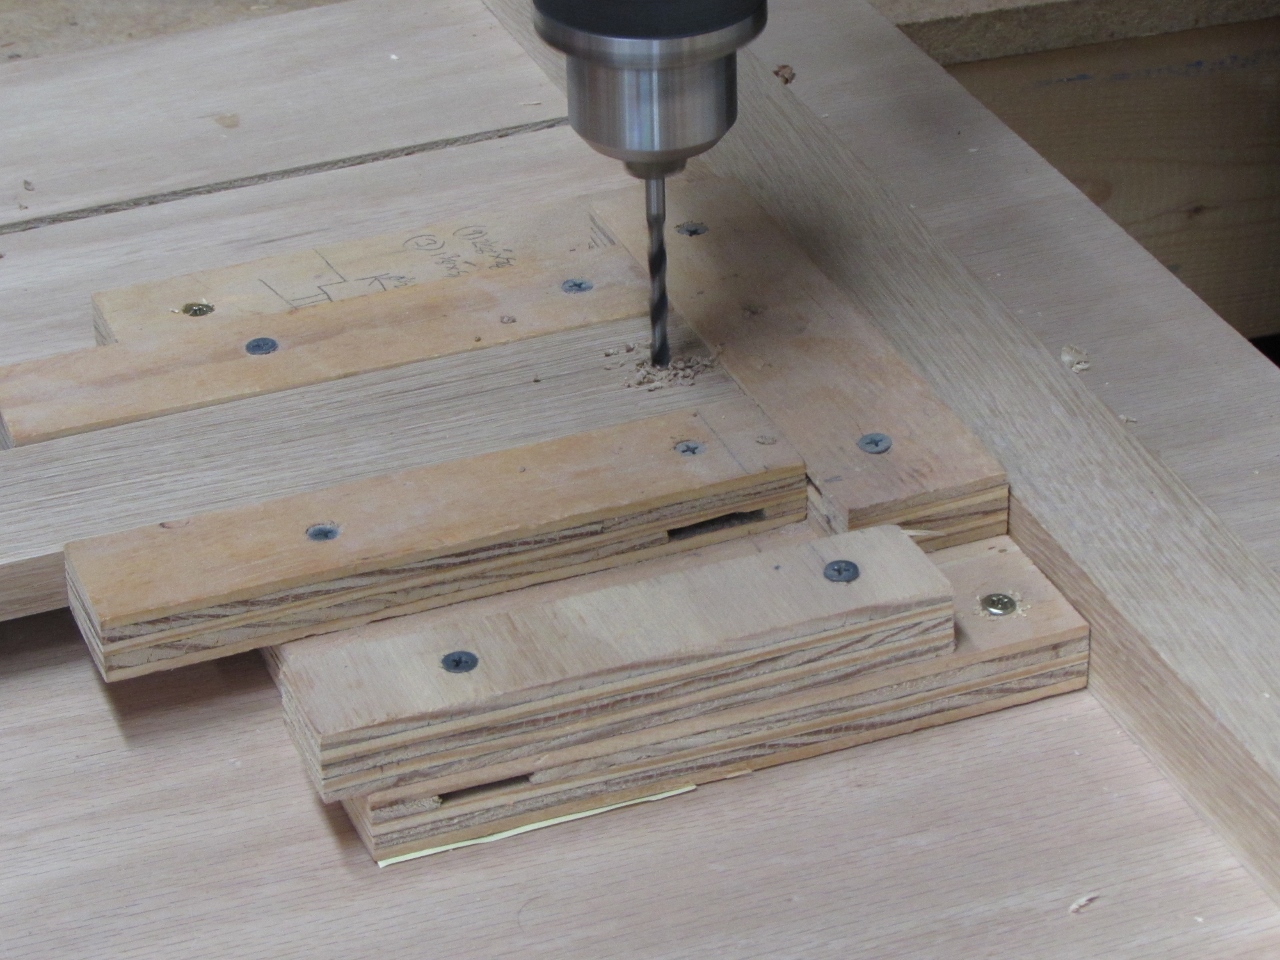
Drilling the through hole

Added a cross-piece and a wedge
I put a stop to that by simply screwing a cross-brace across the slots. By adding a shim, after the board was inserted, it was effectively clamped in place and I could drill away without even holding the slat down with my hand. With that problem solved, I finished all the holes on the wider slats, then drilled a 1/2″ diameter, 3/16″ deep counter-bore to create a recess for the screw head.

Drilling the counter-bores
When the wider slats were complete, I moved on to the narrow ones.
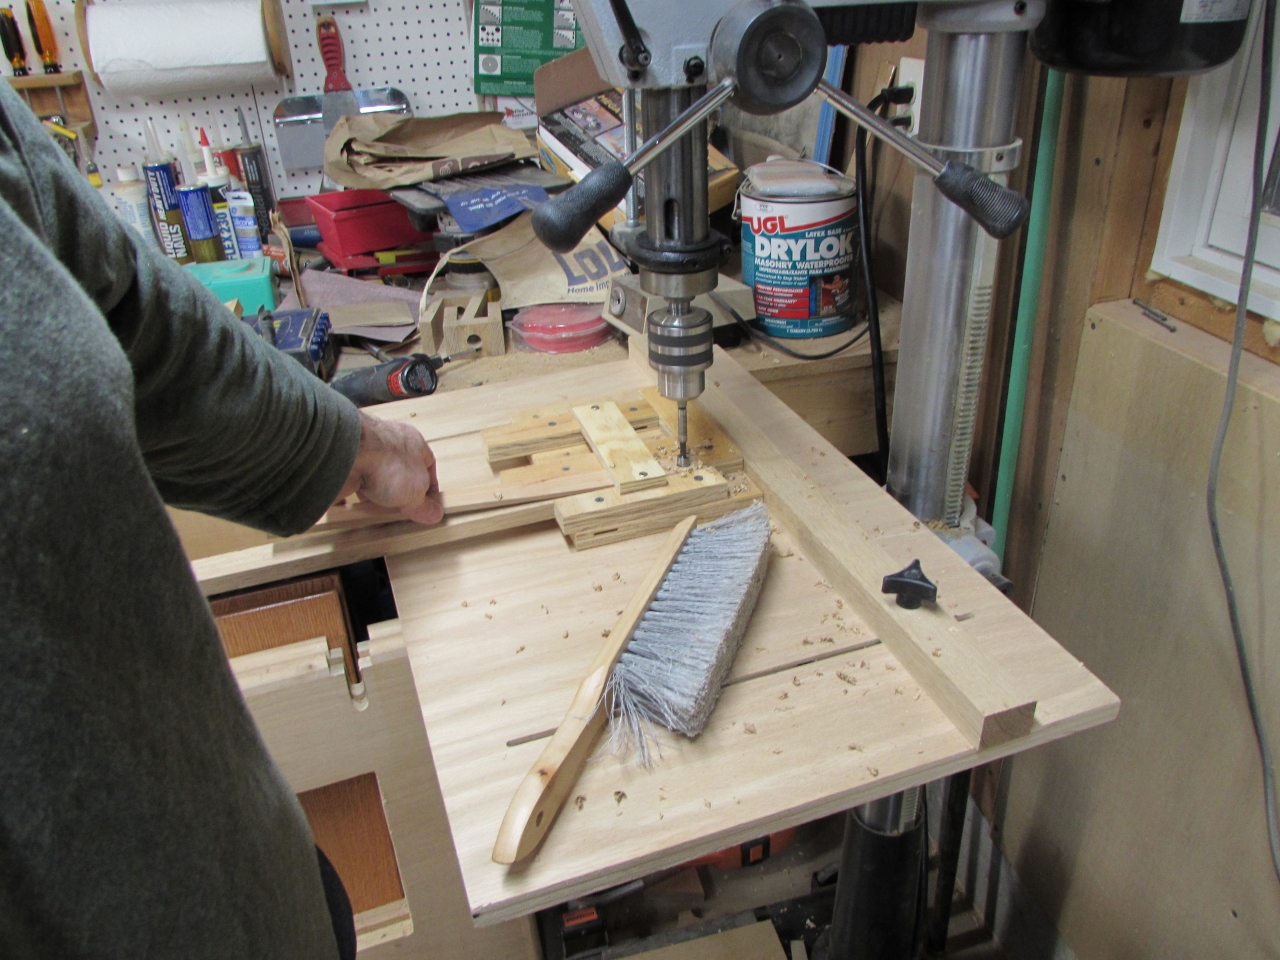
Drilling out the smaller slats

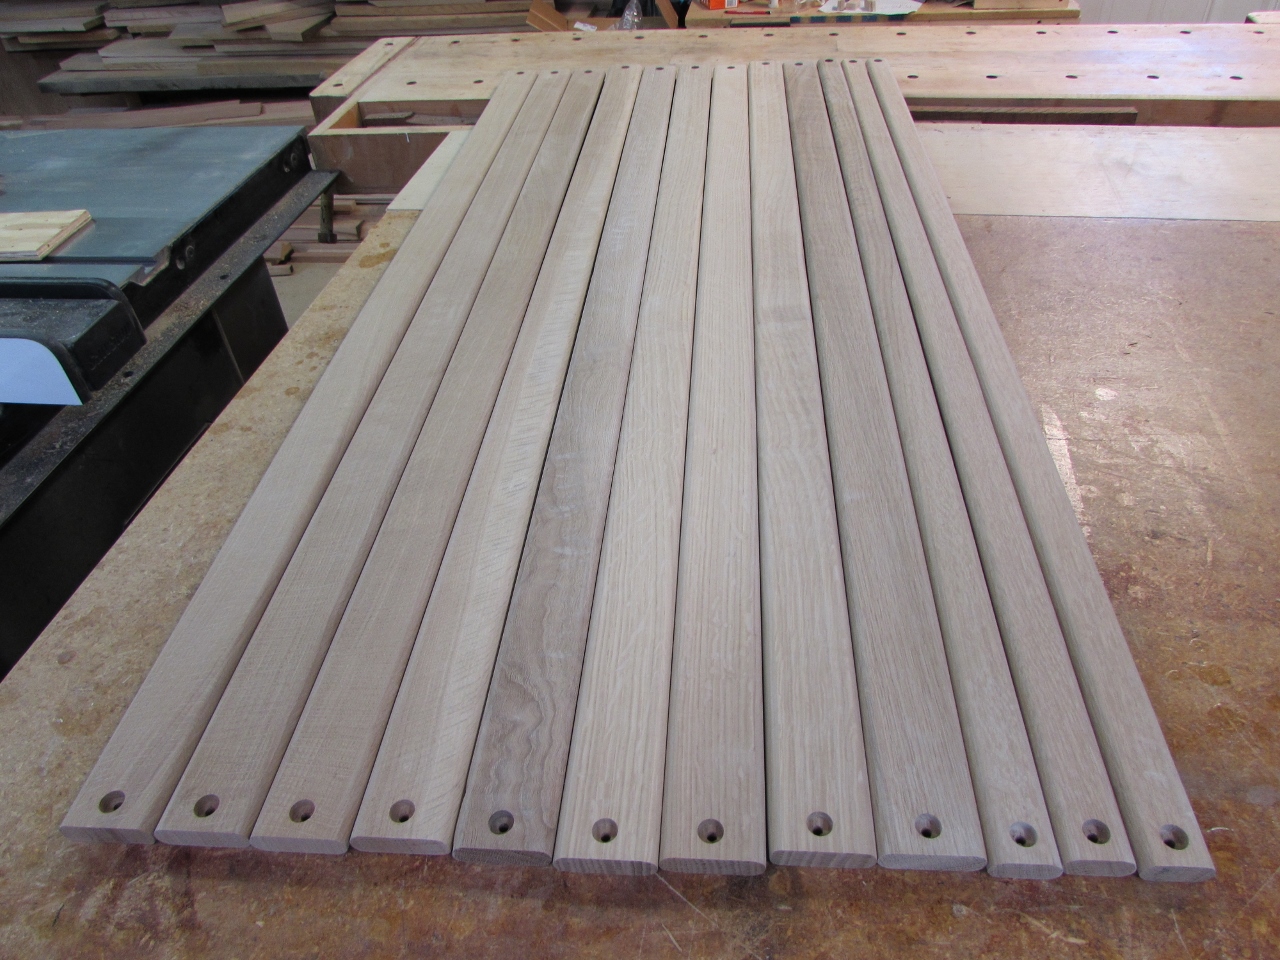
Slats all drilled
All twelve slats are complete. Time to round over the edges. You don’t have to do much to the edges. You could simply bolt these down as is, but the sharp edges are a little uncomfortable. You could break the sharp edges with a hand plane, a rasp, or even sand paper, but I prefer to put a fairly big radius on each edge. It makes the seat more comfortable, in my opinion.

Rounding over the edges
I set up a 3/8″ radius round-over bit in my router table and trim all four of the long edges. I have had people ask me how to do this if you don’t have a router table, so I put up an entire post about how you could do it free-hand with a router. Click here to see that post.

Use a narrow push stick to squeeze past the feather boards
The 3/8″ radius does not a perfect half circle because the board is only 5/8″ thick, but it is close enough that the sander can make it right.

Sand everything
I put 120 grit paper in my orbital finish sander and roll the slat as I move the sander back and forth. This smooths down any sharp edges that may have been left behind.

I roll the slats while sanding to smooth all the edges
And that is pretty much it. You will probably want to go out and buy some new screws. The old ones tend to rust out in the weather. So after a good ten years of service from the old bench, just five or six hours in the shop and you can get another ten.
Slats complete

Do you sell and ship the oak slats. I live in Mckinney Tx.
I do not, but my buddy Bryan does. http://bryan-atkins-hjih.squarespace.com/
Check out his site and he will take care or you.
Thanks for this. I am restoring my grandfather’s bench for our yard that he had when I was a kid. I wanted to preserve something to remember him by. Your tips were very helpful.
That’s awesome, thanks