
Church Altar and tabernacle stand – day 2
Before I can assemble the top, I had a couple of filler pieces that need to be made for the back side. I left them out so I could squeeze more out of my sheets of plywood. Basically I cut some 6″ wide scrap and 2-1/2″ wide scrap left over from my 3/4″ plywood to back-fill. It isn’t critical that you can see the plywood butting together because all of it will be getting covered with veneer or edging eventually.

Filling in the back side
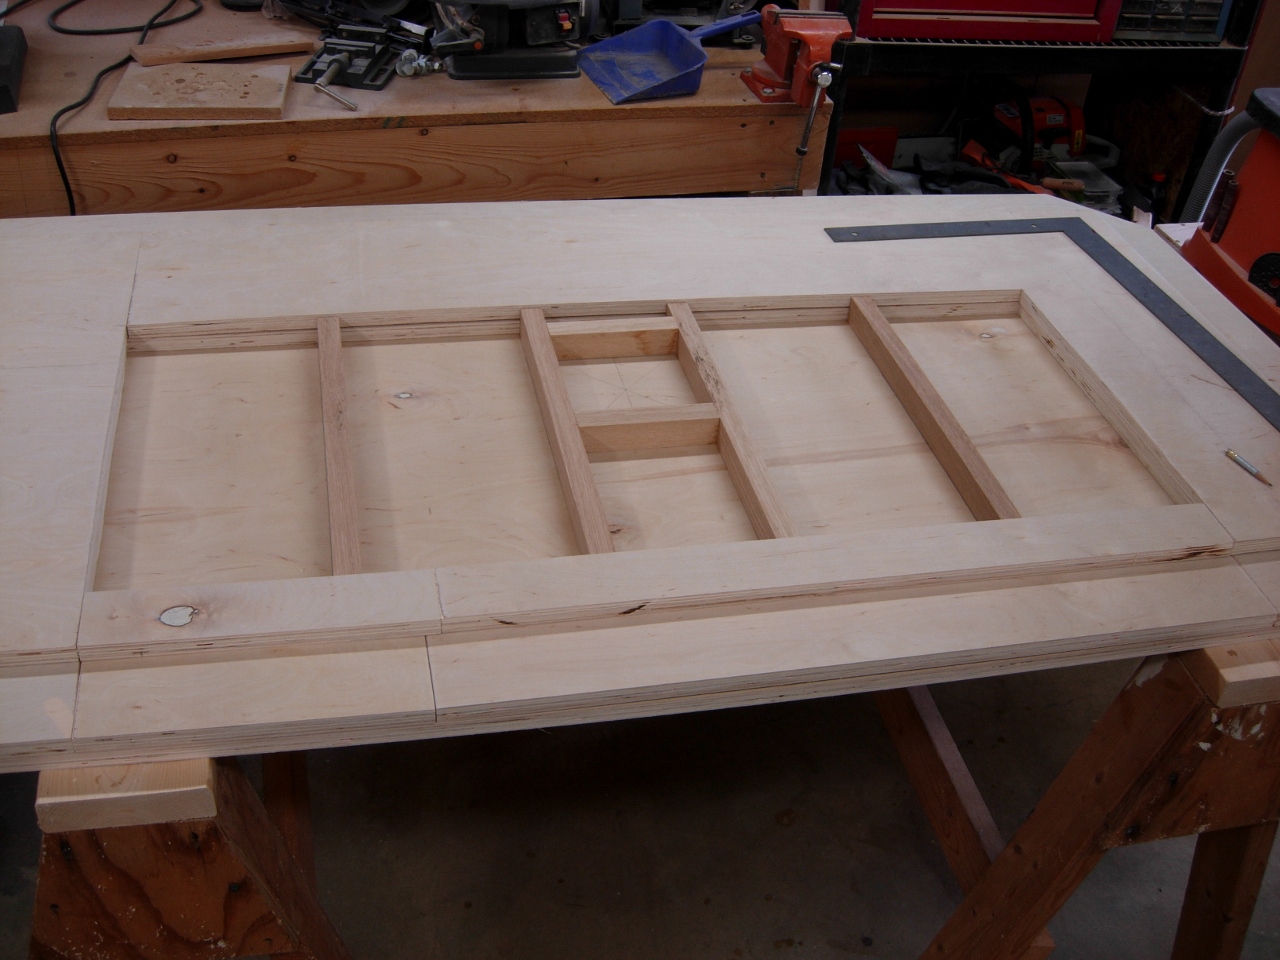
Adding internal structure
After the filler pieces were located, I dug through my scrap pile for some oak to cut into ribs for a bit of internal structure. I also added a couple of cross pieces at the center of the top for the box that will house the relic.

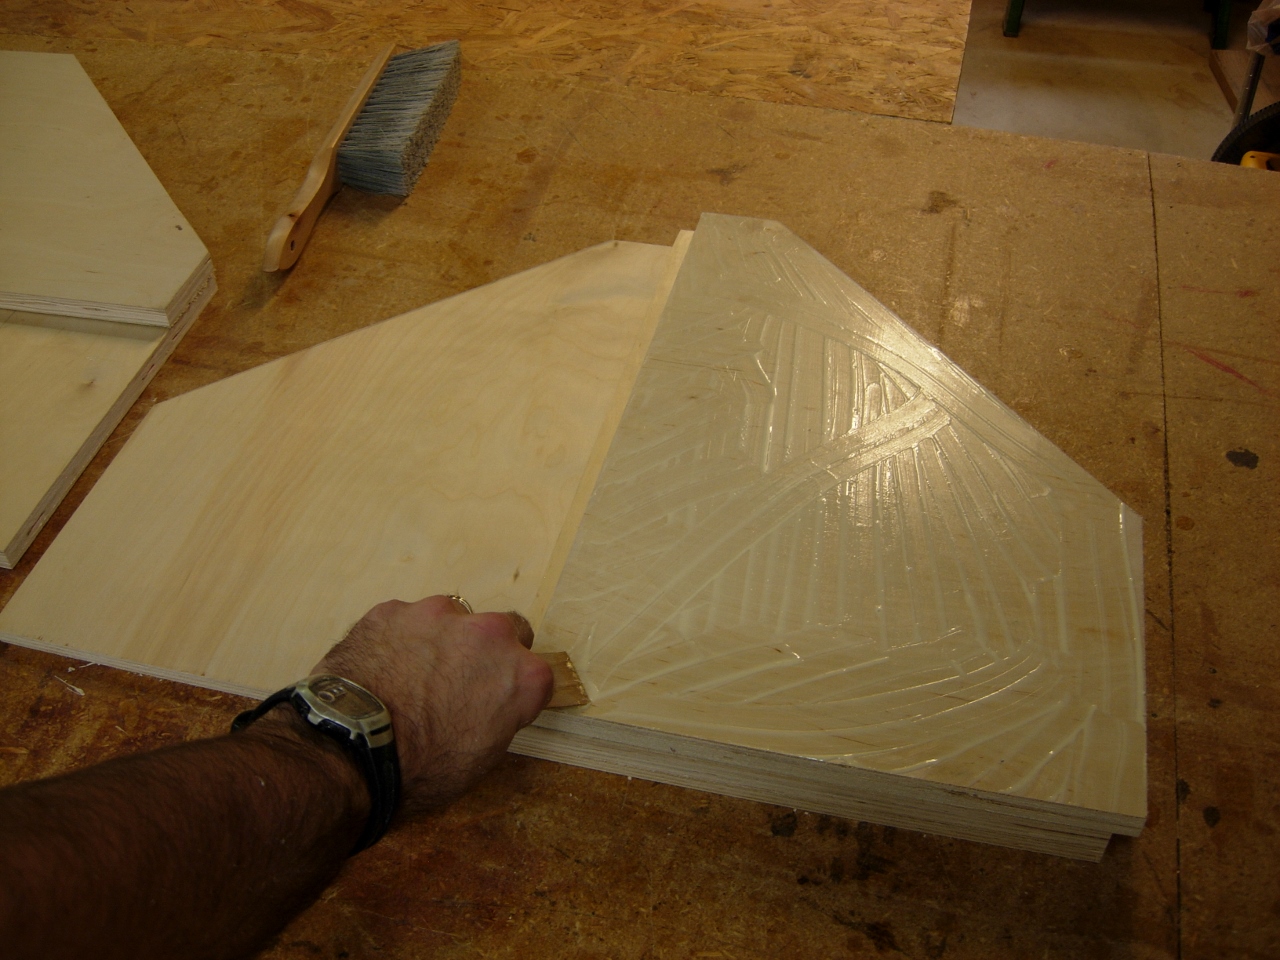
Glueing up the back
I grabbed a thin piece of scrap oak to use as a glue spreader. I then spread glue on the pieces located beneath the top.

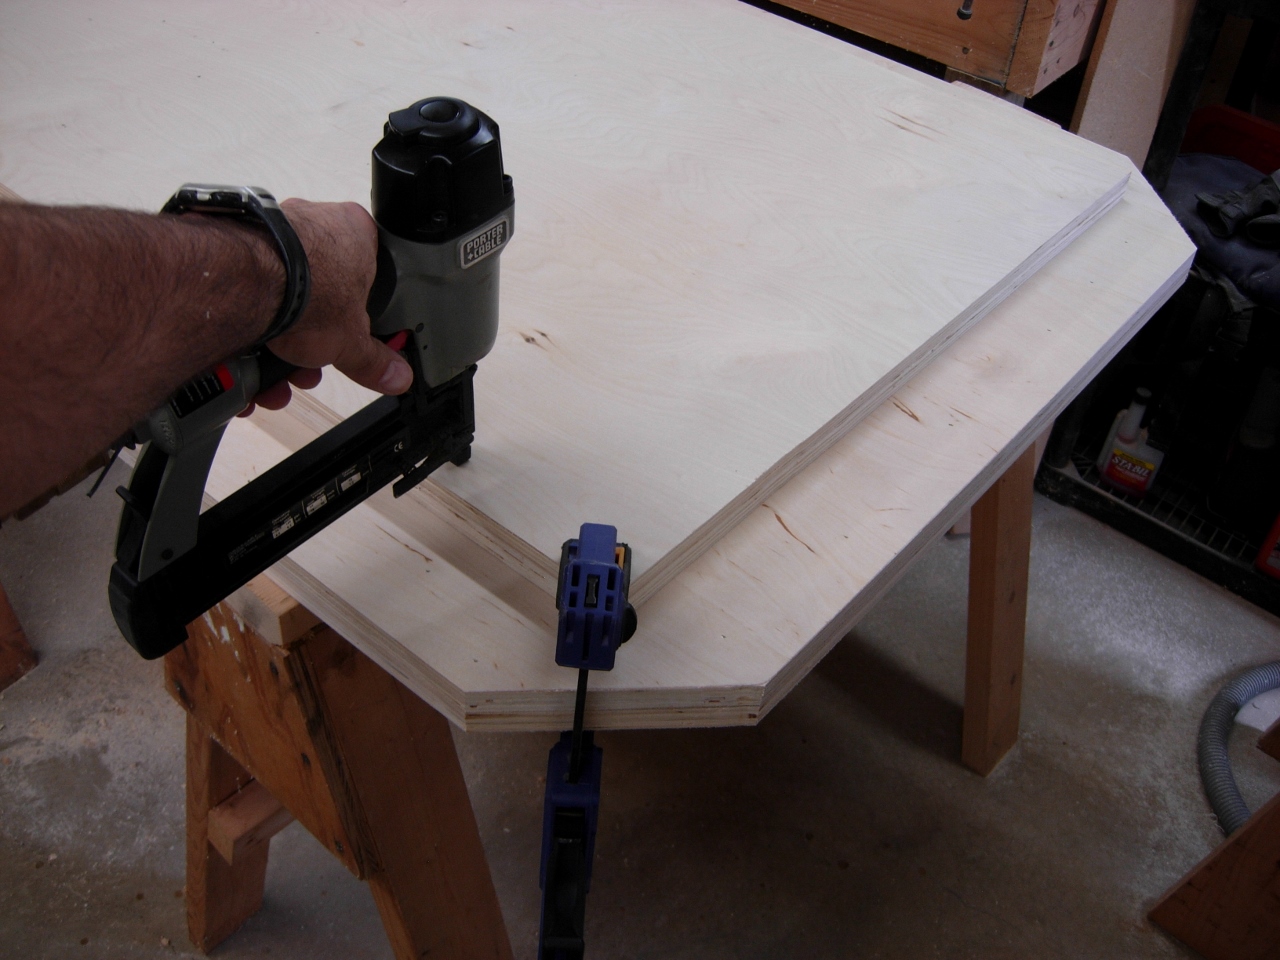
Glueing up the front

Clamping and nailing
I used a few clamps to hold it as flush to the outer edge as possible and fastened it with
1-1/4″ 18ga. brads.

Glueing up the bottom half
Next I glued up the two layers that make up the bottom half of the top and nailed them together as well. With both pieces assembled, I ran my router around them with a flush trim bit to line up the edges.

Trimming all the edges flush

glueing and nailing the inner structure
Before assembling these two pieces together, I glued and nailed the internal structure in place.

Drilling a starter hole in the relic chamber
I drilled a 7/8″ hole in the center of the relic chamber through the top piece. I flipped the top right-side-up and used the flush trim bit to open up the entire hole.

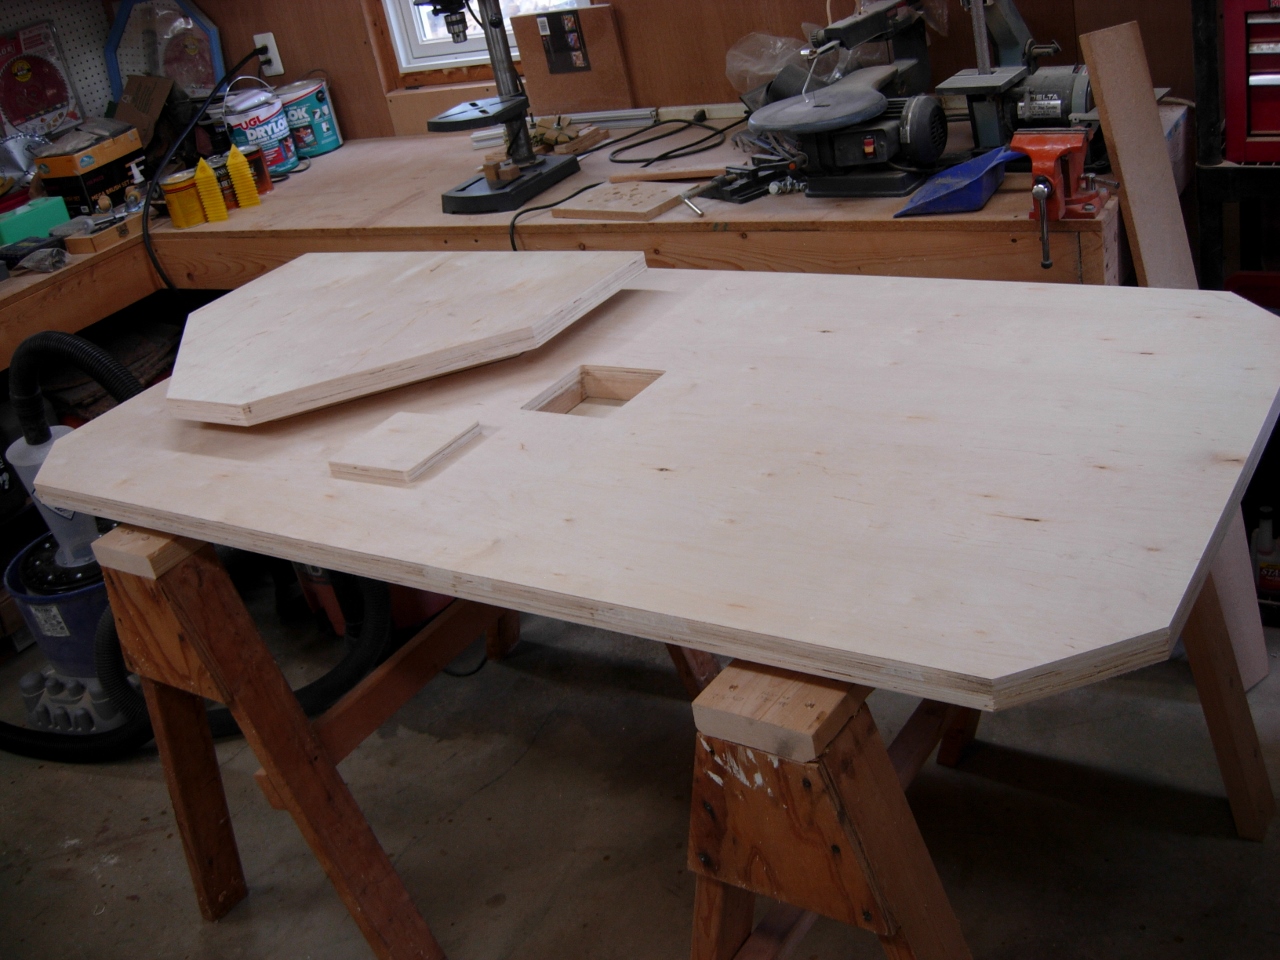
Cutting out the chamber opening
Flipping the top back over, I laid the bottom half on and marked the locations of the internal structure.

Nailing through my marks to the internal structure
I glued and nailed the bottom piece to the top, making sure to center the two pieces. Also, I cut out a 6″x6″ piece of scrap plywood to use as a door for the relic chamber, but I cannot attach that yet.
Nailing the bottom half to the top
Glueing up the tabernacle base top
The altar top is done for now. I still need to acquire the wood for the veneer and edging before I can finish it completely. So while that was drying, I moved on to the top pieces for the tabernacle. I glued and nailed them together in a similar fashion to the altar top, except I didn’t bother with a hollow cavity in the middle. It was just as easy to fill it in completely.

Flush trimming the top pieces
I ran the flush trim router bit around this top as well then glued and nailed the two assemblies together.

Tabernacle base top assembled
Both tops are now ready for the next step, I should be getting the rest of my wood this week so I can start on the columns and paneled sides.
Both tops ready for veneer and edging
