
Adoration tabernacle door
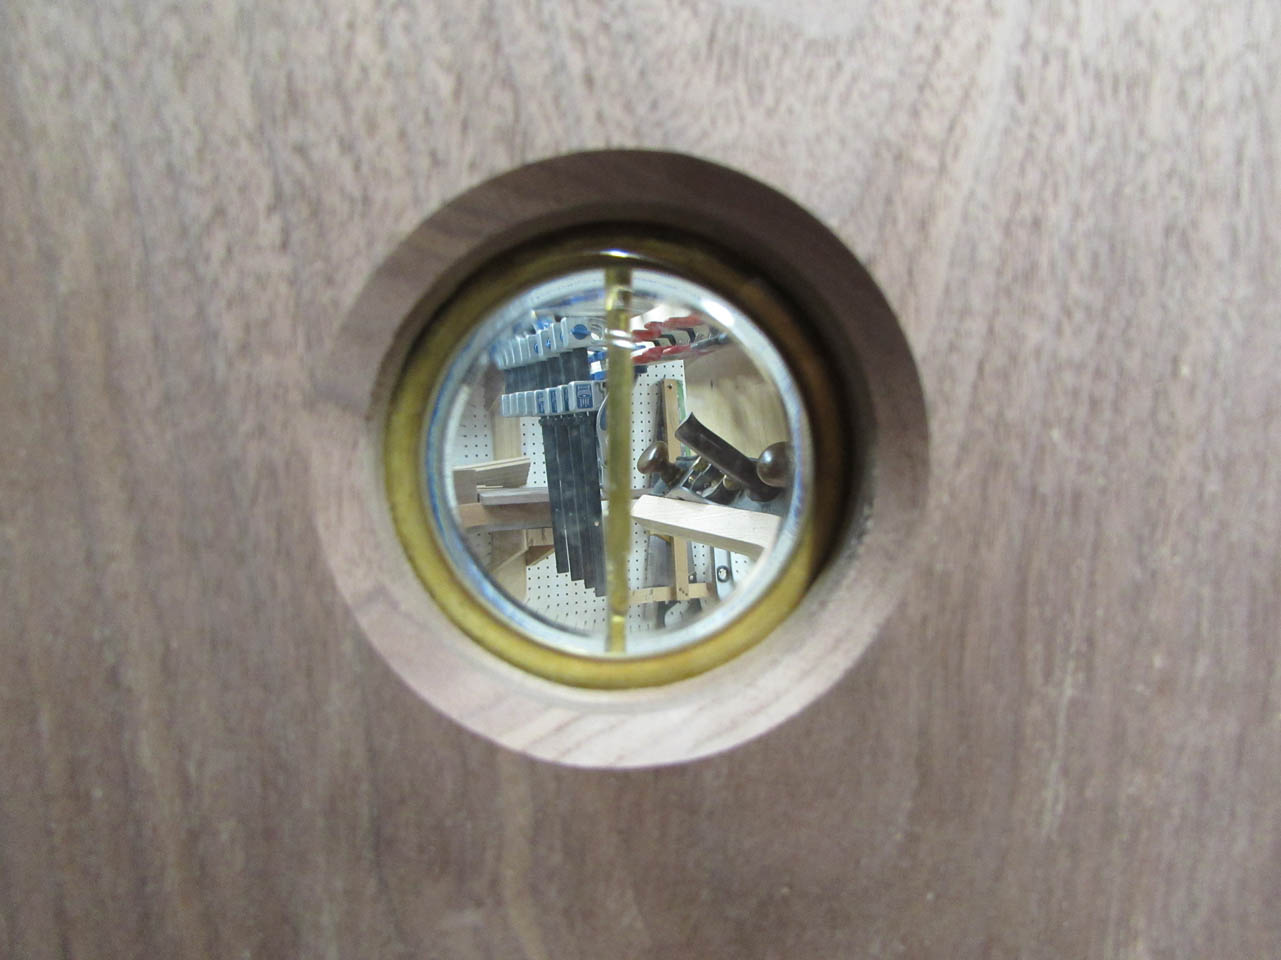
I had an interesting little project to make last week. Sacred Heart Parish, In Glyndon, MD is starting All-Day Eucharistic Adoration. Instead of using a Monstrance to display the Eucharist, they asked me to modify or build a new tabernacle door that could be locked but still have the ability to display the Eucharist. This is the existing door.

I could add a small door and some other features to this door but I wanted to see the chapel first and determine if something nicer could be built.
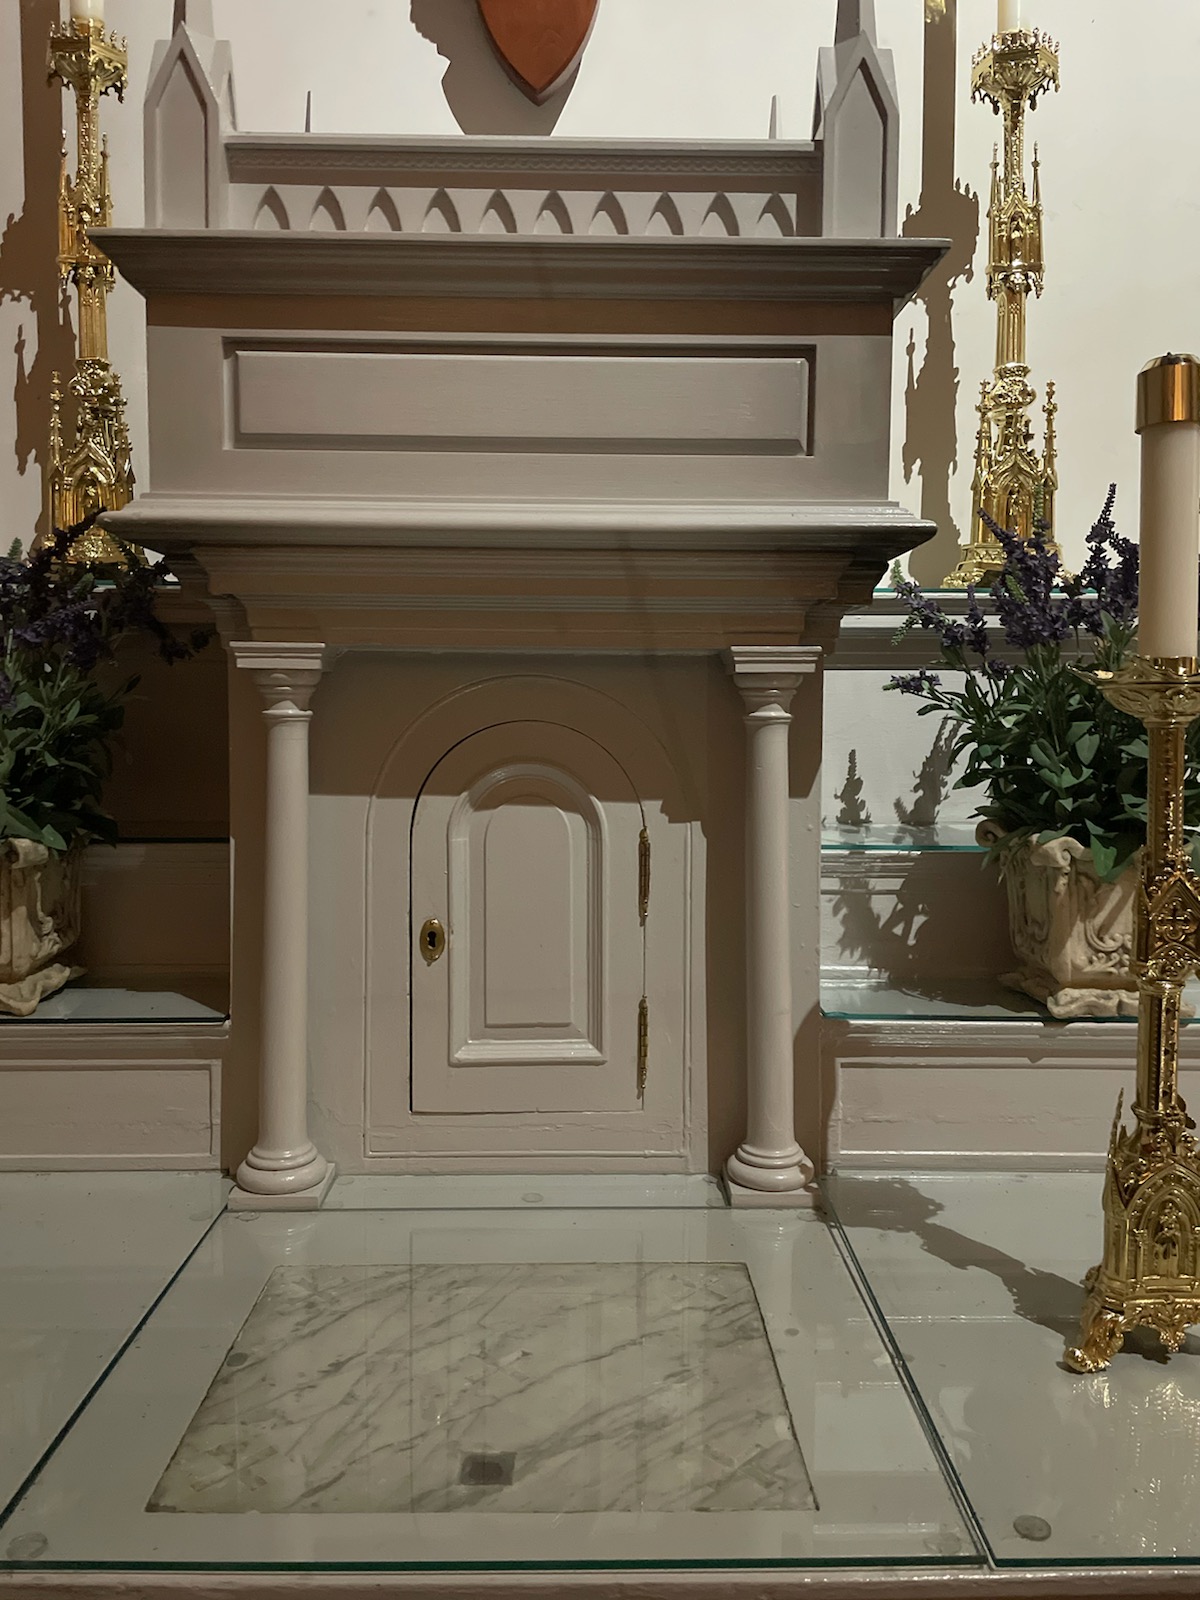
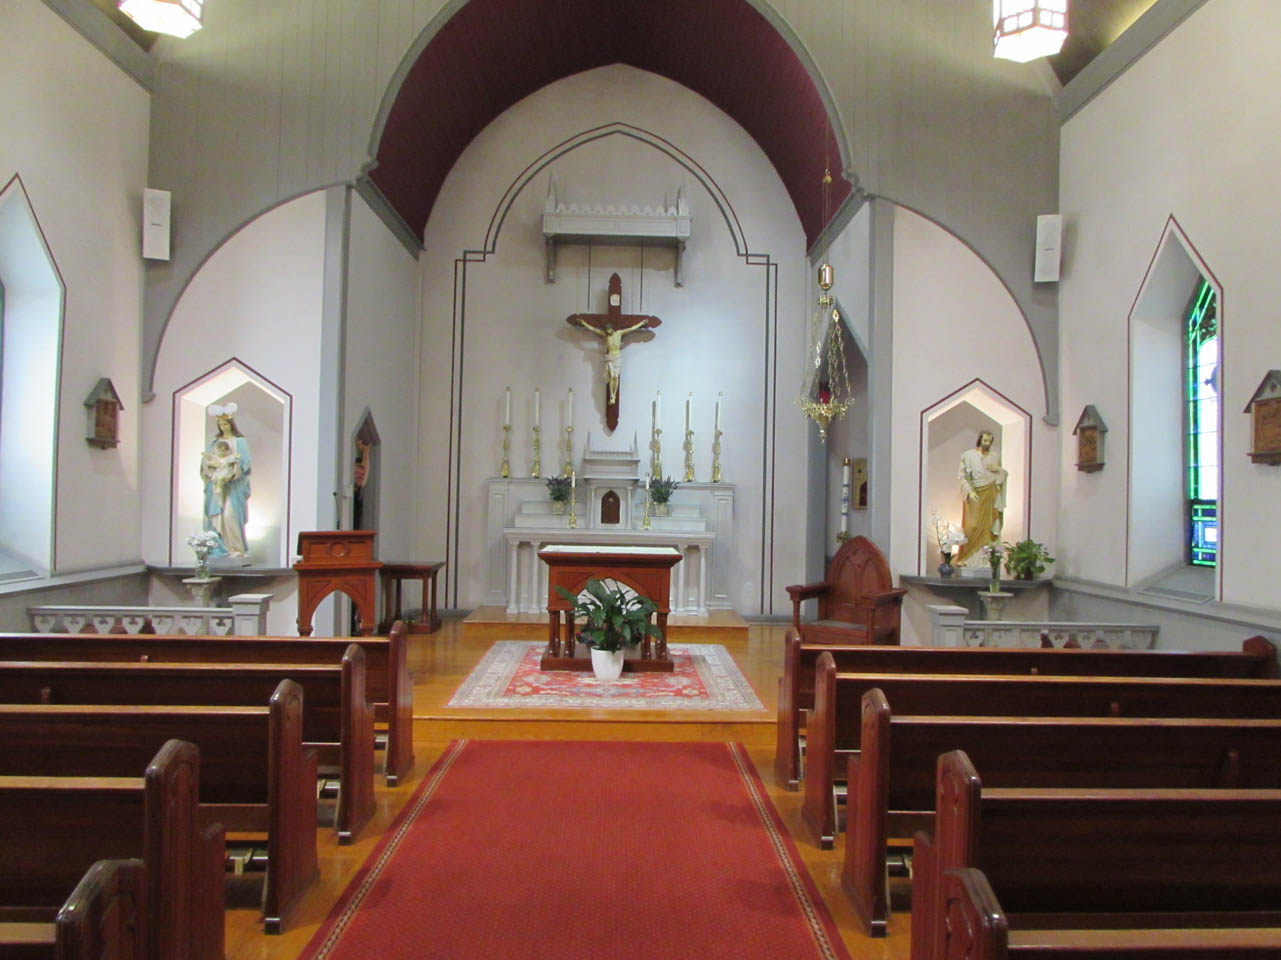
This is the door installed. The tabernacle has a round top and is painted grey.


But, the rest of the furniture is a beautiful walnut with pointed arch tops.

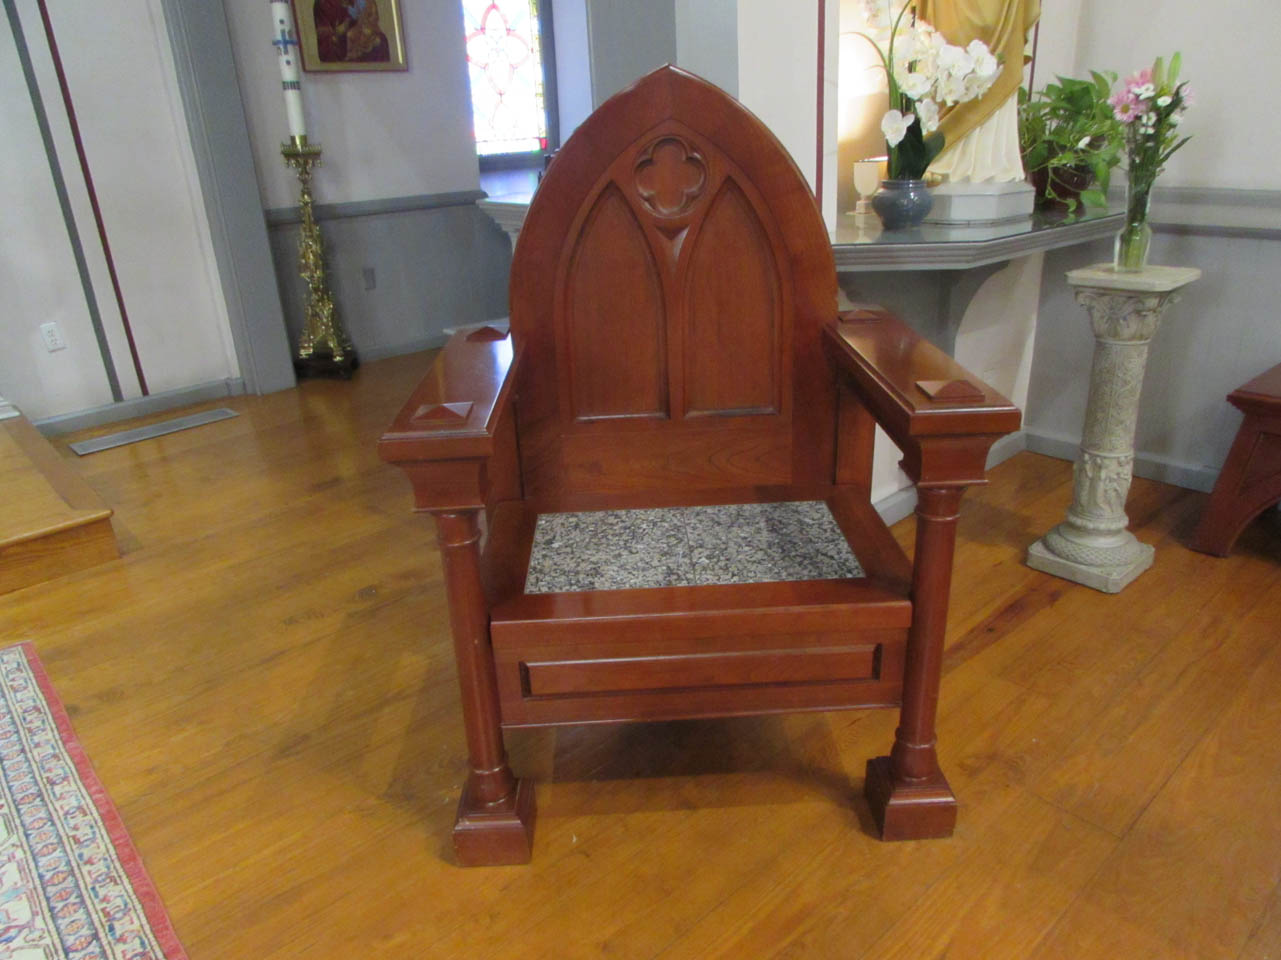
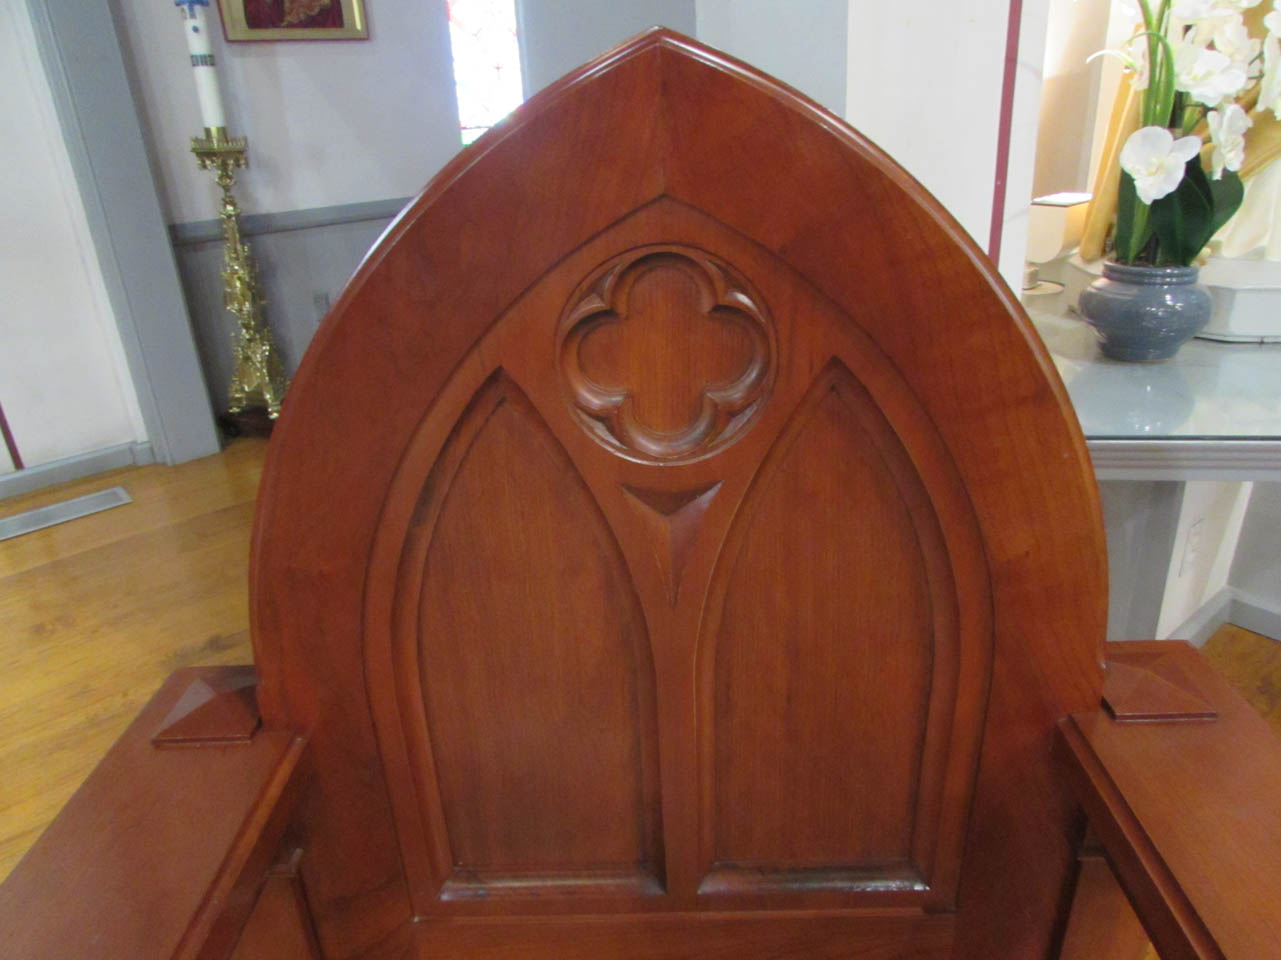
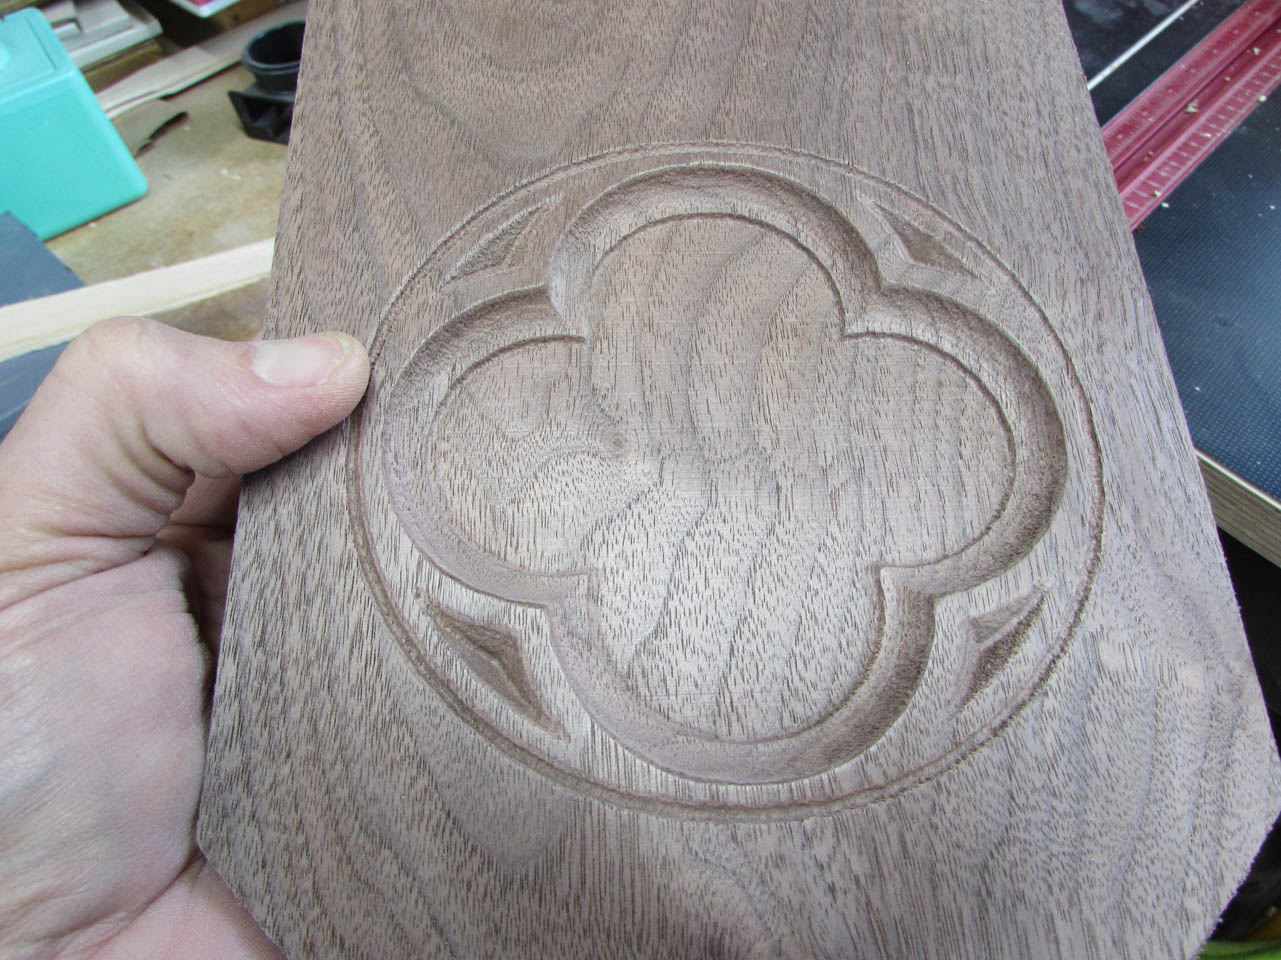
The Pastor chair also has a carving that I could replicate.
The vaulted ceiling also has a pointed arch and dark wood.

After looking at all of this, I realized that the Tabernacle seemed to fade into the background.
I decided to make a new door instead of modifying the old one. This one would be made from walnut and would fit in the same opening but would match the pointed arches found everywhere else in the chapel.

I started with my best piece of air-dried walnut.
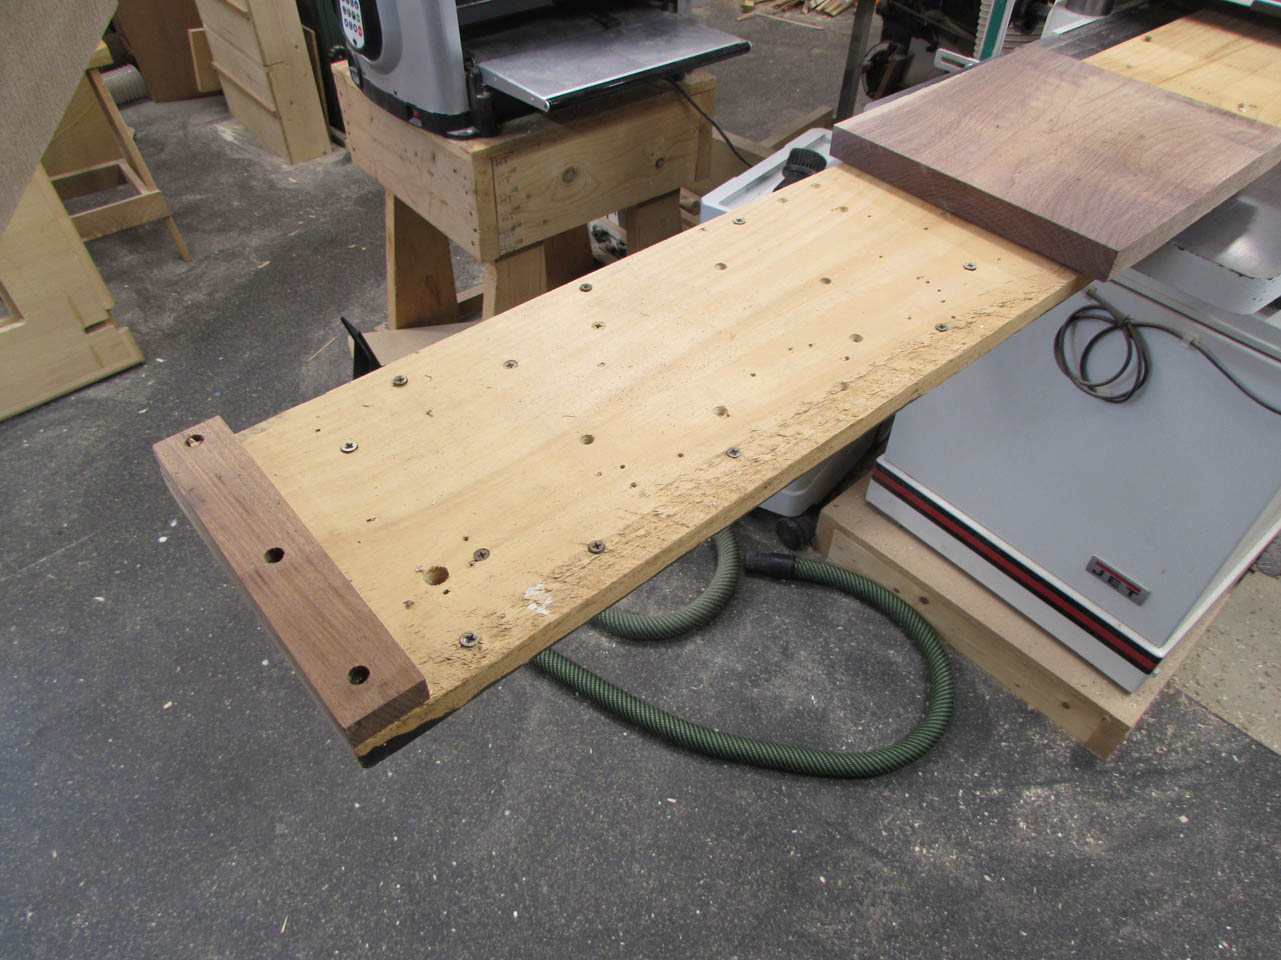
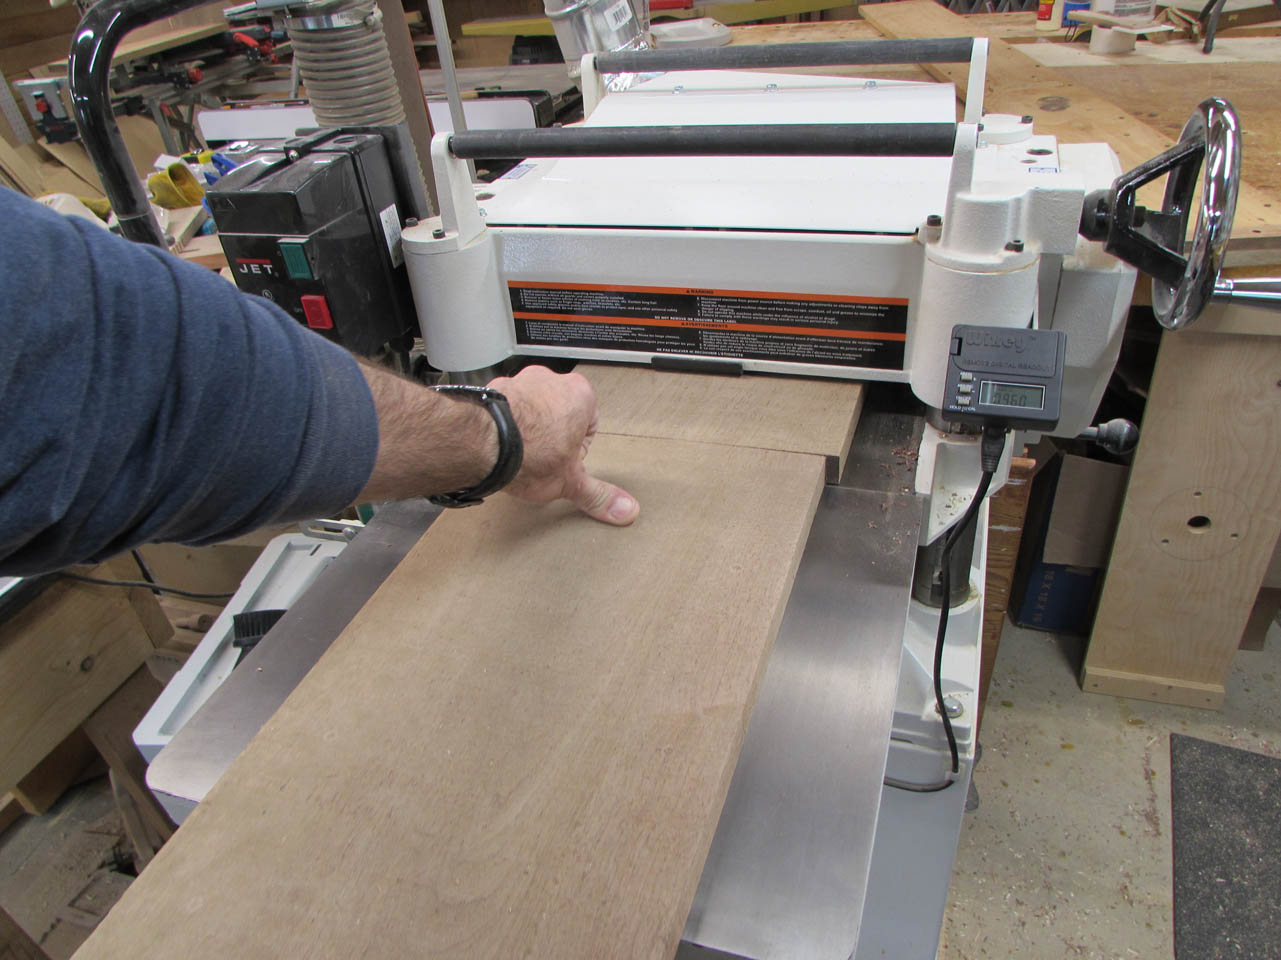
Since it was too wide for my jointer, I used my planer sled to level and support the boards, then ran them through the planer.

After the first side was flattened, I removed the sled and flipped over my boards to plane a parallel face on the other side.

Now I can use my jointer to get one good edge, a perfect 90° to the face.


Then clean up the opposite edge on the table saw, to make it parallel to the good edge.

The original door was 1-1/8″ thick, and made with a floating raised panel. It was made that way because it was an inset door and they did not want it to expand and bind in the jamb. My design will be a solid door, but to help prevent expansion, I am going to create it from three layers, alternating in orientation, like plywood. I need to re-saw some of my walnut down to 3/8″ thick. I made the initial cuts on my table saw.
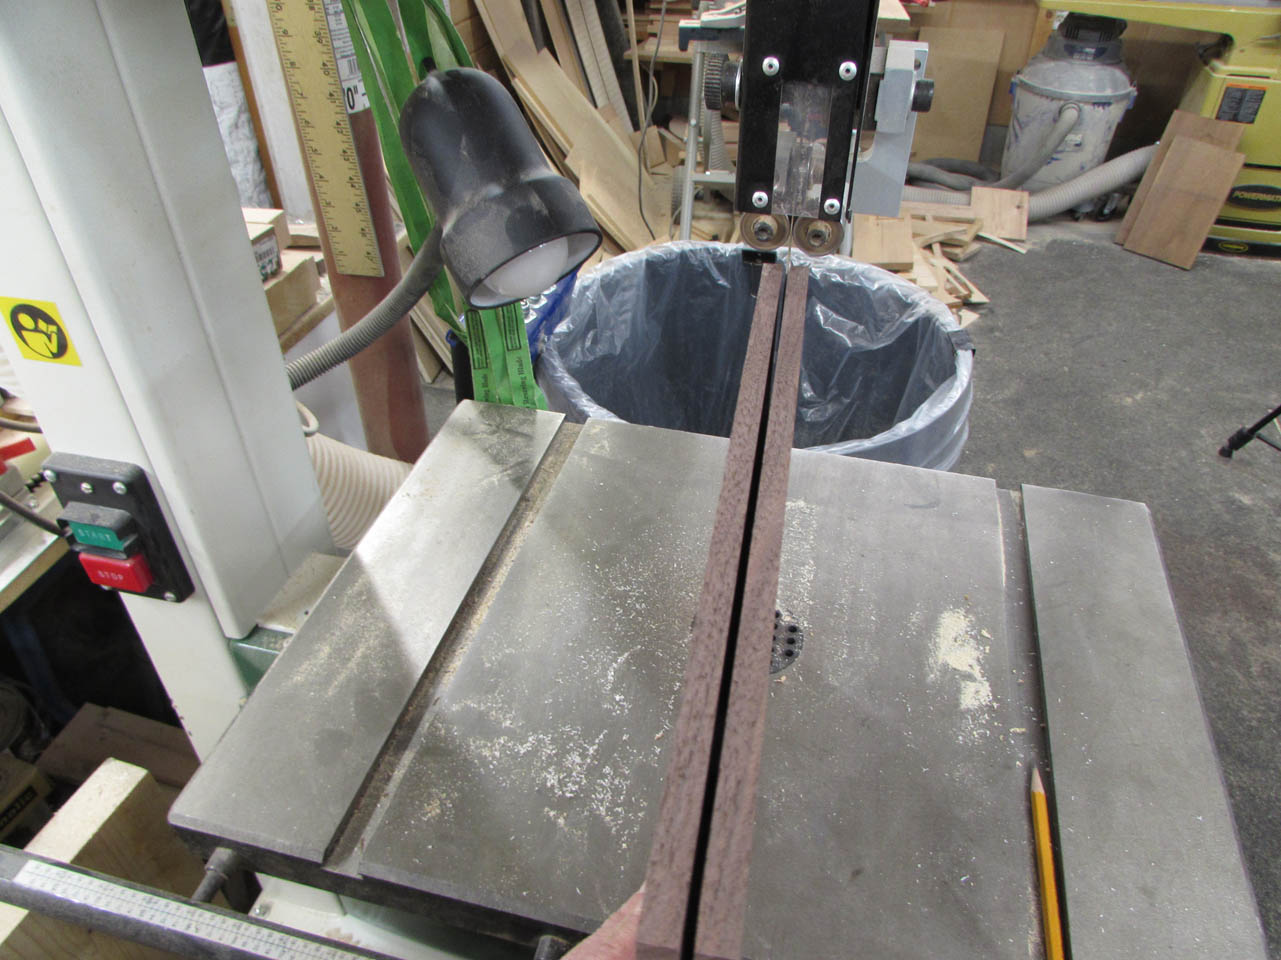
Then finished the re-saw on the bandsaw because the table saw blade could not reach the center of the board.

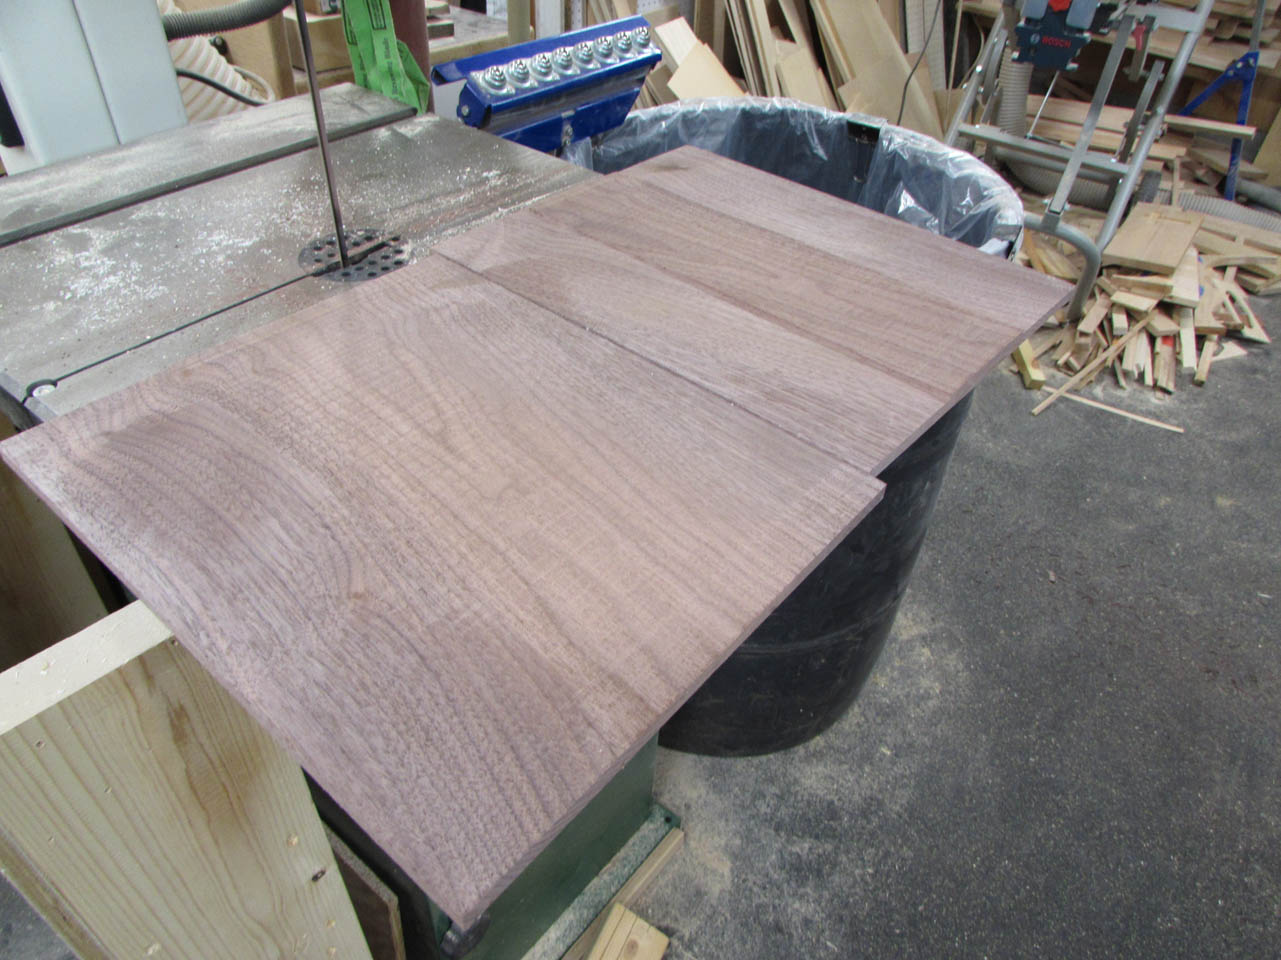
I ran the rough side through the planer and now I have some 3/8″ thick boards to work with.

After figuring out how I wanted the boards to lay up, I started spreading wood glue.

To join the two center pieces, I used a little CA glue on the edges that would touch so that they would bond quickly to each other in the middle.

Then I added glue to the next layer.
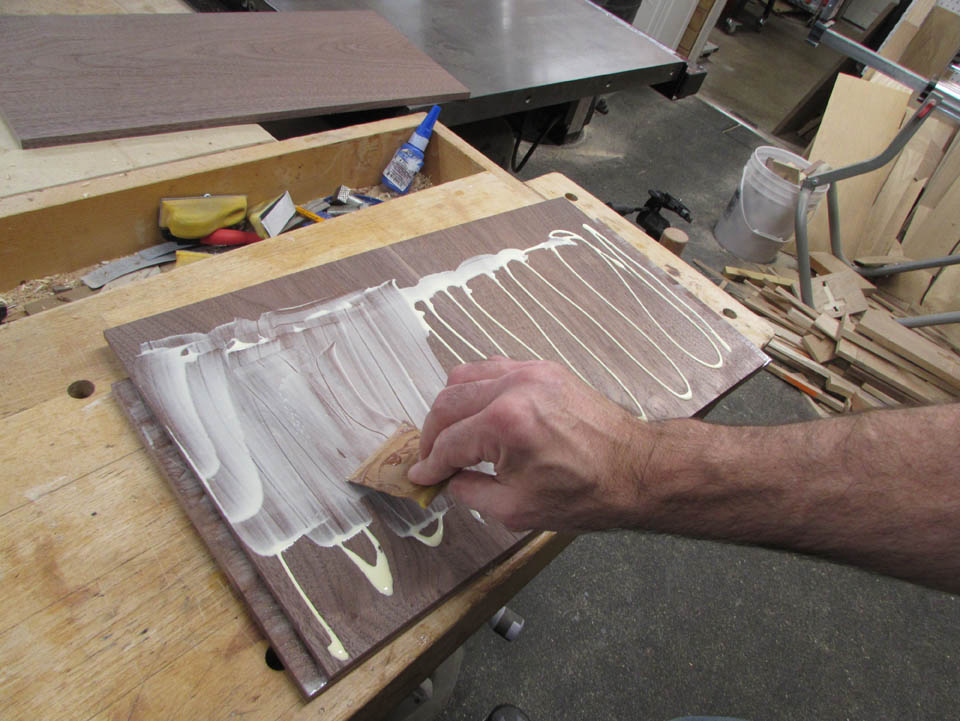

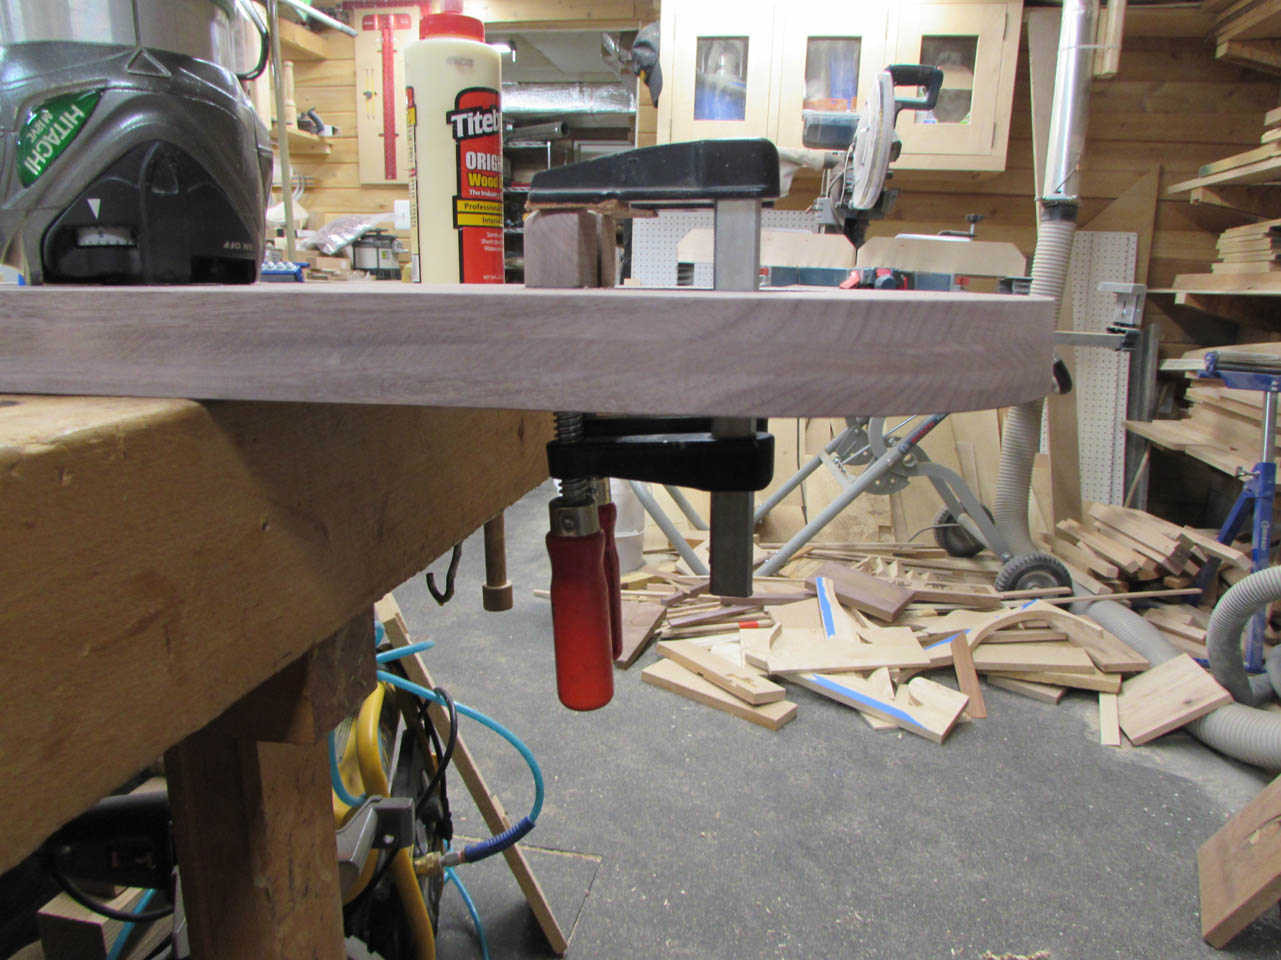
Once all of the layers were glued up, I grabbed every clamp that I could fit to hold the panel together while the glue dried.

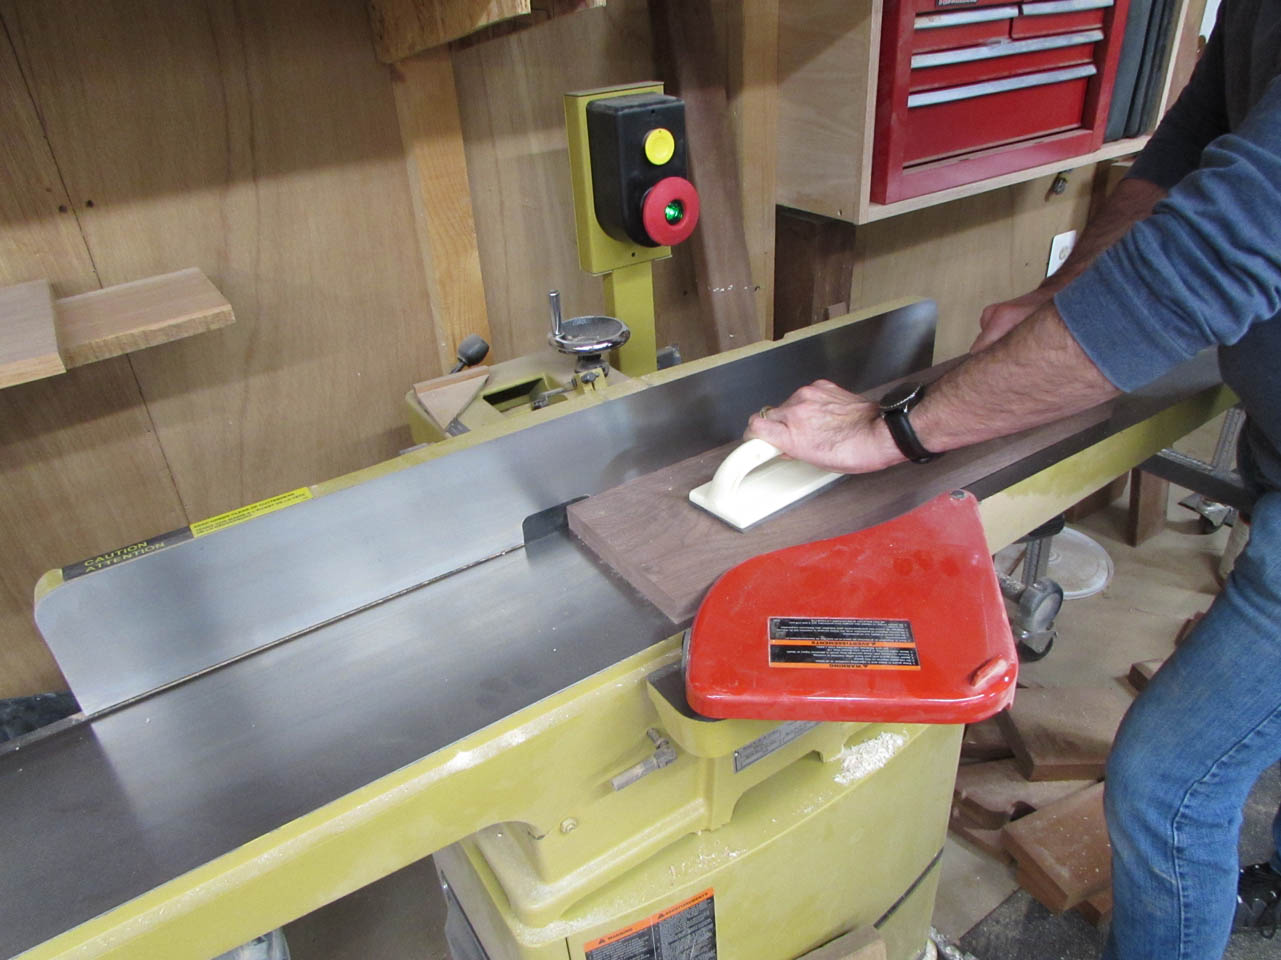
Once the glue cured, I pulled the clamps, then I used my jack plane to joint one edge. This is safer to do by hand since the center board is end grain, I did not want to run it through the jointer.

The opposite side was easily cut straight, on the table saw, once one side was straight.

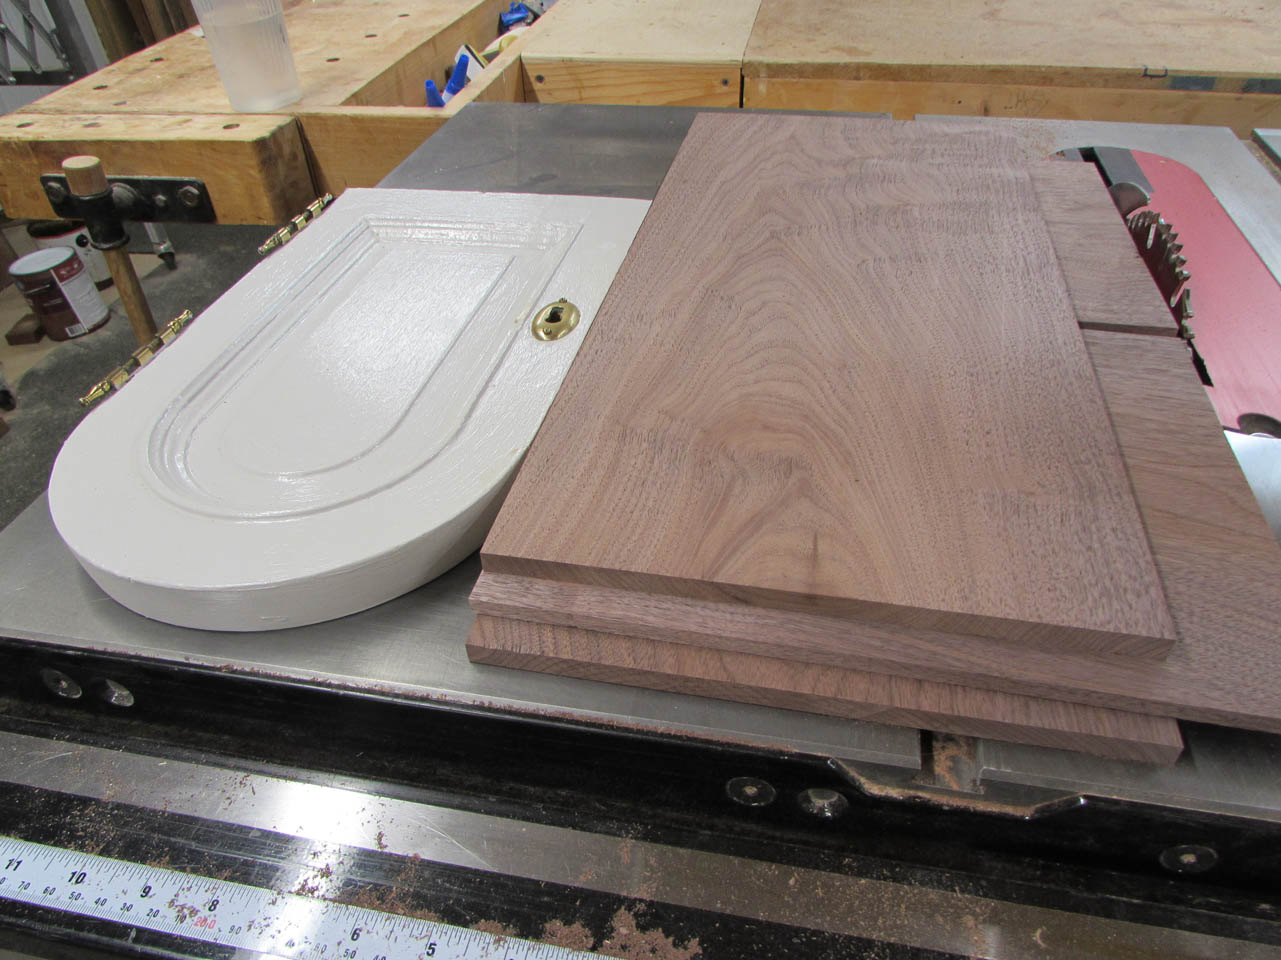
Now I have a panel, large enough to make a new door.

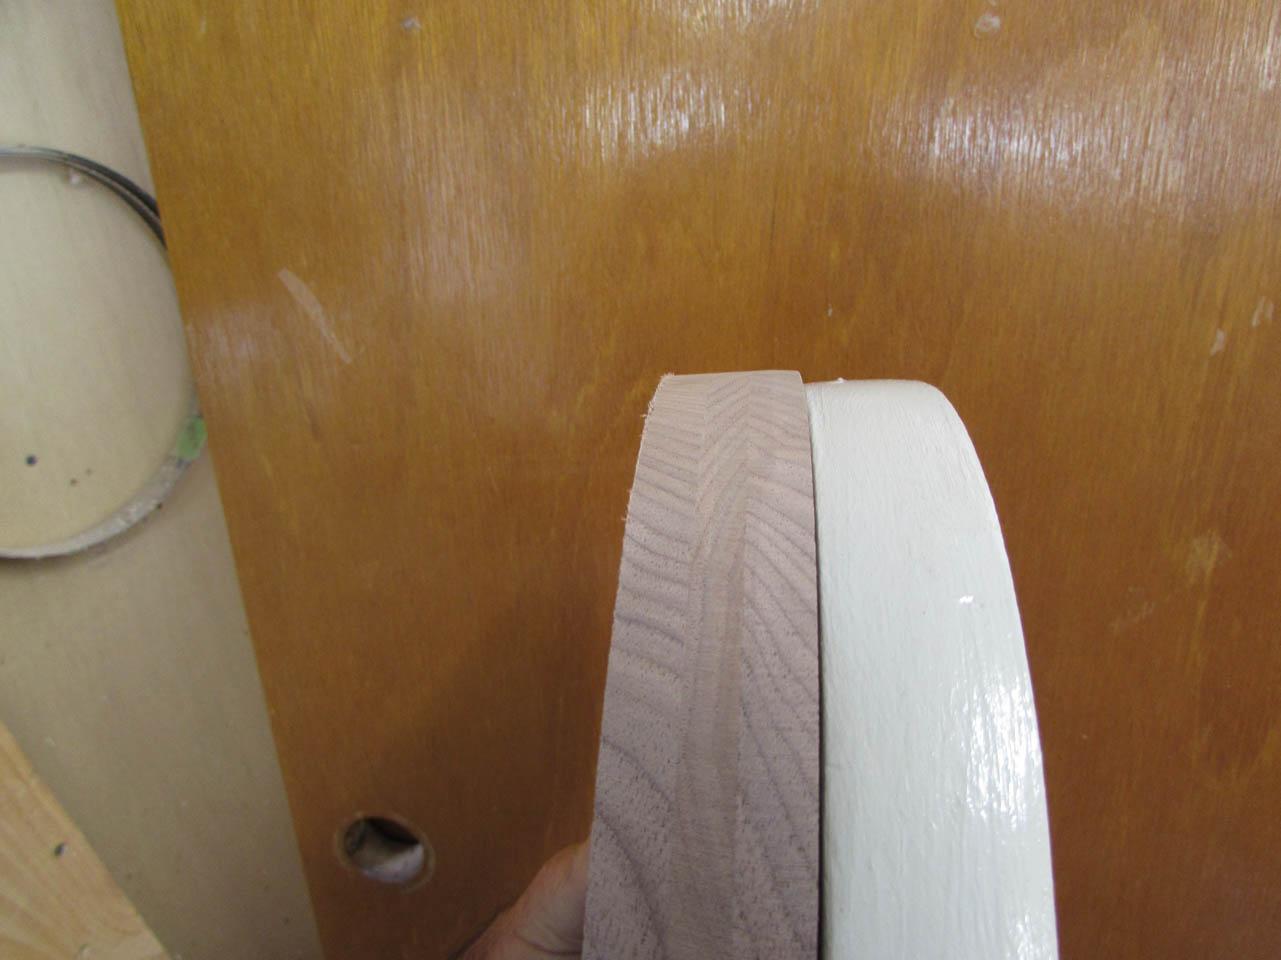
For the outer doors, I will need another board. This one will be 7/16″ thick.


I use double-sided tape to attach it to a backer board to make it thick enough for my CNC.


I spent some time on my computer designing the front doors. I matched the carving from the Pastor chair and made the entire door 1/8″ wider than it needed to be so that I could split it in half later on my table saw.

I designed the point and slight curves at the top of the door to mimic the point on the other arches in the chapel. It will blend into the curve at the top of the door so when you look straight at it, you won’t be able to tell that the lower door is round.


To carve out the lower door section, I needed to add a few strips to make it wider. These were attached with CA glue.

I carved the outline of the door as well as the stepped-in view window and the hole for the escutcheon.

I used a razor saw to cut off the outer scrap section. It needed to stay attached during the carve, so the CNC machine had something to hold onto.


A quick fit up shows that it is looking like I wanted it to.

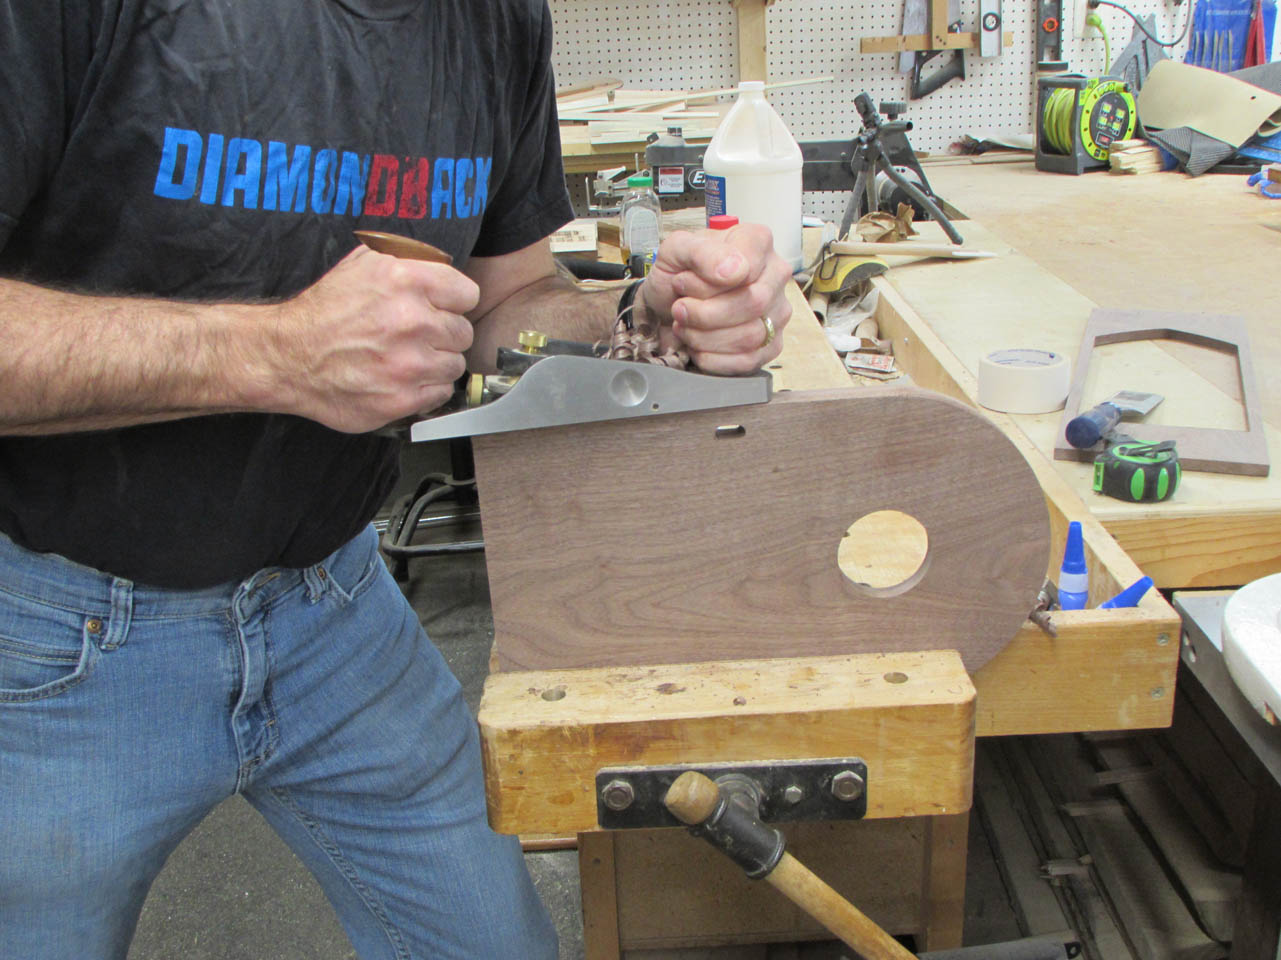
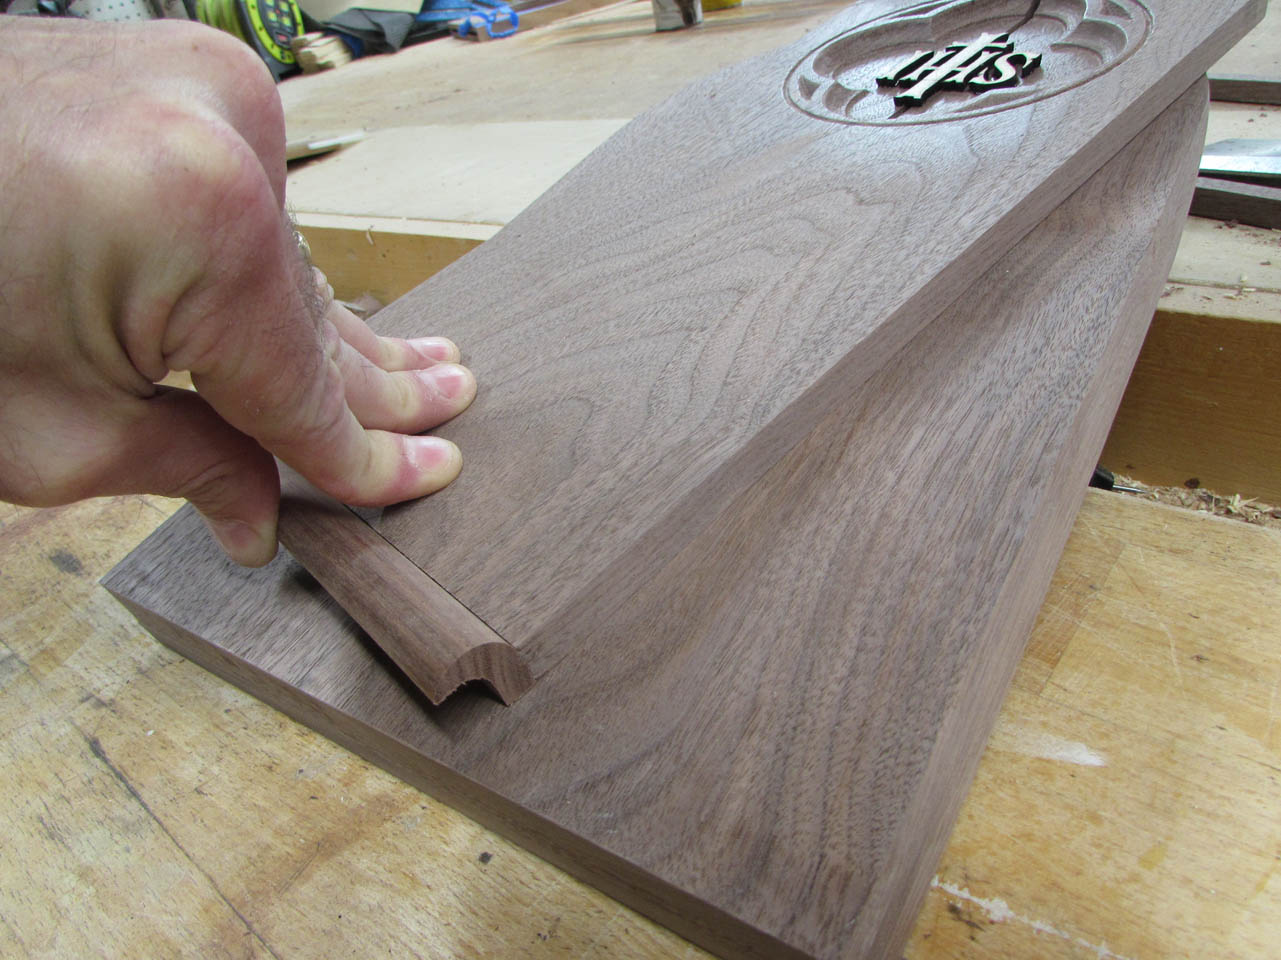
The original door was tapered on all but the hinge side, so that it would close easily but be a tight fit. I used my jack plane to replicate the angle on the straight edges.
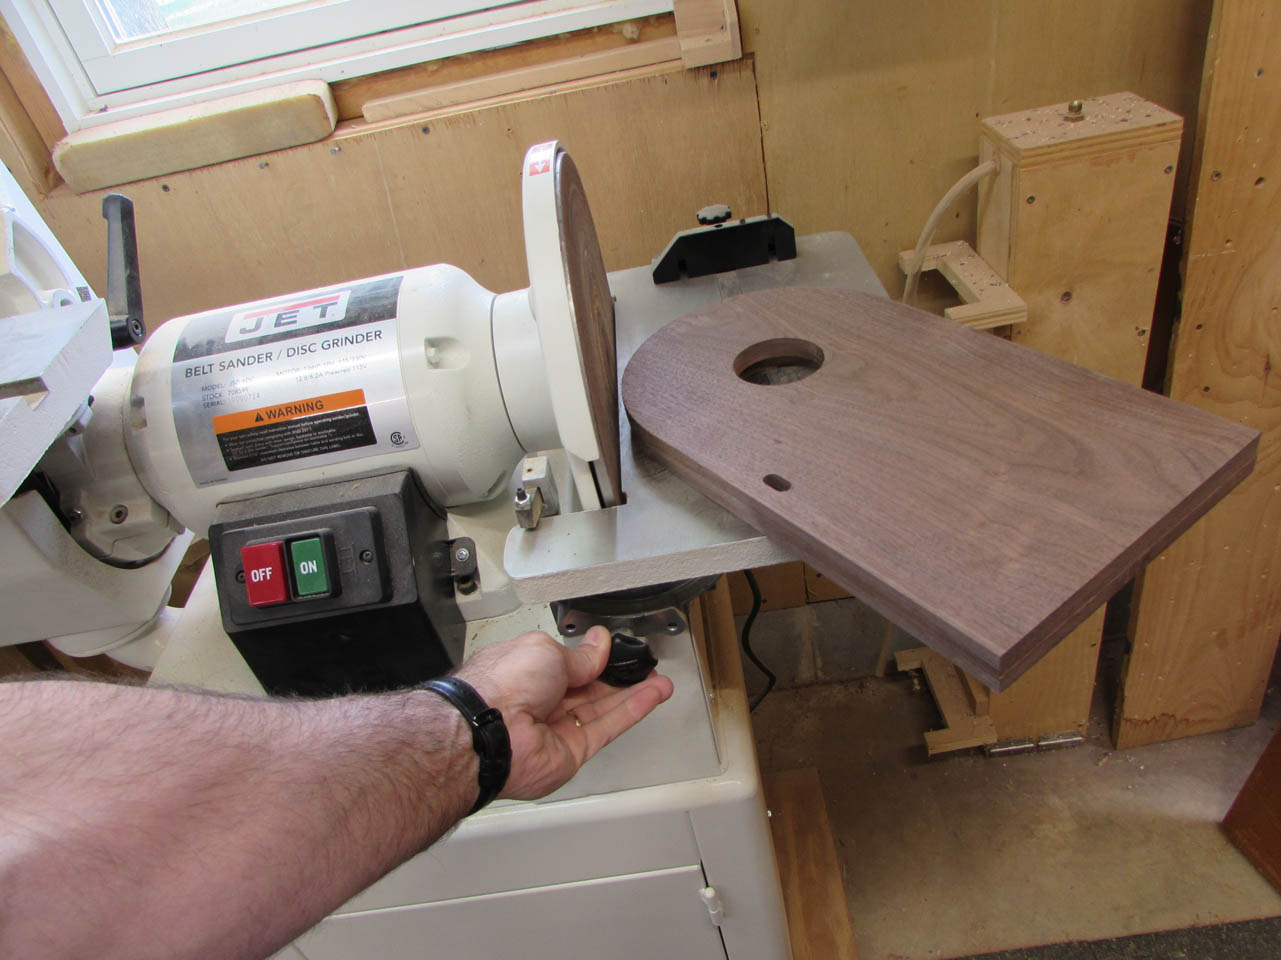
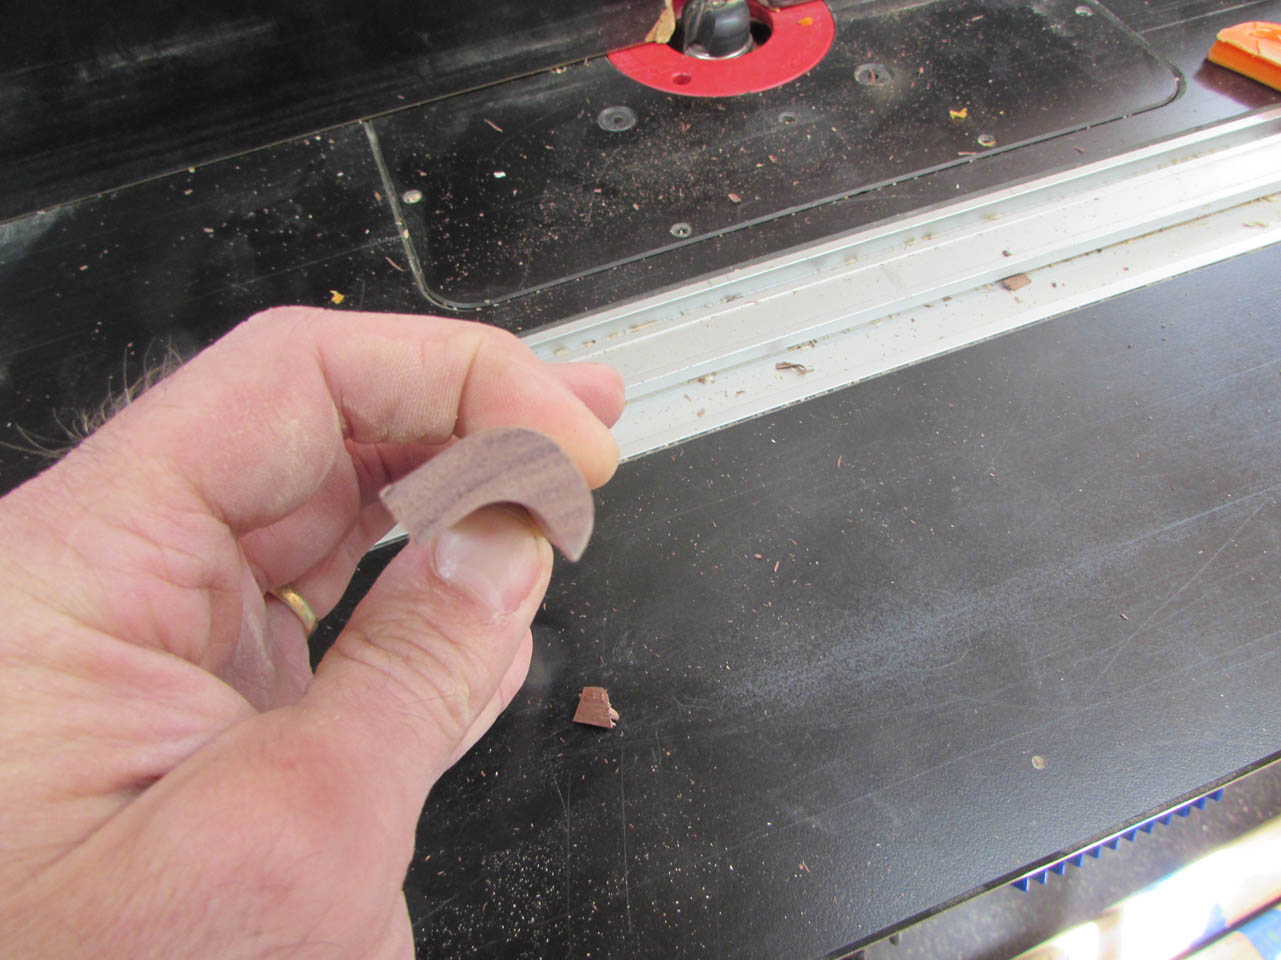
Then I angled the table on my disc sander to mimic the back-angle and sanded the curve around the top..

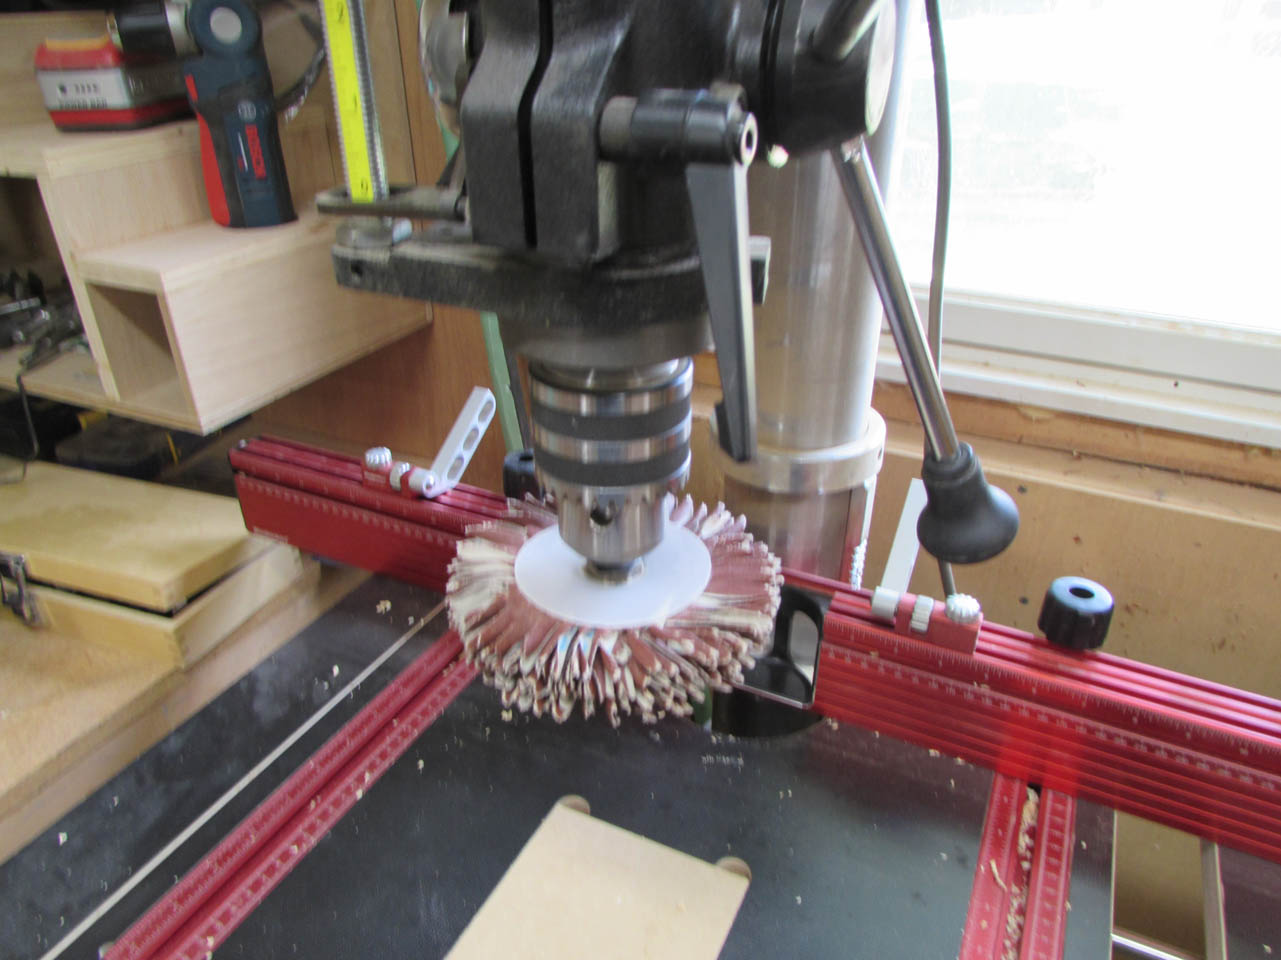
I loaded a mop sander into the chuck on my drill press and spun it up to 2,000 rpms to gently sand the carving on the door.
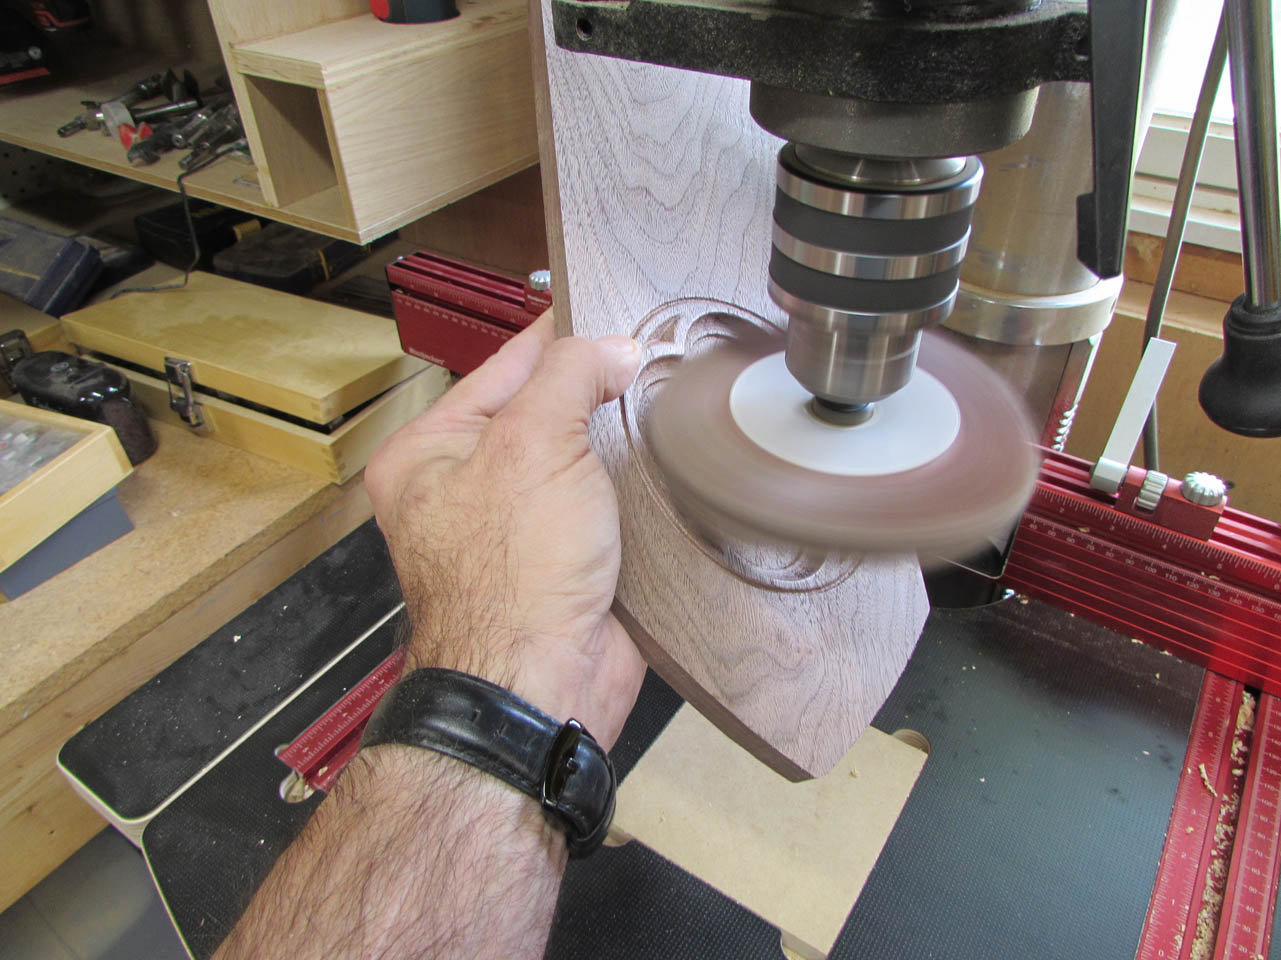
It works really well on the curvy bits.

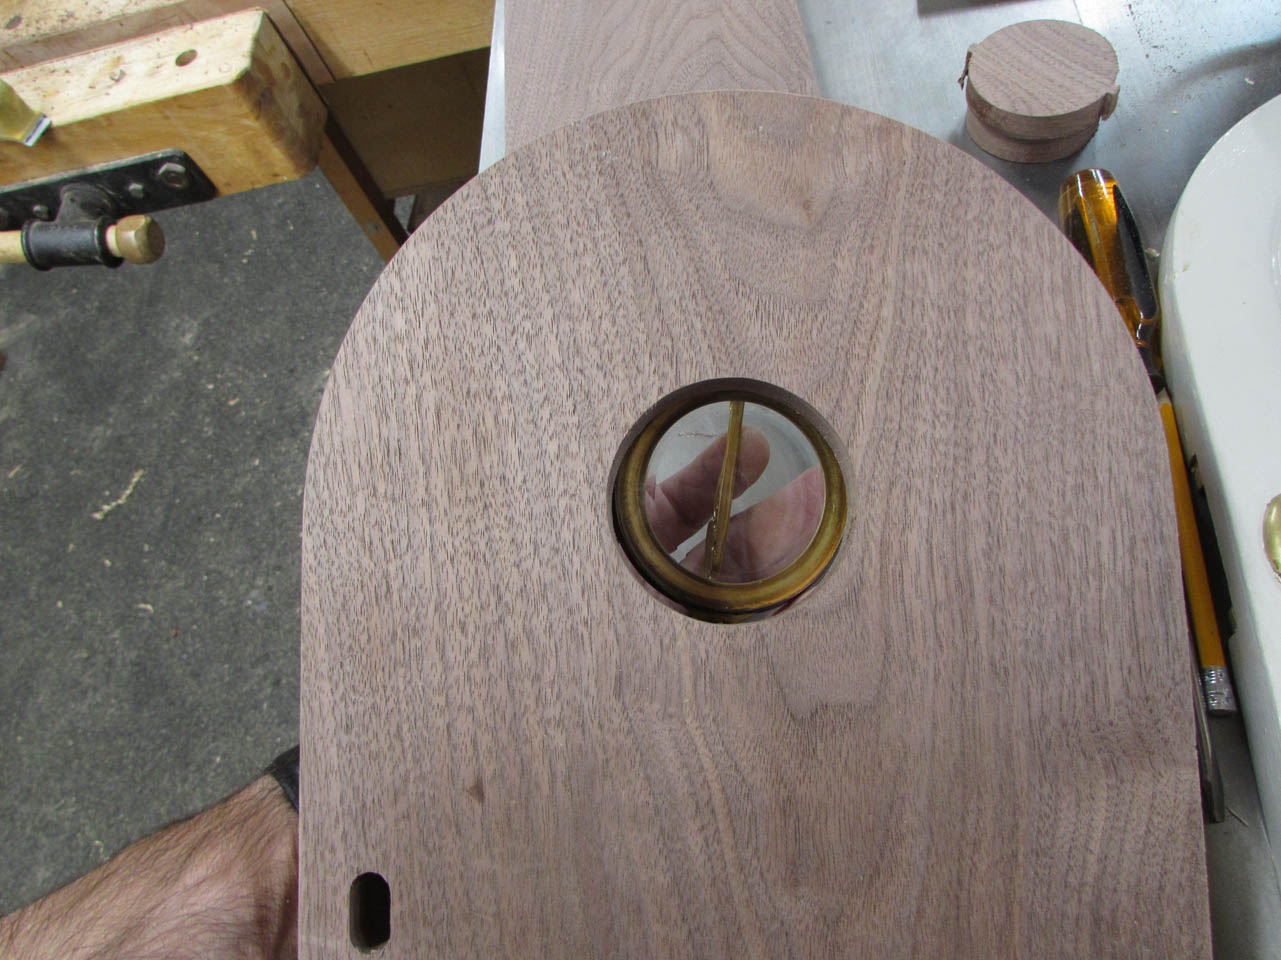
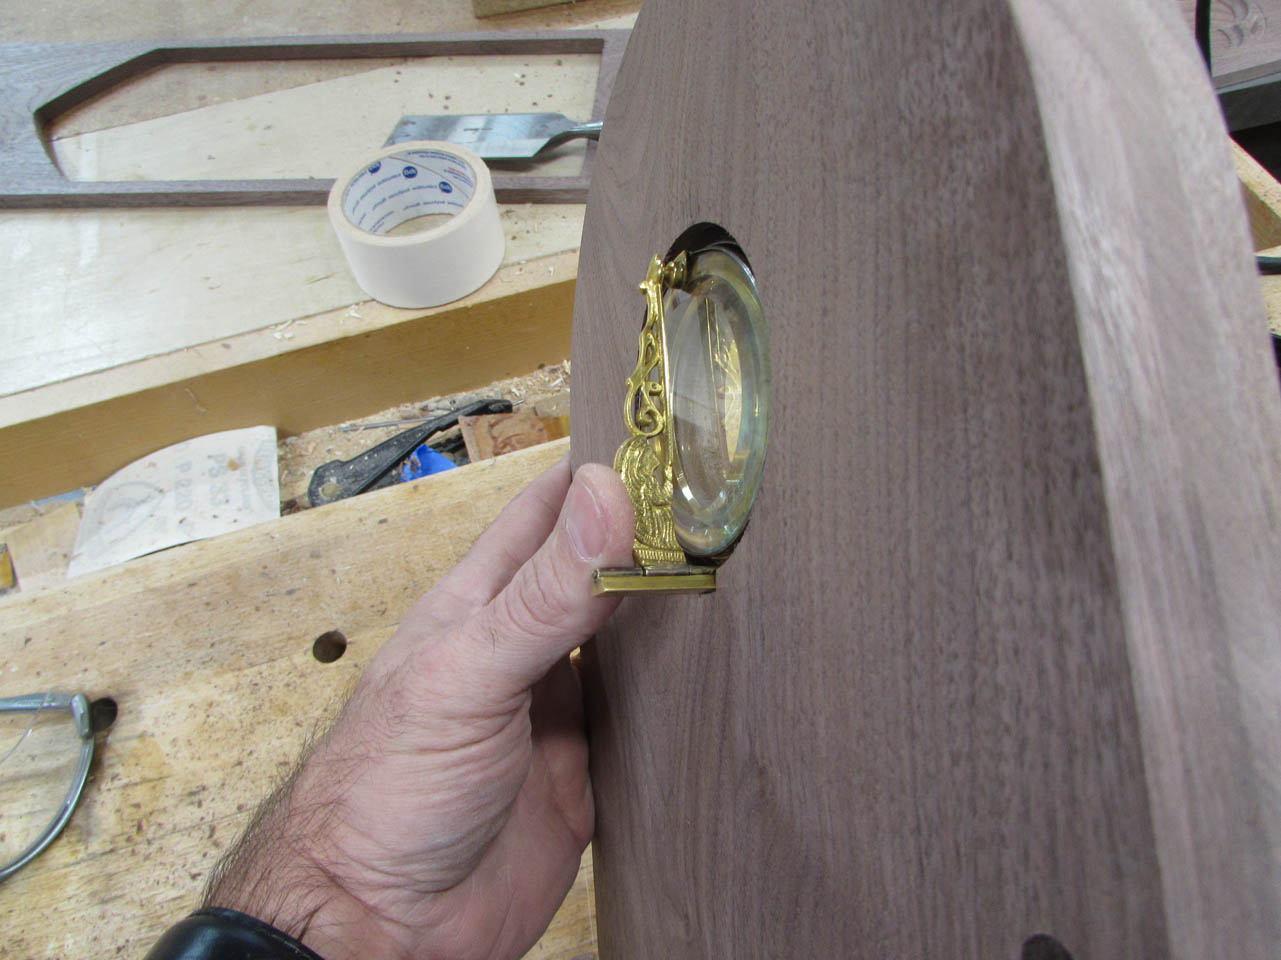
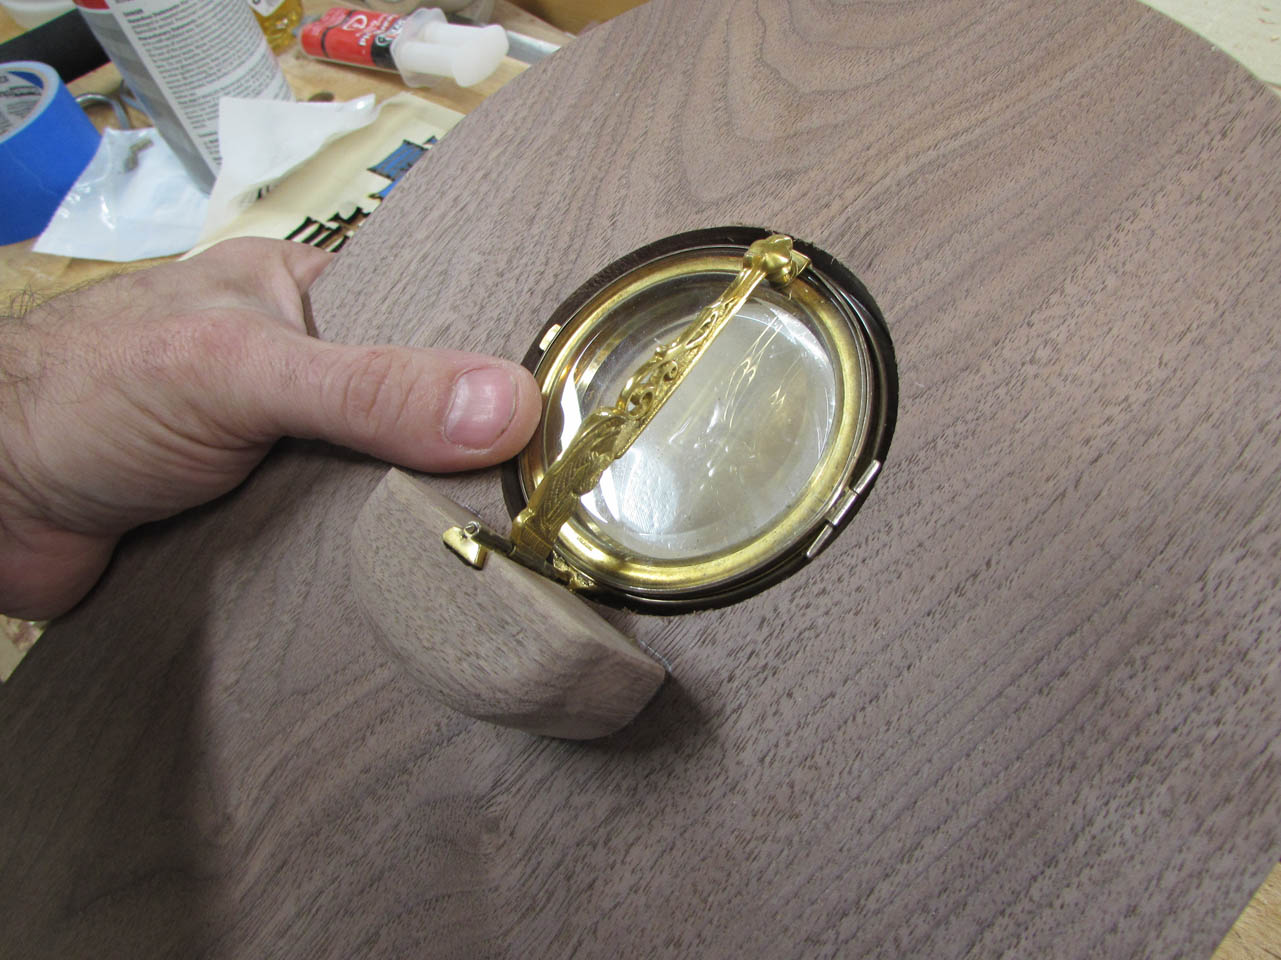
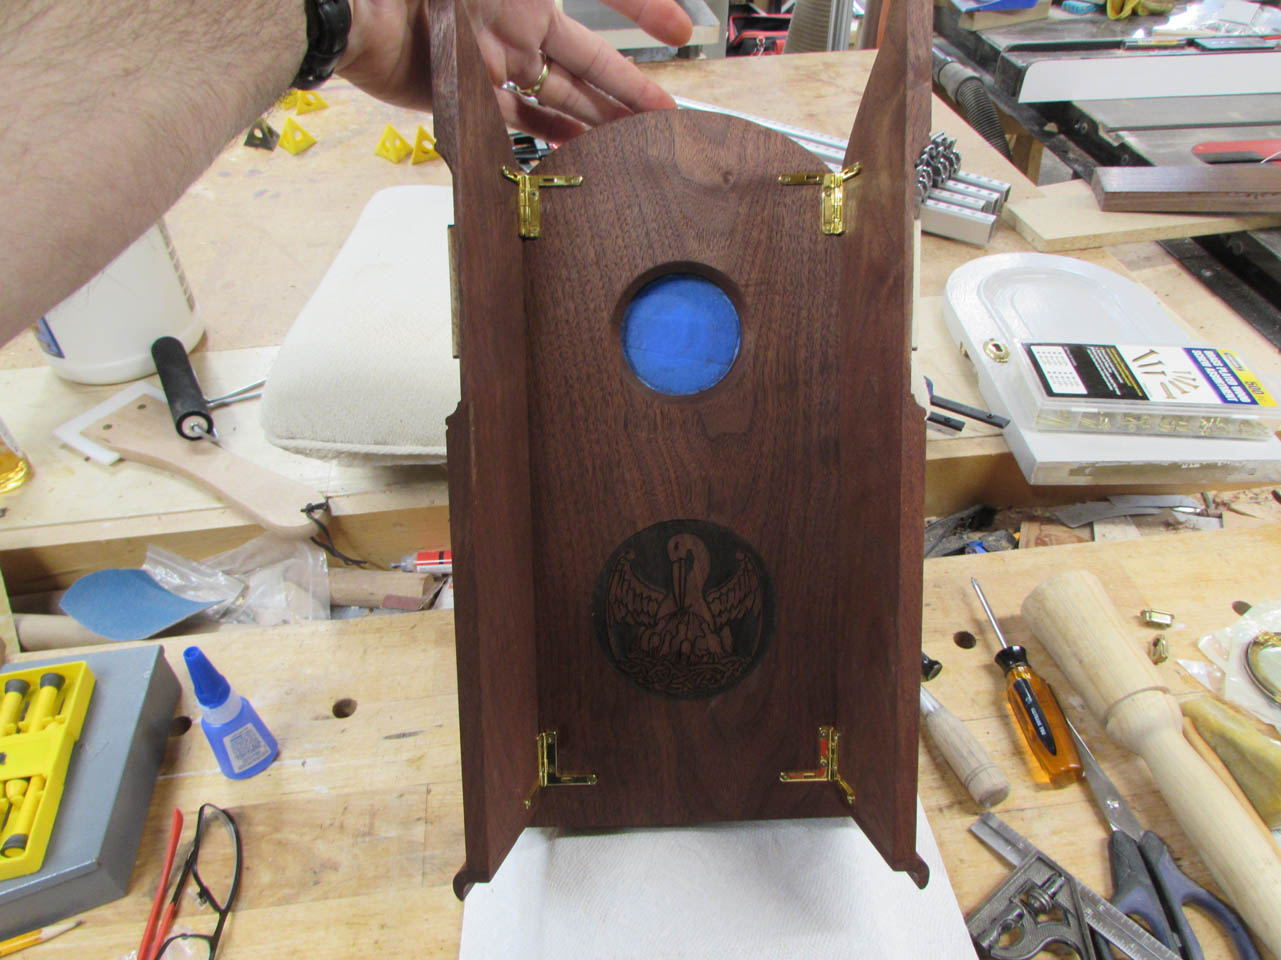
The next task is to find a way to hold the Luna in the door so that the Eucharist can be exposed.

I made the hole in the door, larger on the inside so the Luna could be inserted from the rear.

I decided to open up the window on the outside with a 45° chamfer bit on my router.
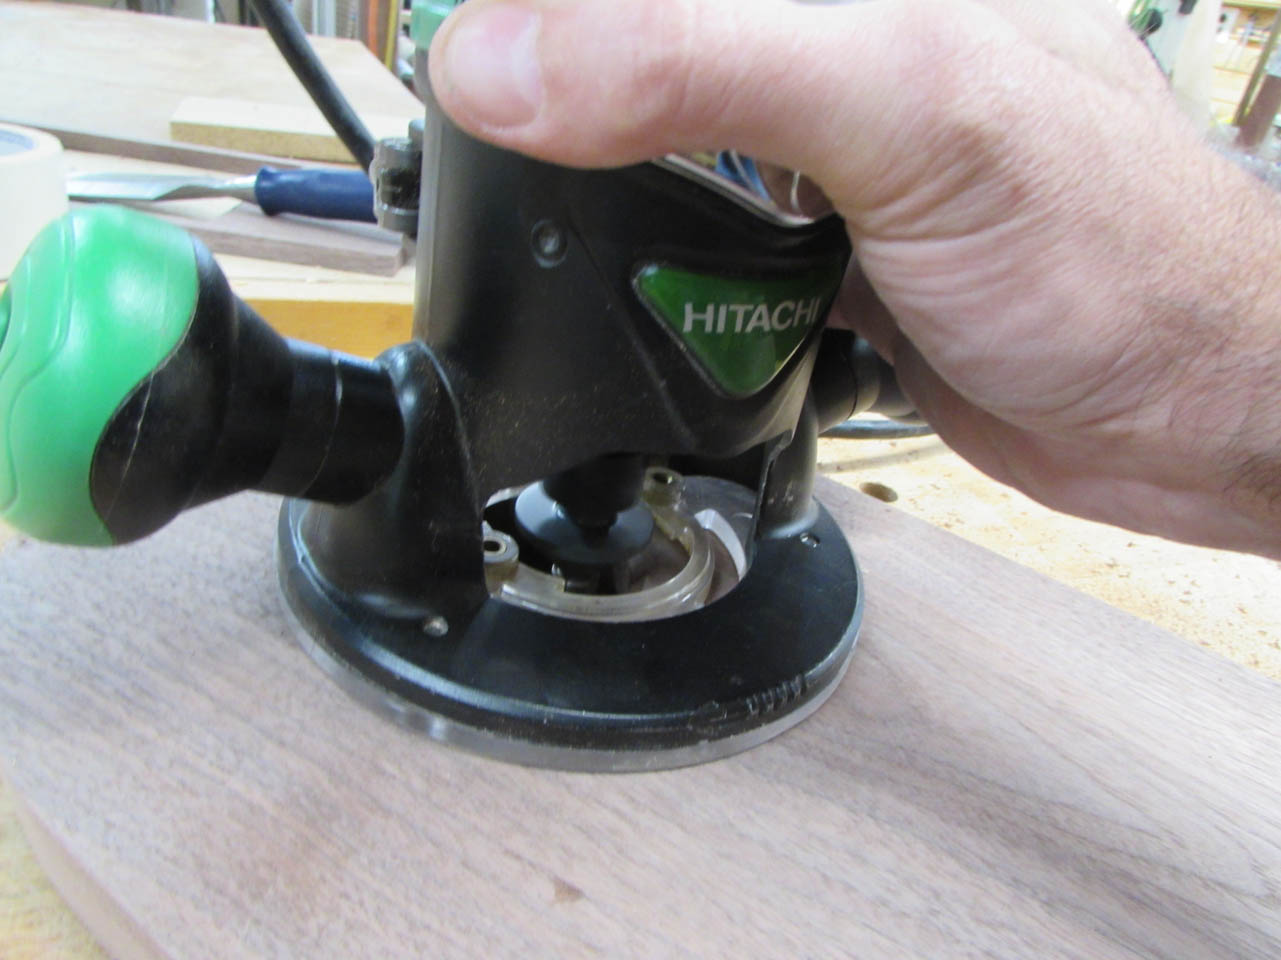

That seems like a nicer frame for the Luna.


In order to recess into the frame, I need to chisel out a dovetail socket for the base of the Luna to slide into.
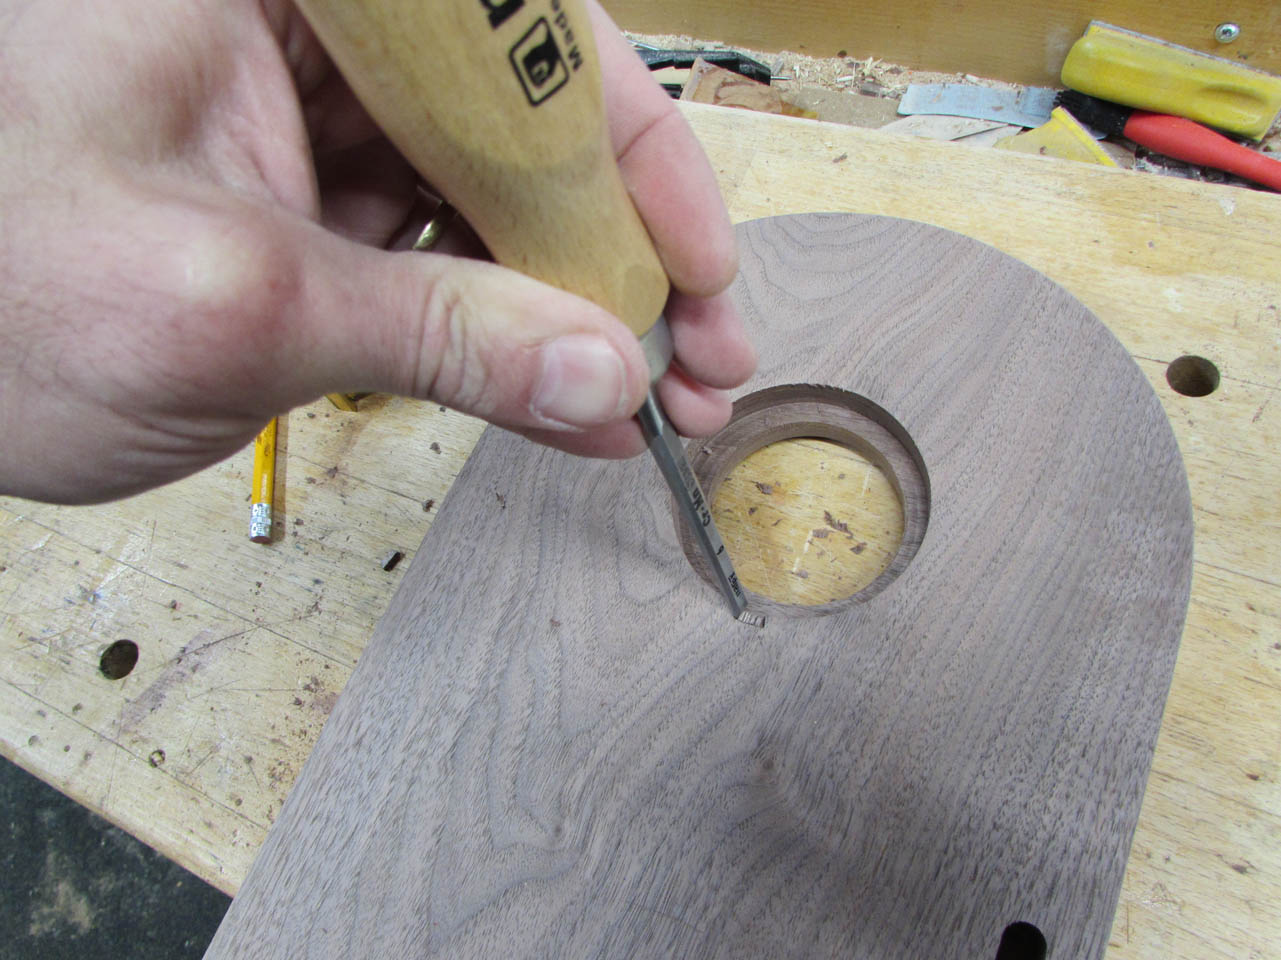
My chisels are sharp so this did not take much trouble.

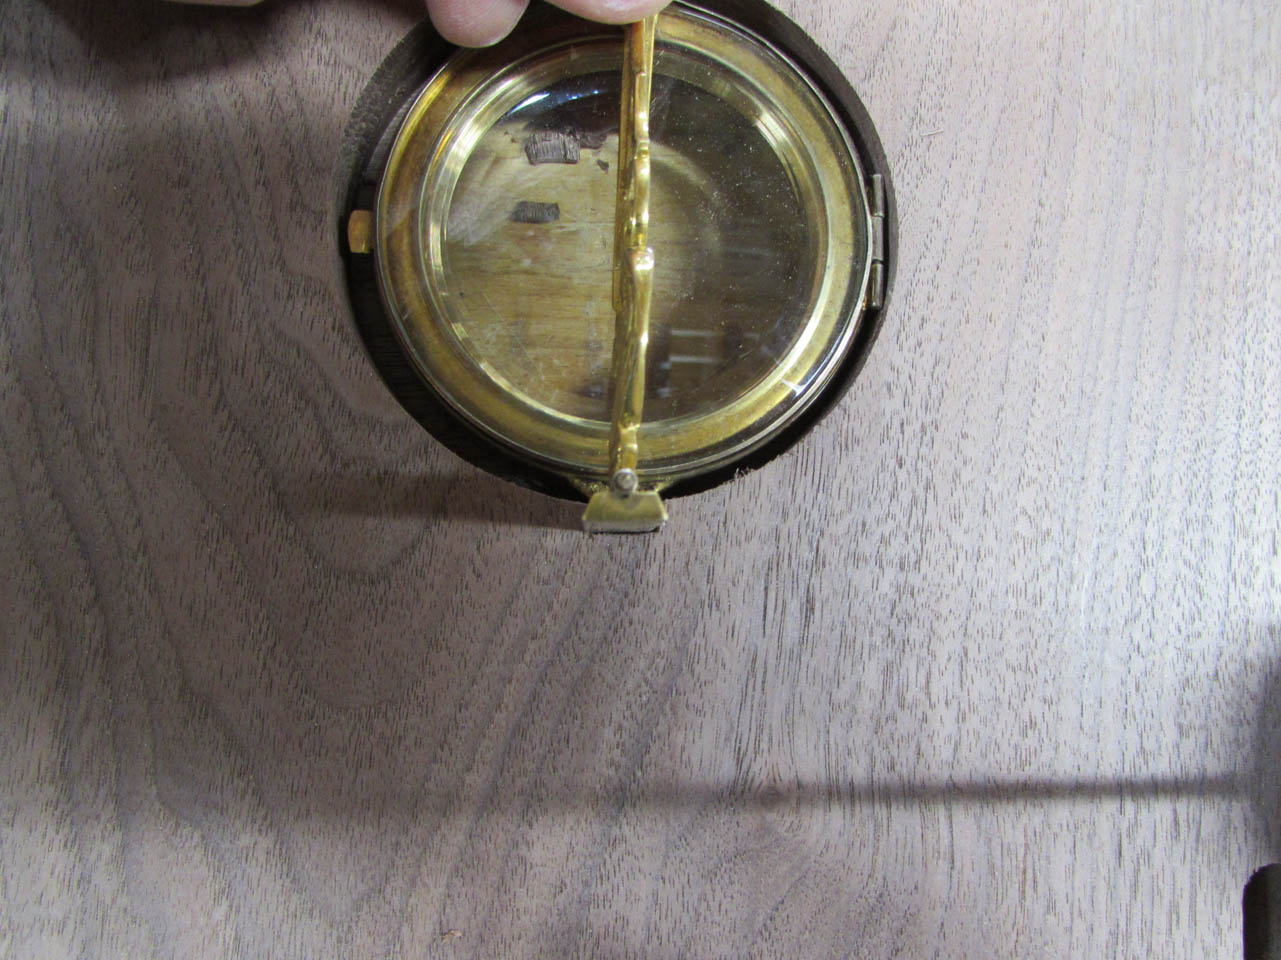
The Luna sits nicely and stays centered.
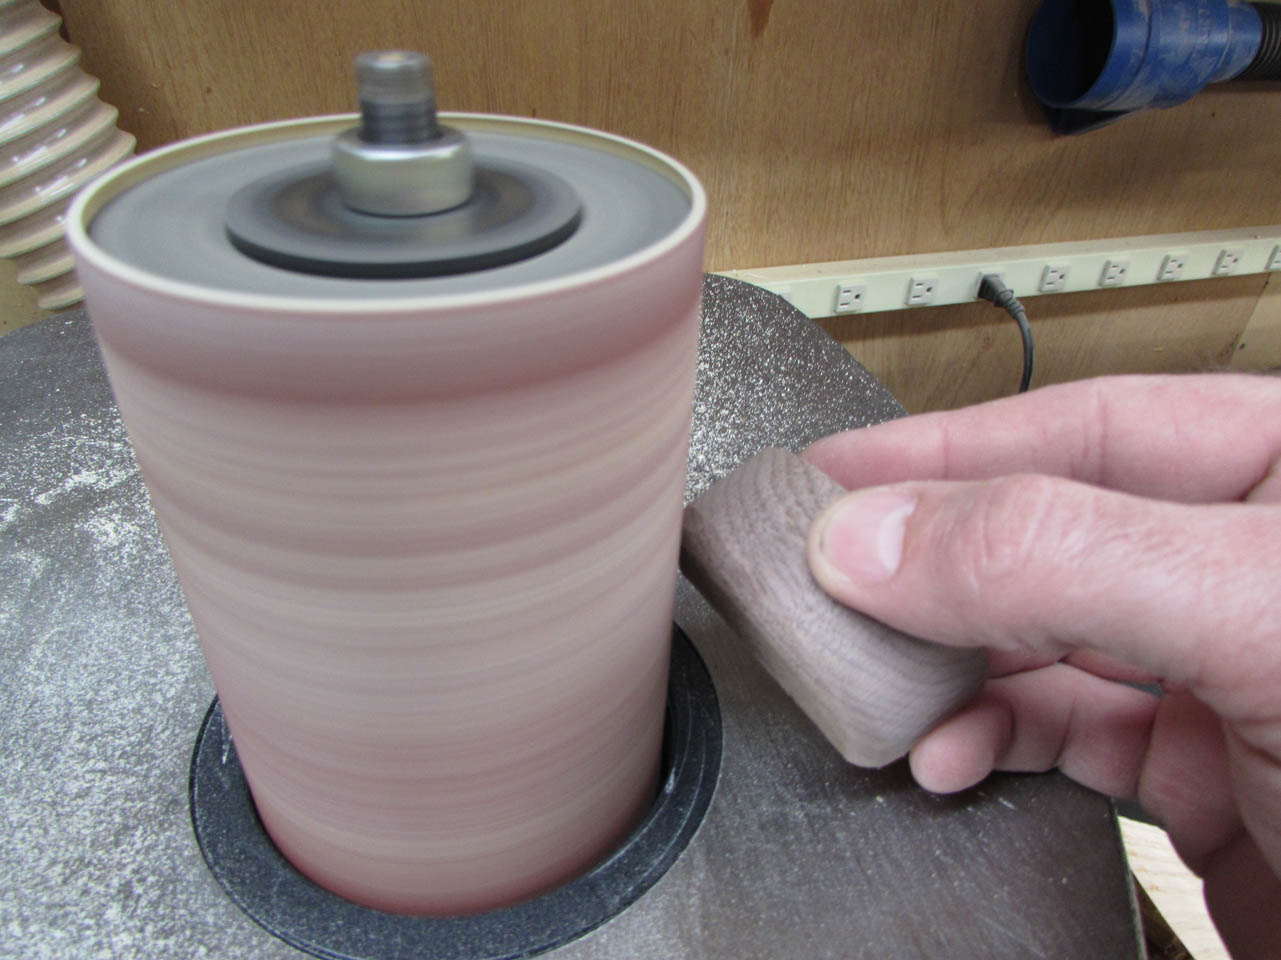
Now I need to make up a buttress to support the rest of the base.

I cut a small curved shelf from a scrap of walnut and shaped and sanded it on my sanders.

I marked the dovetail and cut it out with the band saw.
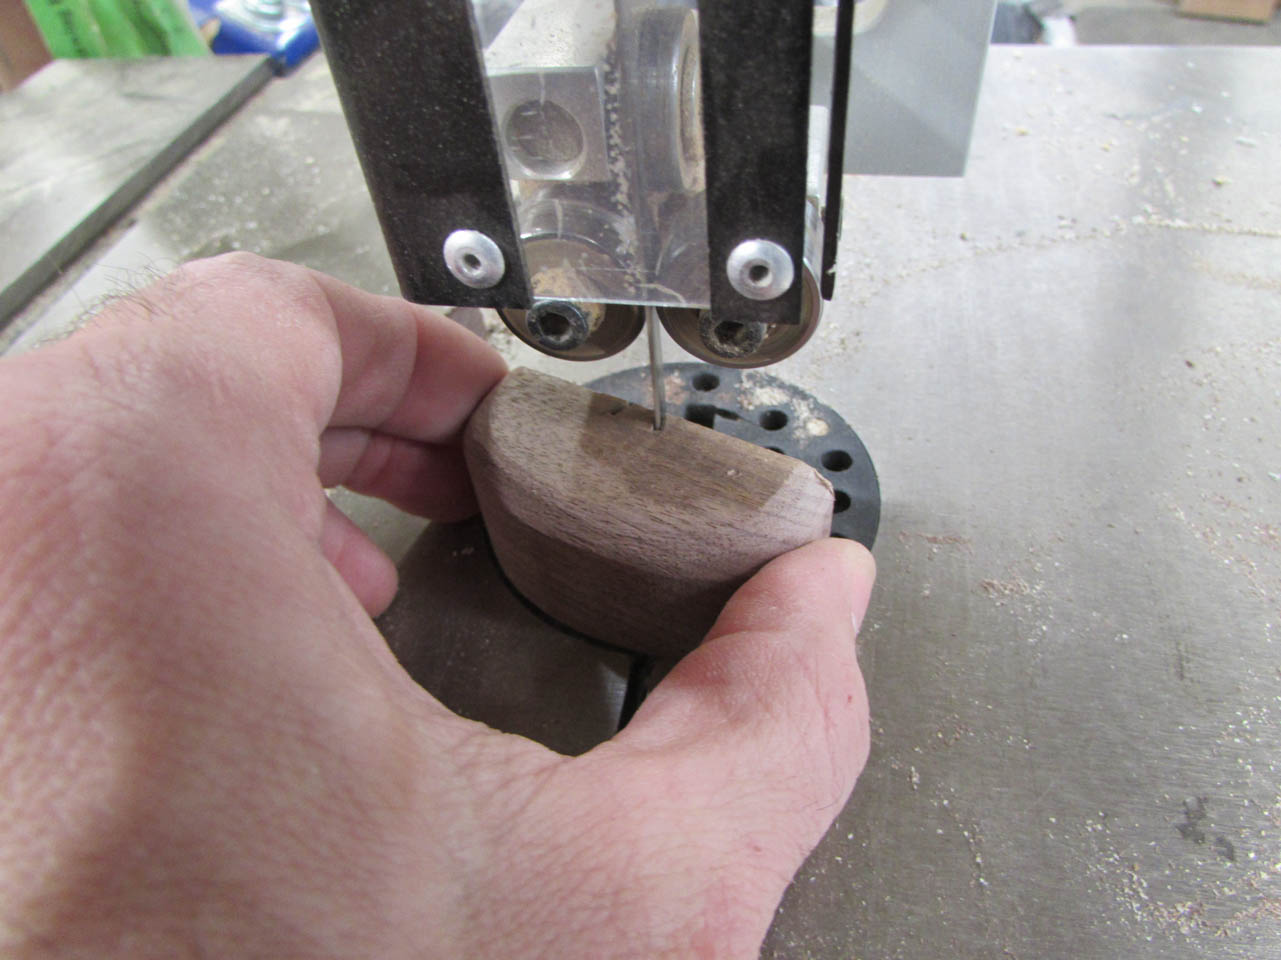

Seems like it will work well.


A little glue and some clamps, and I set it aside to dry for a while.

On the front of the door, Father Jerry wanted an “IHS” symbol. I found a simple one with a cross in the center and redrew it to be 1/8″ wider in the center, then prepped a thin piece of holly for the laser.

I placed painter’s tape across the face that was being cut out so the smoke haze would not stain the holly. The laser only took a few minutes to cut the shape out perfectly.

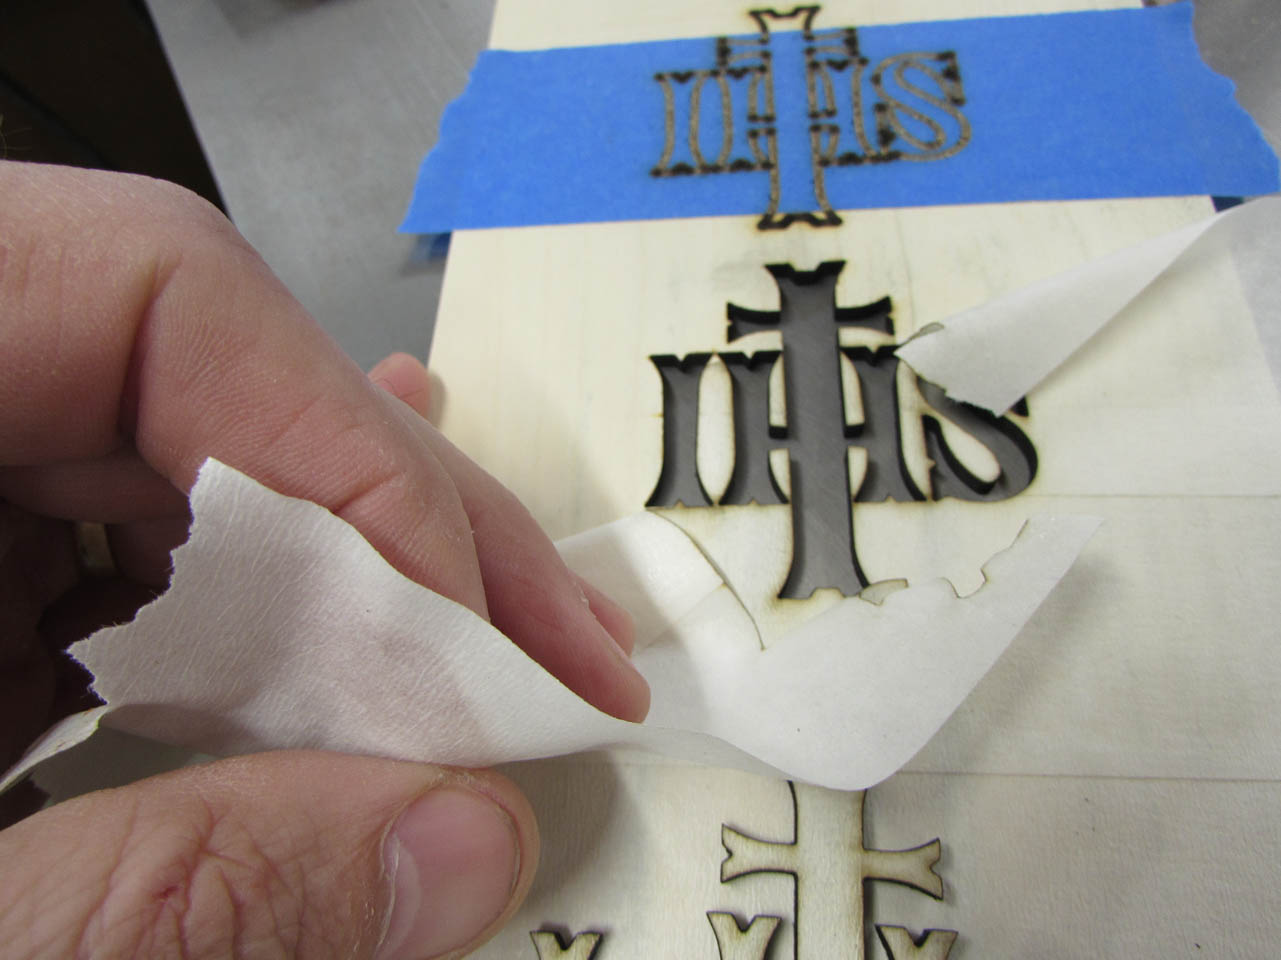
You can see the burn and smoke haze on the back that I am trying to avoid on the front.


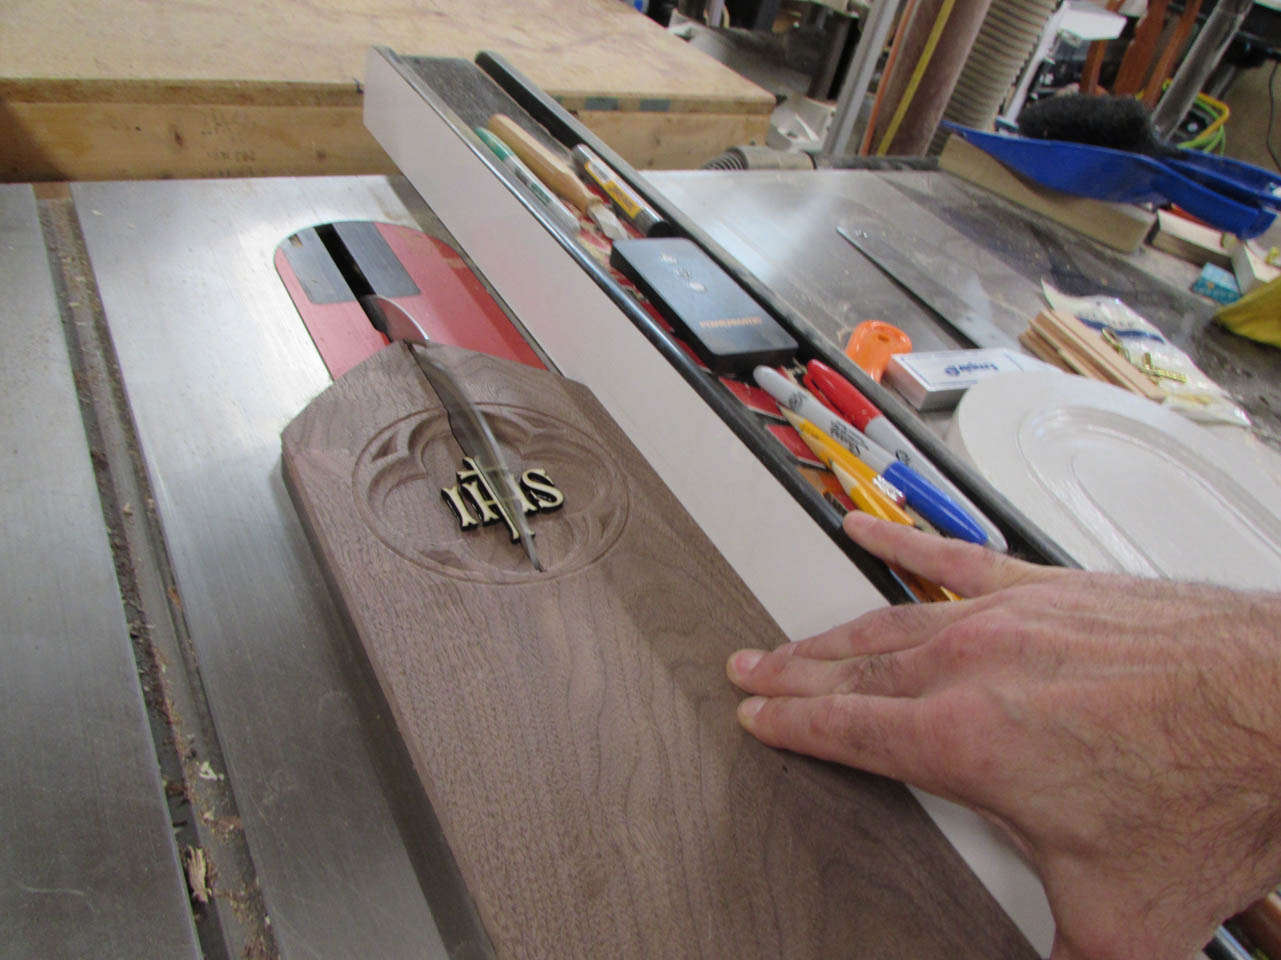
I made the initial cut down the center of my door panel so that I could locate the IHS. Notice the extra 1/8″ of material that straddles the cut. It will be cut away later, but for now it will hold the symbol perfectly aligned with the door center.
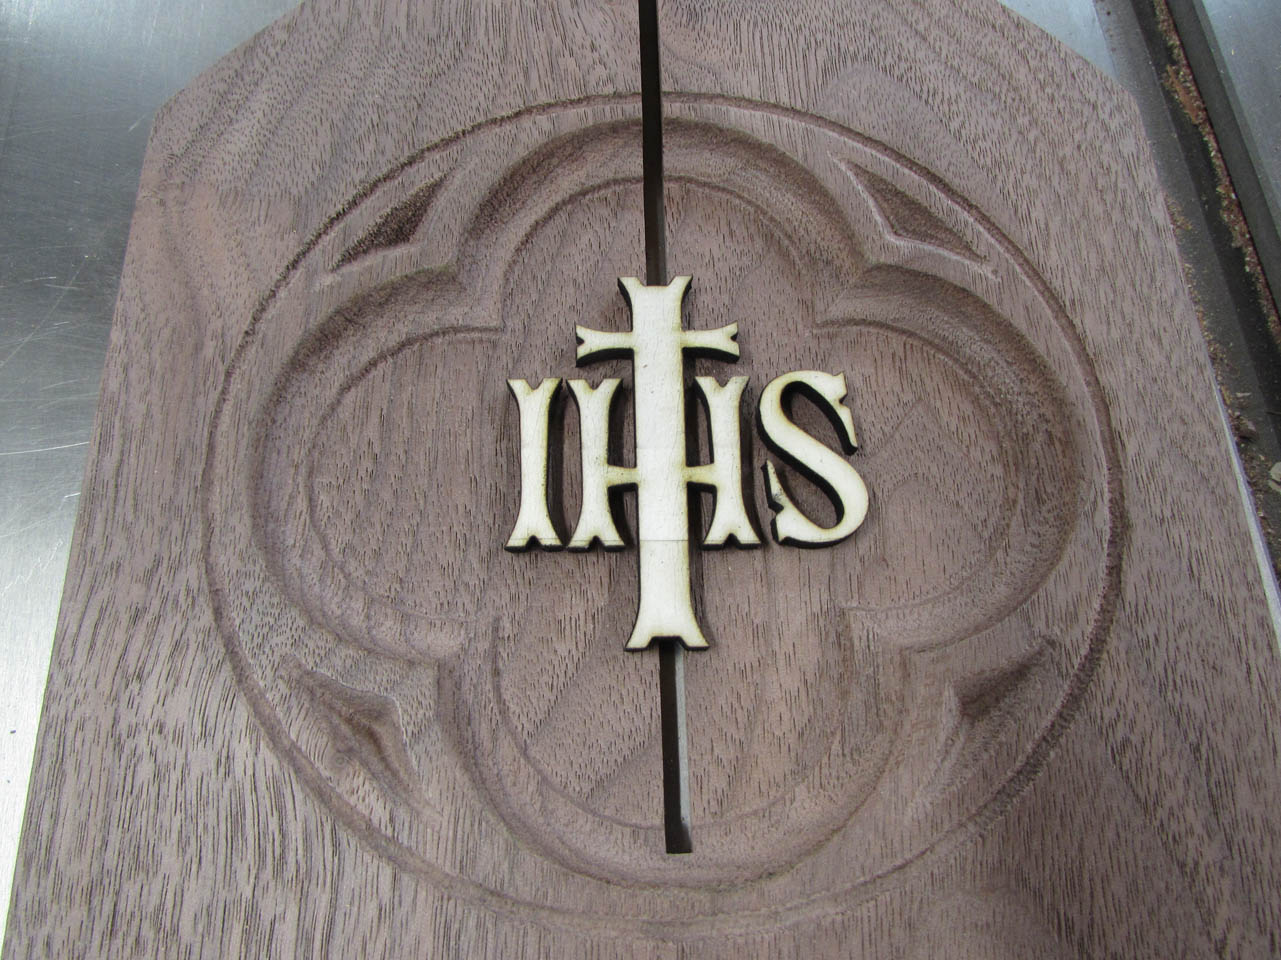

I mixed up a bit of quick setting epoxy and attached the holly.


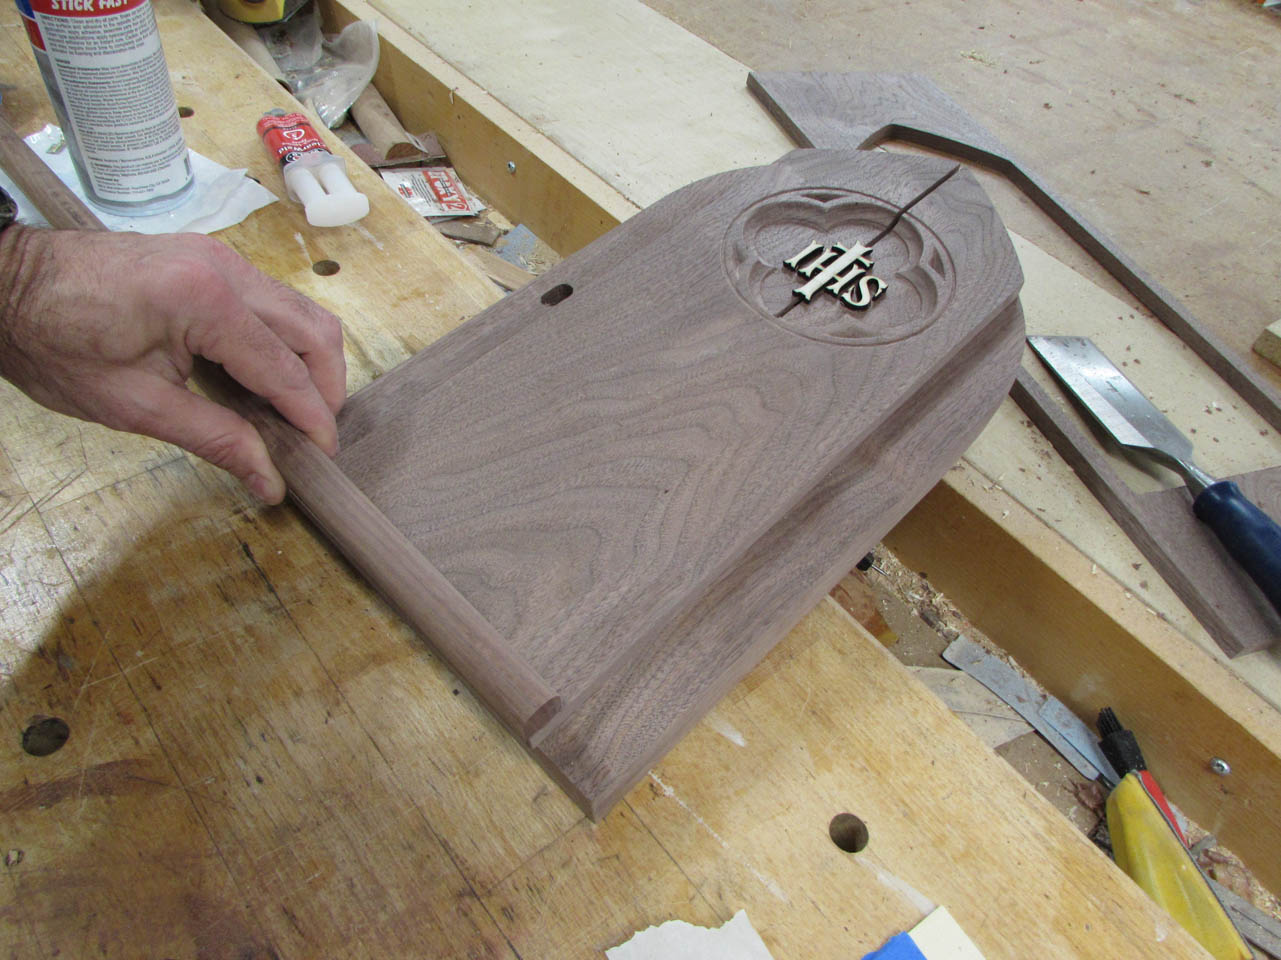
While that is also drying, I need to create a subtle door pull.

I have a piece of 3/4″ bullnose that would look nice if I could undercut a grip into it.
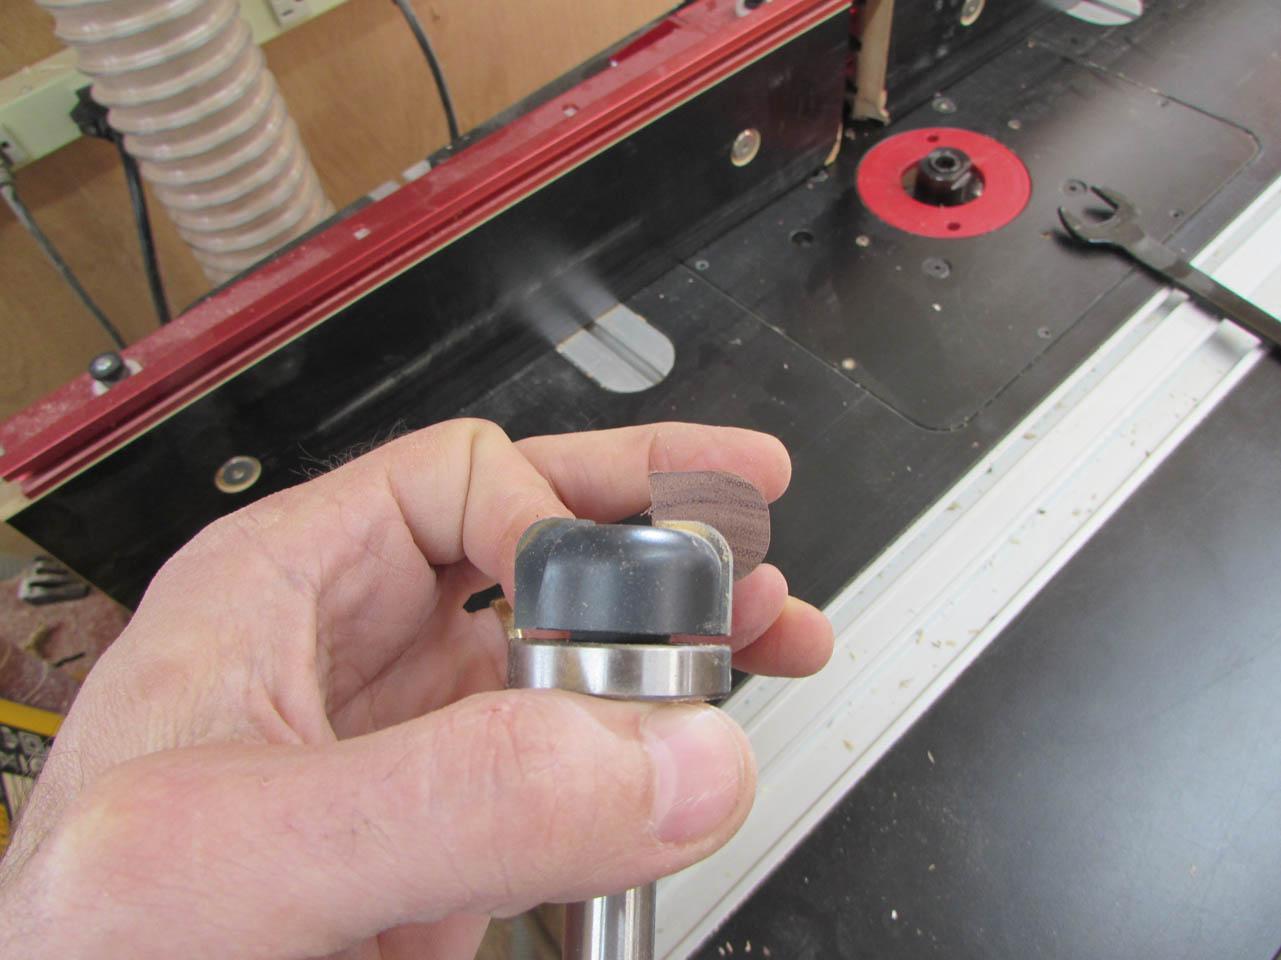
I decided to use a bottom clearing router bit.
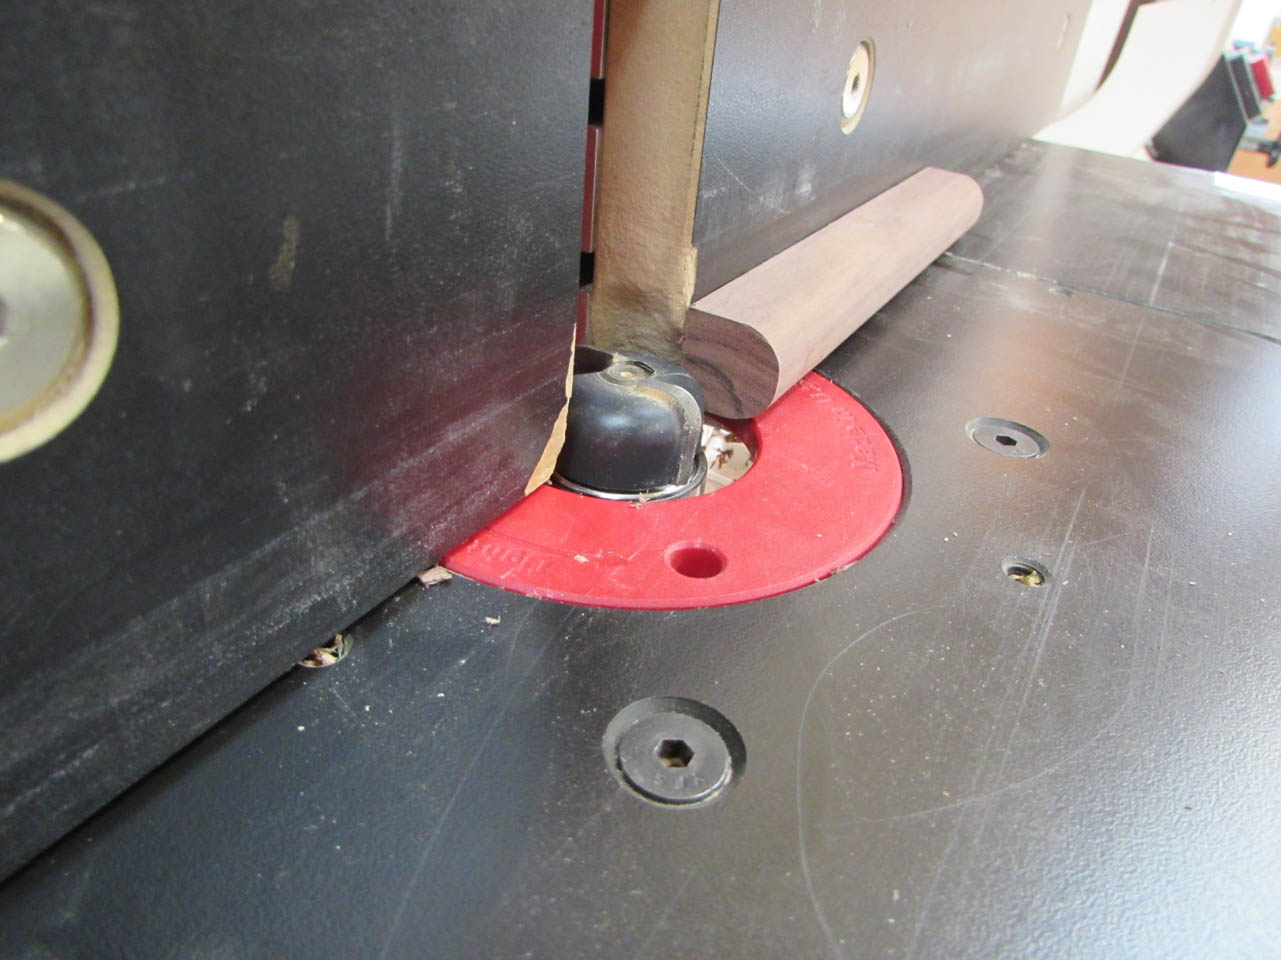
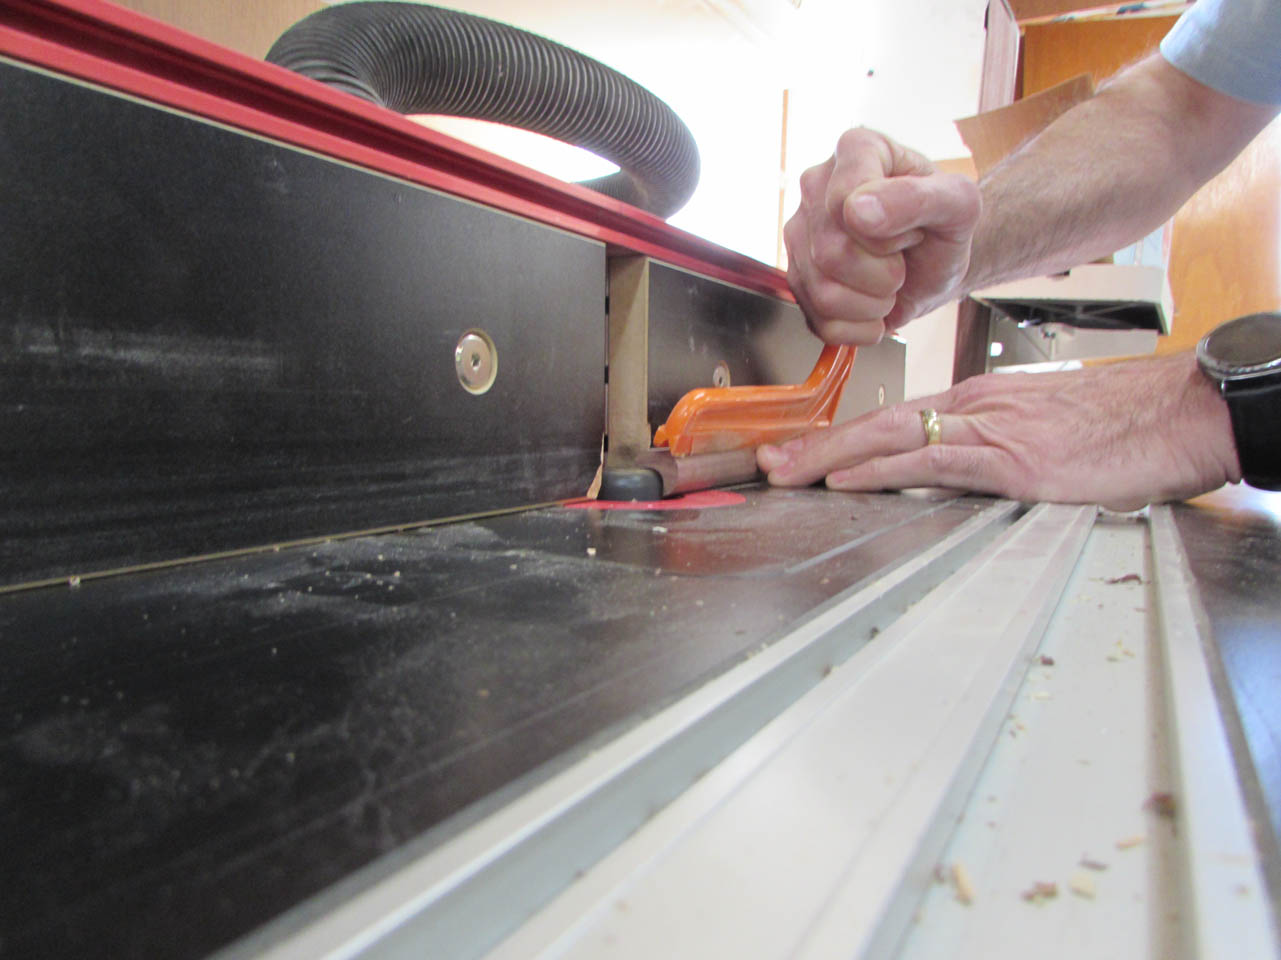
It felt a little unsafe, in fact the first small test piece I tried may have shot across the room and taken a bite out of my push stick… Running a much longer piece through gave me more material to hold in place and the operation went far safer on the second try.
It created exactly what I wanted. After cutting a 6″ piece I epoxied it in place as well.

I used a couple of 23 gauge pin nails to hold it in place while it dried.
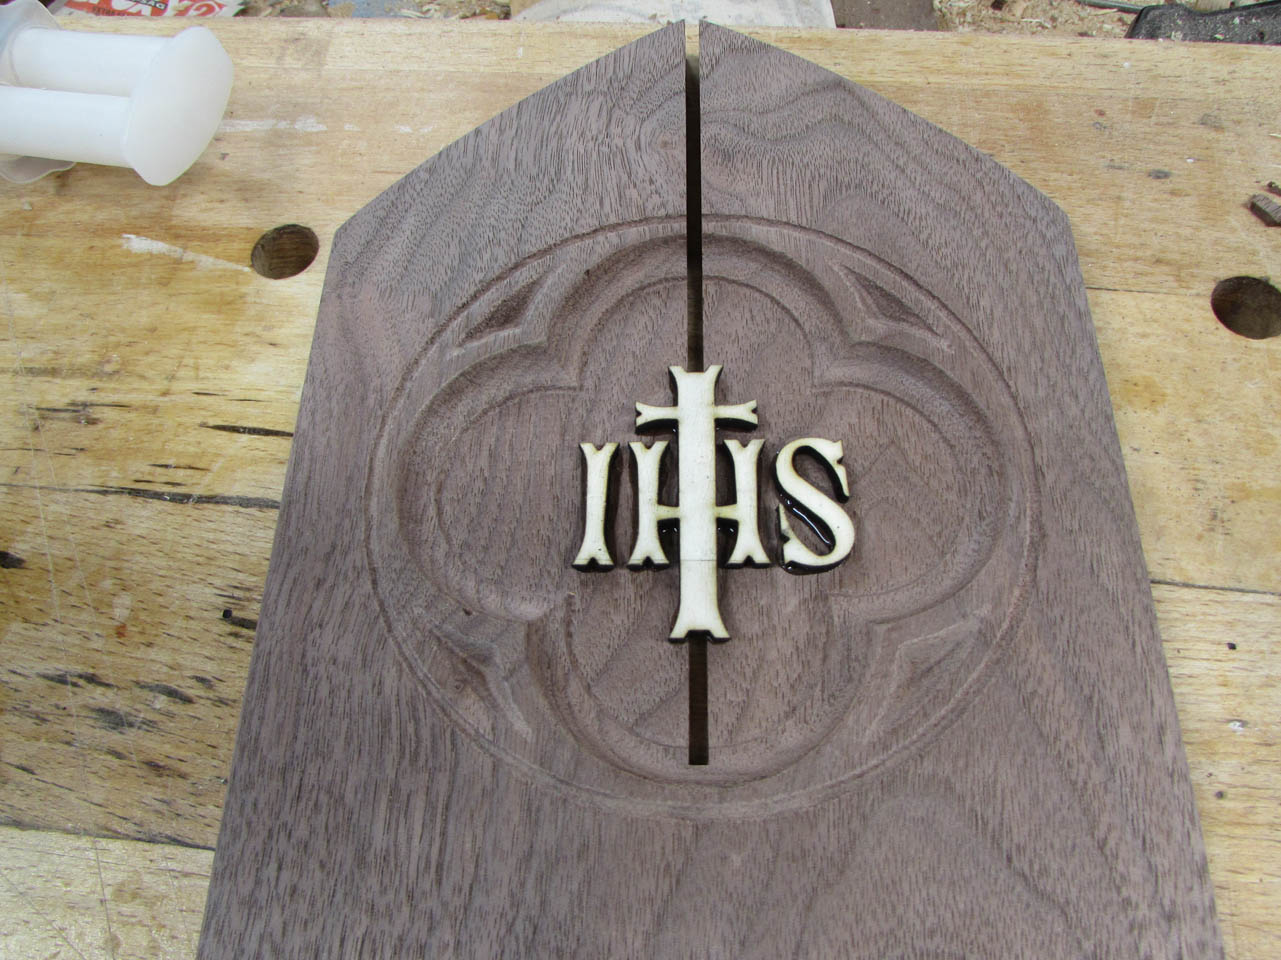
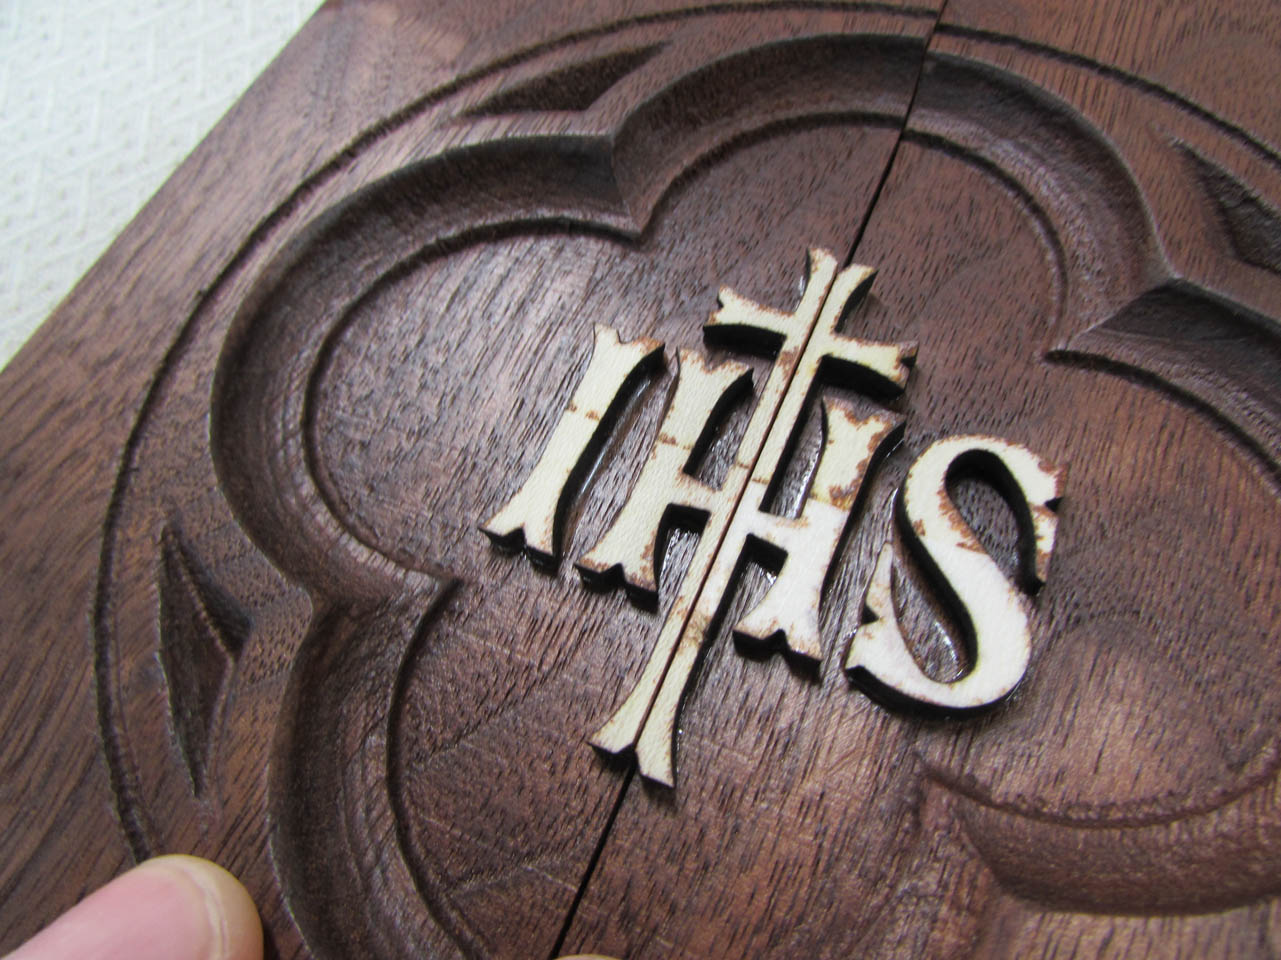
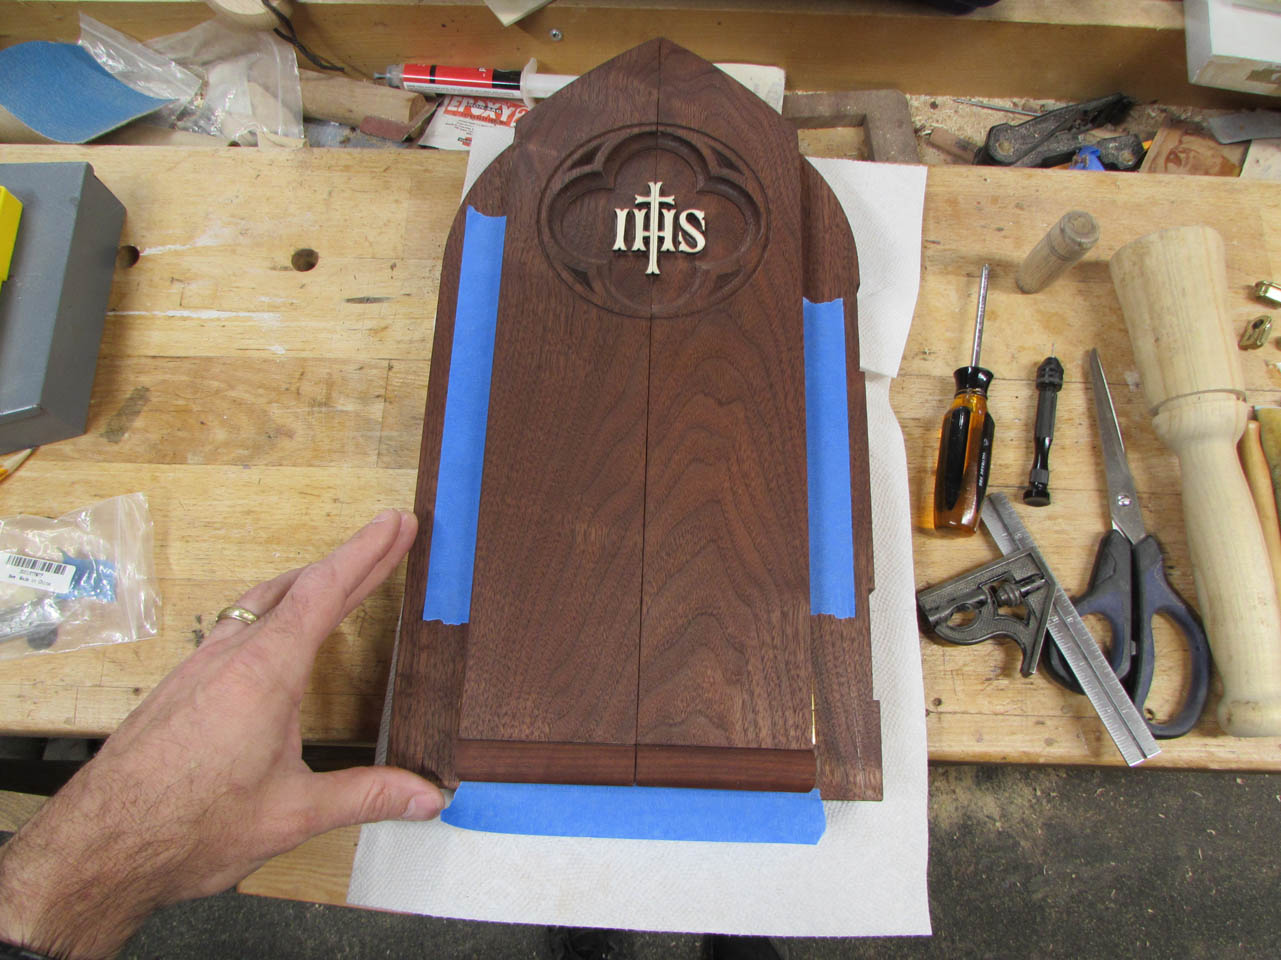
When everything had cured, I finished the cut down the center of the door.
With the center 1/8″ removed, the symbol came together perfectly.


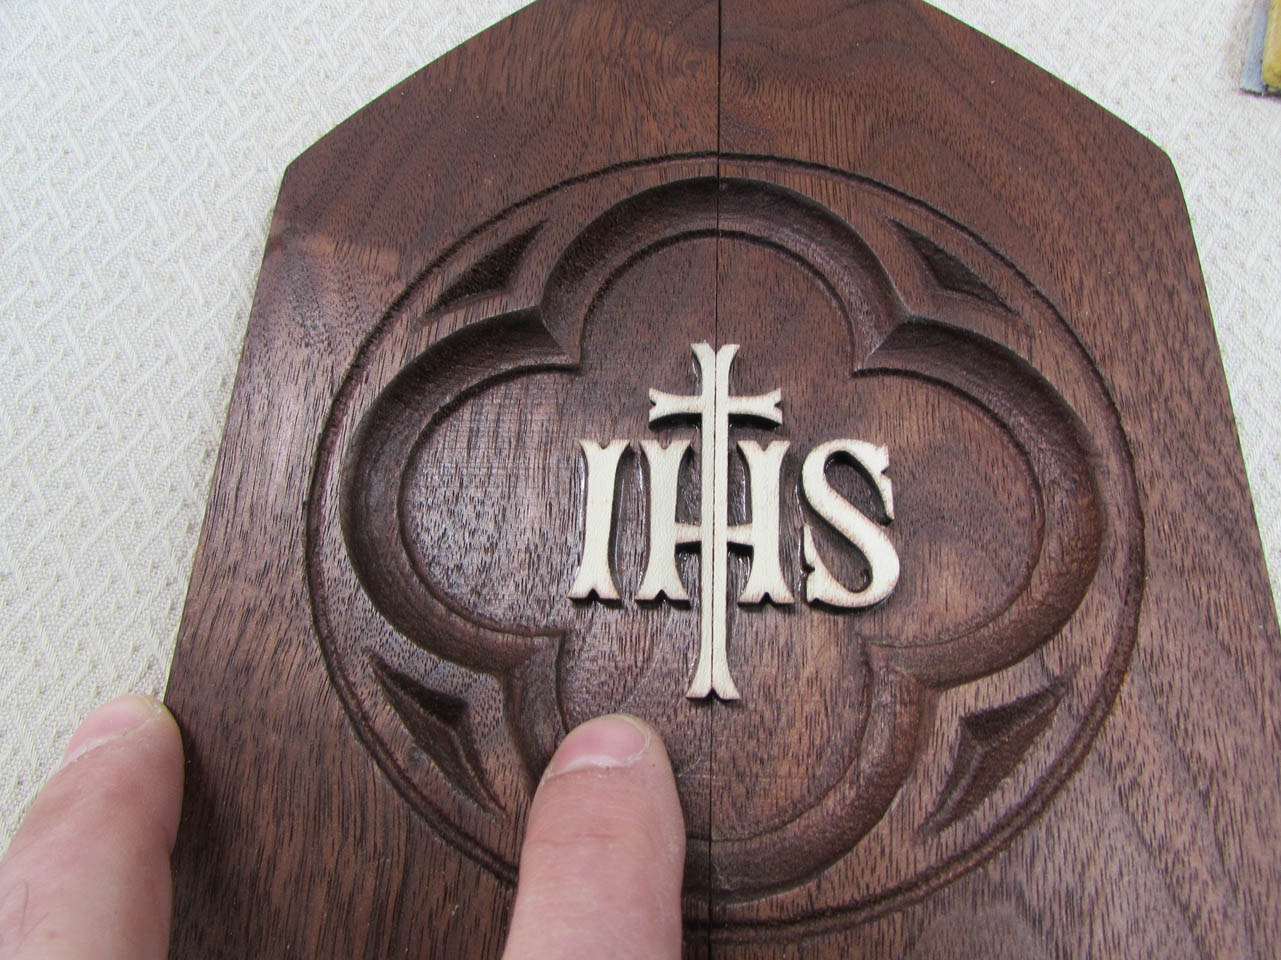
Now I have a set of front doors.


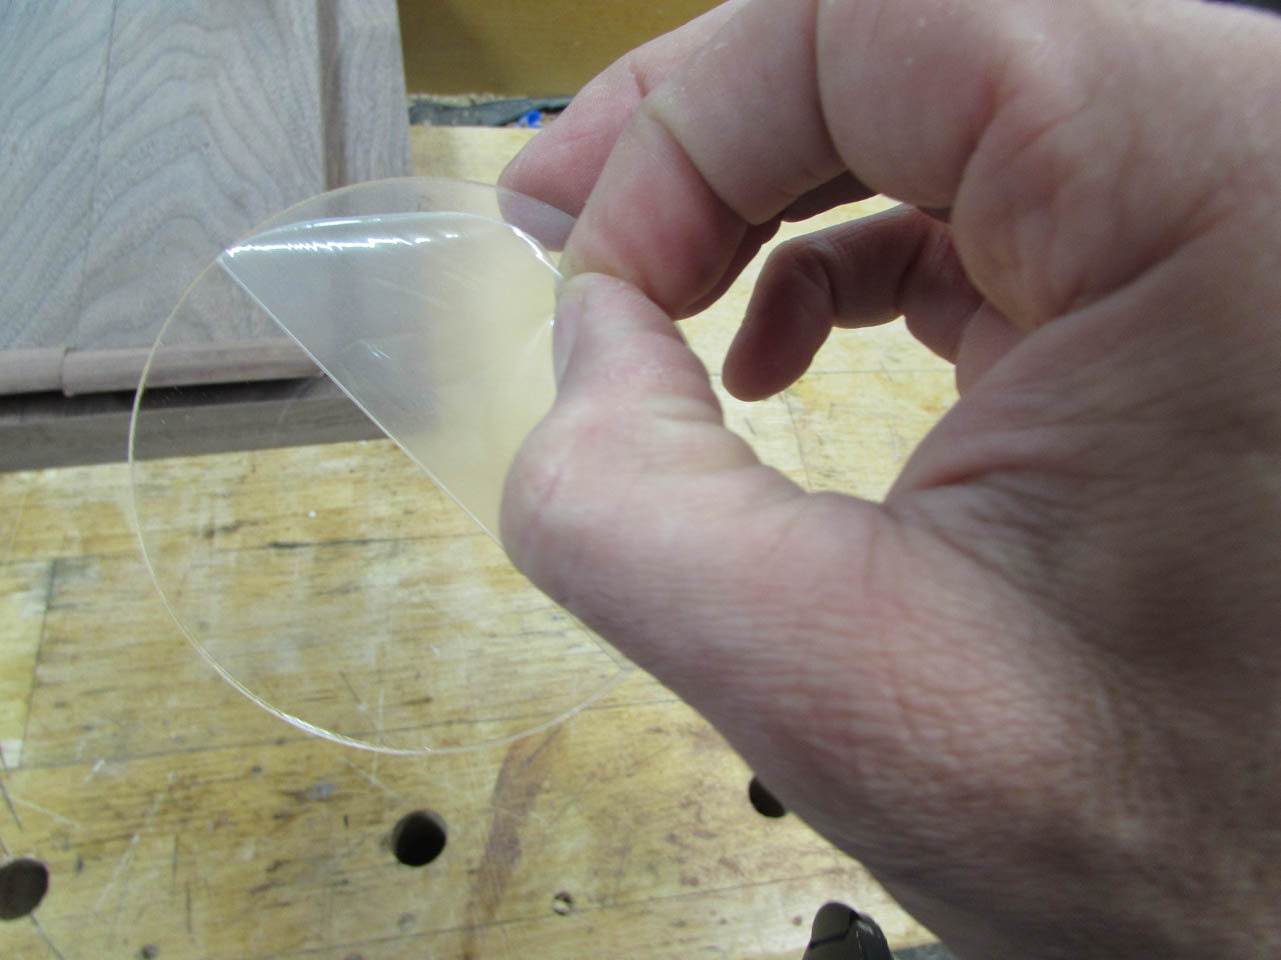
I used my laser to cut out a small circle from clear acrylic for the window.

After test fitting the Luna with the window in place I epoxied it in as well.


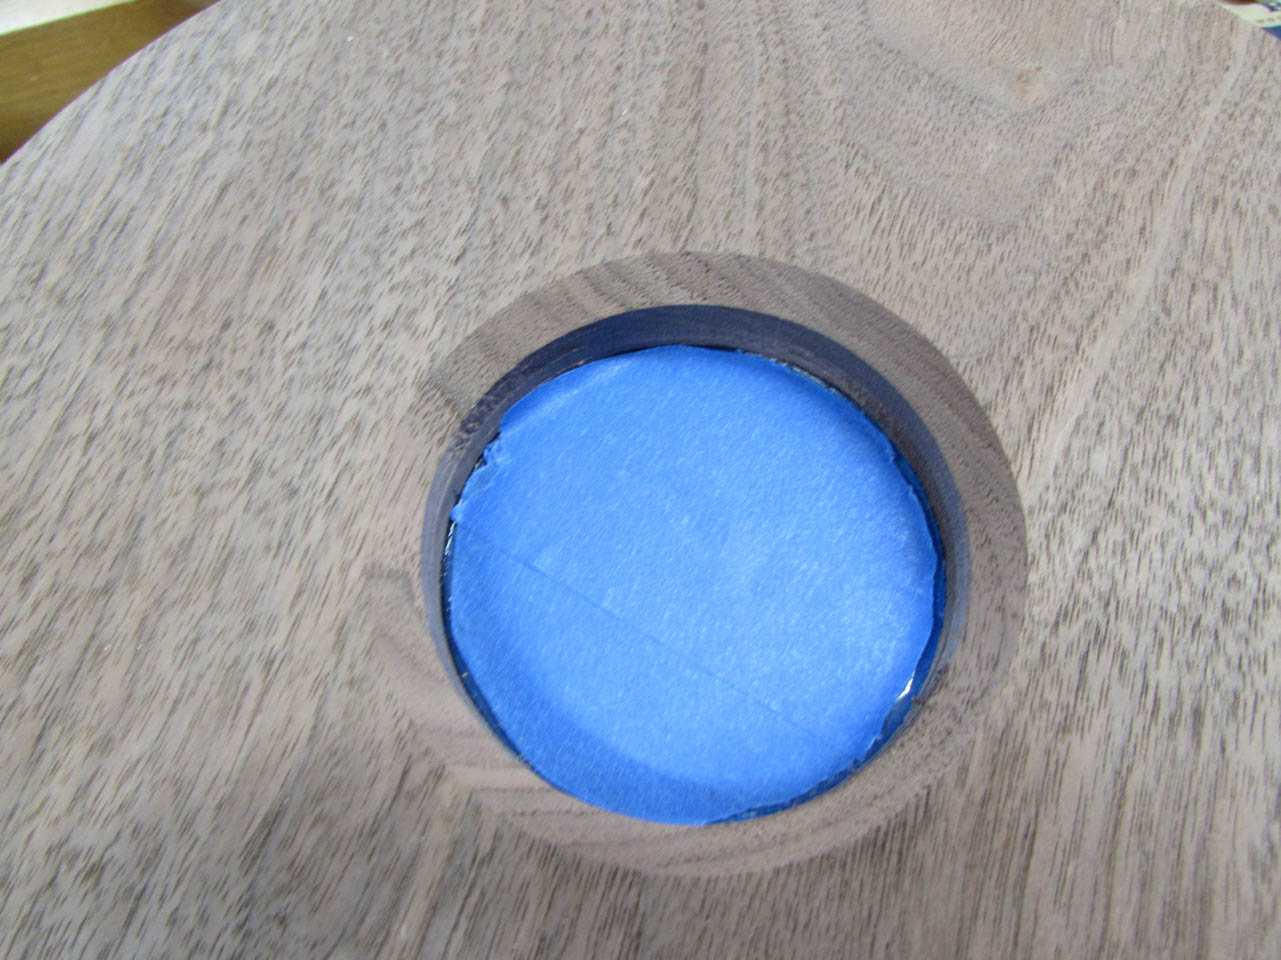
I am nearly ready for finish so I masked off both sides of the window.
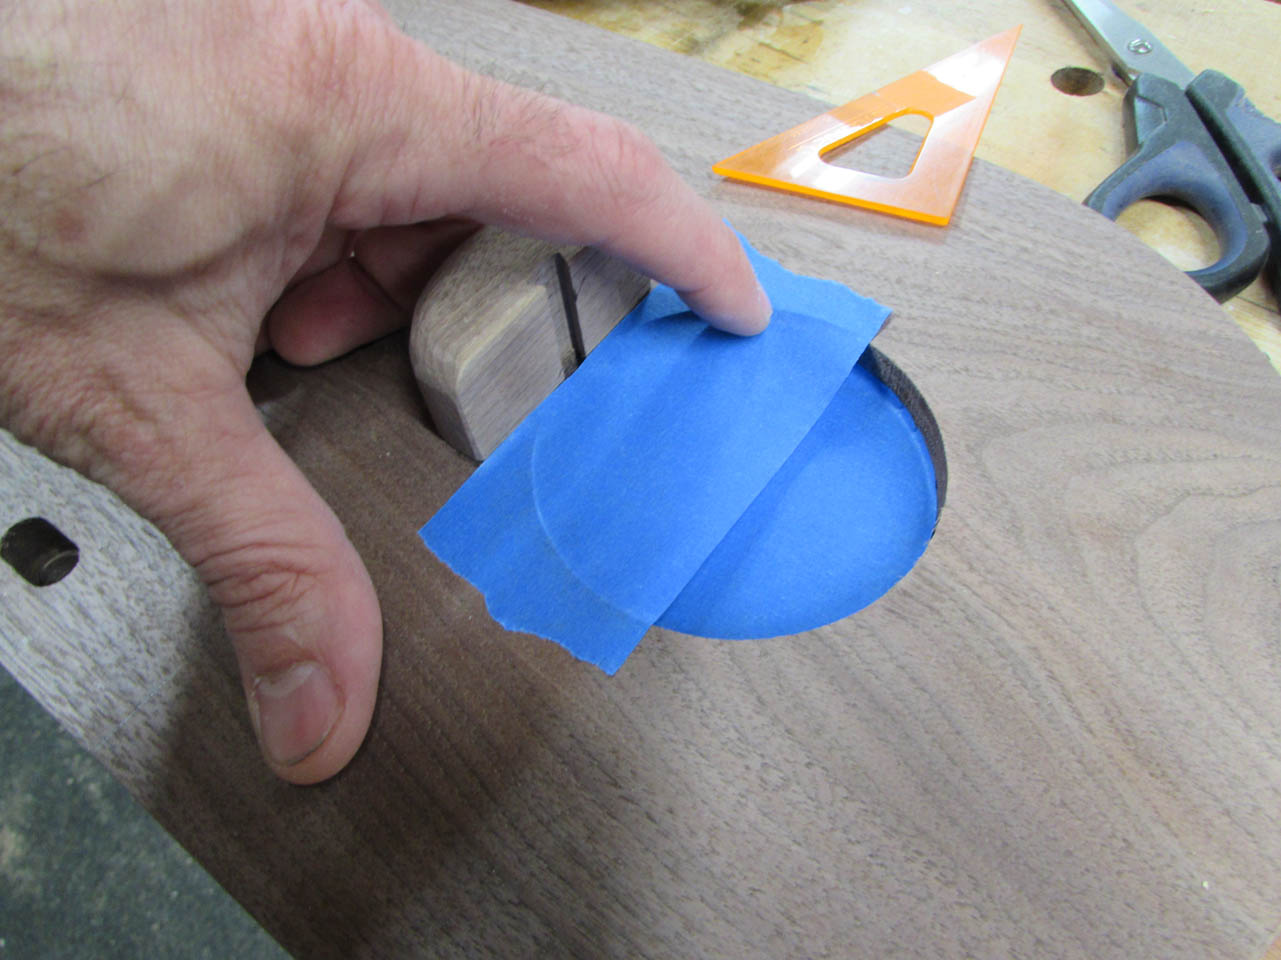
Since the window is recessed, I pressed the edges of the tape to get a curved impression to cut with scissors.

This worked really well for size.
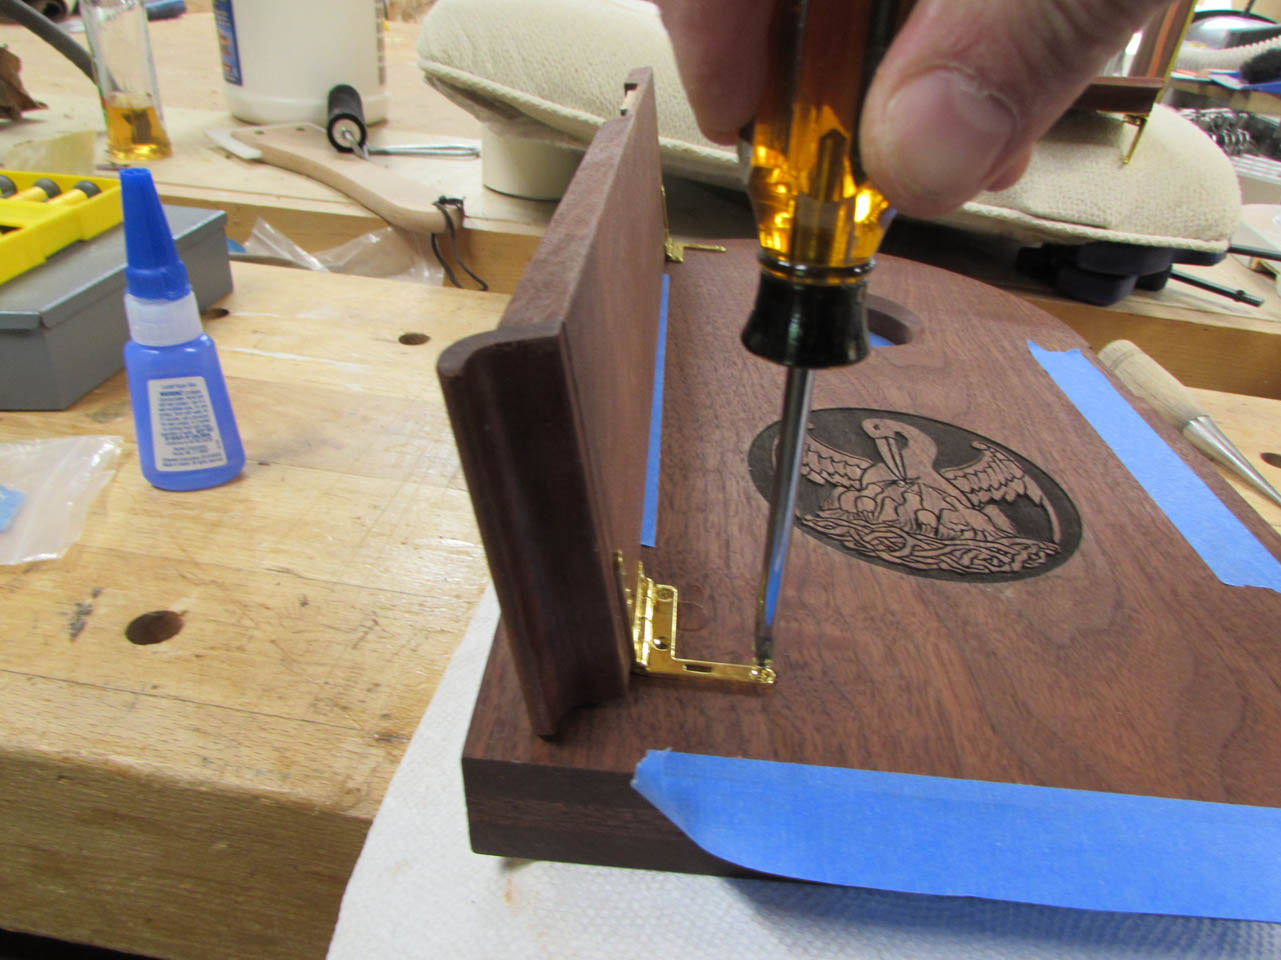
I also had a request to engrave the symbol of a Pelican feeding its young onto the front of the main door. It will only be visible when the Eucharist is exposed.

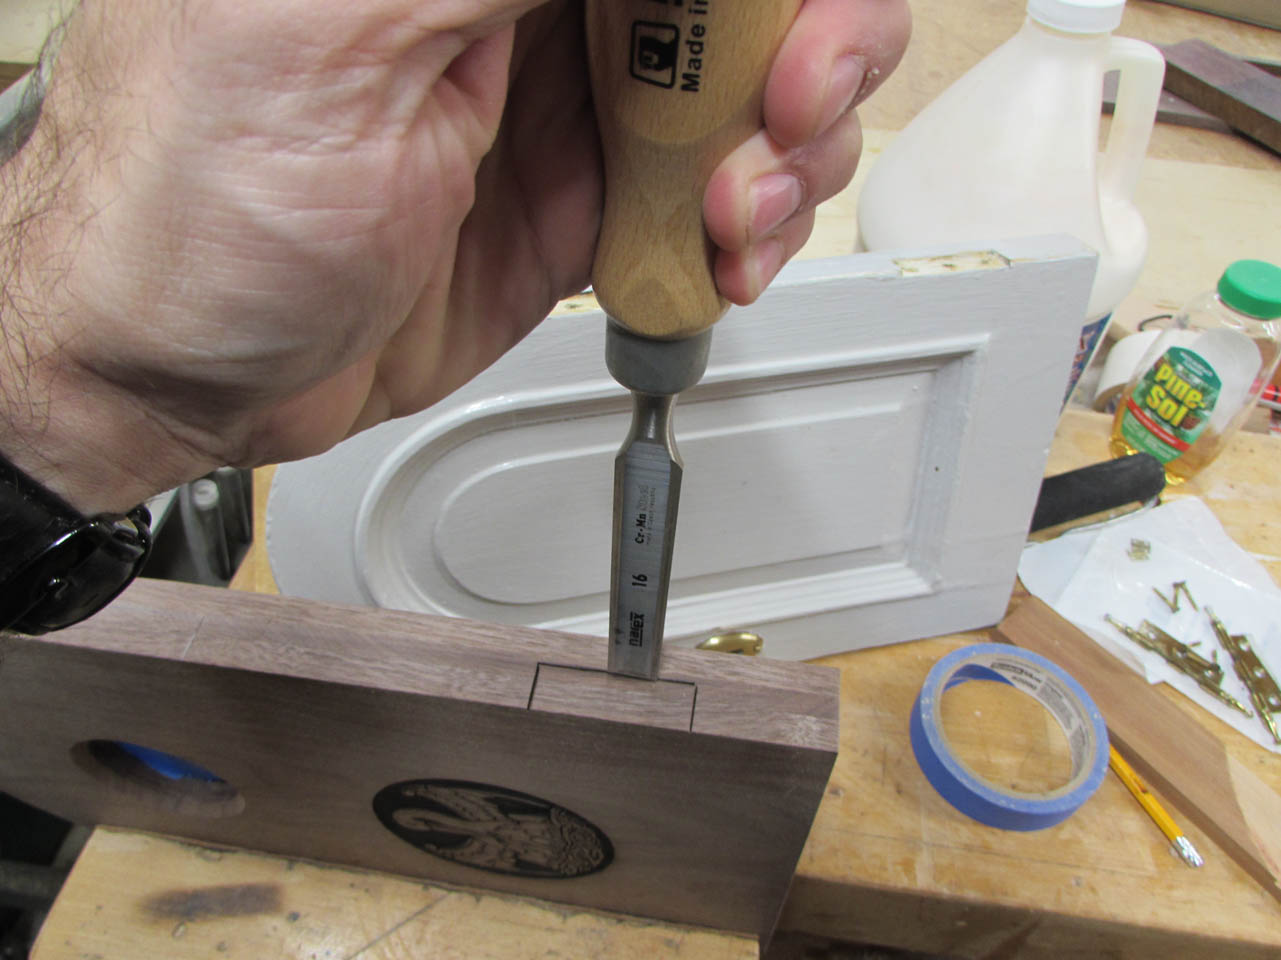
Now, a few final touches before finish. I lined up both the old door and the new and transferred the location of the hinges and the lock to be carved out with a chisel.

After the hinge mortises were cut, I installed the hinges to make sure they fit, then removed them again.


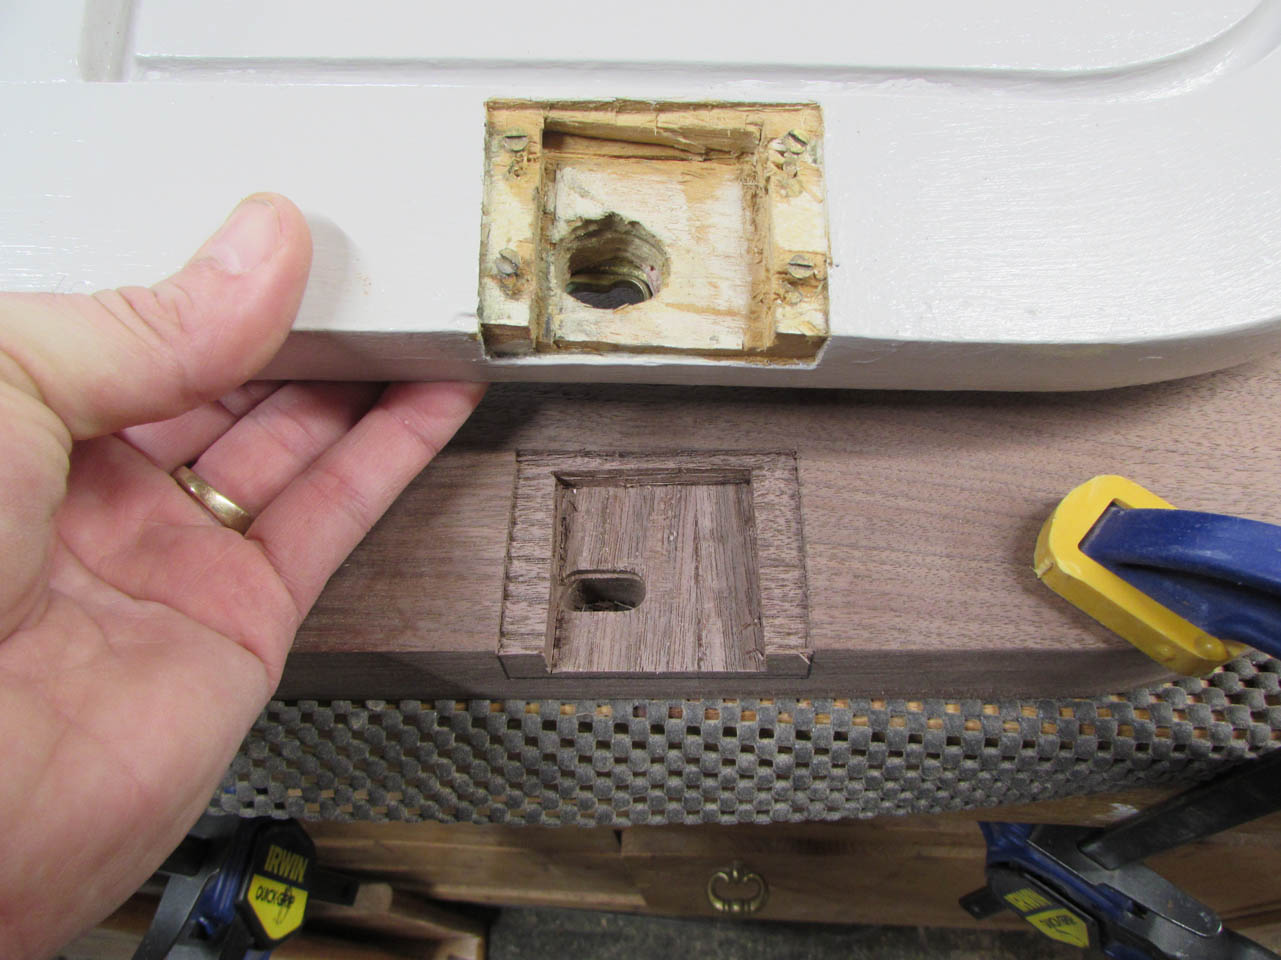
I matched the mortise of the lock as well. I do not have the lock so I will have to make adjustments in the field if needed.

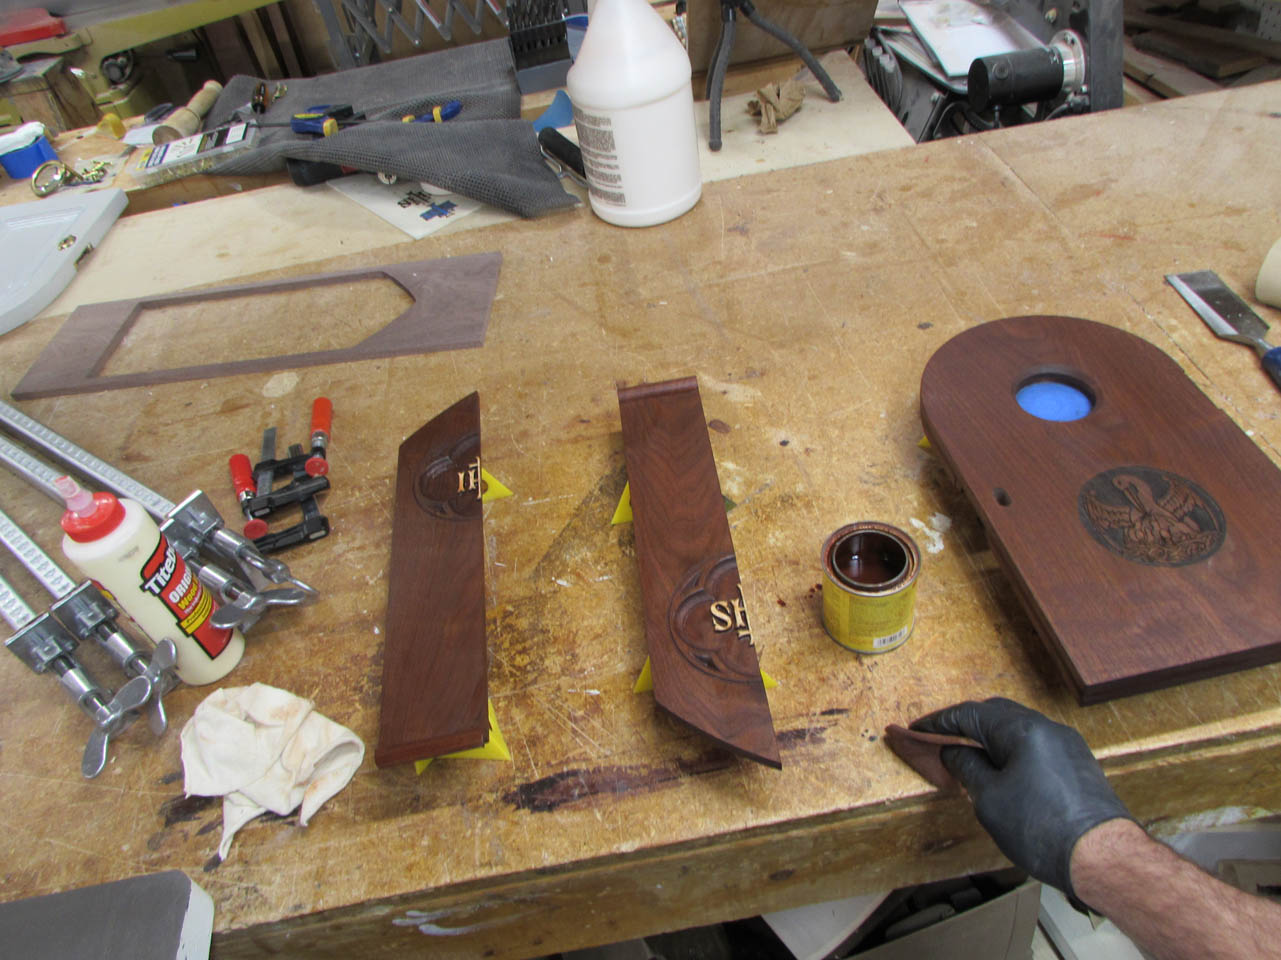
Time for finish. I am applying a Gunstock stain to the walnut to try and match the orange tones of the walnut at the chapel.
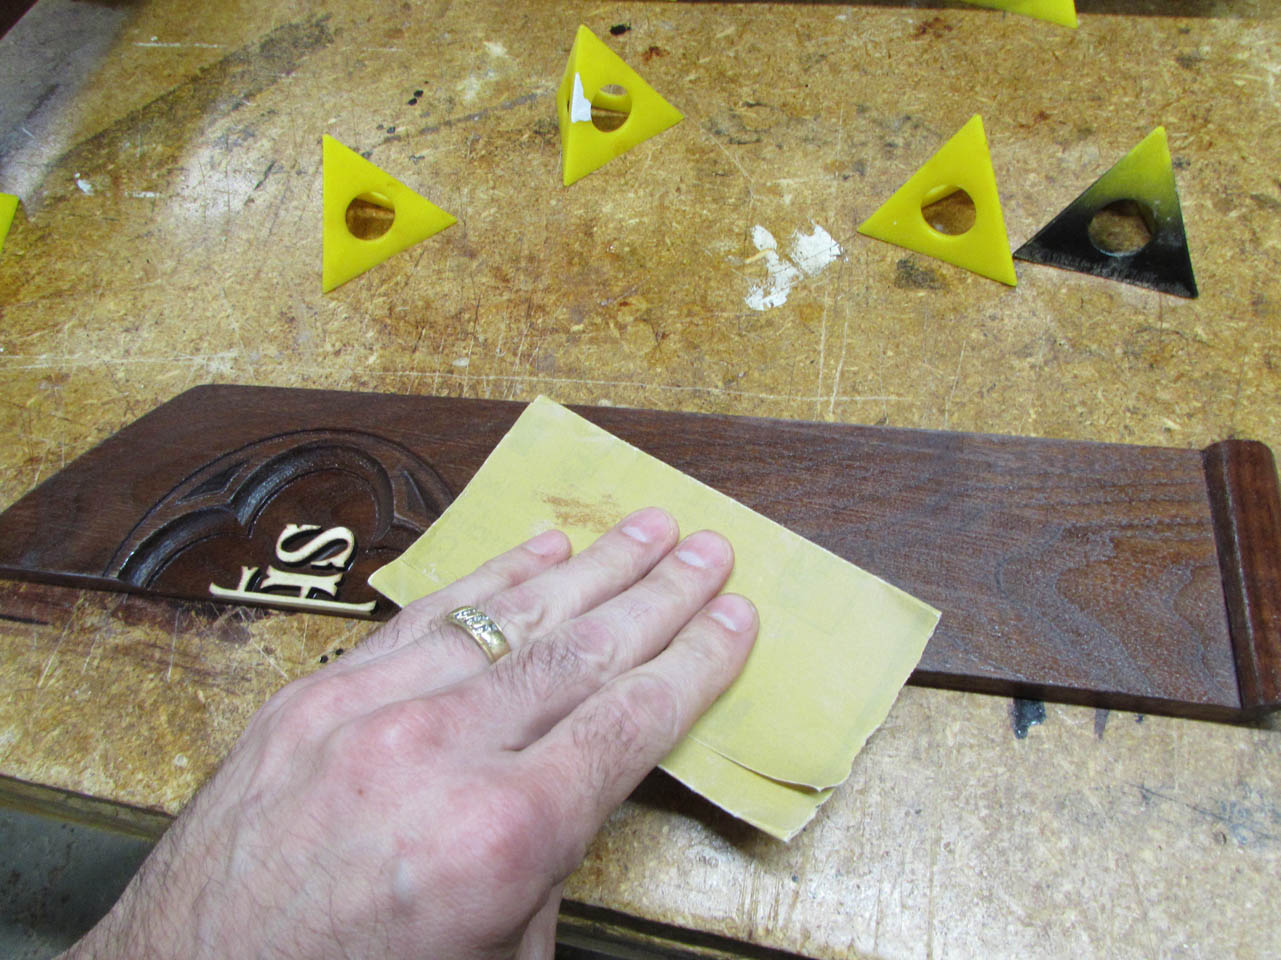
The next day, after the stain had dried, I peeled off the masking take from the holly.
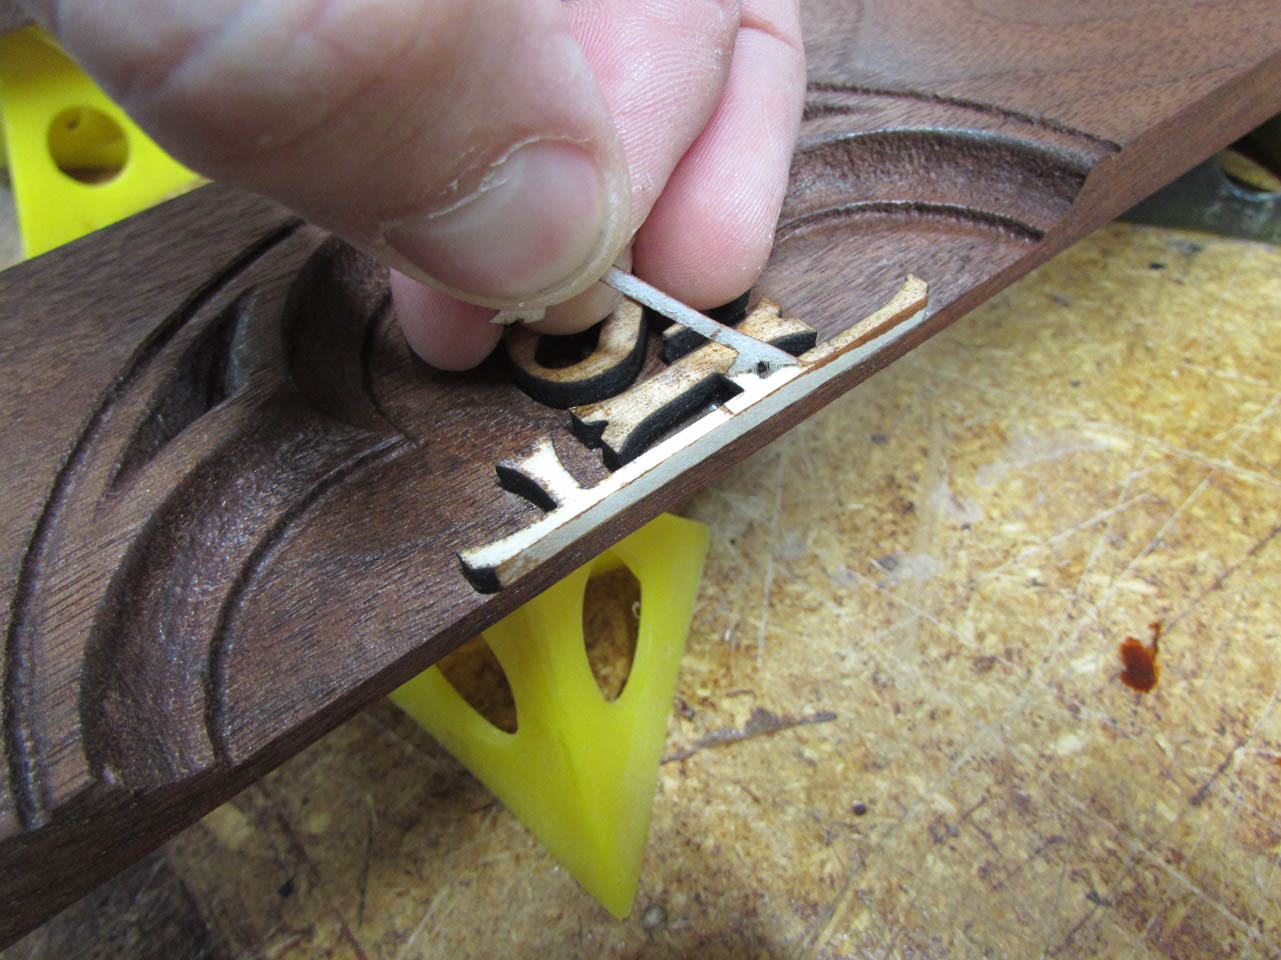
It did not work as well as I had hoped.

But a lot of sanding brought the white back…

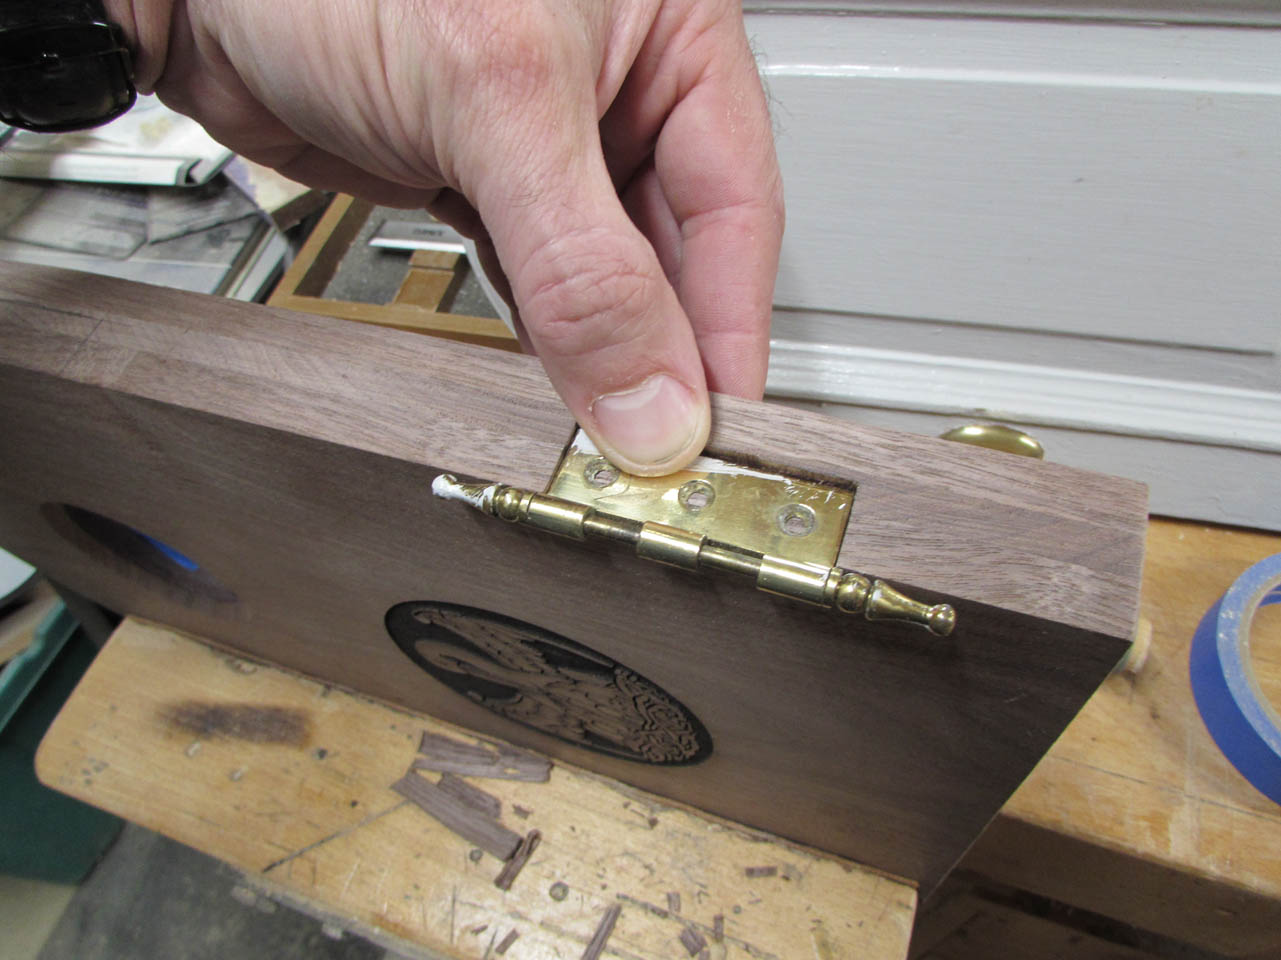
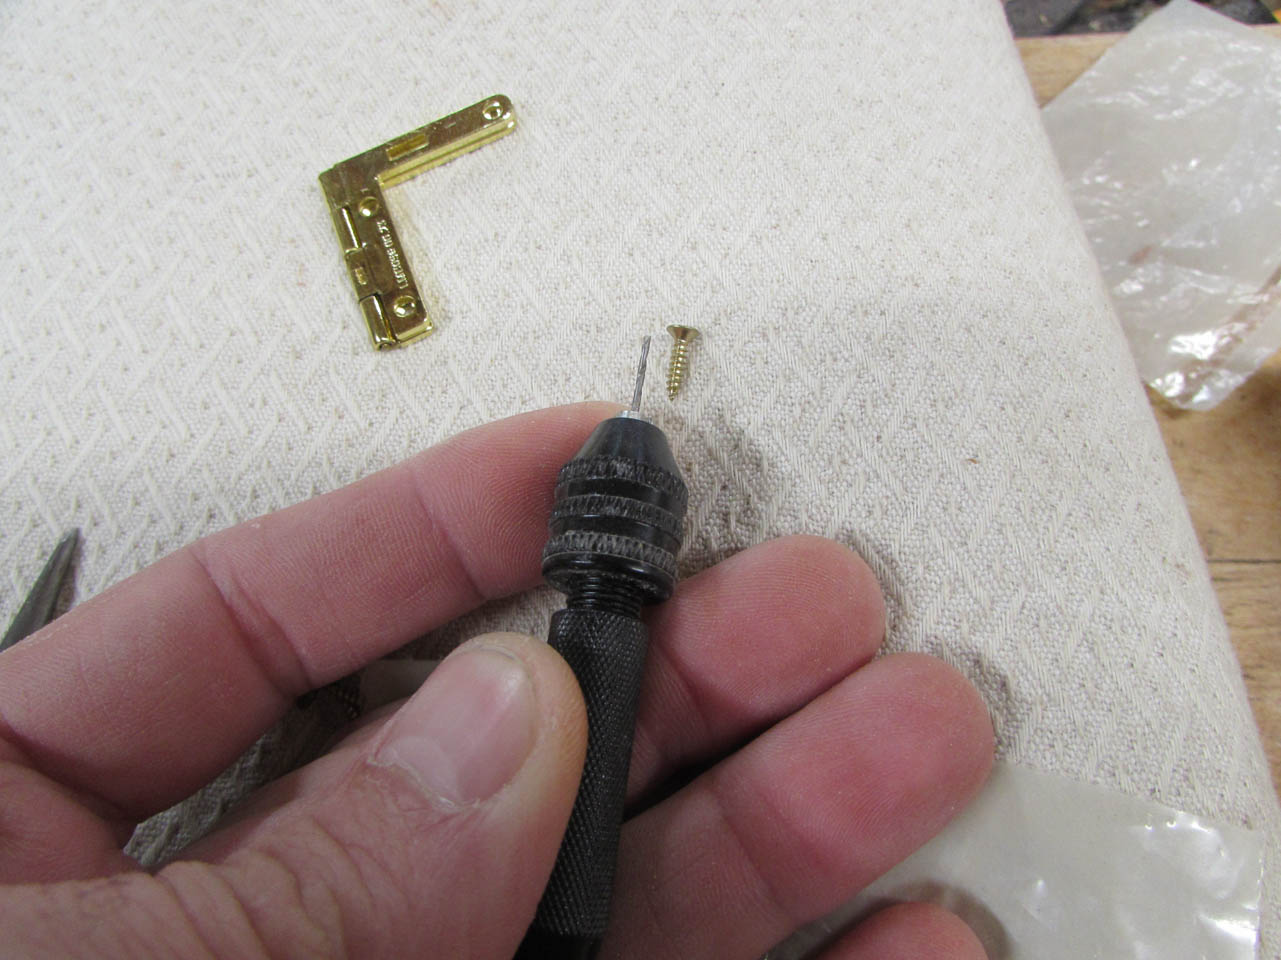
I had a hard time picking the right hinges for these little doors. I settled on brass Quadrant hinges. Tiny screws, but the 90° arm should give me extra strength and support.
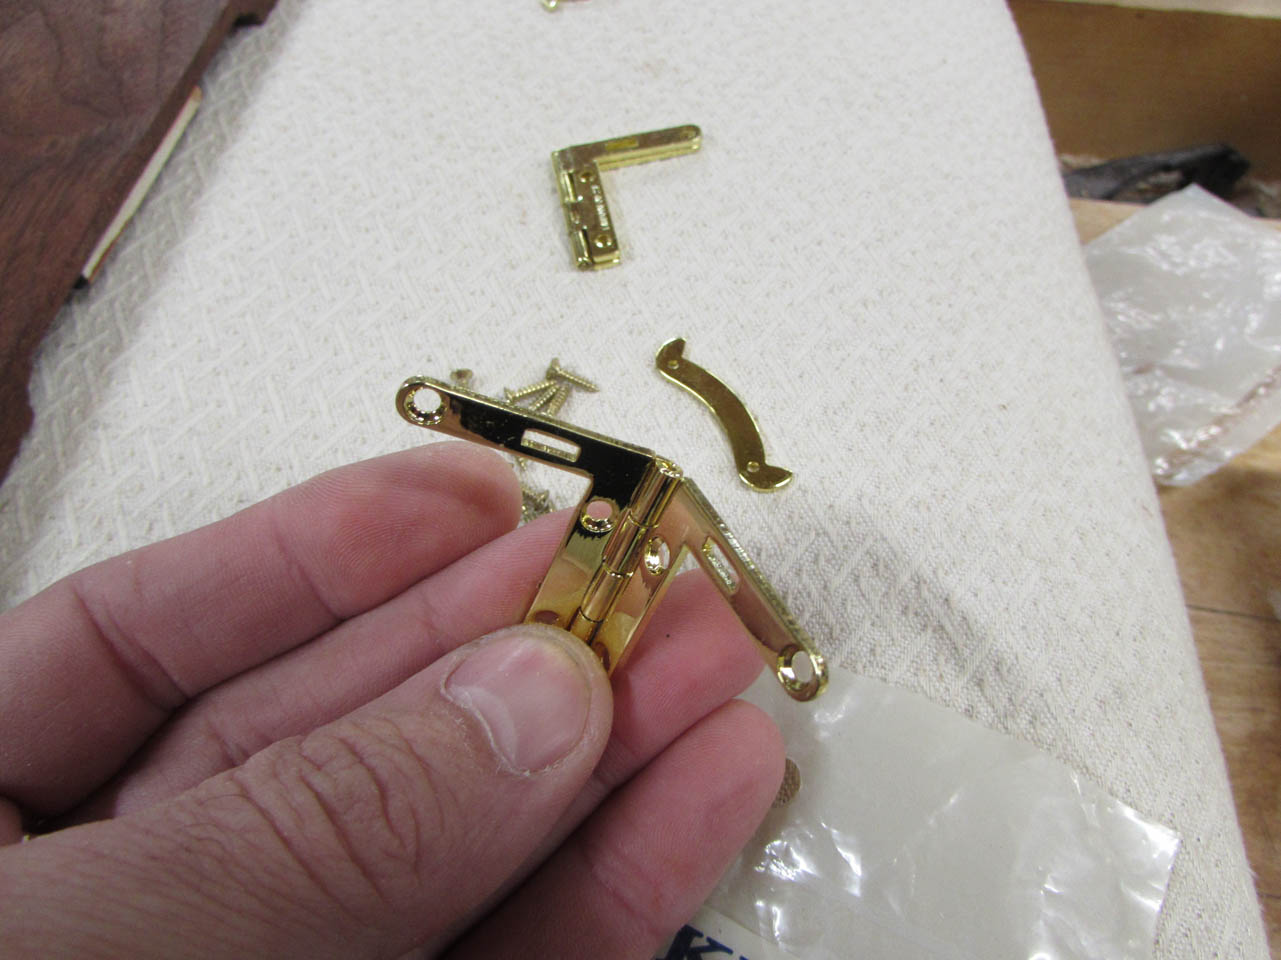
The screws are tiny so I used a small bit in a pin vice to predrill pilot holes.


After screwing in the first two screws along the edge, I went back and did the third.


I attached all four hinges to the doors first.

Then I carefully aligned the doors and marked their locations with tape.


I applied a drop of CA glue to each hinge and set them back in place, with a spacer in the center, to hold the doors flat.

The glue remained wet for a few seconds so I could align the closed doors, then after they set, I could open the doors gently and drill the pilot holes, then screw them in.
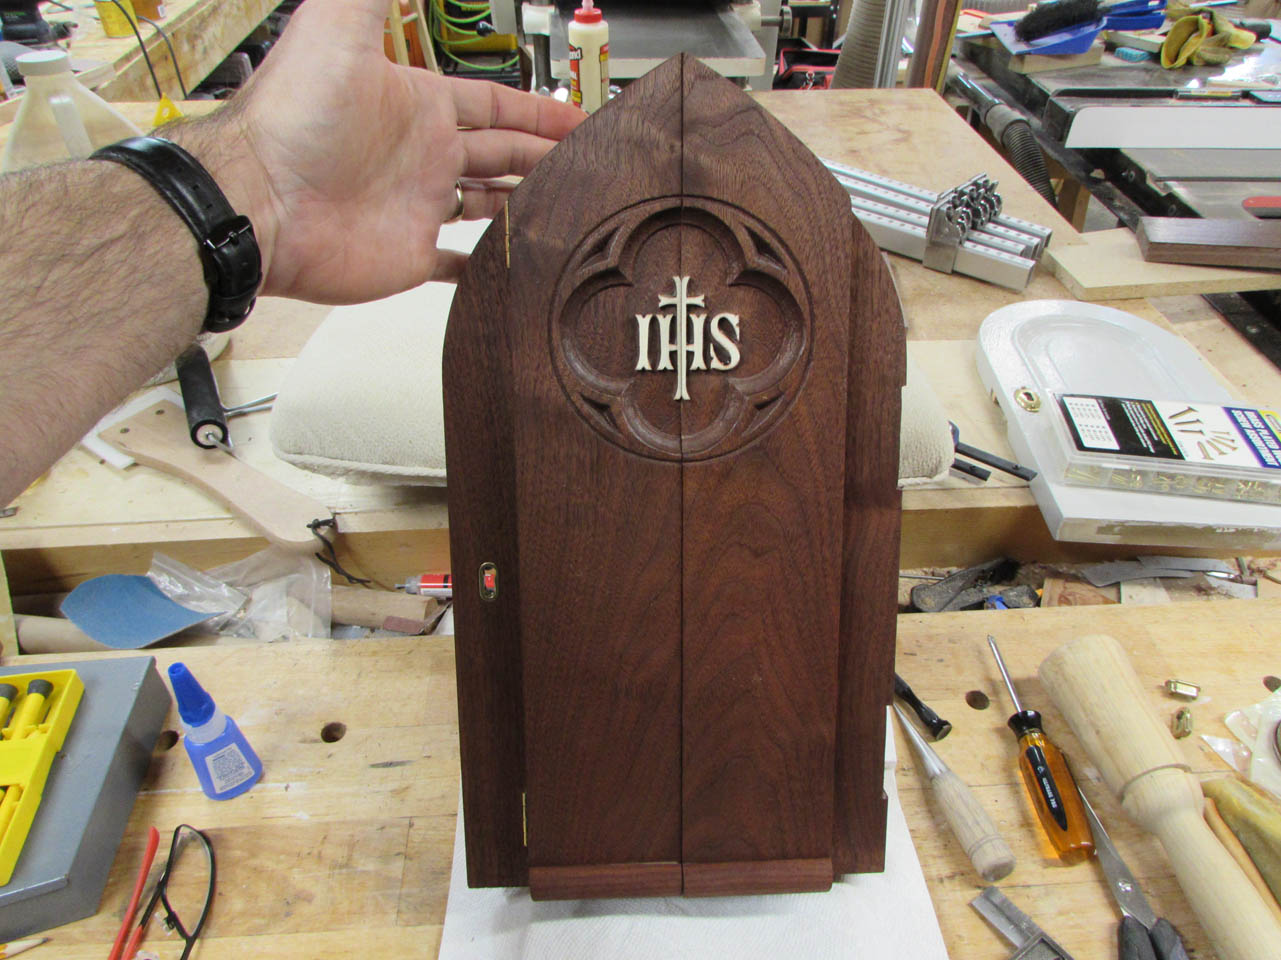
Wow, this door is looking really good.


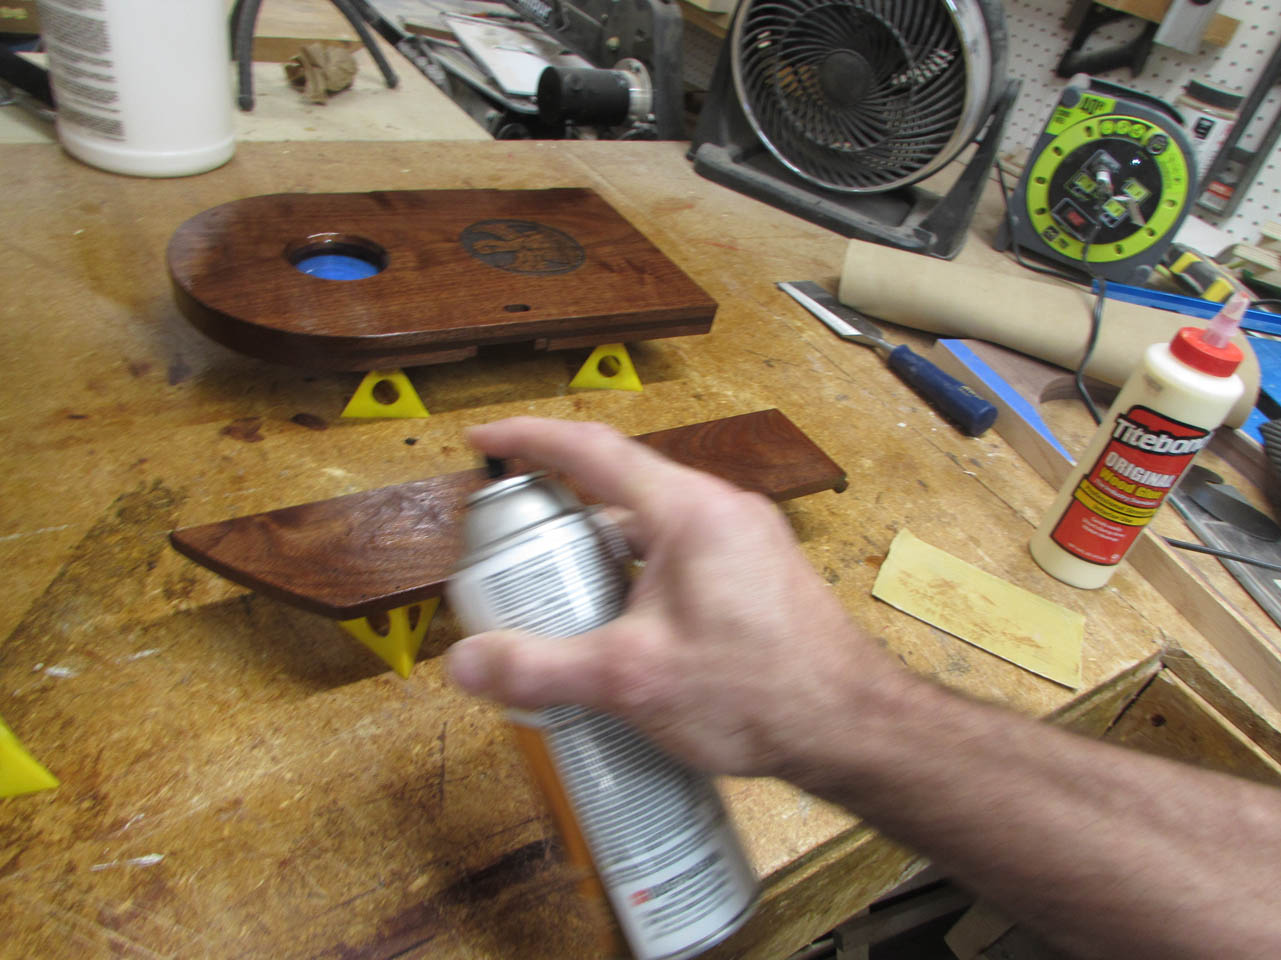
I removed all of the hardware and sprayed on some semi-gloss polyurethane.
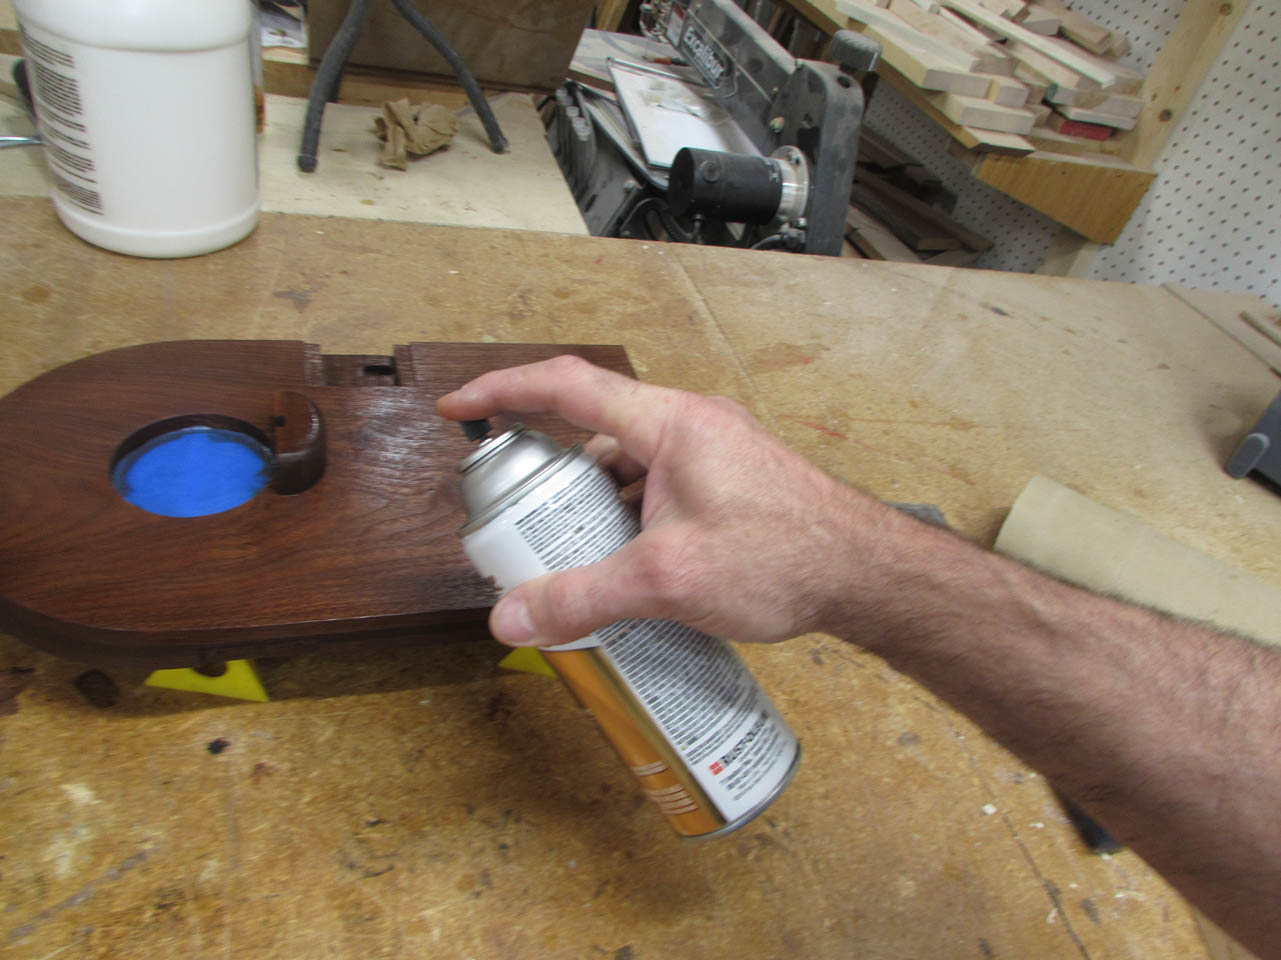

After it dried, I sanded it back with 400 grit paper and sprayed on a second coat.
After everything was dry to the touch, I packed up my tools and headed over to Sacred Heart for the install.

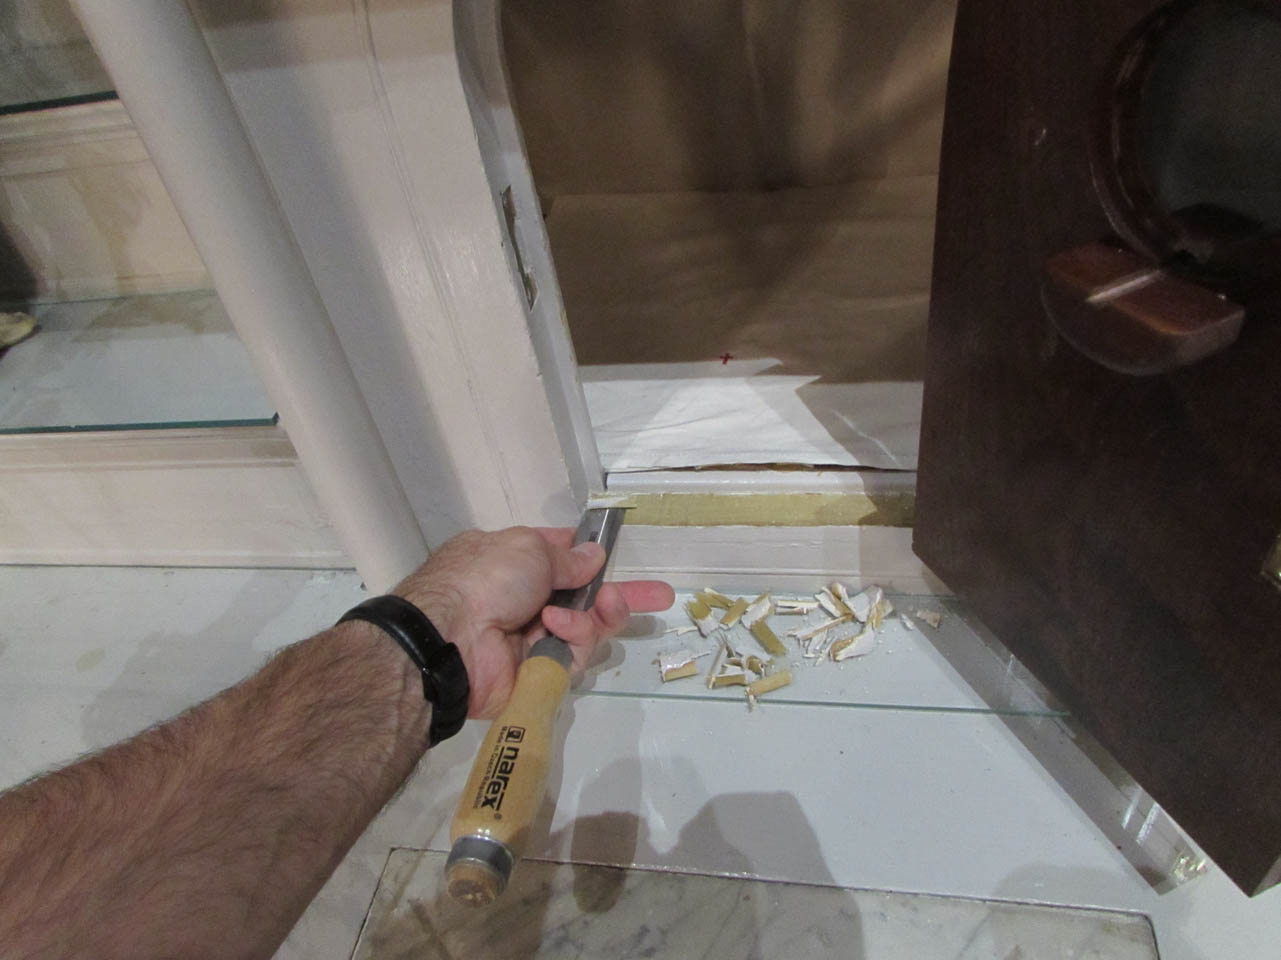
The lock only needed a slight adjustment to fit perfectly, but the opening needed to lose a bit of paint for the door to fit well.
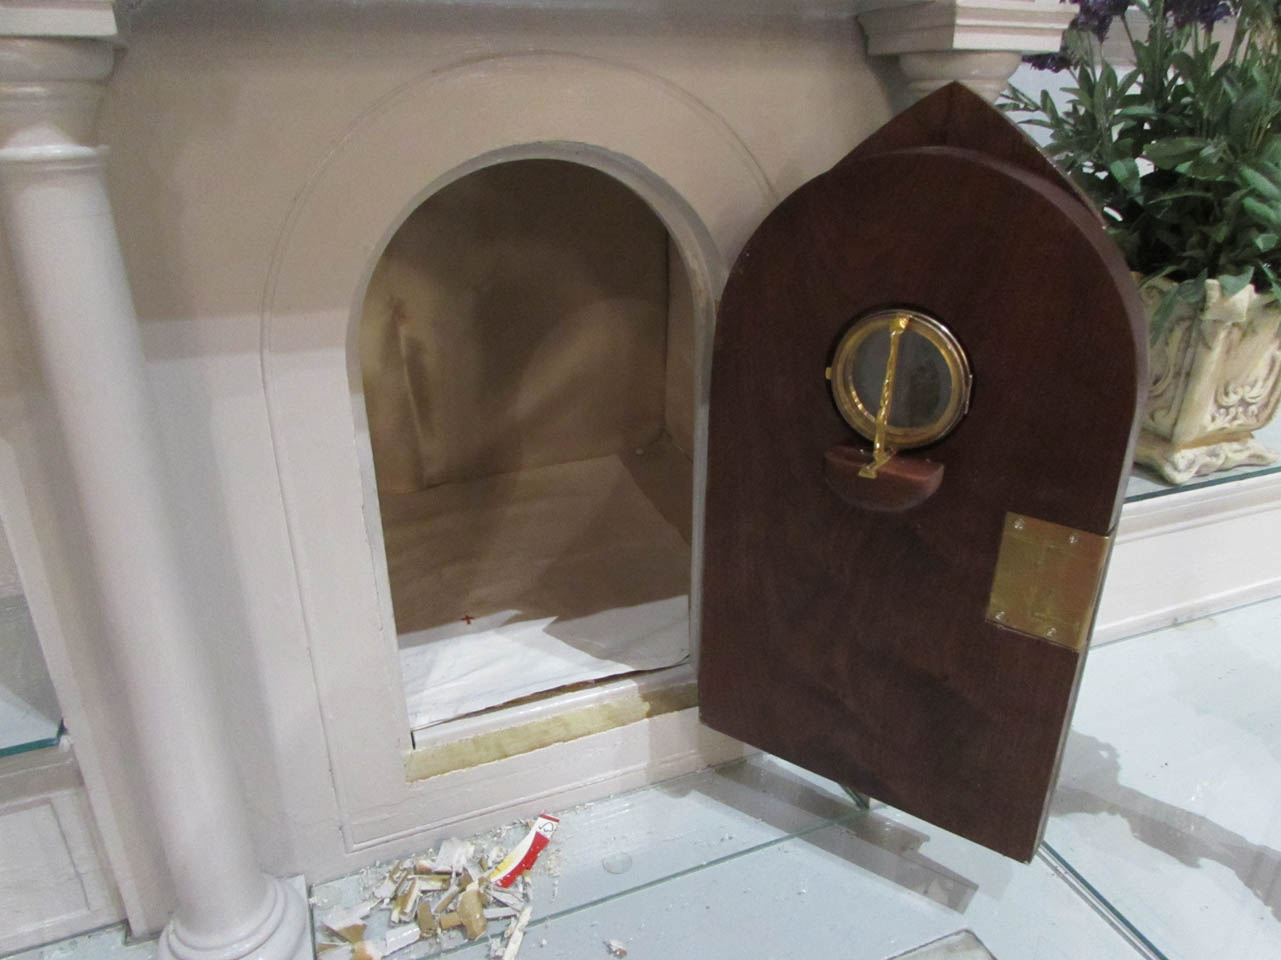
But it did fit well and it looks very nice in its new home.

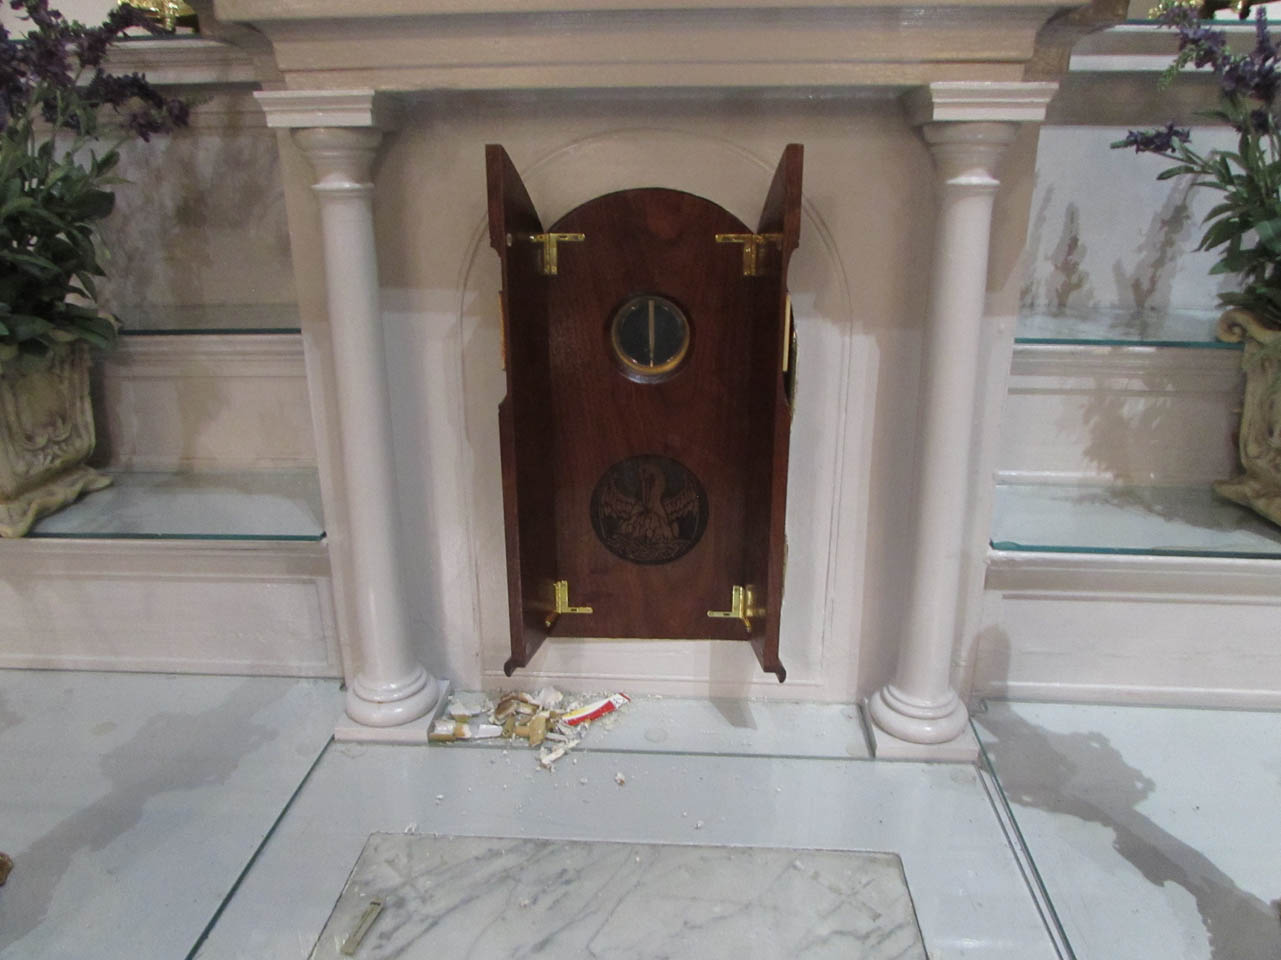
Instead of fading into the background, the door now stands out and better matches all of the architectural features of the chapel.


Nice job! That’s beautiful.