
Laser engraved mirror
It seems like the older I get, the more difficult it is to find the right gift for my parents. It is my Dad’s birthday this month and I was inspired to try something different for a gift this year. I saw an article about laser engraving a mirror and I thought it sounded like it would be fun to try. I have a 16″x21″ mirror that has been sitting around my shop for about 20 years. I removed it from a medicine cabinet in my bathroom and replaced it with a solid wood panel because it’s location adjacent to a larger mirror was a little annoying in the reflection. The wood panel looks better but I couldn’t just throw away the old mirror. A habit that I picked up from my dad was to never throw away anything that I know I will be able to use somewhere else, one day.
So with this gift, I can pay him back for teaching me this. I am going to frame the mirror and give it to him. But most older gentlemen don’t spend too much time staring into a mirror so I will have to clutter it up a bit.

There are two techniques that I want to explore on this project. One of them is burning away the backing material that causes the reflection and the other is engraving the glass itself.

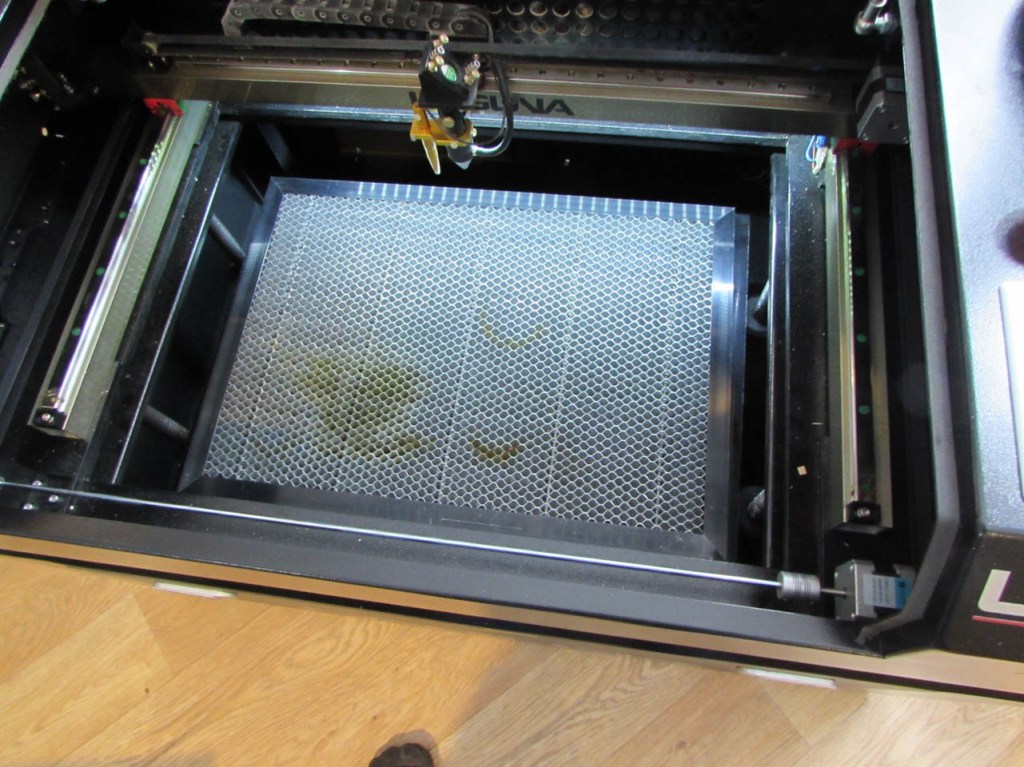
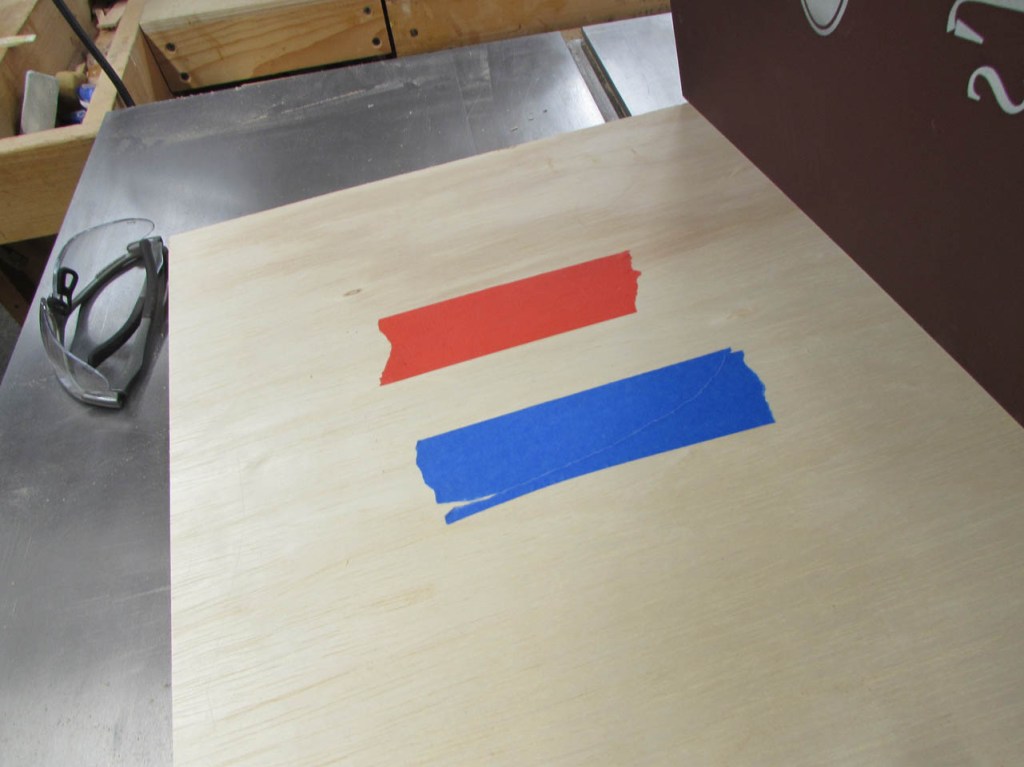
My laser, the Laguna PL1220, comes with a standard honeycomb to lay your materials on while cutting. I am not fond of using it because it moves and I cannot mark locations on it. I typically remove it.

What I like better is to place a piece of 1/4″ plywood on the table and tape it down.

The first thing I do is send my laser to a corner and press the “pulse” button and hold it down while I move the laser around the perimeter. The “pulse” manually fires the laser. This is typically used to align all of the mirrors. If you are really bored, you can use it like an “Etch A Sketch“.

This gives me a nice rectangle that establishes the laser’s maximum limits.
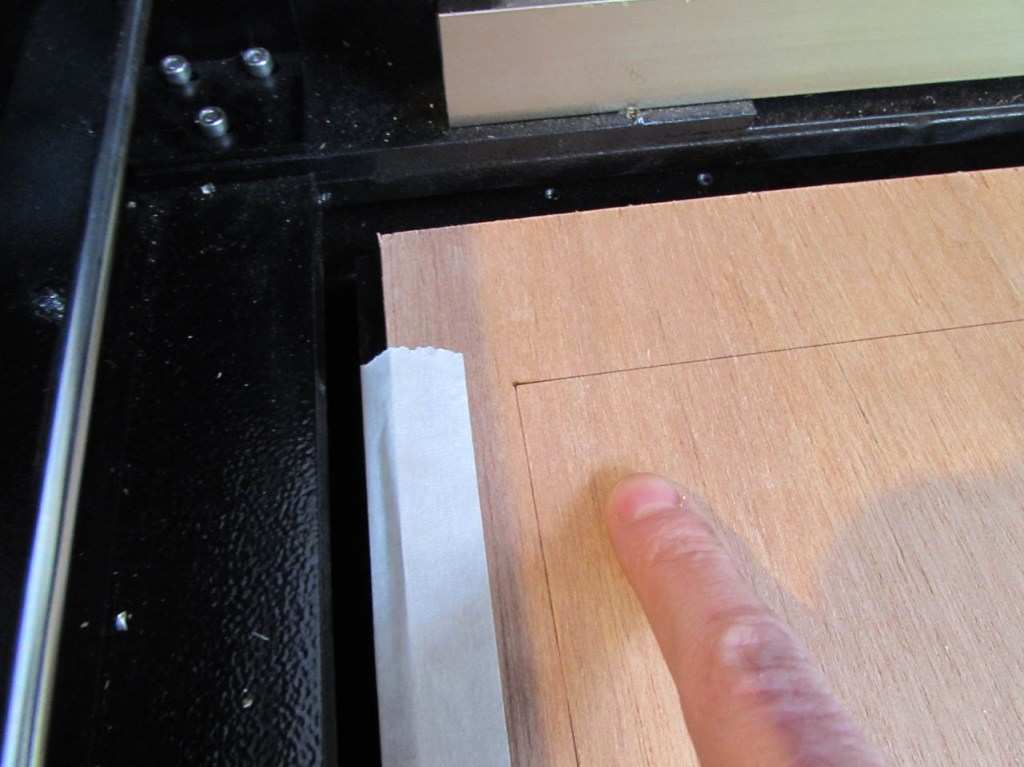
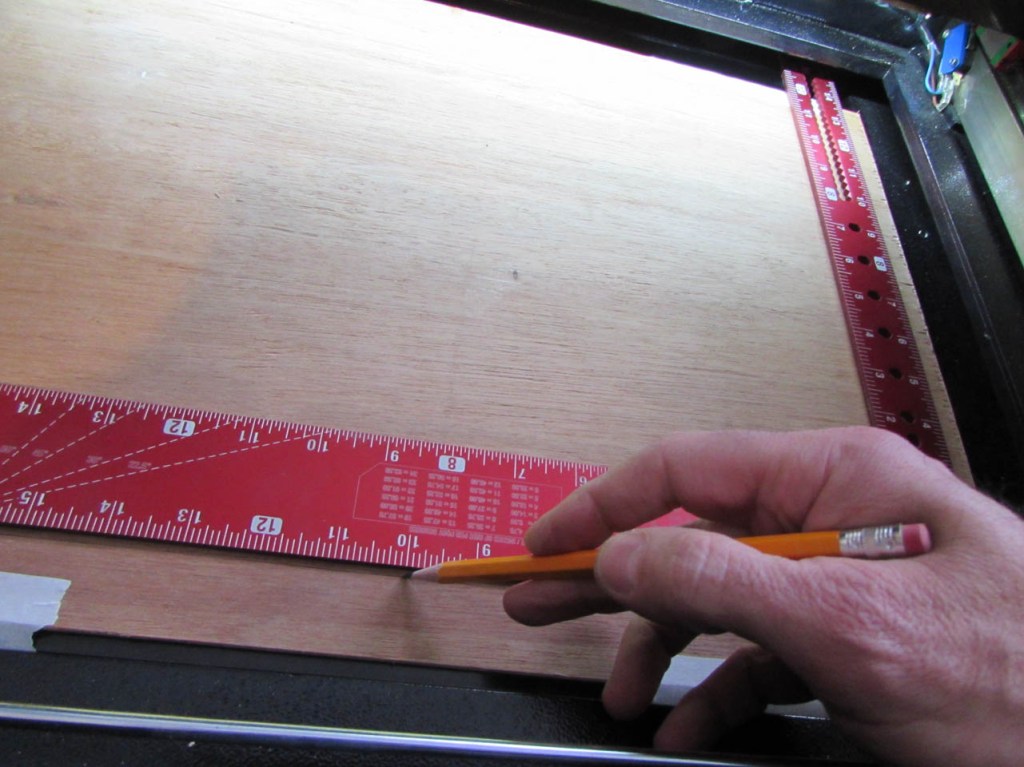
I can create a vector file that draws a grid with dimensions and laser it onto the plywood. This would enable me to easily align material to the table for accurate engraving. I am not in the mood to do that today so I just locate the middle of each side and draw a center line in both directions.

My main reason for locating the center is because the mirror is larger than my maximum limits of 12″x20″. I have room to fit larger thin materials but I need to orient it so that I can place my images in the correct locations, especially since I am engraving both sides.
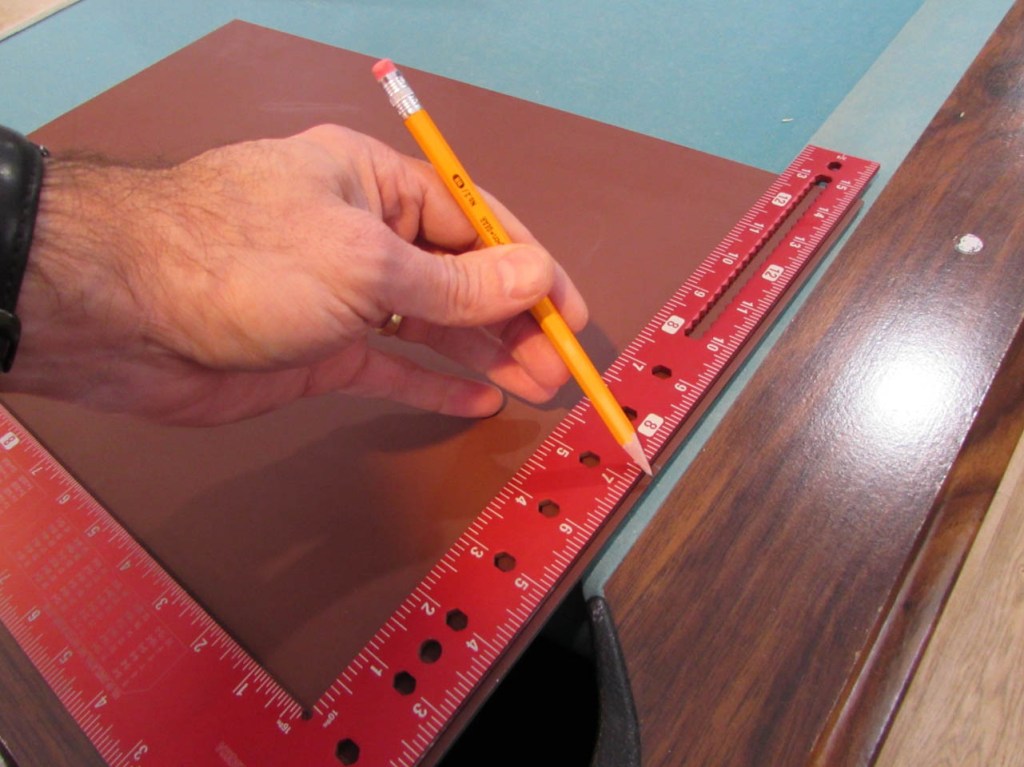
I marked the center points on the back of the mirror and aligned the marks with the center marks on the plywood.

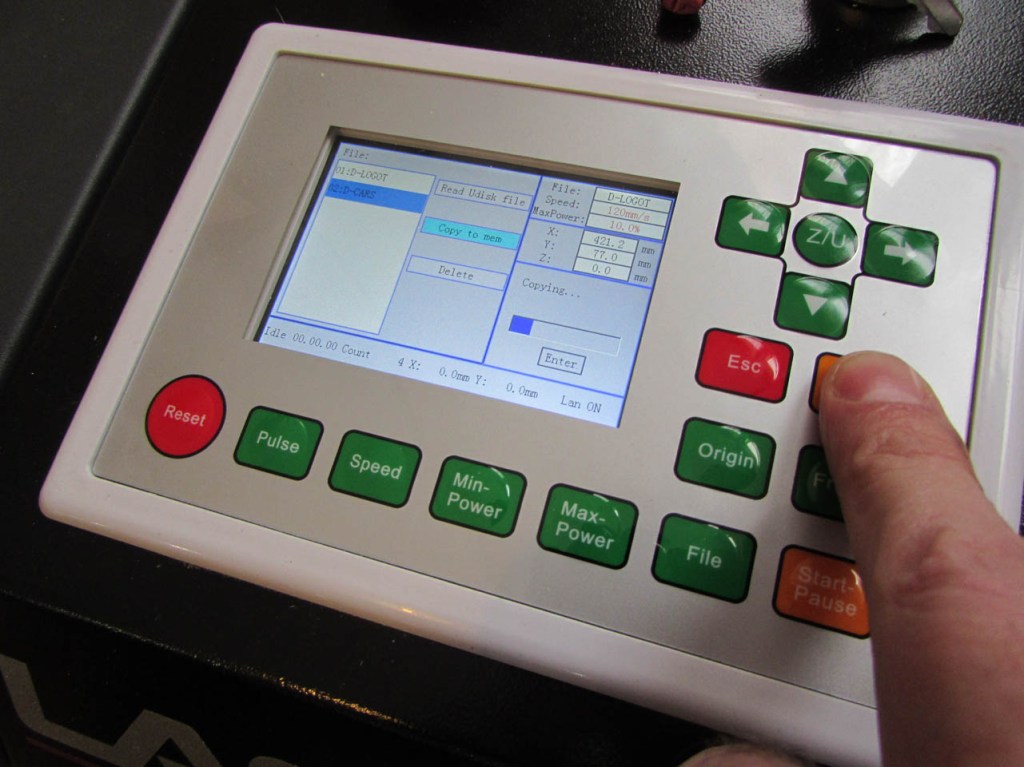
Then I loaded up my prepared files and started the laser engraving. I was going to list my power and speed settings but they are subjective. I will explain why.

My intent was to merely burn through the coating on the back and leave clear glass. For that, I would have had to reduce the power and increase the speed. What I actually did was burn through the coating, then burned a bit further, resulting in etched glass. No point in listing the incorrect settings… I keep looking for a list of settings but they only exist where the person making the list can guarantee that you are using the exact same media every time. In this case, I only have one mirror, like this, so I have to get it right the first time or live with it. Personally, I like the way it looks, it just was not what I wanted for this project.


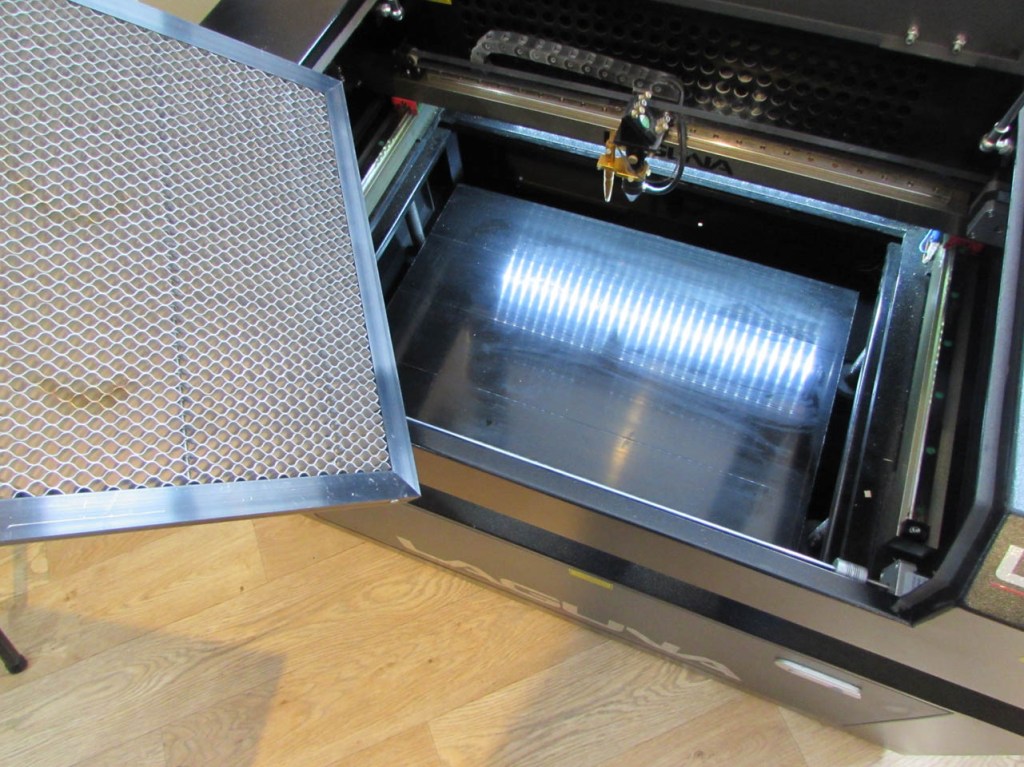
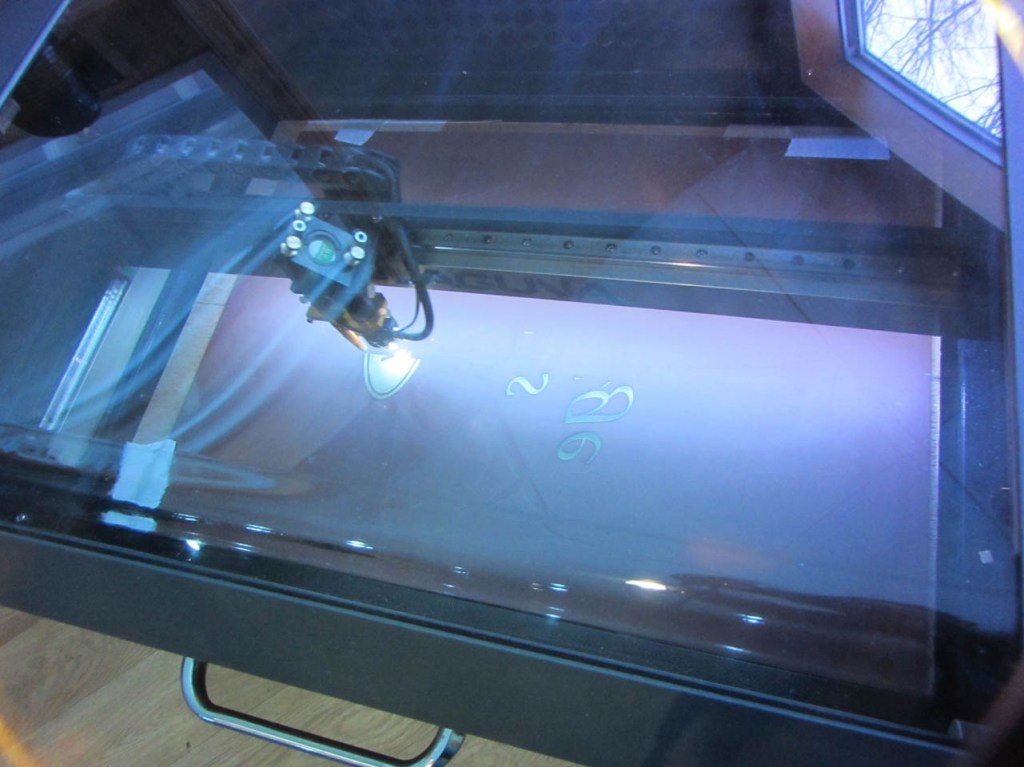
After the back was done, I flipped the mirror over and aligned the centers again. This time I wanted a good etch on the glass so I slowed it down and increased the power. You can see the results in the picture below.

One cool effect that I had not anticipated was that light cast through the etching on the back glows nicely through the front. This would be cool if I were making a back-lit image.

For the next phase of the project, I move over to the shop. I am going to make a frame for the mirror.
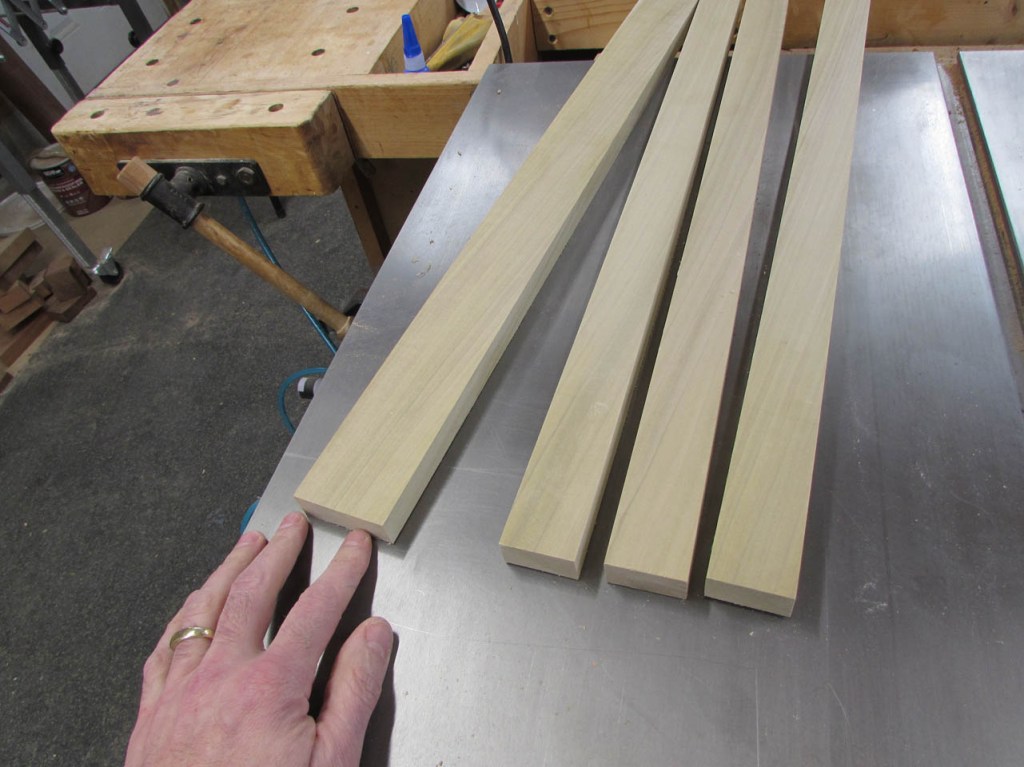
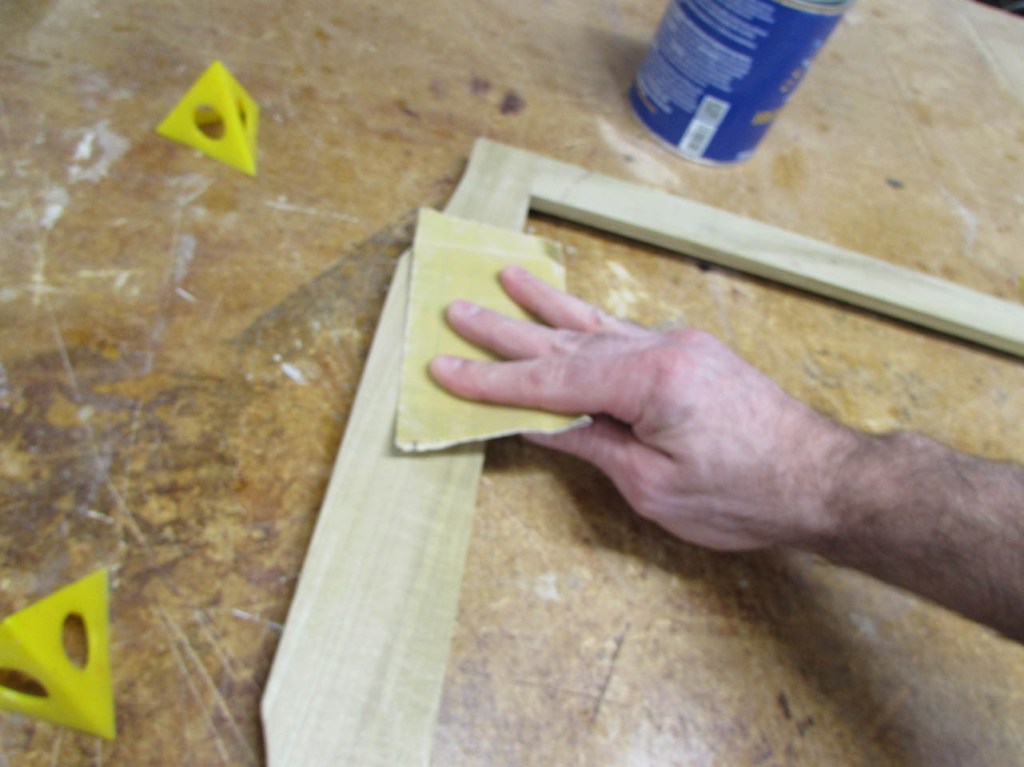
I have a nice piece of poplar that is a nice shade of green that will match the paneling in my father’s office. I cut it into three 1.5″ wide pieces and left the fourth a bit wider. That will be the top and I will figure out it’s shape later.
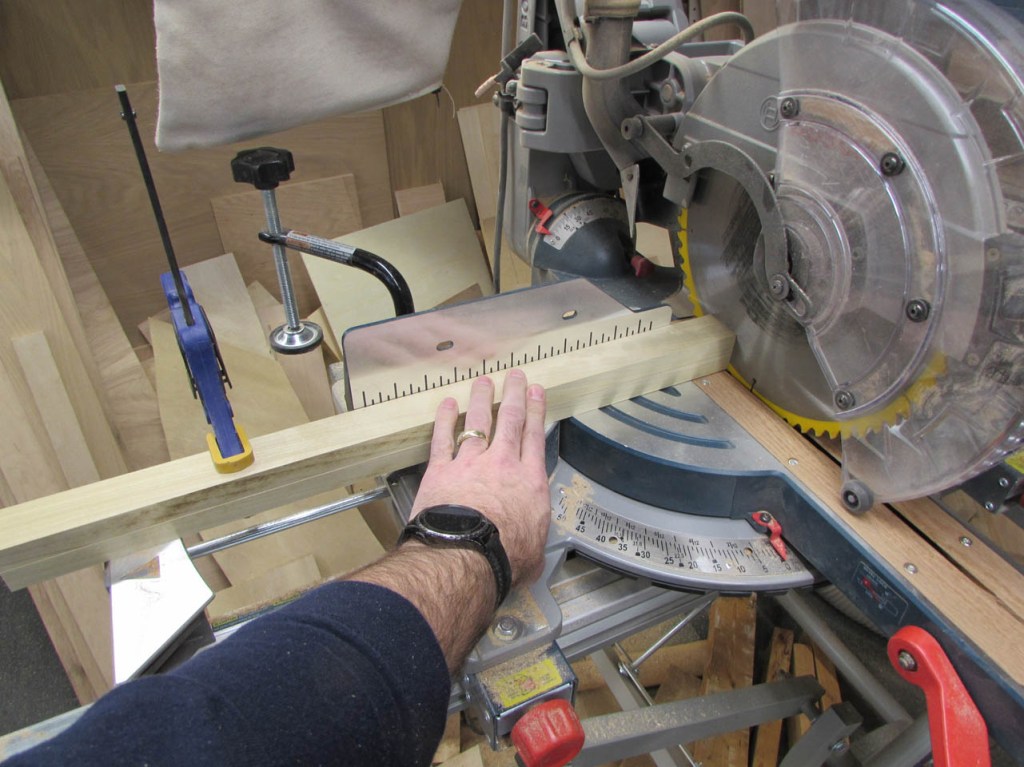
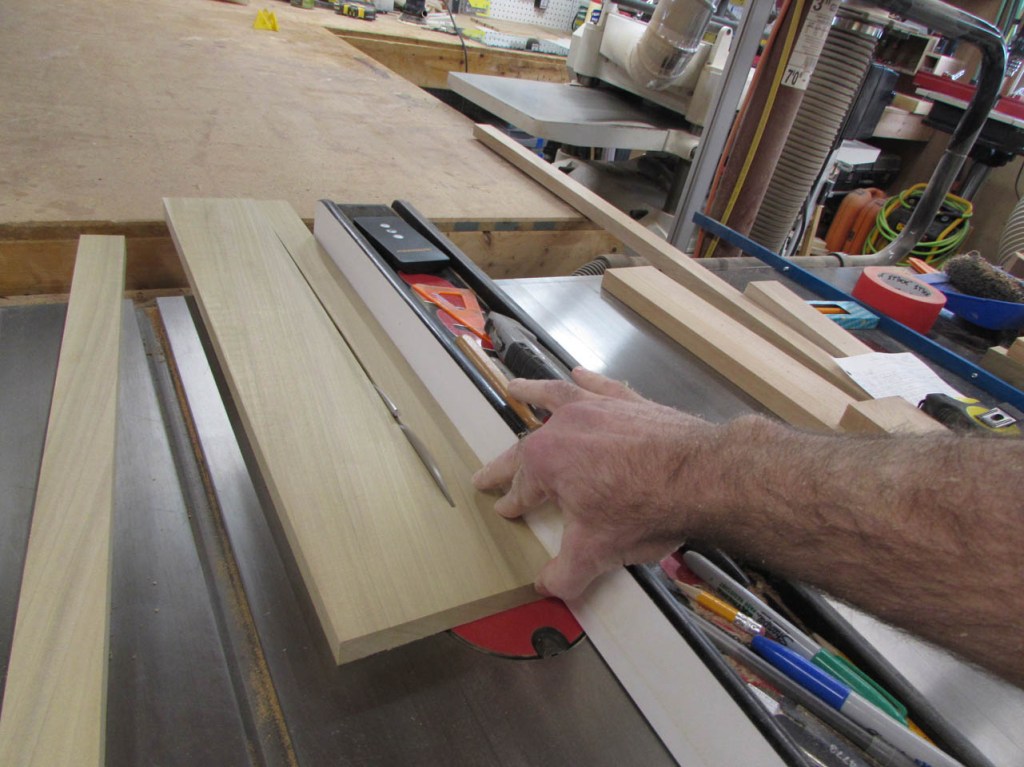
I cut the two sides to the same length on the chop saw by clamping them together first. I did the same for the top and bottom pieces which were shorter.

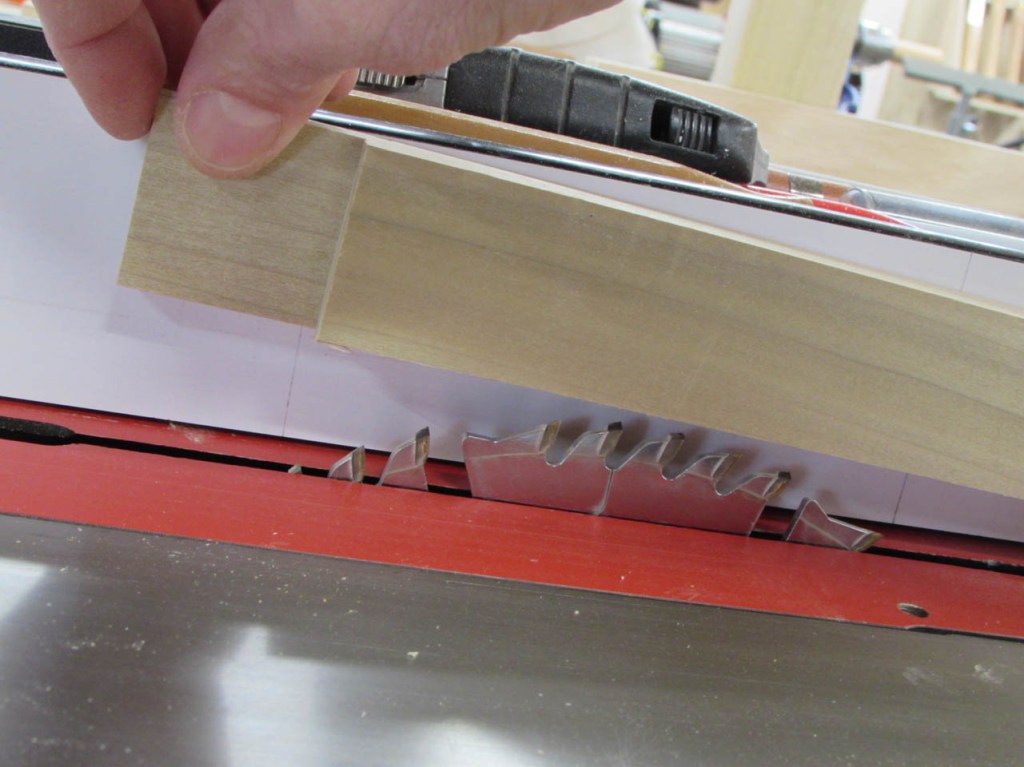
I decided to do half-lap joints on the corners so I set the table saw blade to be the height of the 1.5″ wide pieces.

I do not have a tenoning jig to safely cut the half lap, but it occurred to me that I could make one with two blocks of wood and some CA glue.

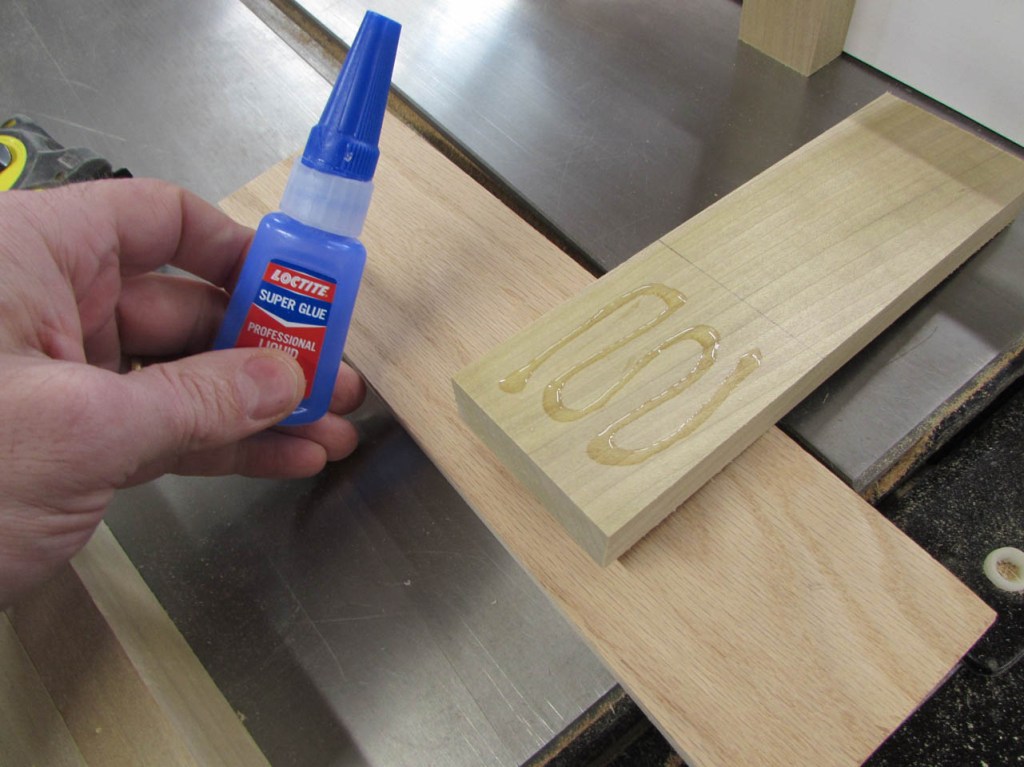
I grabbed two pieces of scrap and glued them in place around the board I want to cut.

Then I used the sacrificial jig to easily guide the first cut.

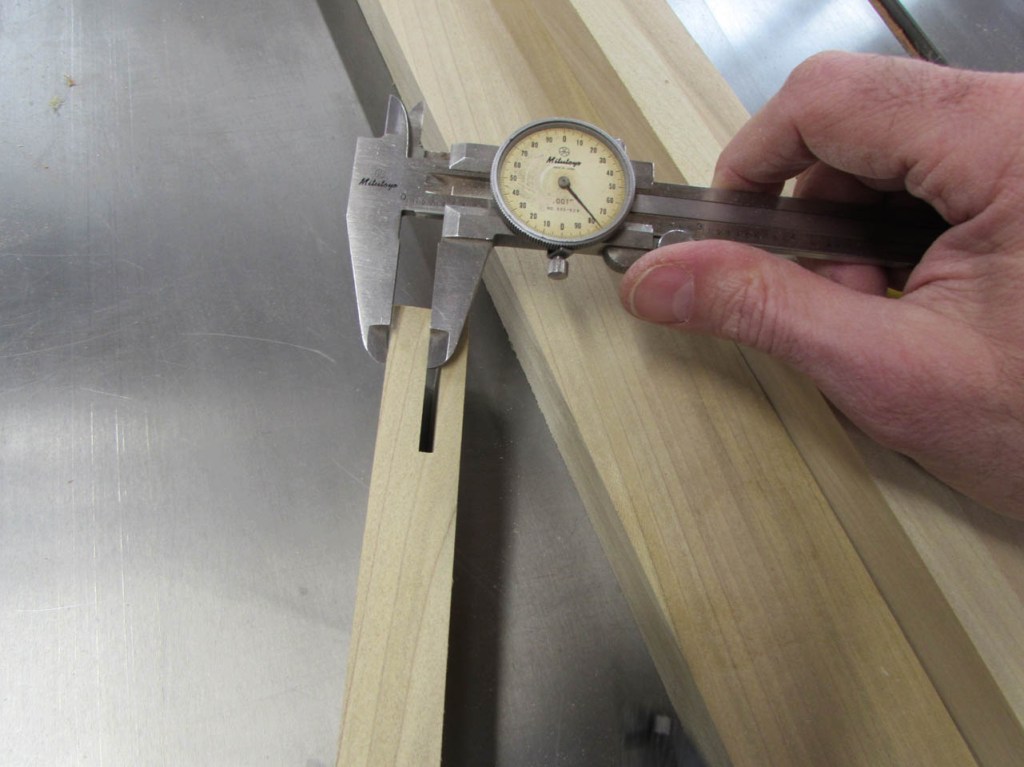
After measuring to insure that I was exactly halfway through the material, I cut all the rest of the sides of the frame.

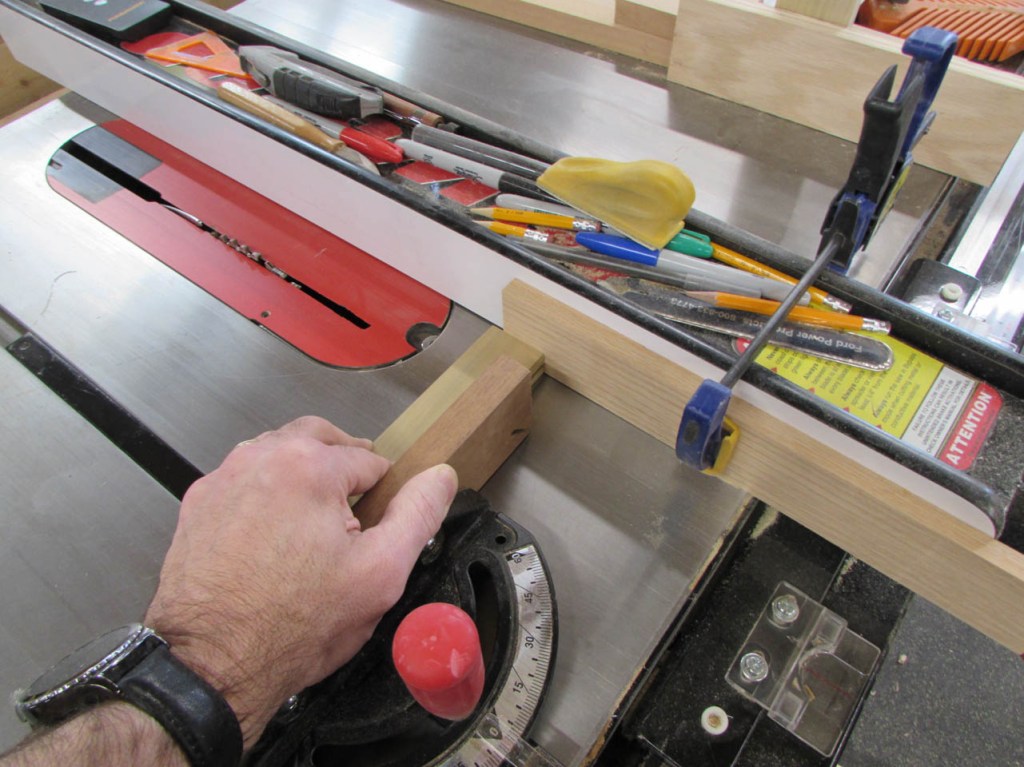
To cut away the rest of the half-lap, I attached a stop block to my fence and used my miter gauge to cut the rest of the notch.

This method worked really well and the corners fit together perfectly.


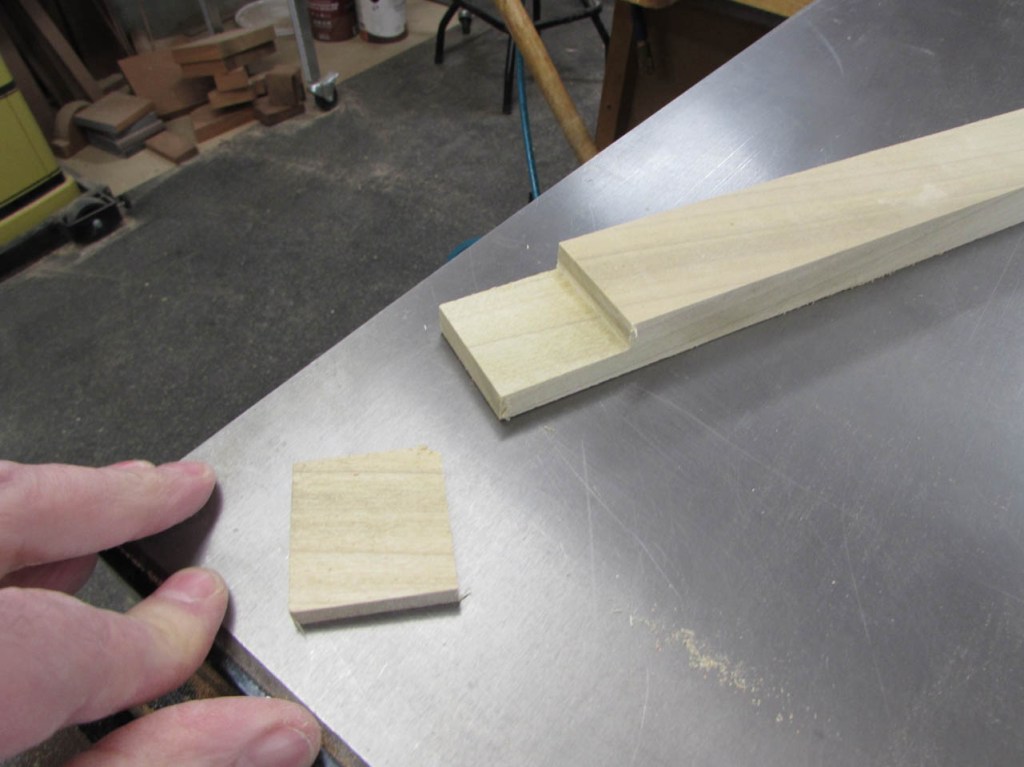
I need to create a step on the back side of the frame, 1/4″ deep for the plywood backer and 1/8″ deep for the mirror. For the short pieces, this was easy, I set the blade depth to 3/4″ and moved the fence to cut all the way down the back of the top and bottom strips.

On the longer sides, I have to start and stop the cut before the ends. If I cut all the way through, I will have to back-fill the ends with pieces later. To create the start and stop points, I used a small square to project lines onto my fence that marked the edges of the saw blade, then I carefully dropped the board down onto the moving blade and stopped the saw blade when I reached the next mark.
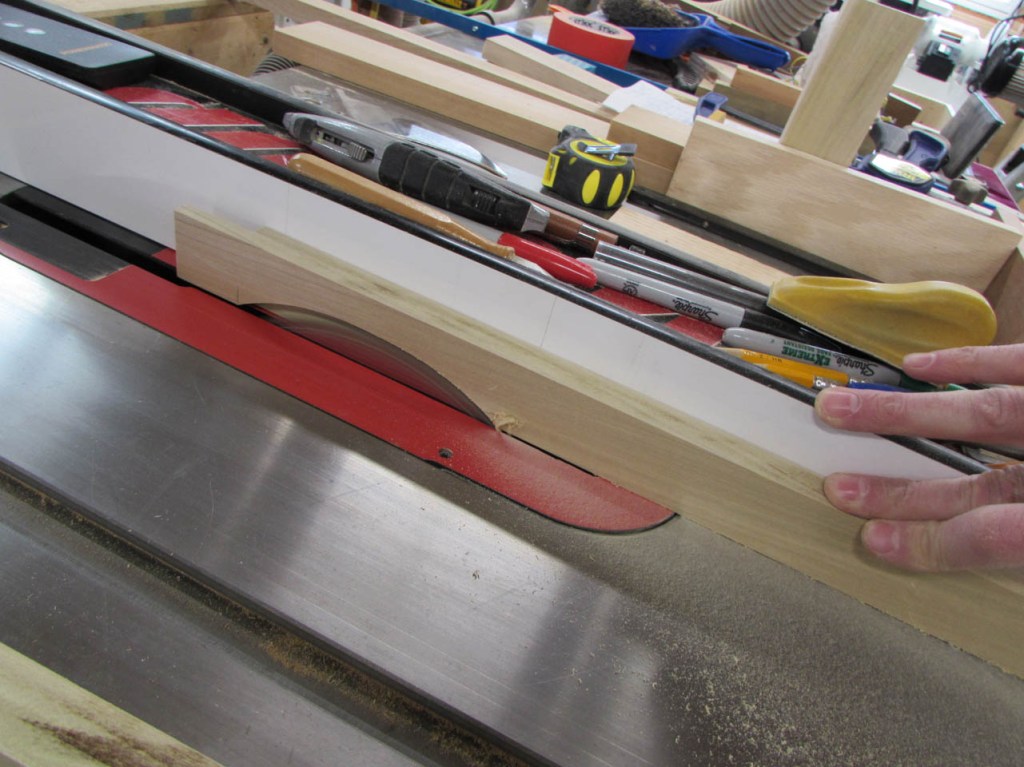
You can see it better in these pictures.
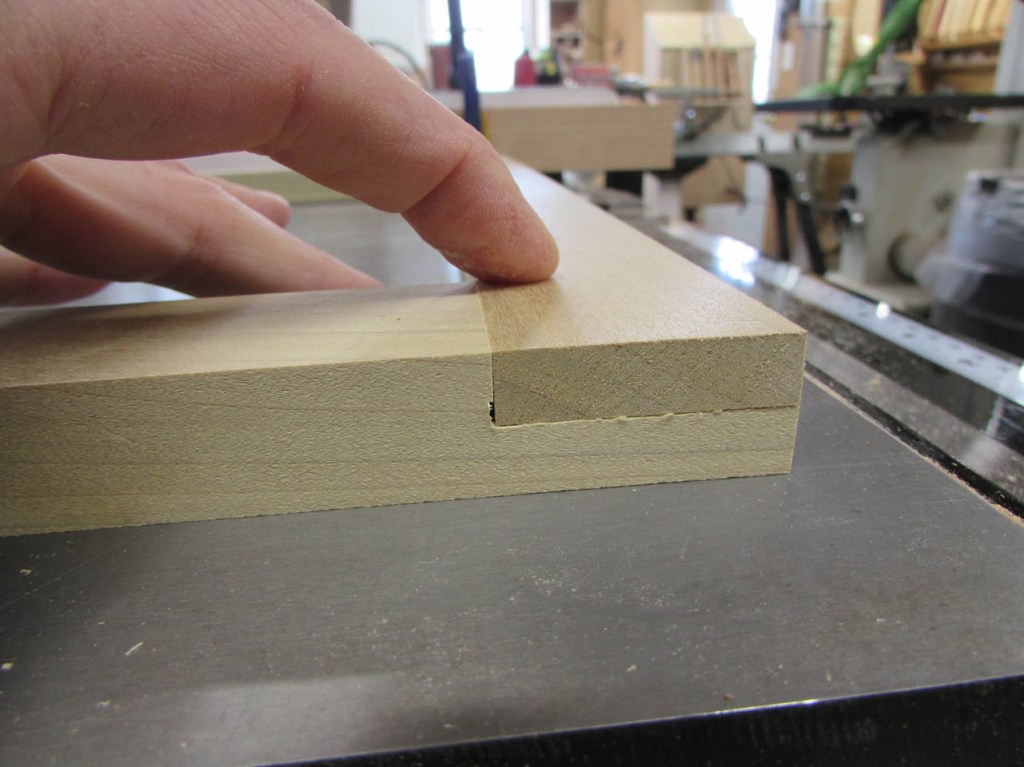
After the first step was created, I lowered the blade and moved the fence to make the second step for the mirror.

The layup below shows you what I was looking for.


Since the saw blade does not cut square corners, I have to chisel them out by hand. I marked the corners that still have to be removed.

Then I clamped down the frame and gently pared away the waste material with a very sharp chisel.


I did the same for the lower step as well. It may not be pretty but this area will not be seen when everything is assembled.


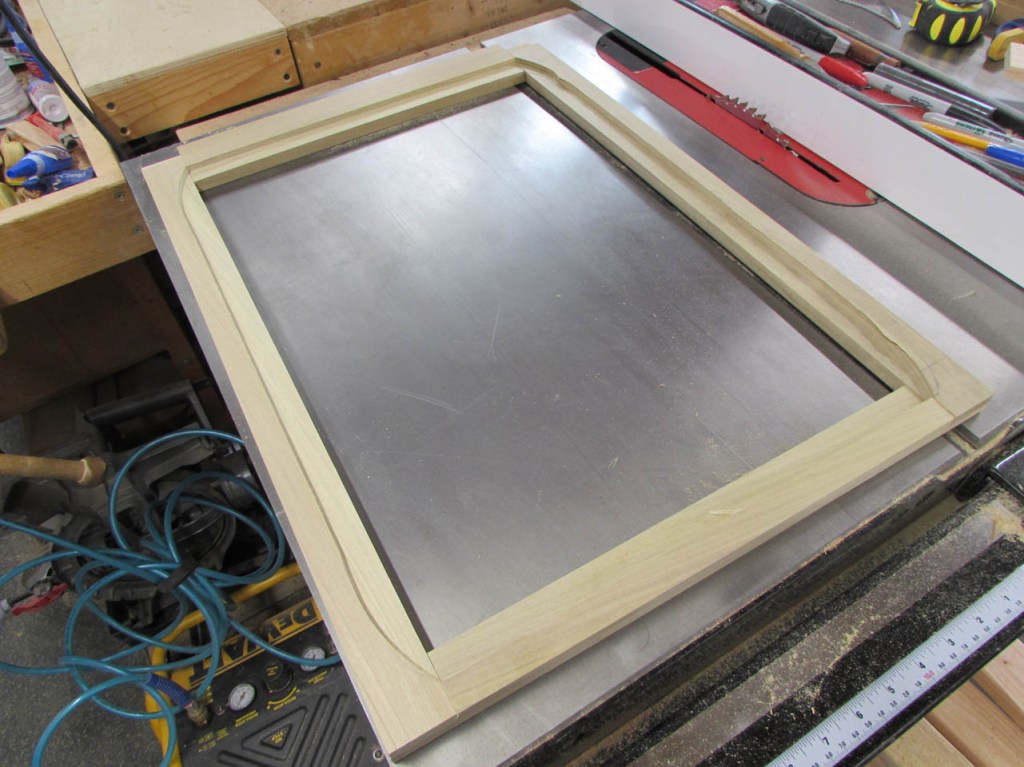
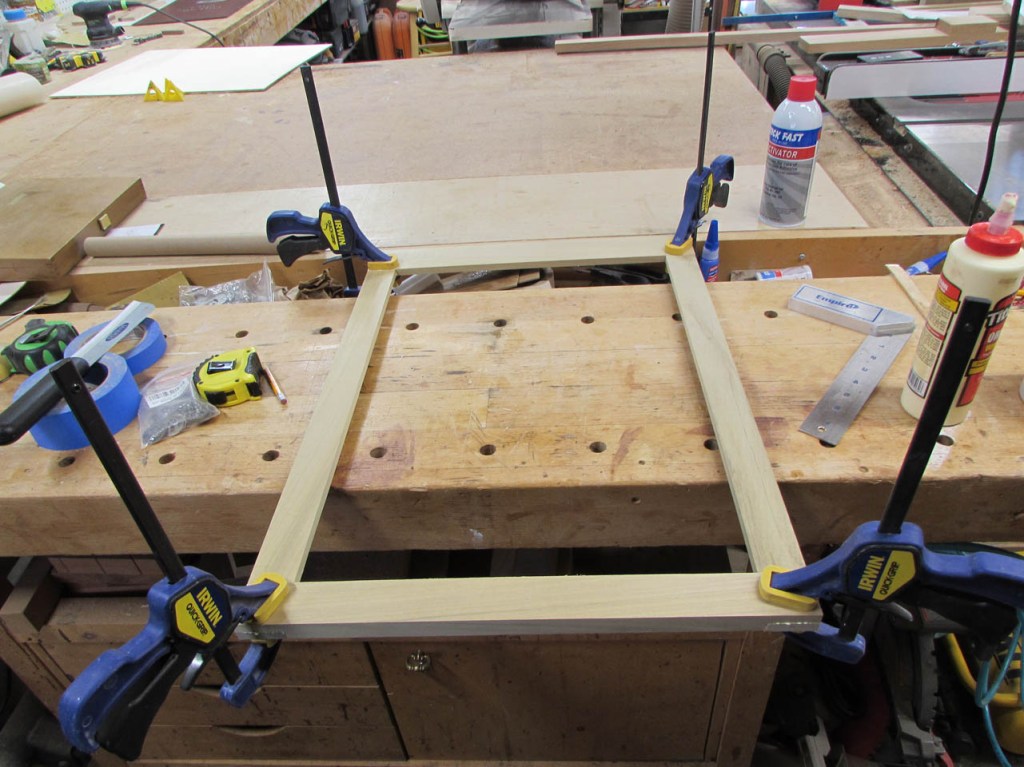
I test fit the mirror, then started applying glue to the first half-lap.


I worked one corner at a time, carefully verifying that each corner was perfectly square before and after clamping.
After it was clamped, I measured the larger step to get the final dimension for the plywood backer and cut it down to size.

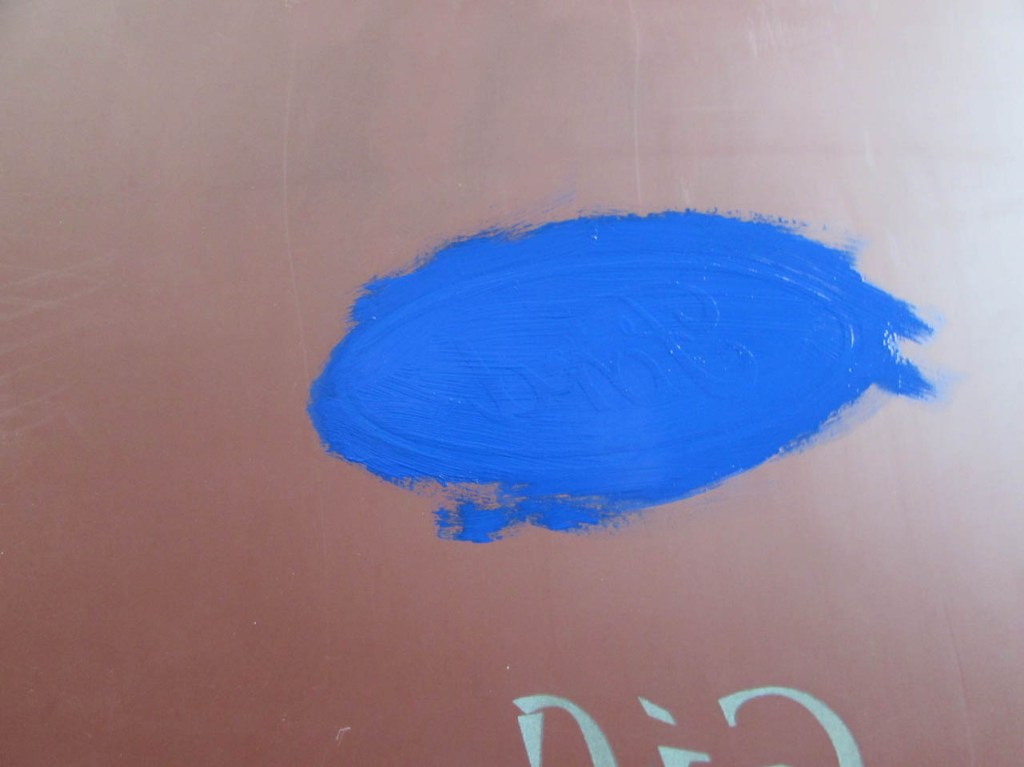
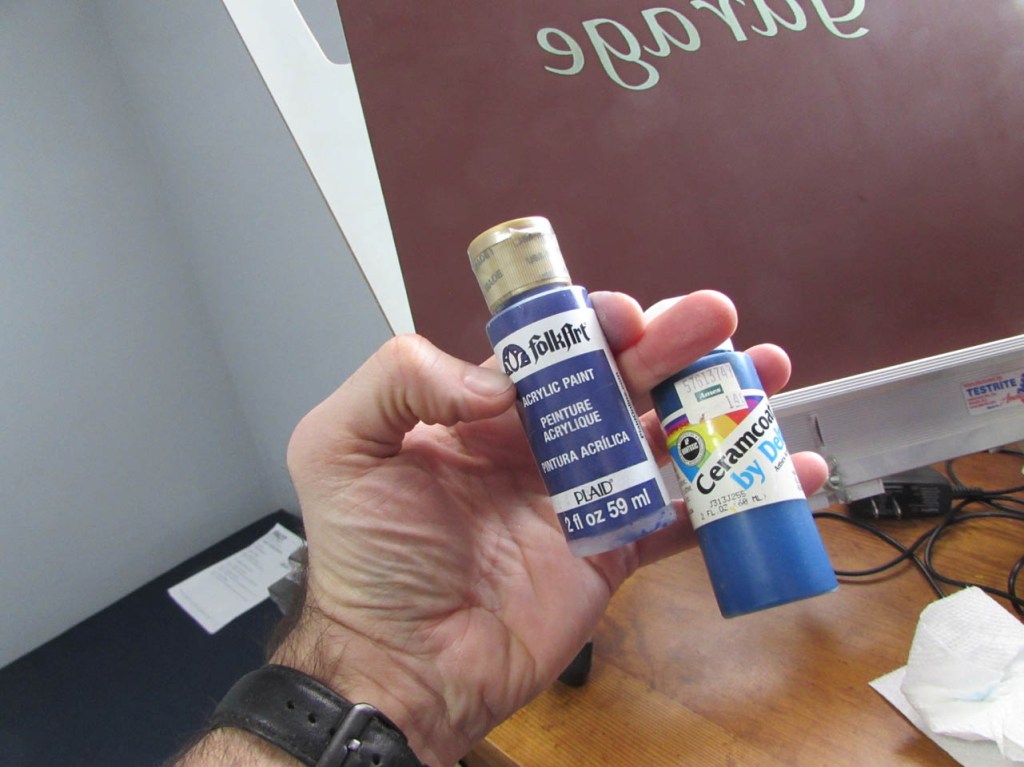
The glue is still drying so it was time to experiment. Originally I wanted to leave clear glass behind when removing the coating on the back. This was because I intended to paint the glass and have a solid color there. With the glass etched, I do not know what it will look like. I decided to use some blue and red tape to simulate paint and see if there was any color contrast through the etching.

The blue was definitely more visible, leading me to assume that darker colors would work better.


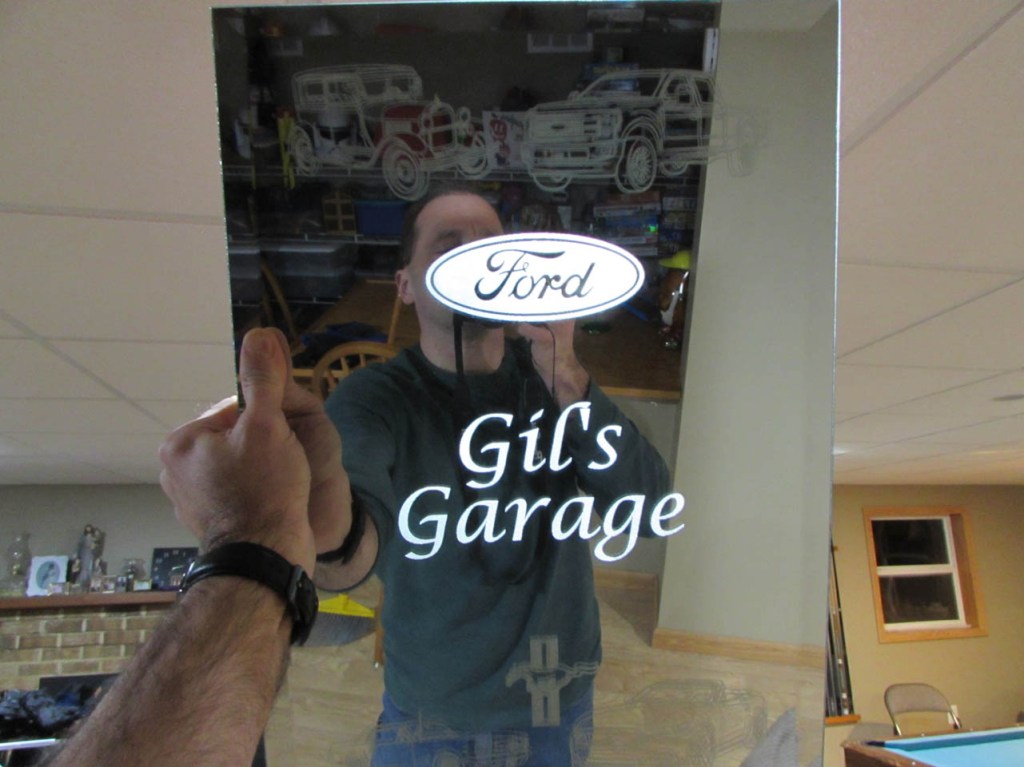
I opted to use a blue for the Ford logo to match Ford’s color.
A little frosty, but I like it.
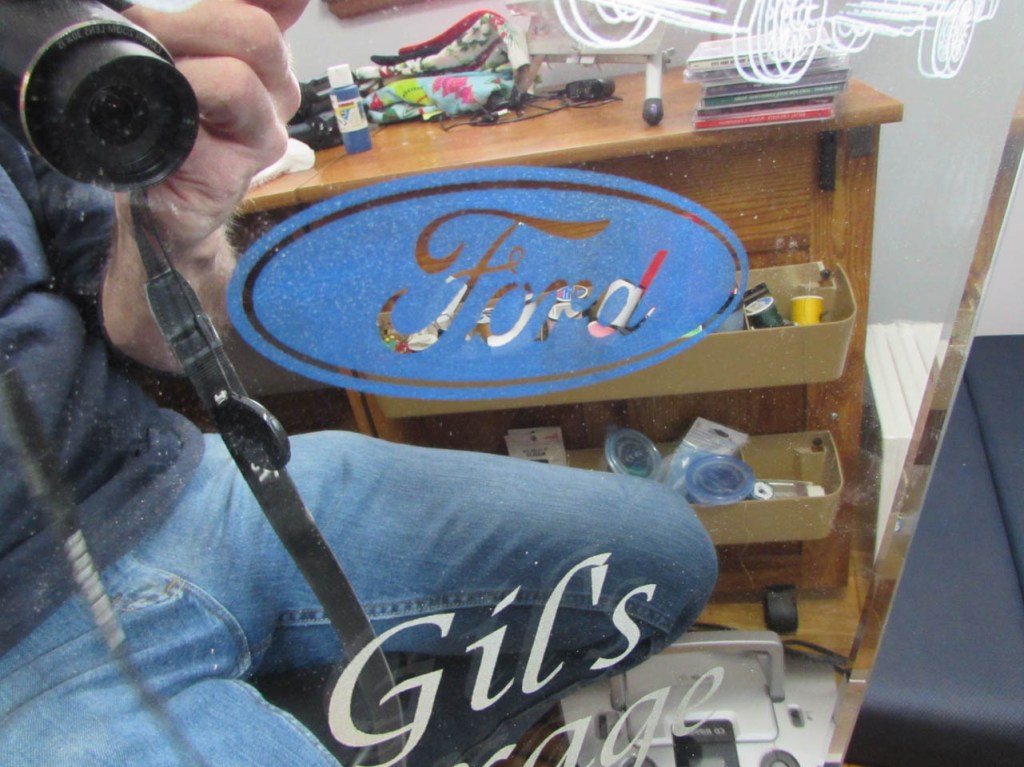
For “Gil’s garage” I chose a purple because that is my father’s favorite color.

It doesn’t look bad with a white reflection, but any other color background and the purple is kind of lost. I should have stuck with the blue…


With the paint dry, I did a test-fit of everything and flipped it over to see how it looked. I have to say that it looks a lot better in person than I seem to be able to capture on the camera. If anyone knows how to photograph a mirror properly, please let me know.

I am happy with the fit though. Now it is time to trim the top.

At the very least, I need to hide the fact that the half-lap does not cover the back entirely at the top since it is wider. I used my curved card scraper as a template and marked a simple curve that just covered the notched area.

I cut away the curve on the bandsaw and was happy with the simple look.


A quick pass on the spindle sander and the curve looked really good.


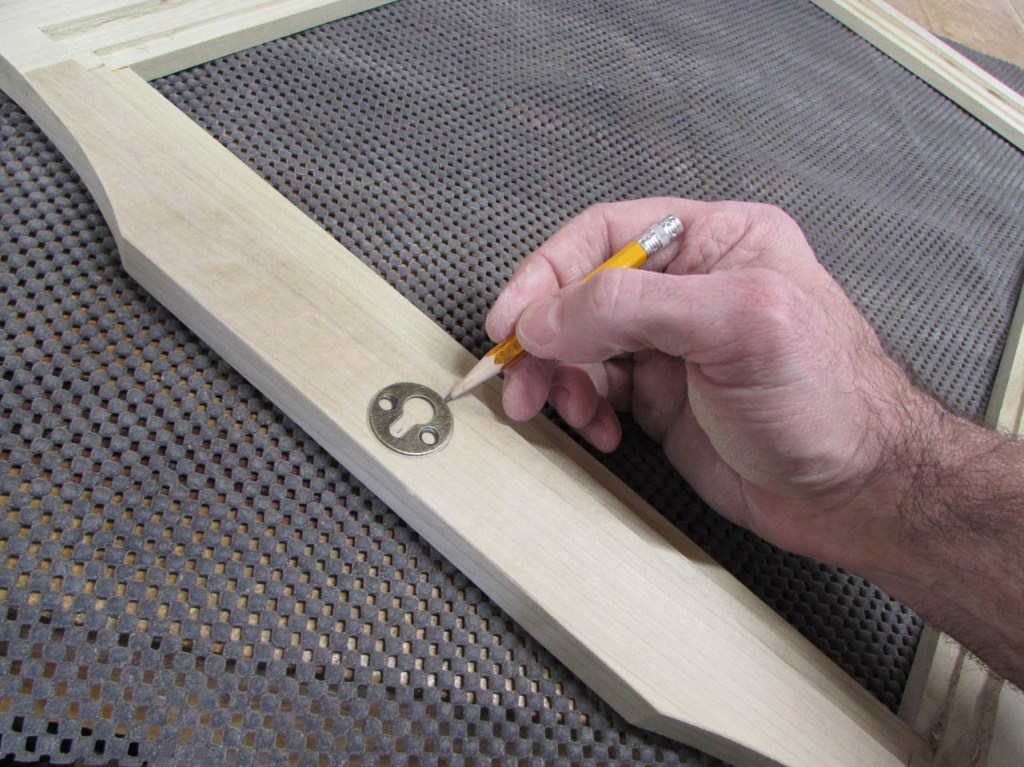
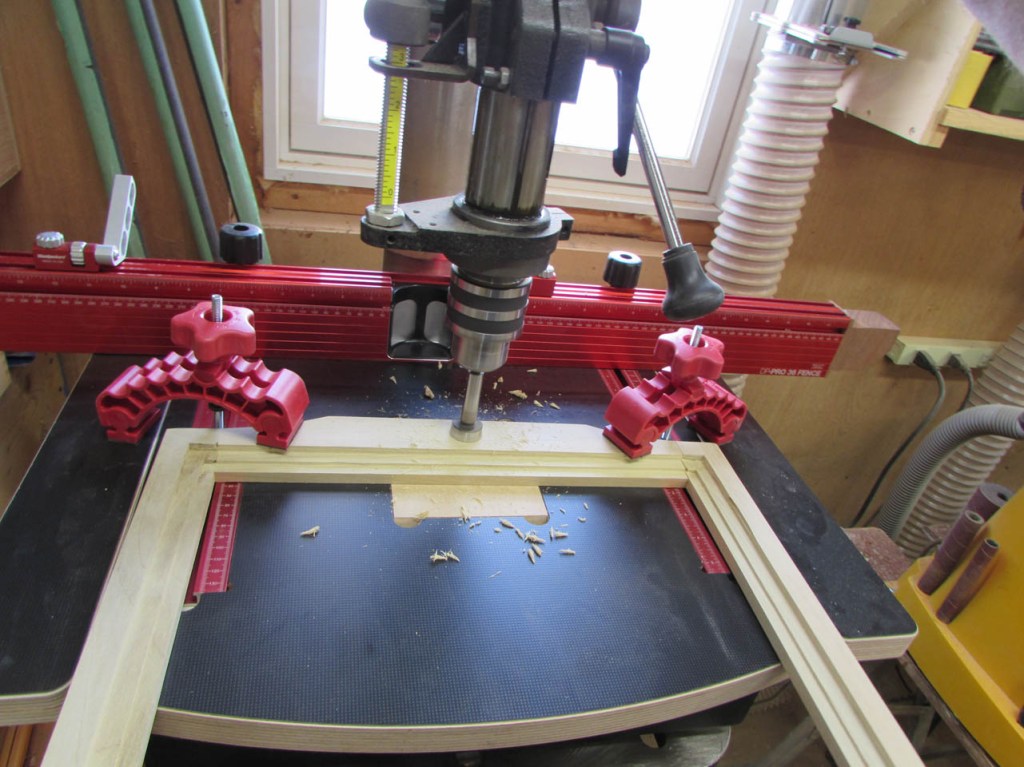
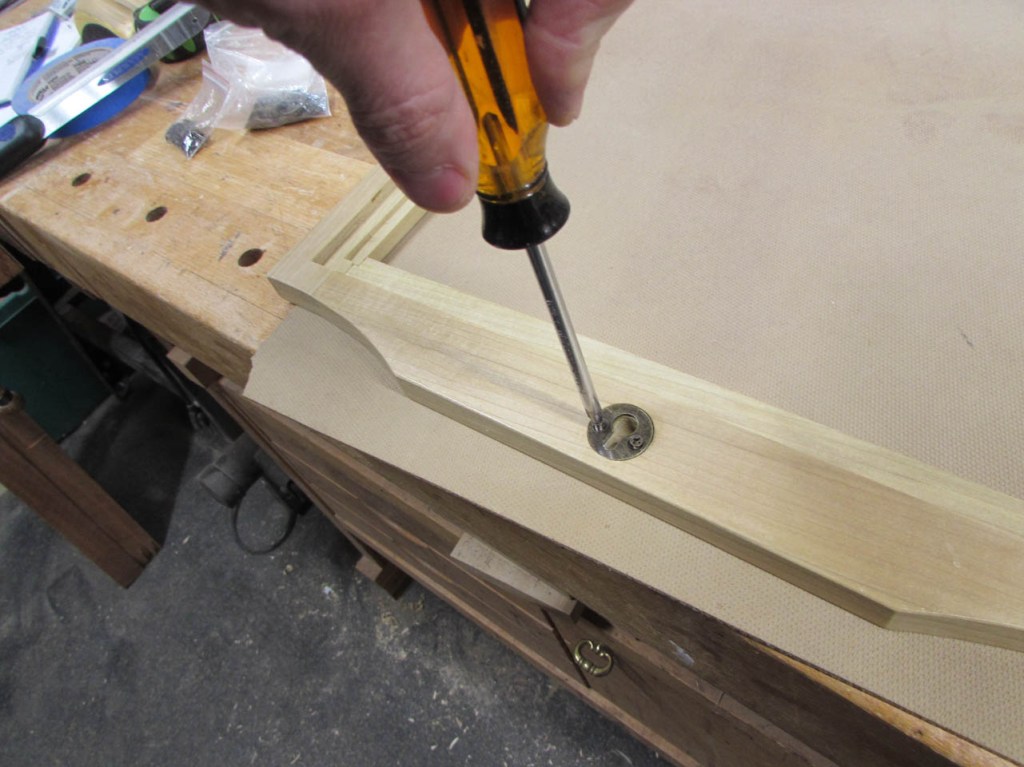
Time to sand it all smooth and mark the location of the hanger plate.
I got to use my new knuckle clamps, on the drill press table, to hold down the frame. They were really useful since the length of the frame made it difficult to hold in place while drilling a small recess for the mounting plate.
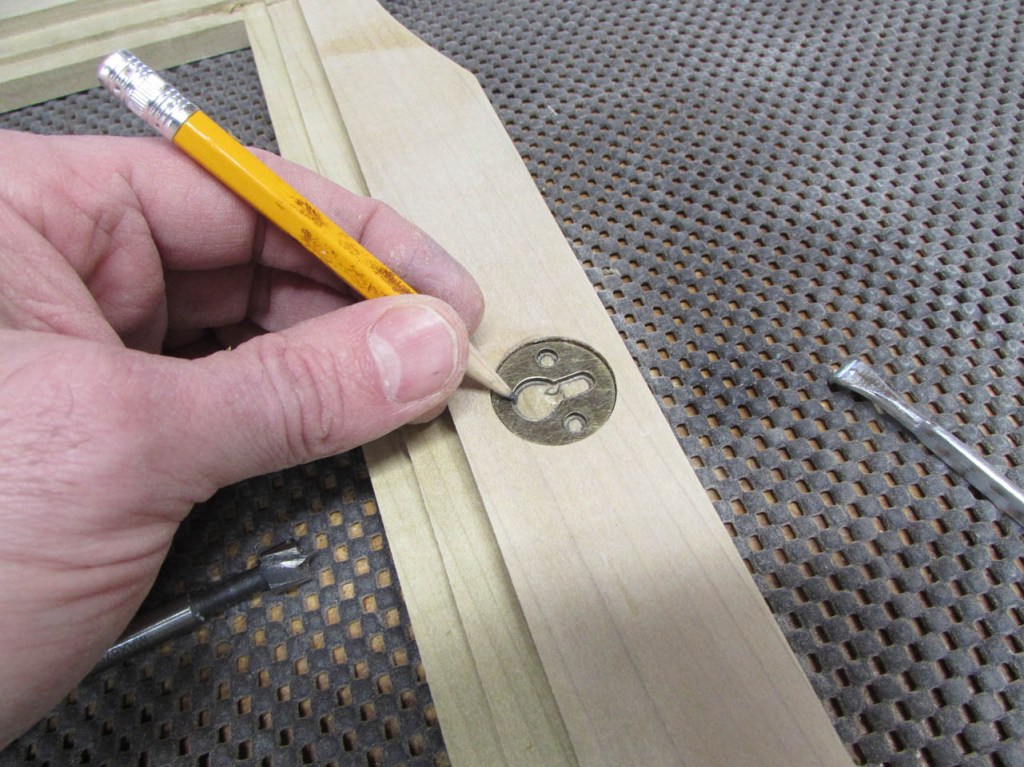
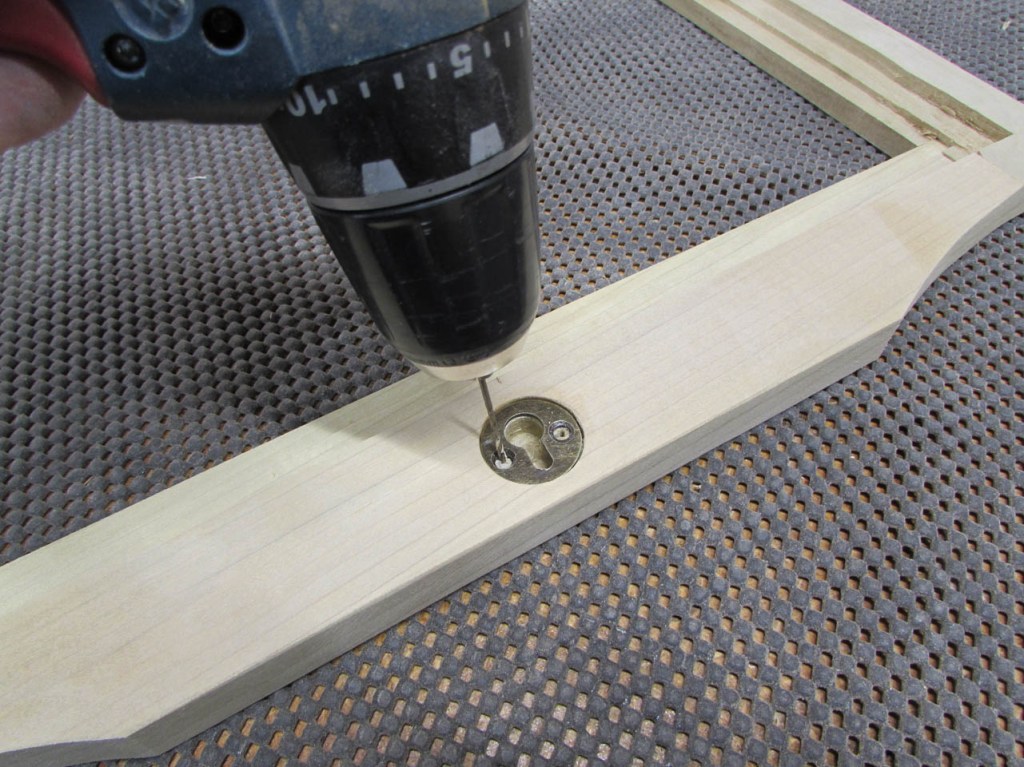
I dropped the plate back into the recess to mark the keyhole so that I could drill the 3/8″ slot below.

Then I just needed a few pilot holes so the plate could be attached after finishing.

I am using a satin, water-based polyurethane for the finish.
After the first coat, I sand down everything again with 400 grit paper to smooth out the raised grain.
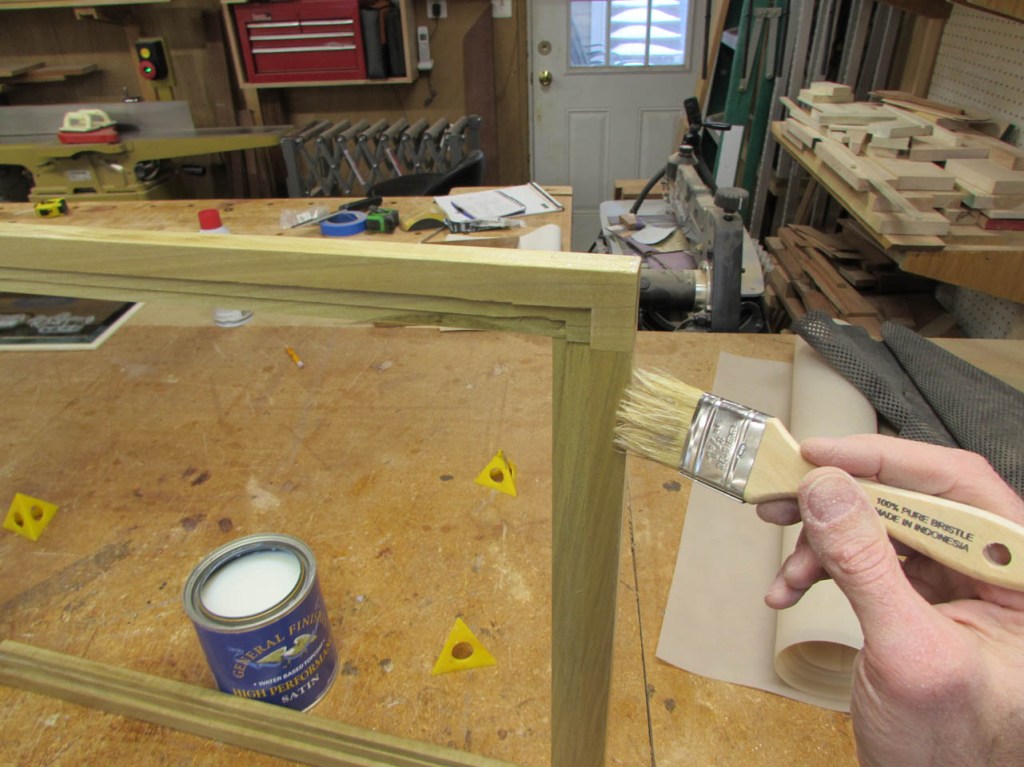
Then I brushed on the second coat.

After allowing it to dry for an hour, I attached the mounting plate.
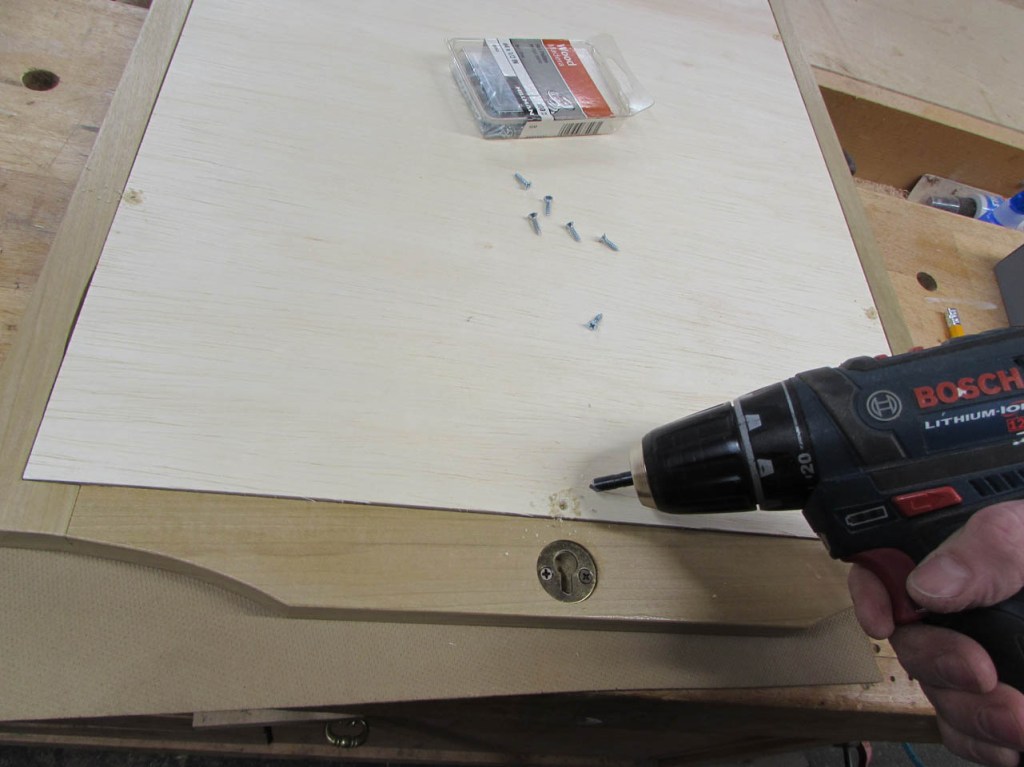
Then I installed the backer plate by pre-drilling and counter-sinking six #4 screws along the edges.


I think it turned out great. I experimented with several locations to try and get a good photo, but I was not happy with any of them.

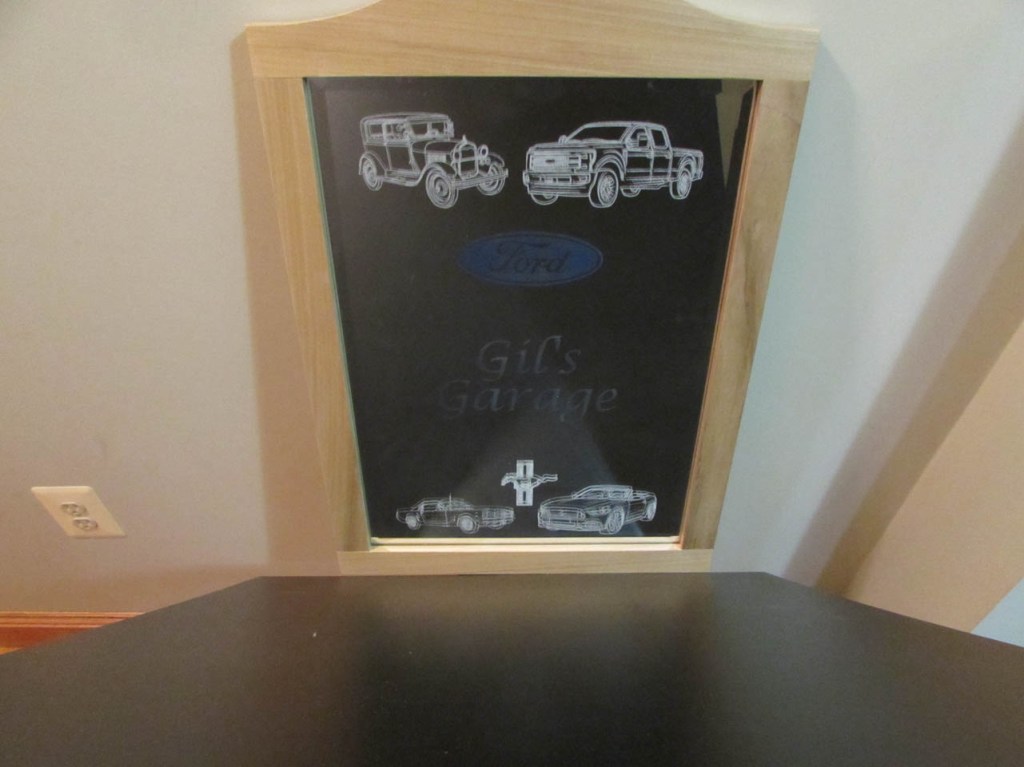
The best shot was with it laying on my bedroom floor, in the one spot that did not reflect the lights above…
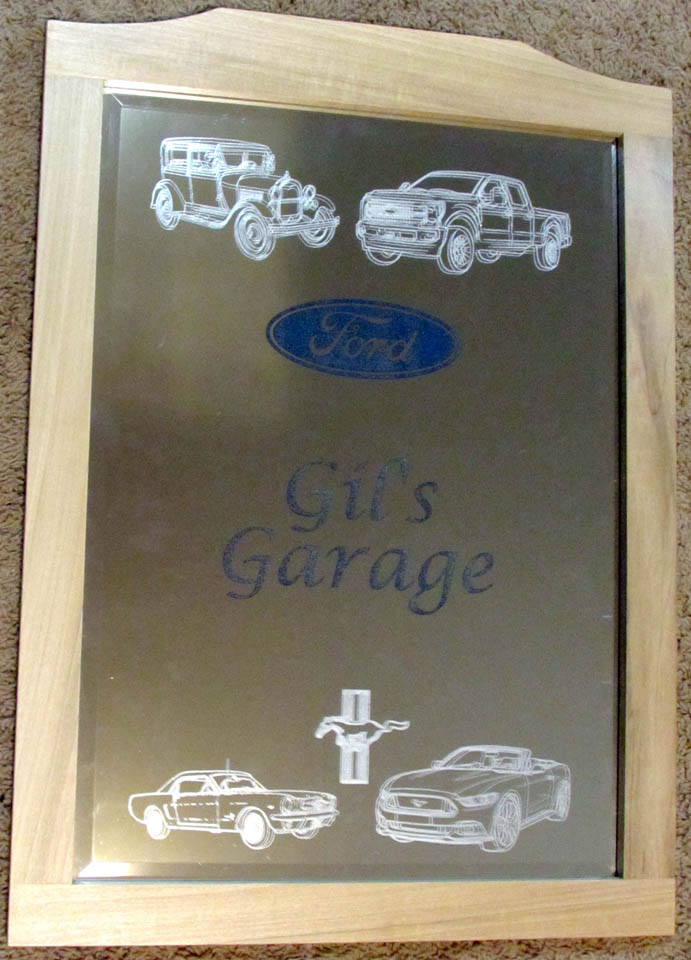
In case you are wondering, my dad likes to work on cars. He currently has three Ford Mustangs, 1965, 1966, & a 2008 convertible, two pickup trucks, including a Ford F250, and a 1929 Model A that he has been restoring. I tried to find images that were close to some of his vehicles. I hope he enjoys the mirror, I certainly learned a few things on this build, but how to photograph a mirror is not one of them…

I am sure your dad will be thrilled. Interesting project