
Cherry and sycamore segmented bowl
My wife has been coming down to the shop again lately. She has once again been working on the lathe, teaching herself how to use the different tools and how to sharpen them. I usually hang out in the shop with her, just in case she has any questions or needs some materials cut. Sometimes I work on my own projects or clean up the mess from my last project. Occasionally I just find it a good time to sit and think. I spend so much time working on other people’s projects that I have almost forgotten that this was supposed to be a hobby. What I enjoy most about my shop, and all of the tools I have collected, is the potential it offers. If I can imagine a project, I can usually find a way to make it.
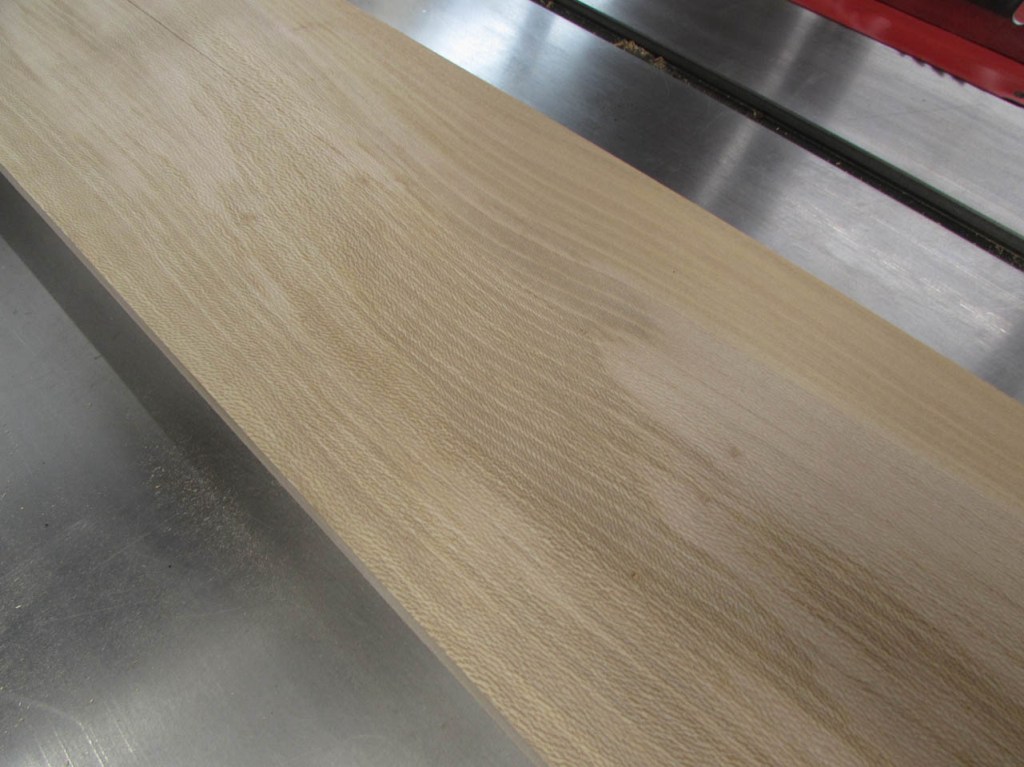
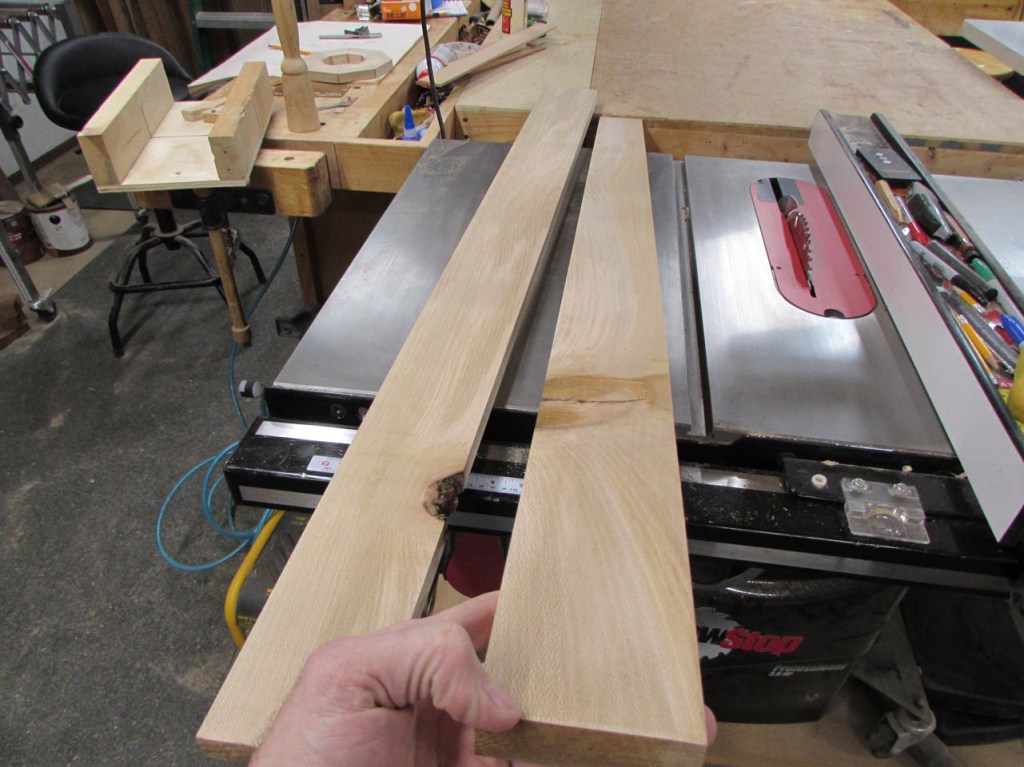
This week I was sitting in the corner of the shop, watching my wife turn acorns from a piece of cherry. The project was initially inspired by a Christmas ornament, hanging from the Christmas tree. She wanted to see if she could make one herself. It turns out that acorns are a nice project to explore using several different tools and techniques. She has made about a dozen of them and they all look different from each other, but they all look like acorns. As I was watching her play, I was wondering what would be a challenging project for myself to make. I wanted it to be something that Tracie could help with. As I was cleaning and looking at my off-cuts from other projects, I found a piece of sycamore. It is a lightweight wood that I have only worked with once before. I thought the grain would be interesting on the lathe, but it was less than 1″ thick. I decided to make a segmented bowl. I could make as many layers as I wanted so it could be deeper than 1″. Tracie enjoys turning cherry so I looked through my cherry scraps and pulled some out to incorporate as I went.
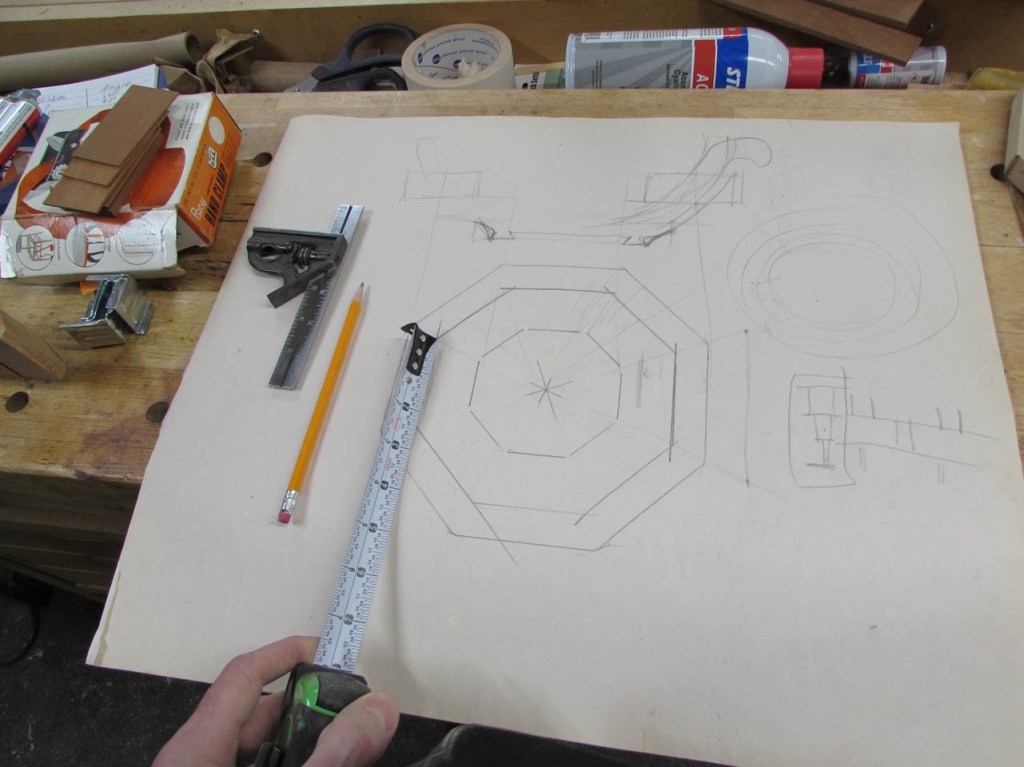
This will be a fairly complex project, but I did not turn on the computer to figure out everything first. This time, I just started cutting.
I did draw up a rudimentary plan, but it was more to explain my thoughts to my wife and see if she would be interested. The quick sketch gave me a starting point for the dimensions for the first layer.
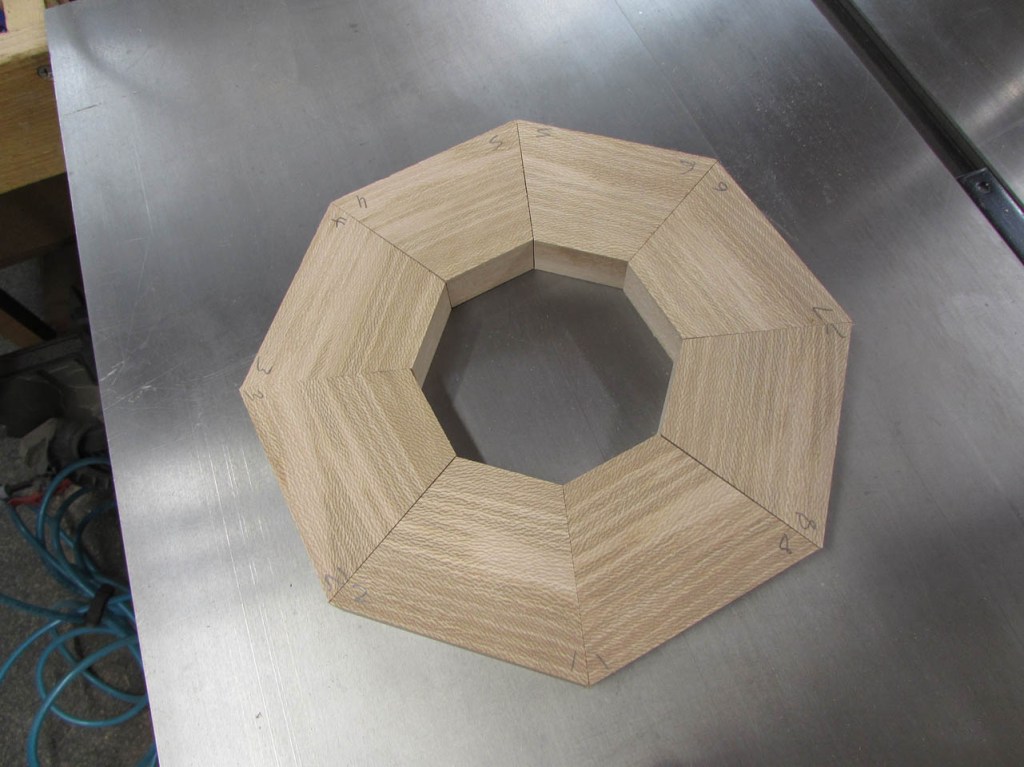
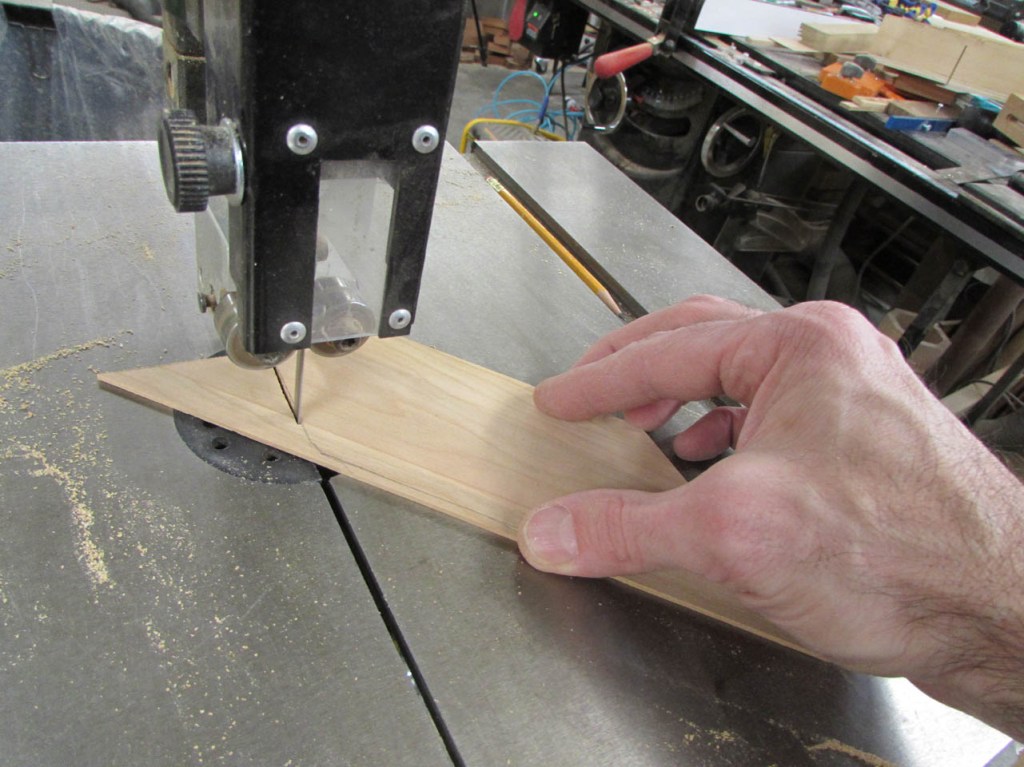
I will be cutting a bunch of pie shaped wedges and they need to be repeatable and accurate.
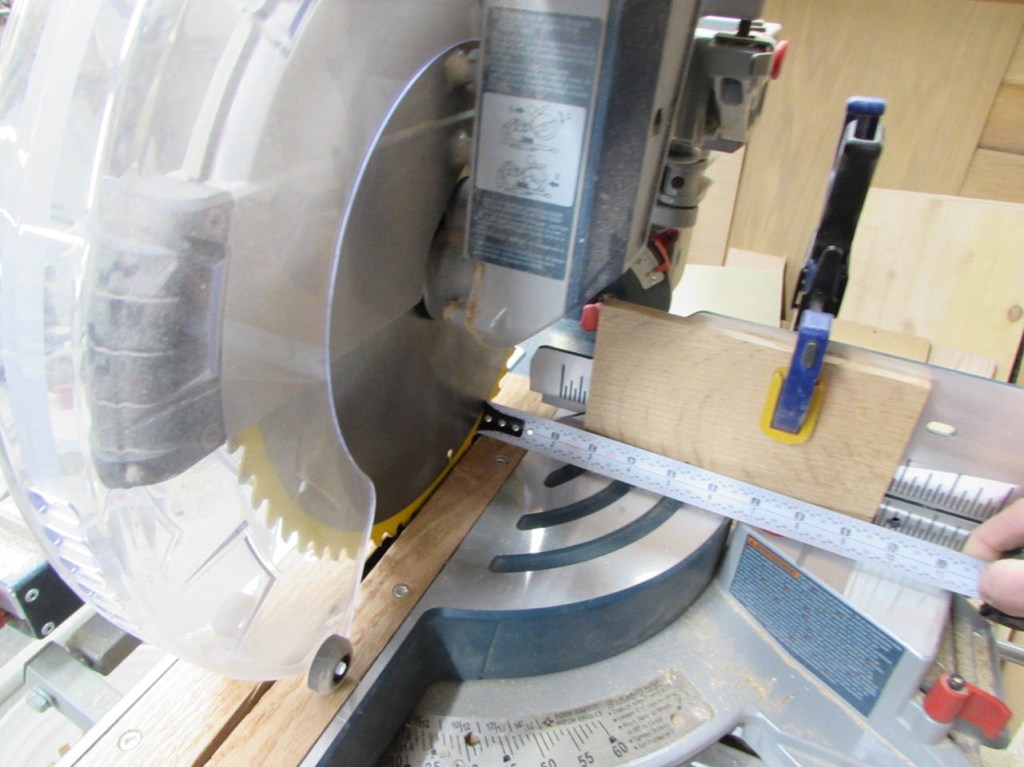
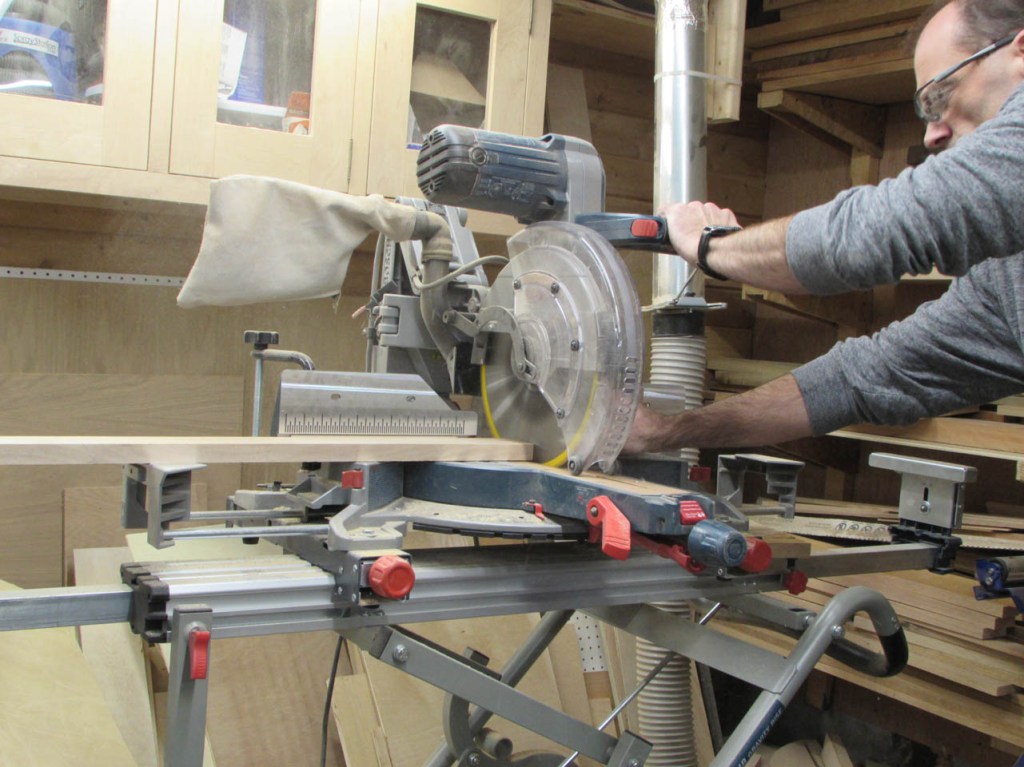
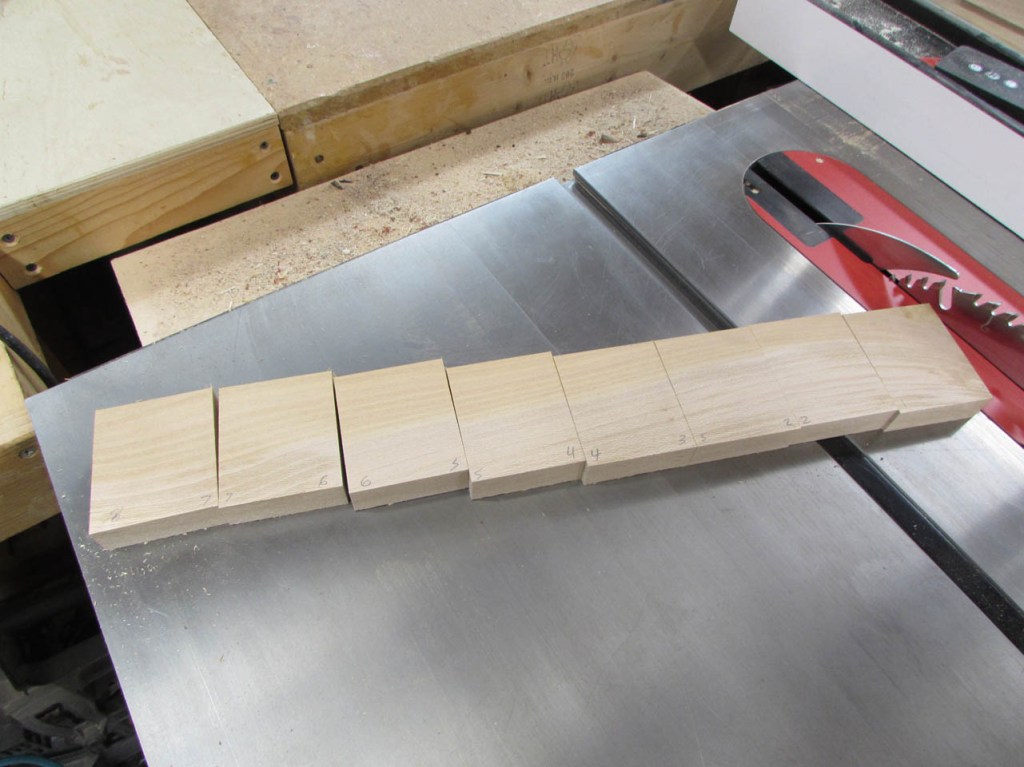
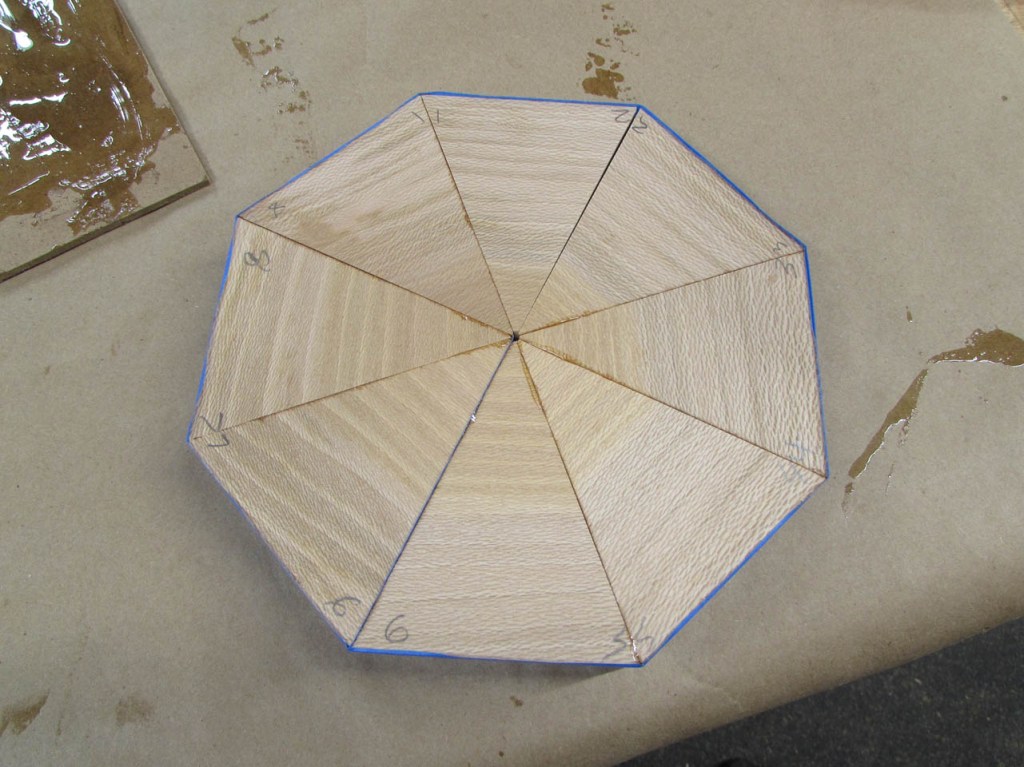
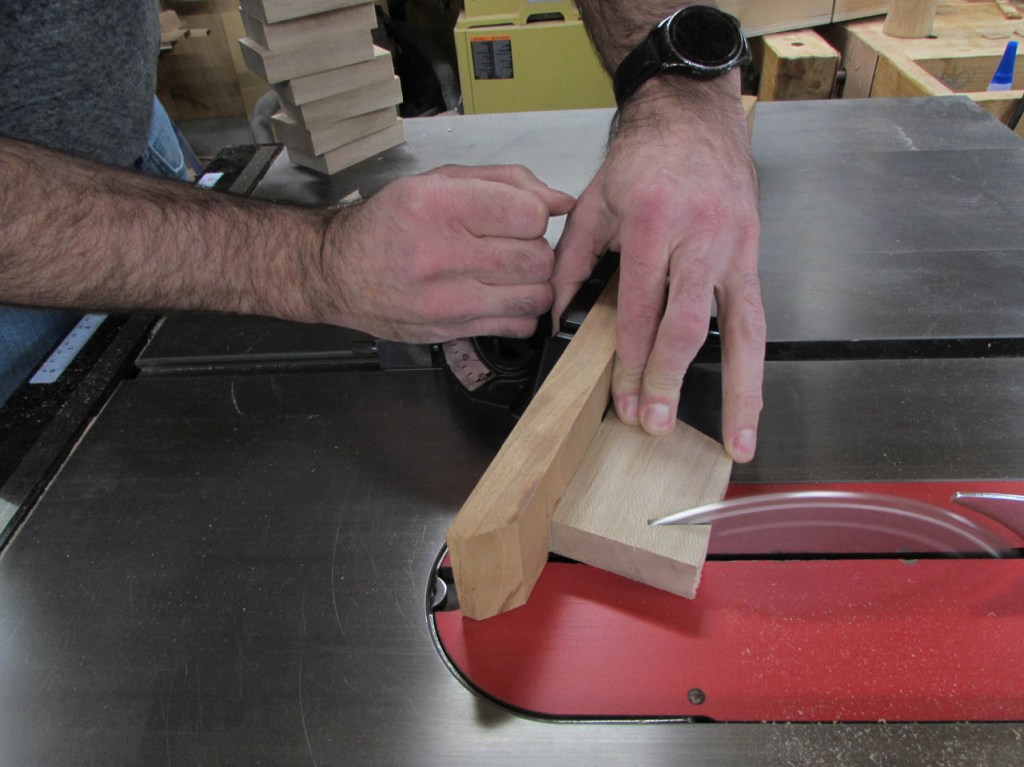
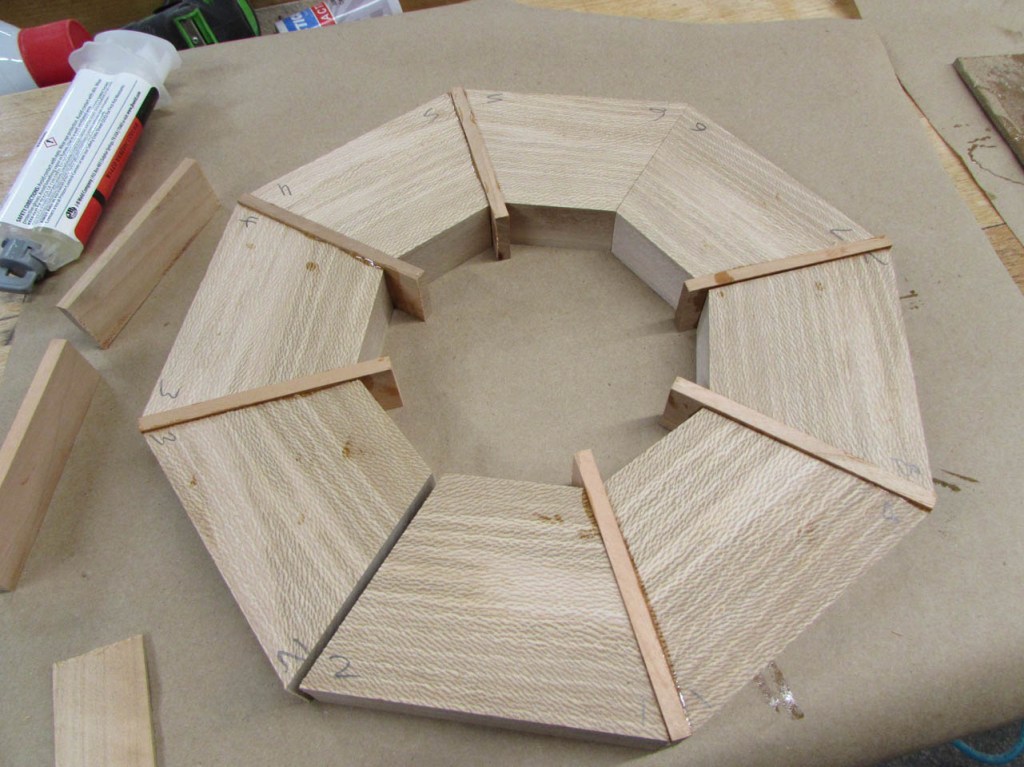
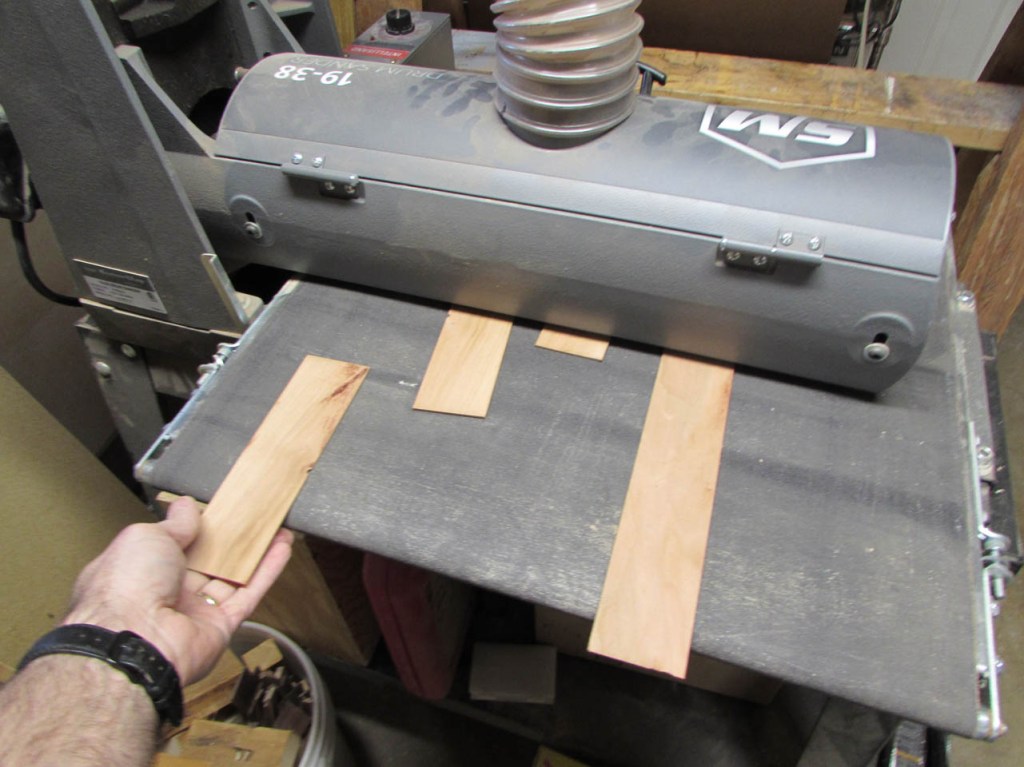
I started by setting up a stop block on my miter saw and started cutting eight identical pieces.
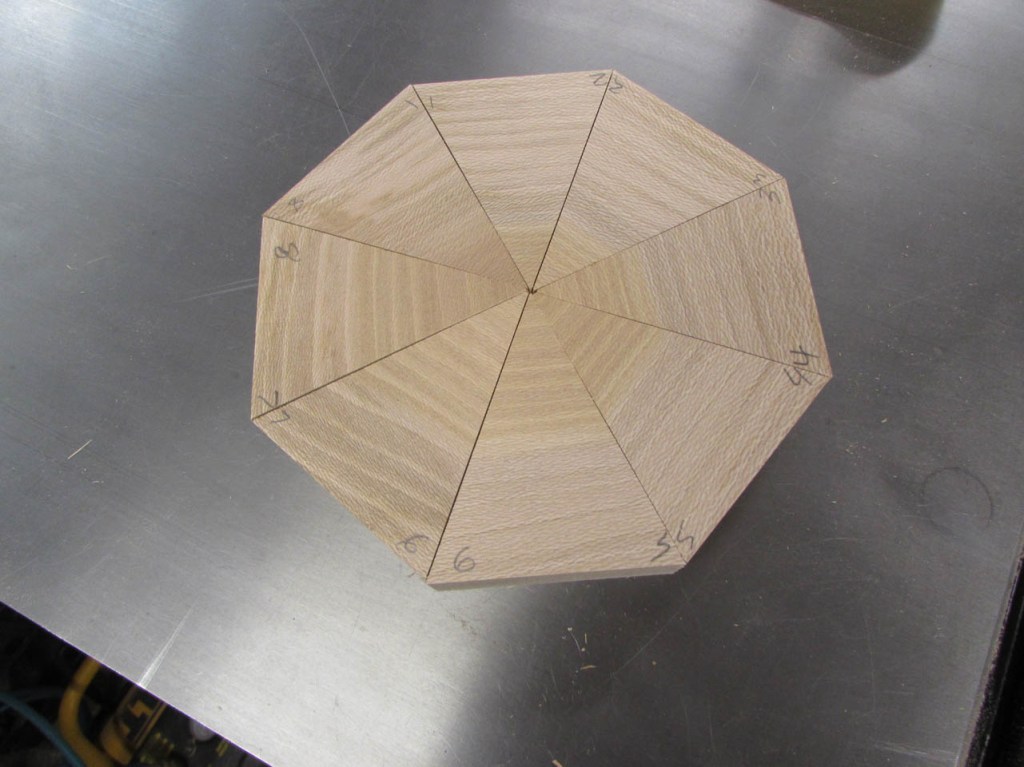
Since there is a really interesting grain pattern, I marked each piece so that they could be glued up sequentially later.
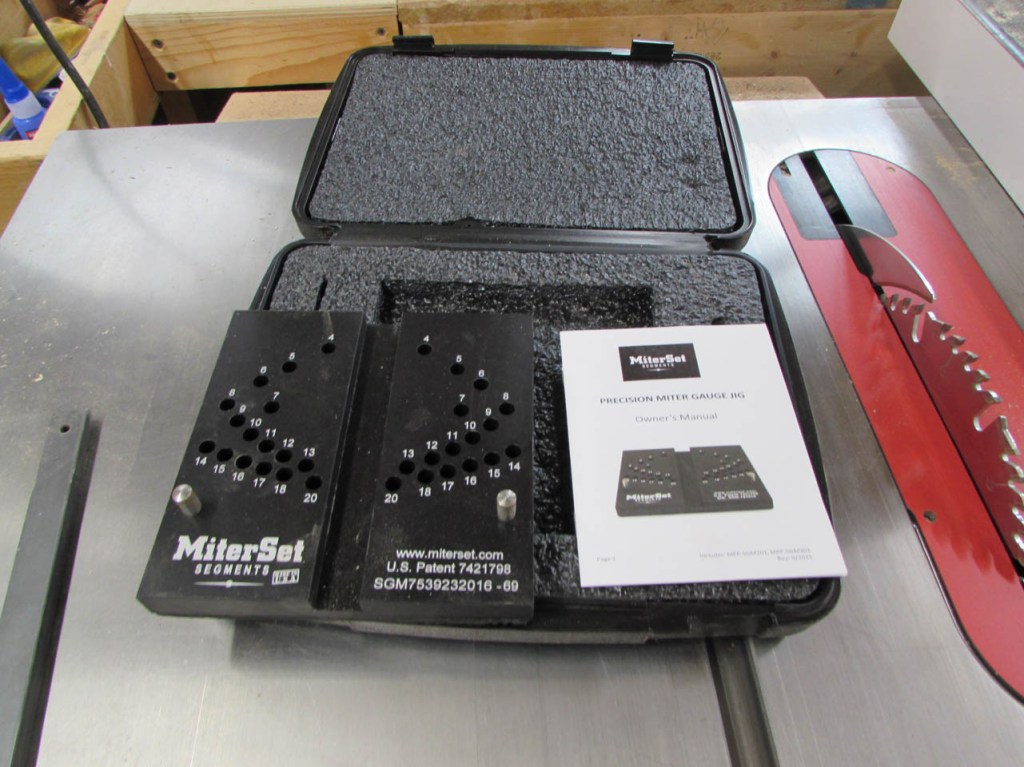
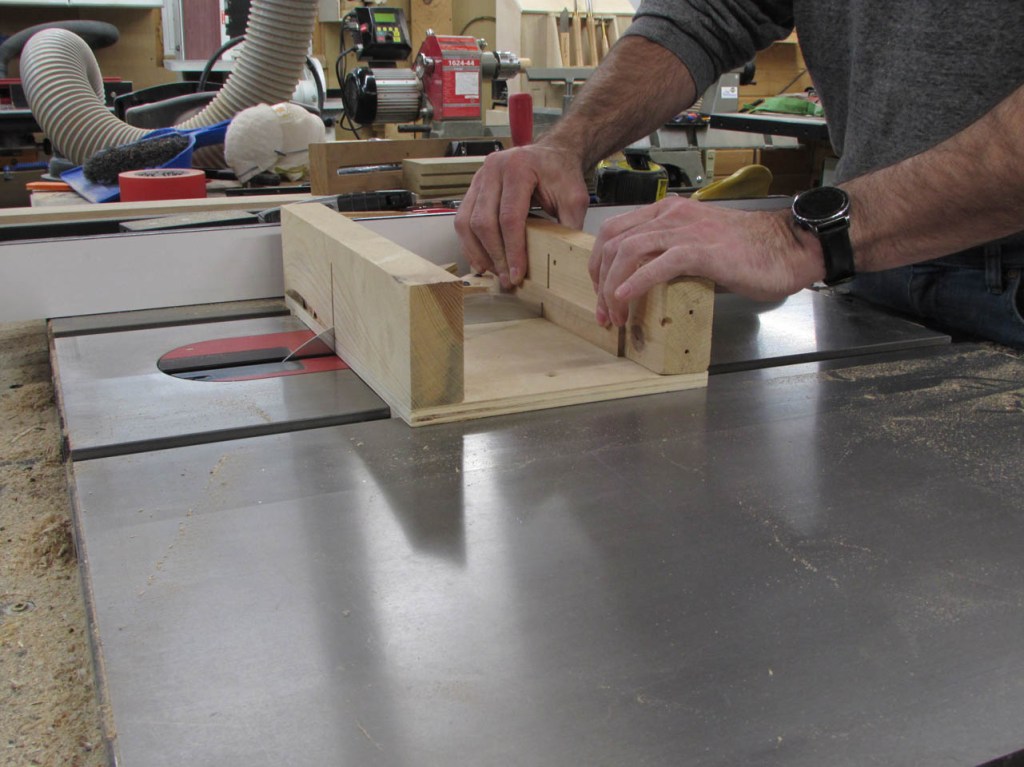
I have had a Miter Set setup jig for several years but I haven’t had the opportunity to use it since I got it.
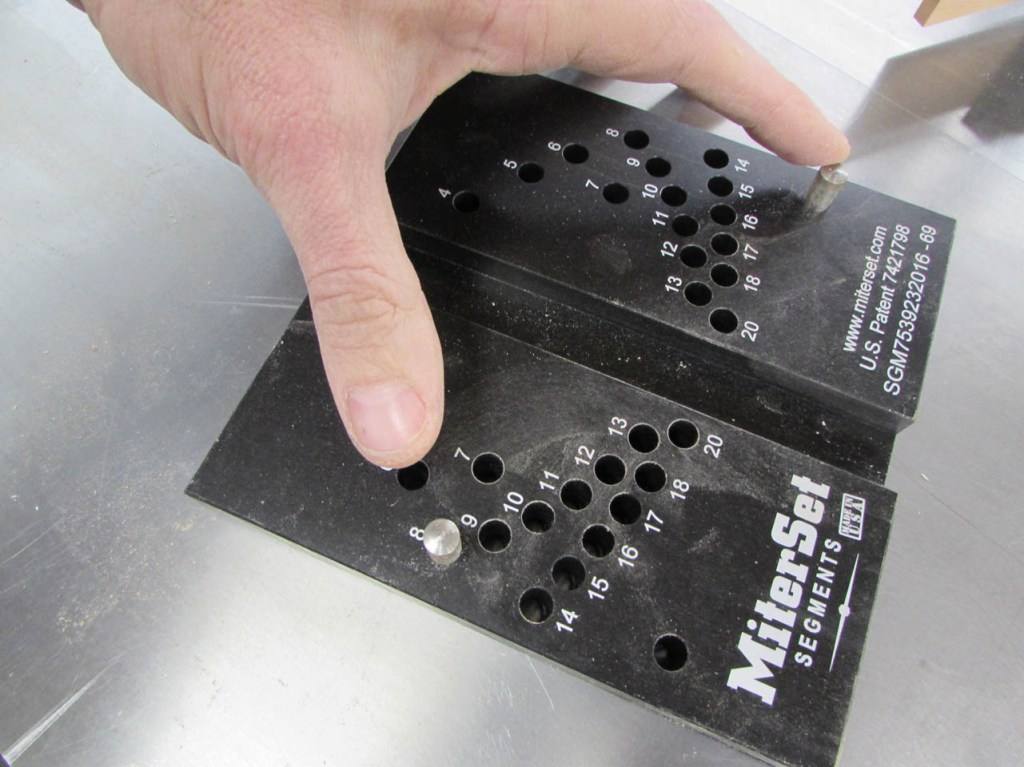
The idea is that you place a pin at the pivot point and another pin in the hole with the number of segments you want. Then you insert your miter gauge and lock it in at that angle. This sets the gauge at the perfect angle for cutting the pie shaped wedges to create the bowl.

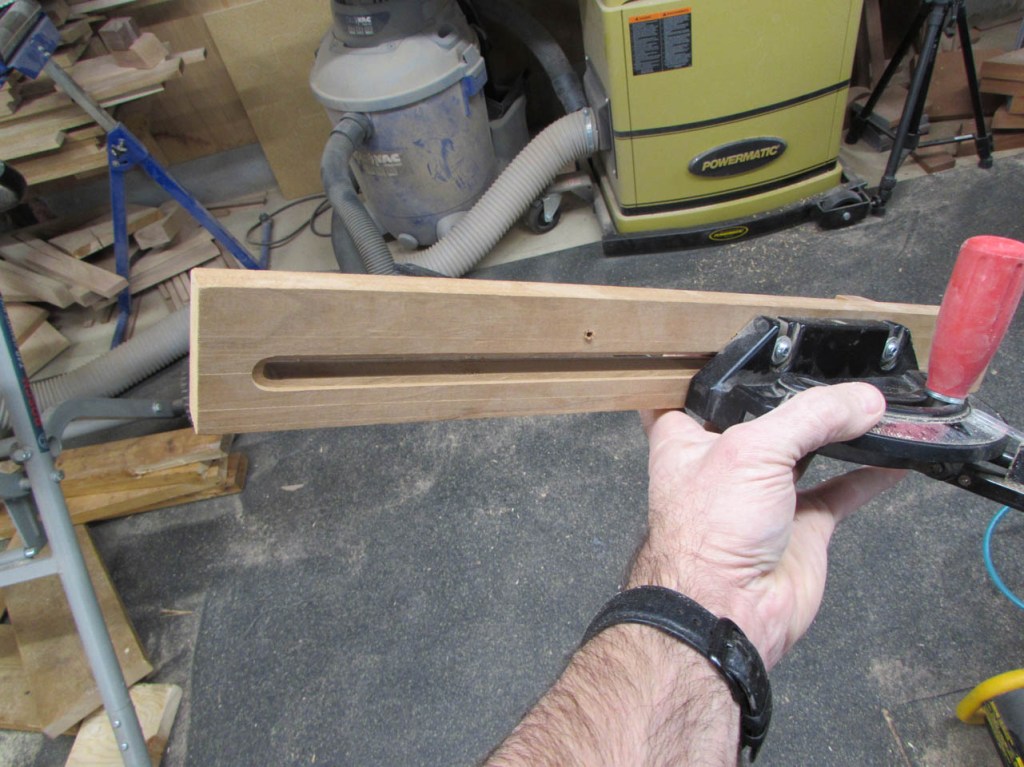
I also added a homemade fence with a stop block to make it easier to repeat the cuts.

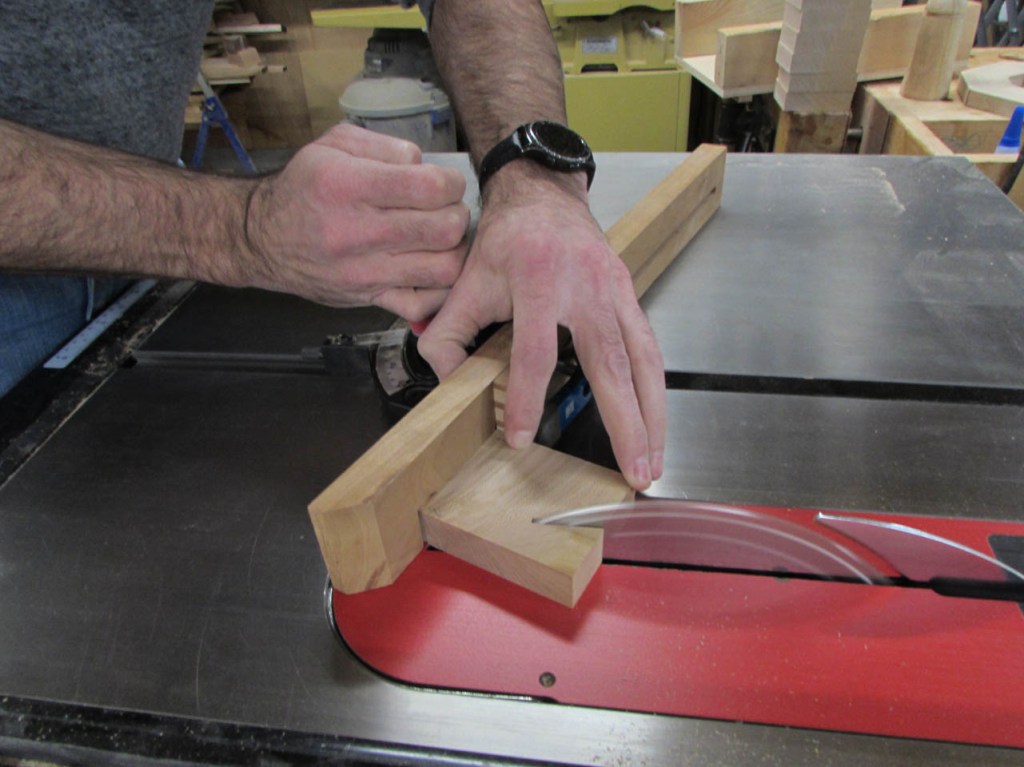
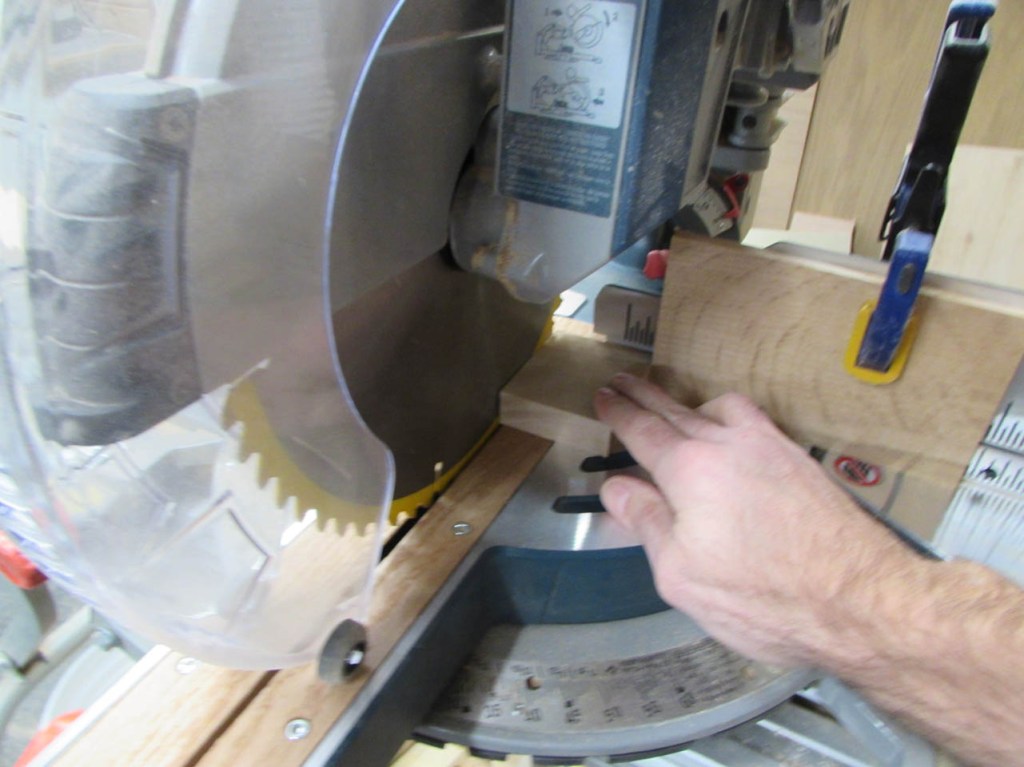
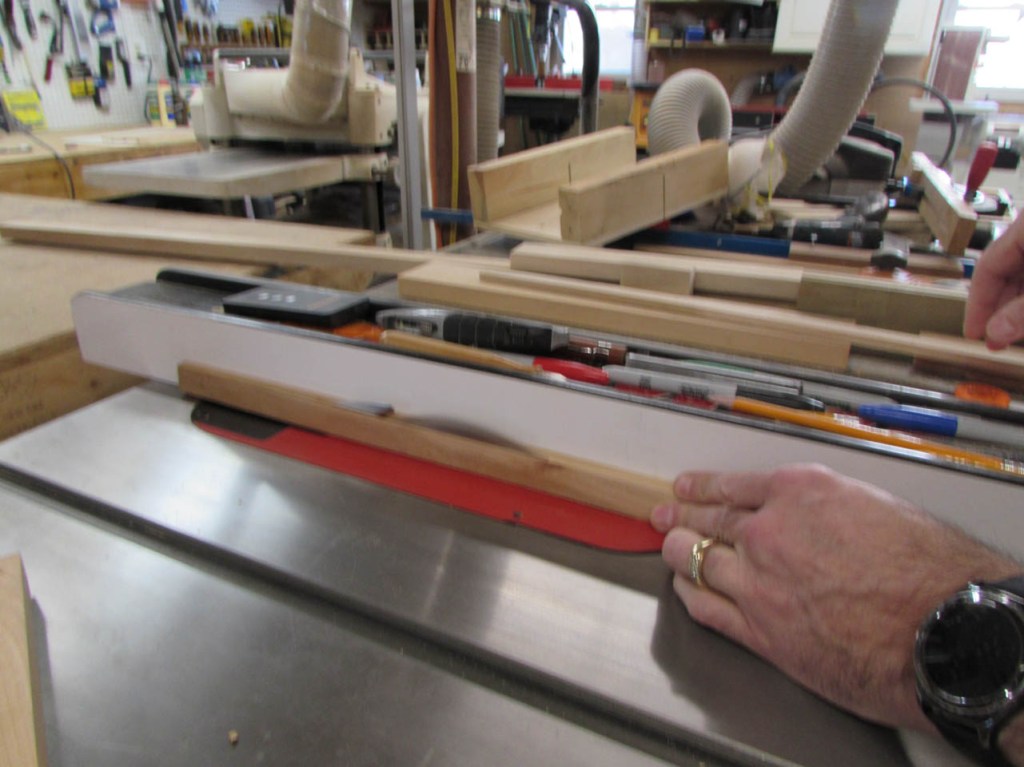
I set my first block in place and carefully ran it through the saw blade on my table saw. Then I flipped the piece and repeated the cut on the opposite side.
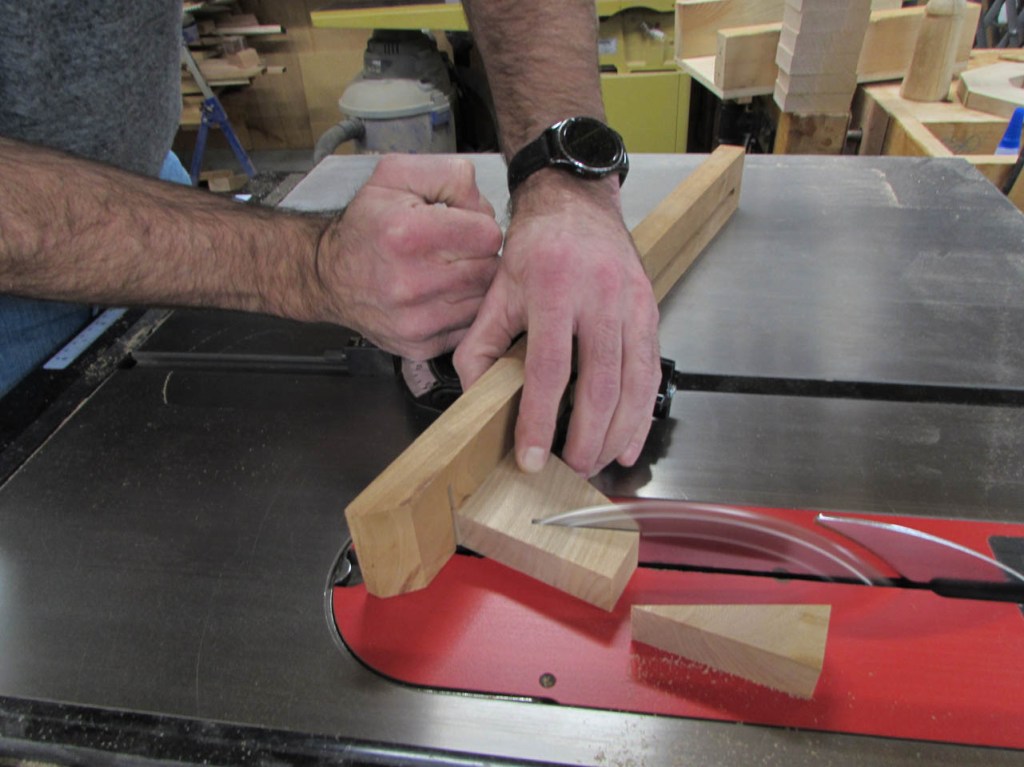
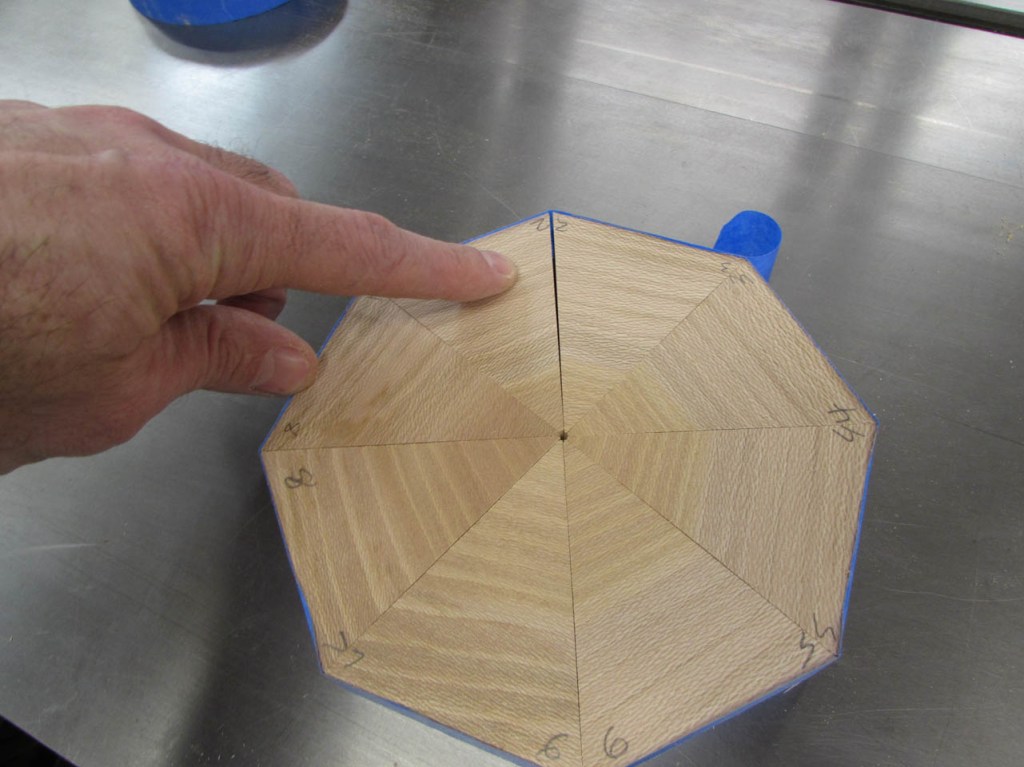
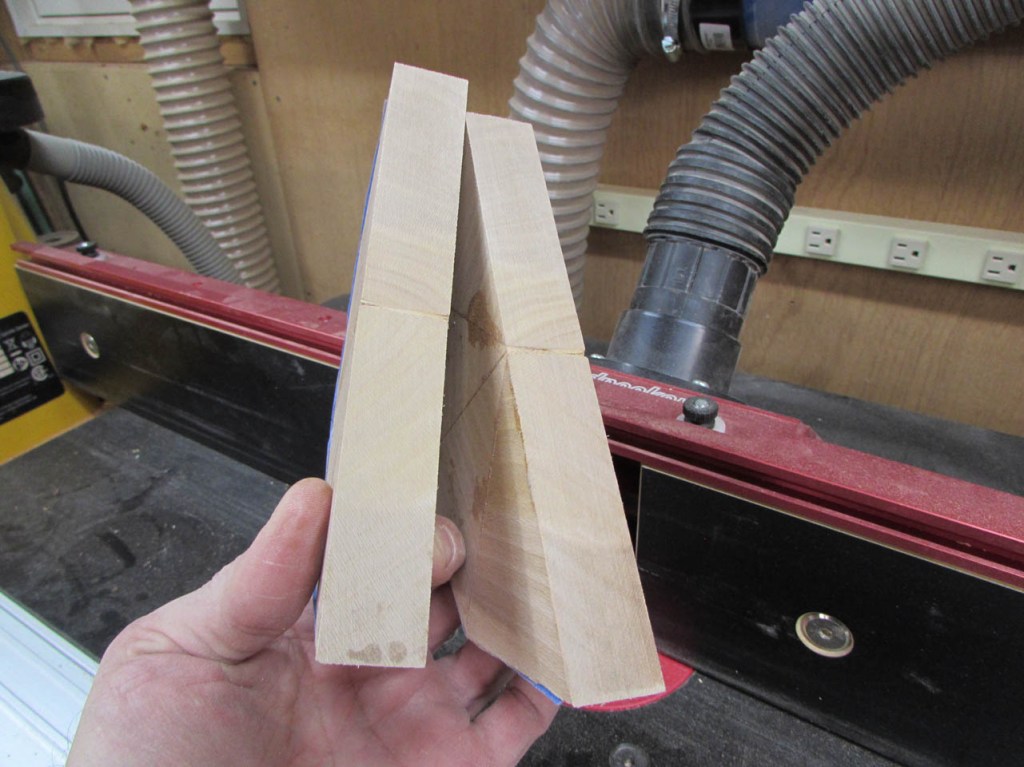
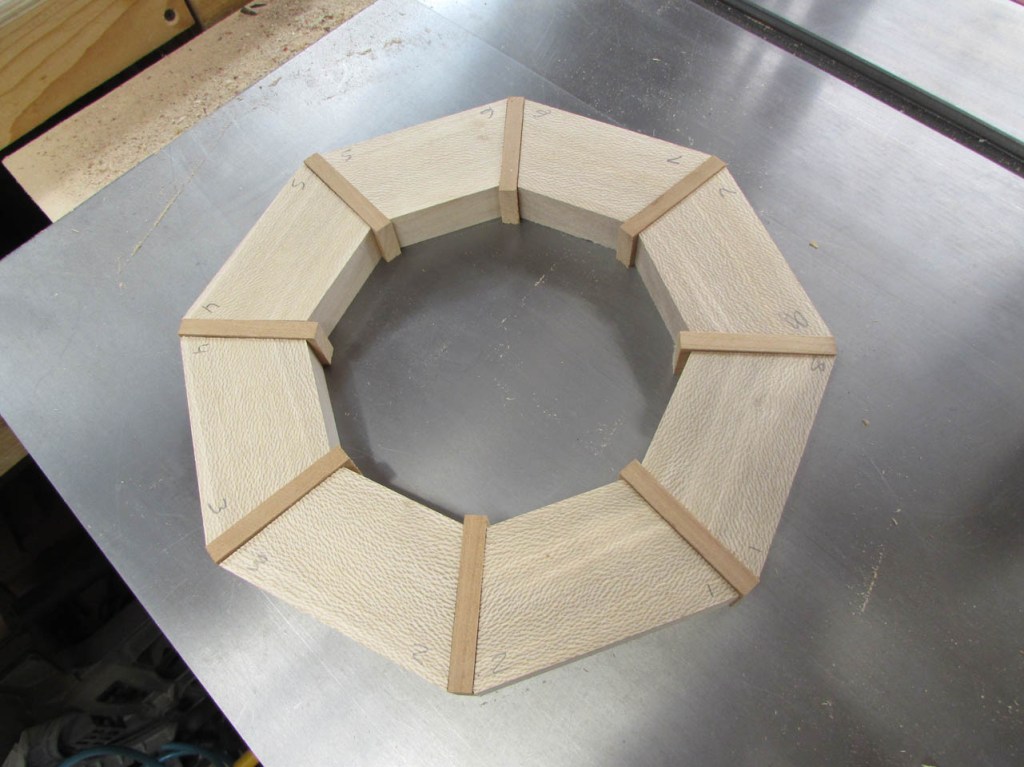
After eight of these, I placed them together sequentially and I got a pretty cool spiral from the grain.
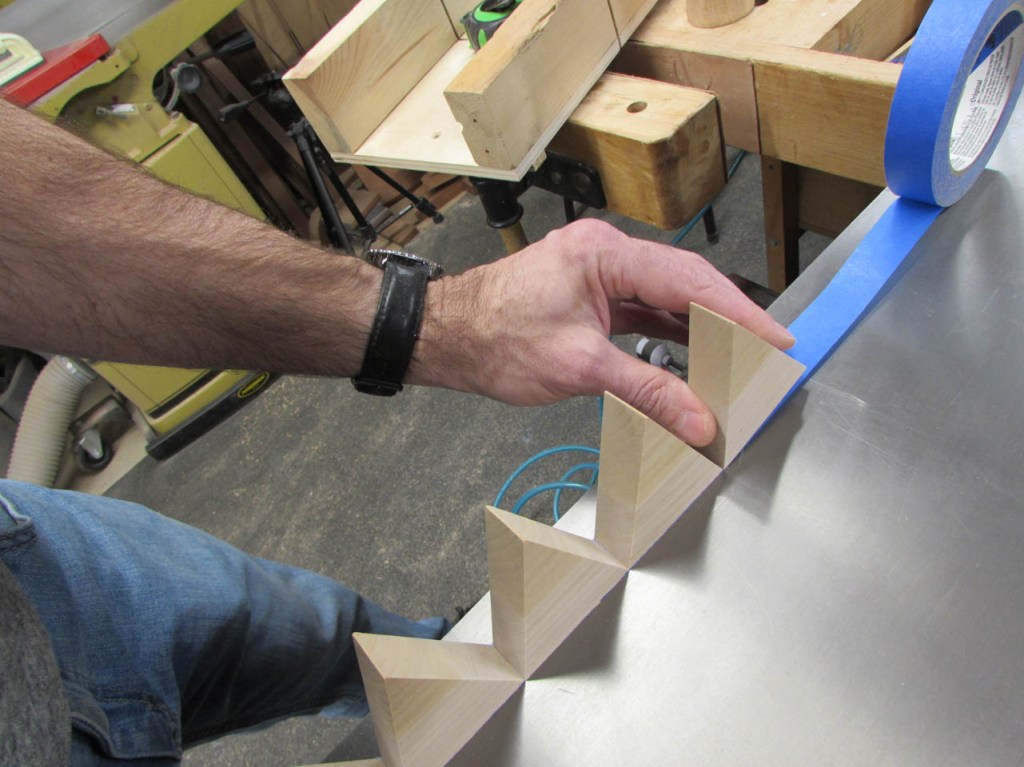
I used painter’s tape to butt each wedge together.
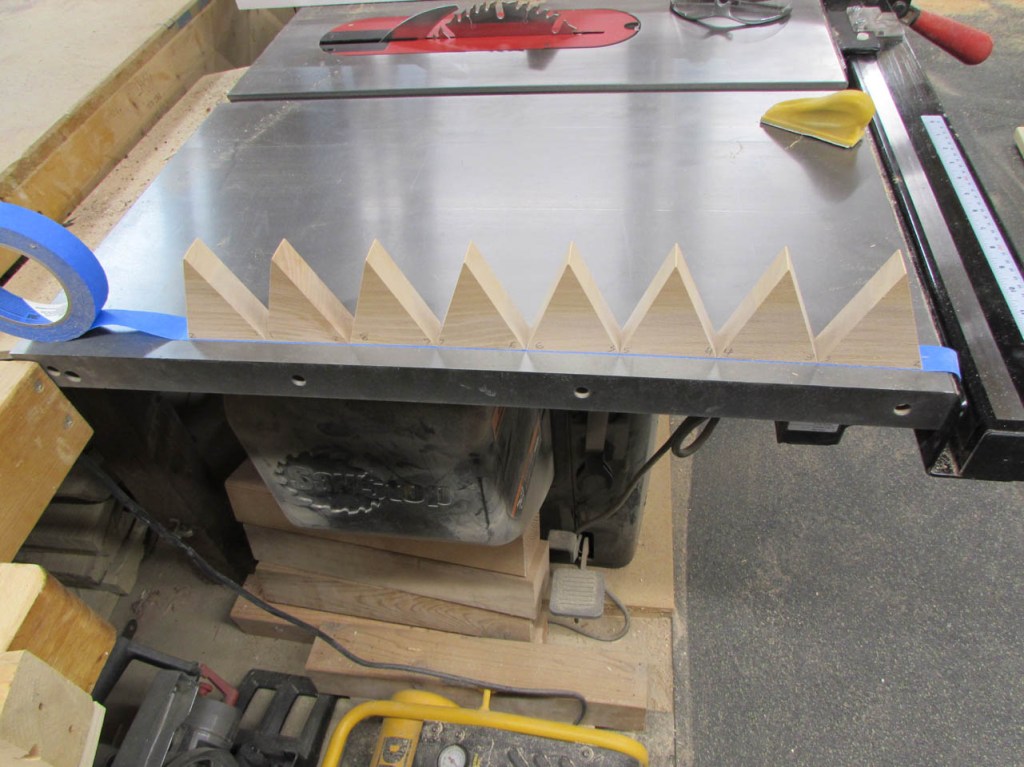
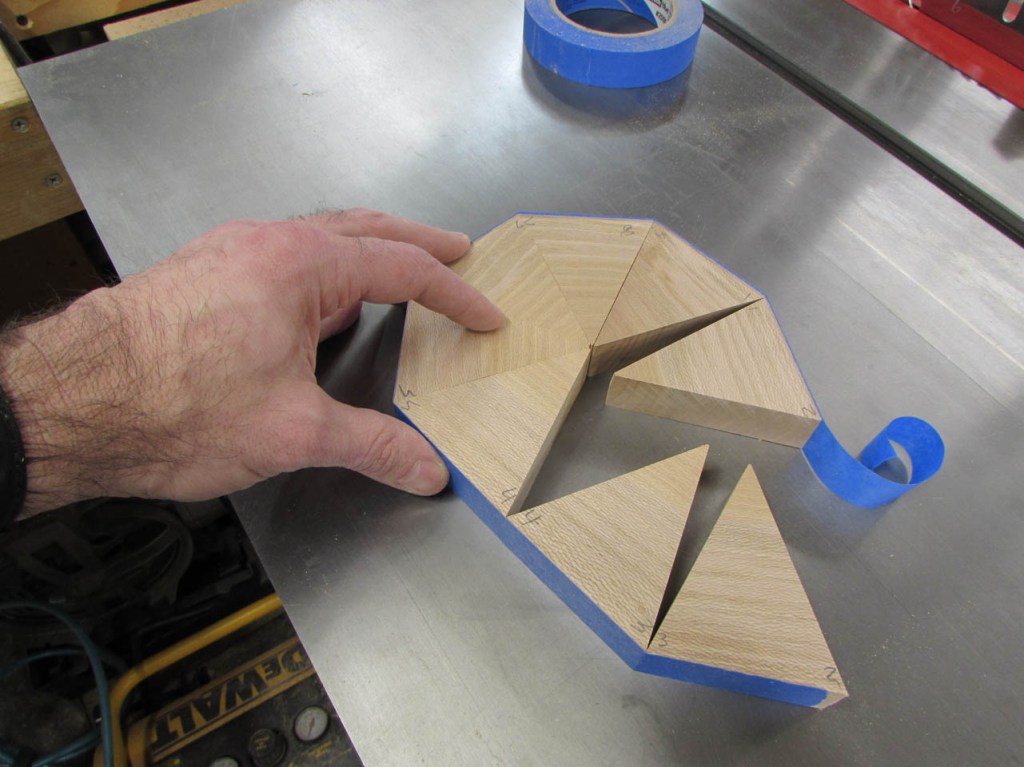
This will act as a hinge for my glue-up.
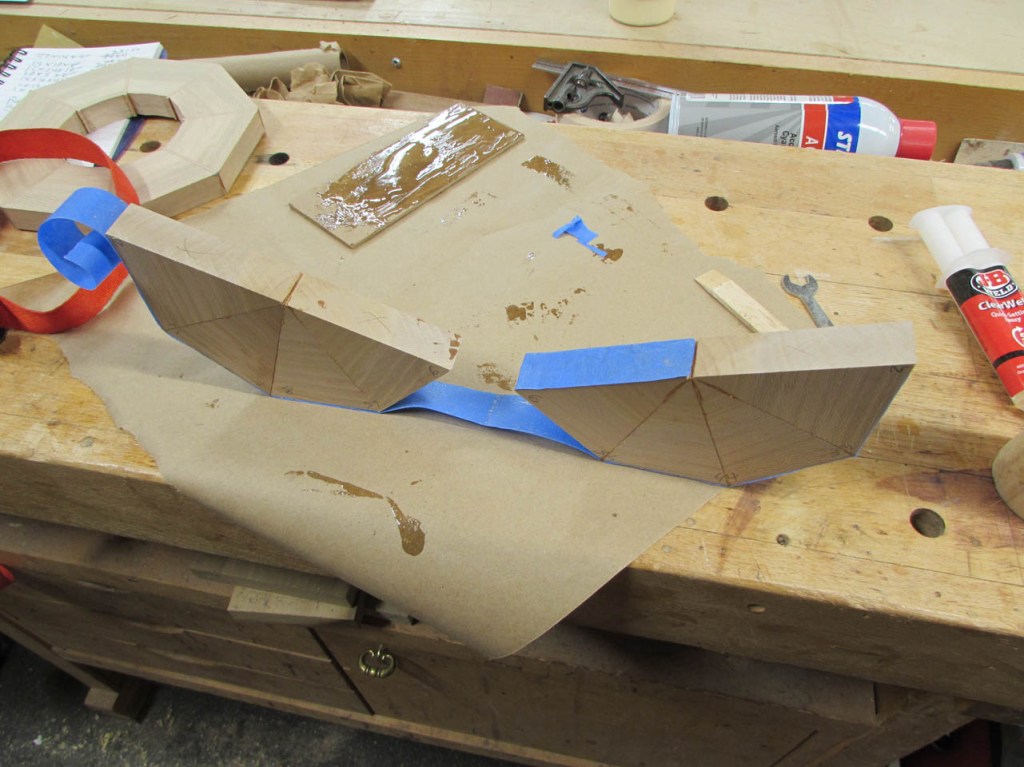
Apparently my miter gauge does not lock in perfectly because I am off by a fraction of a degree resulting in a slight gap. I might have an idea to fix that.

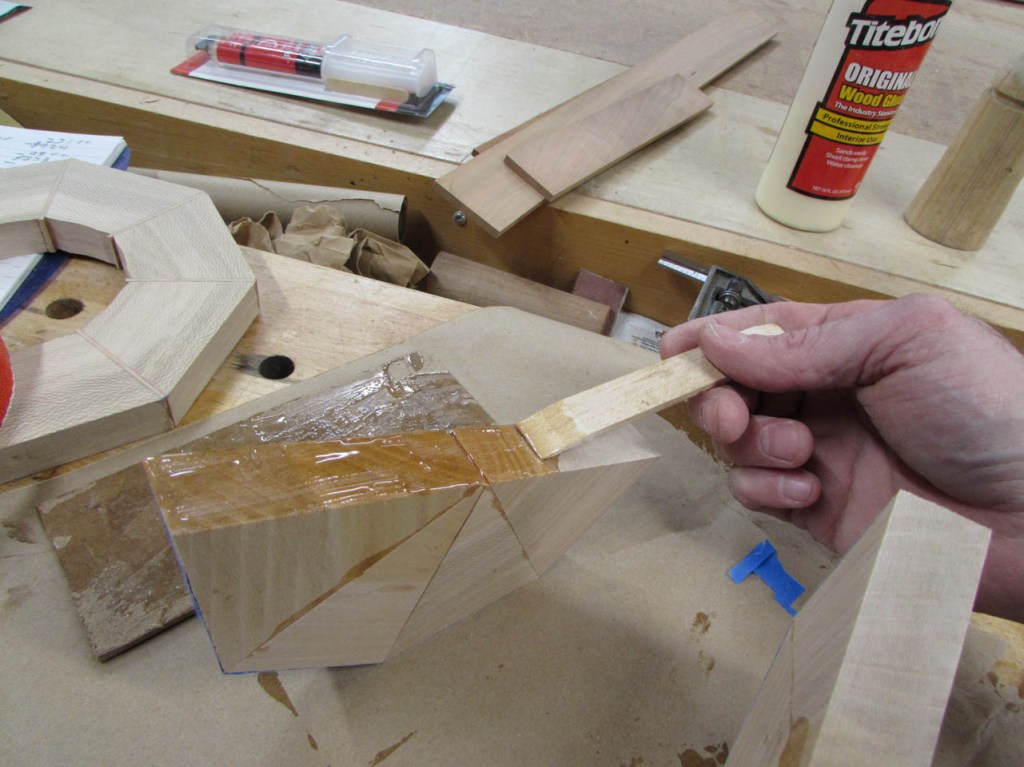
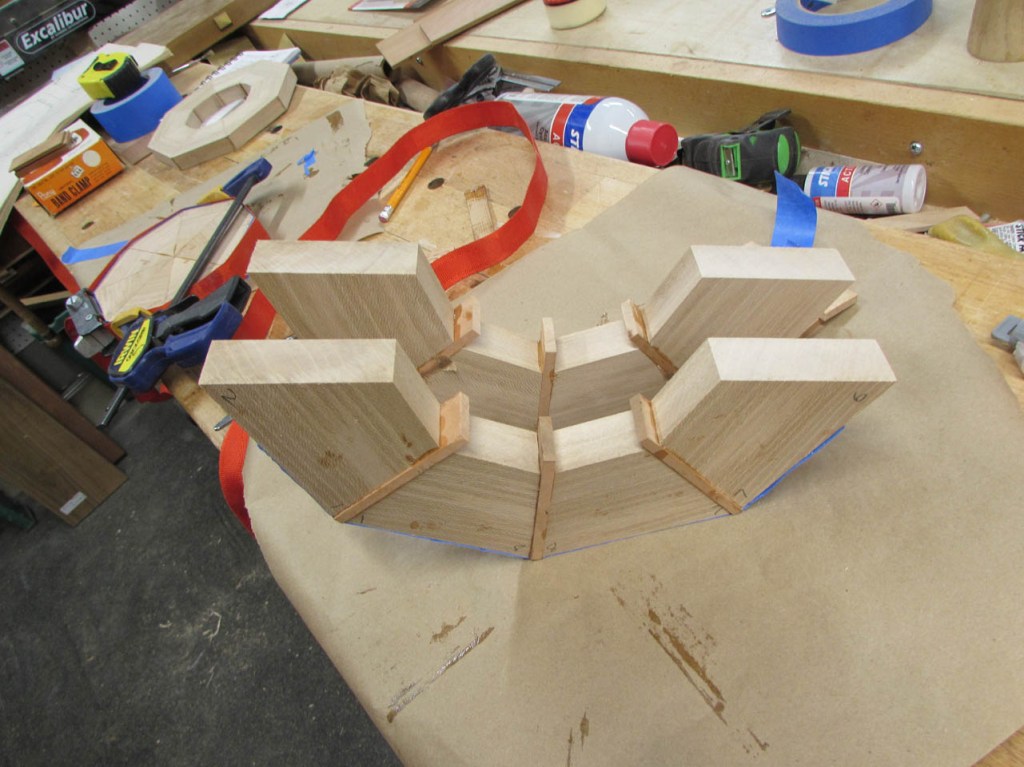
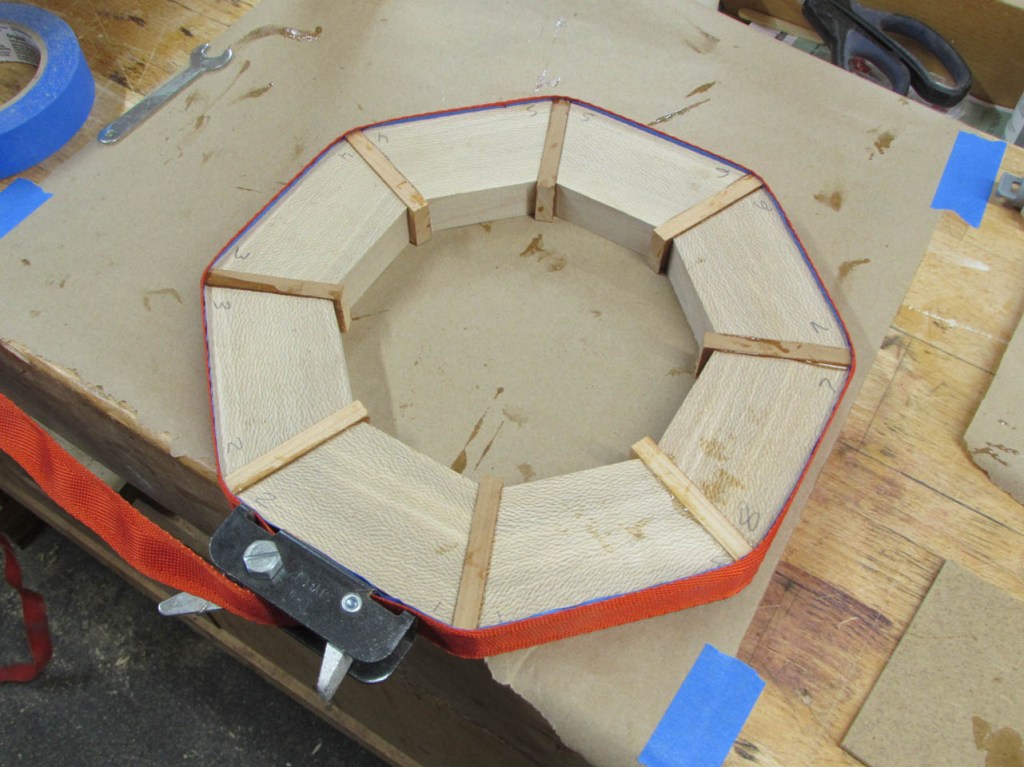
Since this glue-up is all end grain, I am using epoxy to hold it together.
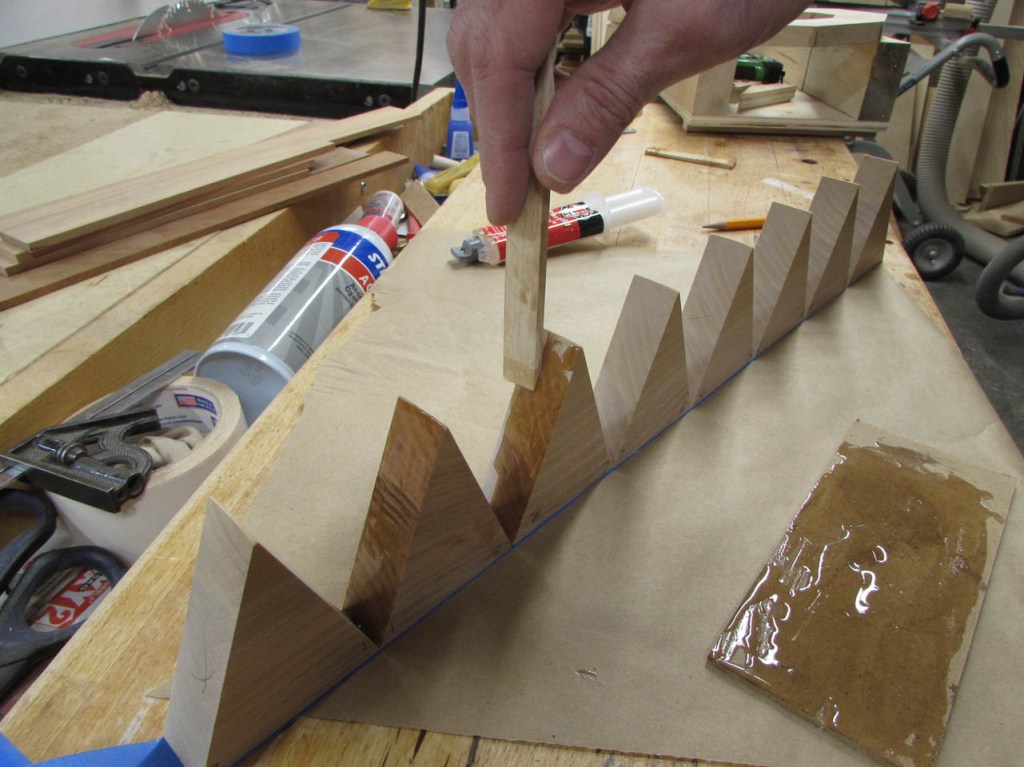
I am not glueing the center joint or either of the two ends.
This will basically create two glued up halves, allowing me to fix the slight gap later.
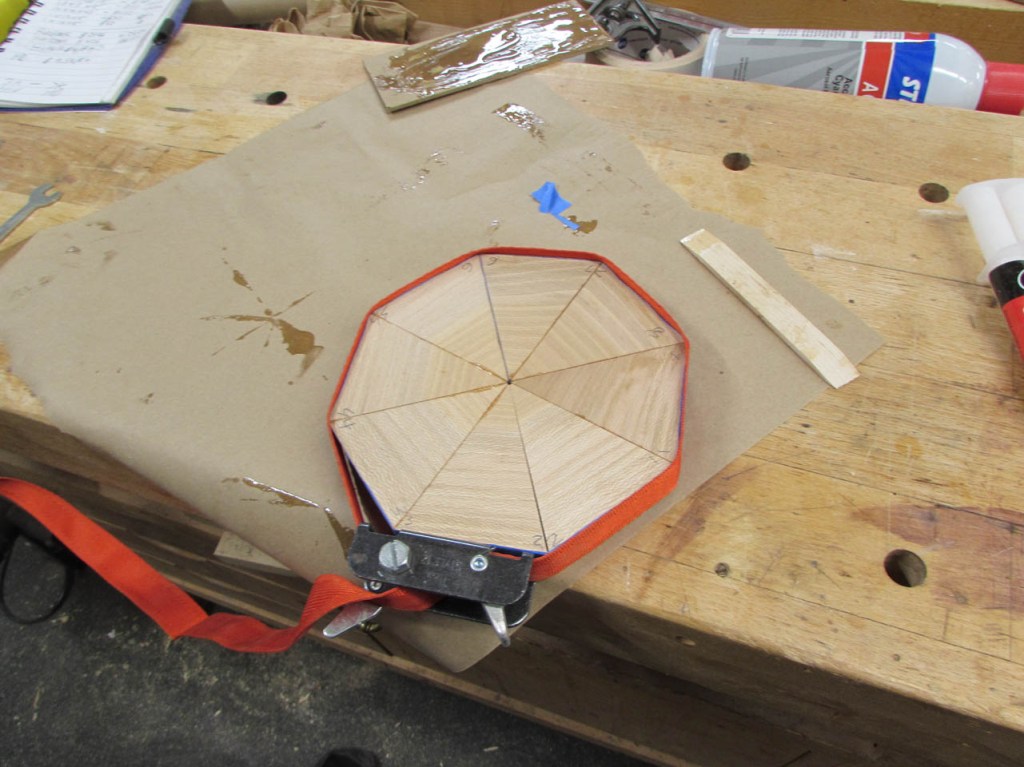
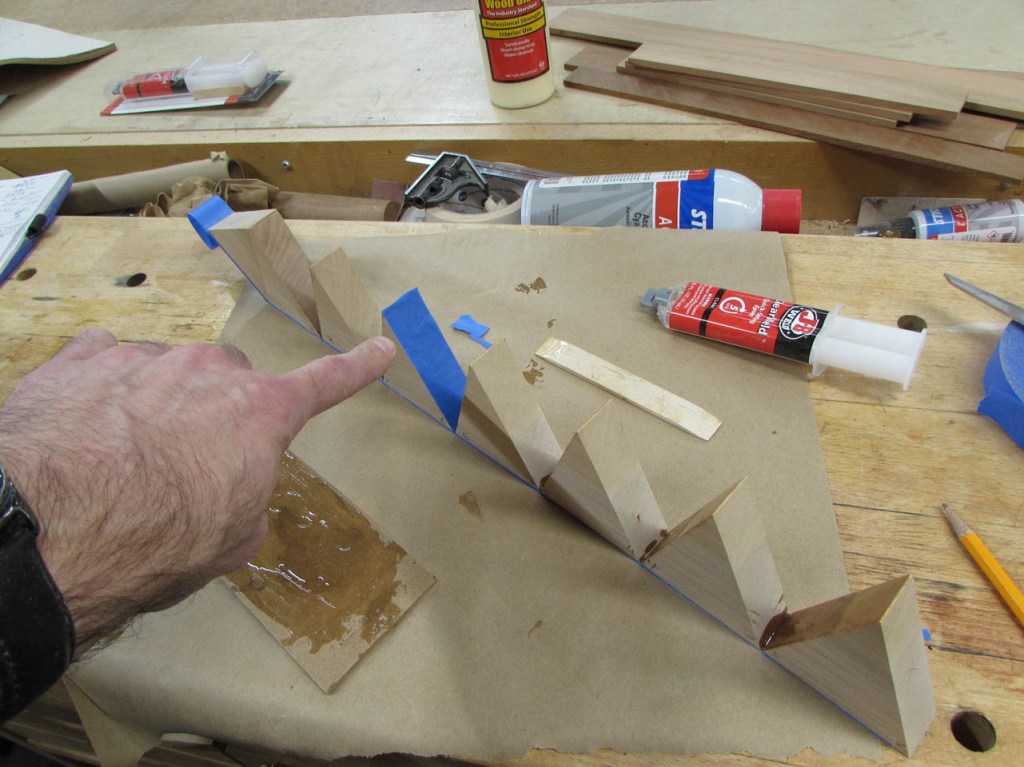
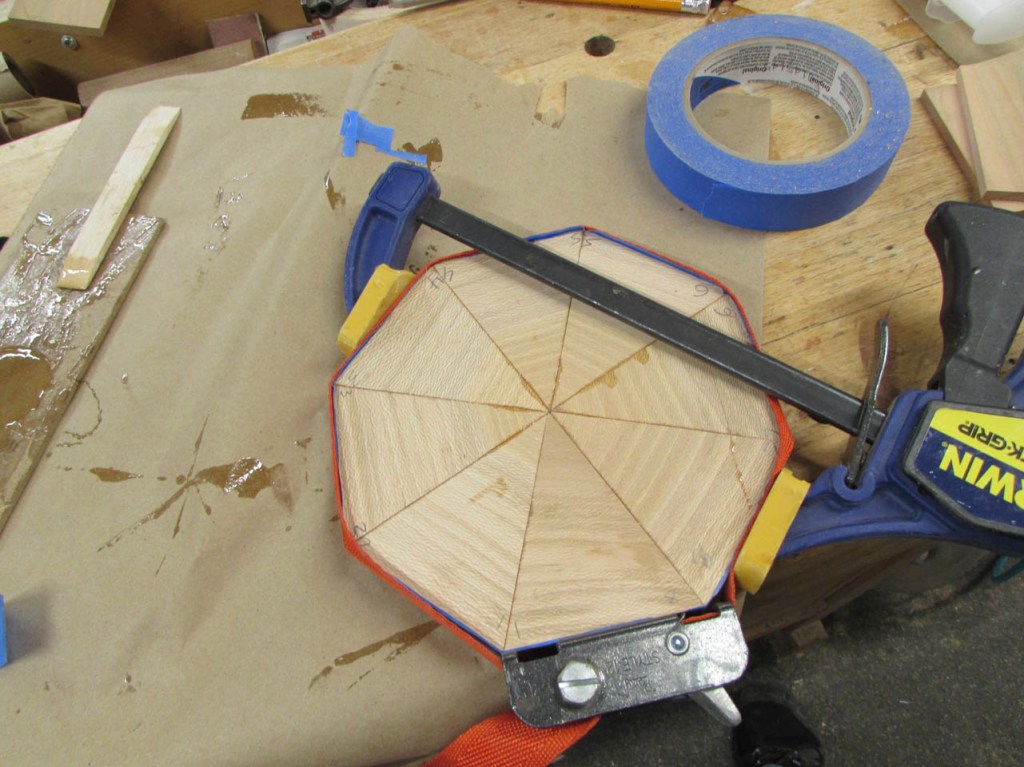
I wrapped a small band strap around the assembly and let it dry over night.
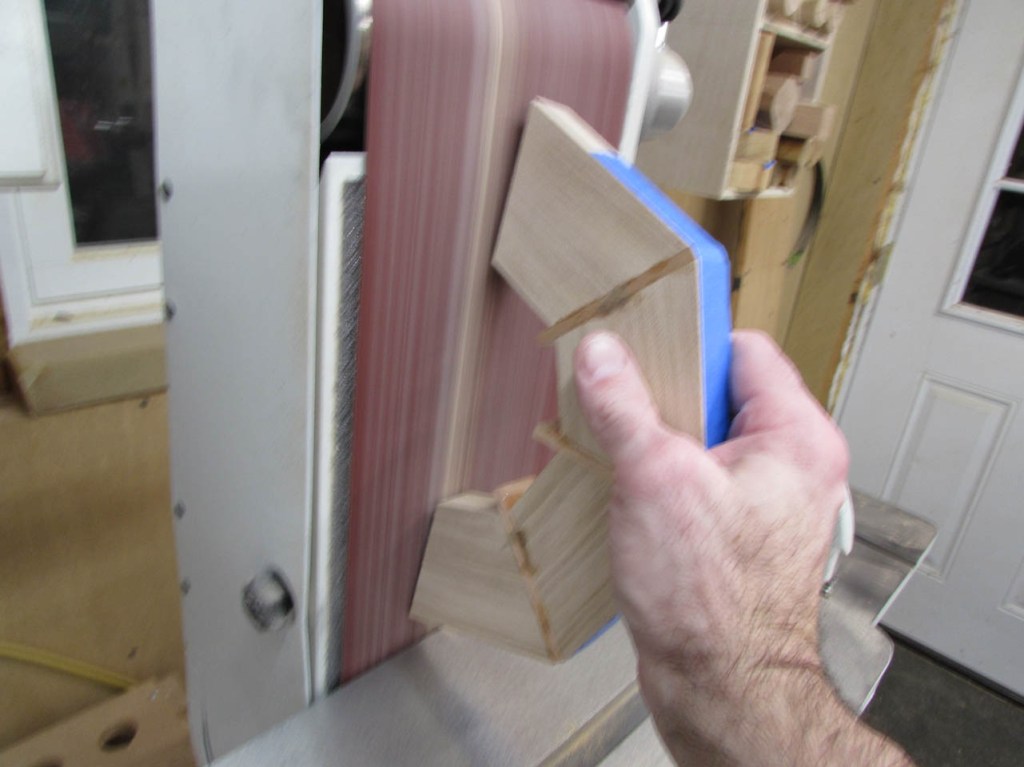
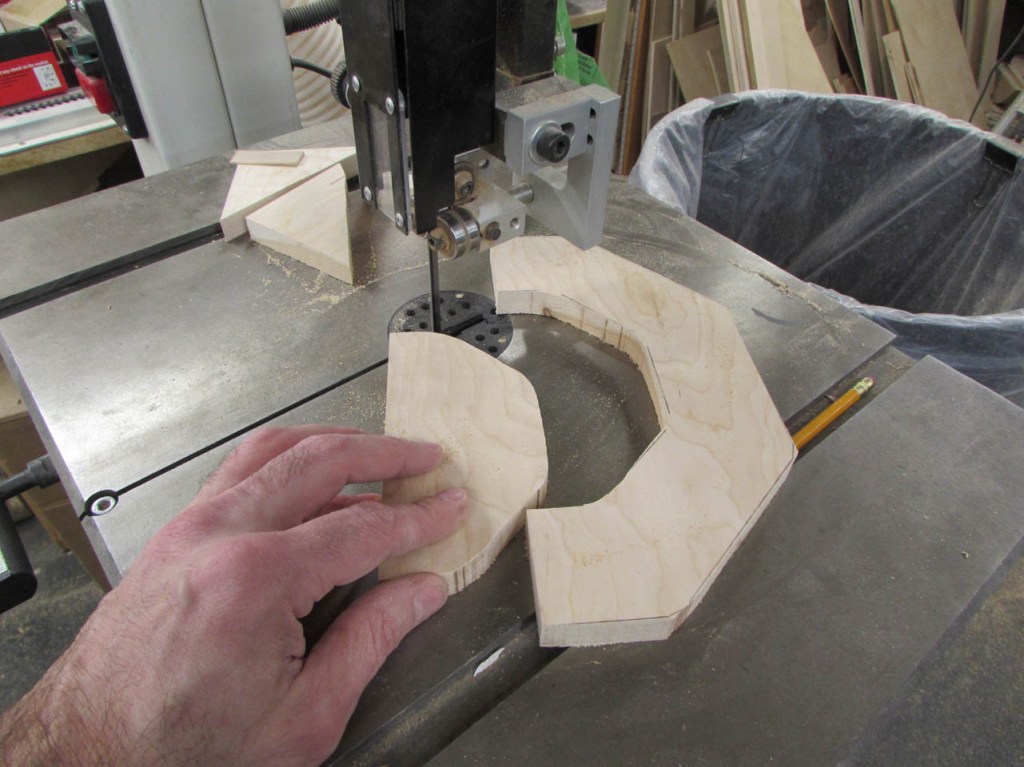
In the morning, I separated the halves and held the inside face to the flat bed of the sander to take out the slight angle on both halves.
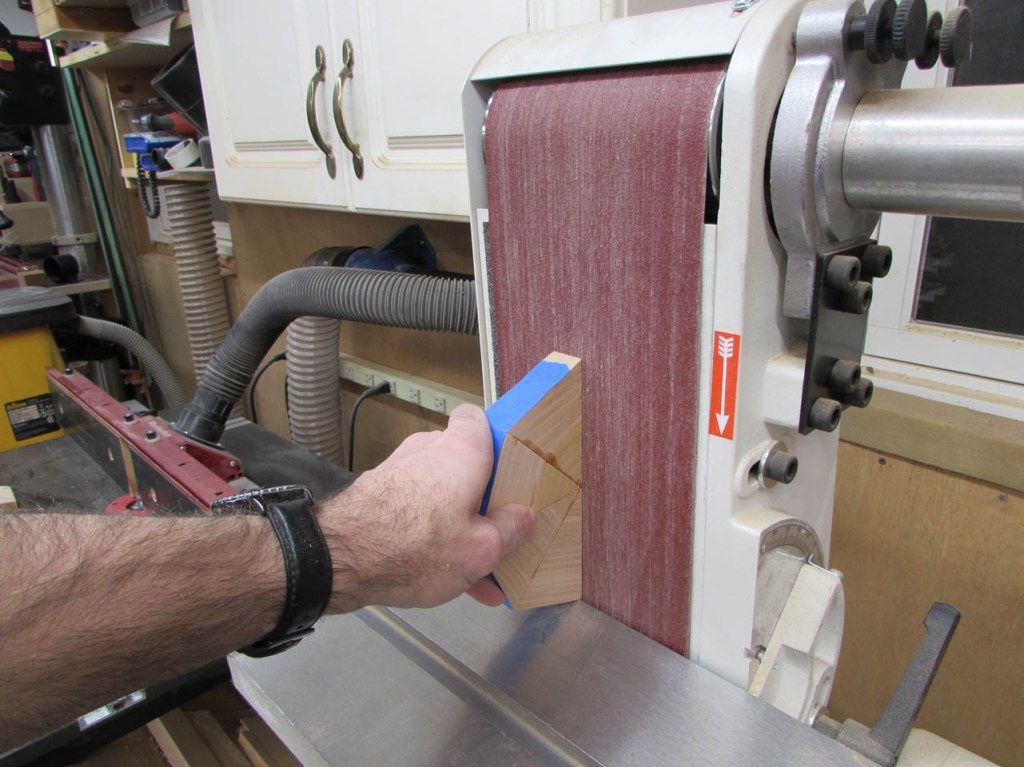
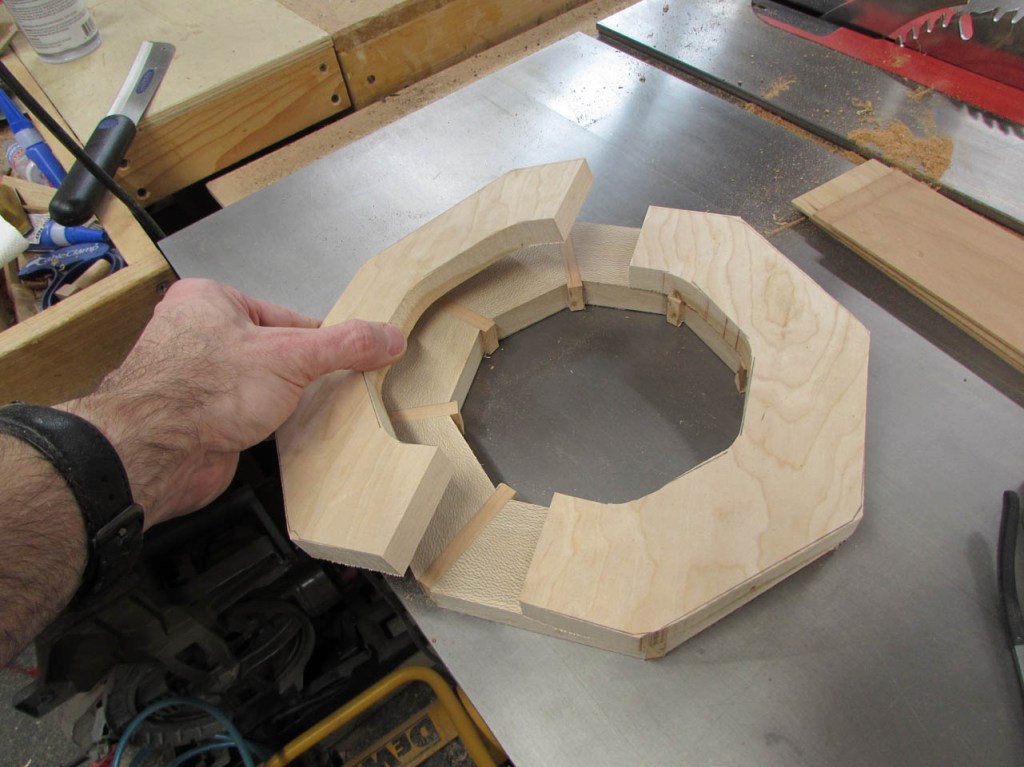
With two flat, clean faces, I applied more epoxy and clamped it all back together.
While that was drying, I got started on another layer.
To make things more complicated, I discussed with Tracie, what design pattern for the cherry she wanted.

She thought a 1/16″ sliver between each wedge of the first layer would be nice and each layer up would grow 1/8″ thicker. I used the table saw to make strips that were slightly over-sized.

After cutting them shorter on my small cross-cut sled, I epoxied them and placed them between the wedges.
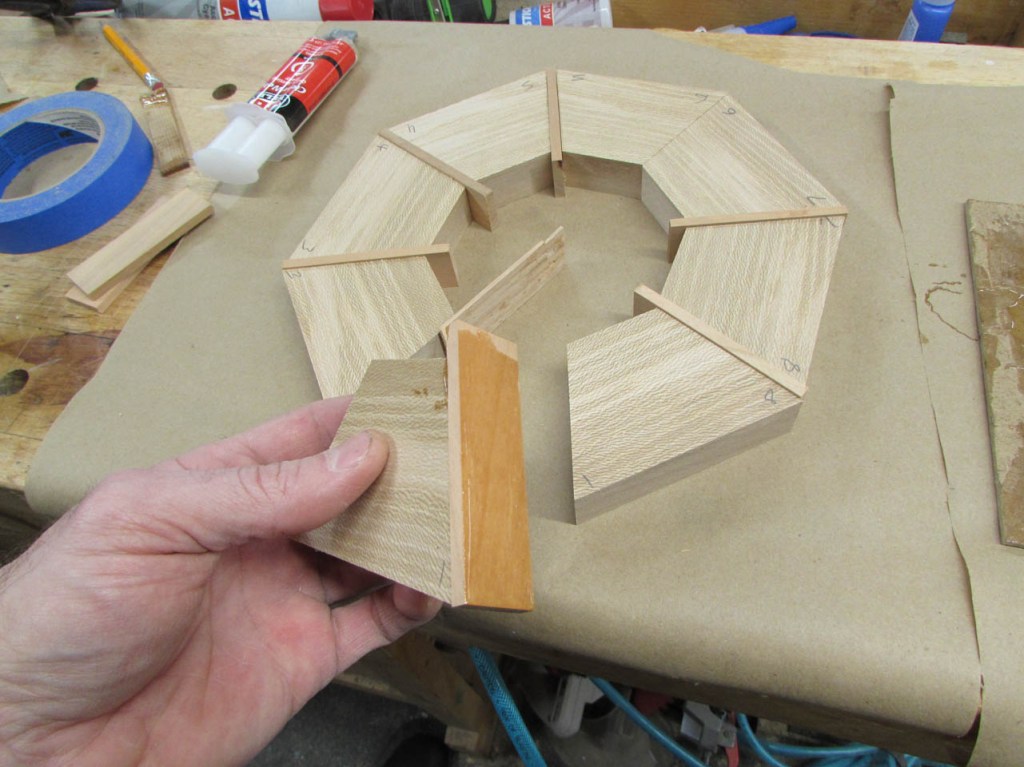
Running into the same problem again, I only glued the two sides first.
I used a small wedge to fill the gap as I strapped it tightly together.

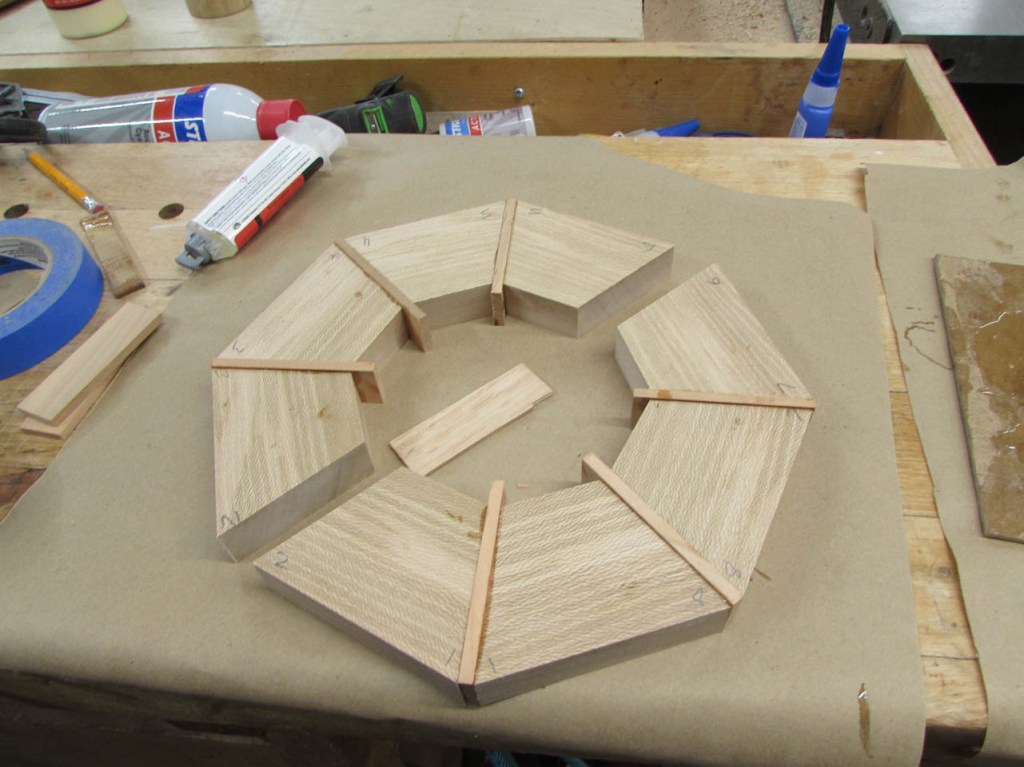
Once dry, I sanded the faces again.
Then added in the remaining pieces of cherry and glued it all together.
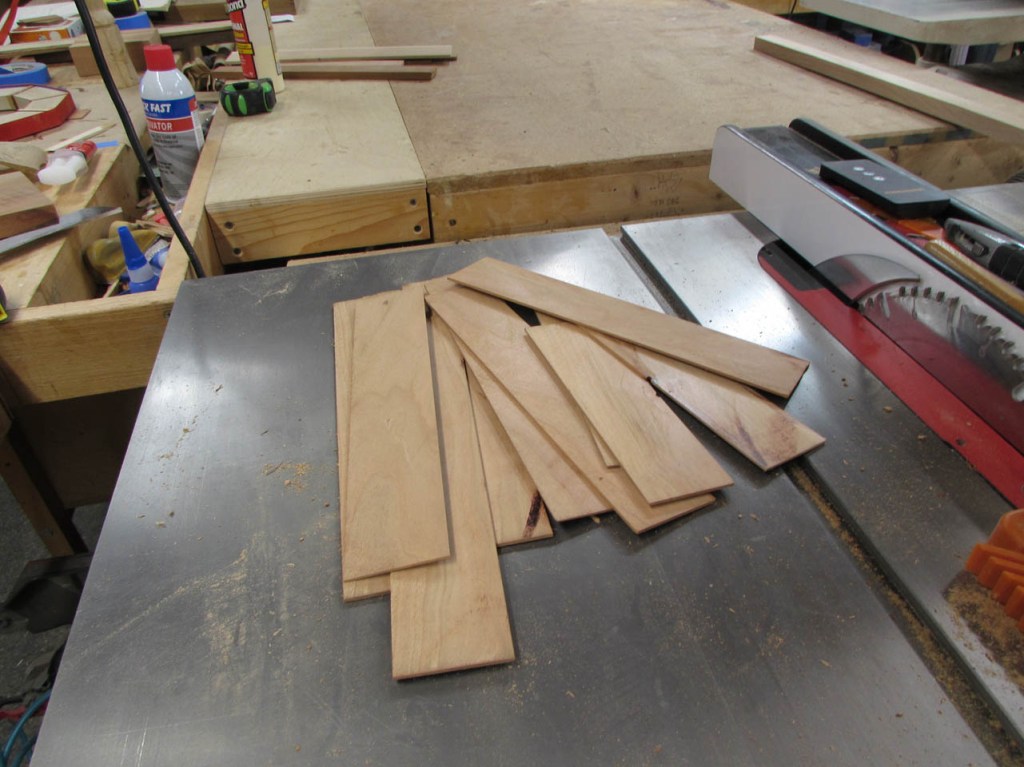
Since I let the epoxy cure for a while, I go back and forth making the several layers. I didn’t bother to include all of the photos.
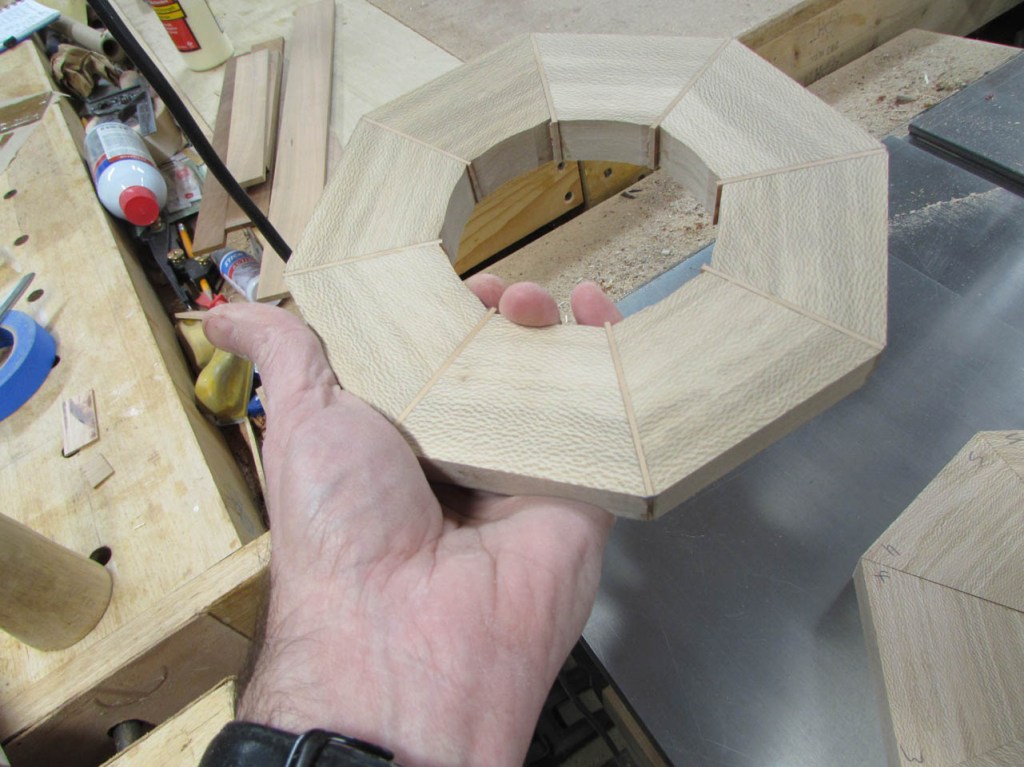
To flatten the faces so that they can be glued together later, I ran the layers through the drum sander, sanding both sides flat. By the time they are ready for the next phase, they are down to about 3/4″ thick.
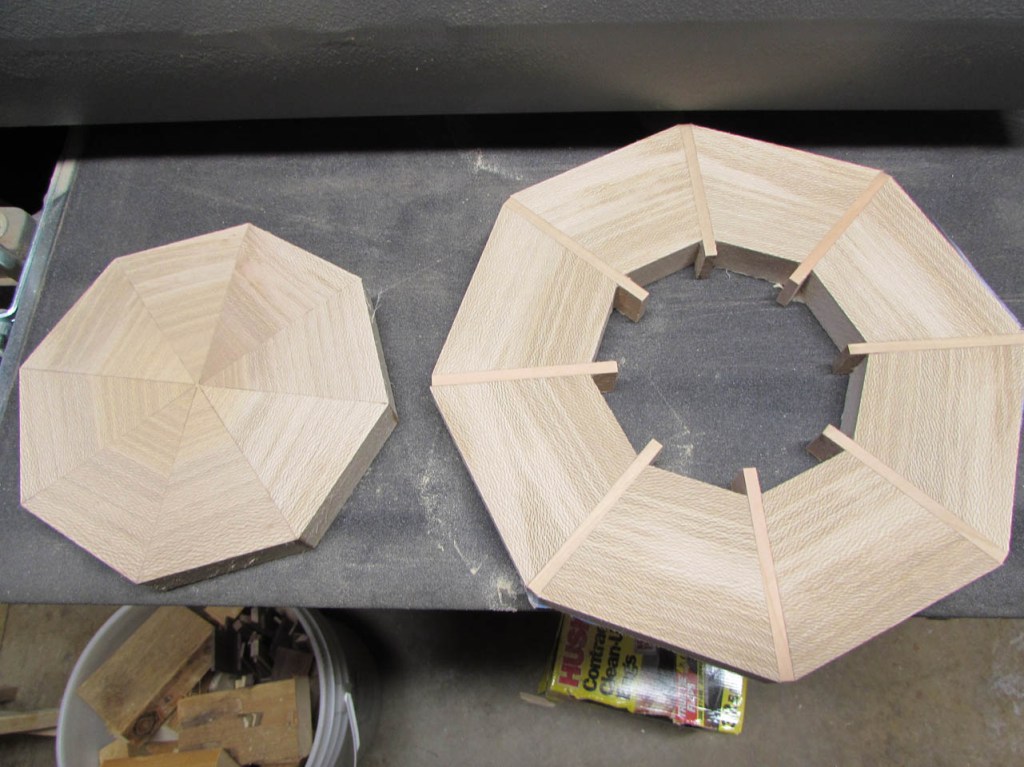
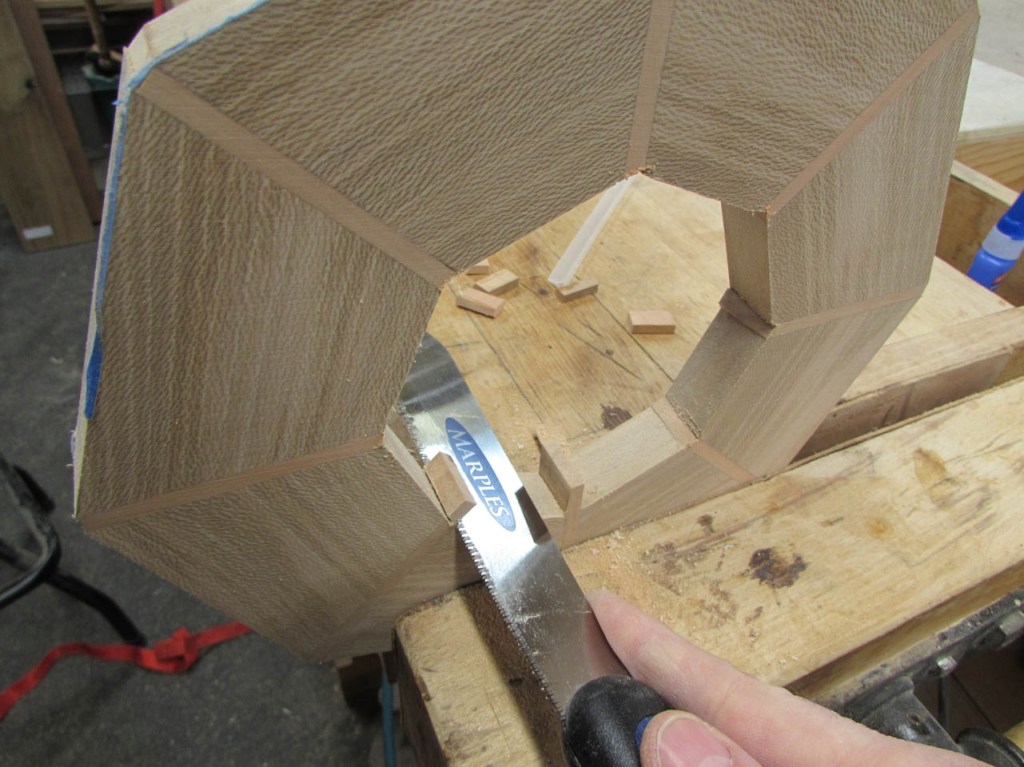
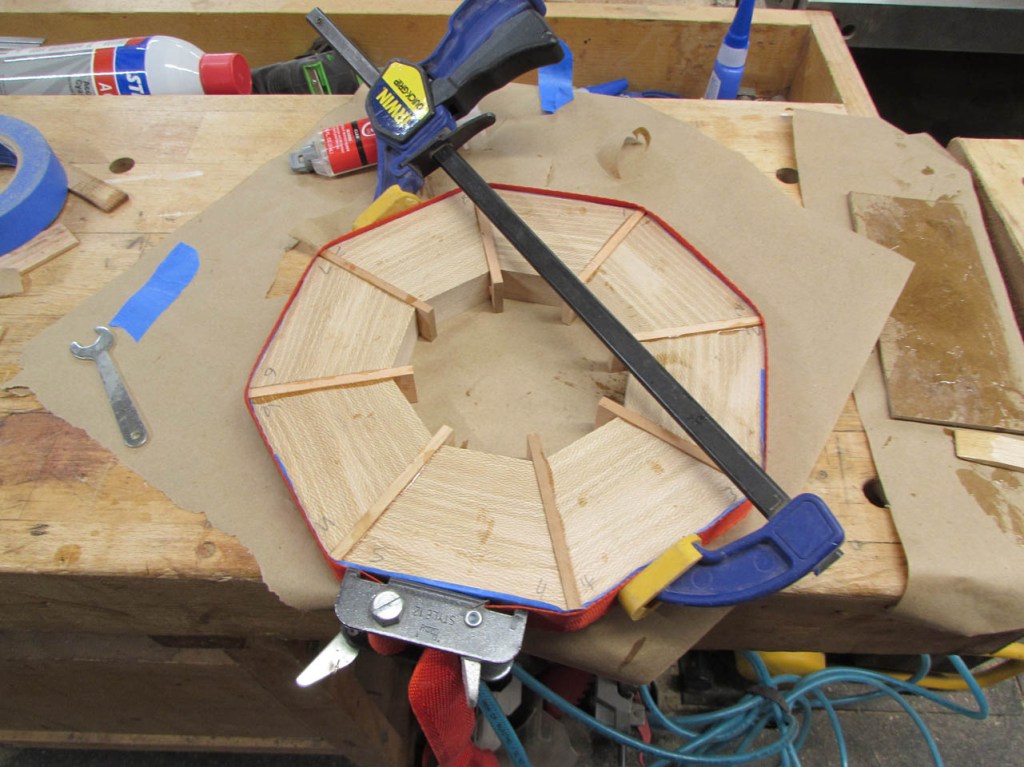
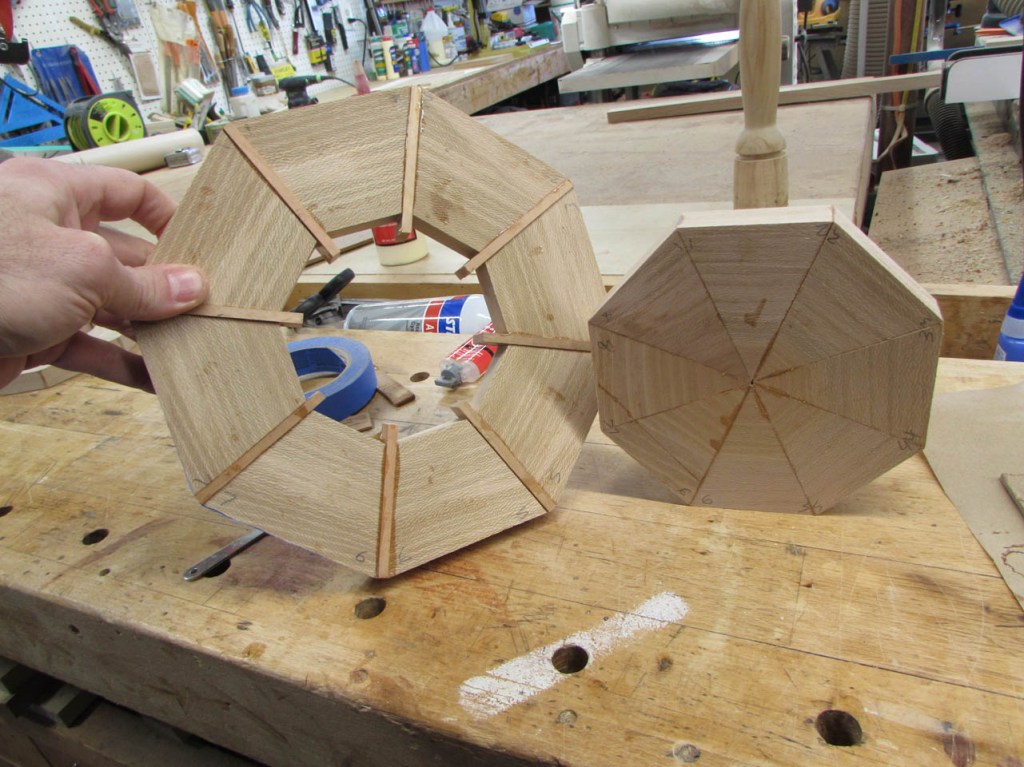
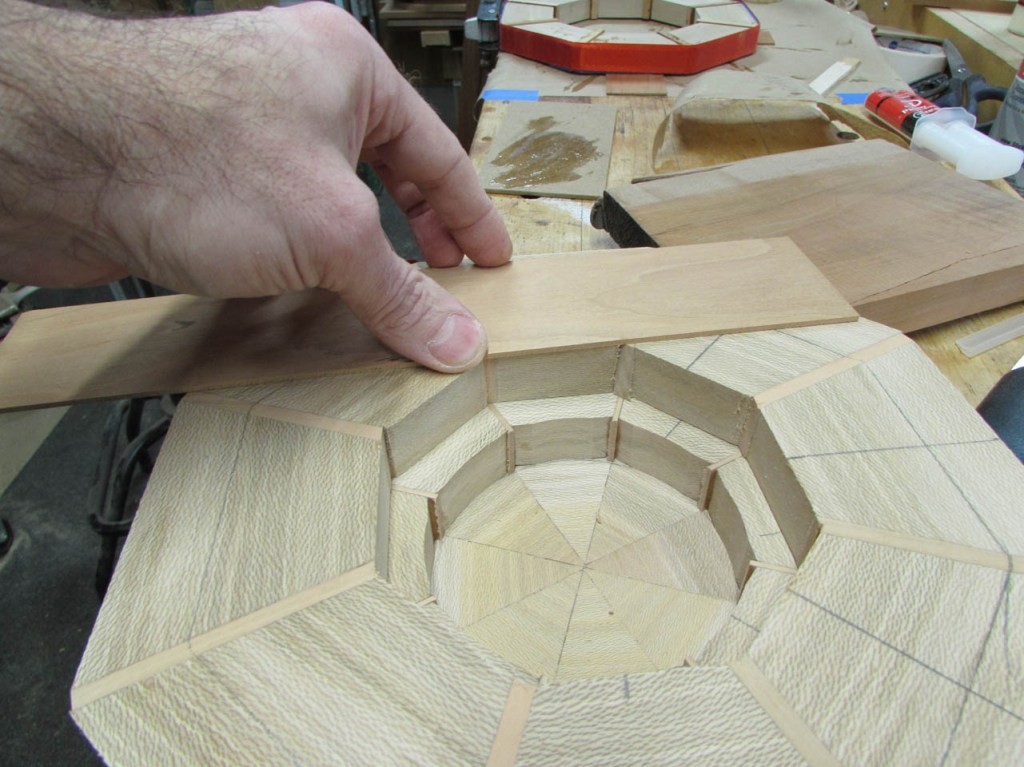
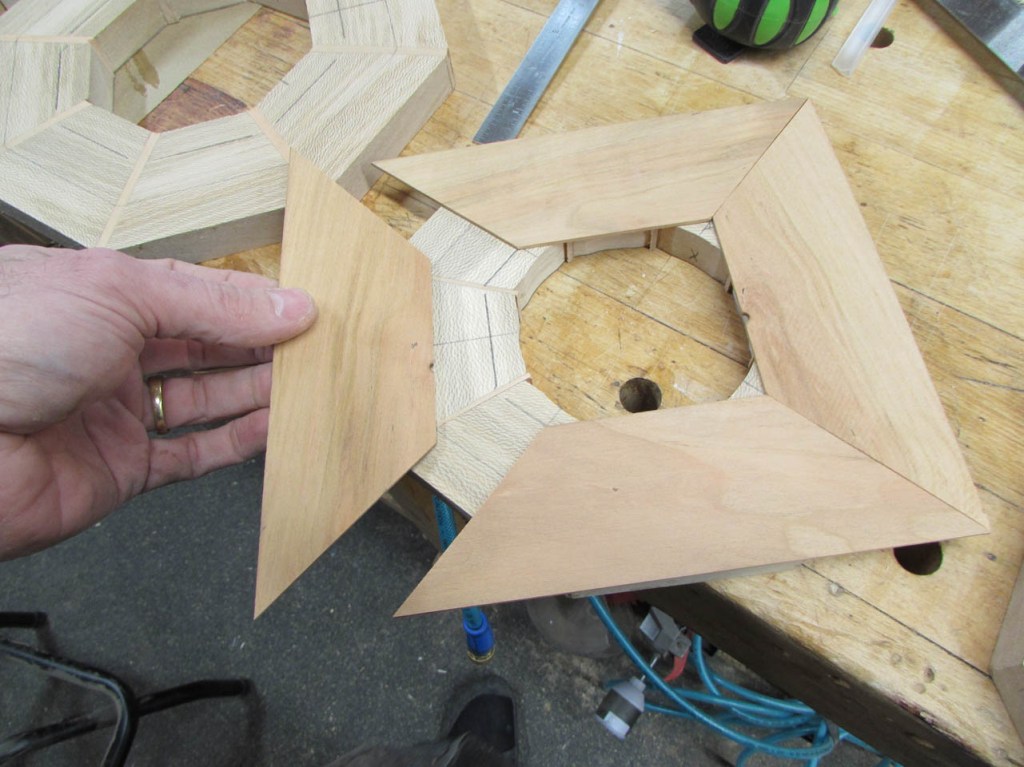
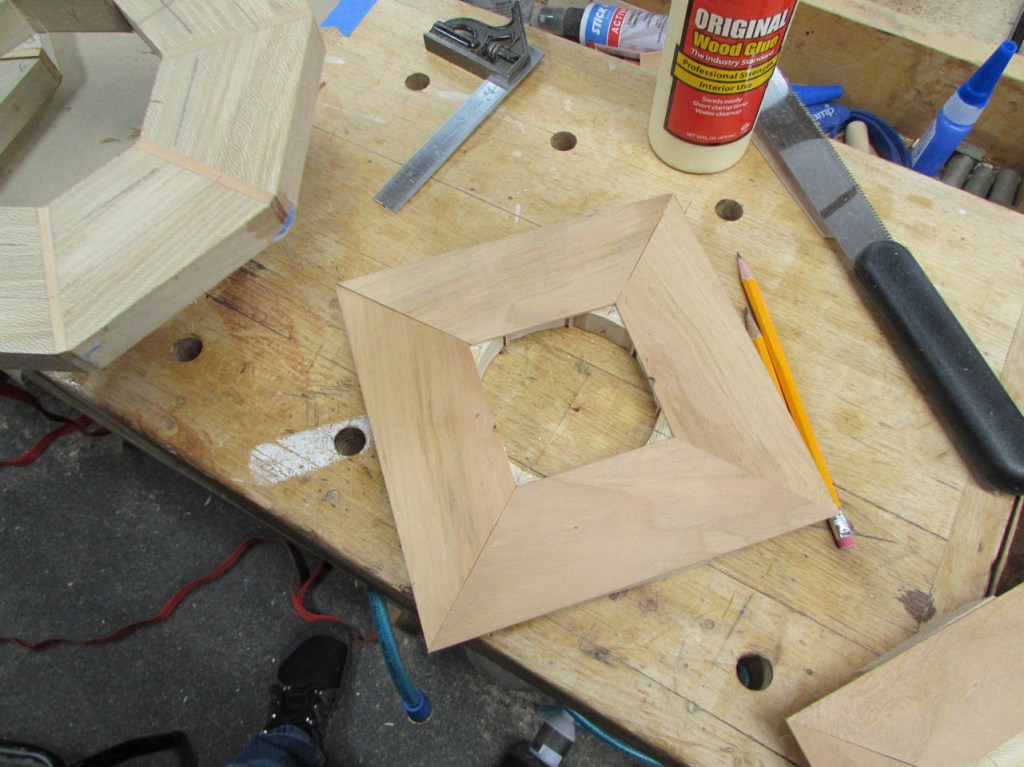
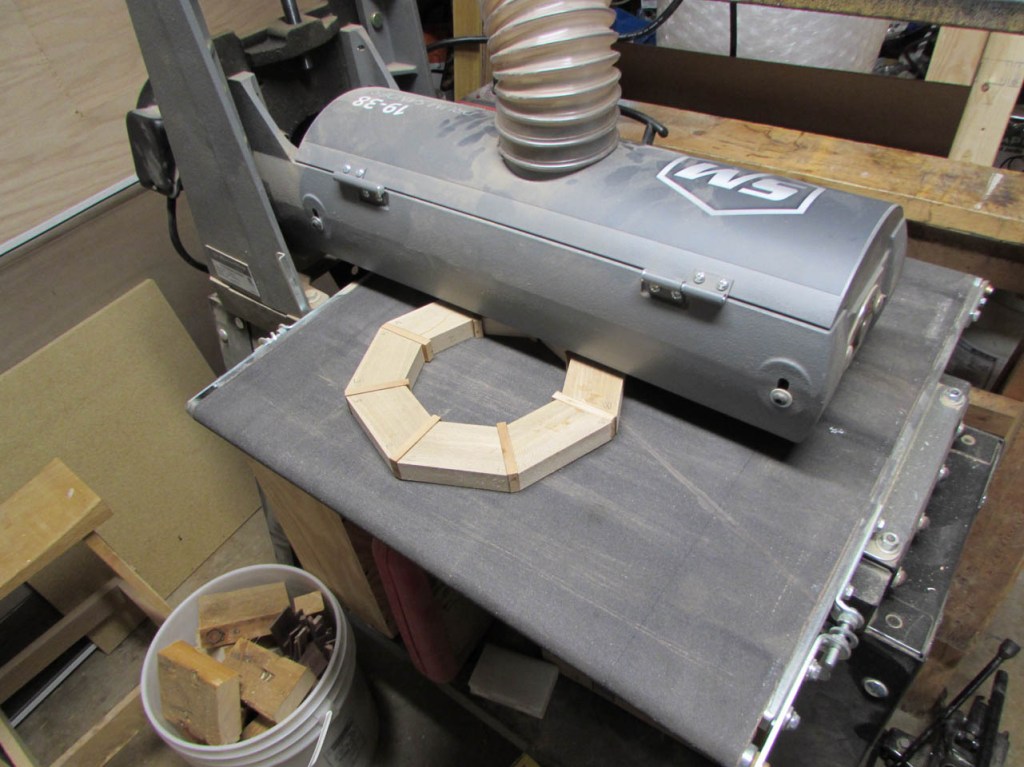
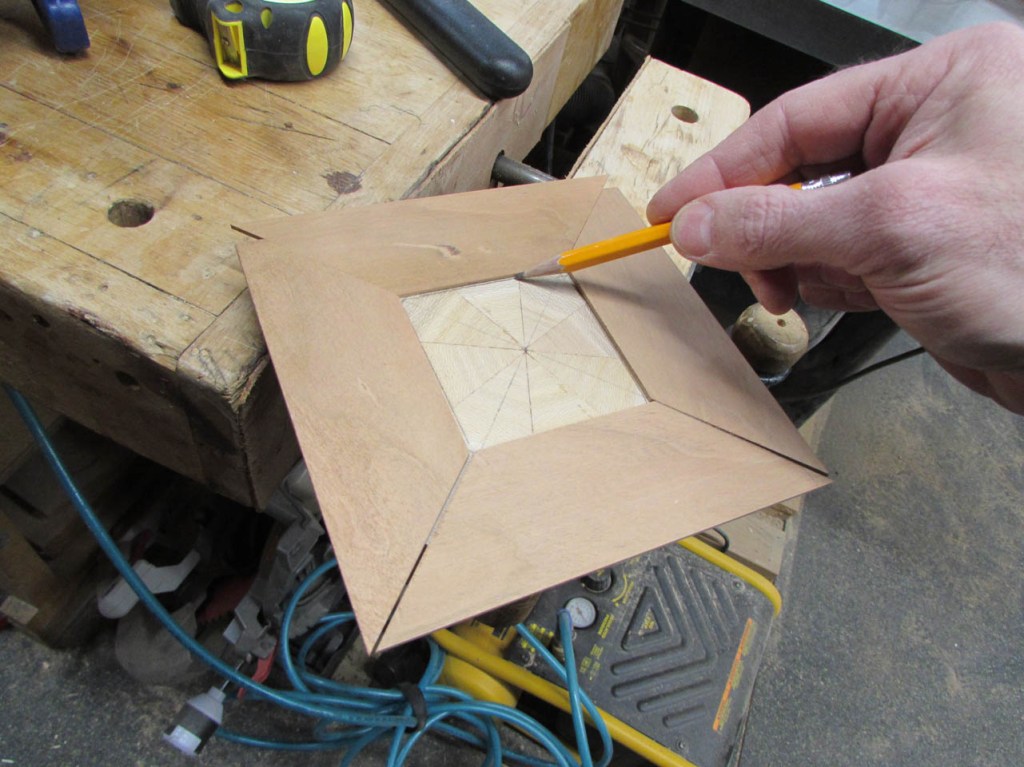
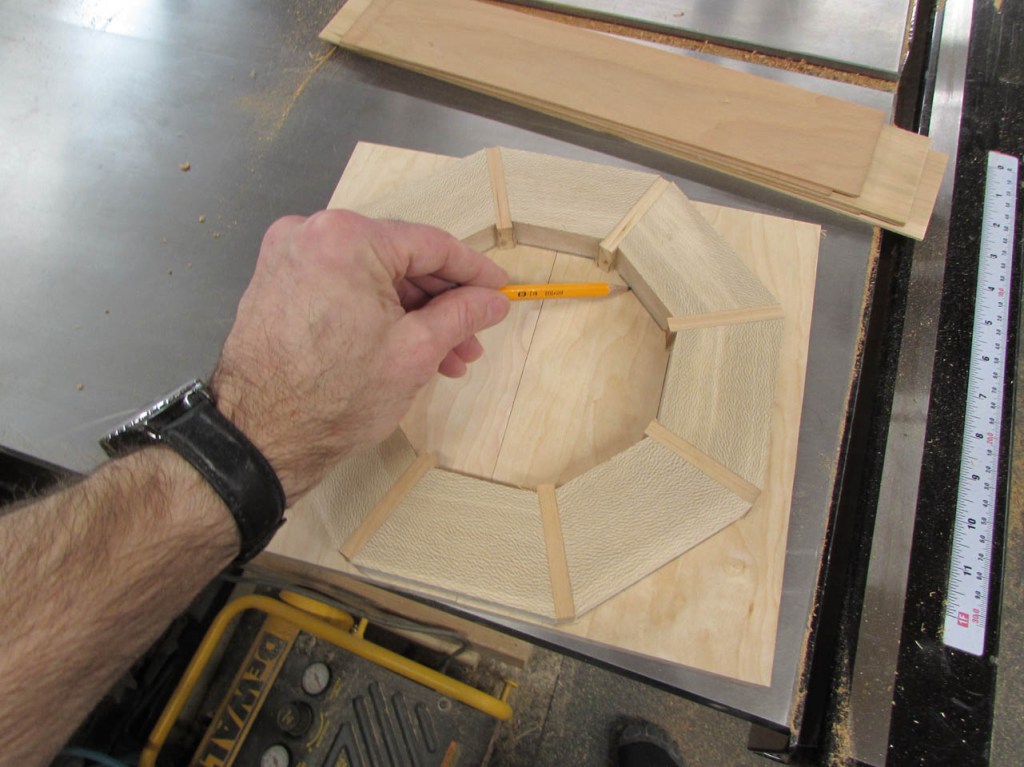
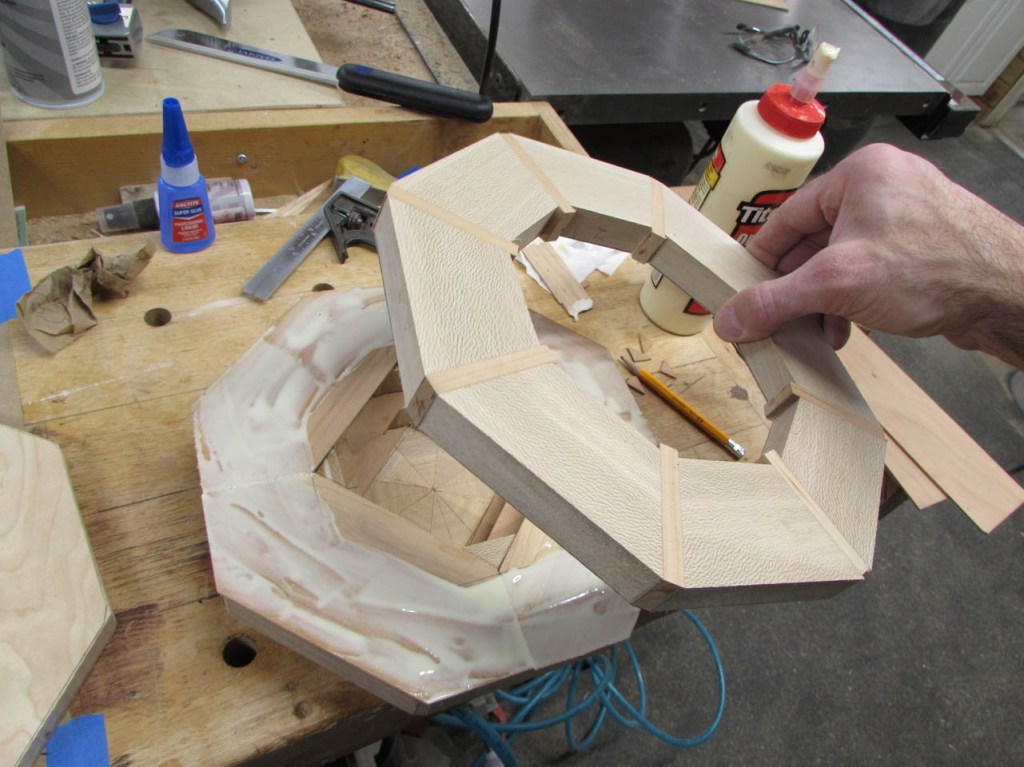
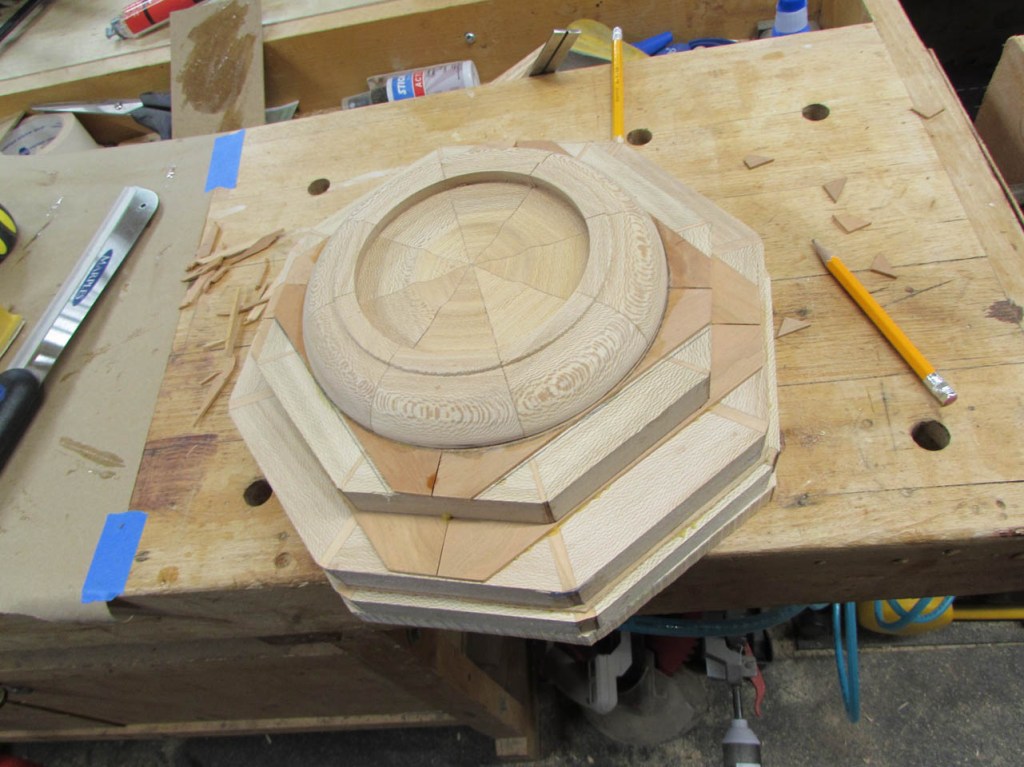
To make it easier to see what I am doing, I decided to cut off the cherry that extended inside the octagonal layers.
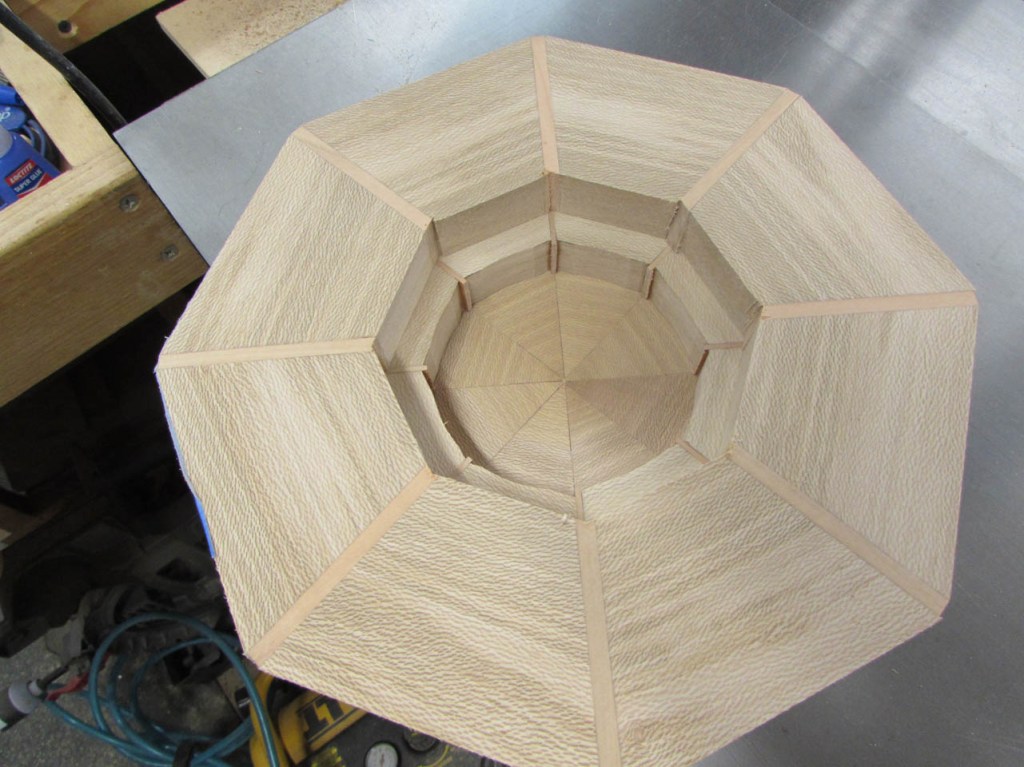
That way I can see how best to align things.
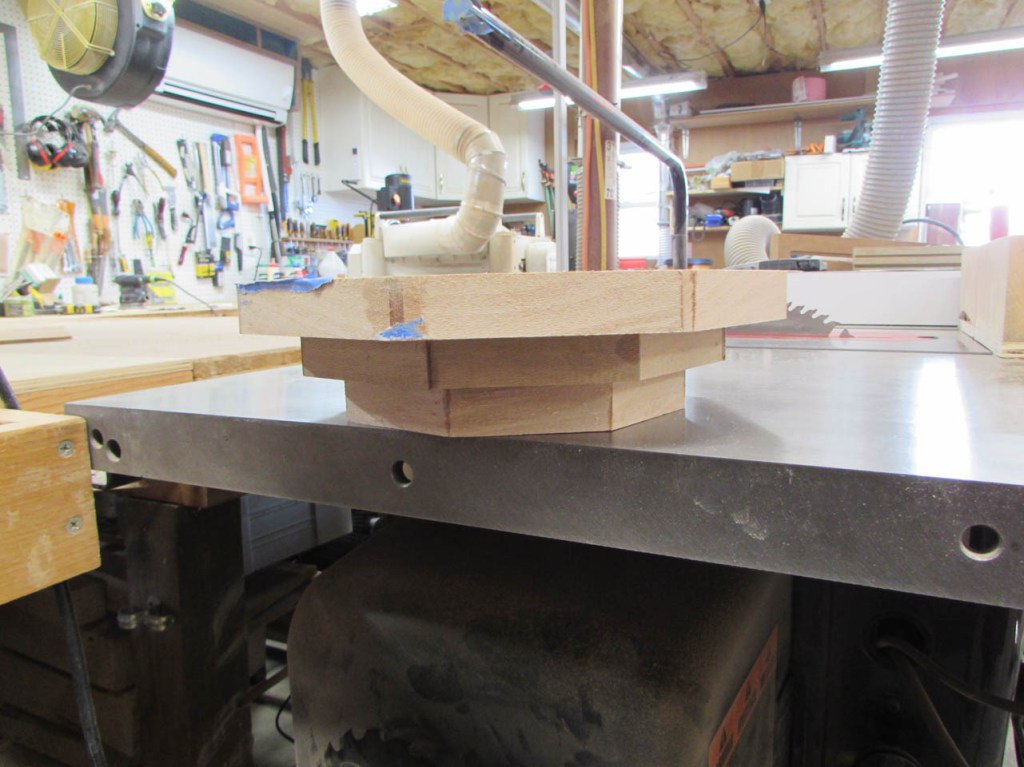
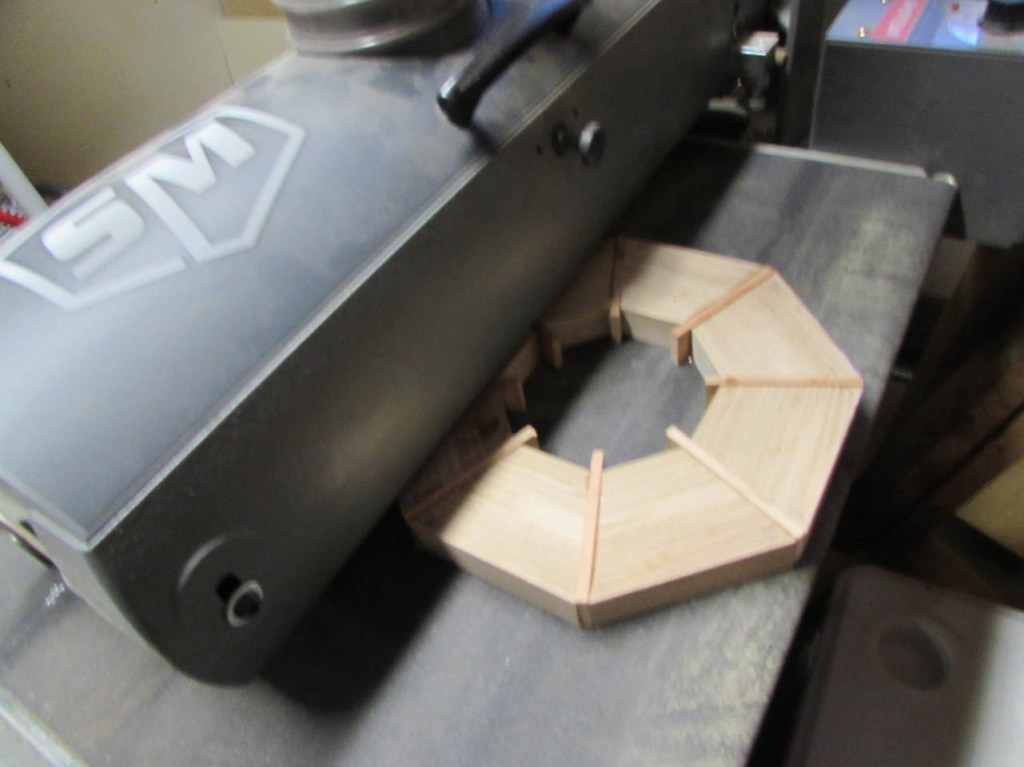
We decided that the bowl was not tall enough yet, so I cut up some more wedges and strips of cherry.
Apparently I adjusted the miter gauge properly this time because there was no gap when it came time to glue up.

Things went very smoothly this time. Next problem is that my wife would like all of the graduating cherry stripes to align. Usually you rotate each level so that the glue joints do not align and create a potential weak point. The overlapping layers just add to the strength, like plywood. In order to add that overlapping layering, I cut more strips of cherry to lay between each layer.
These were all cut and sanded down to 1/16″ thick.
These thin strips will lay across the joints on each level to create that plywood type strength.
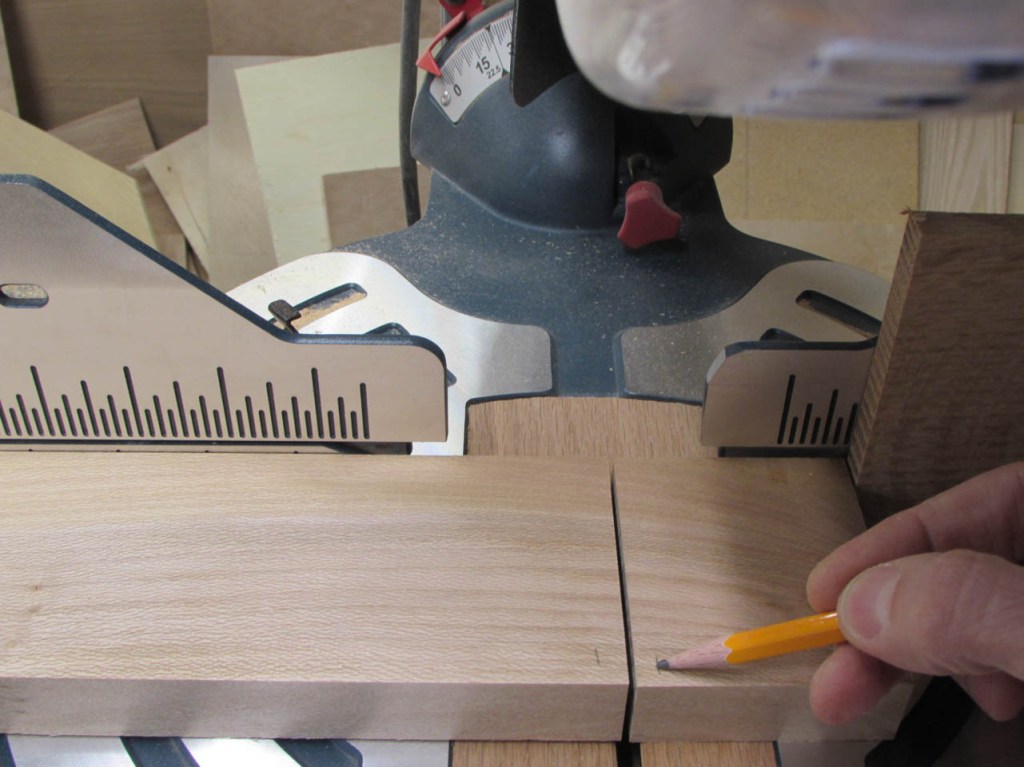
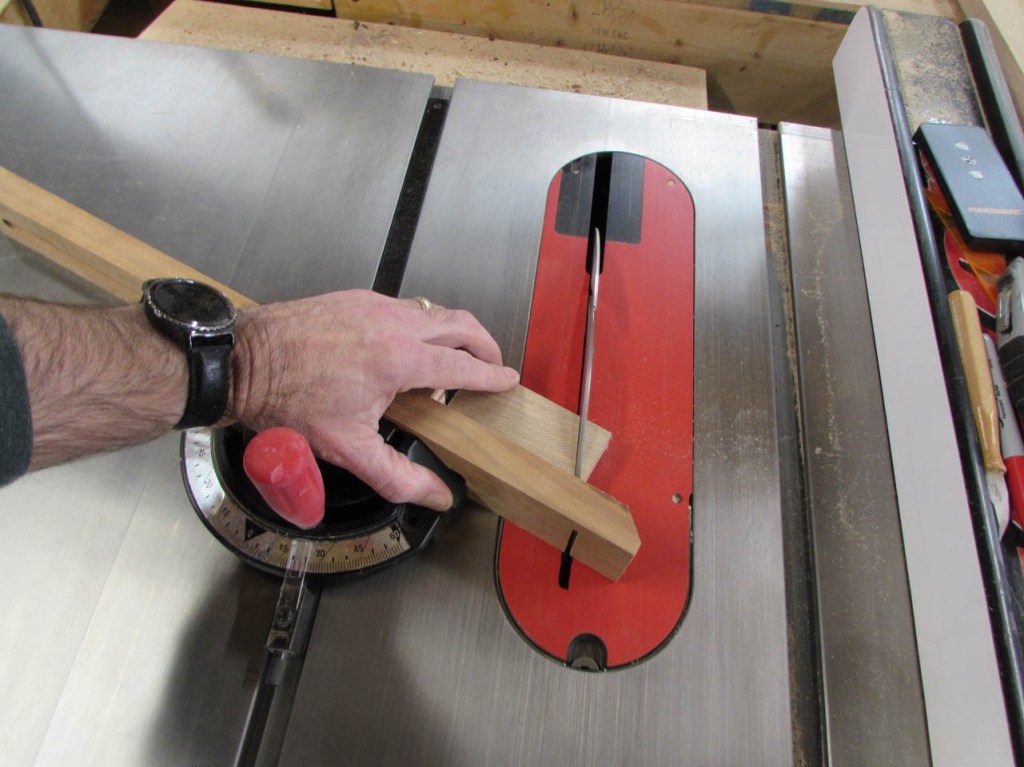
Additionally I will be only cutting them at 45° angles so that I only need four pieces per level, not eight, further reducing the number of joints.
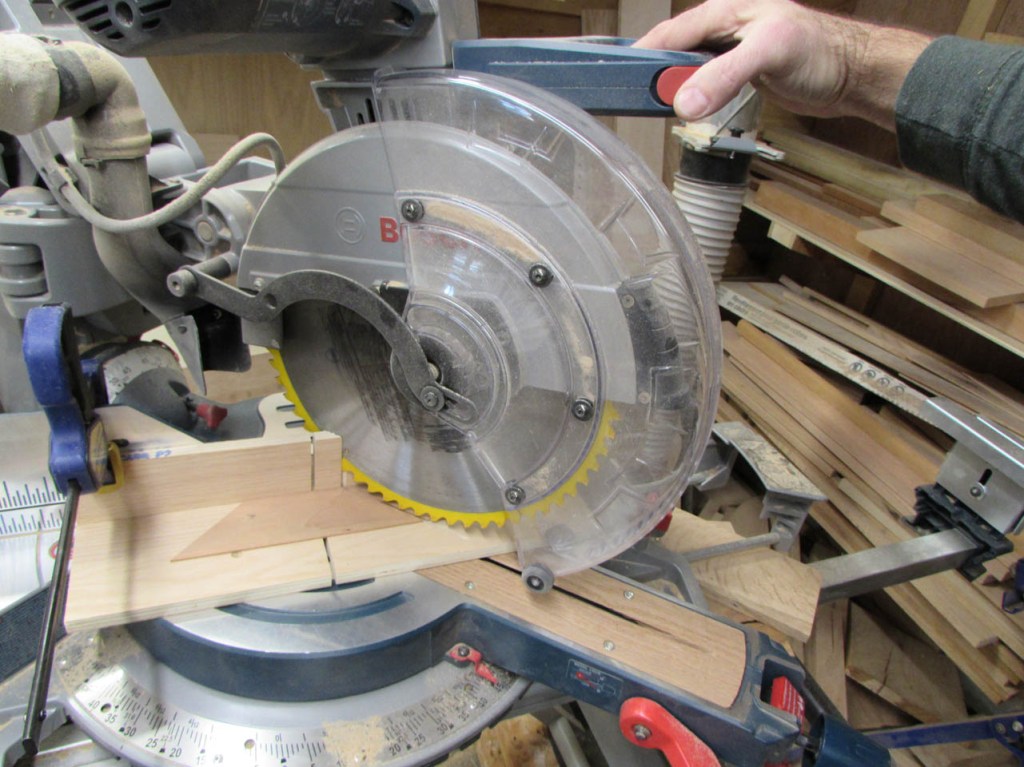
The 45° angles can be easily cut on a sacrificial fence, on my miter saw.
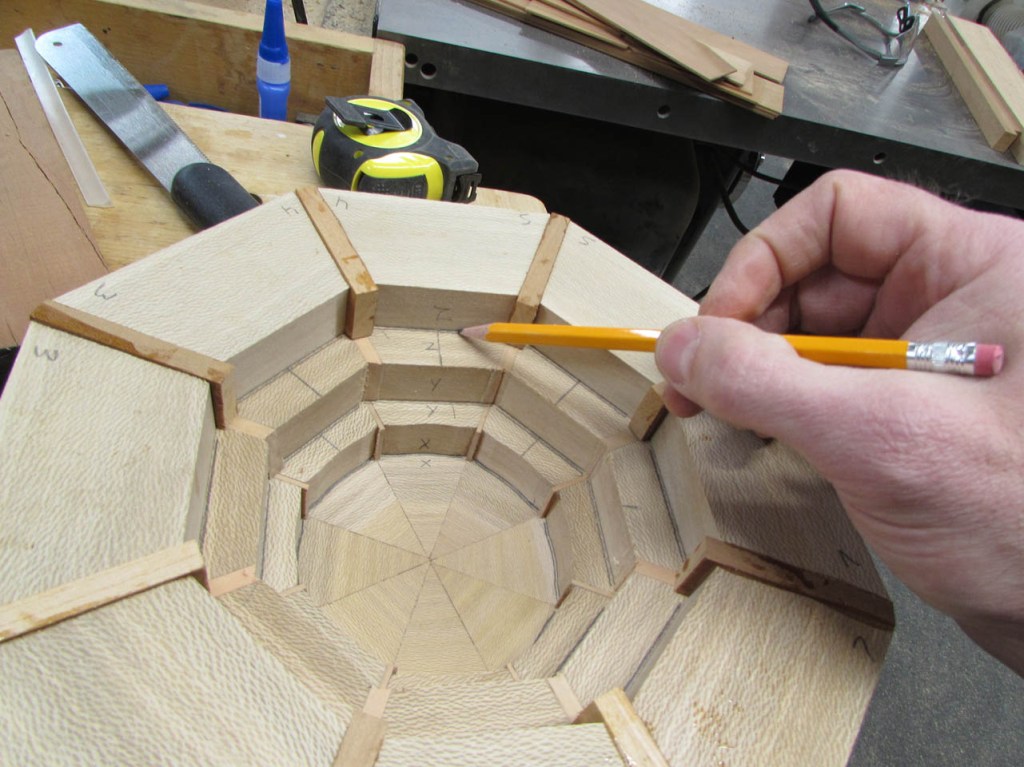
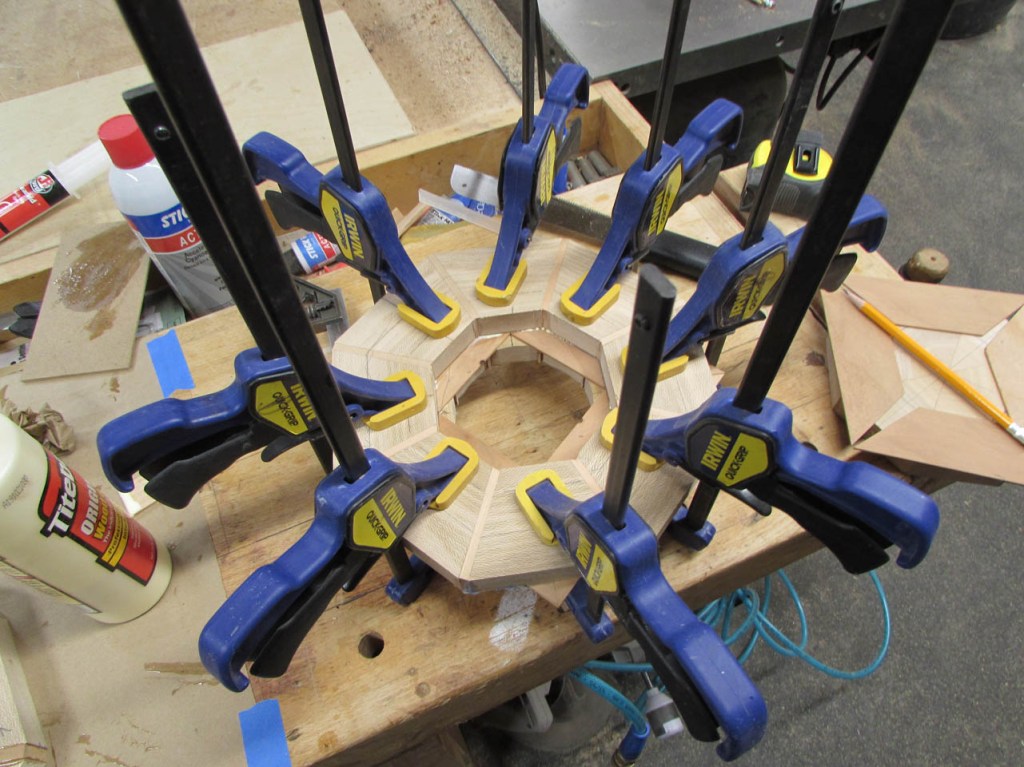
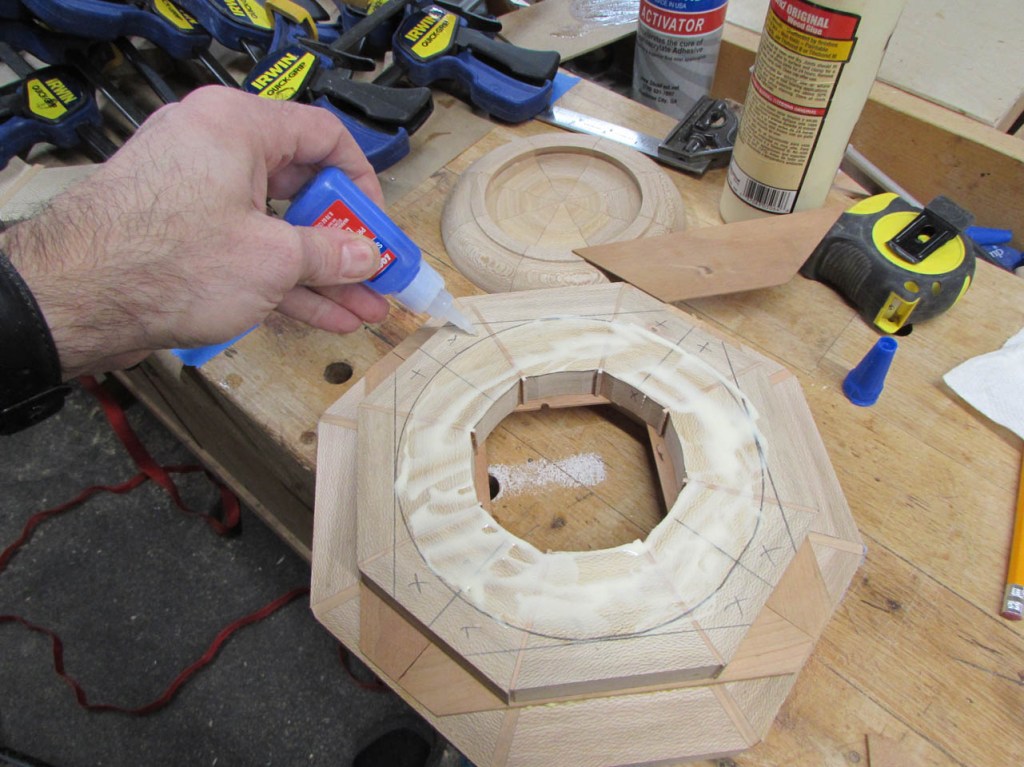
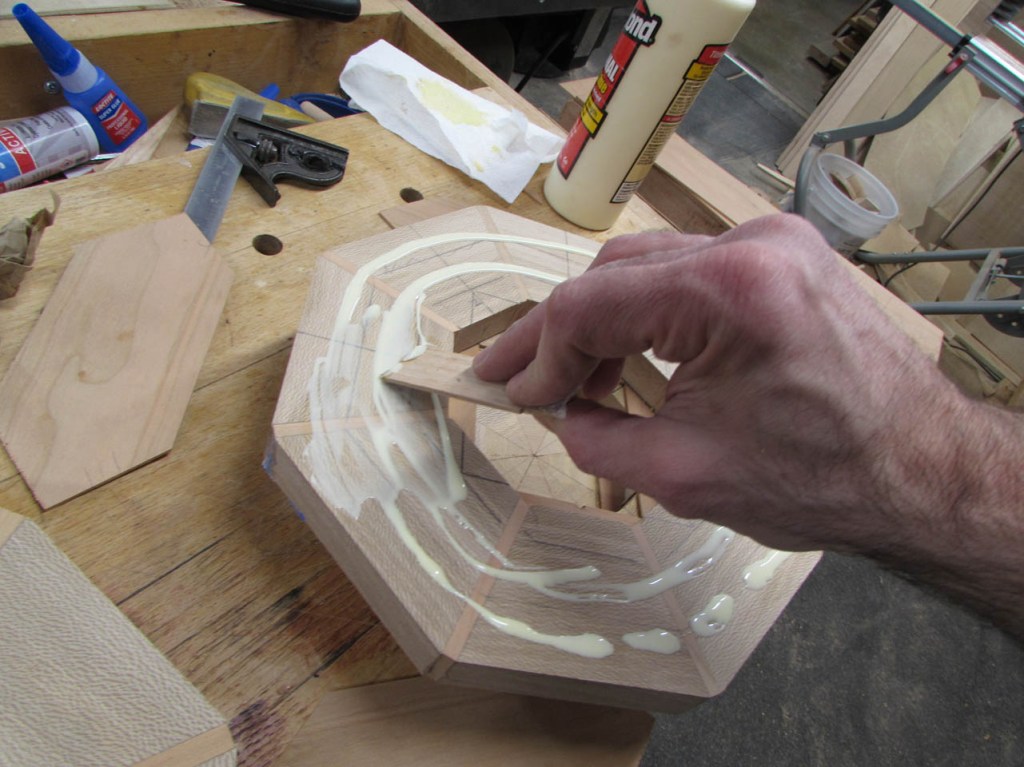
I align all of the levels on the bowl and mark them so that I know where to apply glue.
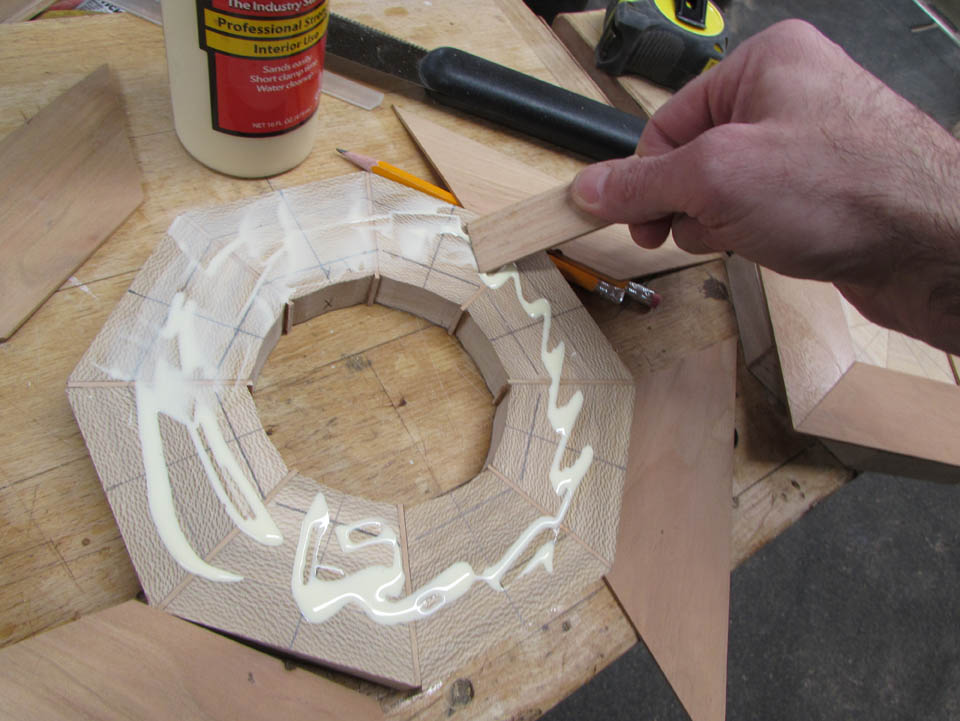
After applying a liberal amount of wood glue, I lay on the first layer of cherry.

I mark the location of the next layer and apply more glue.
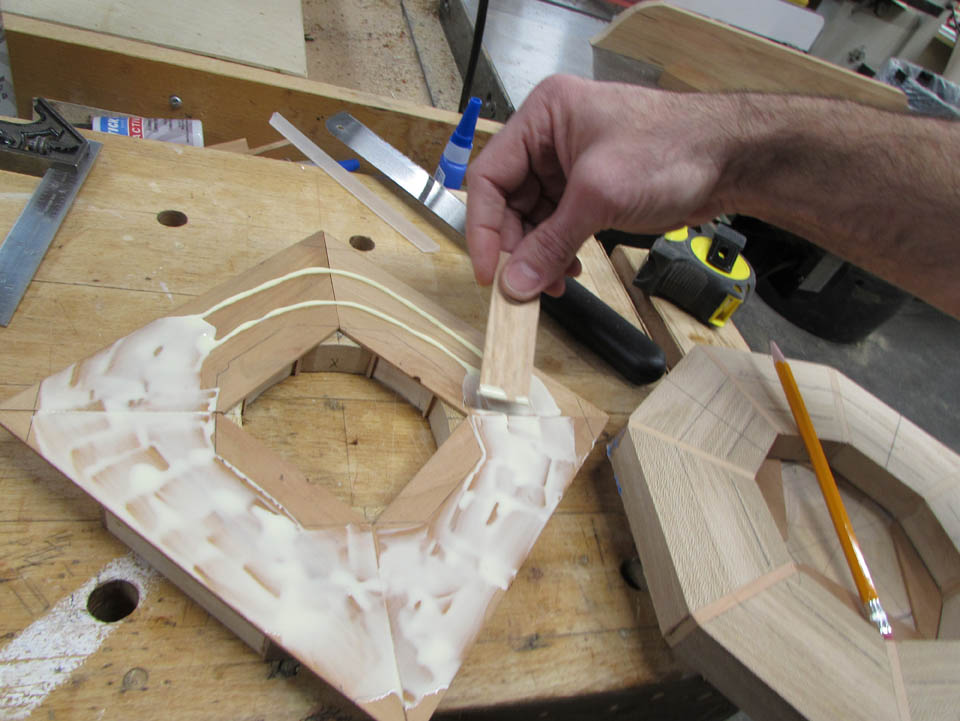
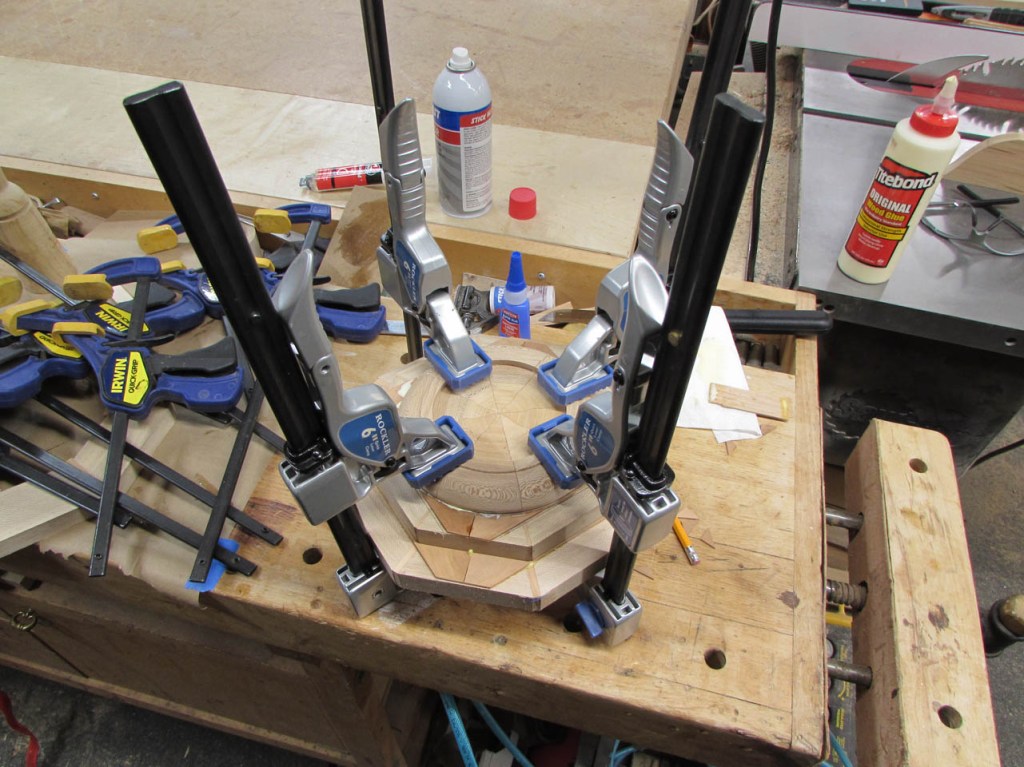
This sandwich is then clamped up and left to dry for an hour or two.
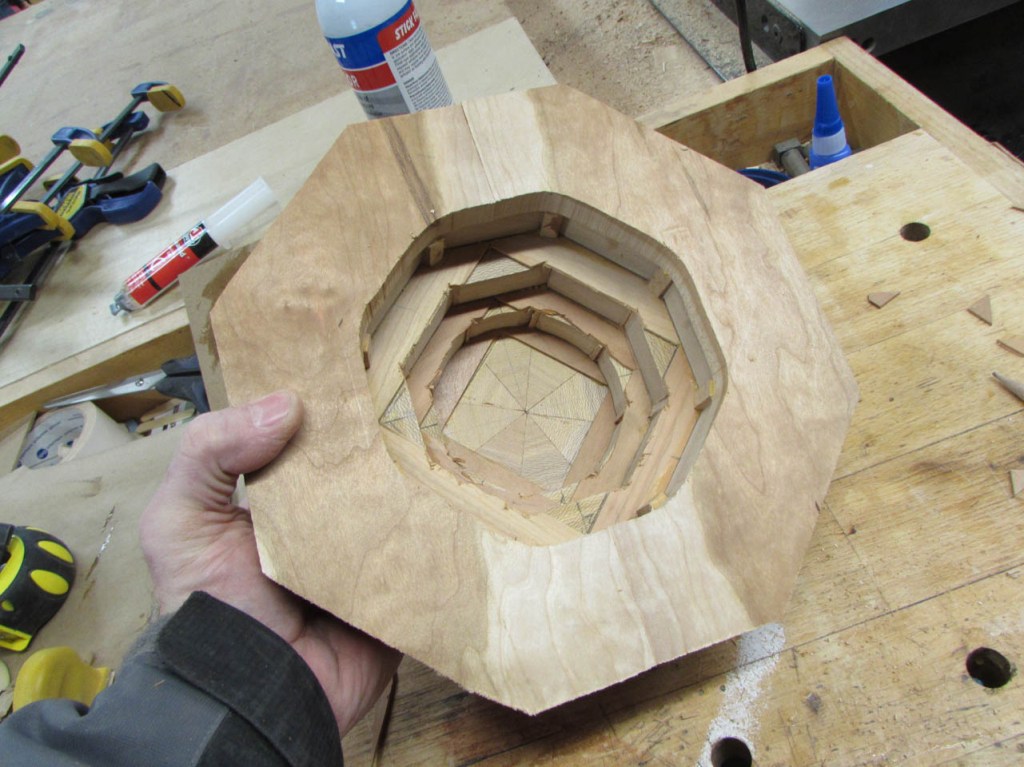
While that is drying, I sanded down the final layer and began to prep the bottom piece for the lathe.
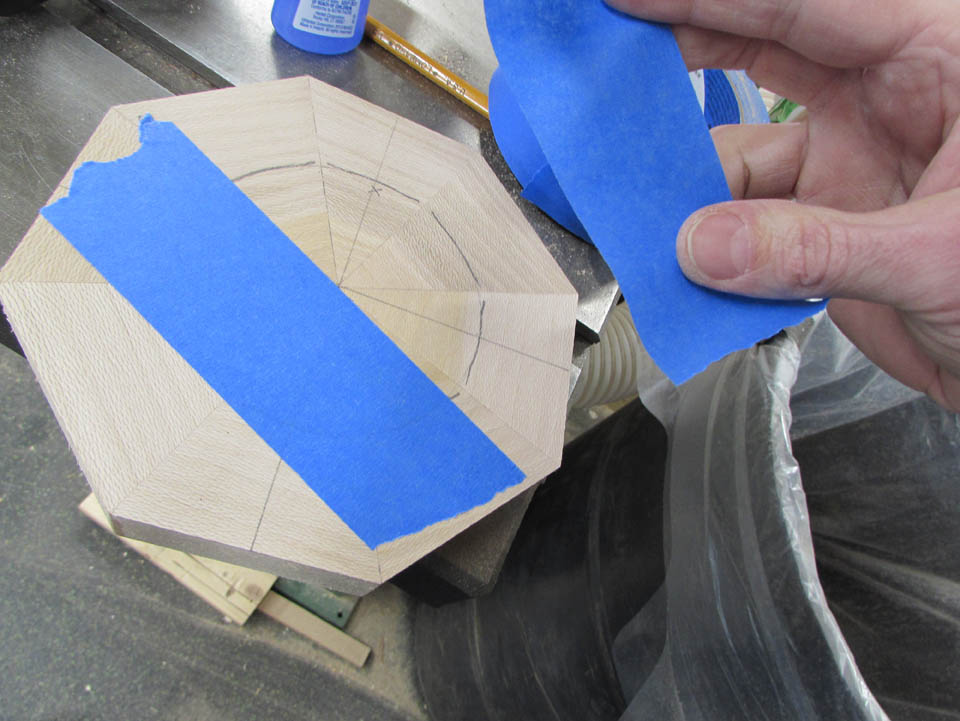
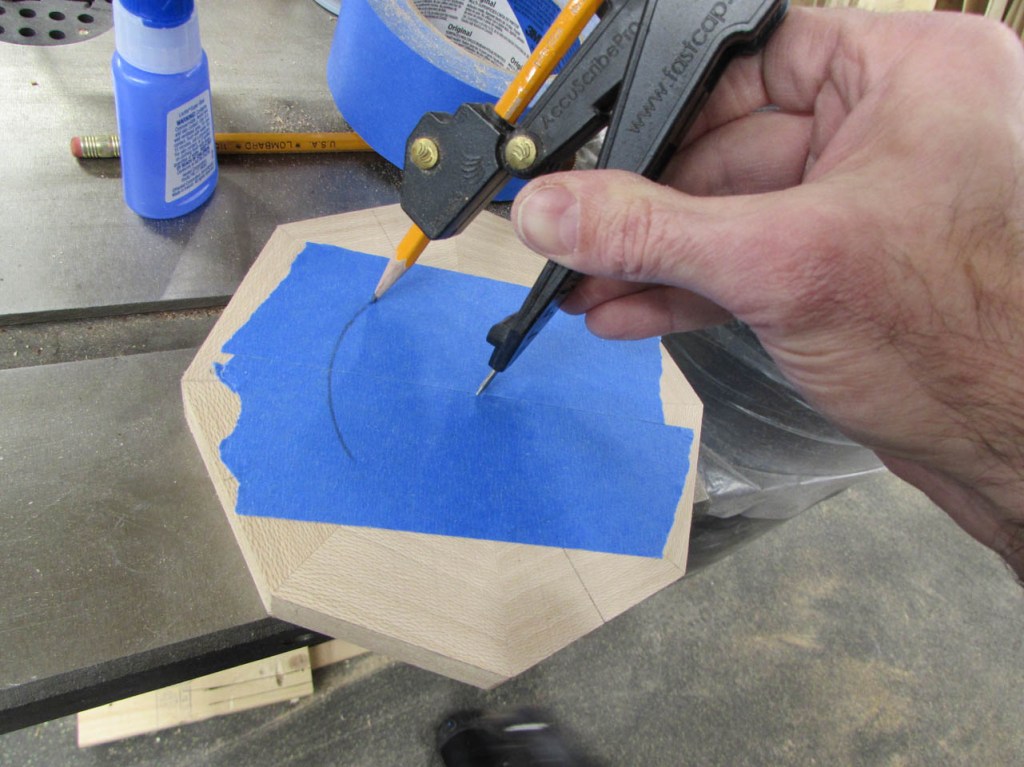
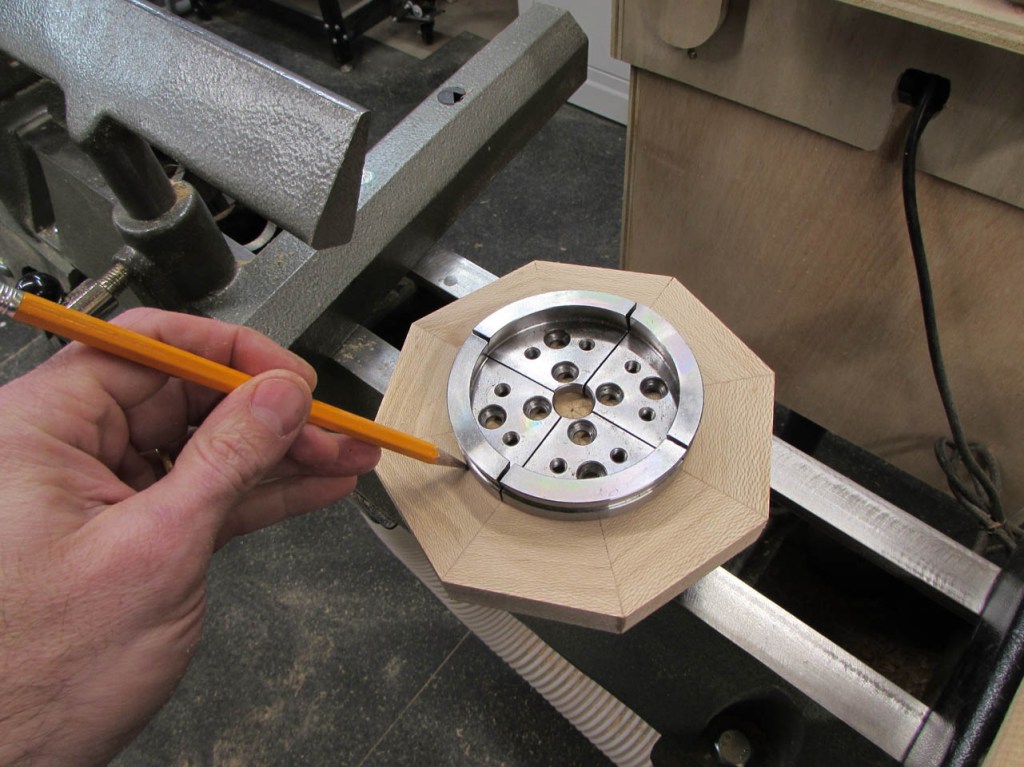
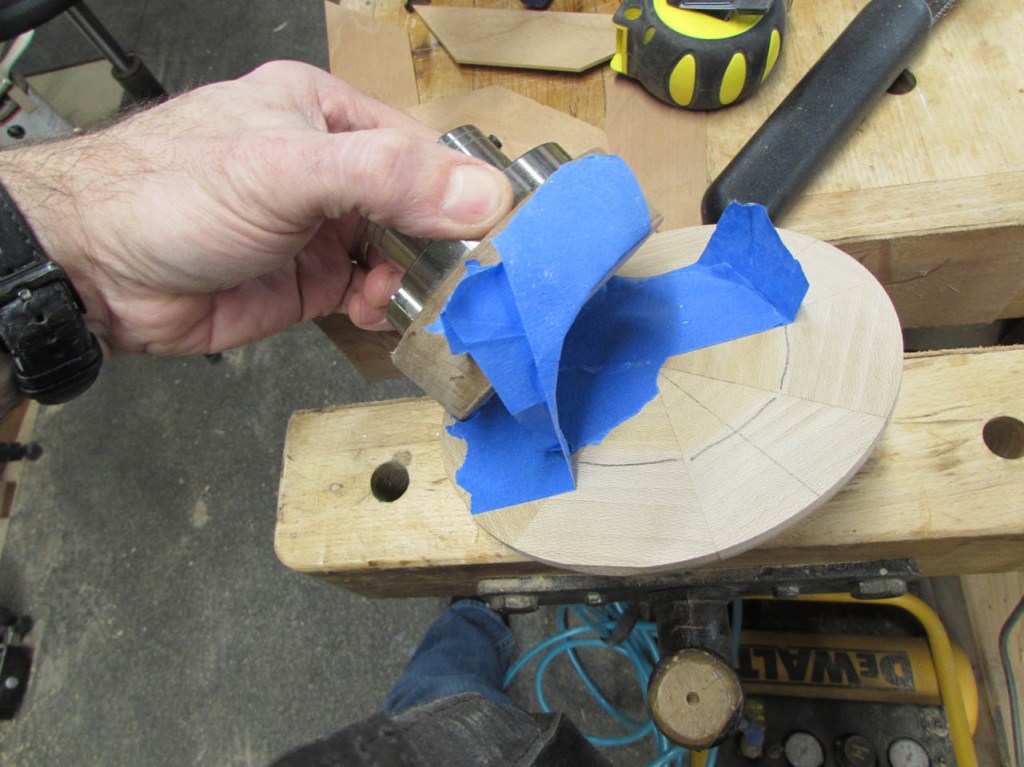
I finally got around to figuring out the best way to hold this in the lathe. I applied painter’s tape to the top of the bottom layer.
Then I used my compass to find the radius of the block of wood I have mounted to my face plate, for the lathe.

This dimension is then transferred to the tape on the bottom layer, using the center of the plate.
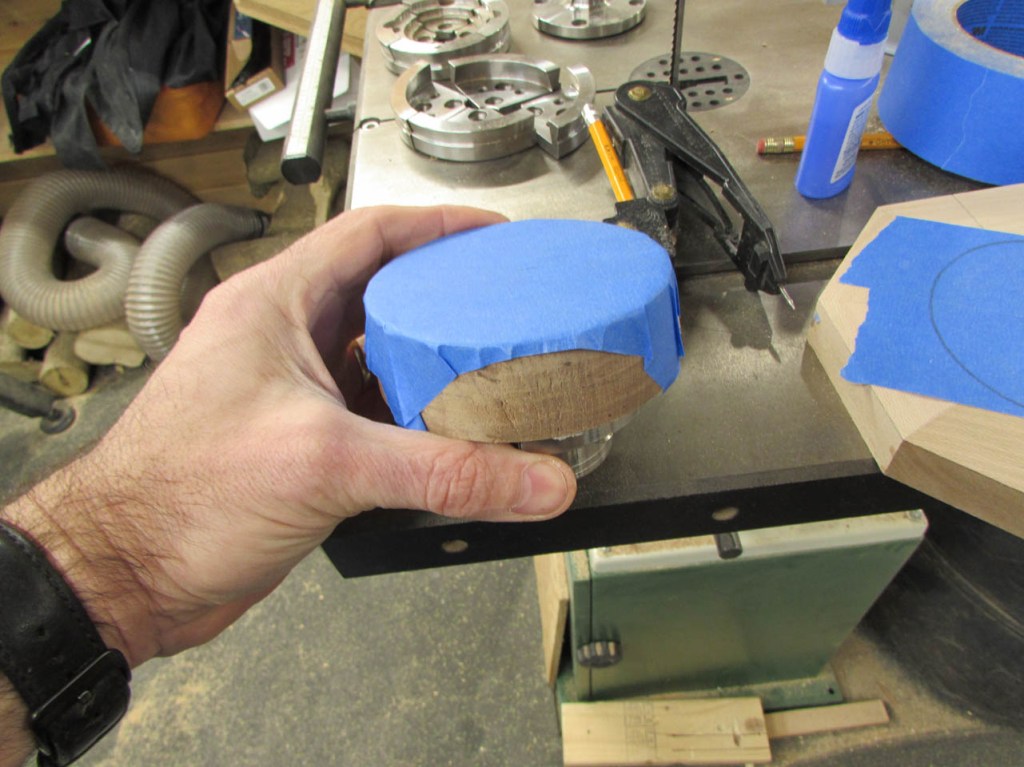
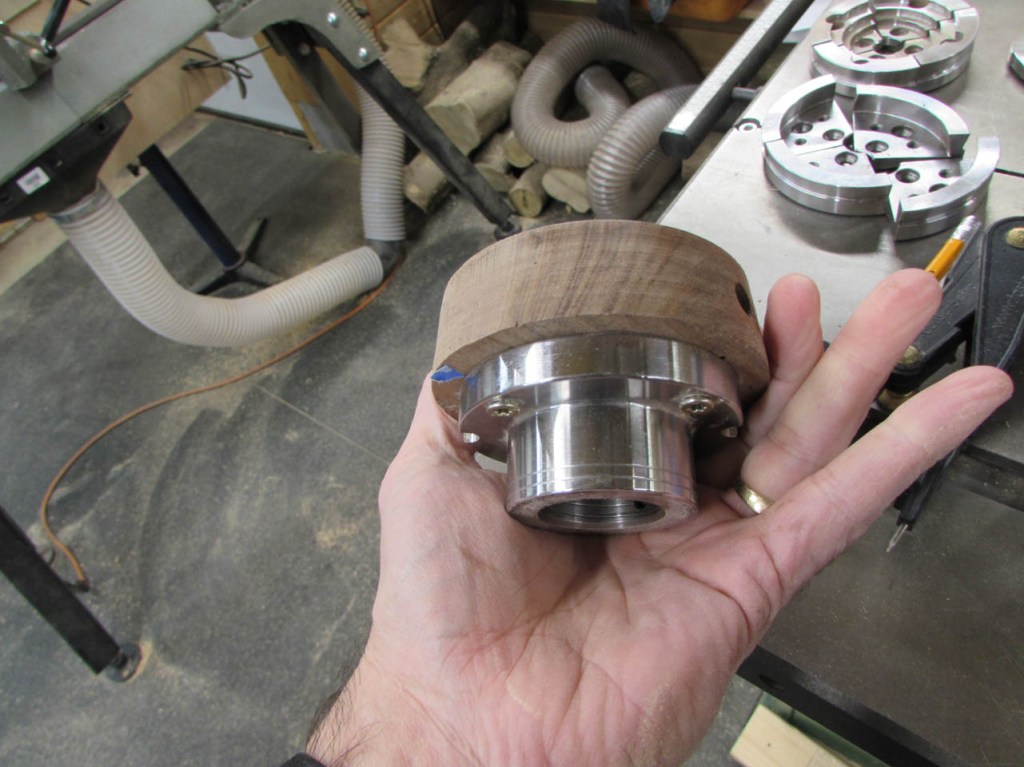
After applying more tape to the face plate, I then applied a bunch of CA glue to the tape.
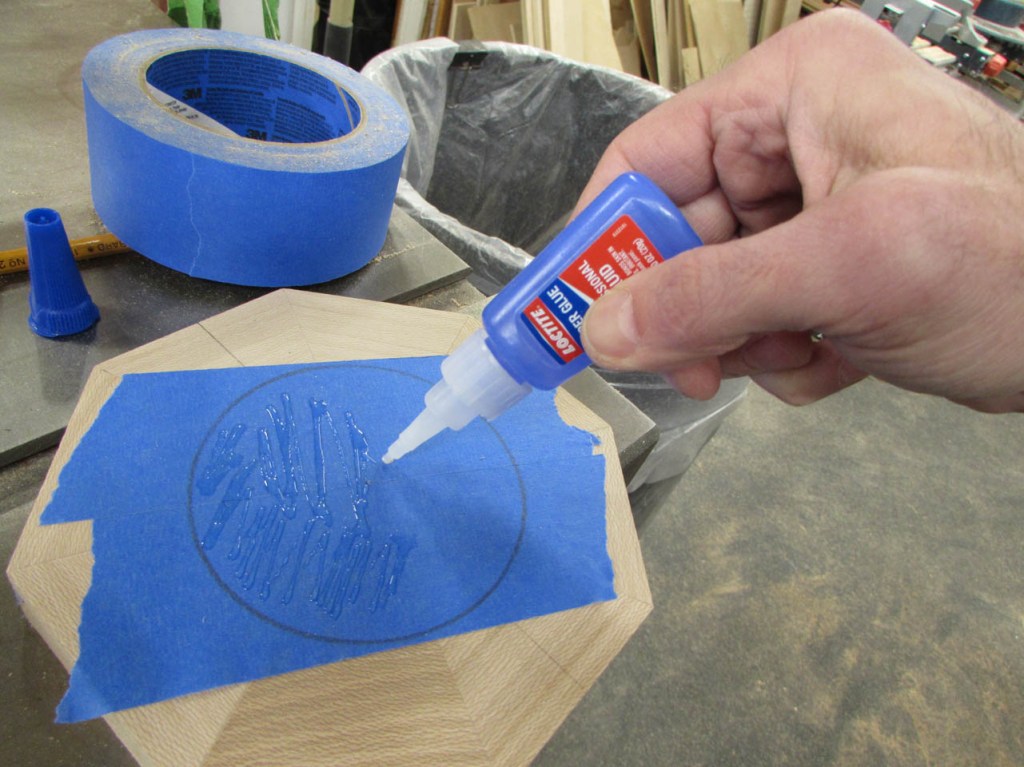
I aligned the face plate with the circle I just drew and held it in place till the glue dried (about 30 seconds).
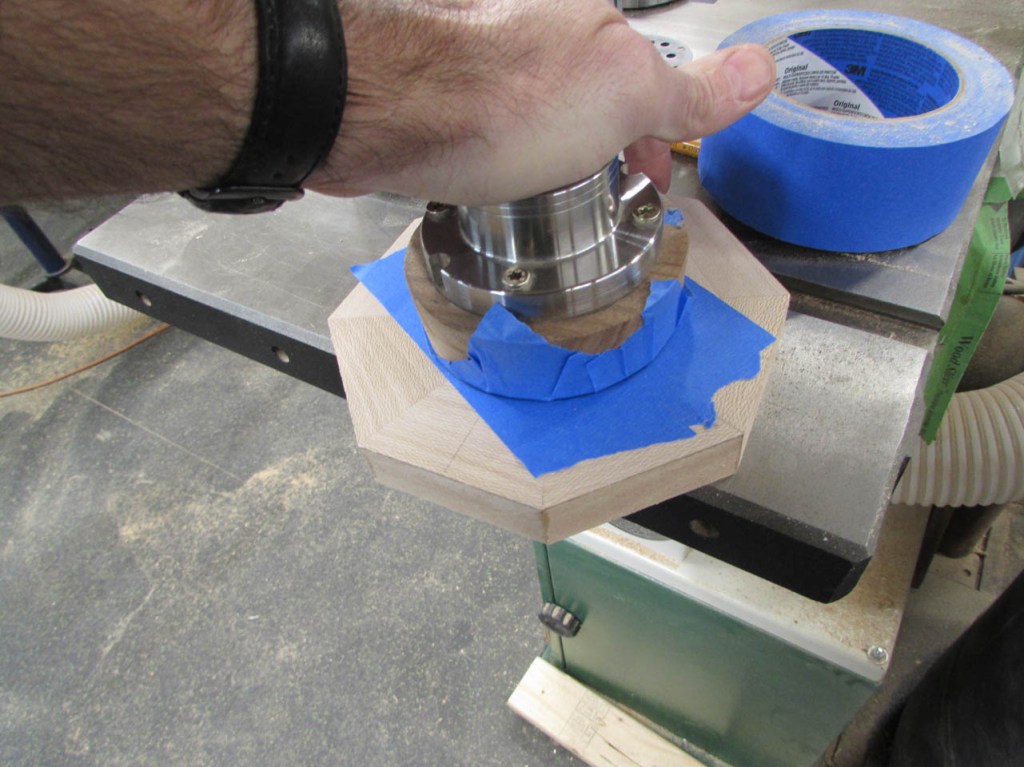
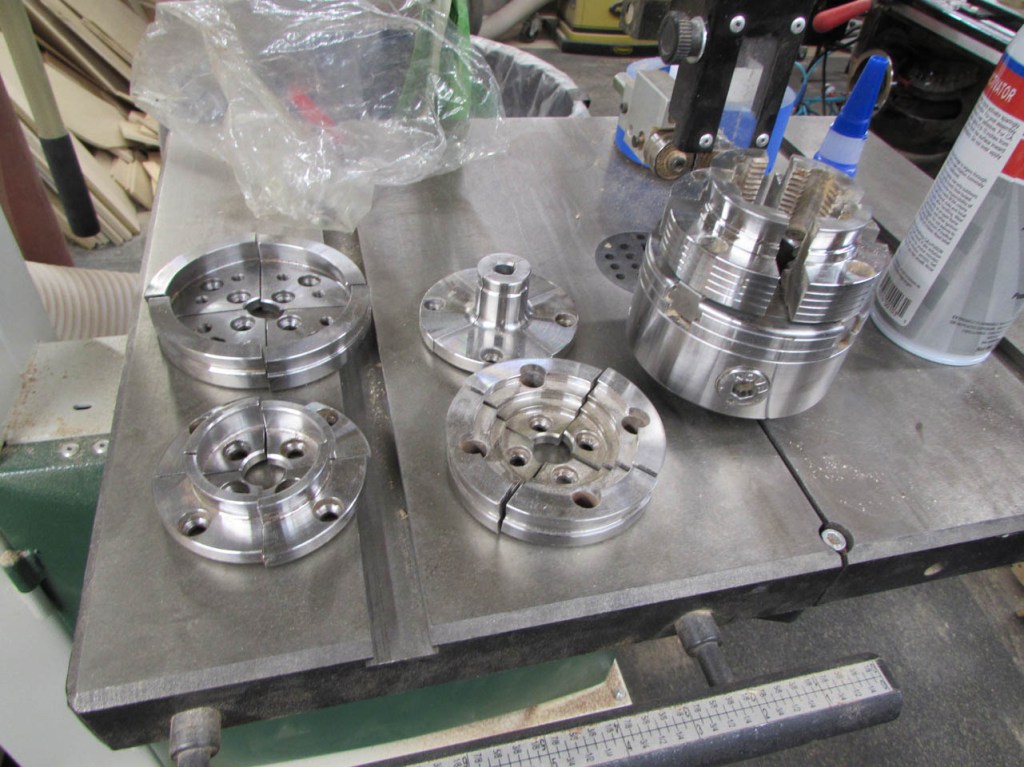
After Tracie and I decided how wide we wanted the foot of the bowl to be, we picked the widest set of jaws for the lathe chuck. I used the 100mm jaws (about 4″) to mark an approximate location on the bottom of the plate.
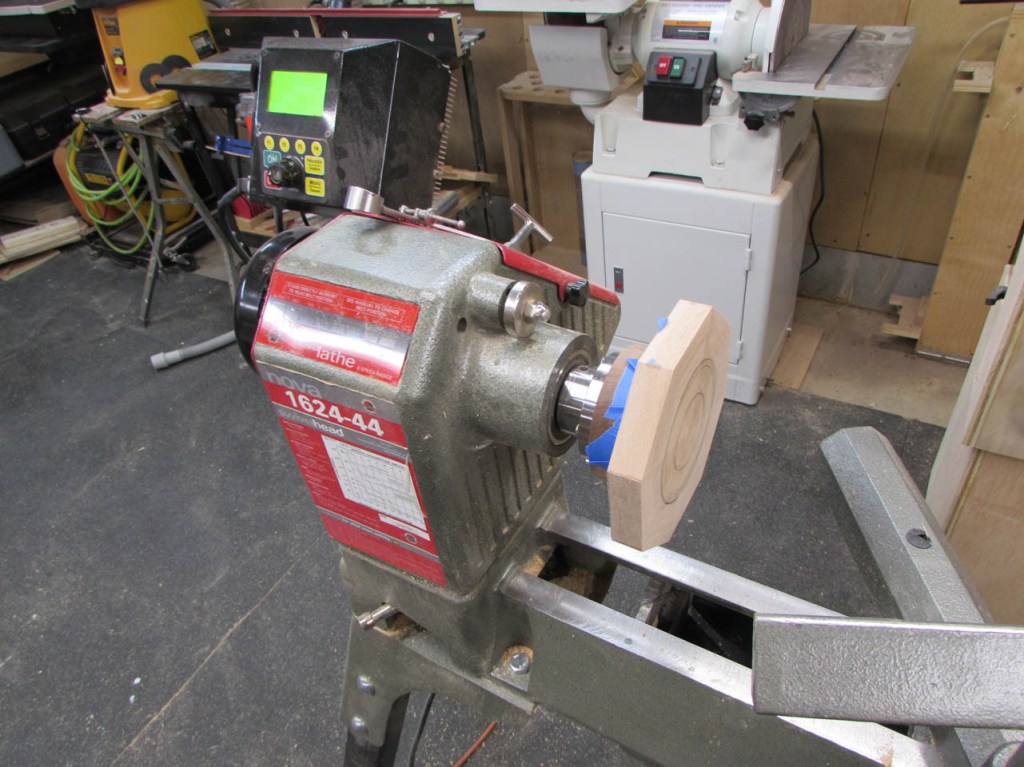
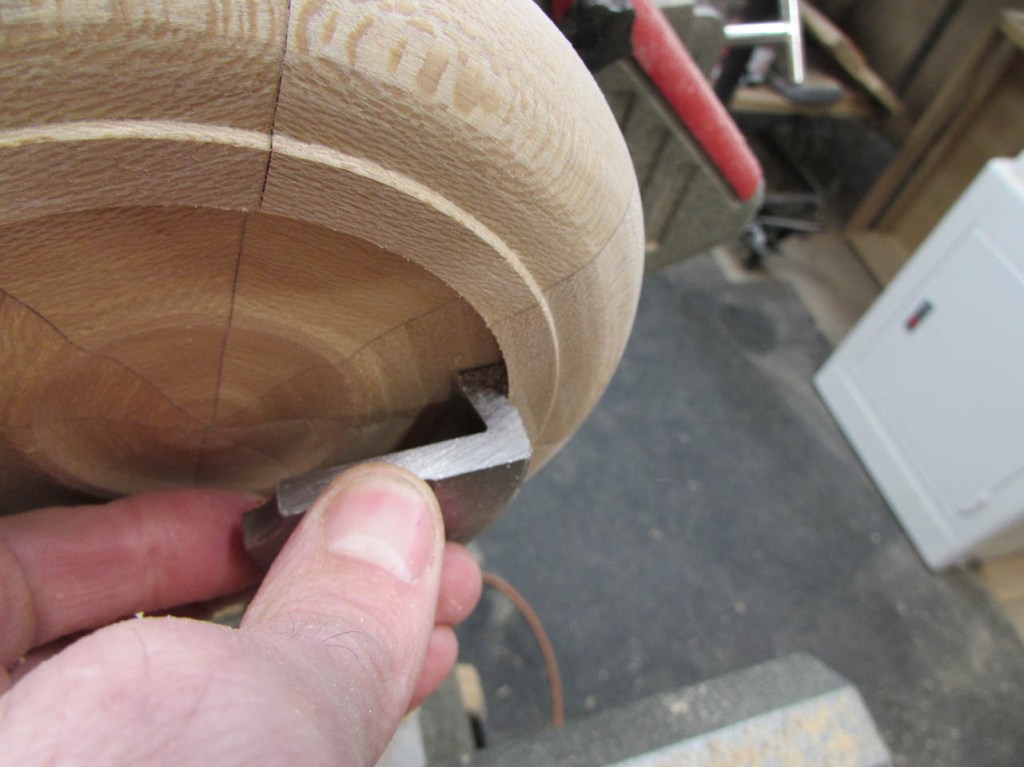
I installed the face plate assembly on the lathe and cut a recess on the bottom.

I used a specific chisel to cut the dovetail for the chuck jaws, then played around with making the bottom a bit decorative.
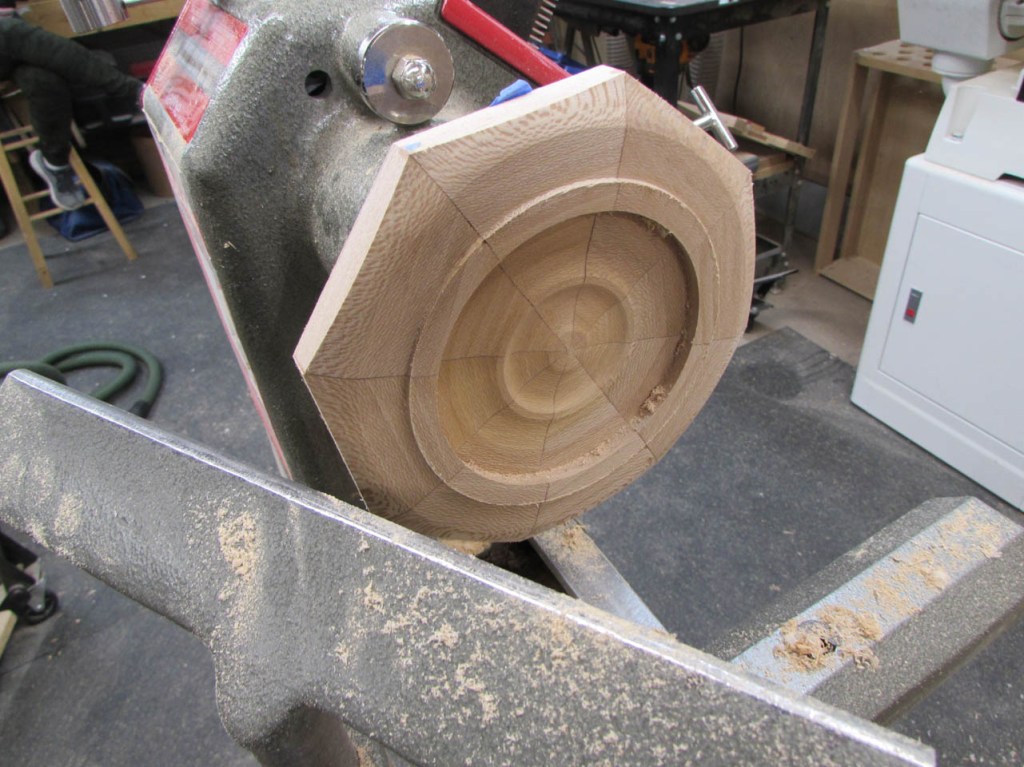
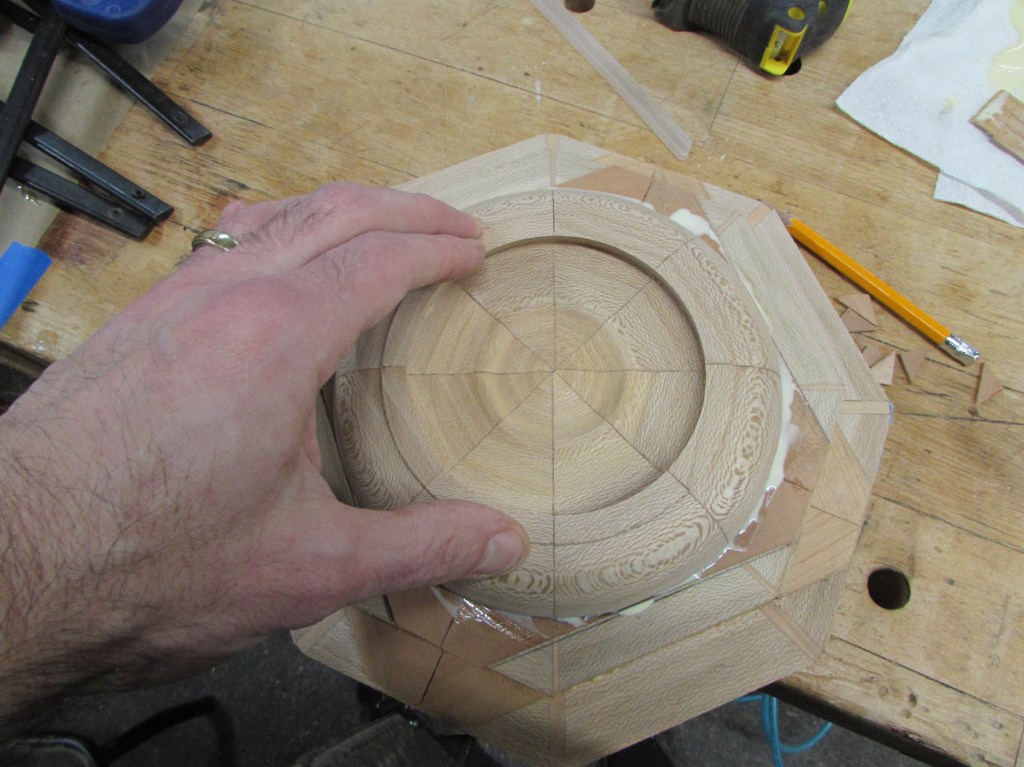
This will be the only time I can work on this end so I do all the cutting and sanding I can while the hollow at the bottom is exposed. Look at that crazy grain. It is so cool.
Before removing the bottom, I test-fit my chuck jaws, just to make sure we were good.
Then I just had to peel off the tape and remove the face plate.
I aligned and marked the next layer of cherry and then stopped to admire the bottom again.


In order to prevent slippage, I marked the corners that would be cut away later and applied a drop of CA glue to them and wood glue everywhere else.
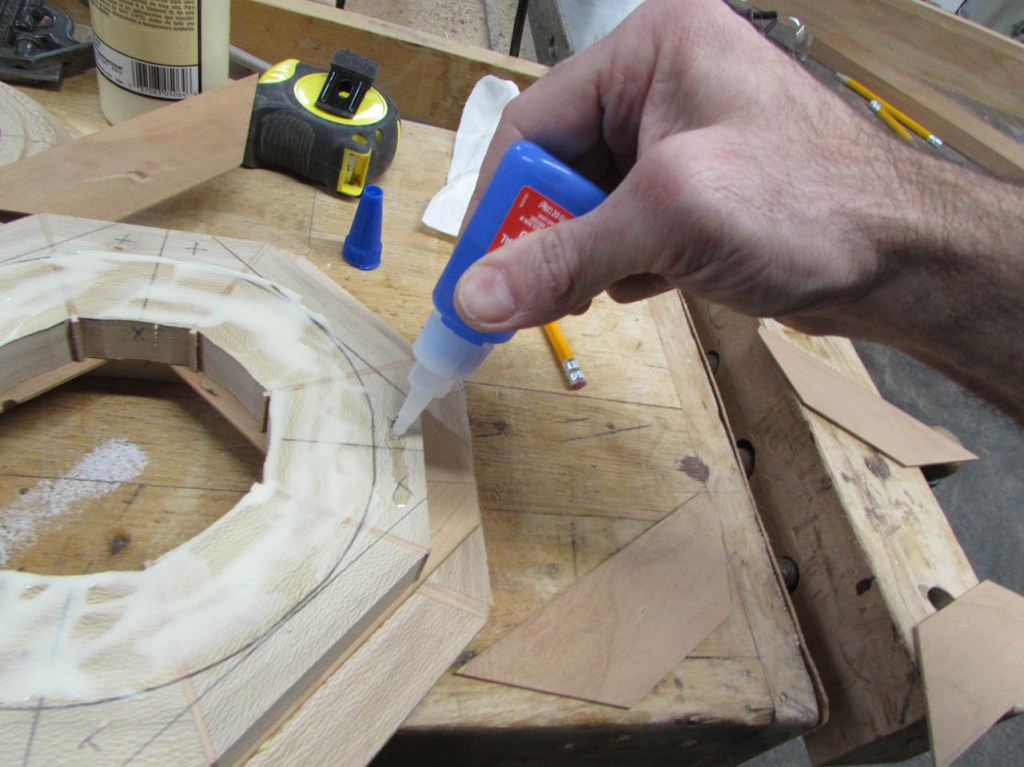
The CA sets quickly and holds the cherry temporarily while I apply glue for the next layer.


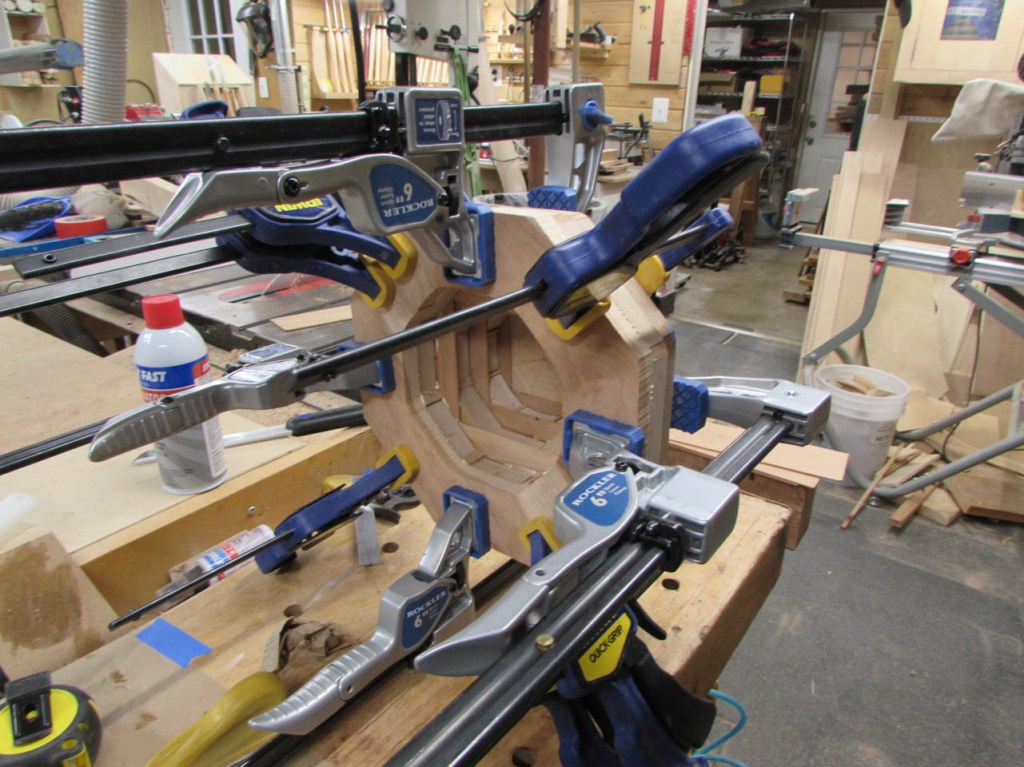
I decided to trim away the extra pointy bits to make it easier to work, then applied wood glue.
Once aligned to the rest of the bowl, I used some deeper clamps to hold the bottom in place.
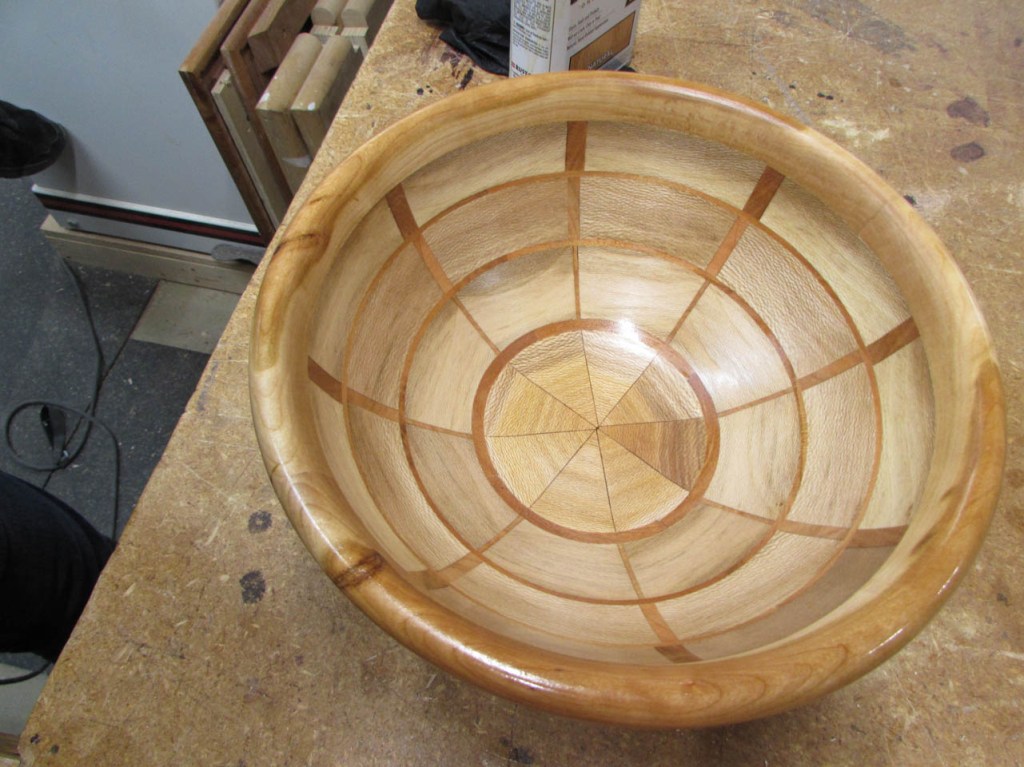
The sycamore is pretty but softer than I would like for the rim of the bowl. I decided to add a cherry rim to the top. My wife liked a piece of cherry sapwood I had so that is what I used.

I marked and cut two halves so that they would kind of book-match on the top.
After I was happy with the fit, I cut another layer of thin cherry to glue to the next layer being attached.
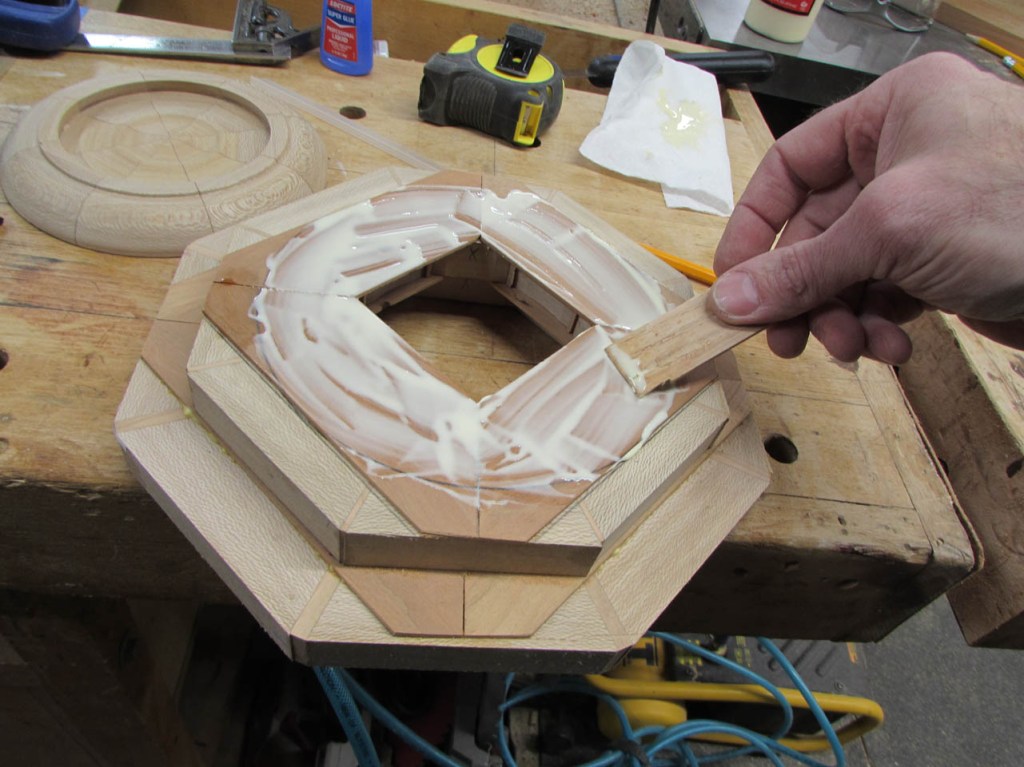
Layer number four got applied and aligned.
Then the cherry top went on and everything got clamped.
The next day, I pulled the clamps. It definitely looks interesting…

I dropped the chuck into the dovetailed spot on the bottom and expanded it tightly into place.
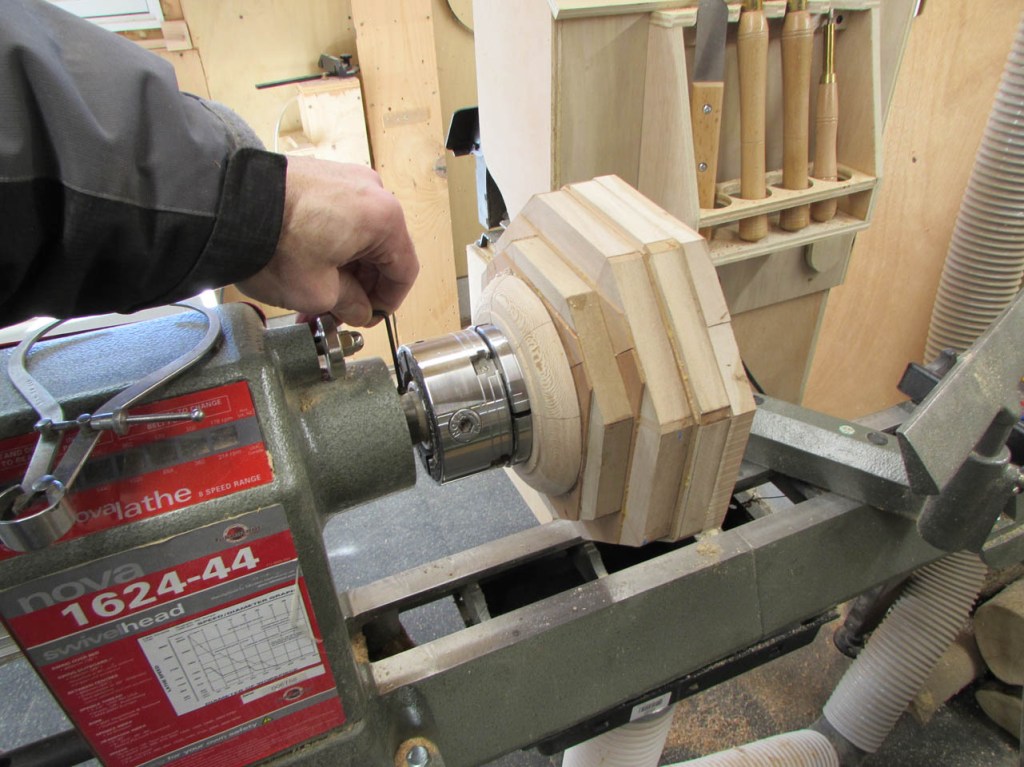
Then I loaded it onto the lathe and stood back while I turned it on. Just in case… I cranked it up to 2,000 rpms and is hummed along very smoothly.
I was a little concerned handing it off to Tracie for the initial rough-out because there is a lot of end-grain to smooth out and sometimes you get hit with a lot of sharp chunks.
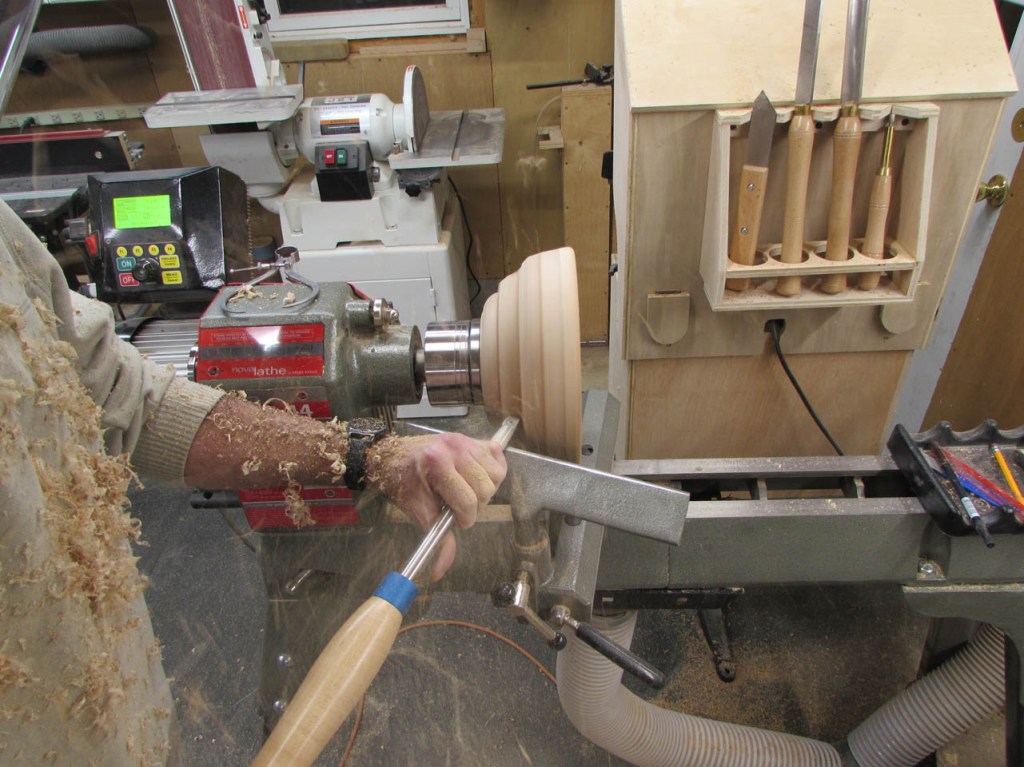
There were a few painful chunks at first, bouncing off my hands, but it quickly smoothed out.

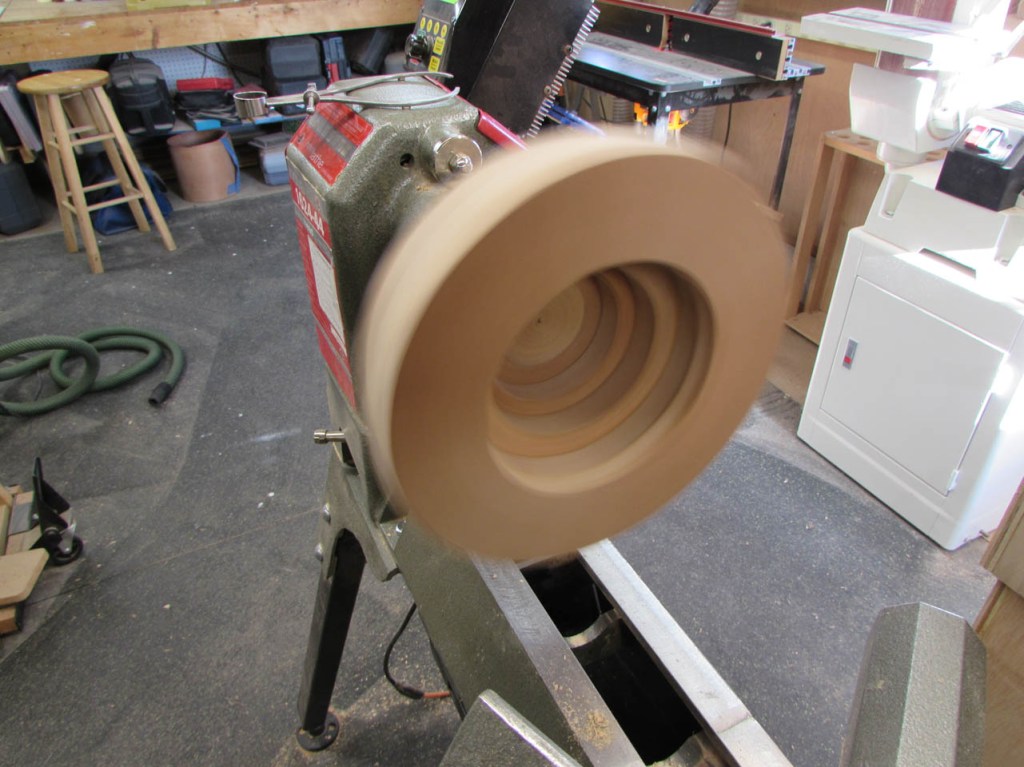
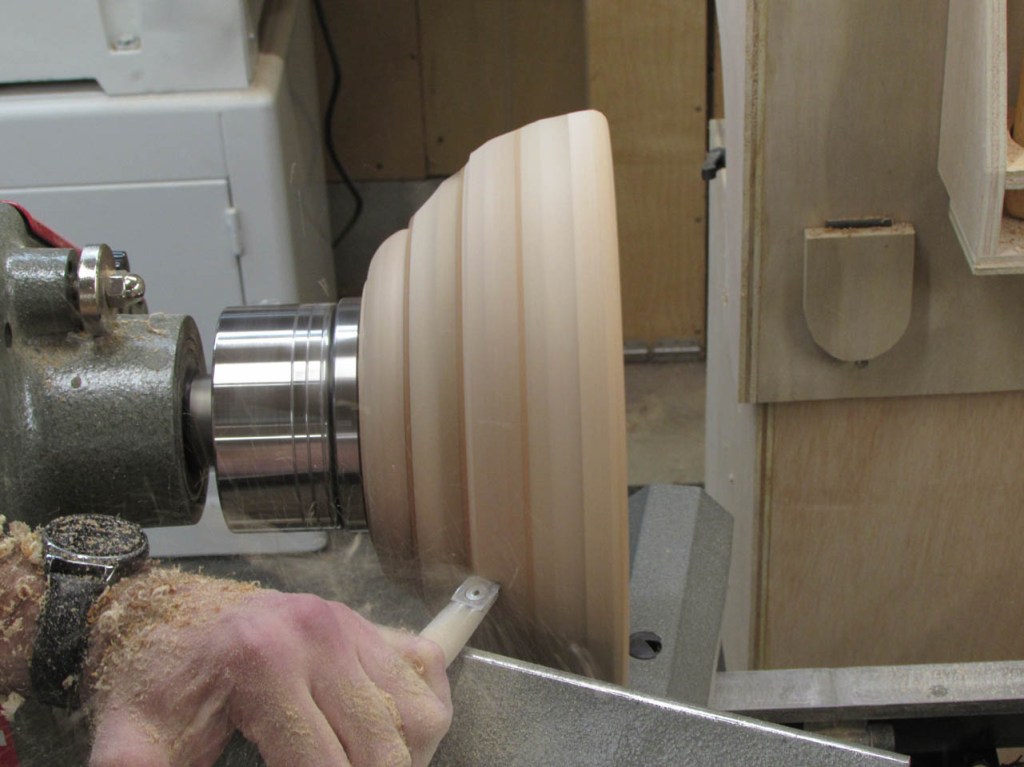
I do not know what shape she will ultimately prefer so I got creative and made a beehive…

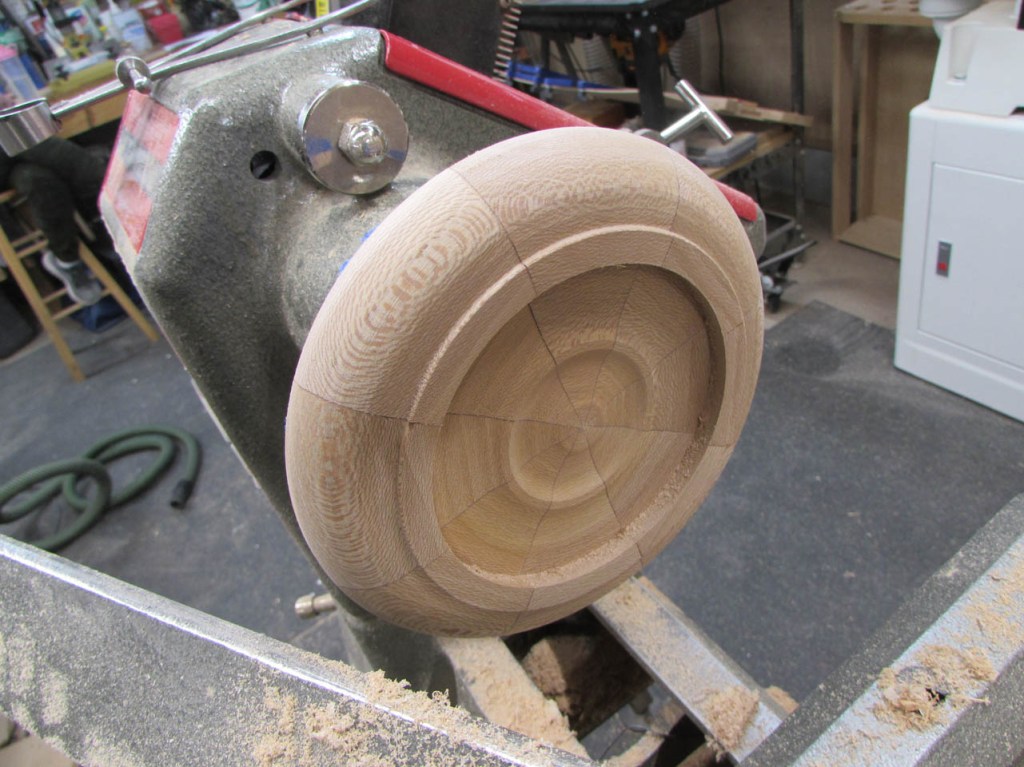
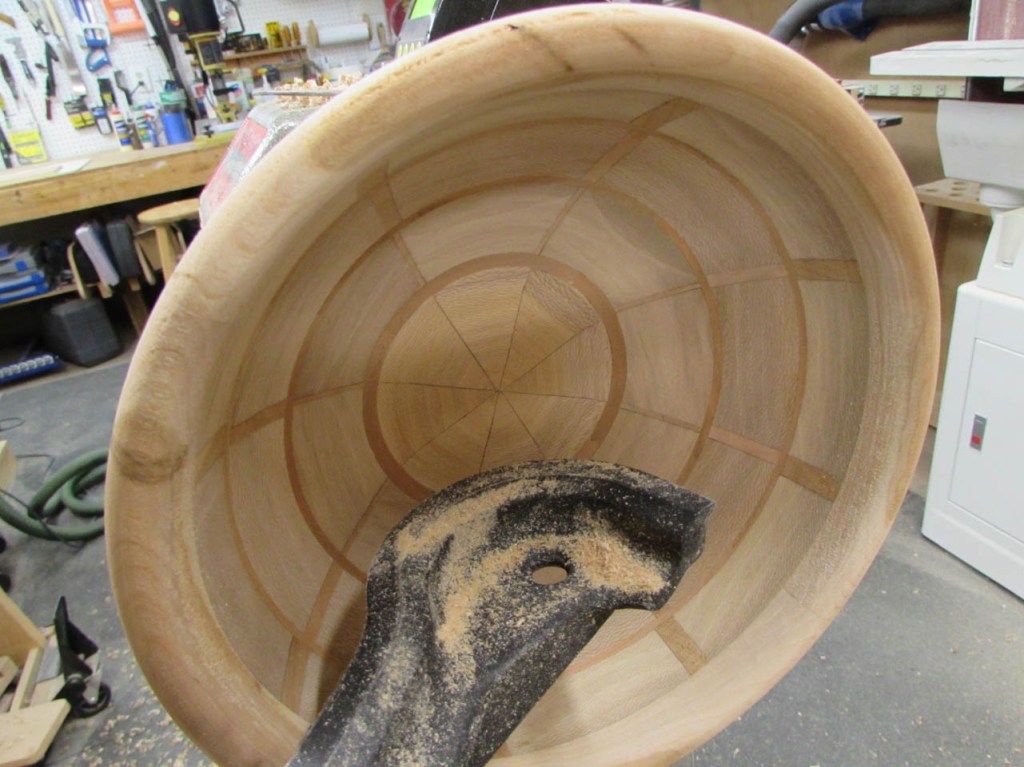
The inside was a little trickier and I had about 2″ of material to remove so I took the bowl down to about 3/4″ thick.
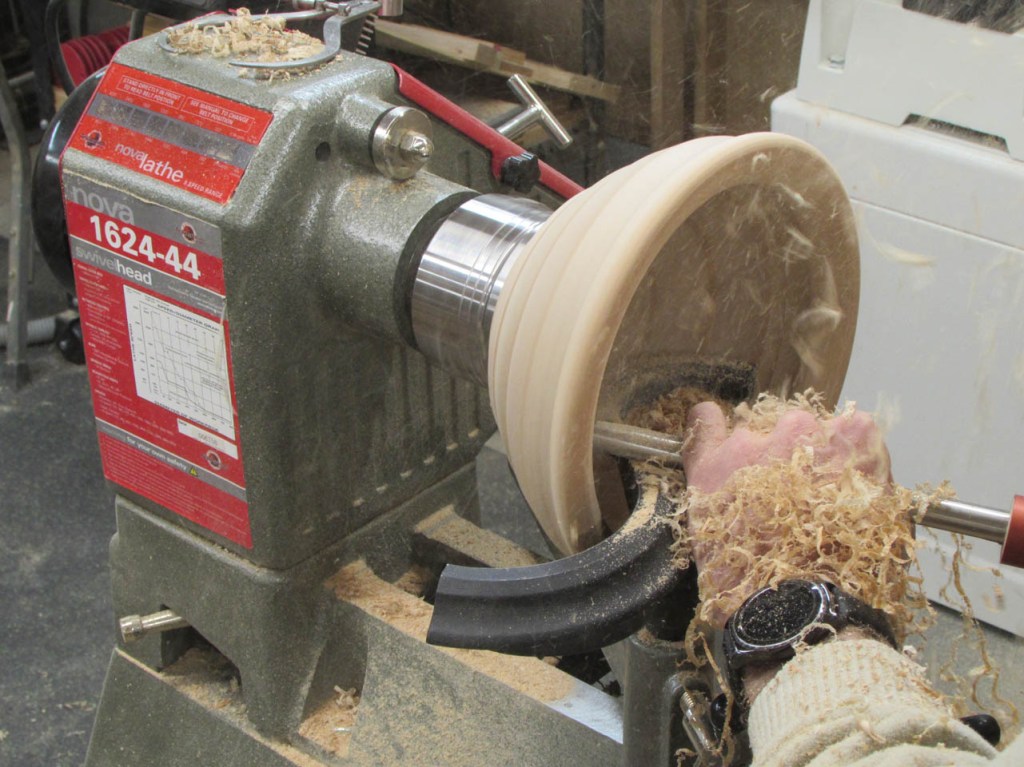
I made a very large mess. The sycamore was amazing to turn, it didn’t catch or give me any trouble. I will have to play with more of this in the future.
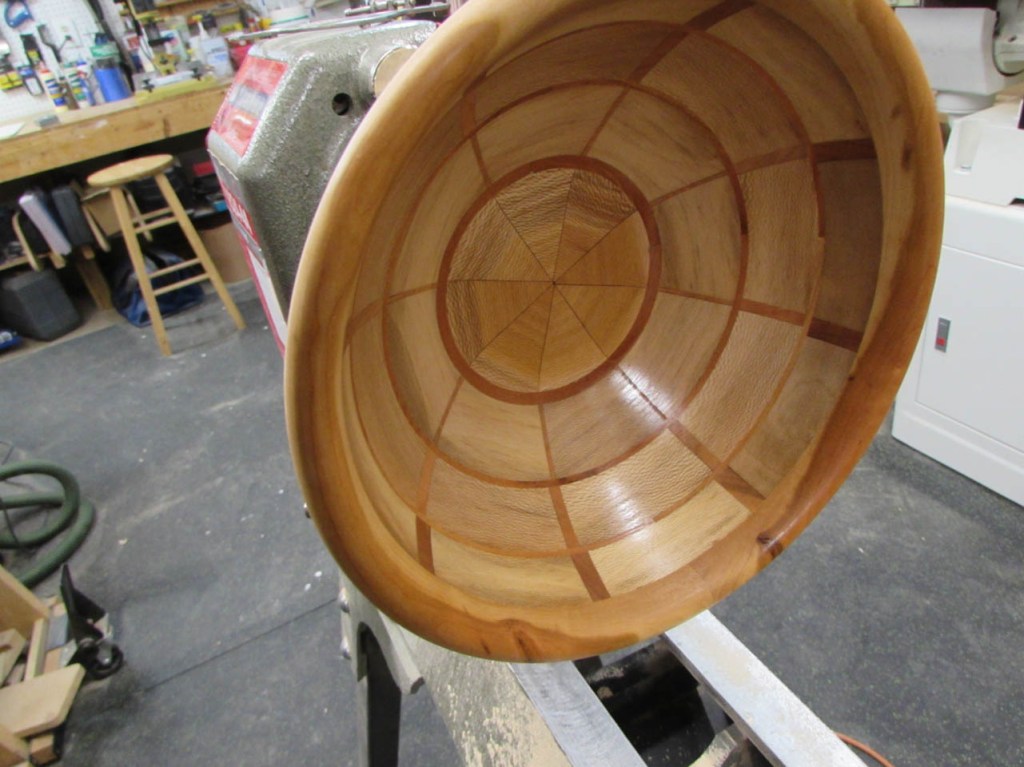
Look at that pattern. A bit like a spider’s web. I really like it.
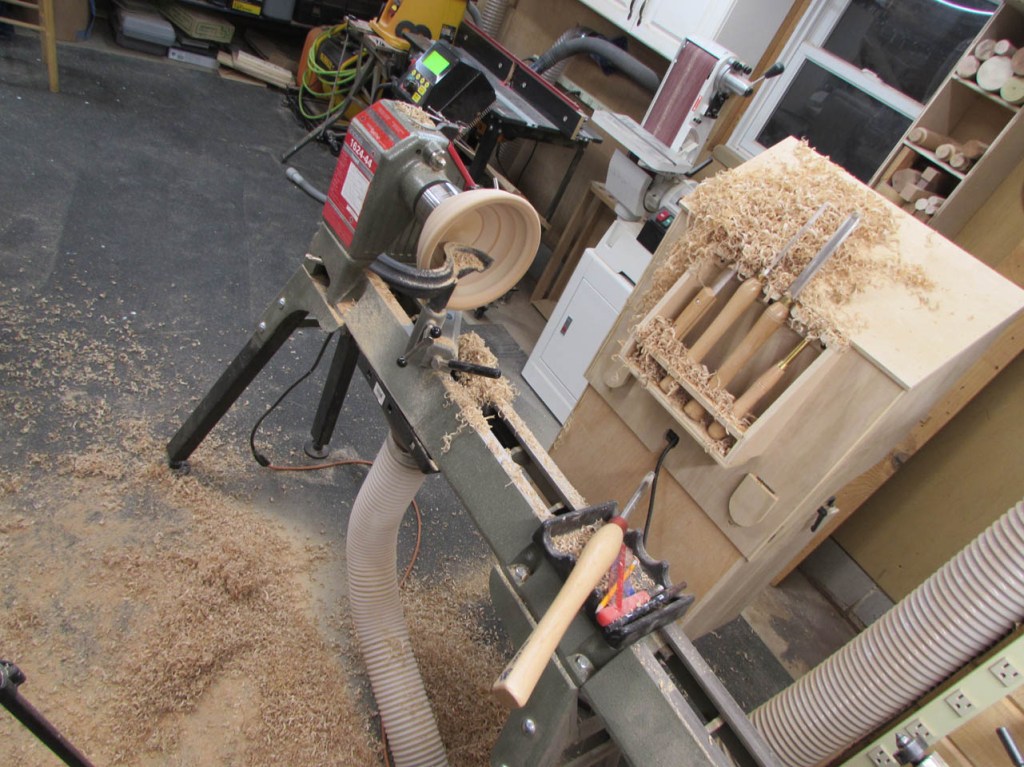
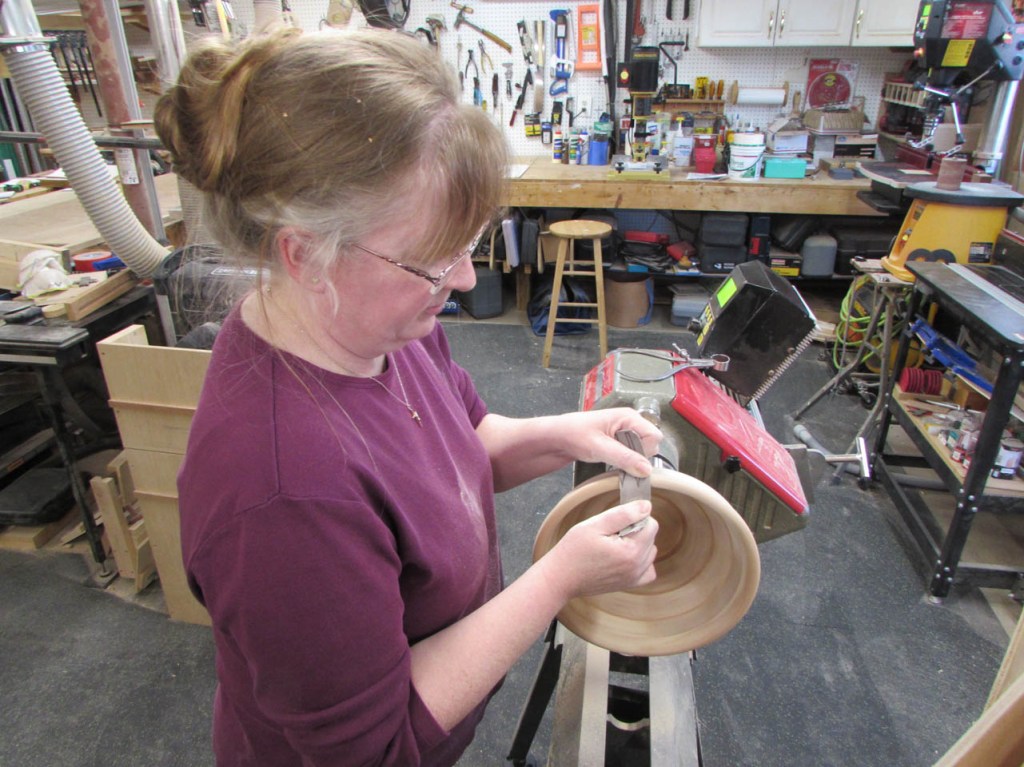
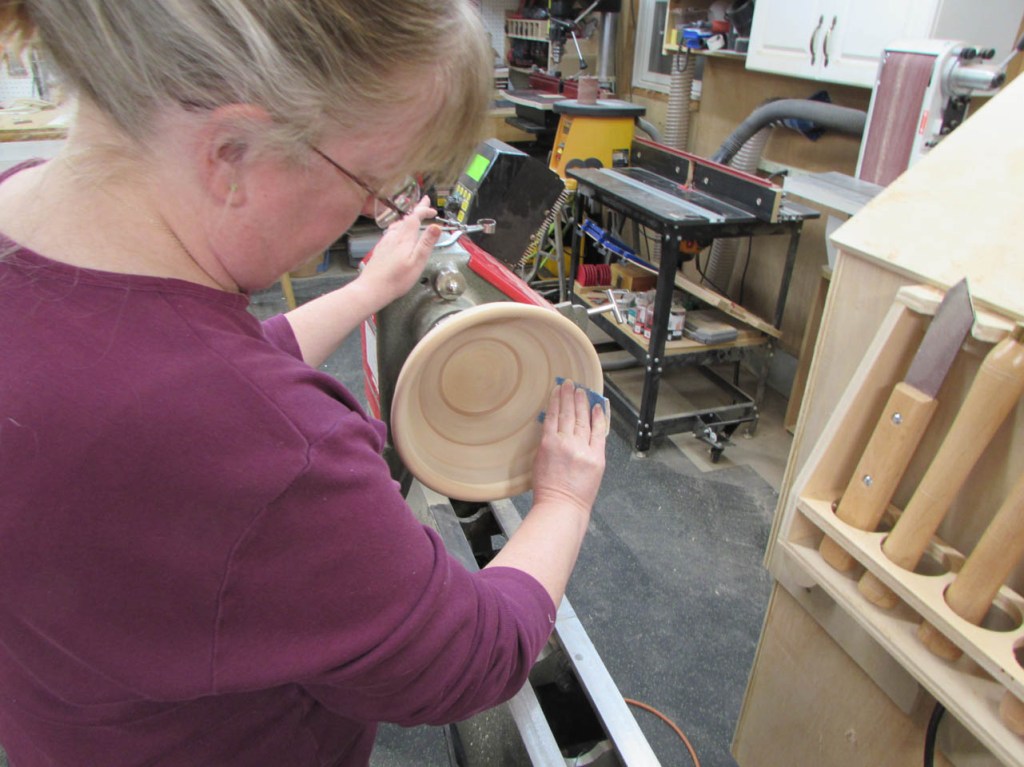
Before I got too carried away, I turned it over to my wife to finish shaping.

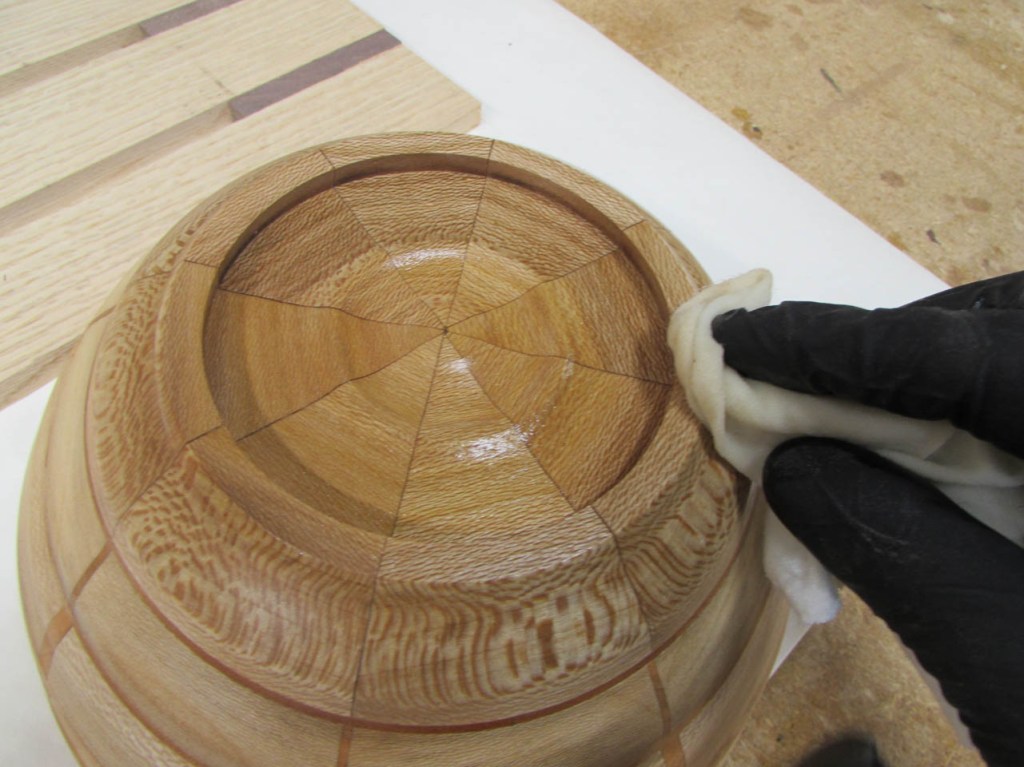
She decided to keep the beehive shape and only evened it out slightly, then sanded it smooth.
She then used a negative rake scraper to smooth out the inside of the bowl and make it a bit thinner.
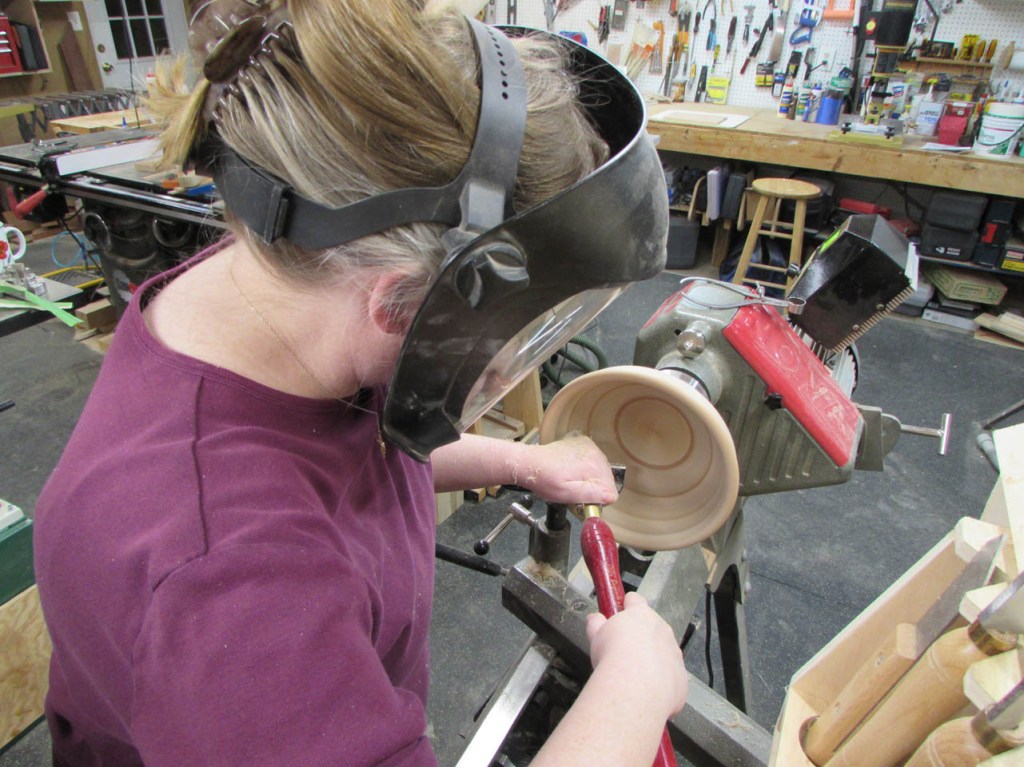
Then lots of sanding. The sycamore was fine, but the cherry had a lot more tear-out to clean up.
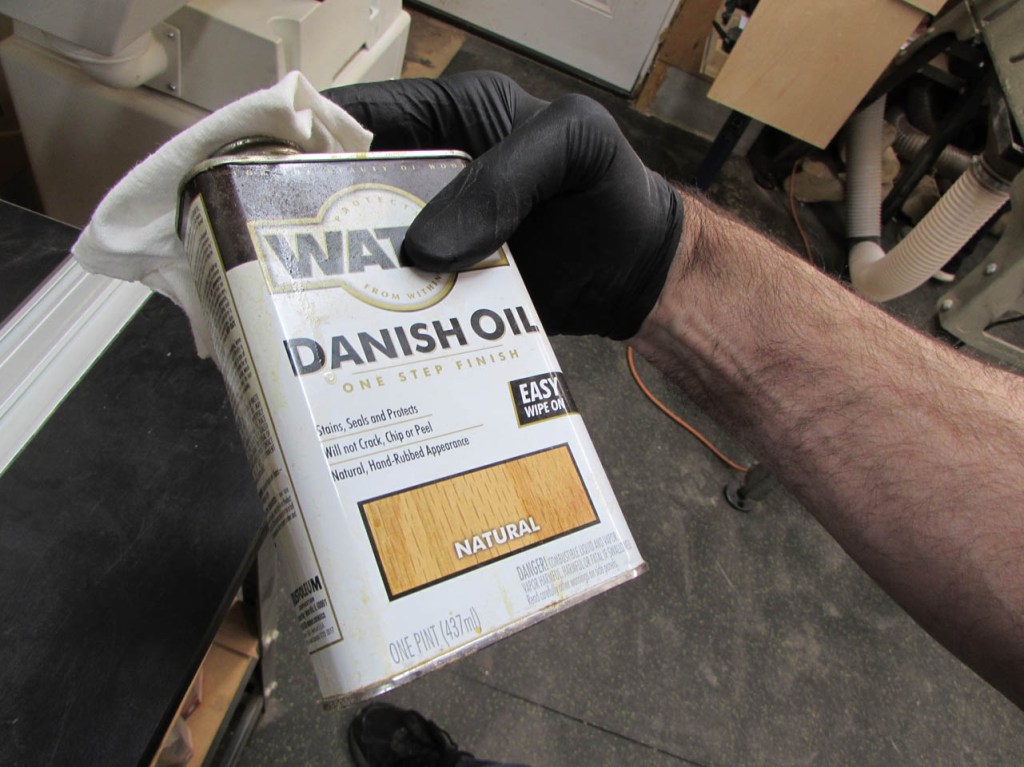
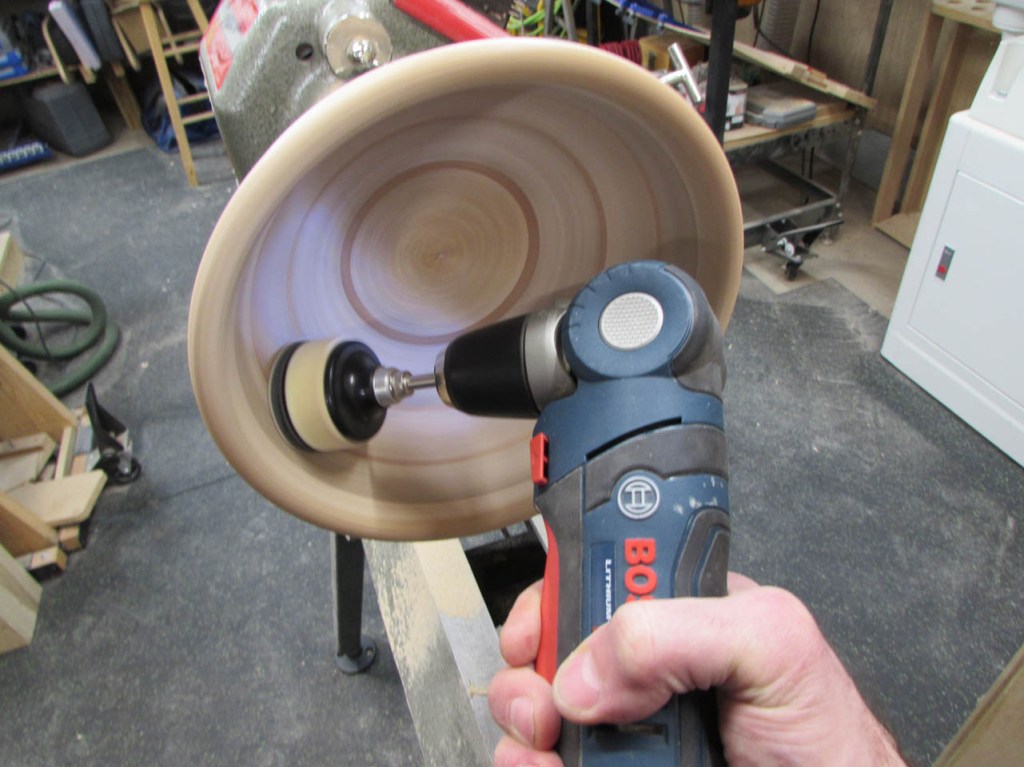
We decided to keep the finish simple and I applied Danish oil with a cloth.
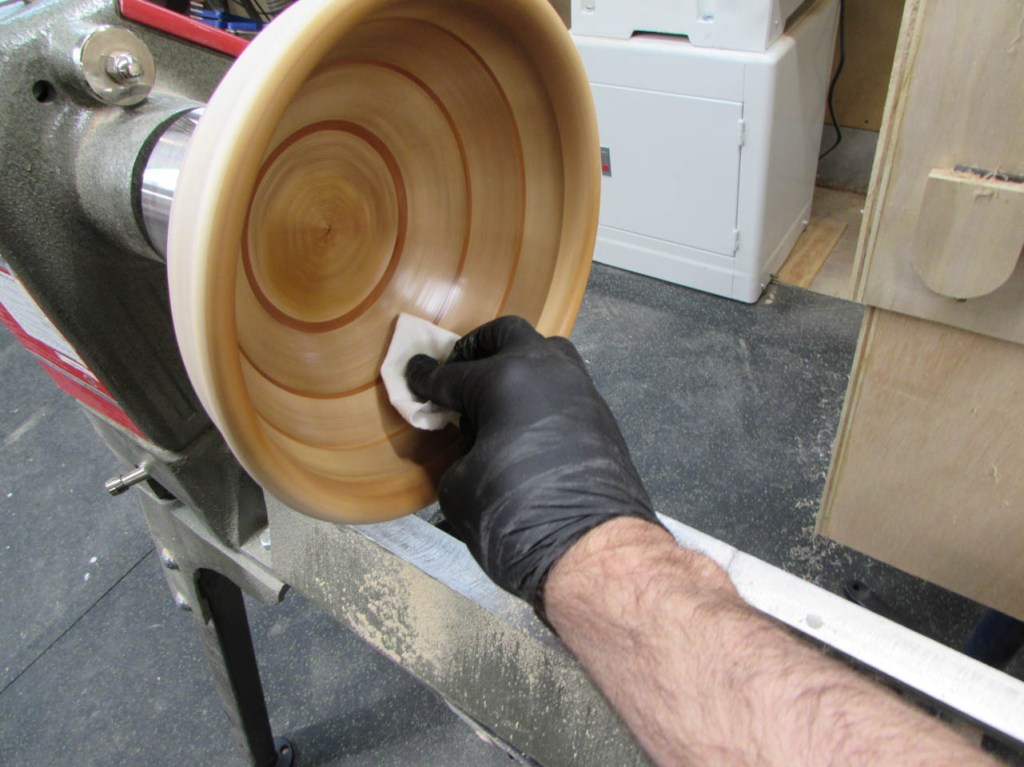
Wow, what a difference.
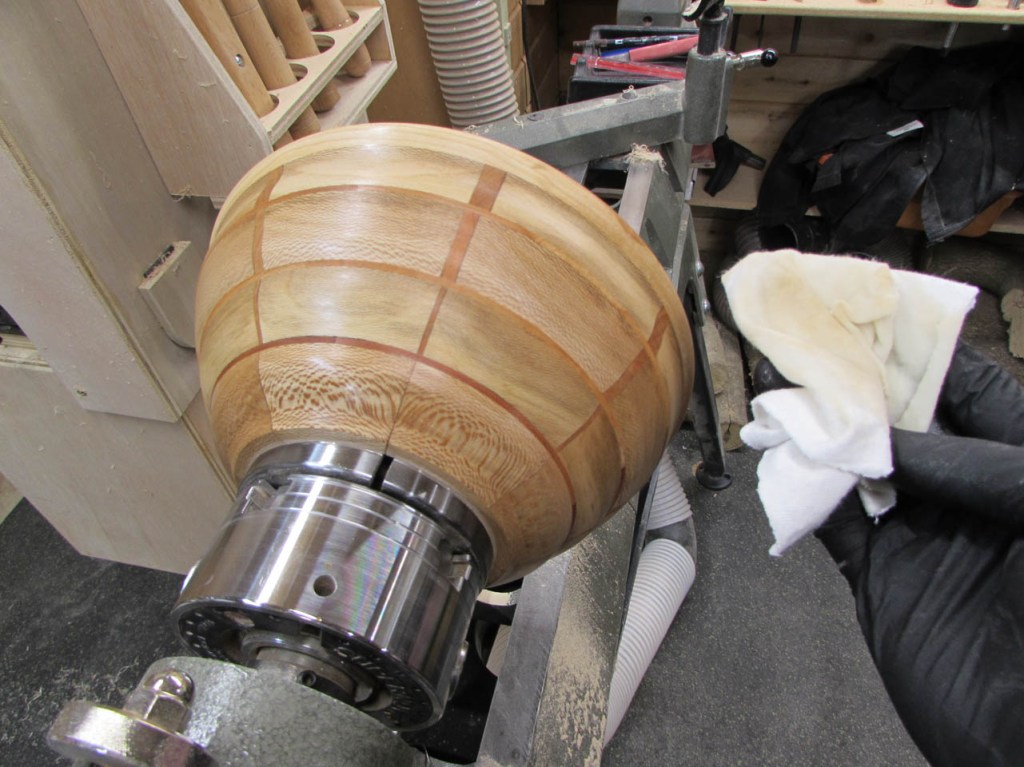
After the first layer was applied, I removed the bowl from the chuck so that I could apply finish to the bottom as well.

I let it stand on some painter’s pyramids to dry. I added three coats in all to give it a nice protective finish. We really like the sapwood rim. The way it fades from light to dark really ties to the rest of the bowl very well.
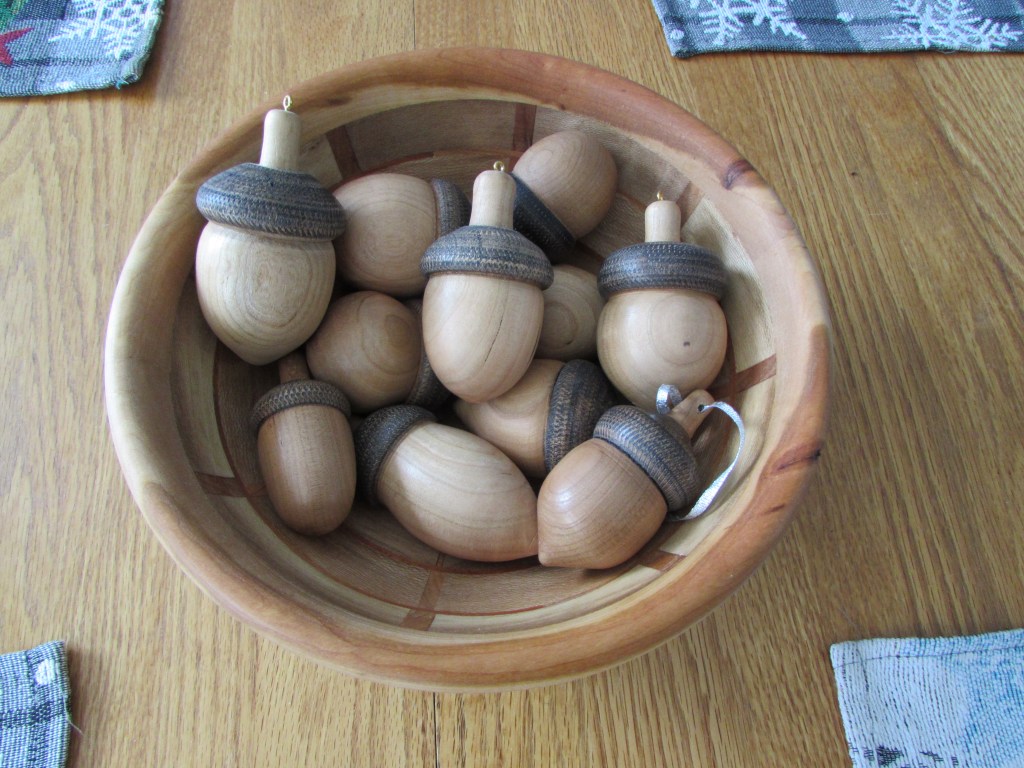
This was a fun\challenging little project. I will have to do some more experimenting with segmented turning. Maybe next time I will let Tracie do more of the turning. I mainly enjoy figuring out how to pull it all together.
