
Making Christmas ornaments
I have been working with my buddy Dave recently, making Christmas ornaments for his church, holiday fund raiser. He has been laminating together veneers to make a custom plywood blank, then using his CNC to cut it into an oval. My job has been to laser engrave writing and pictures onto the surface and give it back to him to finish.
My friend Chris saw these and wanted a custom Christmas ornament for each of his girls. Since I did not have any more oval blanks of Dave’s, I had to make my own. Dave gave me a few sheets of the curly maple veneer for test cutting on the laser, so I grabbed one of them and cut it in half. For the core of this ornament, I have a left-over piece of walnut that is about 1/8″ thick. It is actually left over from a guitar that I made with Chris’ brother Kyle. The walnut was cut and dried by their grandfather. He has since past away, so it is really cool to make a gift for the girls that their Great-Grandfather helped to make.

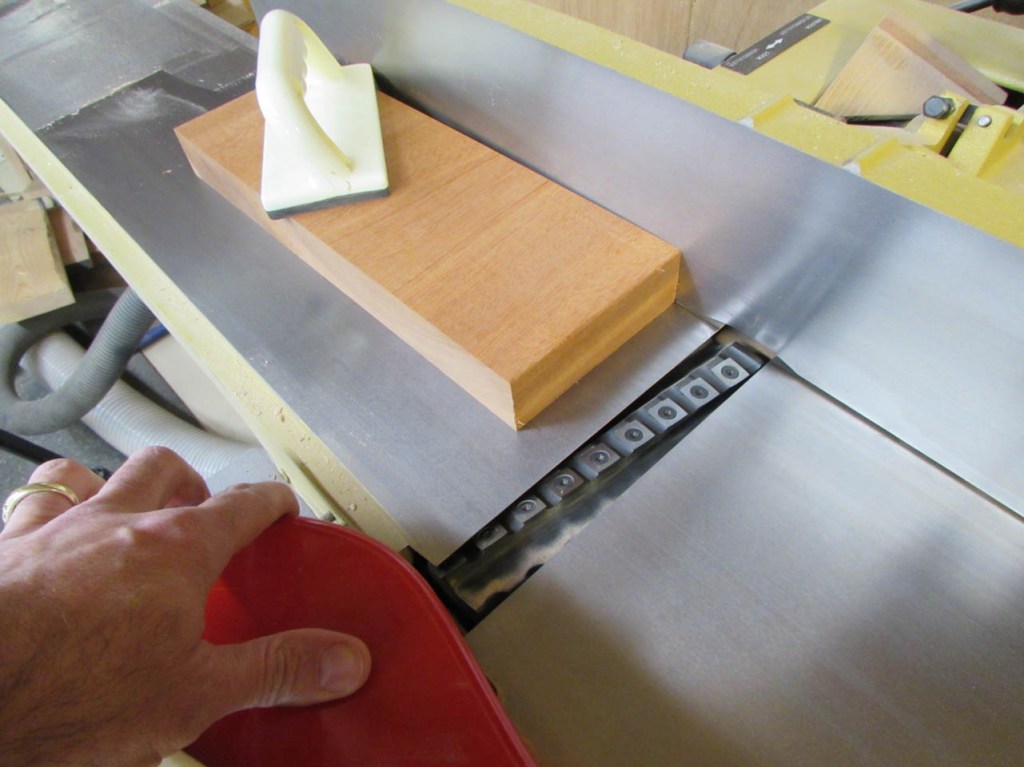
I have never done veneering before so this will be a first for me. I do know that I need a couple of good, solid blocks to press the veneer between. For that, I have two end-cuts of some 2″ thick mahogany.

Unfortunately, these were off-cut because of the snipe at the ends of the boards.

Fortunately, I have a helical head in my jointer. This allows me to perfectly flatten those faces.
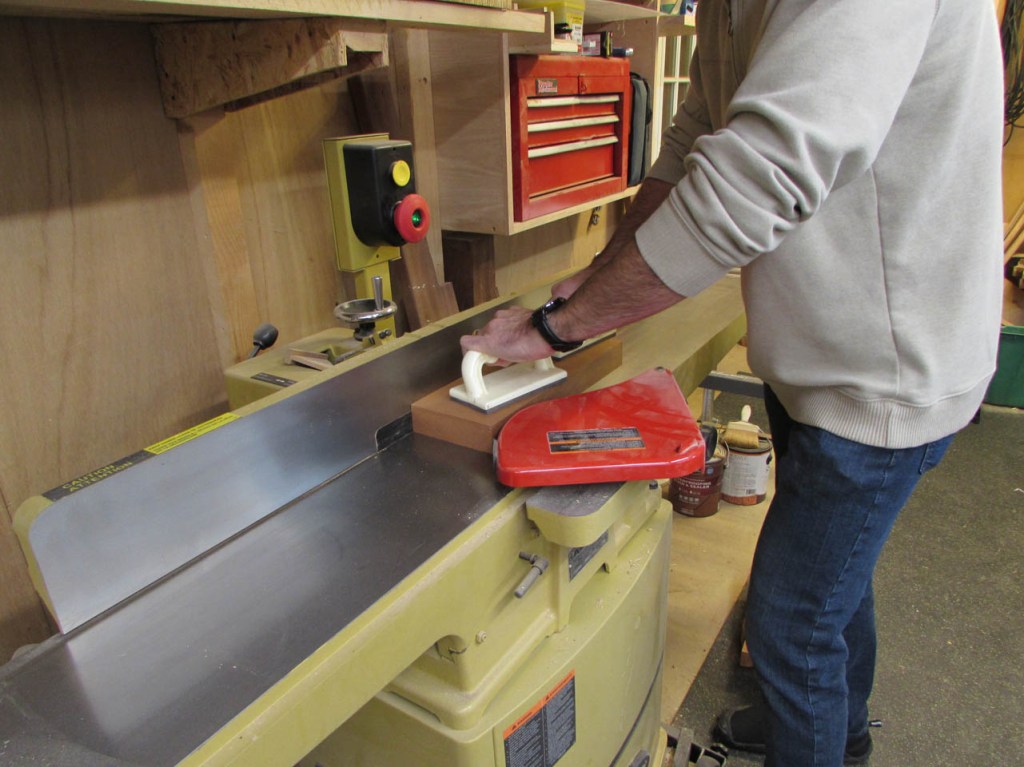
That means I can run the board through the jointer sideways without it throwing the board across the room, which it would have done if it had straight blades. I don’t think that this a recommended practice from a safety point of view, but it has worked fairly well for me in the past.
I do not have any special glue that is designed for veneering wood so I am using the standard yellow wood glue that I typically use.
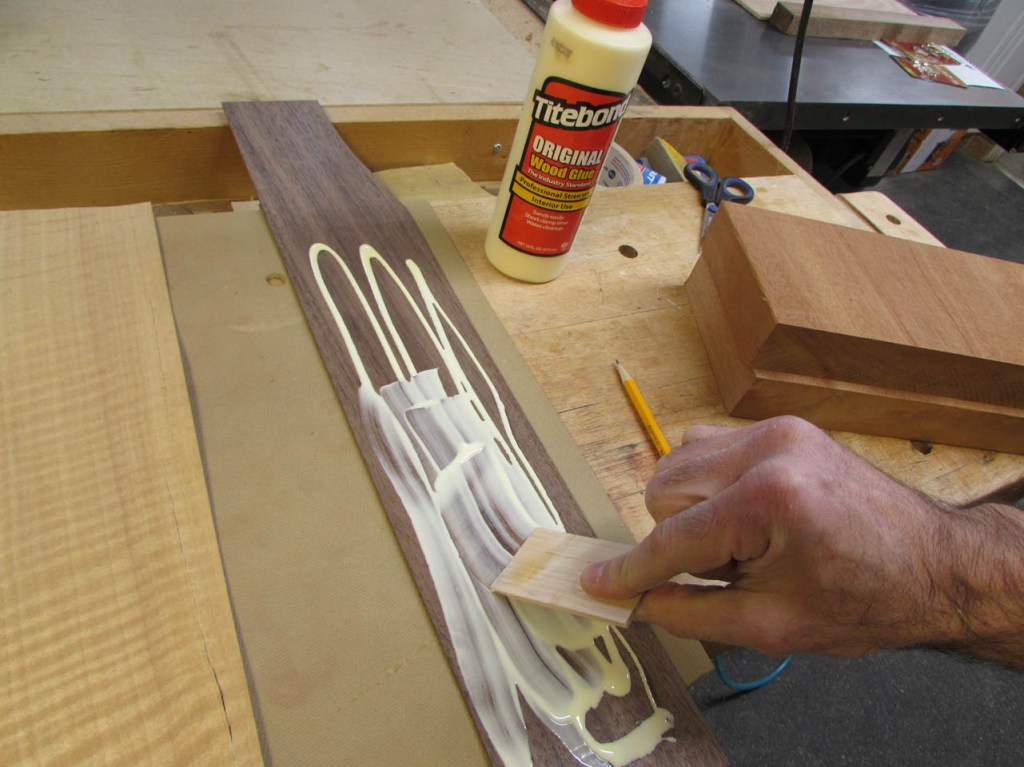
I spread a liberal but even amount on one side of the walnut.

Then stick that face to a piece of veneer and flip the board over to repeat the process.

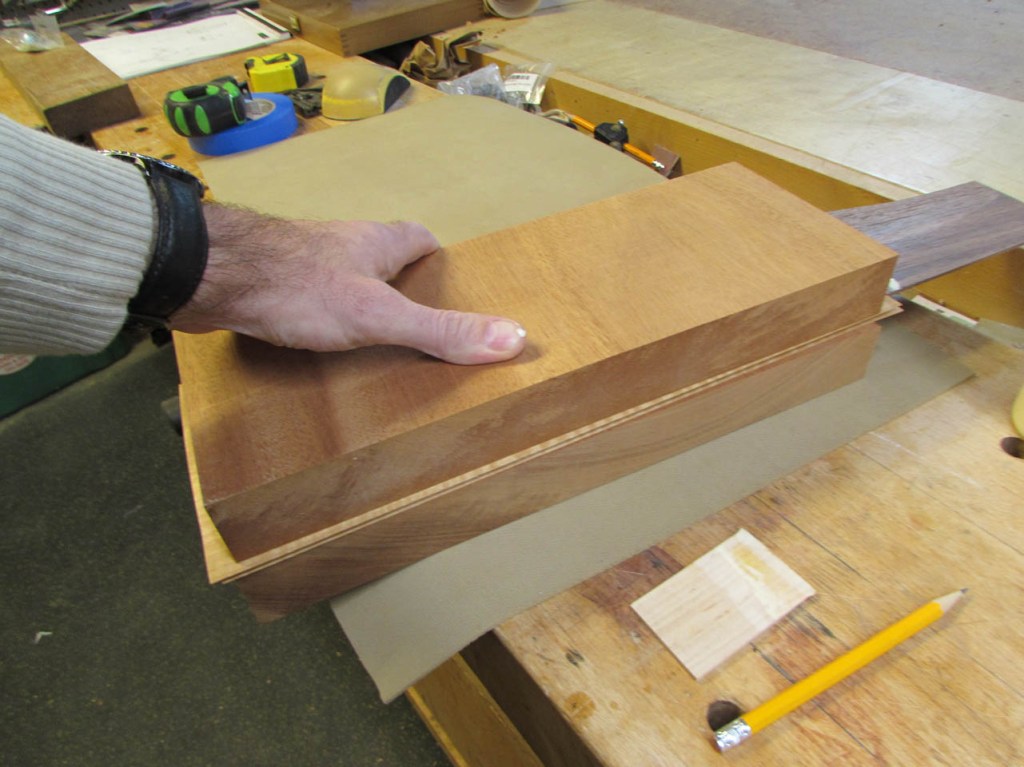
I lay the assembly onto one block of mahogany, then apply the second layer of veneer.

The second block of mahogany gets laid on top of the pile.
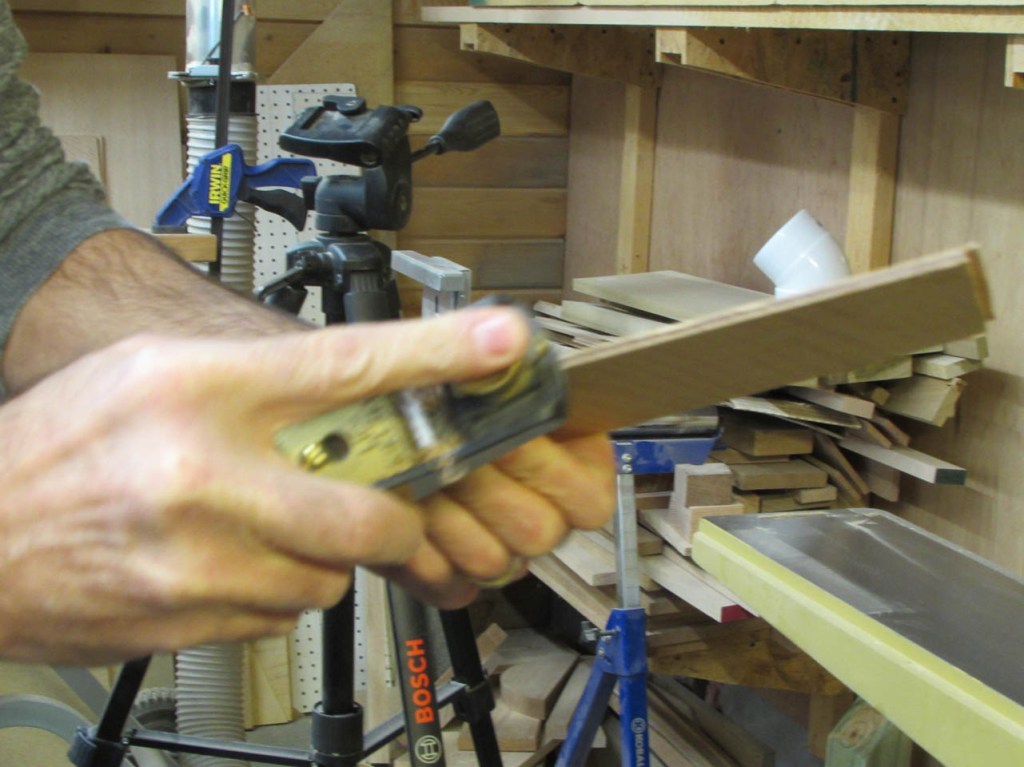
I recently bought some new heavy-duty Quick Lever Clamps from Rockler. They are supposed to generate up to 600 pounds of clamping force.

I figured this would be a great opportunity for some over-kill. Six of these clamps should hold the boards fairly flat while it dries over night.

The next morning I learned that some veneer can be porous… Fine amounts of the glue squeezed up through small cracks and pores in the veneer to adhere to the mahogany blocks. No pictures of the mild struggle that ensued, removing the blocks, sorry. I needed both hands and a mallet but I managed a successful separation. Remind me to use some wax paper next time… Luckily most of the veneer stayed attached to the walnut. It had way more glue on it.

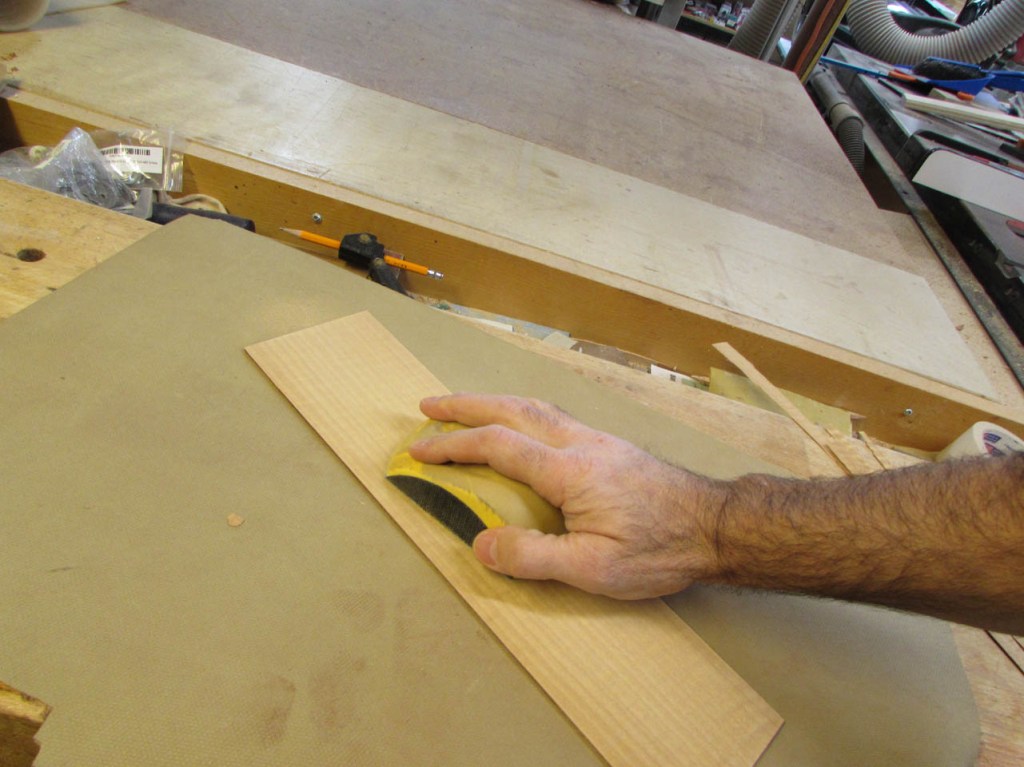
I used my utility knife to remove the extra veneer and my block plane to clean up the edges.
I did a little sanding to smooth down the veneer. The removal of the blocks left it a bit fuzzy…
Now to create a jig for the CNC. I need at least a 1/2″ thick board to run through the CNC and this is nowhere near that.
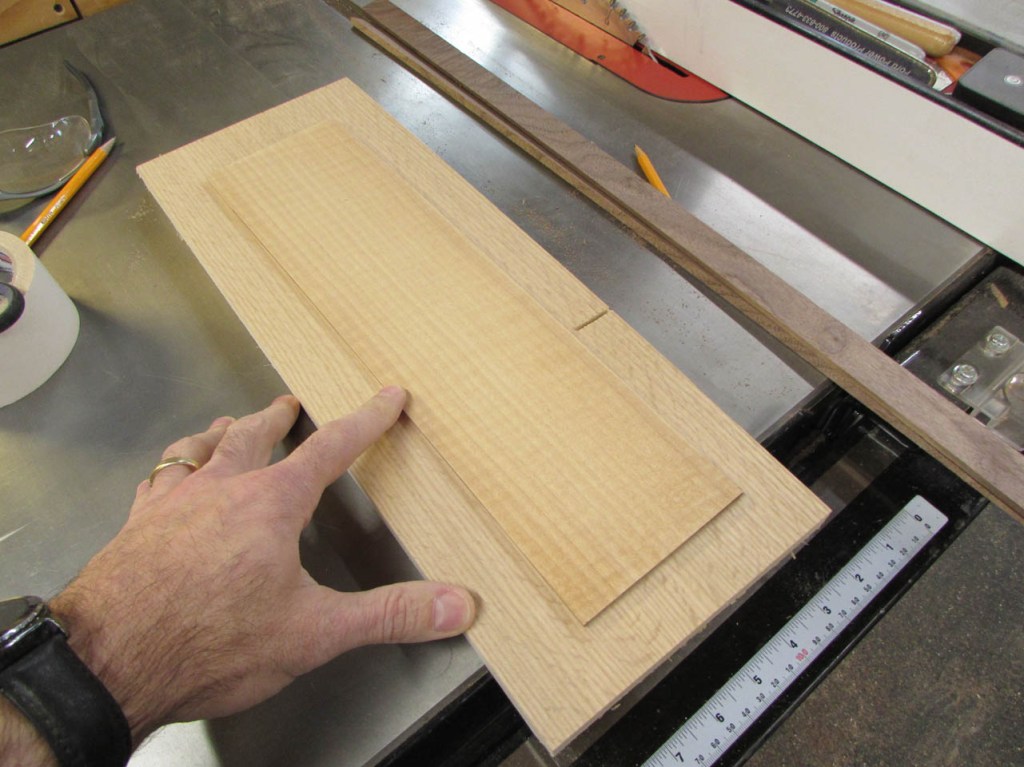
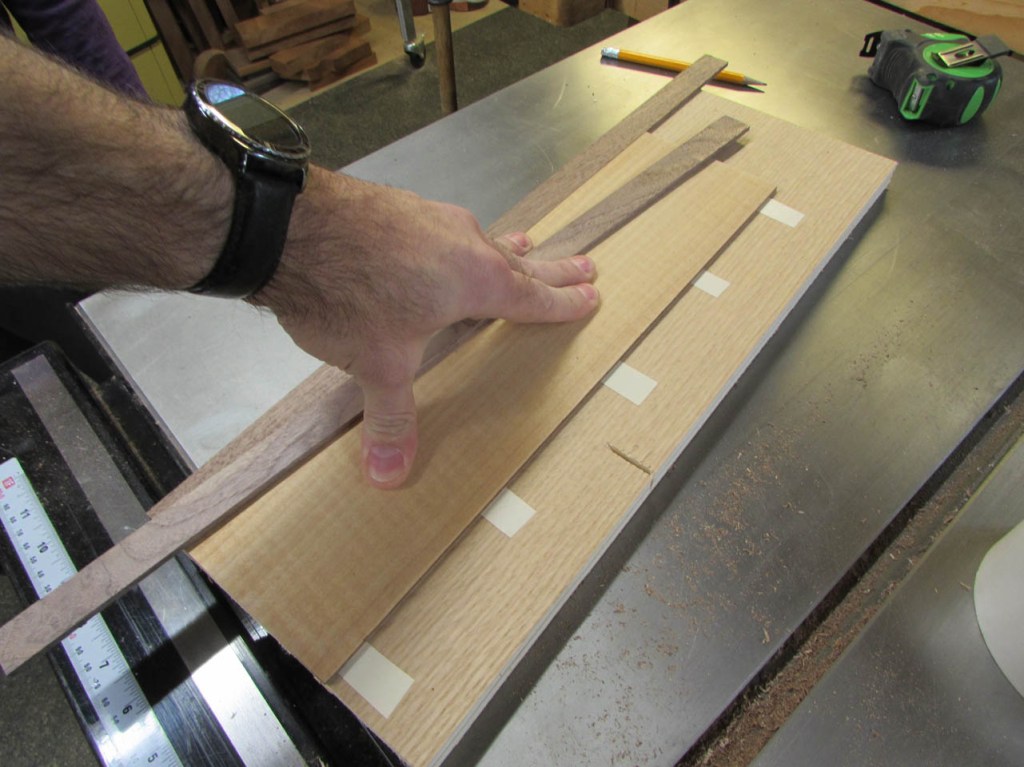
I am starting with a piece of scrap 3/4″ plywood. I also need a 1/2″ or so added to each side so I used my piece to set the fence on the table saw.

Then I used a push block to safely rip two strips of walnut on the table saw.

These strips will go along each side of the veneered piece, making my board wider to accommodate the CNC.
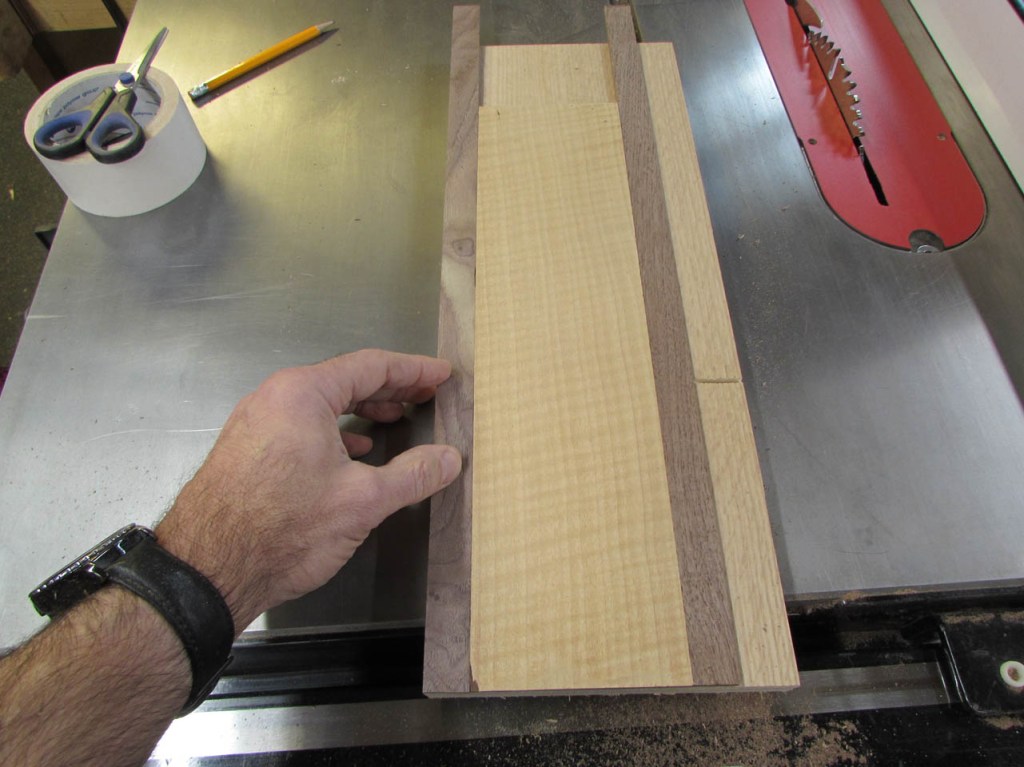
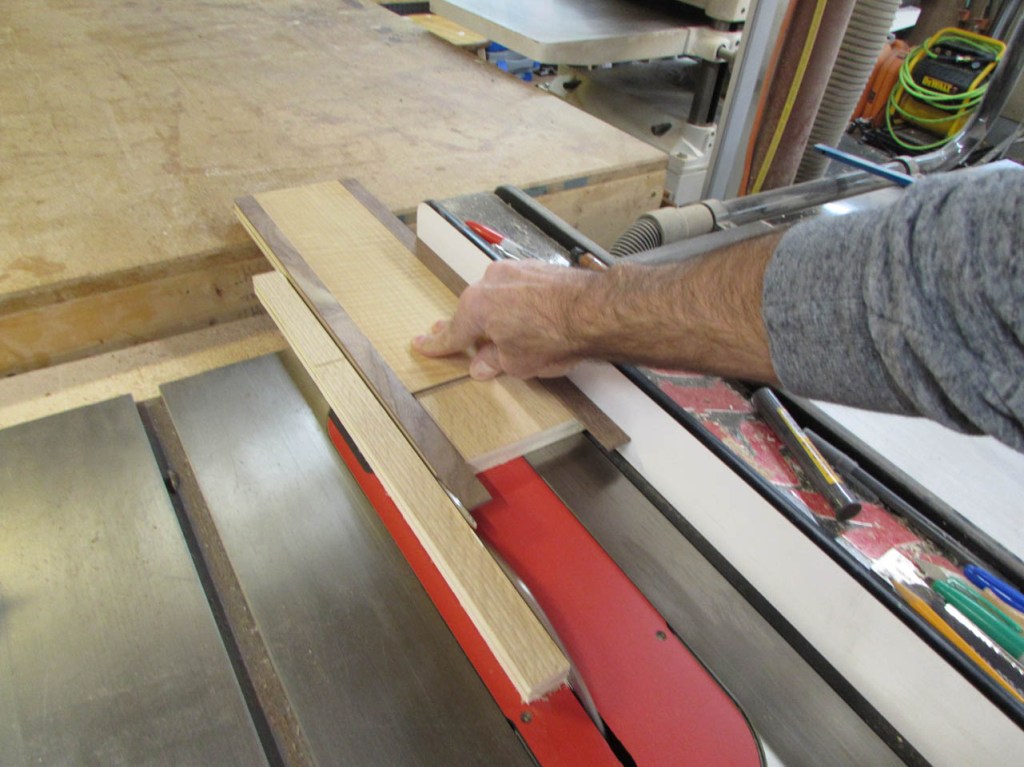
To hold it temporarily but firmly in place, I am using double-sided carpet tape.

Once everything is attached, I trim it all up to be a rectangle that has one uniform height.

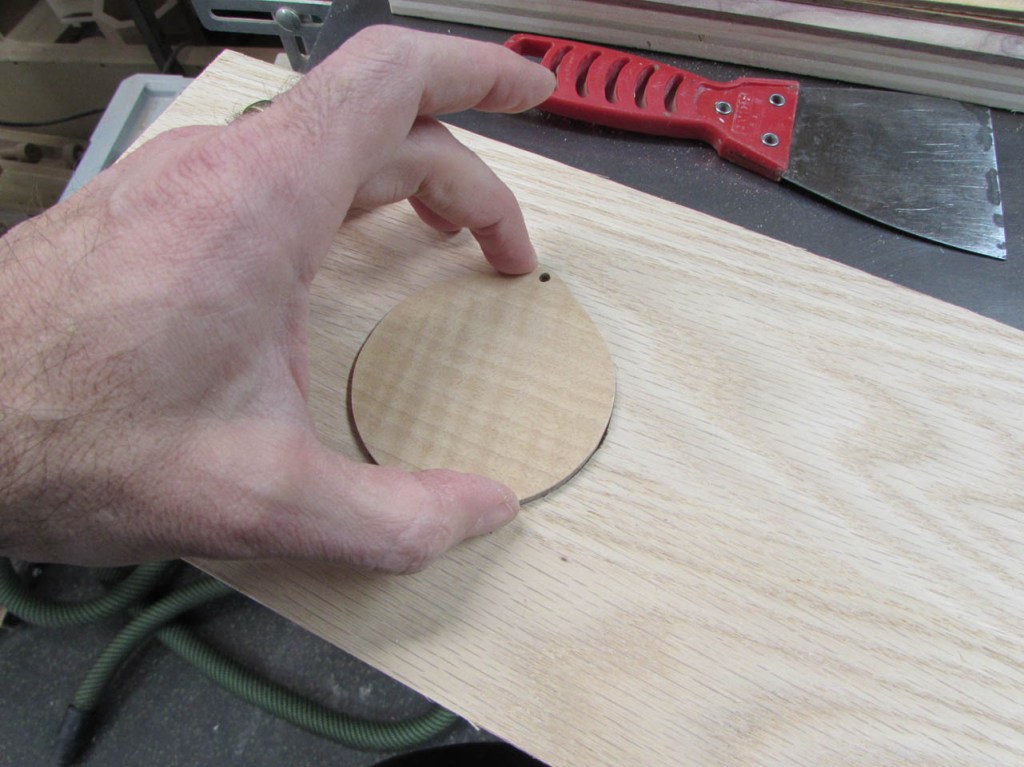
The trimmed board is loaded into my CNC for cutting the ornaments.


Yes, these could have been easily cut out on a bandsaw or by hand, and then sanded, but I wanted them to be exactly the same so that I can make a socket for the laser to hold them in a repeatable manner. More on that shortly.

The hardest part of this project so far was removing them from the double-sided tape without damaging them. I need the tape to be strong enough to keep everything in place while the CNC cuts it. Removal takes a dull putty knife and a lot of patience. Alcohol would help dissolve the glue on the tape, but I don’t know what it would do to the glue on the veneer…
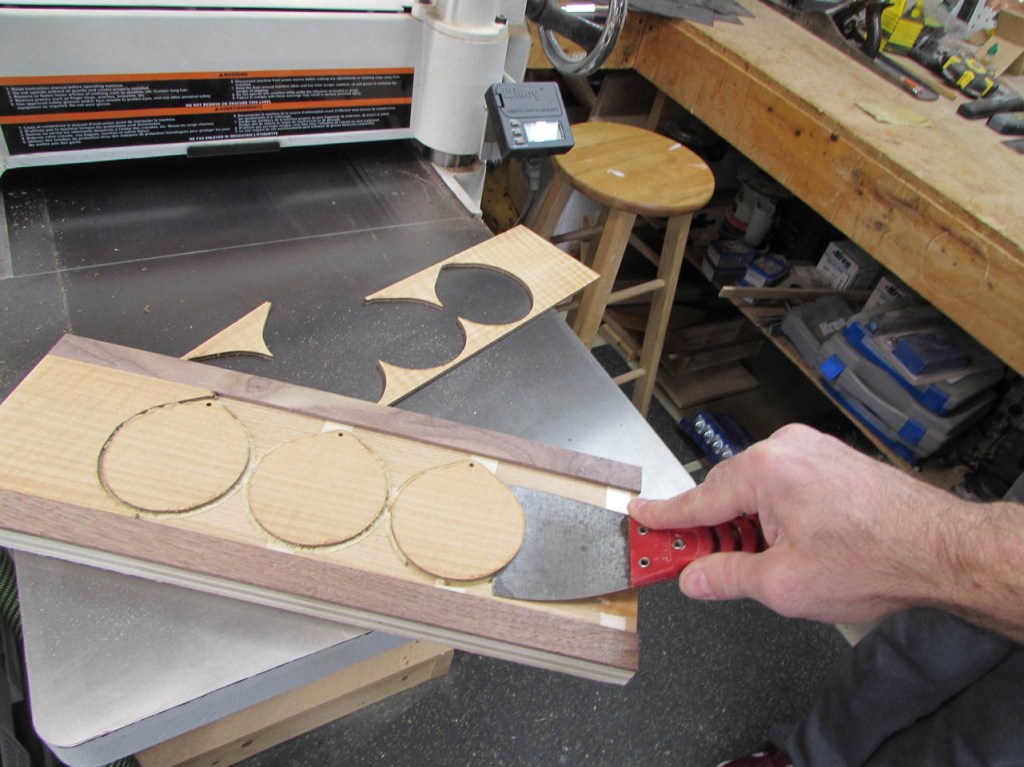

Once released from the tape, I did a quick sand to clean up the edges.

I put another piece of scrap plywood in the CNC and carved out a shallow pocket to hold the ornaments. I also made sure to drill a pilot hole at the exact center of the socket. That will be used to locate the laser later.
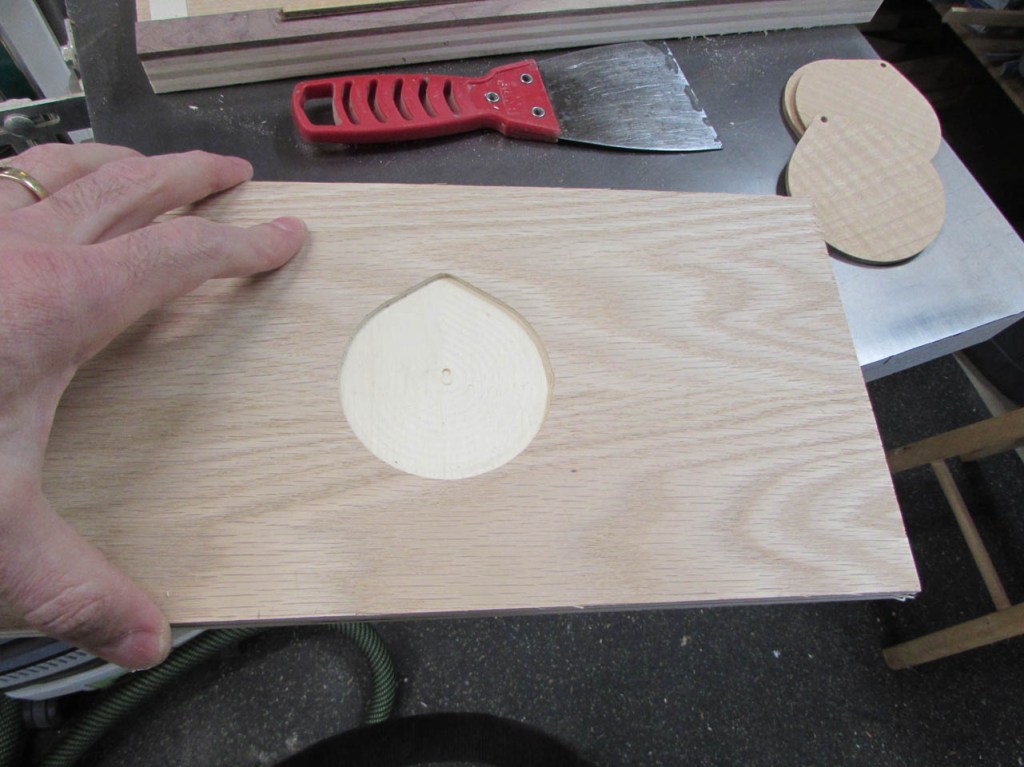
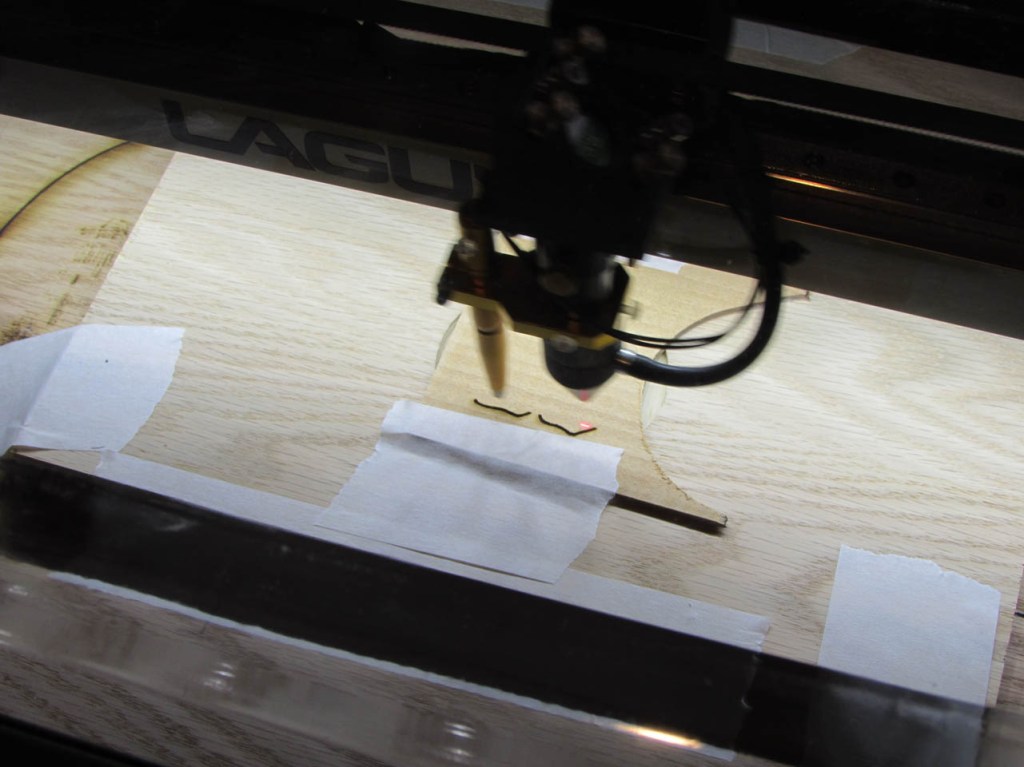
Once the socket was tested, I took everything to the laser.

I spent a few minutes on the computer importing the images I wanted to engrave. The RDWorks V8 software that comes with the laser is pretty rudimentary. It is not hard to use but I tend to do most of my work on other programs and then import it to this software. I do the same thing with my CNC software. I feel bad admitting that I have never read the directions for either program. They both may be more useful than I give them credit for, but I know the software that I am used to so I do it my way…

I currently have a piece of plywood attached to the bottom of my CNC. This allowed me to laser a line around the perimeter so that I know where the maximum limits are and it allows me to align my socket board’s edged with the vertical line on the side.

Even though I am certain that everything is aligned and ready to go, I want to do a test run on some scraps of the veneer glue-up.

This will help me get the correct speed and power settings for the laser. Since I am always using different types of media, the setting always change. Some woods are denser than others so the settings will always need to be tested first.
I will be engraving this little guy and a couple of his friends onto the ornaments and I figured this would be the best for a test. I think the settings are good so it is time for the real ornaments to get engraved.

The pilot hole I made, at the center of the socket, is used to align the laser. I can set my origin point at the center, with the board aligned perfectly to the horizontal and vertical edges and I can be confident that the ornament will cut at the correct spot.

Since the scrap piece was taped to the top of the board, I need to re-align the focus of the laser at the new elevation. I have forgotten this a couple of times and had some very blurry results…


I ran the penguin again and he turned out good. Since there was a lot of material burned away, there is a fair bit of soot left around the engraving.
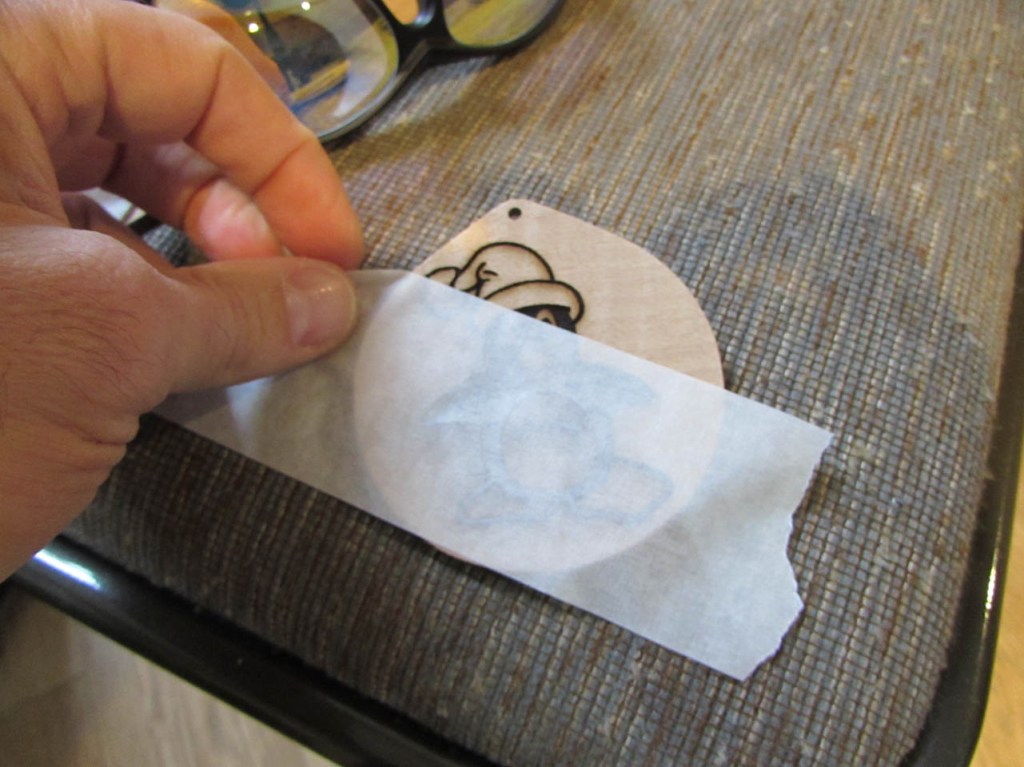
I used some masking tape to remove as much as possible, I will gently sand the surface to remove the rest.

The penguin’s friends all turned out nice as well.

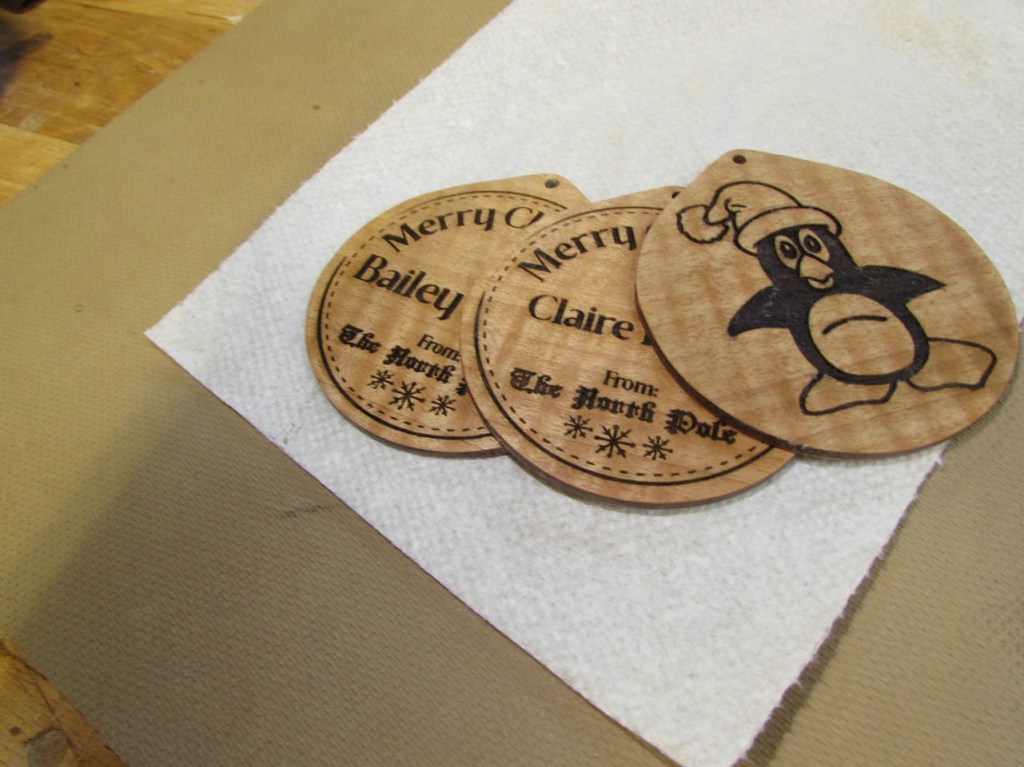
After the animals were cut, I flipped the ornaments over and engraved the North Pole stamp for each of the girls on the back. And, yes, it would have been easier and faster to laser cut the ornaments out and not bother with all of the CNC work, but I wanted to accurately engrave the back sides as well and I did not want to clean the burn off all of the edges. I wanted the walnut to be visible.

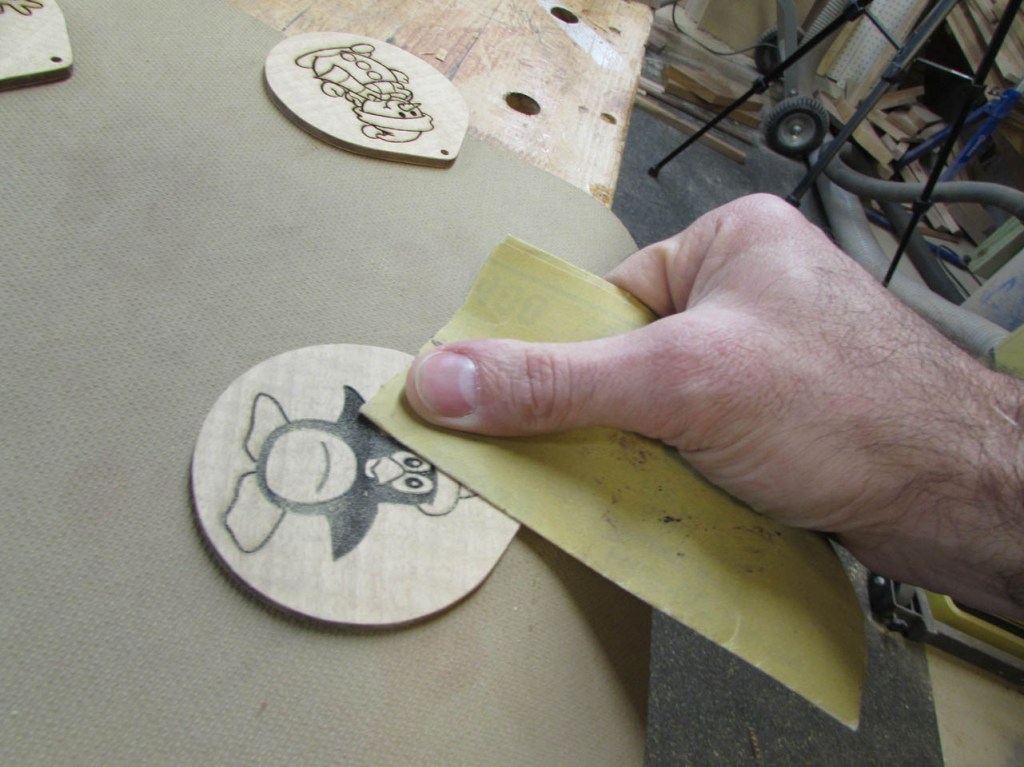
After some gentle sanding with 400 grit paper, I was ready for finish to be applied.

I am using Shellawax for this. It is a mixture of shellac and wax. It really pops the grain and it smells really nice.
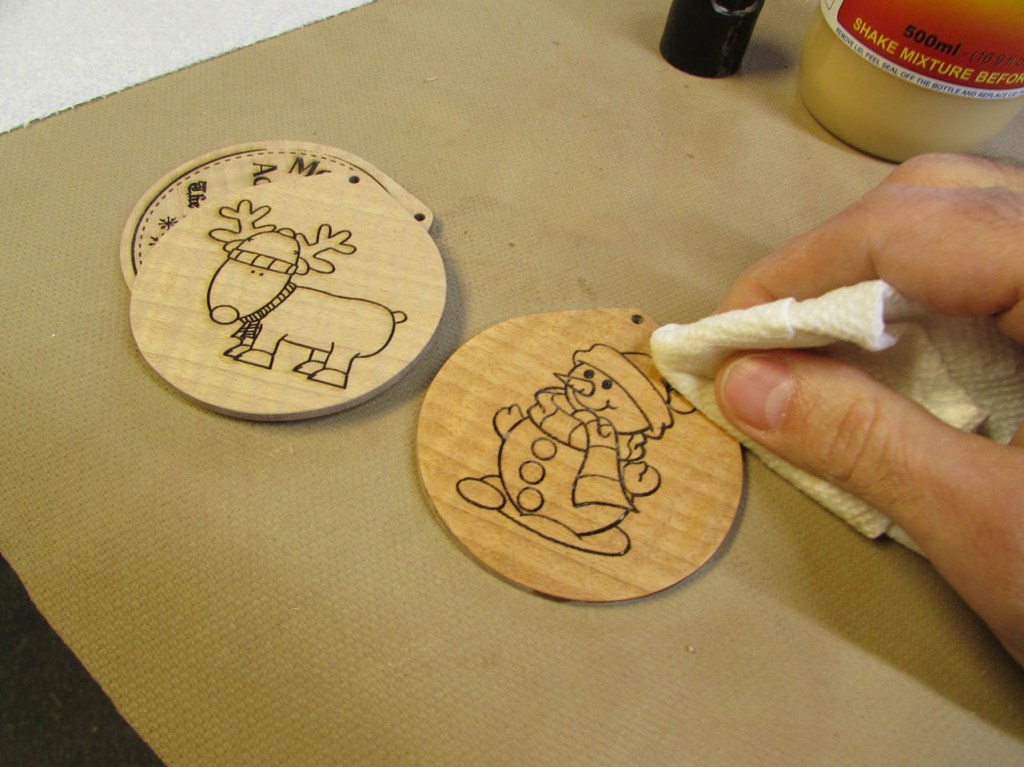
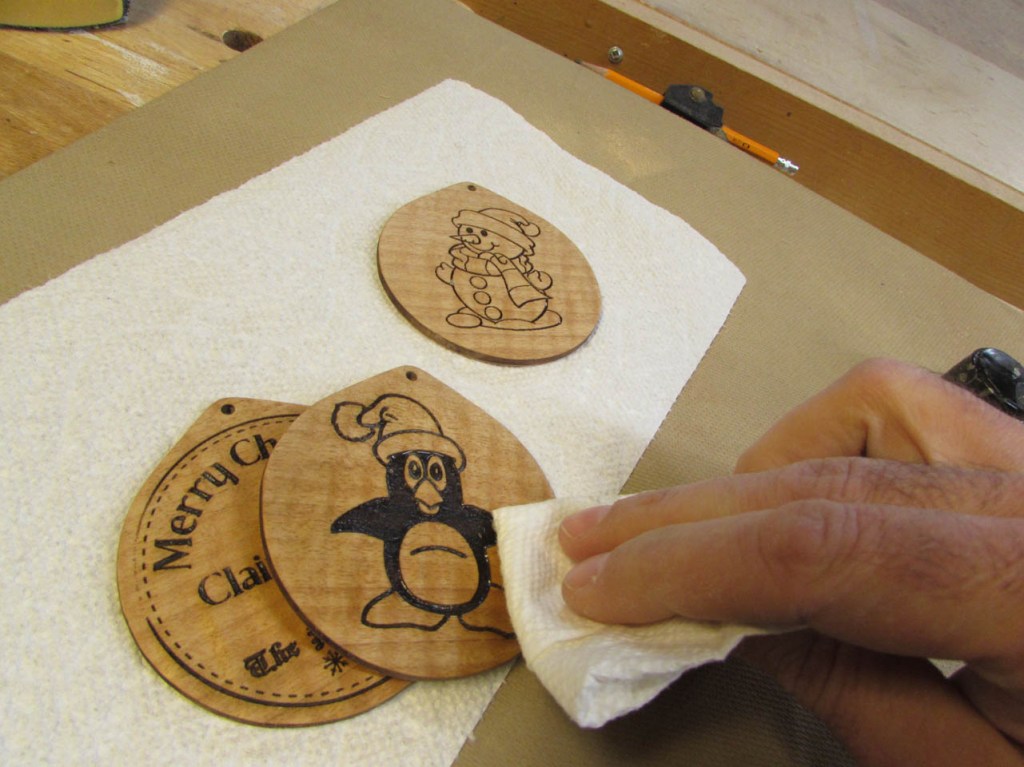
This is a friction finish usually used on the lathe, so after I apply a coat, I rub the surface vigorously on a paper towel to heat and buff the finish.

I used some compressed air to remove any towel fuzz that was left behind.

Three custom ornaments for three little girls that their Great-Grandfather helped to make.
Fun project and a good exercise in using the CNC and laser together.
