
St. Kilian chapel – Ambry – part 1
I took a little break from furniture for the last month or so. I needed to catch up on some home projects now that spring is here.
I have also been kind of dreading starting the next piece because I am not entirely sure how it will all come together yet. I am much happier when I have all of the details figured out before I start a project. But sometimes you just have to have a little faith that you will figure it out in the end.
The next project is the cabinet that will house the holy oils. It is called an Ambry and it will match the octagonal shape of the other pieces in the chapel. Well, closer to half of an octagon anyway. Here is my design so far: AMBRY PARTS.PDF I believe all of the pieces are there, but I am not yet sure how they will all be joined together. Let’s figure it out..
There are not a lot of large pieces in this project, in fact most of the panels will be made up of smaller strips. The sides and the top will be built like raised panel doors, but with glass in the centers.

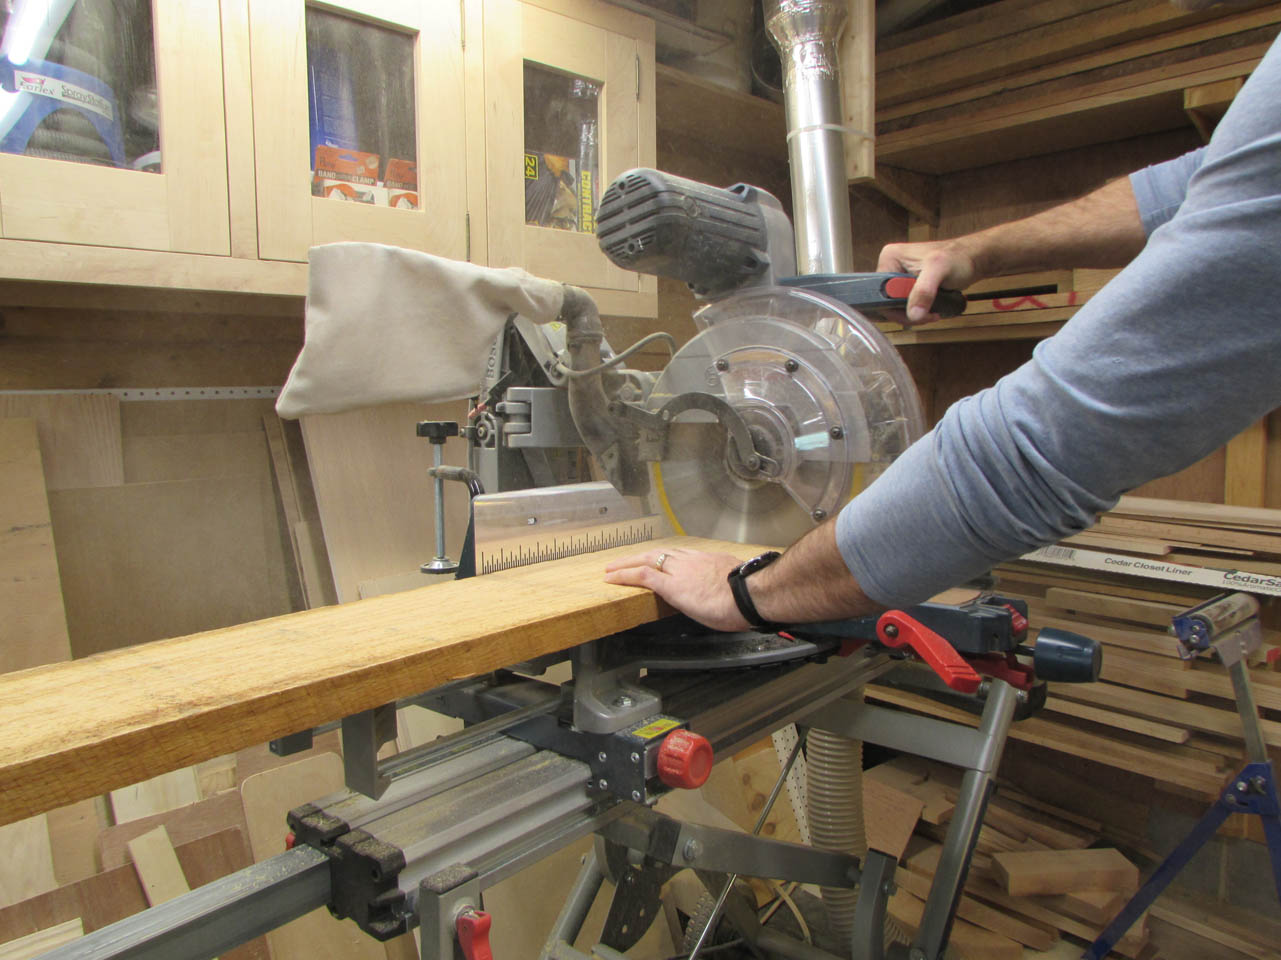
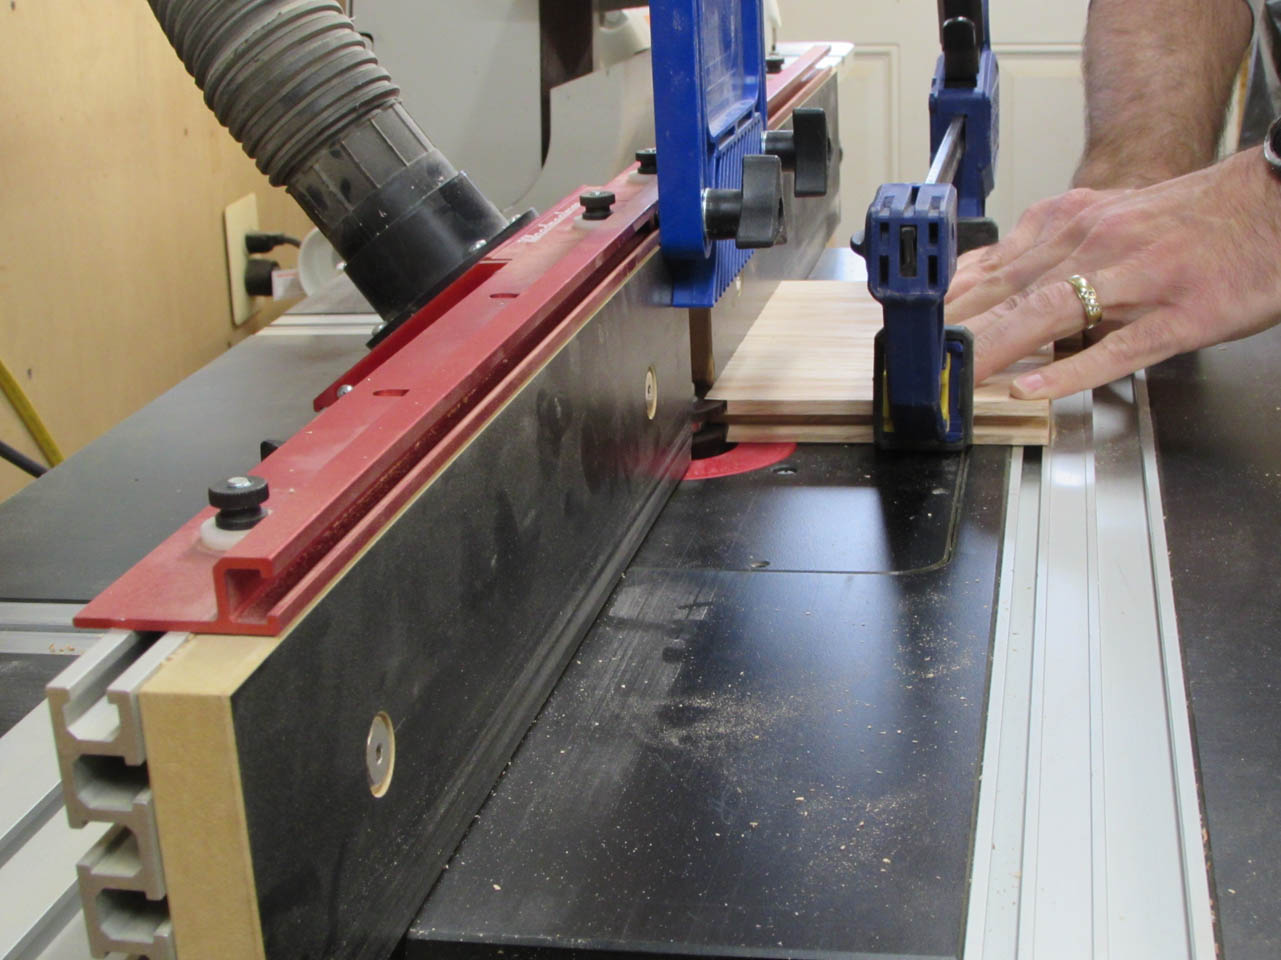
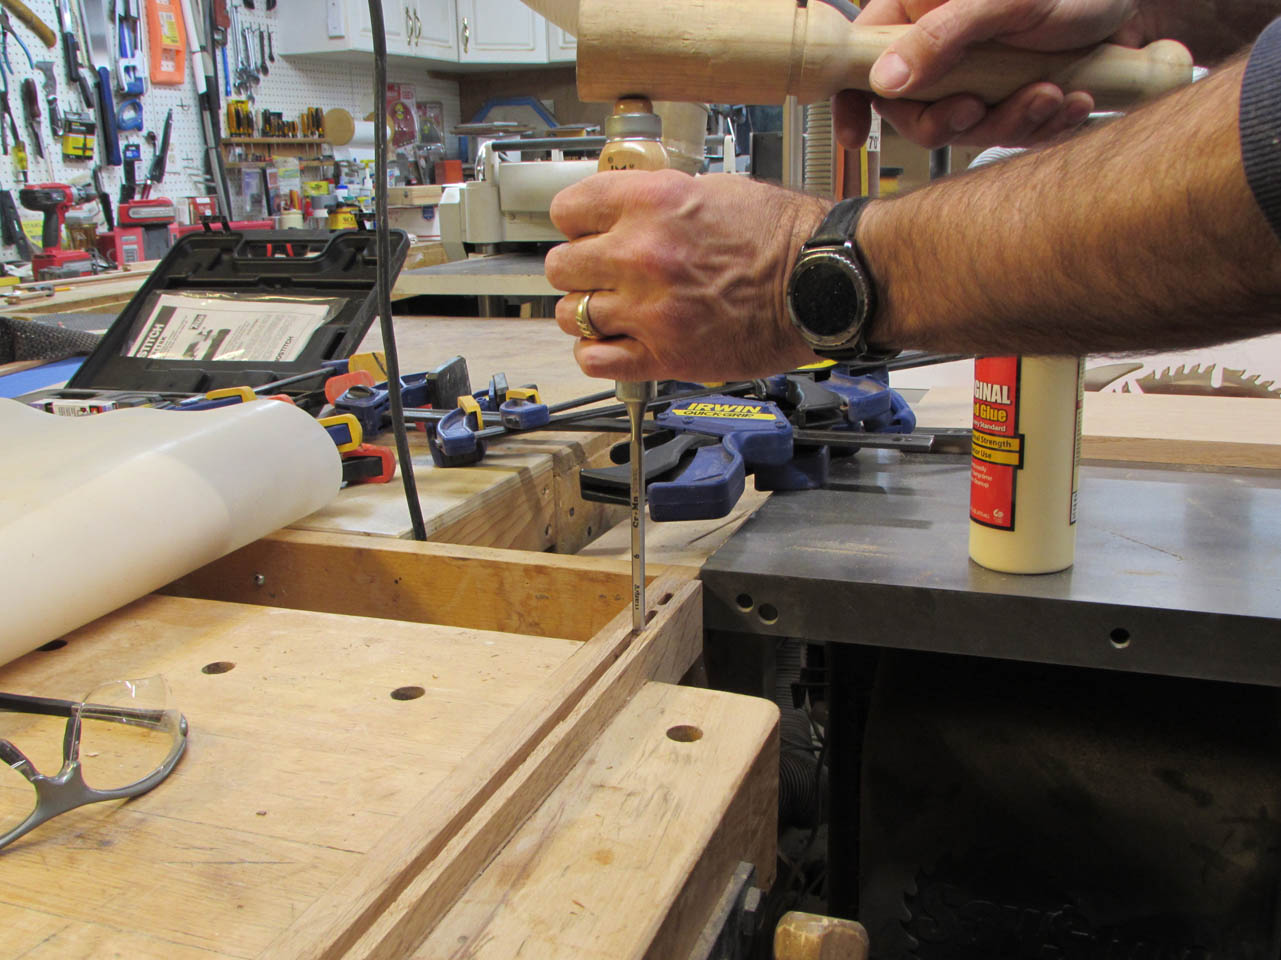
I start by cutting a few boards to create the sides and door.

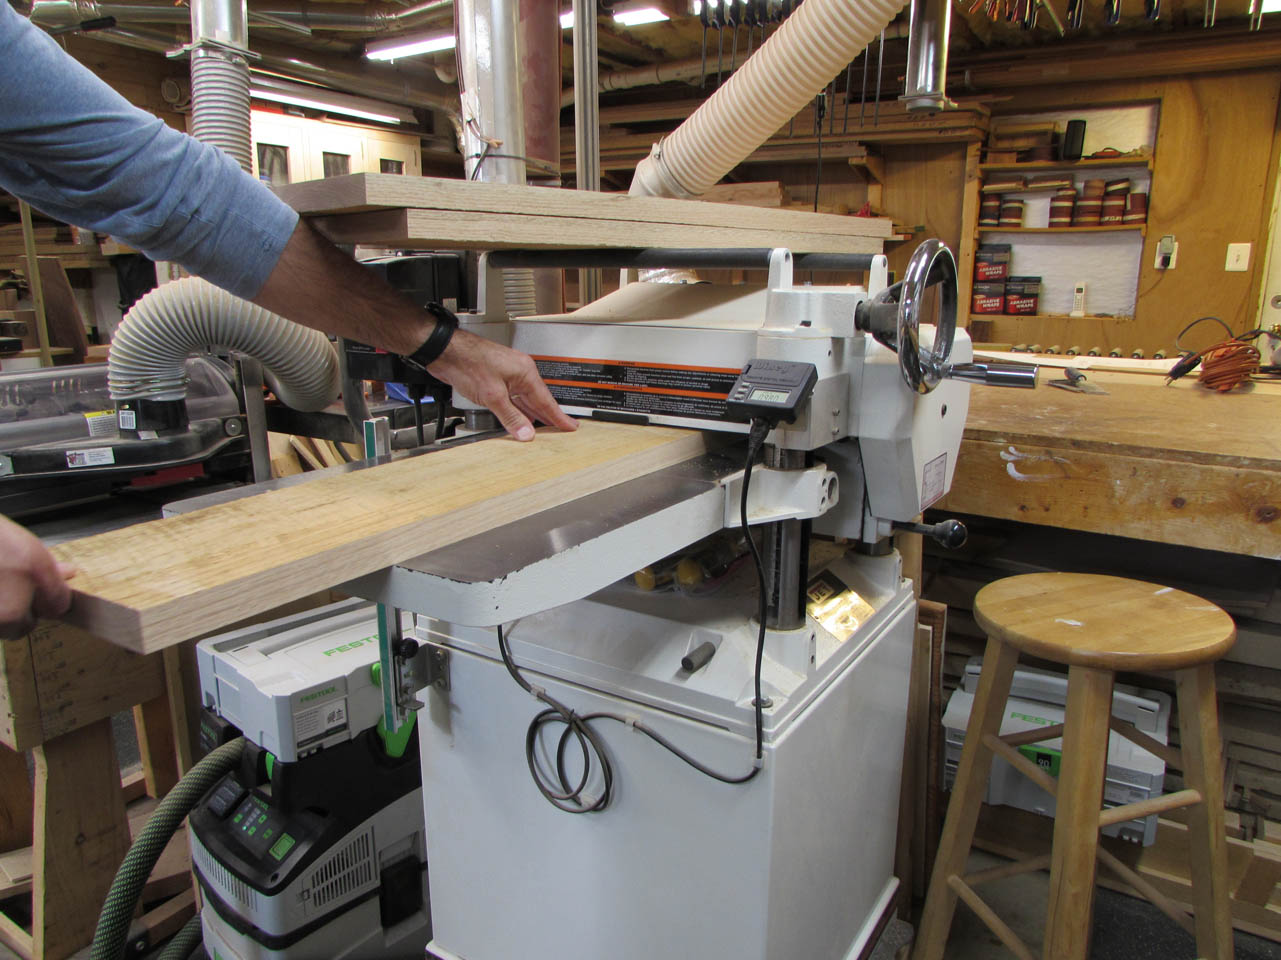
I cut them longer than needed, then planed and jointed them down to 3/4″ thick.
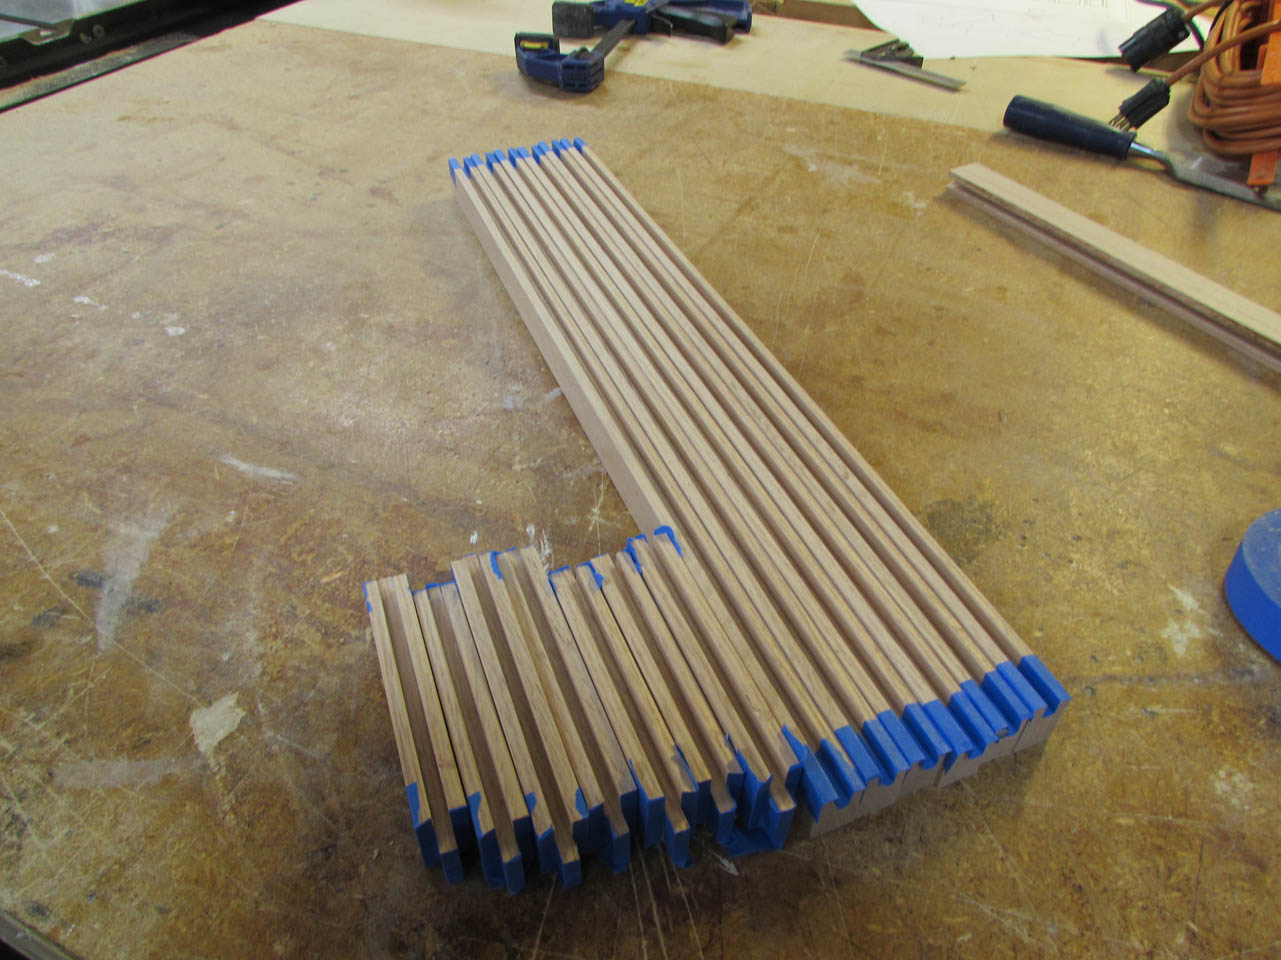
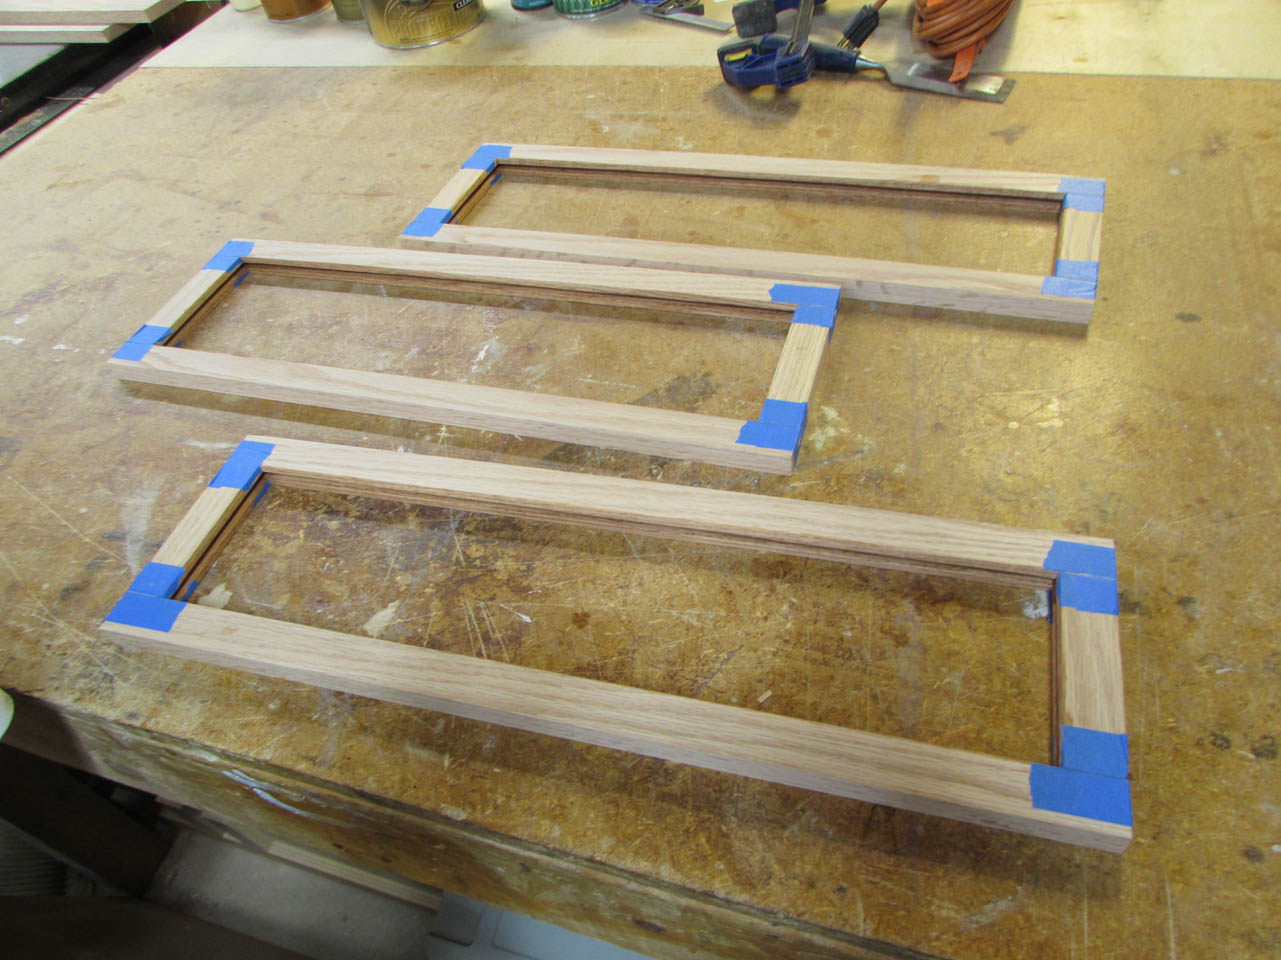
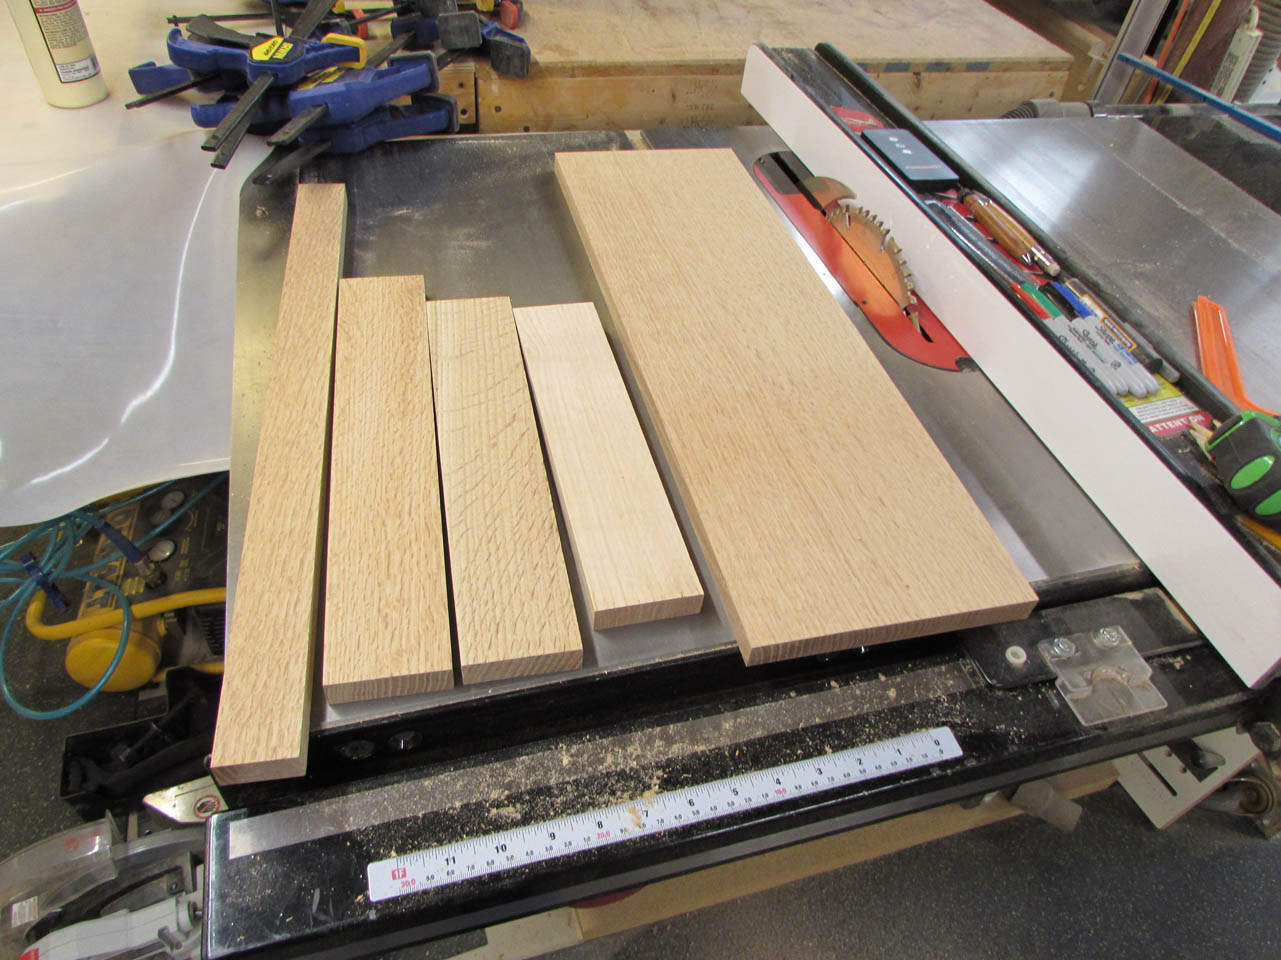
I cut six strips to the width needed for framing the glass sides and the door. I left them about 10″ longer than needed so I can cut the tops and bottoms of the panels from the excess.
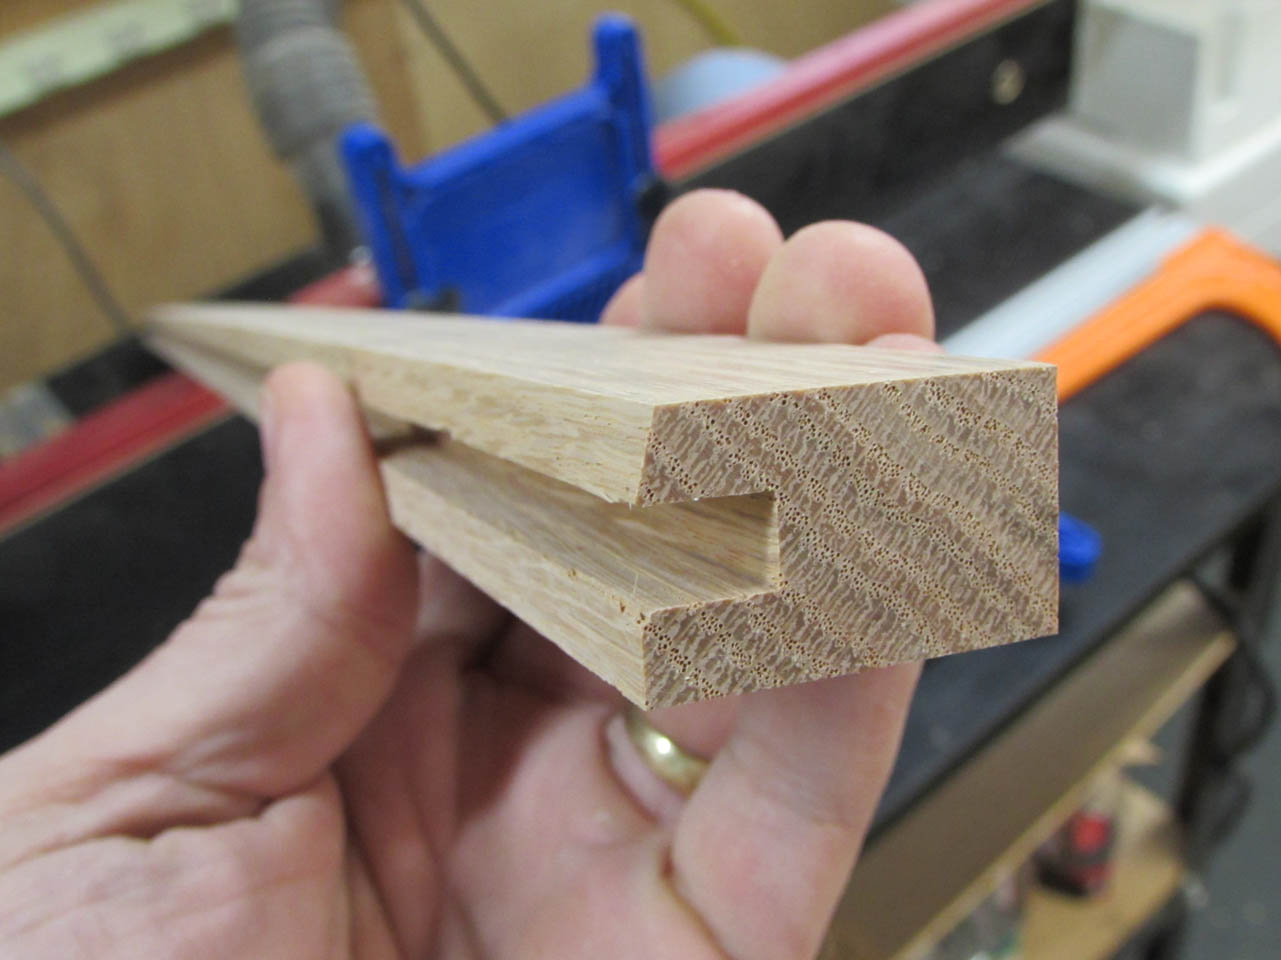
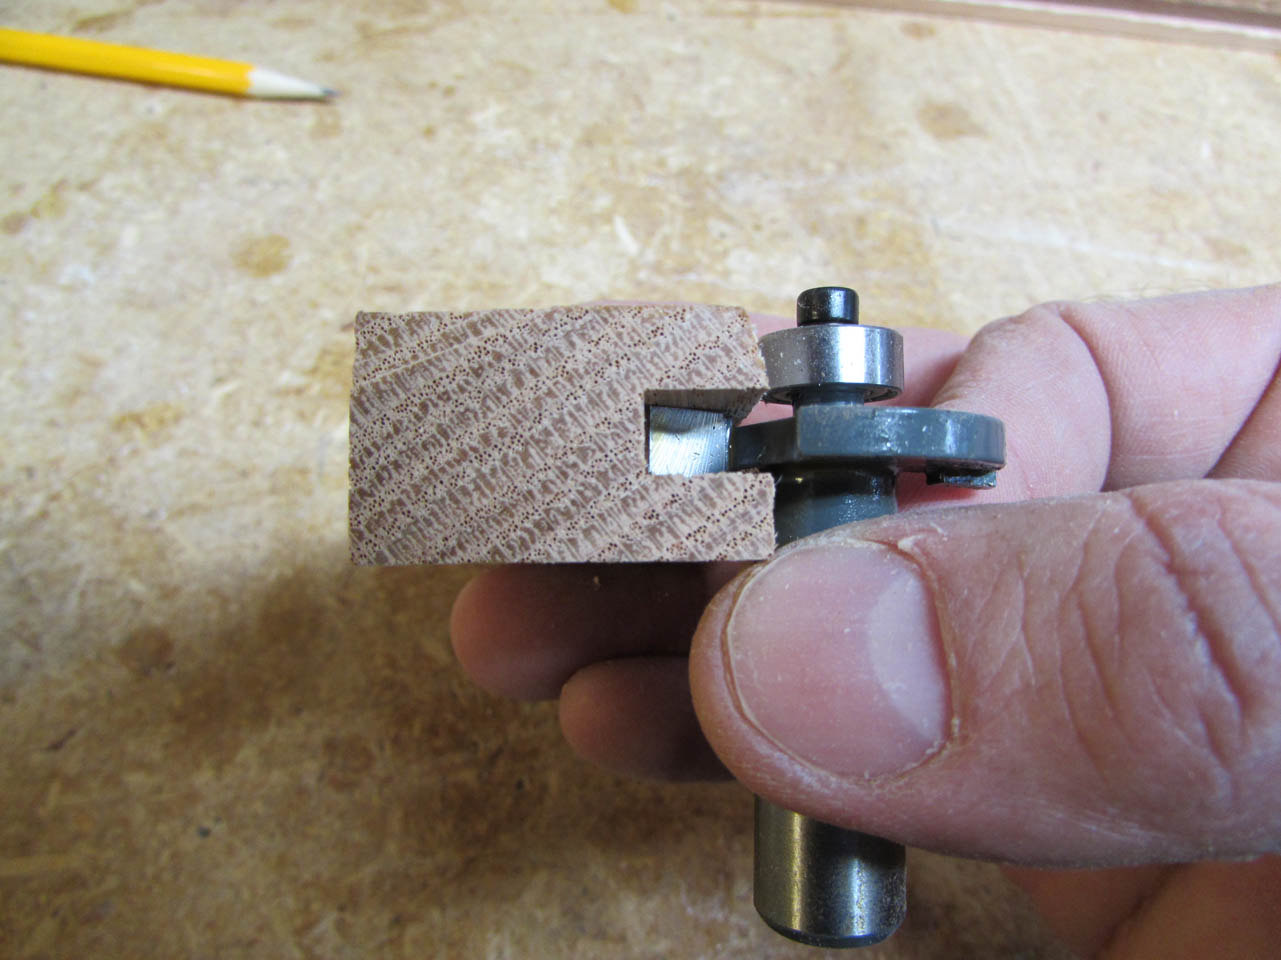
I am setting up two different routers to cut the rails and stiles, that way I don’t lose my height setting switching back and forth between bits. Monsignor wants a simple design for everything so I am going with a Shaker-style profile on the bits. I have a set of raised panel bits already, but they were always a loose fit. I decided to buy a premium set of bits for this project to ensure a good fit. I was very impressed with the Katana bits from MLCS they were much more precise than the inexpensive set I have used in the past. The tighter the fit, the more straight and square the panel will be.


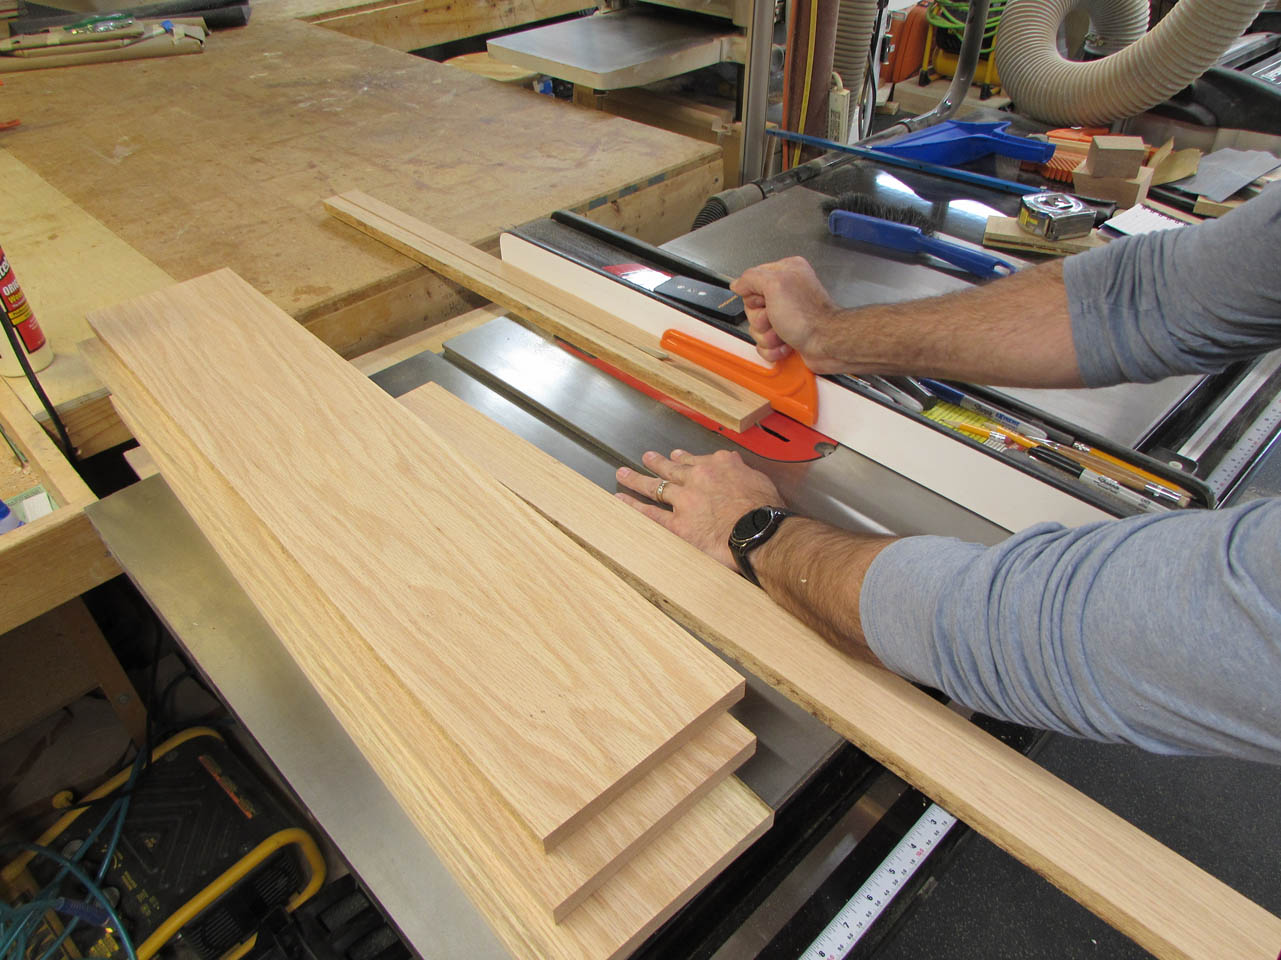
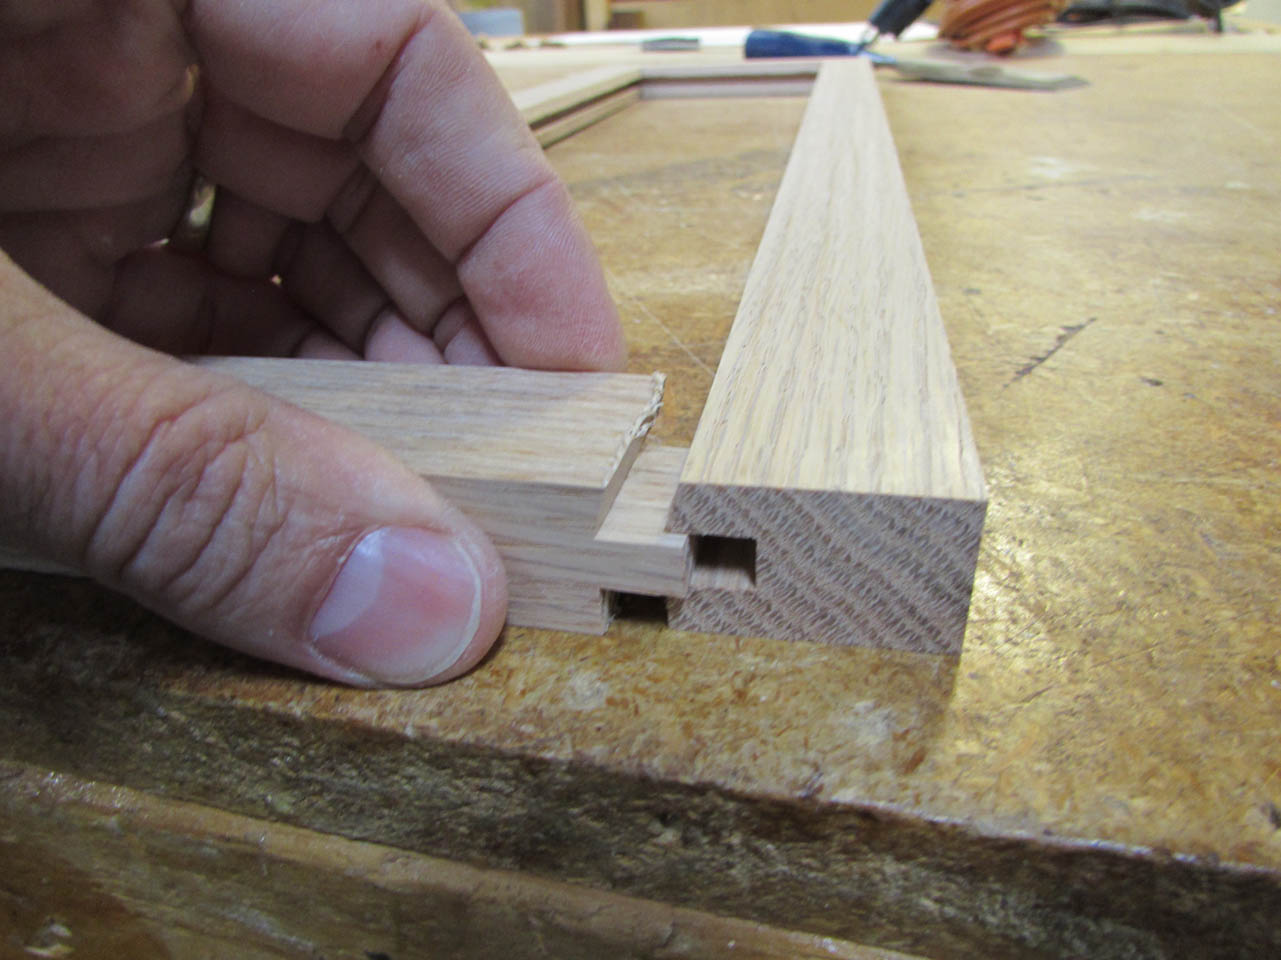
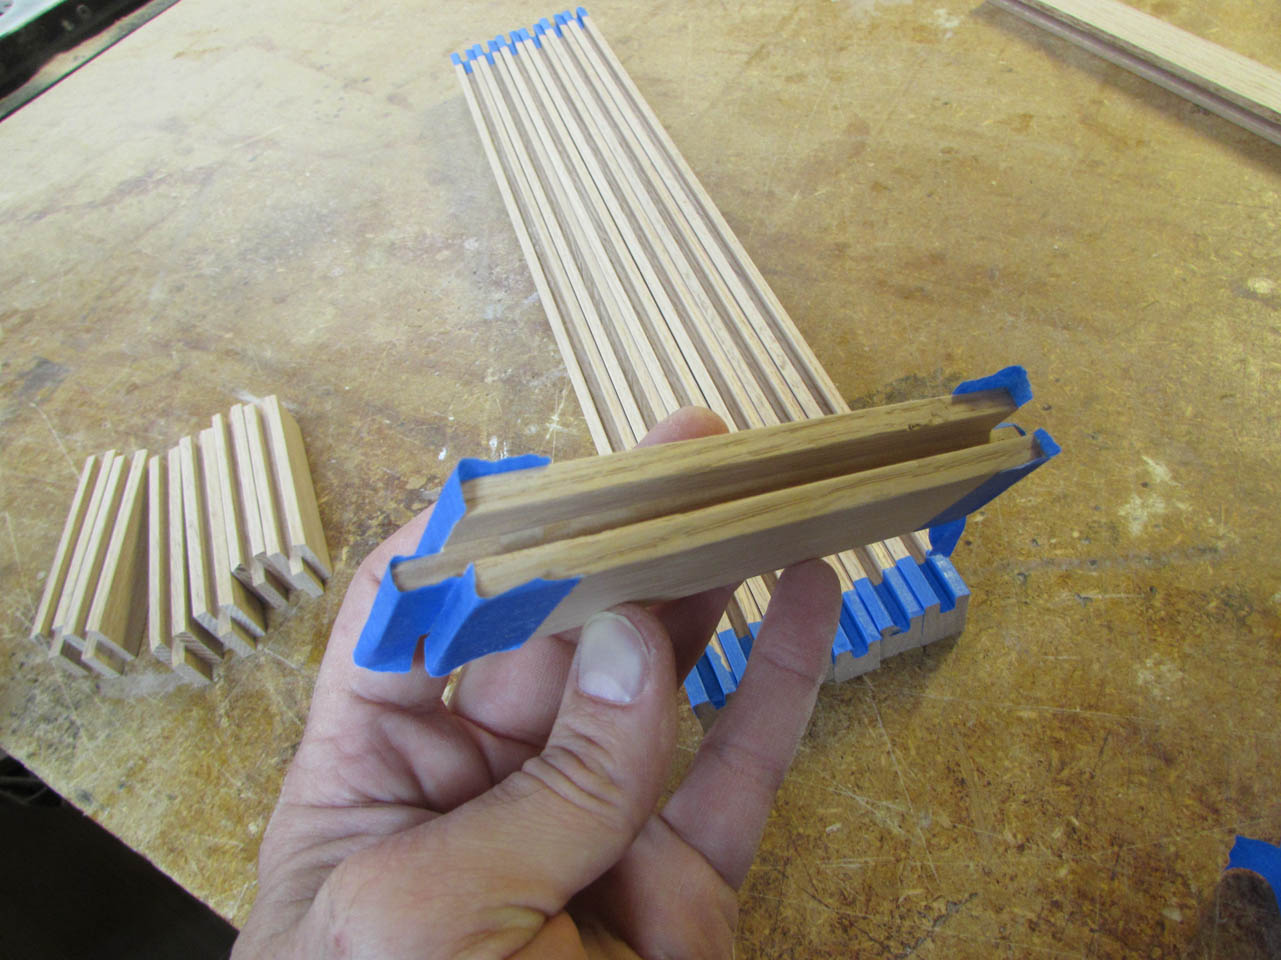
I cut the stiles first. The cutter leaves a nice, clean, simple profile with a 1/4″ gap to receive the slightly less than 1/4″ thick glass that I had cut for the cabinet.
I then cut the stiles down to the required 24-1/2″ length and used the off-cuts to make the rails.
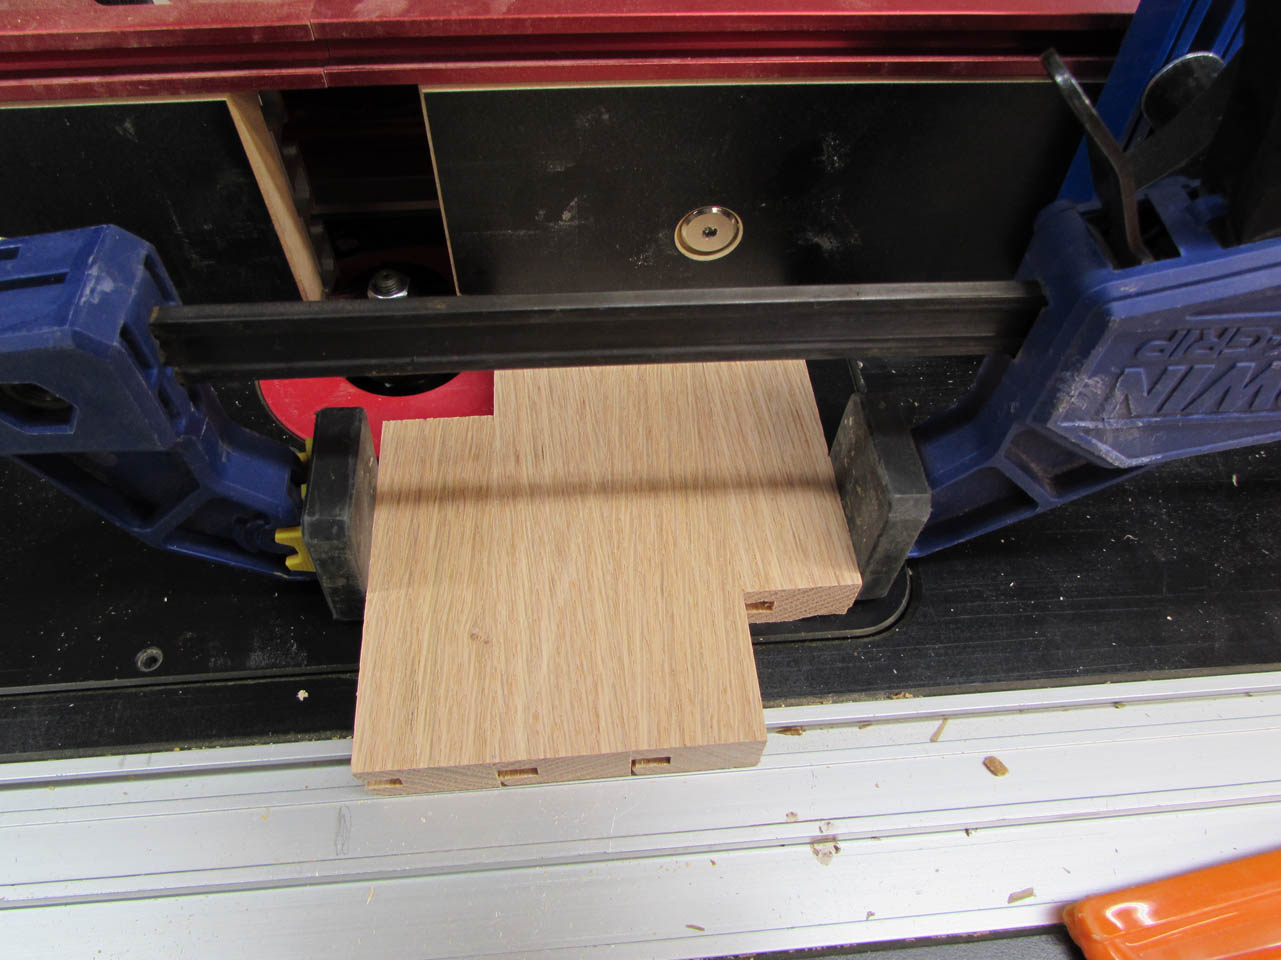
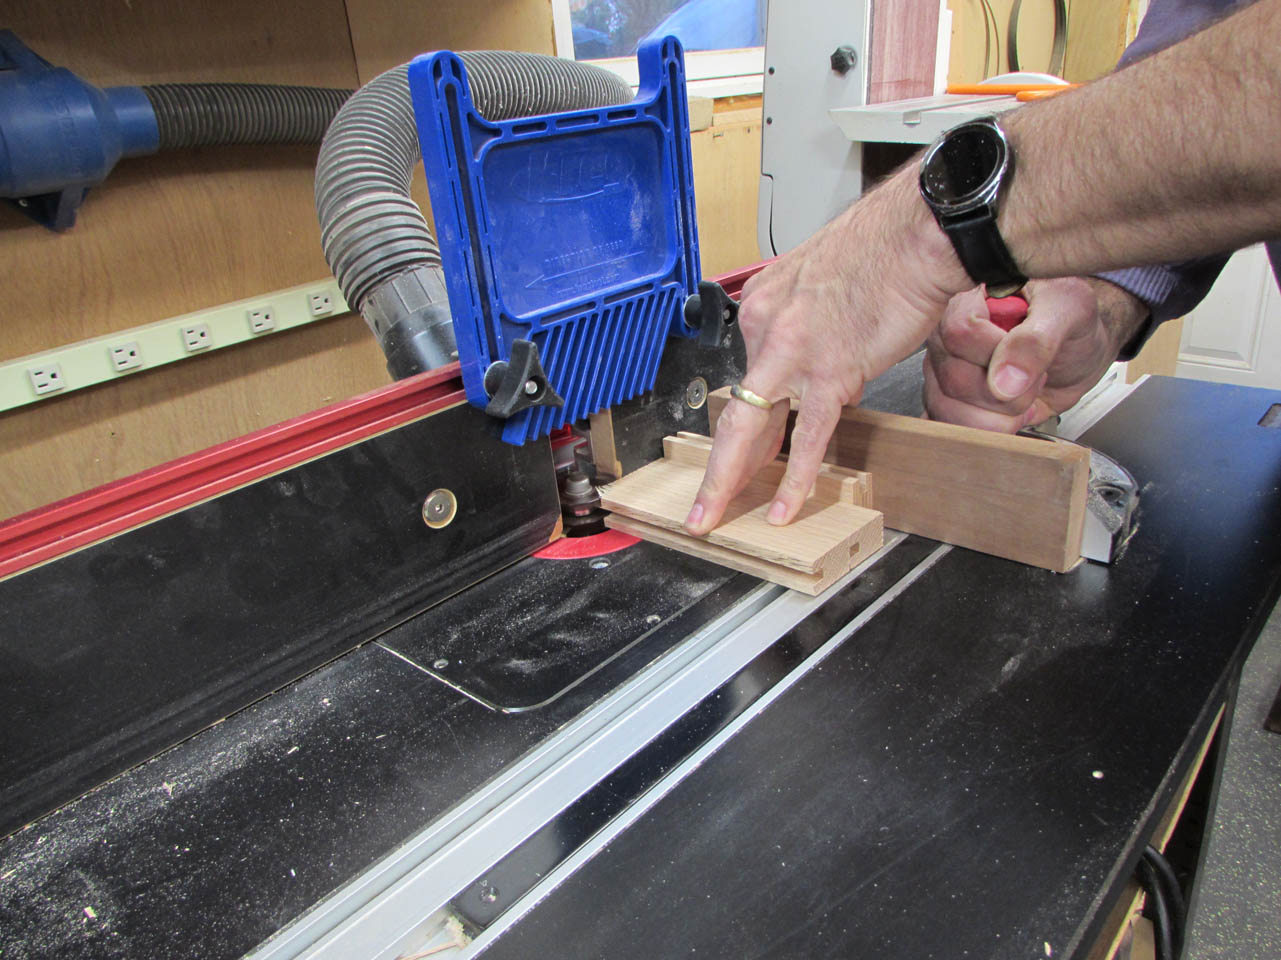
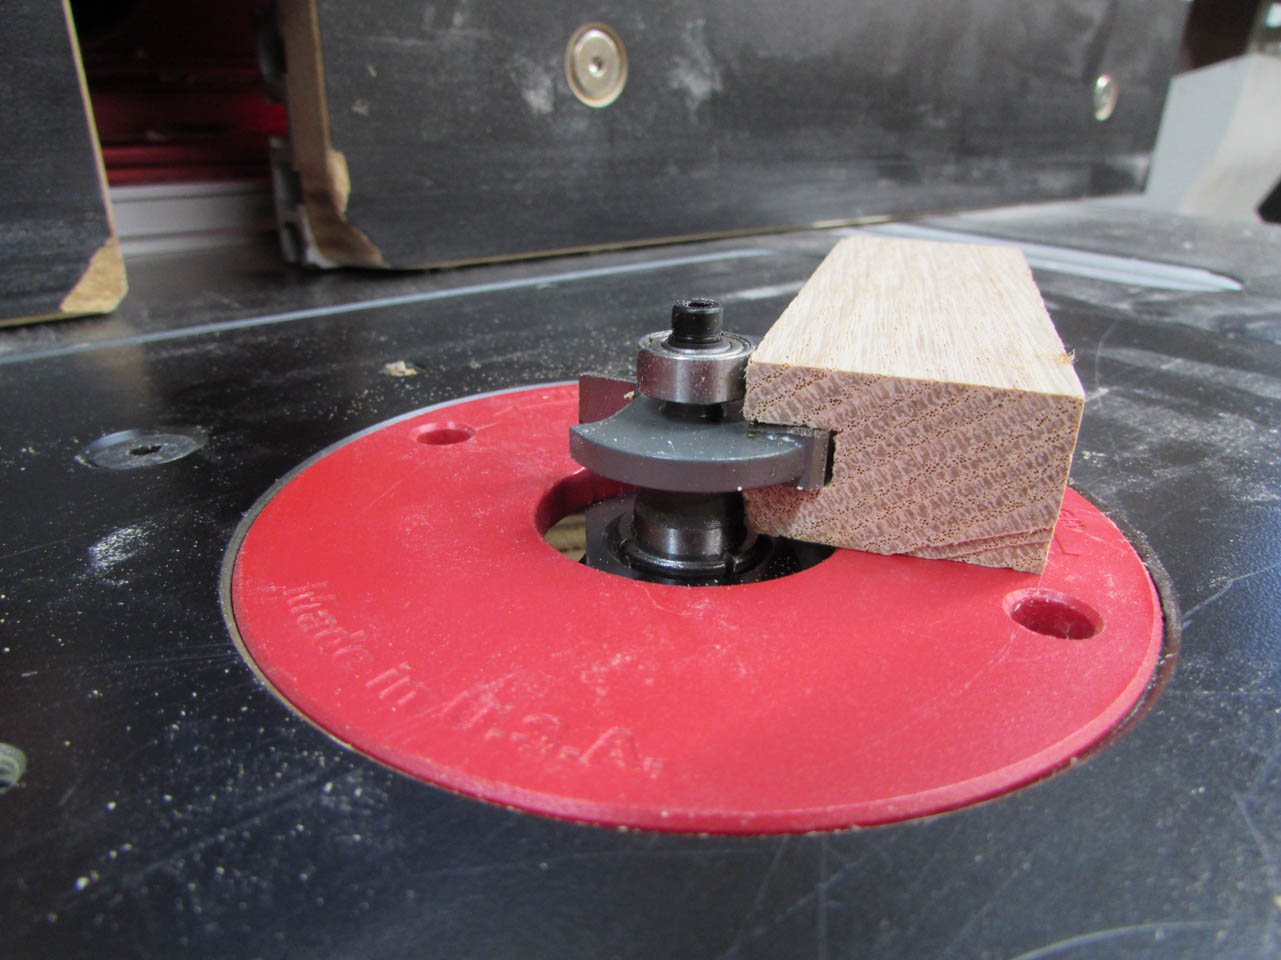
I switched out the routers to cut the ends with the opposite profile. I clamped several of the shorter pieces together, along with an extra piece on the back side to prevent any tear-out on the good pieces.

Then flipped it around to cut the other side.
This first frame is actually a test piece since I have not used these bits before.
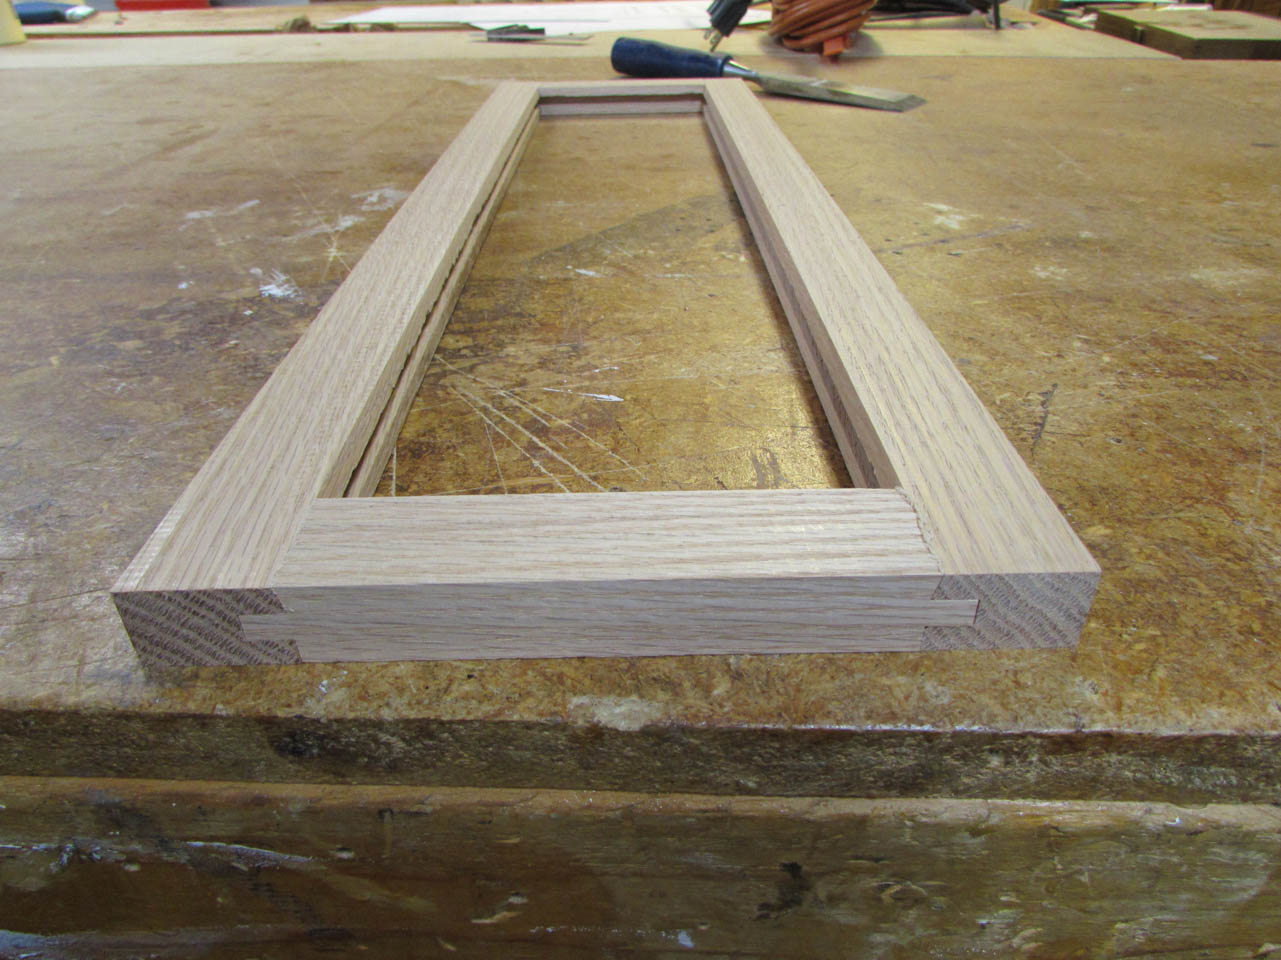
I was very impressed at how well they went together.
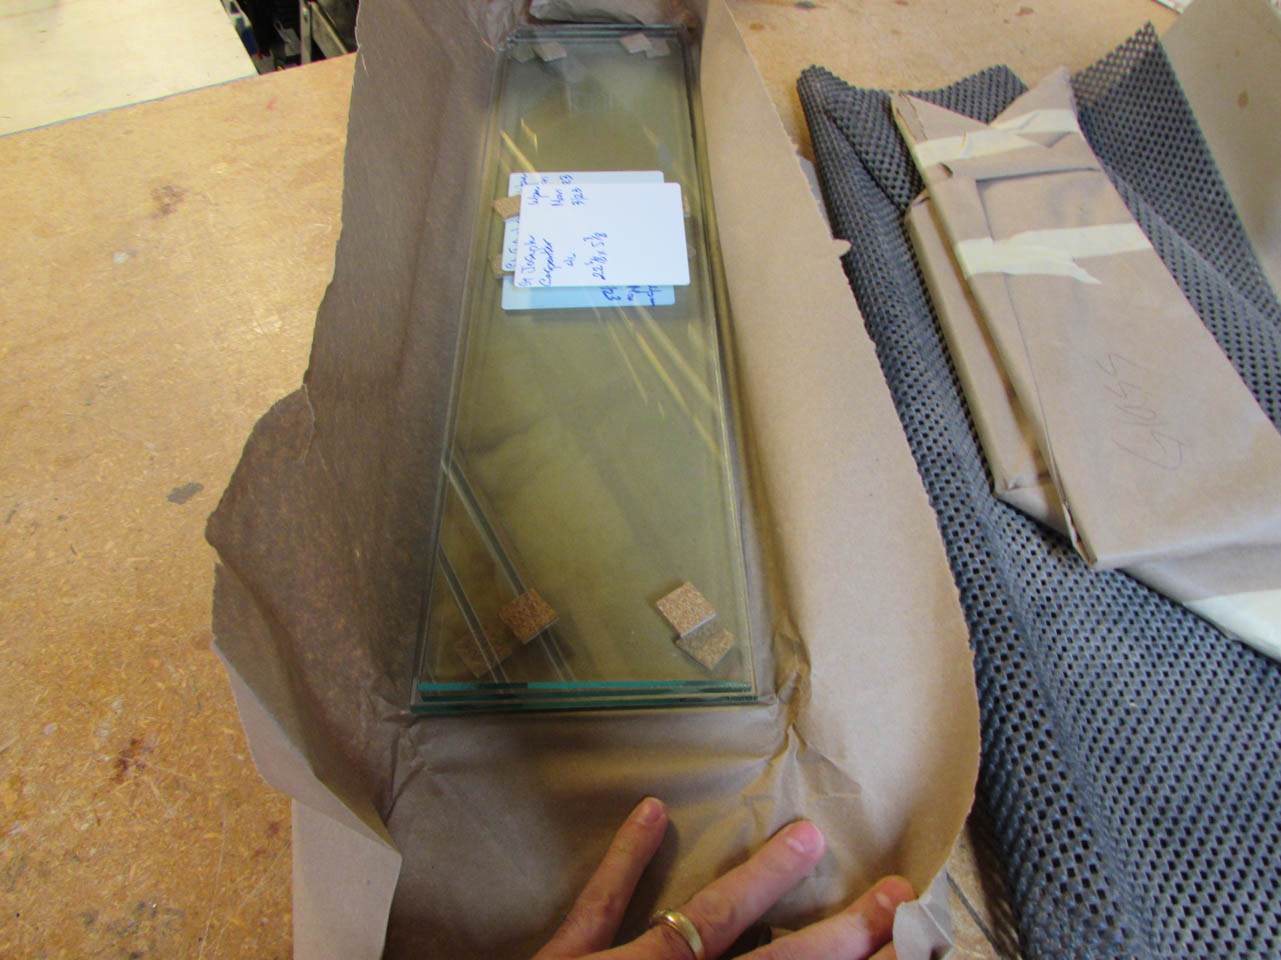
I unpacked the glass I had cut and did a dry-fit to see how it all fit together.
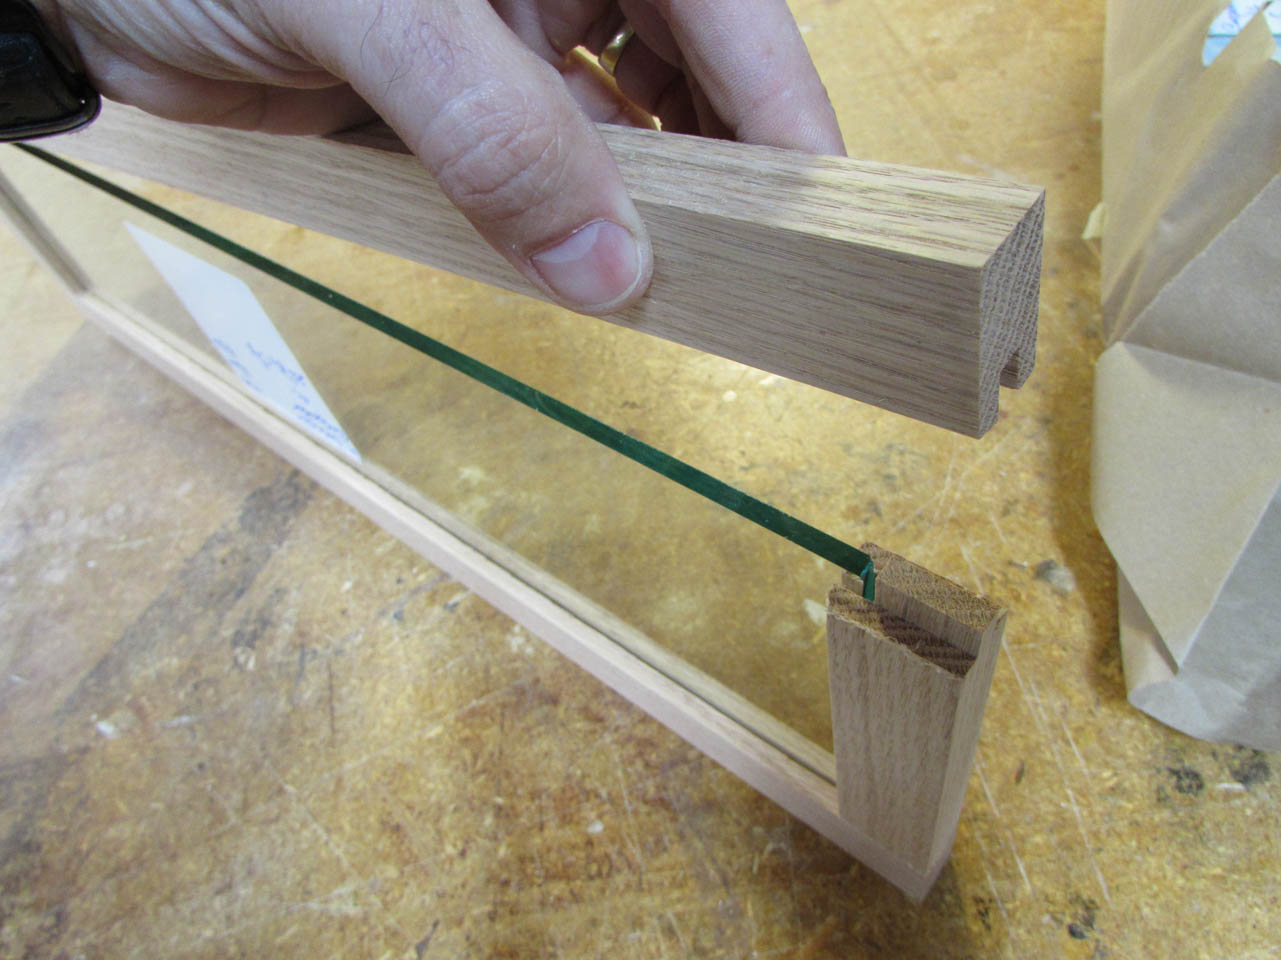
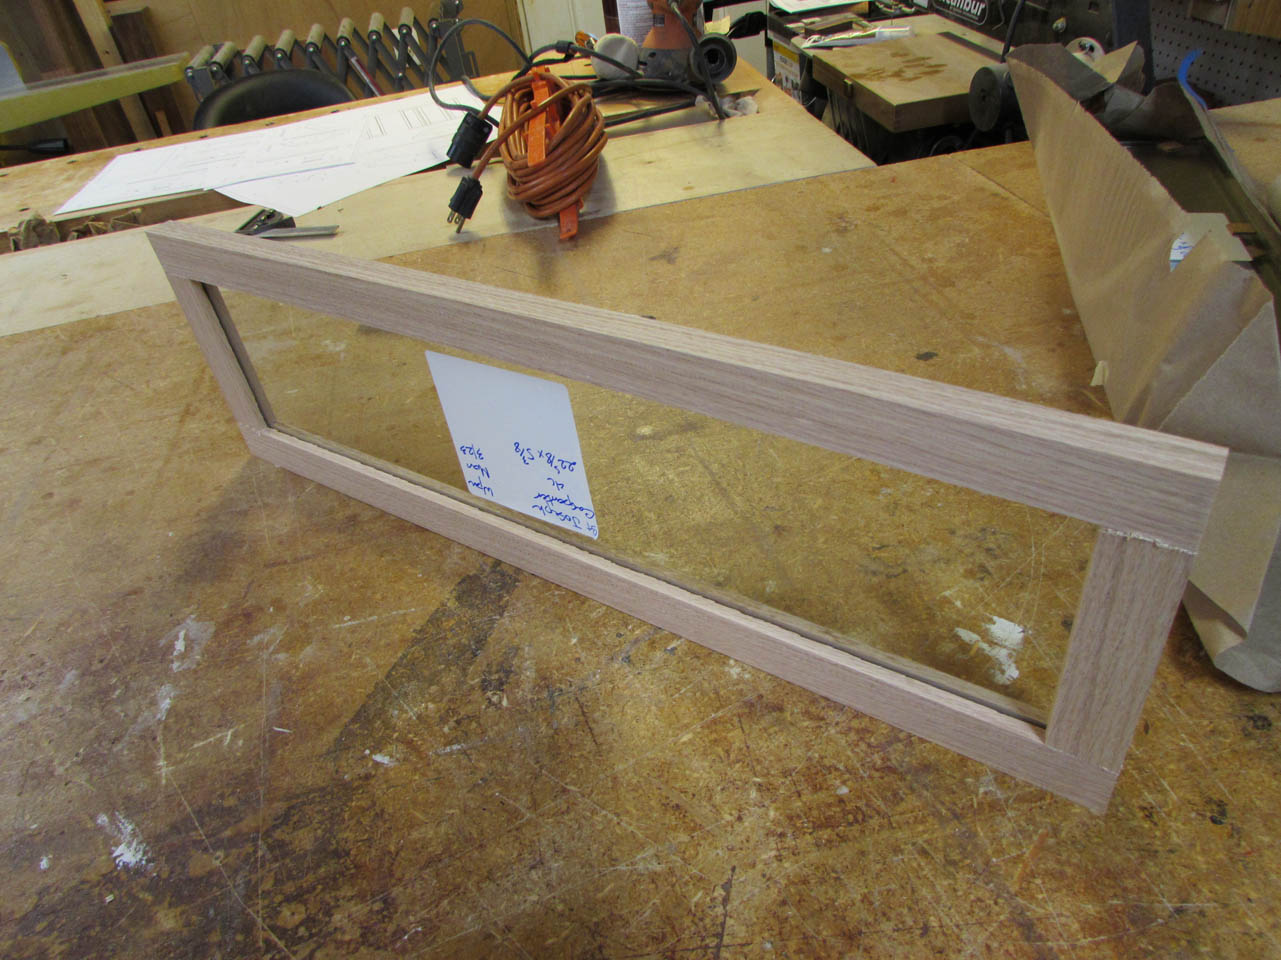
I think it works great.


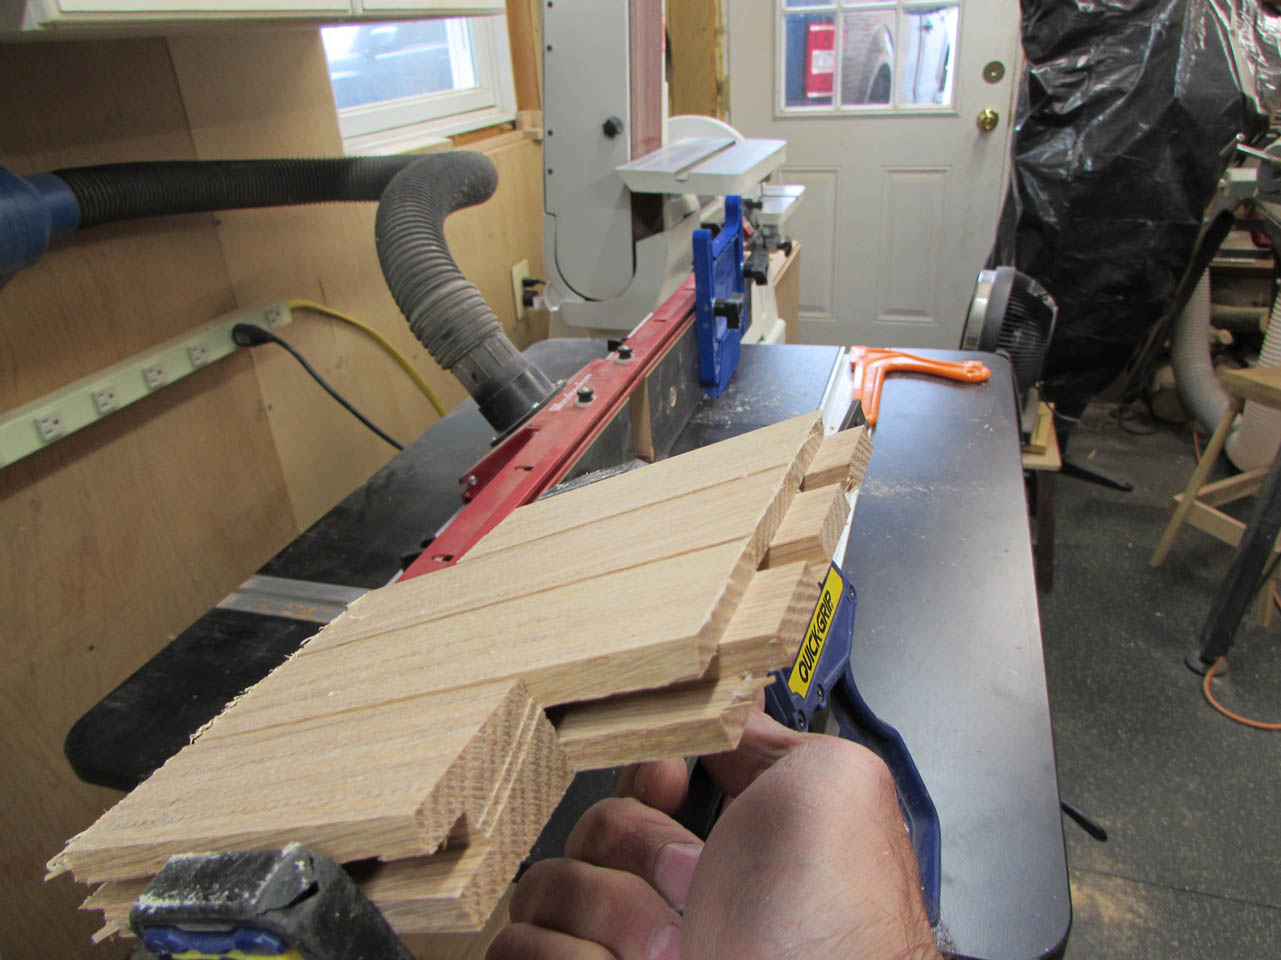
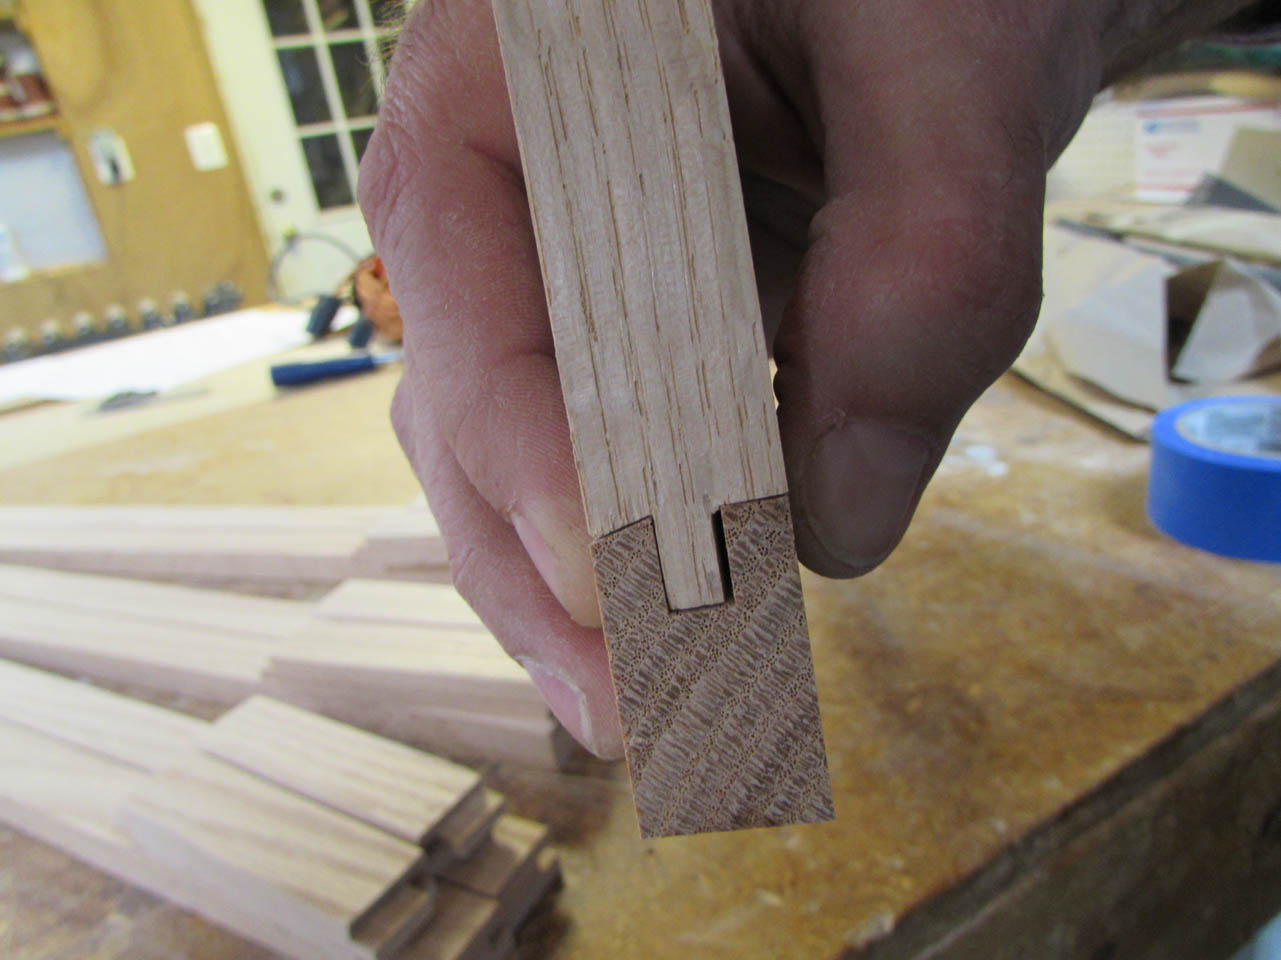
So I repeated the process on six more strips.


I determined that this method of clamping and cutting the ends of the rails was not the best when you clamp up too many.
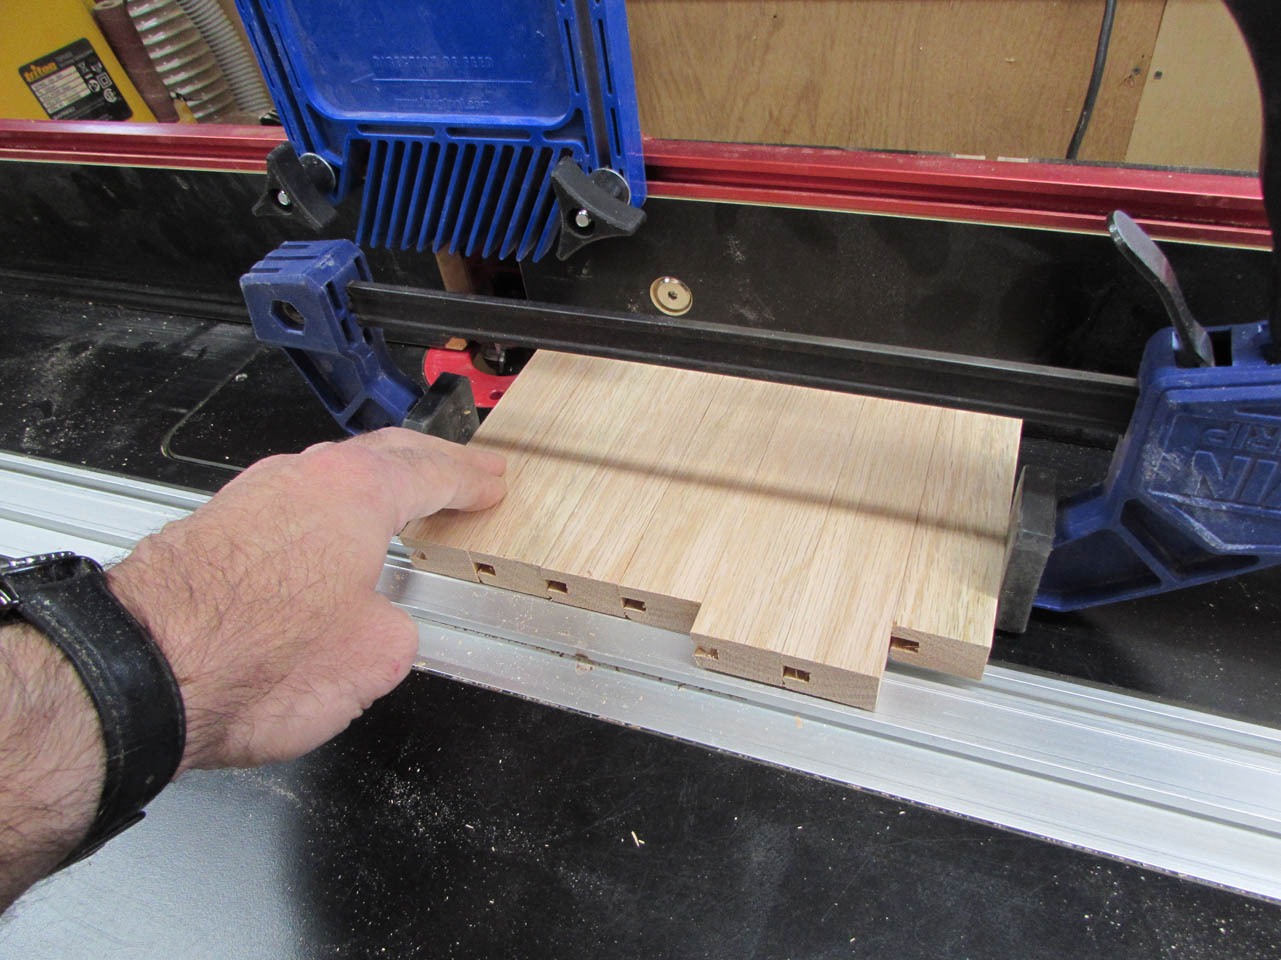
Things can shift around if you are not very careful.
Although, my scrap piece on the exit side of the cut worked well, see the tear-out that can occur.

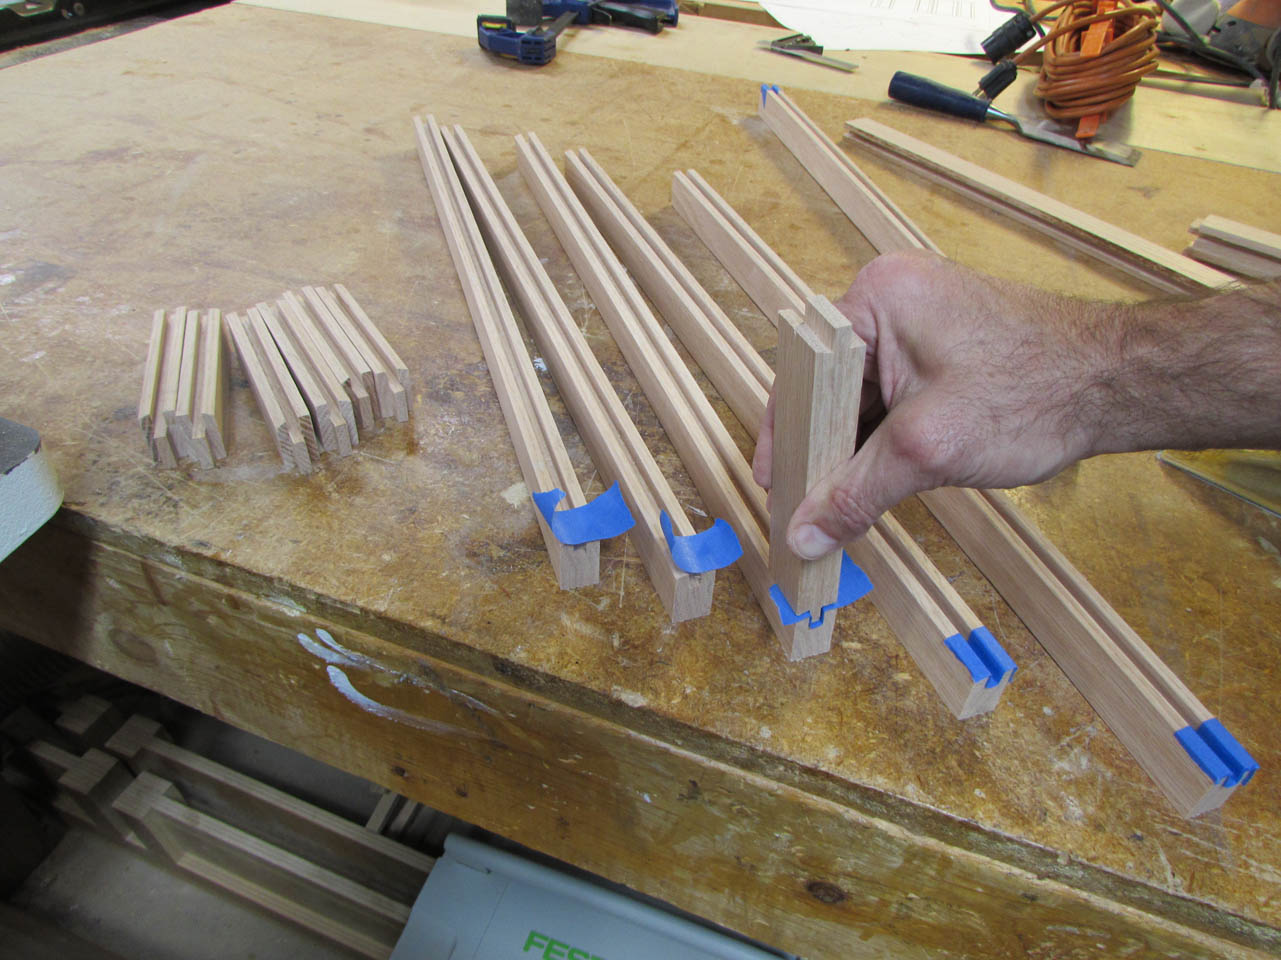
I had to remake a couple of pieces so I tried using my miter gauge instead.
Between the two methods, I got what I needed.

Although, I am kind of glad that I screwed up a couple. I re-cut the one below because it rose up during the cut and I wound up with a thinner tongue.
This leaves me enough of a gap to use the bad piece to press tape down into the groove to mask the end for pre-staining.

That was one of those details I had not figured out yet…


Actually worked very well.
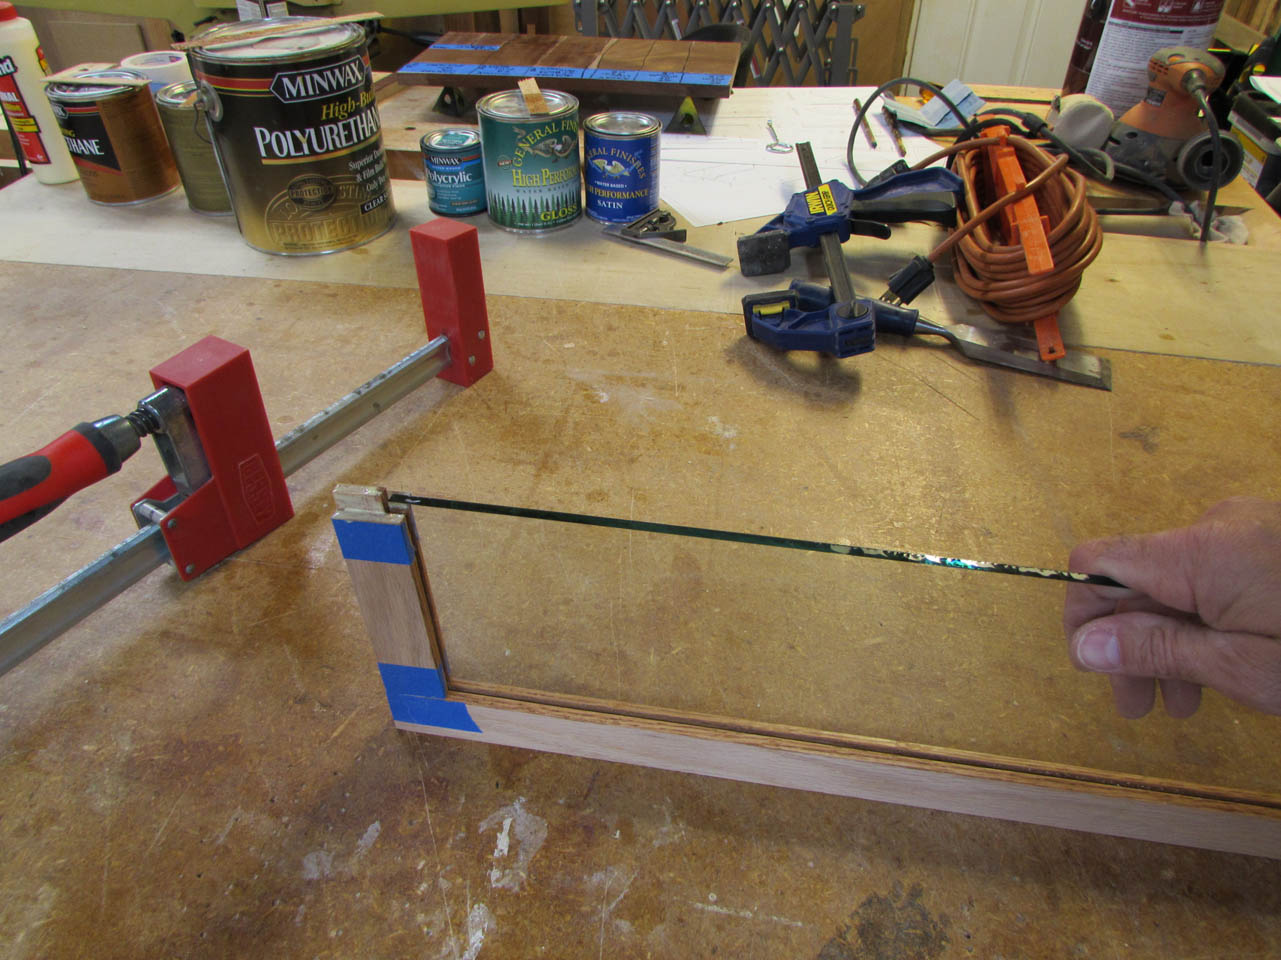
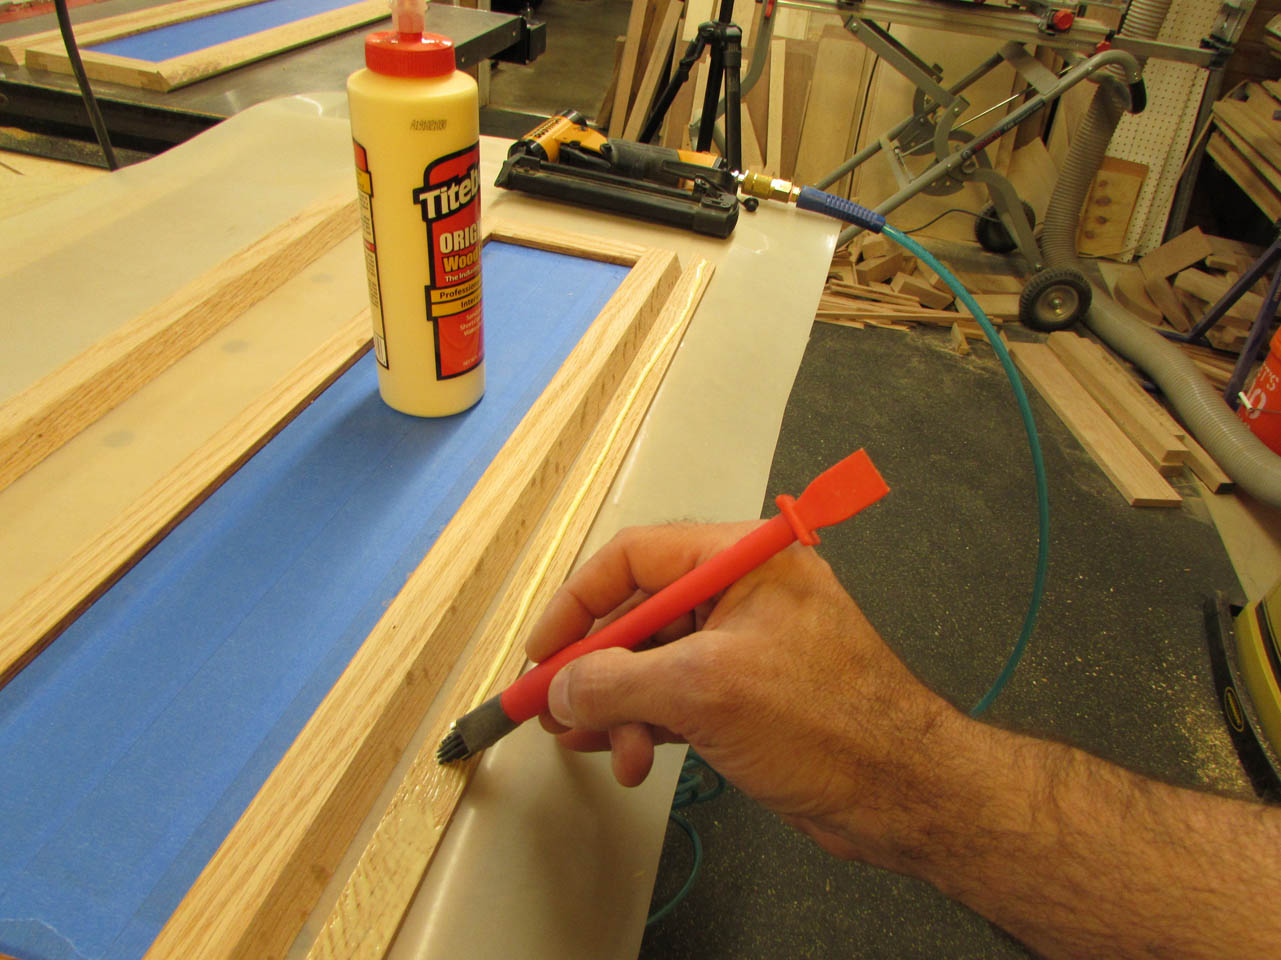
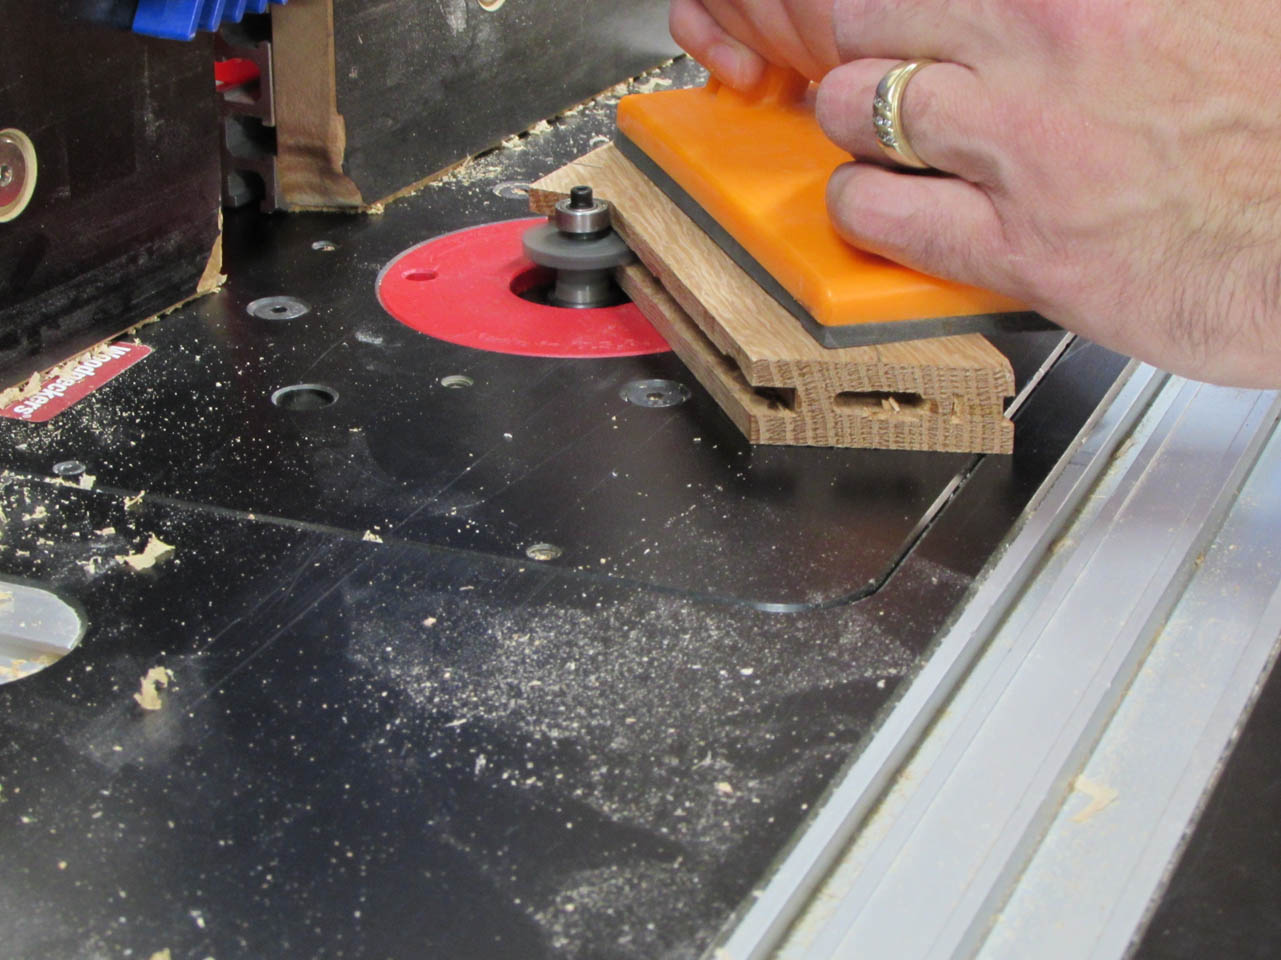
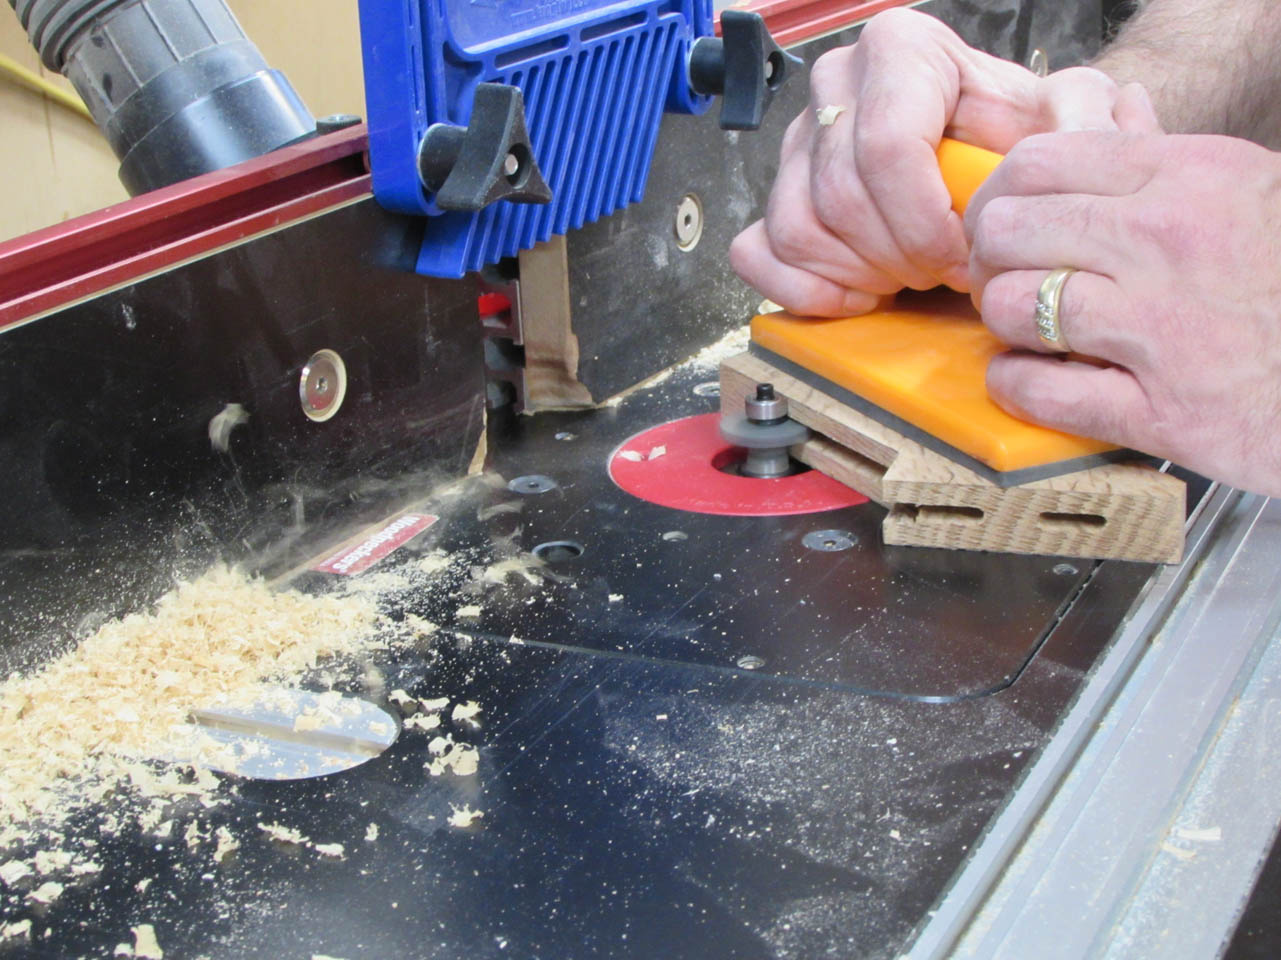
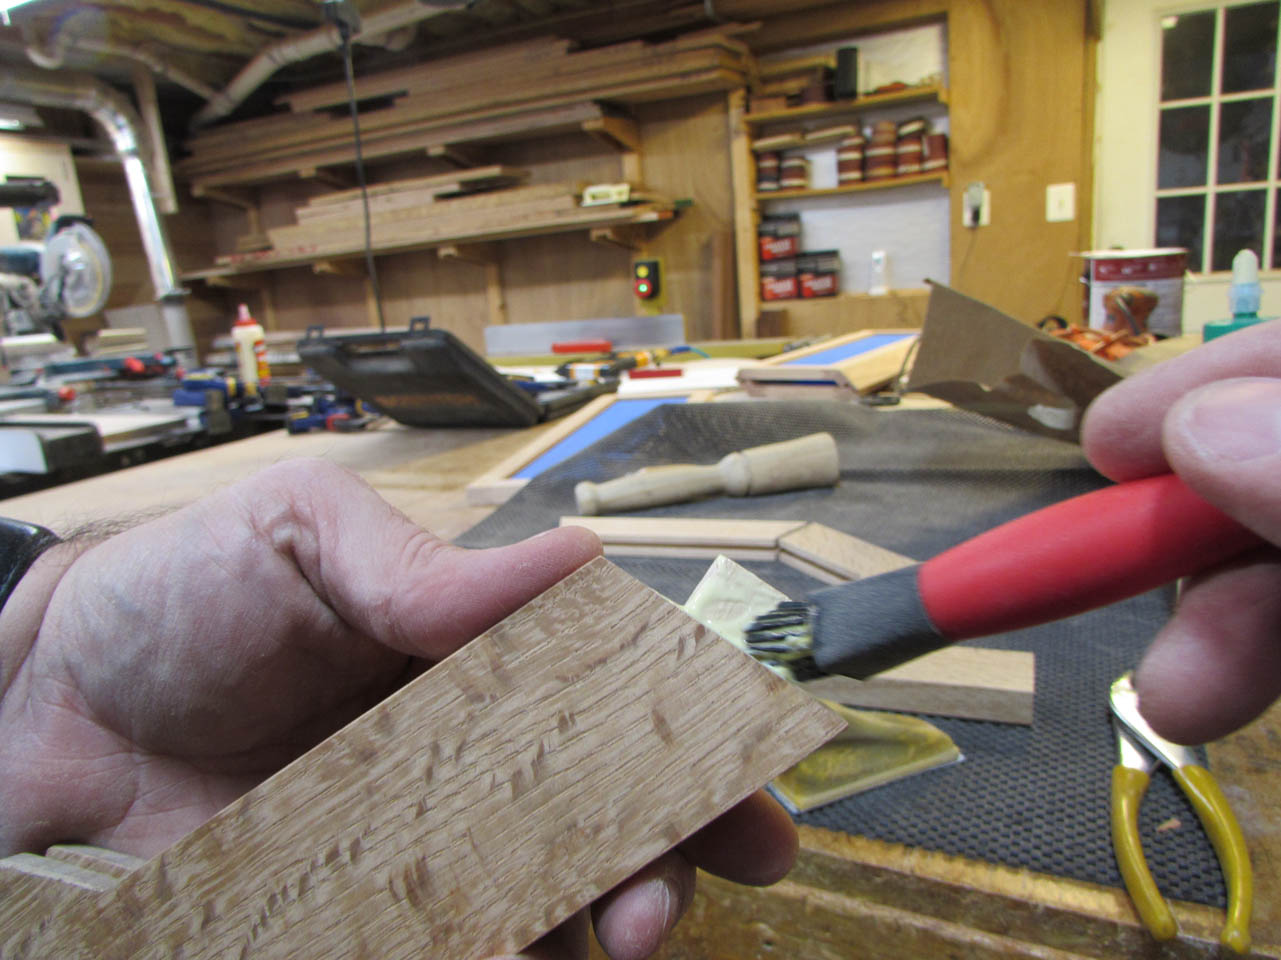
Since the glass will be installed and the frame glued up prior to finishing, I need to pre-stain inside the groove so that it will be the same color as the rest of the cabinet.
This requires me to protect the areas where glue will be applied later from the stain.
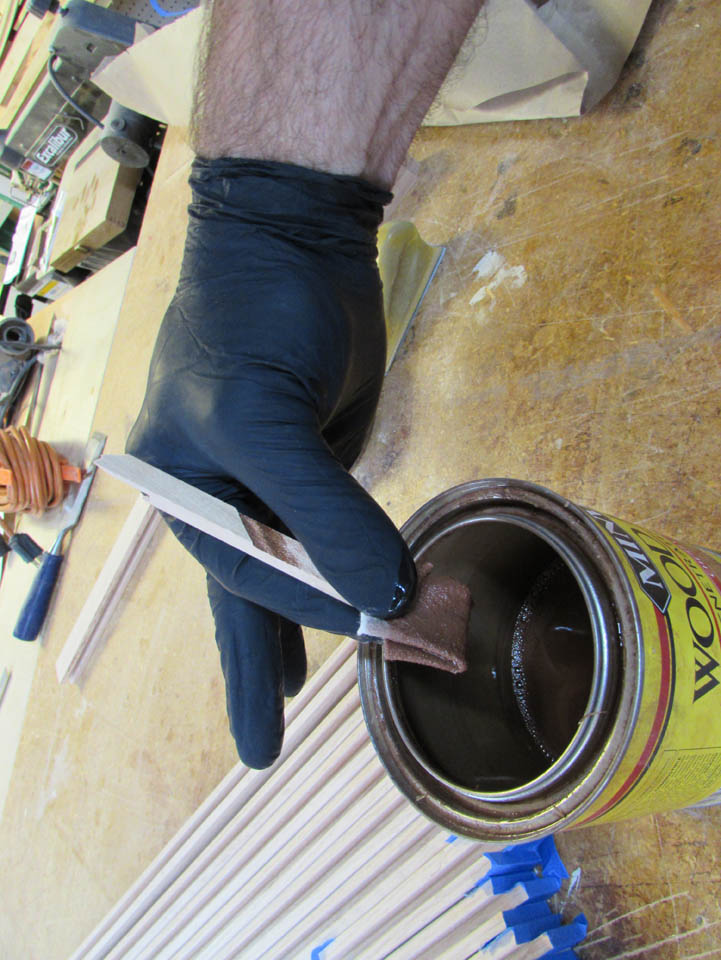
To apply the stain, I cut a stick to be about 3/16″ thick, then wrapped a cloth around it and slid it along the groove repeatedly until all of the grooves were evenly coated with stain.


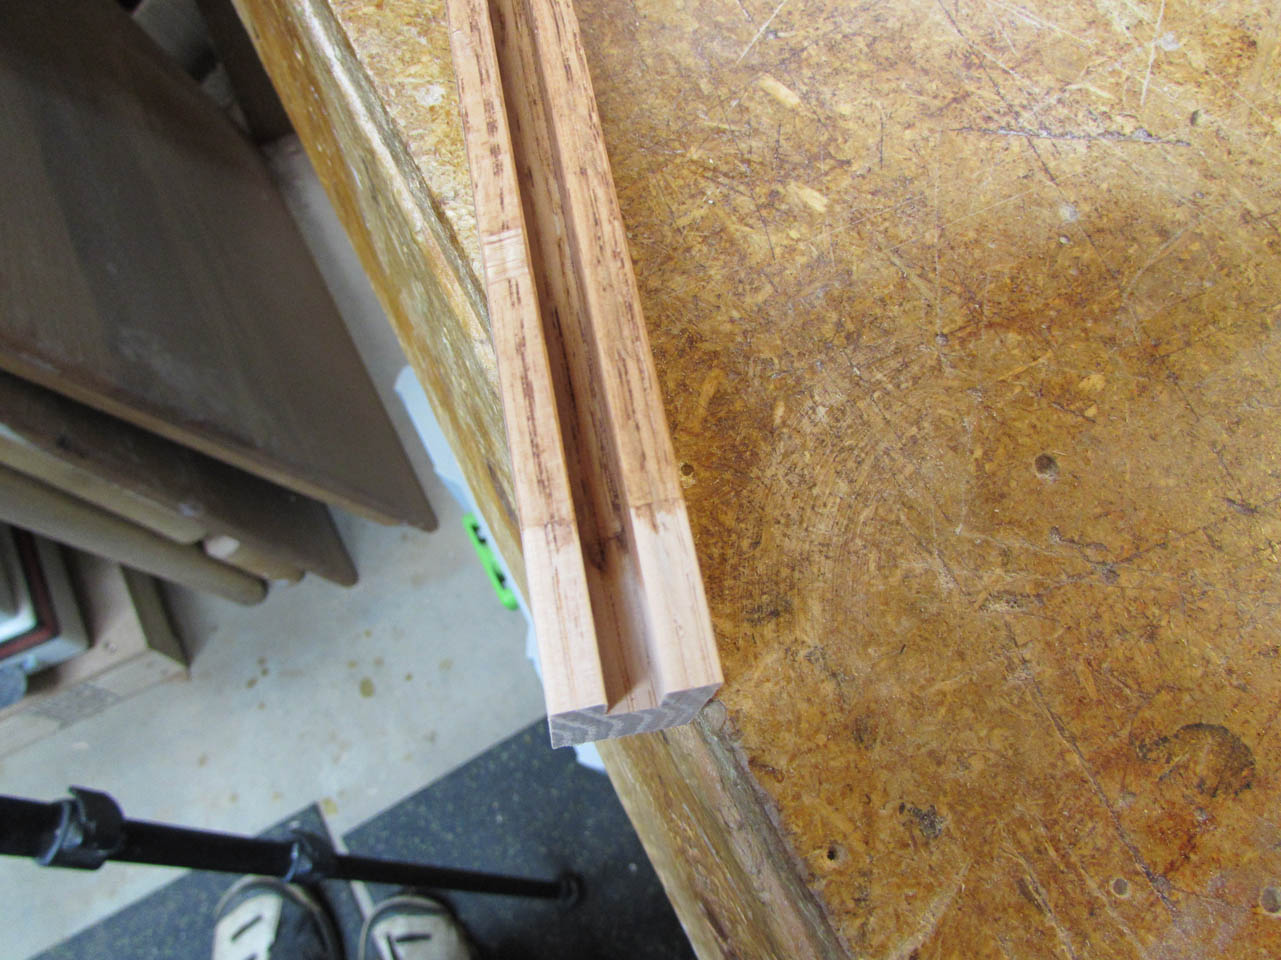
I let the stain dry overnight and removed the tape. Only had a little bit of bleed under the tape. That will leave plenty of bare wood for glue-bonding.


Now, prior to glue-up, I need to mask around the glued areas to prevent squeeze-out from getting onto the surface of the wood.

After another dry-fit to make sure all the parts were paired up correctly, I applied a bead of silicone along the inside of the groove that will house the glass. This should prevent the glass from rattling and add a bit of protection against any glass cleaner that may drip down the glass into the groove.

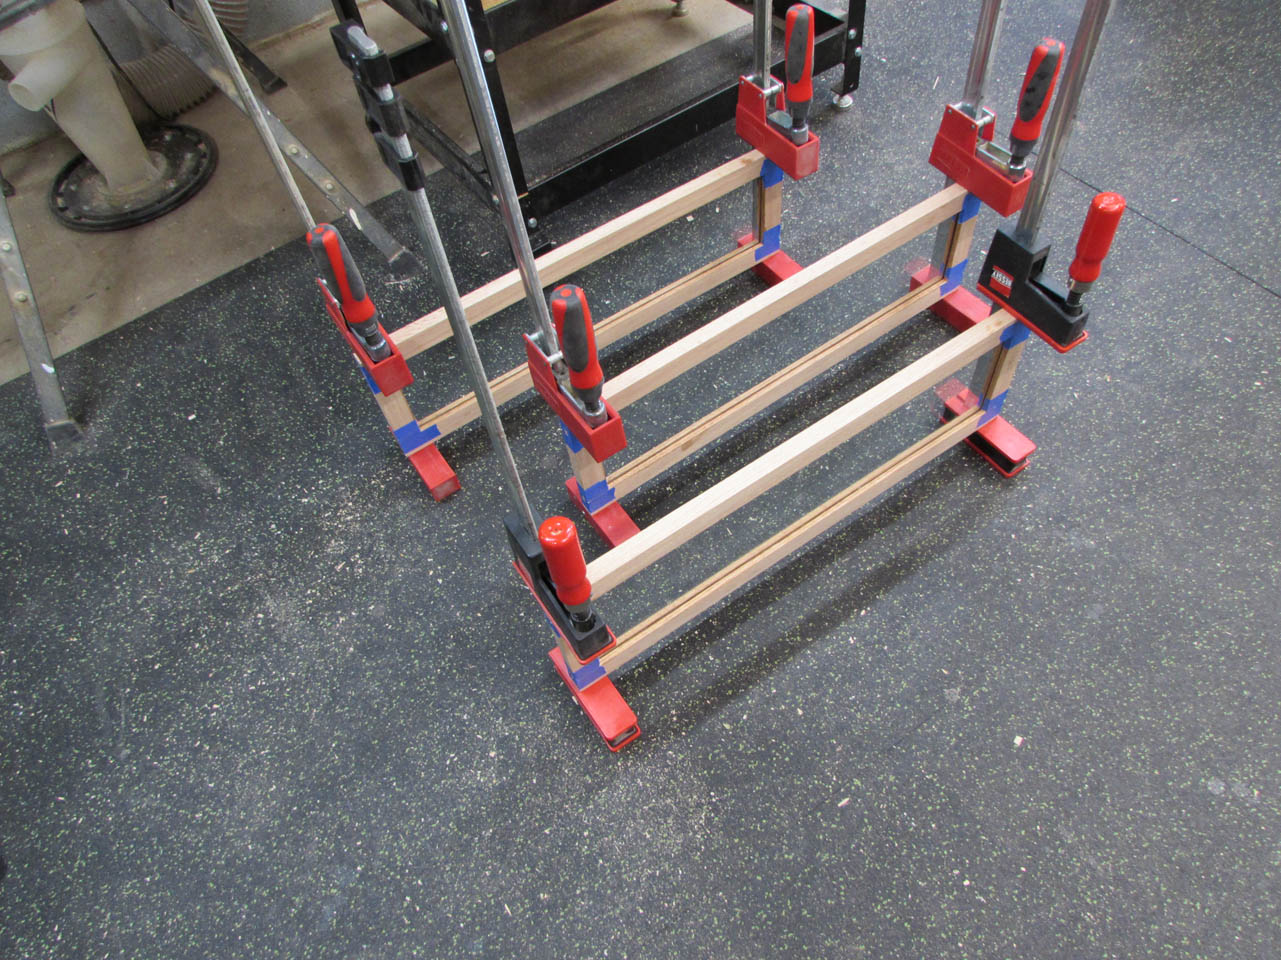
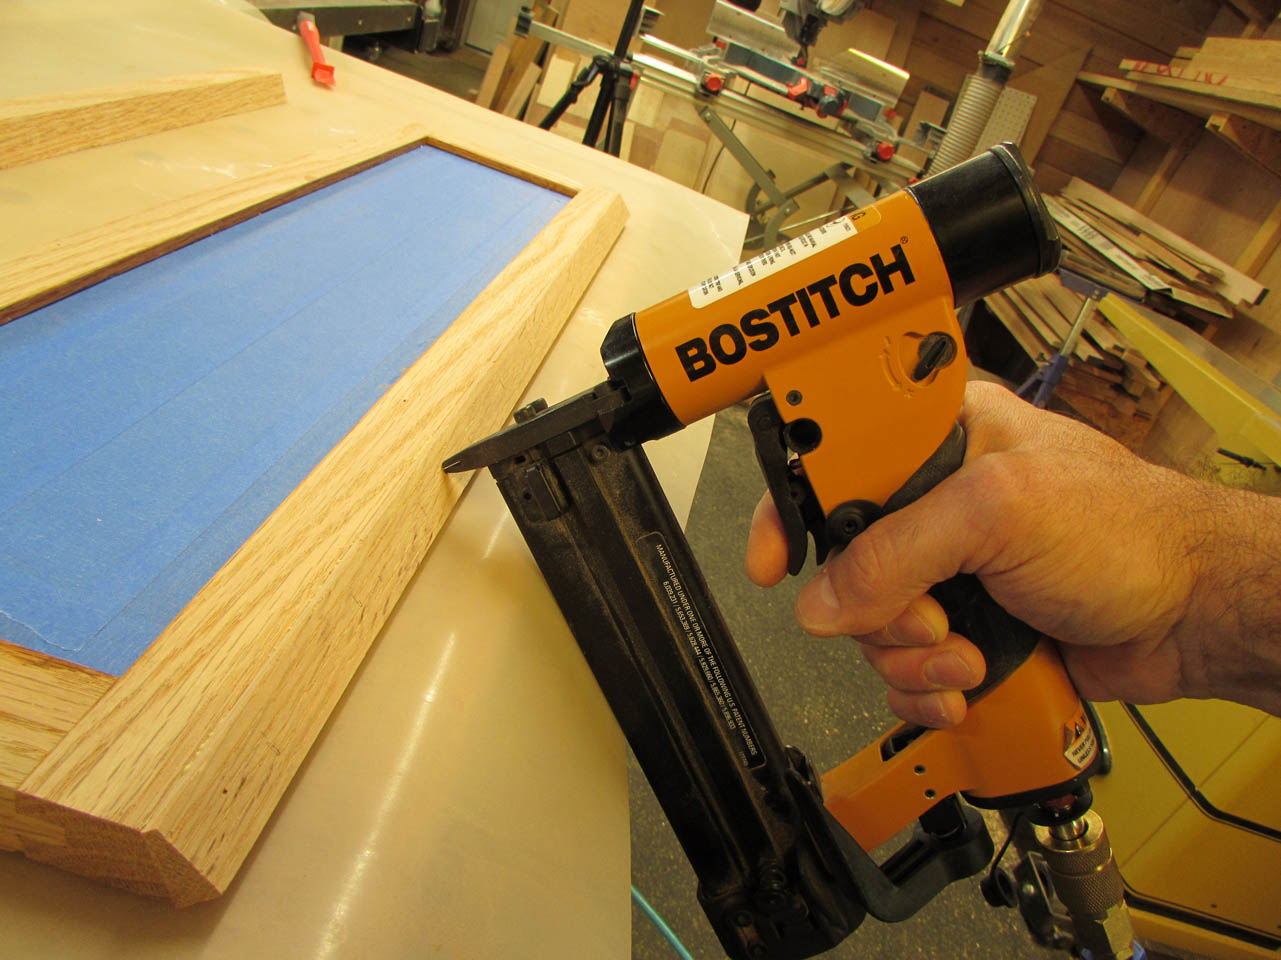
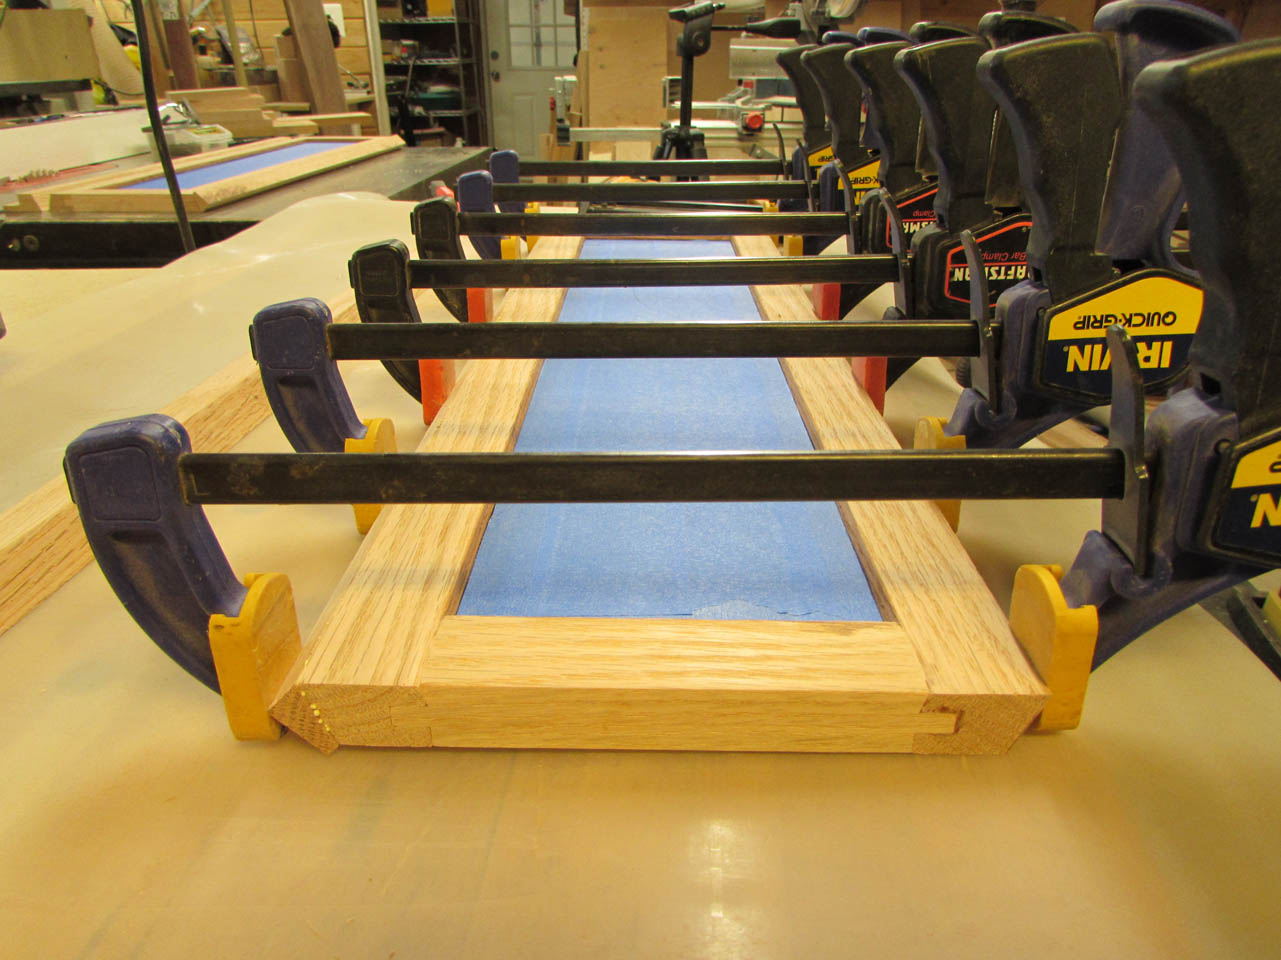
Then I carefully apply a thin layer of glue to all of the connection points.

Then insert the glass and clamp the frames together.

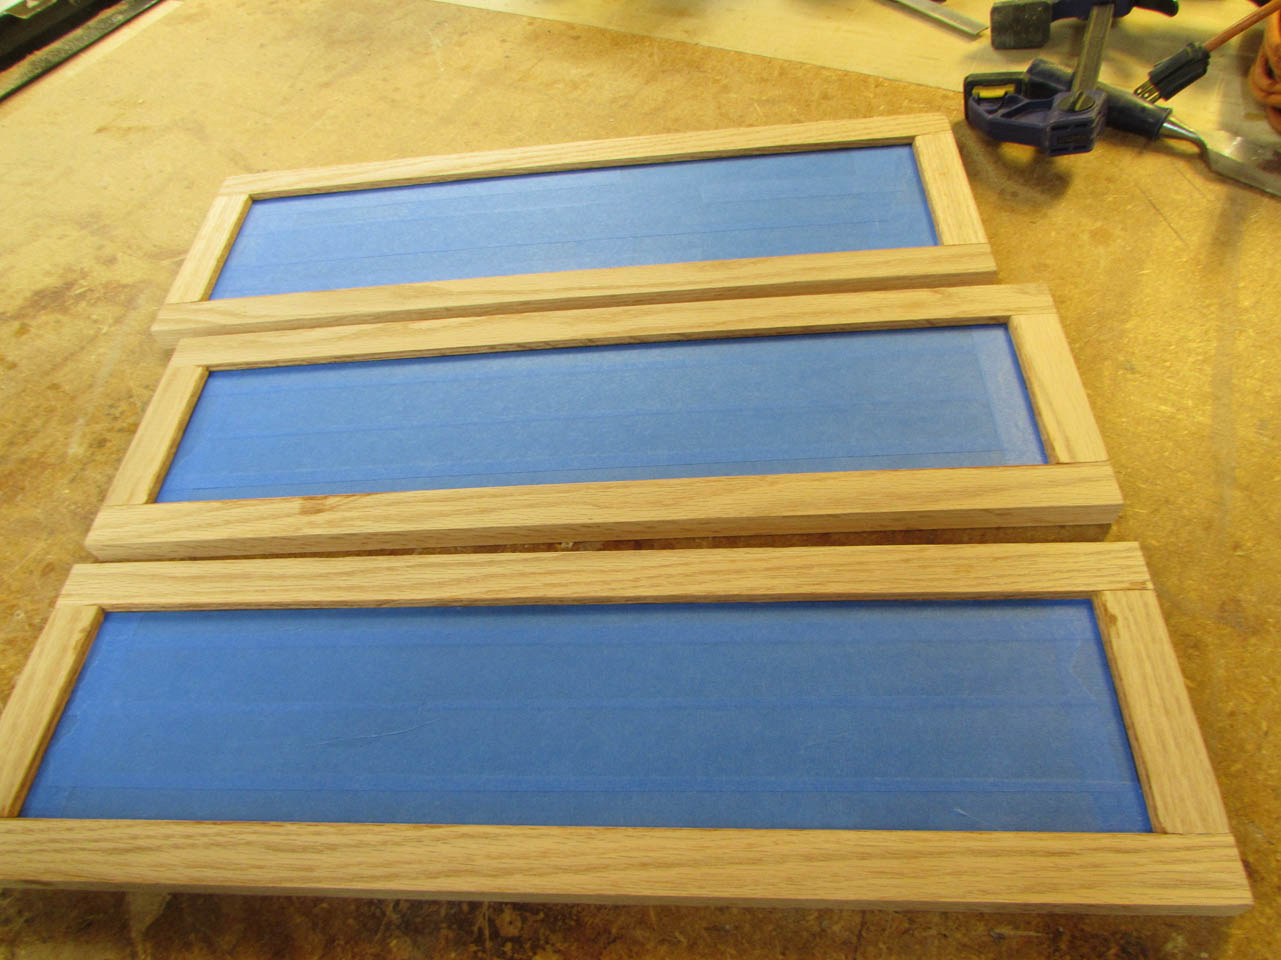
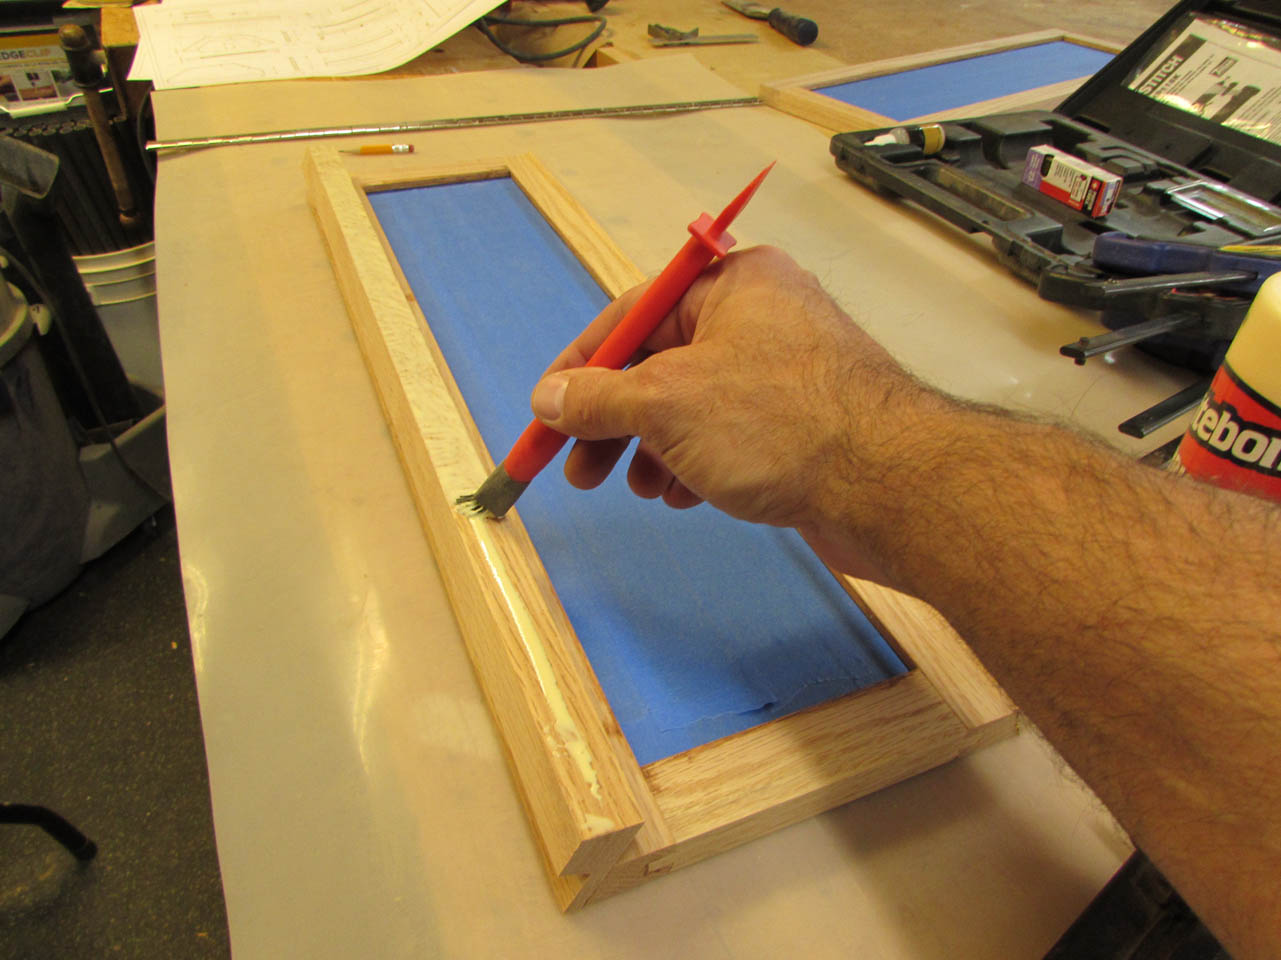
After they have dried, I carefully apply painter’s tape to both sides of the glass, right up to the edge of the wood.

This will protect the glass from the rest of the finish when it gets applied.

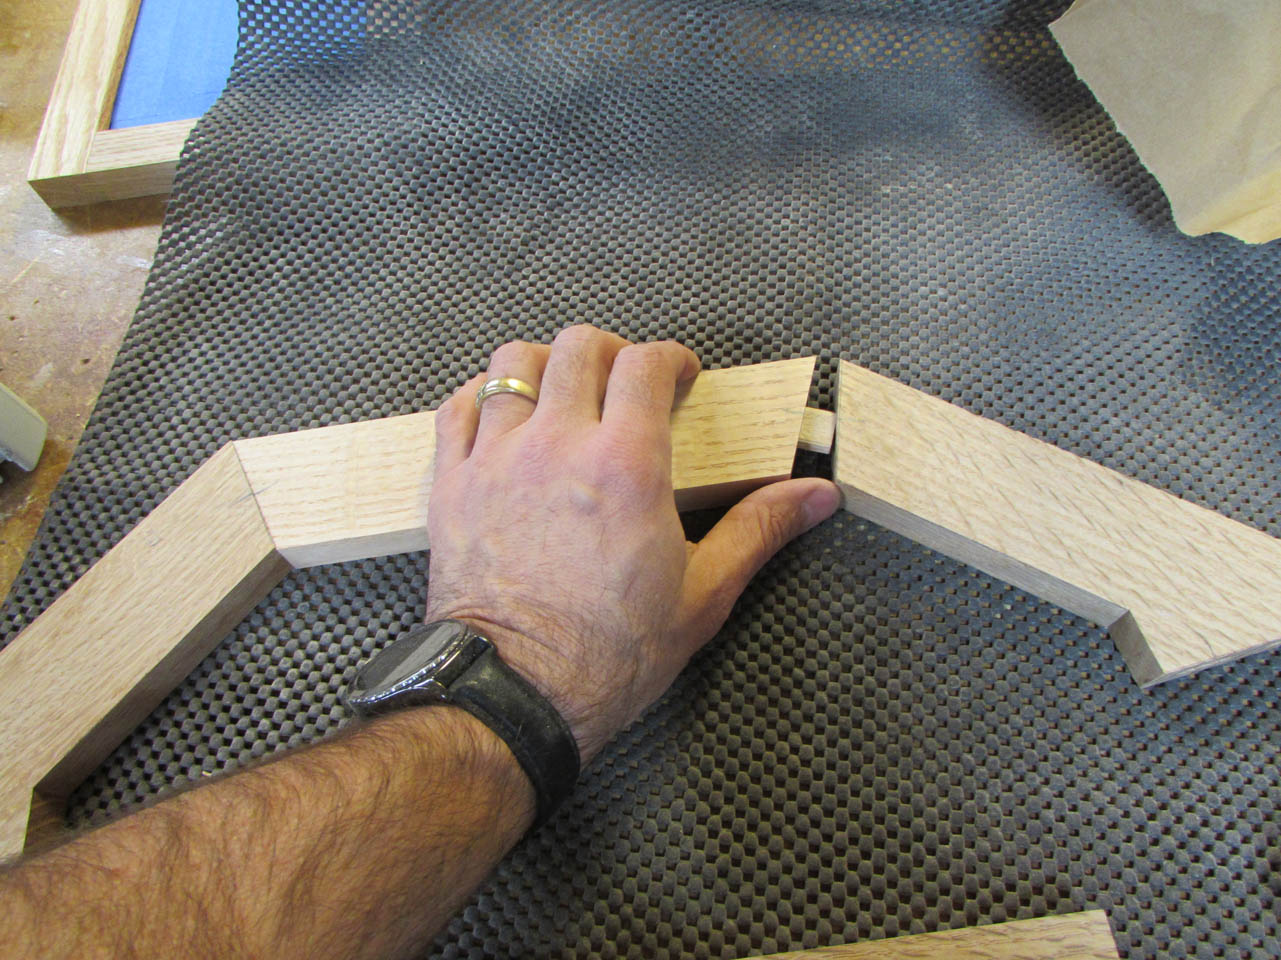
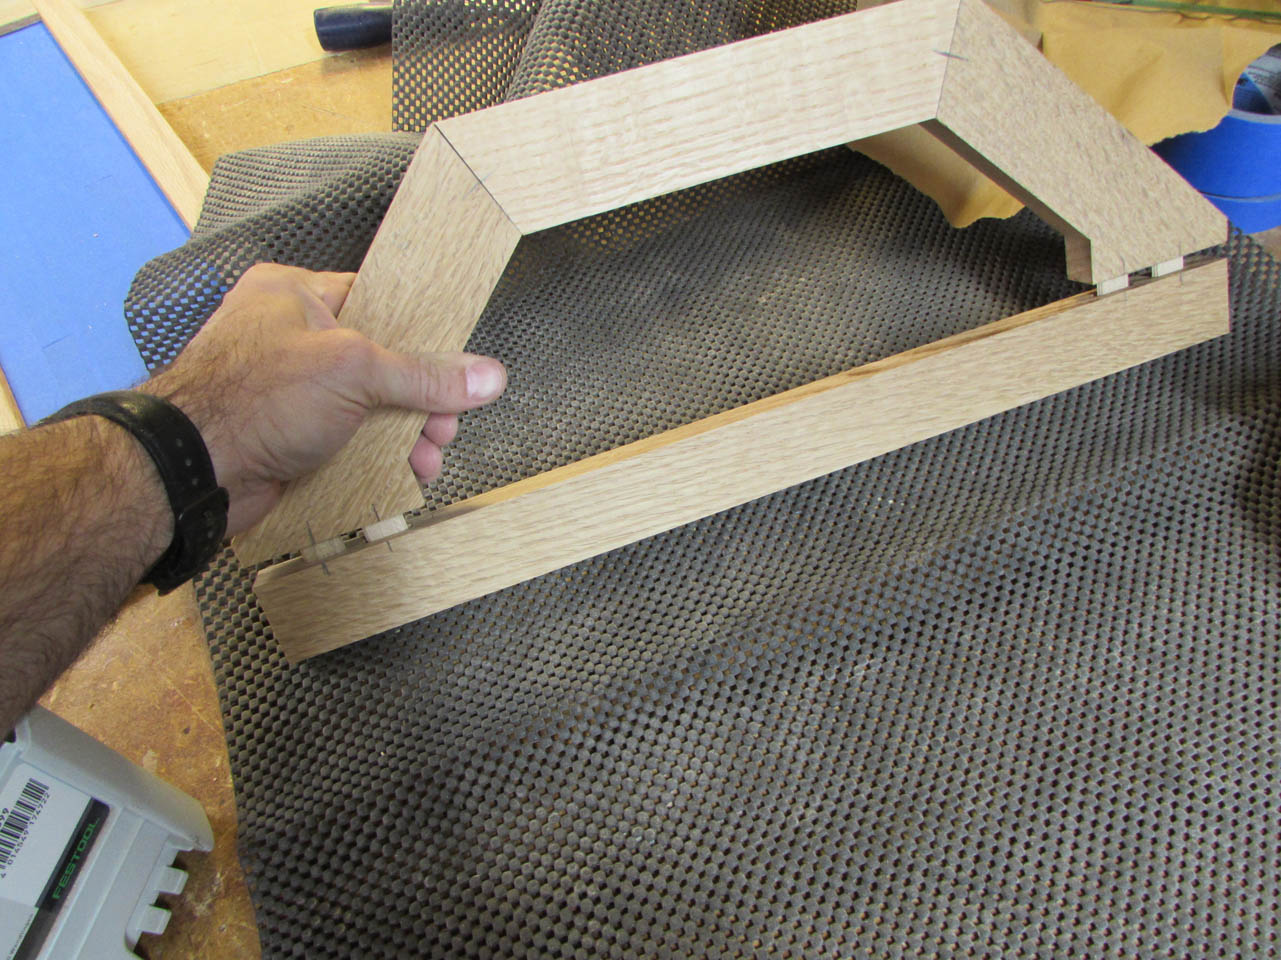
I deliberately left the edges of the frames square for the glue up, even though they need to be angled for assembly. This enabled me to use the clamps without damaging the sharp edge that would have been left behind.
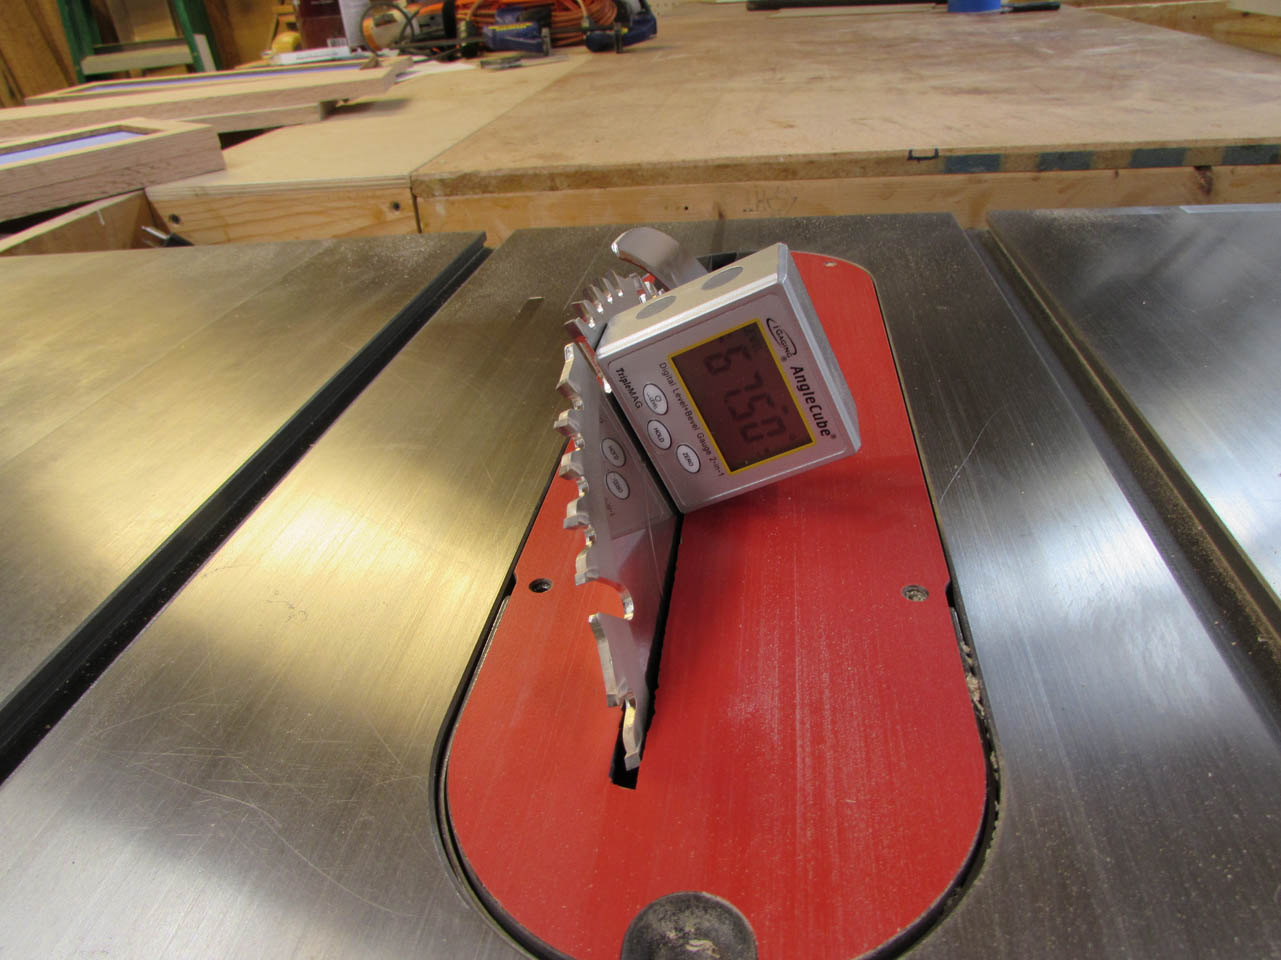
Now that the frames are glued up, I can take the two, narrower, fixed panes and cut the 67.5° taper on each side. I used my digital gauge to set the table saw blade at 67.5° and ran both long edges of the frames through.

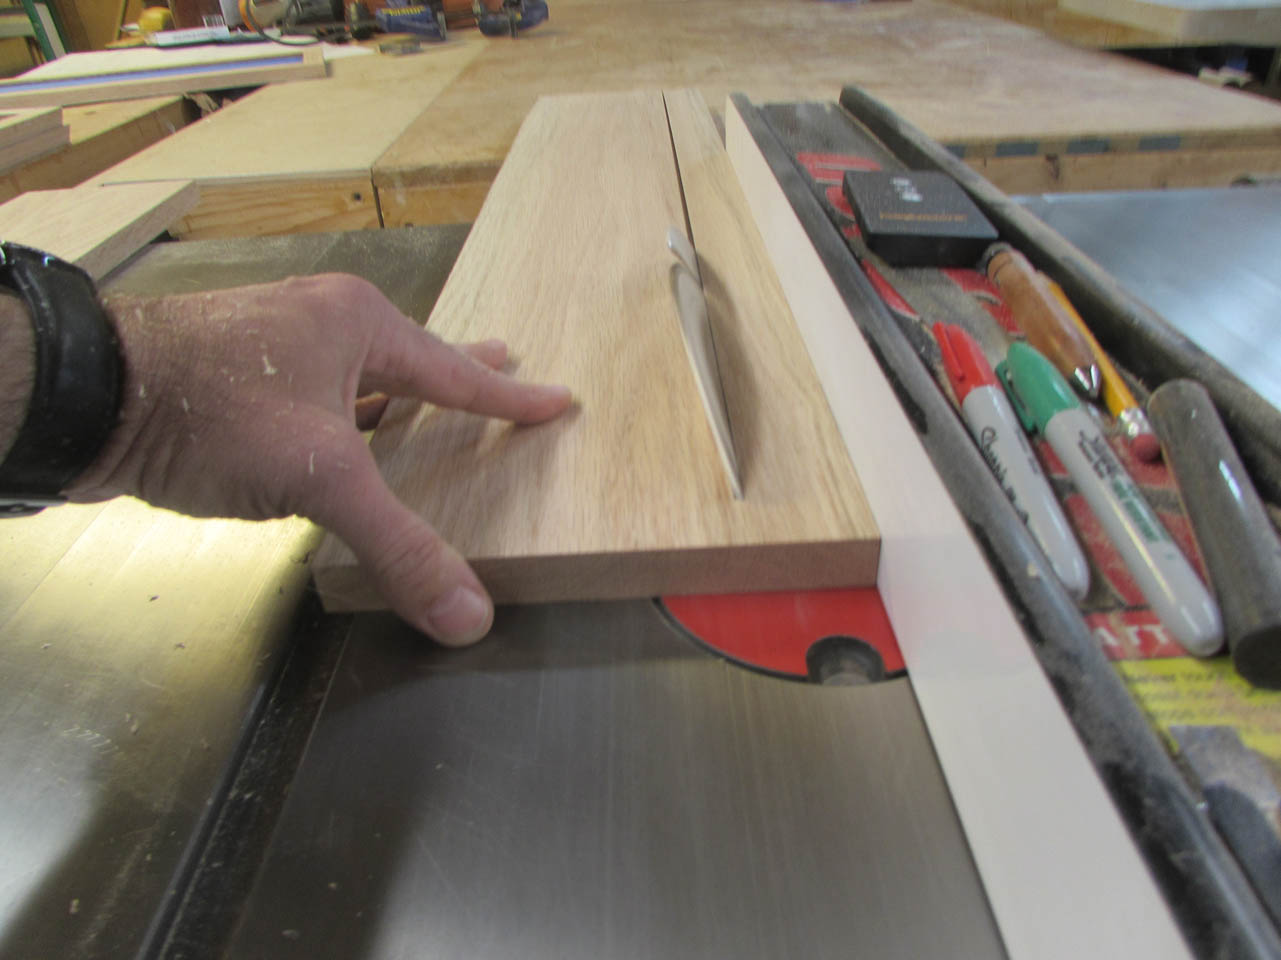
Then, while the blade was at an angle, I cut a couple of more strips that will attach to the front and back of the same frames to create the angles sides.

I straightened up the blade and set the fence to the correct location to rip the correct width for the door jamb pieces.
Then I ripped down the other two angled pieces to create the back sides.


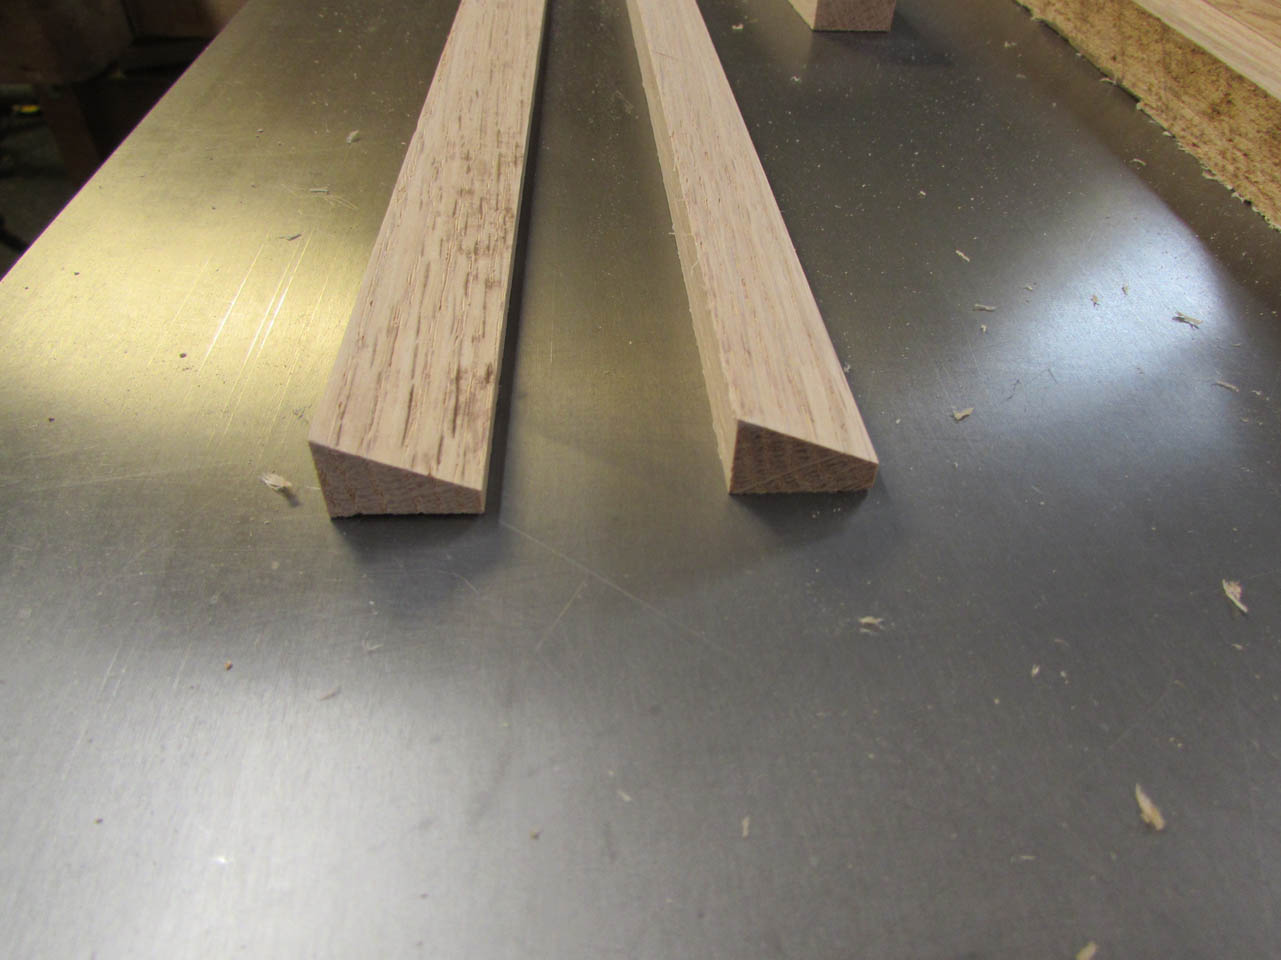
I cut a large rabbet on the back side. This will create the recess for the back panel.

The picture below shows how the two strips will ultimately be attached.


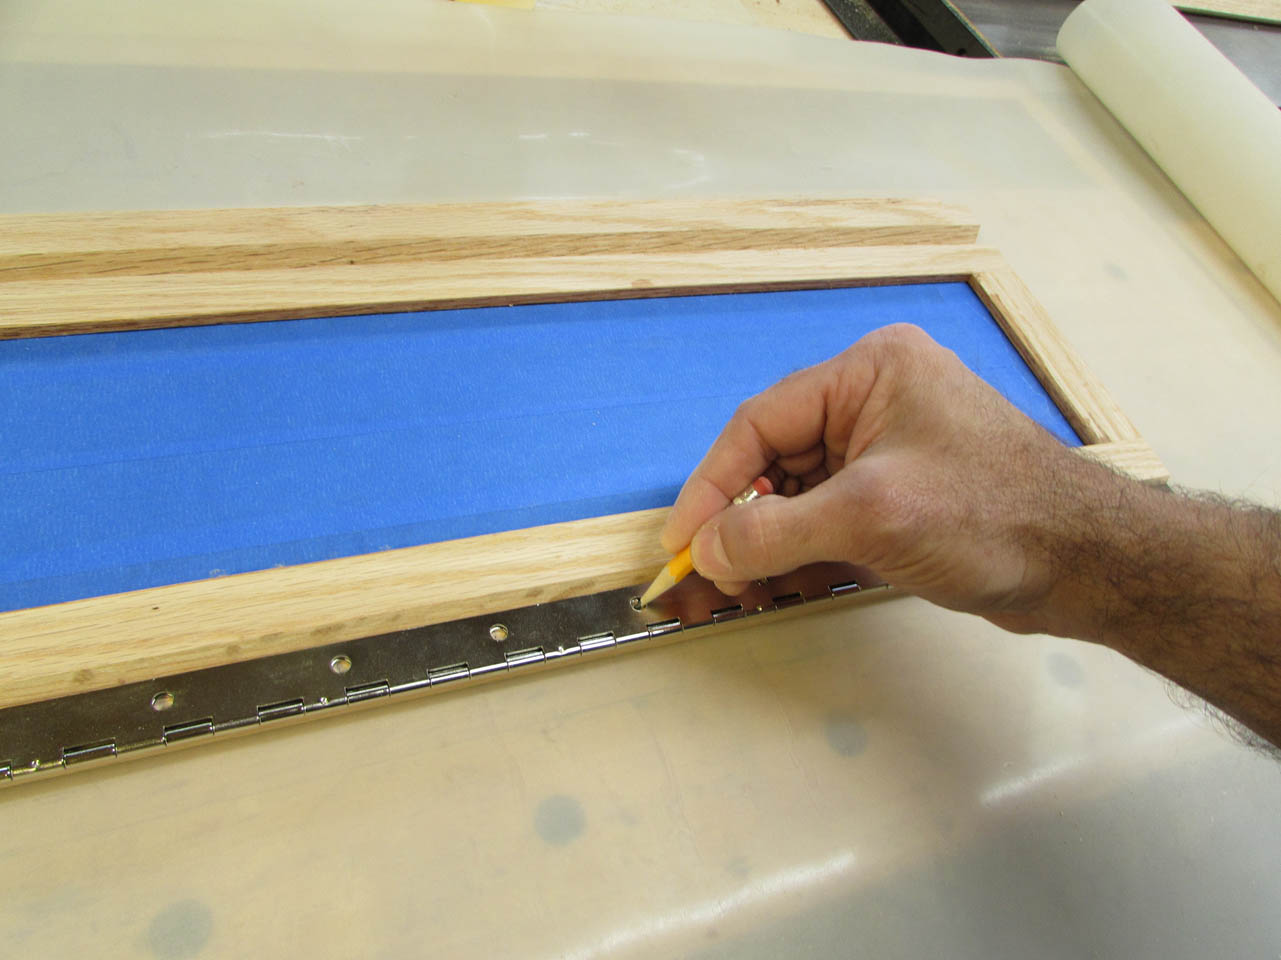
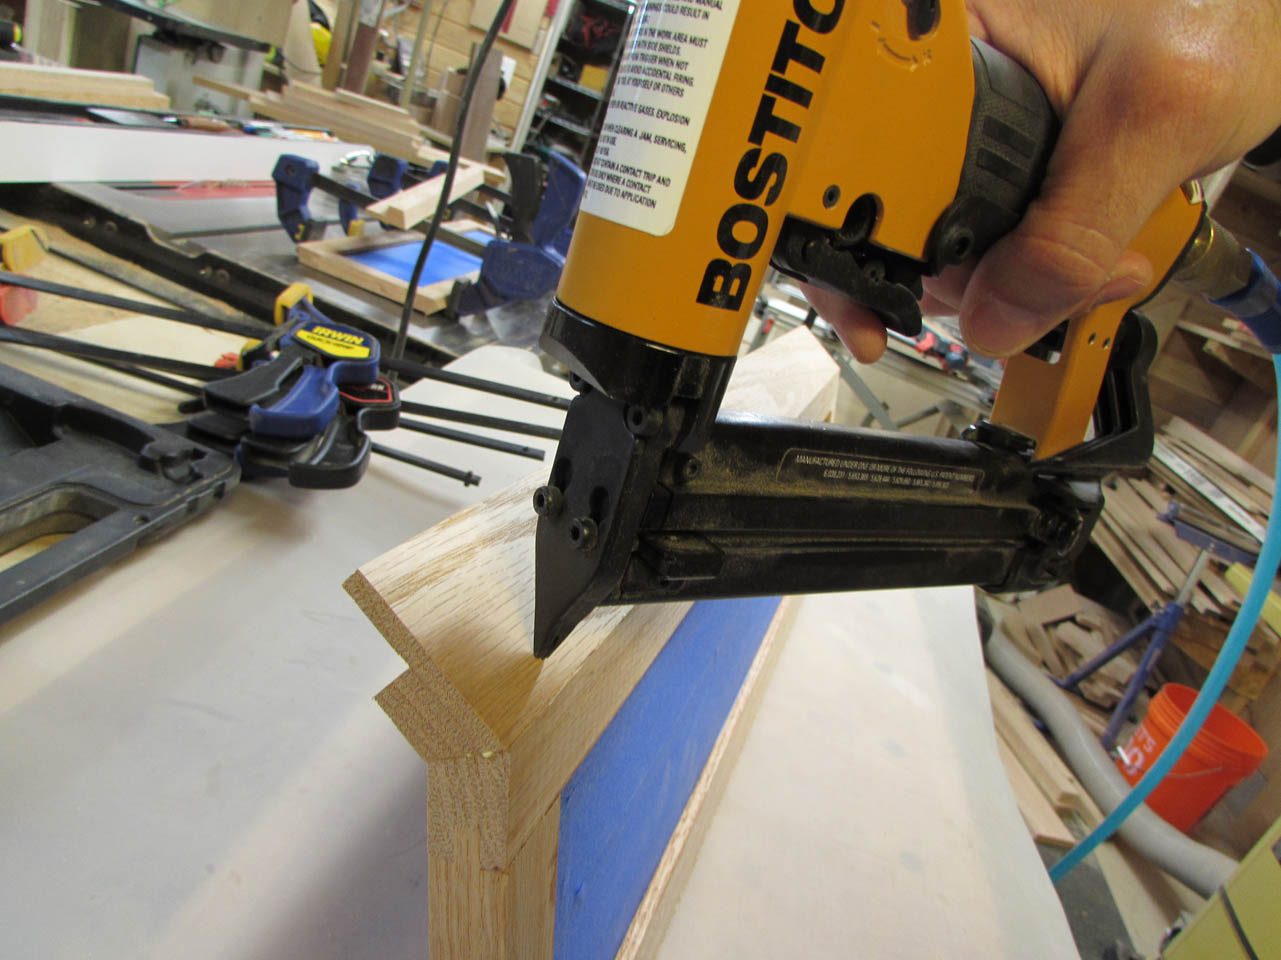
Since the front strip is so thin, I will probably use a couple of pin nails to keep it from moving when clamped in place. A piano hinge will be added to one side, I laid it in place and marked the approximate locations of the mounting holes. This shows me where to avoid placing nails.
Next, I applied a thin layer of wood glue and pinned it in place.
I applied gentle, even pressure with some of my light-duty clamps and let it dry while I repeated the process on the other side. I even repeated locating the hinge because I am not sure which of the sides will receive the hinge yet.
After the glue dried enough, I applied glue to the back piece and used a few 1″ long pins to hold in in place as well.

I shot a few pins in from the front as well, since I cannot clamp this piece without shifting the location. Too many angles… The 23 gauge pin nails are tiny and will not be visible once finish is applied.

Now that the sides are set aside to dry, I am going to work on the top and bottom. The bottom is the widest piece of solid wood and all the frames will be attached to it. To prevent much expansion and contraction, I will be using a piece of quarter-sawn oak. The grain direction will only allow a very tiny amount of movement. The top will also be quarter-sawn because it will capture a piece of glass with some 2″ wide boards and we want minimal expansion there as well.
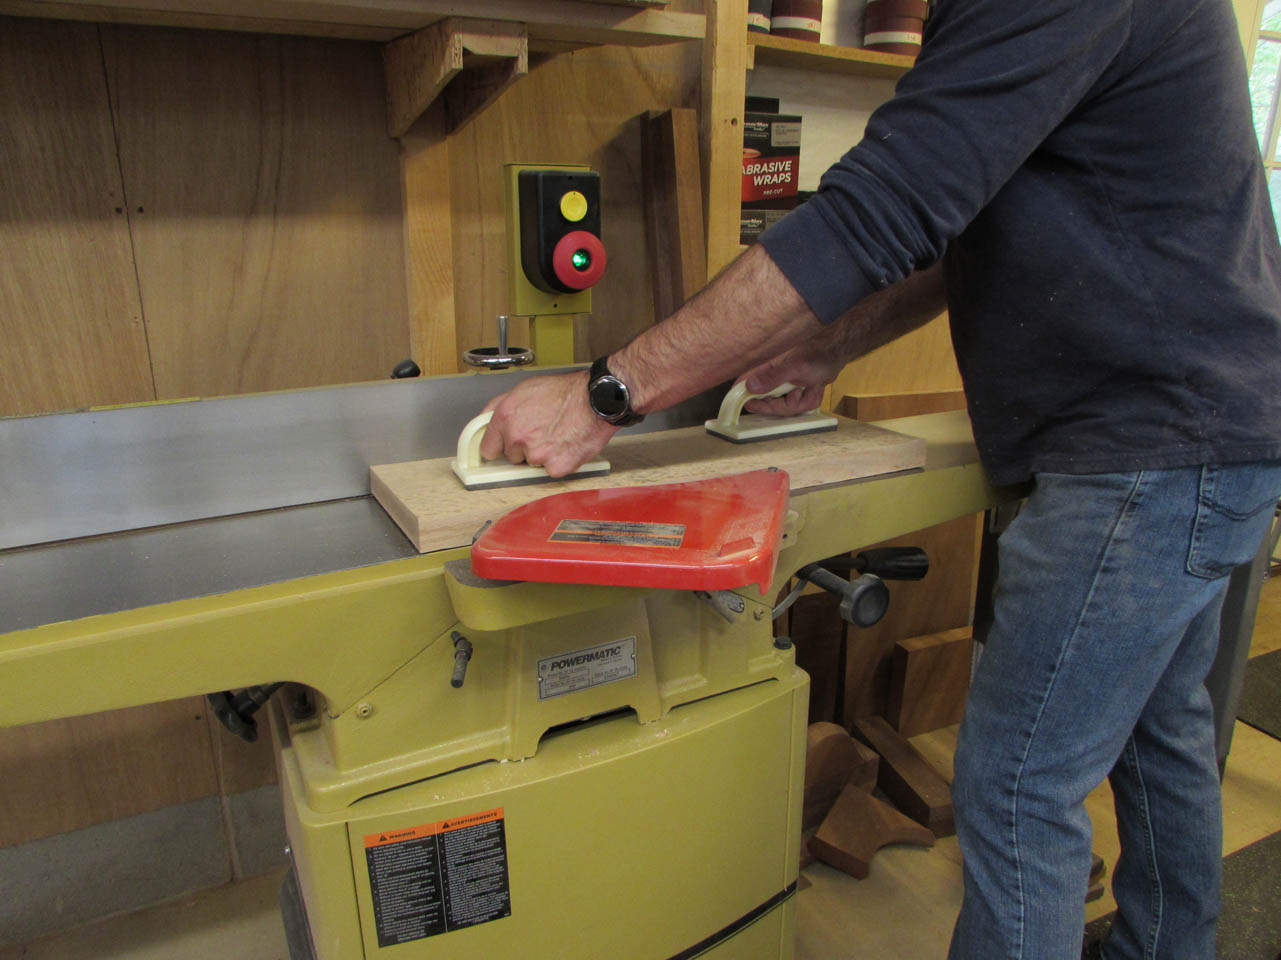
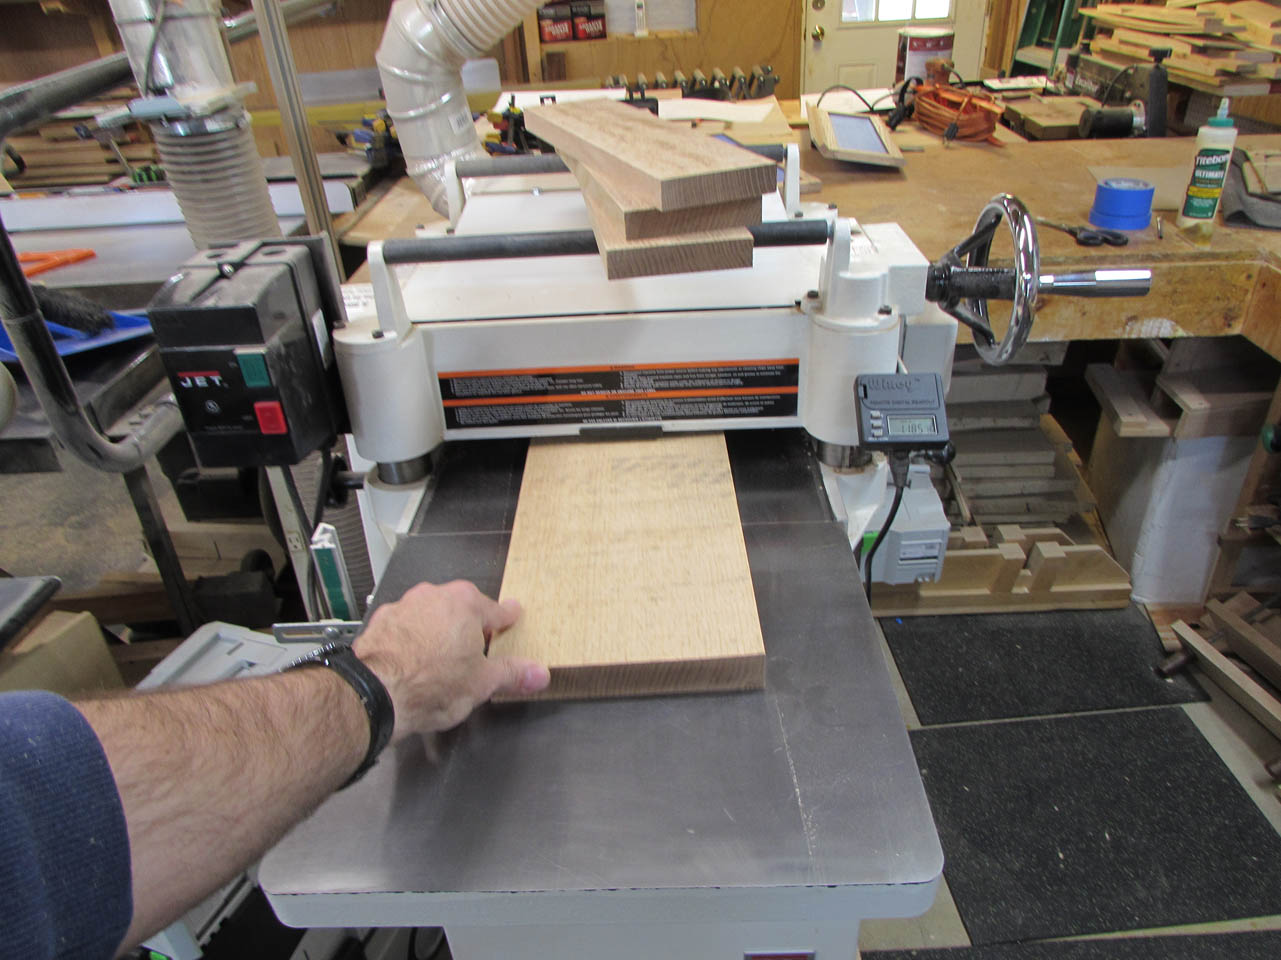
I cut, planed, and jointed the boards down to 3/4″ thick.
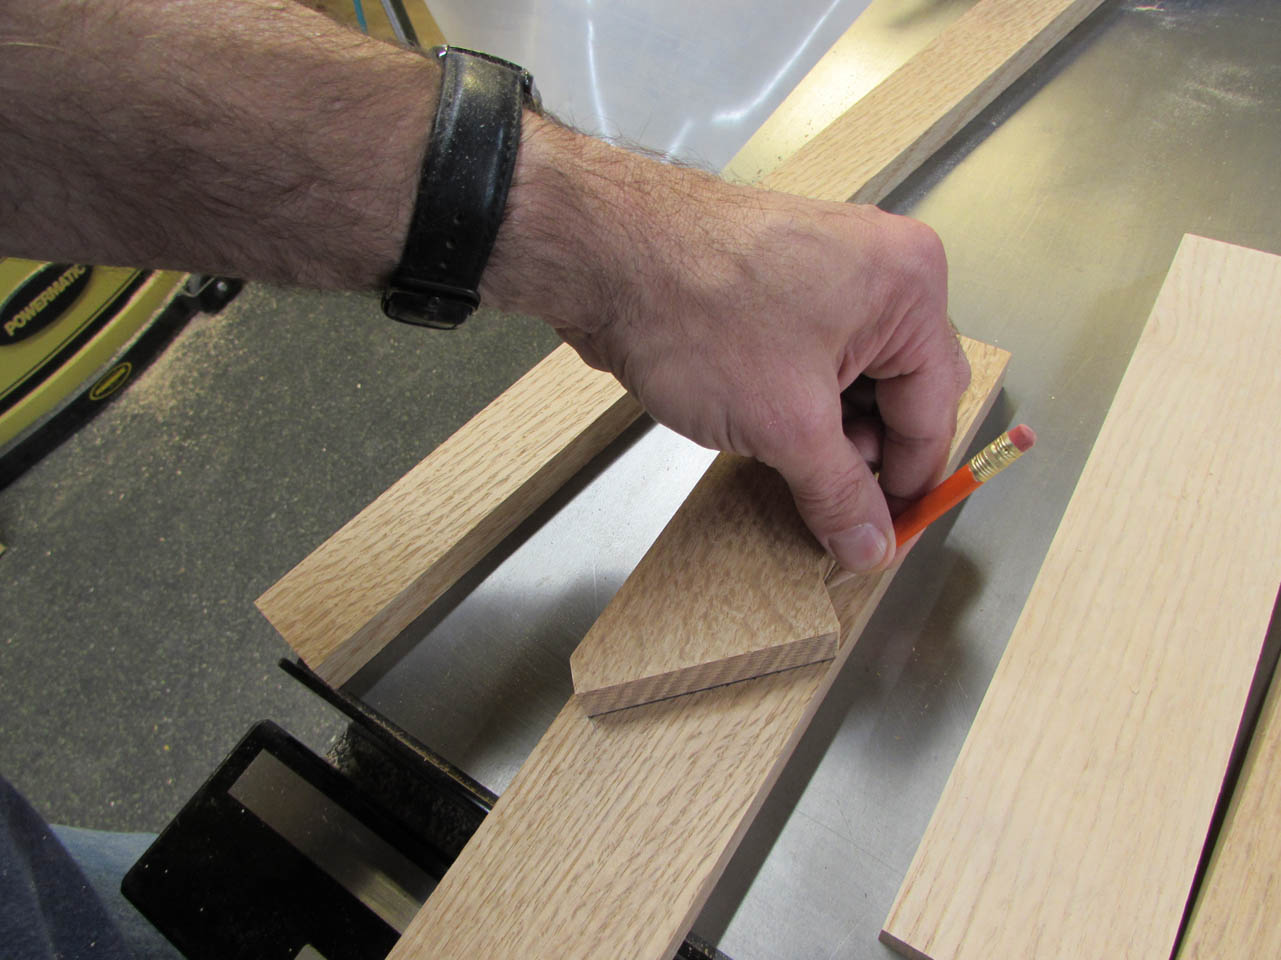
Then I started laying out the funky-shaped ones.

They required some careful cuts on my table, miter, and band saws.


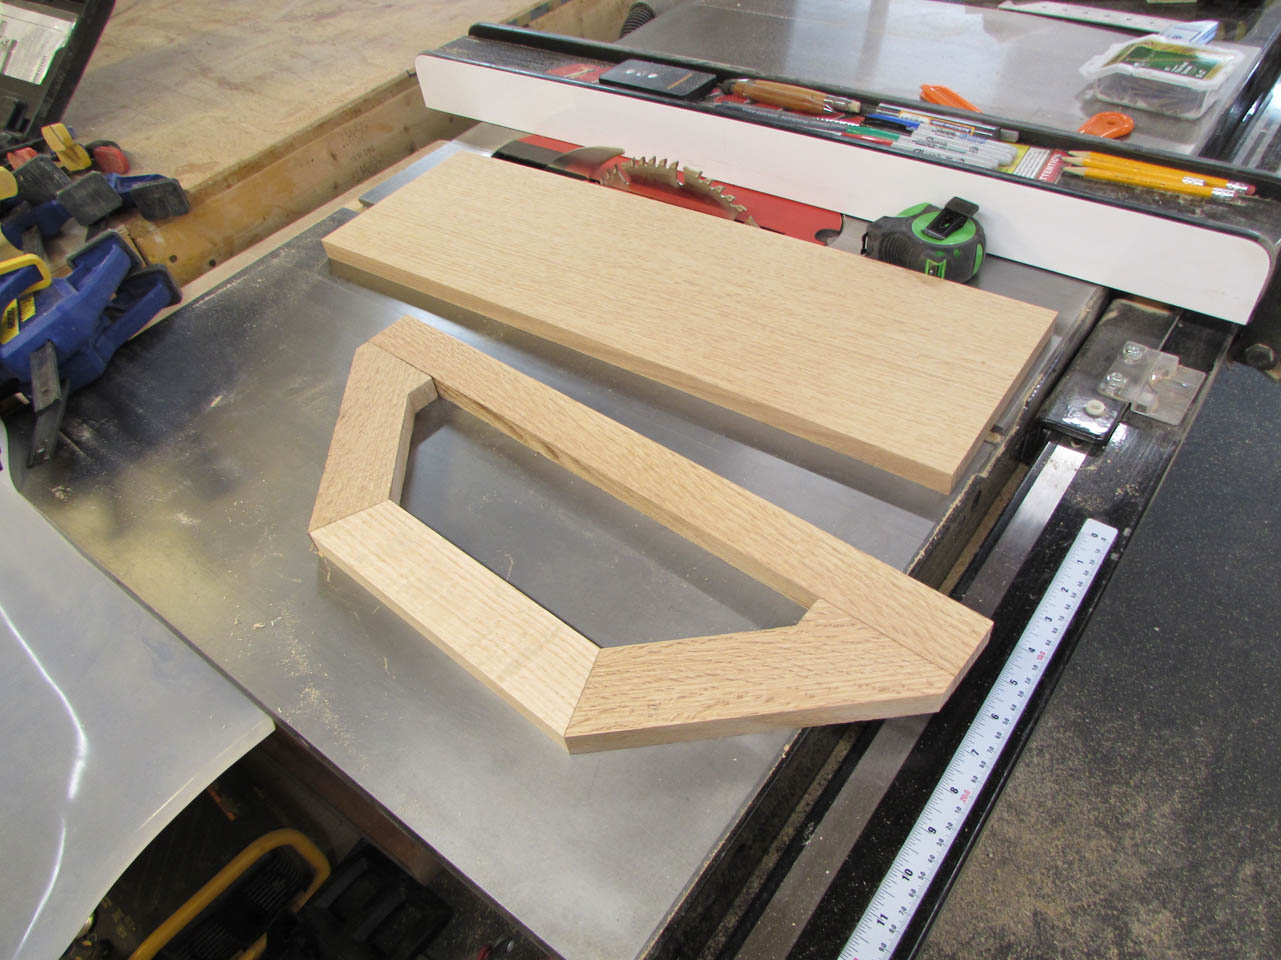
But they turned out perfect. When I finished the first one, I traced it as a pattern for the second.
I could have made the top out of one piece for better grain continuity, but this is a fairly heavy cabinet and I wanted more strength and less possibility of expansion, so I decided on multiple pieces.
After all of the cuts were made, I laid out the locations of my floating tenons.
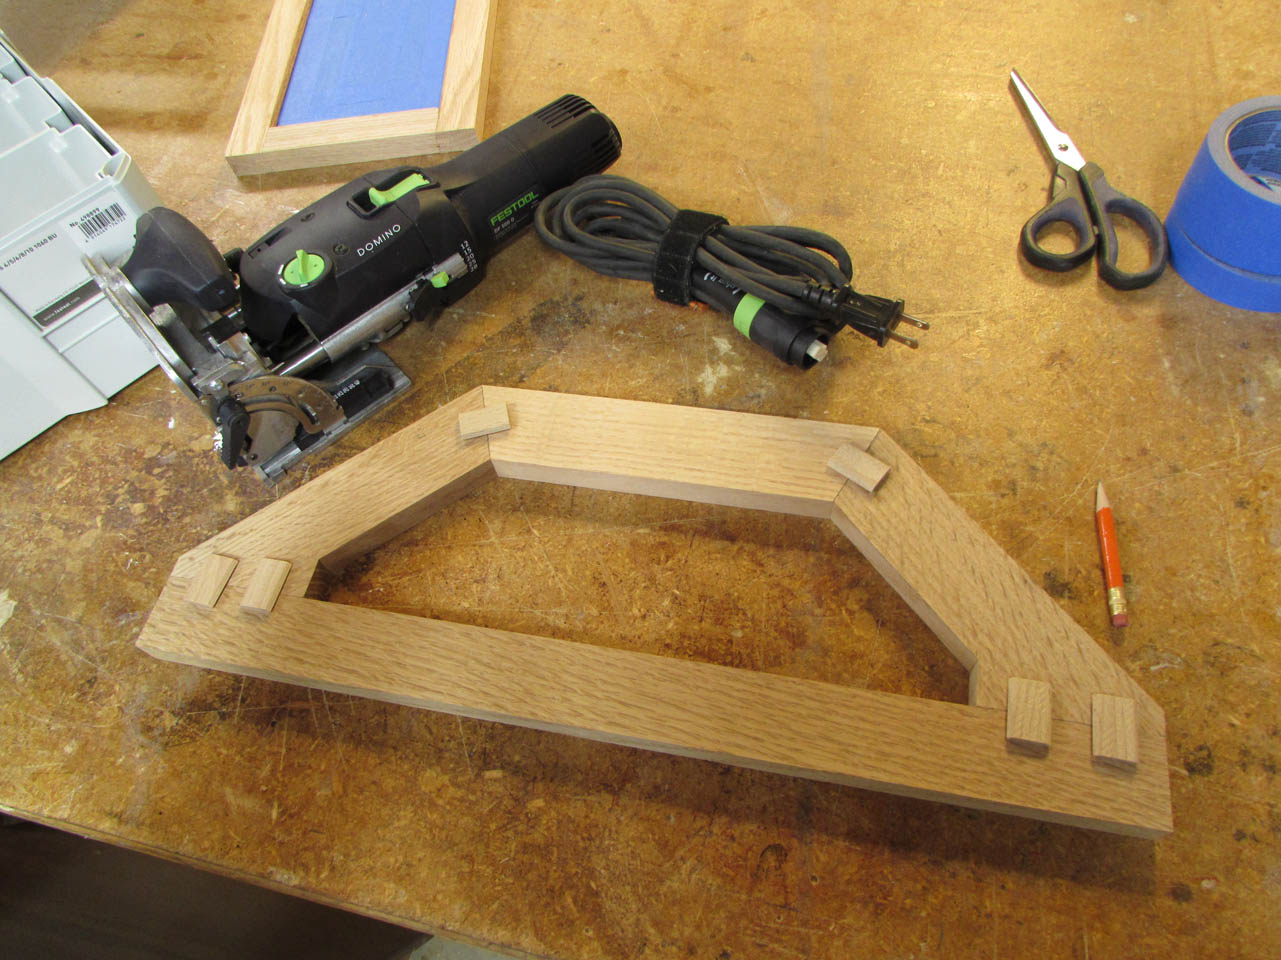

I marked all of the tenon locations and laid my piece of glass in place to make sure none of them would be in the way.
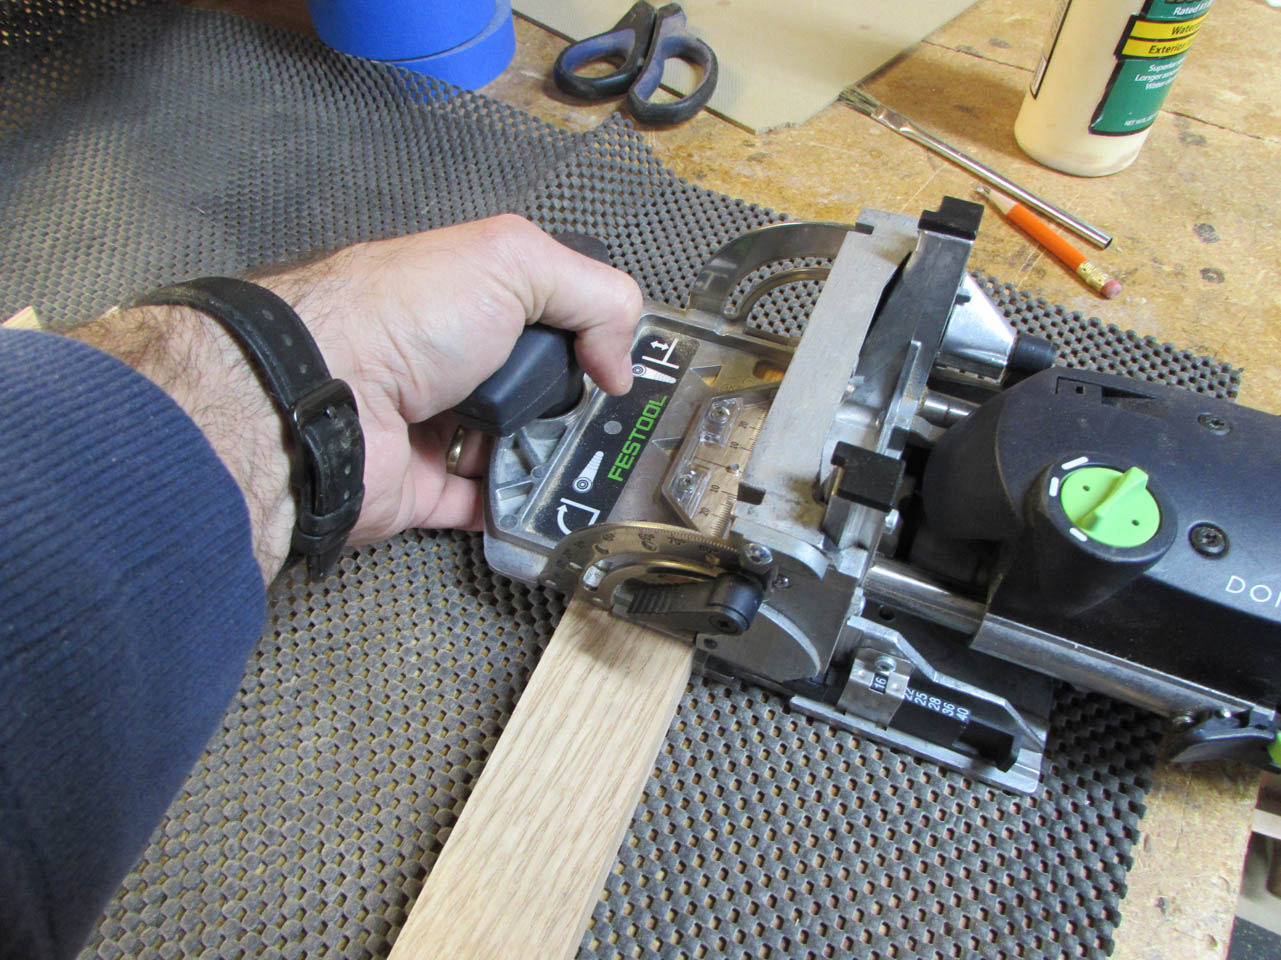
Then I got out my Festool Domino and cut all of the mortises on my marks.
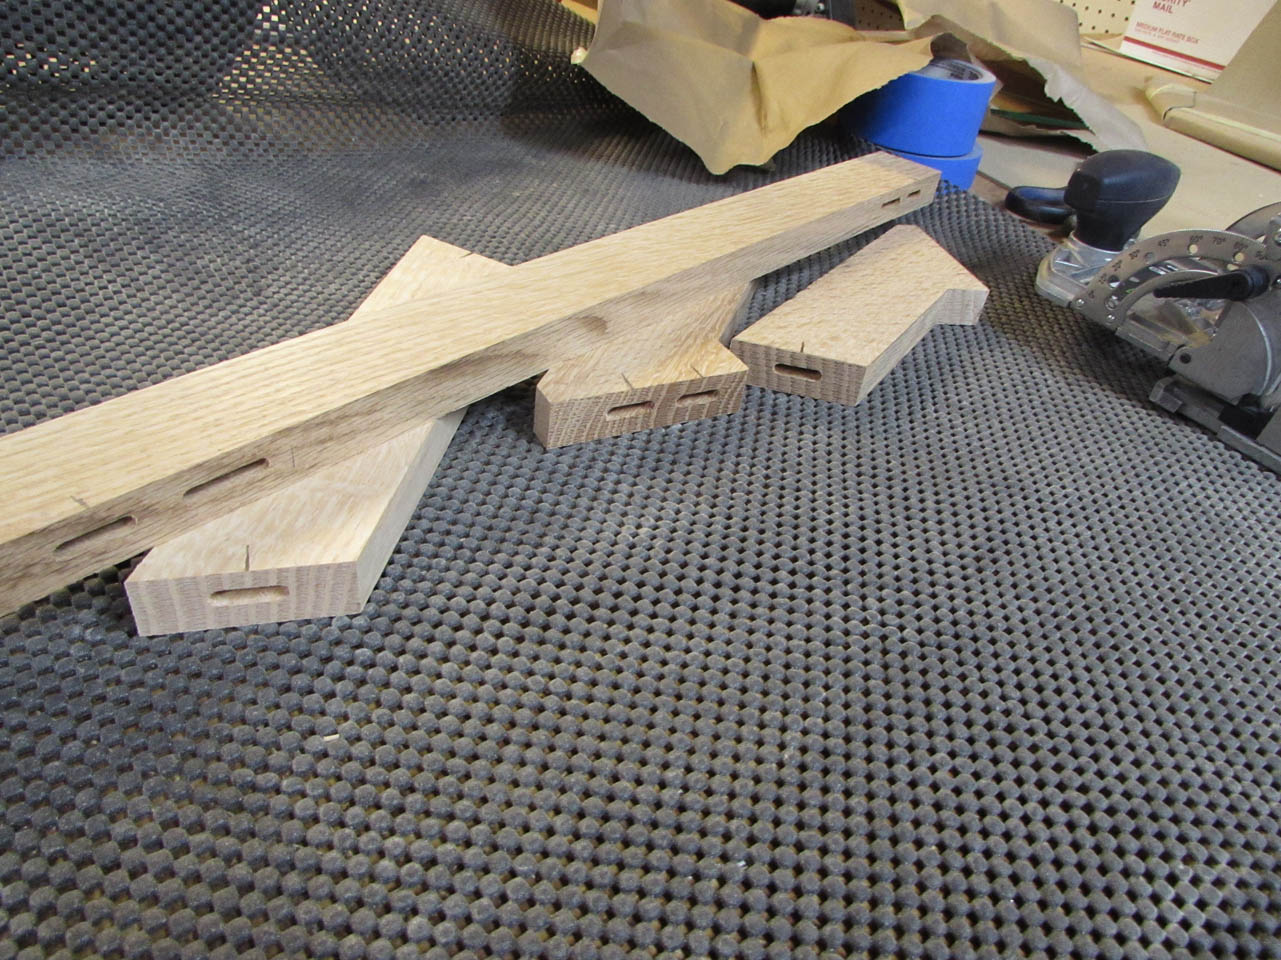
I dry-fit all of the tenons.
Dry-fit was successful. Everything holds together perfectly.


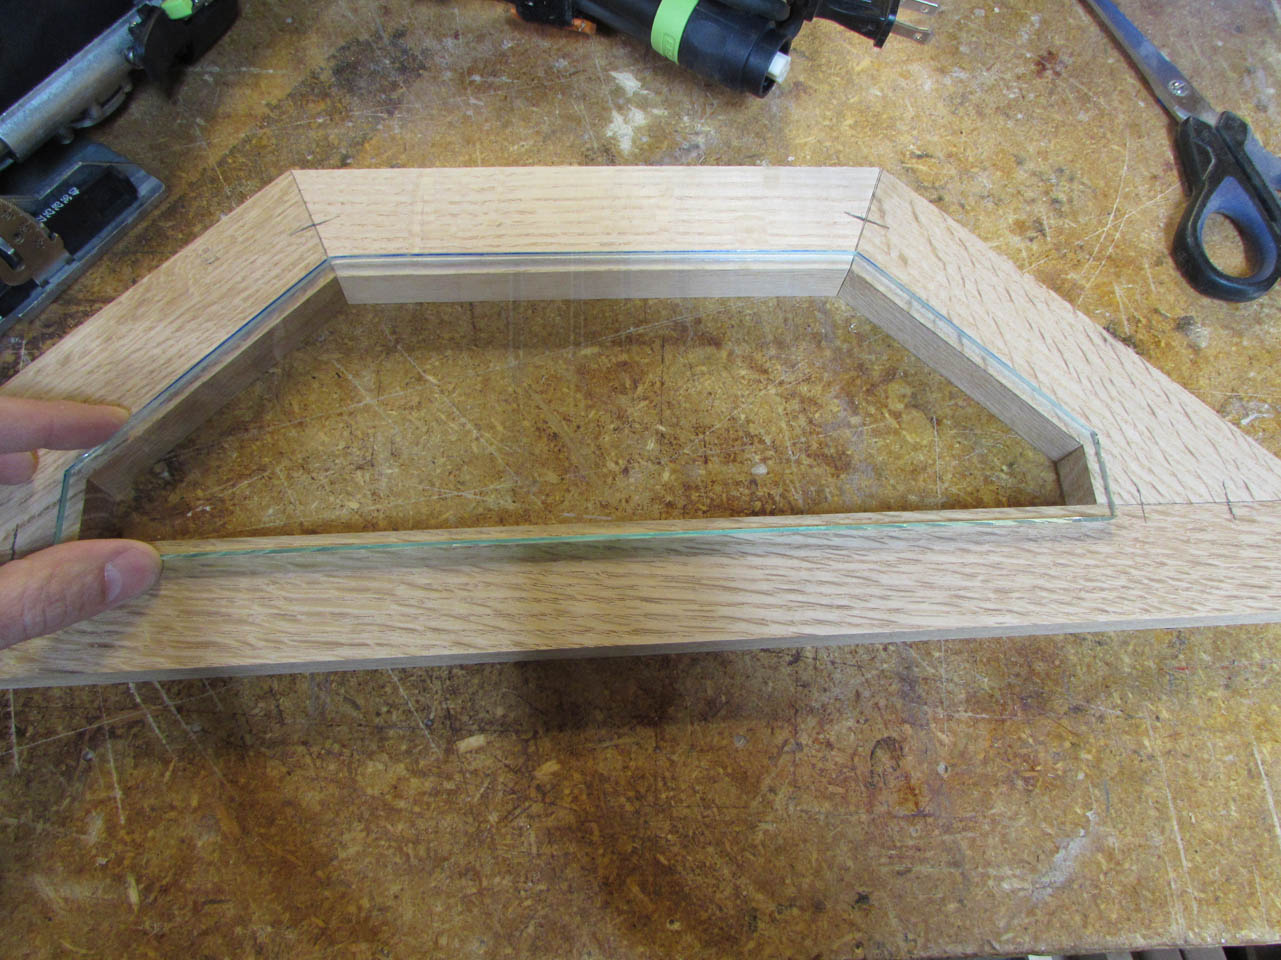
To house the glass within the frame, I need to create a groove to match the rails and stiles on my side panels. I was surprised to find a router bit in my collection that was exactly what I needed.
I used a scrap from one of my rails to set the height of the bit in the router table.
Then I very carefully routed the groove in the appropriate location, switching to a slightly safer method of work-holding after the first piece was yanked out of my hands and shot across the room…

The long piece, along the back, has a stopped groove so I had to square up the cuts at each end with a small chisel.
It was very close to my tenon, but it will work fine.


After a test fit to make sure it would all work, I sanded down all the parts and started applying glue and attaching the front three pieces.
Because of the angles, I couldn’t think of a better way to clamp it all up, but the tenons fit tightly so it all seems to stay where it needs to be.


The next step was to pre-stain the groove and apply silicone to the channel after it was dry enough.

Then a little more glue and some clamps.

There is still a bit more milling to be done to this piece, but it will have to wait till everything is dry.
