
St. Kilian chapel – Altar – part 5
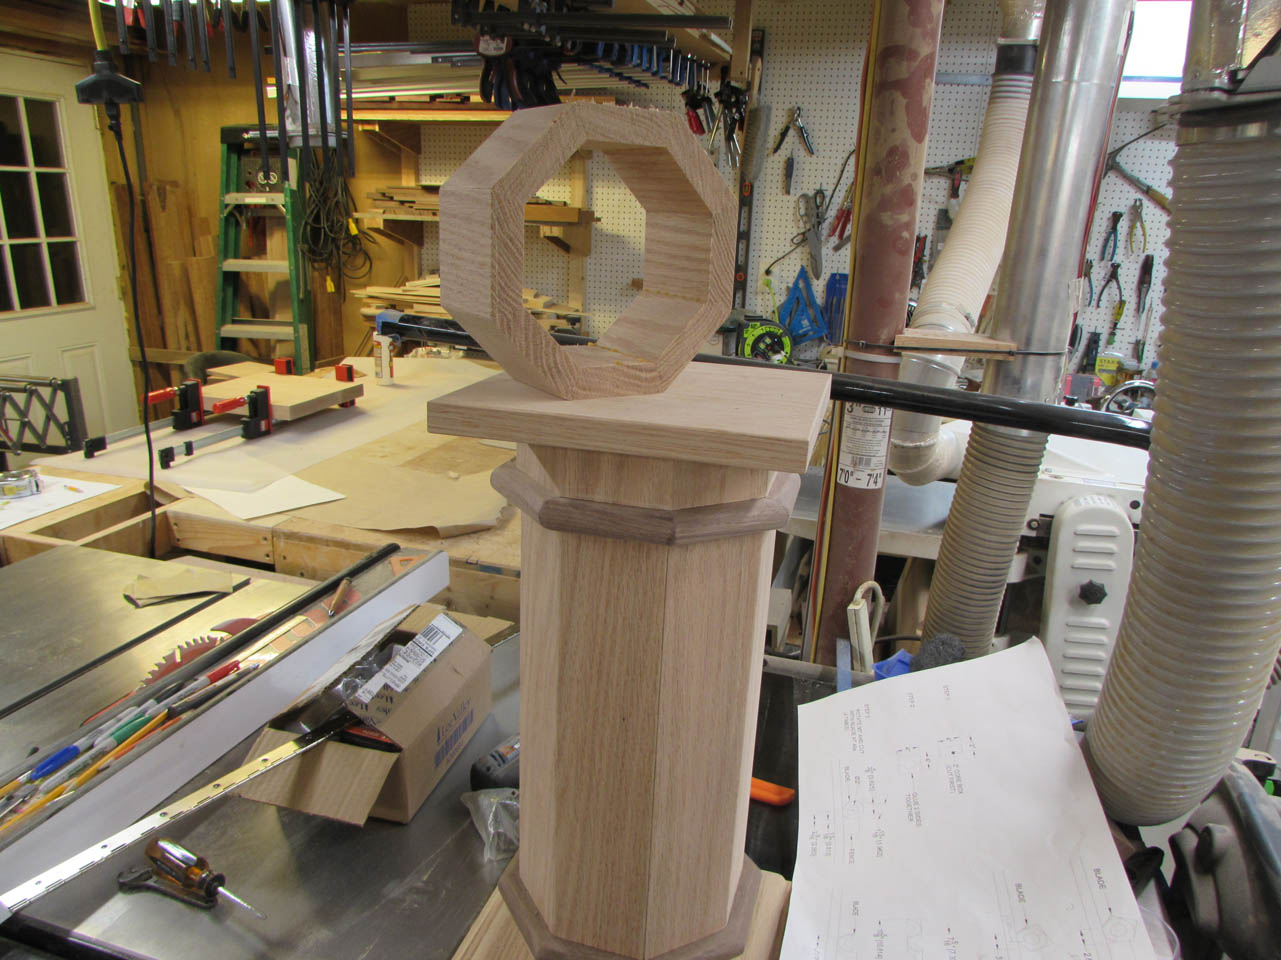
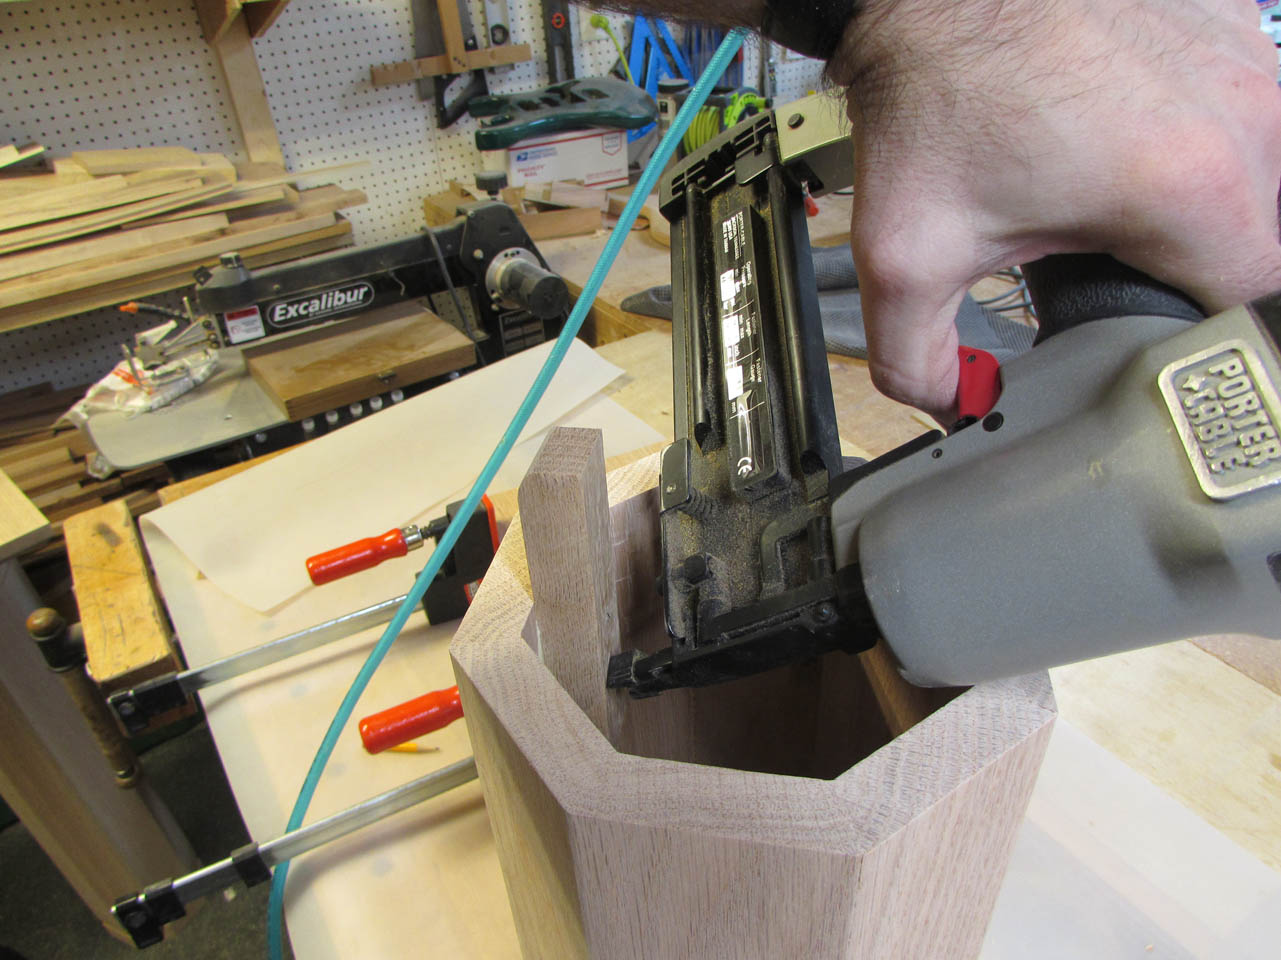
In the process of trying to determine the dimensions of the short column’s top, Msgr. Rowan and I discovered that I had made the center column too tall. He gave me the dimensions of the reliquary and standing on the column, it would have just stopped 1/4″ from the altar top. Since the column was 90% complete, I didn’t want to scrap it so I gave the problem some thought and decided to cut down the column right beneath the walnut trim. A repair at this location would be unnoticeable if done right.
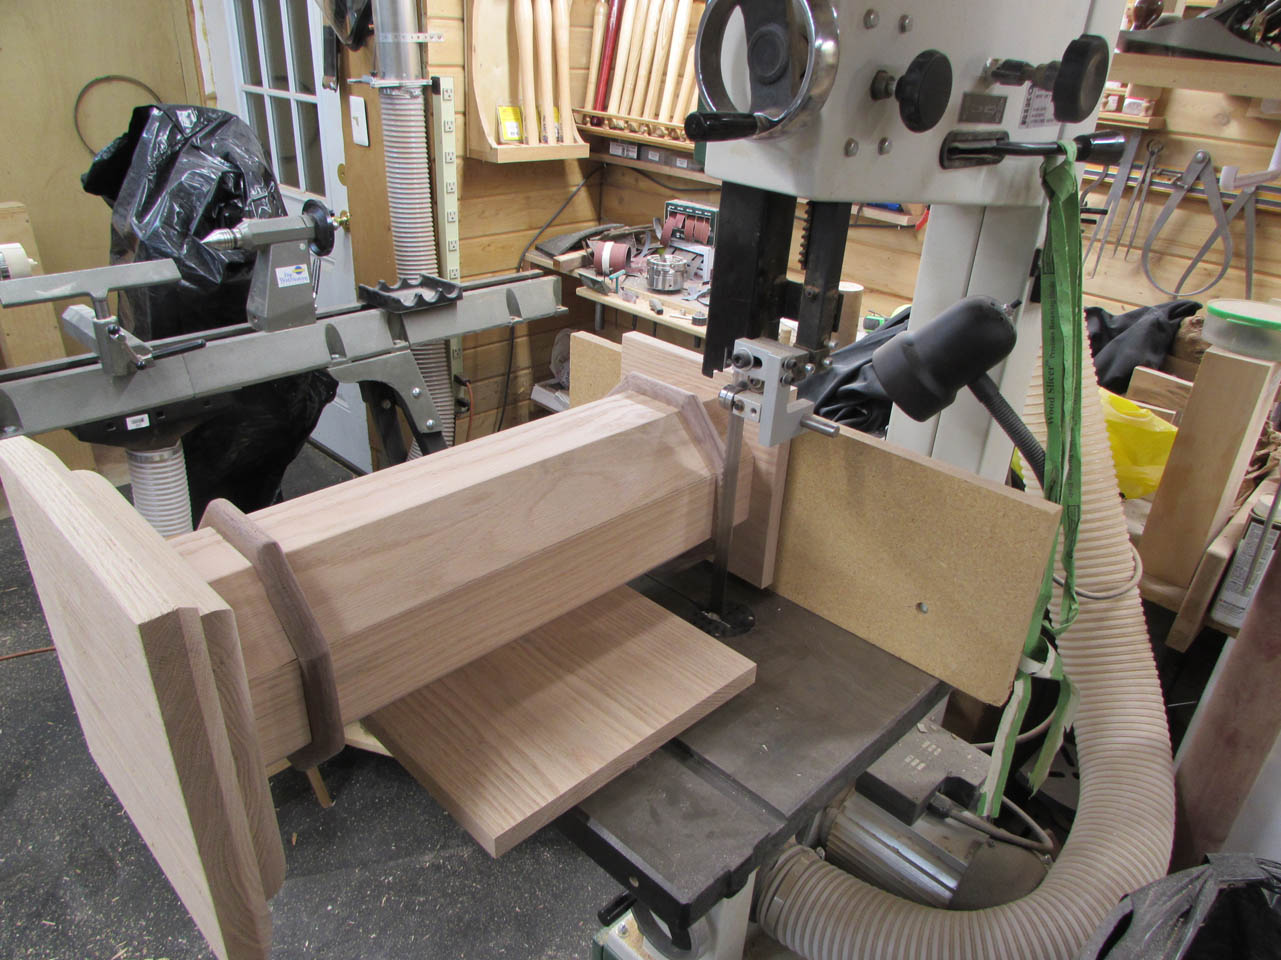
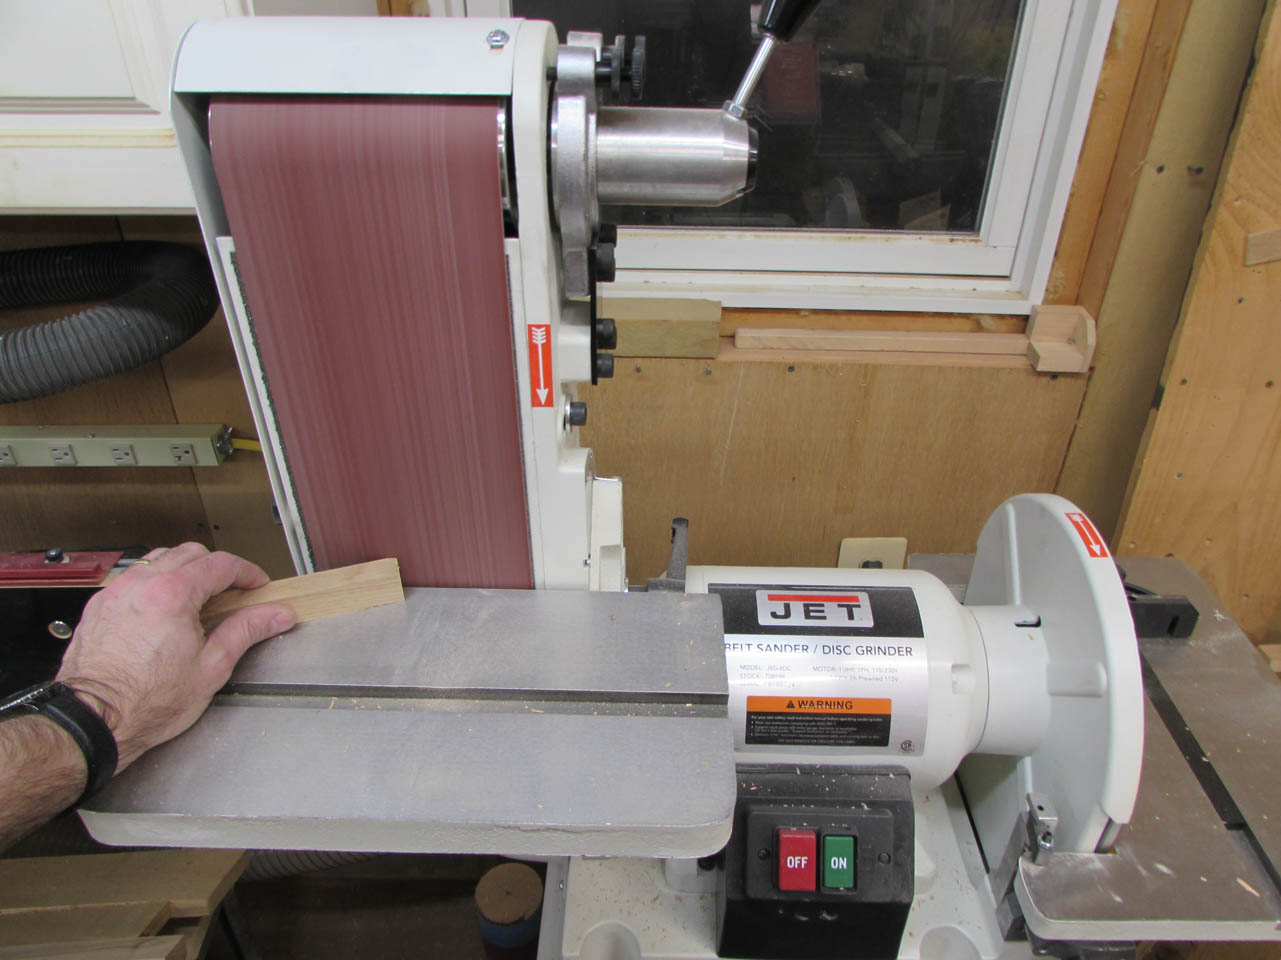
The only saws large enough to cut the column were my band saw and a hand saw. Since I can’t seem to cut a straight line with a handsaw, I chose the band saw. I loaded in my thickest blade so it would cut as straight a line as possible. Next I raised the column up on a block so that it was level. Then I set the trim up against the saw blade and moved the fence up against the base. In theory, I should be able to cut right along the bottom of the trim.
It cut way better than I expected!
Then, after I set the top aside, I pushed the column up against the fence and cut off 3″ of the column.
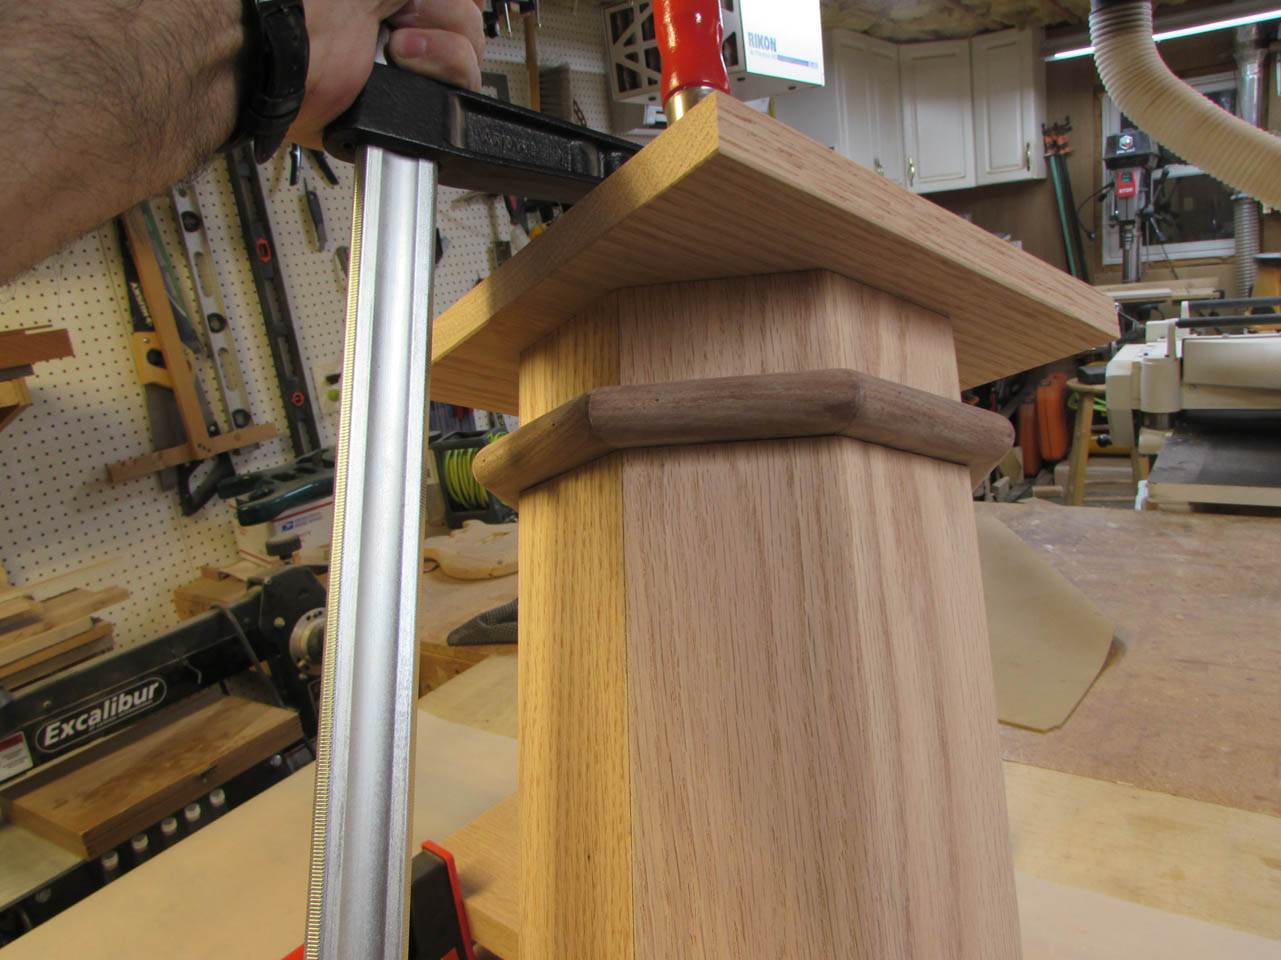
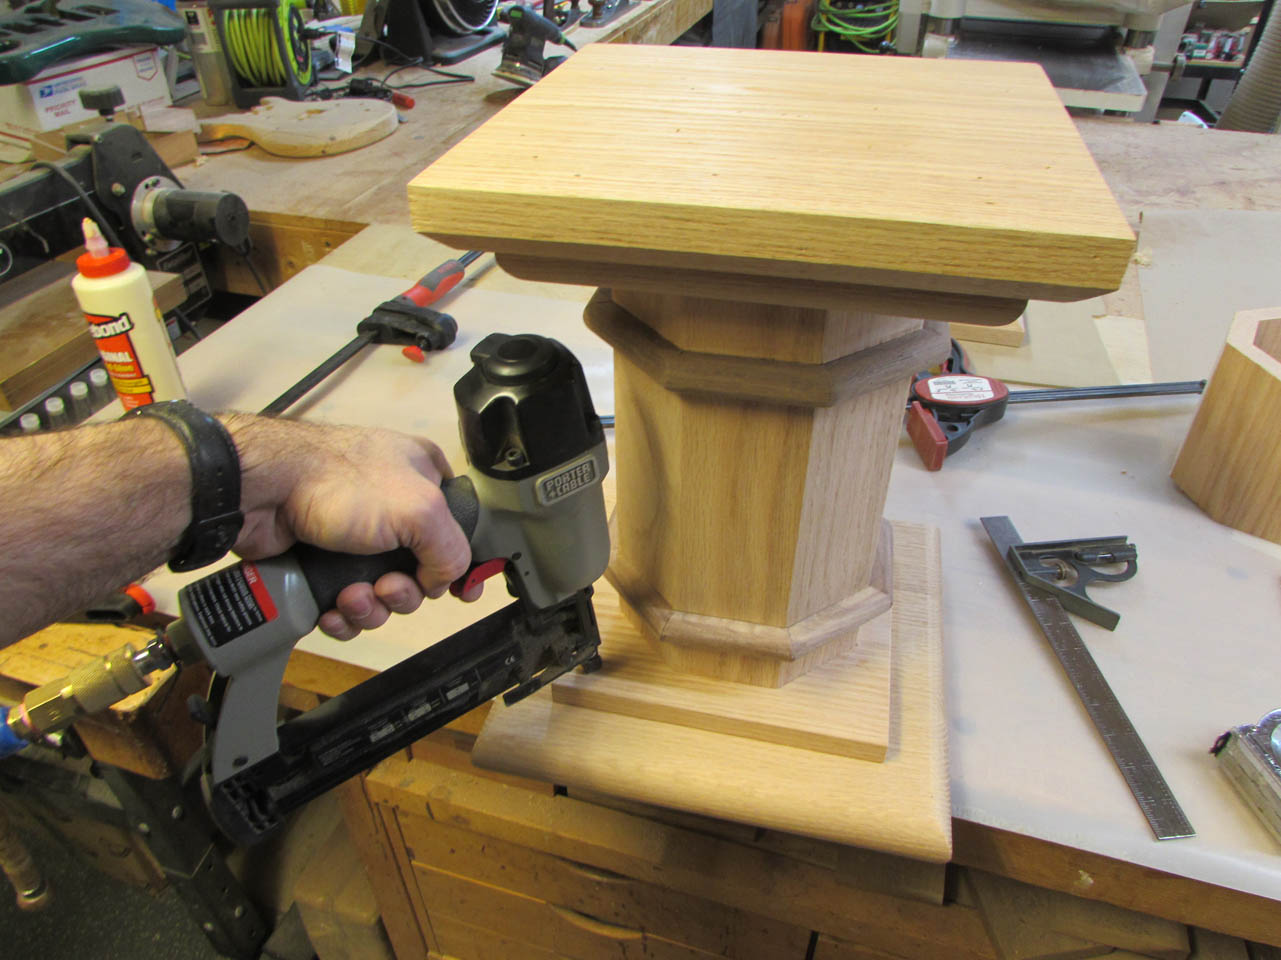
I set the top back in place and it looked great.
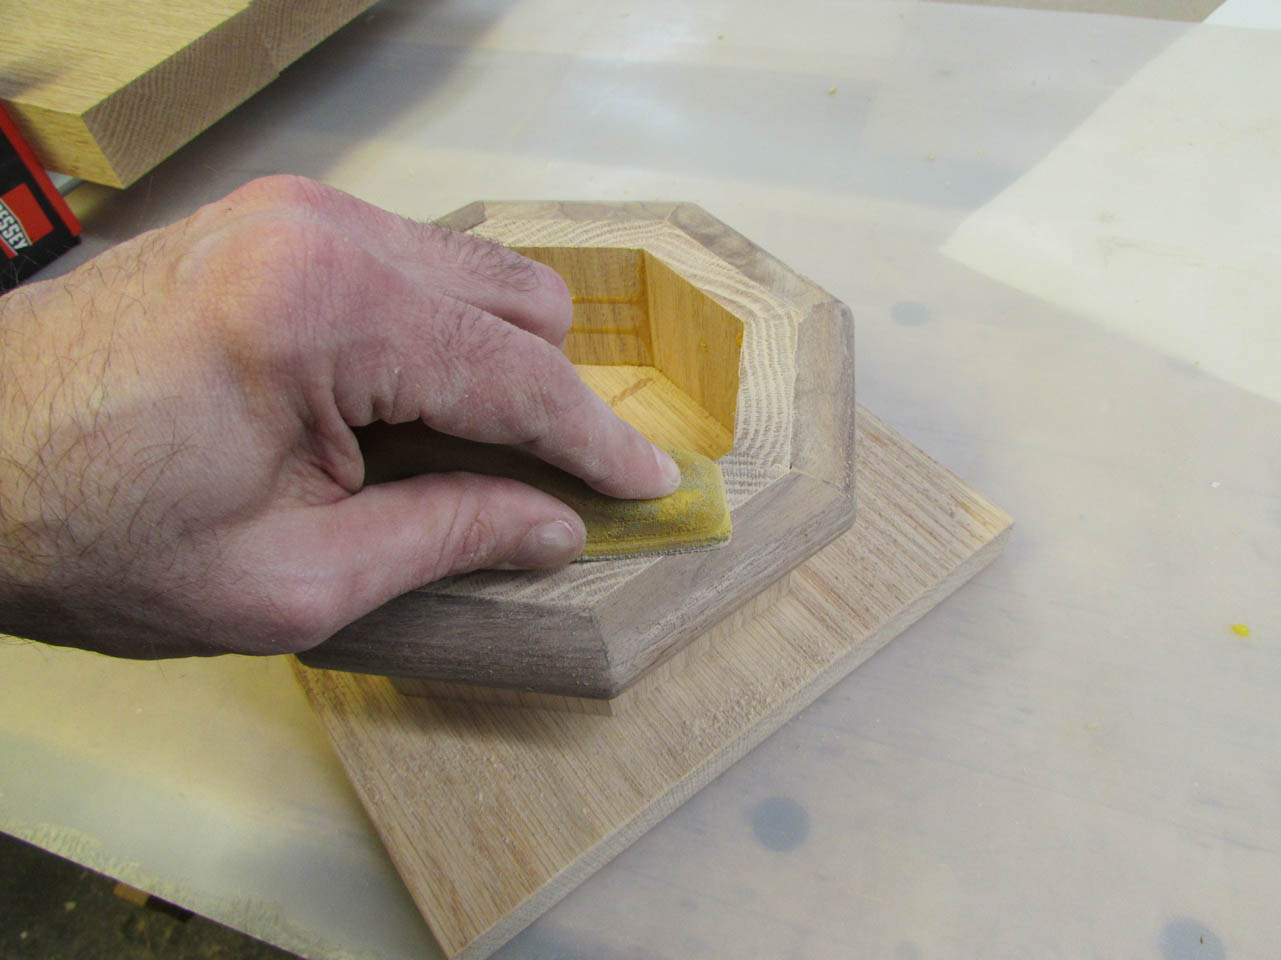
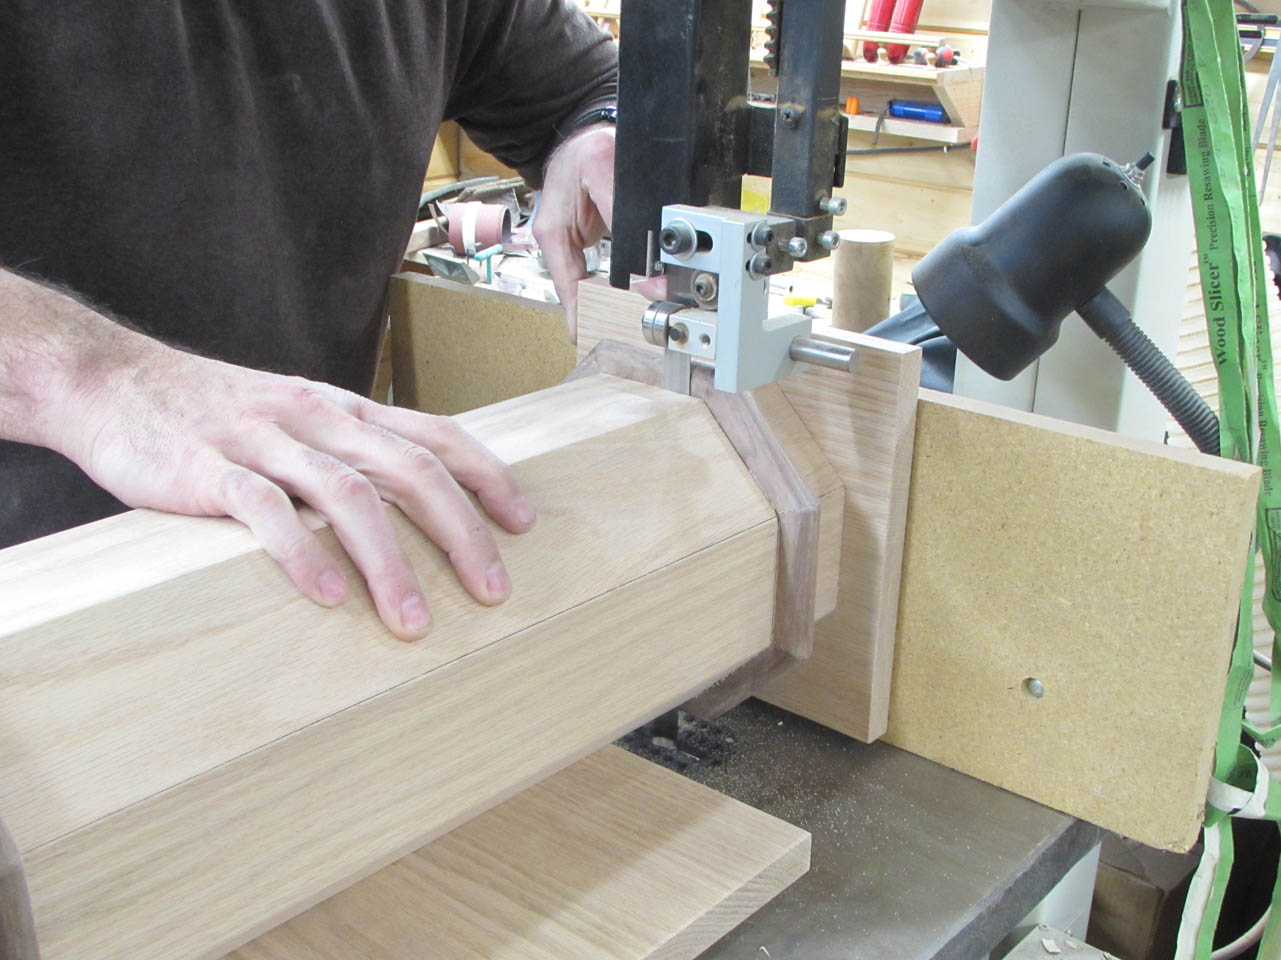
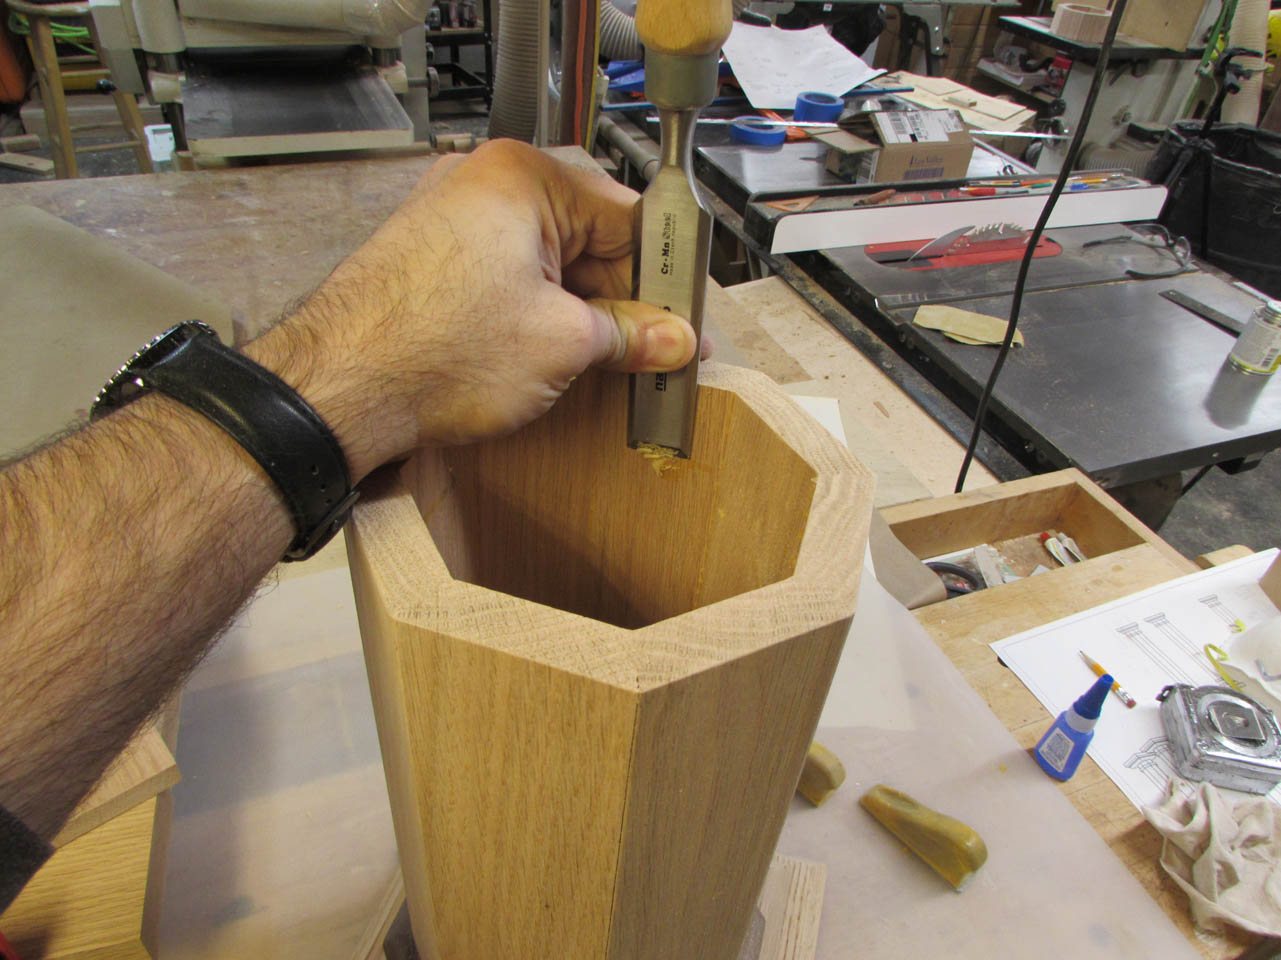
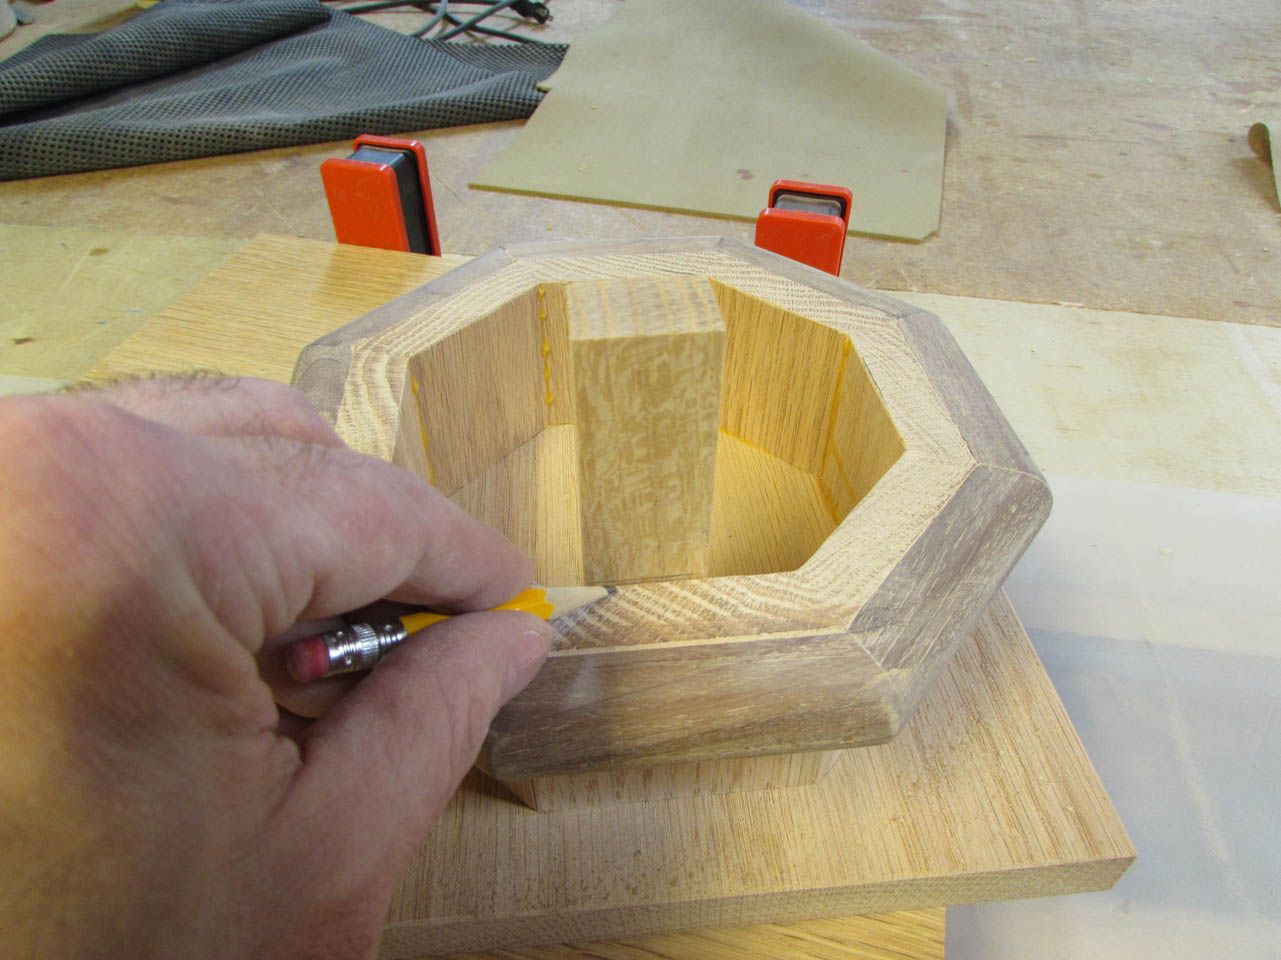
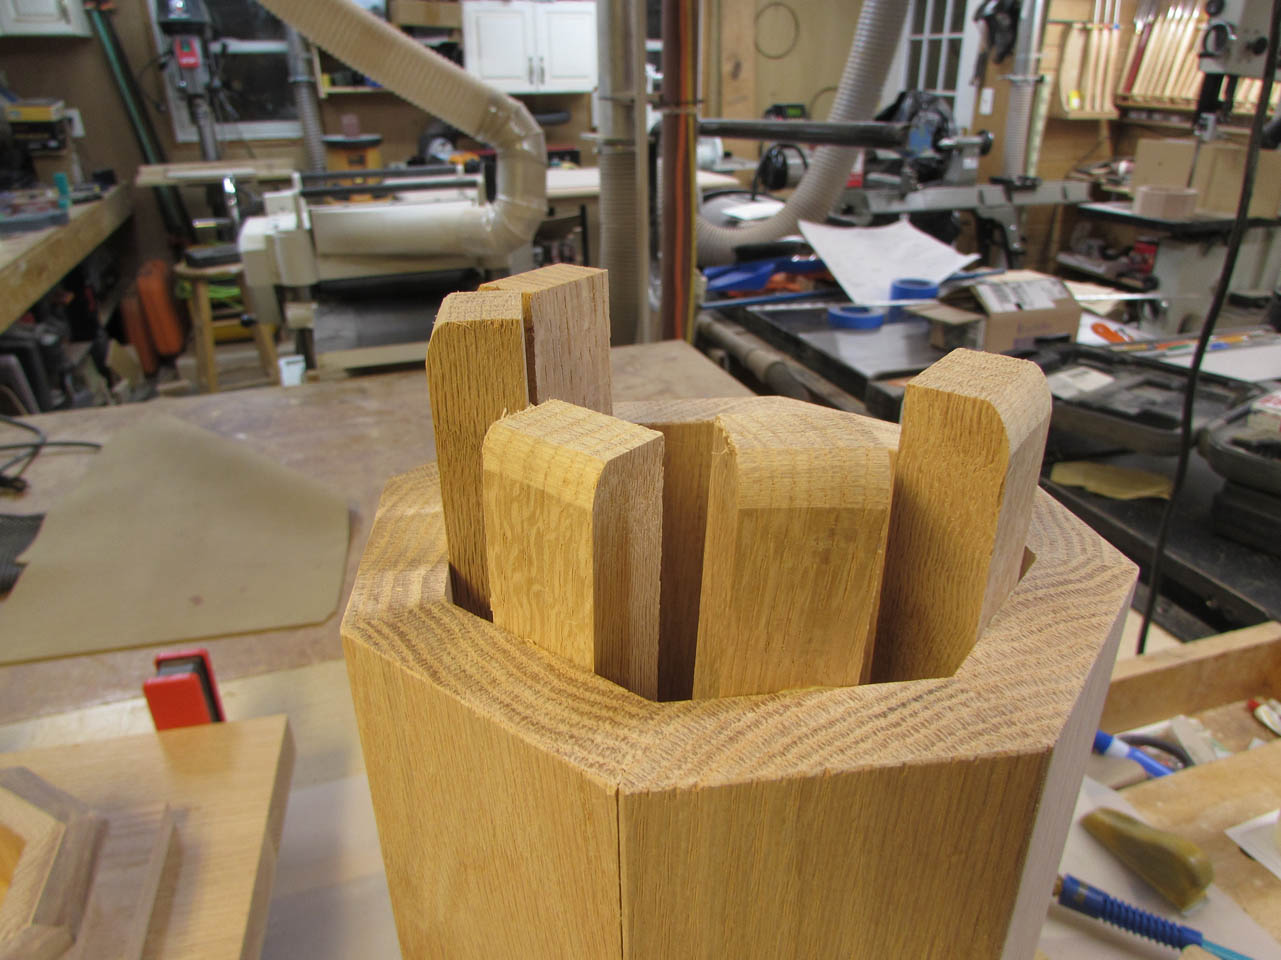
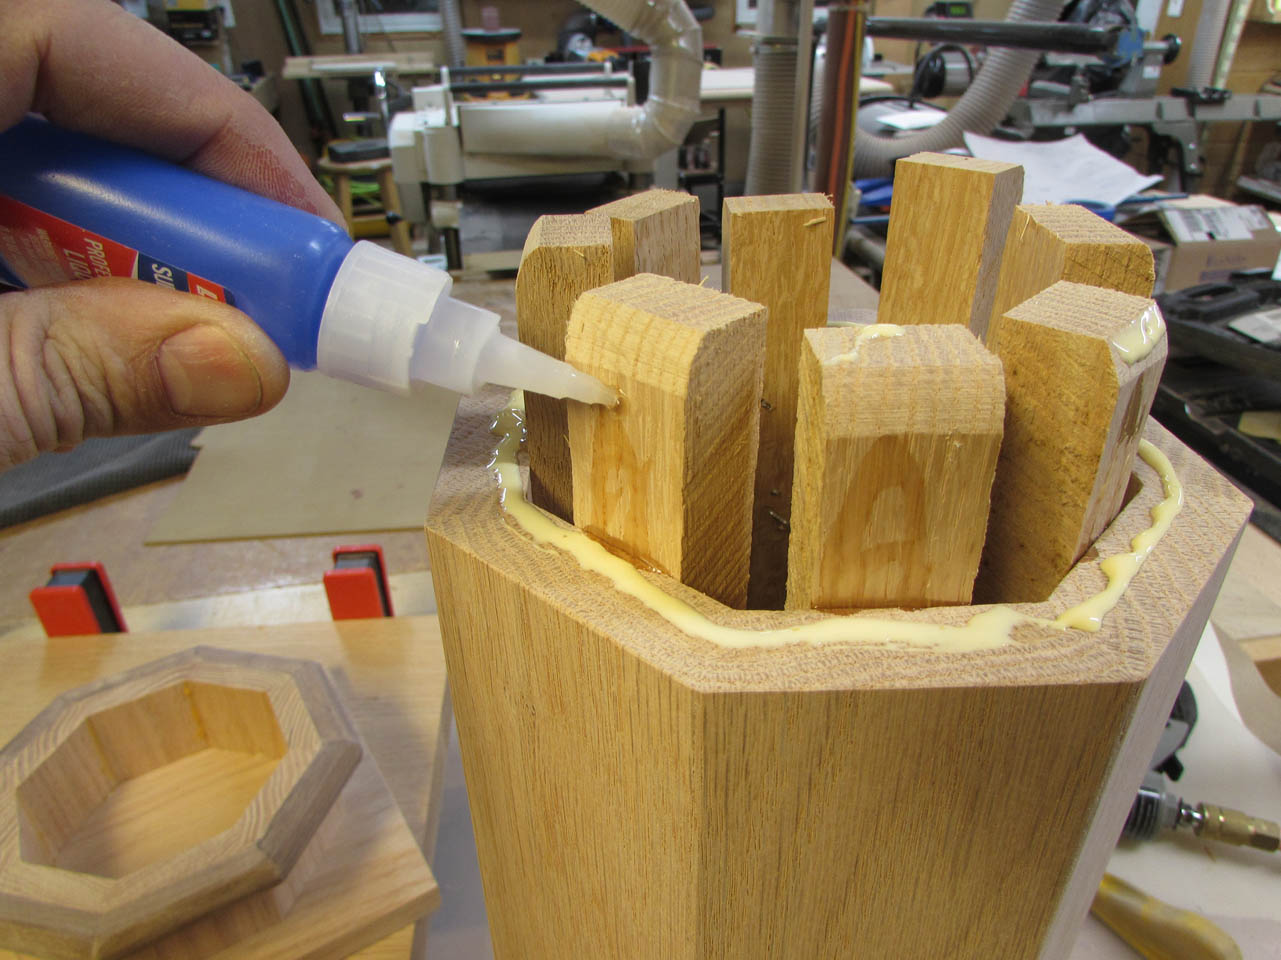
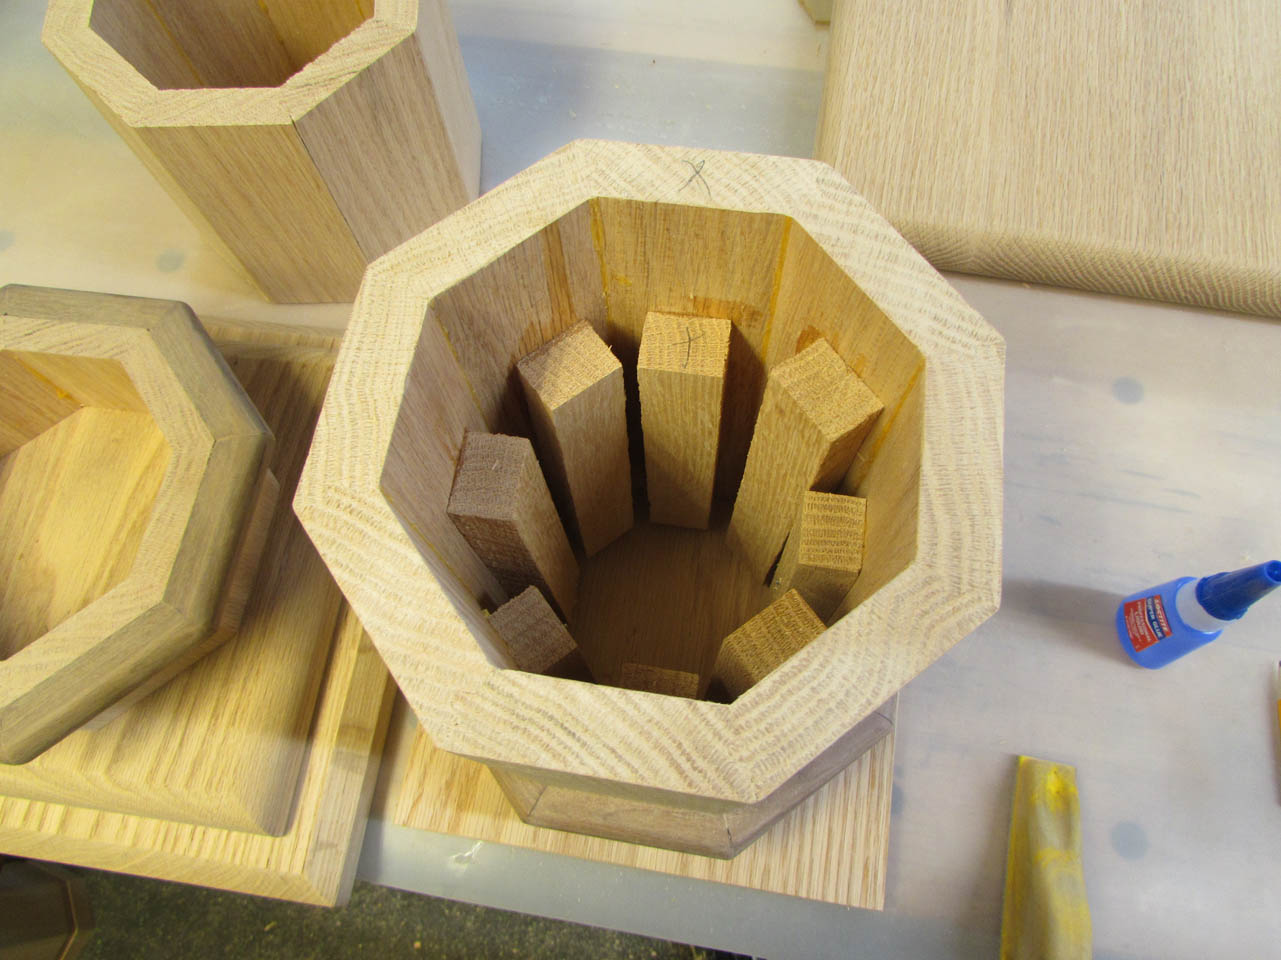
Before splicing the top back on to the column, I had to clean up the old glue squeeze-out inside the column.
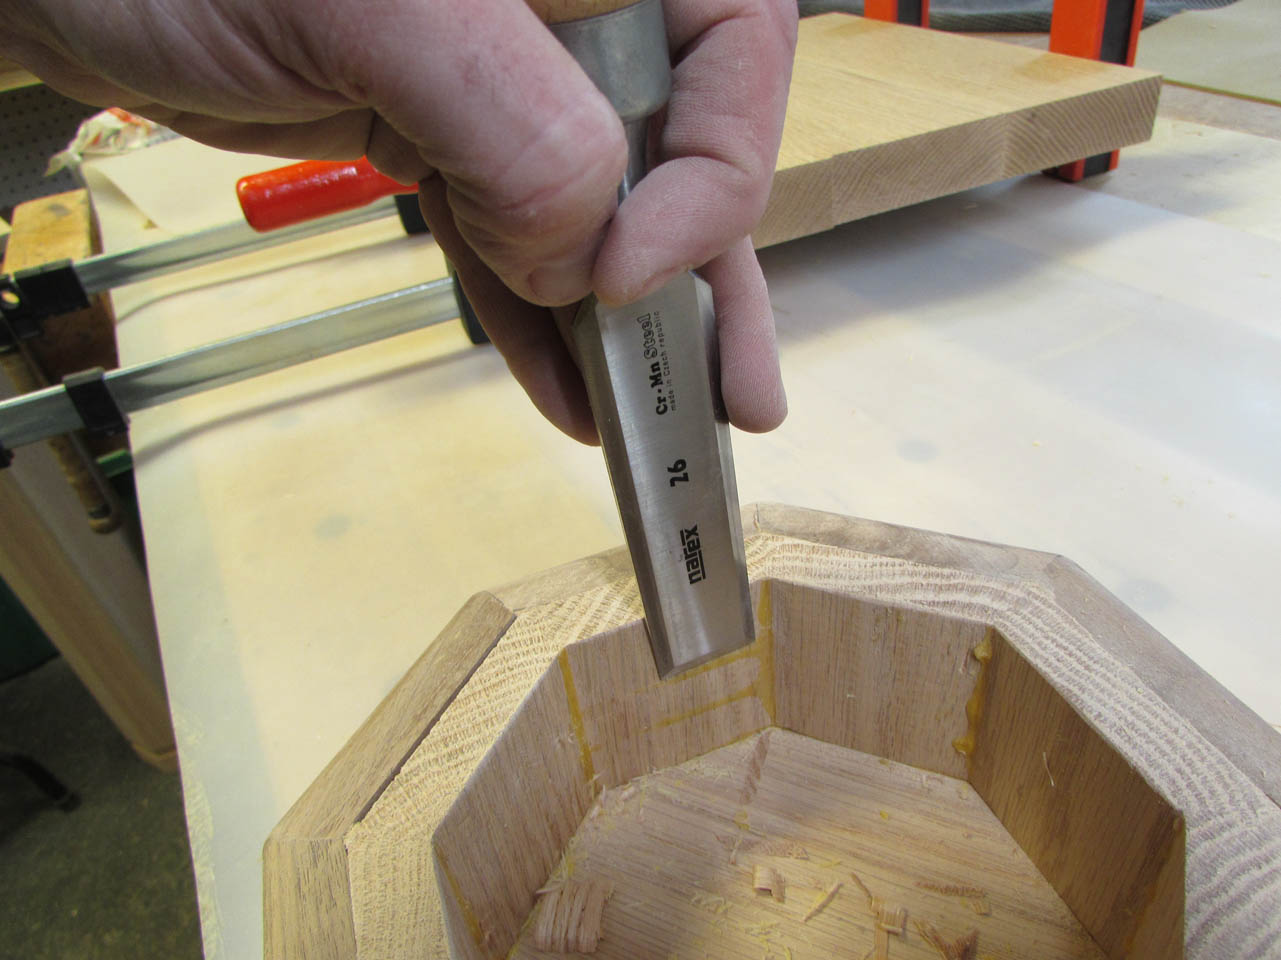
This is where my splice pieces will sit so it has to be perfectly flat on each face.
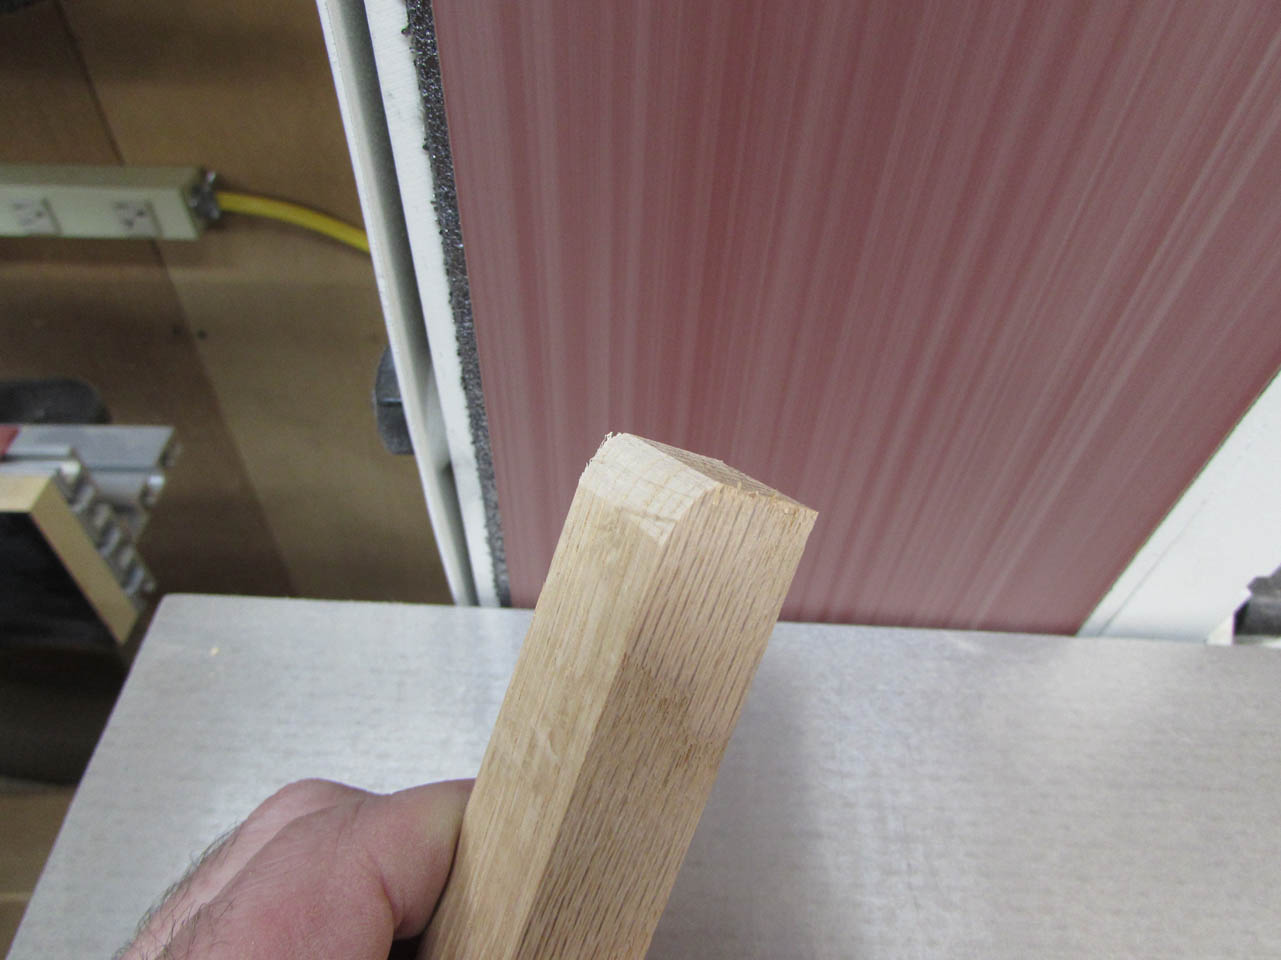
I grabbed a bunch of 3/4″ thick scrap pieces and cut them down to about 5″ long and sanded down one corner. This rounded edge will stick up and face outward to allow the column to slide back on more easily then over a square edge.
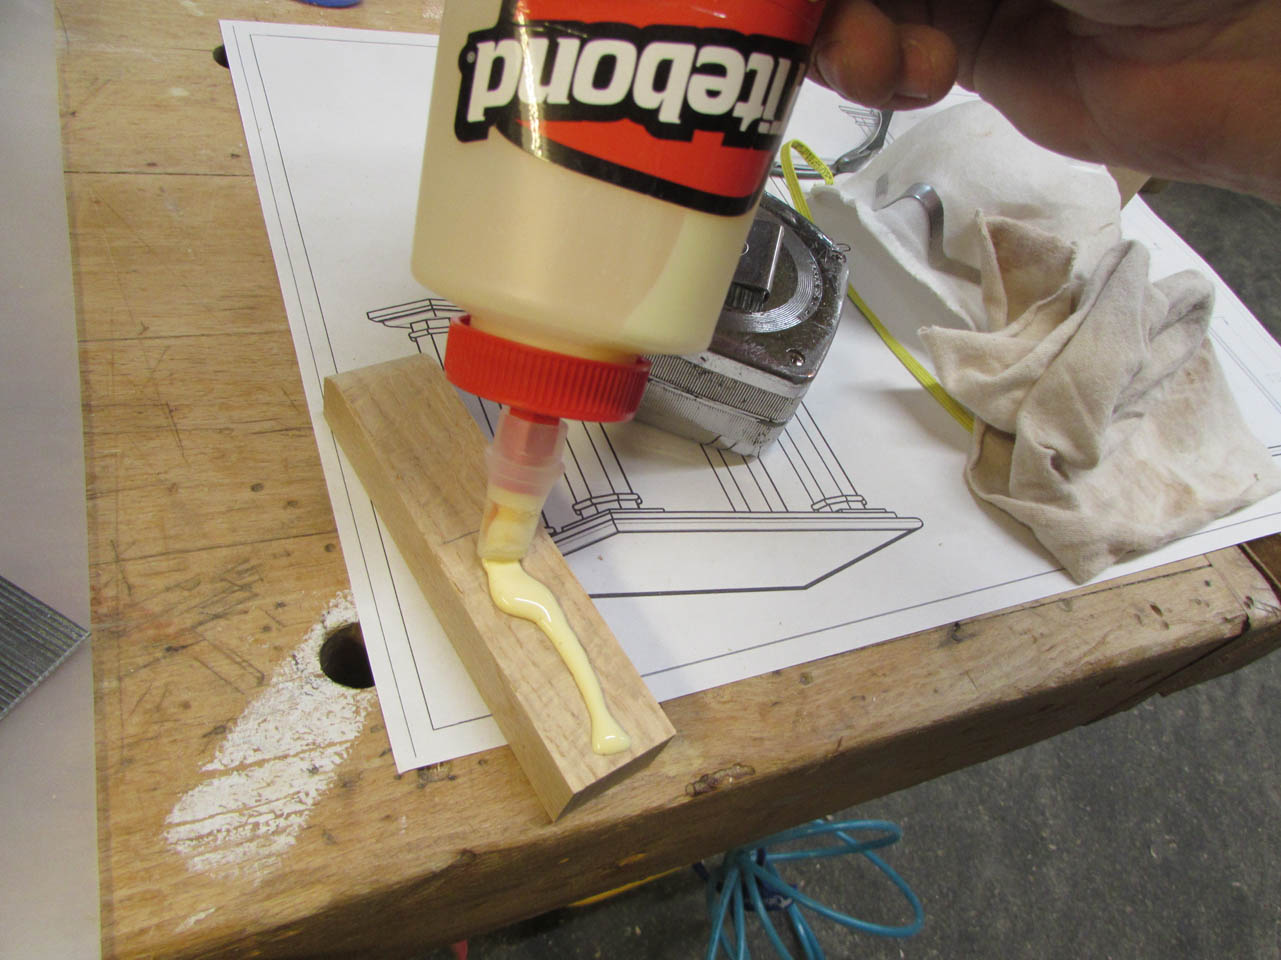
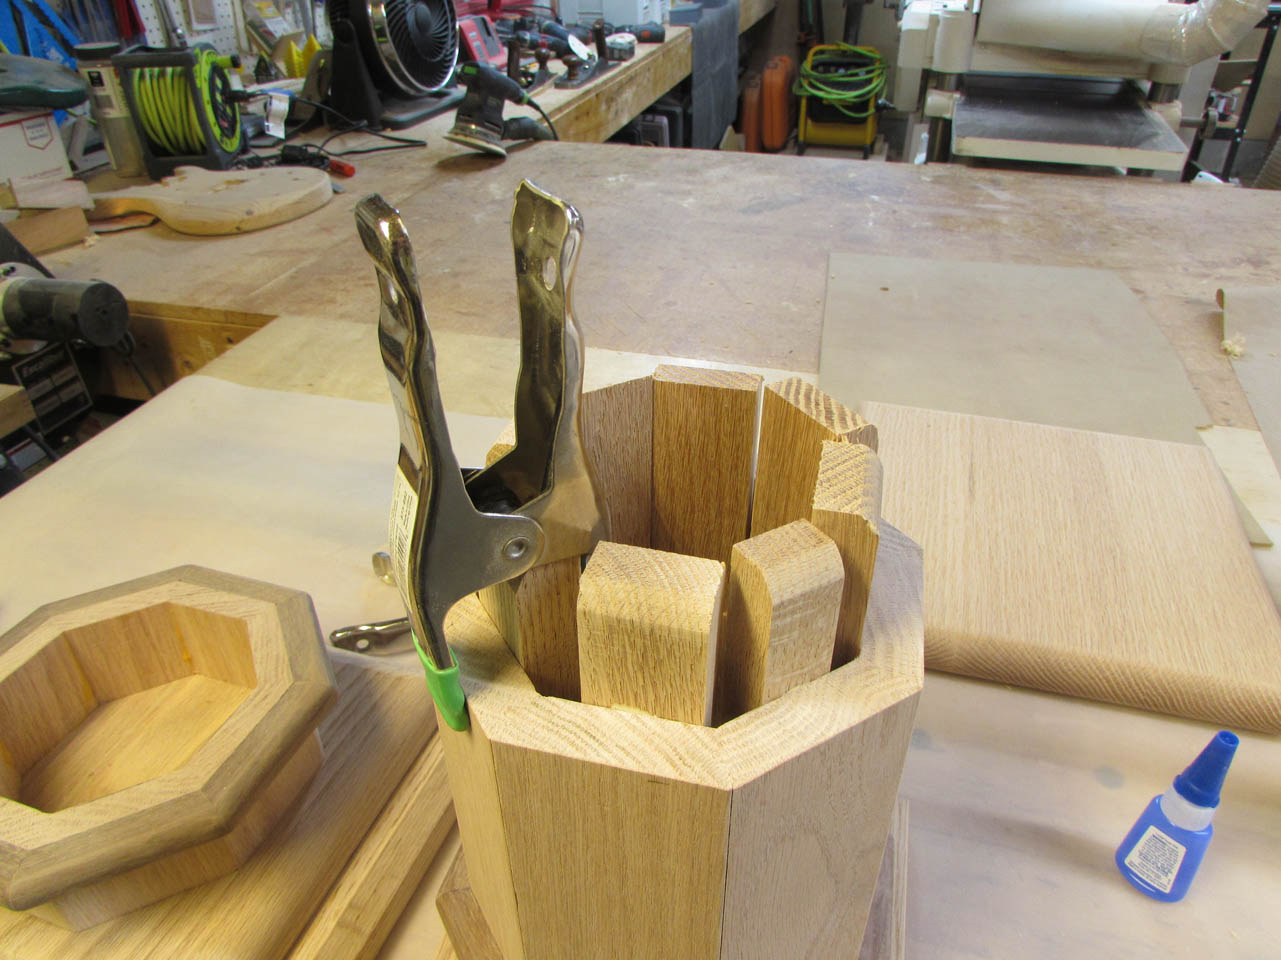
I marked the maximum depth on the top section, then applied glue to the opposite end,
I held some of the first few pieces in place with 1-1/4″ brad nails while they cured. Note the rounded edges all facing out.

For the last few splices, I placed a strip of wood glue down the center and quick setting CA glue on the sides. I only had to hold the strip in place for 30 seconds then the CA glue held it while the wood glue cured for a better bond.
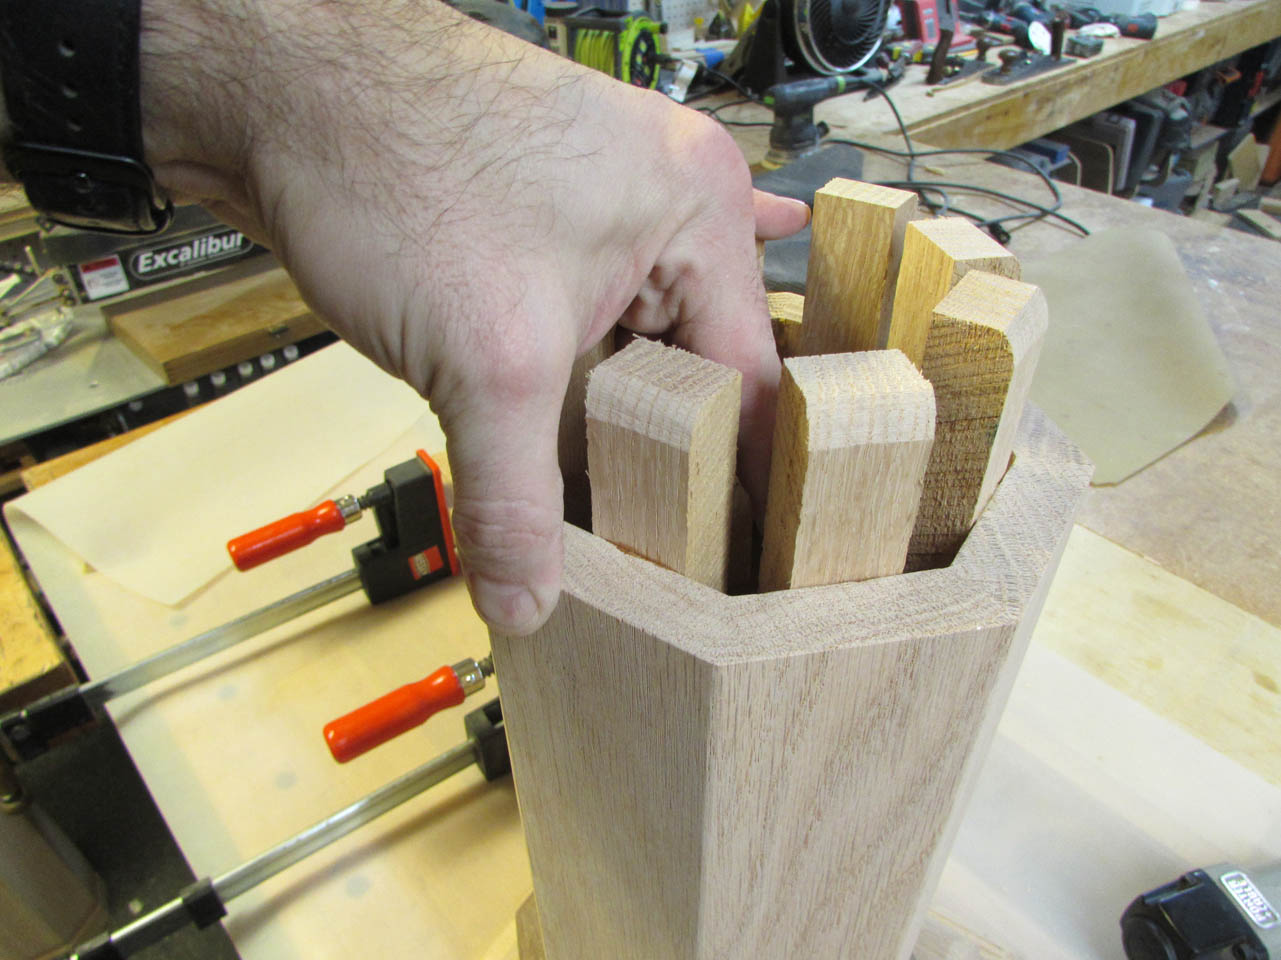
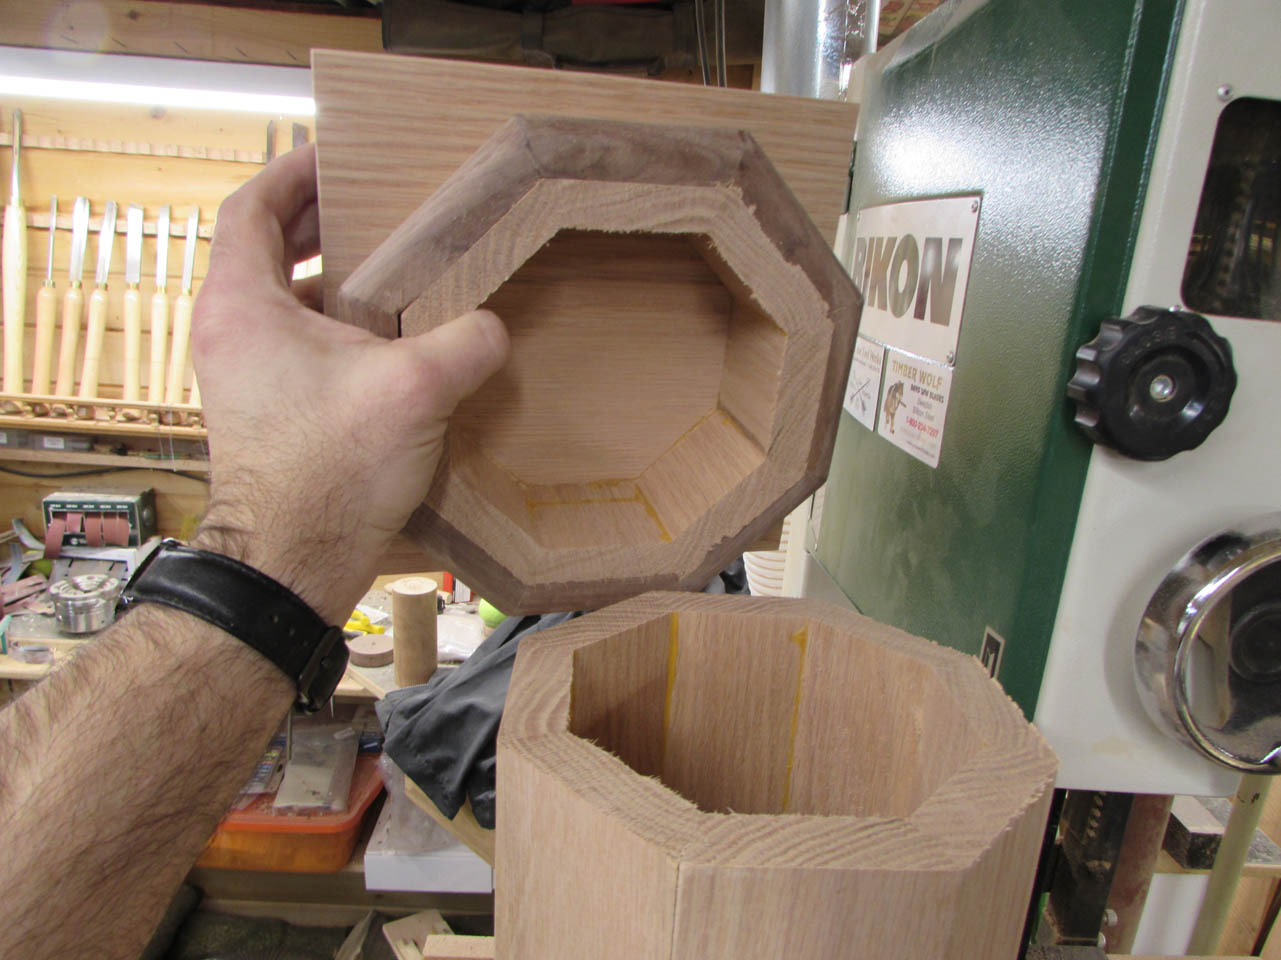
The little rounded ends really helped a lot. The column top slid right back in place with a gentle push.
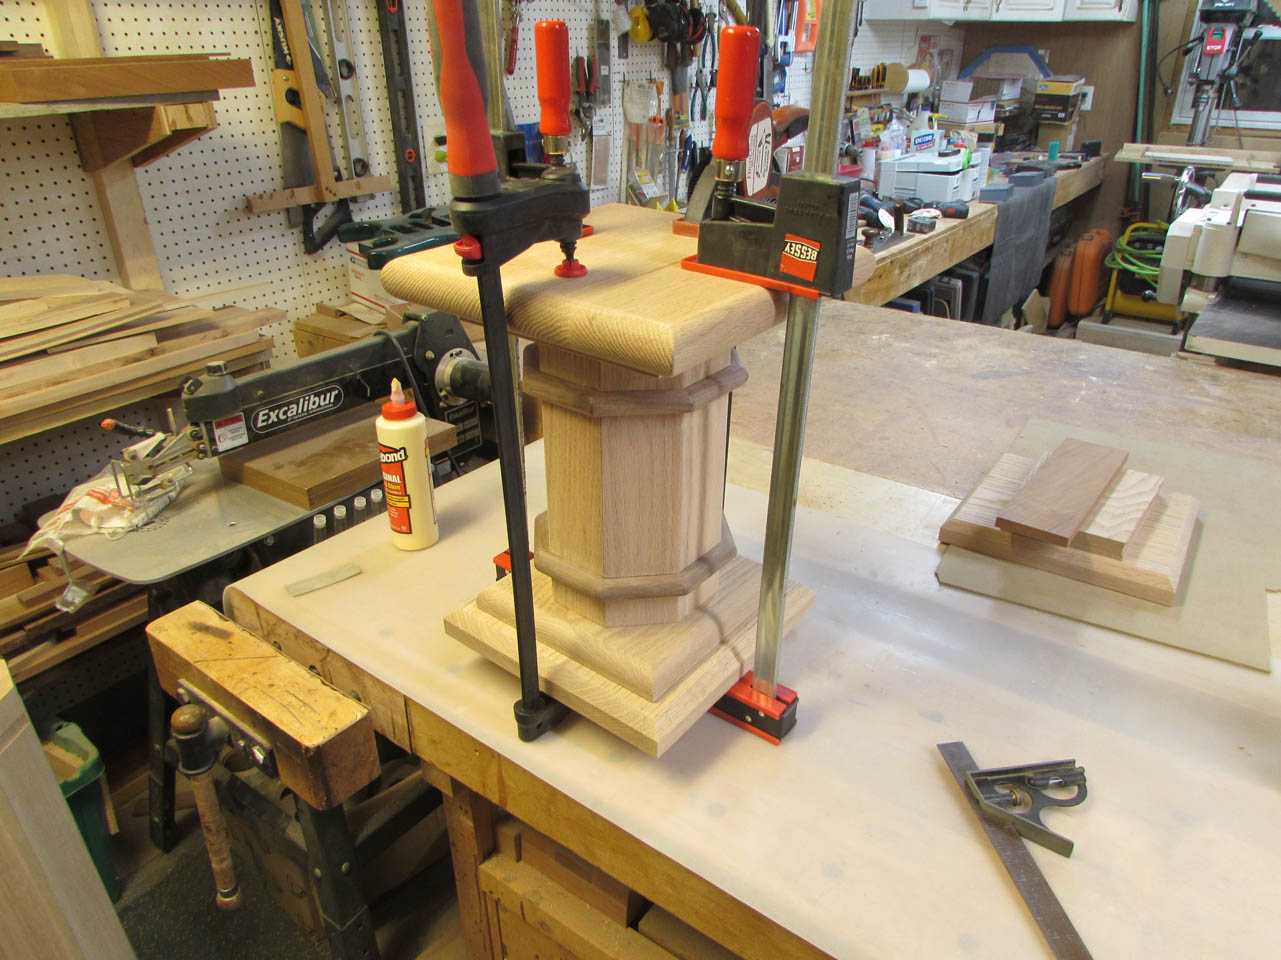
To avoid a lot of wood glue squeezing out, I only put a ring of it around the splices and CA glue on the face of the splice strips.
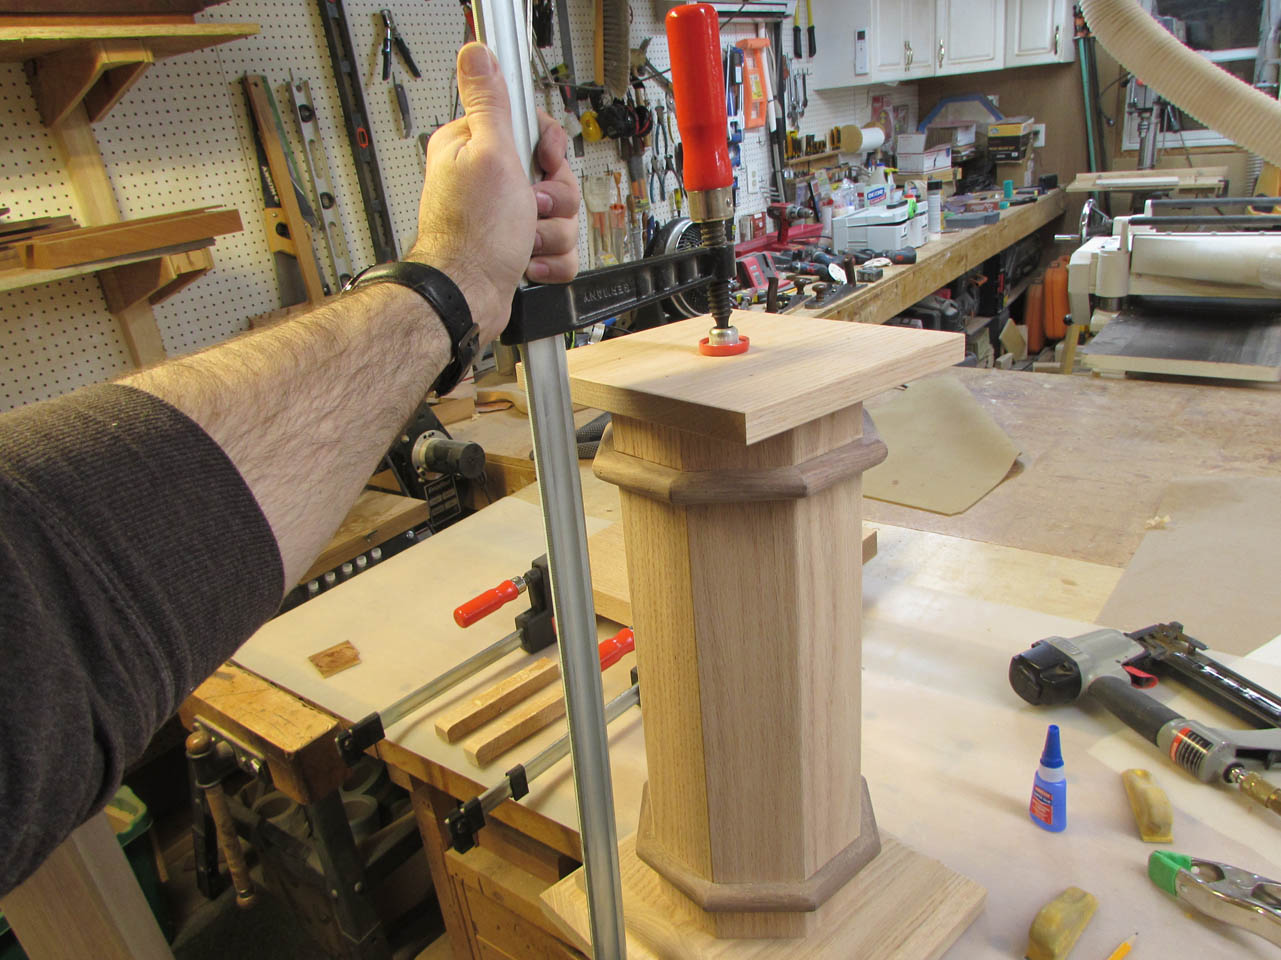
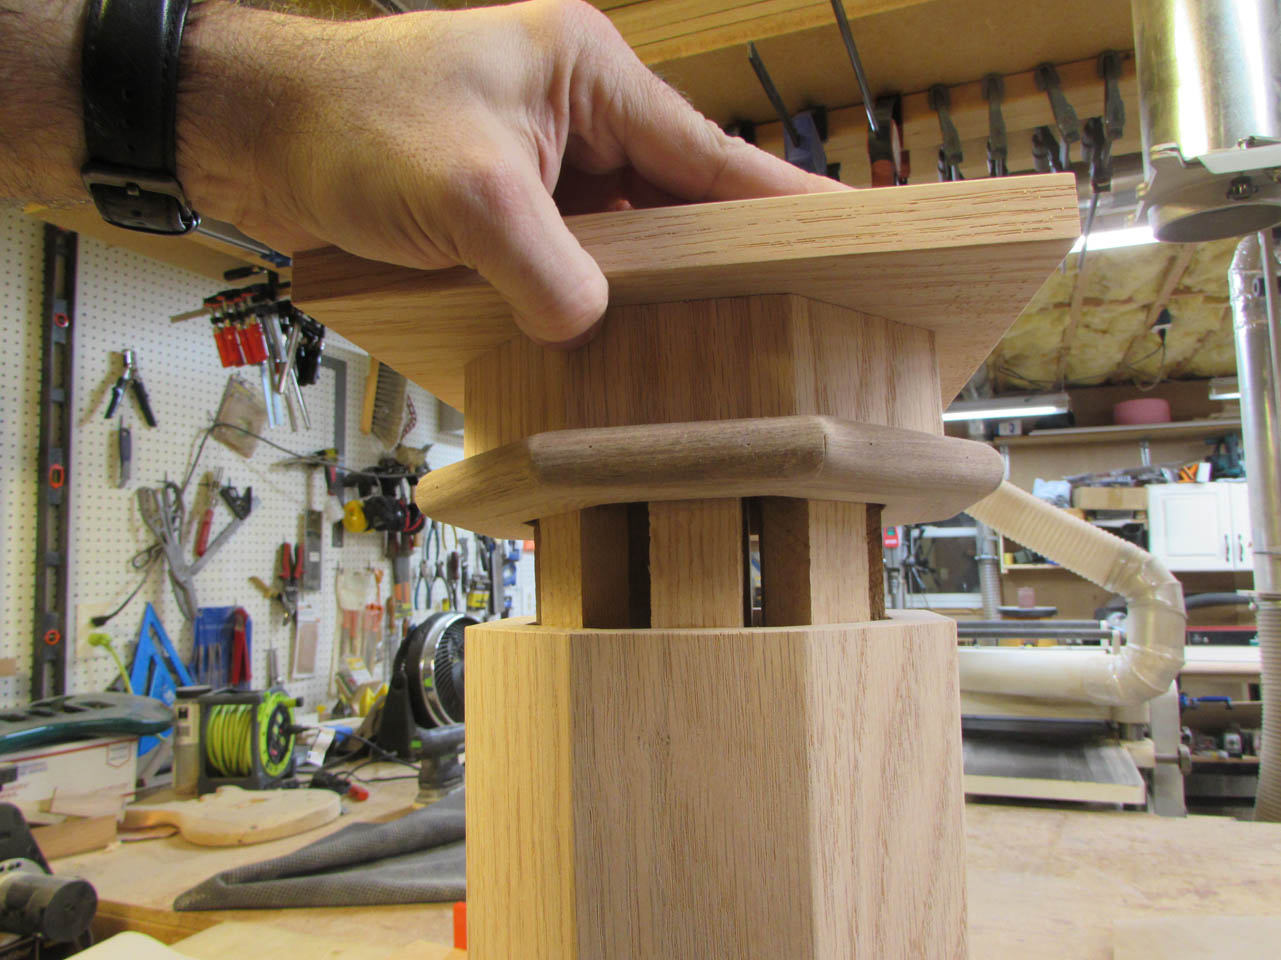
Then I clamped the top on to cure. Looks really good.
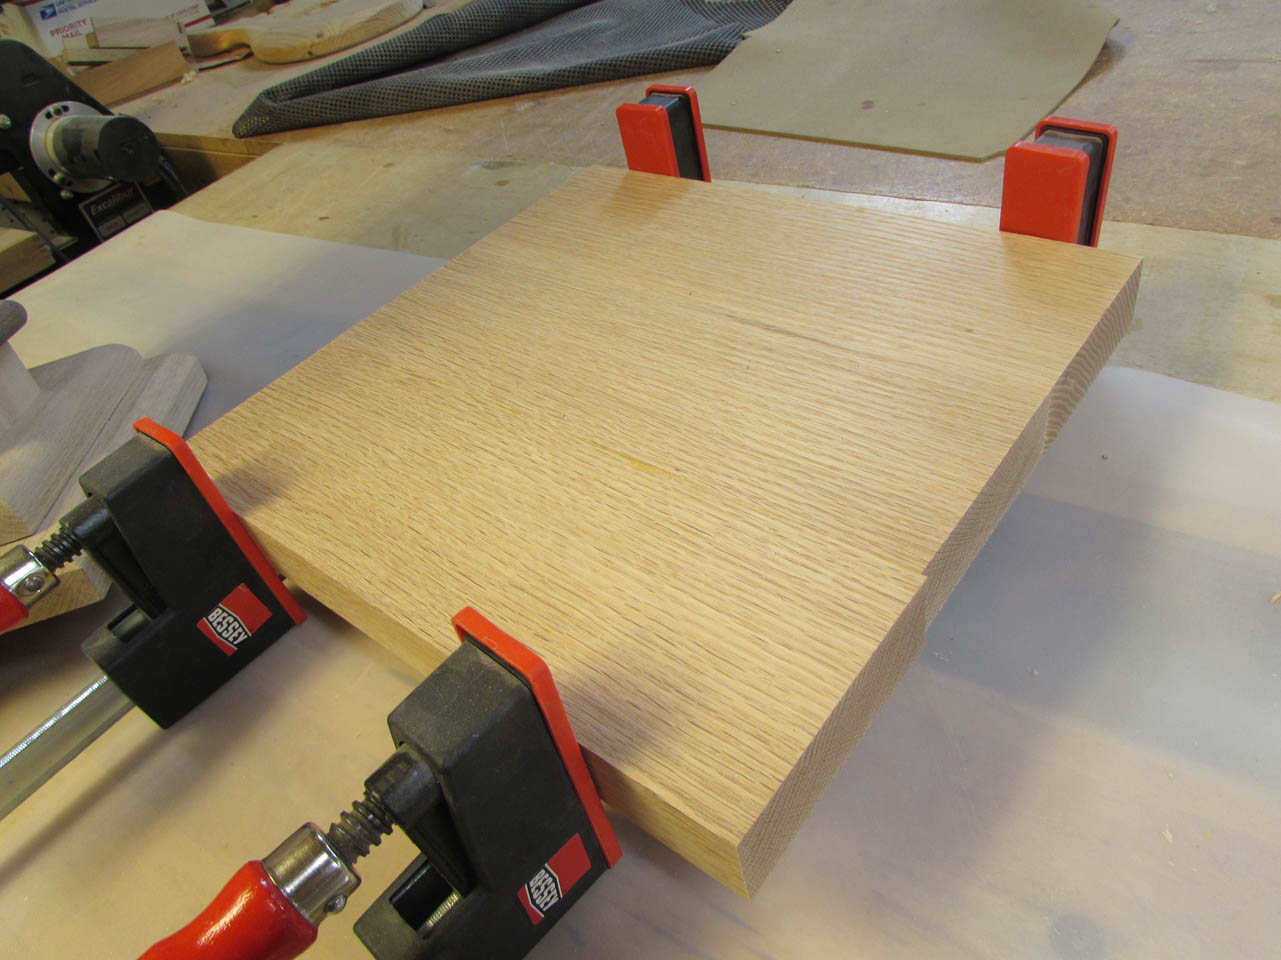
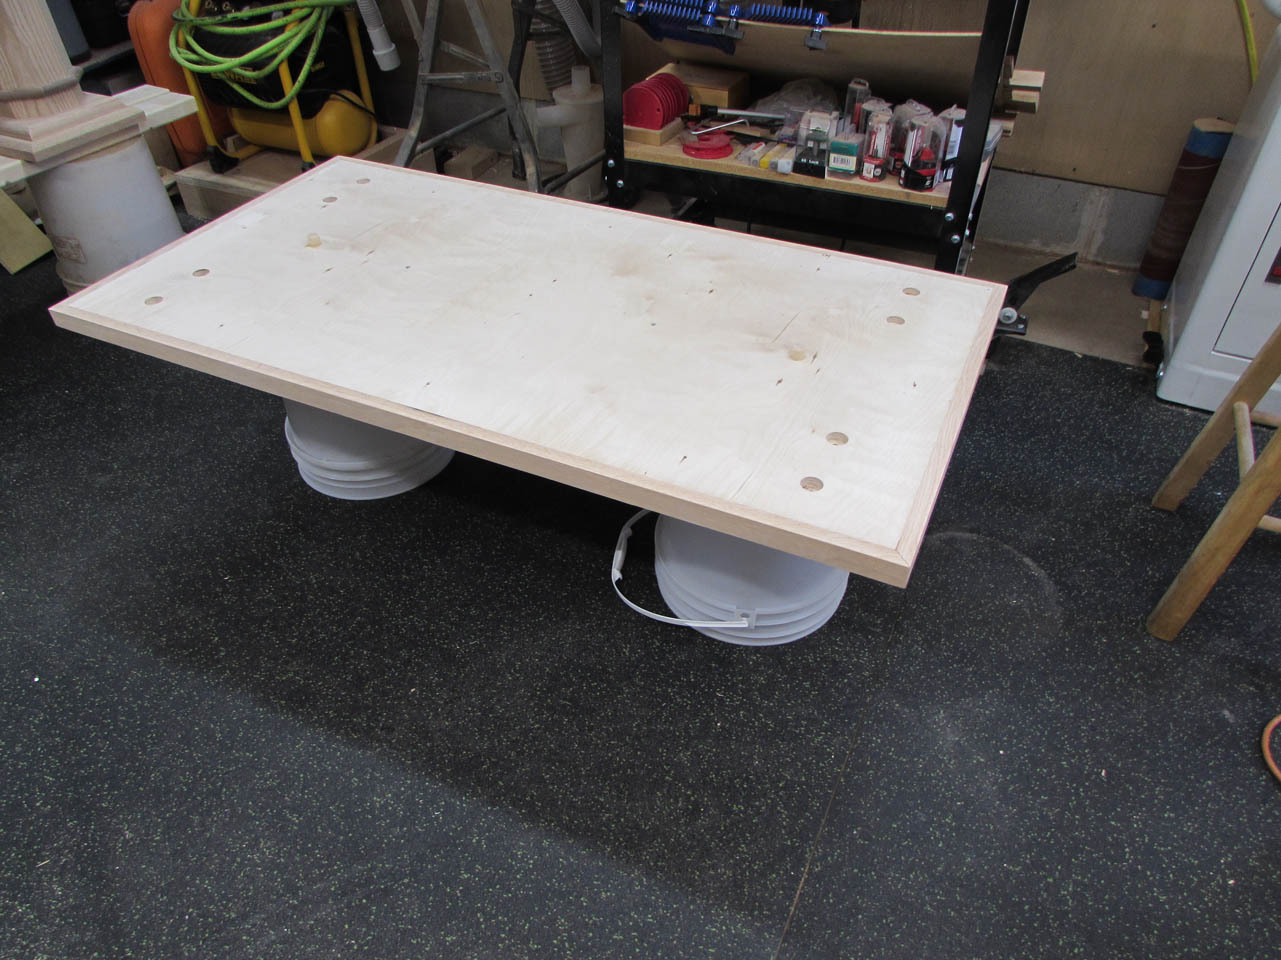
While that was drying, I planed down a panel that I had glued up to make the top.
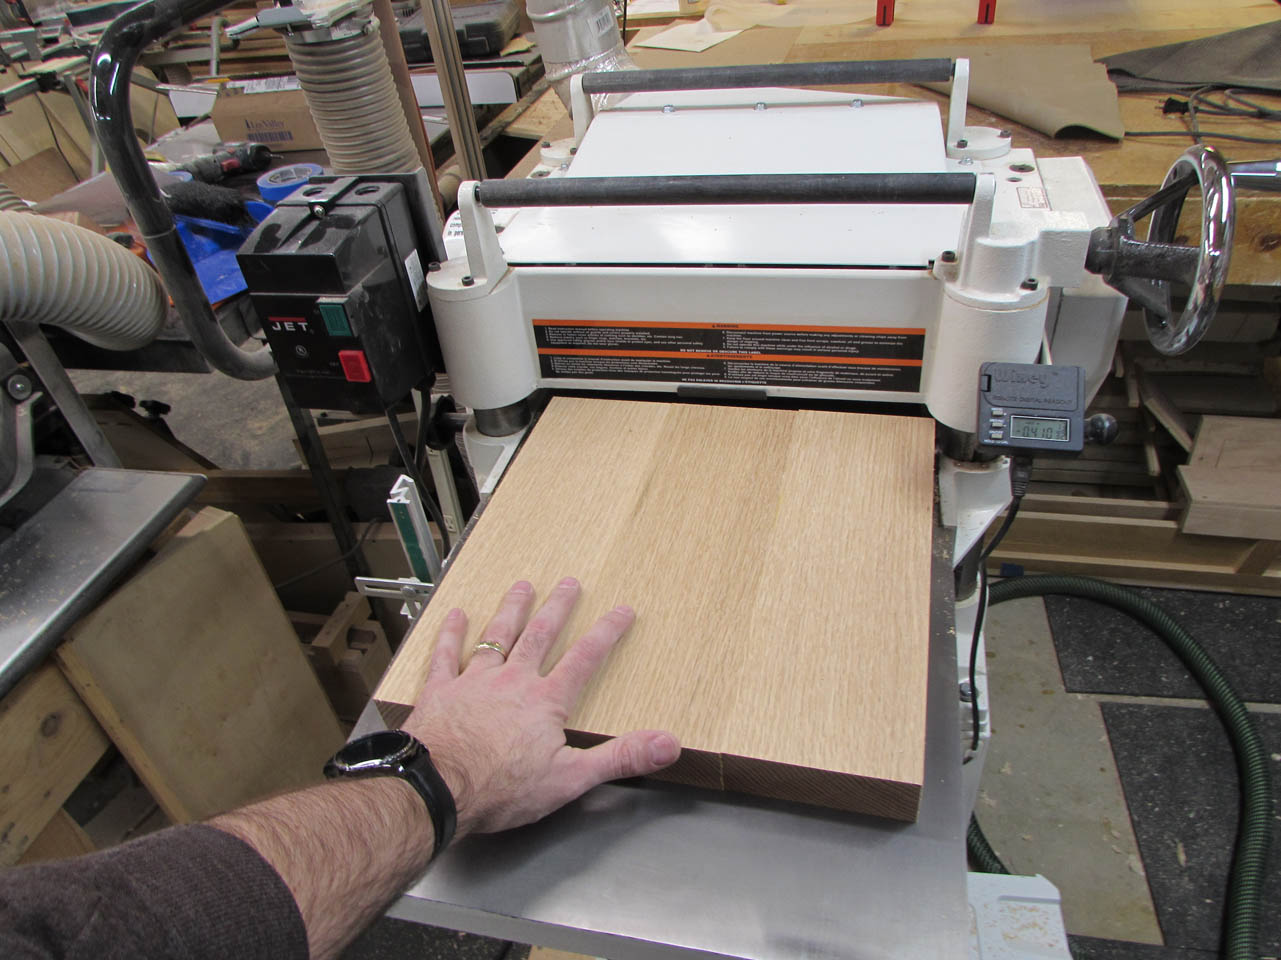
I cut it down to be a 12″ square on the table saw.
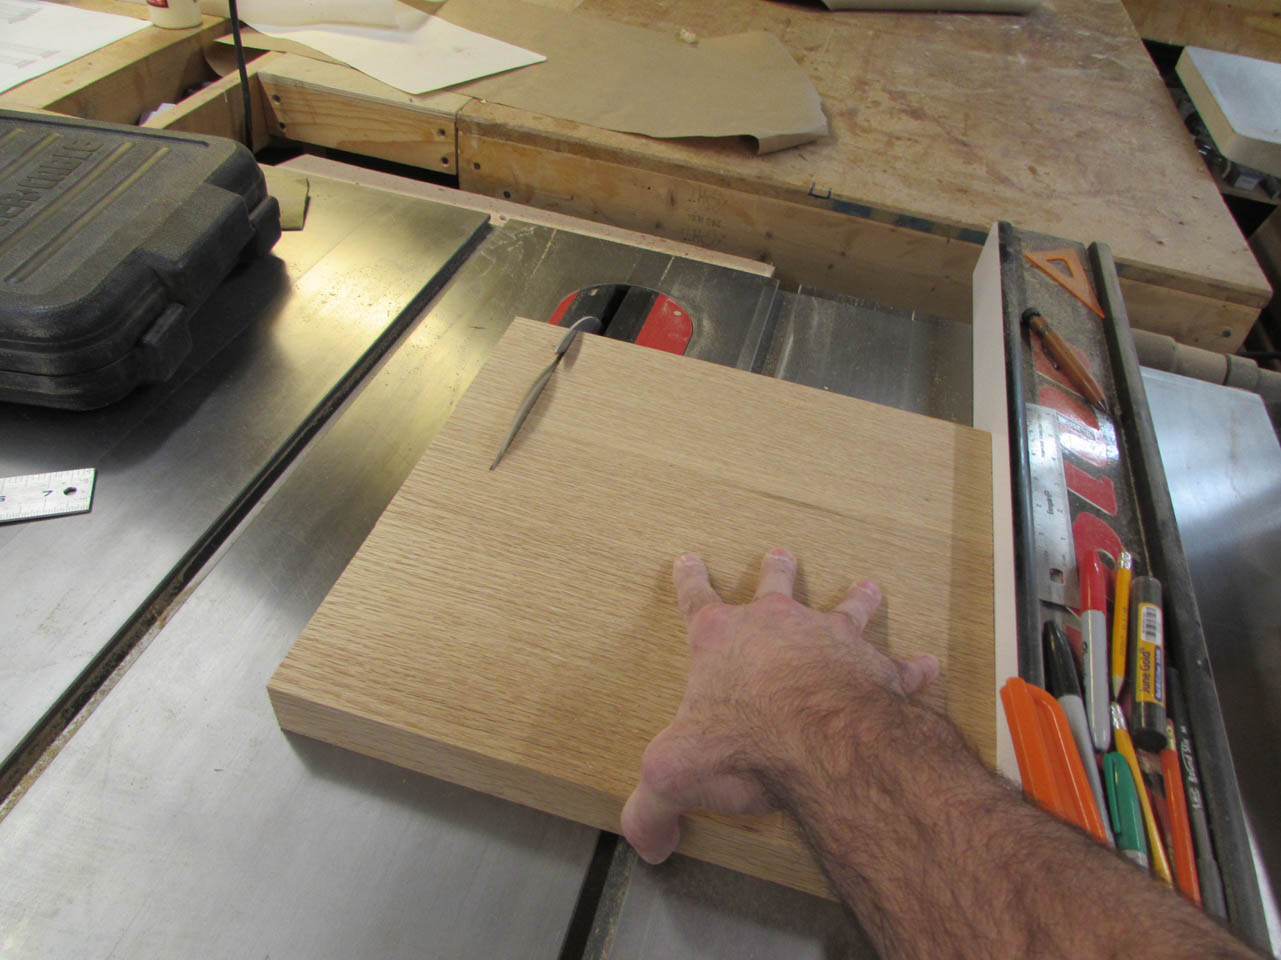
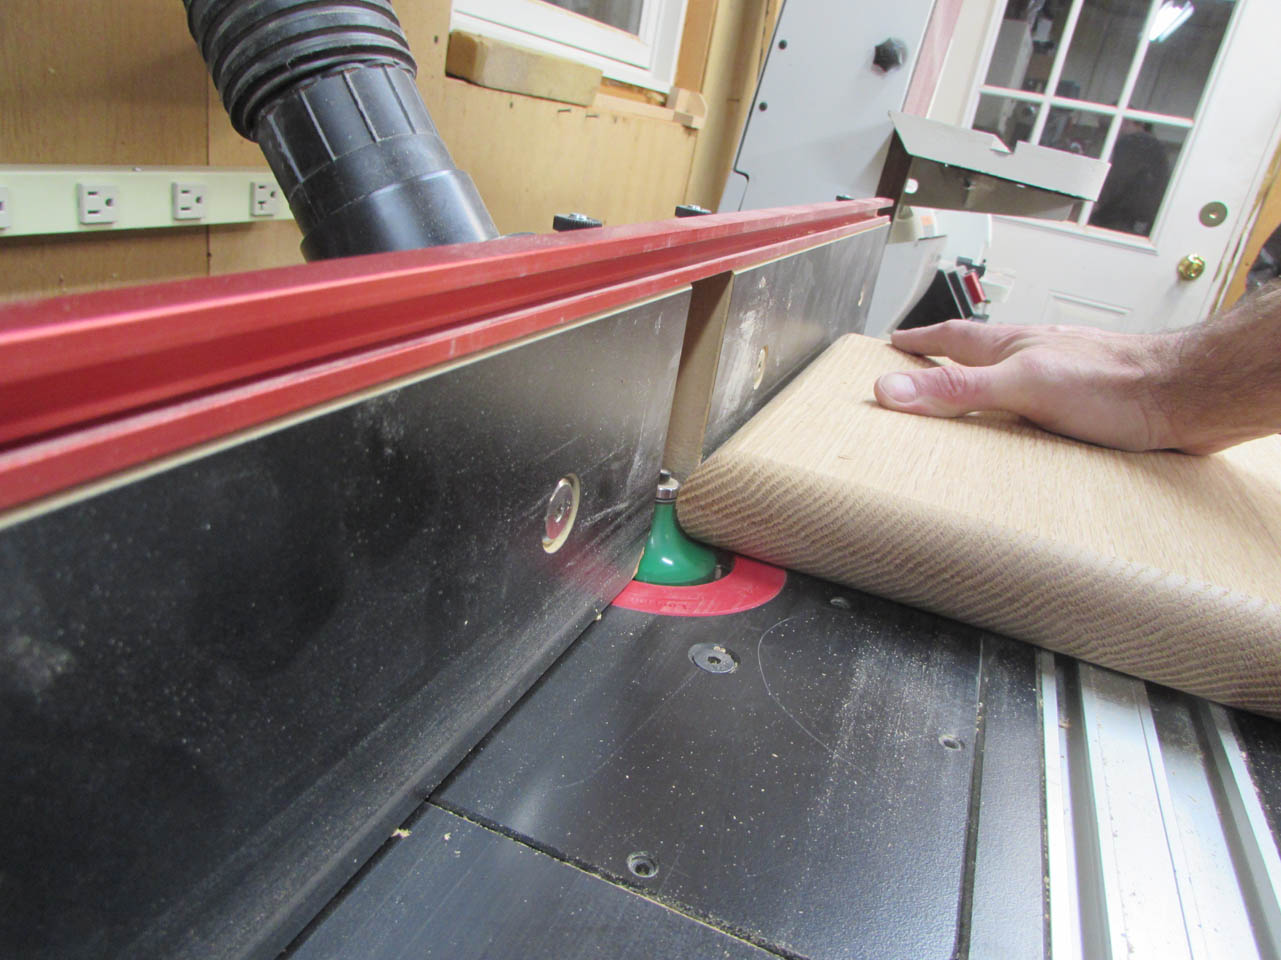
Then I used a 3/4″ radius to create the 1-1/2″ thick bull-nose that matches the tops of all the other pieces.
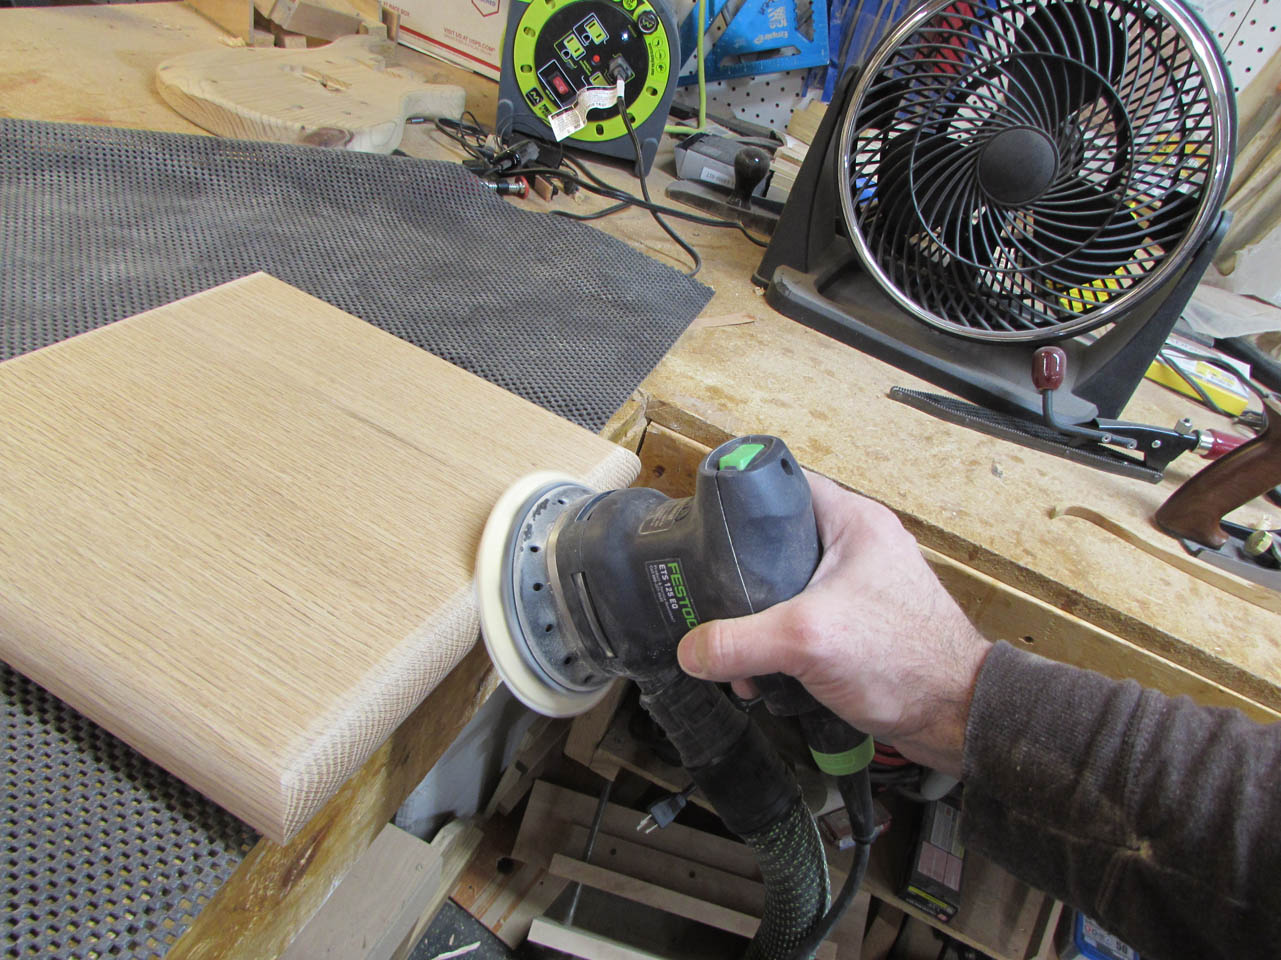
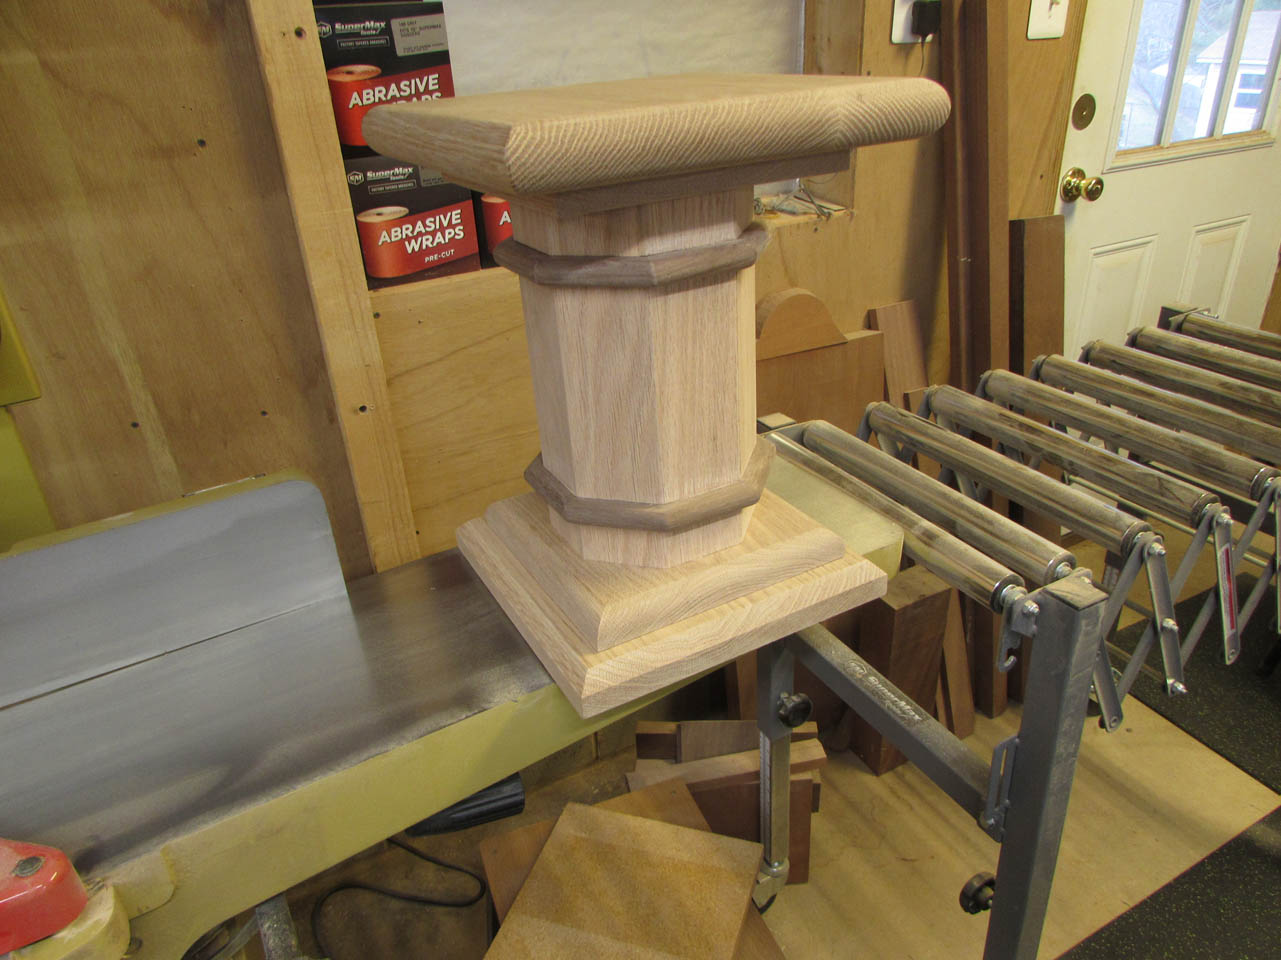
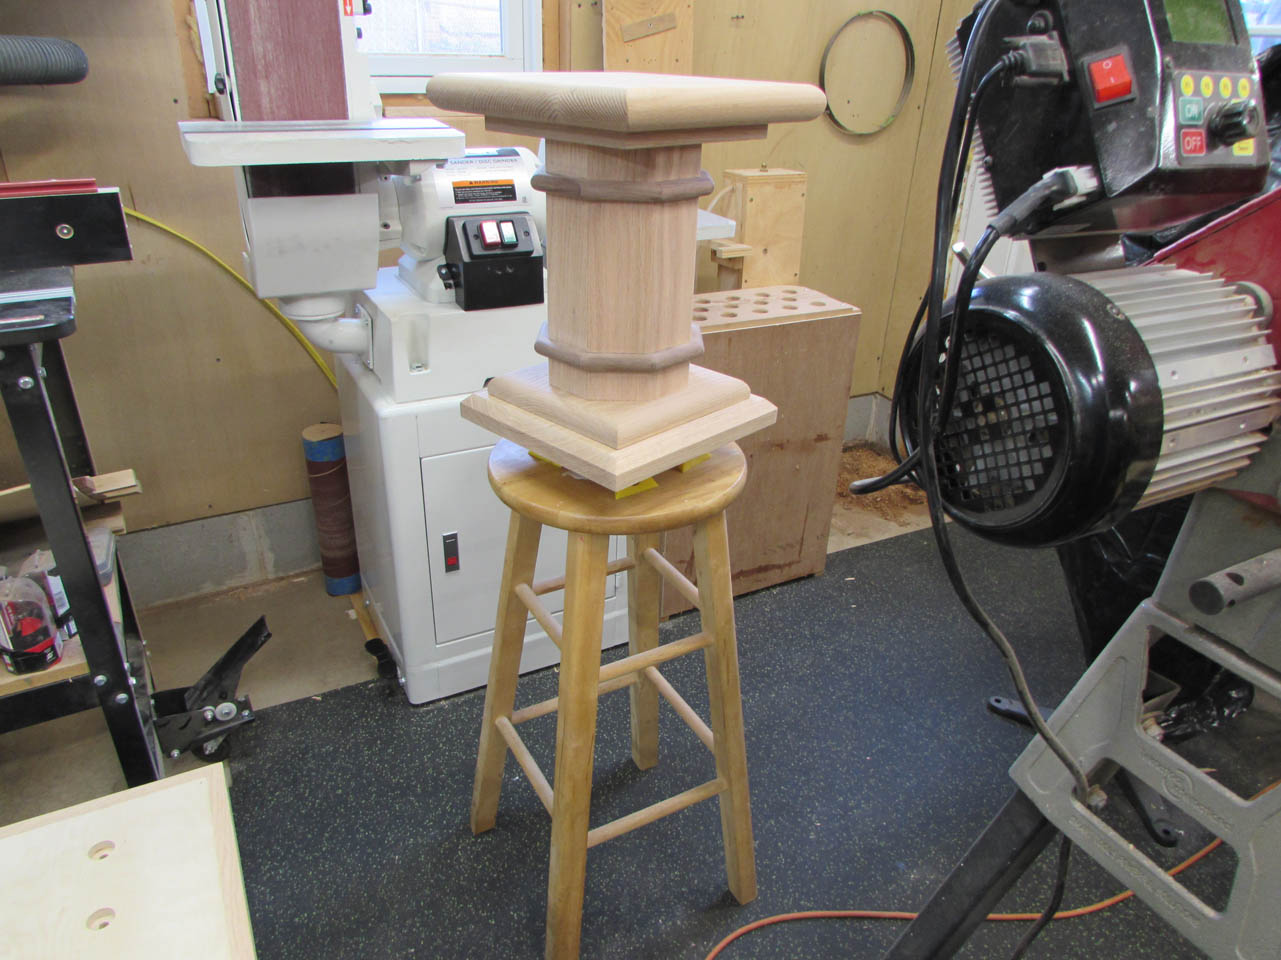
After a little bit of sanding, I placed it on top of the newly shortened column. I cut a block down to the approximate size of the reliquary and sent a photo to Monsignor for his approval. I didn’t get it though. I had failed to ask how much shorter he wanted it and just made an assumption. That was not the best idea. I should have also taken into account the fact that there will be an altar cloth draped over the edge… Monsignor wanted it to be about 6″ shorter.


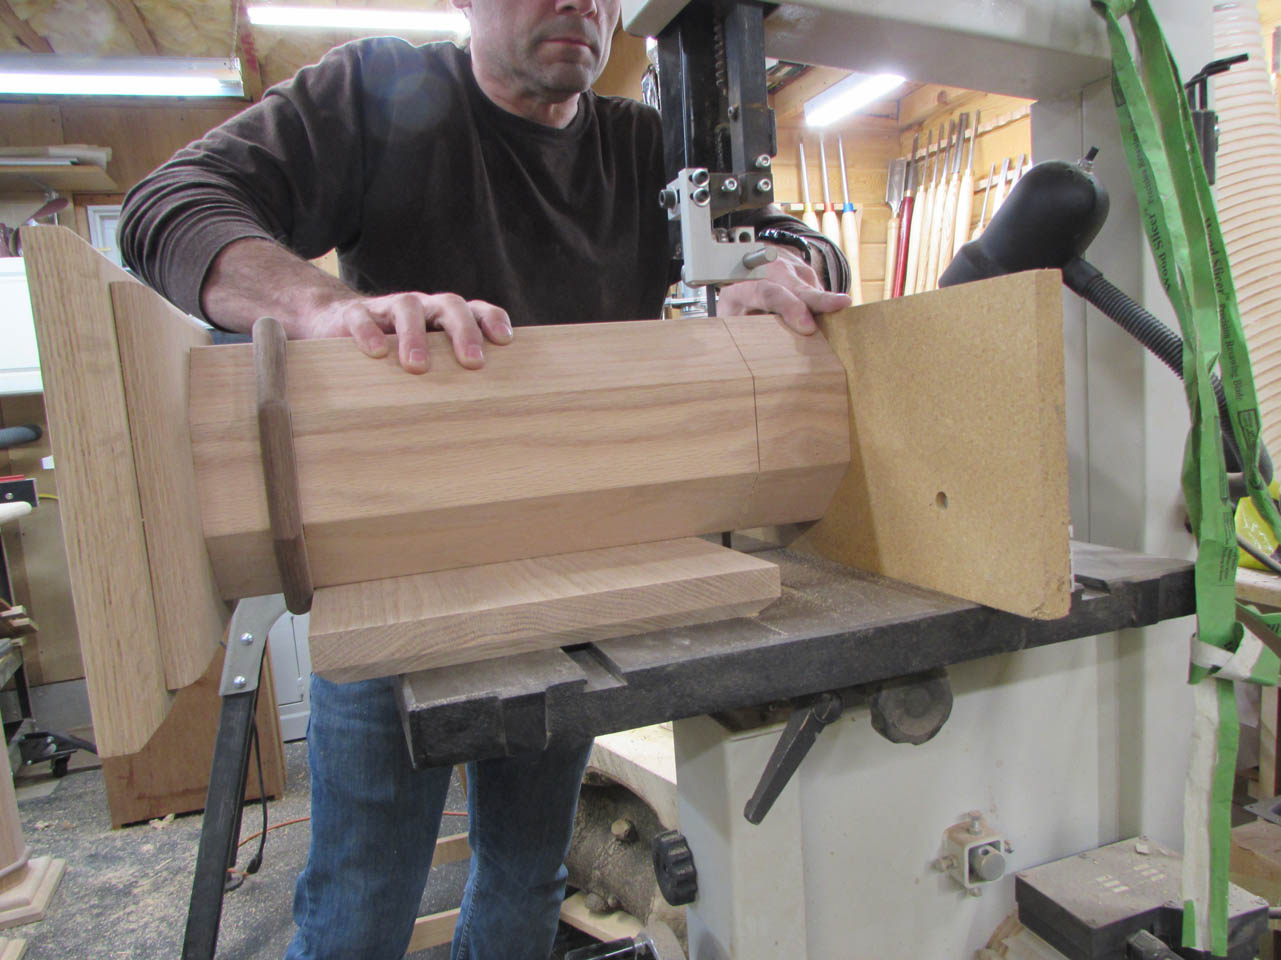
So, after all that practice on the first shortening, I flipped the column around and cut off the bottom, then 6″ more of the column.
Then repeated the installation of eight more splices on the opposite end.
I learned my lesson though and sent a photo for approval before gluing anything back together this time…
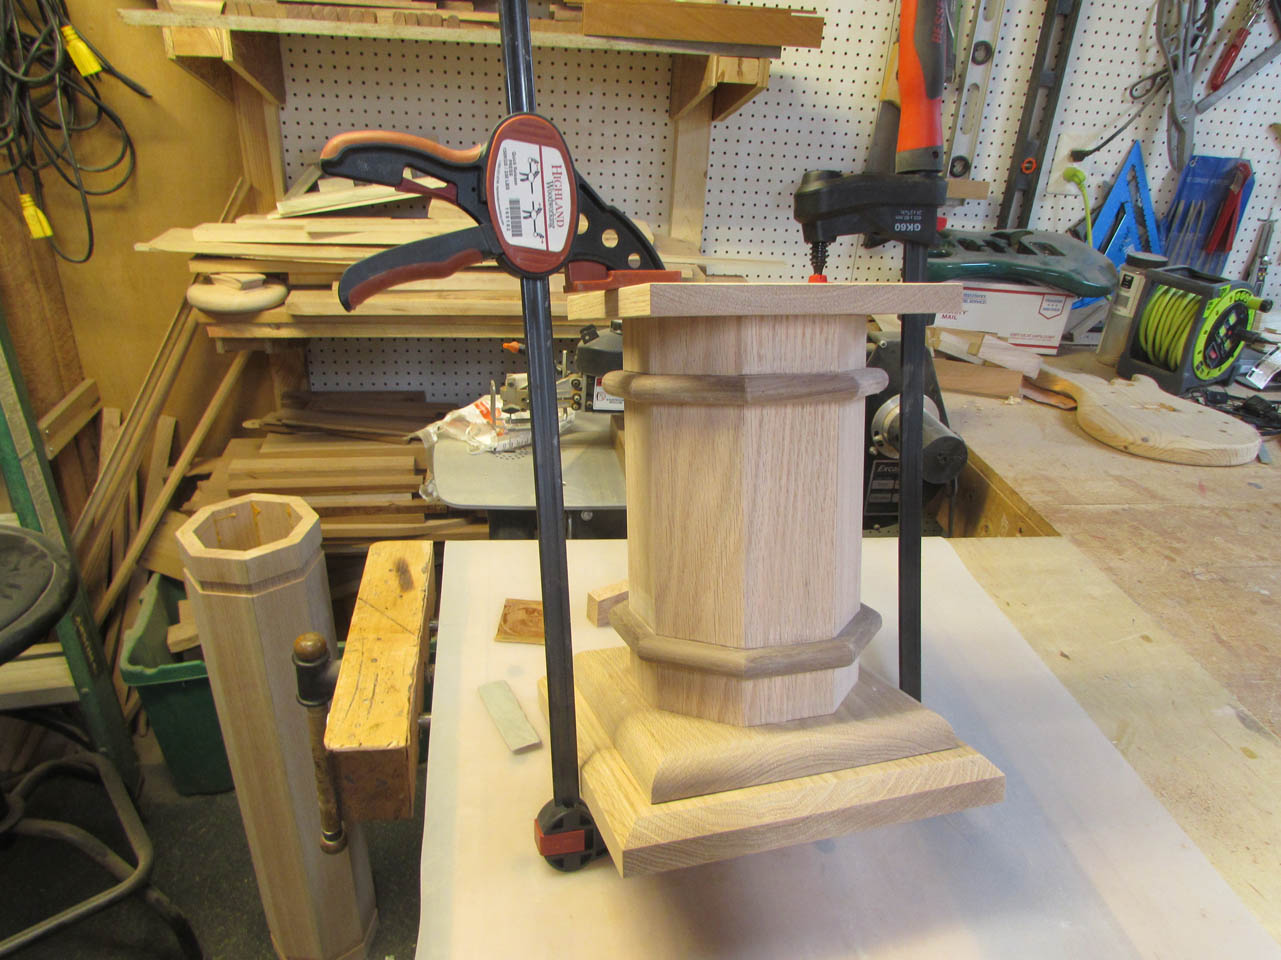
After I got my approval, I glued it up and clamped it together.
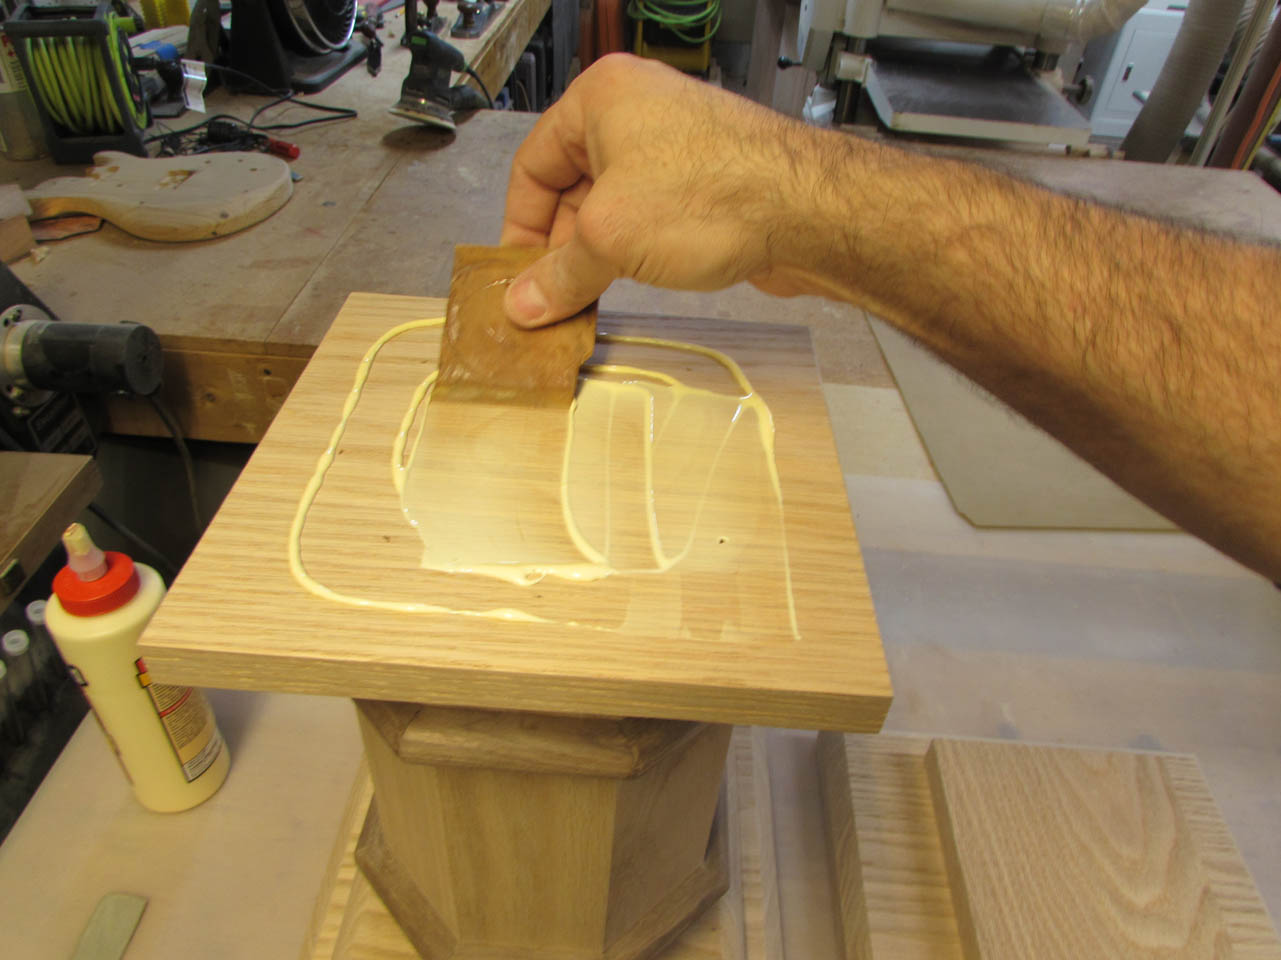
Then I applied glue to the top and attached the top plate as well.
Then I re-clamped it and let it sit over night.
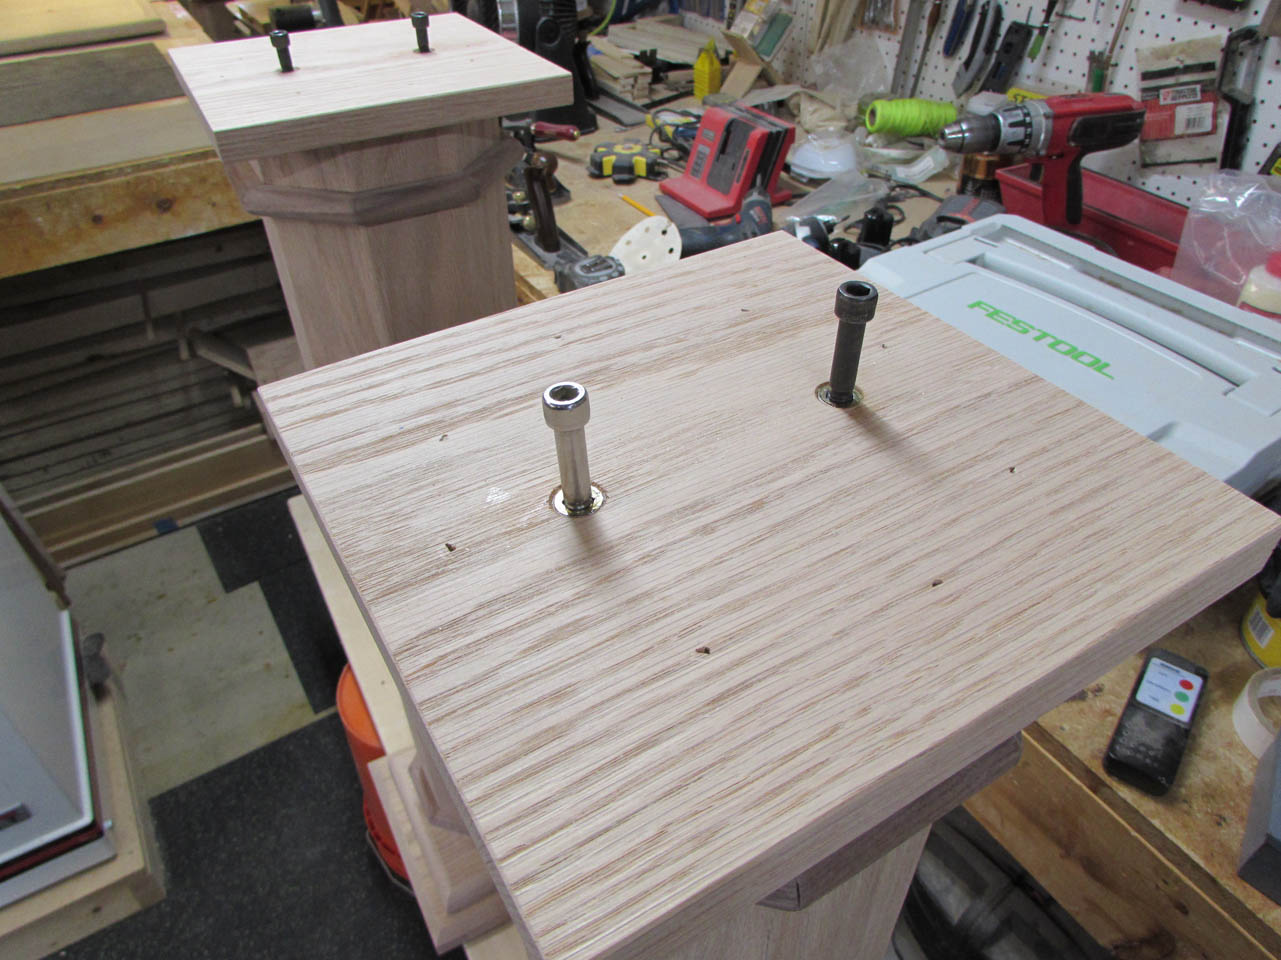
The next day, I started prepping for finish. I found a bunch of 5/16″ bolts and screwed them into the threaded inserts on the top of the columns to prevent any finish from getting into the threads. This also gives me a way to pick up the columns when they are covered in wet finish.

To keep the bolts clean as well, I wrapped them in painter’s tape.

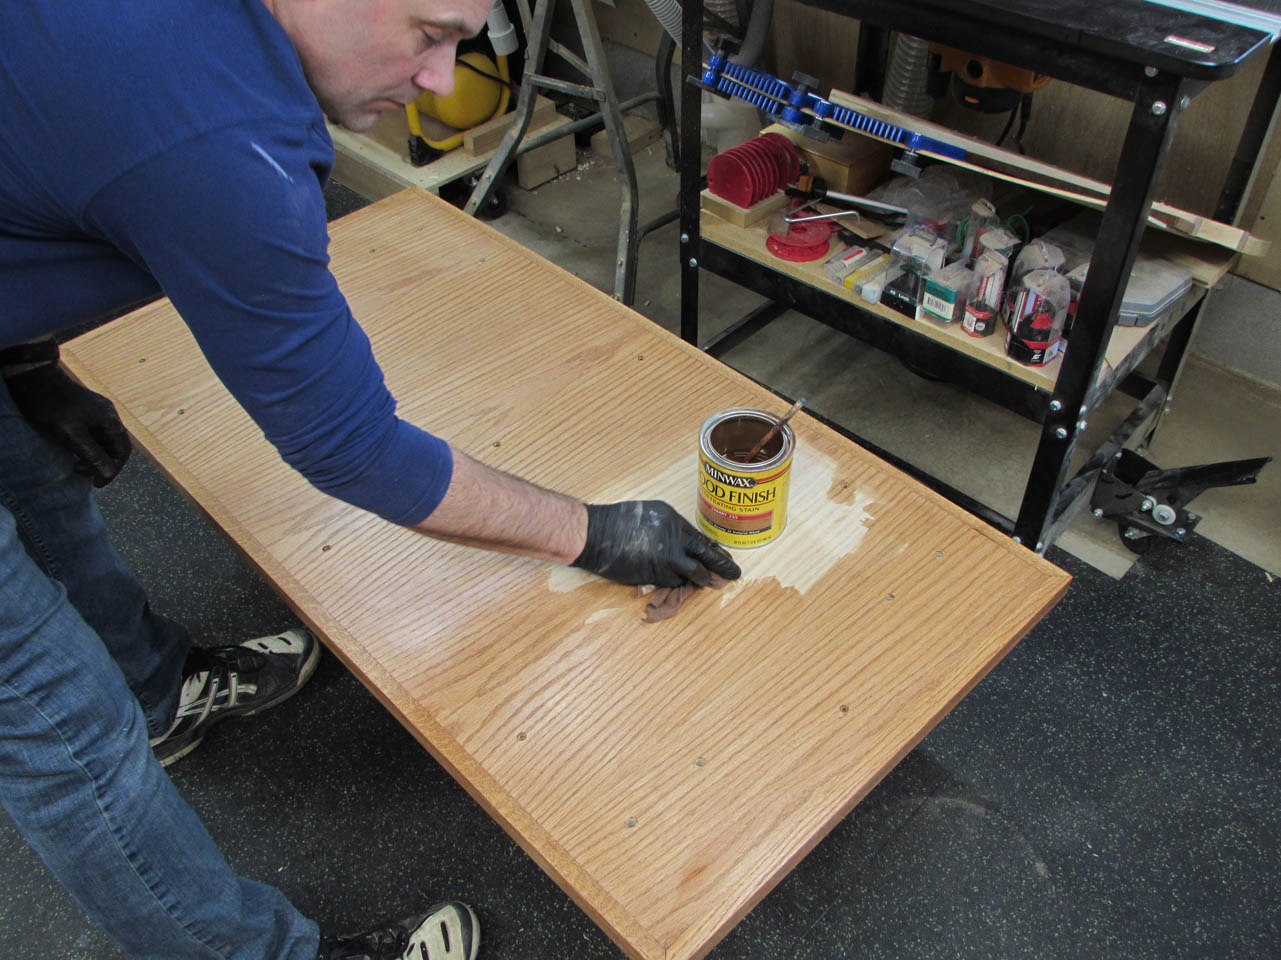
Then I started setting everything up for staining.
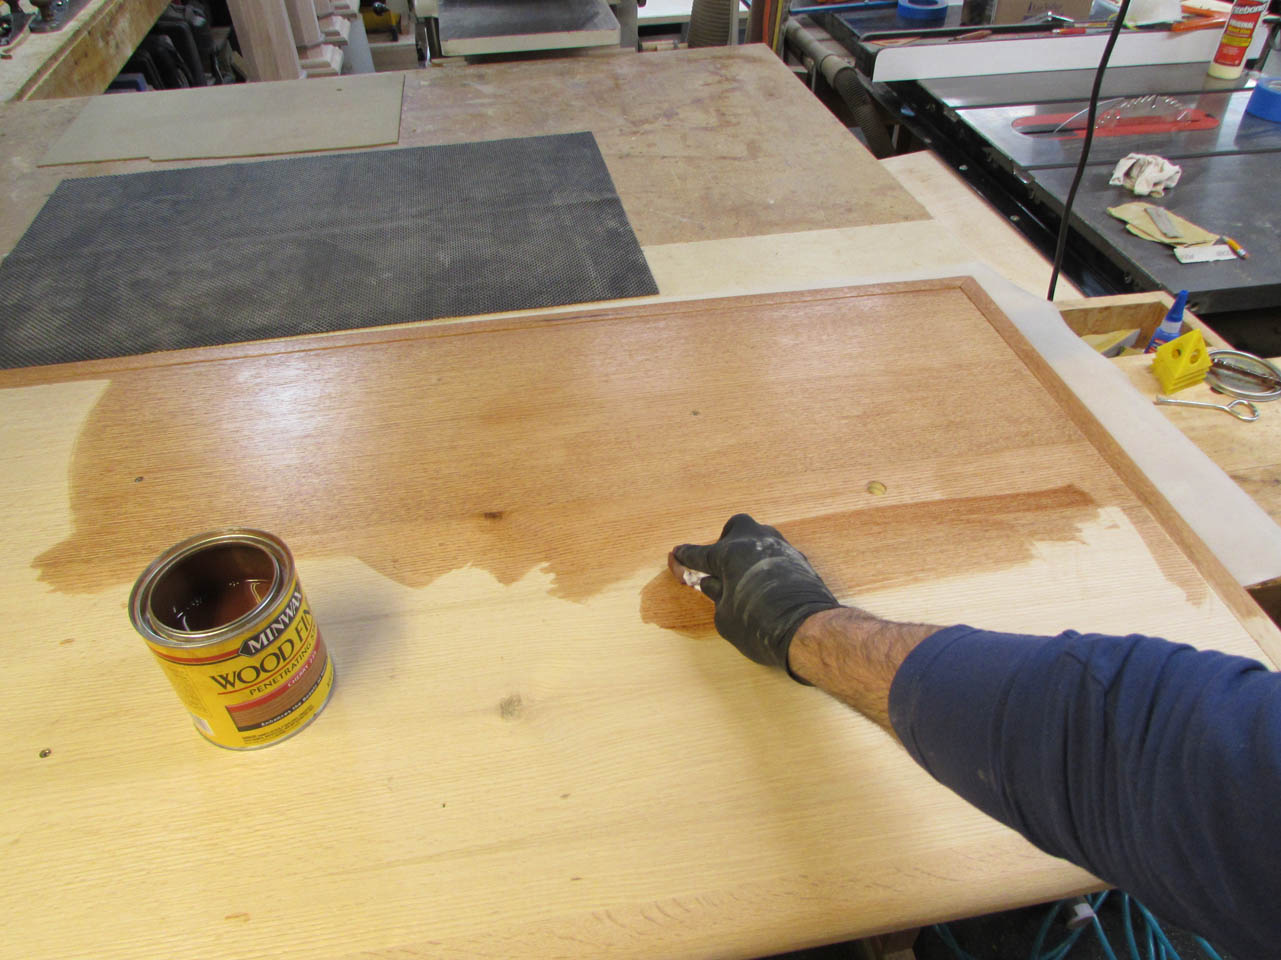
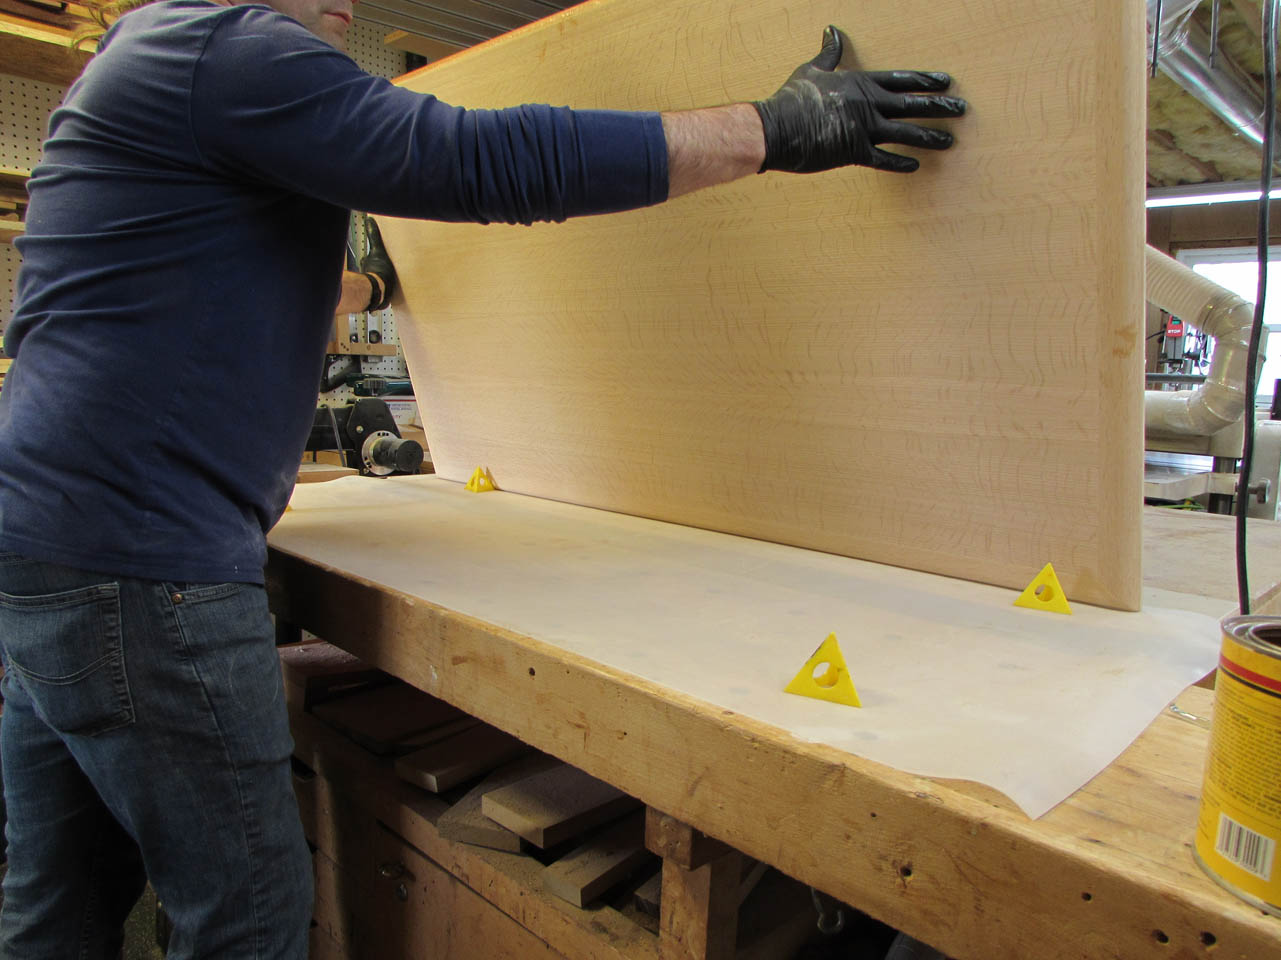
I started staining the bottom of the altar top first.
I left the sides unfinished so I had grab points. I picked the slab up on edge, flipped it over, and put it down pyramids to set it on.
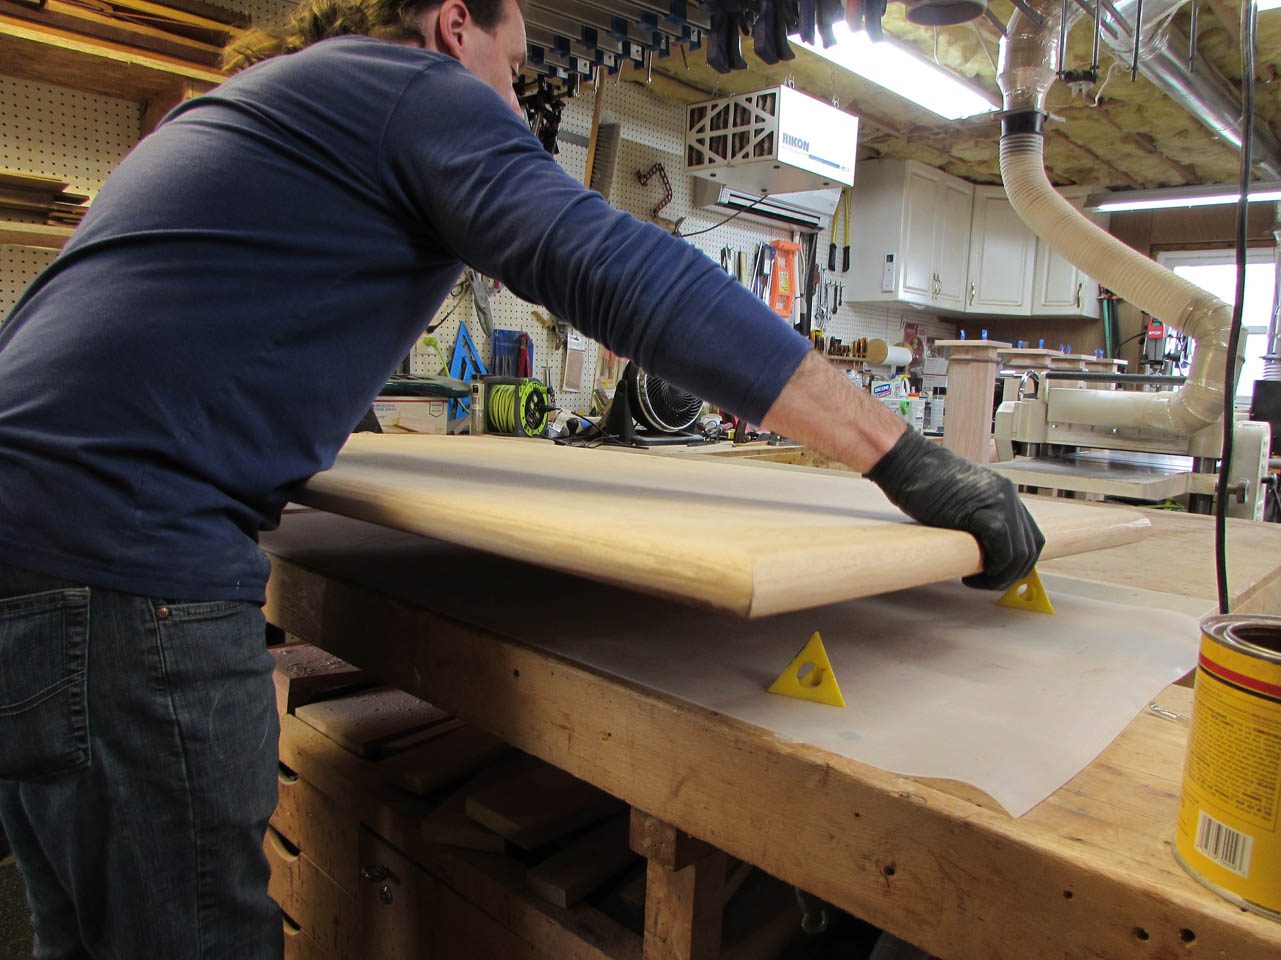
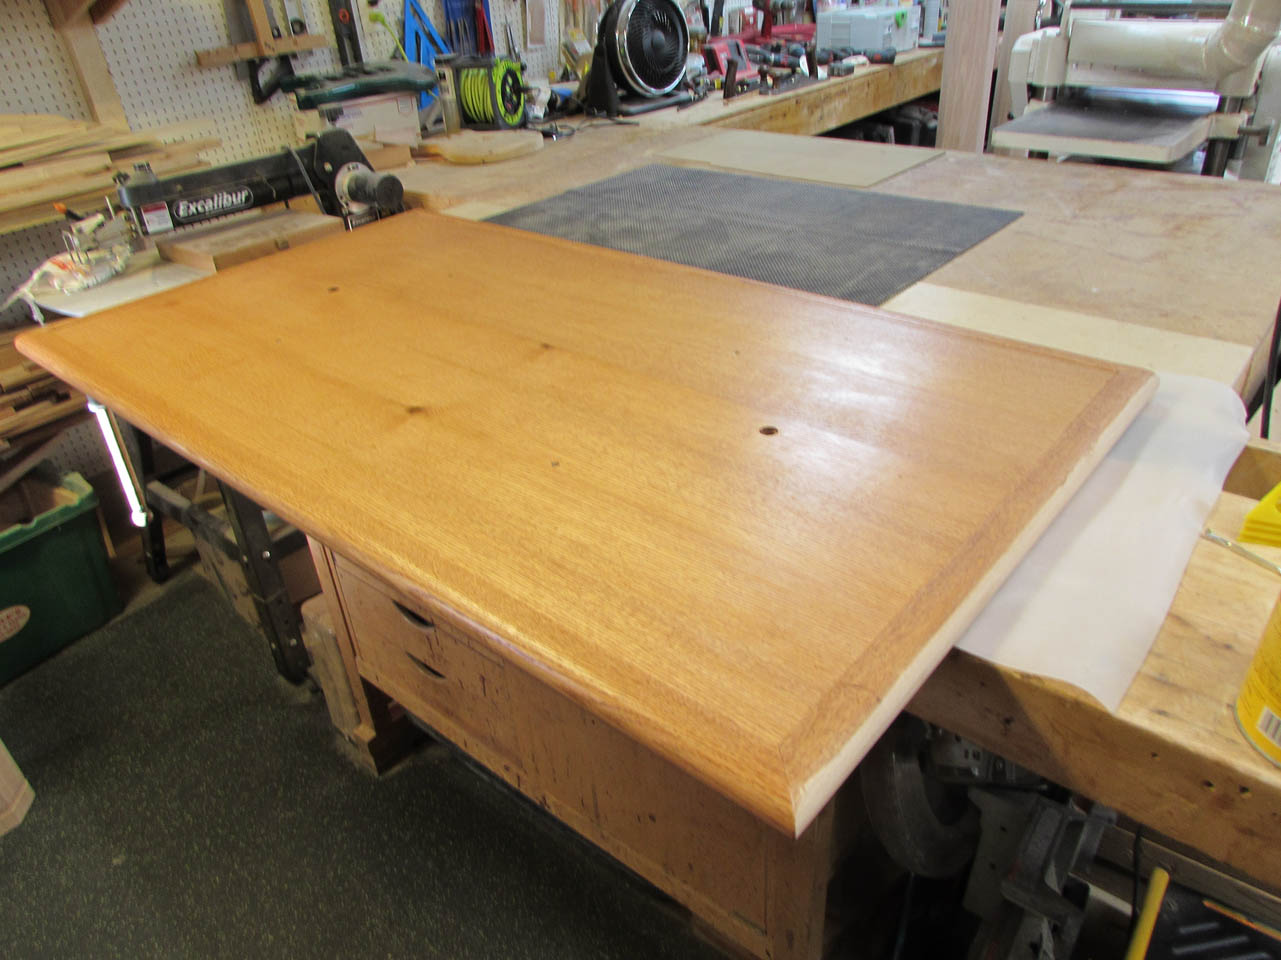
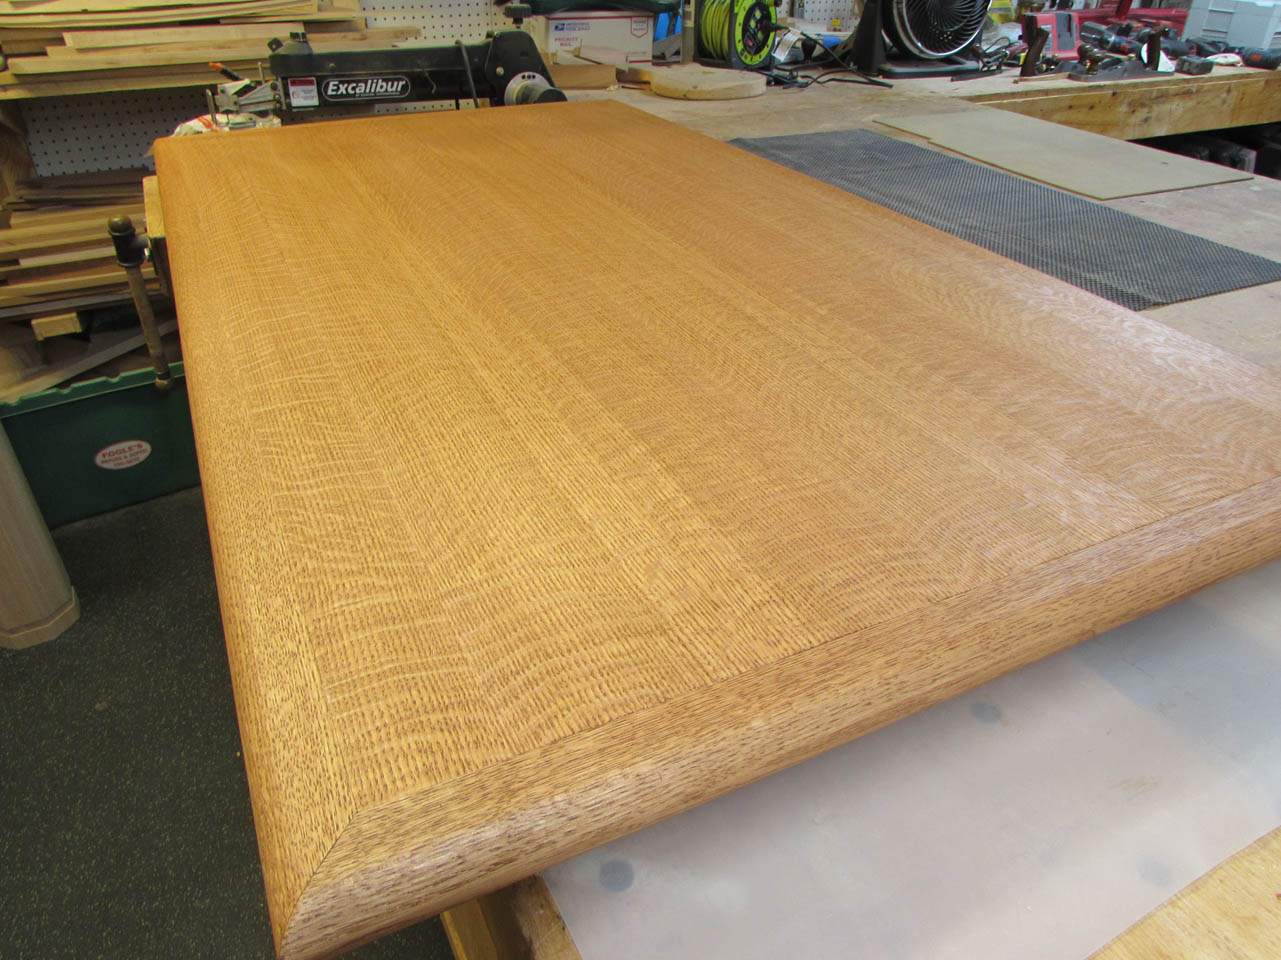
Then I stained the top side as well.

The quarter-sawn top really looks nice.
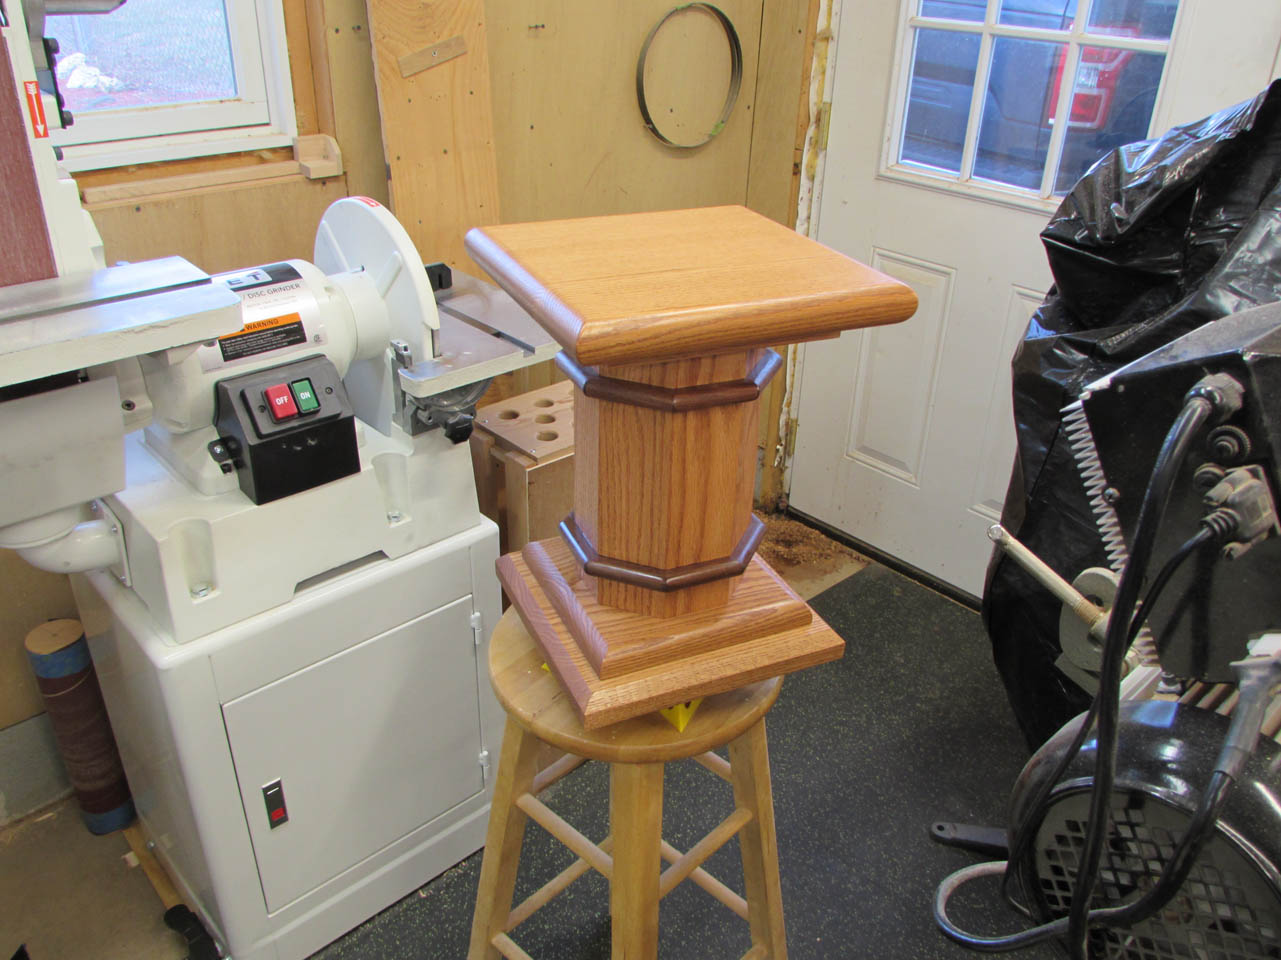
The next piece I stained was the really short column. I put it on a stool and tucked it out of the way.
Next I stained the transition plate, then all of the columns.
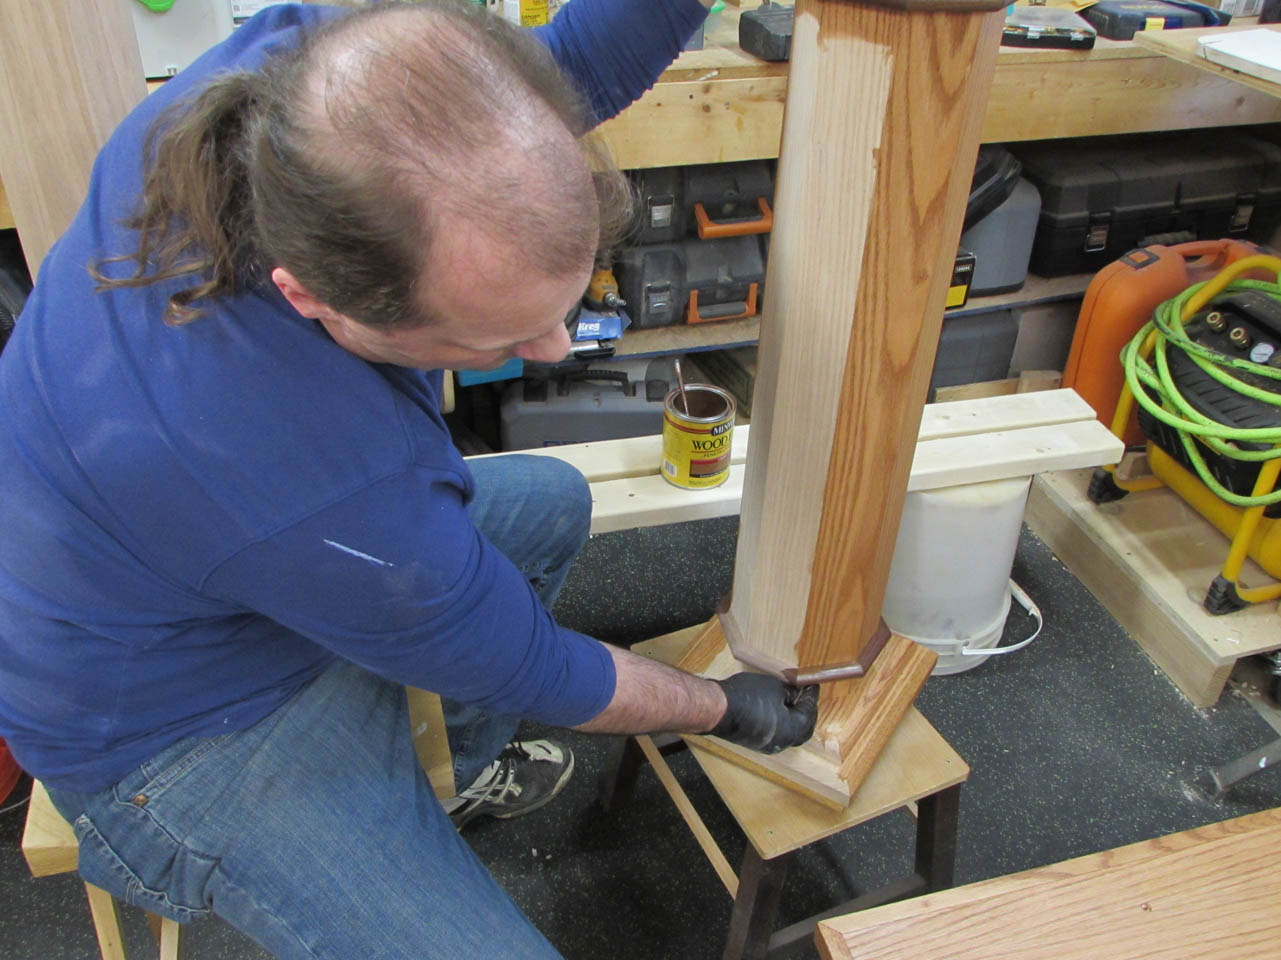
I found it easier to sit down and stain the columns while spinning them on my lazy-Susan stool, then I picked them up by the top and moved them to the shelf I made for them and finished staining the tops.
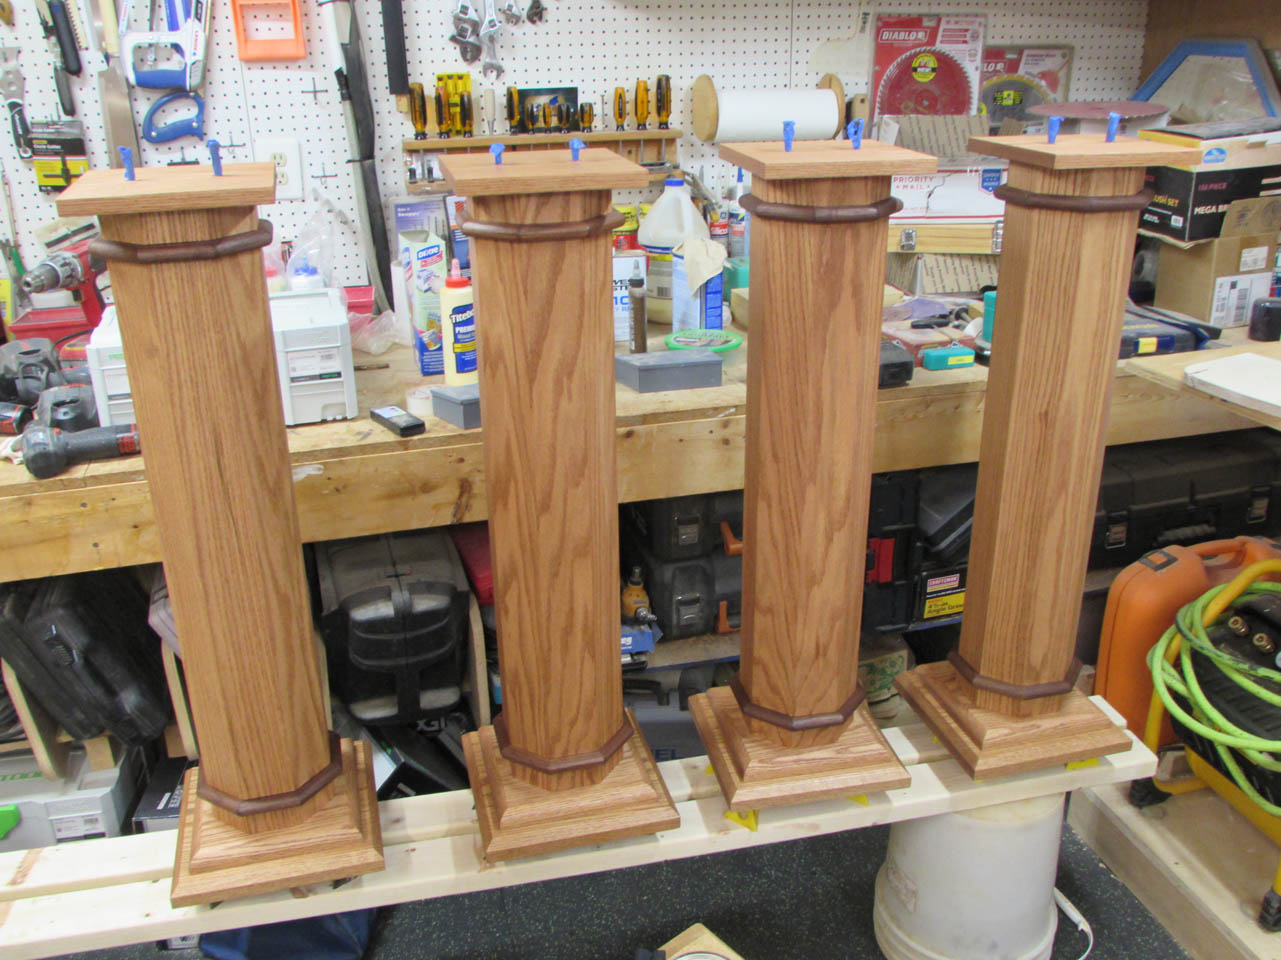
All done for today. Now I have to figure out how to spray polyurethane on all of these. There are too many pieces for my normal spray booth and I don’t have room for a bigger one…
