
Bleached walnut dining table – days 4/5
As usual, it has been a busy week. I did manage to get the last of the urethane applied during the week, but no real progress got made until the weekend. Busy, busy…

Last week the main part of the table got two coats with a few drops of amber dye. When that was dry, I removed the masking tape from the sides and was happy to see that there was no bleeding of color onto the edges. I applied two coats of General Finishes water-based polyurethane to both edges and it dried without darkening the edge color at all.


After I sanded the entire top down with 400 grit paper, I applied a third and final coat to the entire top and the edges.


While I left that to dry, I went back to working on the legs of the table. The middle section of the legs needs to be 3″ thick so I am glueing together two 1-1/2″ thick sections that were cut from the same piece of wood. I am hoping that the grain matches well enough that it will look like one piece of wood when bleached and urethaned.

It is difficult to keep the boards from sliding around as they get clamped. I left them a bit over-sized so that they could be planed back to size and cut to length after they are dry.

With those drying, I moved on to the feet. They are 4-1/2″ wide and almost 3″ tall. That is way bigger than the 8/4 wood that I purchased so I had to dig into my personal wood pile to find some pieces big enough. I had one piece that was large enough, and another that I could cut and book match. This will give me the opportunity to try two different ways to create my mortises.


For the one that I am book-matching, I used my table saw to cut half the mortise, by making repeated passes. It took a while, but the blade I have makes a nice clean cut.

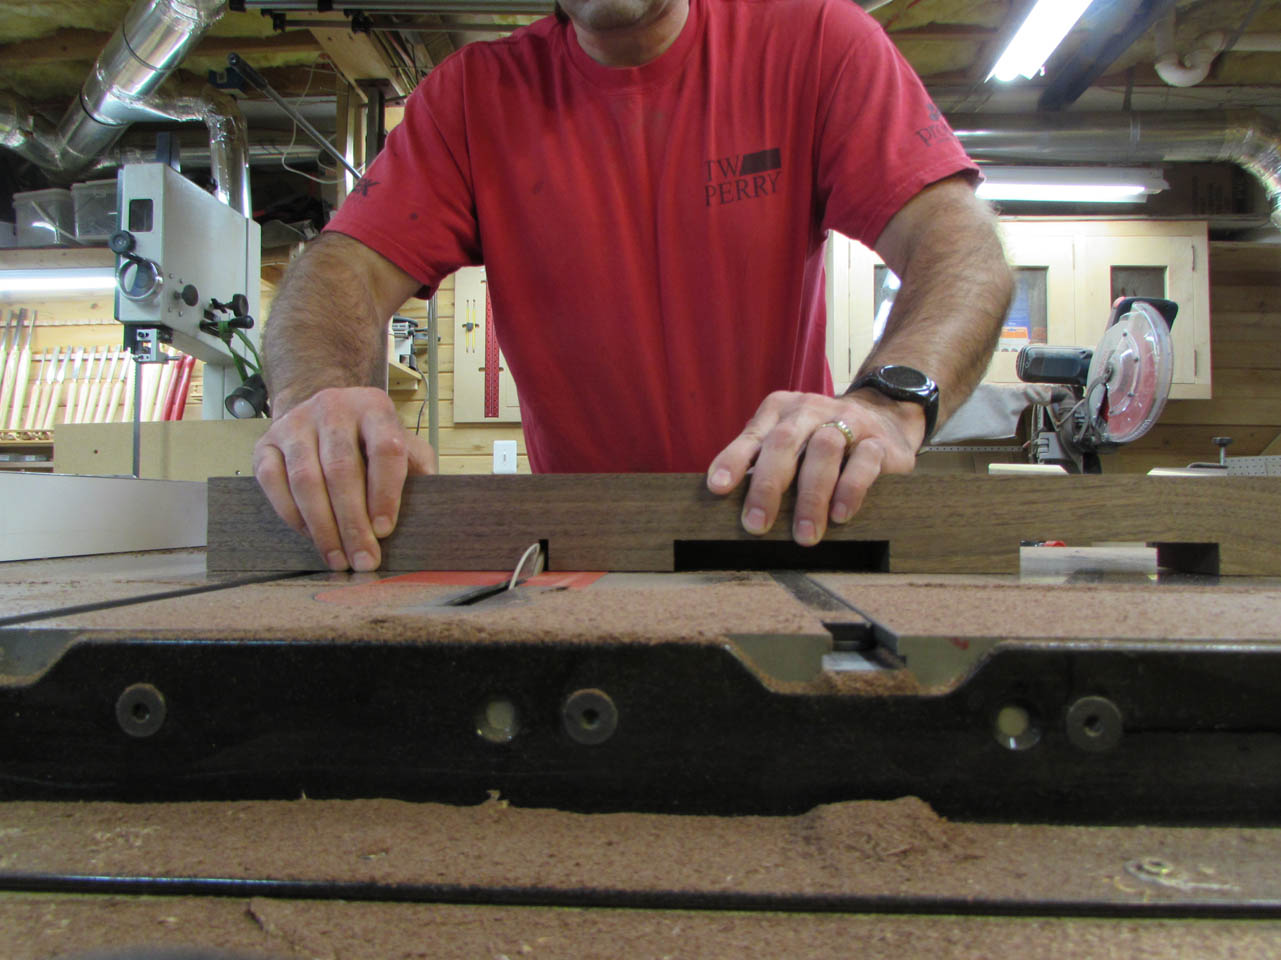

It looks pretty good so I applied some glue and clamped it up.


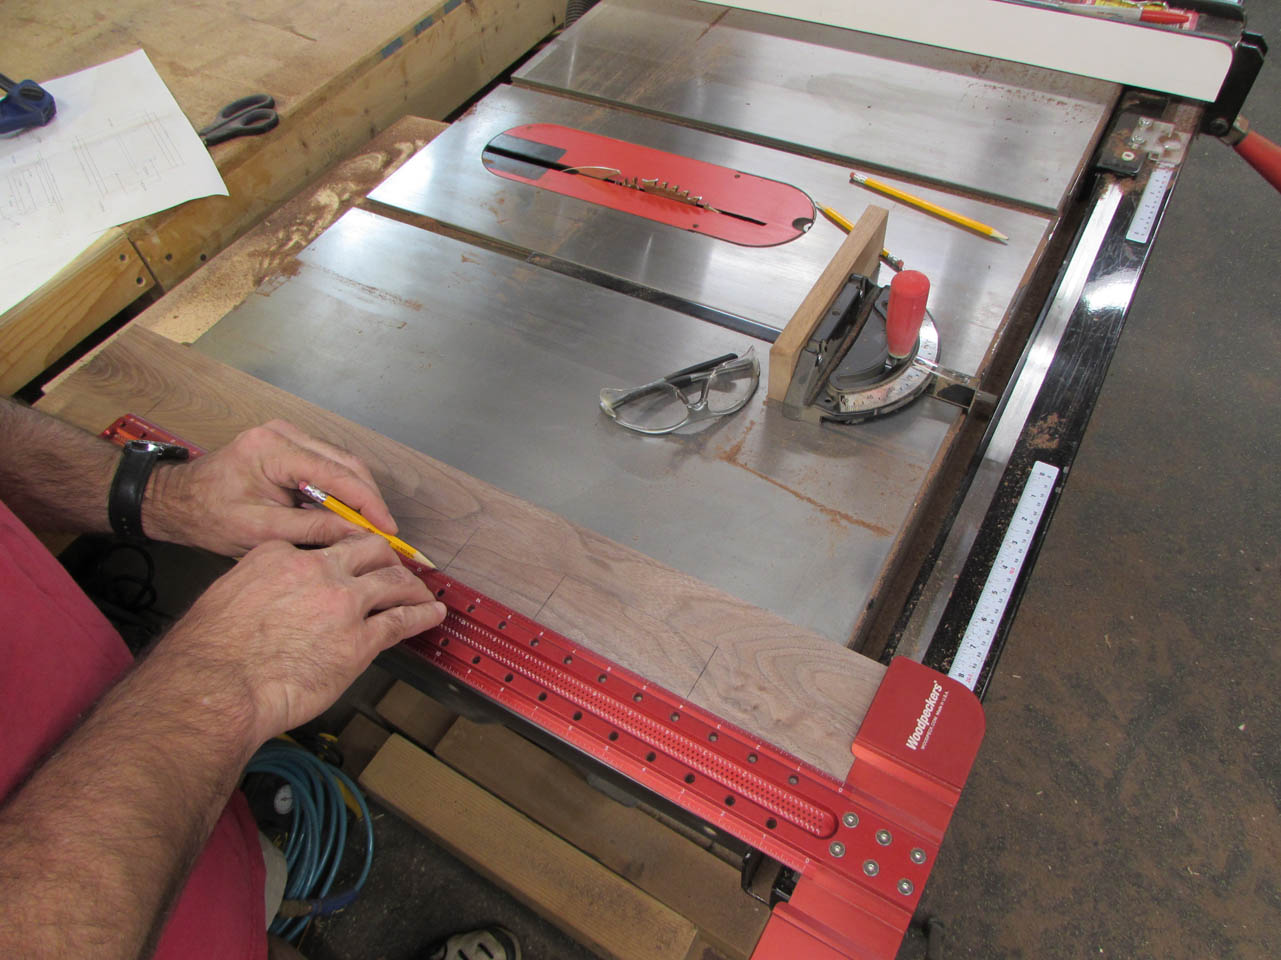
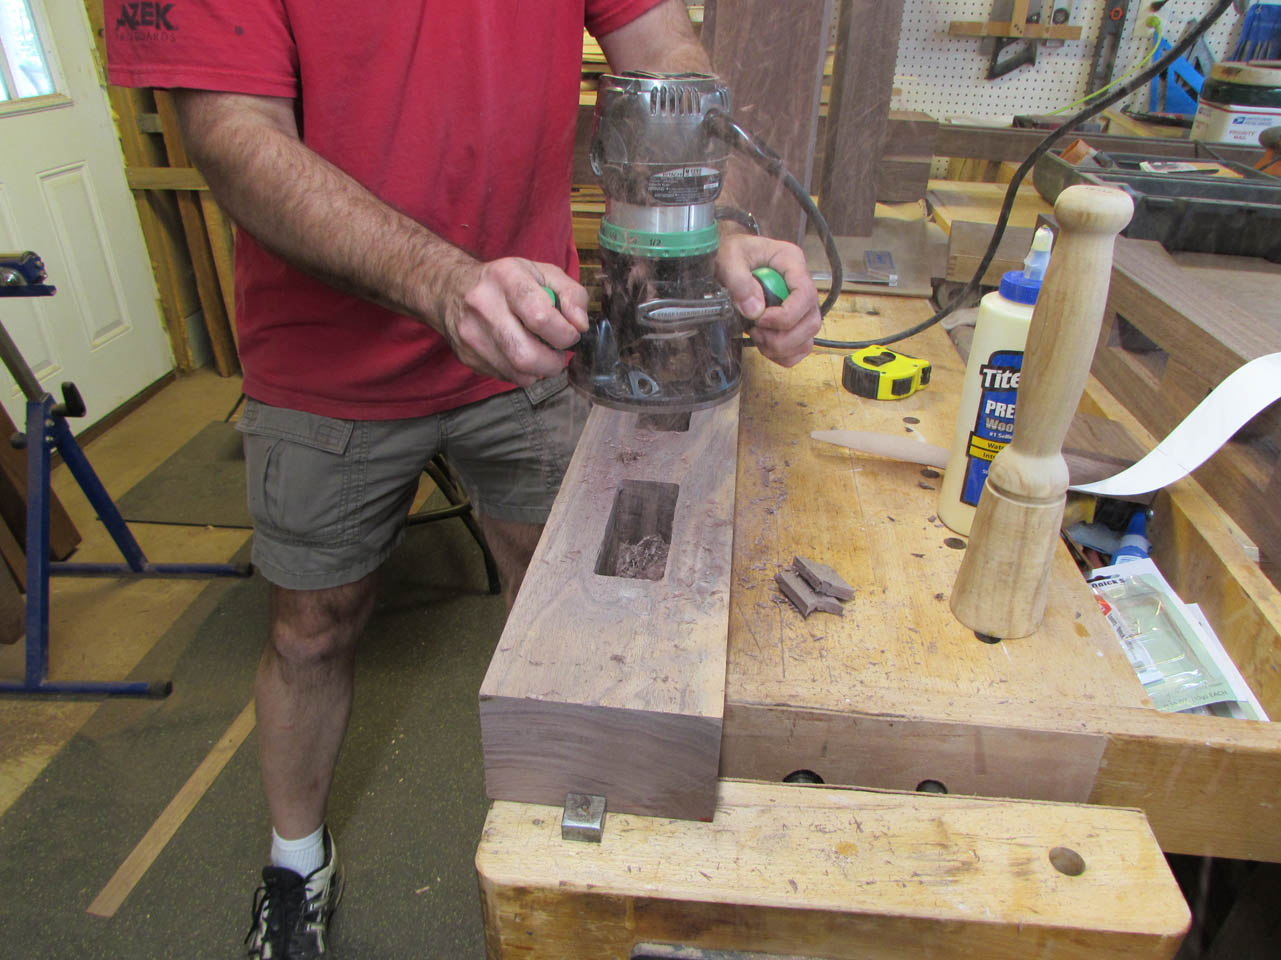
For the solid piece, I laid out each of the three mortises and then punched a center hole for my drill bit.


I used a 1-1/2″ forstner bit to hog out most of the cavity.


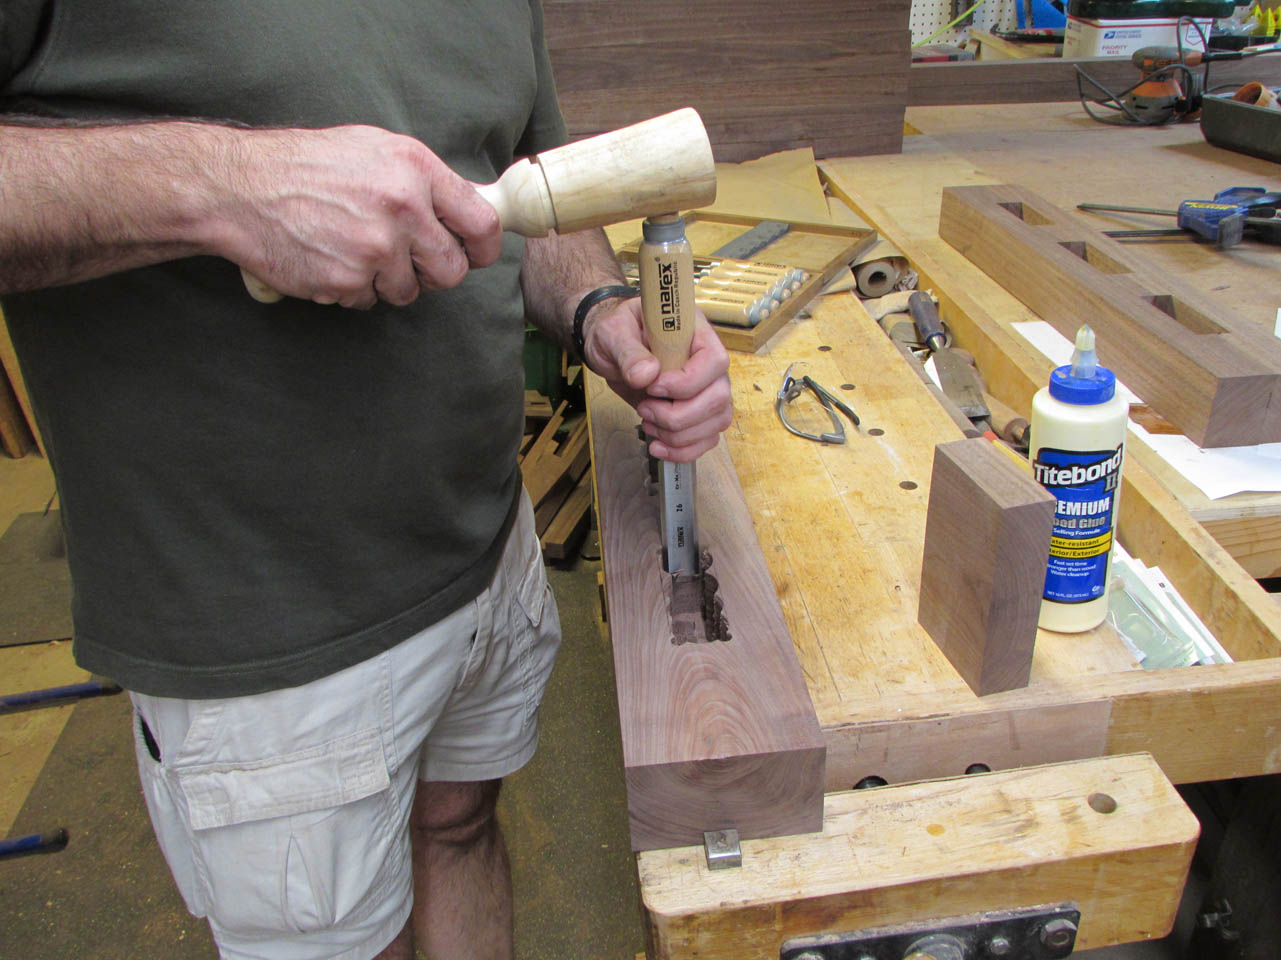
Then I sharpened up my chisels.


It took a while to chop out the corners of the mortise, but I was able to clean out the rest of the pocket eventually. As you can see from the picture, I did not drill all the way through the board. I intend to cut 1/2″ from the bottom when I cut the round ends of the feet, so I didn’t bother drilling all the way through.
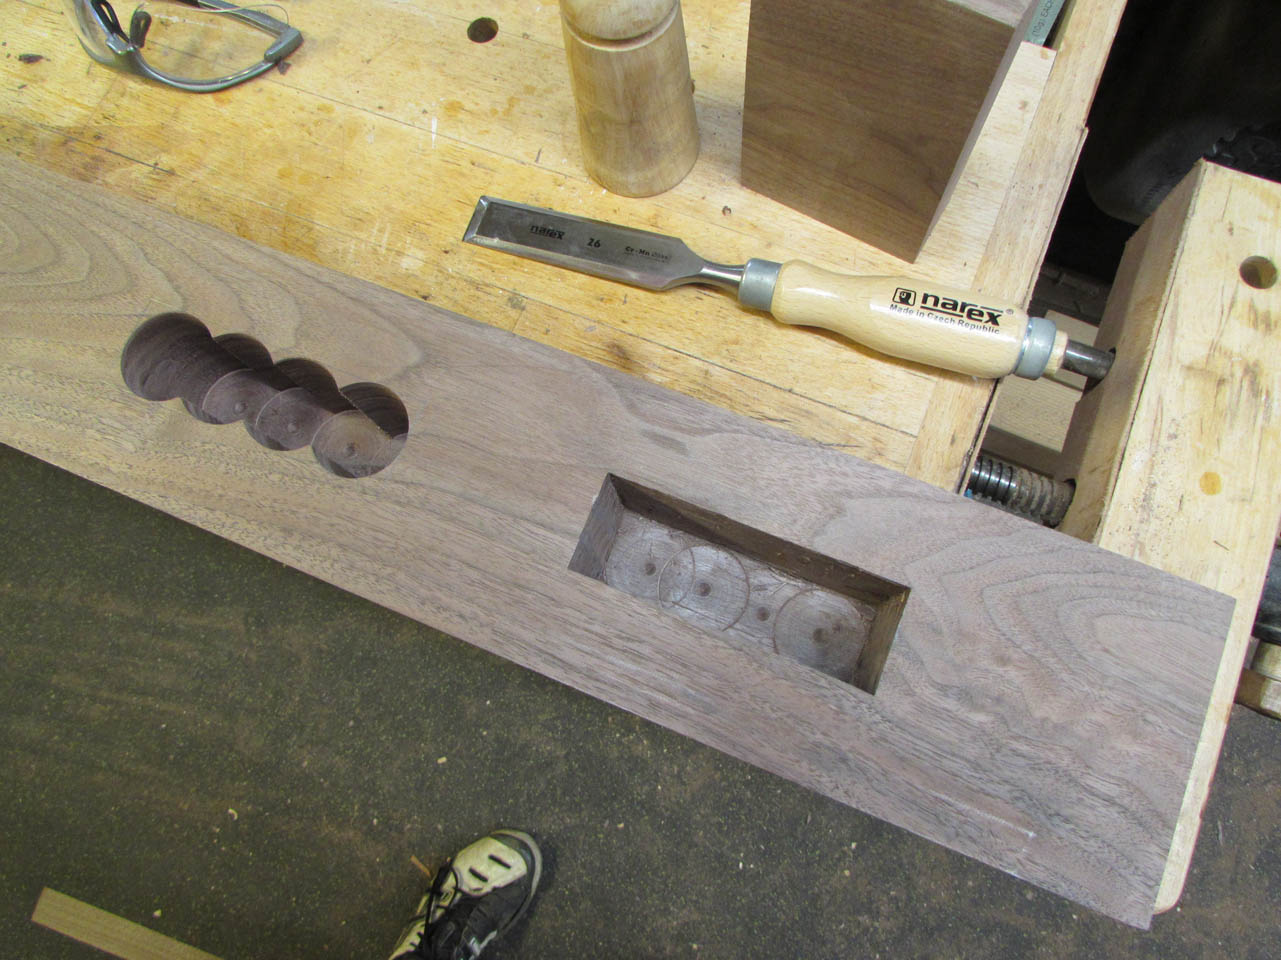

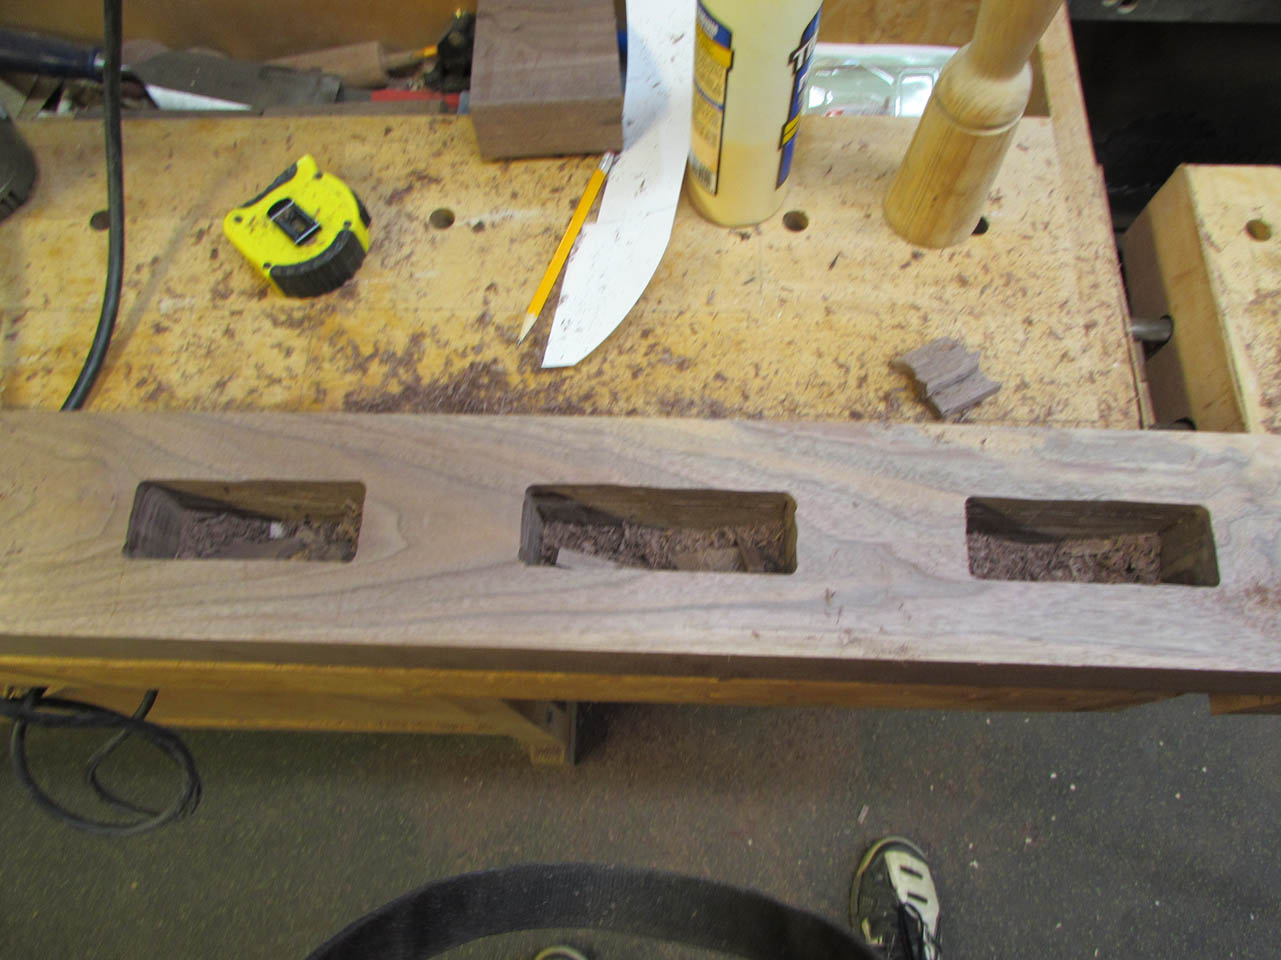
To speed things up a bit, I used a smaller bit to drill out the corners of the pockets.

This helped a lot and the other two were cut out faster than the first. I created a test block that was 1-1/2″ thick to make sure the mortise stayed tight and straight.

The other foot was dry now so I un-clamped it, and cut it down to final size on the jointer.


I printed out templates to mark the curves. While looking at the feet compared to the legs, I determined that I wanted them to be a bit chunkier.


I decided to leave the body of the foot the full thickness and just add pads below. This will be easier than cutting out that section on the bottom, and the foot will be thicker. Because of the change, I couldn’t use my template for the curve, but I could trace another curve that was close.

I used some of my scraps to make some foot pads that were about 1/8″ in, all the way around, and 5/8″ thick.

Unfortunately, I will now need to finish cutting through the bottom of the mortises…


I decided to drill a 1″ hole through the center of each and use a flush trim bit to clean out the rest of the mortise.

This worked really well, if a bit of a mess.
Then I just needed to square up the corners.


I decided to give the feet a small chamfer so the table could slide around without snagging any sharp corners.

I used my block plane held at a 45 degree angle. After about 10 passes I had a nice chamfer on the feet, I also added a chamfer to the bottom of the larger section as well.


It should look pretty good when assembled, creating a small shadow line so it is not as noticeable that the foot was attached.
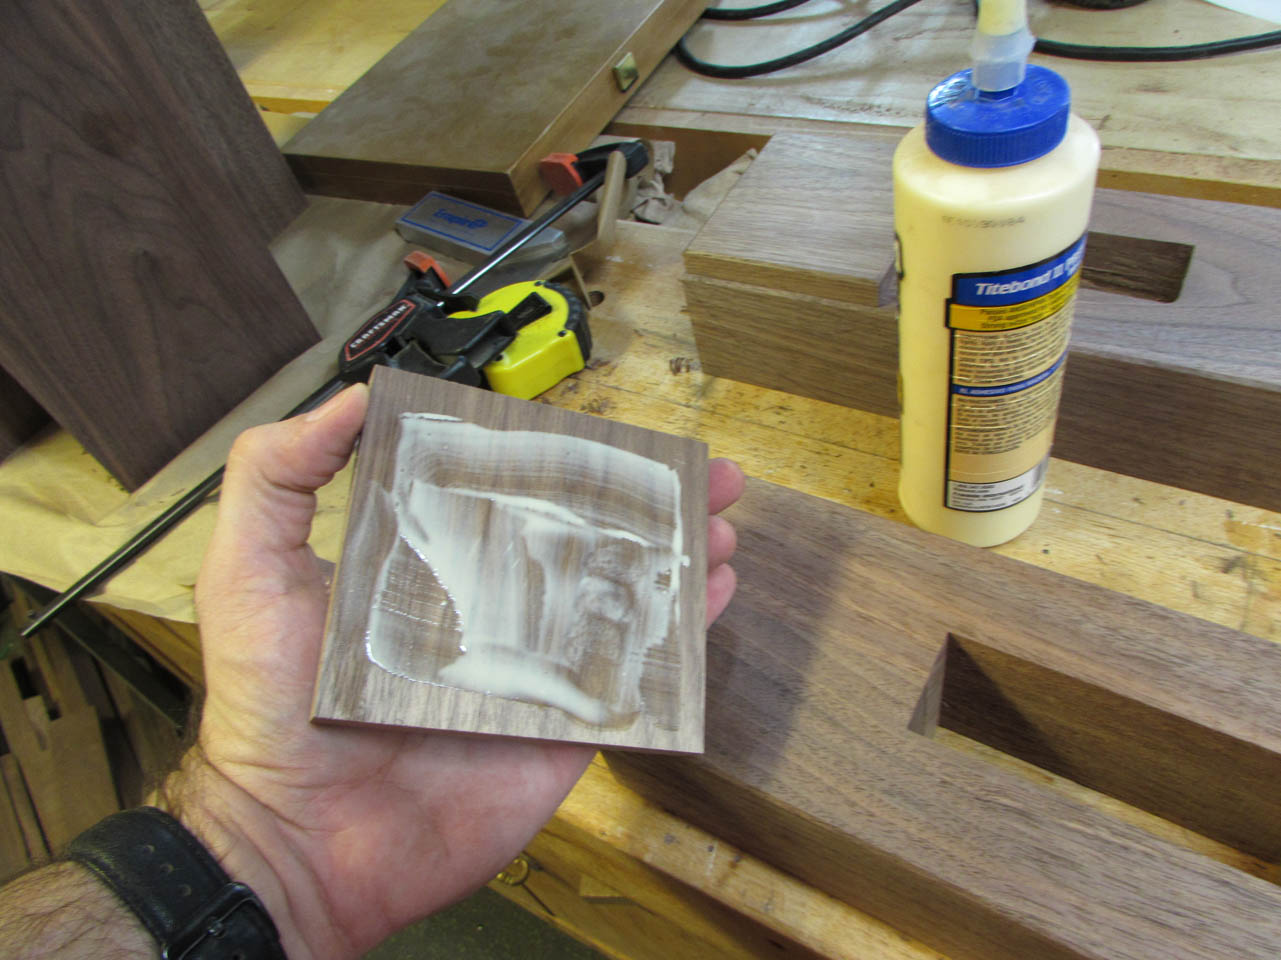
I applied a thin layer of glue to the bottom of the foot and used some 23 gauge pin nails to hold the block exactly where I wanted it.

The pins keep it from sliding when it gets clamped.

After it was dry, I pulled the clamps. I think it looks pretty good. I have not cut the curves on the feet yet because I needed the opposite side of the foot to clamp to. I will cut the curves later when I cut them on the top as well.


Speaking of the top pieces, it was time to start laying them out as well.


I need some large mortises in these, but I am starting with some small counter-bored slots on each end first. These have to be cut before the curves get cut in . It would be a lot harder to drill into a curved surface later.

I started by drilling and chopping out the 5/8″ counter-bore.

This leaves center marks that will be used to start the smaller thru-holes.


I matched the centers and drilled two holes through, them flipped the block over and drilled one through the center of the two.

Then a quick slice or two of the chisel gives me the slot I need.


I laid out center marks for the holes and lined the block up on them to verify that they fell centered on the slots. This is where the legs will attach to the top. The legs will be bolted to the top and the slots will allow for movement as the wood shrinks and expands.

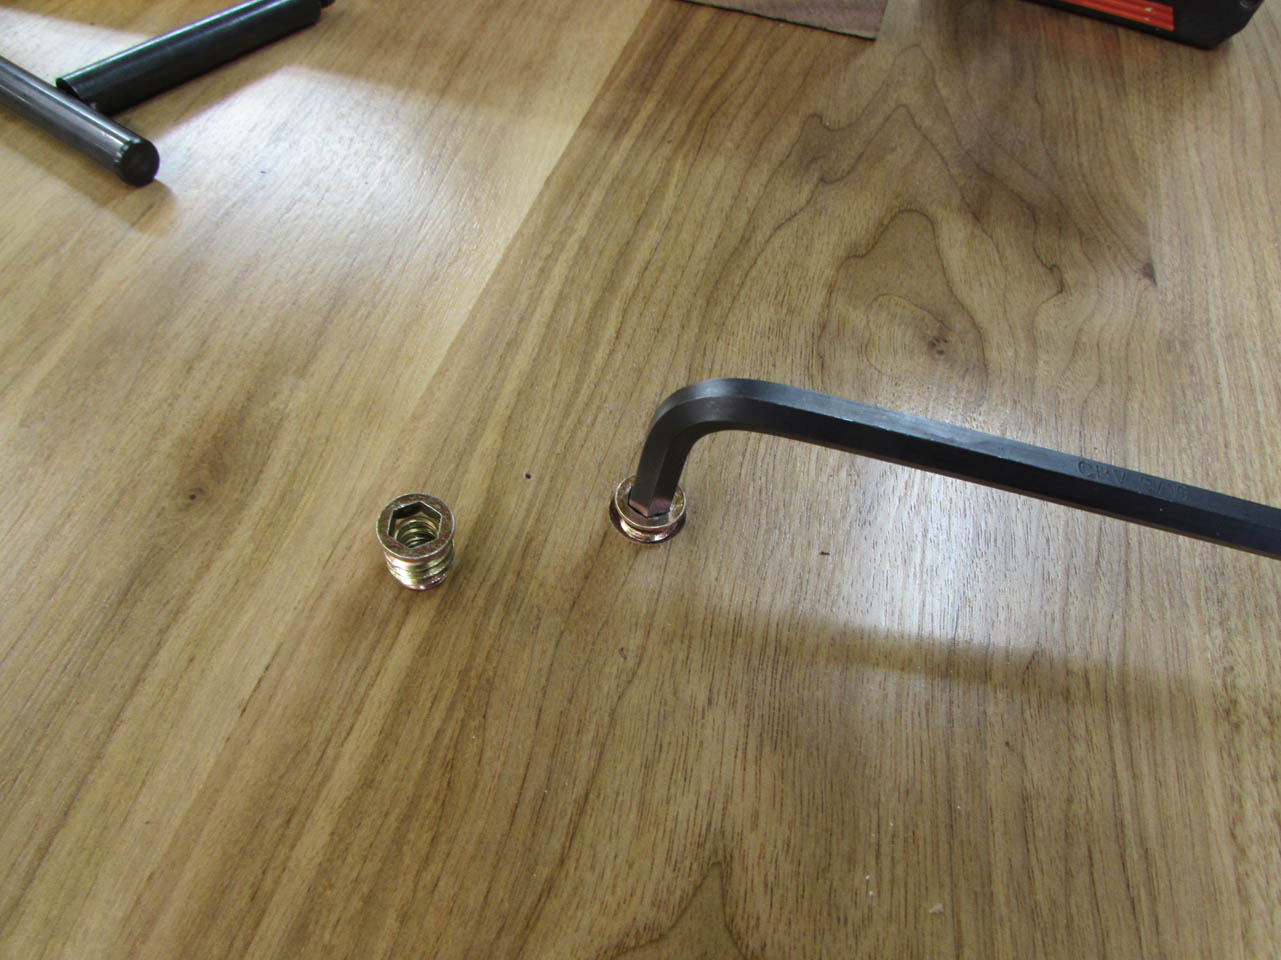
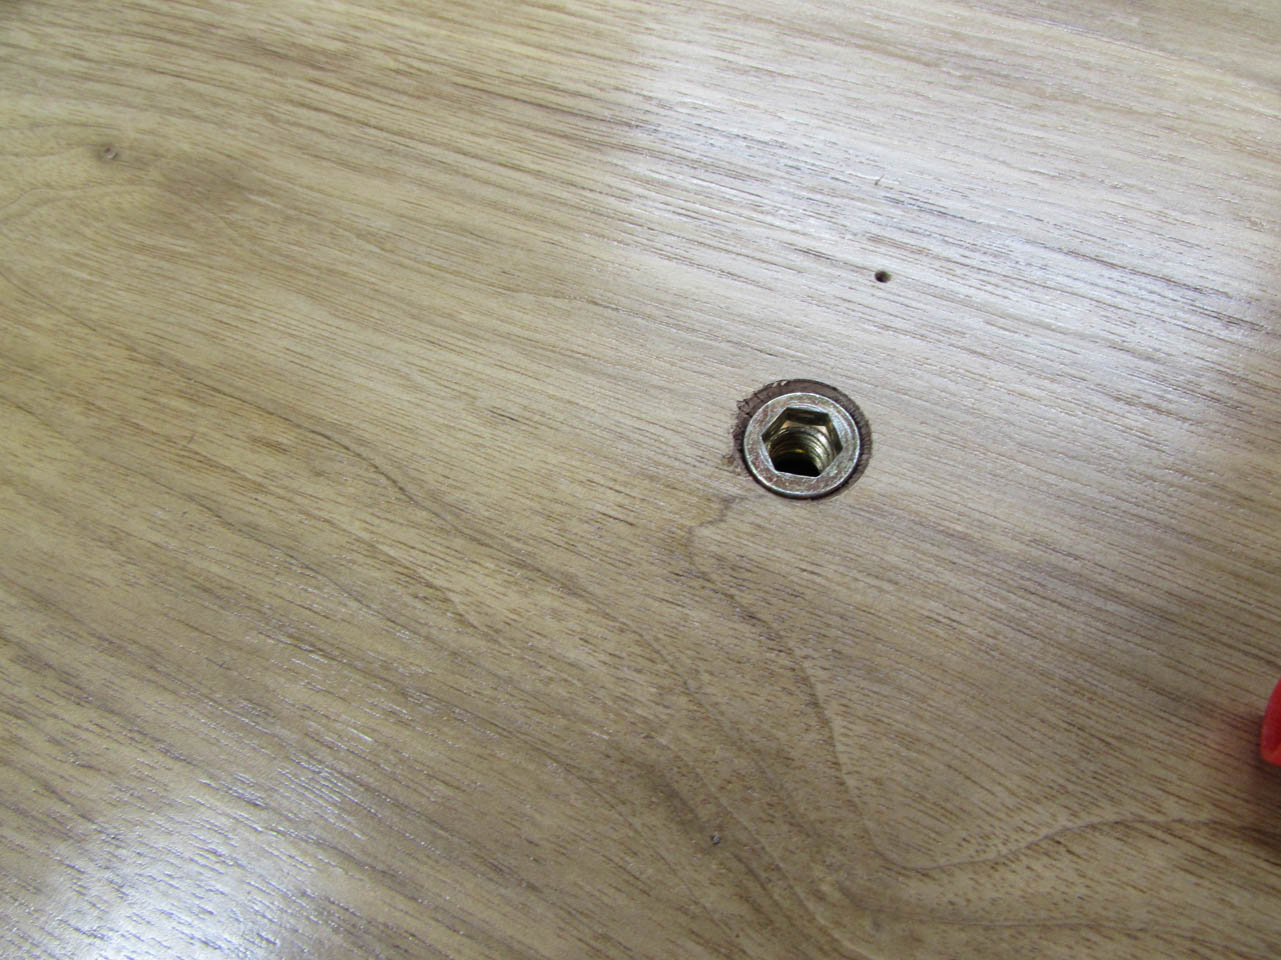
To have something to bolt to, I will be installing threaded inserts. I pre-drilled all four holes to 1-1/4″ deep.


Then to account for the flange on the insert, I used a counter-sink bit to create a chamfer.
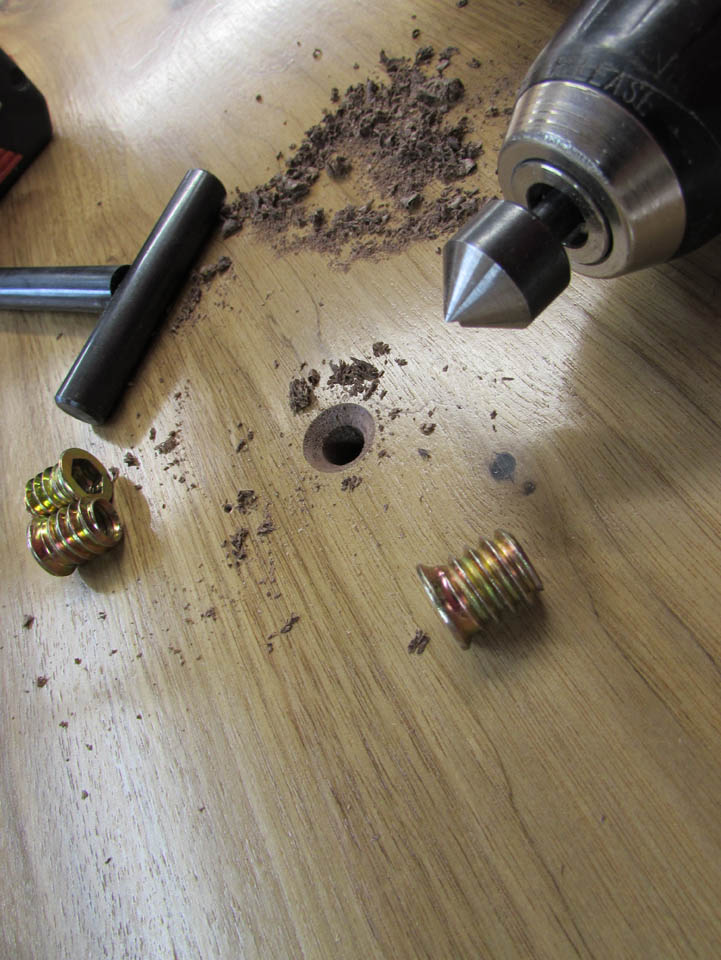

I use a Tee-handle to install the inserts and hex wrench to remove them again.
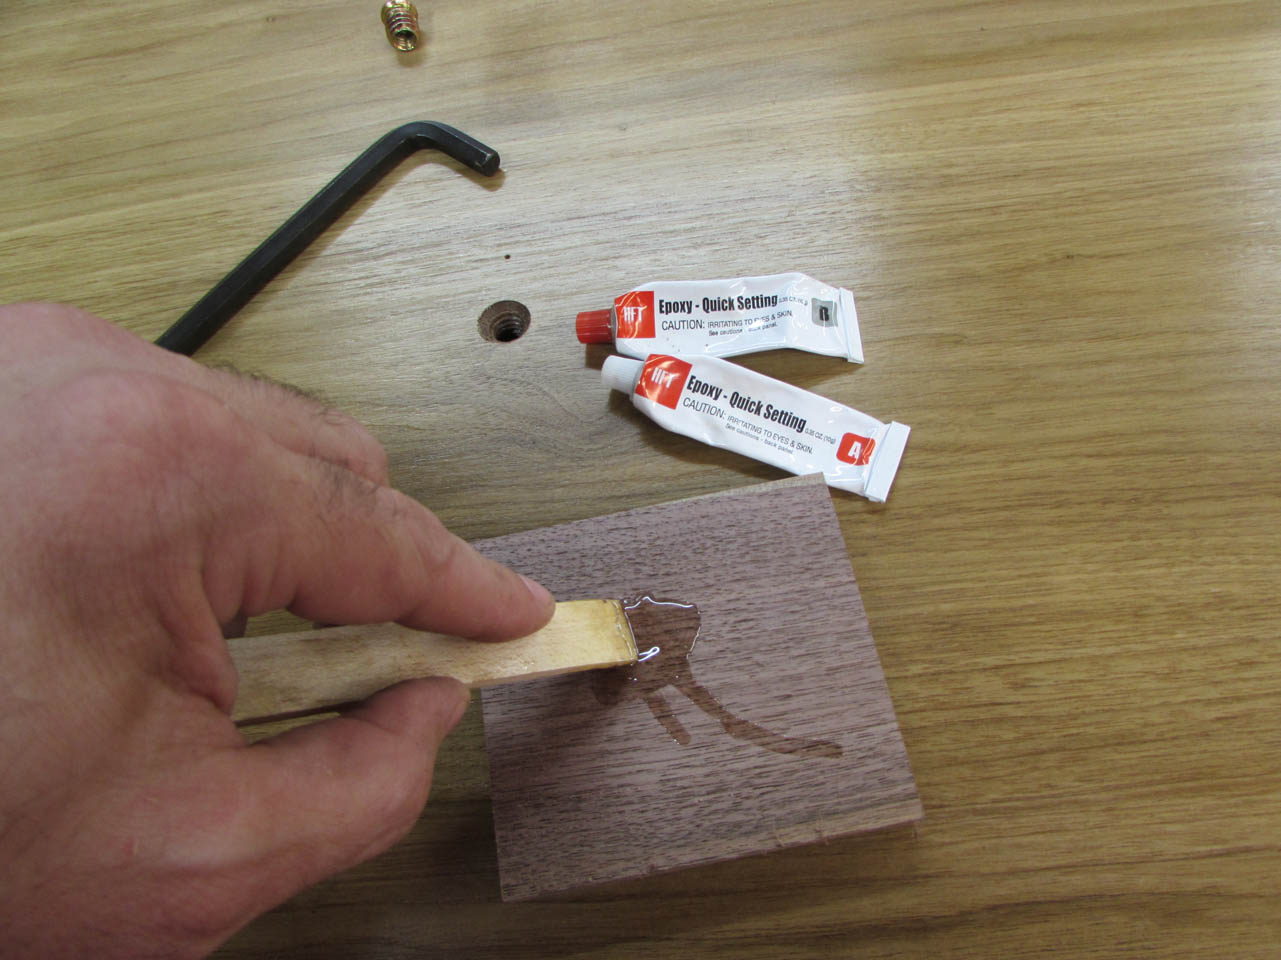
I mixed up a small amount of two-part epoxy to line the threads of the hole, then re-installed the insert.

The epoxy will help prevent the insert from coming back out, if the bolt starts to bind on the threads.
The table top is done so now I can finally move it out of my shop and get back some room. I just need to find somebody to help me lift the big thing…

The last thing I did this weekend was lay out the mortises on the leg tops. I matched a foot to a top and marked them with tape.

I then traced the edge of the mortise to insure alignment.

Using the straight edge and an awl, I laid out the drill centers. When I get time this week, I will drill and chop them out as well.
