
Bleached walnut dining table – day 2/3
I had hoped to get back to this table over the last week, but some times there just isn’t enough time. I did get a chance to work up the plans: trestle table plans.pdf. With them finished, I should be able to cut and mill the rest of the wood for the legs.
I did have time to work this past weekend, and the epoxy was definitely cured enough to sand flat.


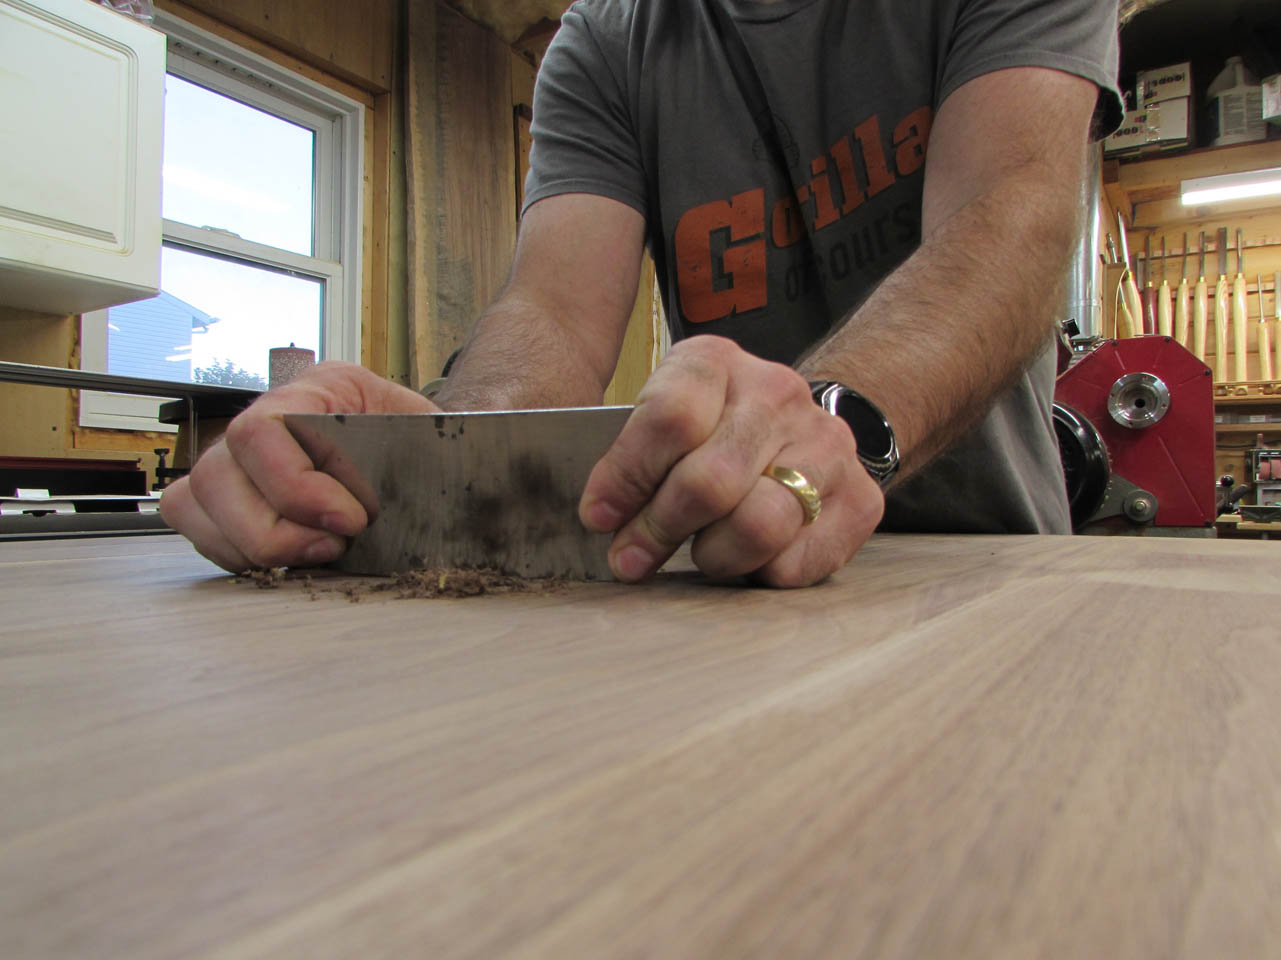
I used my card scraper down the glue joints to make them flush.
Then I used 80 grit paper to sand the entire surface.

Once the back side of the table top was completely flattened, I set up my track saw and cut the opposite end to length.


To lay out the corner radius, I used a can of paste wax as a pattern.

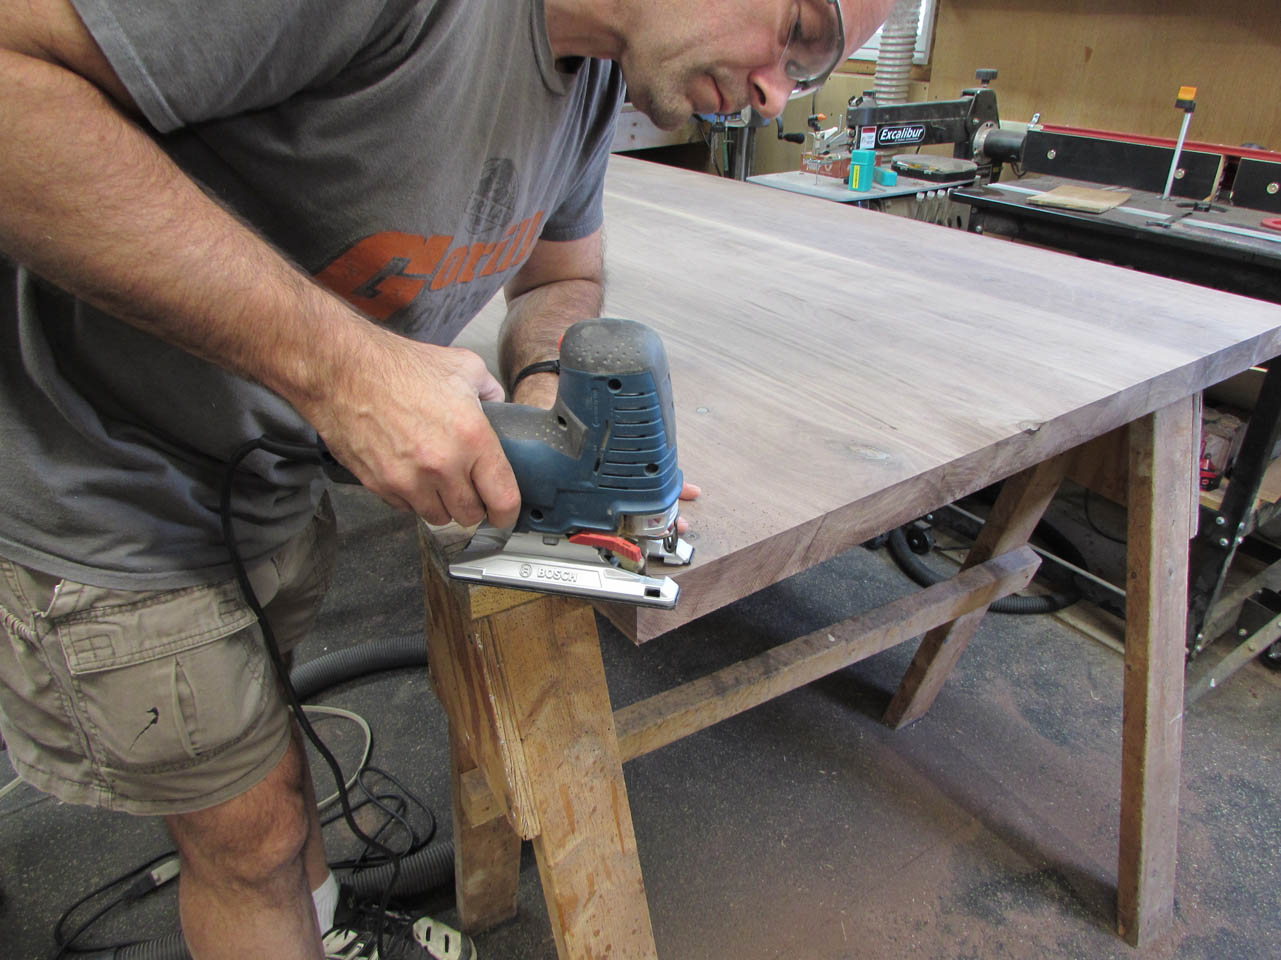
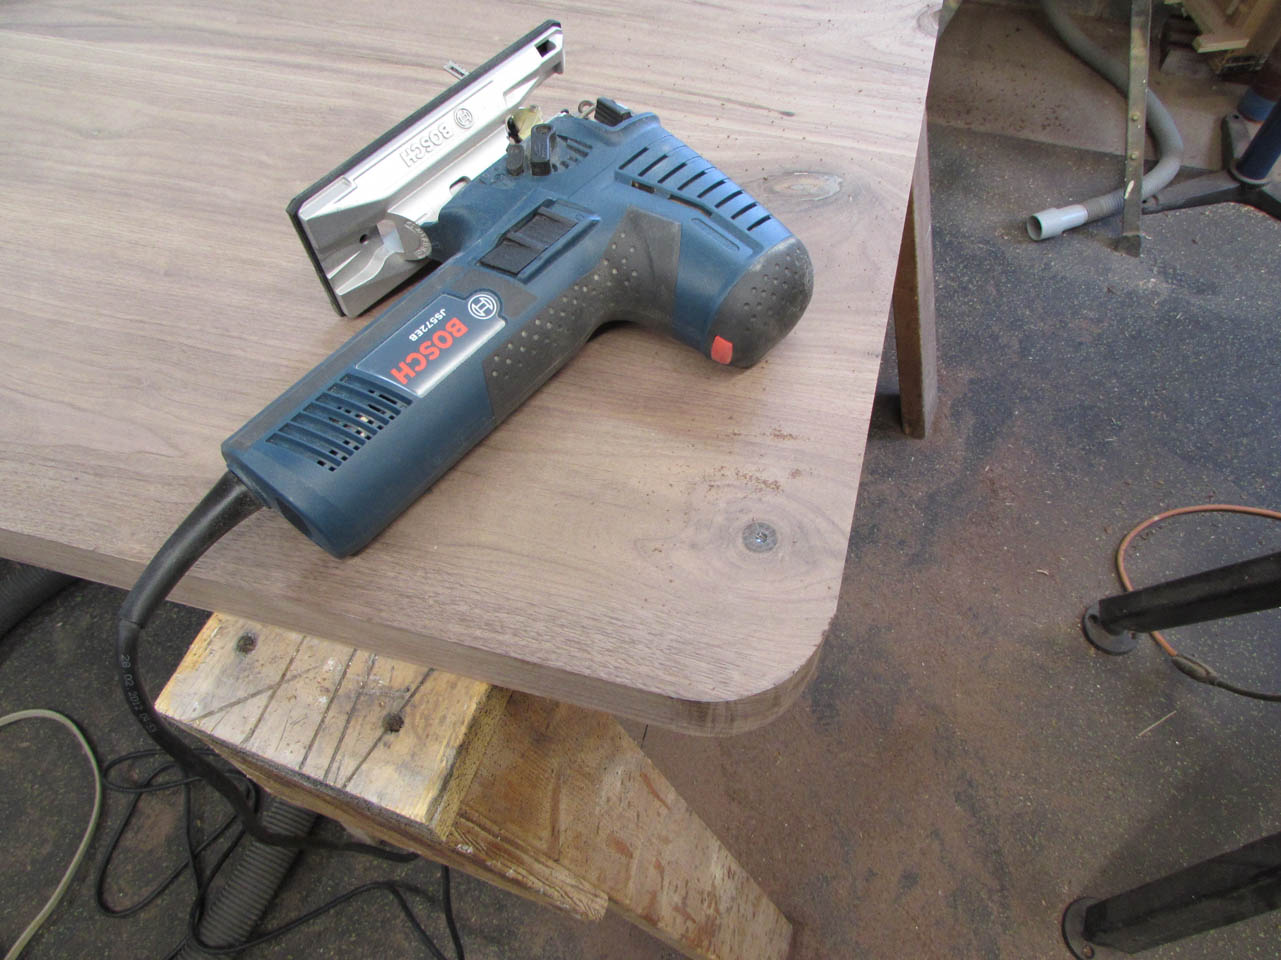
Then I used my jig saw to rough cut the radius.
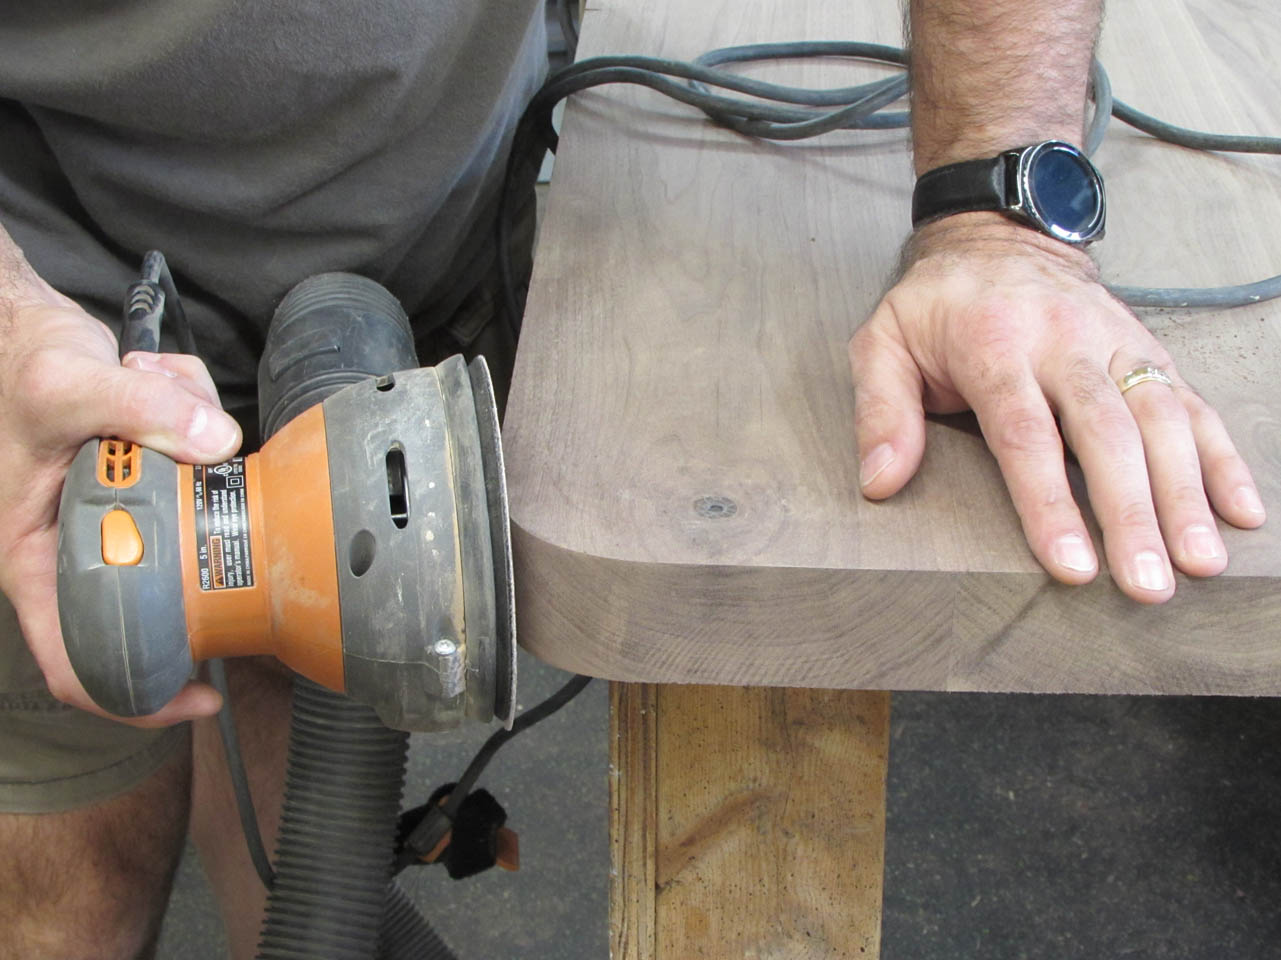
After a little sanding I was ready to round over the top and bottom edges.

Though I quickly realized that my 3/4″ round-over bit did not fit the base of any of my routers.
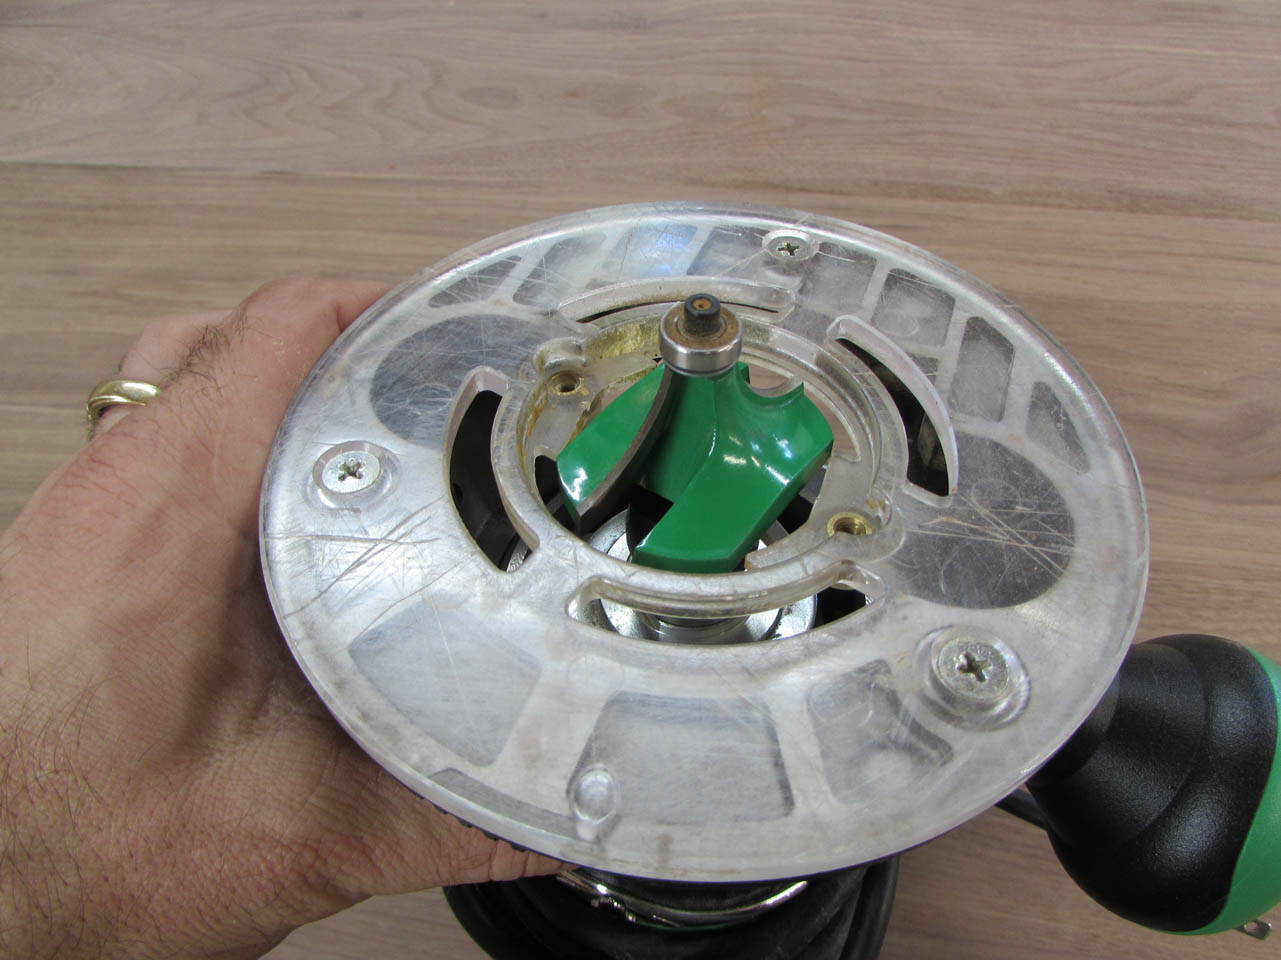
In fact, the only bases that were large enough were the drop-in plates for my router table. I grabbed the smaller of the two routers that I have set up for the router table and set up the bit.

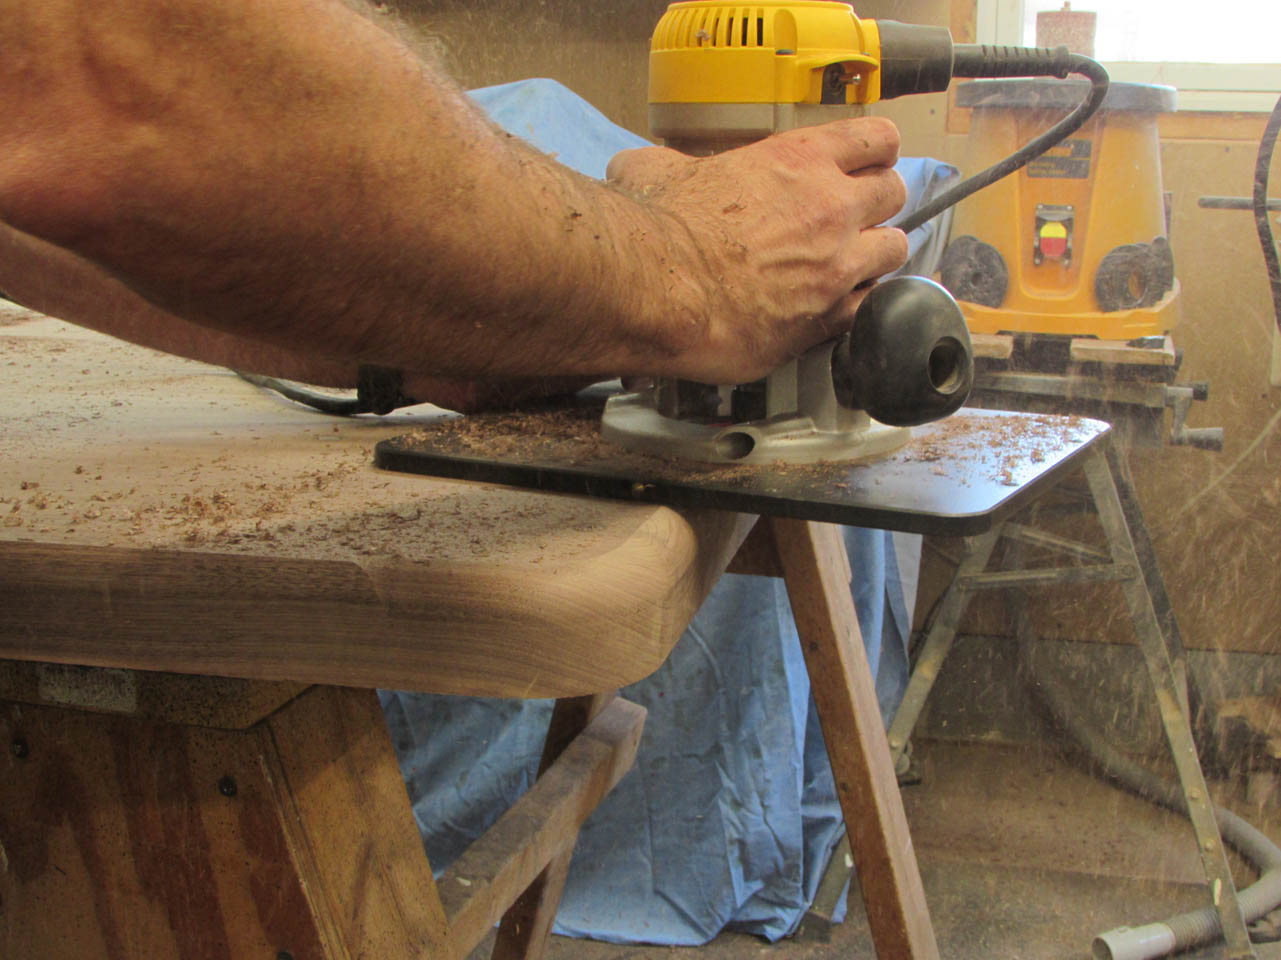
This is going to make one very large mess so I draped sheets over my work bench and my router table, just to keep the clean-up to a minimum effort.


On the first pass, I set the bit depth to only cut half of the material away, then I dropped it to the final depth and made the full radius cut. It could probably have made it in one cut, but I didn’t want to risk it.
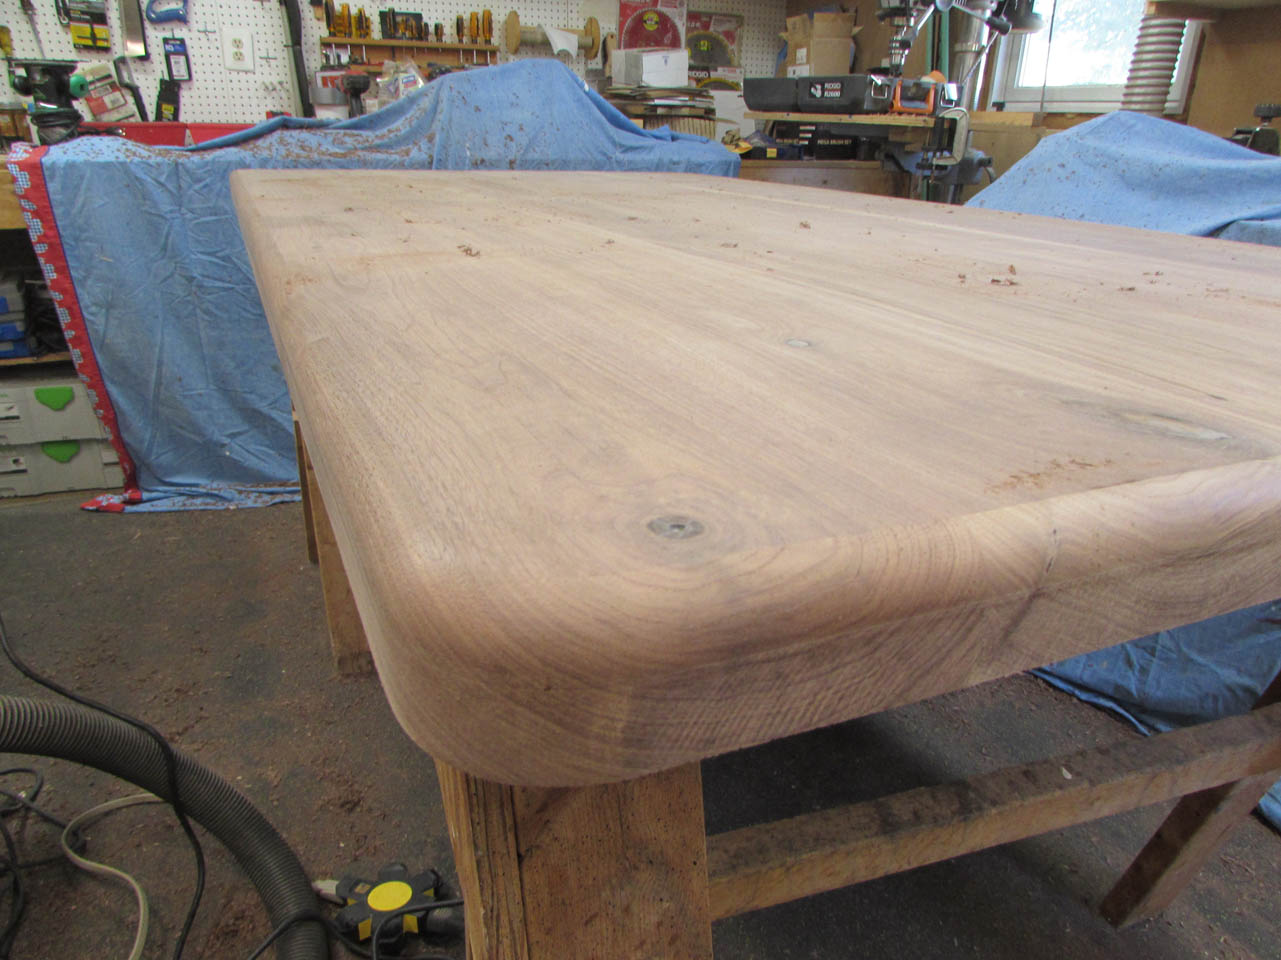
The full radius cut looks really good, time to do some more sanding. I hand-sanded the edge and the new radius down to 220 grit. This side of the table was now smooth as butter, time to flip it over and work on the top side.

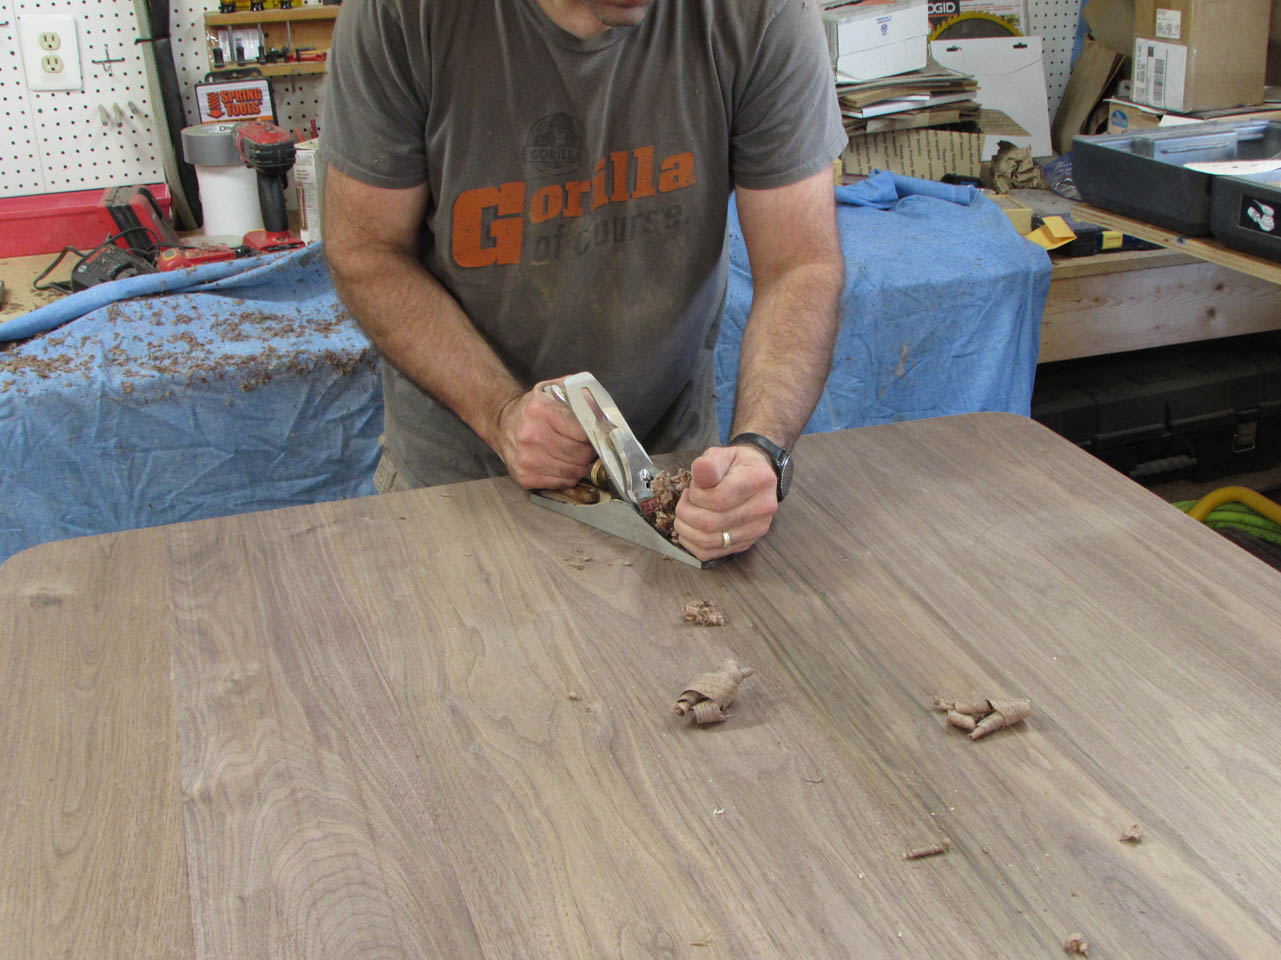
I had one high spot that the card scraper couldn’t handle so I got out my smoothing plane and cut it down flat.


Then I radiused the top edge, and sanded this side as well.


Now it was time to start playing with wood bleach. I tested this on my last project and it worked pretty well. I put on my heavy-duty gloves and started applying the liquid from bottle “A” with a sponge.

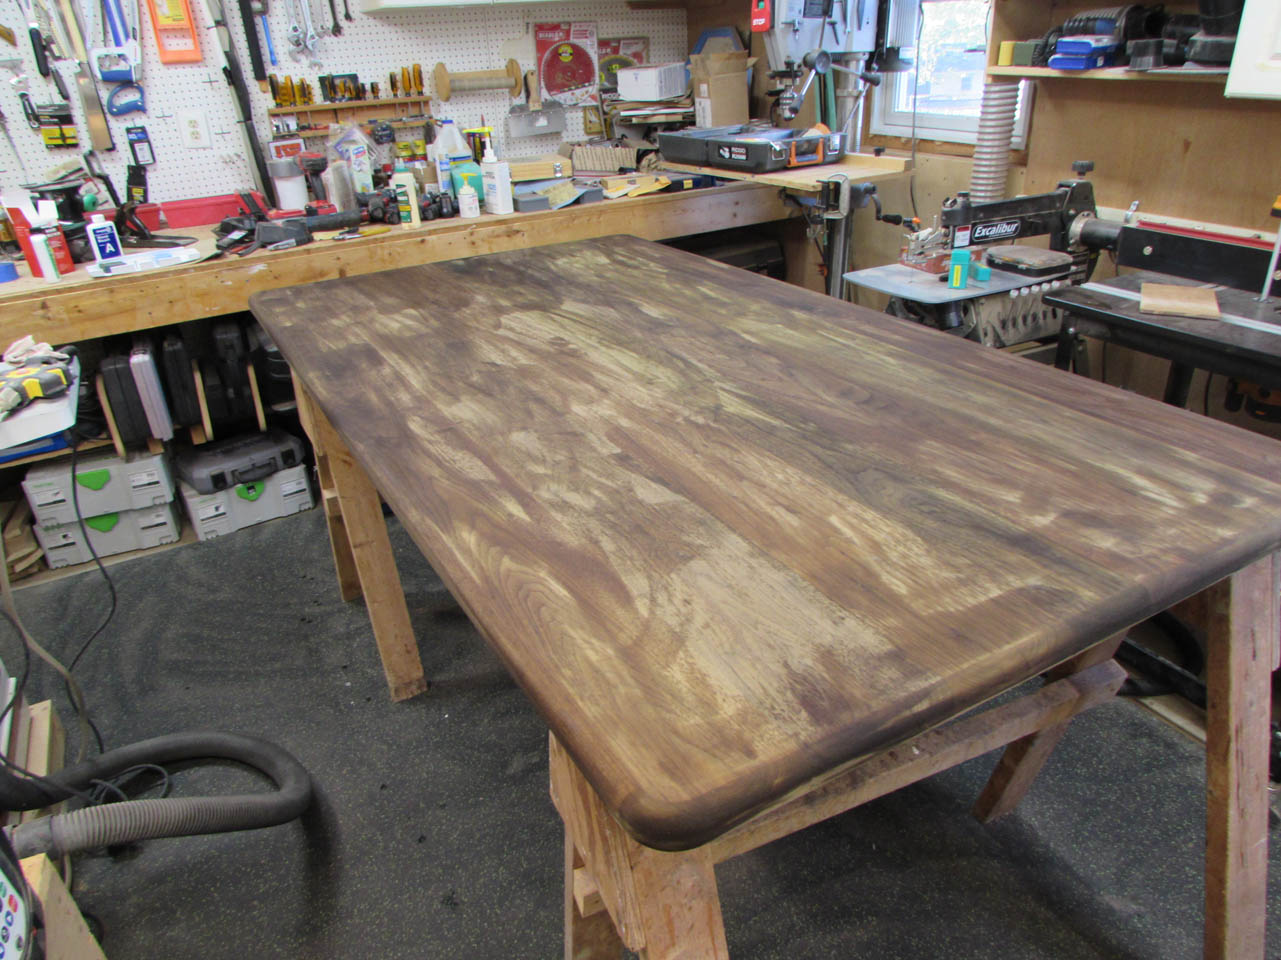
I let that soak in for about 10 minutes and then repeated the process with the liquid from bottle “B”.

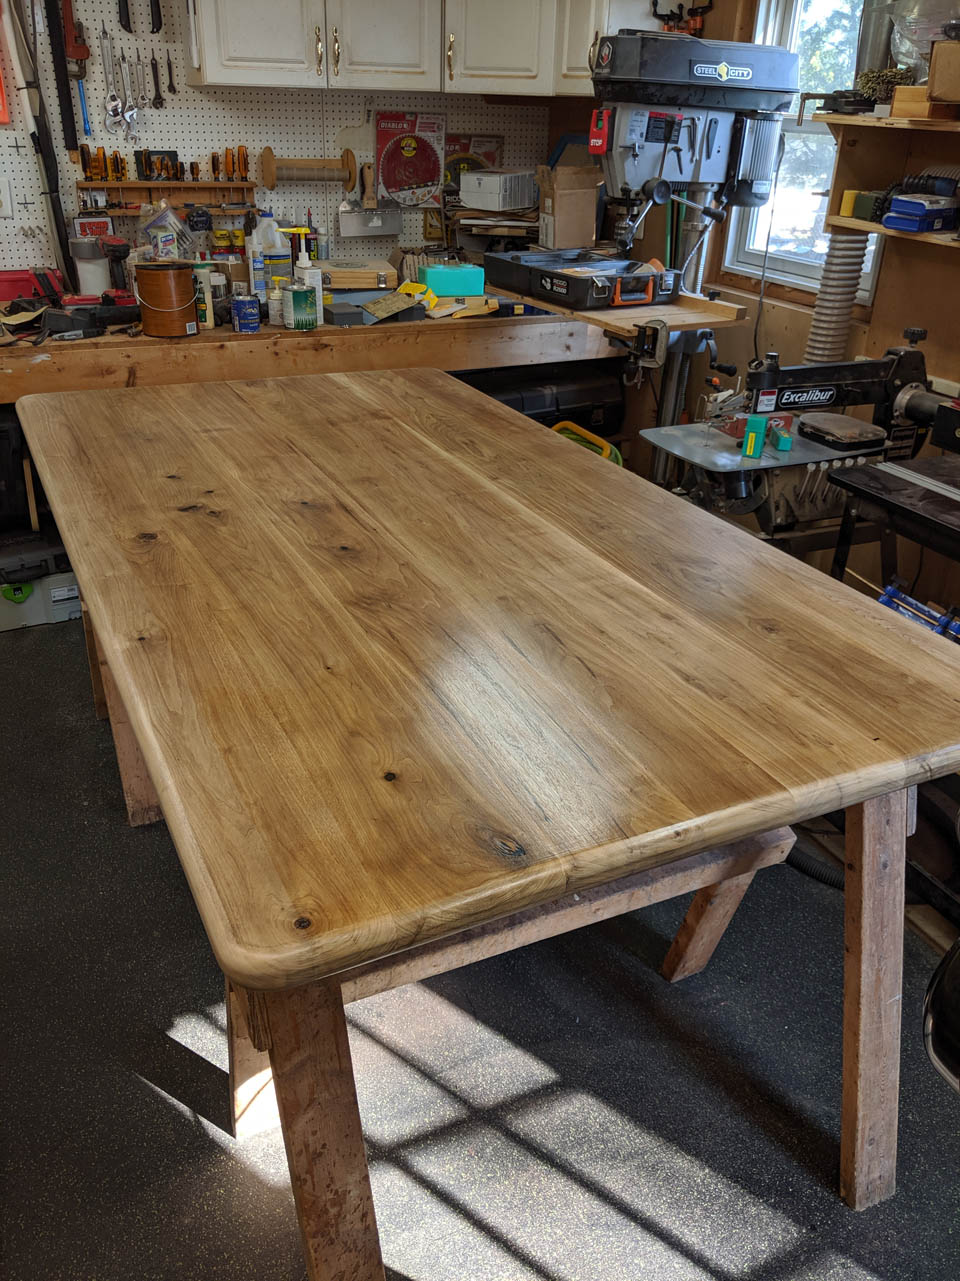
And one hour later, I checked in and the table top was considerably lighter in color.

I applied a second coat of bleach, to further lighten it, but it had far less effect.

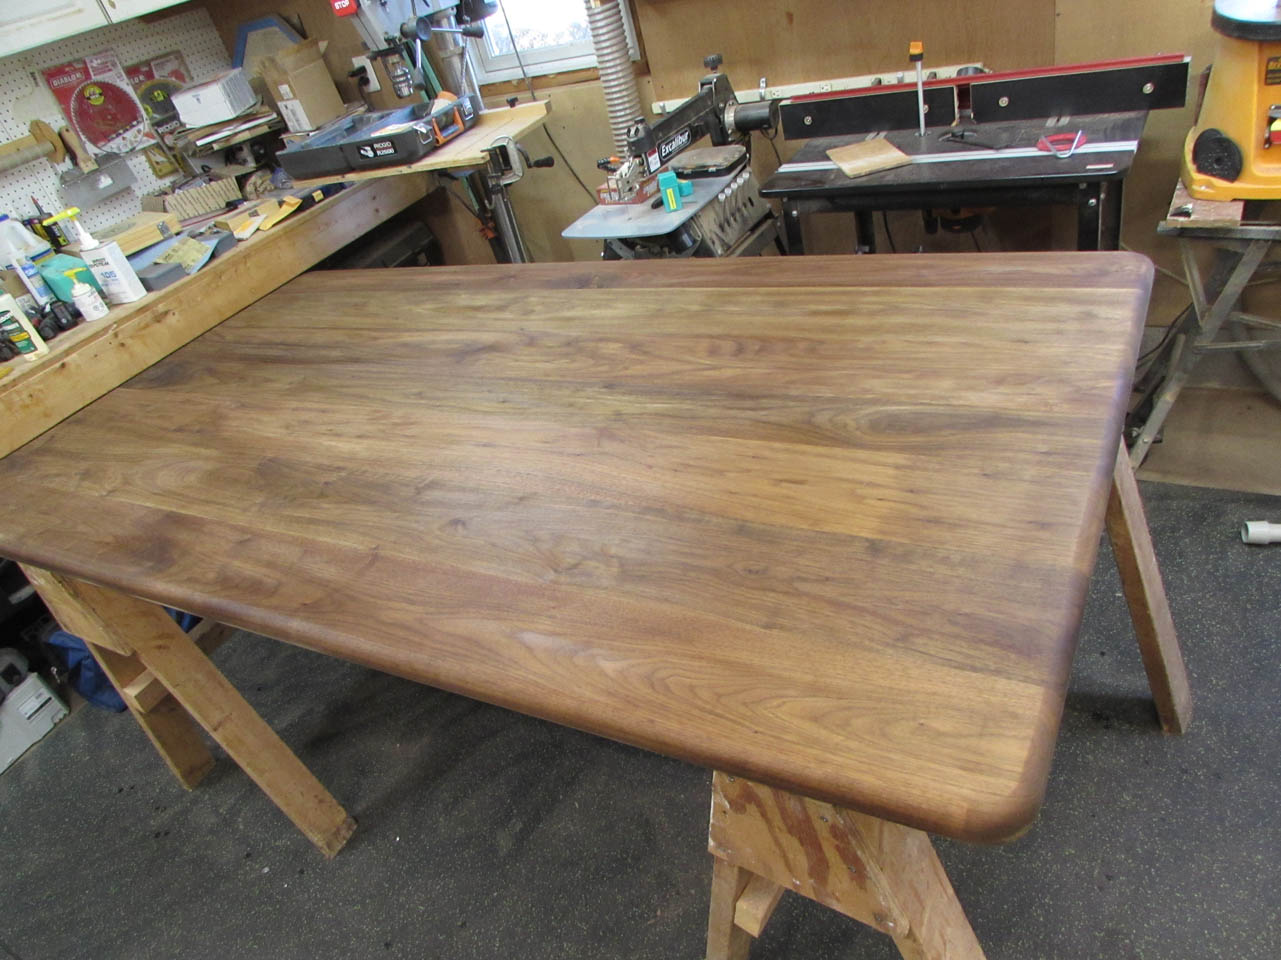
So I flipped the top over and started on the second side.


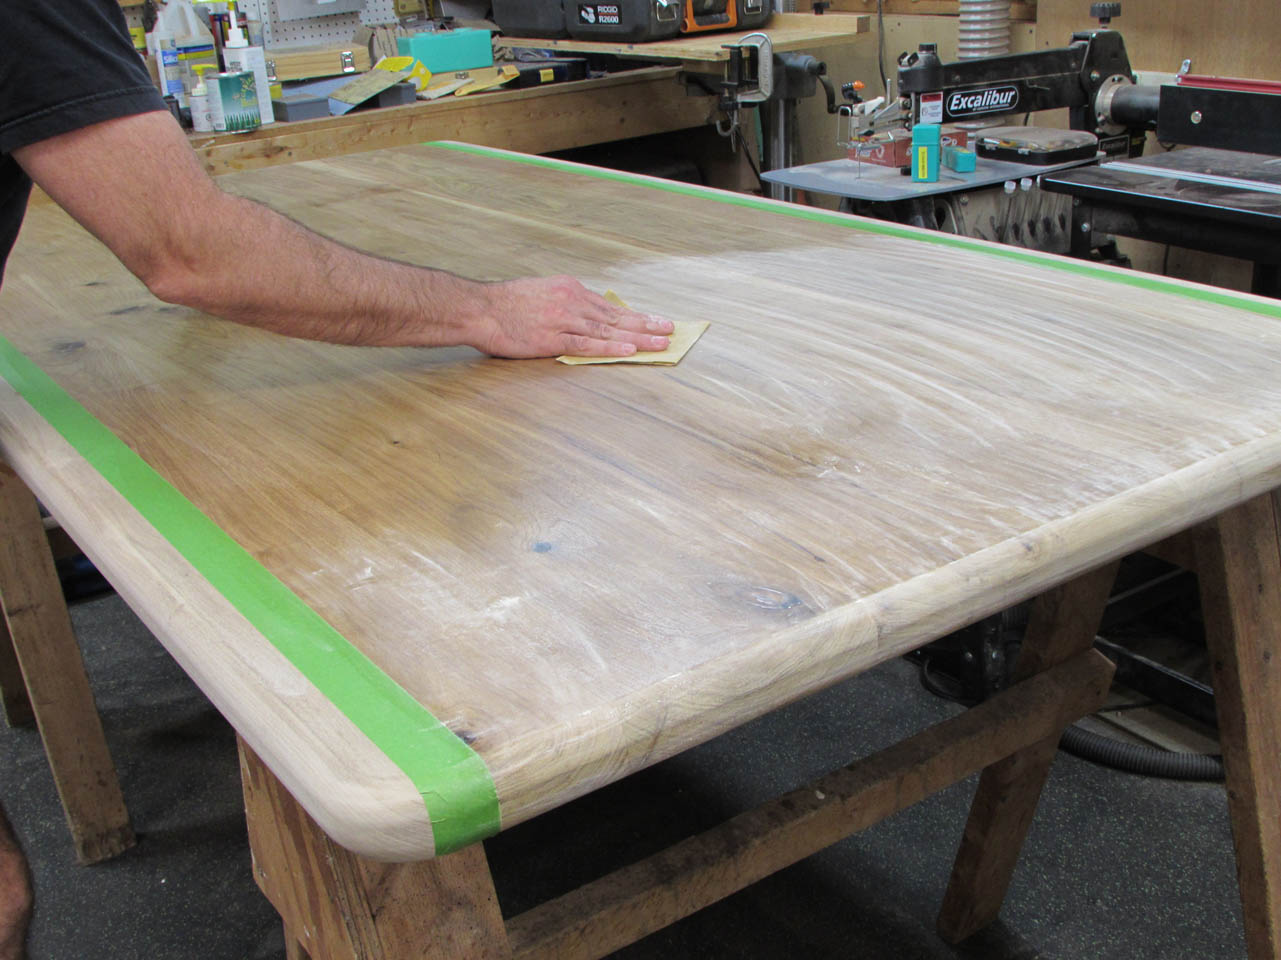
Once the bottom was bleached, I sanded the entire surface back with 220 grit paper. The bleach is water-based so it raises the grain and makes everything fuzzy.
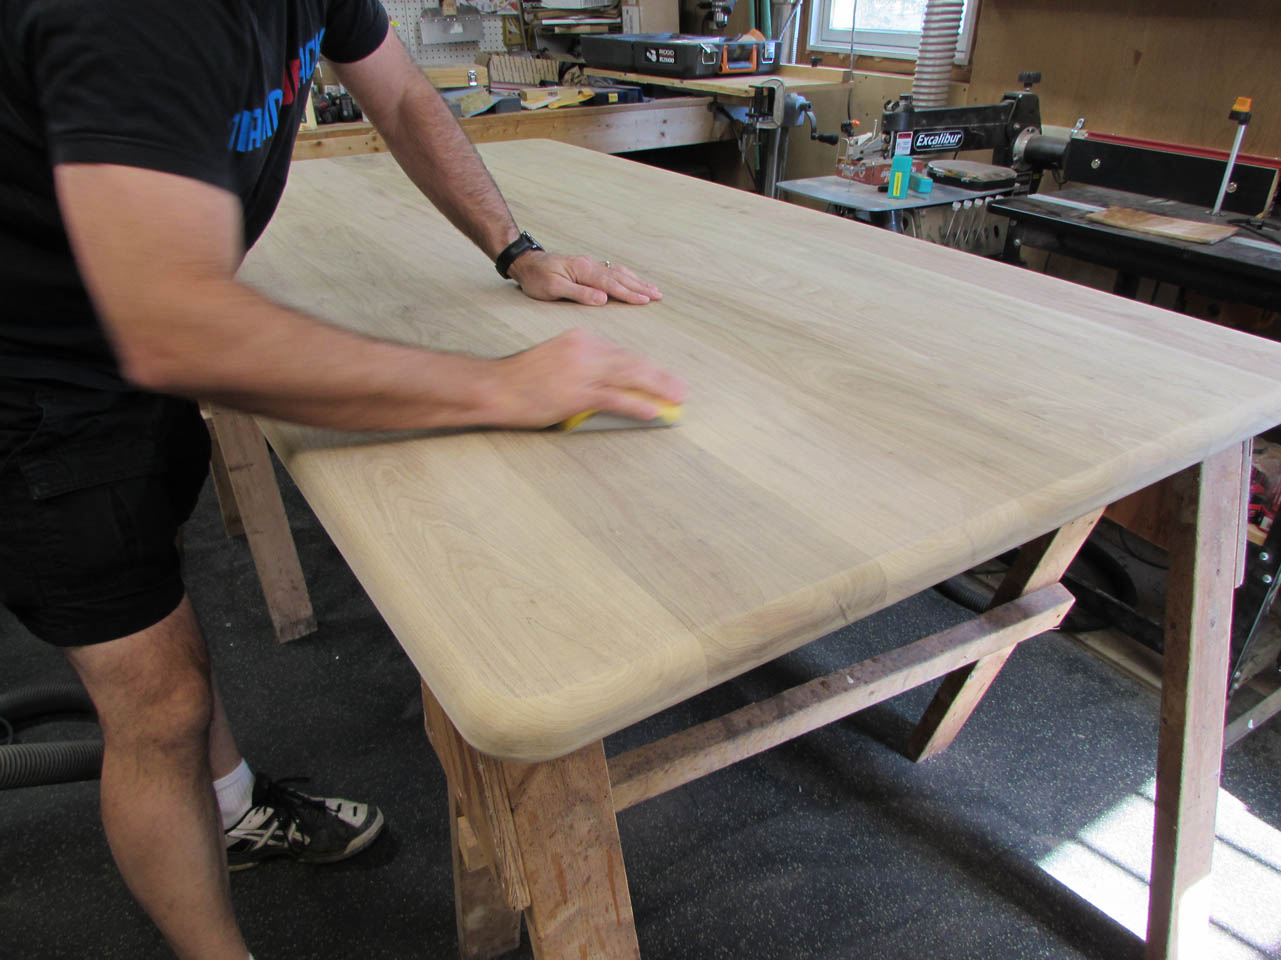
It does have the added benefit of pre-raising the grain so you have less sanding later, when using a water-based finish.

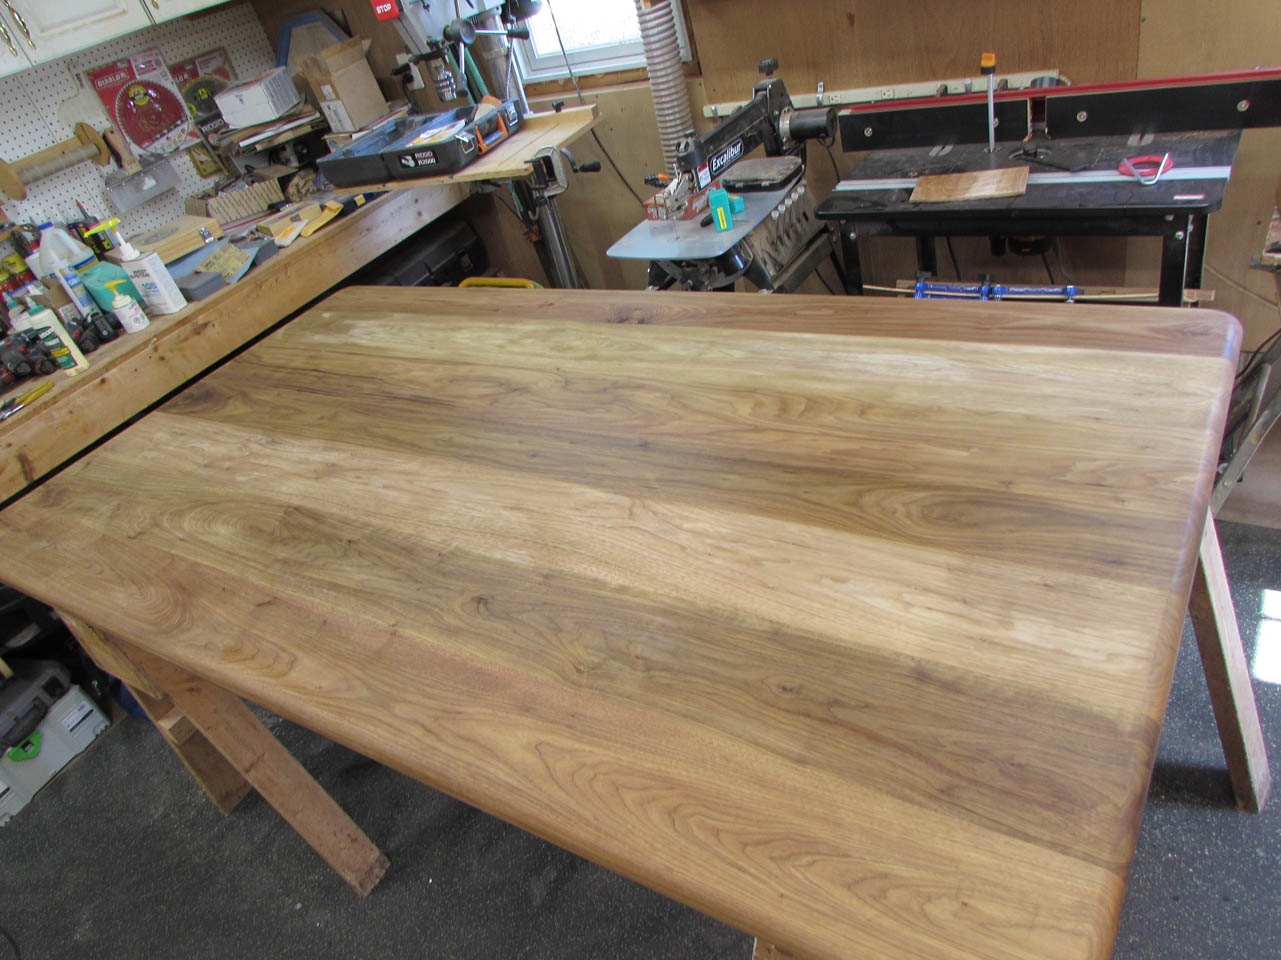
My client wants to have a lighter edge running down the sides of the table. I have experimented with masking and staining, but the oil-based stain bleeds under the tape. I decided to try a different approach. I am using an oil-infused polyurethane that was designed for hardwood floors. It darkens the color slightly, emulating the effect of using an oil-based finish. I am hoping this will give me the contrast that my client wants.

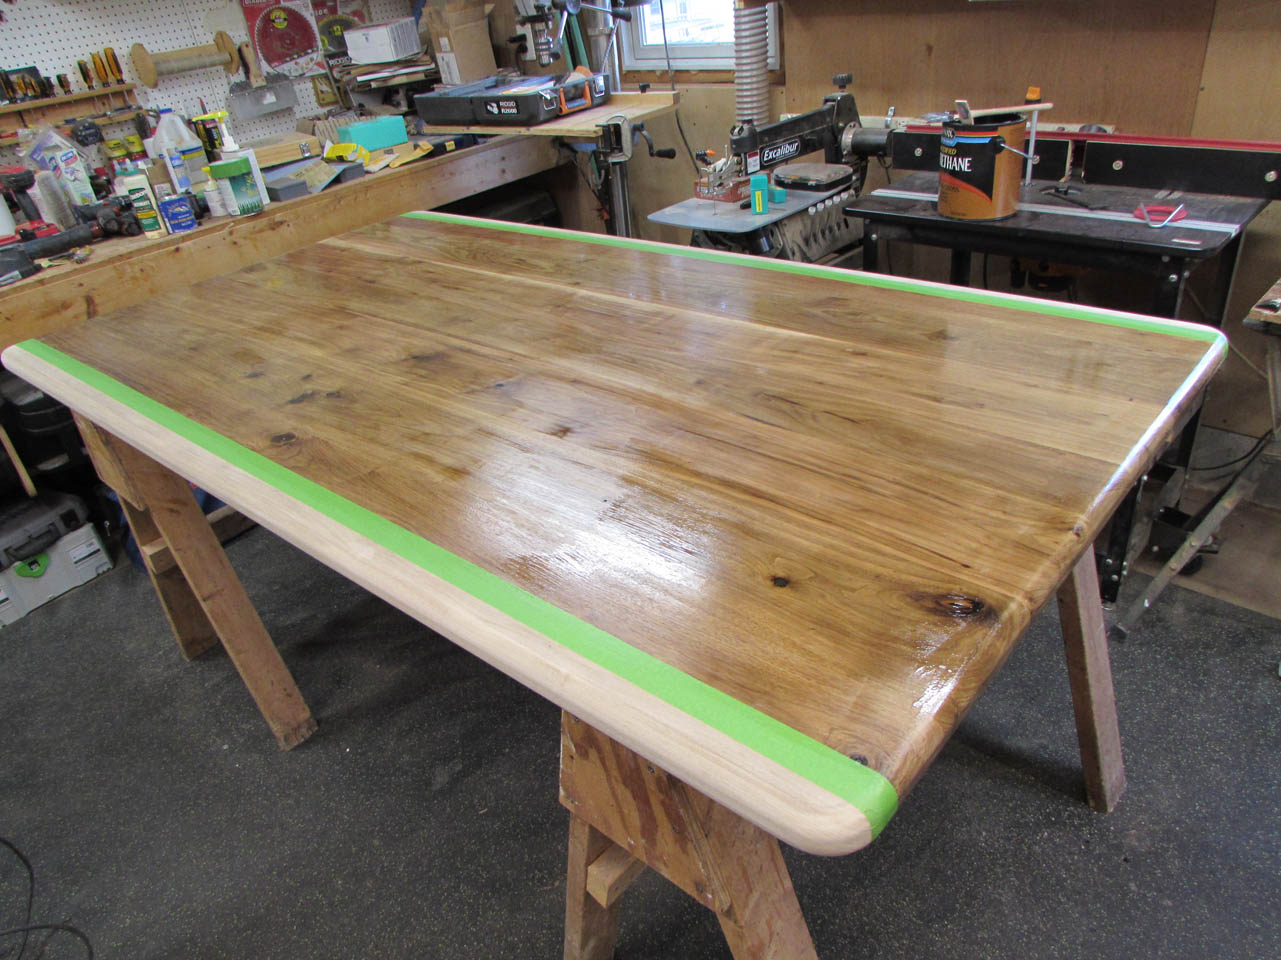
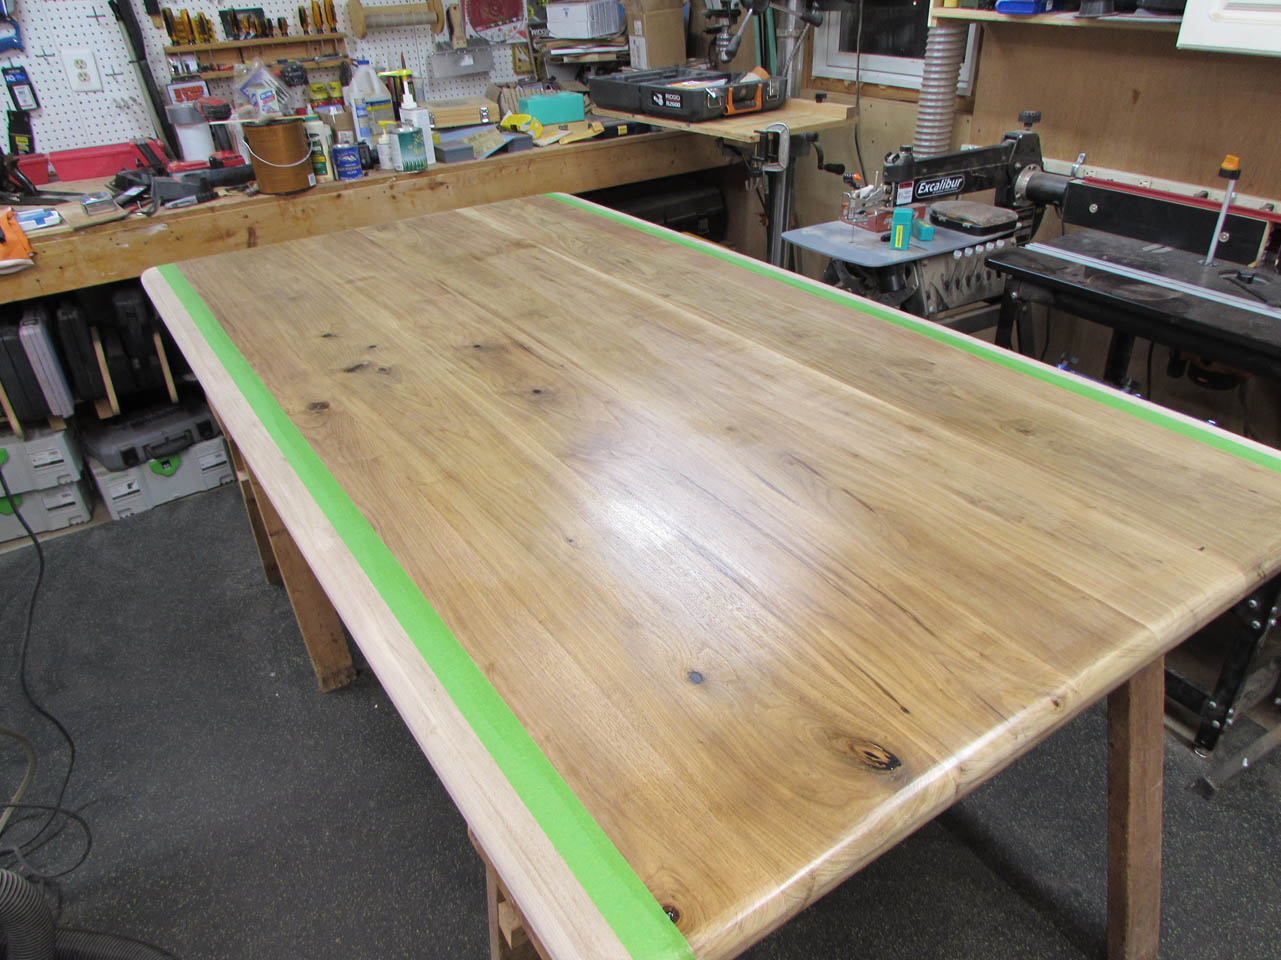
When dry, the color lightens a bit, so I sanded it back with 400 grit paper and applied another coat.


After that was dry, I applied two coats of a regular water-based poly, hoping for a lighter tone. It is lighter, but I am not quite happy with it yet. That was why I tested this on the bottom first.

Taking a small break from finishing, I started breaking down the remaining walnut. I cut one piece in half and planed both pieces down to the correct dimensions for the two cross-bars.

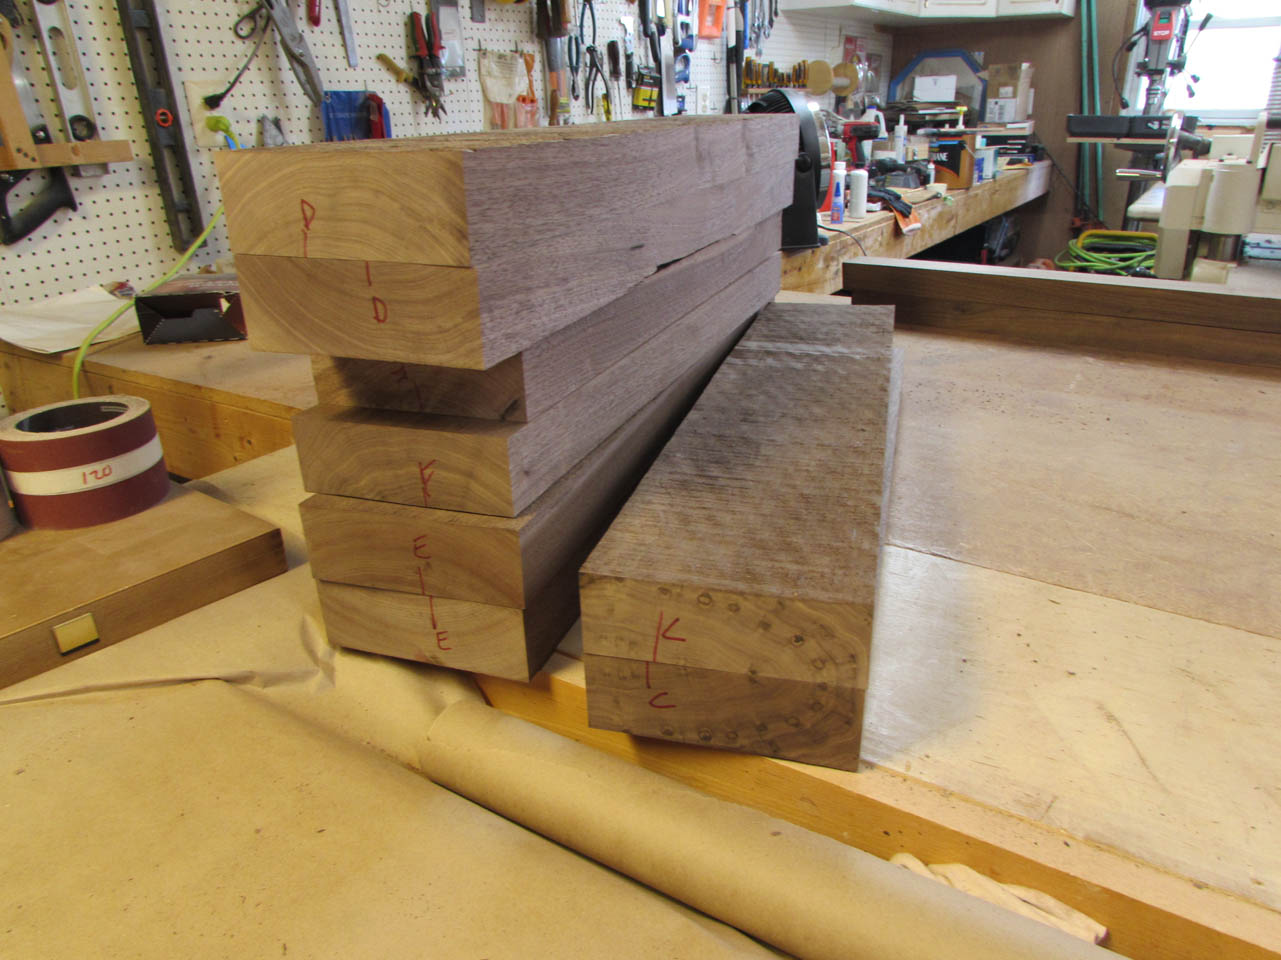
Then I cut all of the side pieces for the legs. Since they will be 3″ thick, I will need to glue two pieces together. I decided to mark each board as I cut them in half so they could be folded back upon itself. I marked the cut ends so that they could be matched up later. I am not doing this for the grain match. I actually want the wood tone to be similar when they get bleached. The densities of each board differ slightly so this will ensure that each glued up leg will bleach to the same color on each side.


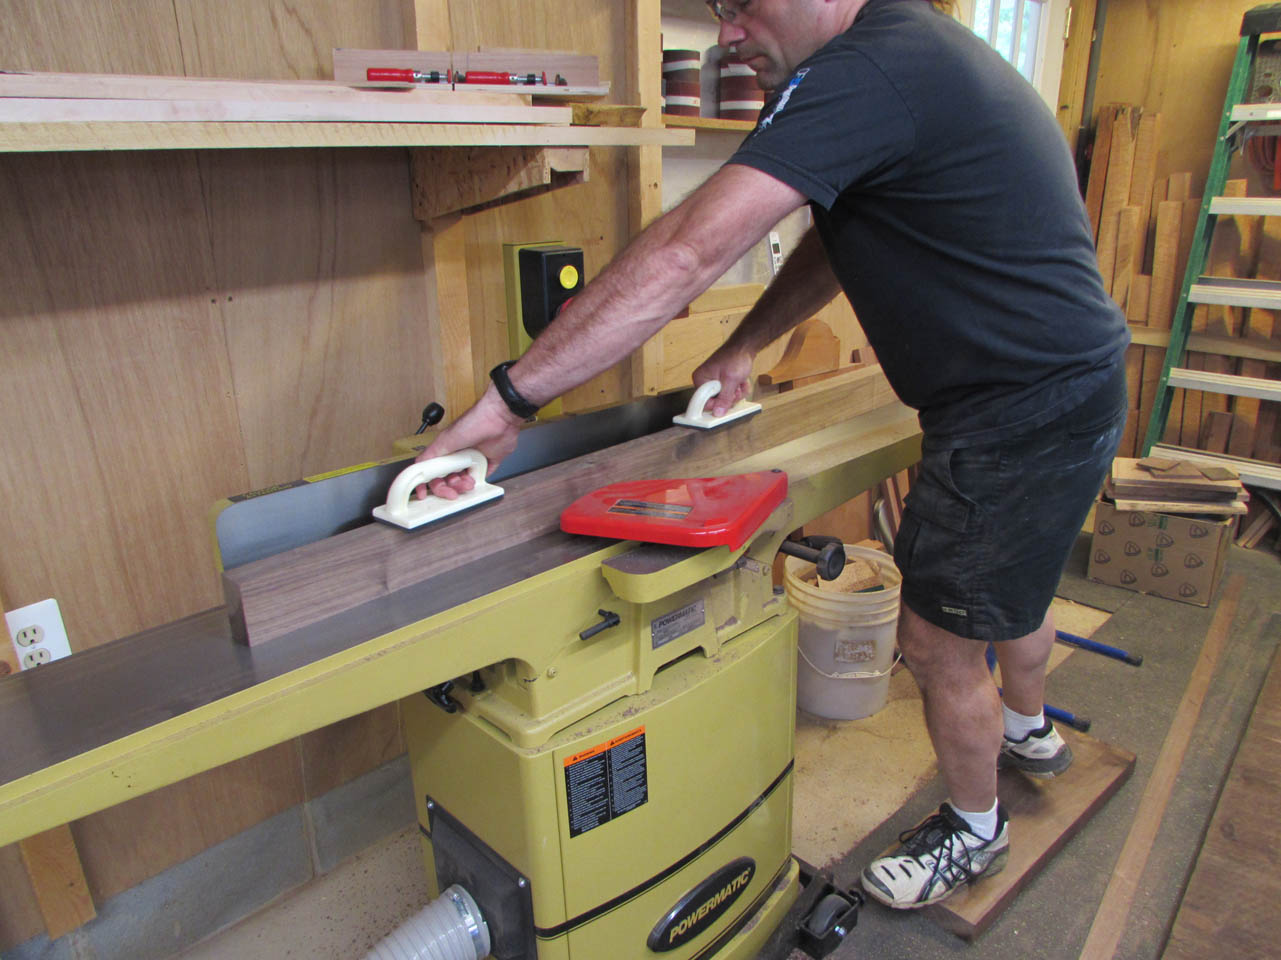
I have 12 pieces to cut, plane, and glue up, so I stacked them next to the jointer and got to work.
I jointed one face flat, then jointed one edge at a perfect 90 degrees adjacent to the good face.

Then I ripped each one to be 1/16″ wider than the 6″ I needed and Jointed the sawn edge down to 6″.

This makes both sides parallel and perfectly flat.

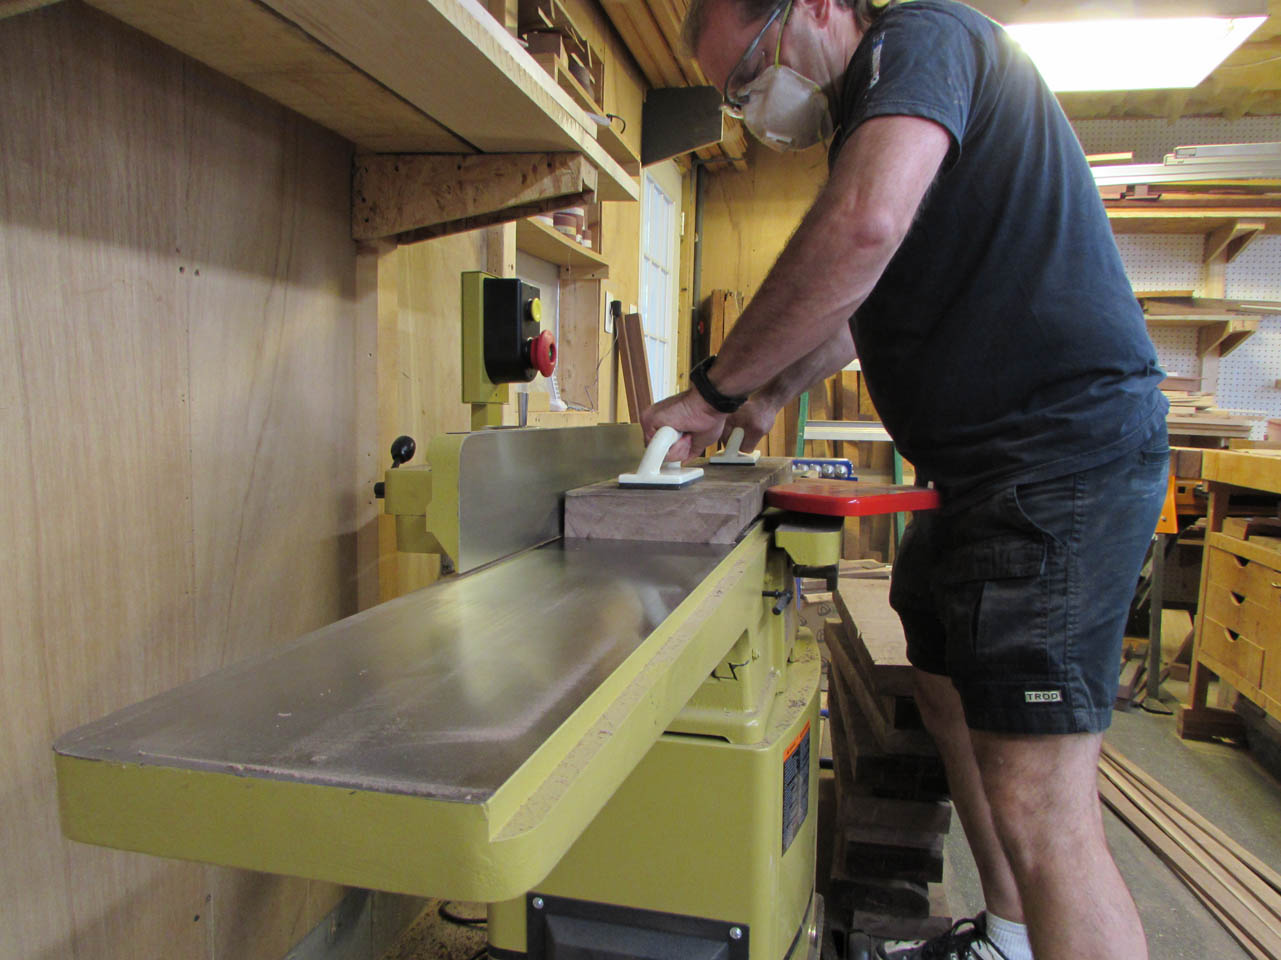
Before planing the final side down to size, I checked on my dust collector. Glad I did, it was starting to over-fill. I actually filled the 20+ gallon dust bin three times while milling these leg boards.

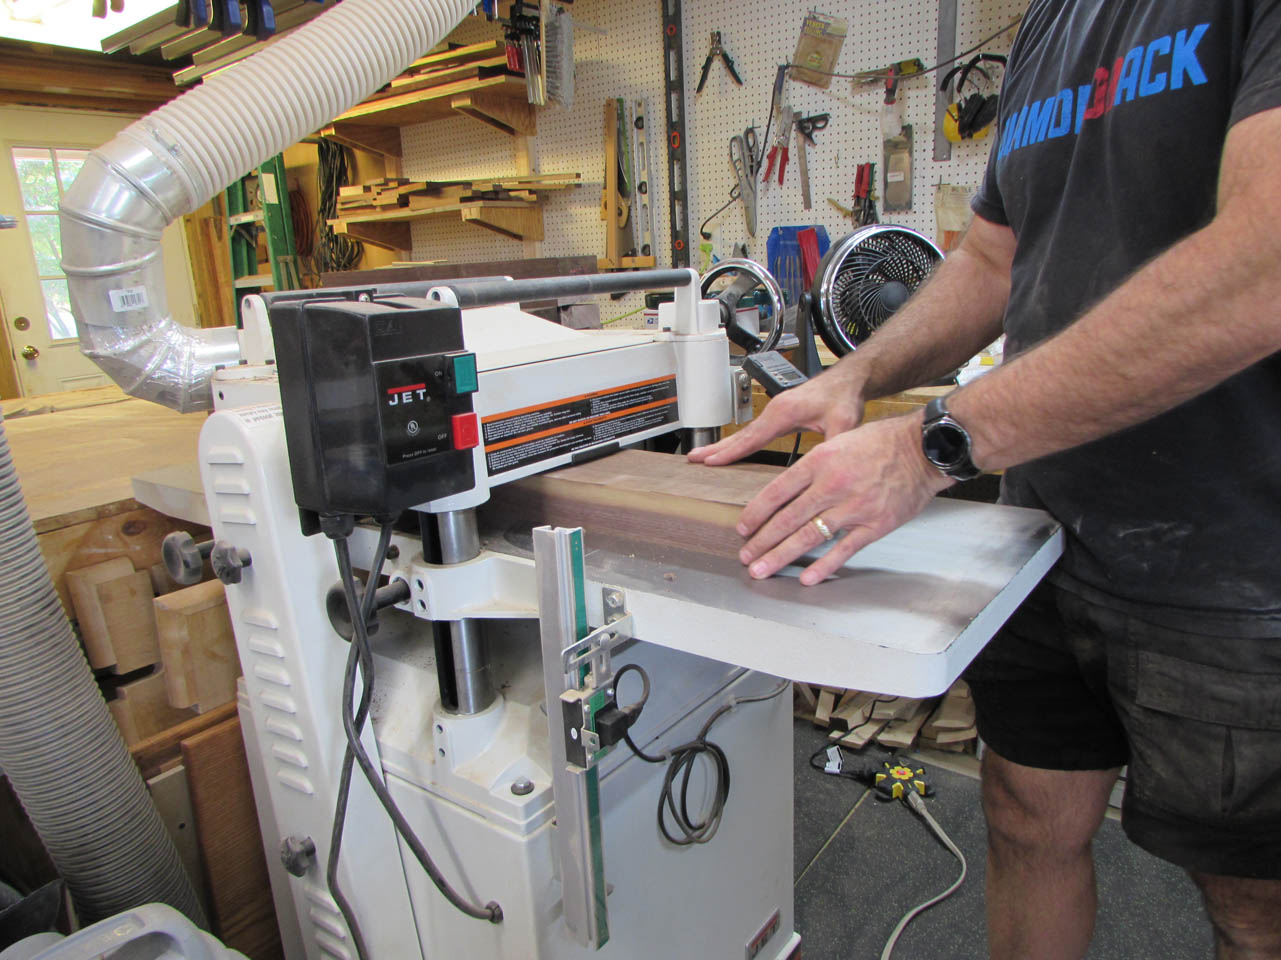
Time to start planing. I did the best I could to avoid knots and the torn out chunks from the fork lift. Having to plane off an additional 1/2″ to get these down to size took care of the rest.

This is a considerably smaller pile of wood…


I got tired of milling so I moved back to finishing on the top side of the table. I decided to experiment with deepening the color tone of the finish a bit so I added a couple of drops of amber dye to a sample batch of the oil-infused poly. It dramatically darkened the color of the liquid.

But it only slightly darkened the poly.

I sanded back the first coat and applied a second before I finished working around 10:00pm.

Two and 1/2 days of milling, bleaching, sanding, and finishing this weekend. I am ready to go back to work to relax…
