
Floating shelf
After adding the new couch to the living room, my wife and I wanted to open up the corner of the room, where the TV is. This would give us some space to add another seat if needed. The corner console has served us well for many years, but it is big and takes up a lot of space. We want to mount the TV on the wall and move the electronics to a shelf. After searching for several different options, we agreed on a floating shelf. I made a sketch of the wall in that corner and located all of the studs in the wall. I also ordered a set of Heavy Duty shelf brackets that looked like they might be able to handle a heavy load. I don’t expect the Video recording devices to weigh much, but I do plan to make the shelf pretty beefy.

The brackets have a 1″ x 5 1/2″ flange, that I plan to hide behind the shelf. That means I need a minimum of 1 1/4″ thickness to recess the flange into my shelf.

I am starting out with some air-dried 8/4 red oak. It is straight, but has some deep saw cuts in it, so I will probably be planing it down to 1 1/2″ thick.


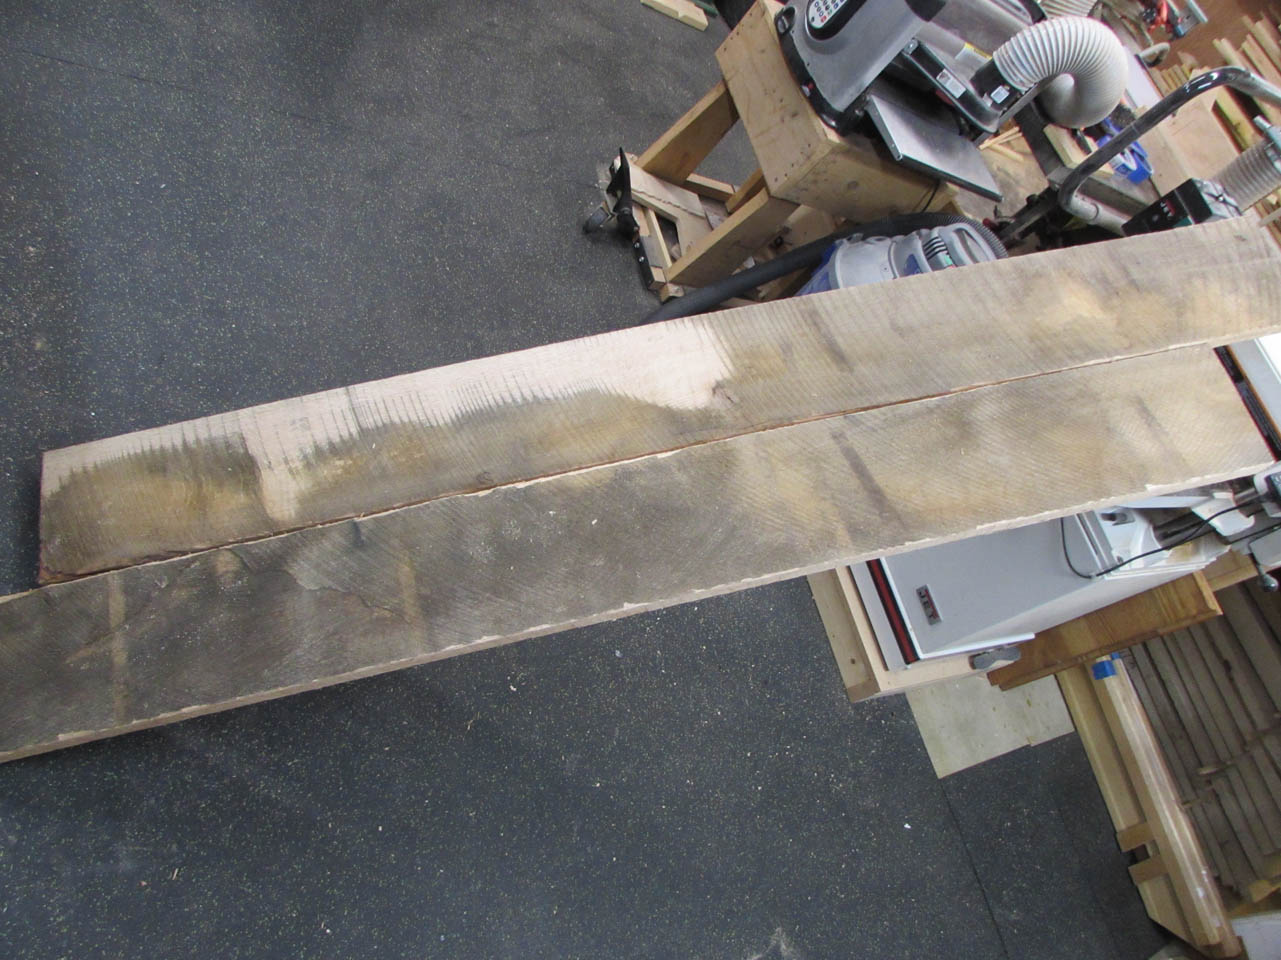
I had 4 boards to work with, ranging from 5″ wide to 9″. These boards were rather heavy, so my wife offered to help with the planing.

I only need a maximum length of 48″ for the longer boards, so I cut some of them in half to make them more manageable.

I am looking to make this shelf 12″ deep so I will need to join two boards together to make each piece. To do that, I need some straight edges. Ideally this would be done on a jointer, but I don’t have enough room in my shop for one so I make do with my table saw.

Sometimes I cannot quite get a perfectly straight rip and there is a gap at the joint.
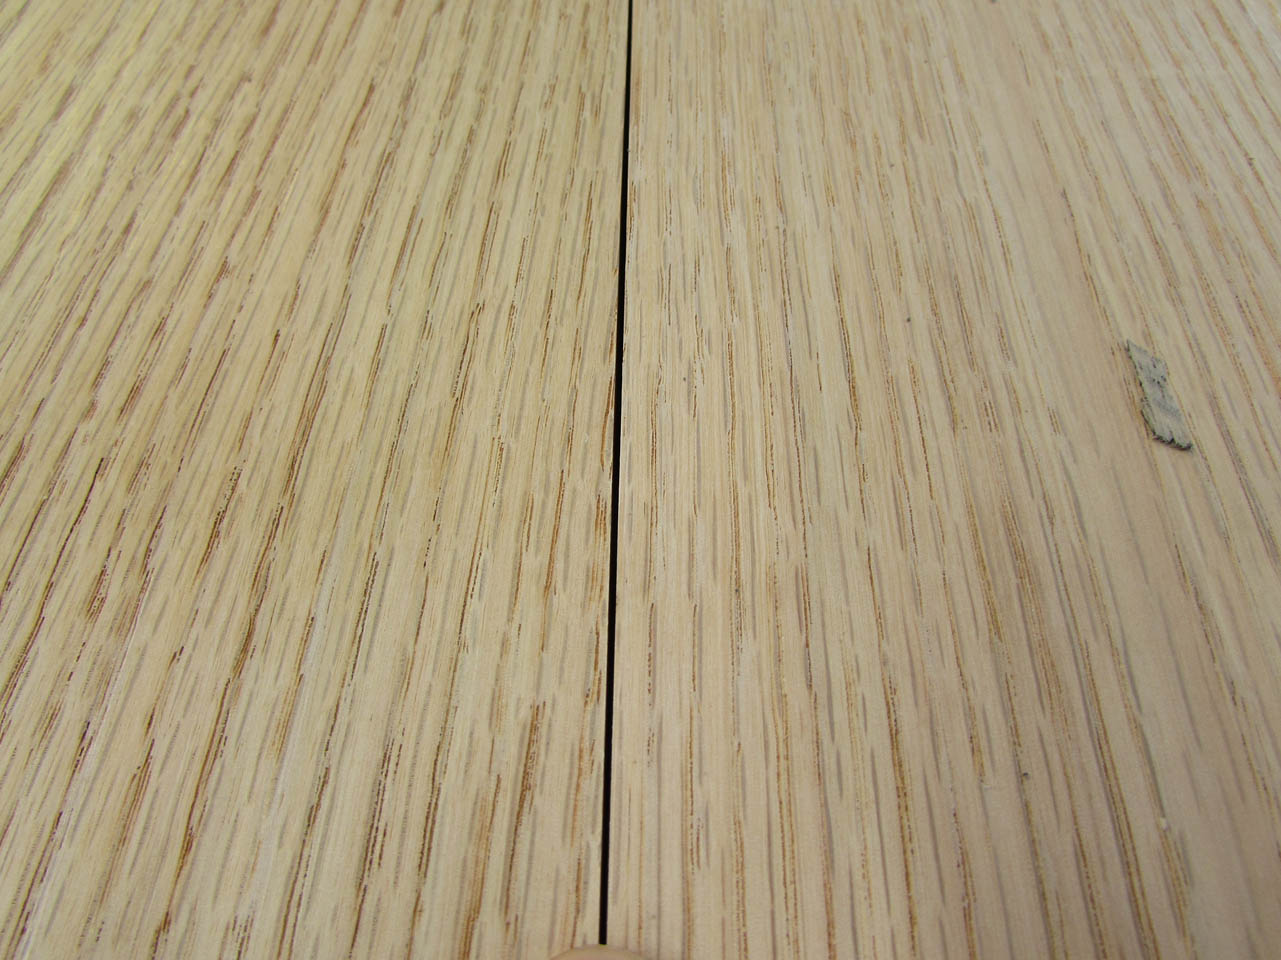
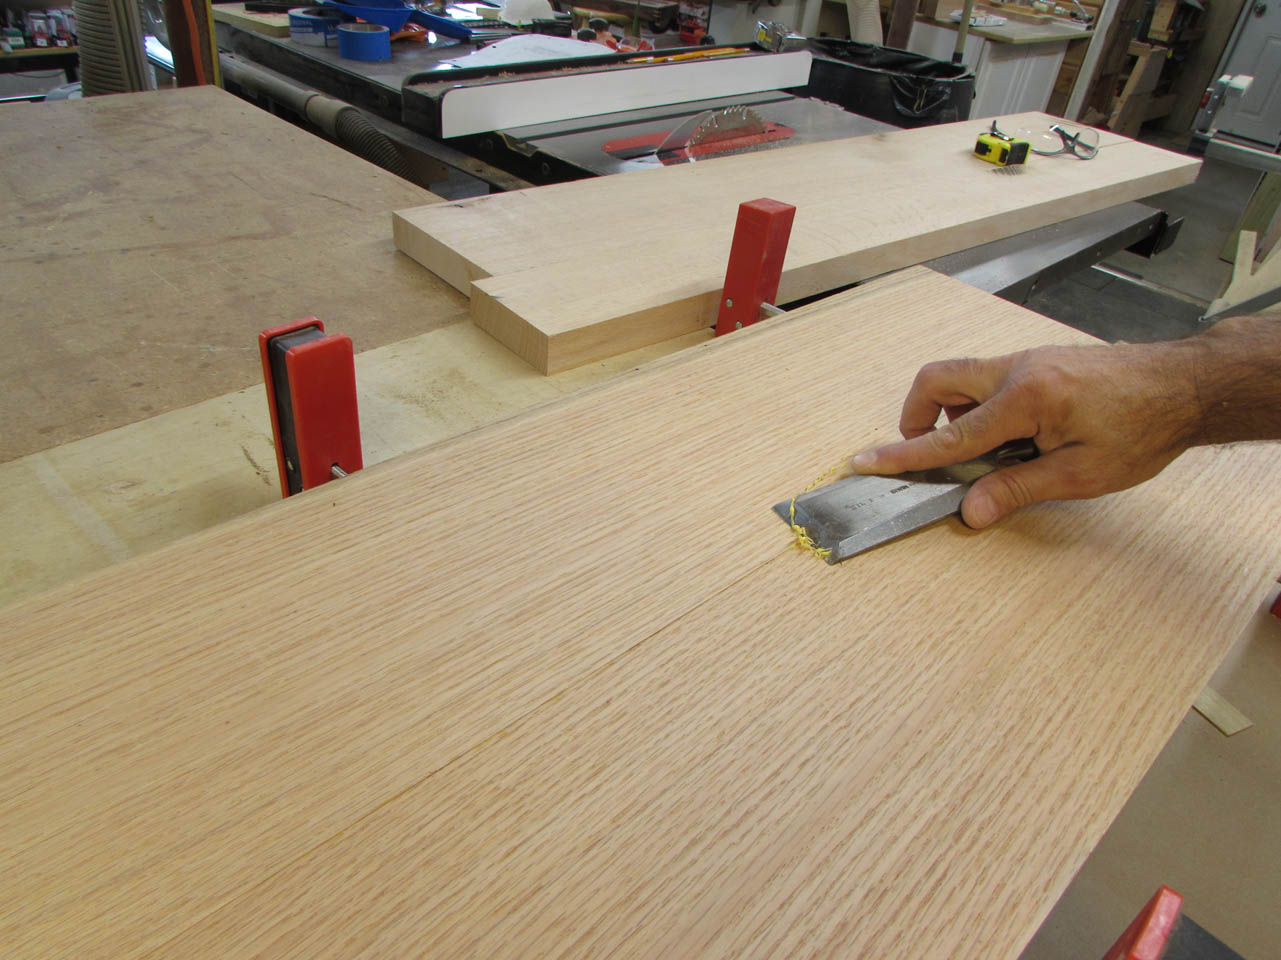
To fix this problem, I clamp the boards into my workbench and get out my #8 jointer plane. I am not very fond of hand-planing, but with a sharp blade, I can quickly achieve a completely flat side.

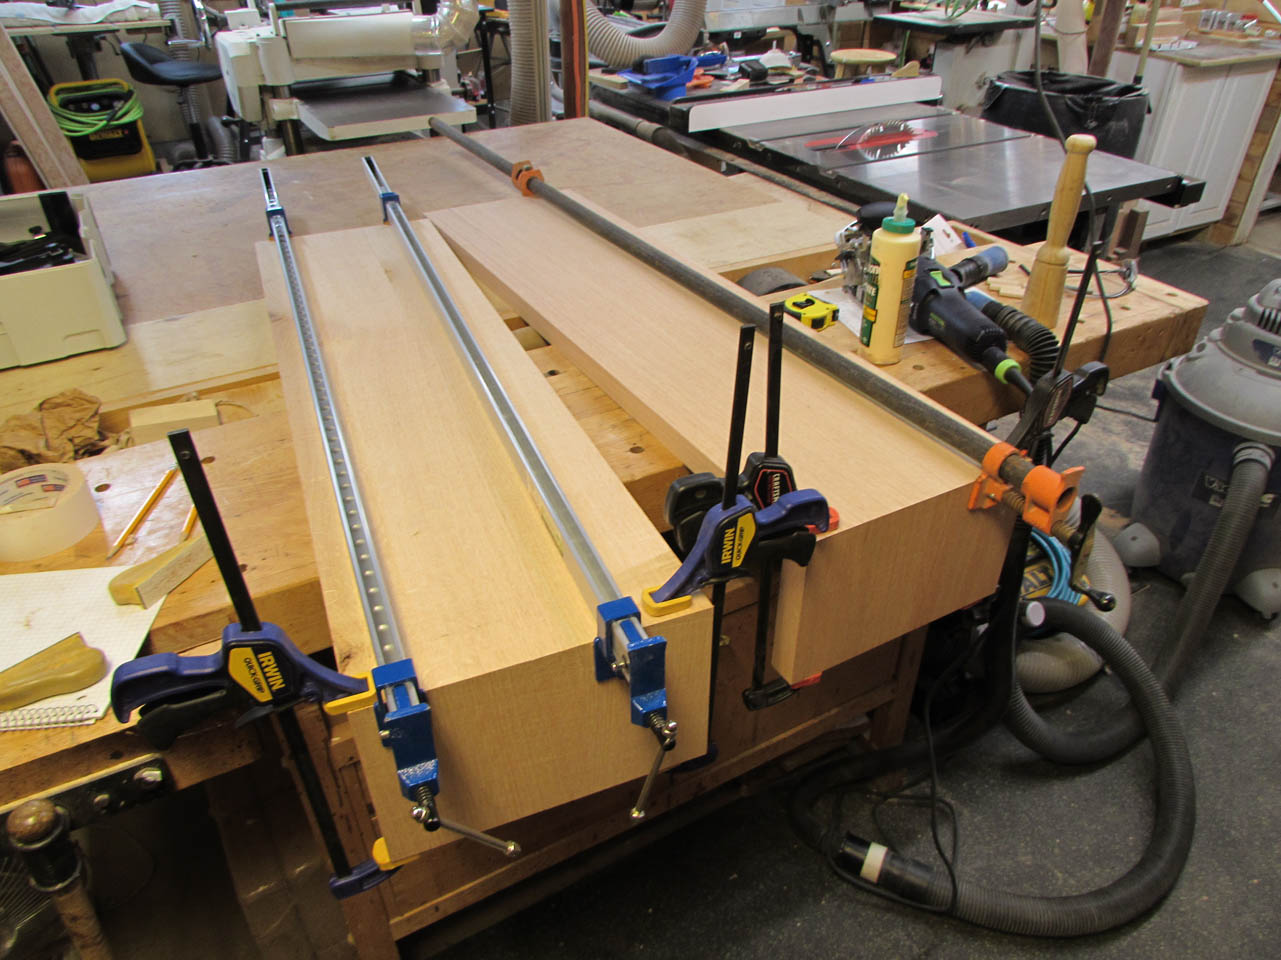
That looks a lot better. I applied some glue to the edges and clamped the first panel up.

Then I moved on to clamping up the rest of the panels.
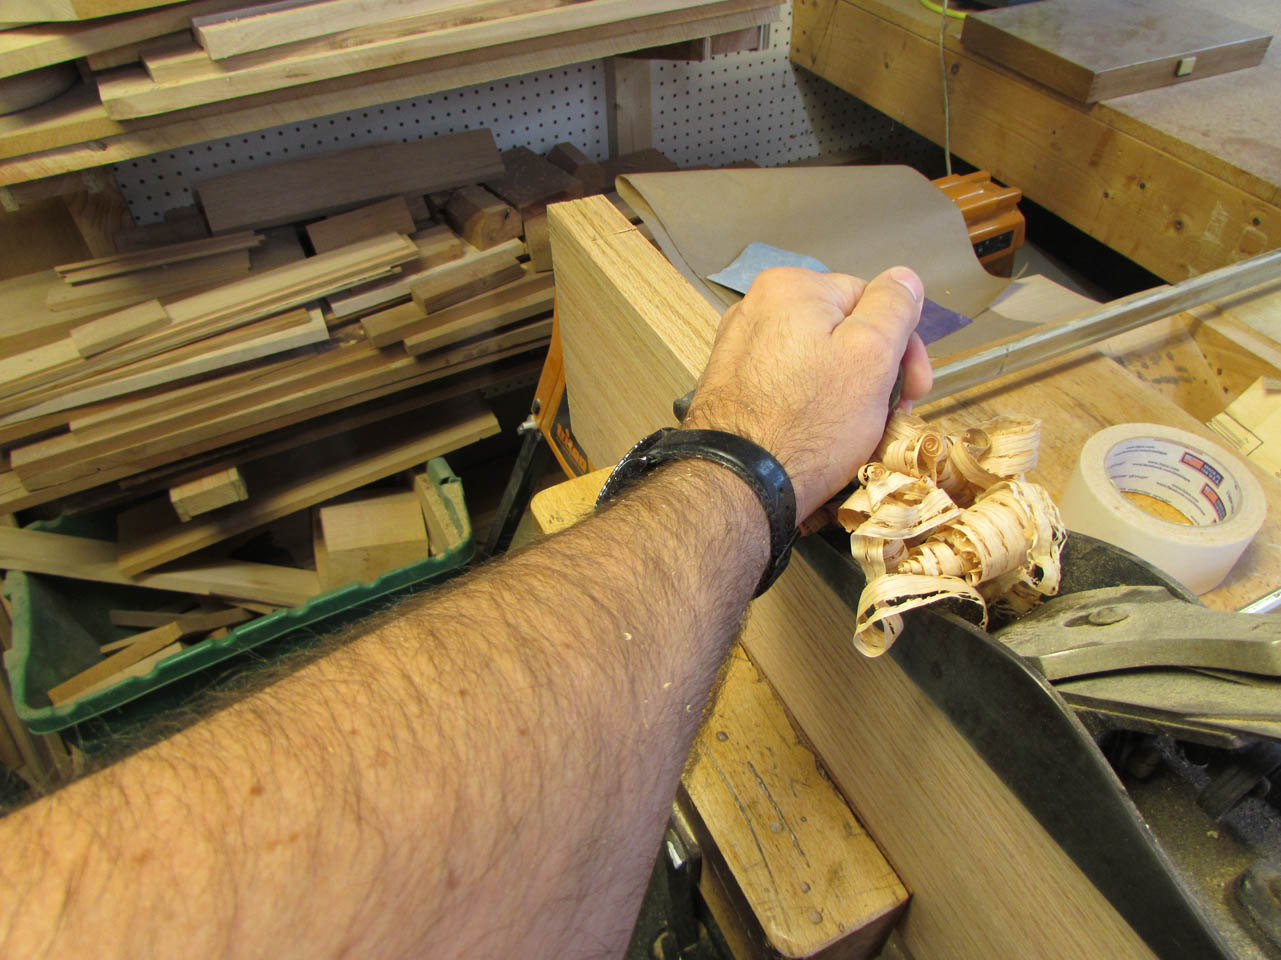
I use a 2″ wide chisel to slice away the glue squeeze-out after it has been drying for 20 minutes or so.

I repeated the process for two longer boards, and two shorter ones.

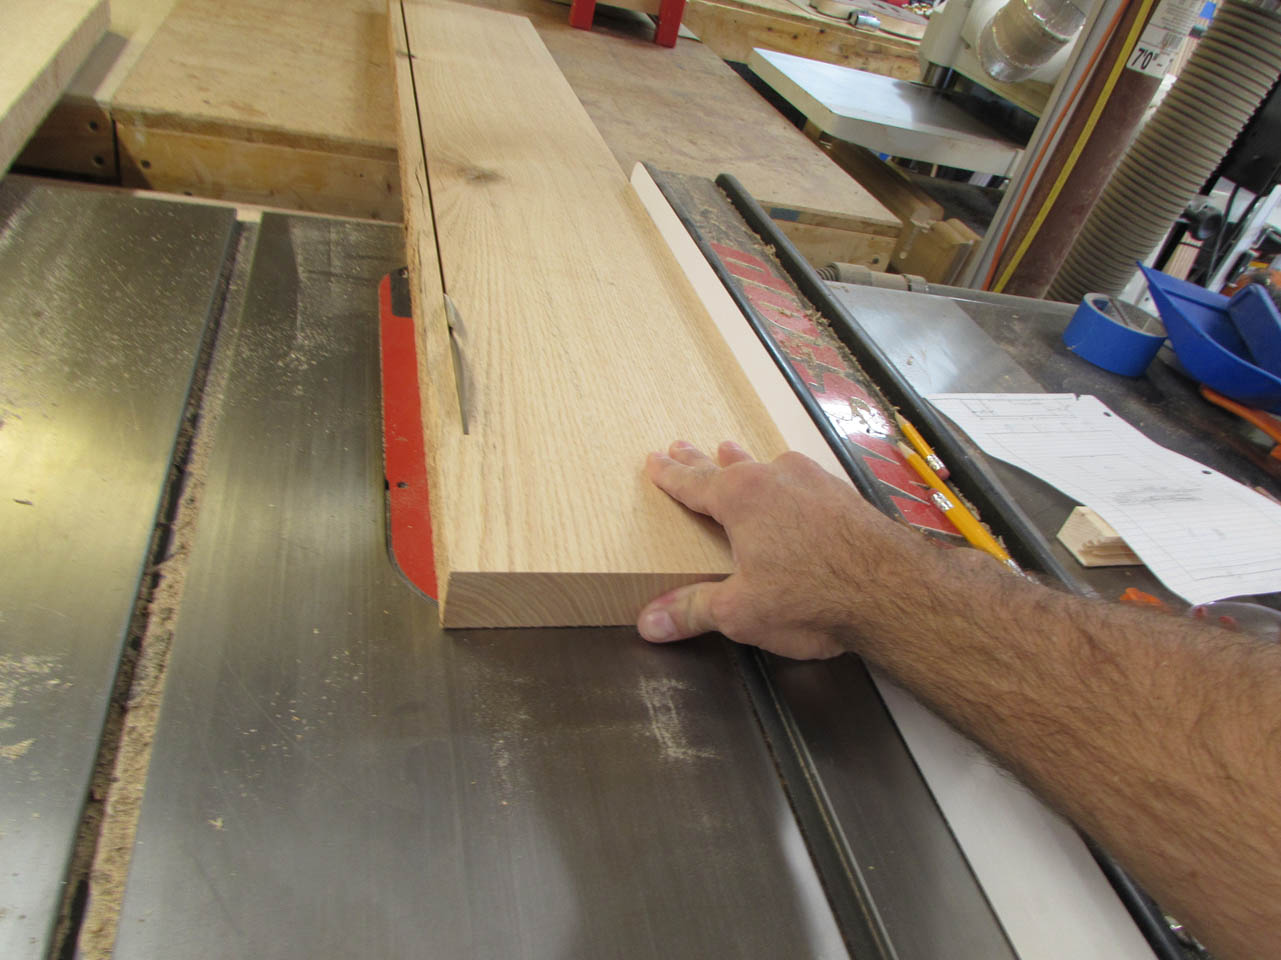
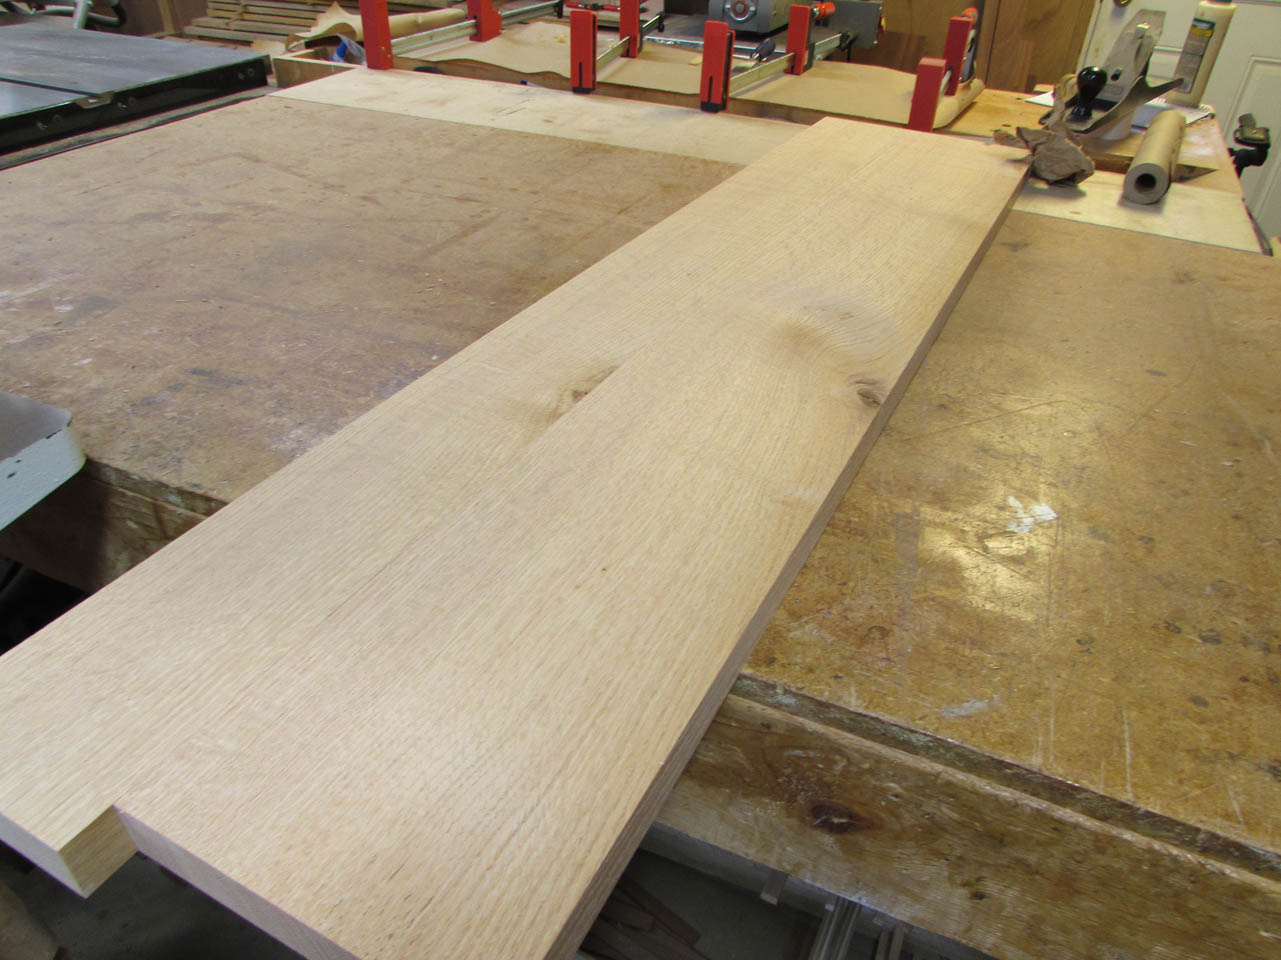
After everything was dry, I cleaned up the outside edges and ripped my boards down to the 12″ width that I wanted.

I ran the joined panels through the planer again to clean up the glue joint and plane down past any remaining saw-cuts. This left my boards at 1 3/8″ thick. A little thinner than I wanted, but these boards are heavy and I was starting to doubt that the shelf would be light enough to mount on the wall…


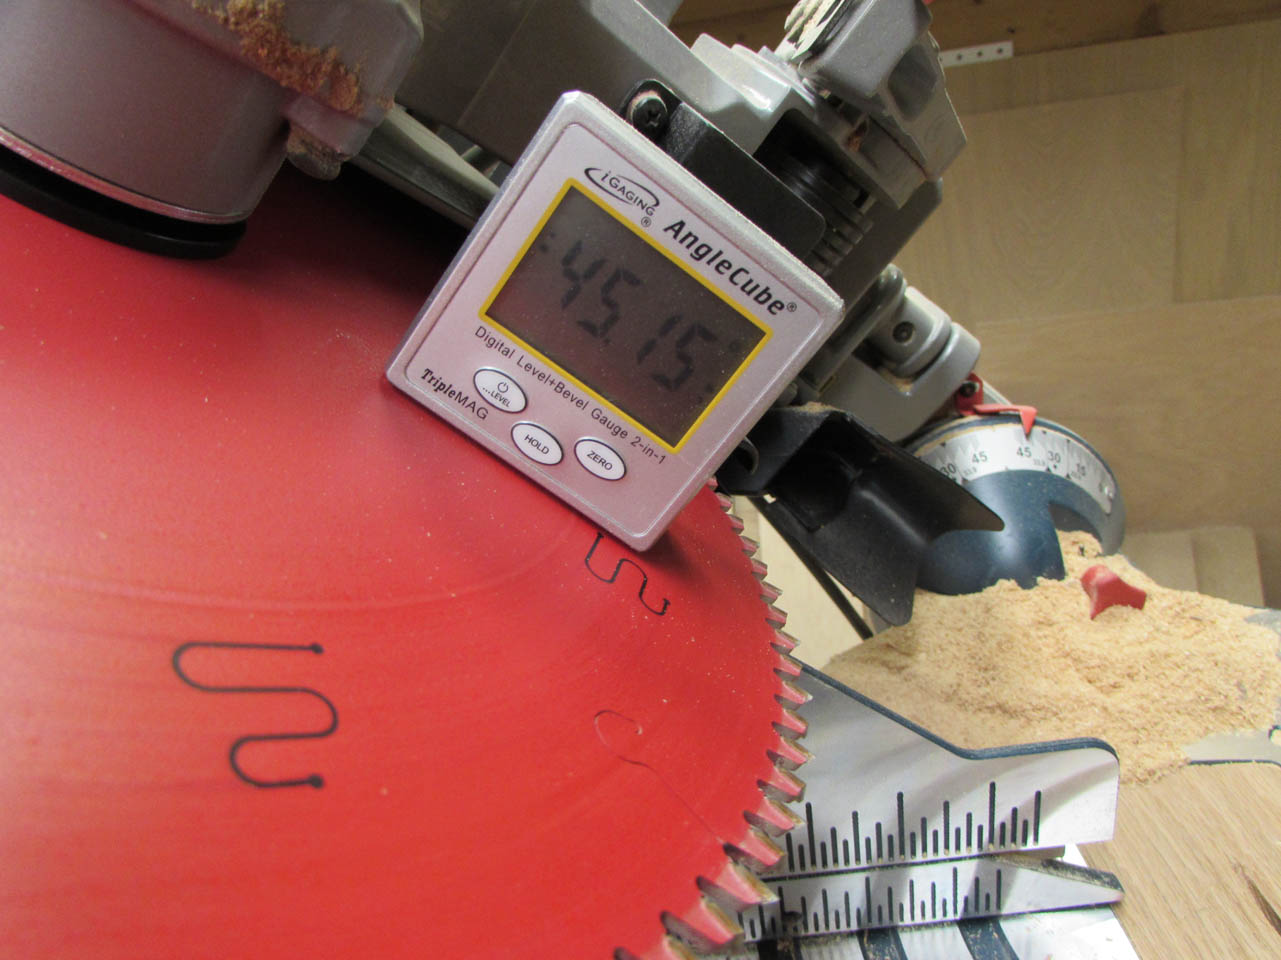
There are several ways to cut the 45 degree miter I need. I decided to try my miter saw, since it is easy to set up and it has a 14″ cut capacity. I set my digital angle-finder on the blade and tweaked the settings until I was as close to 45 degrees as I could get it.

Then I started cutting. I made the 45 degree cut first, in case there were any problems. I can always cut it to length later.

The first cut went well, so I proceeded to make the rest.

My dry-fit put me within half a degree of a perfect 90 degree corner. That should work out fine once everything gets clamped up.
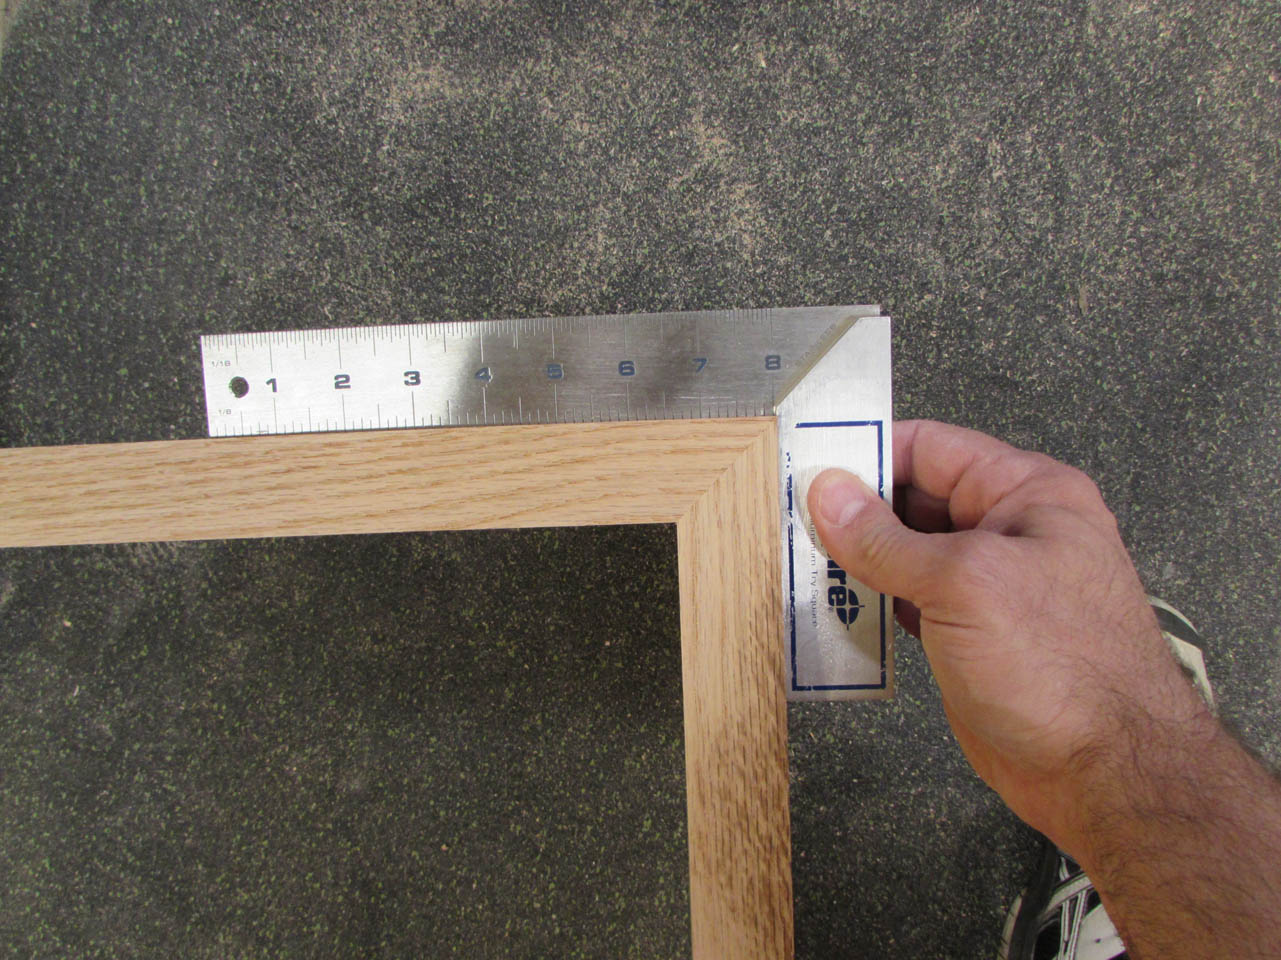
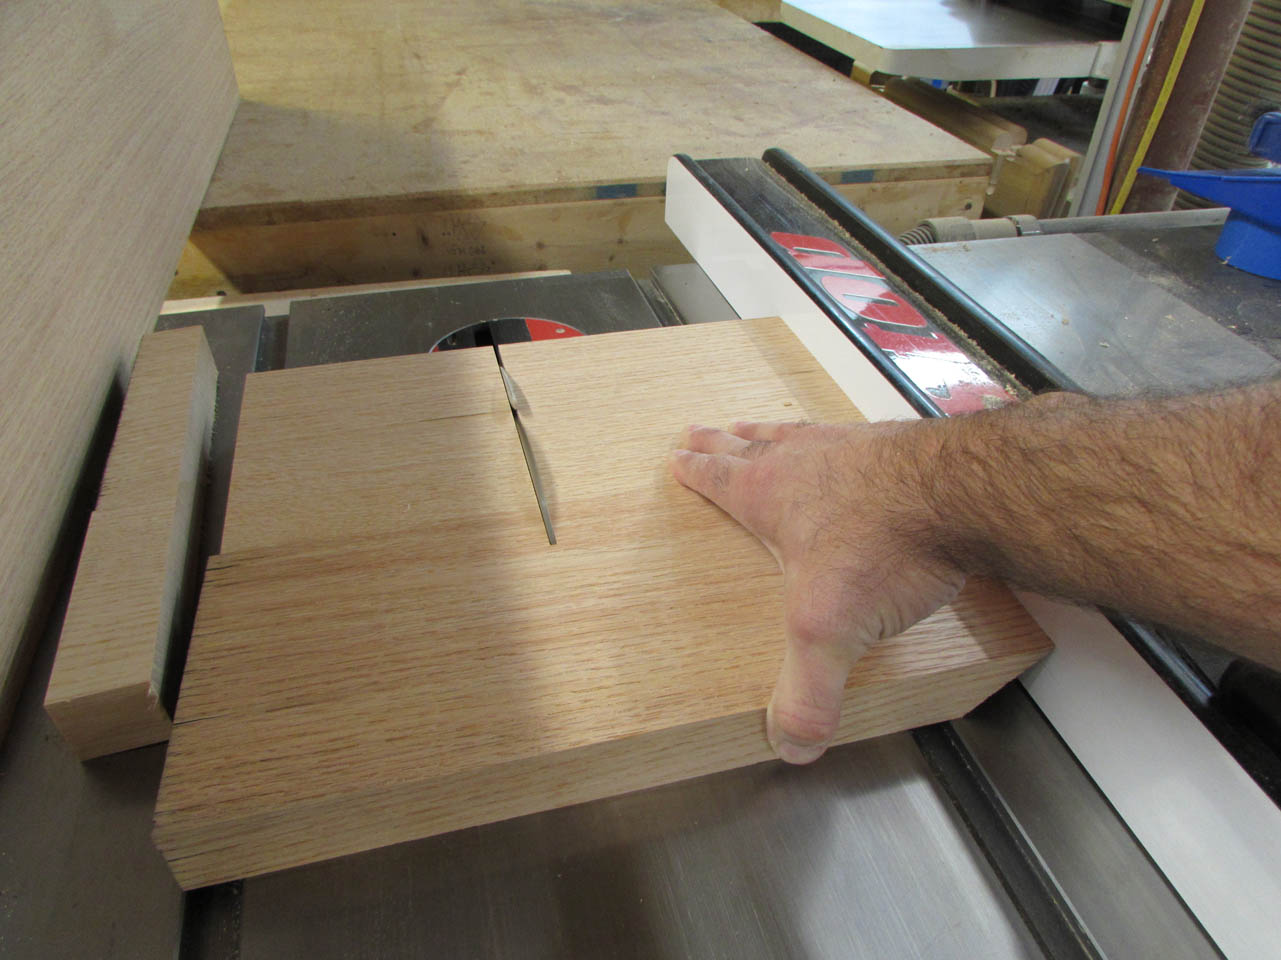
To get a good parallel cut on the short pieces, I used my table saw with the miter against the fence. This also insured that the two short pieces were exactly the same length. I cut the longer pieces to length on the miter saw, since they were not as critical. A dry-fit showed me that everything was working well so far.

The 45 degree corners will be end grain glue-ups. That is not ideal for anything structural. The glue can pull out of the porous end grain. To ensure a good joint and a tight fit, I decided to break out my Festool Domino.

I don’t use my Domino much, so I did a few test mortises on a scrap piece and I got a very good fit.

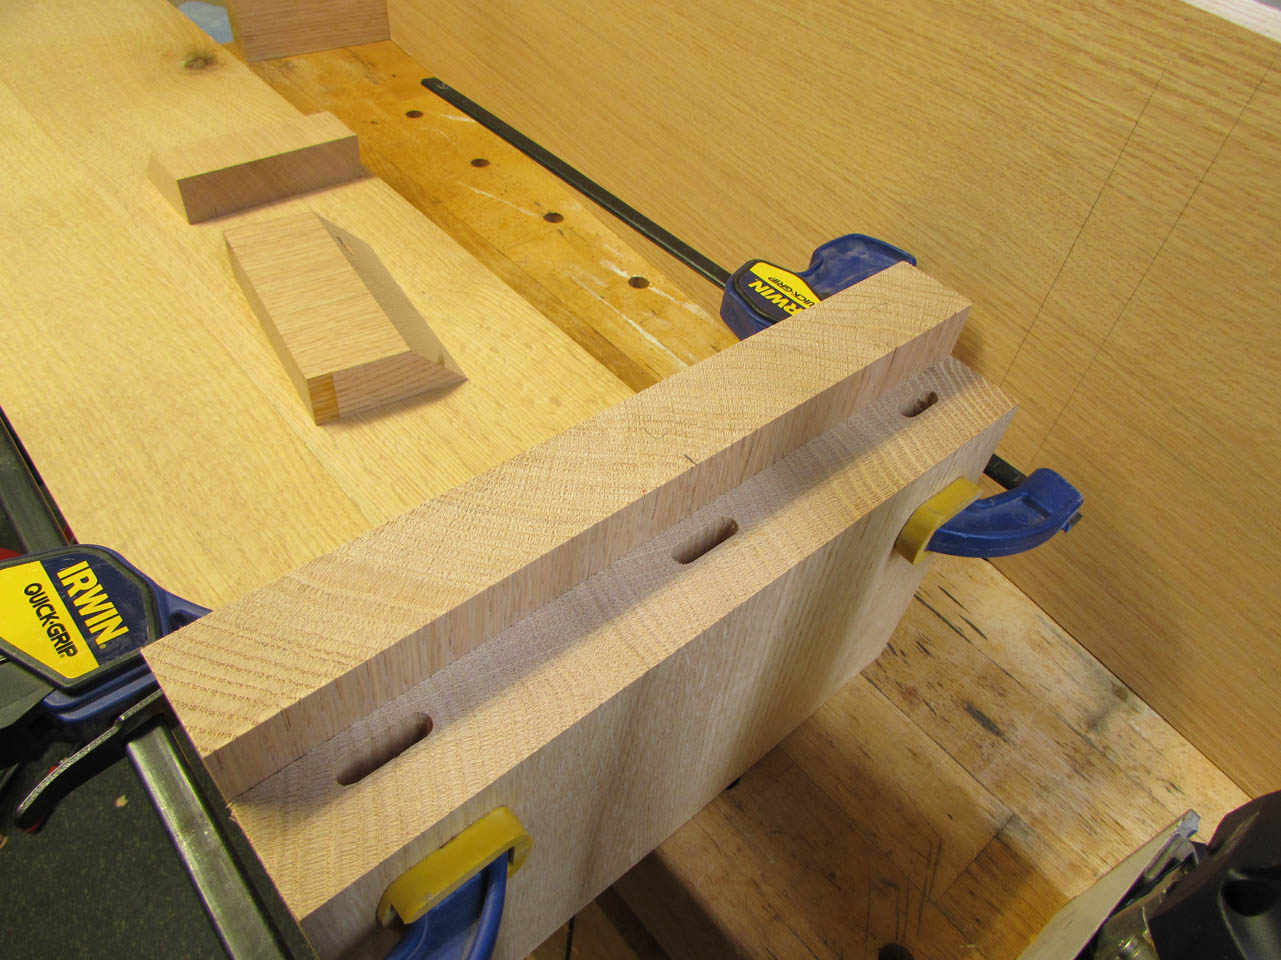
I laid out marks to place three mortises across each side of each miter, then cut them with the Domino.

I made all of the mortises, on the short pieces, the perfect width for the Dominos, But only one on the longer boards. I made the other two mortises wider to allow an easier fit at assembly.


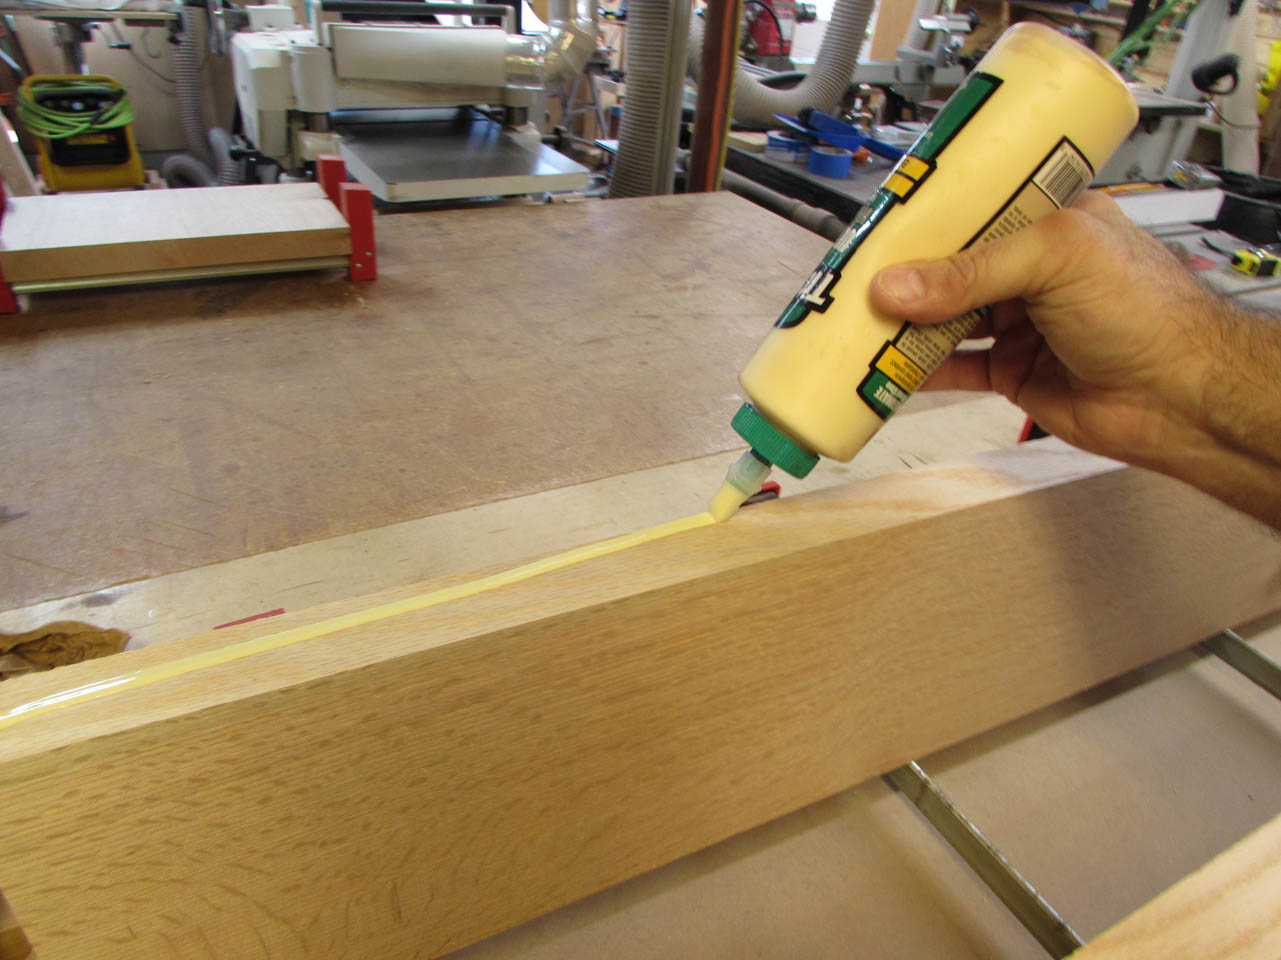
Since this is an end grain glue-up, I usually put a thin coat of glue along the miter and allow it to soak into the pours.

After it dries, I add a a second coat of glue before the final assembly. I am not sure if this helps insure a better joint, but I haven’t had one fail yet.

Then I gently tap the joint together and check for square.

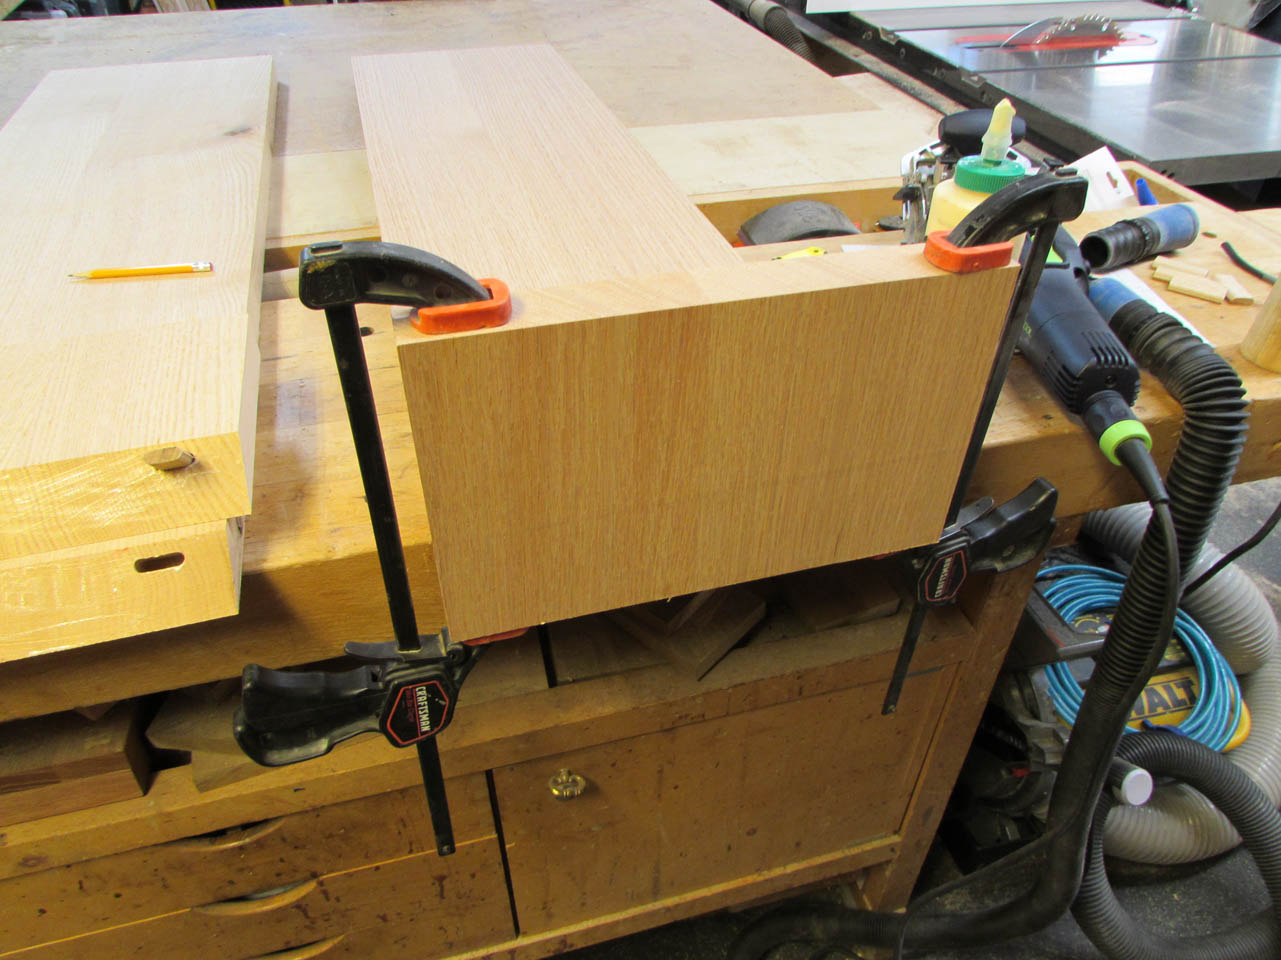
I threw a couple of clamps on that one and glued up the next. Then I added some more clamps and checked to make sure everything was still square.
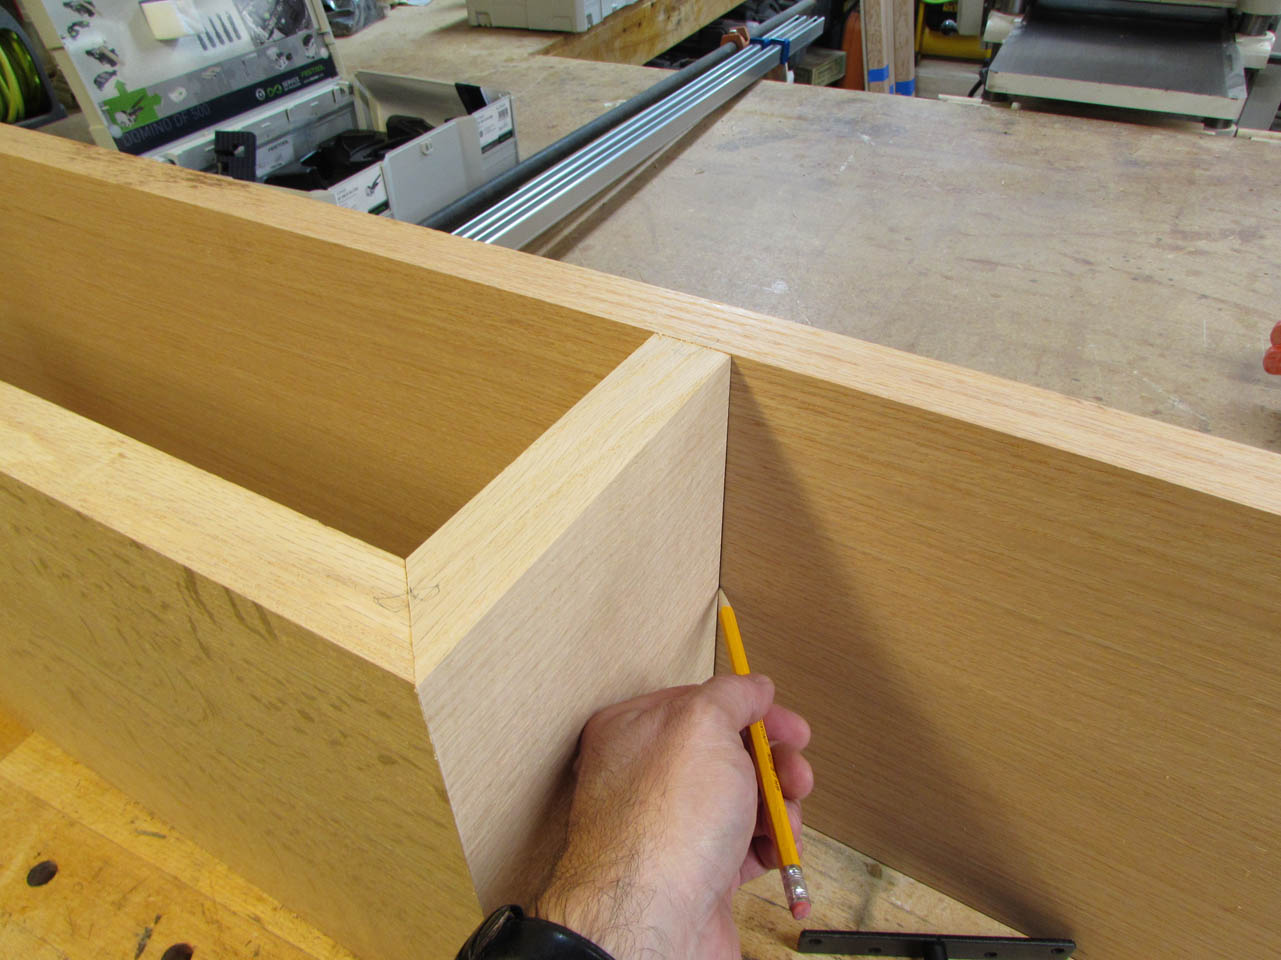
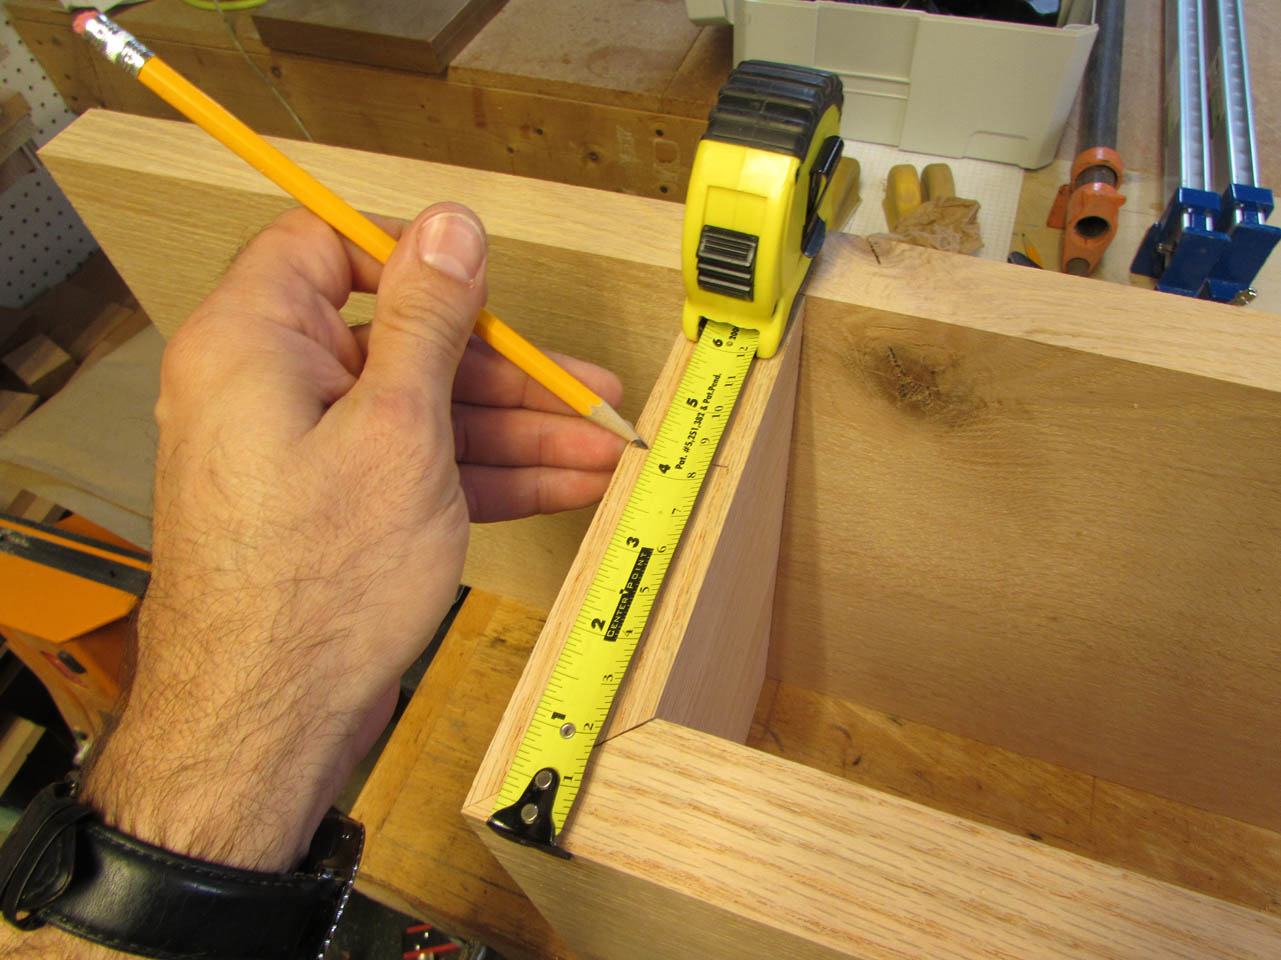
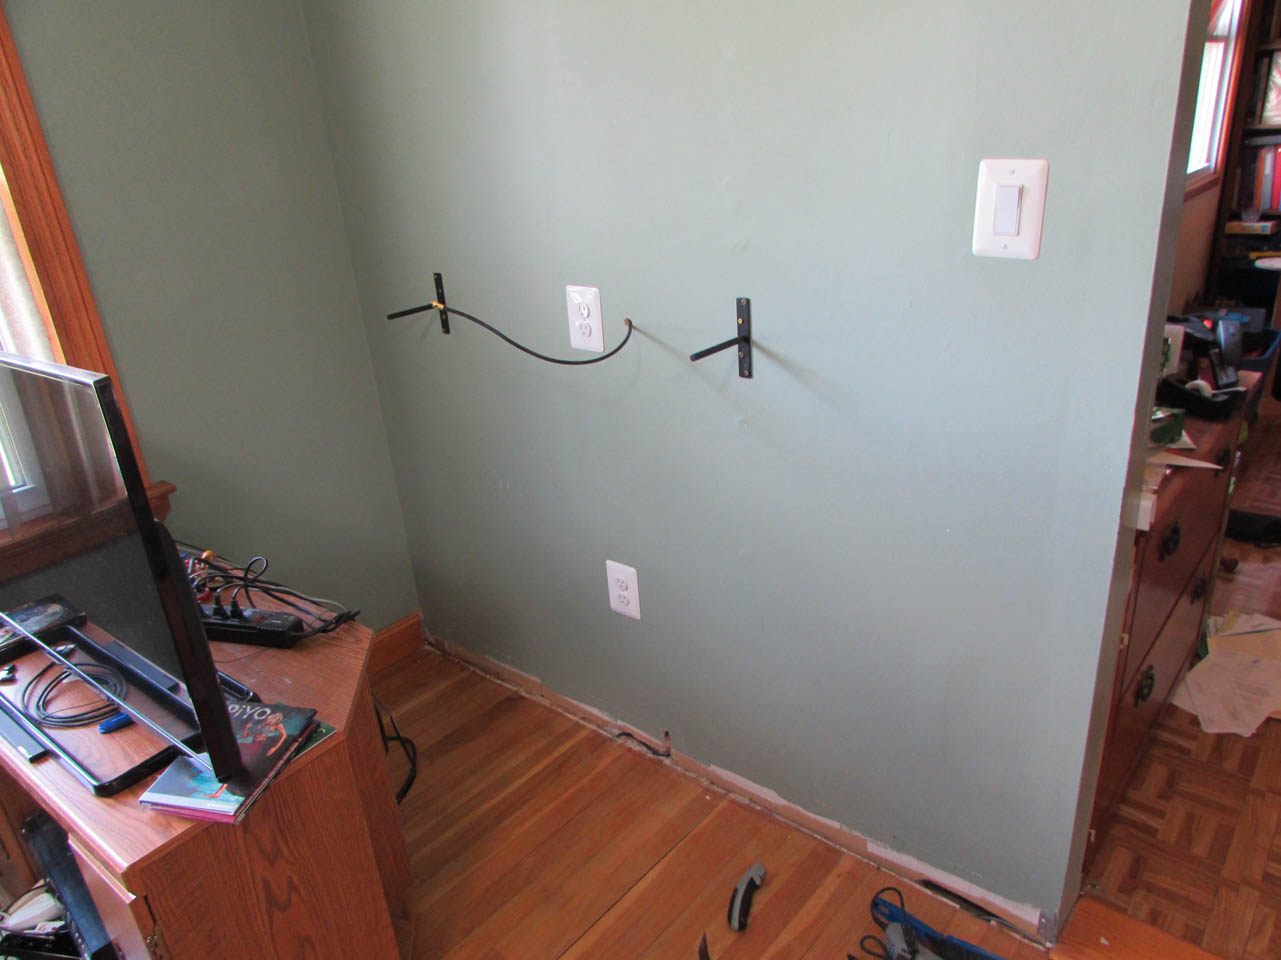
After the glue was dry, I did one more dry-fit before the final assembly. After locating the sides to insure they would fall centered on my studs, I marked the locations.

I clamped an off-cut to the short sides to give me a back-stop for my Domino and cut the mortises into the end-grain.

Setting another scrap piece against the marks I made on the longer pieces, I repeated the process.


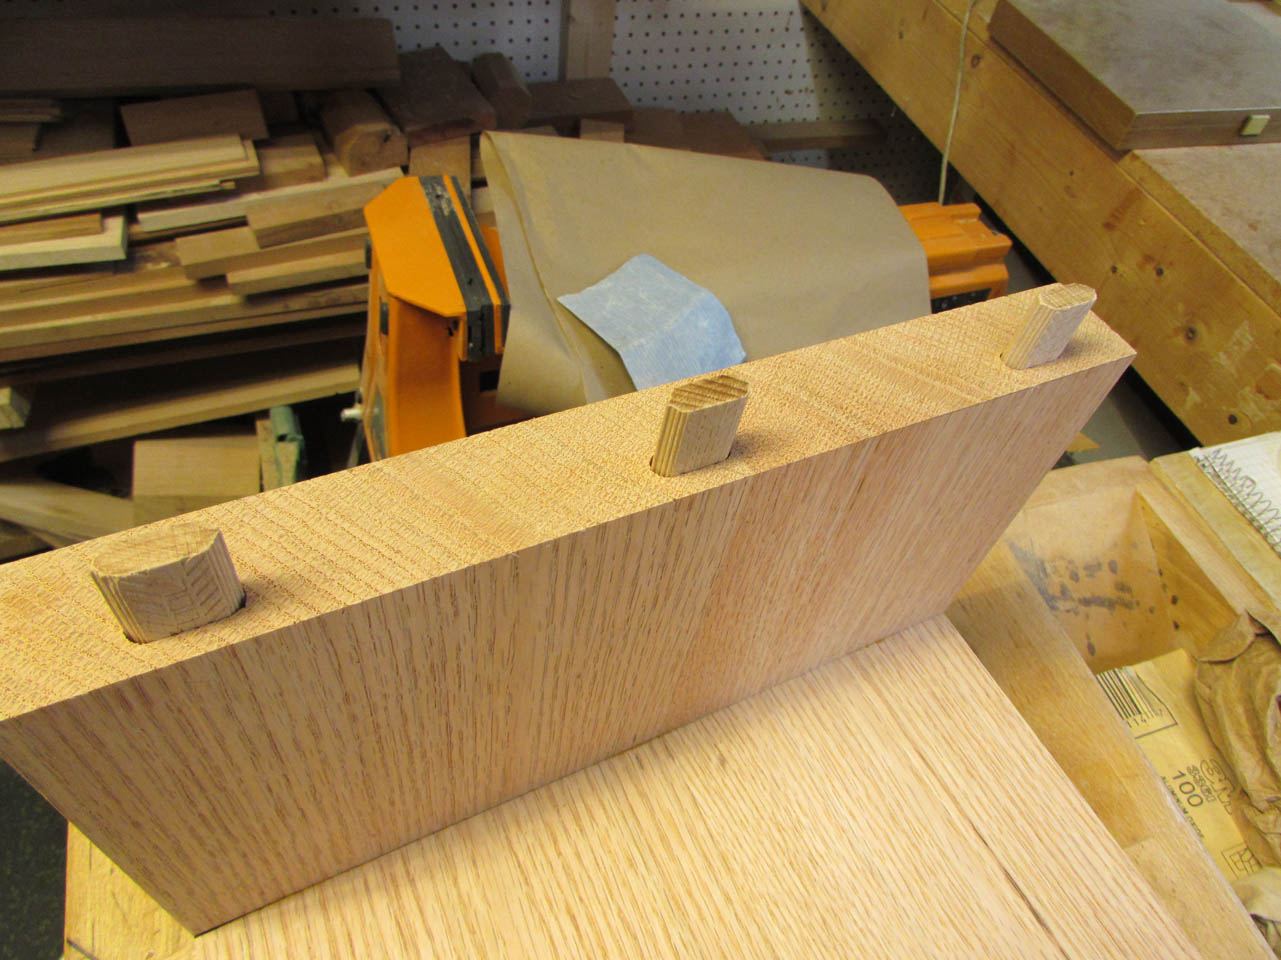
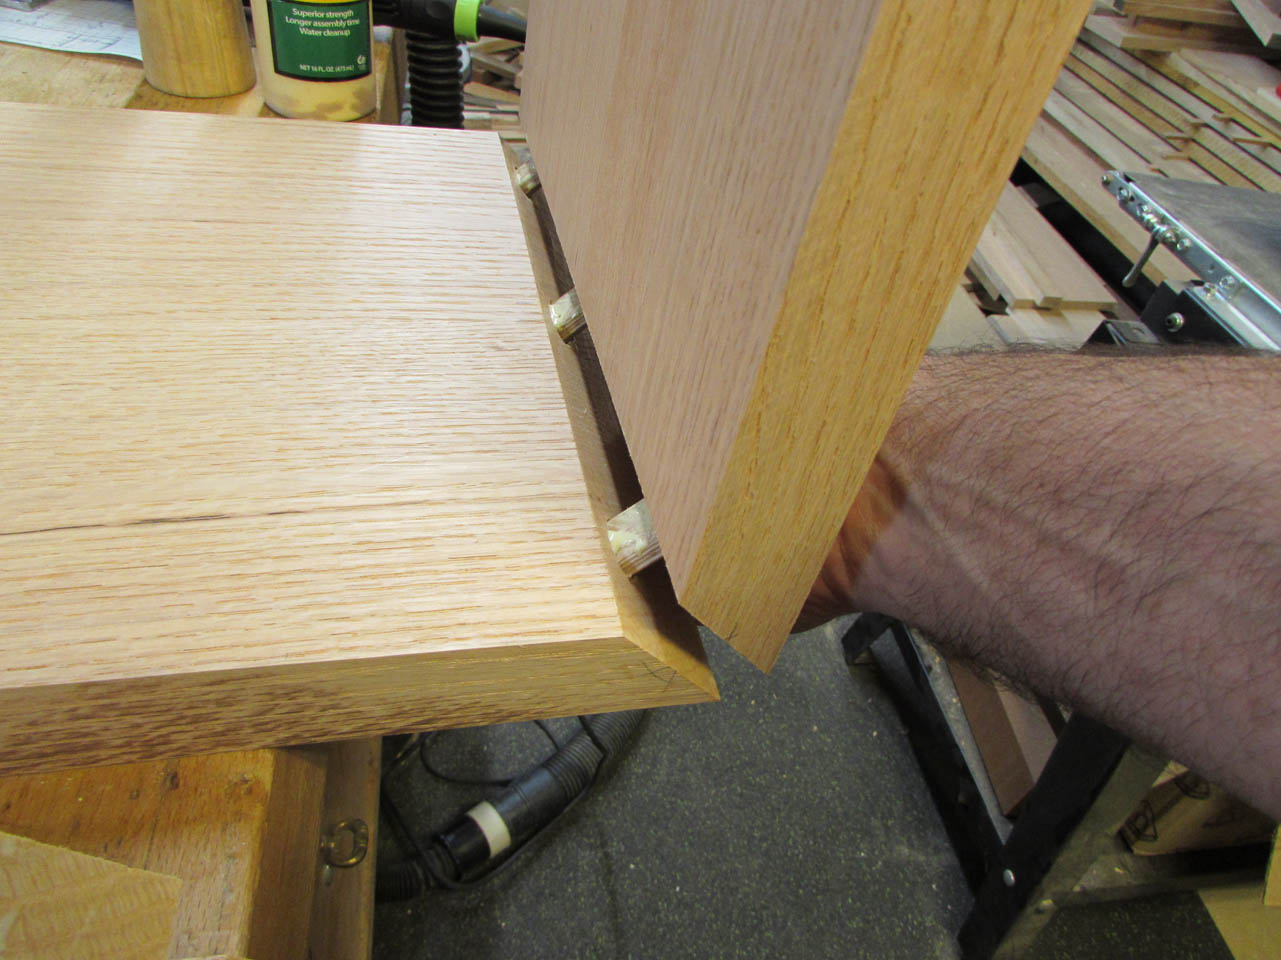
I set my Dominos in place and did a dry-fit.
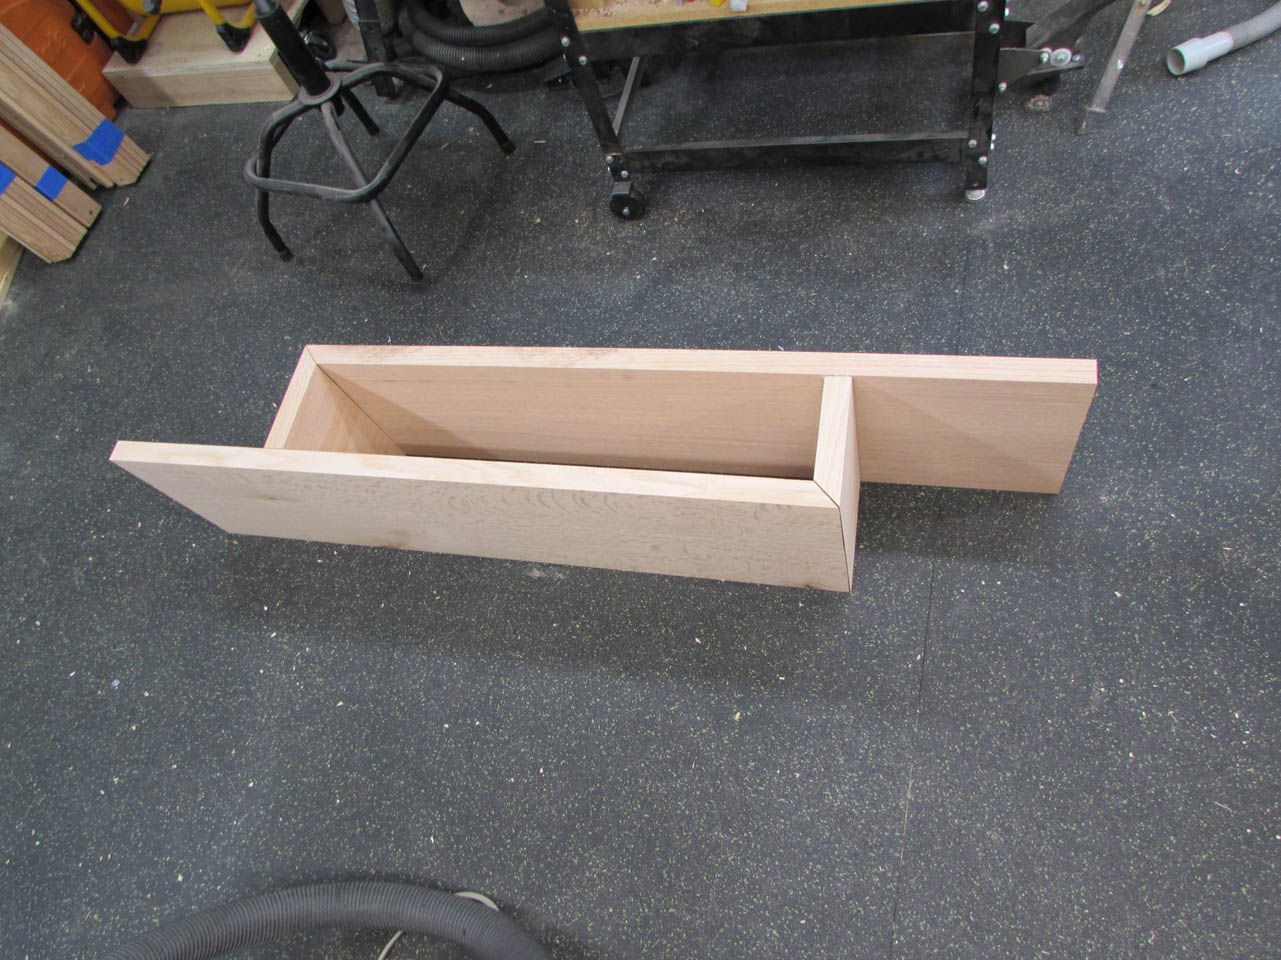
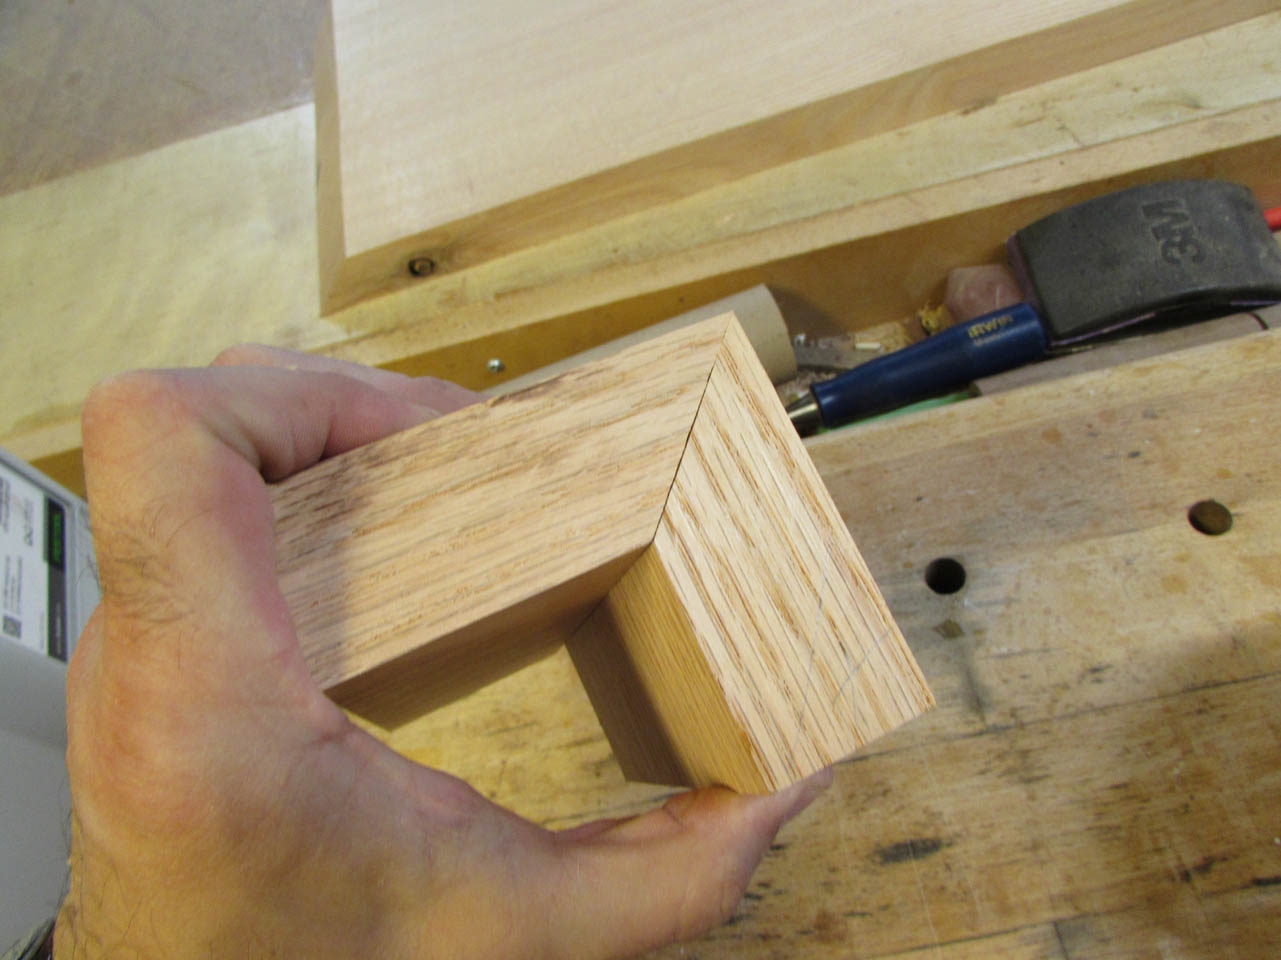
It went together perfectly. I was a little surprised. Nothing ever goes perfectly…
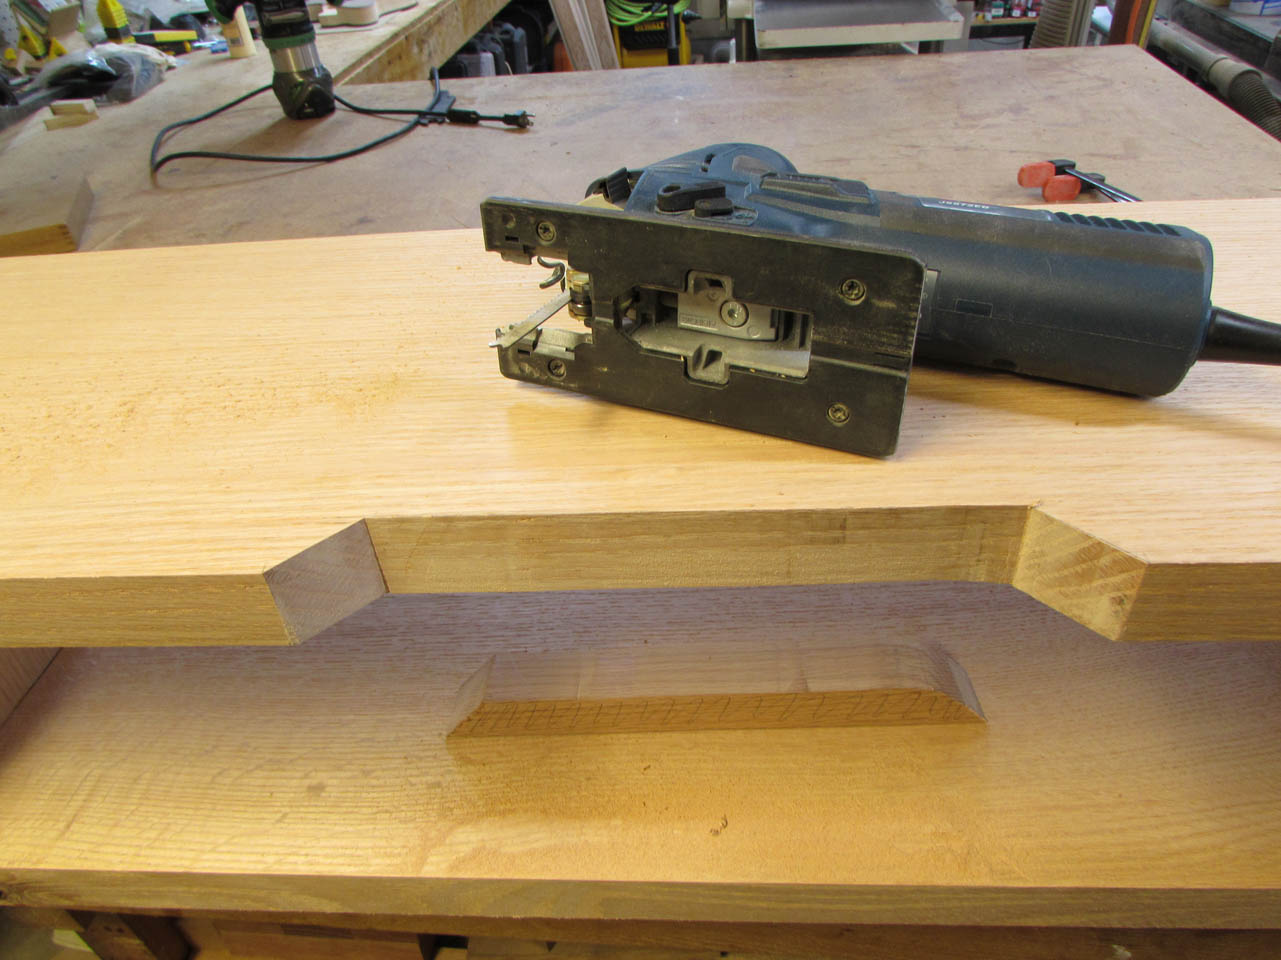
I had intended to cut dado slots into the shorter pieces on my table saw, to receive the flange for the brackets, but I forgot. So I will have to route them out the hard way… First though, I laid out the exact center of both side pieces.

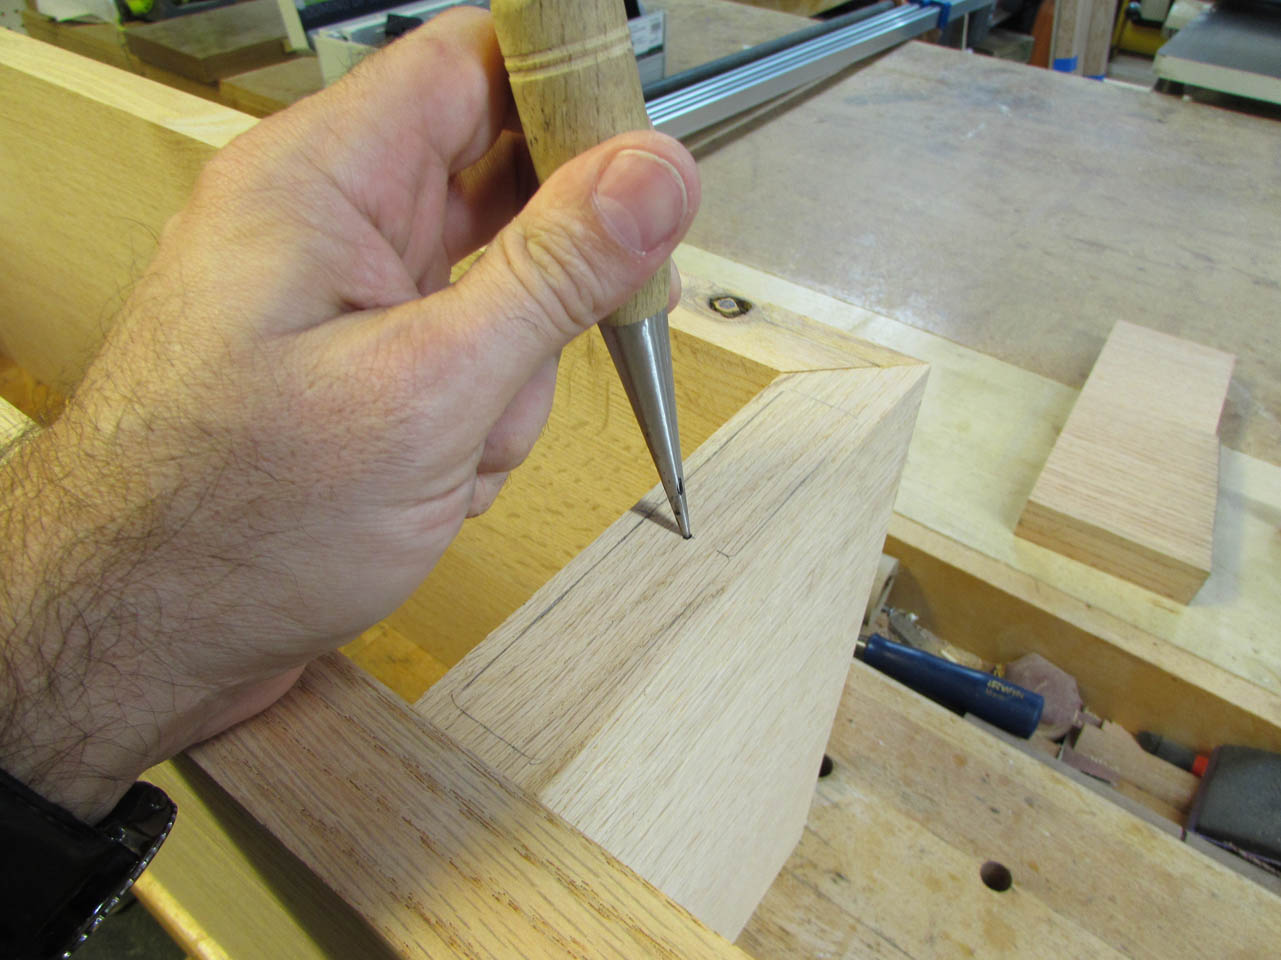
I marked the center then drilled a 1/2″ diameter hole into each, at my drill press. I am hoping this will give me a hole perfectly perpendicular to the face.

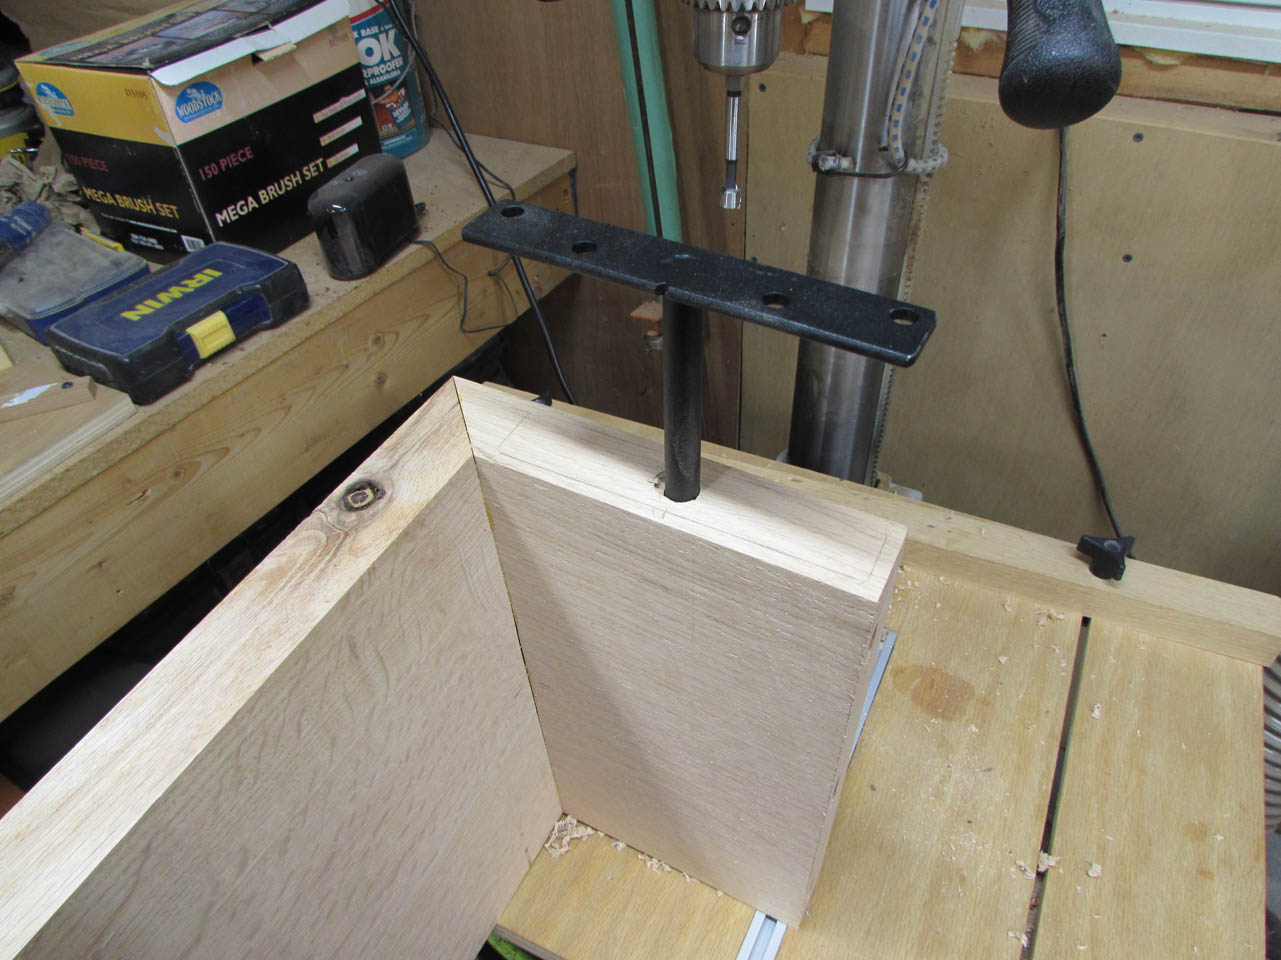
Since the forstner bit was not long enough, I needed to find a longer bit and finish the holes by hand.

I have a brad-point and a twist drill that are long enough. I chose to go with the less-aggressive twist drill bit.

With the hole already started, I could drill it the rest of the way with a fairly high level of confidence that the hole would continue being straight.

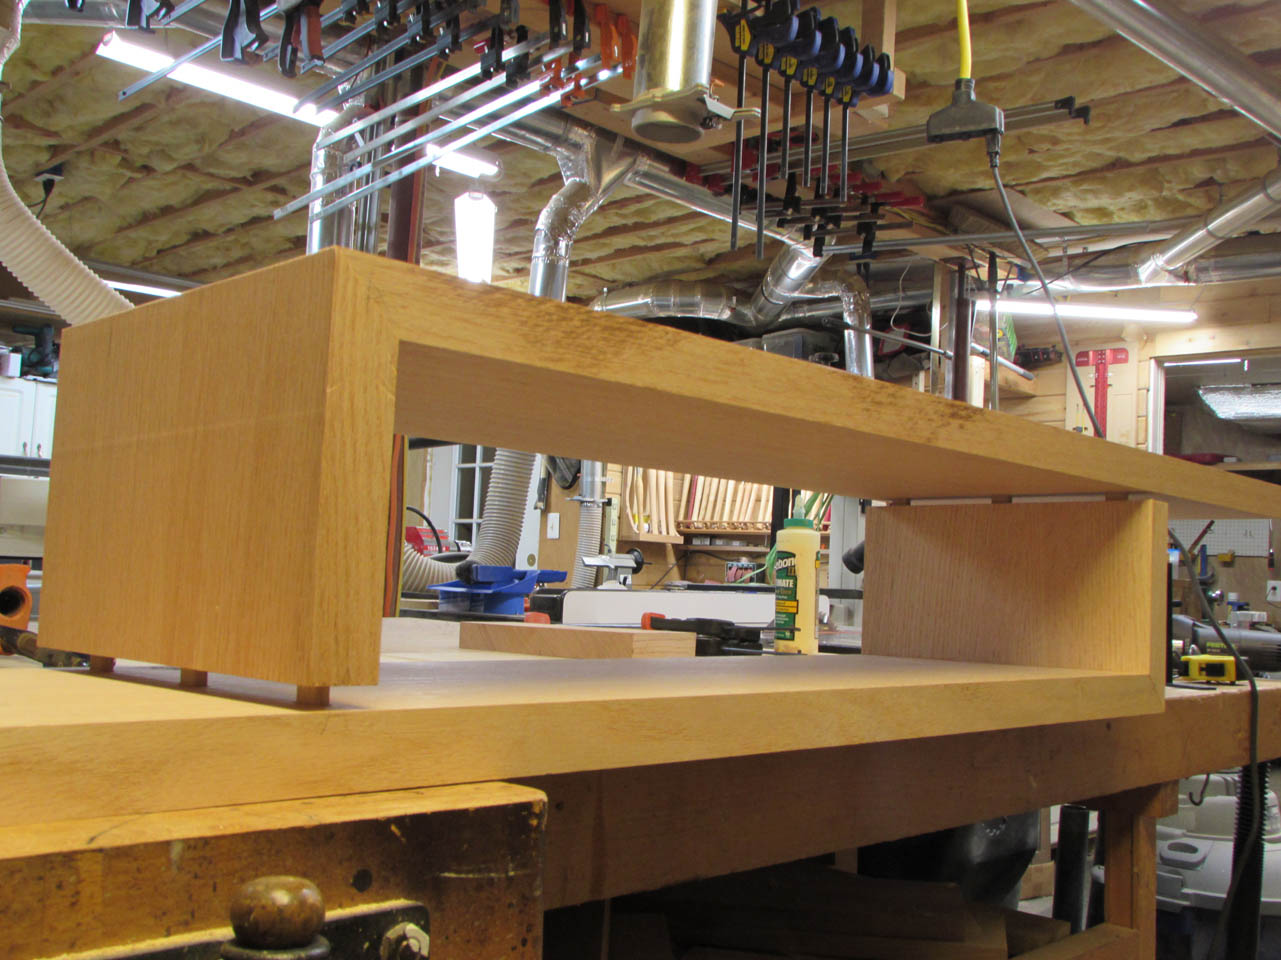
My test-fit shows that the holes were deep enough so I went back to finish the final glue-up. This thing is getting heavy and I wasn’t confident I could drill it out, on the drill press, fully assembled.
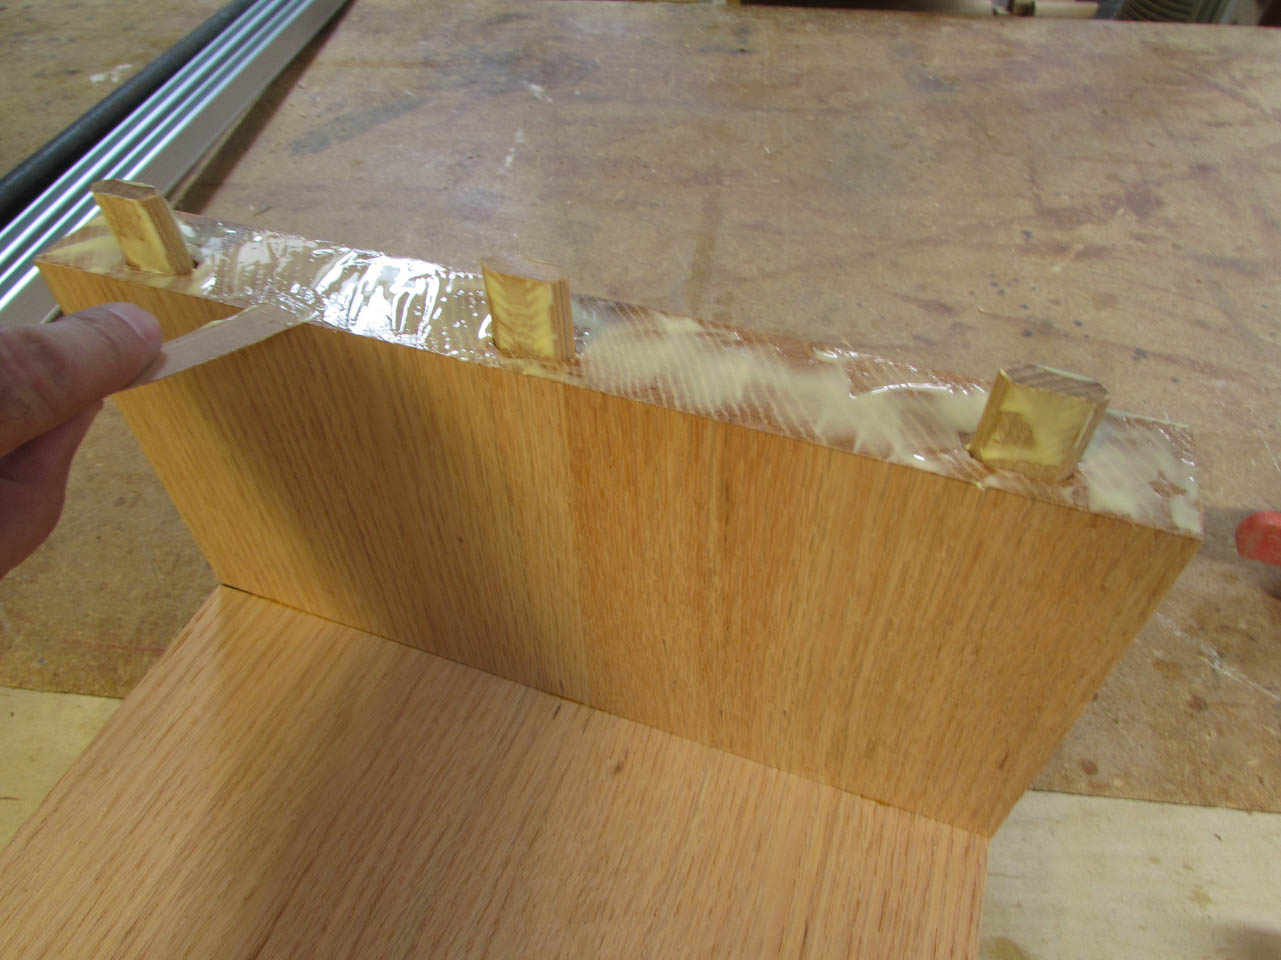

I glued and clamped it up for a couple of hours.

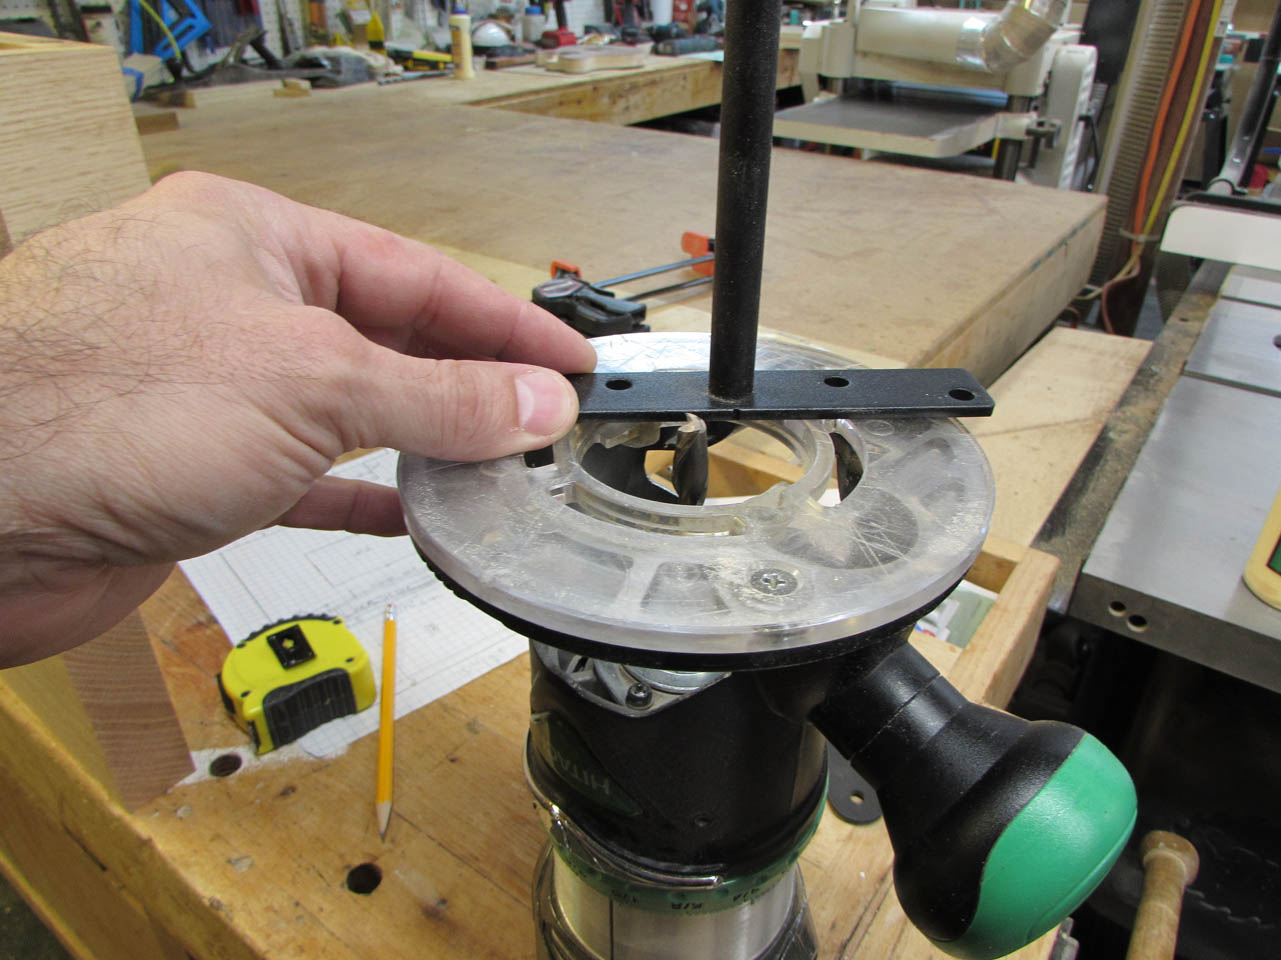
When it was dry enough, I set up my router and started free-hand cutting the mortise to receive the mounting flange.

It is a little rough, but it works. It will always be up against the wall so I don’t care if it isn’t perfect…

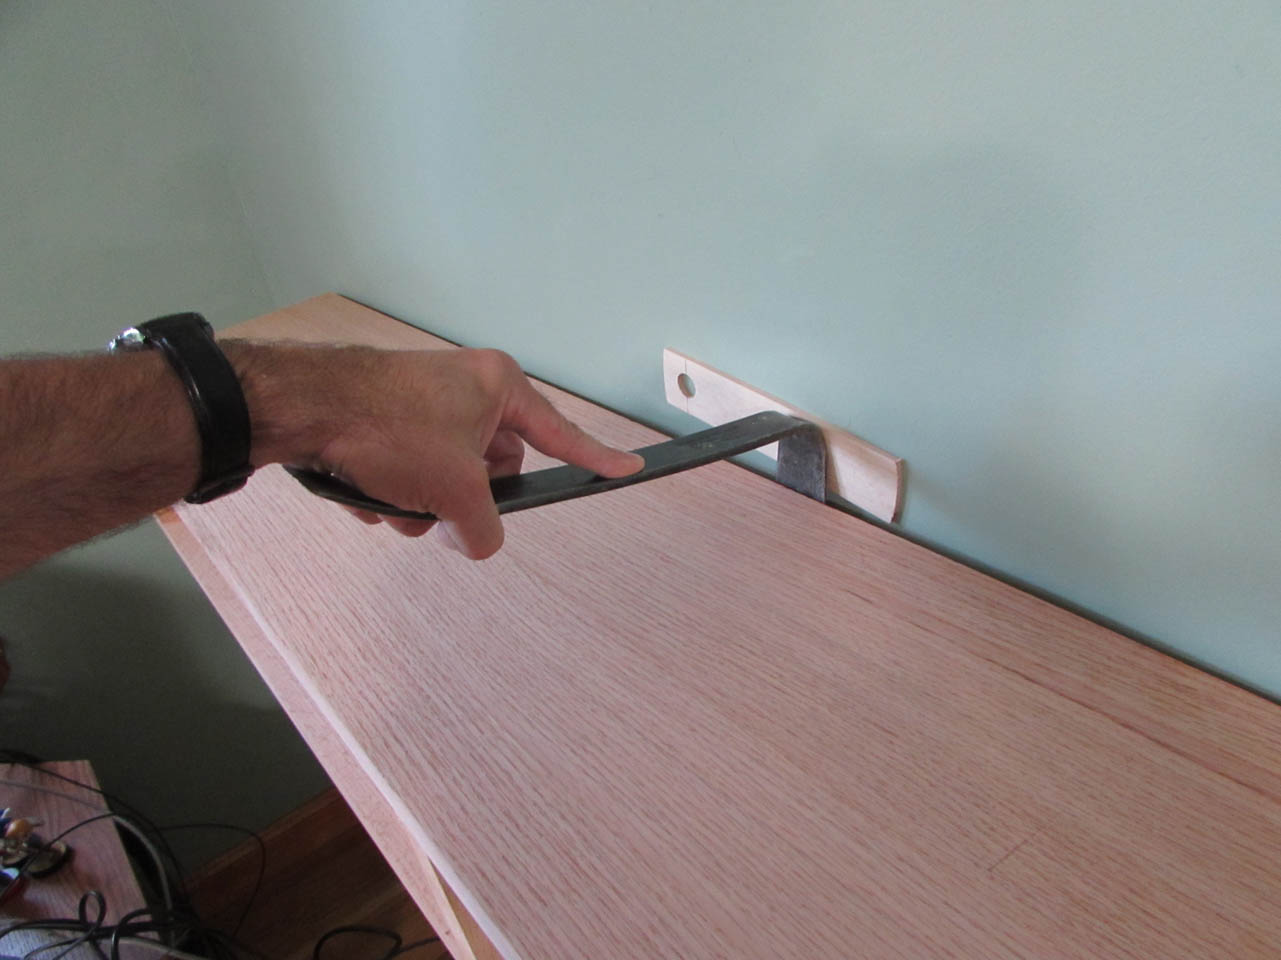
I weighed this shelf, fully assembled. It weighs 45 pounds total. My heavy-duty brackets are only 5 1/2″ long, but rated for 100 pounds. I was starting to worry that they may be a bit under-sized, but after beating it into place, I was fairly confident that it would work just fine.

I am not really happy that my wall is not straight, but the gap does give me a space to pry the shelf back off the wall again. The fact that I had to pry it off the wall makes me more confident that it will stay in place.
I decided to shave a bit off of the one end to better match the curve in the wall and give me a tighter fit.


I also laid out a notch to allow my wires to reach from the TV to the rest of the electronics.

I used my Jigsaw to cut out the notch. It did a surprisingly smooth job.
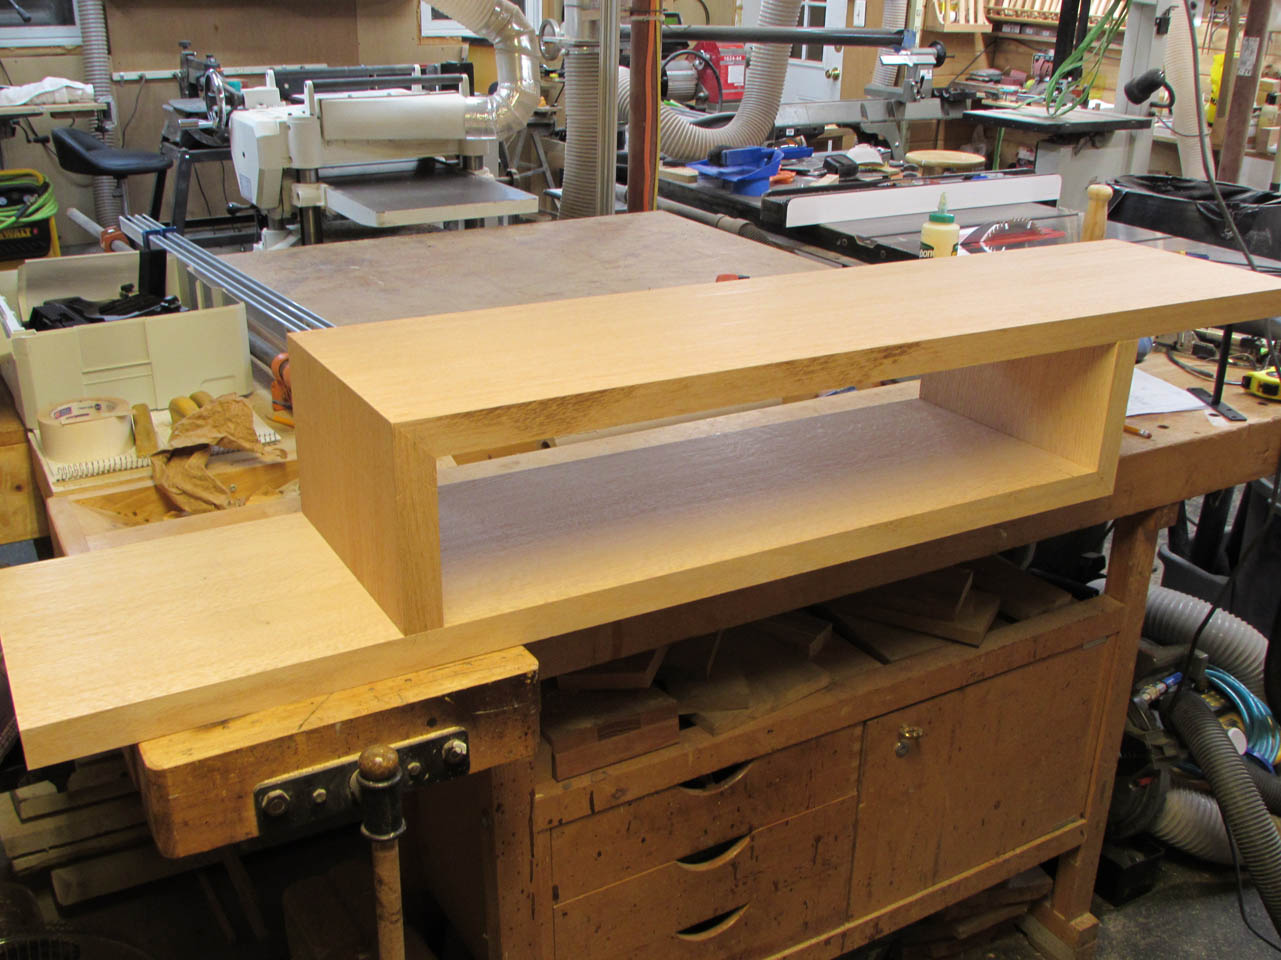
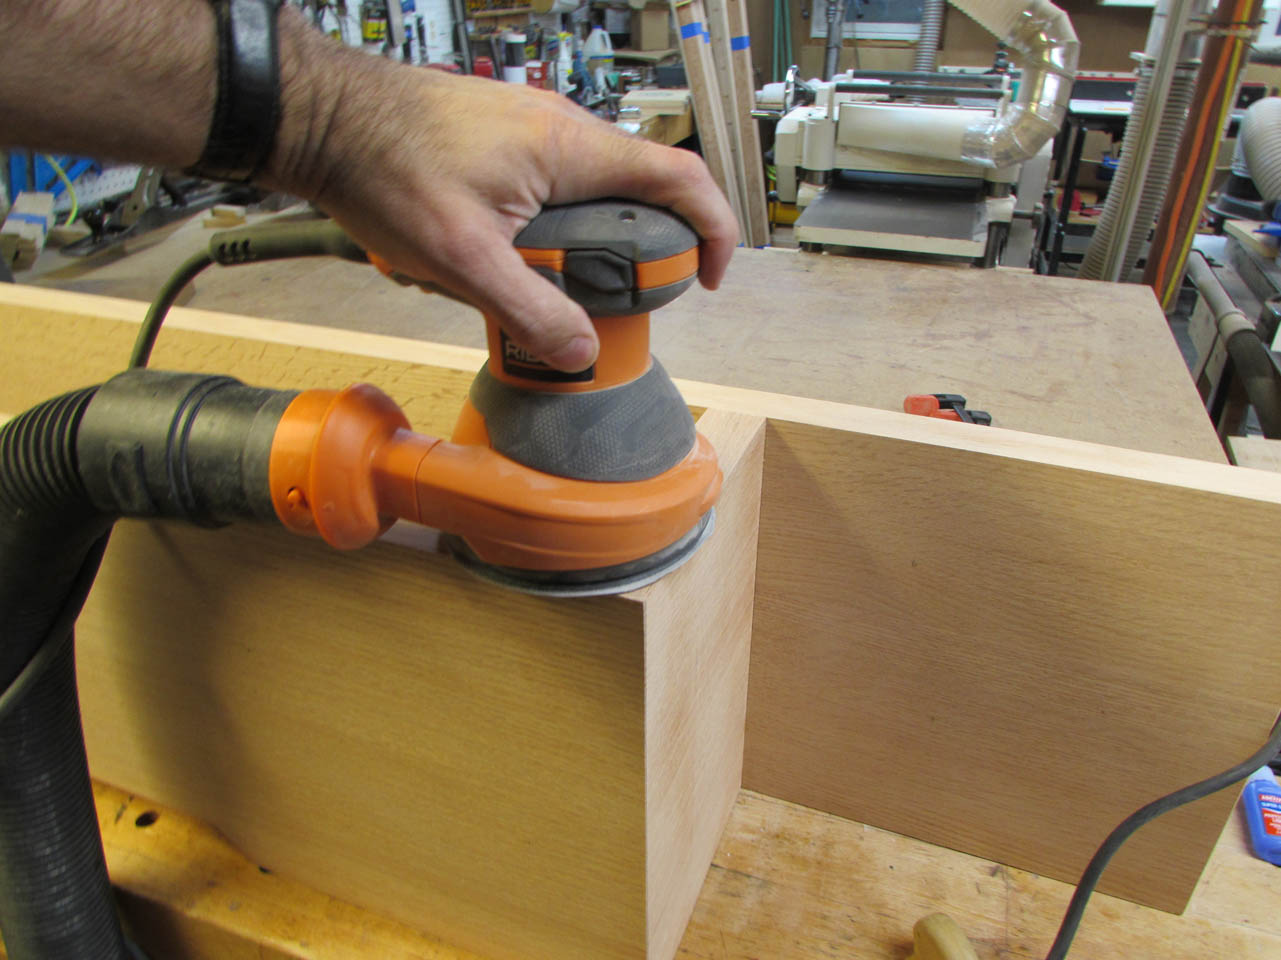
With all the cutting and assembly complete, it was time for the final sanding.
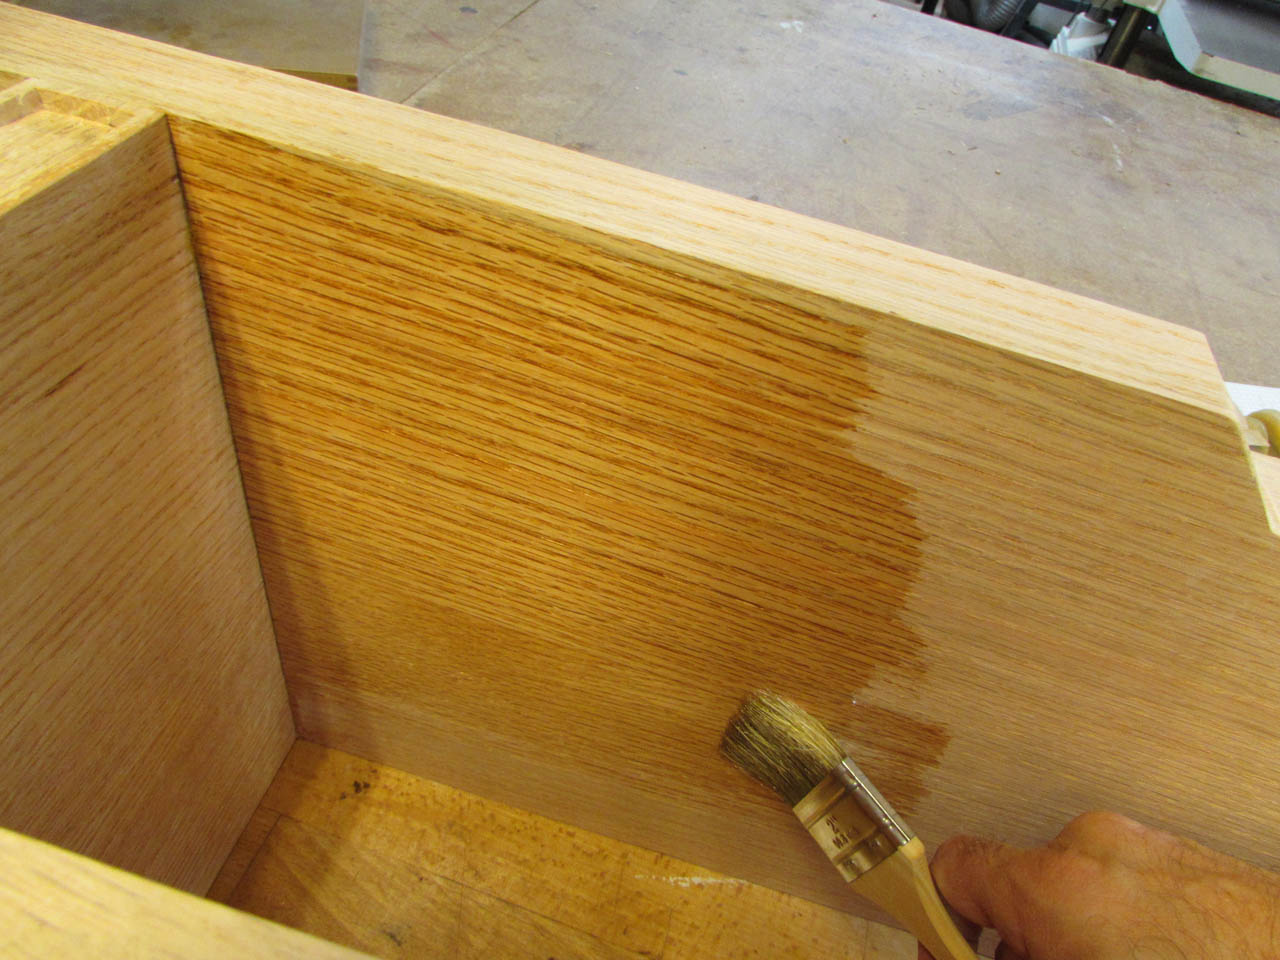
Once sanded, I started applying polyurethane. I started by painting the inside and back first.


Then I painted the bottom and flipped the entire thing over onto painter’s pyramids.
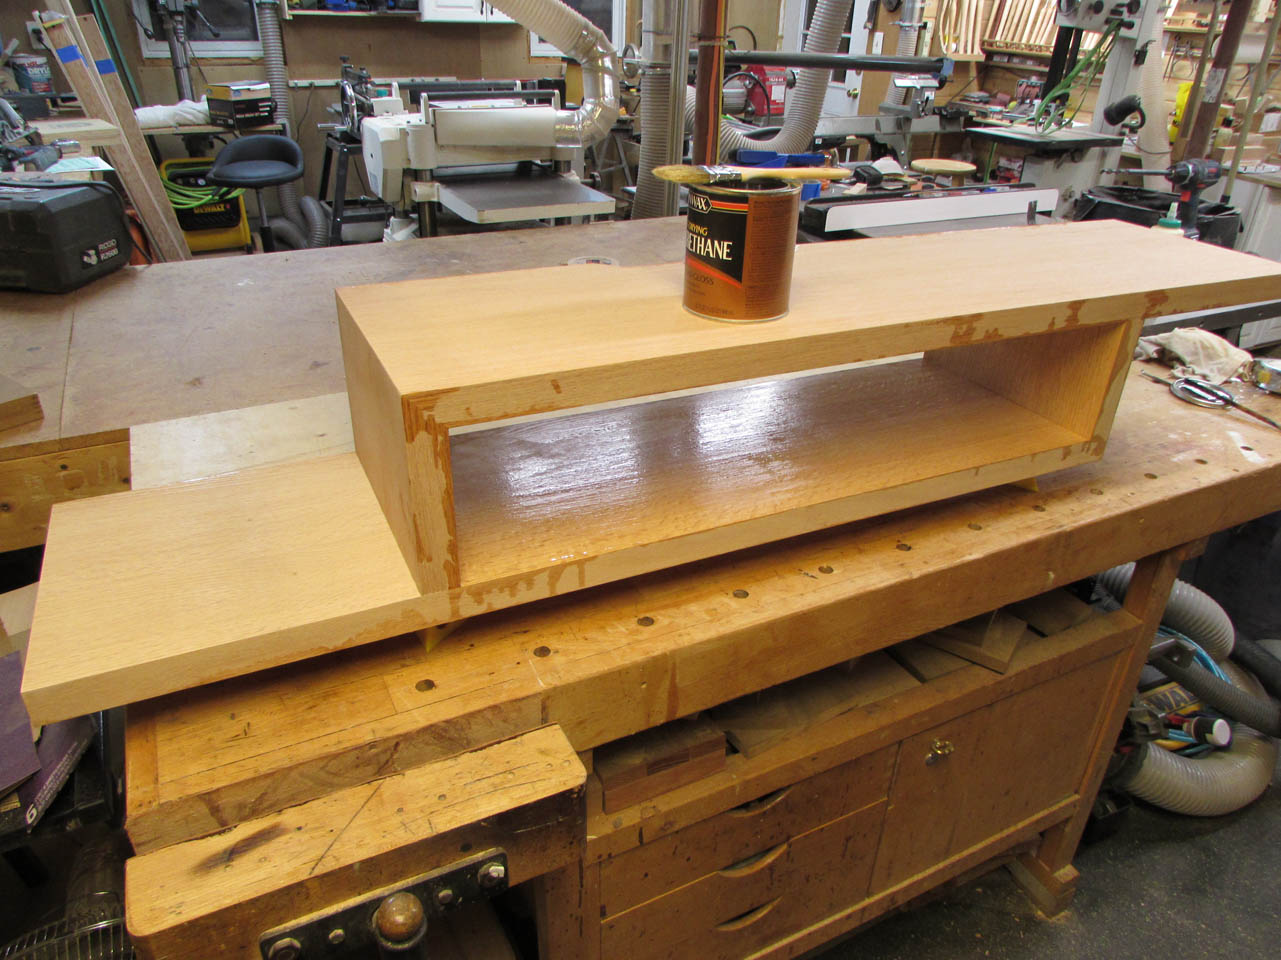

I finished applying poly to the top and front, then looked everywhere for drips.

After it dried, I came back the next day and sanded everything back with 400 grit sand paper and applied a second coat.
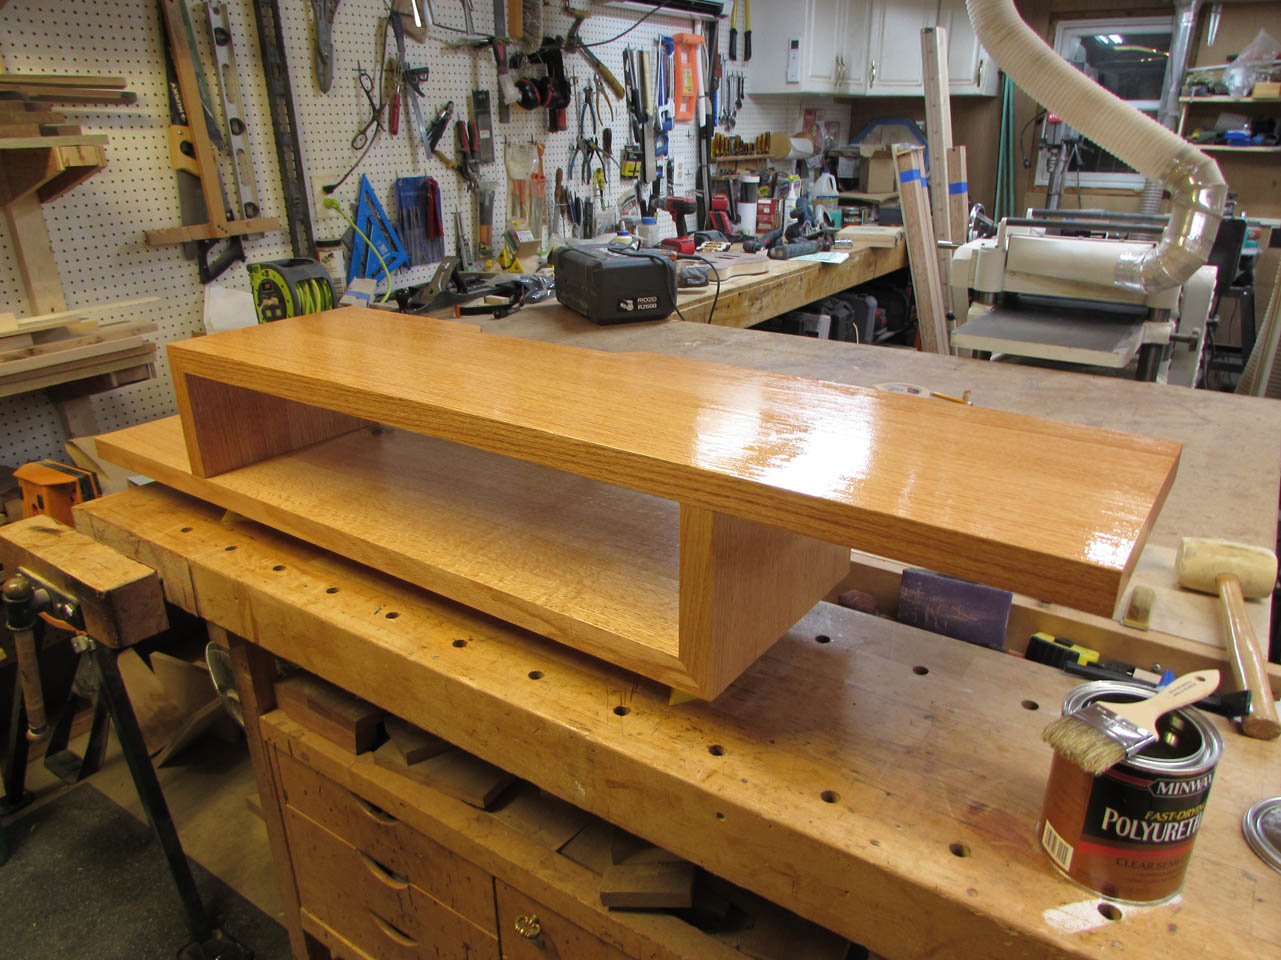
When that dried, I buffed out the entire surface with some brown paper, leaving the surface smooth and finished.

While the urethane was drying, I took the opportunity to fish my antenna cable up through the wall and bring it out in the shelf location. I also fished a wire down to the outlet and added a second outlet, next to the cable. This will help to hide some of the wires on the shelf. Just a warning to anyone using these brackets, the screws that come with them are too small and pull right through the the bracket holes. I used construction screws instead.
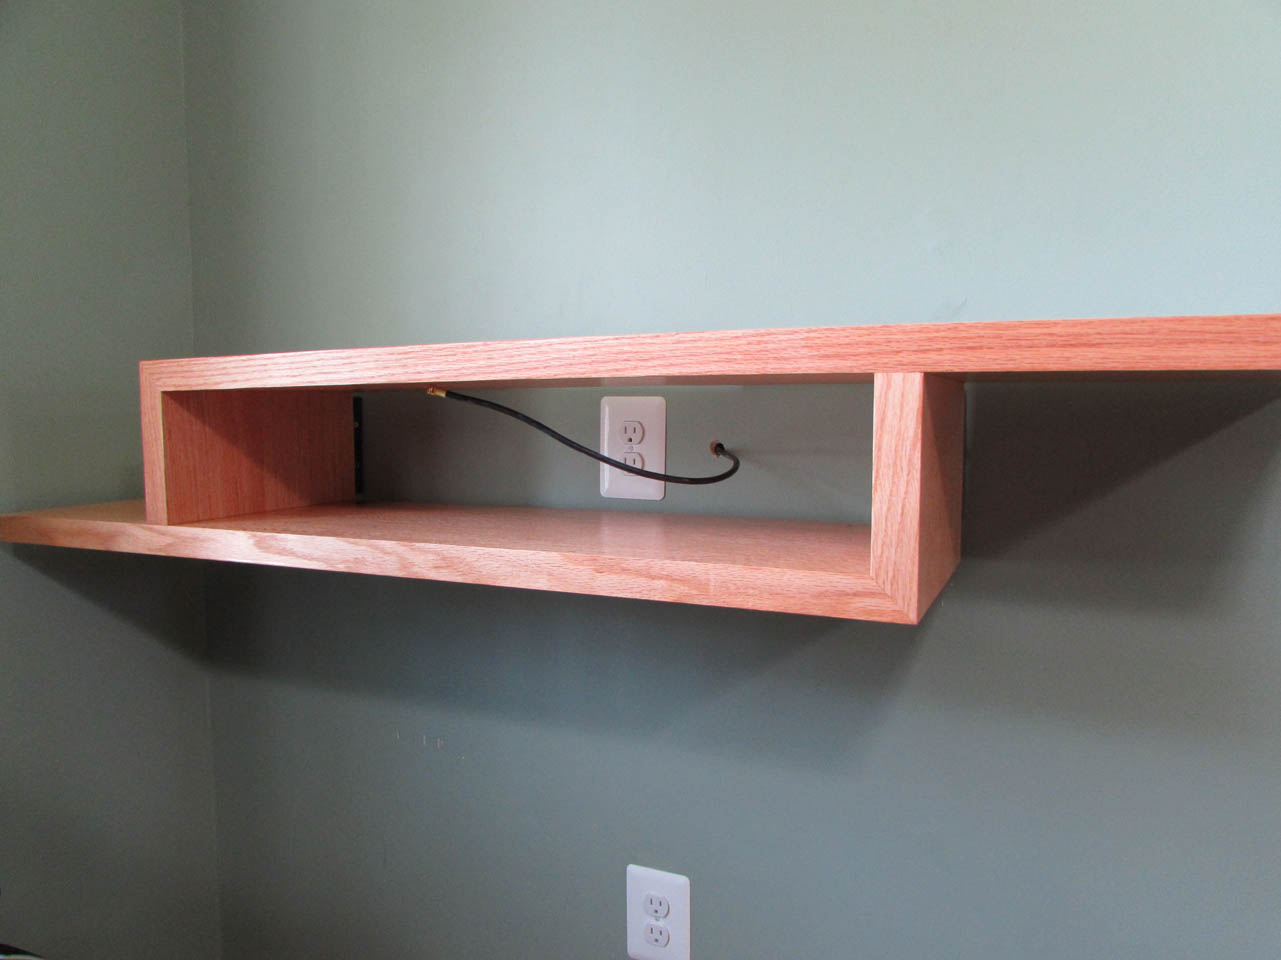
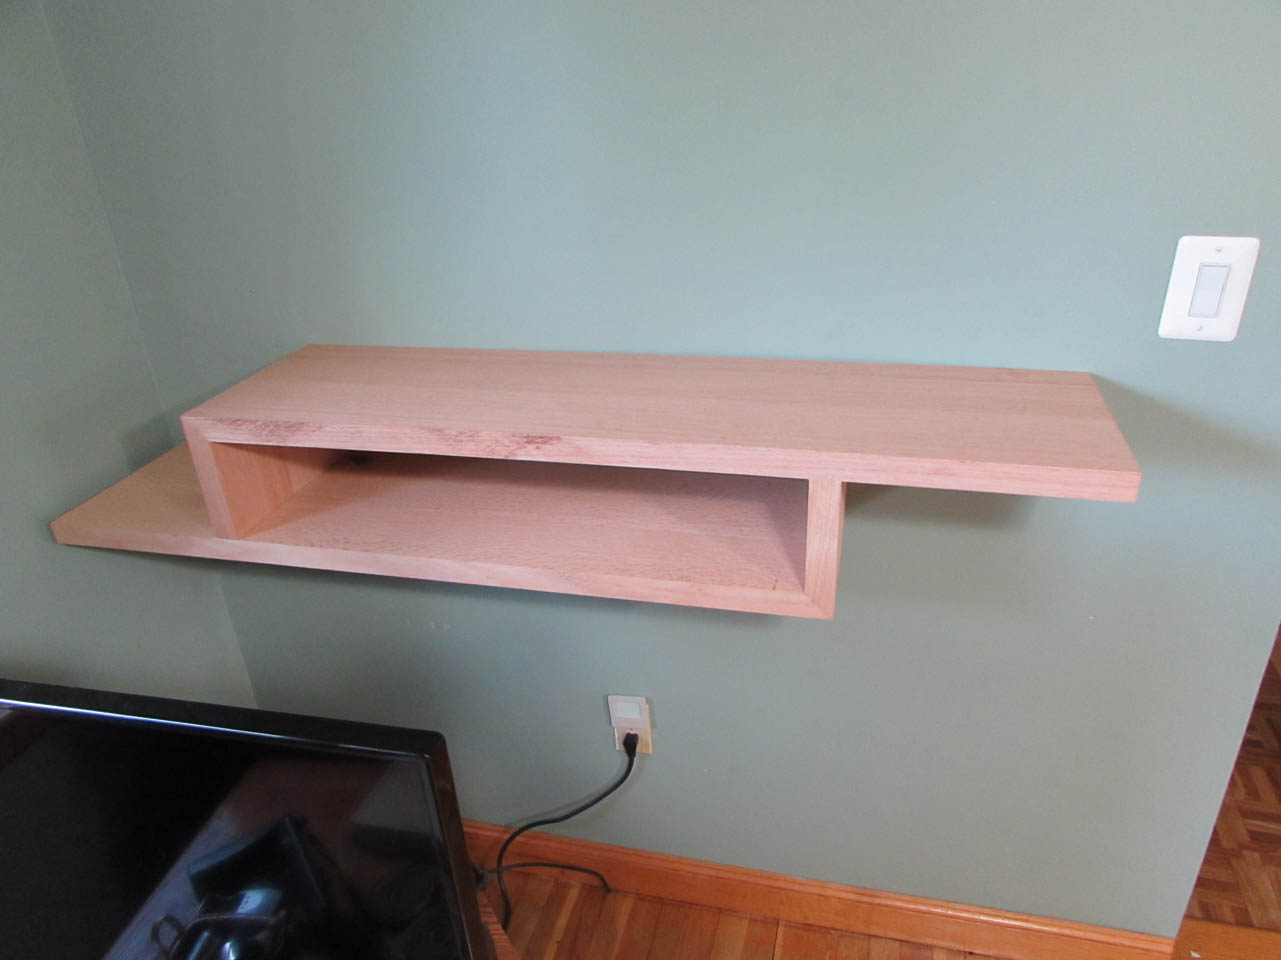
I installed the shelf and plugged everything back in to make sure it all worked.


When I had a bit more time, I mounted the TV on the wall and added a sound bar. The only thing I have left to do is hide the wires. I couldn’t route them through the wall because it is an exterior wall. I think I will look for a flexible wrap that matches the wall color. Just a bit more cleaning left to do and I will have a completely open corner.
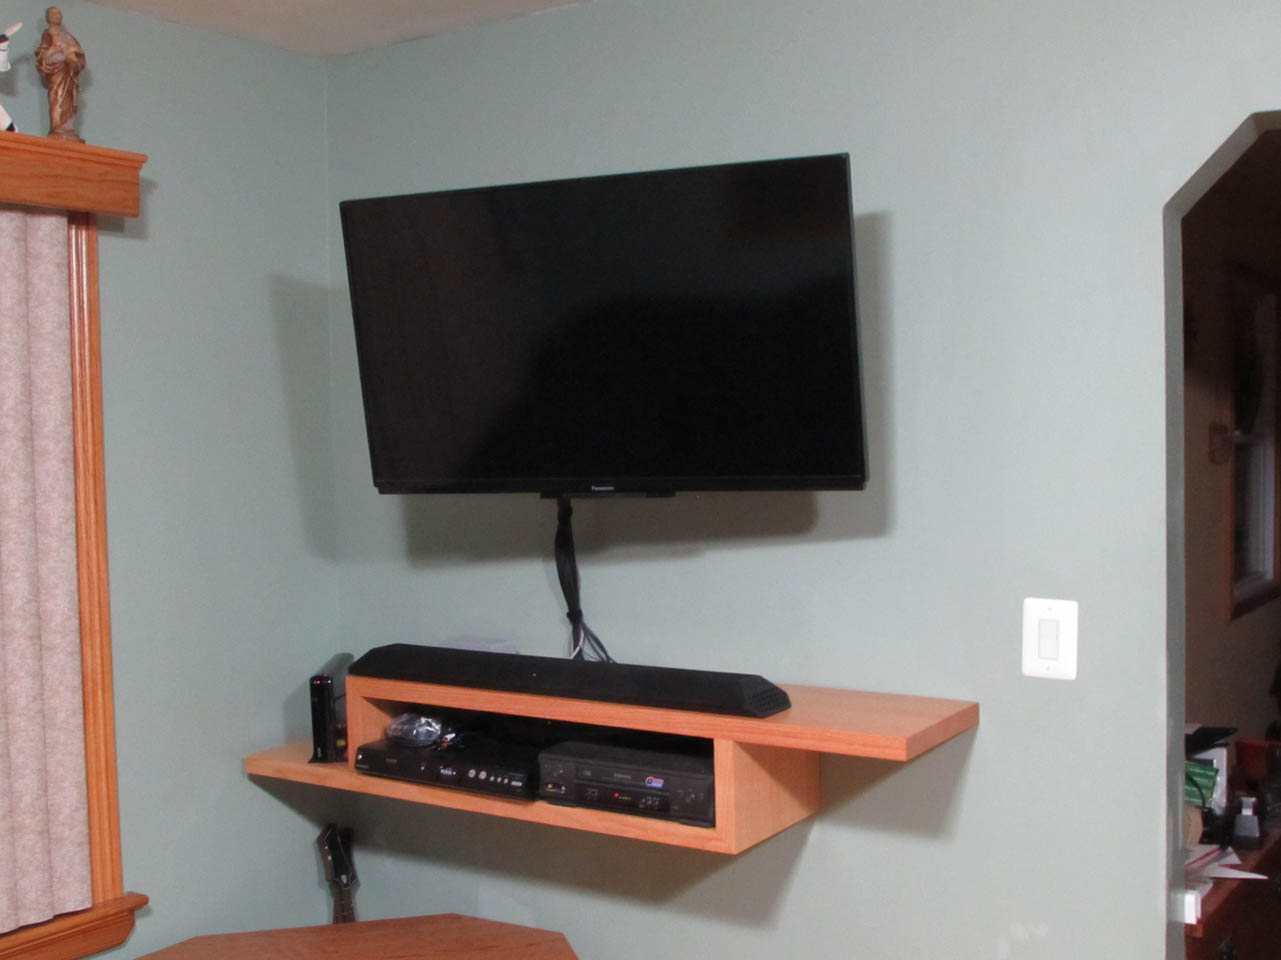
Now we just have to agree on what kind of chair will look good in that corner…

Just a quick update I wanted to add to this post. I really did not like the cables being so visible so I picked up some cable sleeves from Amazon. They were 20″ long and white cloth with a zipper. The white looked better, but I got a couple of them so I could experiment. I unrolled one and flattened it out, then I painted the outside face with some matching flat latex paint. It soaked into the fabric and stained it. I was afraid that it might lay on top then crack when I rolled it up, but it did not. It stayed flexible and wrapped easily around the cable bundle. Just a neat little trick that I thought I would pass on.

