Walnut counter – day 4
Erin hasn’t been available, to work on the counter for a little while. She has been busy prepping the wall, in her house, for the installation. Her house is over 100 years old and some of the original charm has been covered over. The wall, on which the counter will be installed, was once brick covered with parging, then wall paper. It was later covered again with drywall. When we discussed the possibility of exposing the original brick, Erin got intrigued. We cut away the drywall and parging, in a small area, to determine how much effort it would require.

For two weeks, Erin worked at cutting away the drywall with a utility knife, then chipped away at the parging with a hammer and cold chisel. With the bulk removed, she followed up with a wire brush and a shop vac. I trimmed out the edges with some poplar, that will be painted to match the rest of the room, and she sealed the wall with some clear DRYLOK. The DRYLOK is designed to seal a wall and hold back hydro-static pressure. We reasoned that it should be sufficient to stop the mortar from crumbling further. All in all, we think the wall turned out fantastic. It really warms up the room.

I gave Erin a day or two, to get the use of her hands back. Two weeks of hammering and chiseling really took its toll…
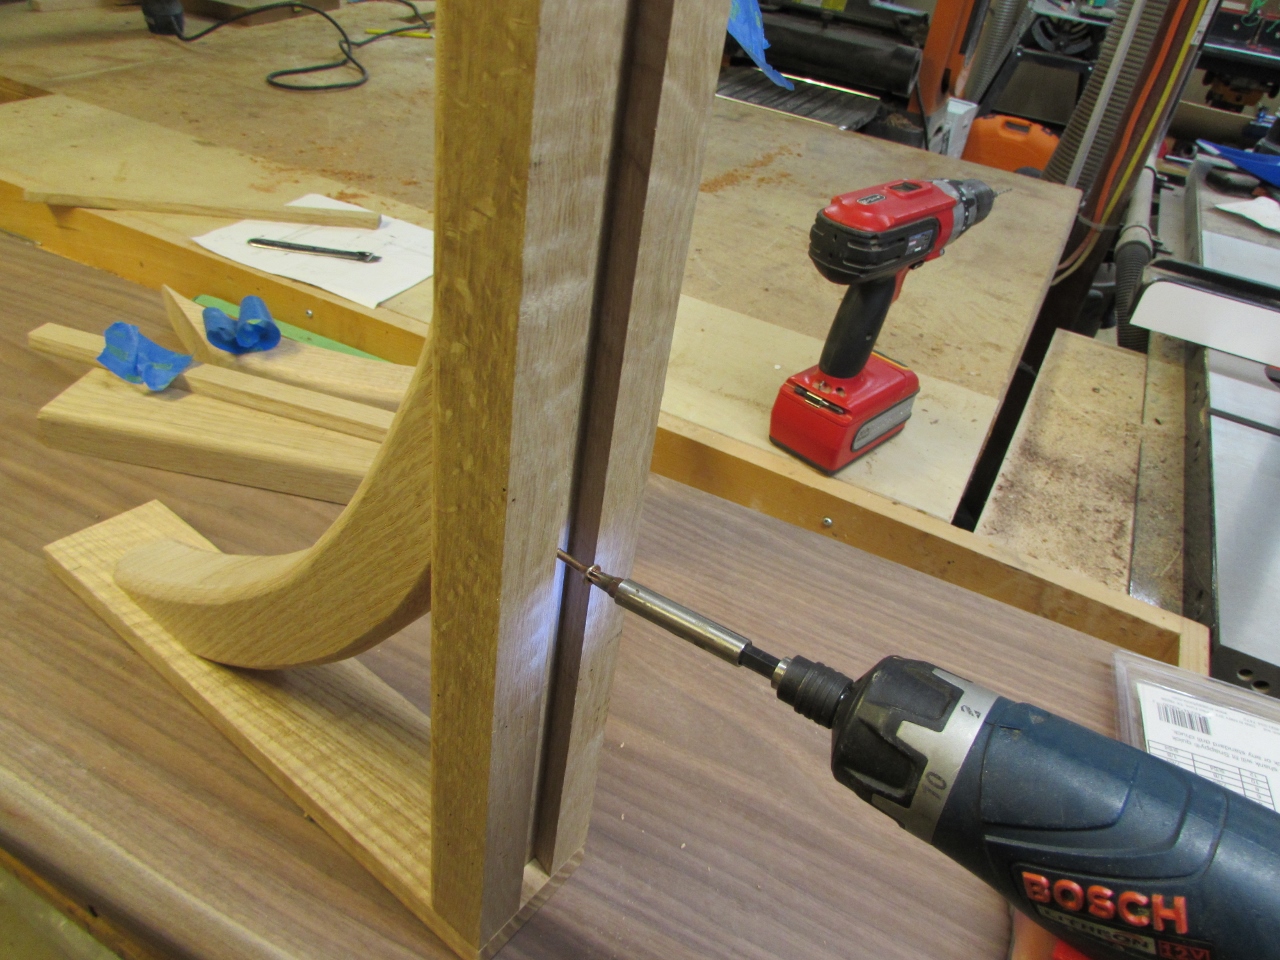
We left off with the corbels half finished so she rounded over the edges and did some sanding to the curved supports.


We will be using glue and screws to attach the supports so I set up some screws to gauge the depth of the pilot holes we needed to drill.
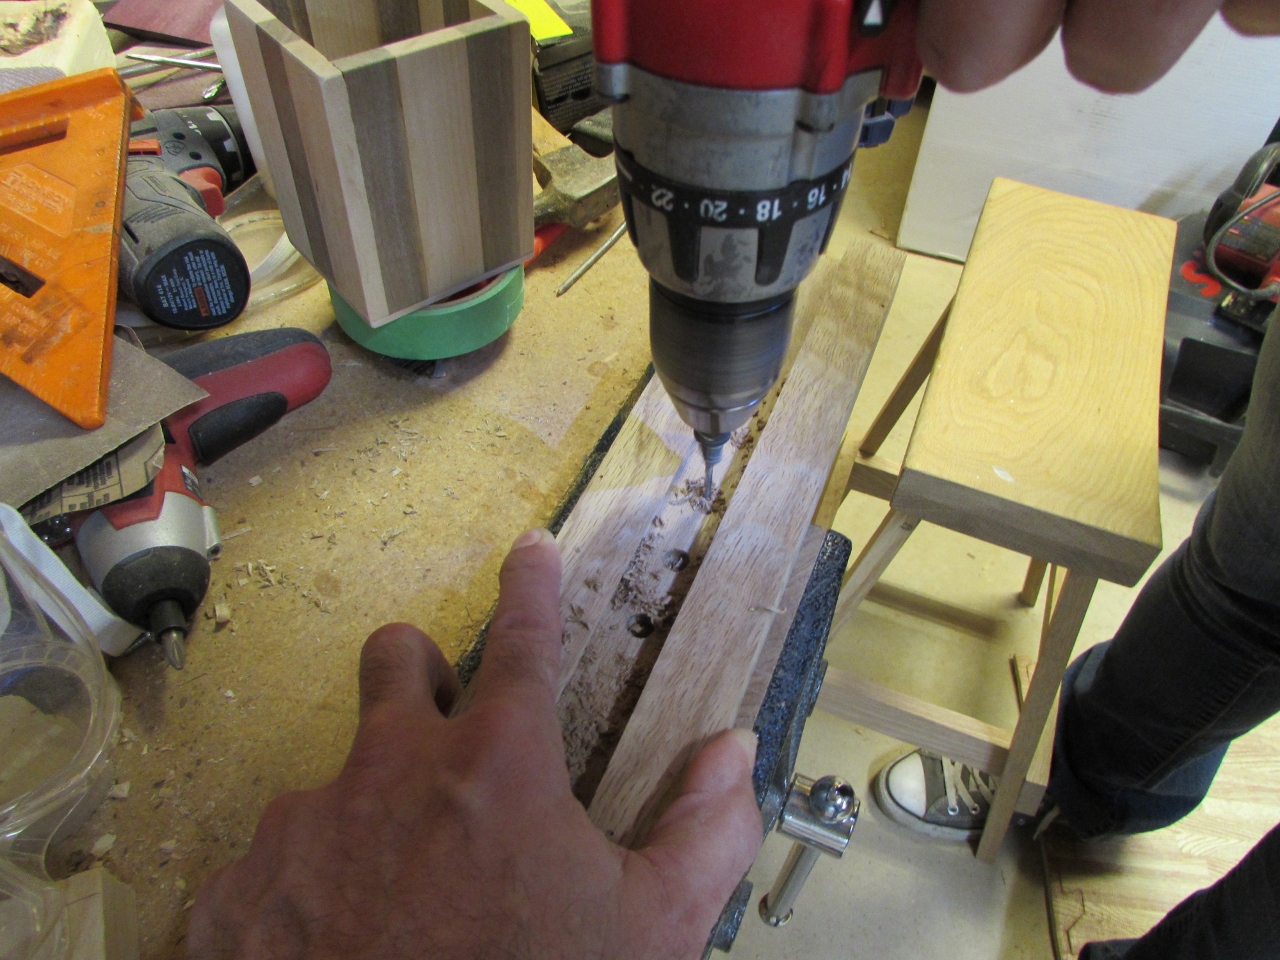
We drilled counter-sunk pilot holes through the L-brackets, then taped the curved support in place.

Using the pilot holes as a template, Erin pilot drilled through them into the curved support.


Applying glue to the end grain of the support will not help much, but every little bit helps. After applying glue, we screwed the corbels together.

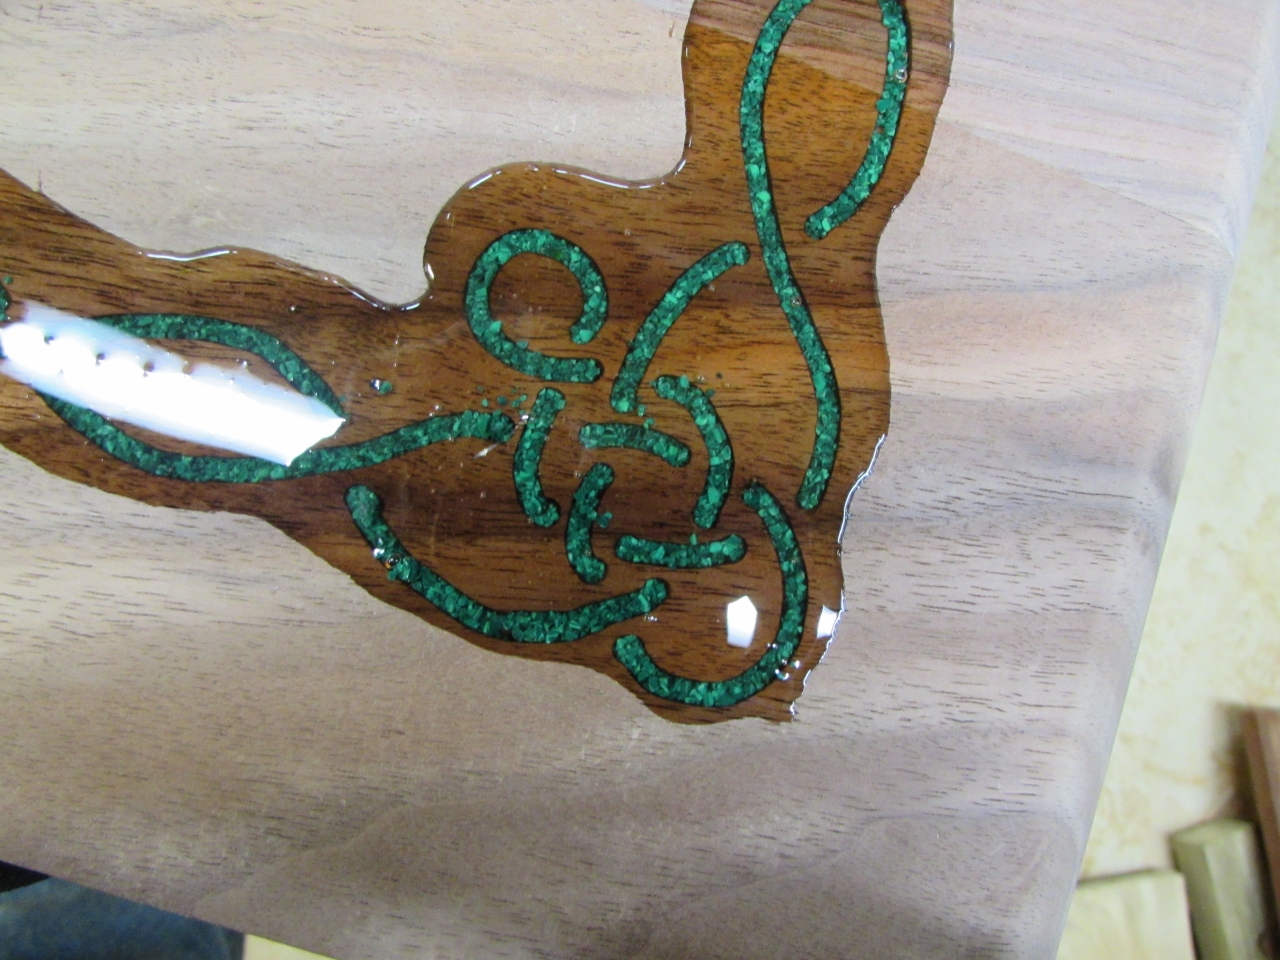
With the corbels and their matching dove-tails complete, we moved on to laying out a bit of decorative inlay on the counter top.

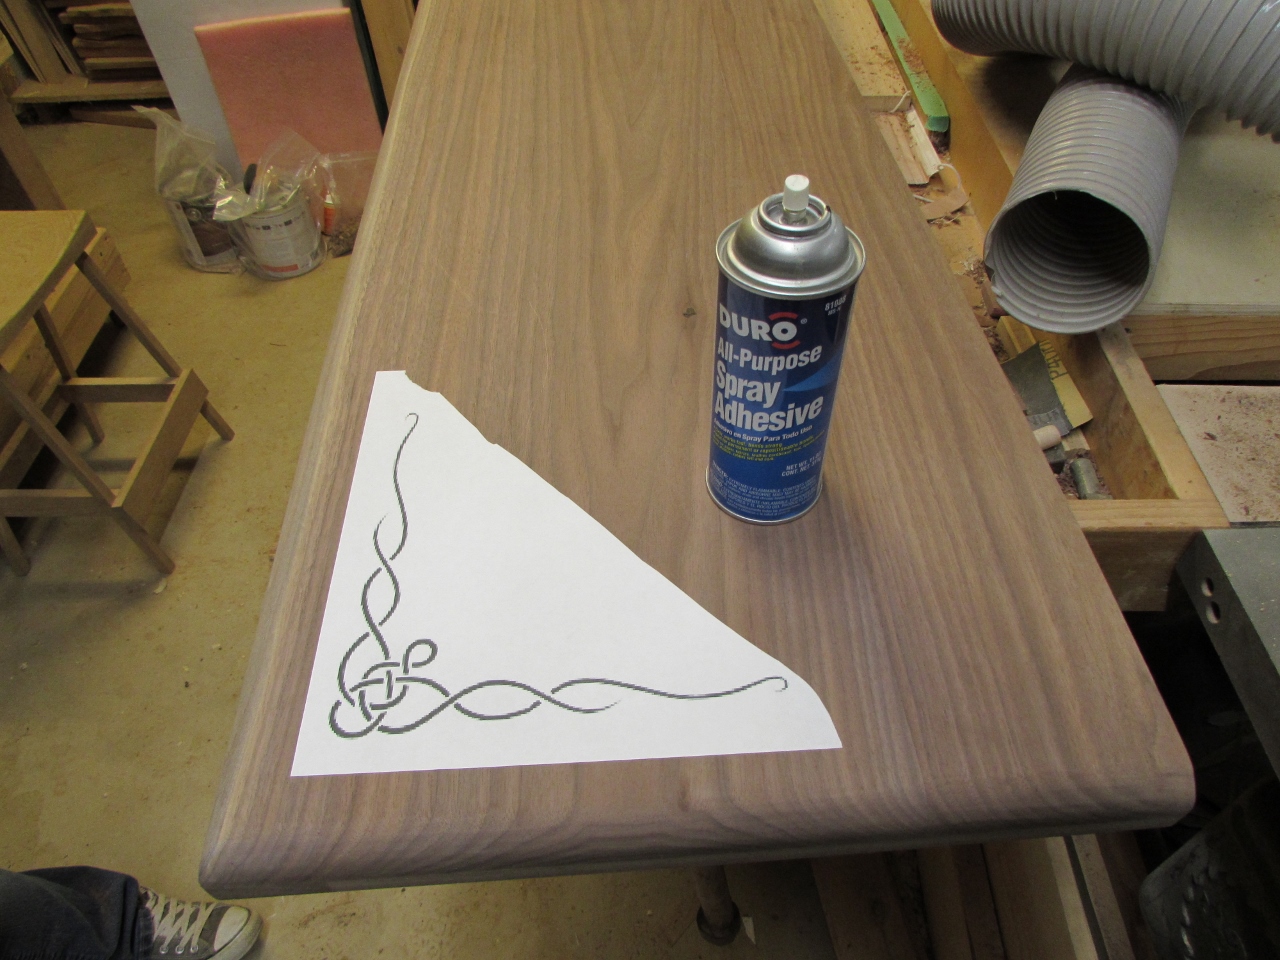
Erin picked out a simple bit of Celtic scroll work for two of the corners. the intent is to rout a shallow channel and fill it with some crushed stone, then epoxy it in place.
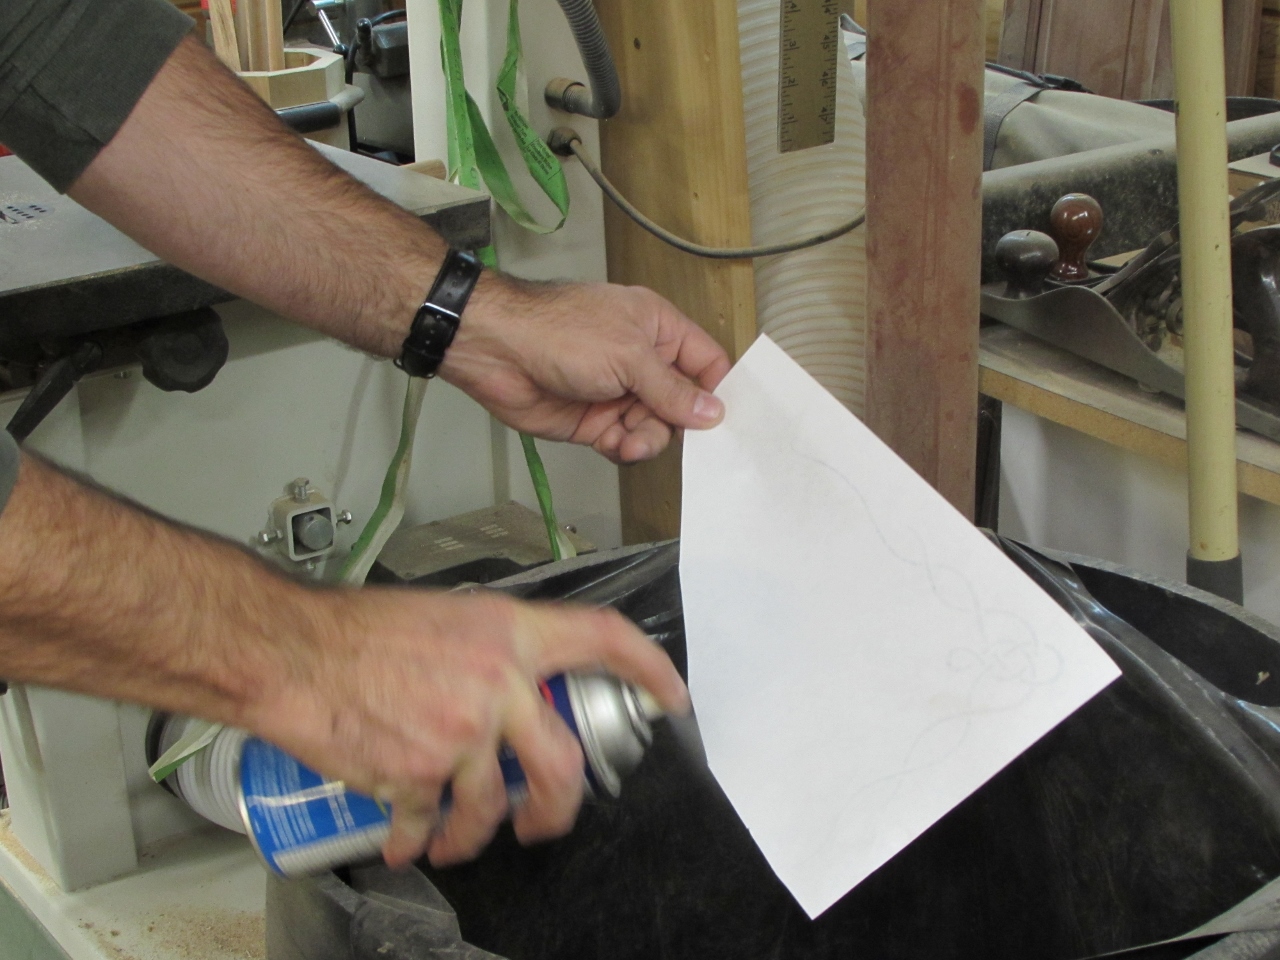
This will be Erin’s first time free-hand routing so we are going to practice on some scrap. I applied some spray glue to the pattern and stuck it to the test board.


We selected several different bits to test with. I was not sure which would give us the best profile for holding the inlay material, so we tried them all…
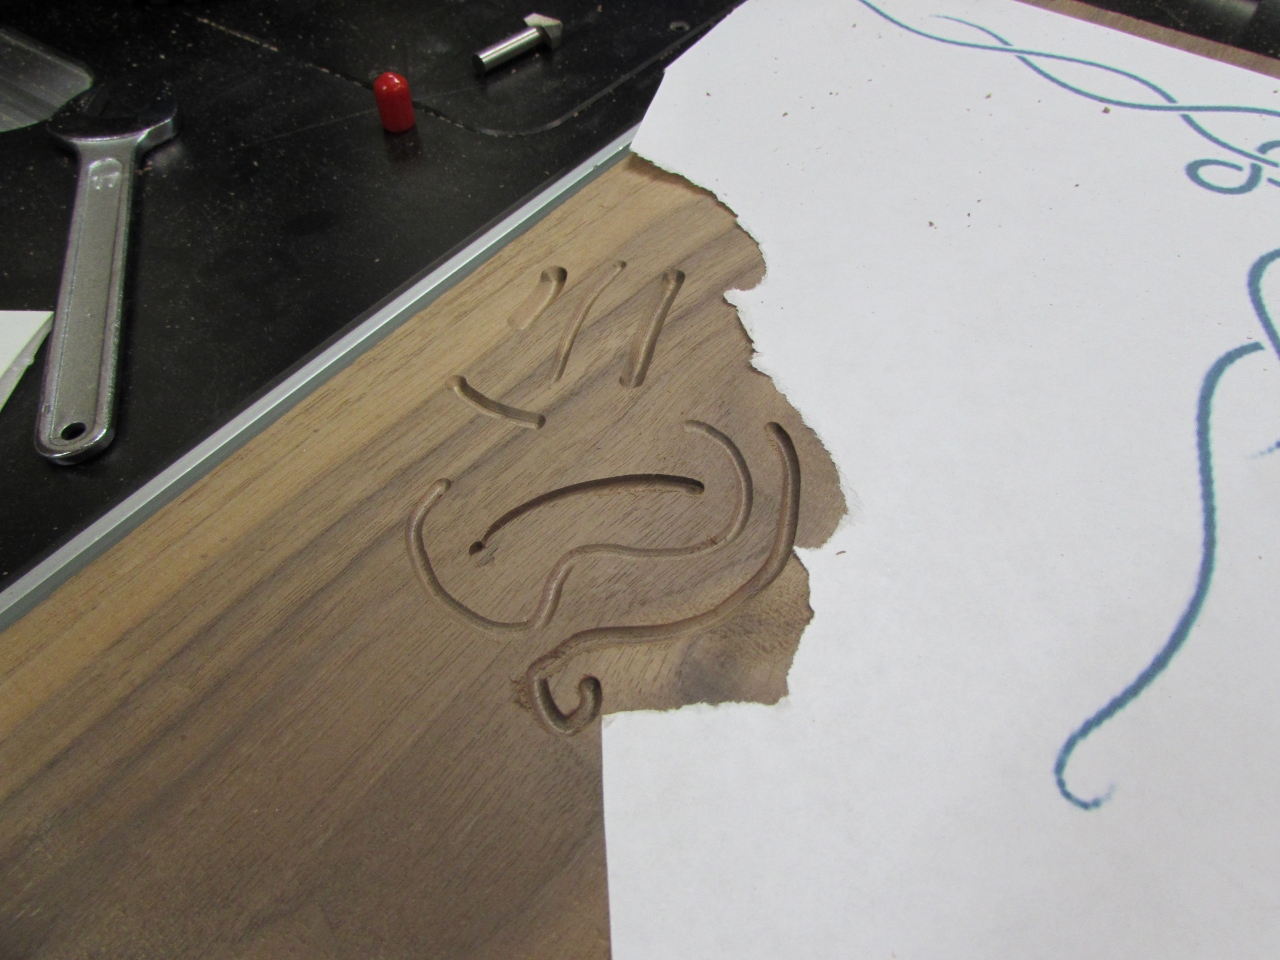

I started Erin with my trim router thinking that the smaller router body would be easier for her to control. It came out a little shaky , so we will try some other options.
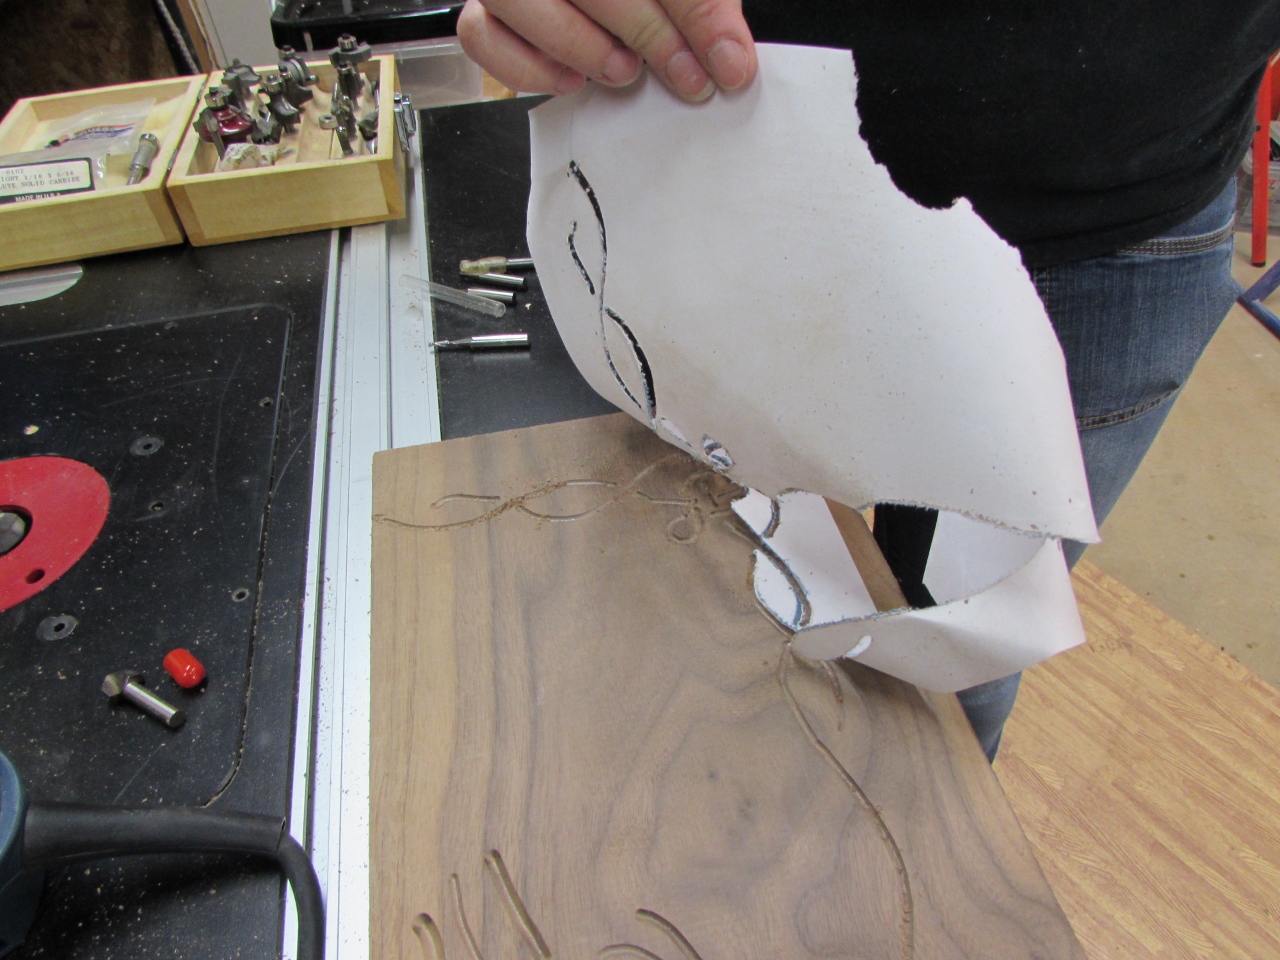
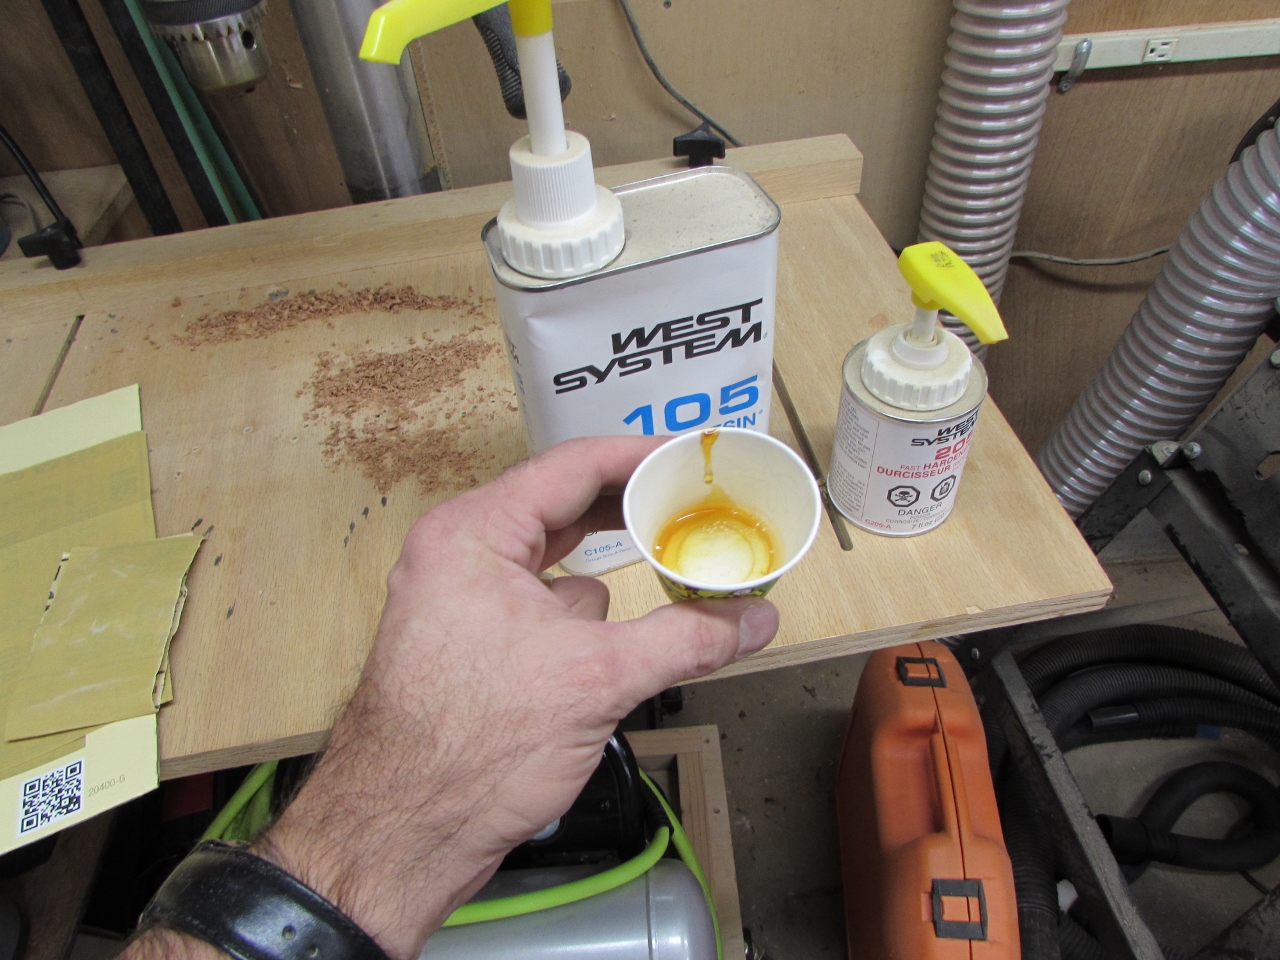
We peeled away the paper, then mixed up some two-part epoxy.

Ground stone is a bit expensive to experiment with so I decided to try some play sand that I had.

I mixed it directly into the epoxy and poured. That was a stupid idea! The sand did not settle into the grooves, as I had hoped. Instead, it stayed suspended in the epoxy.

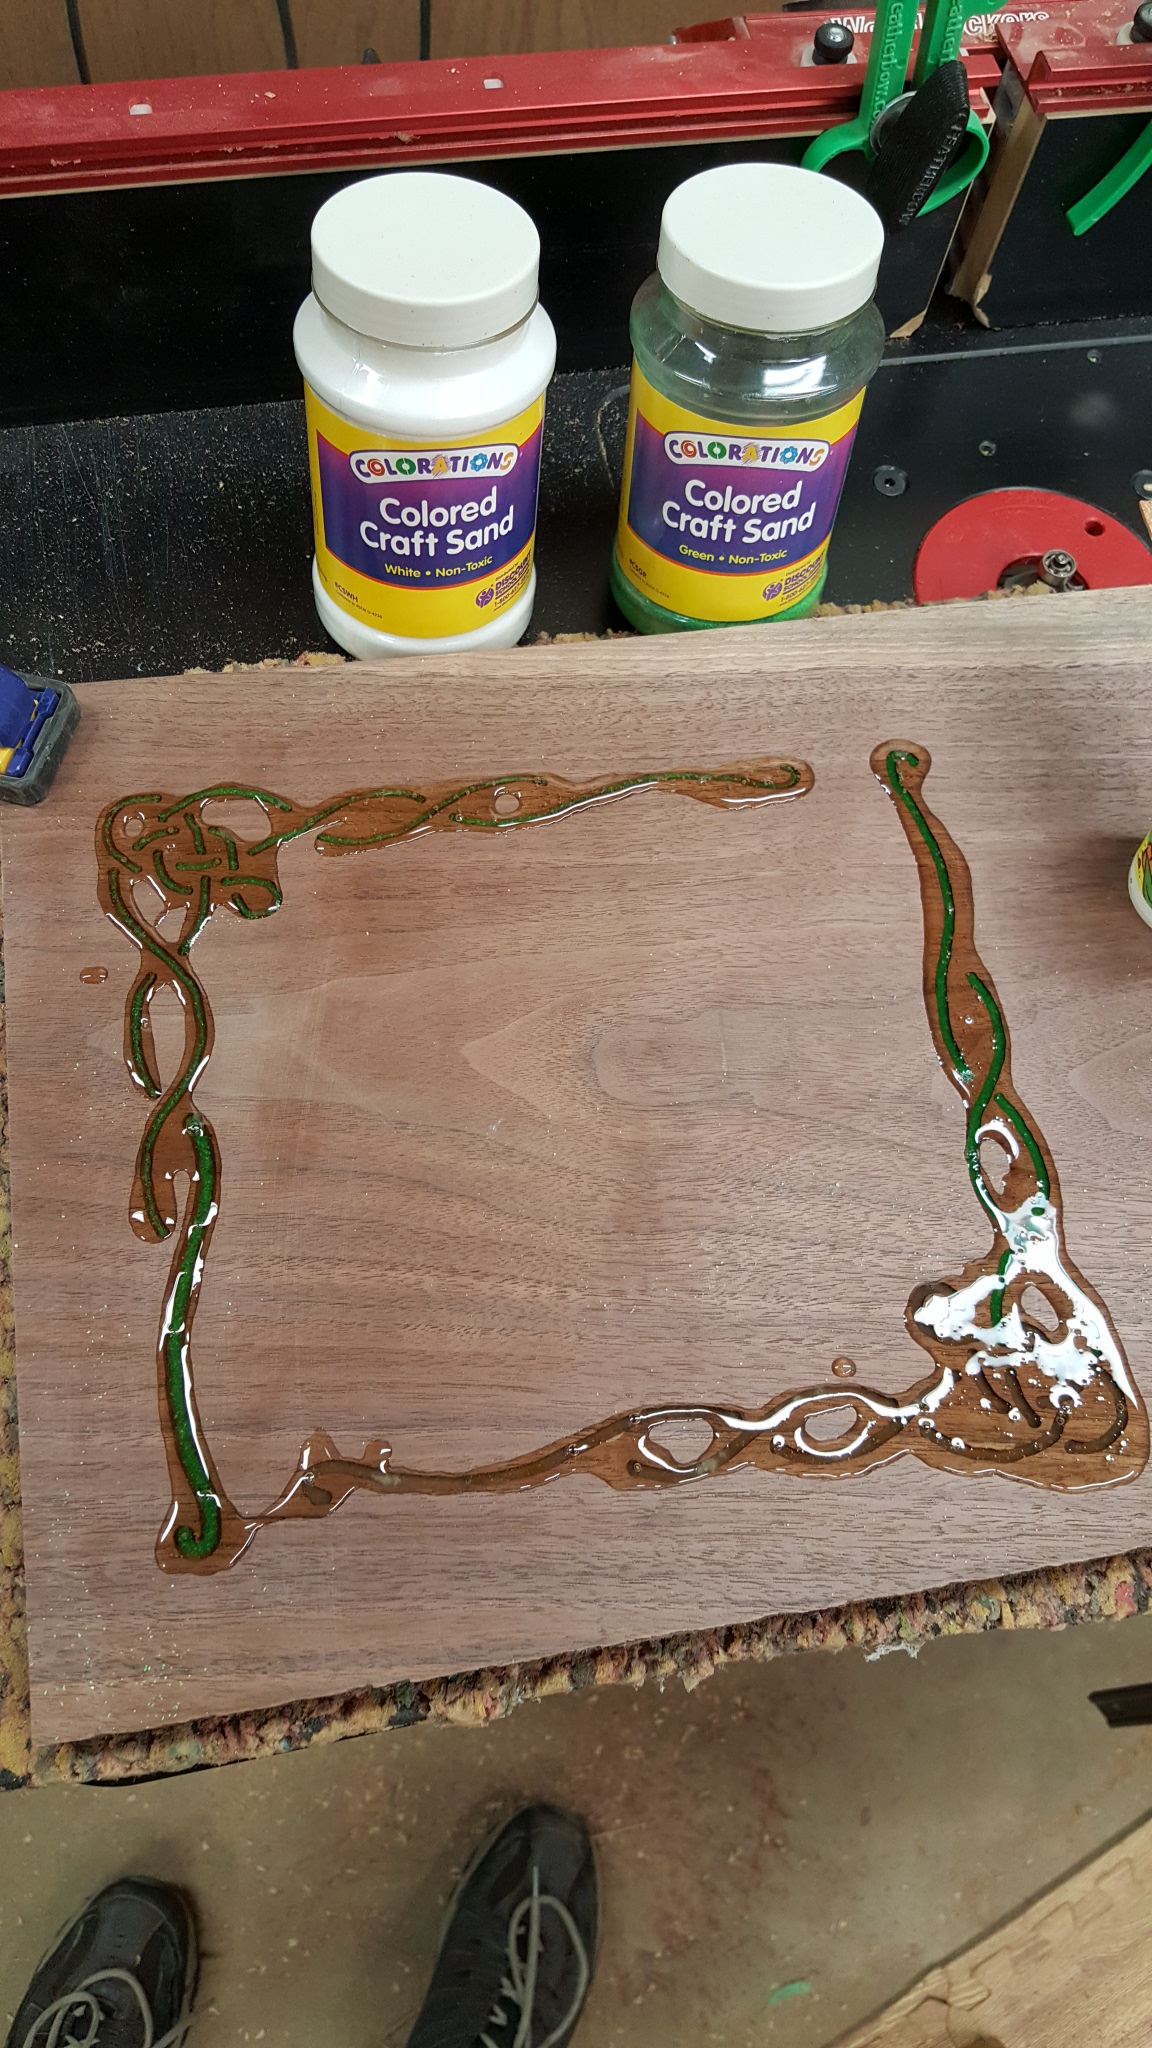
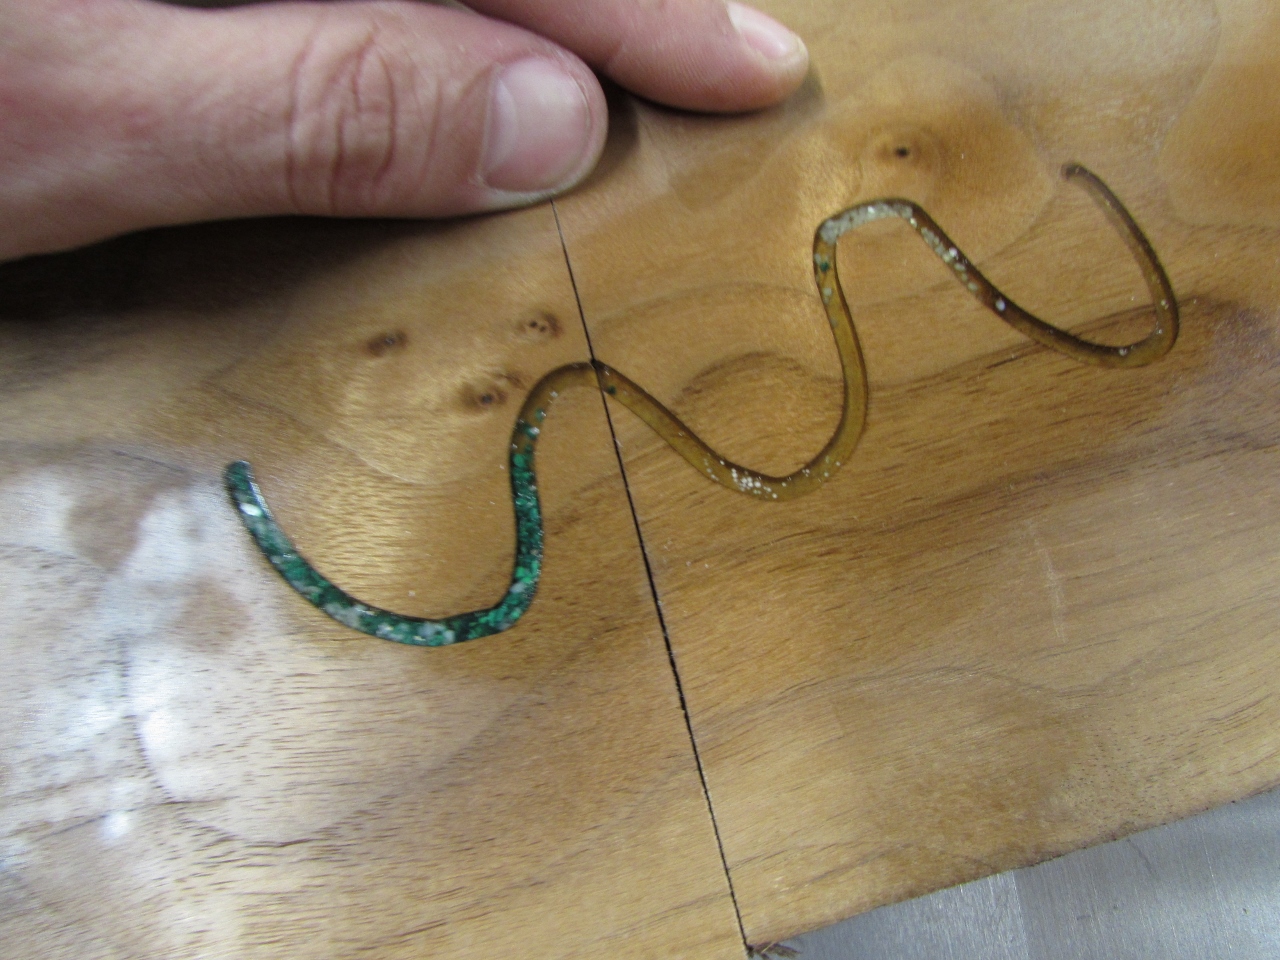
Failing in the first attempt, we made up more test boards. This time I poured the sand into the groove first, then covered it with epoxy. This was a far more successful test. Erin had purchased two different materials to try, ground opal and crushed malachite. To simulate them in this test, I grabbed some green and white sand from one of my kid’s old sand art projects. The green was very vibrant, but the white completely disappeared in the epoxy.
I did one final test using a pinch of the opal and malachite. The opal faired better then the white sand, but it still did not stand out as much as the malachite did. Erin decided to just use the malachite.

With method and materials selected, we moved on to testing routers for better stability. First I put my plunge base on the trim router, reasoning that the handles might help. Also the plunge option should make inserting the bit easier. It improved the stability a bit, but we tried my much heavier Hitachi router to see if weight helped. It did, Erin was much more confident and her lines were smoother.

After a bit more practice, we stuck the templates in place on the counter top and Erin started routing.

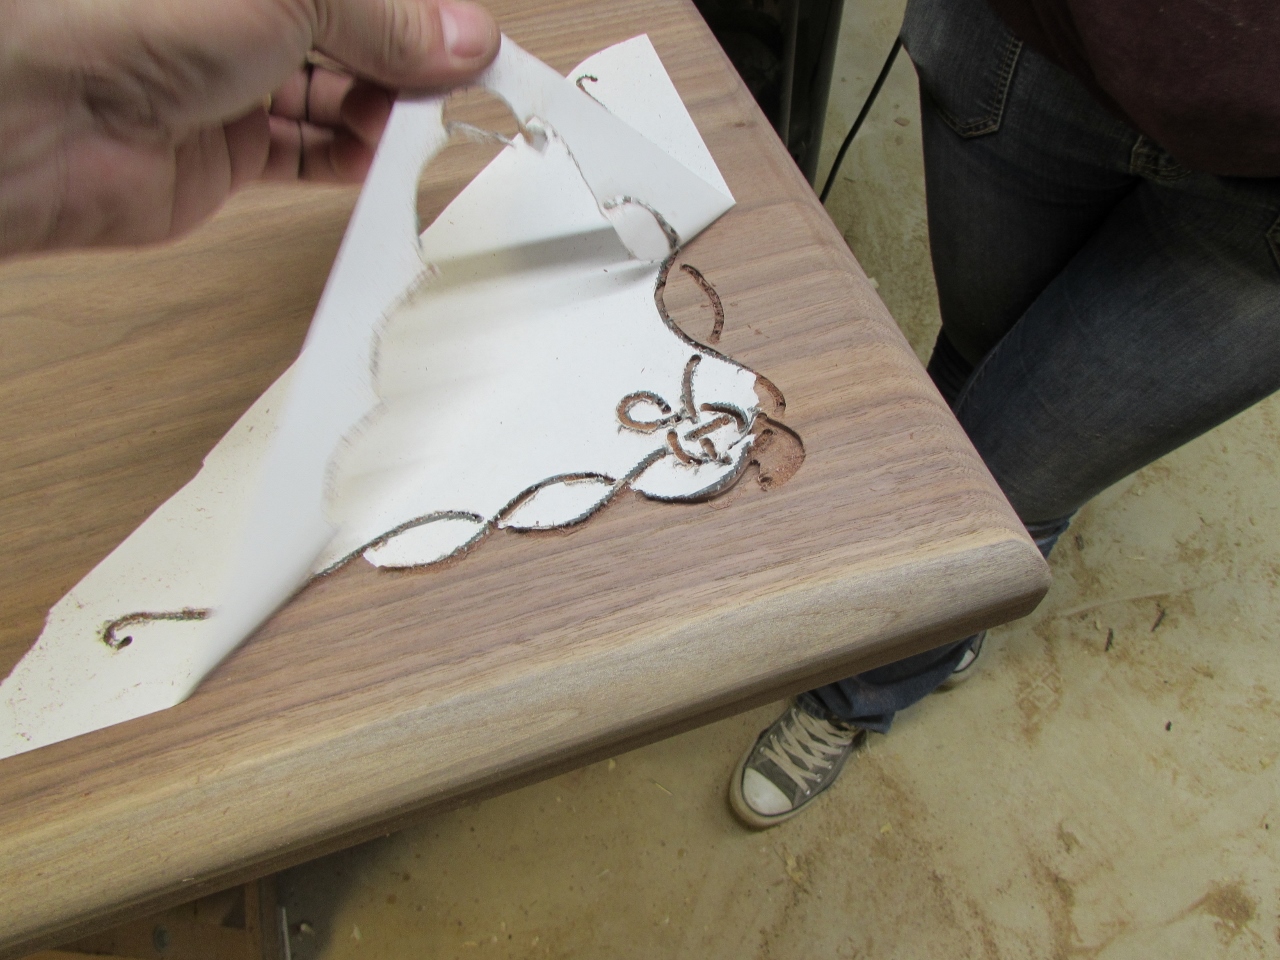
There were still a few spots where the curves were not perfect, but they will not be so visible when the inlay has been applied.


We dumped out some malachite and started pushing it into the grooves.
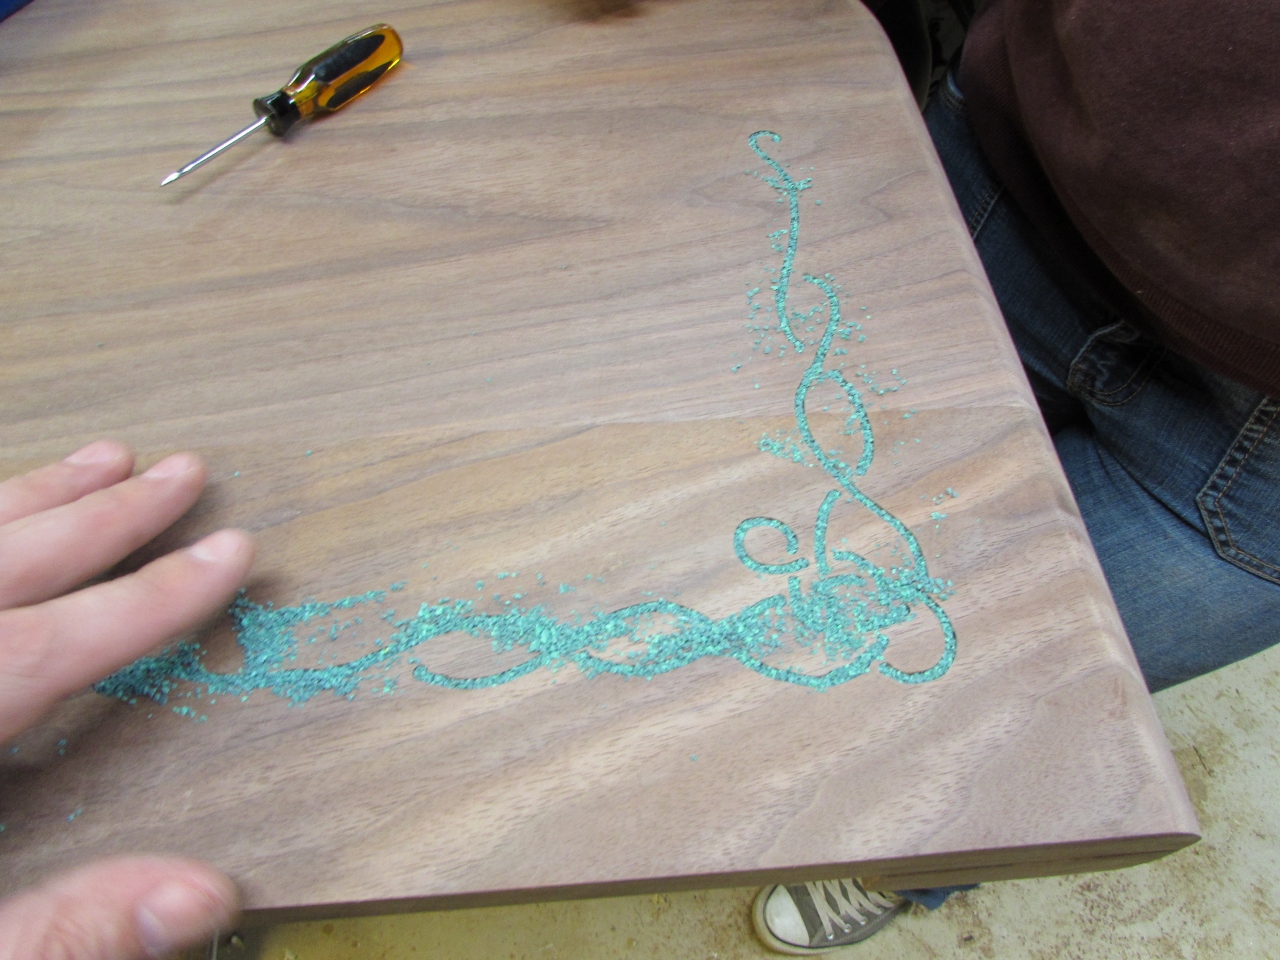
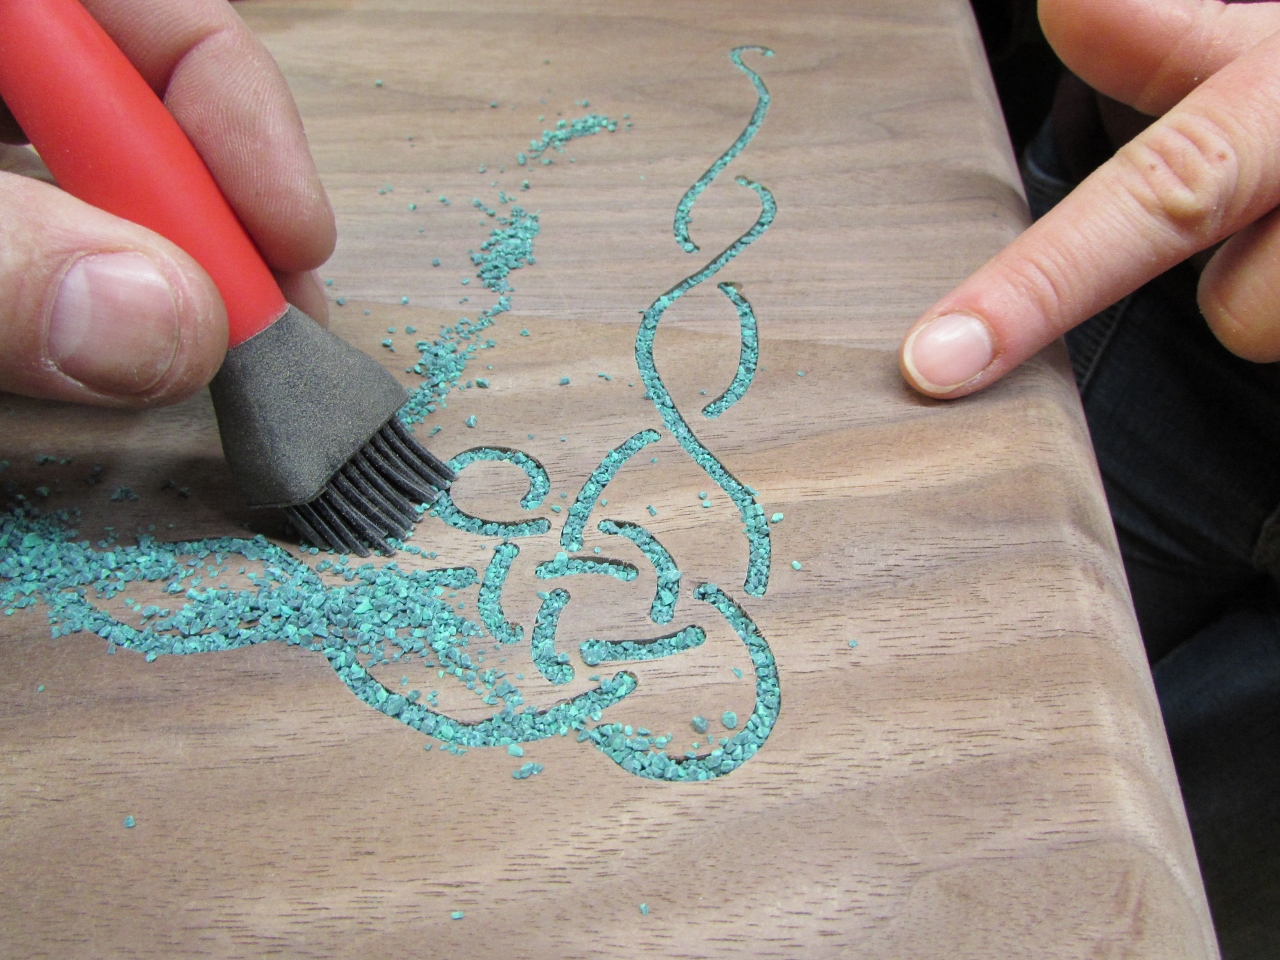
I found the silicone glue brush worked very well at smoothing it around. It cleared away the excess and left the media just below the surface, which was exactly what we wanted.

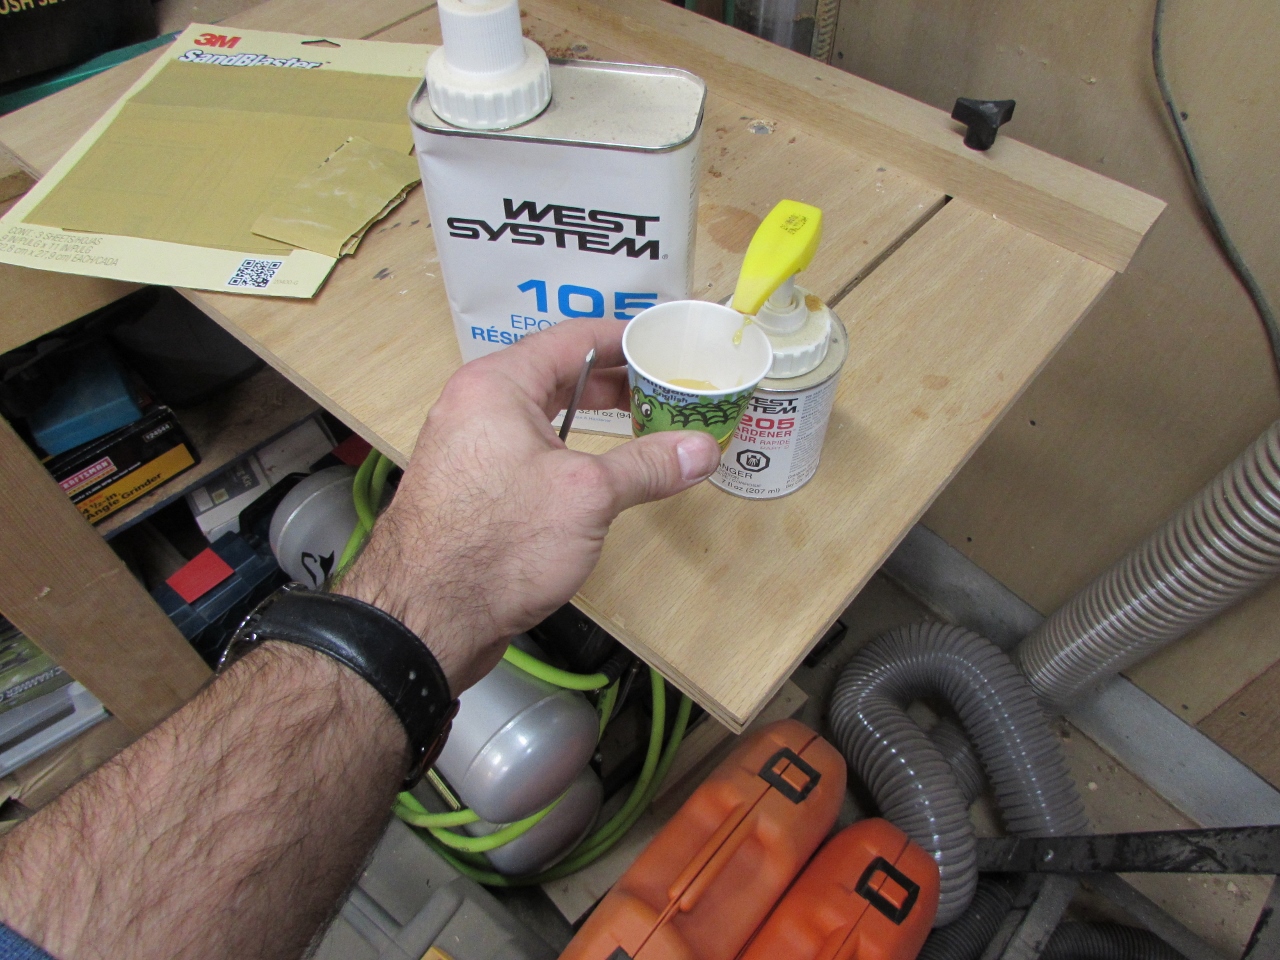
I mixed up another batch of epoxy and started pouring.
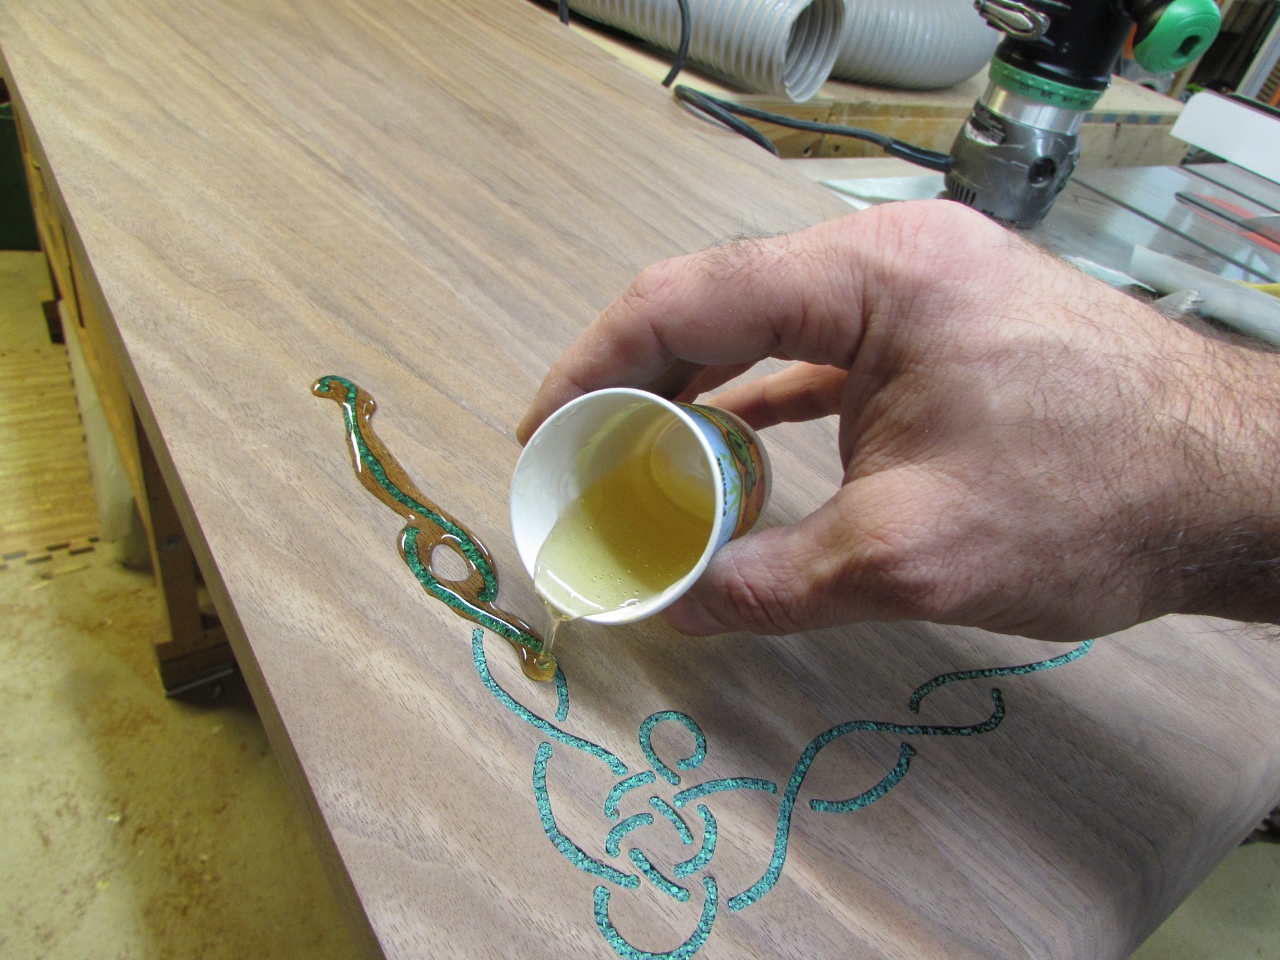
I did notice a lot more air bubbles rising up than we had with the sand. We kept watch for a few minutes waiting for more bubbles. When they arose, I just blew puffs of air to pop them. Crude, but effective, I understand that heat will force the bubbles to rise, as well as spraying acetone on the epoxy. I did not want to try either of these methods for such a small area, so I just stuck to the puffs of air.

We will let it cure for 24 hours before sanding, but I think it turned out great.