Book shelves
I was planning on finishing this project a week ago, but 36″ of snow got in the way.
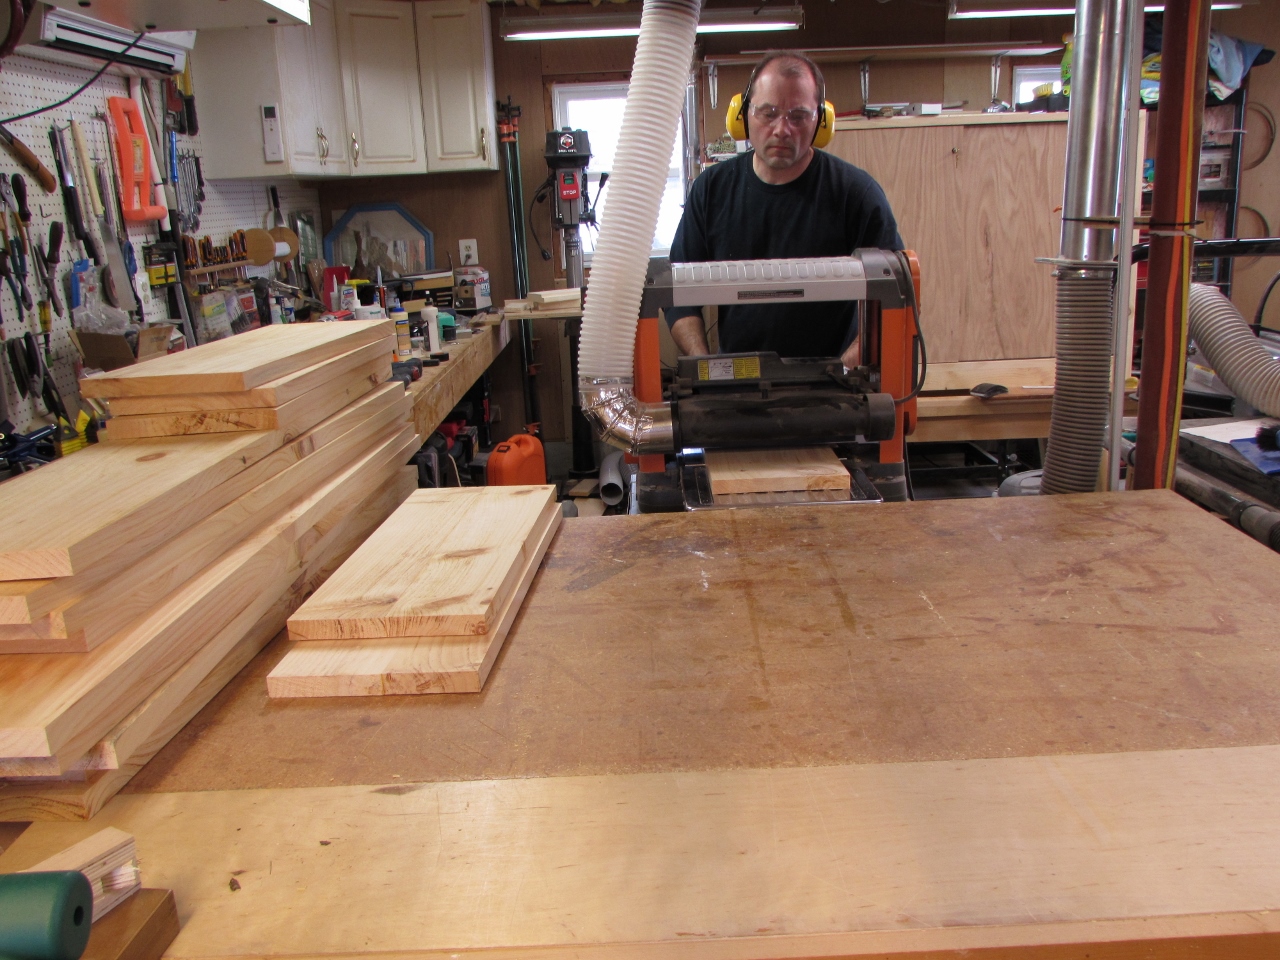
I was asked to make a set of shelves that will be recessed into the wall of a bedroom. I am using some nice 5/4 knotty pine boards for the project.
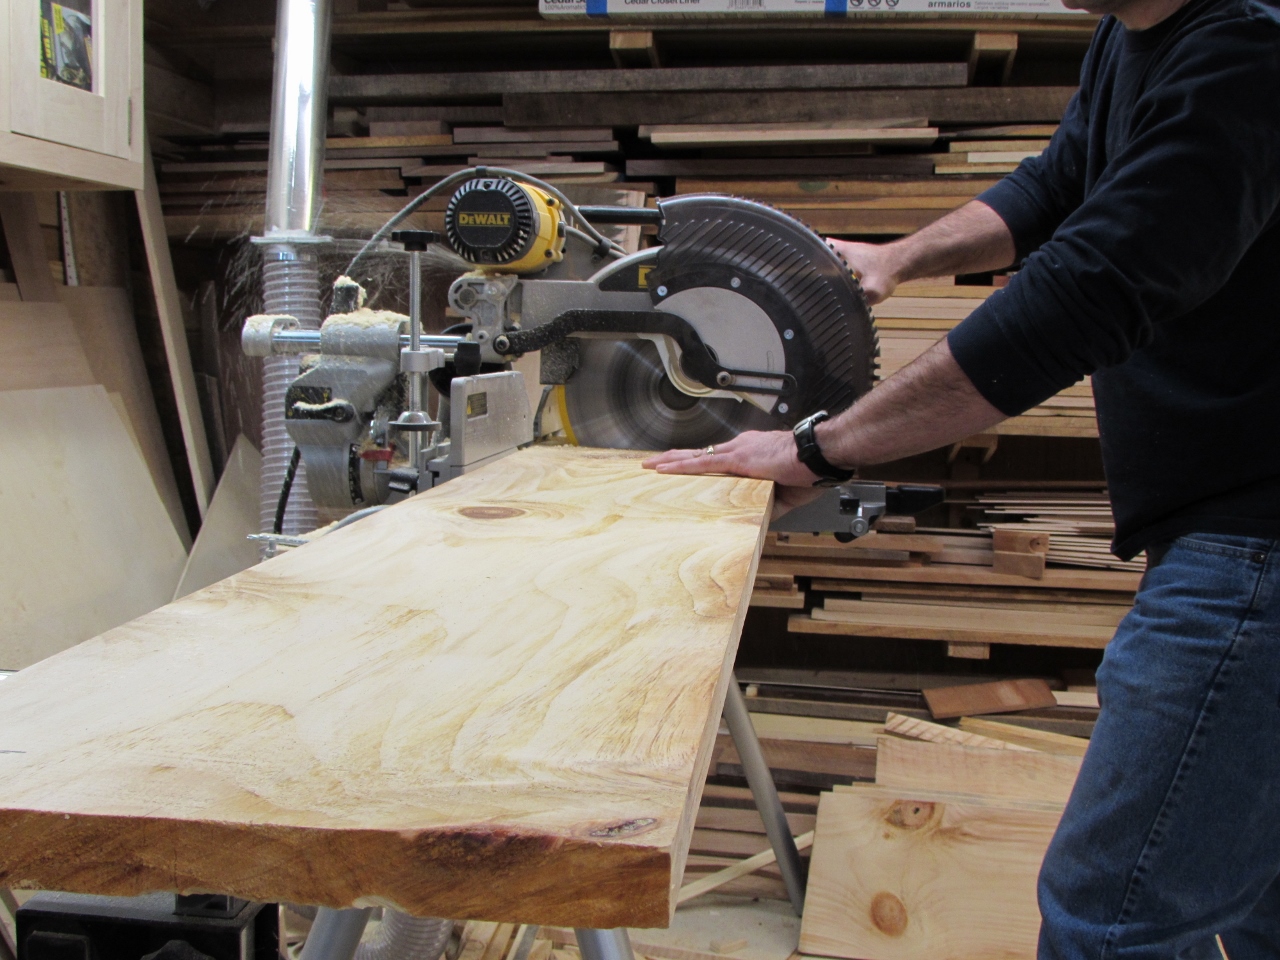
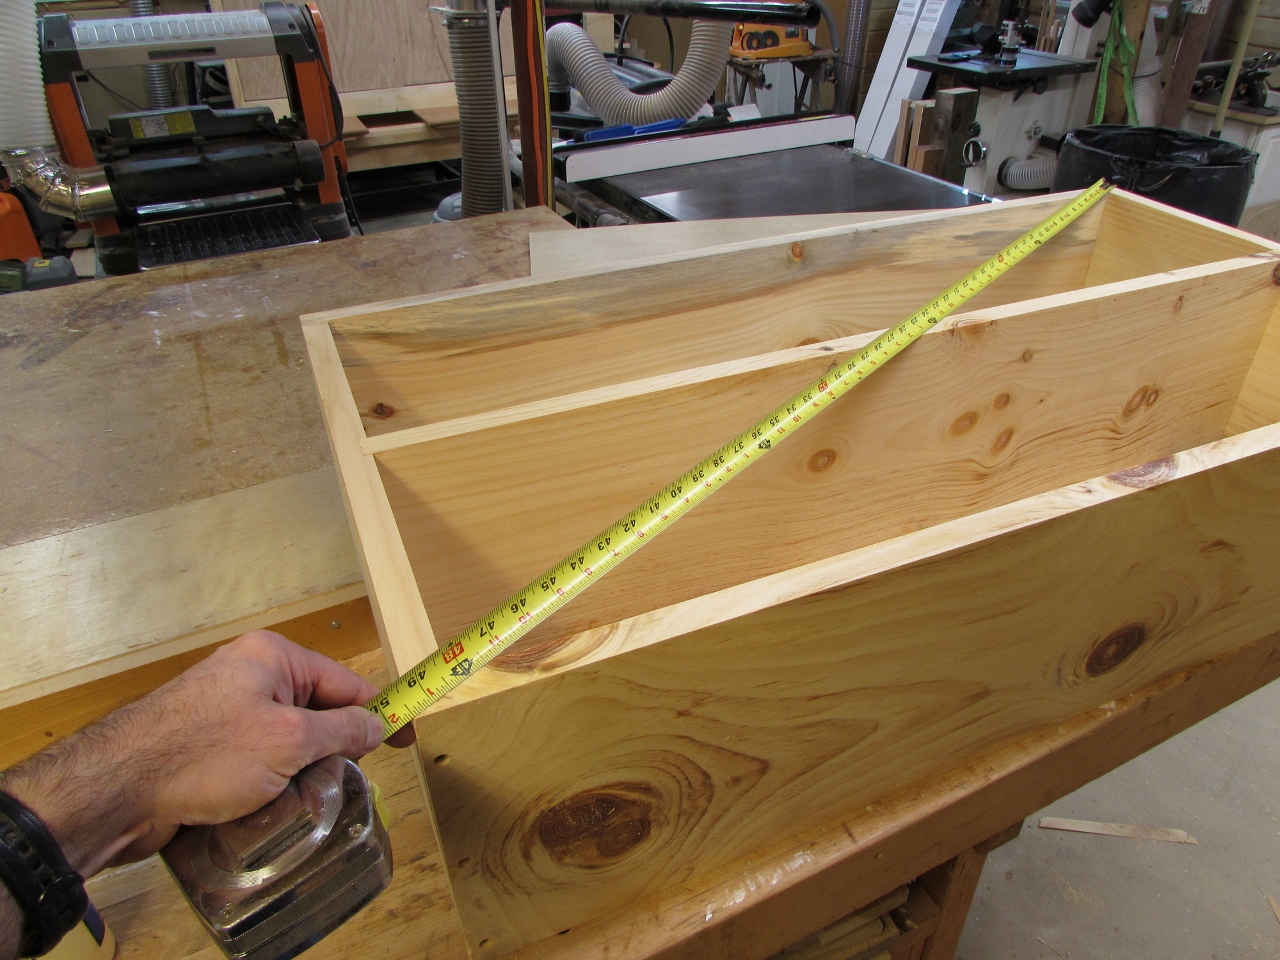
All of the boards are approximately 11″ wide and 9′ long, so I started by breaking the boards down to a manageable length. The shelves will be 44″ long 23″ tall and 10″ deep, so I cut the boards down to a little over those lengths.
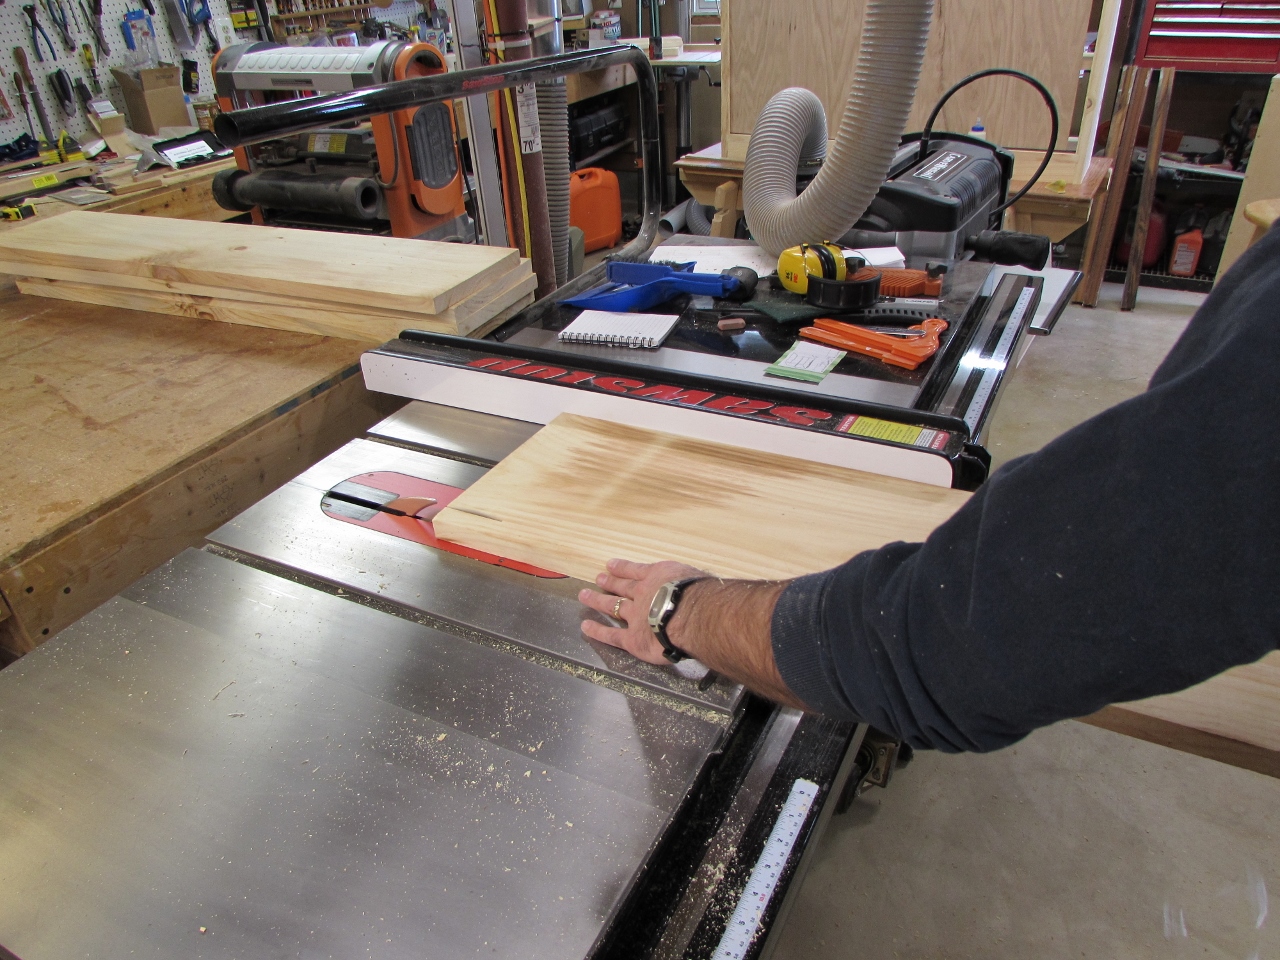
The next step was to rip the width down to 10″, while making sure I had nice clean edges.
One of the boards had a split running down the center. My first thought was to set it aside for another project, then I remembered that these boards were over an inch too wide. I could cut 1/2″ out of the center, then re-join the boards, and still be over 10″ wide. I did this for a couple of the boards and they turned out nice. The shelves are going to be painted anyway, so I didn’t even have to worry about matching the grain.

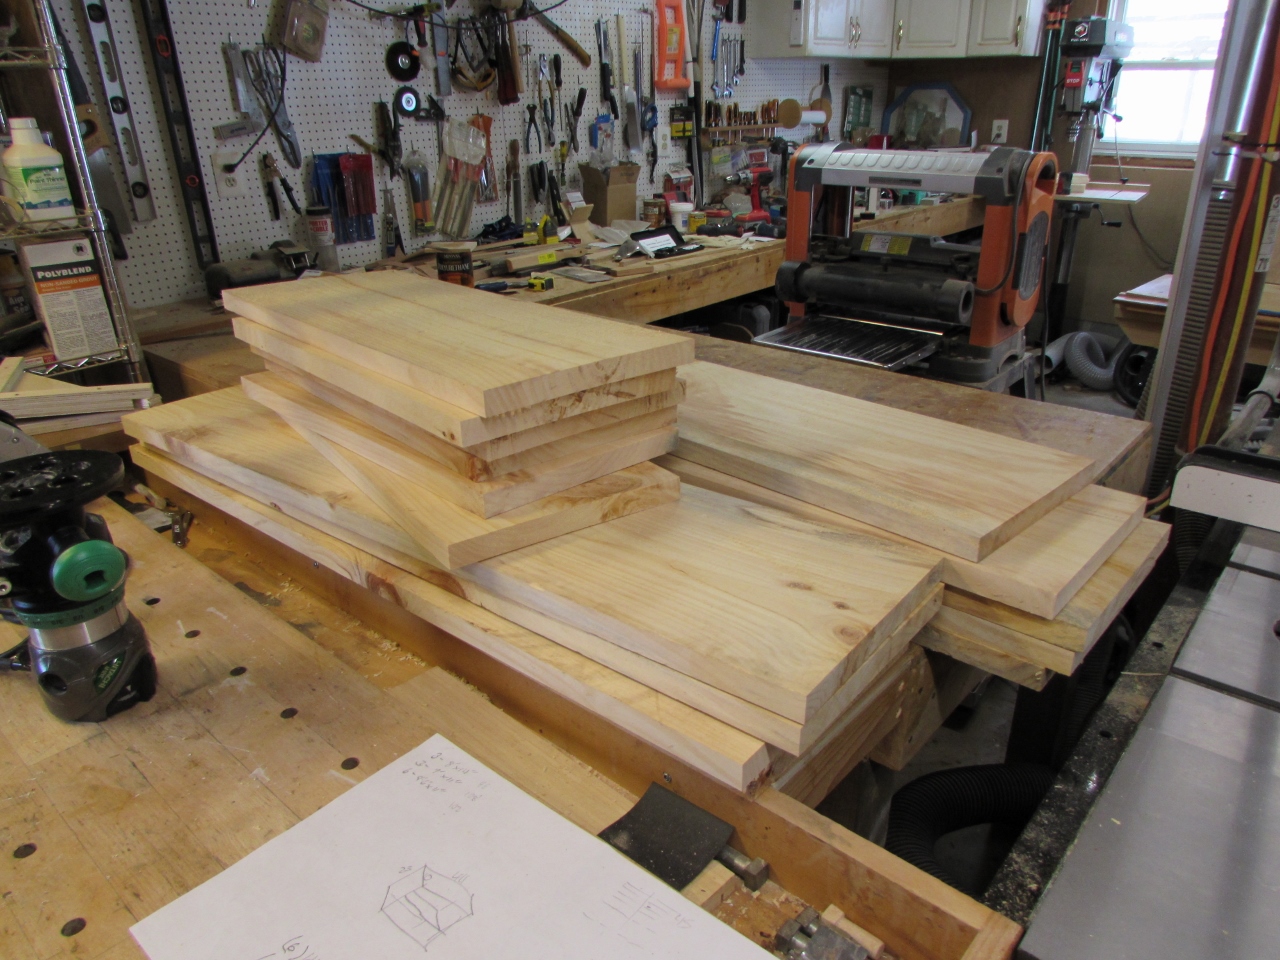
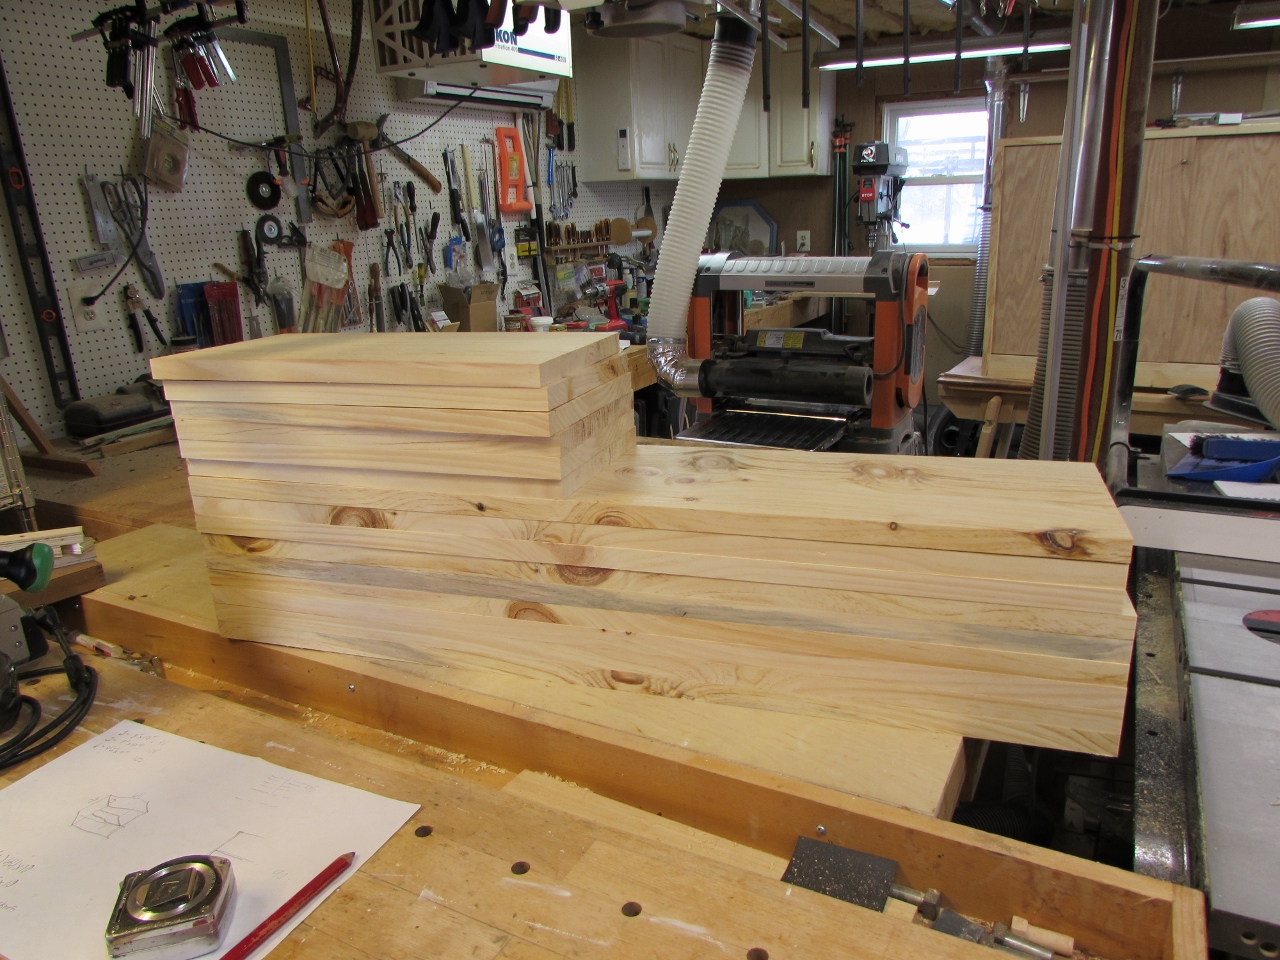
When those boards dried, I started planing the pile down to my desired 1″ thickness.
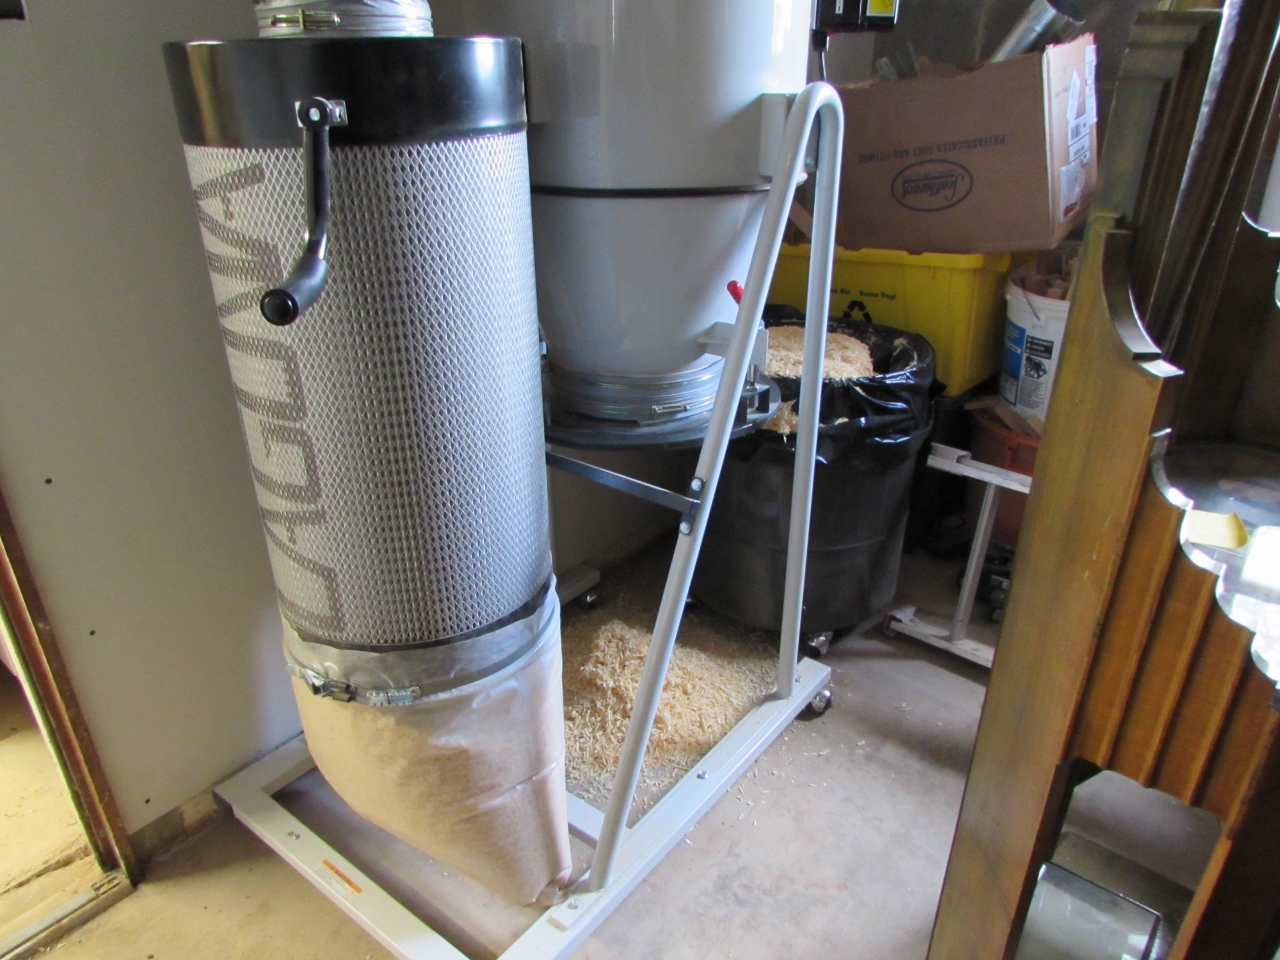
Having the dust collector in the garage has really cut down on the noise in my shop, but I have no idea when it gets full anymore. I had to take a break and clean up the over-flowing collector. I even filled the bag that is only supposed to collect the fine dust…

Getting back on task, I clamped up all my boards and cut them to their exact lengths. Having them all exactly the same length really helps with keeping everything square.
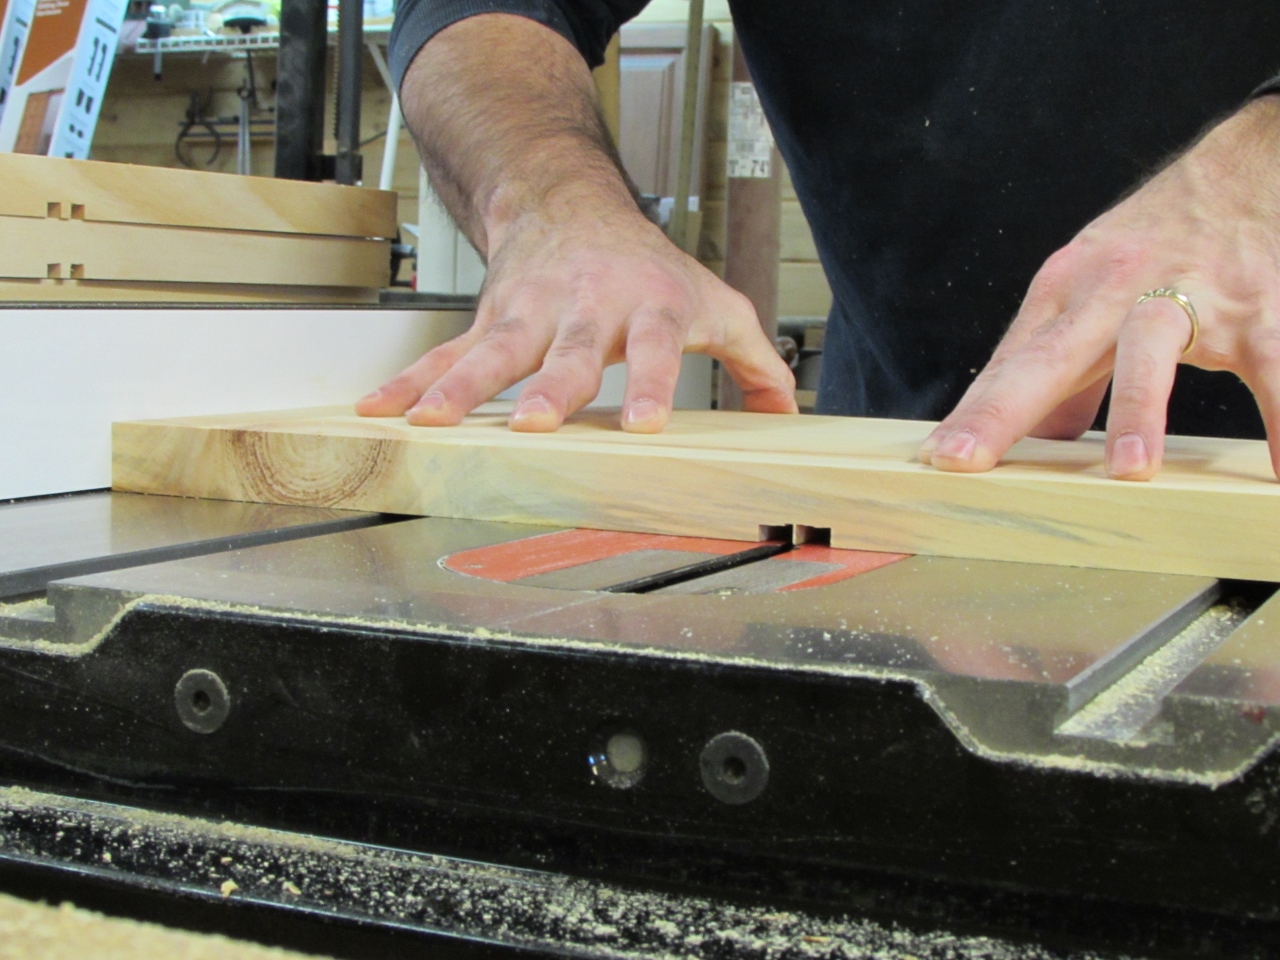
I like the way the shelves were done on the liquor cabinet, so I repeated the design. Instead of routing out the dados, this time I went with the table saw. My side pieces were only 21″ long and my shelf was 1″ thick. I just set my fence to 10″ from the blade, then ran the shelf through, with the blade set to 1/4″ high. after running one side, I flipped the board and ran the other. This places my shelf, dead center of the sides.

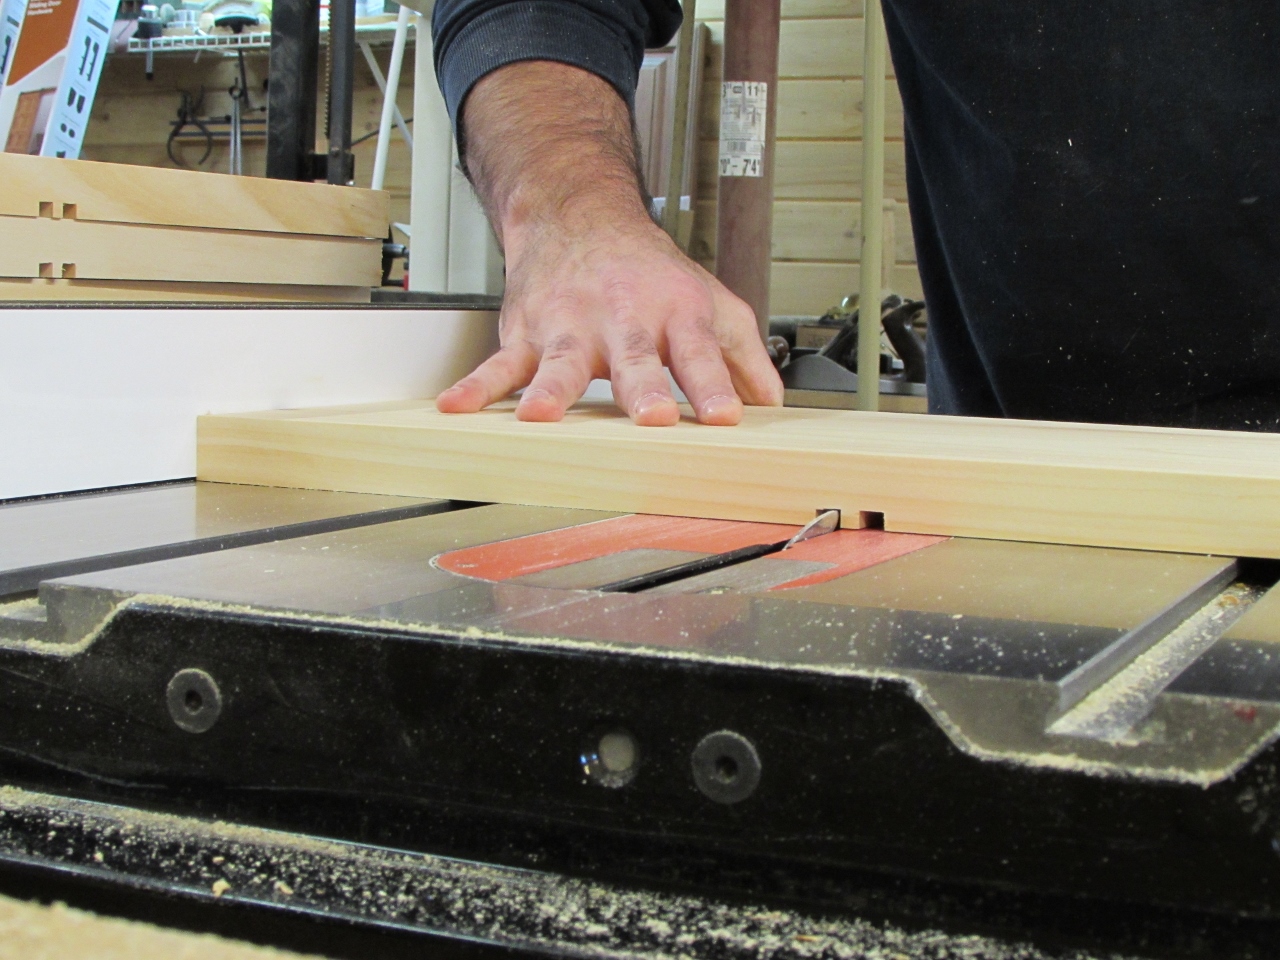
To cut away the middle of the dado, I just moved my fence out 1/8″ at a time until I removed all of the waste in the center of the dado.
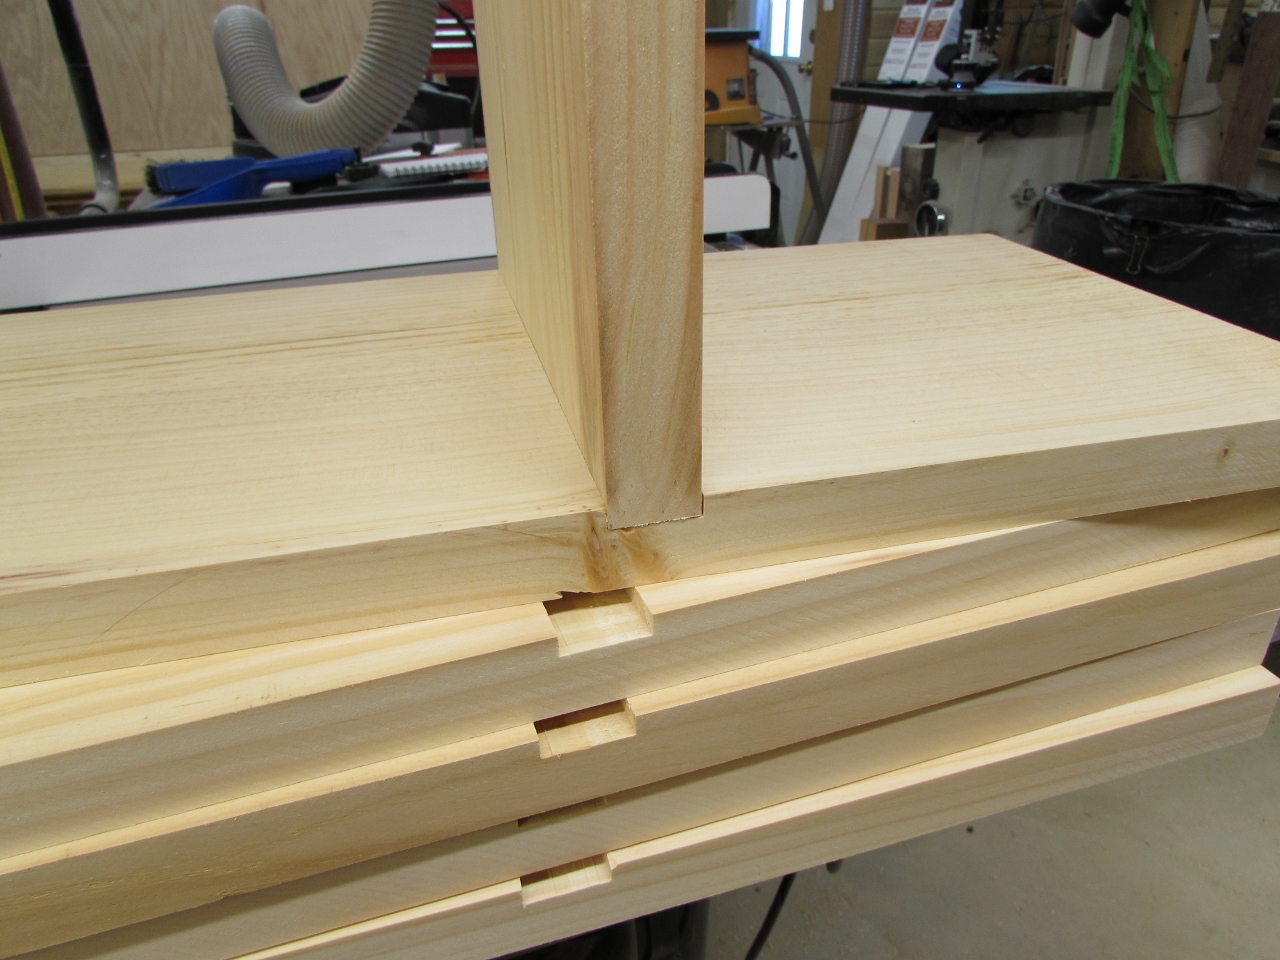
While testing the fit of my shelf in the dados, I noticed that the bottom of the dados was not perfectly flat, due to the slight crowning of some of the boards.

I was about to clean it up with a chisel when I remembered that my bull-nose plane was also exactly 1″ wide, so I thought I would give it a try.

It worked really well, with surprisingly no tear-out at the ends.

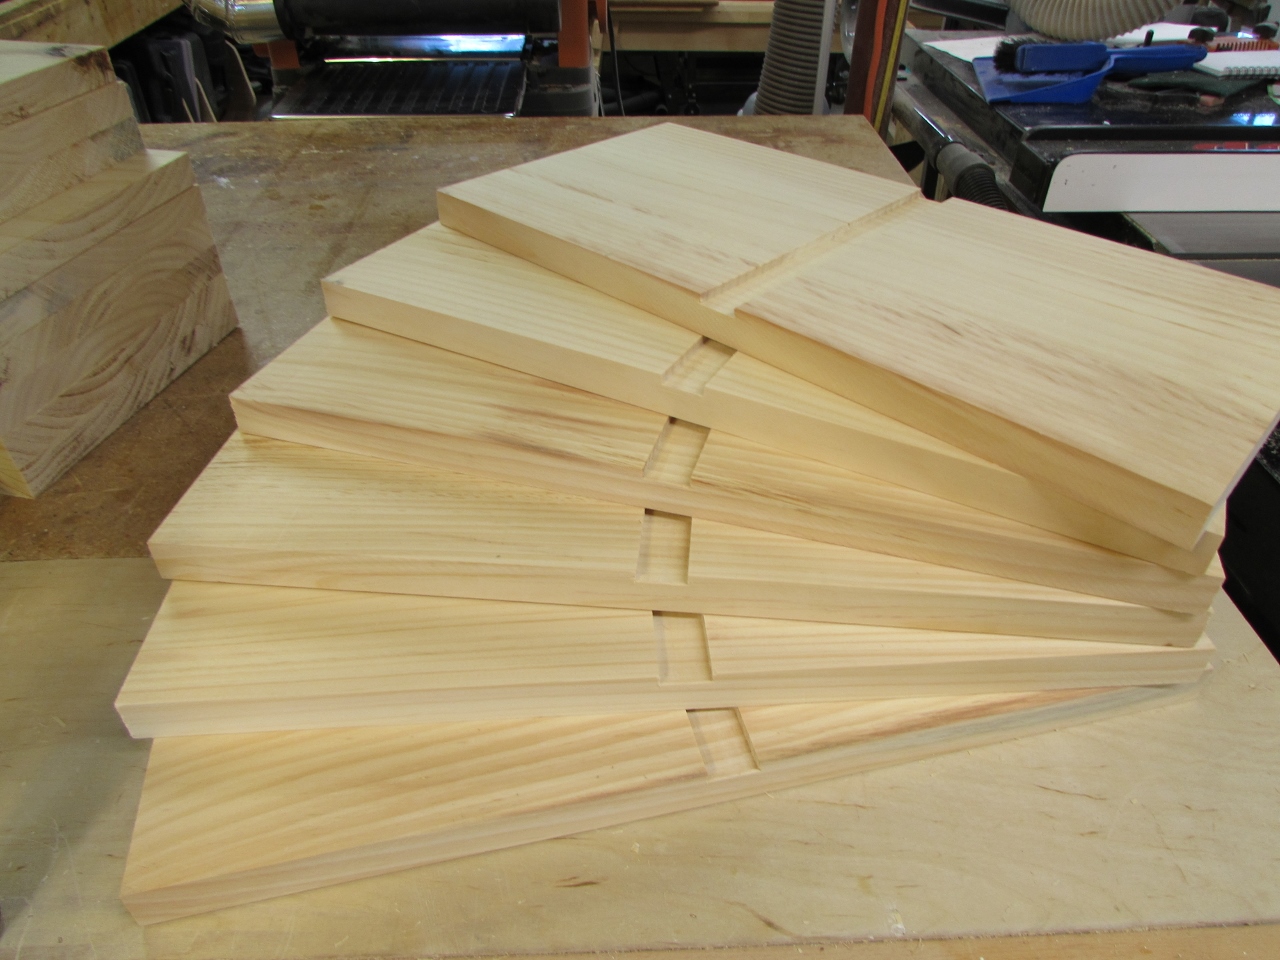
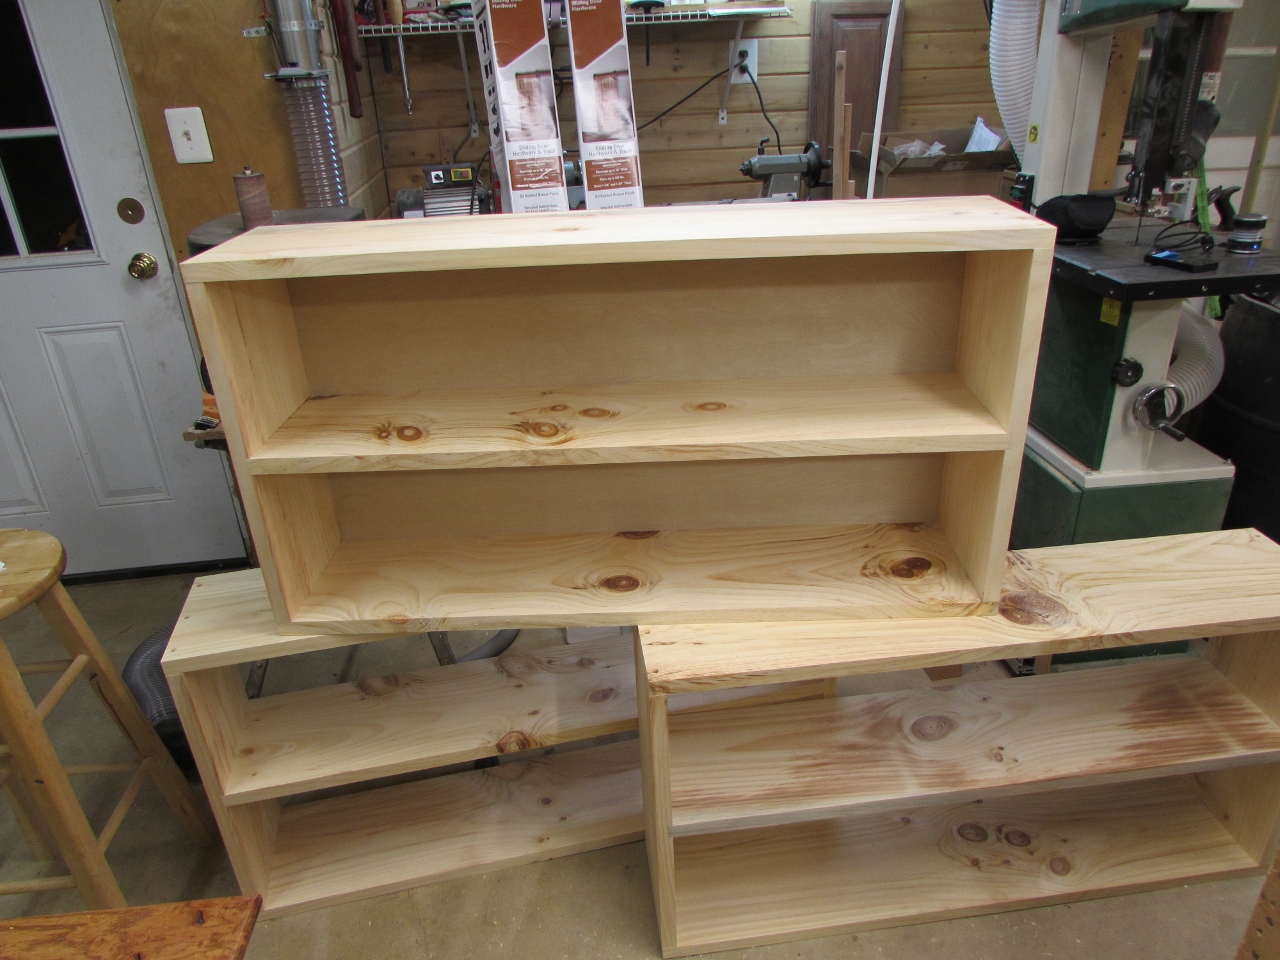
All the parts are cut and ready for assembly.
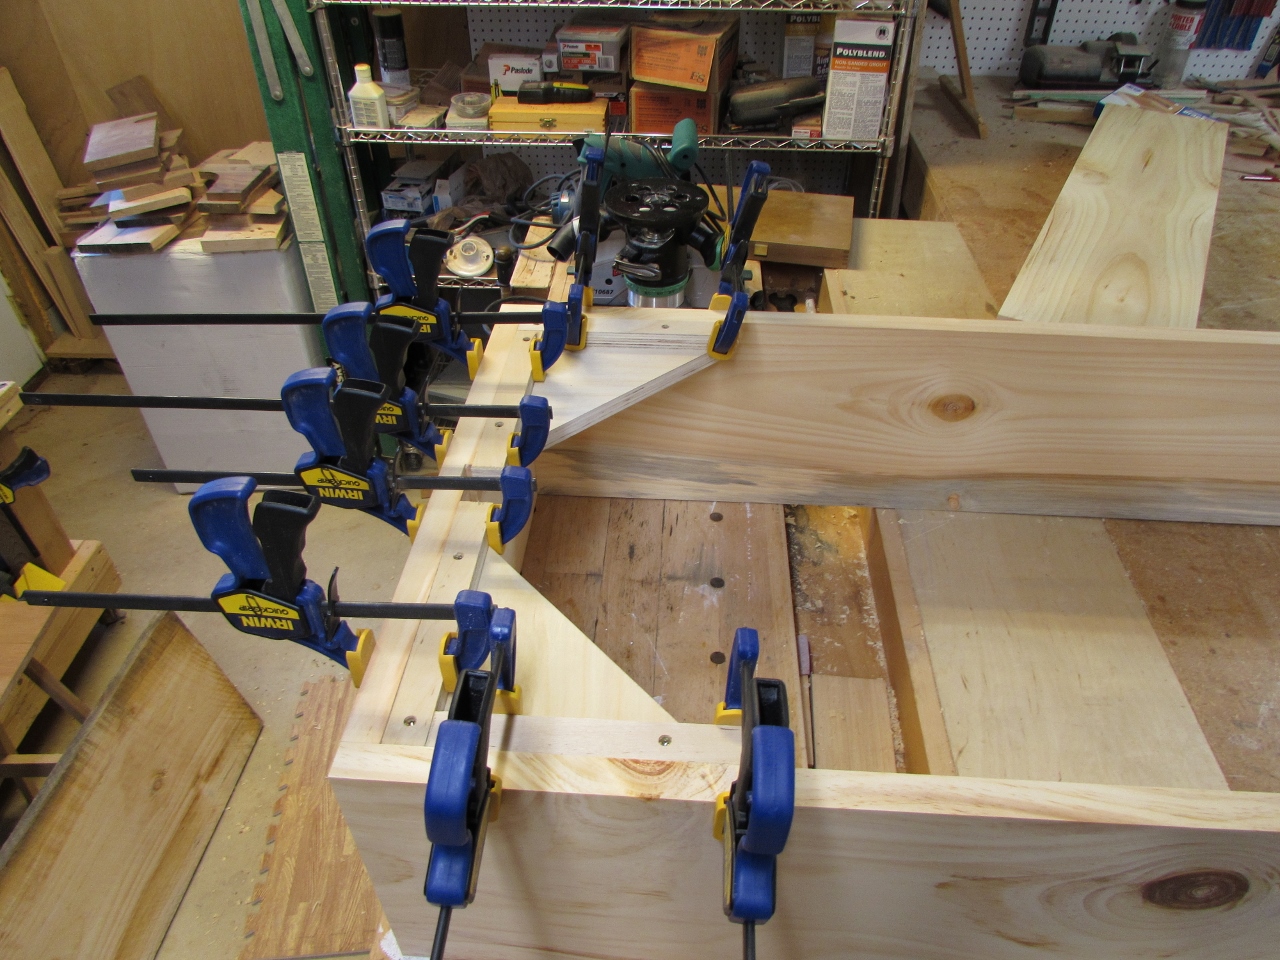
I squared up the first end with the corner jigs that I made on the last project, then started drilling the counter-sunk pilot holes.

I used 2″ long construction screws, three in each joint.

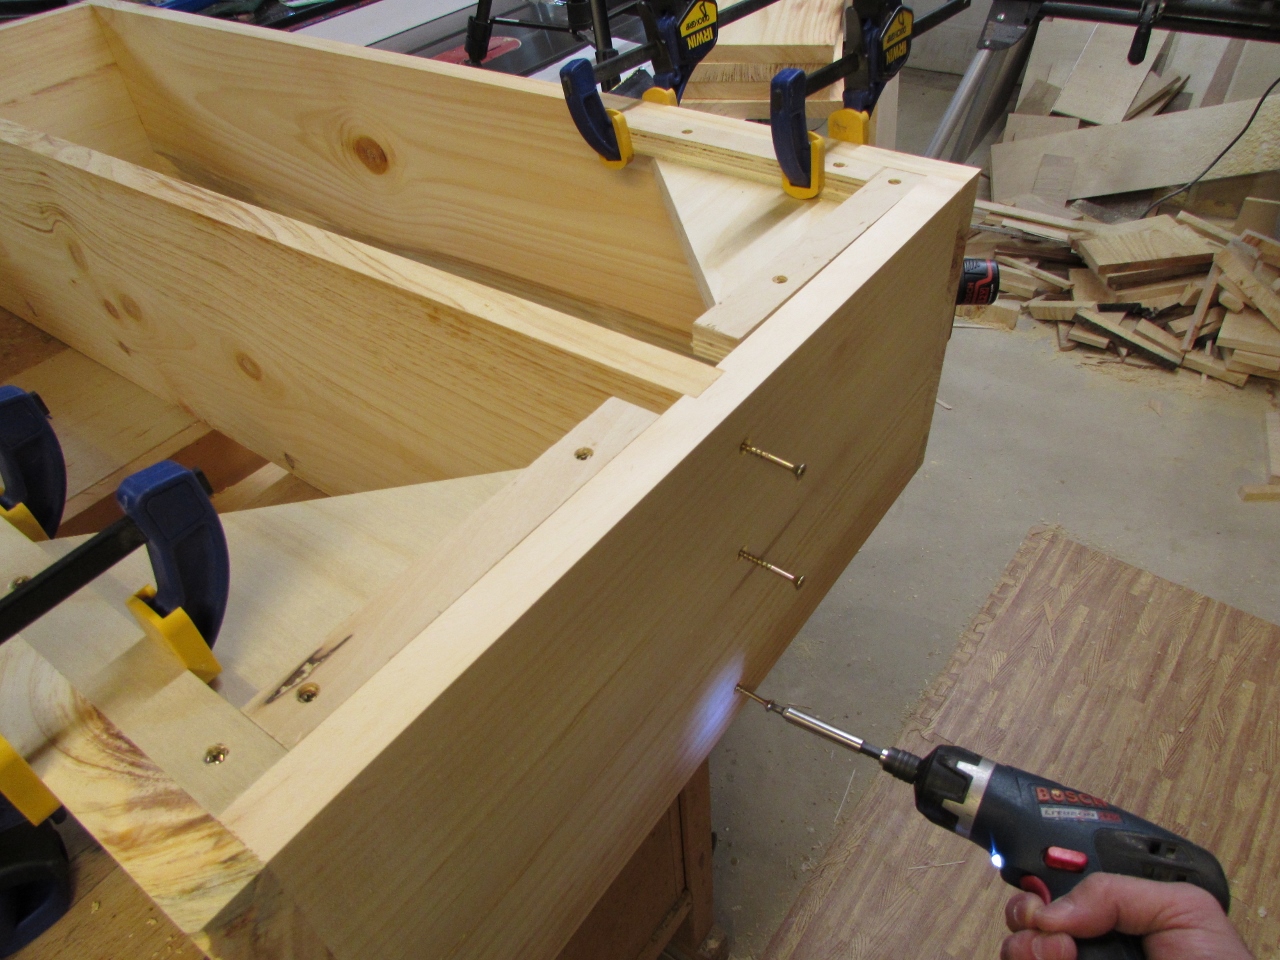
And three into the sides of the shelves as well. One down, two to go.

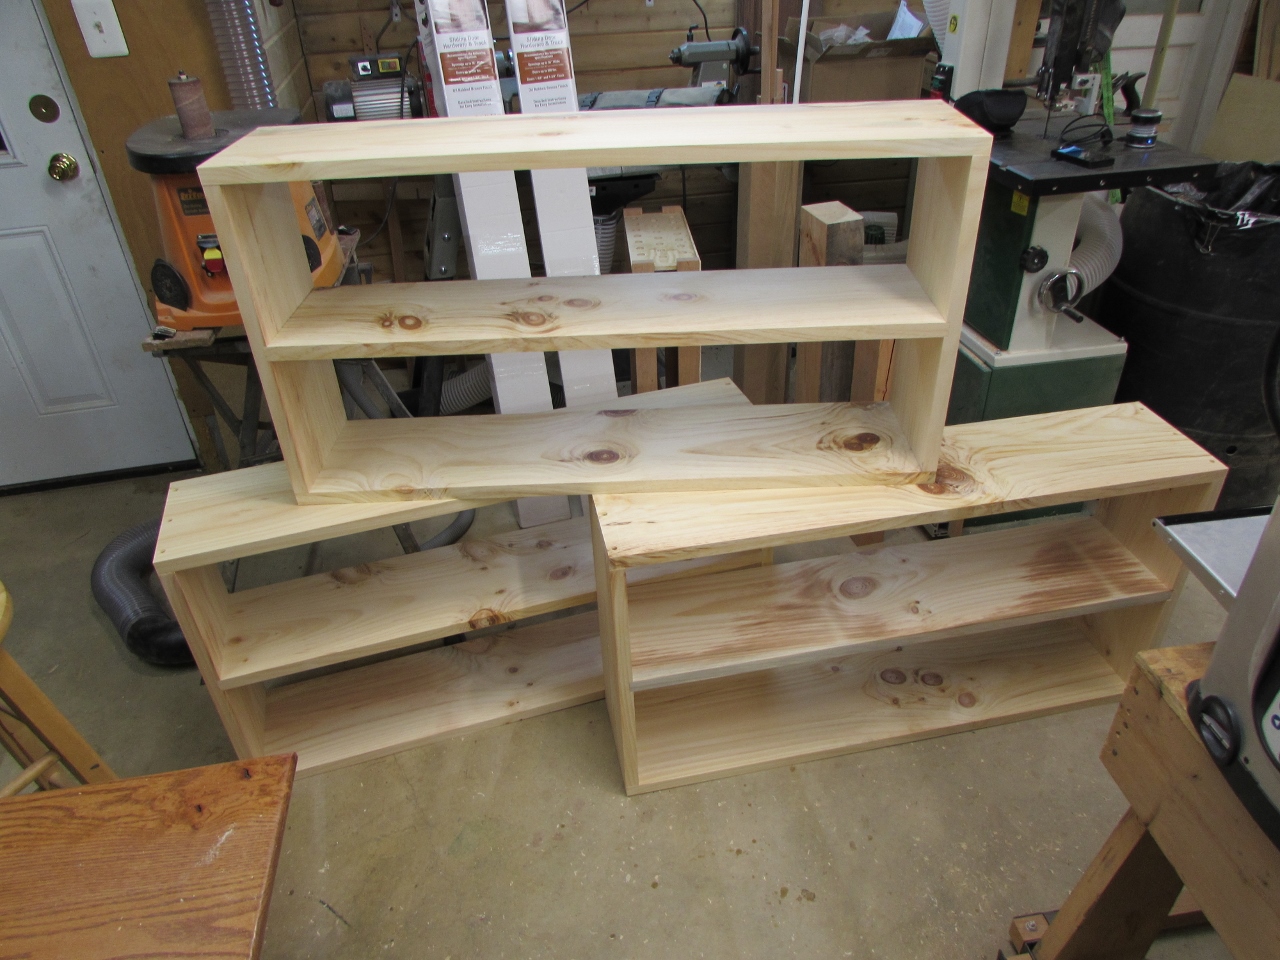
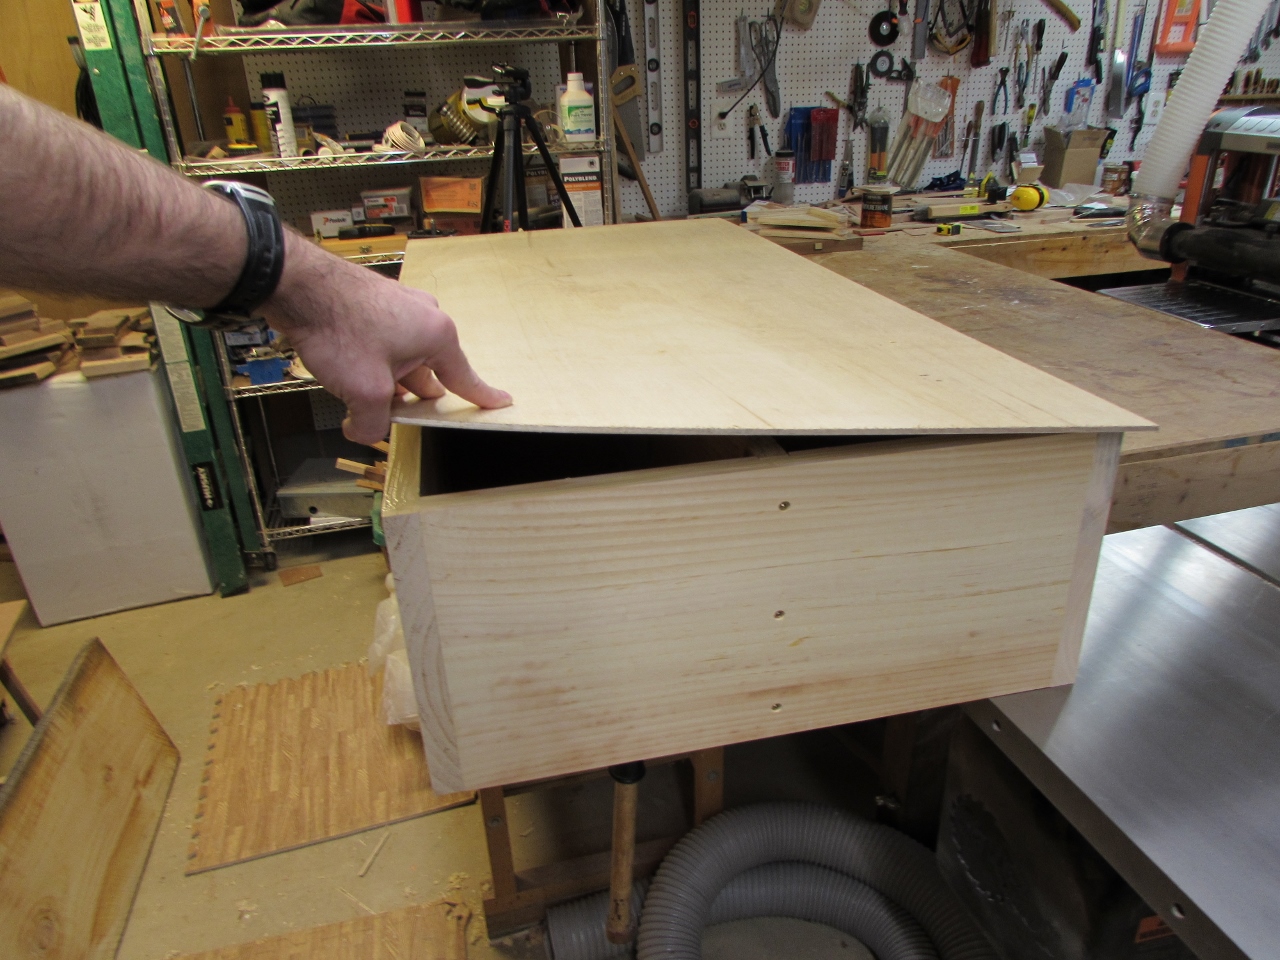
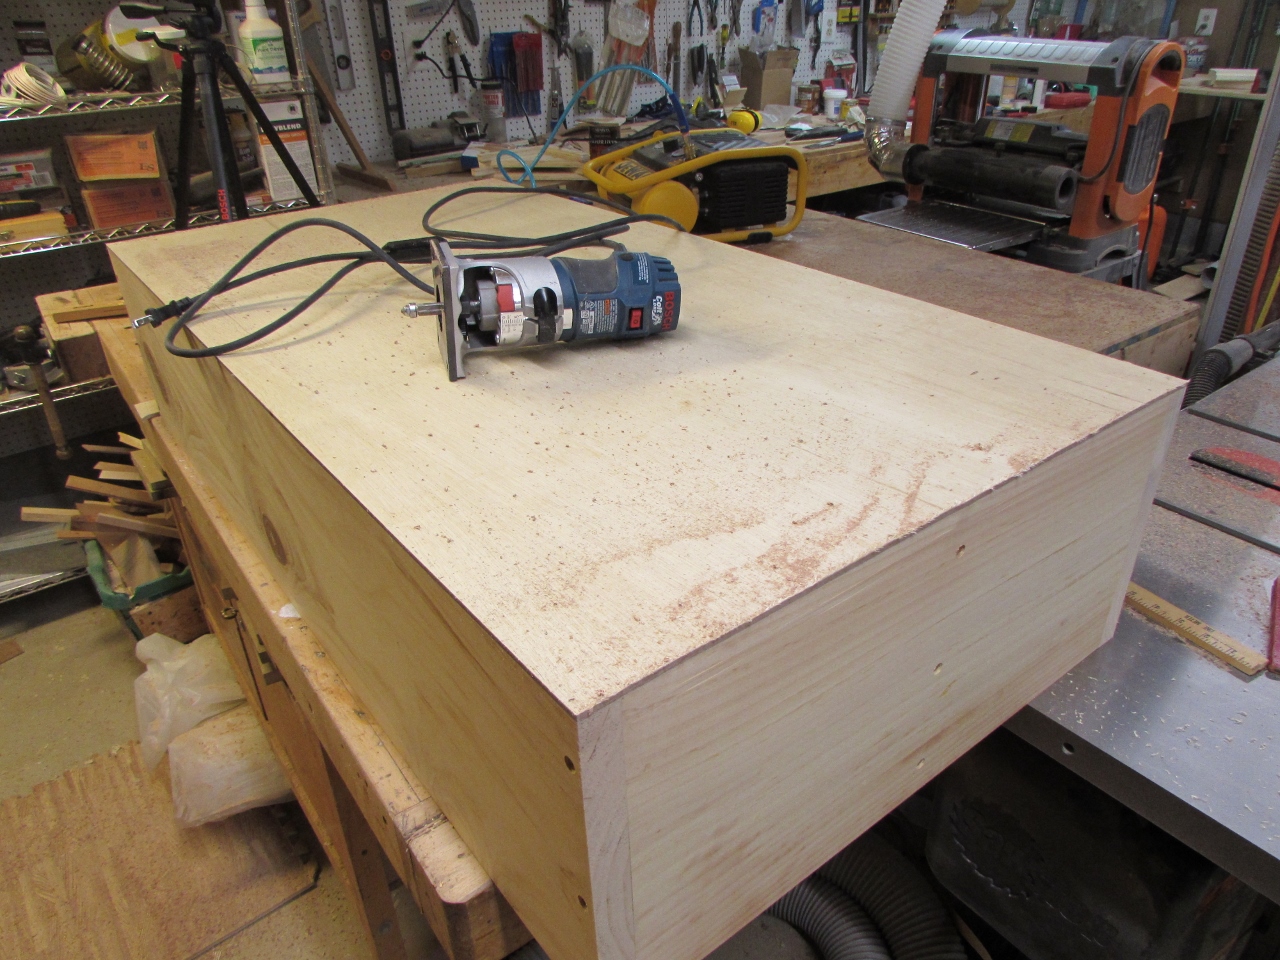
I got all three assembled and the only thing left is to attach a piece of 1/4″ plywood to the back of each. Since my truck is still buried in the afore-mentioned snow, I am only going to do one today. That’s all the plywood I have available without a trip to the store.

I decided not to bother cutting the plywood anywhere near to the correct size. Since my shelves are square, I wanted to try a different method.

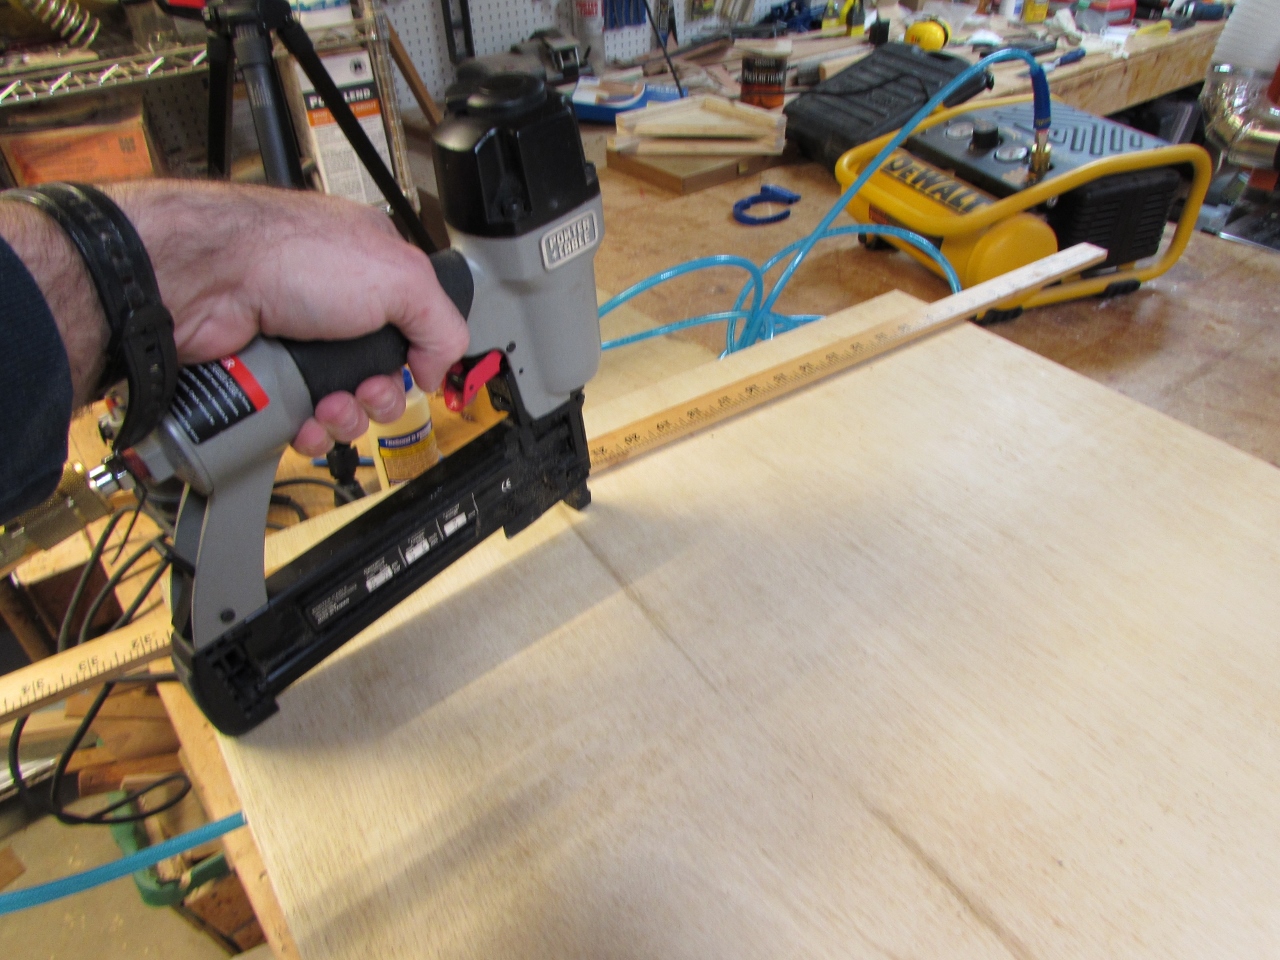
I checked and rechecked the squareness of my shelf, then applied glue to the back side.
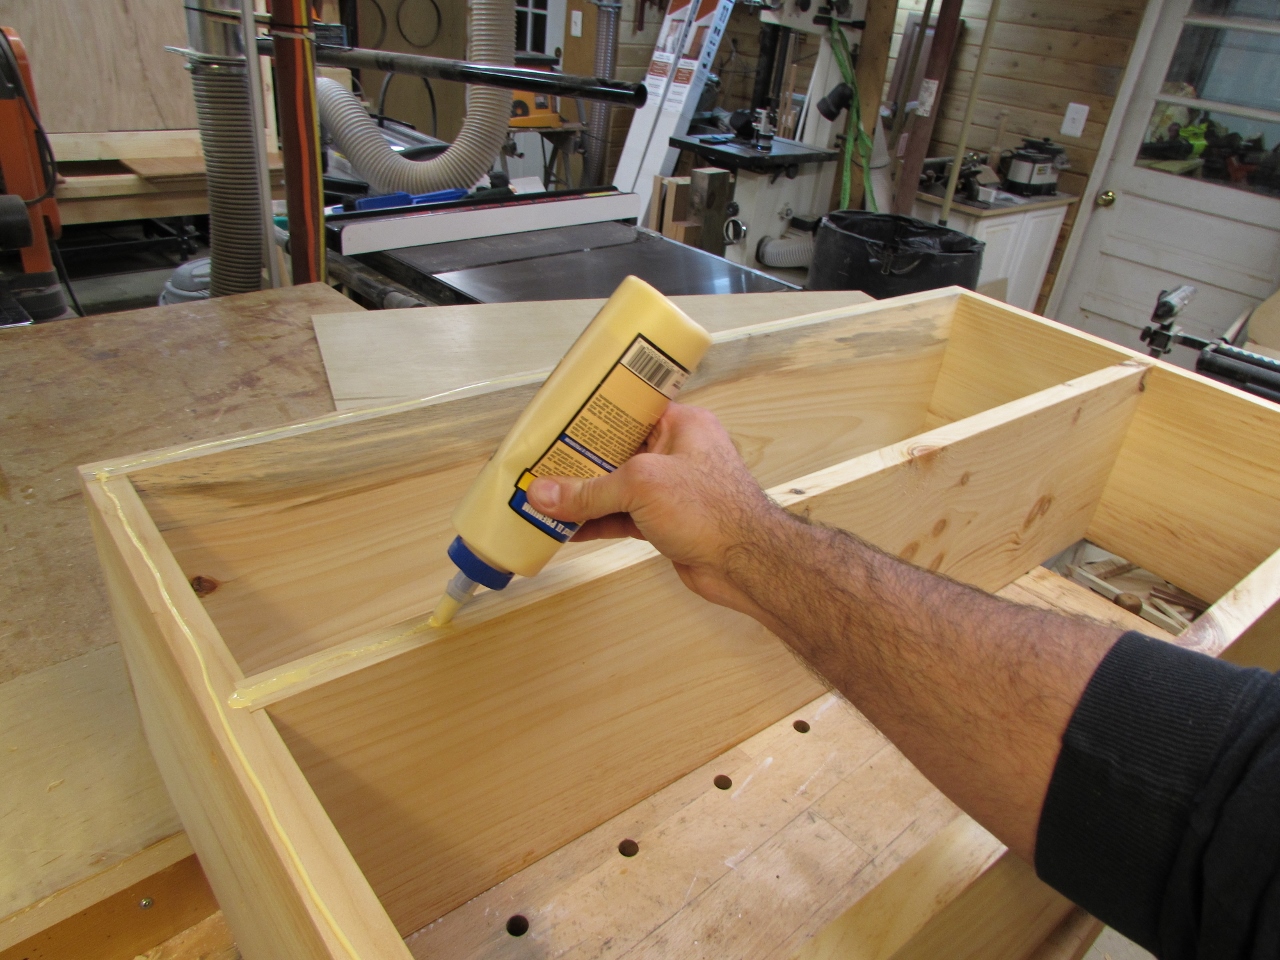
I laid my oversized piece of plywood on top, making sure it overhung all the edges, then fastened it in place with some 18 gauge brad nails. I used a long straight edge to make sure I hit the shelf in the middle.
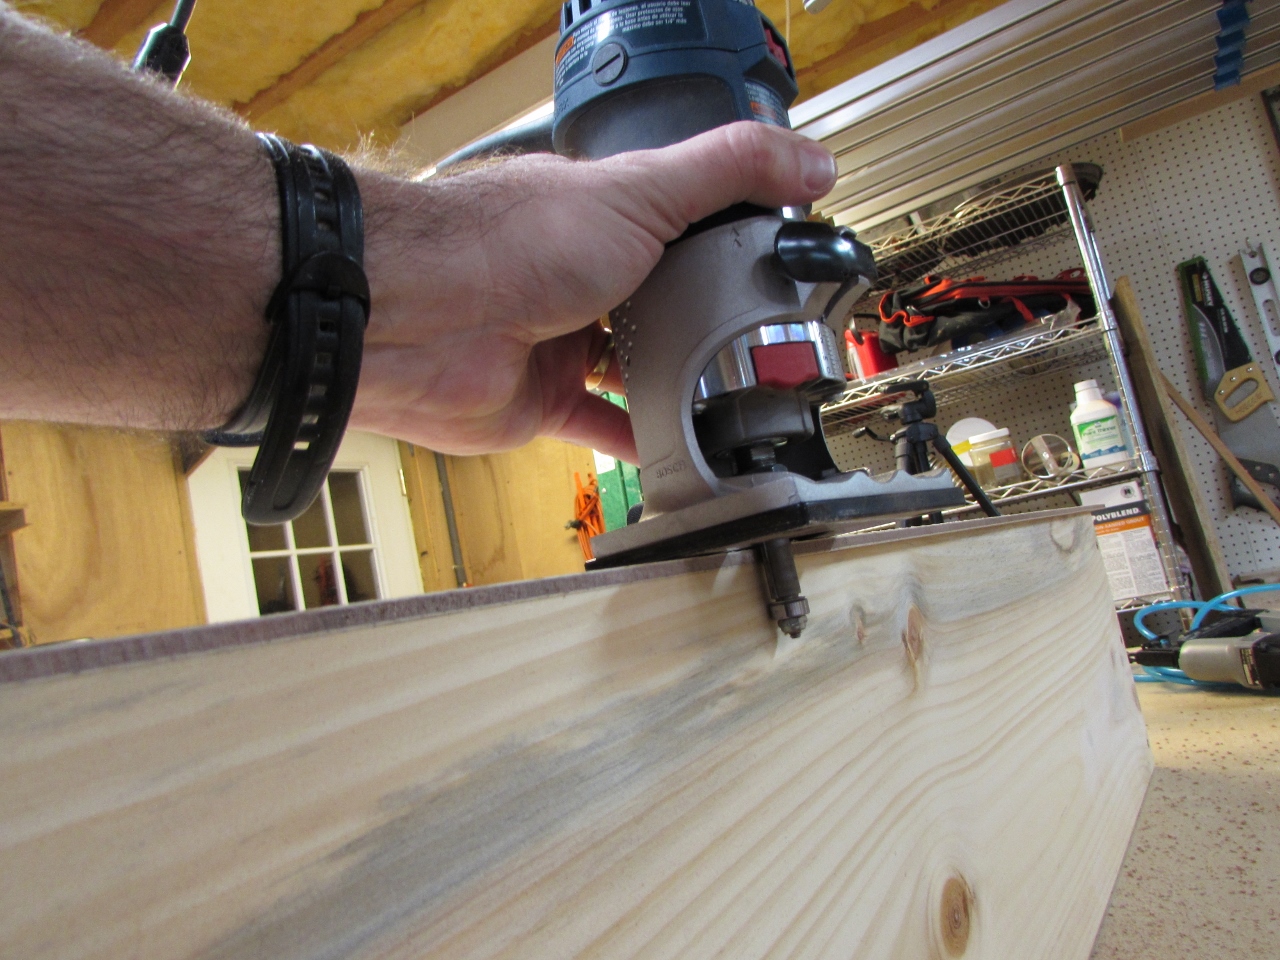
Next, I inserted my flush trim bit into my trim router, and tried flush cutting one corner.
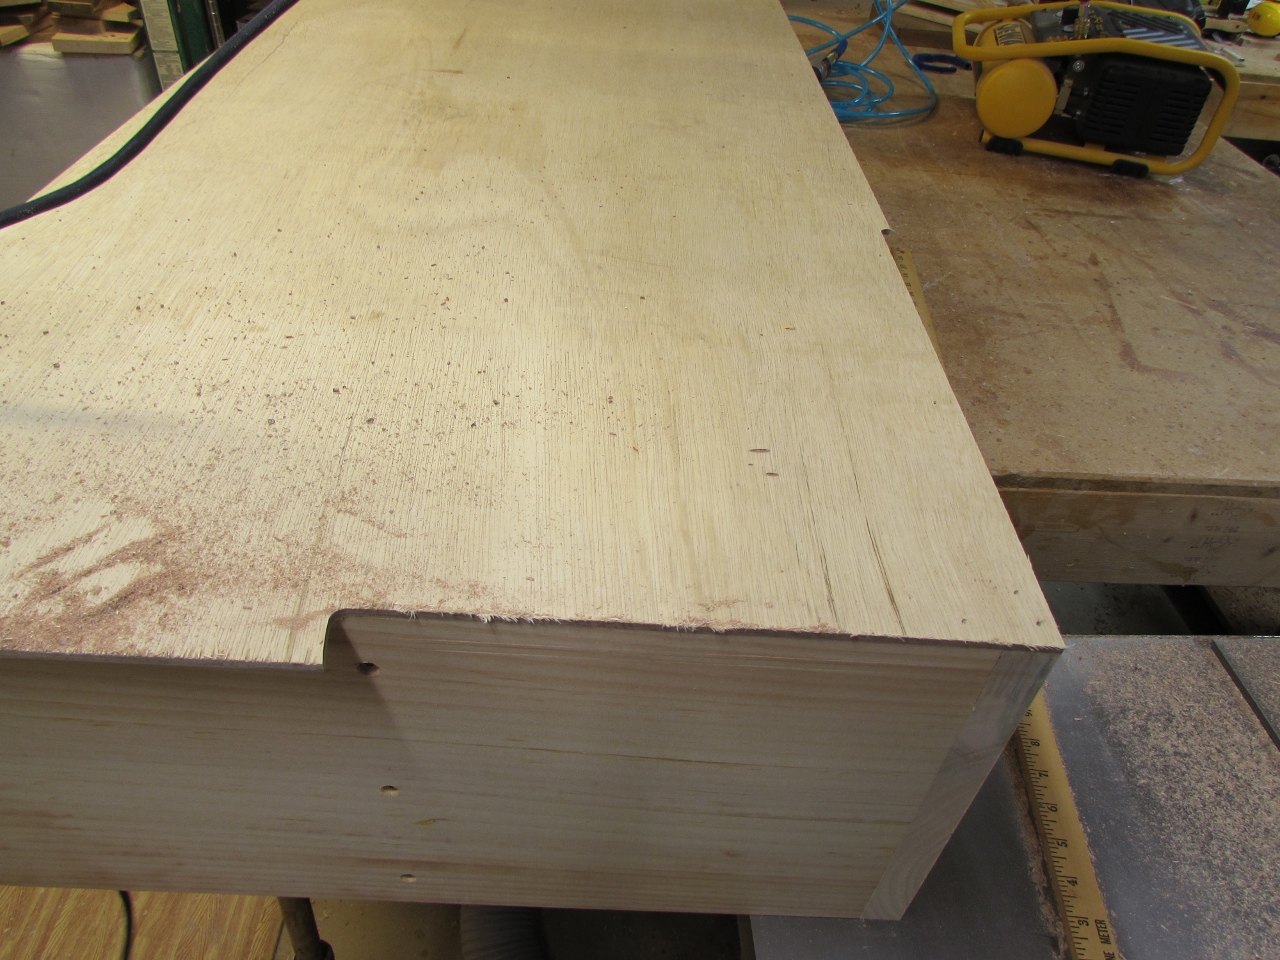
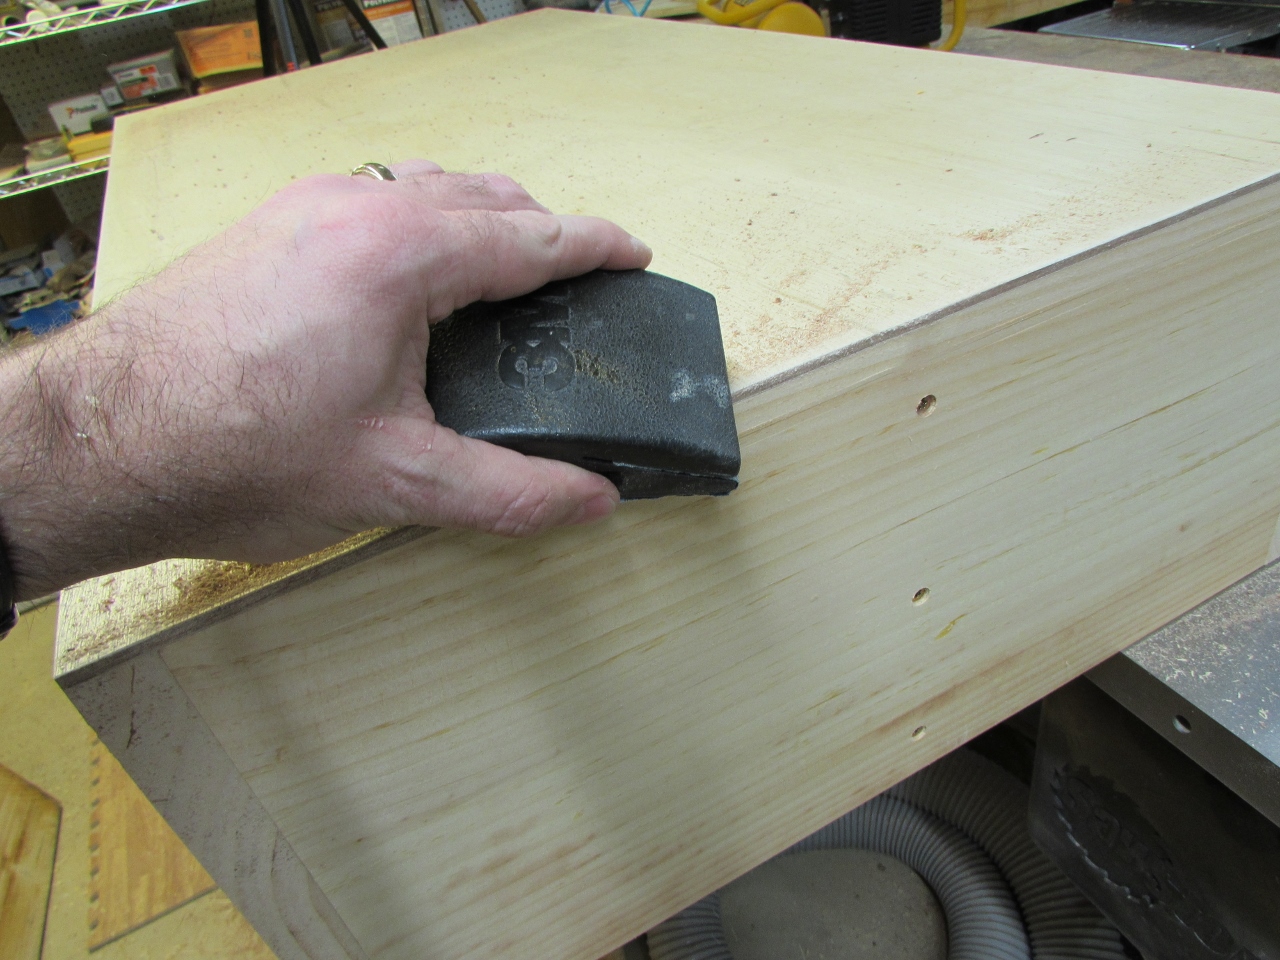
It looked good, with no significant tear-out, so I went ahead and finished trimming the rest.
I used my sanding block to clean up the fuzz at the edges, and I was done.
Hopefully I will be able to get out tomorrow and get more plywood, but the shelves look good. Done for today.