
Chair repairs
I have a friend named Liz. She has a problem. If you throw away a piece of furniture, she will find you and take it. No matter how damaged the piece of furniture is, she will “Rescue” it. Recently, she has tried to recruit me in her cause. I have no sympathy for old broken chairs, but I have a problem with saying “No”…

This set of chairs matches two others that I have already repaired. They originally had caning for the back. I have never fooled with repairing caning, but it looks pretty much like repairing the screen in a window or door. You can buy sheets of woven caning, cut it to size, then press a reed spline into the retainer groove to hold it in place. Unfortunately, on one of the earlier pair, someone had tried this and thought that a lot of glue was the key to making the repair. That meant that the reed could not be removed again for future repairs. Liz wanted to change the caning to a hard back anyway, so repairing the caning wasn’t an issue. The new issue was how to make a hard back for it instead.

The seat will eventually be reupholstered, so that is also not my concern. I do have to consider whether or not a matching cushion will eventually be added to the back.
Reupholstering the seat will require pulling a few staples and just replacing a few pieces of fabric as well as the stuffing, then stapling a new piece back in its place.

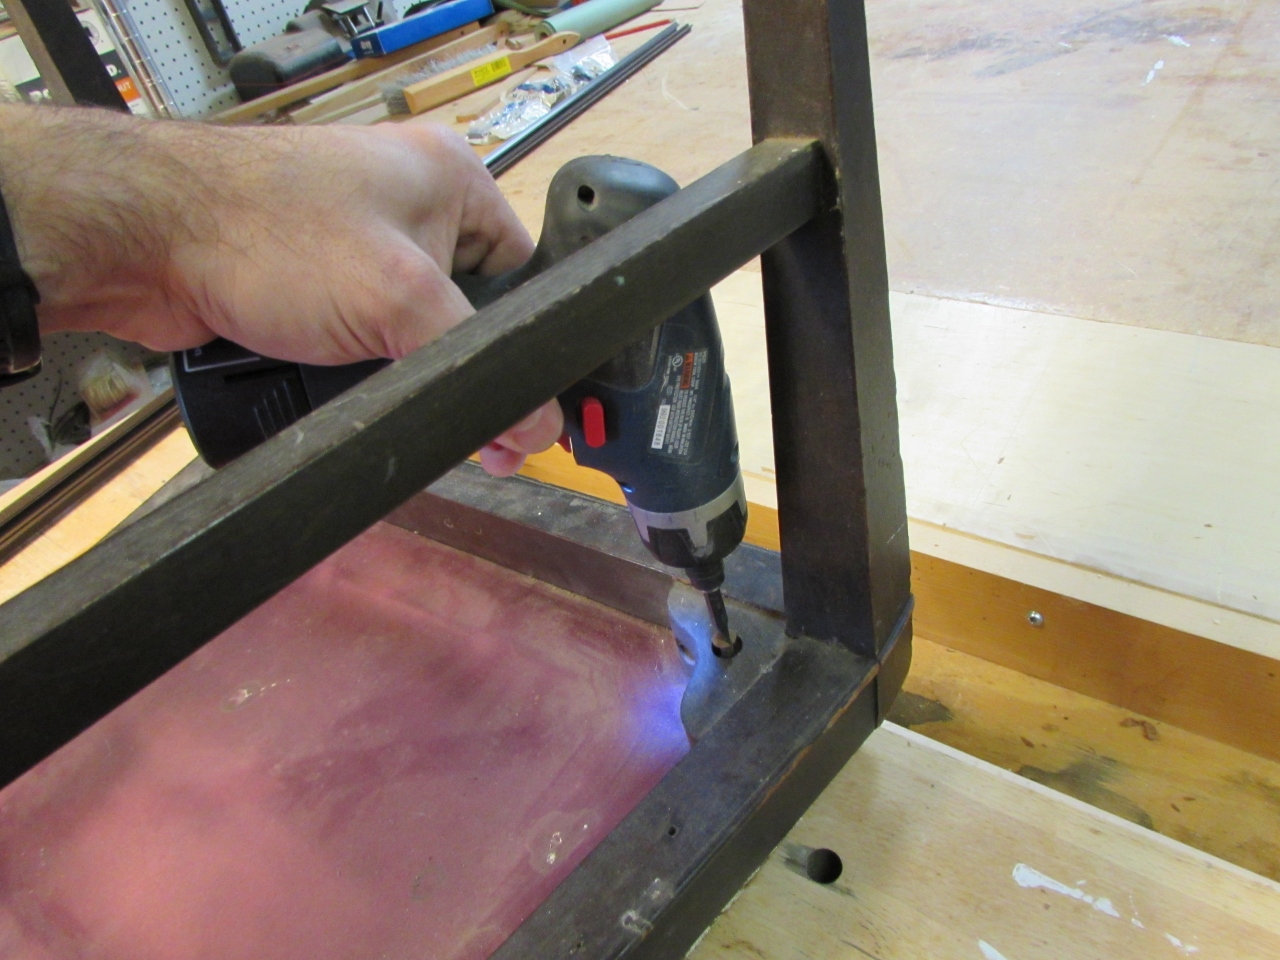
Before I even start with the back (still trying to figure that out…), I am going to take the wiggle out of the legs.

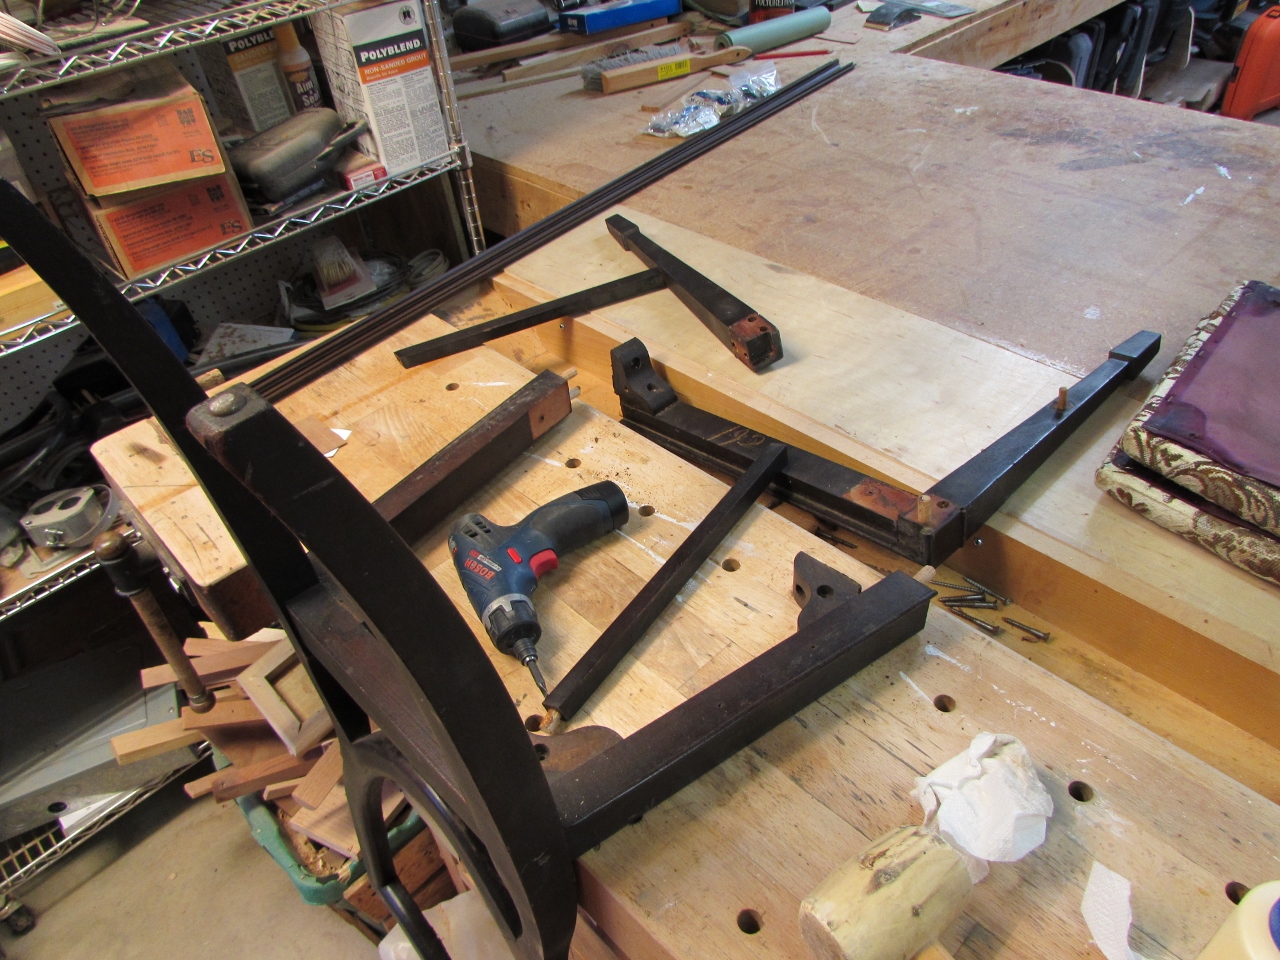
I started by pulling out any screws I could find, then gently separating the joints with a rubber mallet. I have also used my clamps with the ends reversed so that they press out instead of clamping in. That is a really good way to control the pressure at several points at once if you are trying to avoid breaking anything.

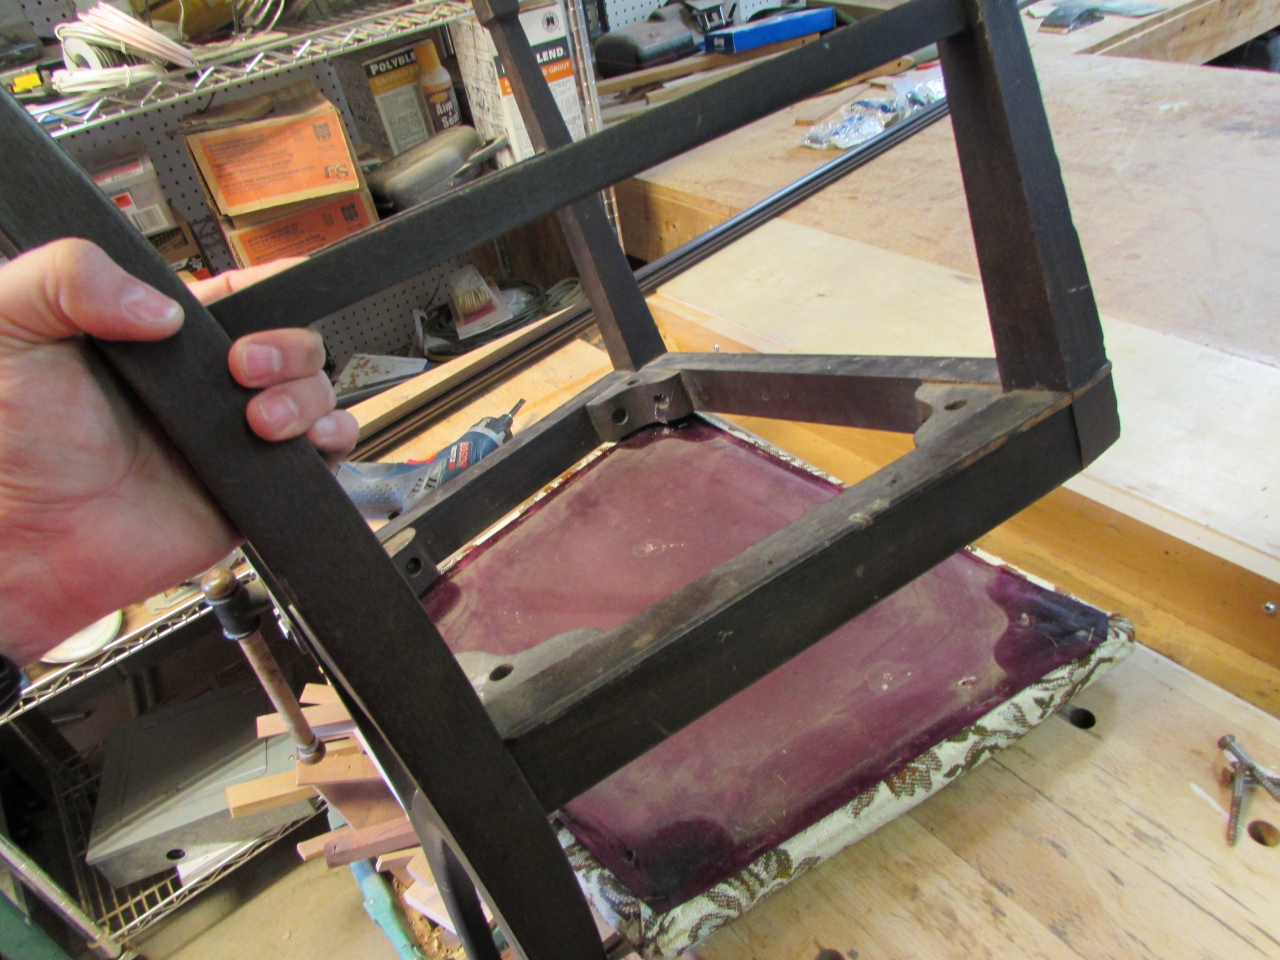
Once all the pieces, that were loose, were dismantled, I found one or two places that couldn’t be separated much without damaging the chair.

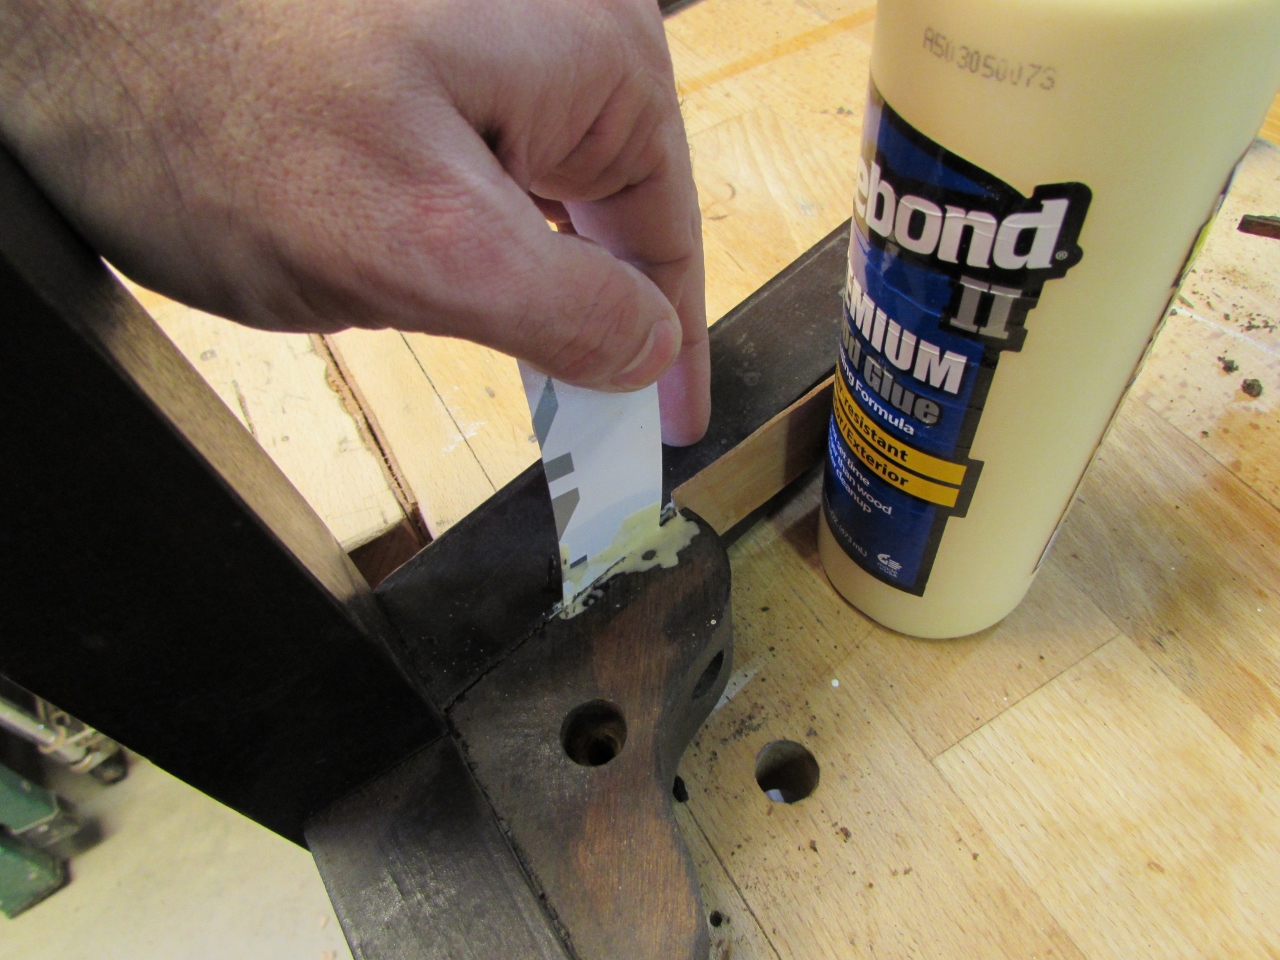
These areas, I shimmed open, then forced glue down into the joint with a piece of heavy paper.
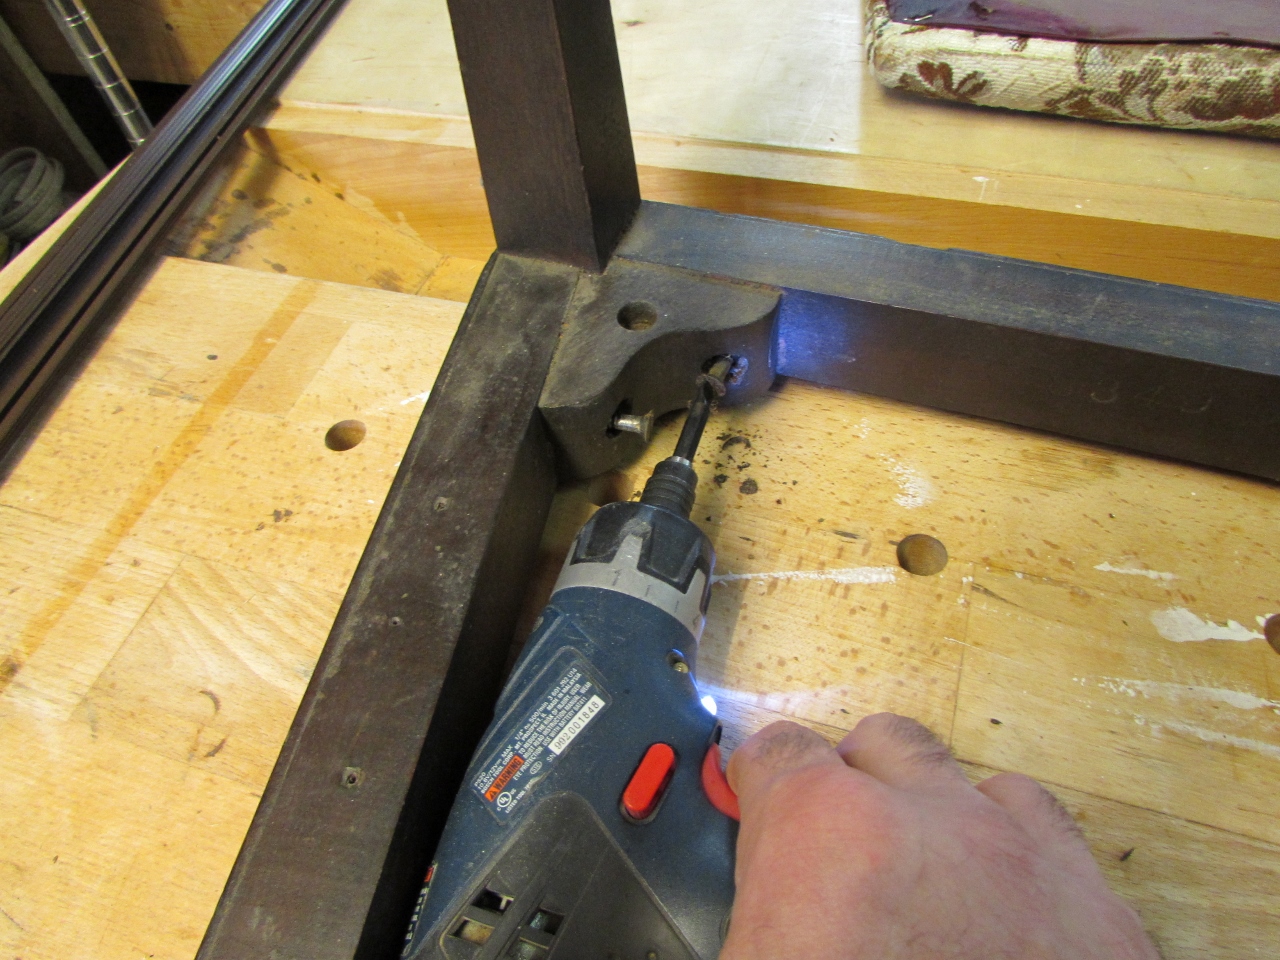
Some of these places could be clamped tight by simply replacing the screw.


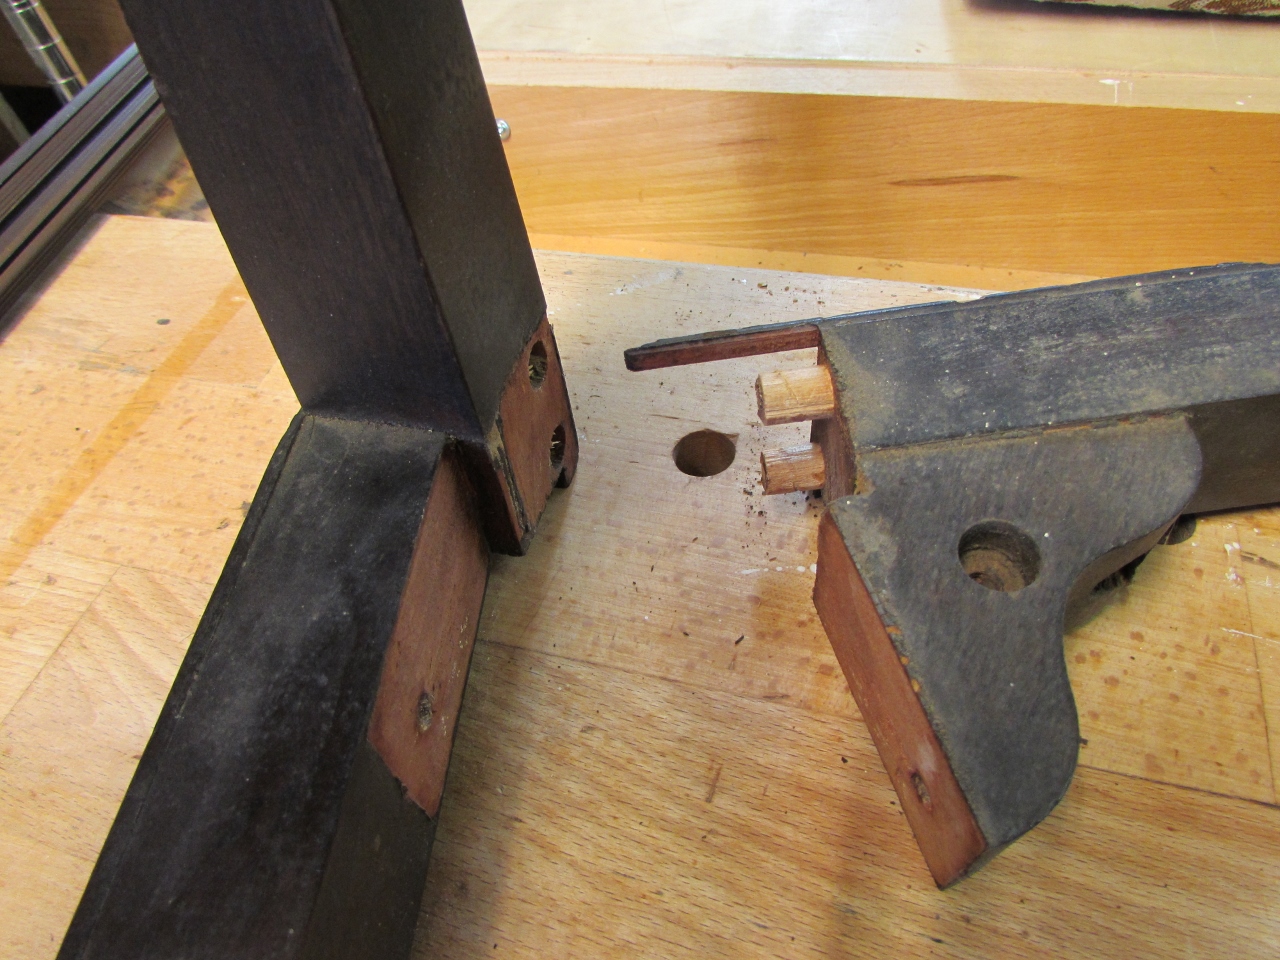
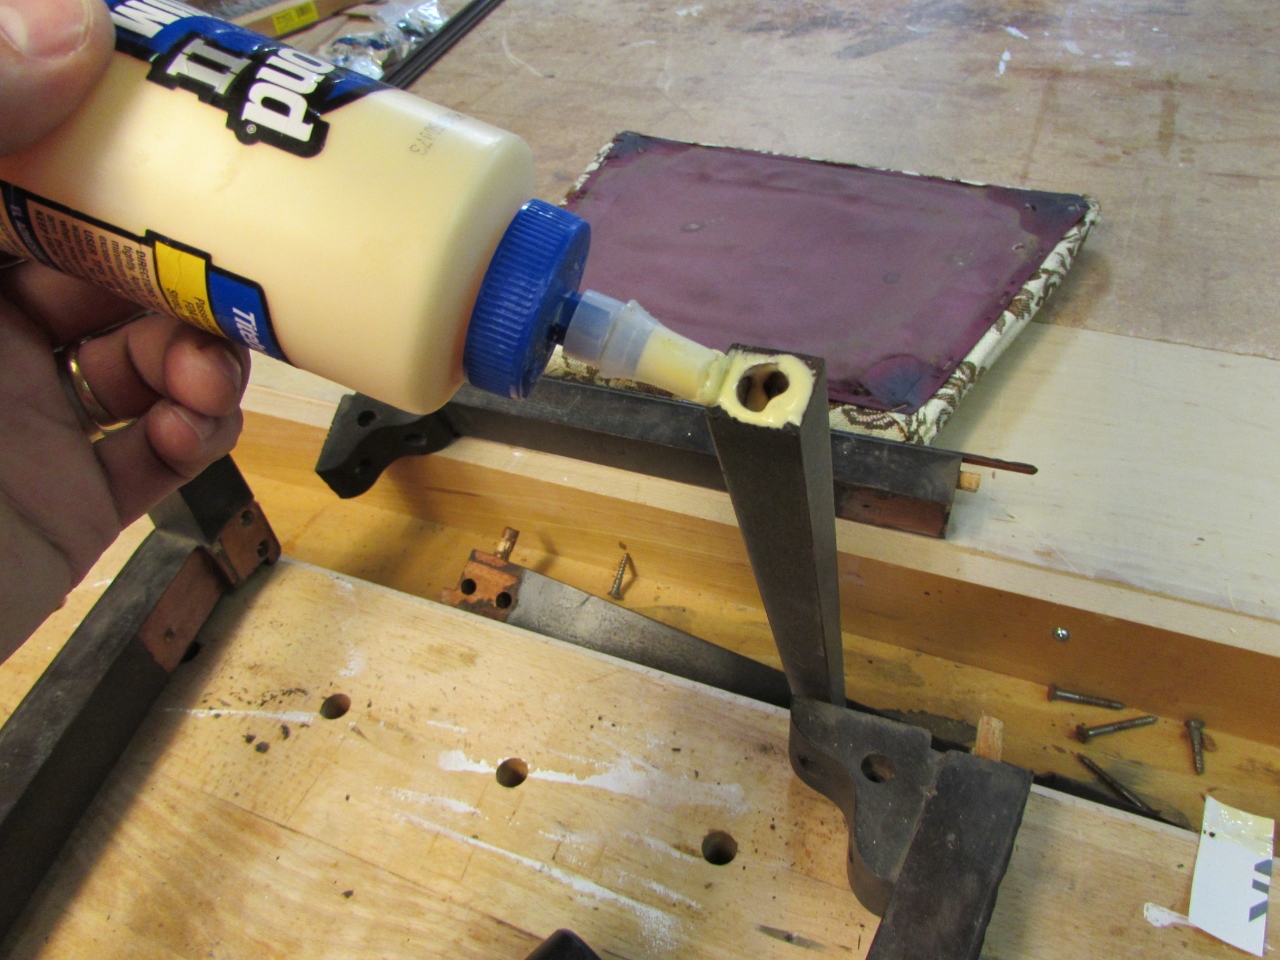
Next I applied a little glue to all of the dowels and faces where the loose pieces were joined. I really can’t do one at a time because it all goes back together at the same time.

I tapped all the joints tight and applied more glue anywhere that I had missed.

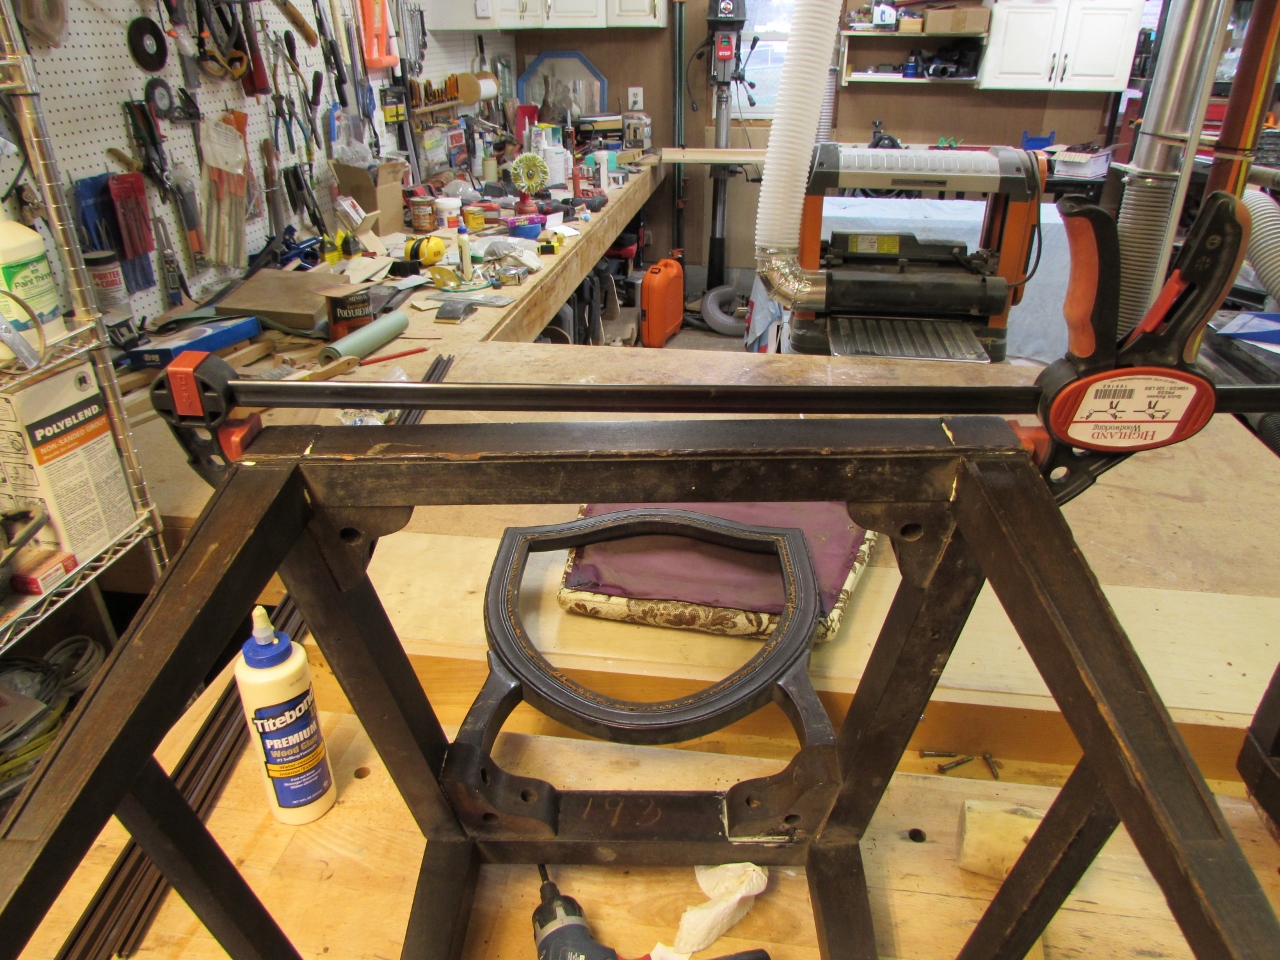
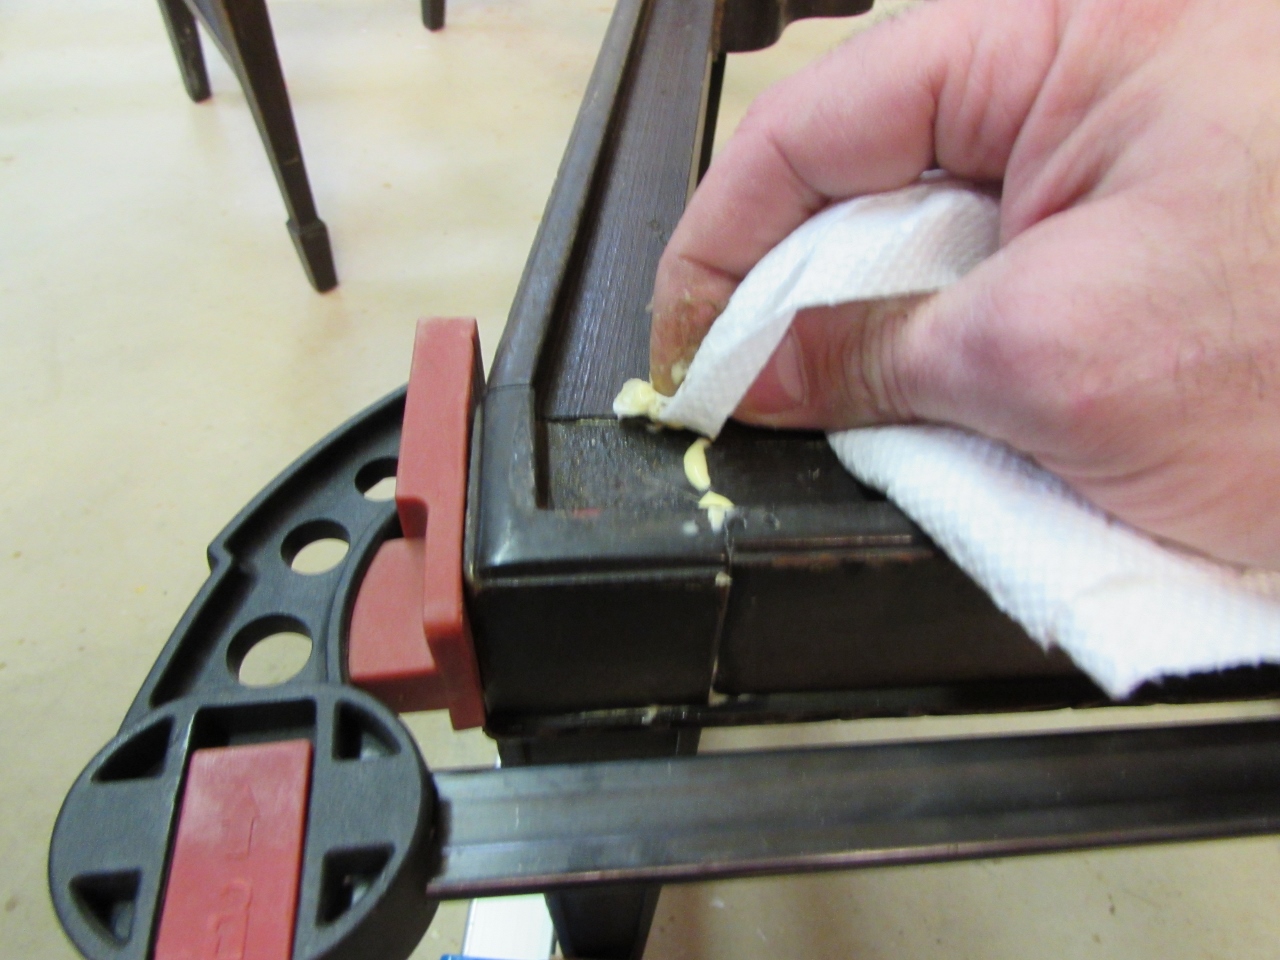
The last step was to clamp it all up and clean the excess glue away with a damp paper towel.
Chair two was a little more extensive, but luckily there were no broken pieces. On the last two, I had to remake the cross bars as well as remake some of the dowels.

After a little more clean-up, I left the chairs to dry.


Now that the legs are dry, it was time to tackle the back. I scraped away all of the exposed caning with a sharp chisel, to leave a relatively smooth surface behind.
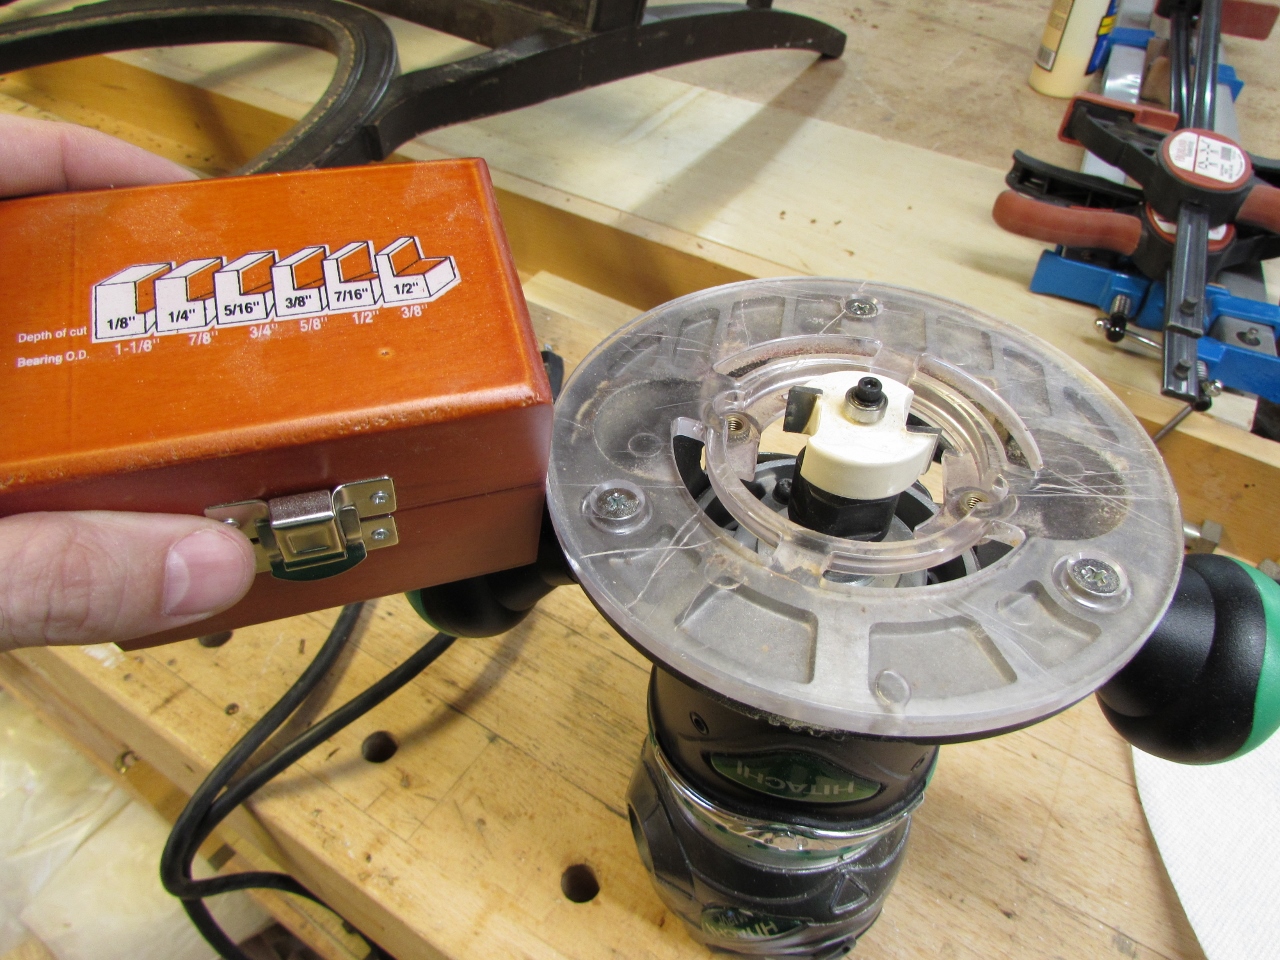
On the last set of these chairs I free-handed the router to cut away a rabbet to recess the new seat back. Boy was that a stupid idea! My flat surface was less than 1-1/2″ wide to balance the router on. Without a good flat surface, you have no real way to control your cut. Since I bought a set of rabbeting bits, for the router, on the vanity project, I decided to try them instead. I am still working with a narrow surface, but the bearing riding around on the inside helped stabilize things a bit more, as well as preventing the router from jumping into areas I did not want cut.


The bit wasn’t quite deep enough to cut past the reed spline, but it was easy enough to remove once the rabbet was cut in.
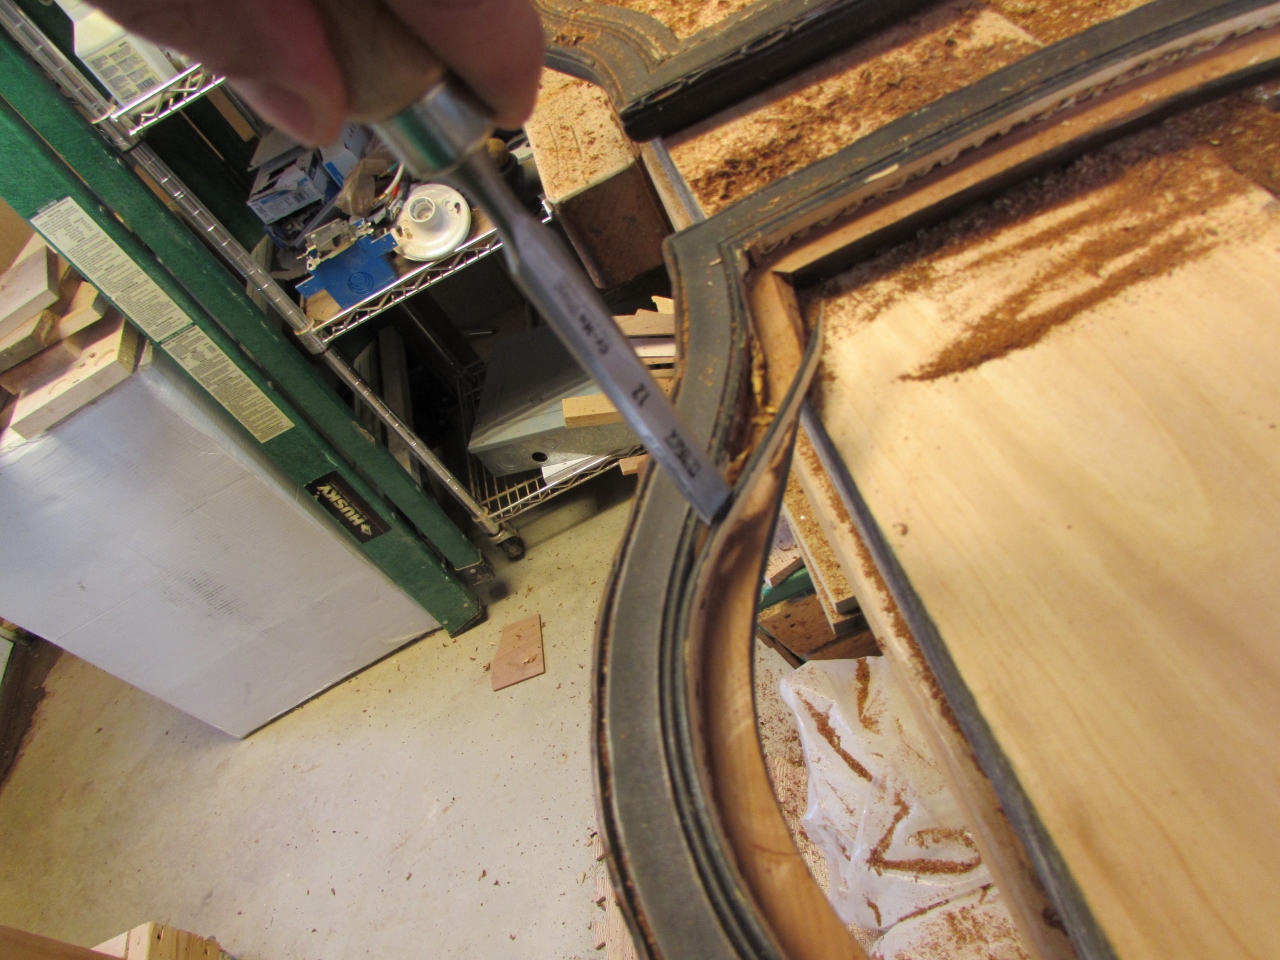
I used a chisel to separate the reed, Then scraped away any extra caning (or glue).

The second one went just as smoothly, and the backs were done for now.


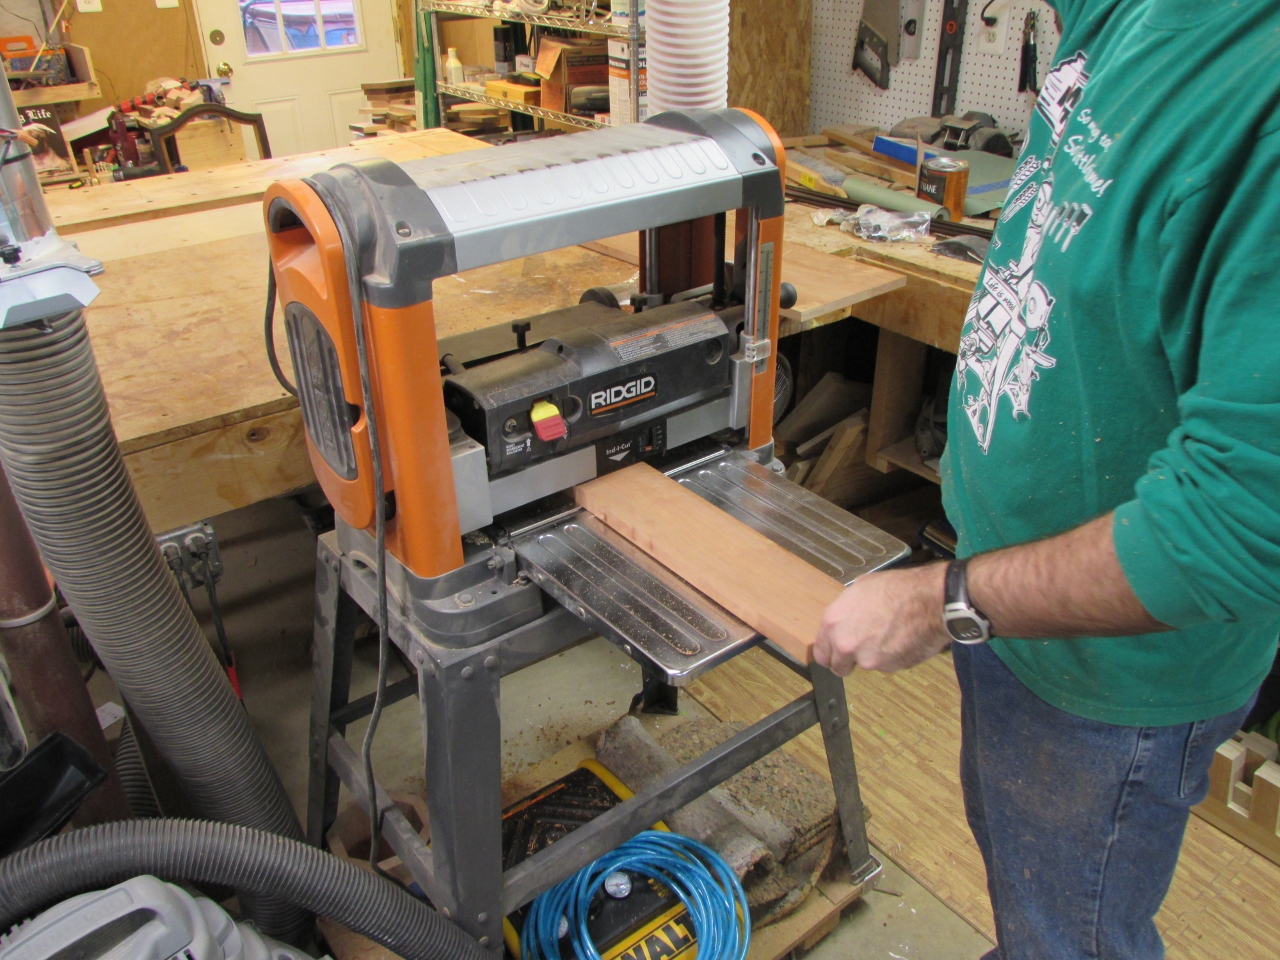
Time to create the panels. The chairs look to be made from mahogany, and stained dark. I have some cherry that will compliment the existing finish or will be pretty close in color if Liz wants to stain it. I am using a reclaimed piece of cherry from an old dresser, but it is not wide enough. So to make up the difference, I cut a piece of cherry from some of the left-over scraps from the Papal seal that was carved for the Pope’s visit, earlier this year.
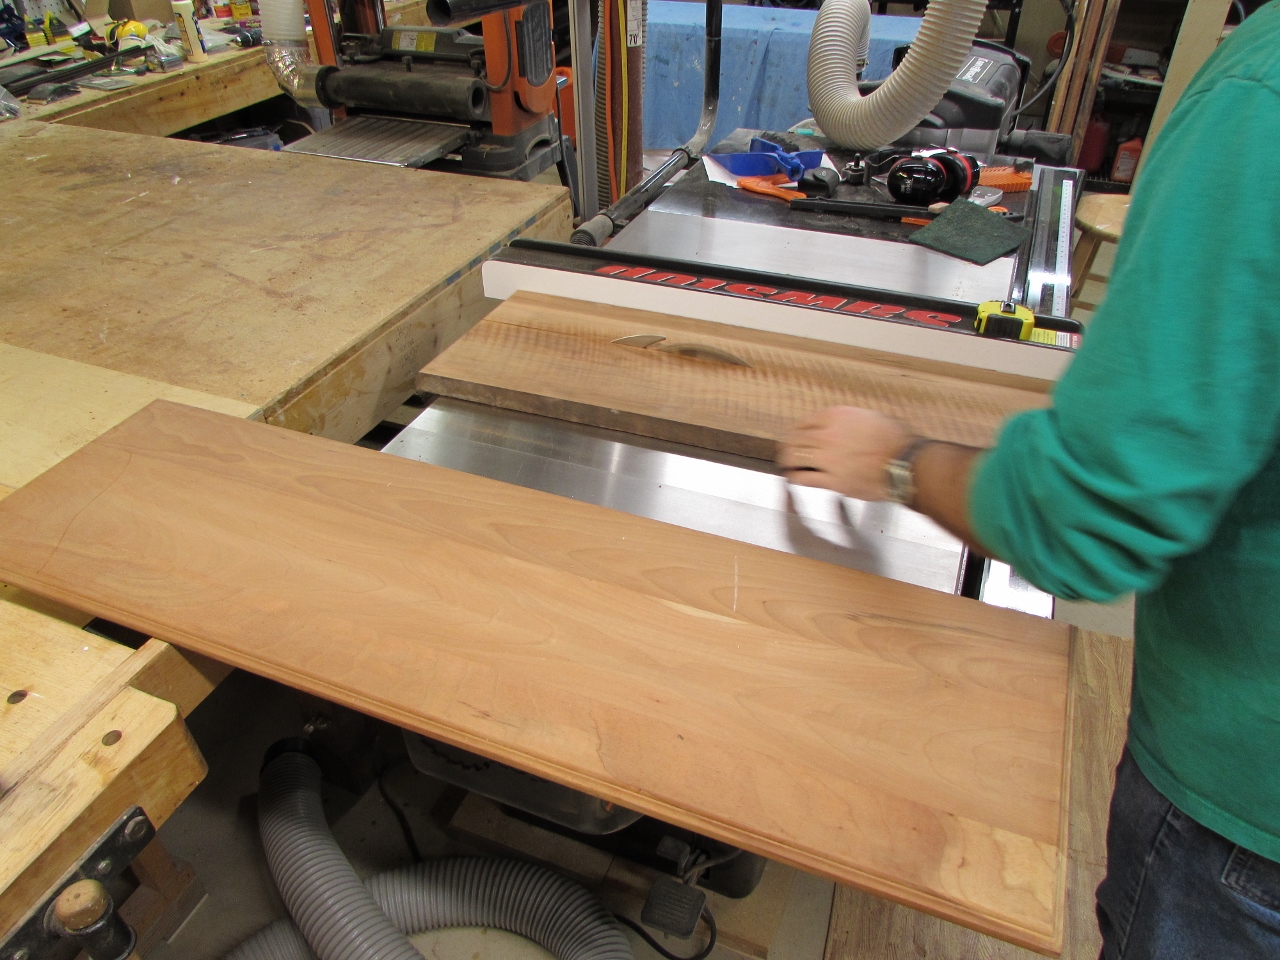
My rabbet was cut about 3/8″ deep, so I am planing the panel down to about 9/16″ thick so that it sticks up a bit to create a shadow line that will hopefully hide any potential mistakes in cutting the back to match the rabbet. I am not hoping for mistakes, but I am a realist…

Once the boards were milled to the right size, I applied glue to both sides of the glue joint, then spread the glue evenly.


I clamped it up and let is dry over night. Before the glue fully cured (after about an hour or so), I used my wide chisel to scrape away any excess glue. This is so much easier when the glue is still a bit pliable.


After the clamps were pulled, I sanded down the glue joint, first with 80 grit, then 120.

I have no idea how someone would normally go about creating a pattern from a recessed area, but this is what I came up with: I started with some masking paper, that is typically used to mask off areas when spray finishing. I taped two pieces together, so that it was wider than the seat back.

I trimmed the paper to the approximate outside dimensions of the seat back, then used some painter’s tape to hold it tightly in place.
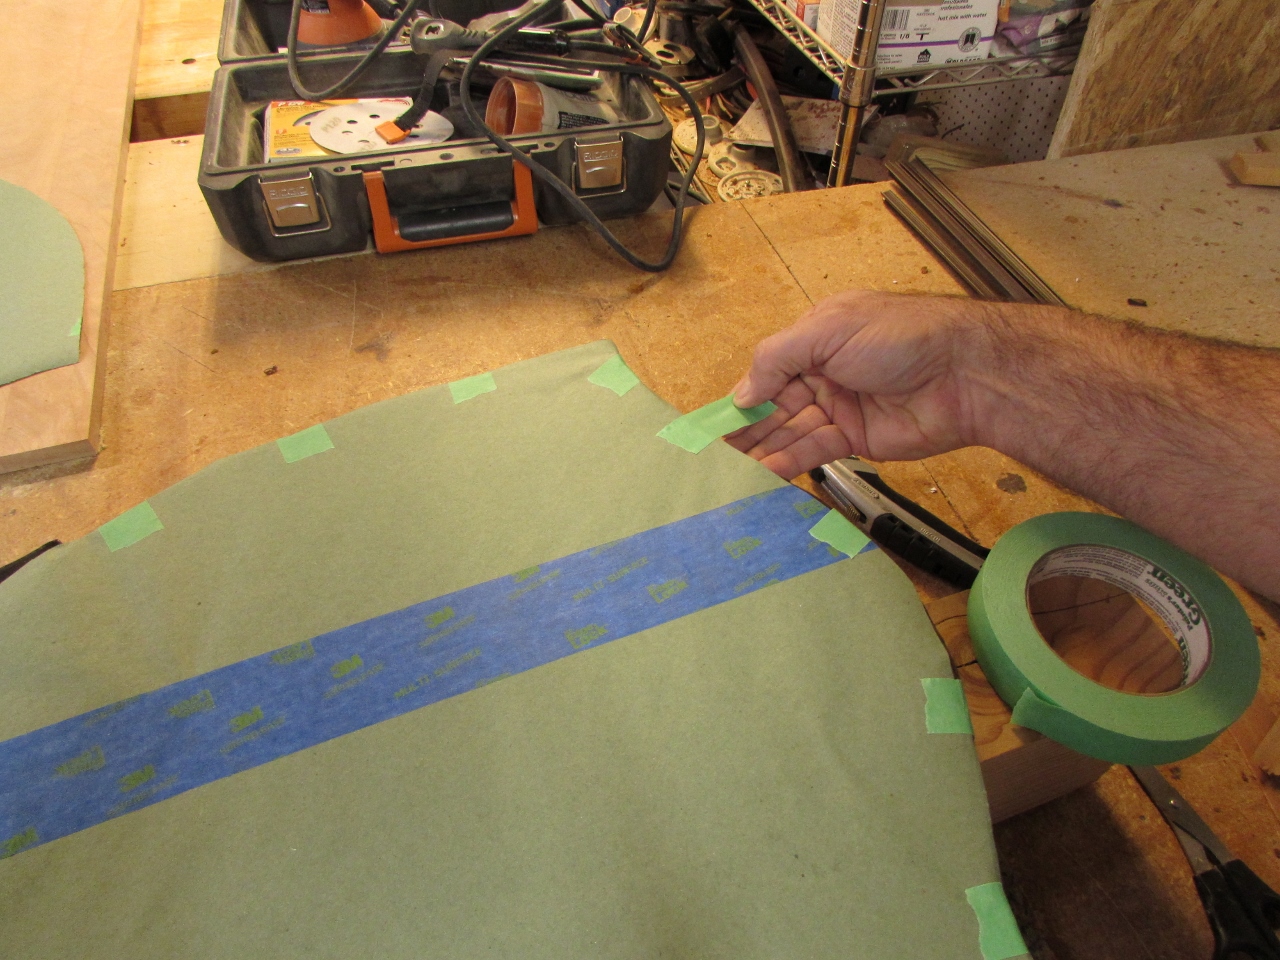
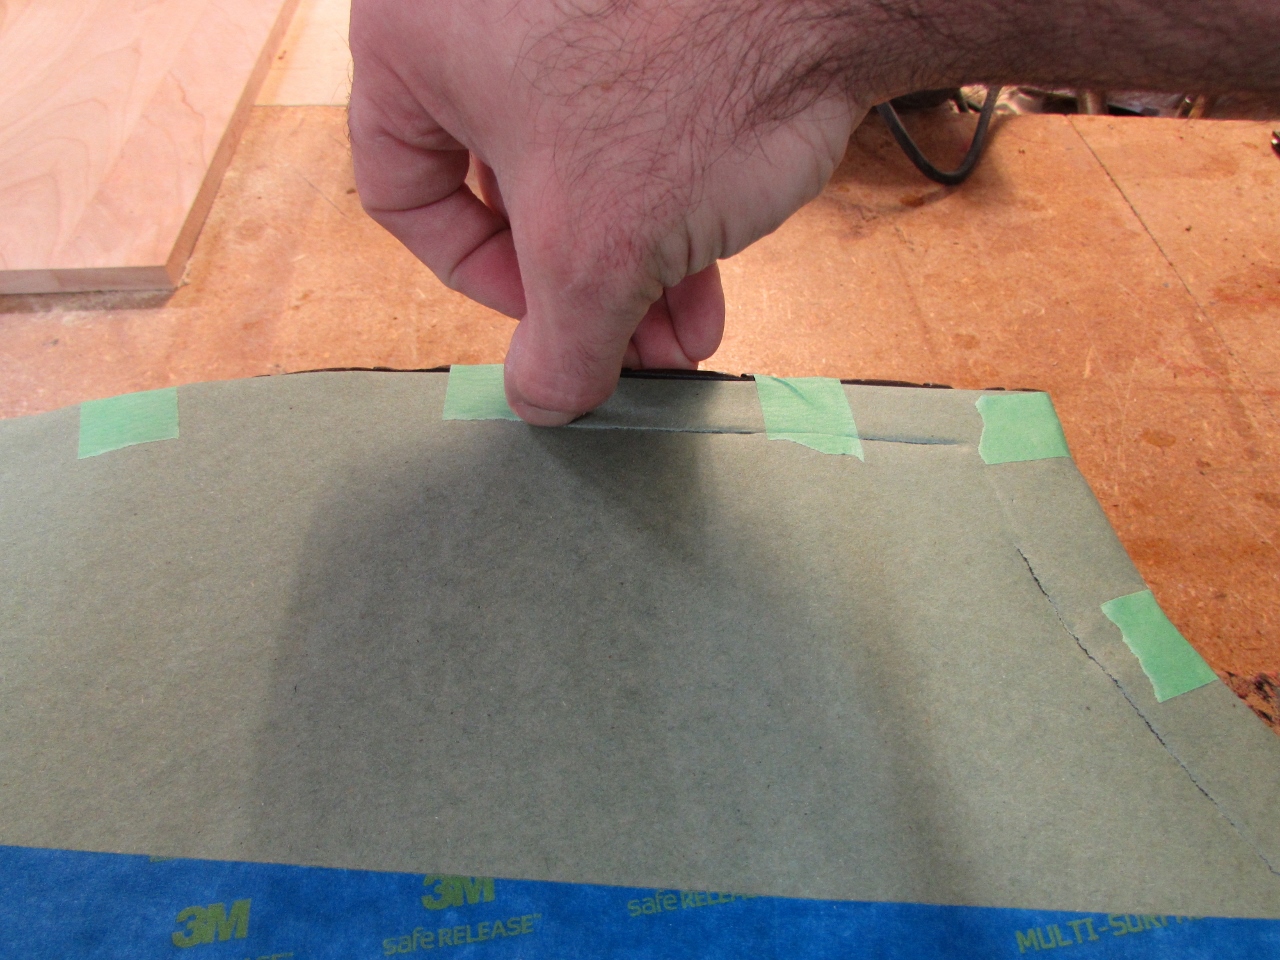
With the paper as tight as I could get it, I used my finger nail to cut through the paper wherever I could. The areas that were taped had to be cut with a knife. I prefer using my nail because I can feel exactly where the edge is. The knife will ride along the edge, but can also cut into the wood if you are not careful.

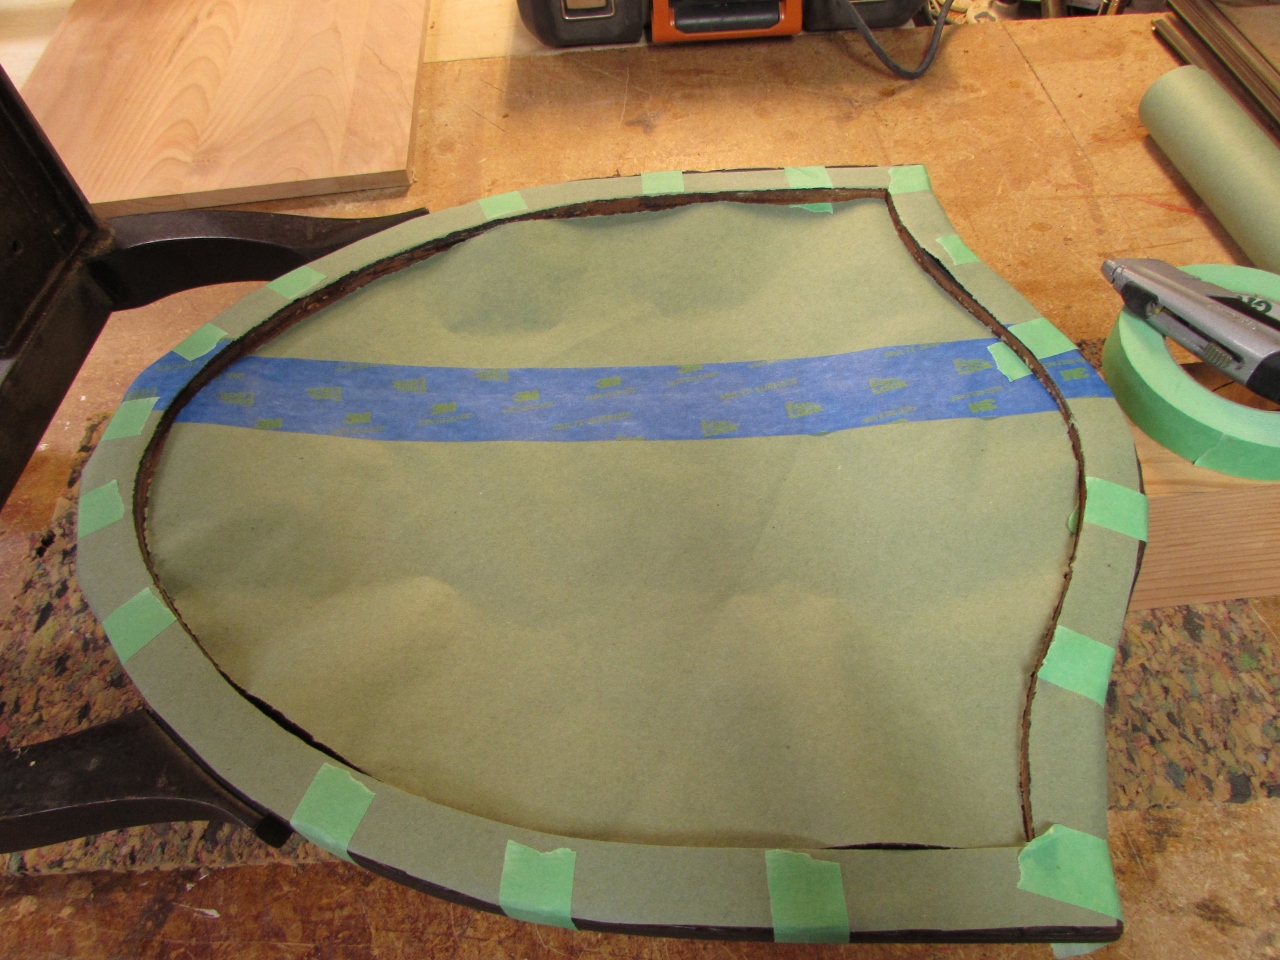
Once the paper was completely cut away, I had my pattern. Since the chairs are not perfect copies, I marked the chair and the pattern so I would know which it belonged with.


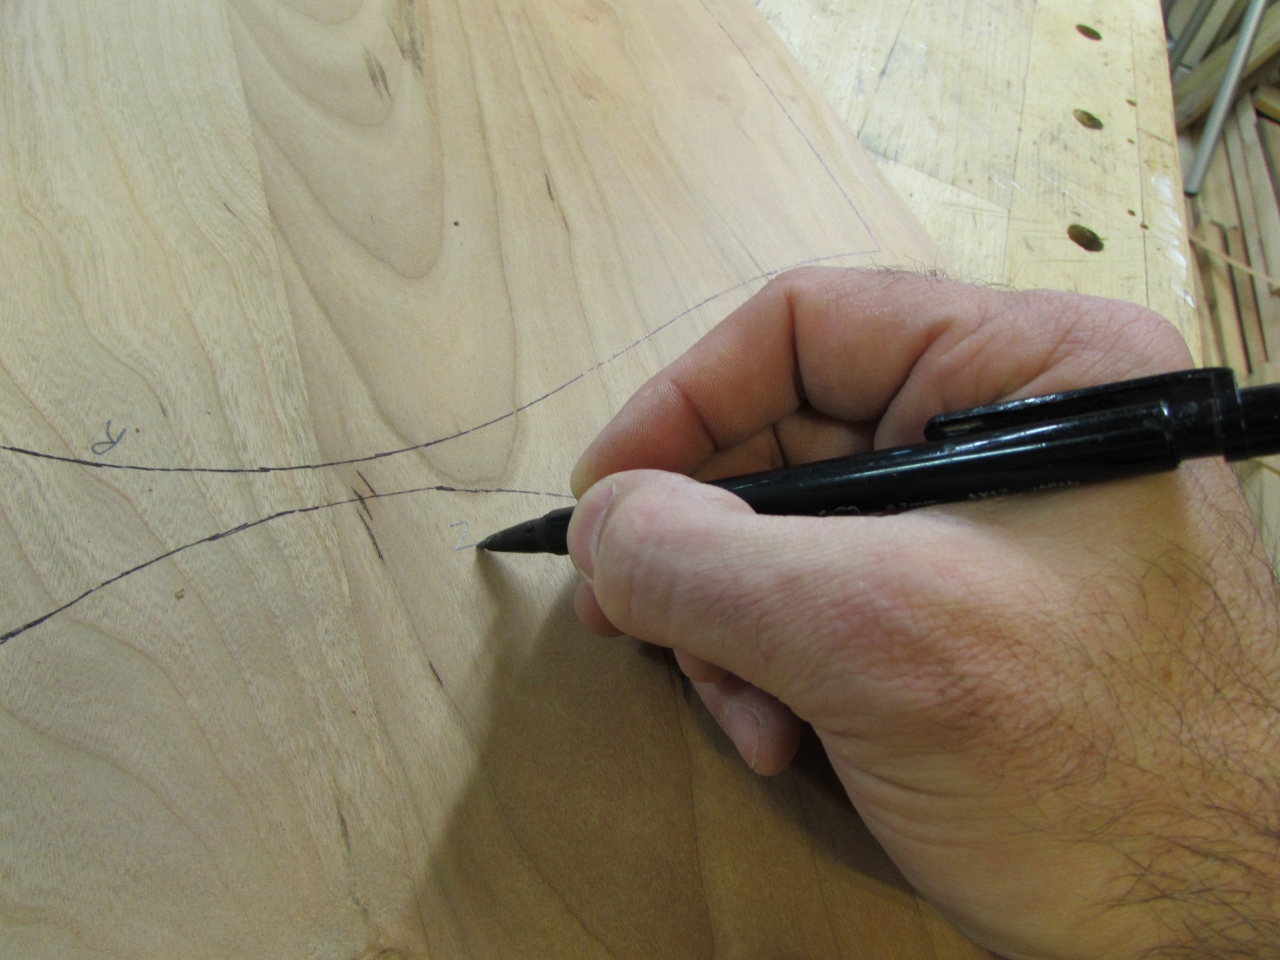
I taped the two patterns to the panel, then used a ballpoint pen to trace the edges. The ballpoint was used because it indents into the wood if you press hard enough. This is helpful when you mark over the tape.
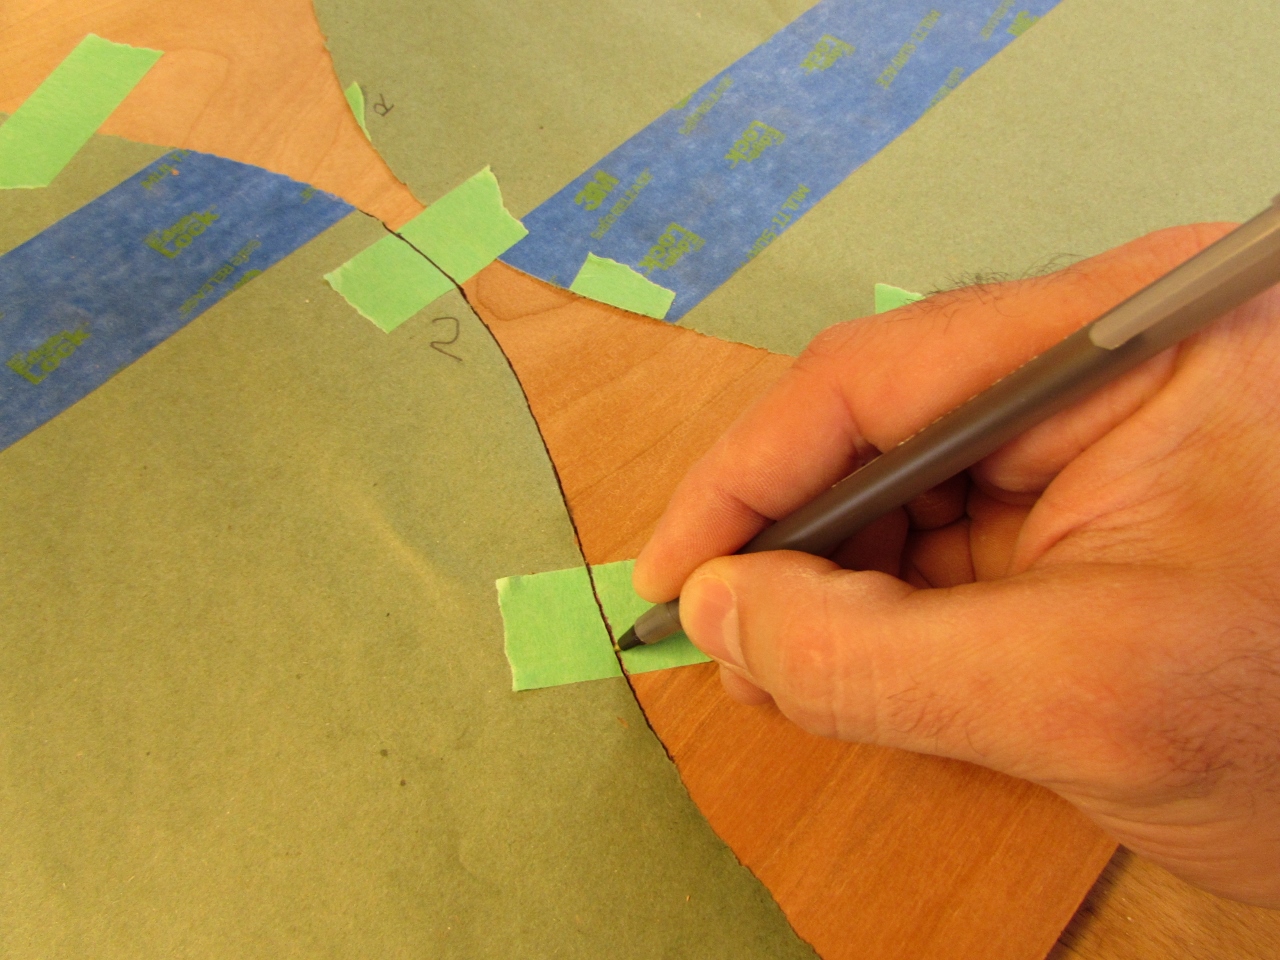
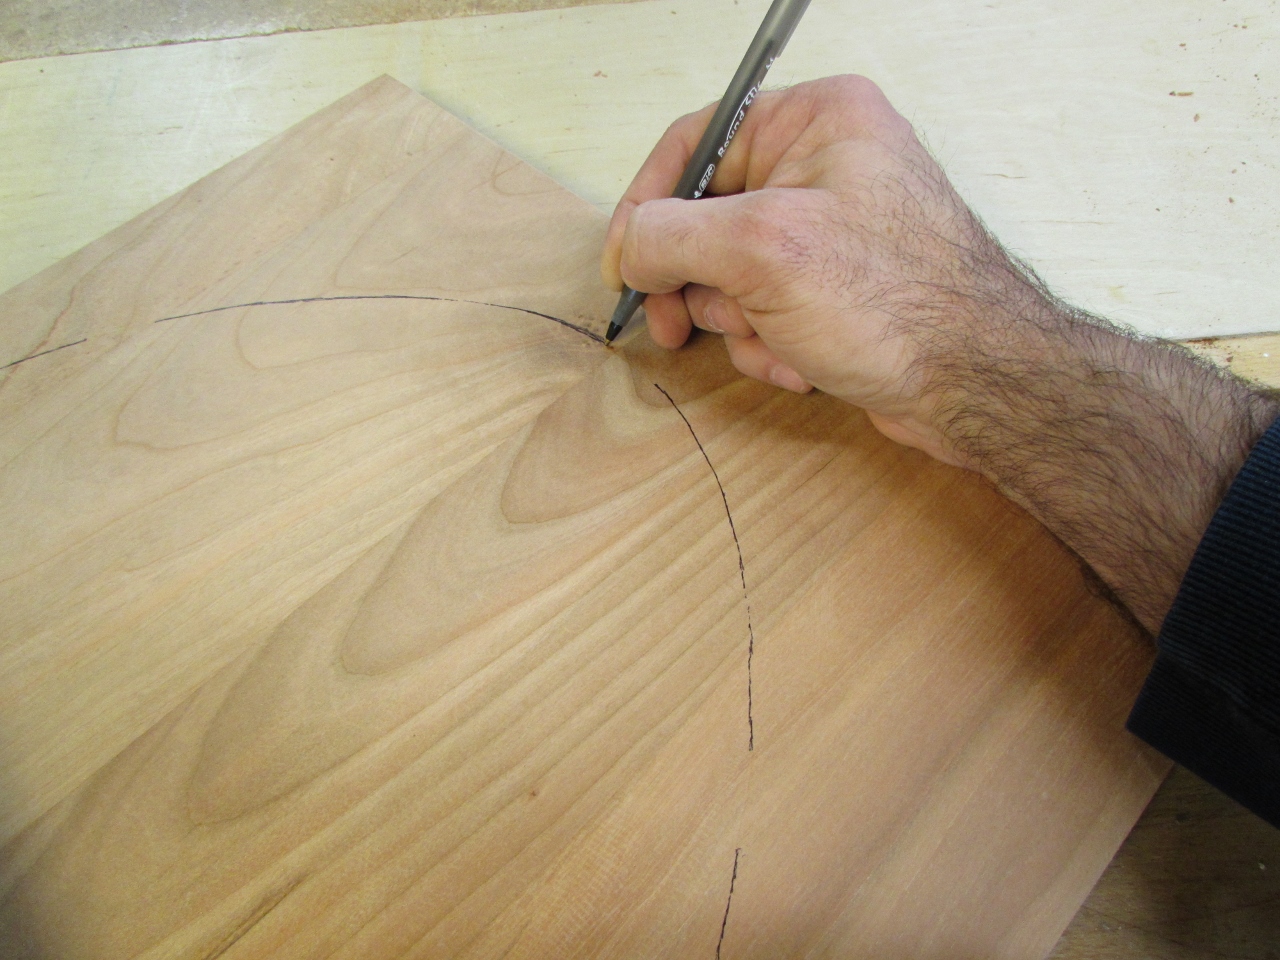
I can trace the indented areas to mark where the tape was. I also remembered to transfer the marks for the individual chairs.

I cut out each panel on my bandsaw. I cut just outside the line, then sanded down, just past the line on my spindle sander.


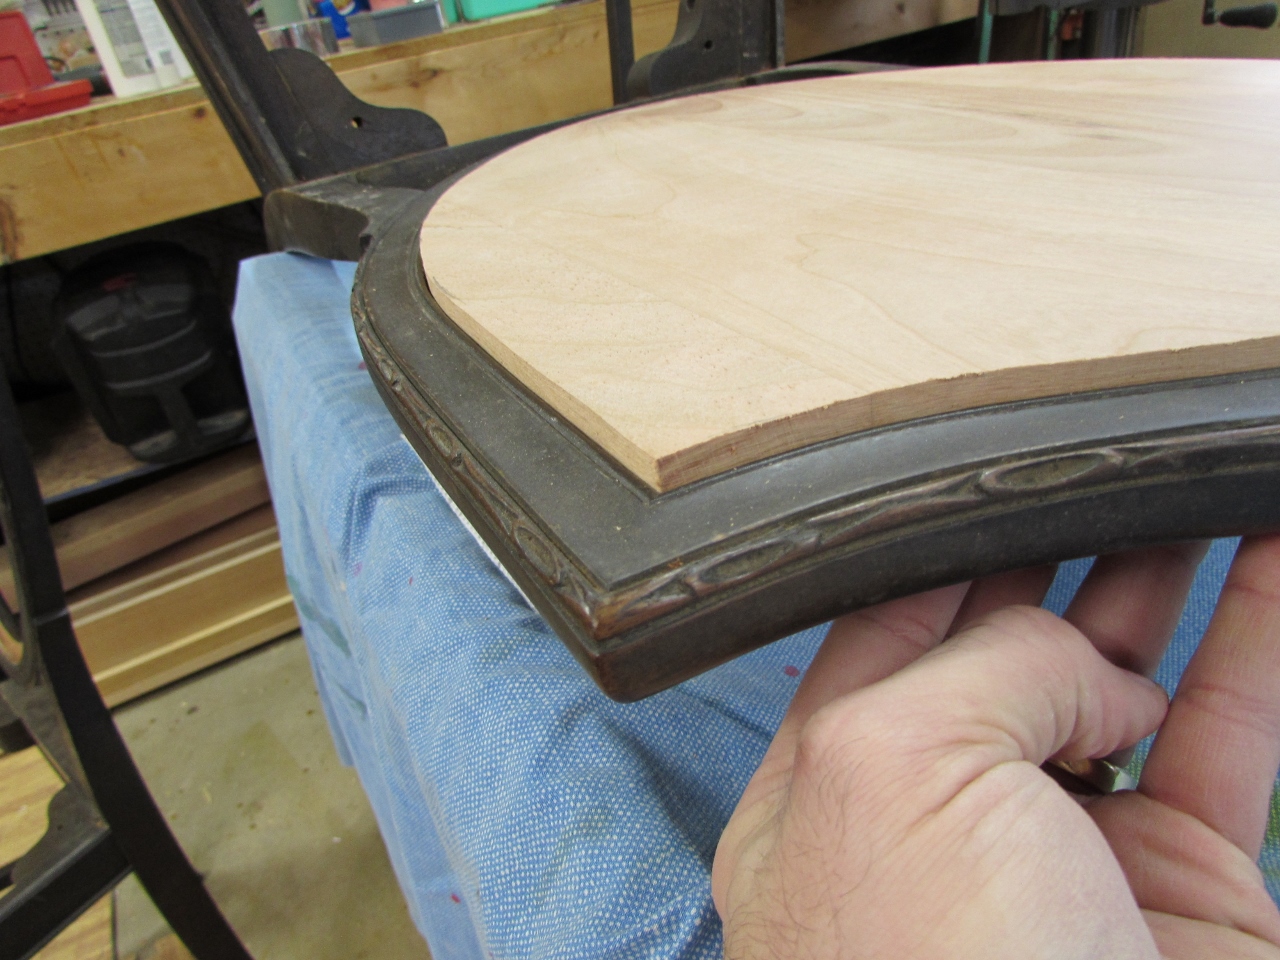
These patterns and marks are not perfect, but it gets you 95% there. I just laid the back in place and marked the high spots with a pencil, then carefully sanded the high spots till I had a nice press fit.

There were also a few low spots, but they tend to fall into the shadow created by the panel sticking up higher than the back. That was the plan.

All that is needed now is a small round-over to ease the sharp edges away.

I used an 1/8″ round-over bit in my trim router, then cleaned up the edge with a bit of sand paper.

Time to put it all back together.

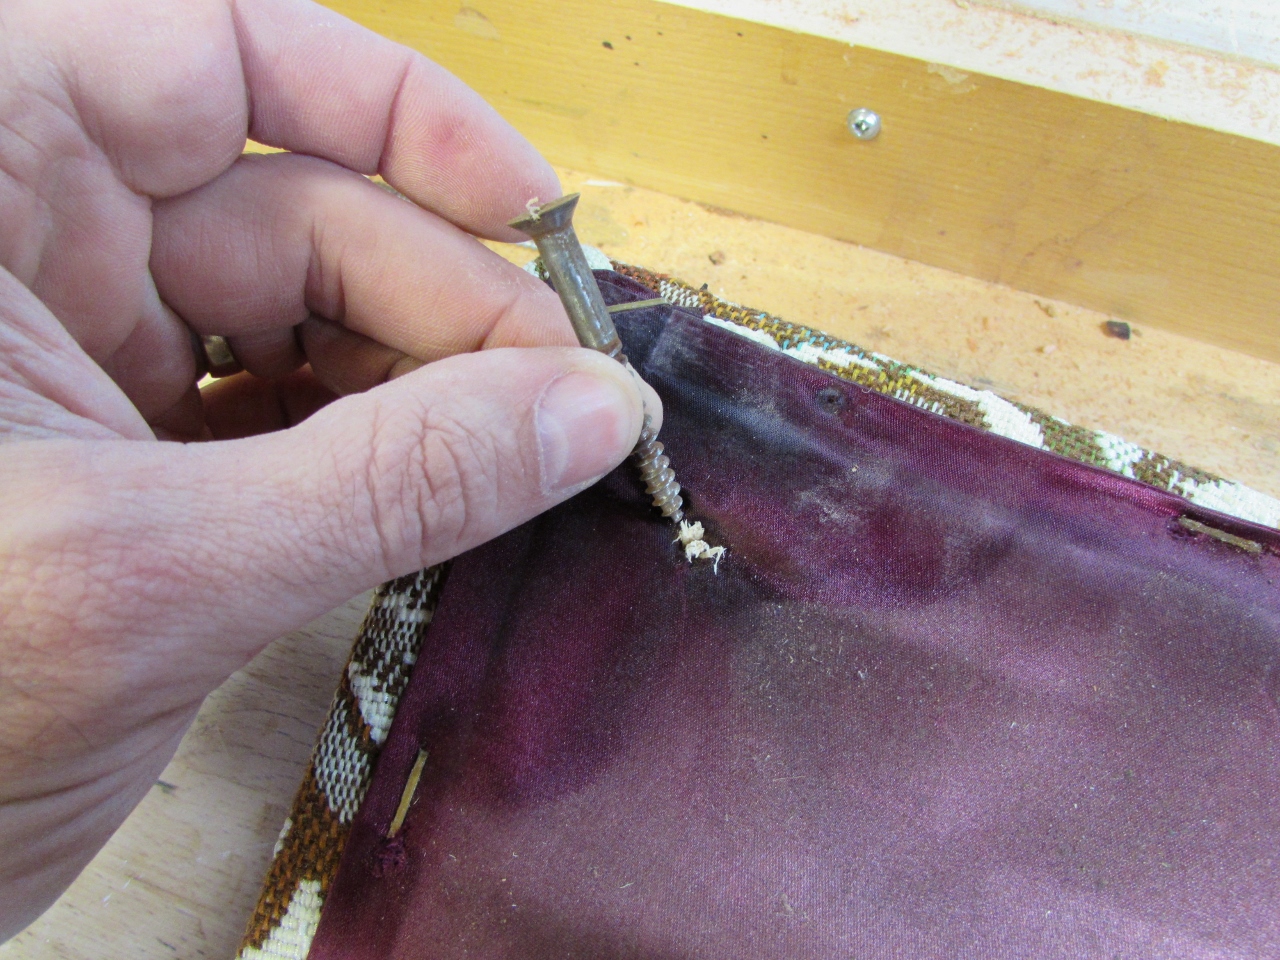
One thing I noticed when, I took apart the chair, was that the screws holding the seat cushion on, were loose or missing.

A simple way to tighten up the screw holes was to cut some thin strips and press them into the screw holes.
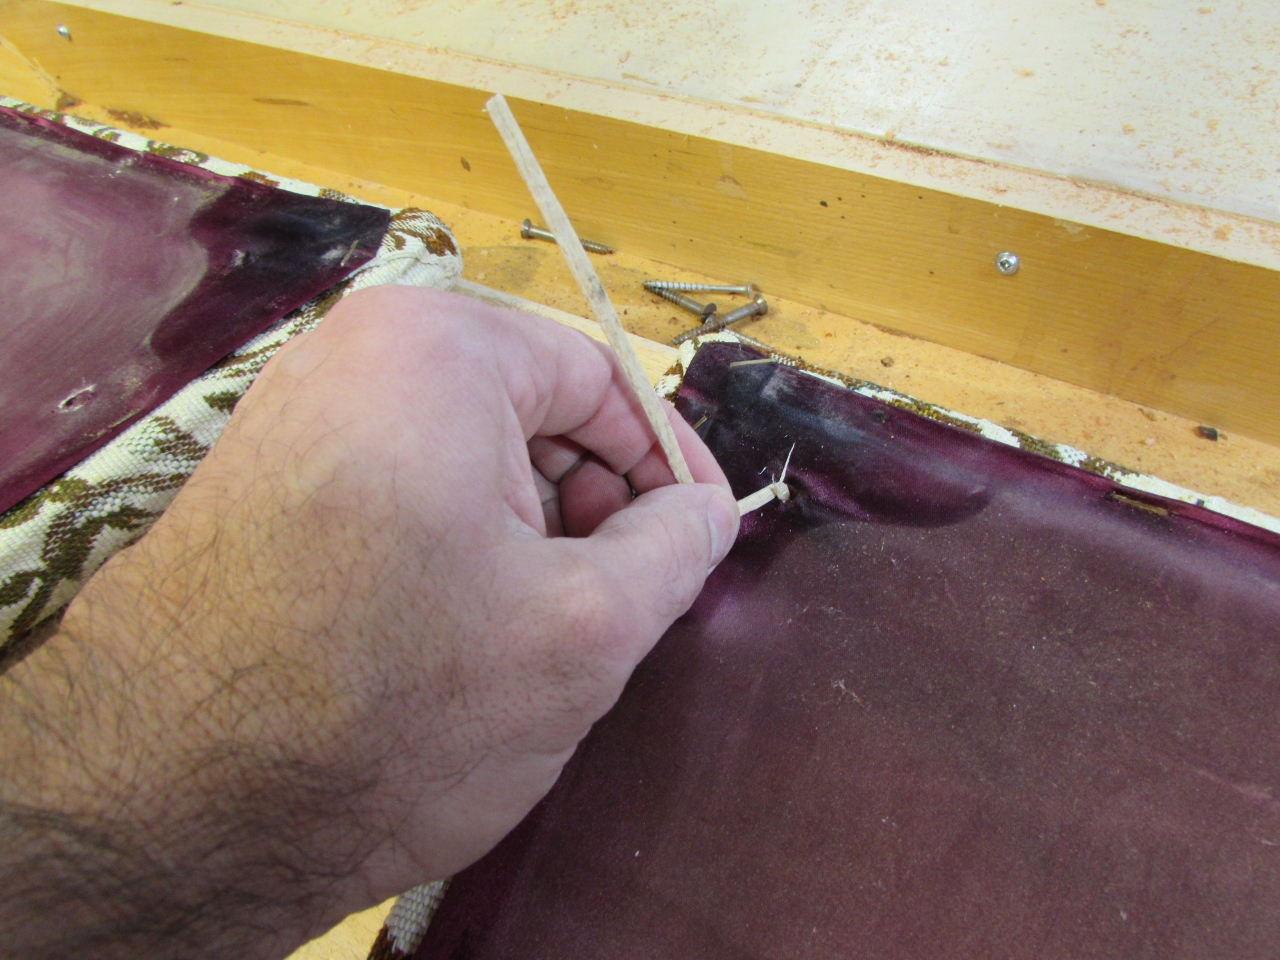
This was useful for the missing screws because I didn’t have any as wide as the original wood screws. My thinner screws worked fine with the holes shimmed.

After re-attaching the seats, I added a bead of glue to the rabbets.


I spread it evenly around the bottom and sides of the rabbet, then pressed the backs in place.

I used a wet paper towel to clean up any excess glue.

I clamped up the backs with as many clamps as I could and left them to dry.
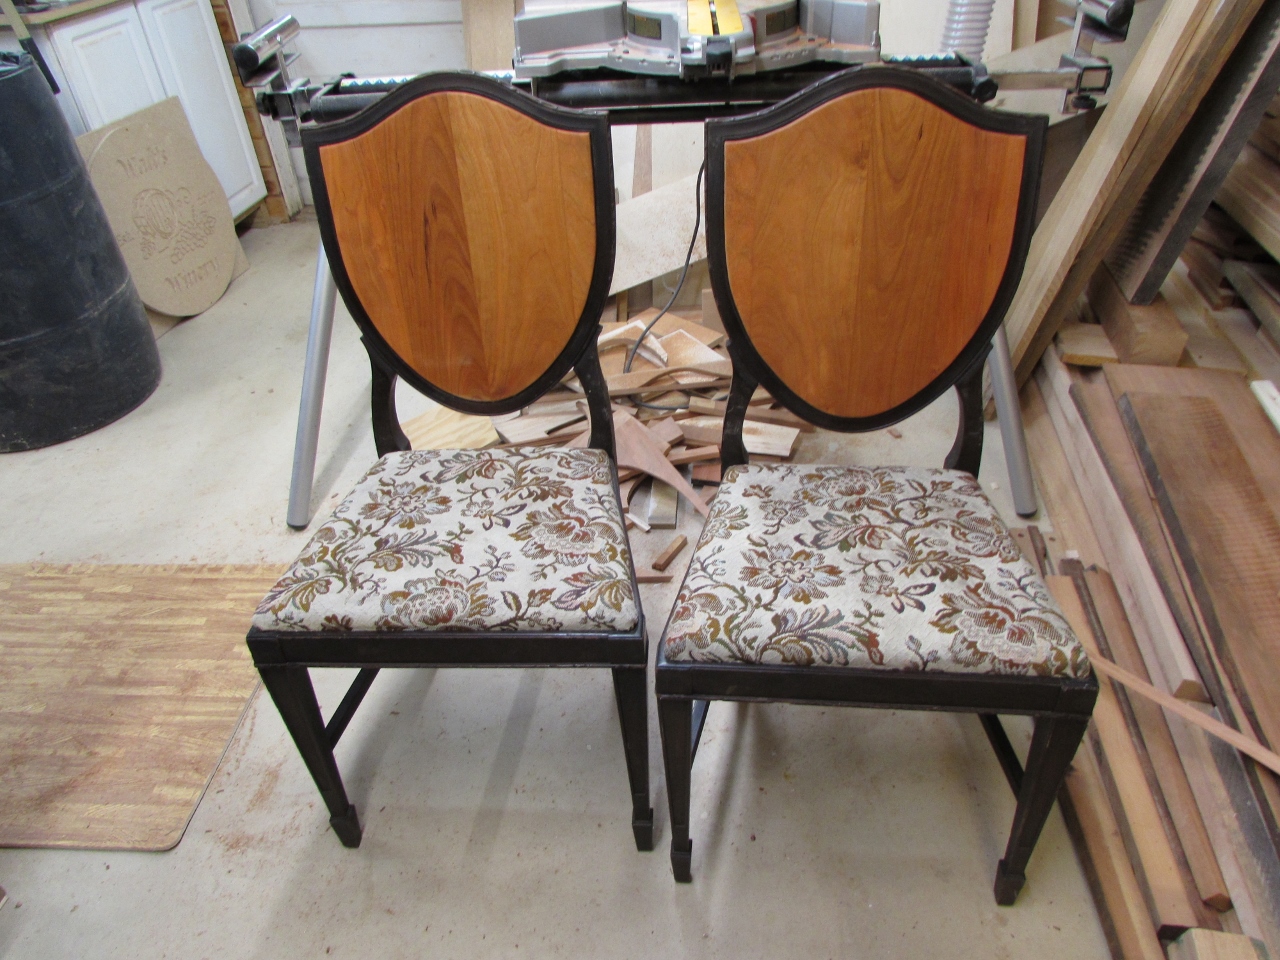
I wiped down the cherry back panels with a bit of Naphtha to show what an oil-based clear finish would look like. A water-based finish will look more like the backs in the previous picture. I will leave the finish options up to Liz, the chair rescue lady… If an upholstered back will be needed, I can now cut out another shield shape from plywood that can be wrapped in fabric and stuffed. this panel can be attached with screws through the cherry back. Preferably some attractive screws, but it isn’t my chair, so I will leave that decision also with Liz.

great project Lawrence! Wonderful detail as always. I always enjoy reading your write-ups. Thank you! and Happy New Year to you and your family.
Thank you for the kind words Michael. It is always good to know someone is reading. I hope you and your family had a nice Christmas and have a very good new year as well.