
Purpleheart & maple bass guitar – day 3
Today I am working on the back panel. Since I try to learn new techniques with every project, I am going to attempt to re-use the piece that I cut for the control cavity, as the cover itself. This will give me a perfect grain match, if I can do it right.
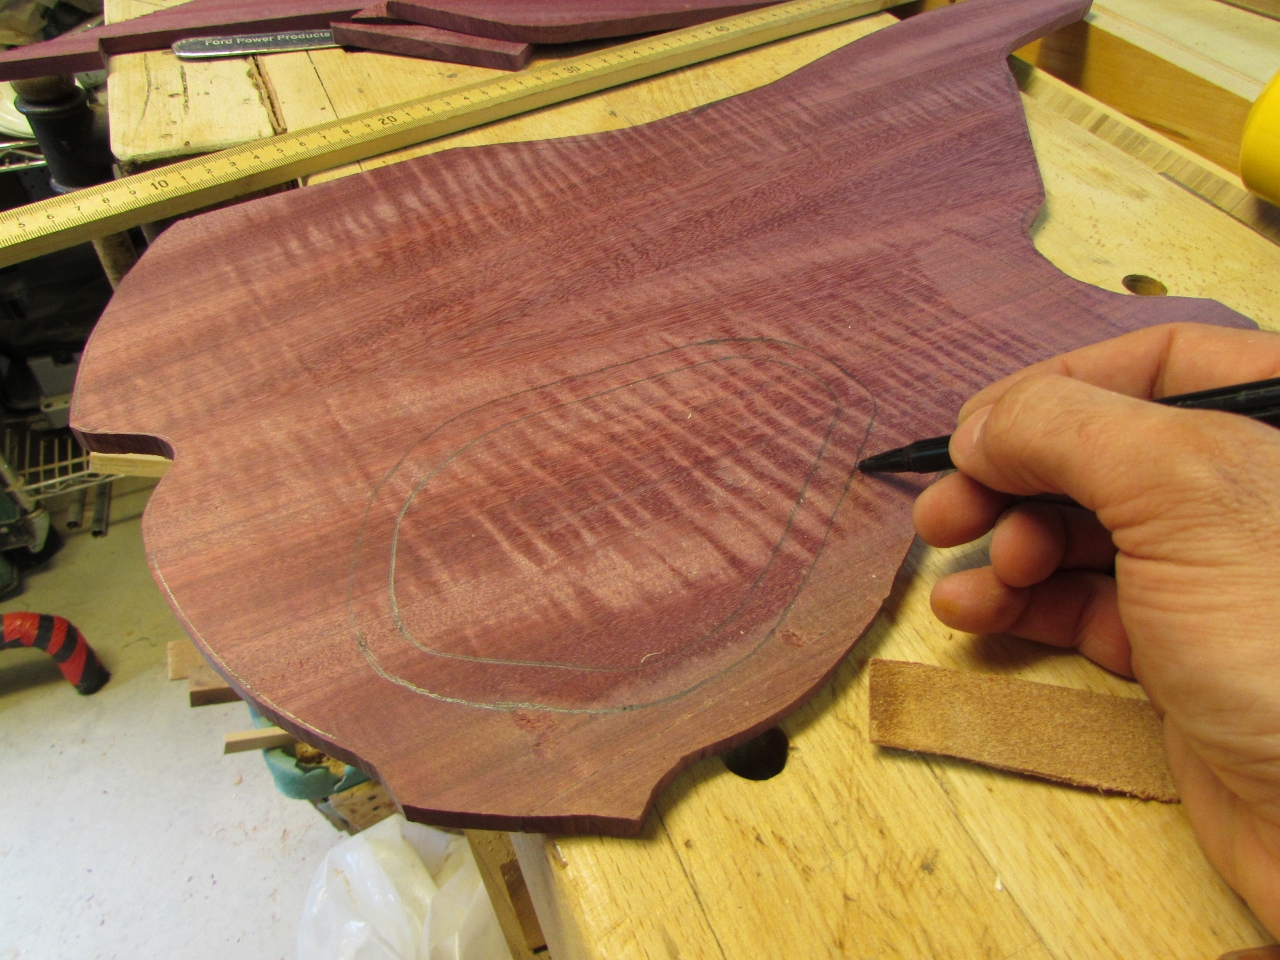
Marking the control cavity opening
I already traced out the cavity walls onto my back piece of wood. In the past, I have made my cavity covers about 1/4″ larger, but I always seem to have problems countersinking holes in the panel, that close to the edge. This time, I am making the cover roughly 3/8″ to 1/2″ larger. The purpleheart loves to tear out, hopefully staying away from the edge will help avoid that.

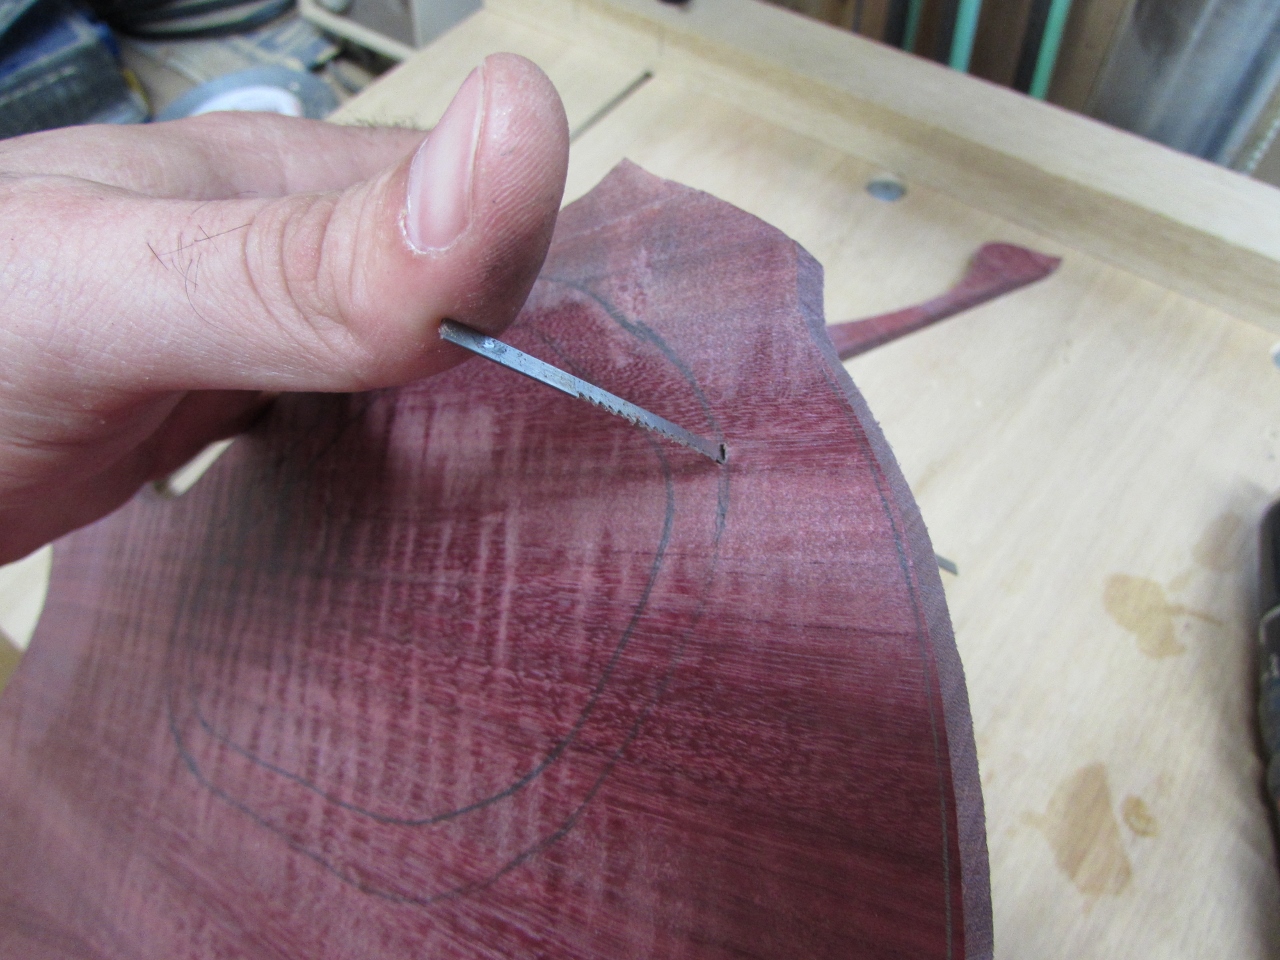
Drilling a small starter hole
The best way, that I can think of, to cut out the cover, is to use my scroll saw. It uses a fret saw blade, which is extremely thin. I used a 1/16″ drill bit to drill two holes, right next to each other. Wiggling the bit a little will break the wall between the holes and give me enough room to slip the blade through. Once the blade was inserted, I installed it into the scroll saw.
Inserting a scroll saw blade

Cutting the cavity
The purpleheart cut surprisingly well. I did push too hard, trying to cut the last curve though. Jacked my blade up pretty good.

OOPS!
Just a side note. The Excalibur scroll saws have a bunch of slotted holes in the side. They are just the right size for test tubes which are perfect for storing your replacement blades. If you have a different kind of scroll saw, I still recommend the test tube storage system. I would probably just drill a bunch of holes in a board, large enough to hold the tubes, and mount it to the wall, near the saw.

Test tubes make good blade storage
Once I replaced the blade, I was able to quickly finish my cut. There were two places where the cut is wider. The start point and the area where the blade got messed up. Hopefully I can sand in a bit of a relief to hide the wide spots.
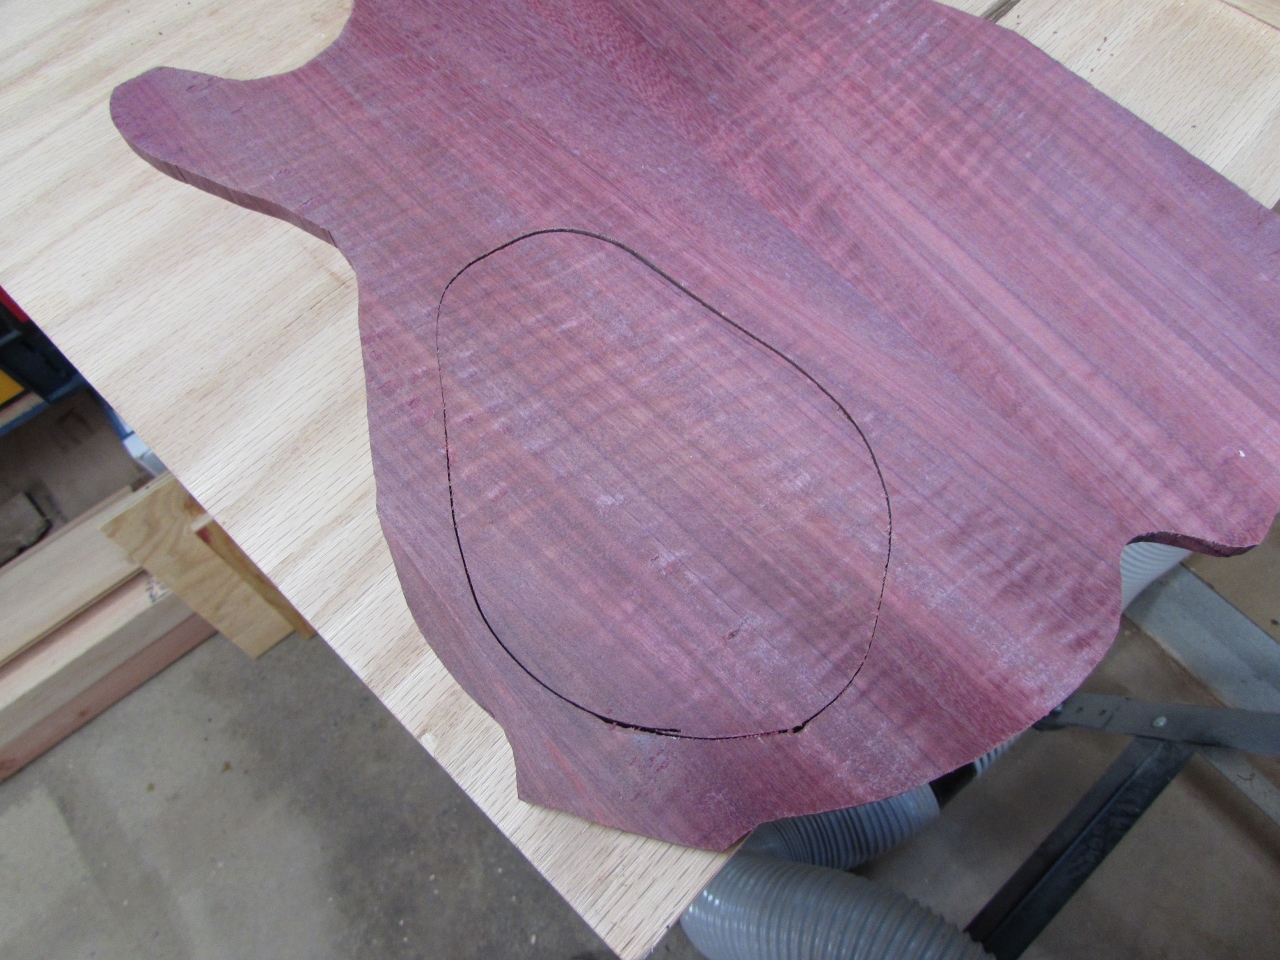
Finished cut

Quick setting epoxy
The back piece has a lot of tear-out and about a 2″ diameter low spot, left-over from re-sawing the board. I want to glue the board on, but wood glue is not good at filling voids. Hollow spots may affect the sound of the guitar. For a good, solid bond, I am going to try my fast-setting, two-part epoxy.
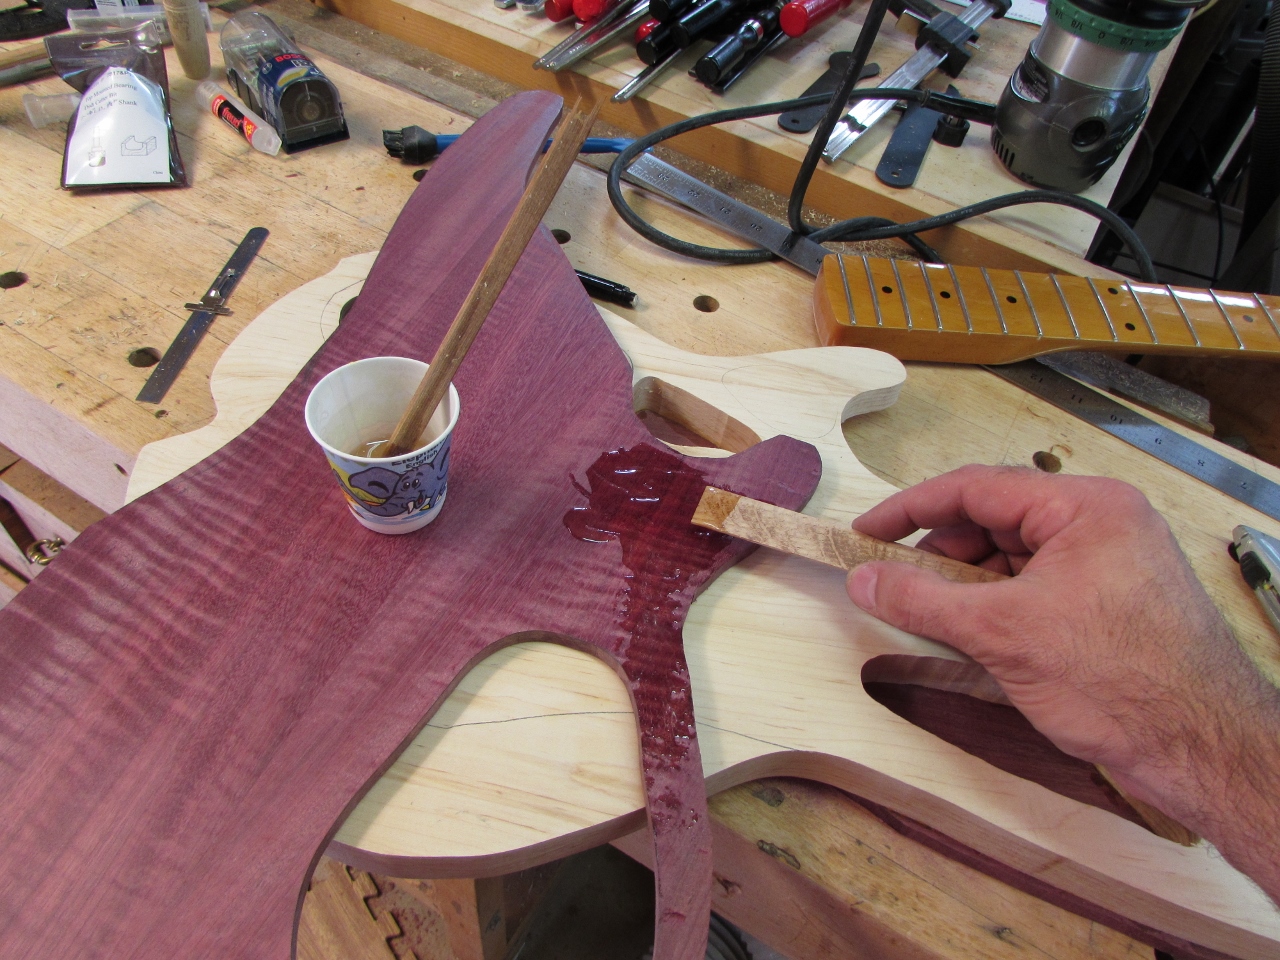
Epoxy is a good void filler
I mixed up about an ounce or so and spread it out, along the entire back. I made sure that all of the voids were filled, then clamped the heck out of it. I wiped off all of the squeeze-out that I could see. I don’t want to have to sand that stuff down when it dries.
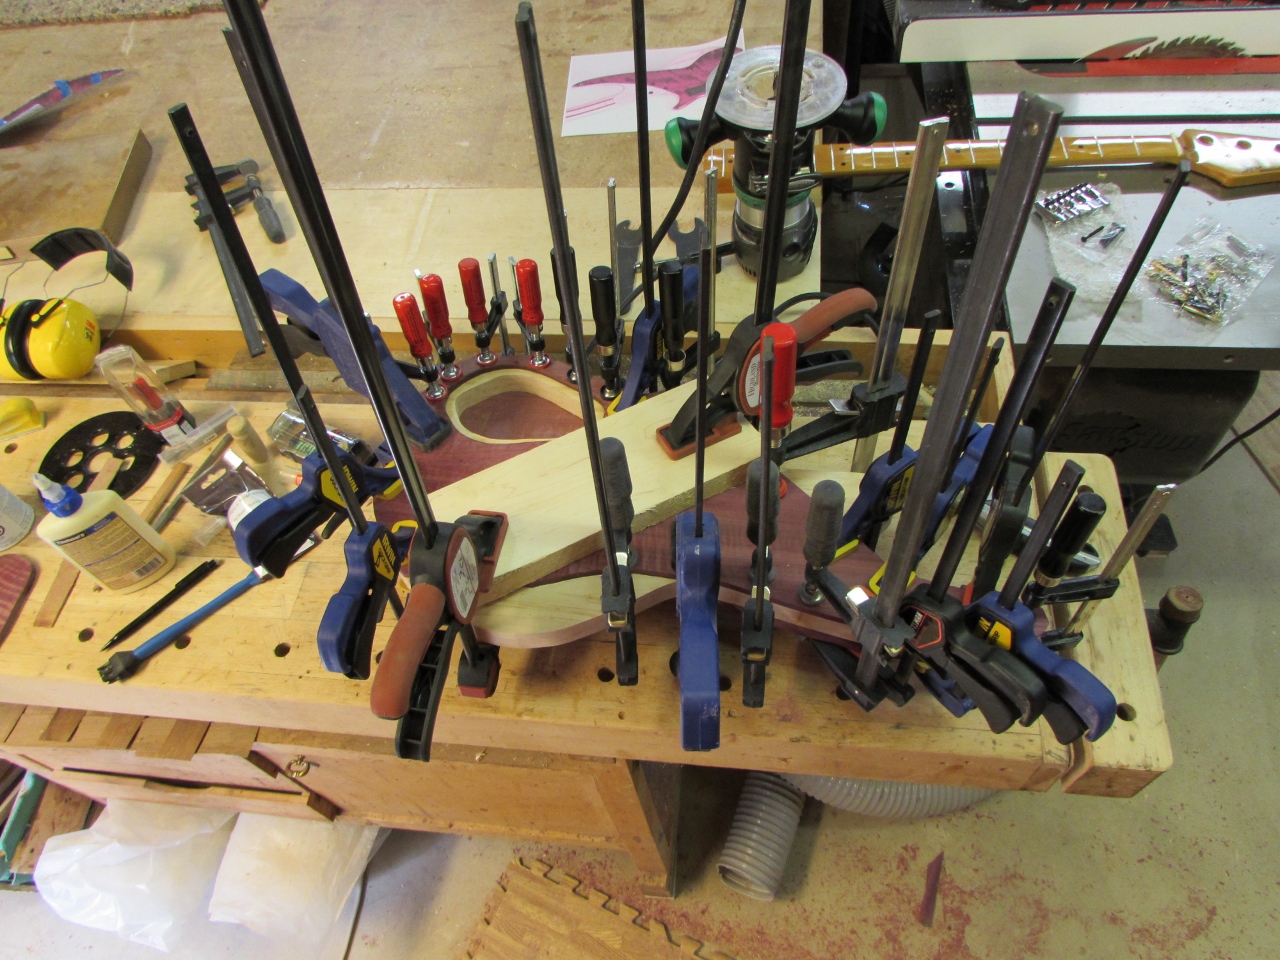
Clamp the crap out of it again

Sanding down the control plate
Since I can’t do much else, until the body dries, I decided to clean up the control cover. I started by working my way down from 80 grit sand paper to 220 grit. After that was as smooth as I could get it, I polished the surface with my mop sanders.
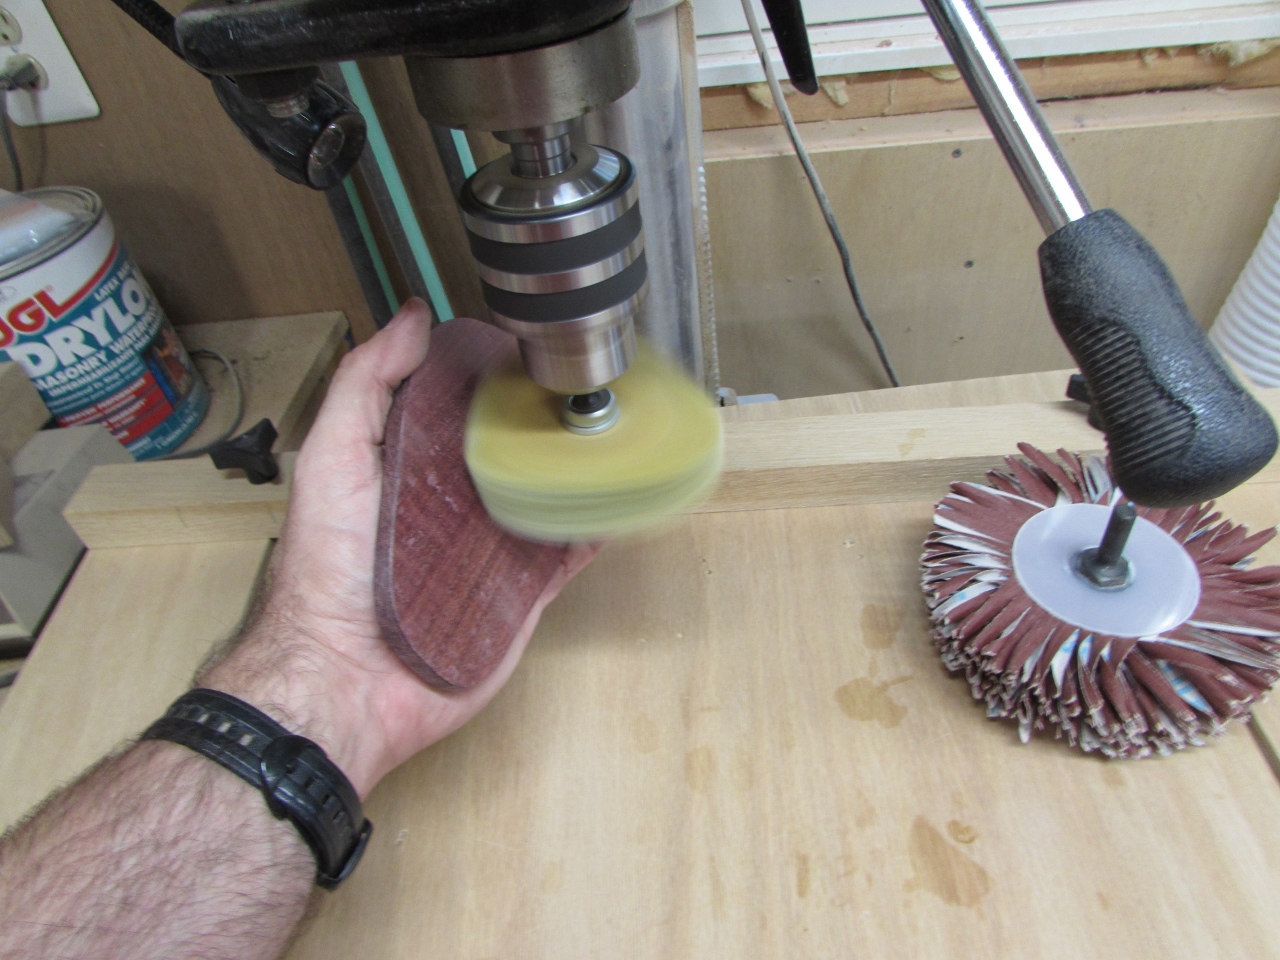
Polishing with the mop sanders
This was an experiment to see the best way to bring up the polish on the guitar body after I have finished. I would say that it worked pretty well. I am really looking forward to seeing what this looks like complete.

Pretty good for an unfinished surface
If it doesn’t rain tomorrow, I intend to take the body outside and try my hand at sculpting some angles onto the surface with a flap sander wheel, on my angle grinder. That will be very dusty, but it should be fun.
