
Deer head mount
I have a friend who requested a plaque for mounting a deer head. He wants it to match others that he has, so he gave me a template and requested that it be made out of walnut, preferably with just a little bit of character. I picked the walnut up from a friend of mine, that cuts and air dries his own. His wood is usually fairly prime, lacking a lot of knots, so for character, I combed through to find a piece with some sap wood. It is sometimes hard to know what is hiding under the rough cut exterior, but I have been working with walnut for a while.
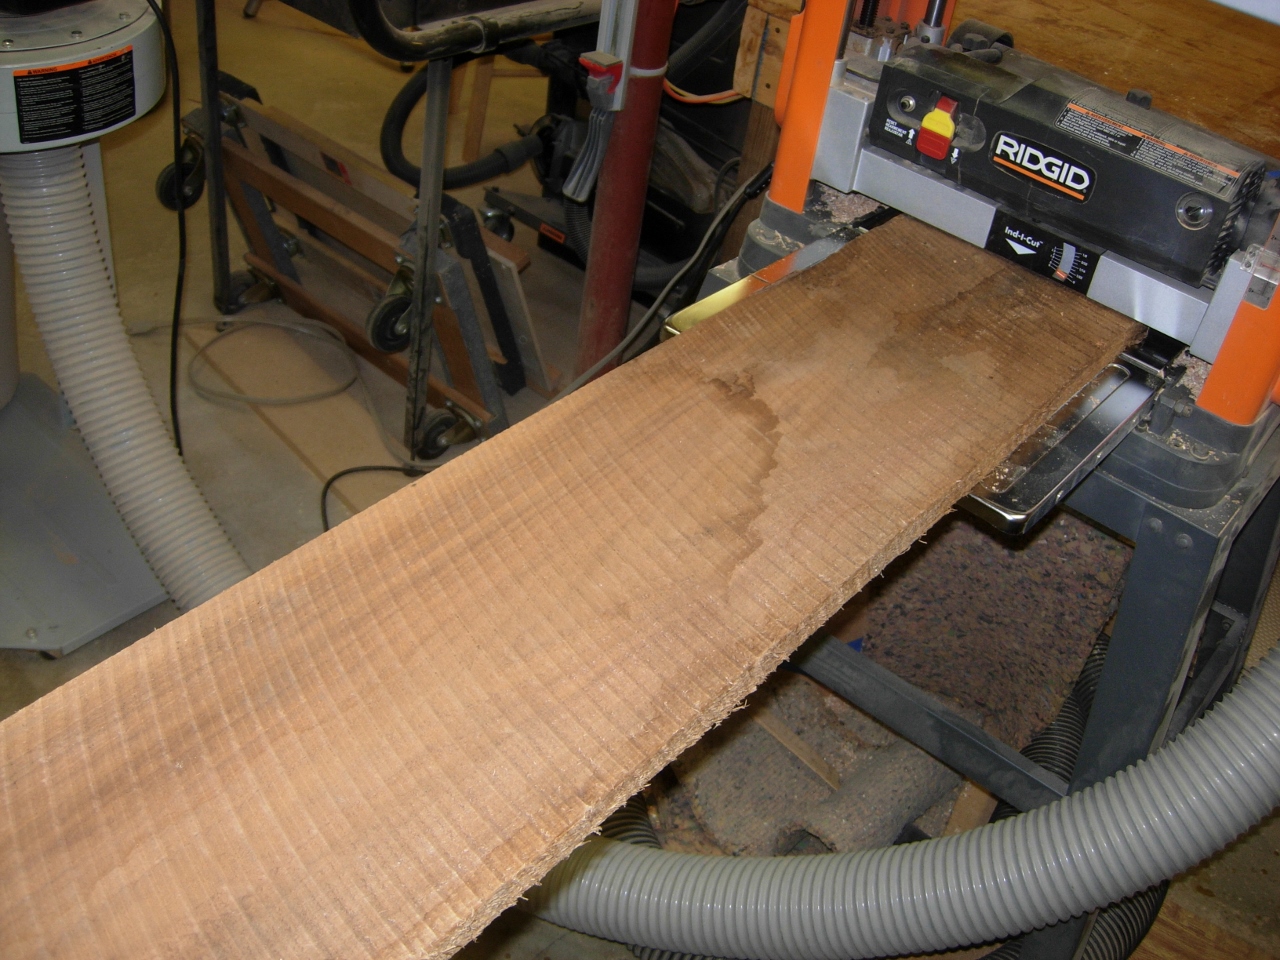
Ugly rough-saw board
After a couple of passes through the planer, the sap wood really popped out.
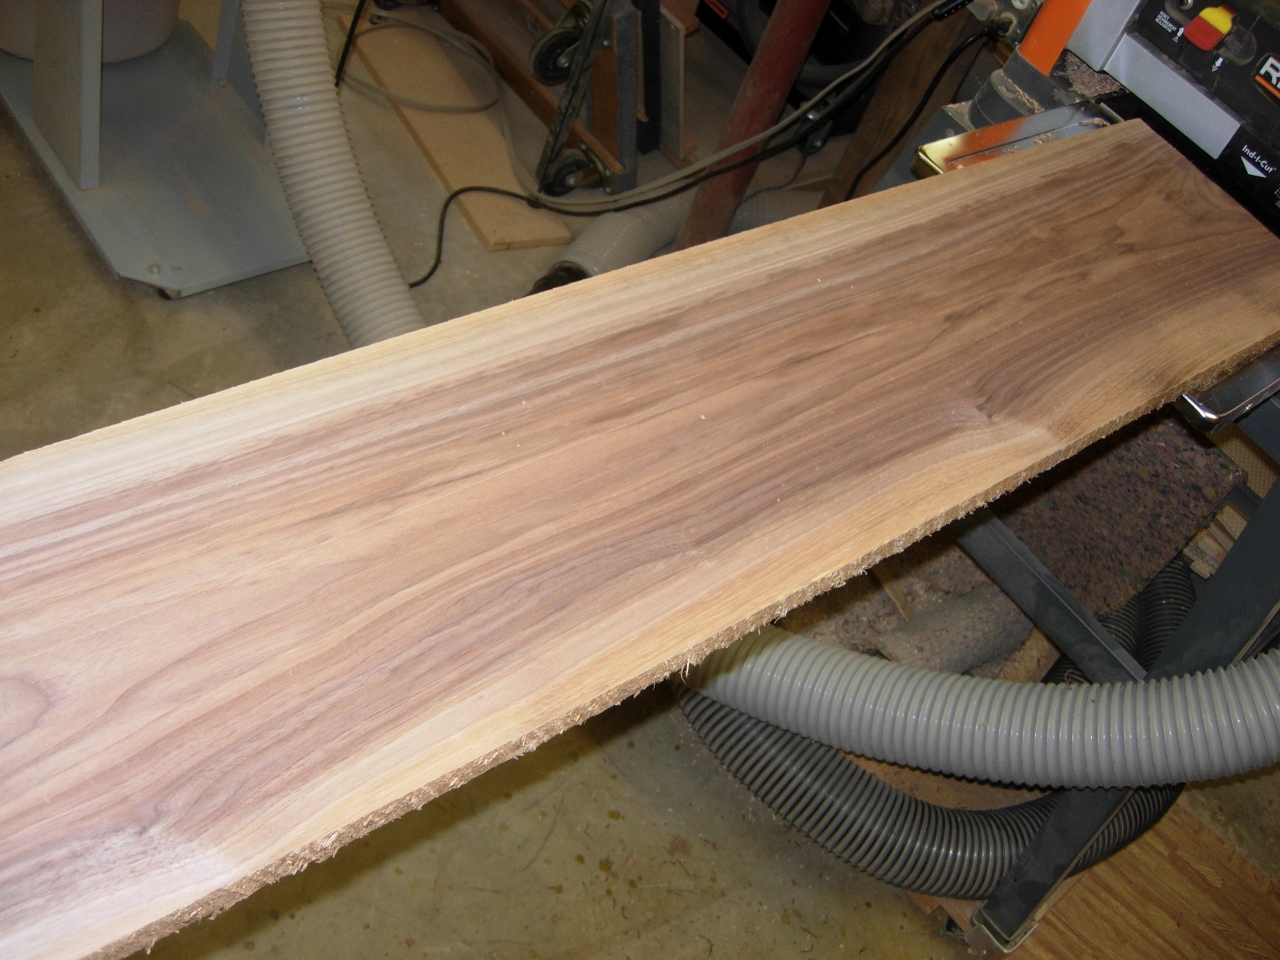
Same board a few passes later
I ran both edges through the table saw to clean and parallel them.
Cleaning up the sides
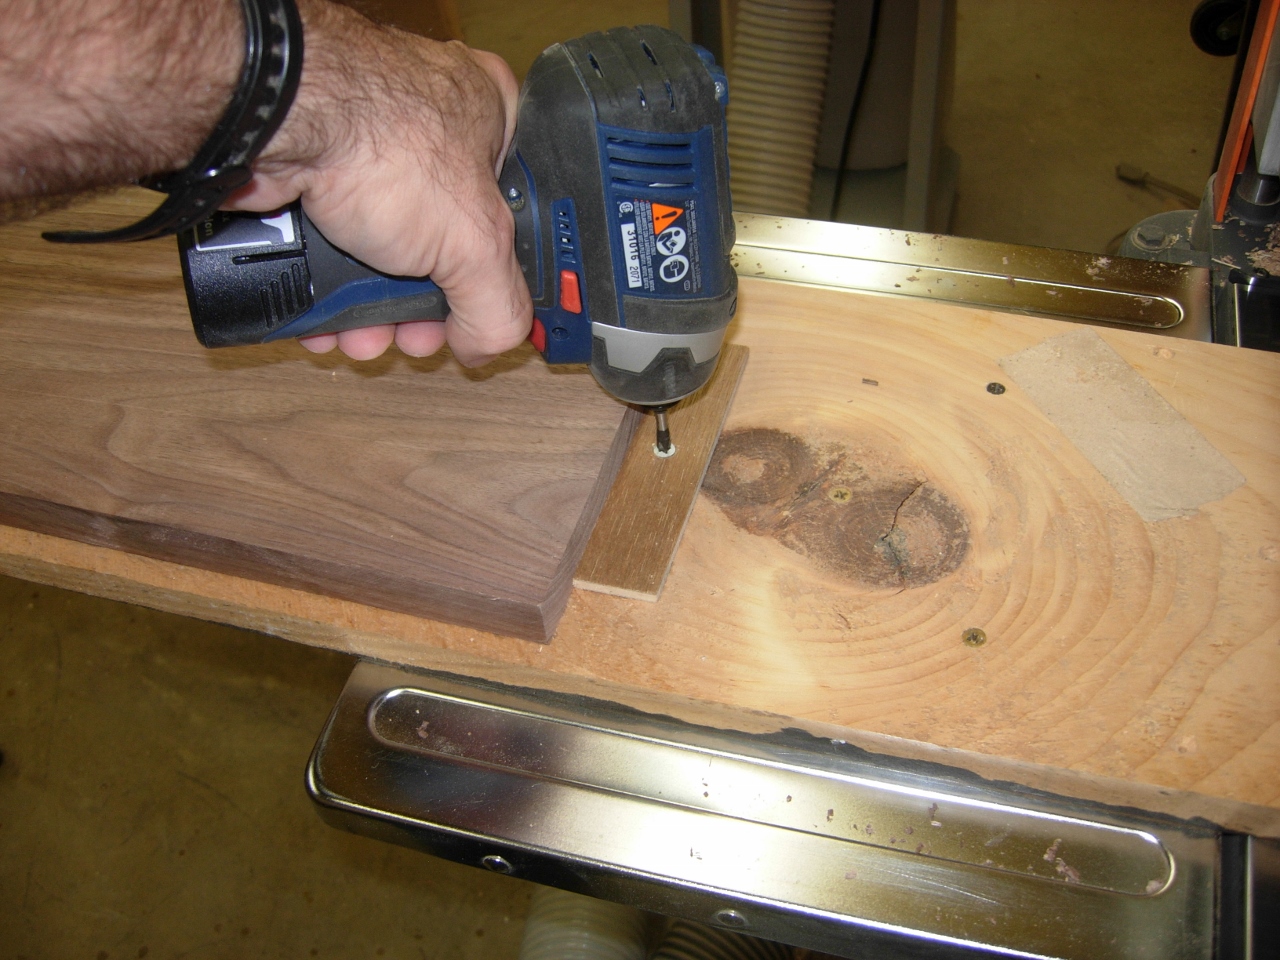
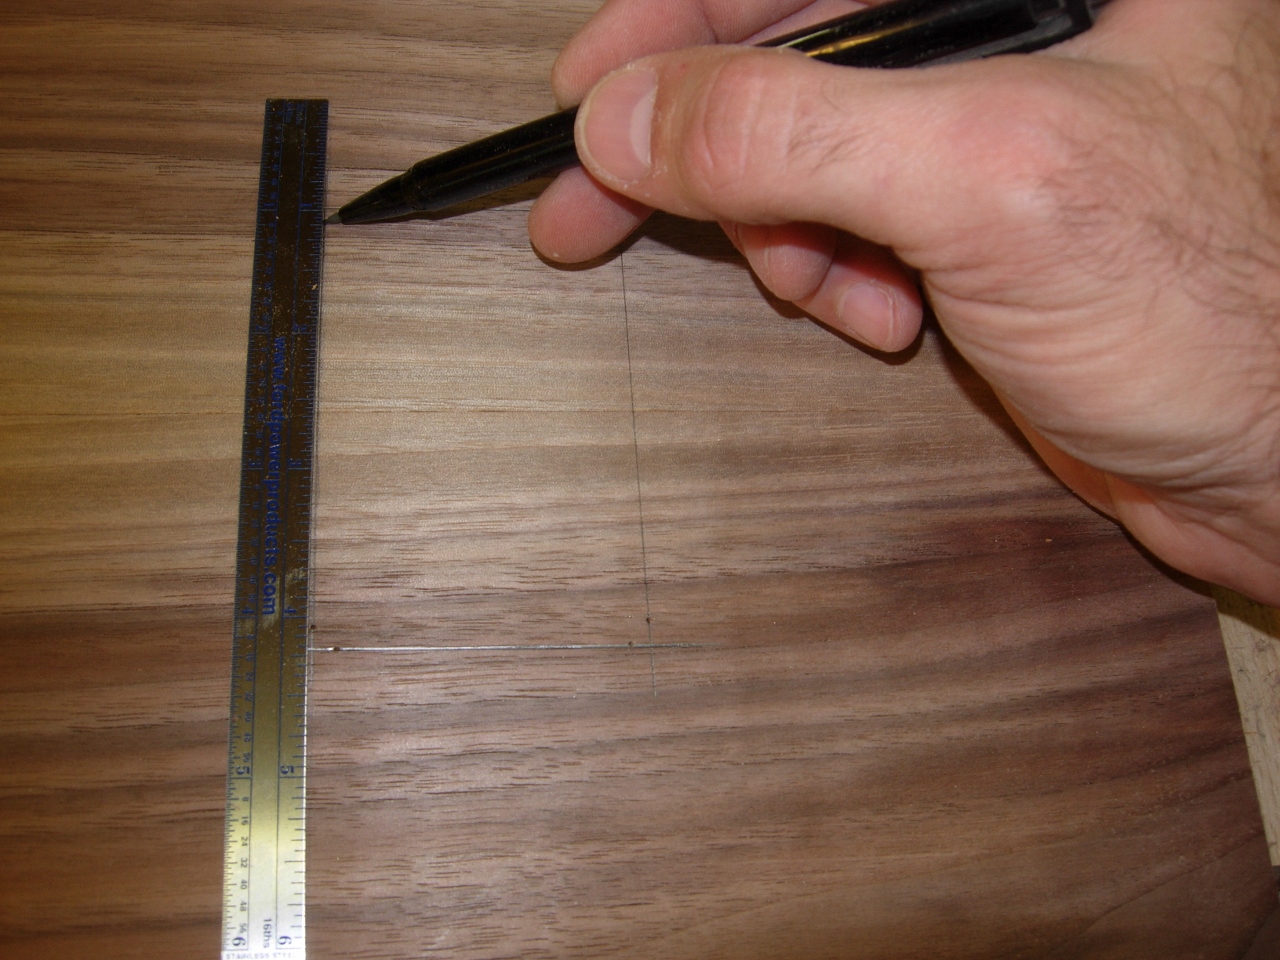
Next, I used the template to identify the required length, then added a little extra.

Marking length
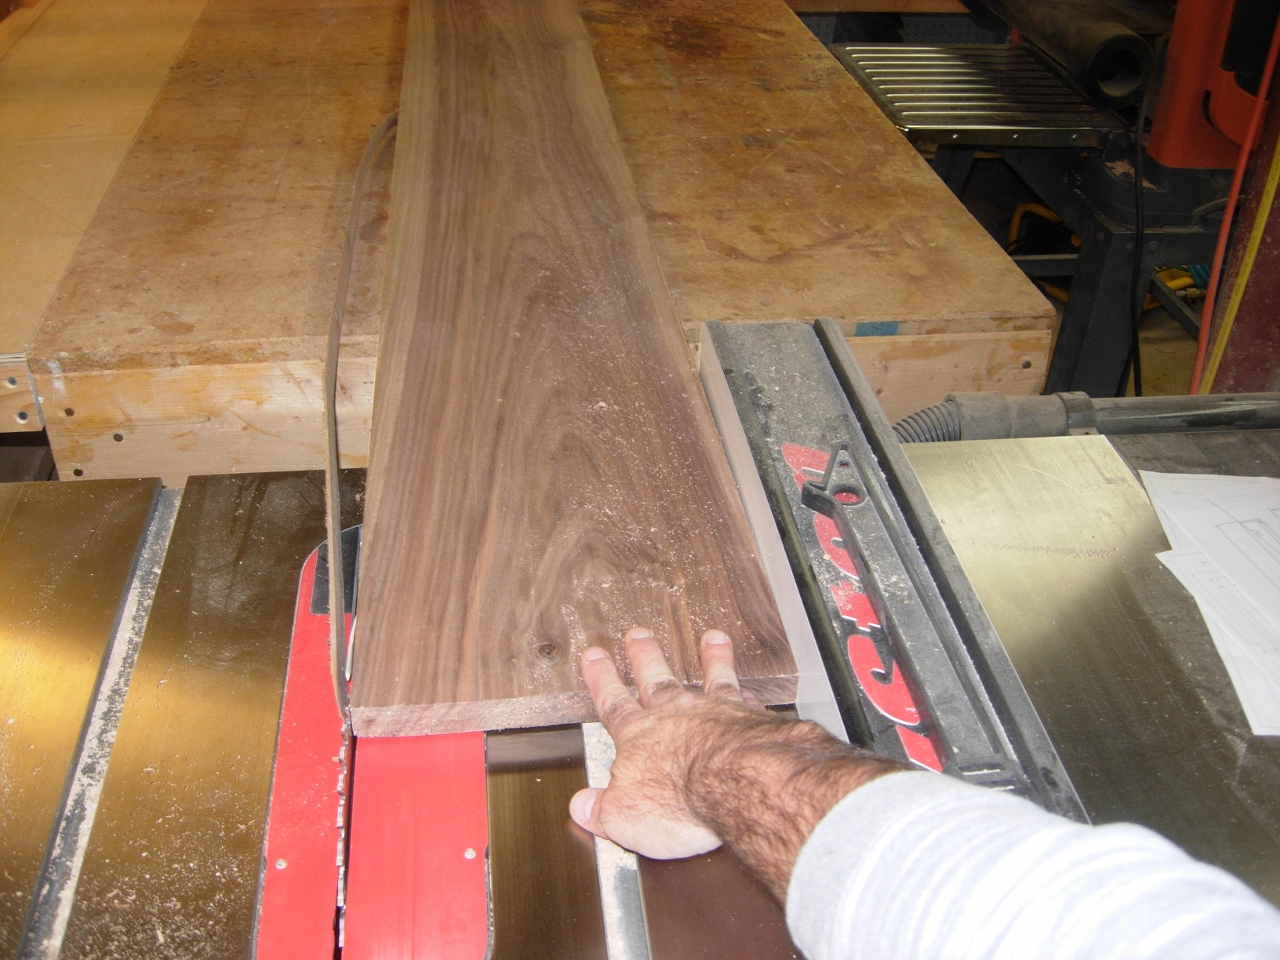
Since the board is 10″ wide and the plaque will need to be 15″ wide, I trimmed a couple of inches off of one side. I prefer to have one long scrap of walnut rather than two smaller pieces. I can always use scrap walnut…

Ripping off the extra
I cut the two pieces, that I need, to length, then checked to see if they were flat enough to join up.

Cutting halves to length
One board had a 1/16″ bow in the middle, so I adjusted some of the screws, on my planer sled, to support the bow.
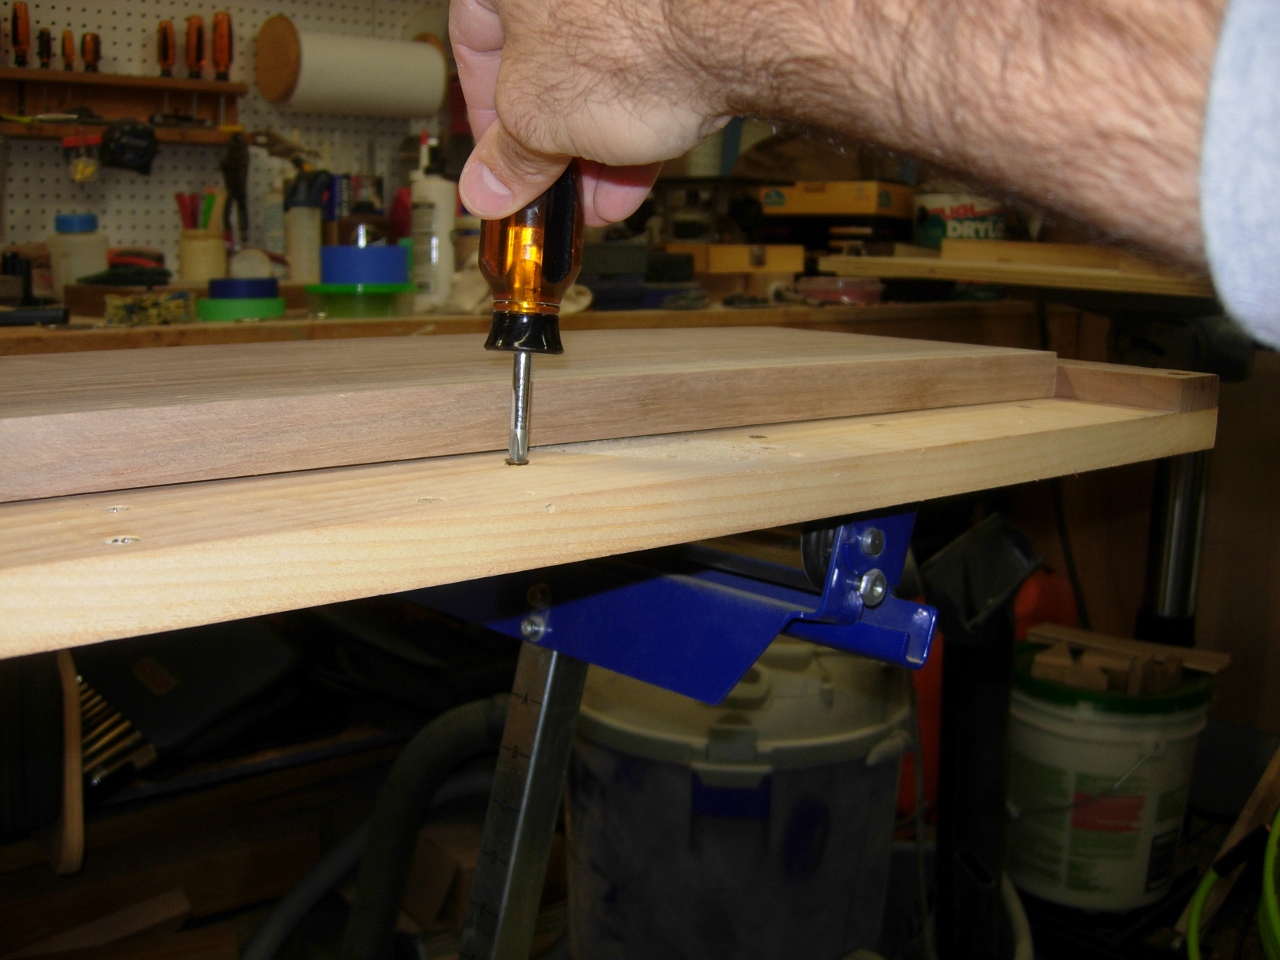
Adjusting planer sled
I also screwed down a cleat at the end, I have found that the board will sometimes slip, moving my high point and causing more problems. Once the high point was supported and the board locked in place, I made two quick passes through the planer, to flatten that side. Then I removed the sled and ran the board through the planer on the flat side to flatten the opposite side. I also planed down the other board to match the new thickness.
Holding board in place
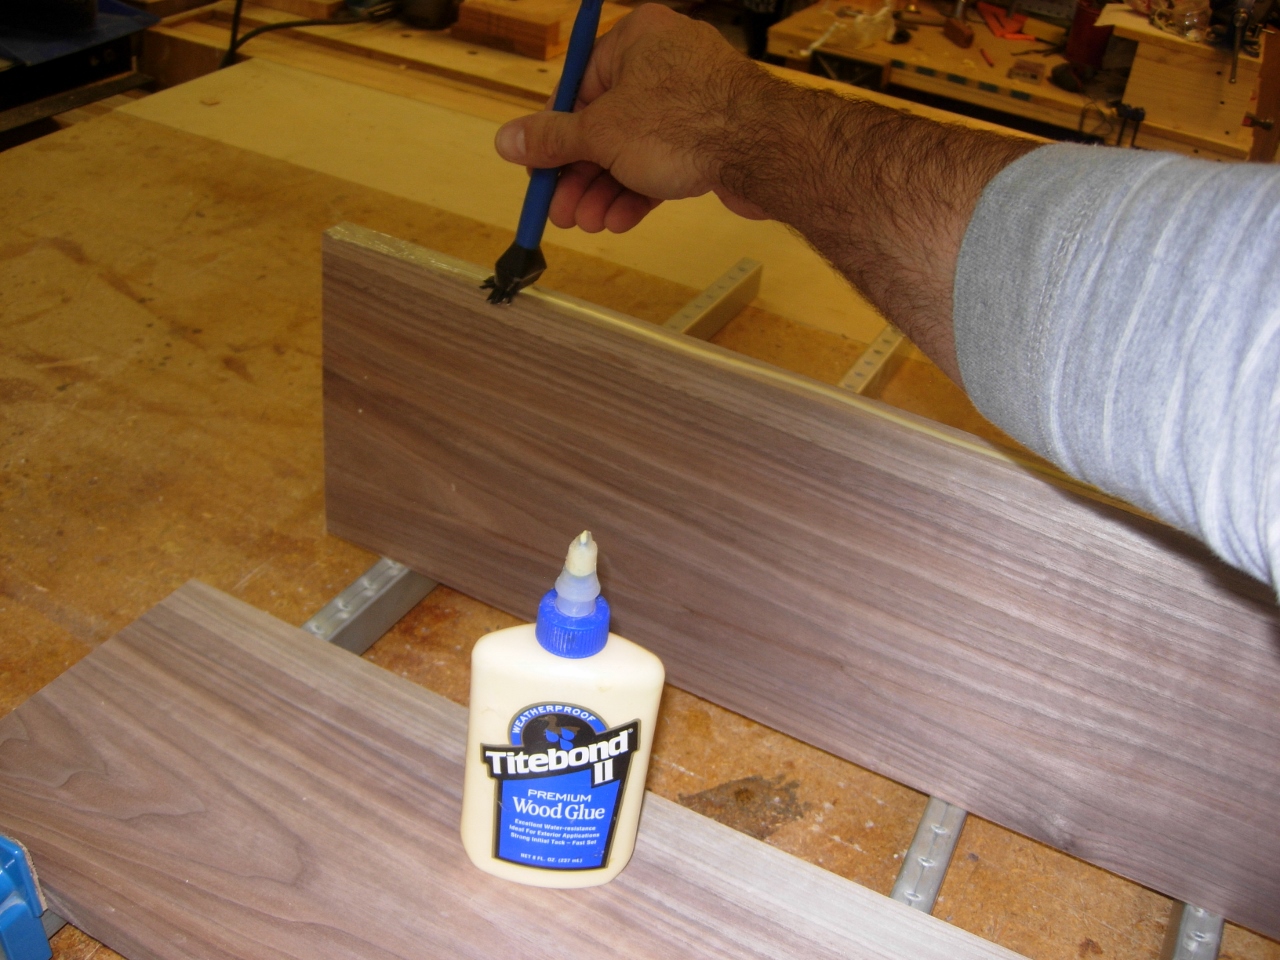
Applying glue to the mating edge
I applied a bit of wood glue to the edges that I wanted joined and clamped them up. Having the contrasting sap wood in the middle gives me a nearly book matched look. It is not a true book match from a re-sawn piece, but once the ellipse is cut, you won’t be able to tell.

Clamp up
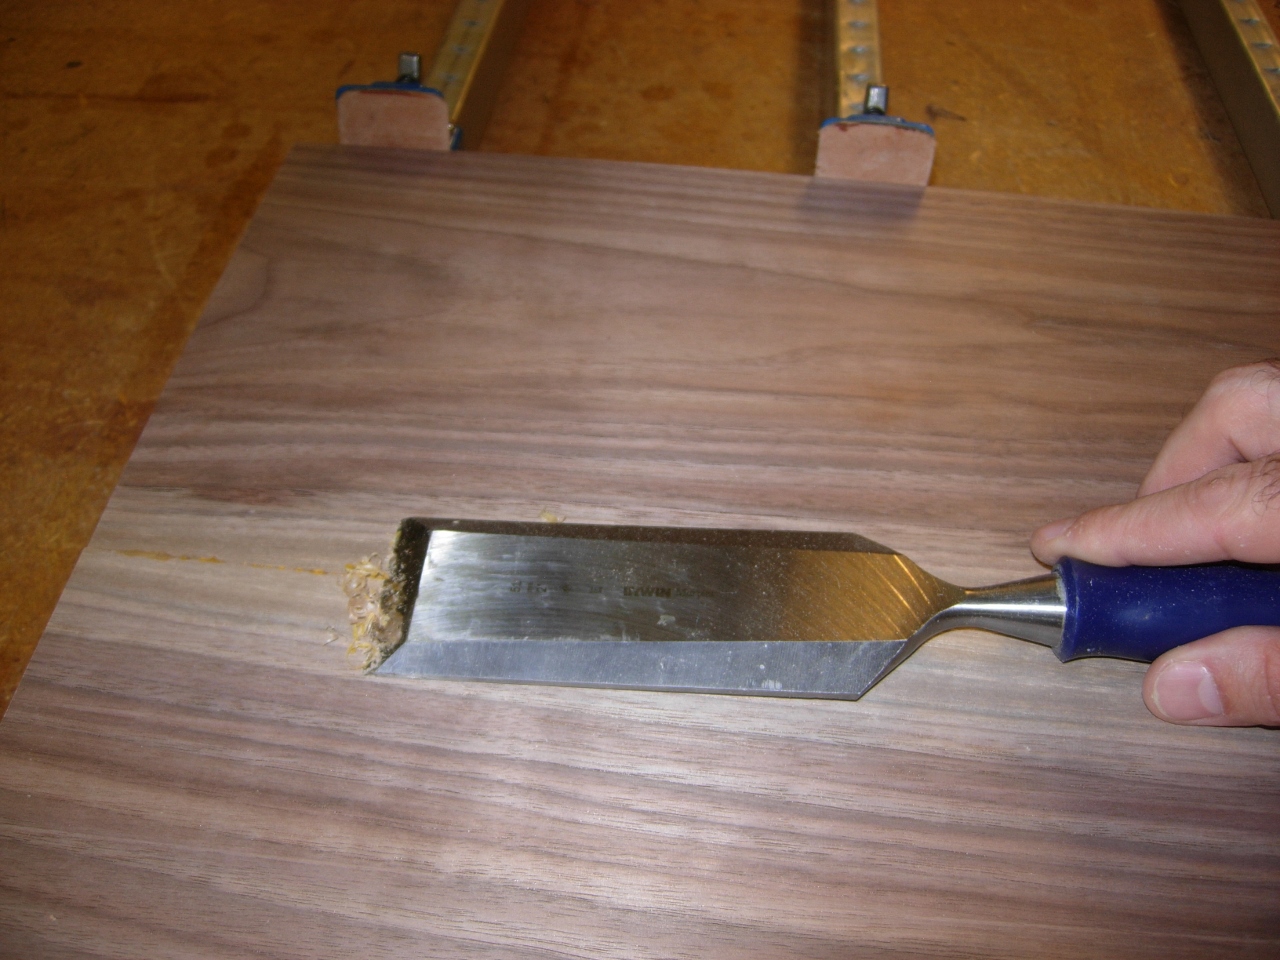
Cleaning away the squeeze-out
After I pulled the clamps, about an hour later, I scraped off the glue squeeze-out with a 2″ wide chisel. This is best accomplished before the glue fully cures. I also clamped down the board and ran a card scraper along the glue joint to smooth out anything that might have shifted in the glue-up.

Scraping the joint
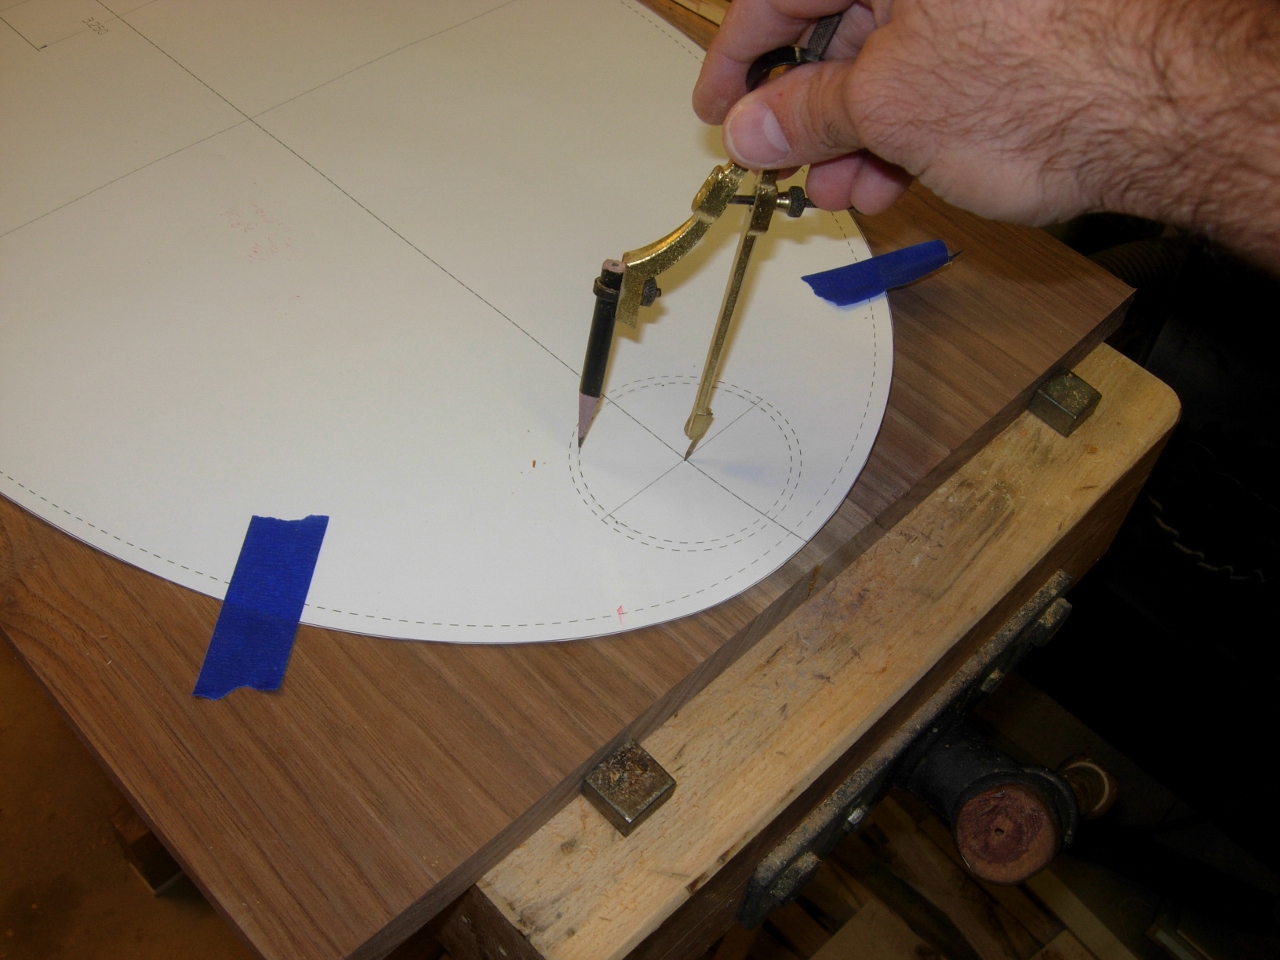
Locating the round pocket
I laid the template on the board, lining the center line up with the glue joint, and taped the template down. I set my compass in the center, then pressed hard to establish the center point. Once I adjusted it to match the required radius, I peeled up the paper, located my compass in the established center point, then laid out the circle.
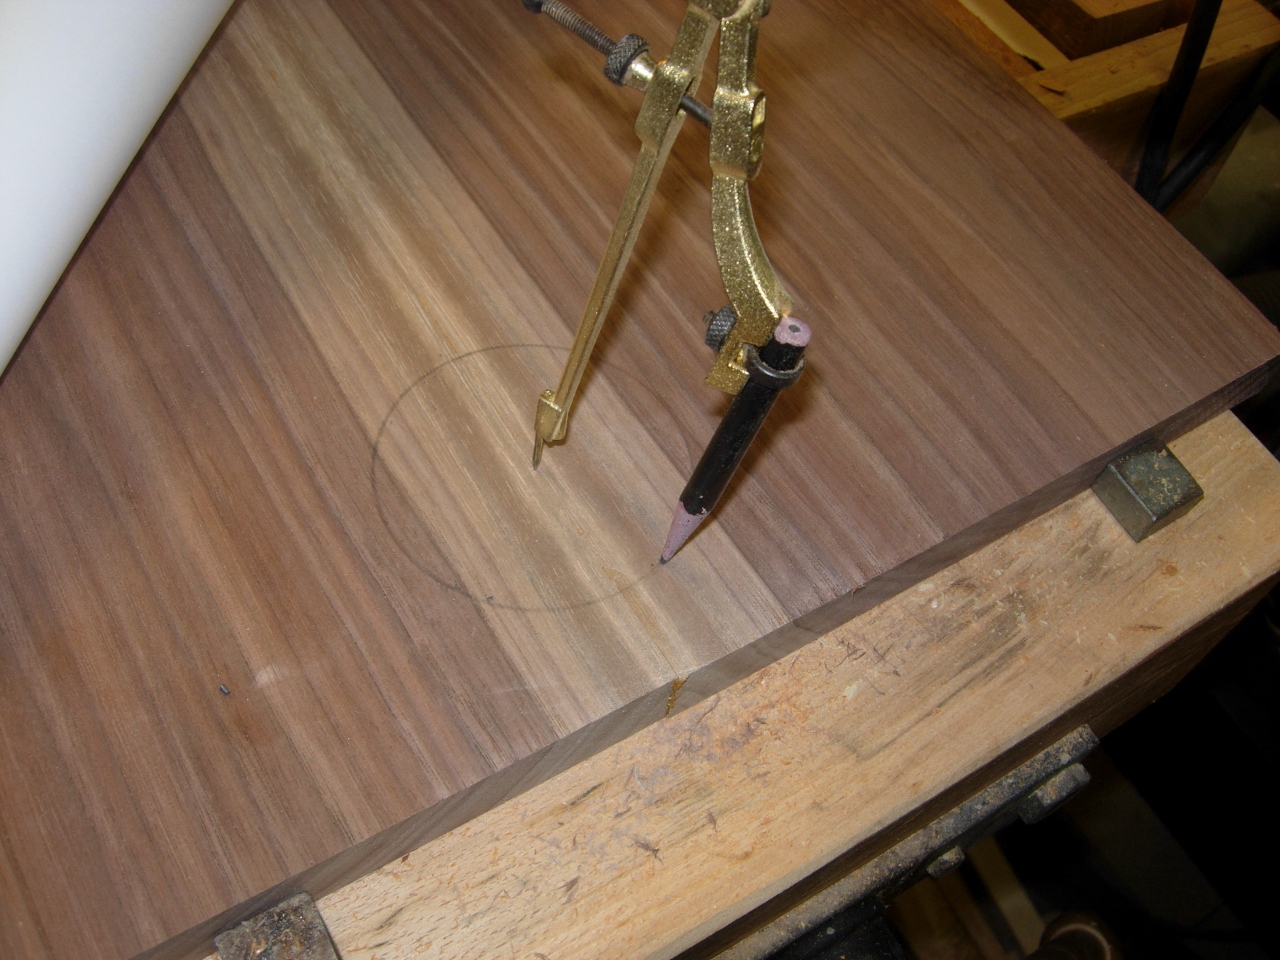
Drawing the round pocket
I then traced the edge of the template, and removed the template.

Tracing the pattern’s edge
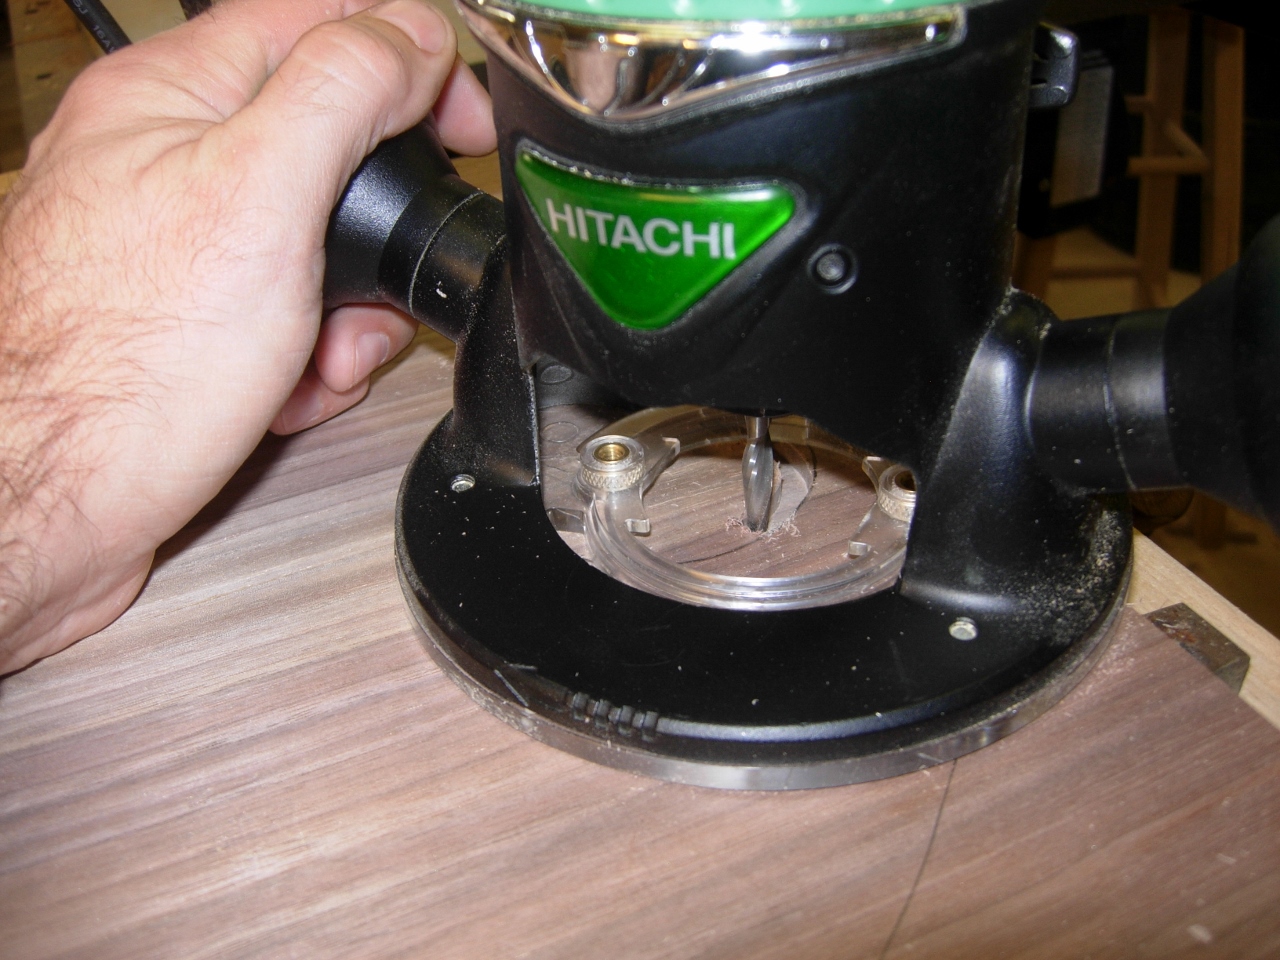
Carefully free-hand cutting the first pass
Most people prefer to rout using a template, but I prefer to free-hand cut with the routers, when I can. I used a 1/4″ spiral up-cut bit to cut the pocket. I set the bit down about 3/16″ and carefully cut the outline along the pencil line. Next I routed the center, and then dropped the bit down to 3/8″ deep and repeated the process.
Cutting the second pass
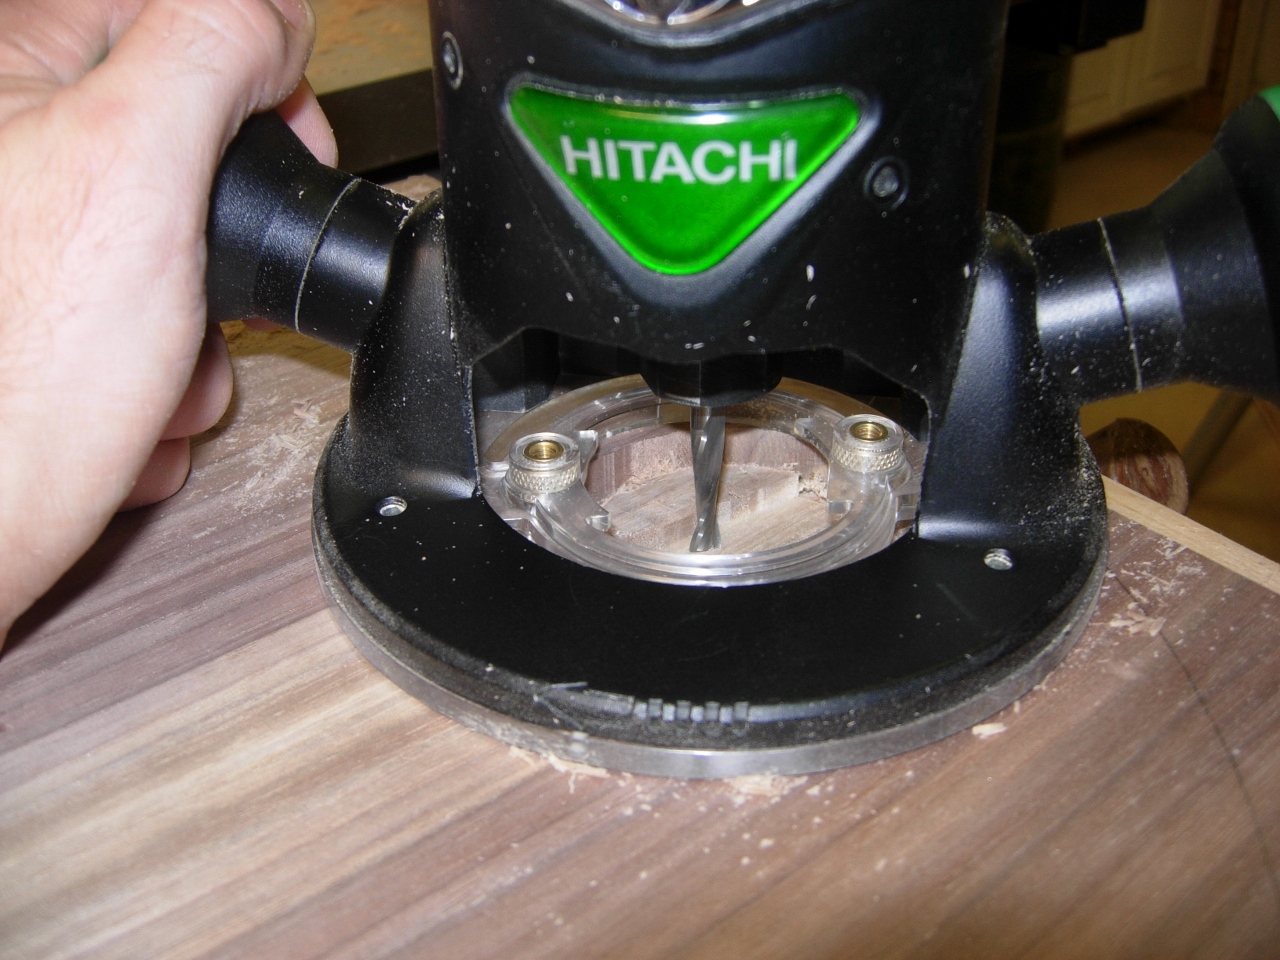
My friend wanted a 1/8″ round-over on the edge of the circle, but my bit with bearing and screw was longer than the 3/8″ deep pocket. I opted to cut another 3/32″ deeper around the perimeter to allow the screw clearance. This should still leave plenty of surface at 3/8″ deep for the medallion, that will be installed later.
An extra groove was cut for the bearing screw
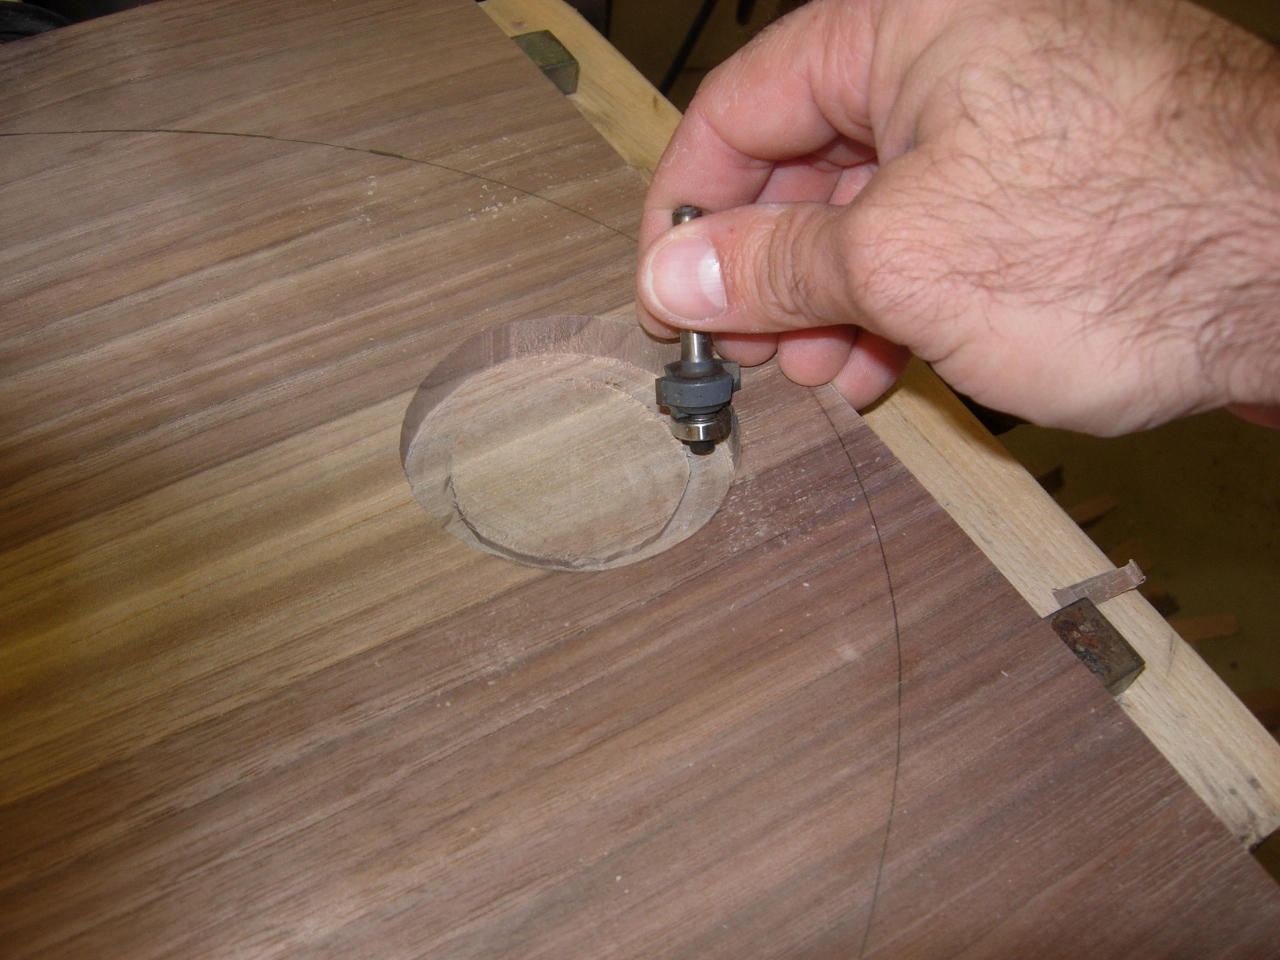
Rounding over the edge
I ran the 1/8″ round-over bit around and that pocket was complete.

Round-over complete

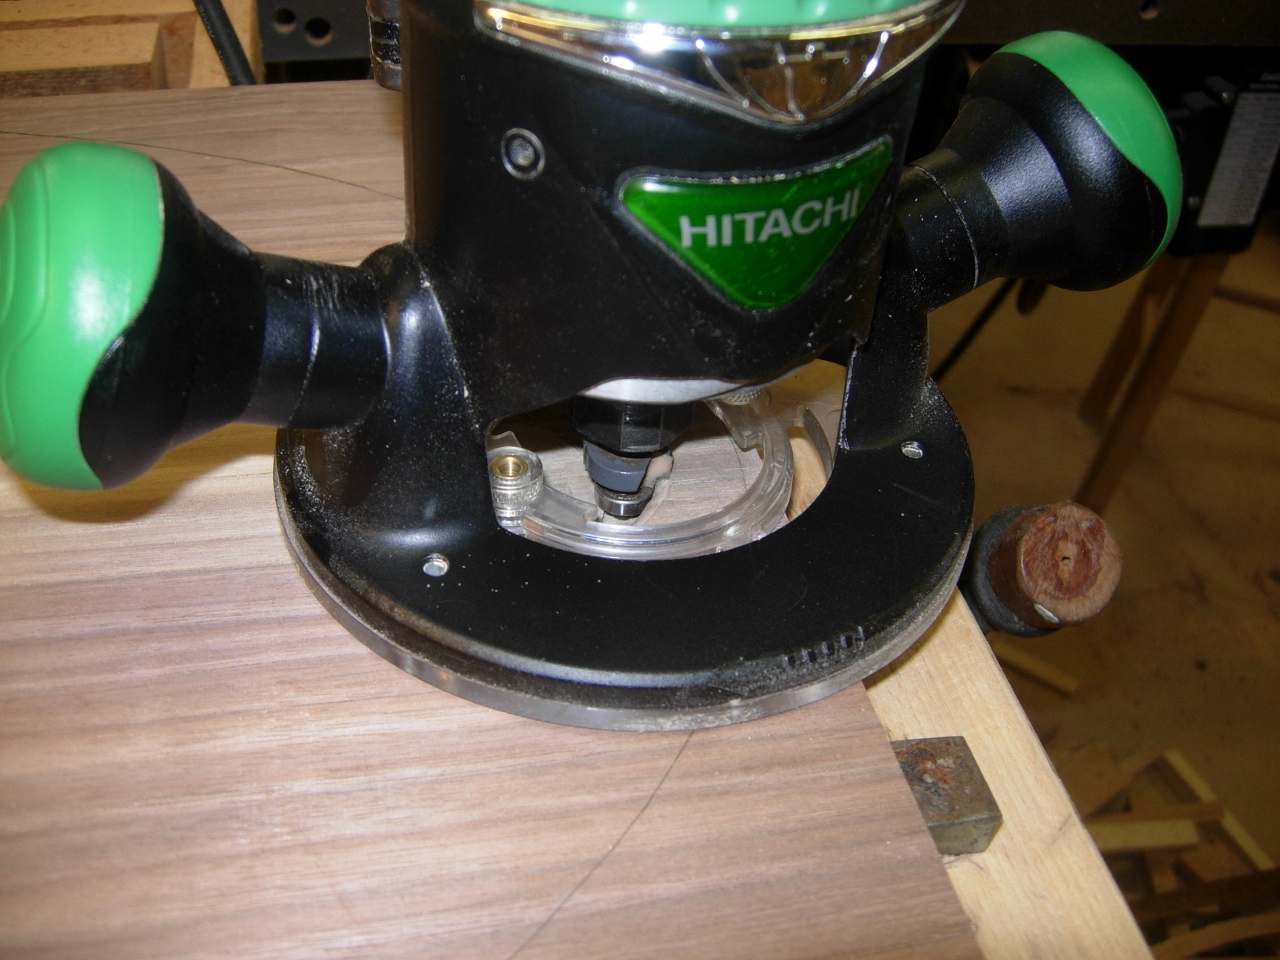
Locating the rectangular pocket
I flipped the board over and lined the template up with the glue-joint again. I poked holes at the end of each straight line that made up the rectangular pocket. Then I removed the template and traced the dots to recreate the rectangle. The rectangular pocket will be used to mount the deer head from the rear.
Connecting the dots
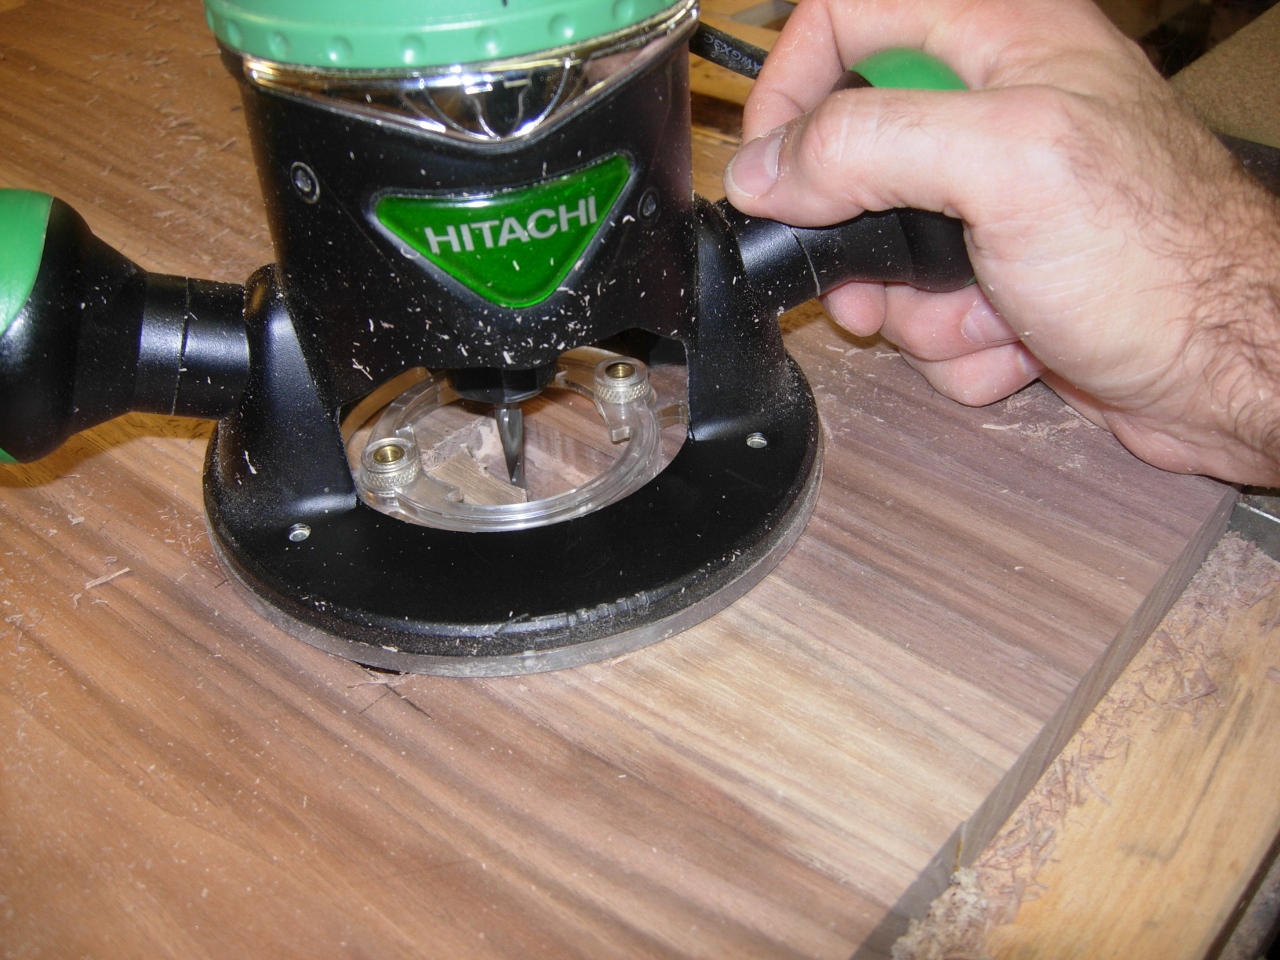
Routing the pocket at full depth
I set the 1/4″ spiral up-cut back in the router at the required 3/8″ depth and free-hand cut this pocket as well. I went ahead and cut it at full depth because the spiral bit was designed to handle deeper cuts, as long as you take your time.
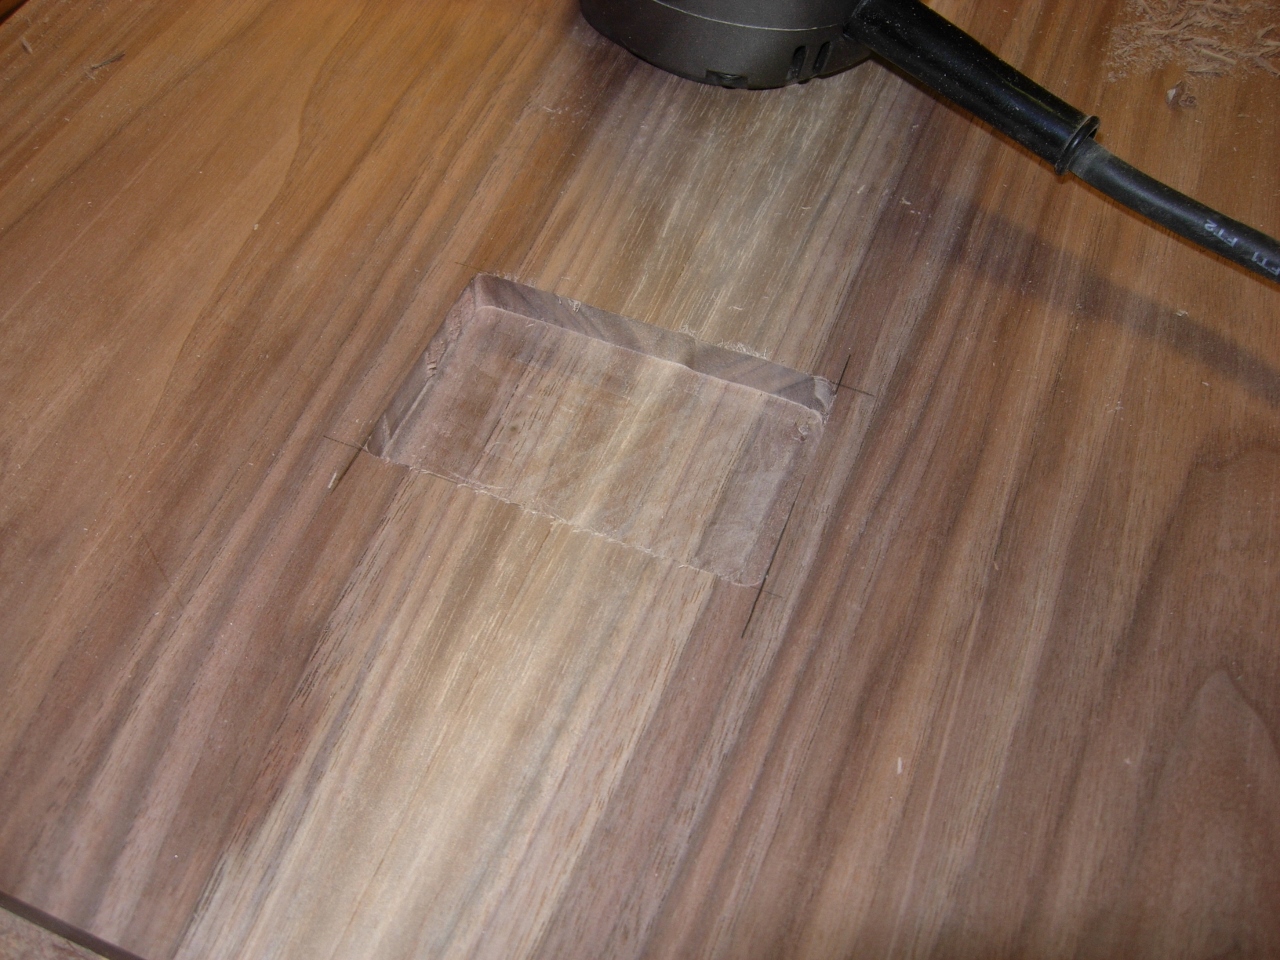
Pocket complete
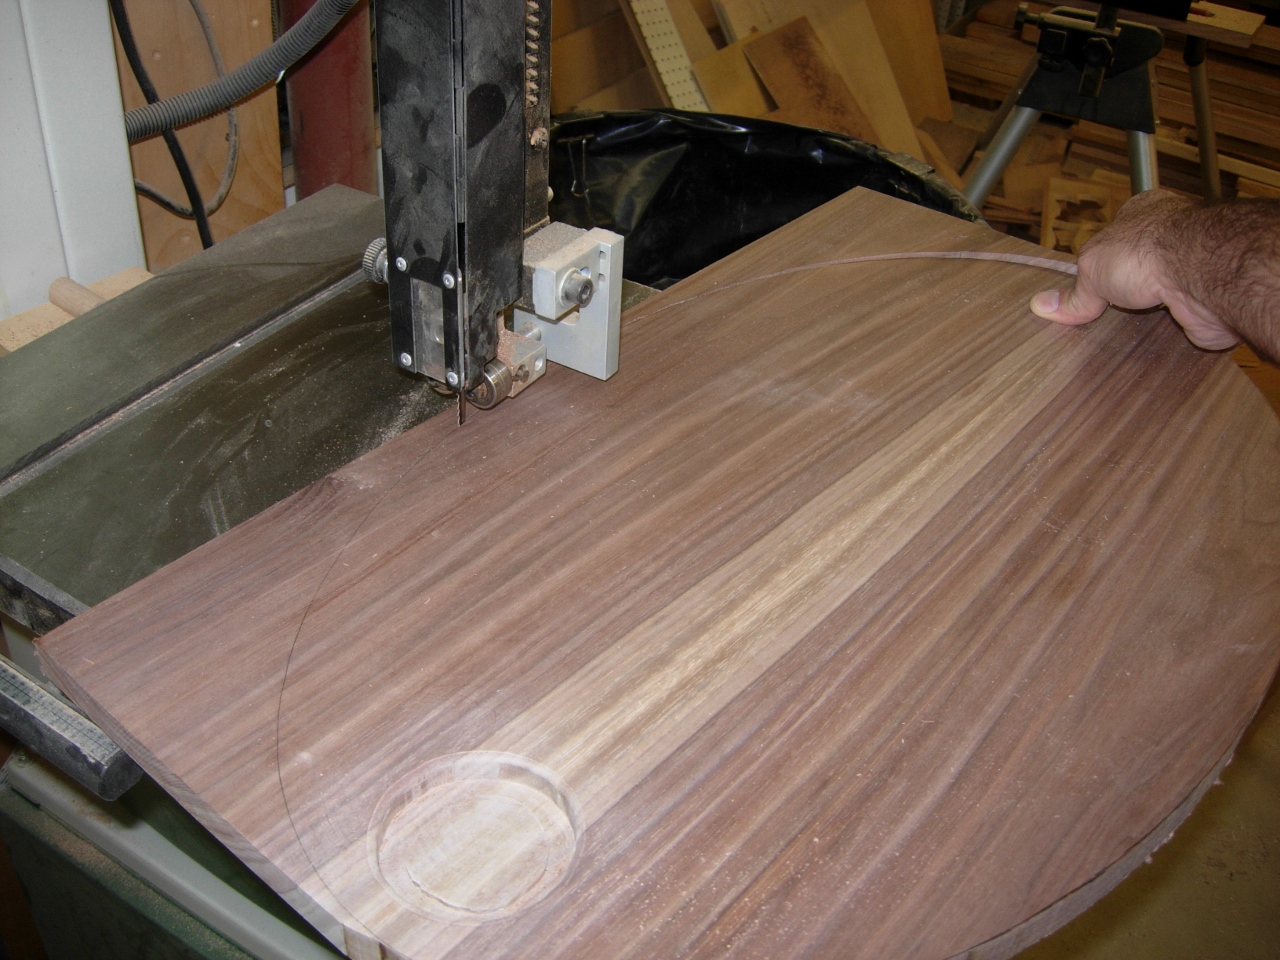
Cutting the ellipse on the bandsaw
With the pockets complete, I cut out the elliptical outline out on the band saw, making sure to stay just outside the line. Then I moved over to the spindle sander and sanded down to the line, all the way around.
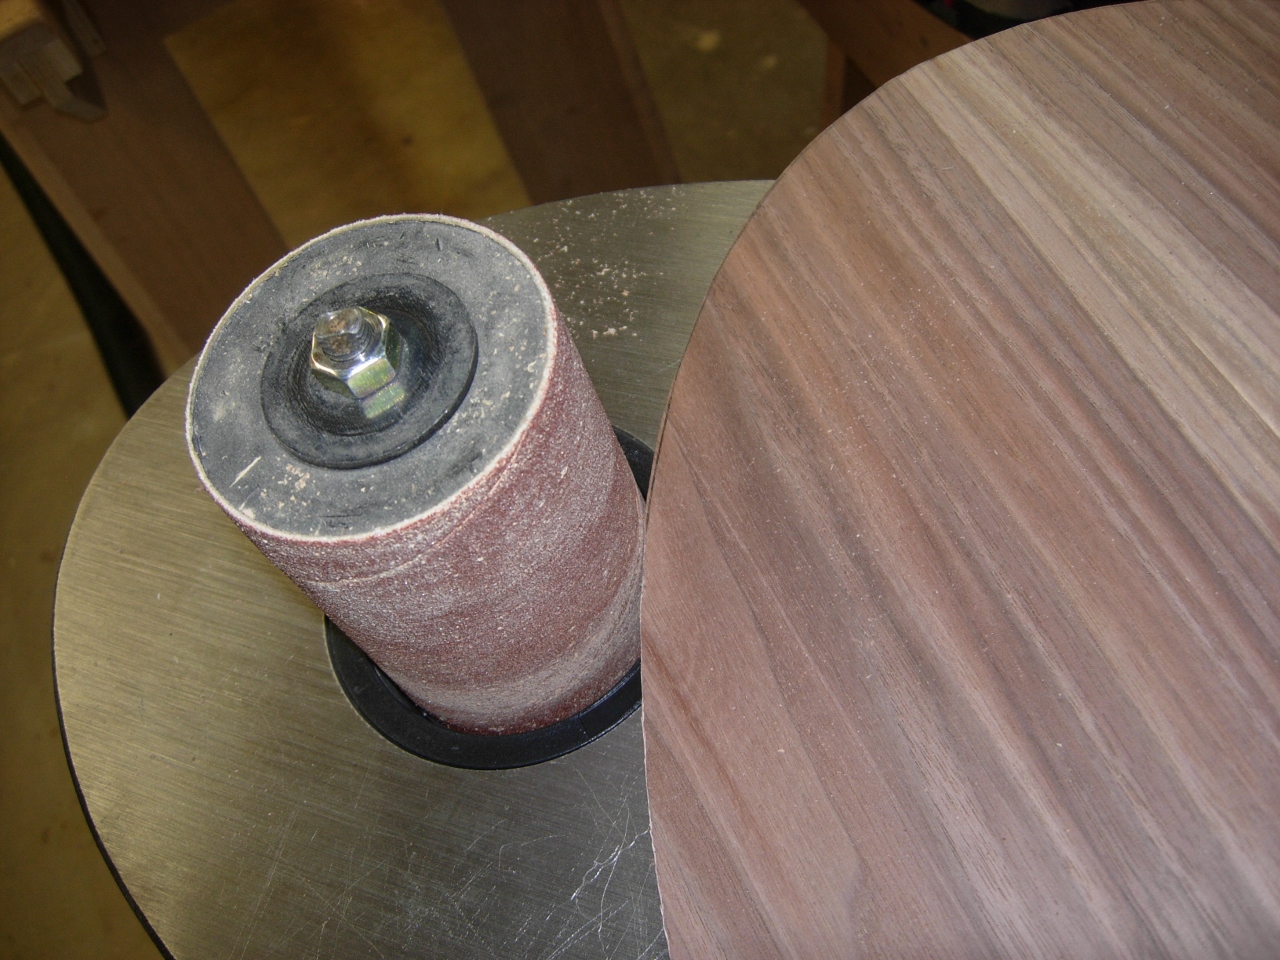
Sanding down to the line
I used the orbital sander, with 120 grit paper to smooth out any bumpy parts, left by the spindle sander.
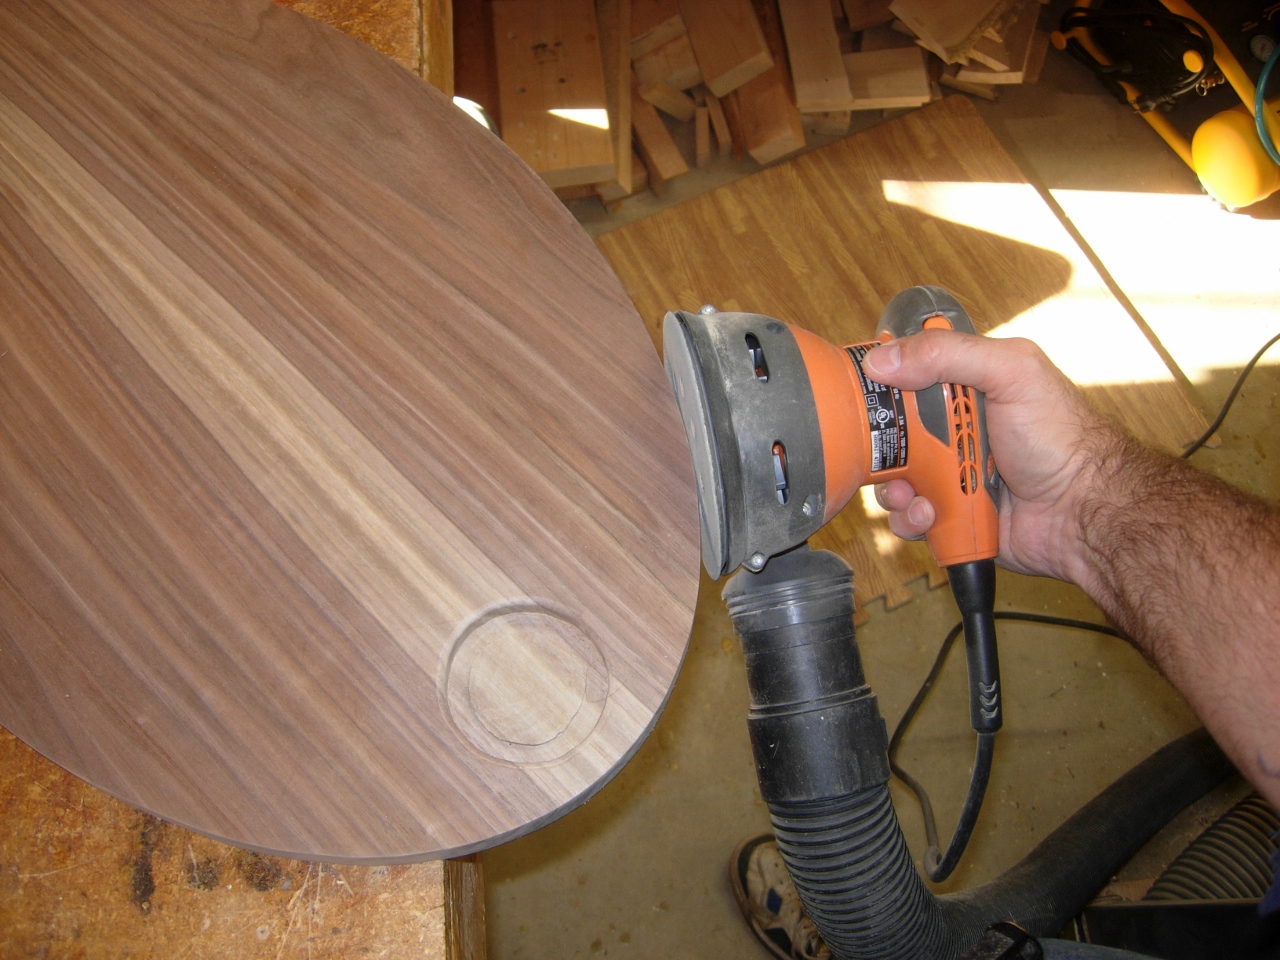
Smoothing out the edges

Cutting the outer round-over
To finish things up, I routed a 1/4″ round-over on the face and gave everything a final sanding.
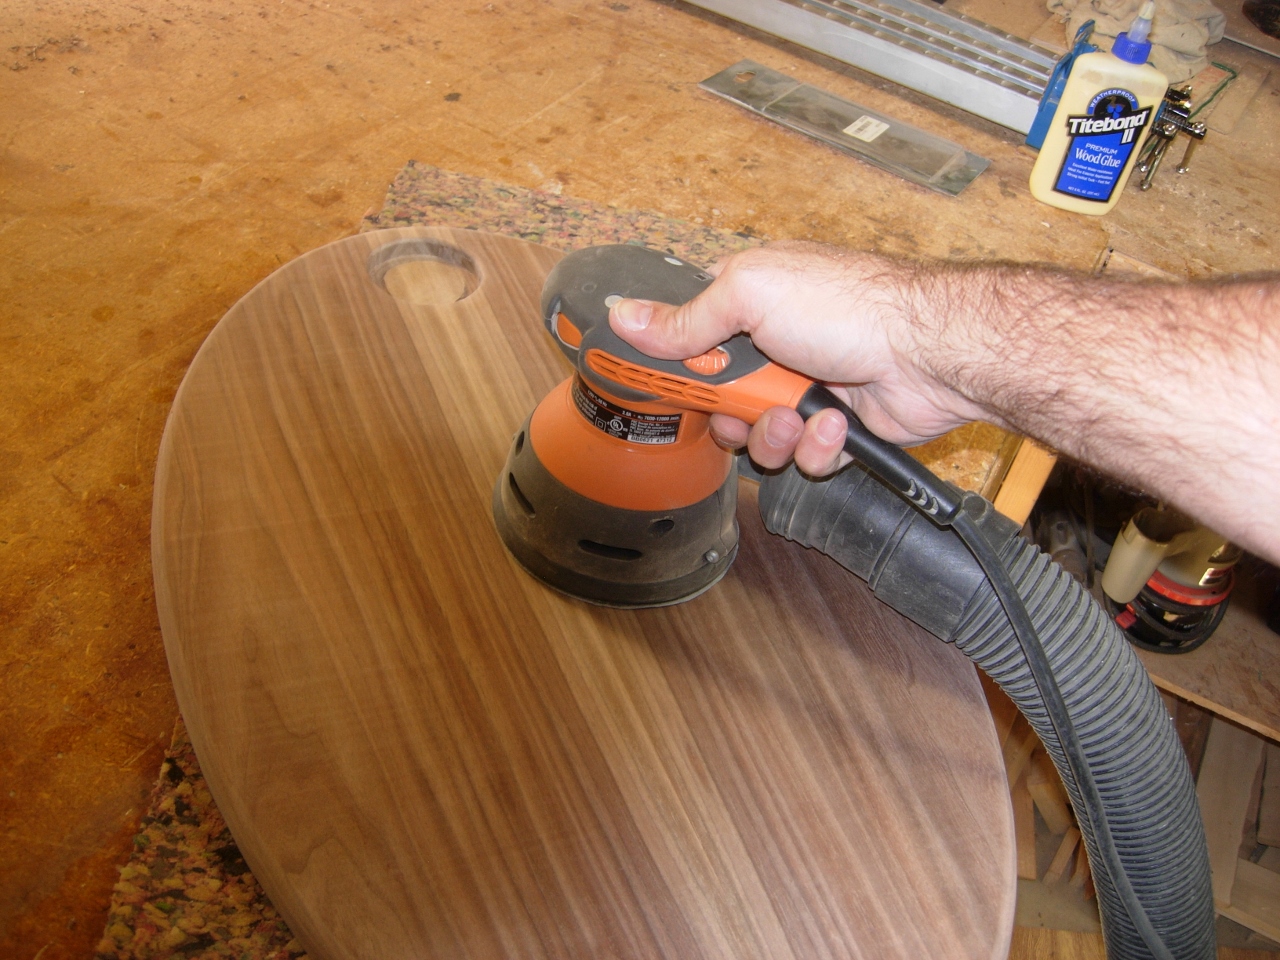
Final sanding
Since I will be passing the board on to my friend to finish, I wiped down the surface with Naphtha to see what the final product would look like. Not bad, and with just a little character.
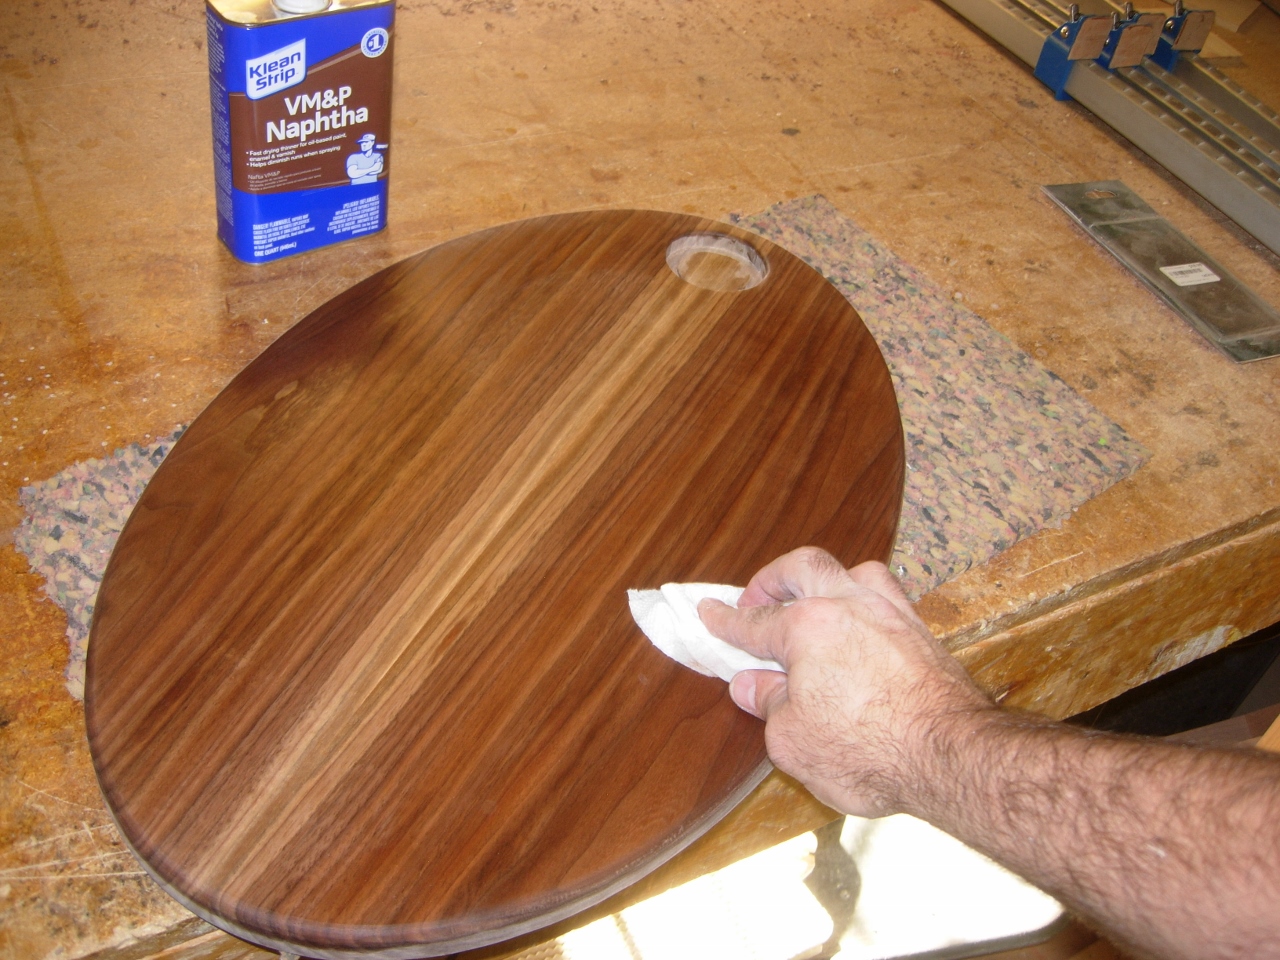
A quick swipe of Naphtha
The whole project only took about two or three hours counting an hour for glue-up. If I had to do a bunch of these, I would have made up some templates, but it turned out pretty nice free-hand as well.

Very nice, I’m sure it will look good hanging on the wall!
Does your friend sell lumber to others? If so I would be interested in some air dried walnut.
Brian.
Thanks Brian, I emailed you his email address. Let me know if you get a response, he can be elusive…