
Bed upgrade – day 6
I installed the receiving side of the rail fasteners on the posts a couple of days ago, so today I have to install the hook side on the side rails.
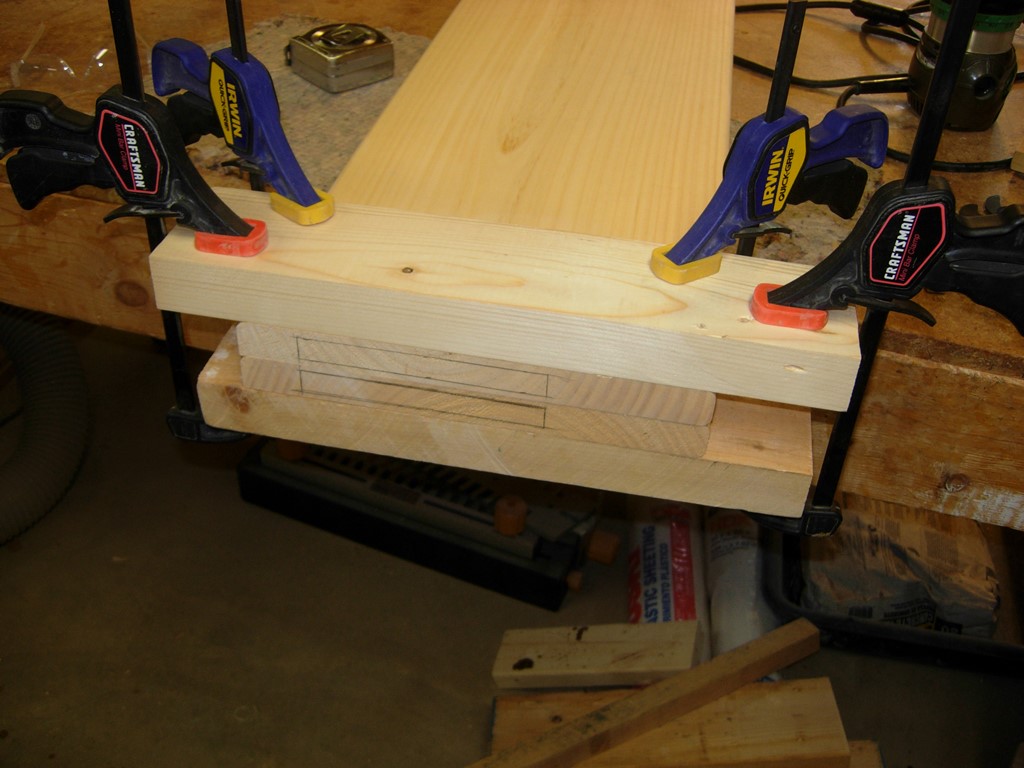
Laying out the rail ends
I started by marking the location of the fastener pockets, then I clamped additional supporting rails on either side. This is to stabilize the base of the router. I will be routing sideways, so the extra support will help a lot.
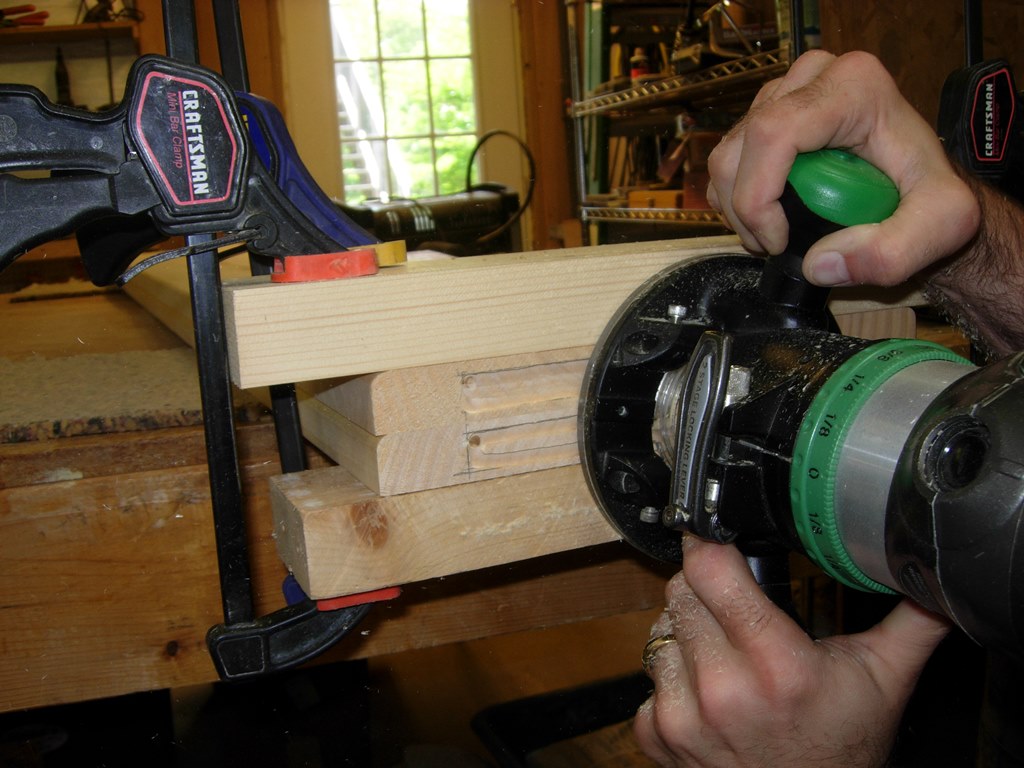
Cutting the pockets
After routing out the pockets, I cleaned up the corners and edges with a chisel.

Cleaning up the cut

Marking the rear protrusions
The hooks are pressed into the fastener plate with a nub of metal protruding through the back. I marked the locations of the nubs by holding the plate in place and smacking it gently with a hammer. This left a dent where I needed to create an additional recessed area. I simply drilled a series of 1/4″ deep holes in these areas and cleaned them up with a chisel.
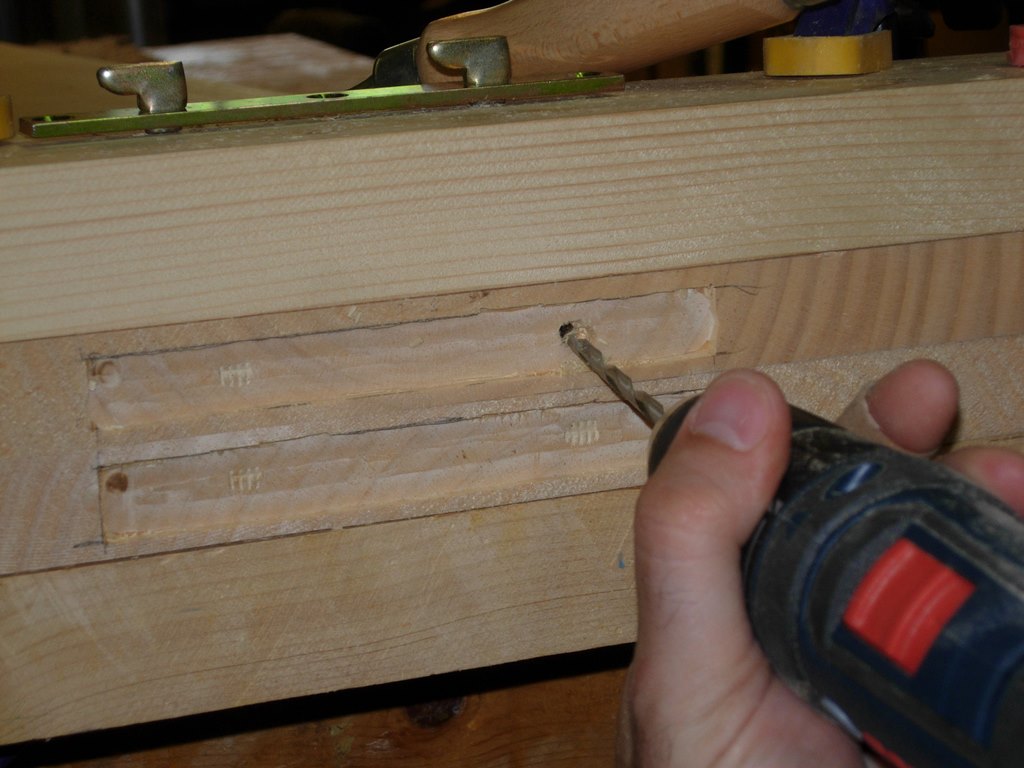
Drilling out recesses
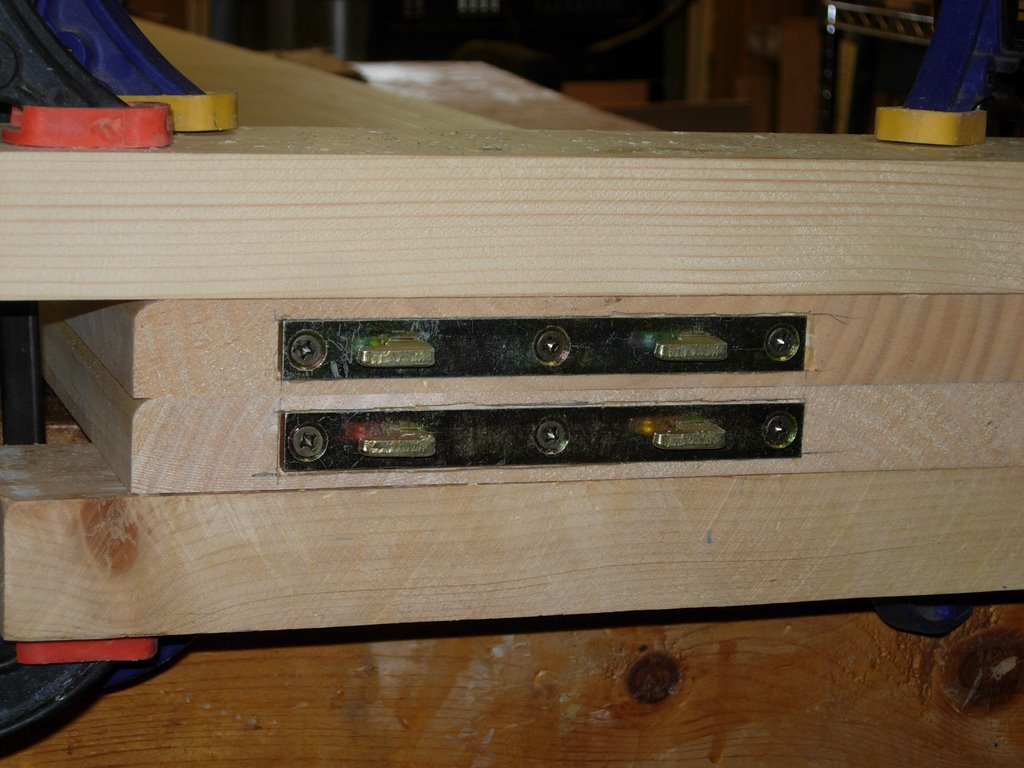
Connectors attached
With the plates screwed in place, I attached the rails to the bed.

Test fit successful
Everything fit nicely, so I moved on to the support rails. I ripped some 6/4 pine down to 2″ wide on the table saw.
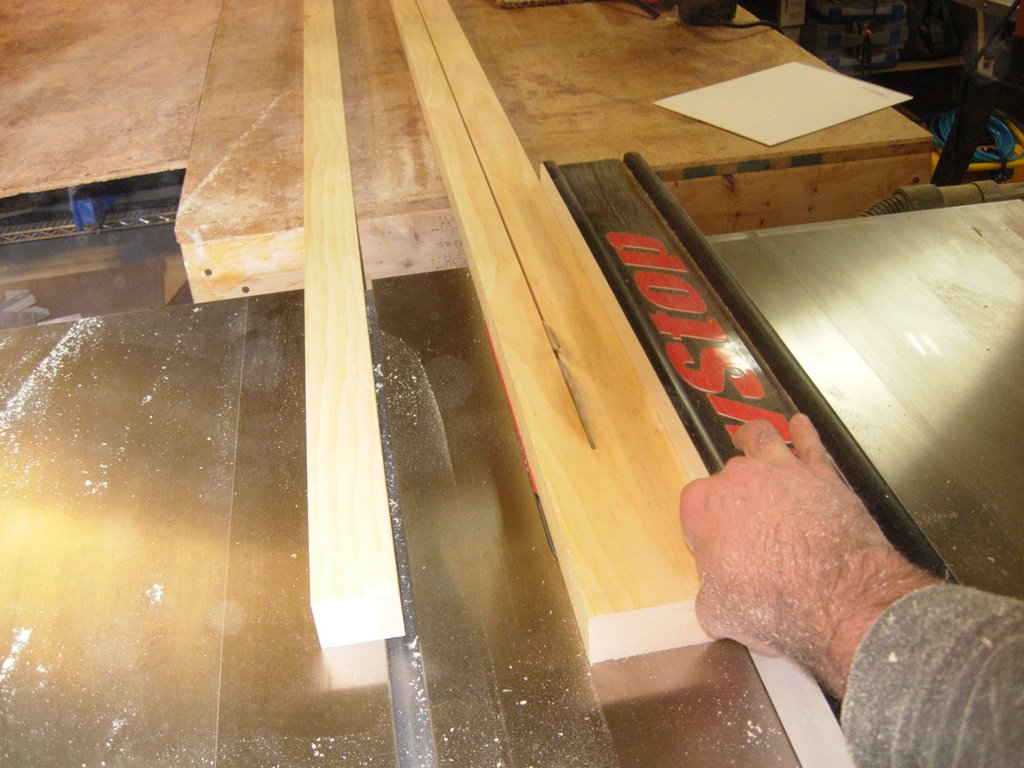
Cutting the frame support rails
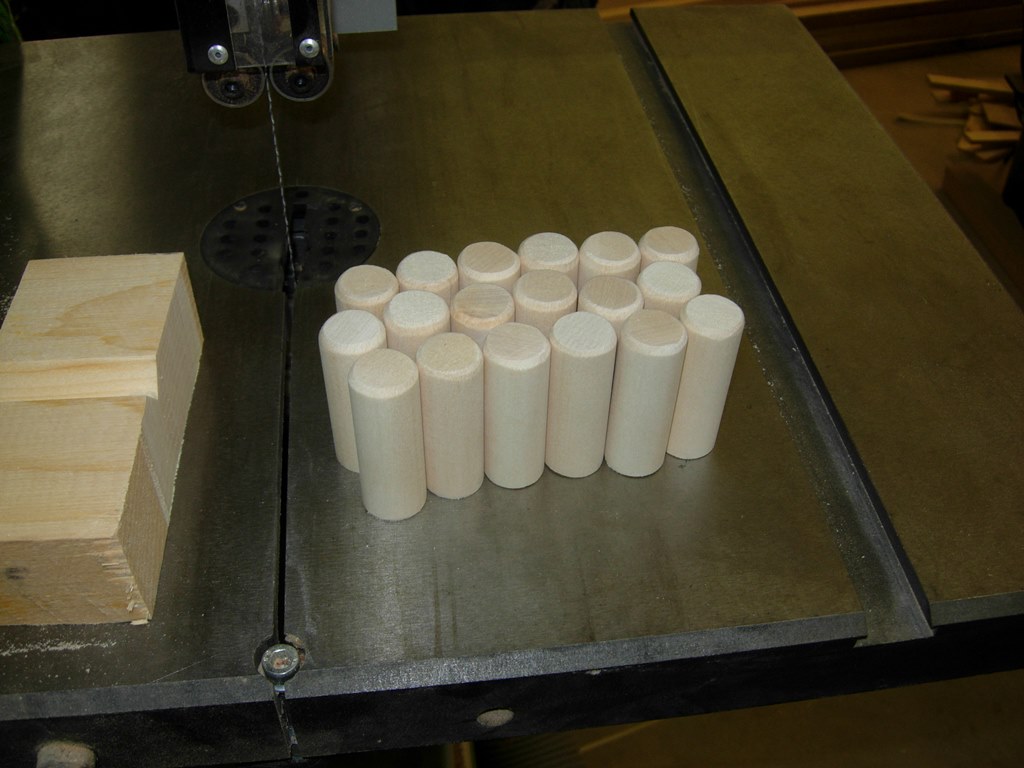
I determined how many slats I would be using to support the mattress and marked the location of the center of each of these on the rails. I set up a 3/4″ bit in my drill press and drilled a 1-1/4″ deep hole at each location.

Drilling out the dowel holes
To create the pegs, I found a piece of scrap and cut it down to 2″ wide, then cut a “V” in the center. This created a simple jig for cutting off 2″ long sections of dowel.

V-block jig for cutting dowel pegs

Chamfering the ends
I sanded a small chamfer onto one end of each dowel. The chamfer will stick up to help make it easier for the bed slats to be dropped in place.
Pegs complete
I applied glue to the sides of the holes with my finger and inserted each of the dowels and let them dry.
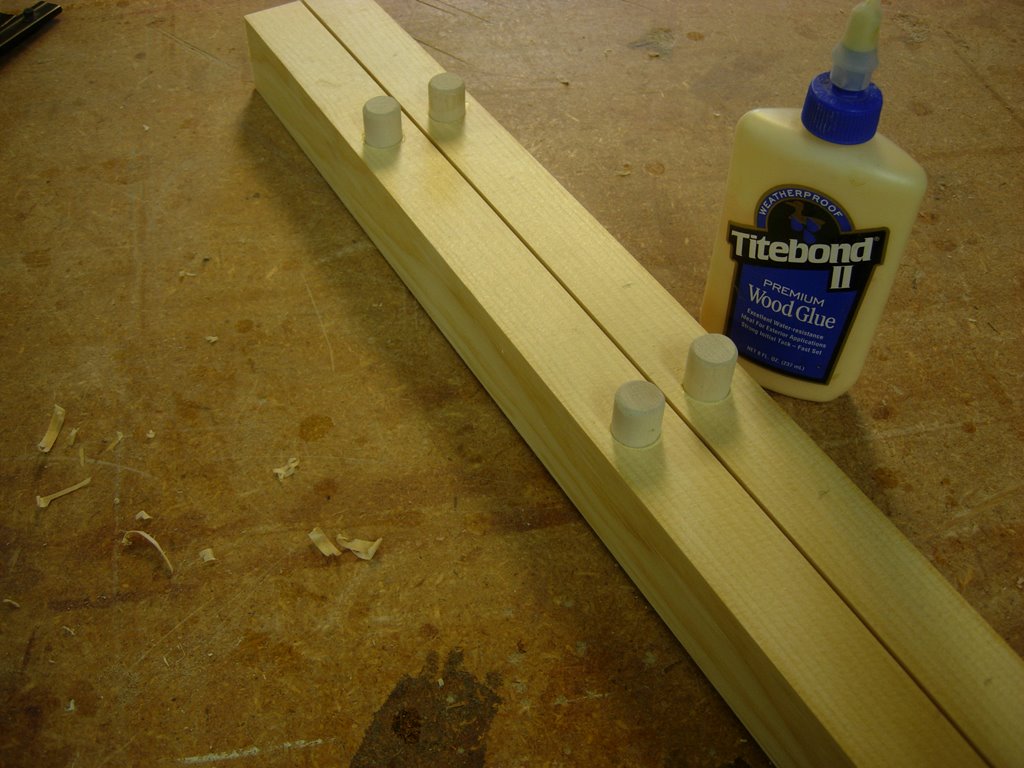
Glueing in the pegs

Glueing up the support rail
I applied glue to the side of the rail and clamped it flush to the bottom of the side rail.

Rails attached
After the glue had set for an hour or two, I pulled the clamps and flipped the rails over. I had a bit of glue squeeze-out, and the easiest way to remove it is to run a wide chisel along the joint before the glue completely dries. It just peels right off.

Removing glue squeeze-out

Staining the side rails
The final step for the day was to apply a coat of stain to the side rails.

Stained and drying
Later this week, I will be working on the center support rail and the slats. After that, a couple of coats of urethane and it will be done.

Great Job !!! Looks super !!