
Some custom crown molding
The storage cabinets, that I built, a few months back, were supposed to have crown molding at the top. To match the existing profile, on their other furniture (built many years ago), I had to have some custom cut. I have a friend who does church restoration, and he has a molding planer and several thousand custom-made cutter heads for it. Of course, none of his profiles matched the one I needed. It is usually rather expensive to have a custom shape made, because the blades have to be ground and matched to your profile. Normally a run would cost a minimum of $1500, and I only wanted two 8′ long pieces. Luckily Dave is a friend and he offered to cut the profile for free. I will owe him a favor down the road… Since he had to run a few test pieces to check the profile, and since it was all set up, he went ahead and ran about fifteen pieces for me. In an effort to save him some cuts, and to make life easier on me, I only had him cut the face. Normally, crown is cut thin with back angles, so it can be easily placed against the ceiling. Mine was cut from 8/4 oak with only the angled profile. That leaves me a vertical face to mount against the cabinet. Since the trim is so much thicker, I am going to cut it in my shop and join the corners ahead of time. I know the dimensions of the cabinets so I can pre-make everything and install it quickly with just a few nails.

Cutting the crown
I started by cutting 45 degree miters on the ends of the four pieces.

All four pieces cut
Next I sanded all of the pieces down. A few of the pieces had rough saw marks on the back. They won’t be seen, but I don’t want anyone reaching blindly over the top and getting a splinter.
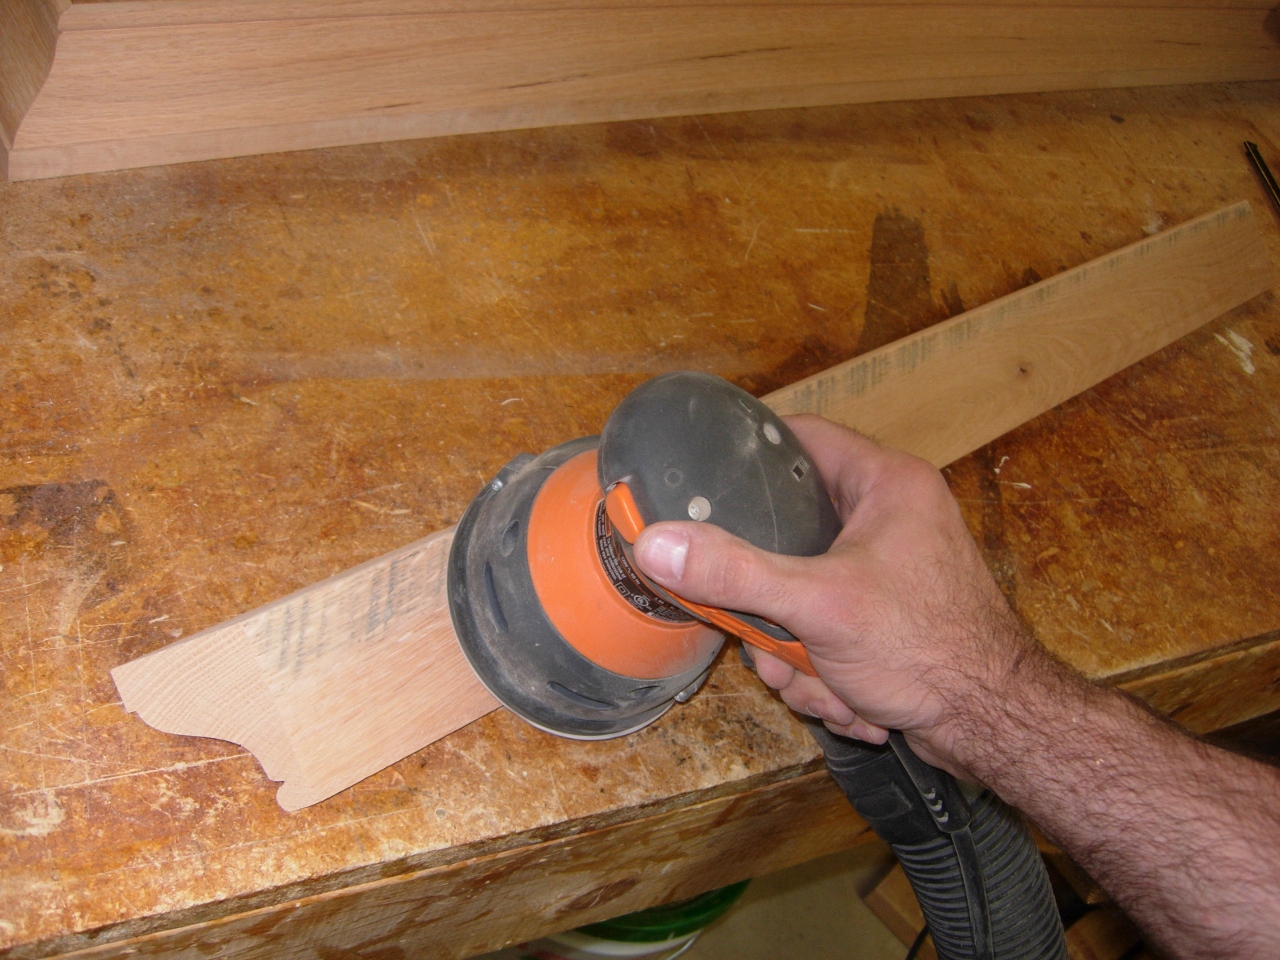
Sanding down the rough spots
One of the pieces had a knot. It was a little loose, so I decided to stabilize it with epoxy.

A loose knot

Two part epoxy
I have a couple of tubes of inexpensive 5-minute two-part epoxy. It dries clear, and holds the knots permanently in place. I just mixed even amounts up on a board and pressed it into the back side of the knot.
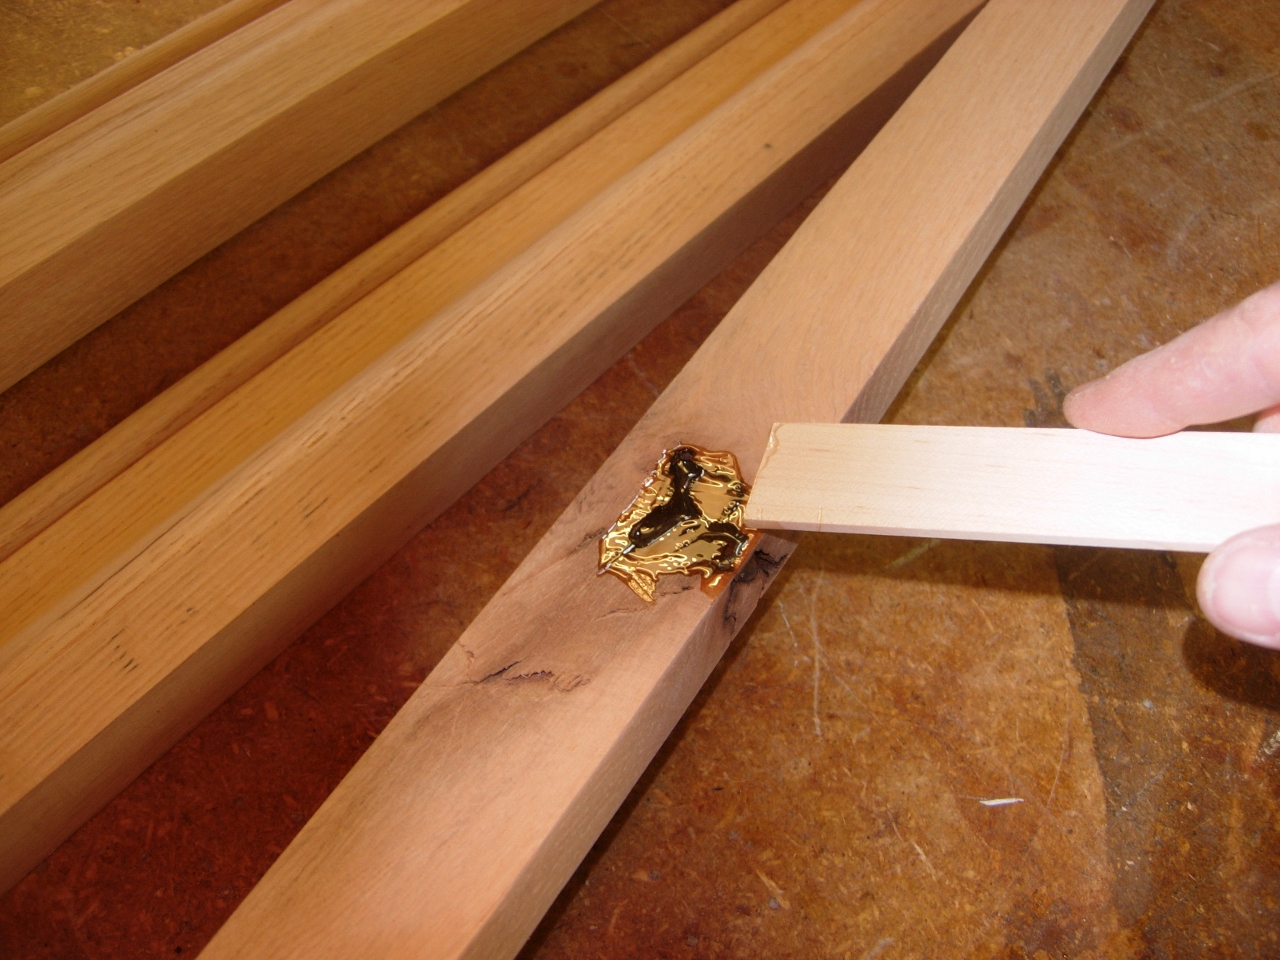
Fill the back of the knot first
I applied a piece of painter’s tape to the area where I just applied the epoxy, to hold it in place when I flipped the board on its side, to fill the front.

Tape the knot to hold the epoxy in
I spread some on the front and let it set for an hour. When I came back, it had sunk further into the knot hole. I mixed up a second batch and repeated the process until the epoxy dried above the surface.

Applying epoxy to the front
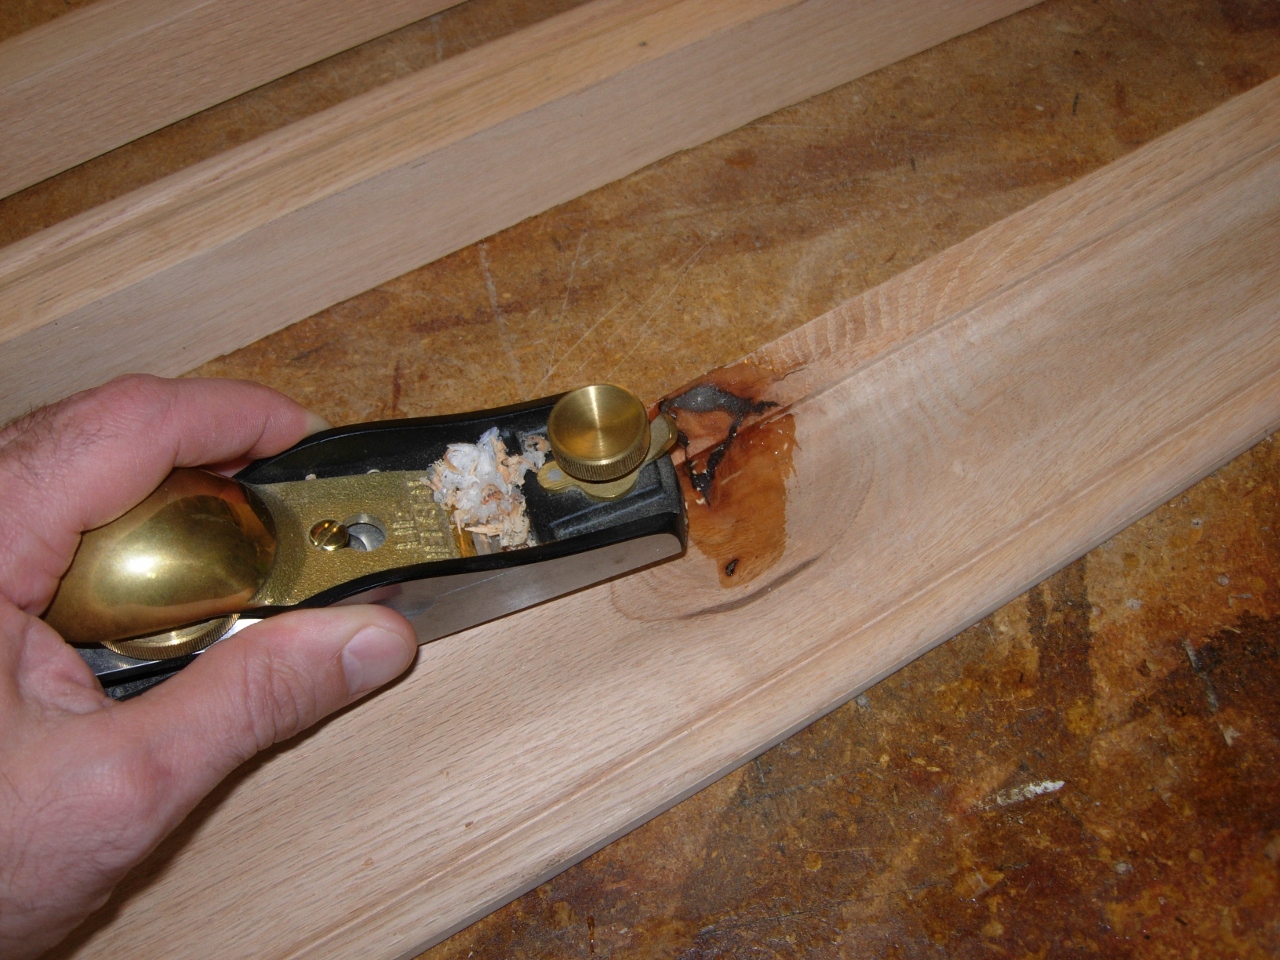
Planing down the flat parts
After it cured, over night, I planed down the epoxy on the flat surfaces, and patiently sanded the curved surfaces, by hand working my way down from course grit to fine.
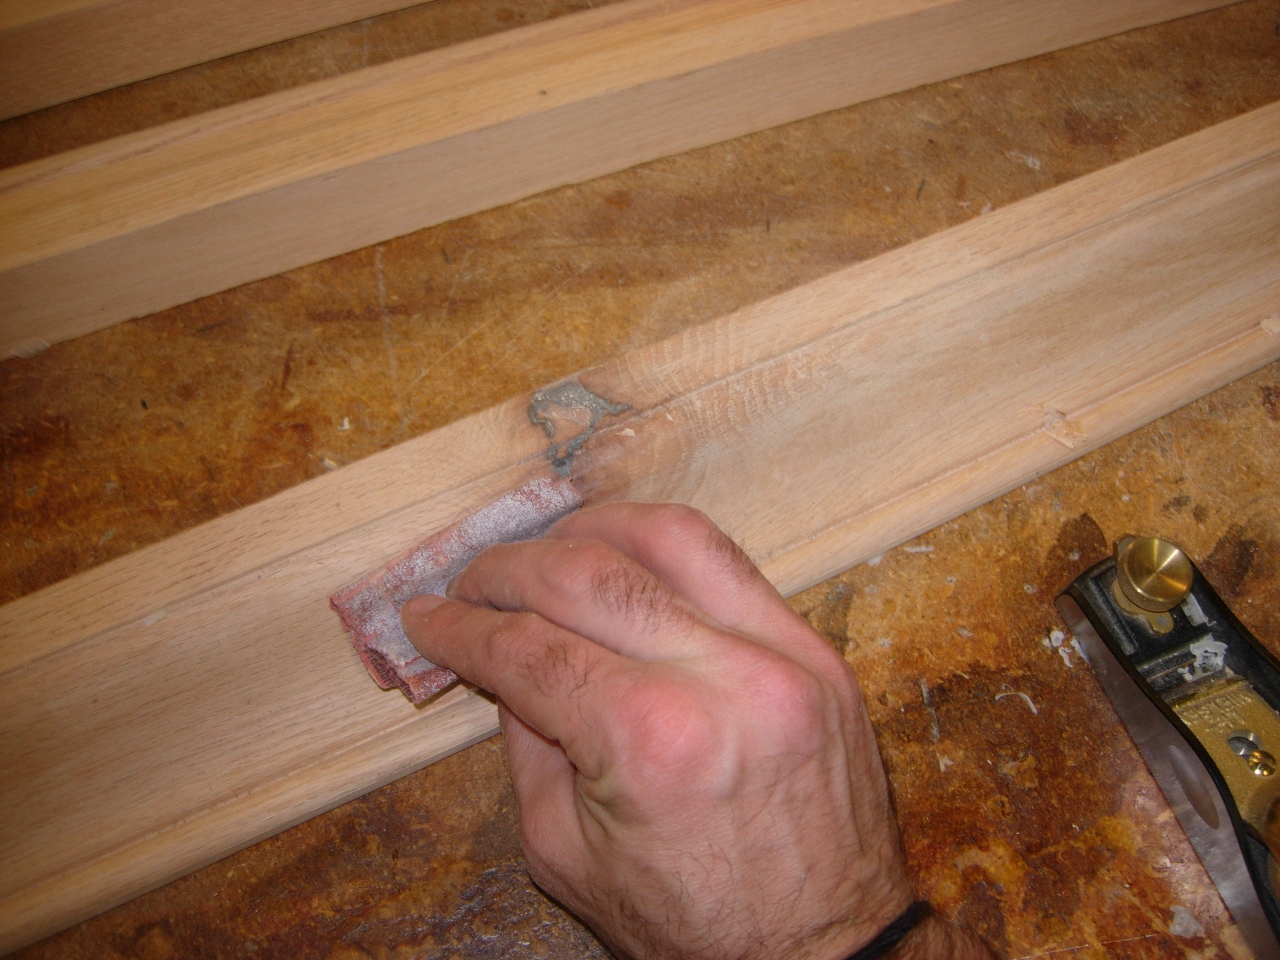
Sanding the rest

Applying glue to each cut face
With the knot repaired, I moved on to attaching the pieces at their miters. I sanded the cut ends down with 400 grit paper to get them as smooth as possible, for glueing. I applied glue to both sides of the miter, rubbing it into the porous ends with my finger.
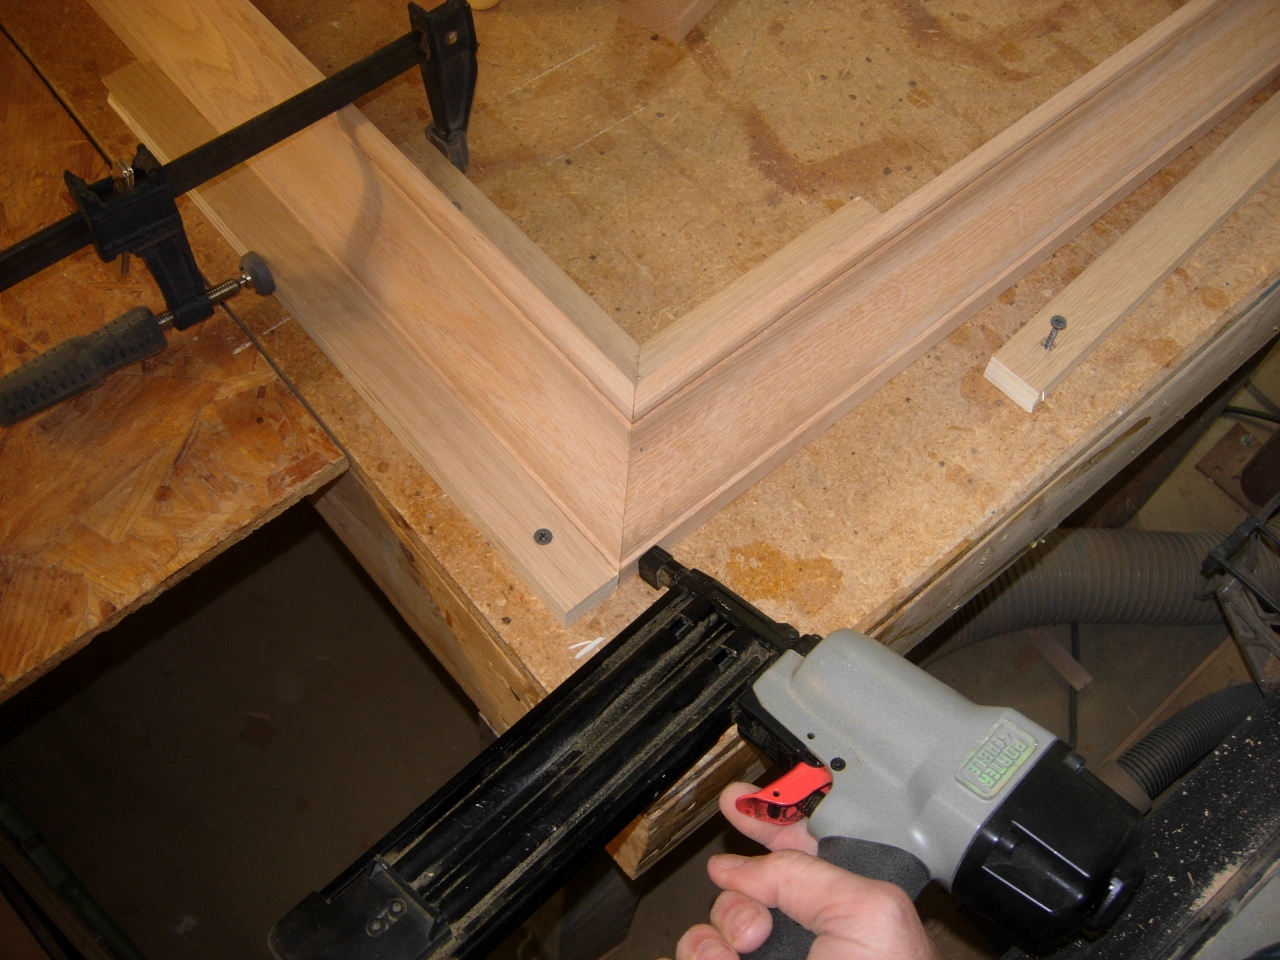
Two brad nails to hold it
I attached a few cleats to my work bench to aid in holding the trim square, then attached the trim with two 2″ brad nails each. I wanted to avoid nailing the corners, but I couldn’t find a better way to hold them while they were drying.

Nailed and drying

Cleaning up the glue joint
After a couple of hours drying, I carefully sanded off any glue squeeze-out, then made sure everything was prepped for finishing.
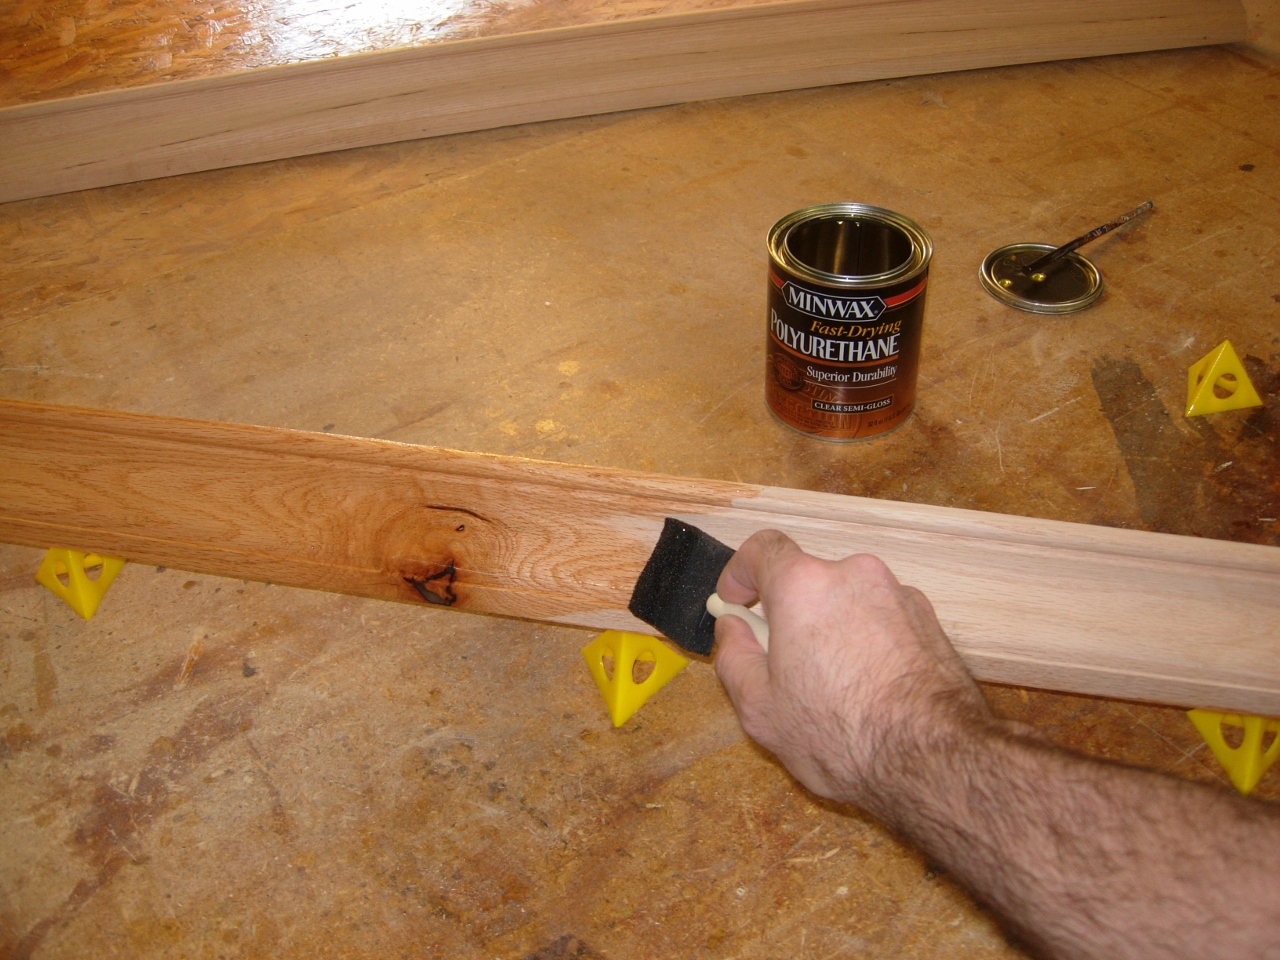
Applying the first coat of urethane
I applied the first coat of polyurethane with a foam brush, to get into the tight parts on the profile. The sanding marks in the epoxied knot, completely disappear when the poly is applied. I will steel wool the surface and apply a second coat tomorrow. Hopefully these two pieces will get installed later this week.

First coat complete
Since I have over 100′ left of the crown, I will set some aside for future projects at Saint Joseph’s. I will be using four of these heavy pieces of trim to create a large picture frame for Saint Peter’s. That will be an interesting project. I need to mount a fairly large painting onto a curved wall. Hopefully I will be getting to that in the next couple of weeks. I have been lazy the last couple of weeks, but it is time to get back to work…
