
Tabernacle build – day 9
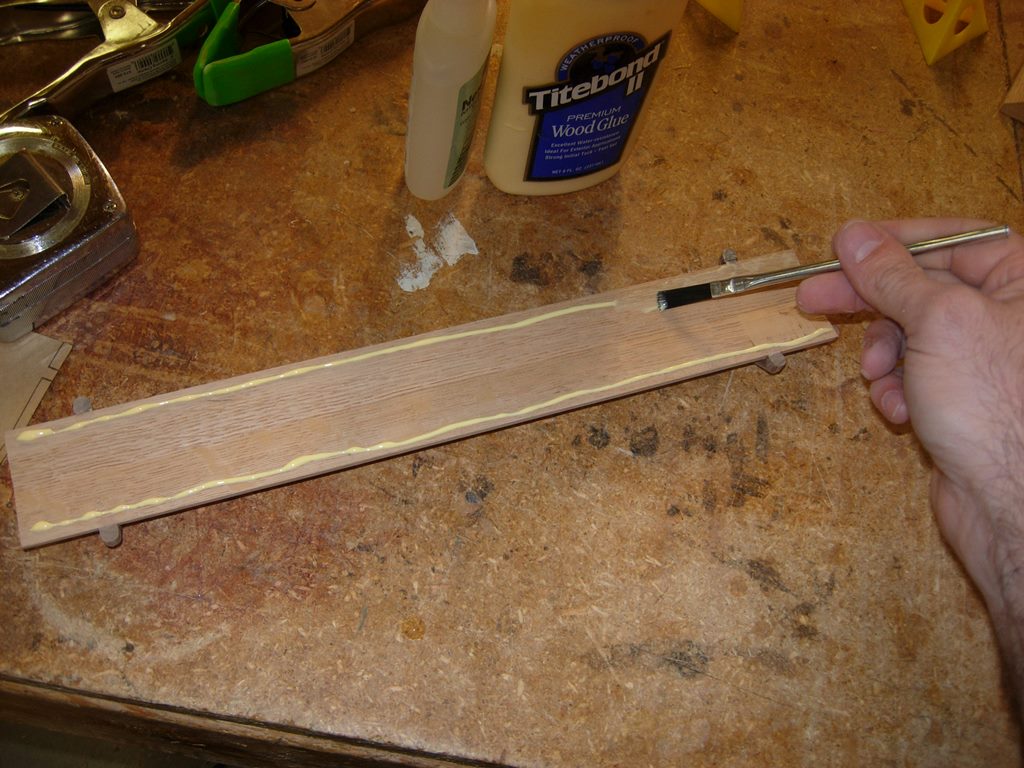
Applying glue to the columns
After sanding the columns and their banding to match the cabinet body, I applied glue to the first column and clamped it in place.

Clamping the first column
Since the first one attached so well, I decided to finish sand the rest and attach them too… Since the body is round, I wound up only doing two at a time.

Finish sanding the rest of the columns
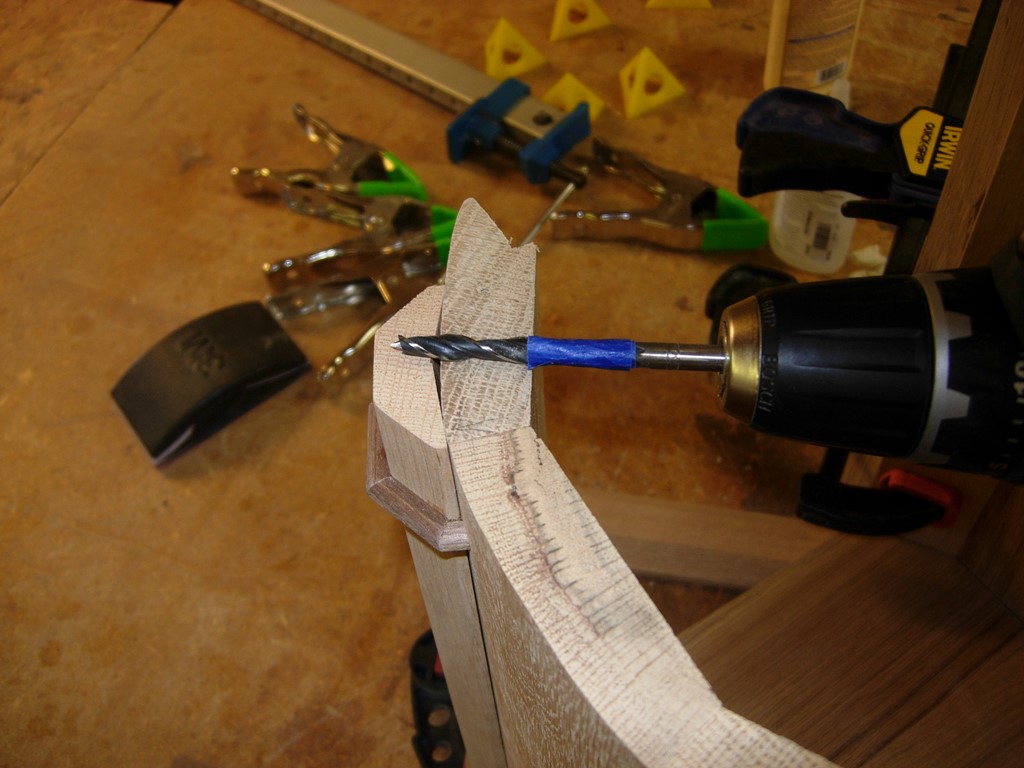
Setting the drill depth
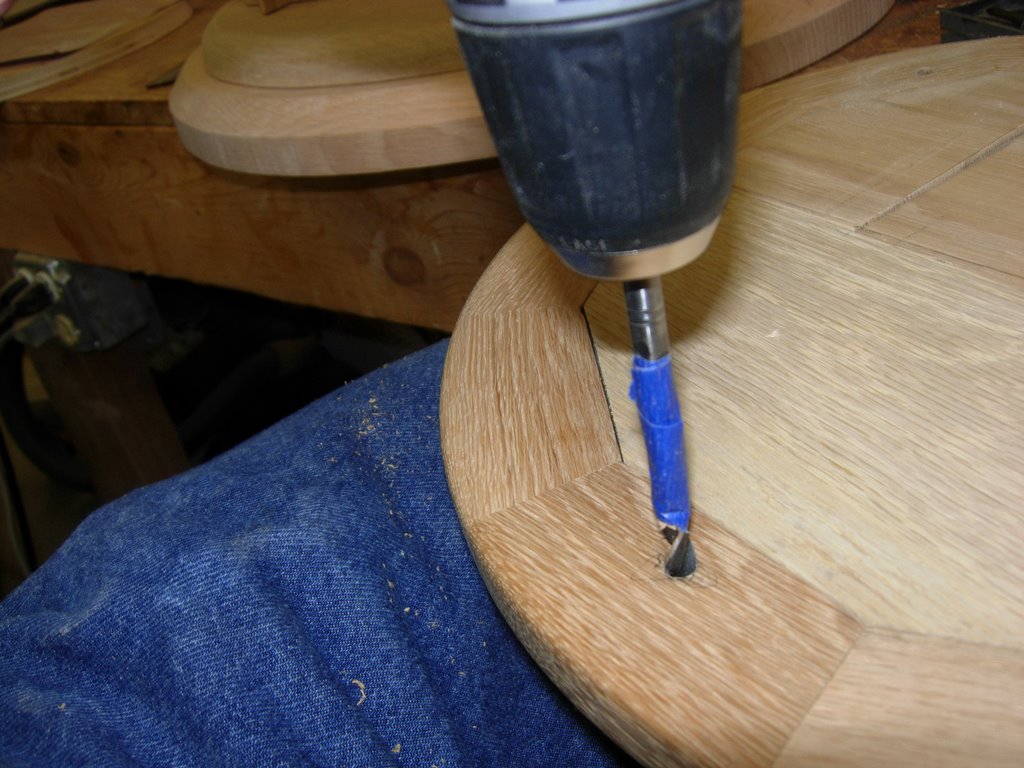
After the first two were dry enough to pull the clamps, I clamped up the other side, then tried to figure a way to make sure the columns stayed attached. Since I cut a large, flat recess into the back to the columns, there isn’t a lot of contact with the main body. I originally, intended to attach them with brad nails, but I really didn’t want to see nails in the columns. I decided to pin the columns in place with oak dowels instead. I set the desired depth in my drill bit with a piece of tape, then drilled a hole about 1″ from the top and the bottom. I used my little 12V screw gun because it was the only drill small enough to fit inside the cabinet.

Drilling fastening holes
I used a scrap splinter of wood to apply glue to the inside of the hole. I didn’t want to push all of the glue into the gap between the column and body, so I used the splinter to apply glue all the way to the bottom of the hole.

Applying glue inside the hole
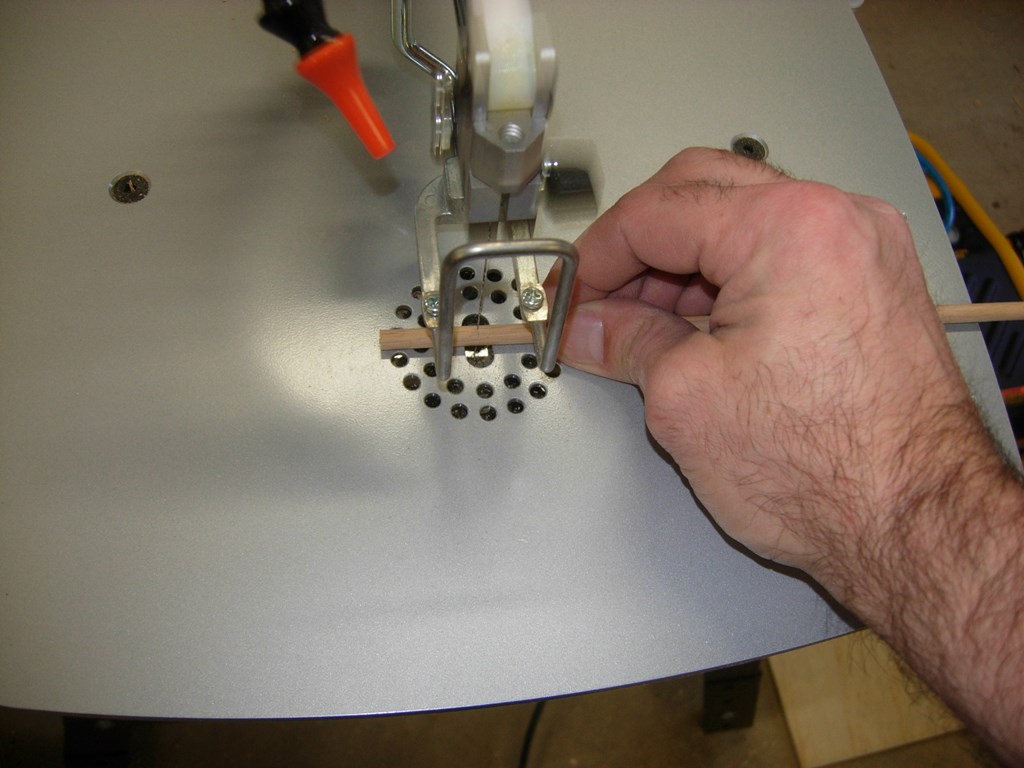
Cutting the dowel pins
I used my taped drill bit to gauge the length of my dowels so that they were the same length or slightly shorter than the depth of the hole.

Press till flush
It is easier to press them in flush, rather than leaving them long and cutting them off, inside a curved cabinet.

One down, seven to go
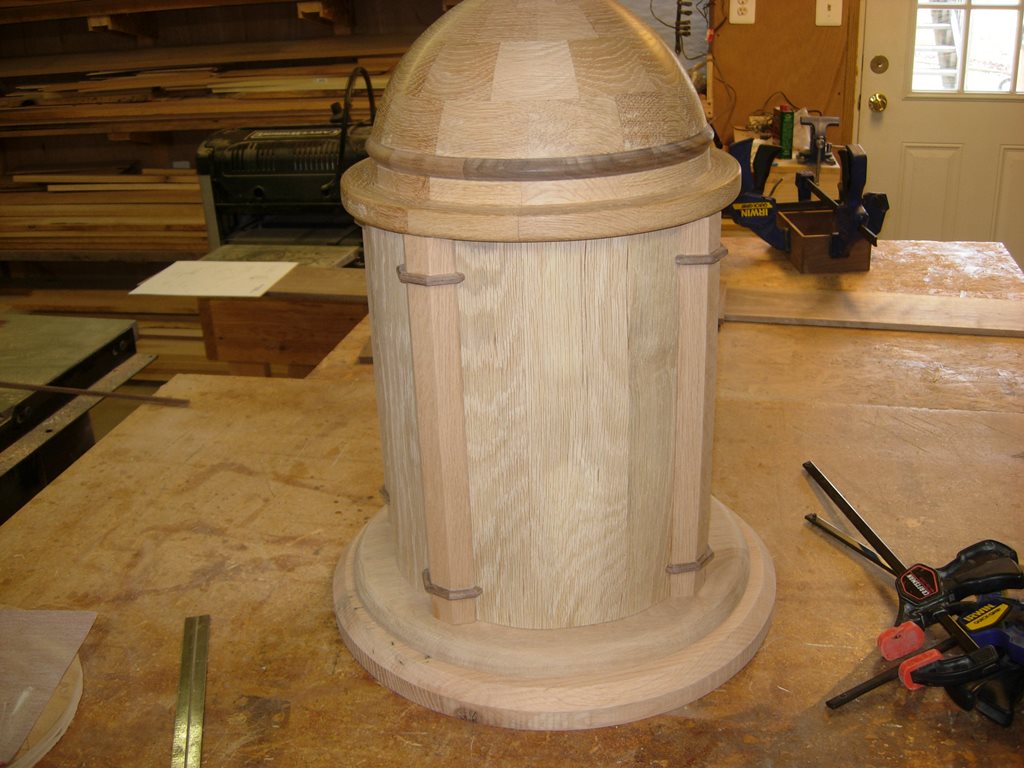
I finished the pins all the way around, then pulled my clamps off of the last two columns.
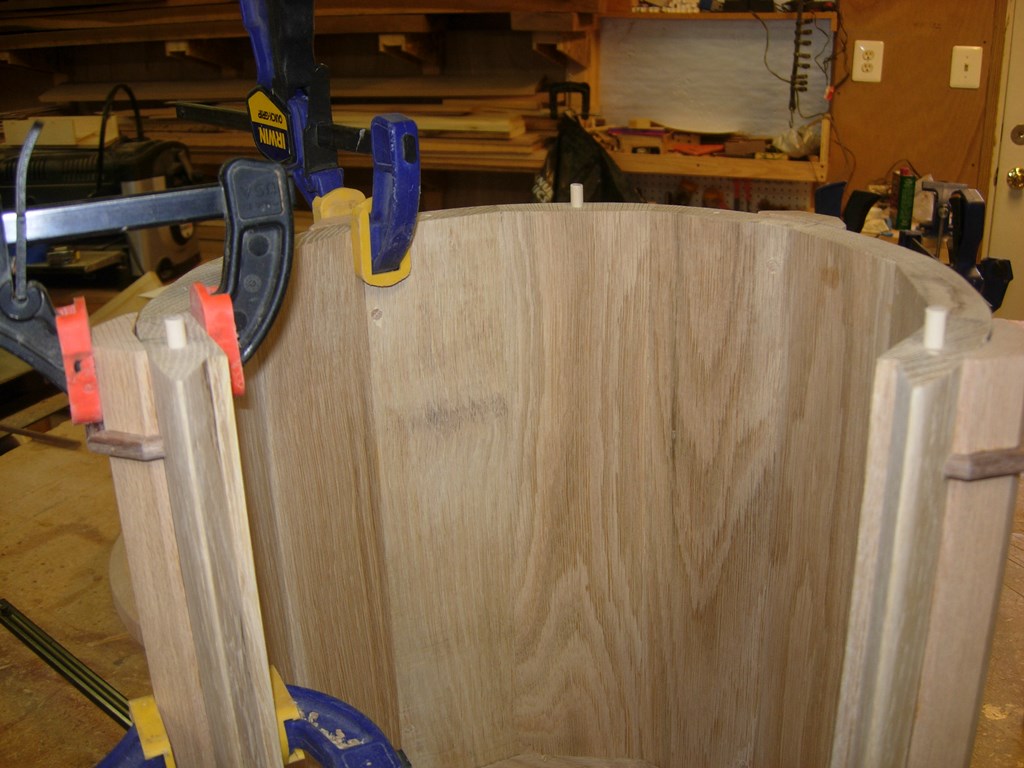
Columns attached and dowels installed
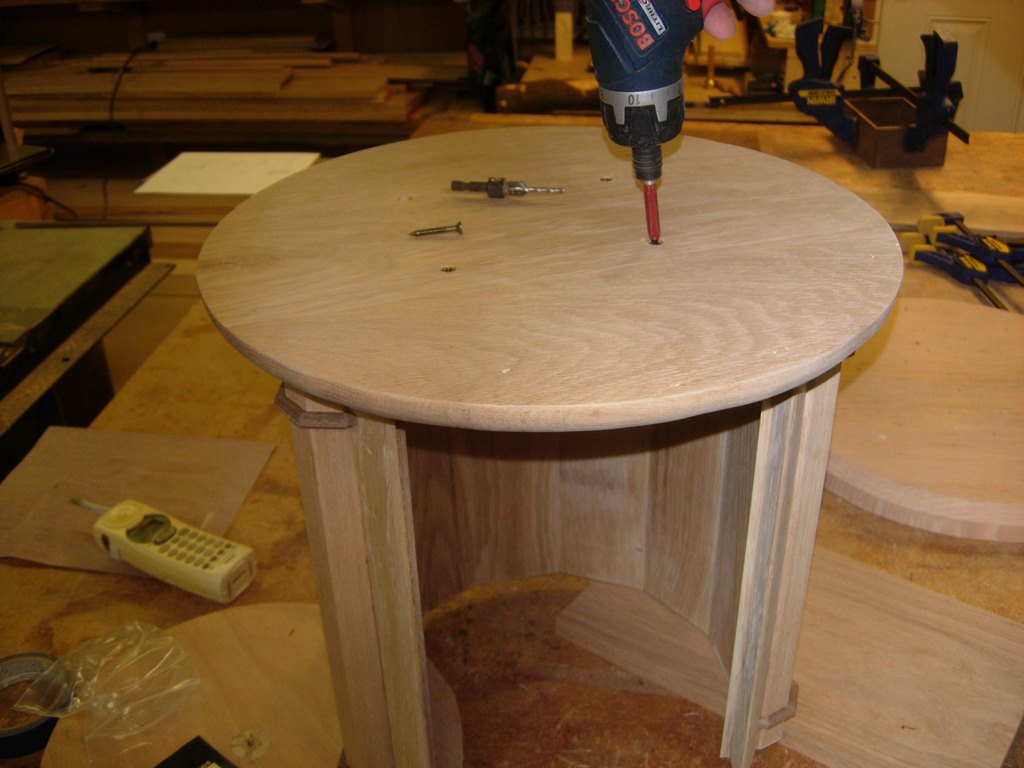
While things were drying, I also drilled and set three dowel pins in the top of the cabinet body and glued them in.

Marking pin locations for the top
I centered the dome on top, then marked the locations of the dowels. I drilled three holes, slightly deeper than the remaining dowel end, in the top at my marked locations.
Drilling the receiving holes
This will enable to remove and replace the top in the exact location. It will also give me something to glue to besides the end grain of the walls, when I do my final attachments.
Dry-fit successful
The next thing I am going to do is work on the door. I will actually need two pieces for the door. I am limited to a 1″ deep carve on the CNC so I decided to create a 3/4″ deep panel that I will mount the hinges to. It will mount flush to the outside of the door opening. Next I want to carve the curved outer part of the door from a piece of 6/4, then laminate the two together.

Finding my big board
I decided to dip into my stash of really good boards for the 6/4 piece so I didn’t have to glue up a panel. I wanted the door to have a uniform grain pattern so it wouldn’t take away from the carving. I only have one piece of wood big enough to use for this panel. It is an 11′ long piece that is 16″ wide. Since it weighs over 150 pounds, I decided to cut it in place on my wood rack. After pulling all of the rest of my white oak off the top of it, I marked a straight cut line with my framing square. Three months back, at the woodworking show, I picked up a Bosch JS572EB jig saw to replace my old $20 Black and Decker one. This seemed like the perfect opportunity to try it out. My old one had trouble cutting through 1/2″ plywood, this baby plowed through in just a few seconds, leaving the edges smooth and splinter-free.

Cutting 6/4 with my bosch jigsaw

Ripping to match door opening
I also grabbed a short scrap of 4/4 oak, that was slightly larger than the door, for the inner panel. I planed both boards down to the required thickness.

Planing down both door panels
I cut the inner panel 1/8″ shorter than the required opening, but the 6/4 board, I cut about 6″ oversize.

Cutting the board 6″ oversize
The CNC moves the board on traction belts, but it holds the work down with rollers. It is possible to cut a piece the exact size, but it won’t be held under the rollers when the cut gets within 3″ of the edge. This can be a problem on really detailed stuff. If the board is slightly bent, the end can pop up, messing up the carve. To avoid this, I just leave an extra 3″ at each end, that I can cut off later.

Fireing up the carver
I loaded up the board and the program, then hit “Start”. The carve is set to “optimum quality” so it will take about 6 hours to carve. I put on my head phones and got back to work. (that sucker is loud)
Attaching the base to the body
Before I can locate the hardware for the doors, I need to ensure that the base is more permanently located. Since I want to have the ability to remove it, I am going to use 4 wood screws, counter-sunk and set with the heads below the surface.

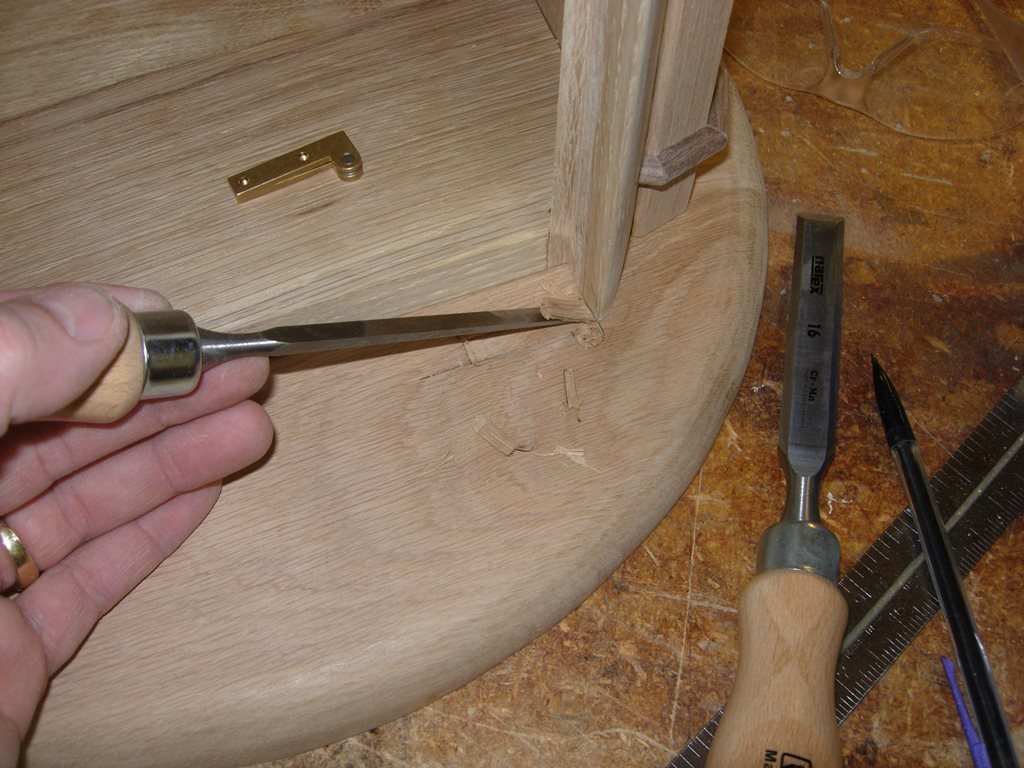
Marking the knife hinge locations
I am going to use knife hinges for this application. I intend to recess them 3/4 of the way into the wood. I won’t set them all the way flush because I want the door to have a bit of clearance, so it will swing freely. I marked the location of the bottom hinge on the base and the bottom of the door, then removed the wood carefully, with my smallest chisel. I used a 5/16″ drill bit to recess the round pivot end.
Carefully cutting out the mortise
I attached the hardware with some #6 wood screws. These hinges are nice to install because they separate at the pivot point. It would be a lot more difficult attaching the hardware with the door still attached.
Attaching the bottom hinge
After testing the swing with the first hinge installed, I found that the inside corner was too tight. I used my block plane to relieve the edge by rounding the corner. The door swung a lot more easily after that.

Planing a relief into the inside hinge corner of the door
With the door in place, I located the top hinge and marked it.

Cutting the mortise in the top
I repeated the mortising process with a bit more difficulty. Since the dome was round, I had trouble holding it still to chisel. I laid some old carpet padding under the top and held it in place with my arm and body while carefully chiseling away at the mortise. I chipped out a bit more than intended, but luckily it will be on the underside of the top so it won’t be visible to anyone over the age of ten (they will be too tall).

Hinge number two set
With the hinge set, I re-assembled everything. The door swung great, but did not close.

Yeah, nearly functional door!
A few swipes of my block plane created a subtle back-angle so the back edge of the door would no longer hit the jamb.

Planing a back-angle on the closing side
Now the door closes perfectly.

Yeah, a functional door!
I pulled the door back off and located the lock.

Locating the lock
After tracing the outline, I cut away the waste with a chisel.

Cutting the lock mortise
With a little patience, the lock was set and mounted.

Lock installed
Meanwhile the CNC finished the carve. I am not cutting the door panel to size just yet because I have decided to add a bit more to it and I may need the flat edges all the way around to mount it face down on the drill press later. It turned out pretty much like I hoped it would, so I am happy. One less detail to worry about.

6 hours later, the outer door is finished
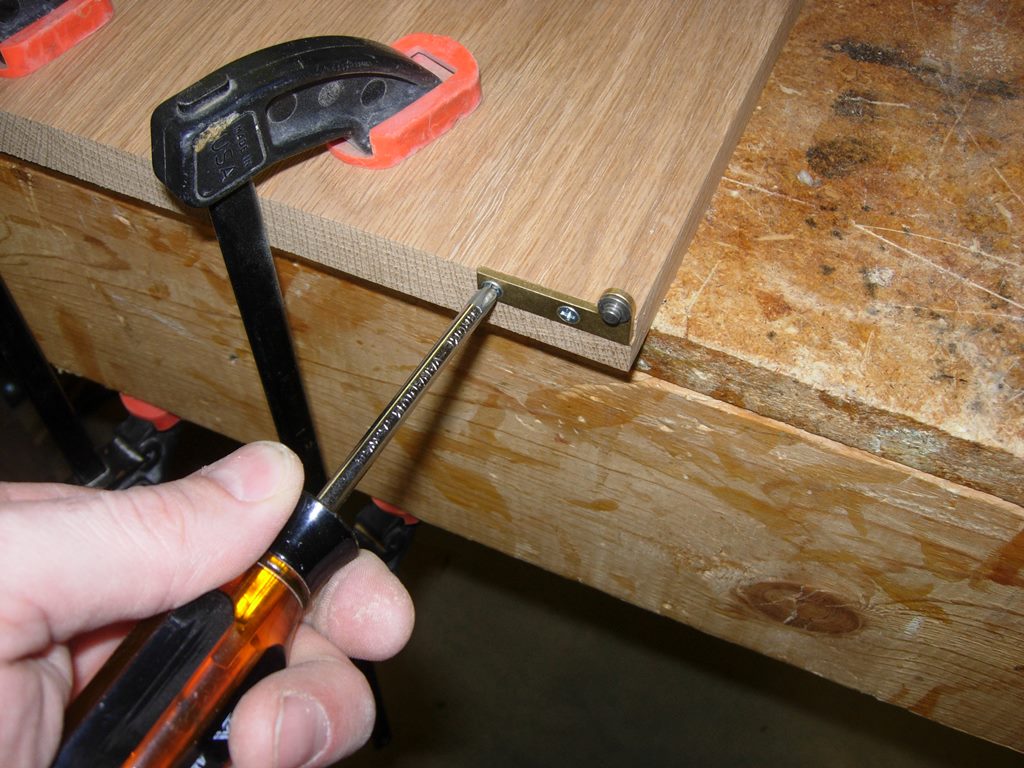
The last thing I worked on yesterday was the mortise for the latch. Being inside an 8-1/2″ wide opening, I can’t drill or chisel out the opening. So I decided to get a little unconventional. I grabbed a self tapping pocket hole screw and used it to start opening up the hole. It actually grabs the wood where you put it and bites in. A drill bit would have slid all over.

Self-tapping screws to start mortise…
After mushing up the area with the screw, I used a chisel, at a bad angle, to cut away most of the splinters, then a small common screw driver to clean and square up the mortise. It is not as pretty as it could be, but perfectly functional.

Cleaning the mortise with a little screw driver
That is all for today. Tomorrow, we should be back on Rob’s humidor, then back to the tabernacle the following day.

Done for the day

Breath taking … What a gift God has blessed you with Lawrence!
Looks fantastic, the “Big Guy” upstairs is smiling down on you.
WOW! Lawrence, what an amazing skill with such stunning results! Thank you for sharing in photographic detail. The tabernacle already hints at its final beauty!