
Maple and walnut blanket chests – day 8/9
I was going to post yesterday’s work this morning, but I was having trouble with the computer I was using. So you get today’s post and yesterday’s post all rolled into one…

Pre-drilling the screw holes
I had thought to pre-install the hinges as well as the lid supports. That way they would go in easily when the wood was finished.

Attaching the hinges
I pre-drilled and located everything, but the screws are tiny and wanted to strip out easily. I switched to a screw driver to avoid this. I will not be pre-installing the hardware on the other one. I don’t want to risk ruining any of the screws, since they don’t give you extras.

Screwing the hardware in by hand
The lid supports did not impress me at all. They hold the lid straight up, but not at any other angle. They had some mixed reviews on Rockler’s web site, now I know why. They would probably be alright, except they also fail to prevent the lid from falling backwards as well. The lid is heavy, and that could cause things to break and bend if it fell back. I think I will switch to a locking arm instead.

Hardware installed

Raising the grain with water
Since I am planning on using a water-based finish, I need to pre-raise the grain. When water hits the wood, the fibers on the outside swell. So by wiping down the box with water and sanding down those fibers, I prevent it from happening when the finish gets applied.
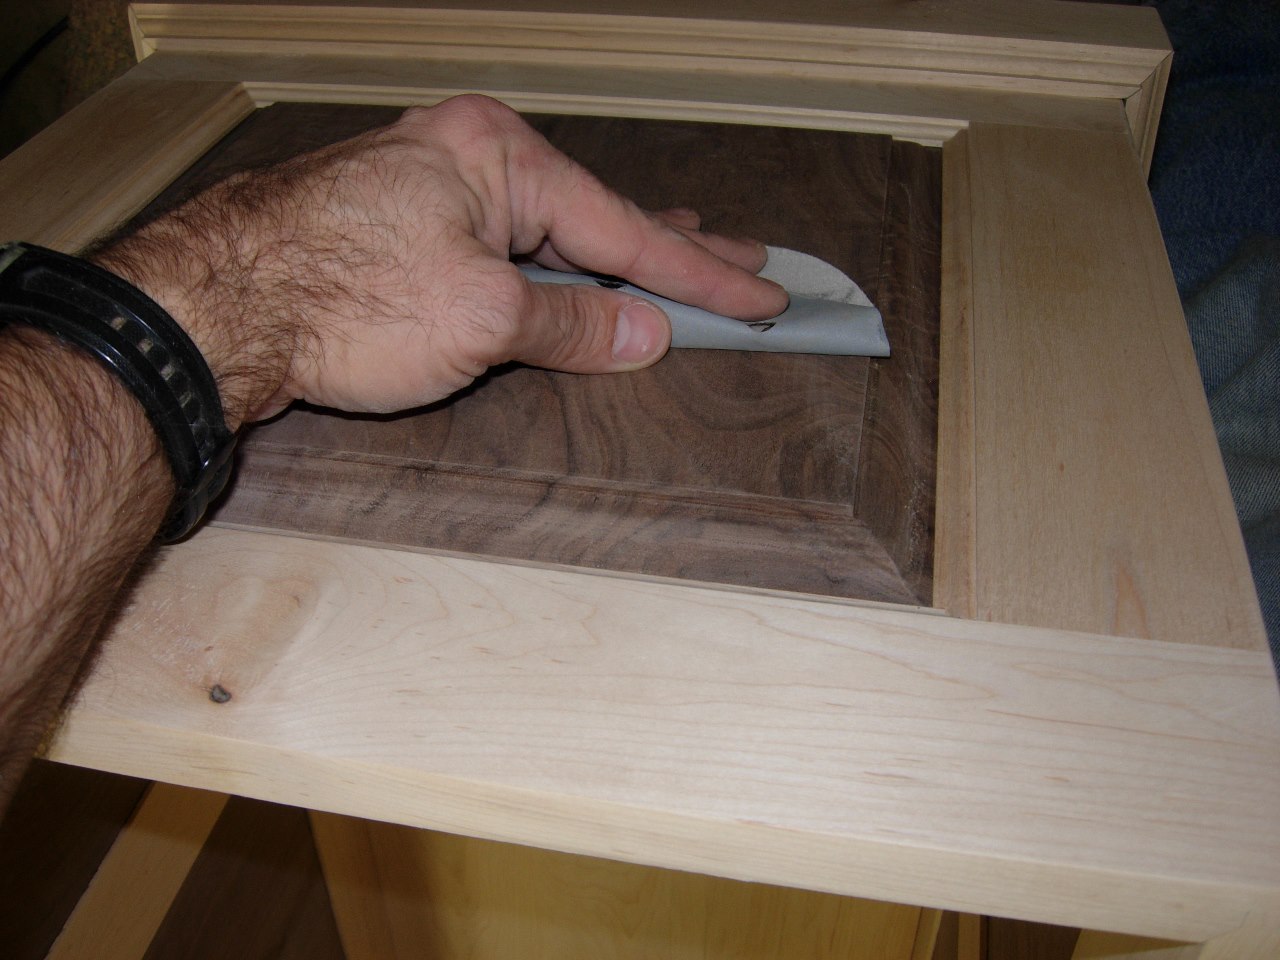
Sanding down the raised grain

My new Earlex 5500 sprayer
I picked up a new tool on my vacation, a couple of weeks ago. It is an Earlex 5500 HVLP sprayer. It is supposed to be extremely easy to use, and give a fairly professional finish.
Temporary spray booth
I had not given much thought to “where” I was going to spray. I originally planned to use the garage, but there is a large pile of maple out there now, and the temperatures have been low at night lately. Too cold for finish to cure. So I cleared some of my tools out of the way and hung a plastic curtain with a couple of clamps and some painter’s tape.

Held up by clamps

The first swipe
I actually read the directions “again” to make sure I was doing everything correctly, then started spraying.

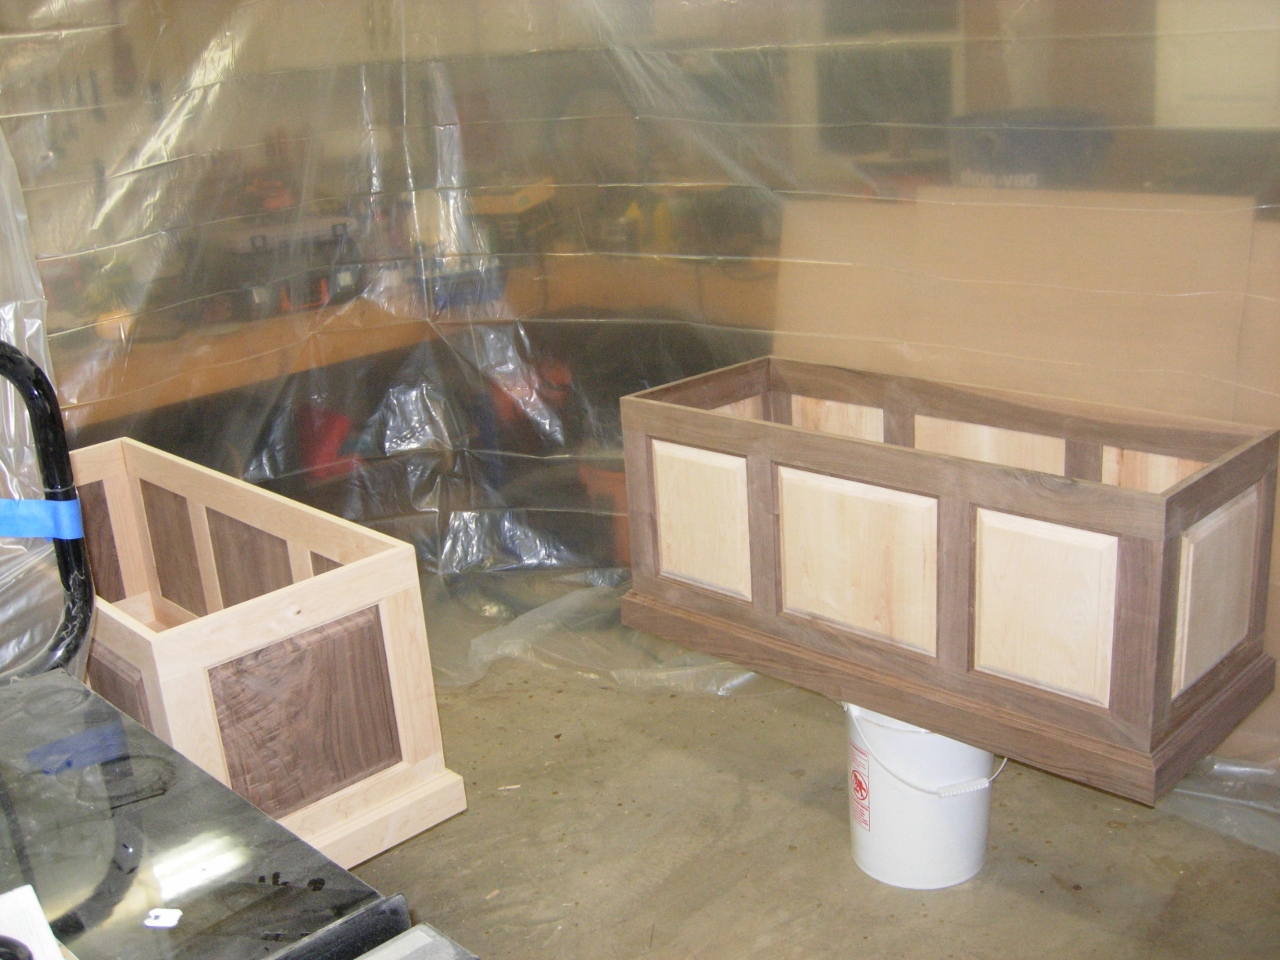
Walnut/maple box done
I didn’t realize how much finish was atomized into the air until I was finished and looked up to take some pictures. It looked like the fog had rolled in. Glad I am using water-based on this project, The fumes from a solvent based finish would have been over-whelming. I guess I should start thinking about installing some form of ventilation if I am going to be spraying…

Maple/walnut box done
The spraying went very quickly, 30 to 40 minutes and I was done. Since it is still early, I may go back down for a second coat later tonight. We will see how energetic I feel.

First coat of poly applied to both lids
