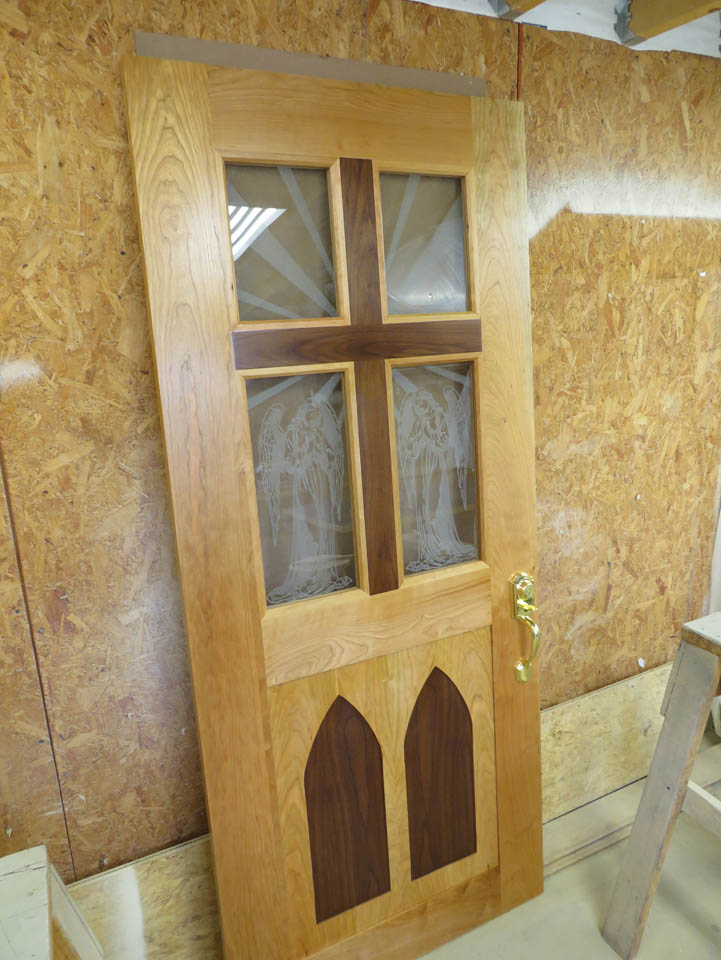
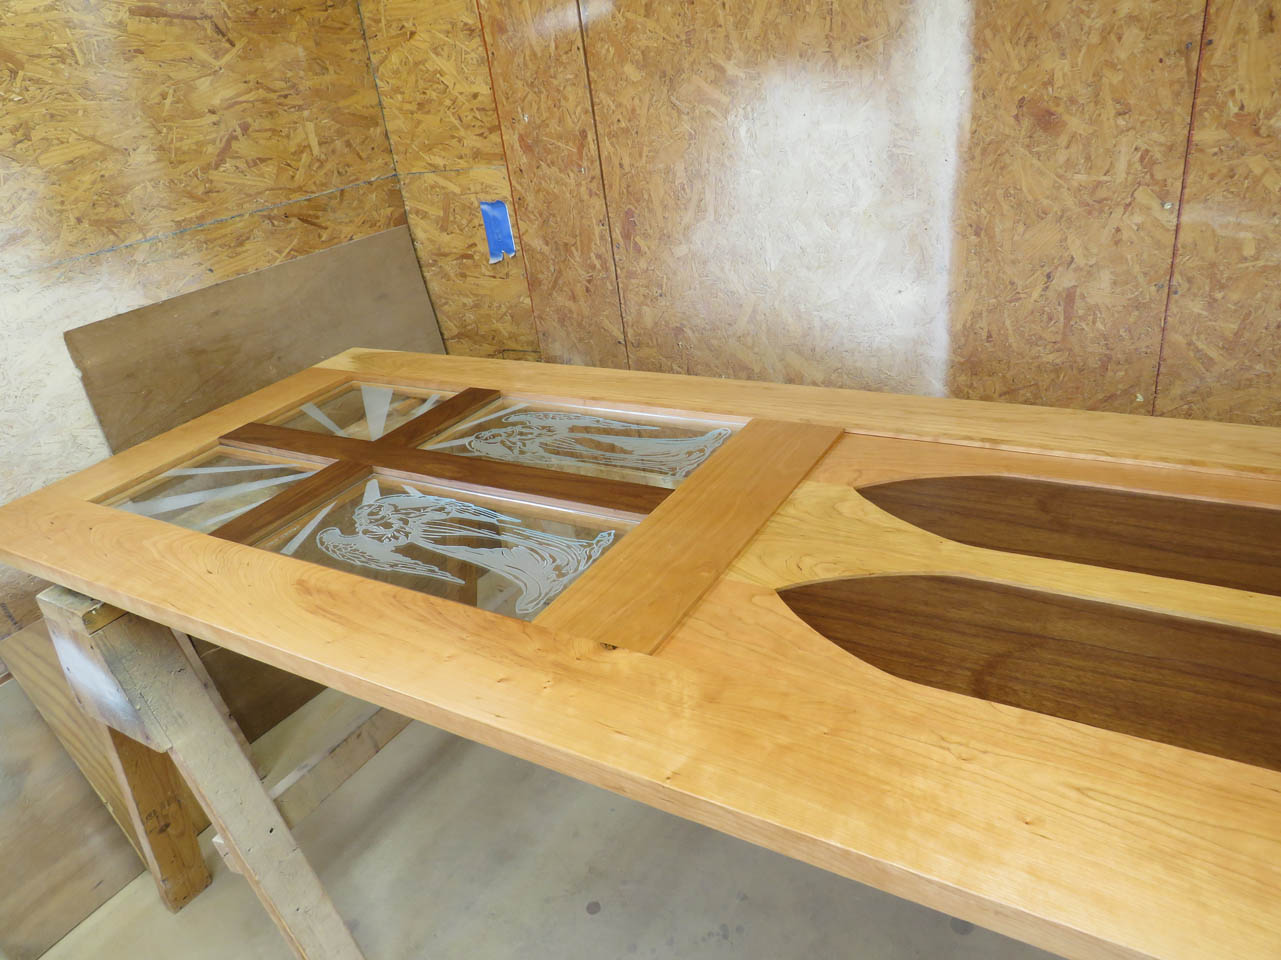
Chapel door with etched glass – part 2
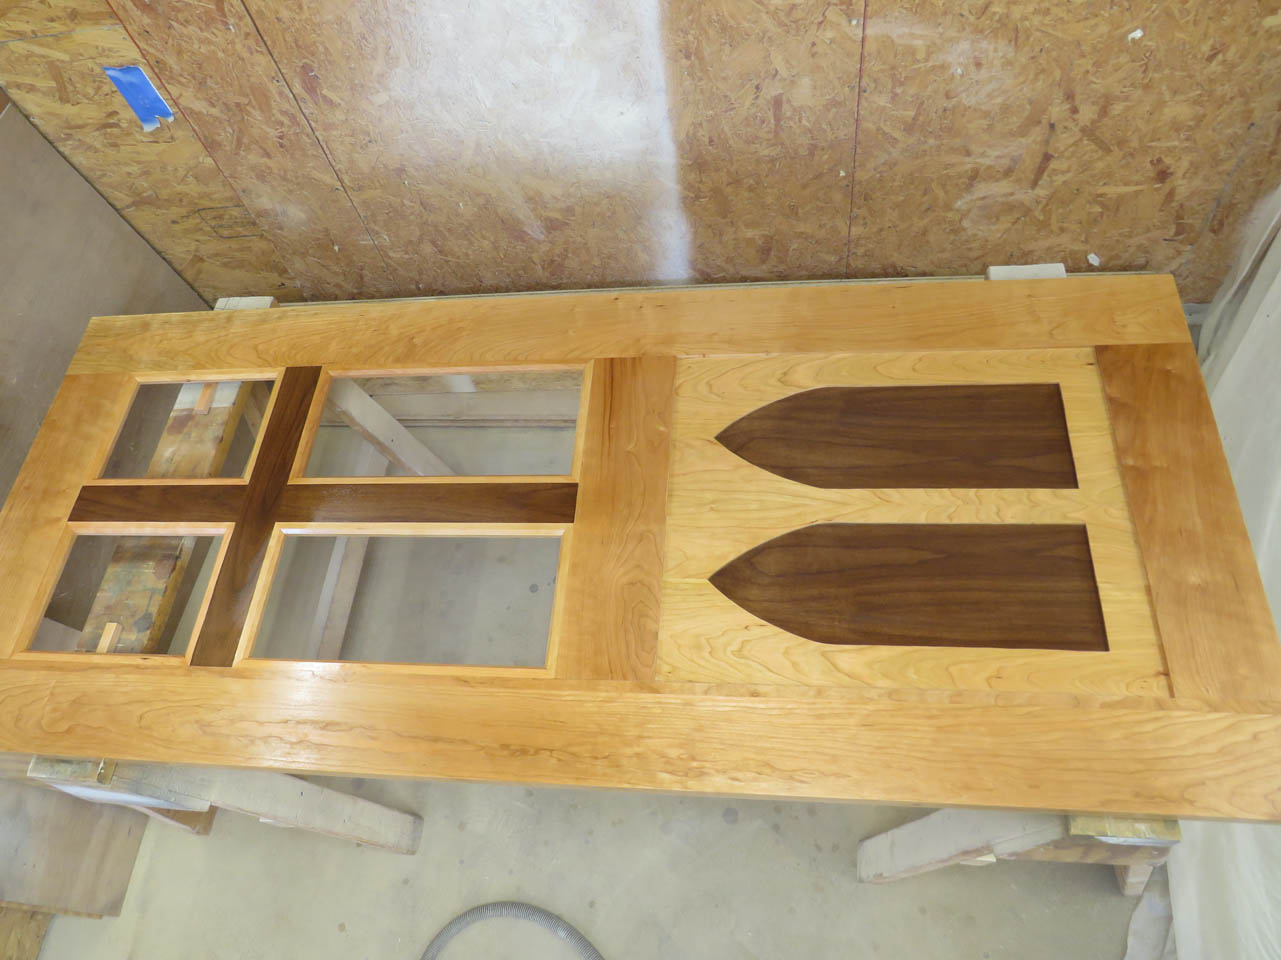
The main door construction is done and my focus now is on the windows. I ordered tempered glass for the four panes that I need. While I wait for that to arrive, I need to trim out one side of the door so that I have a place to mount the glass.
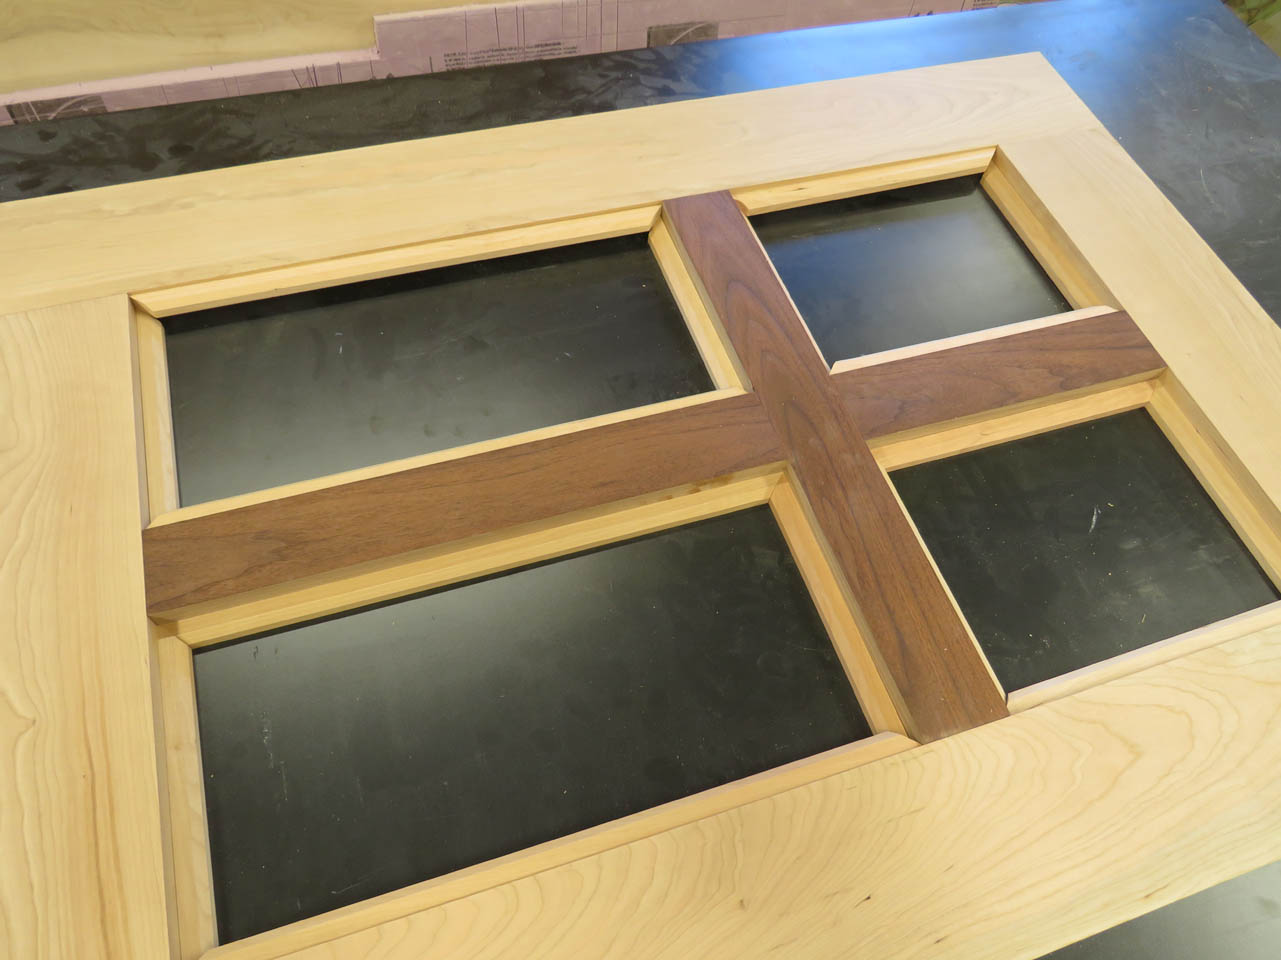
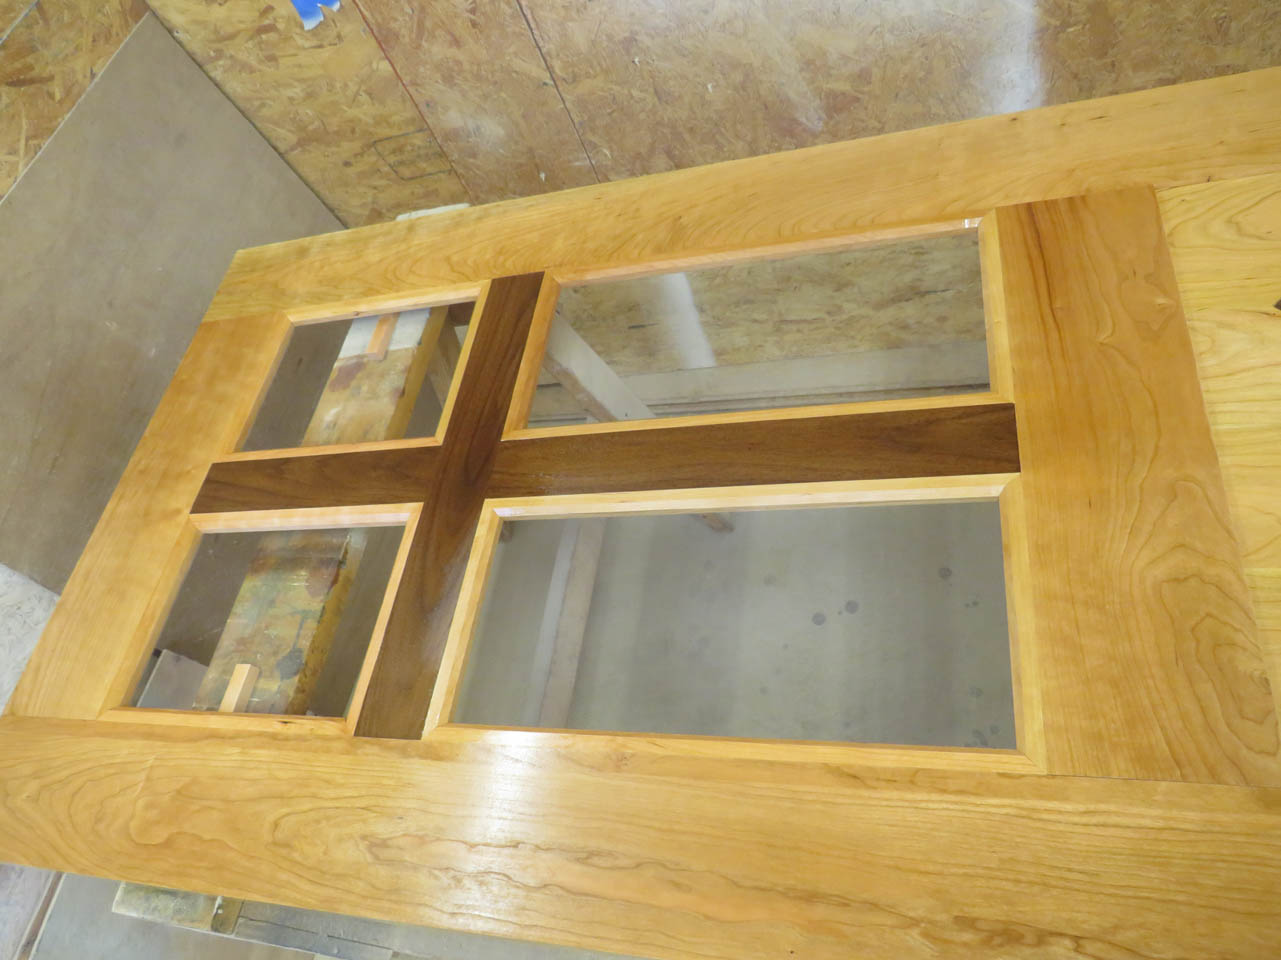
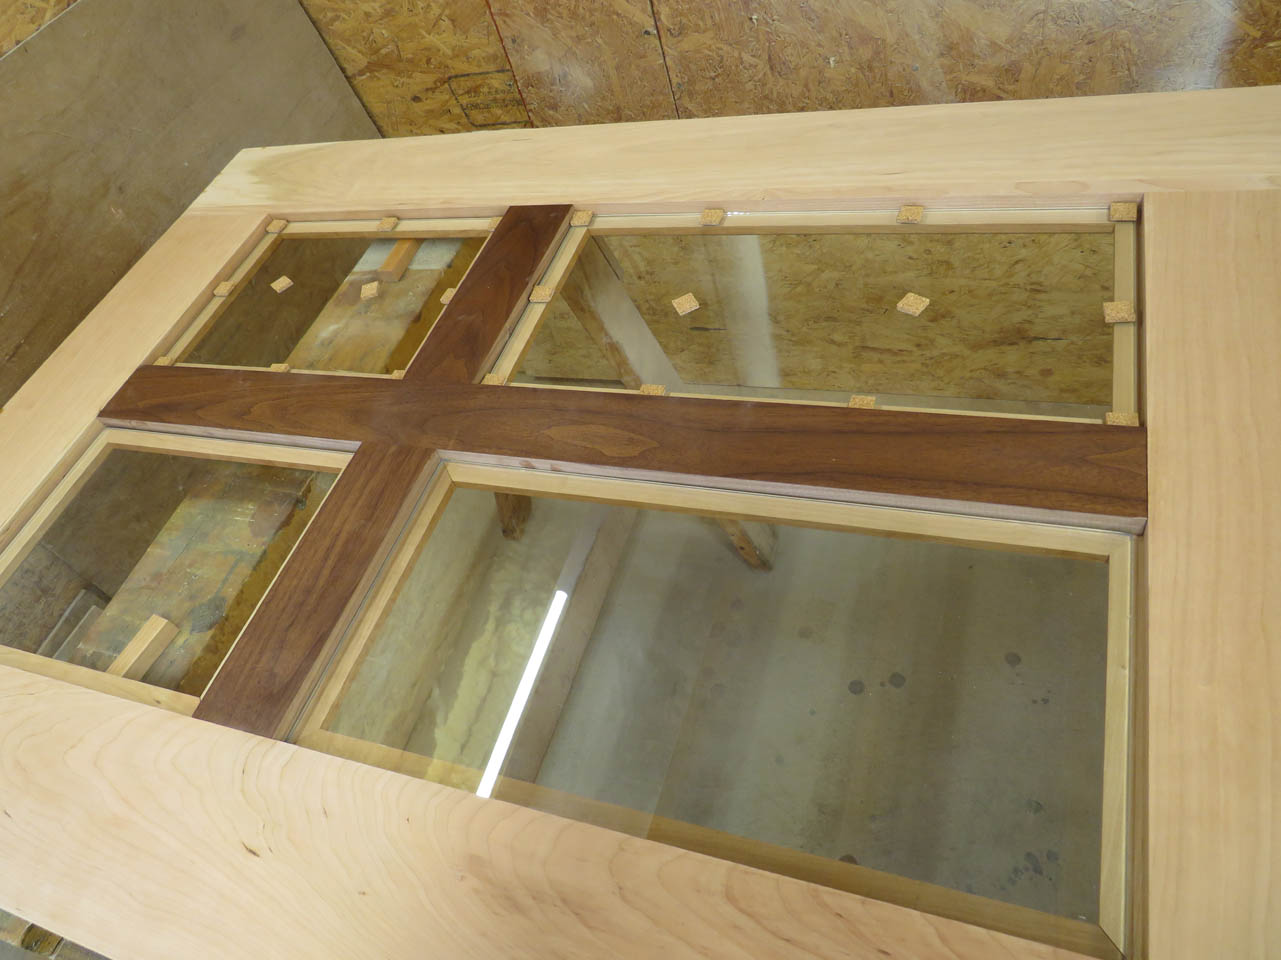
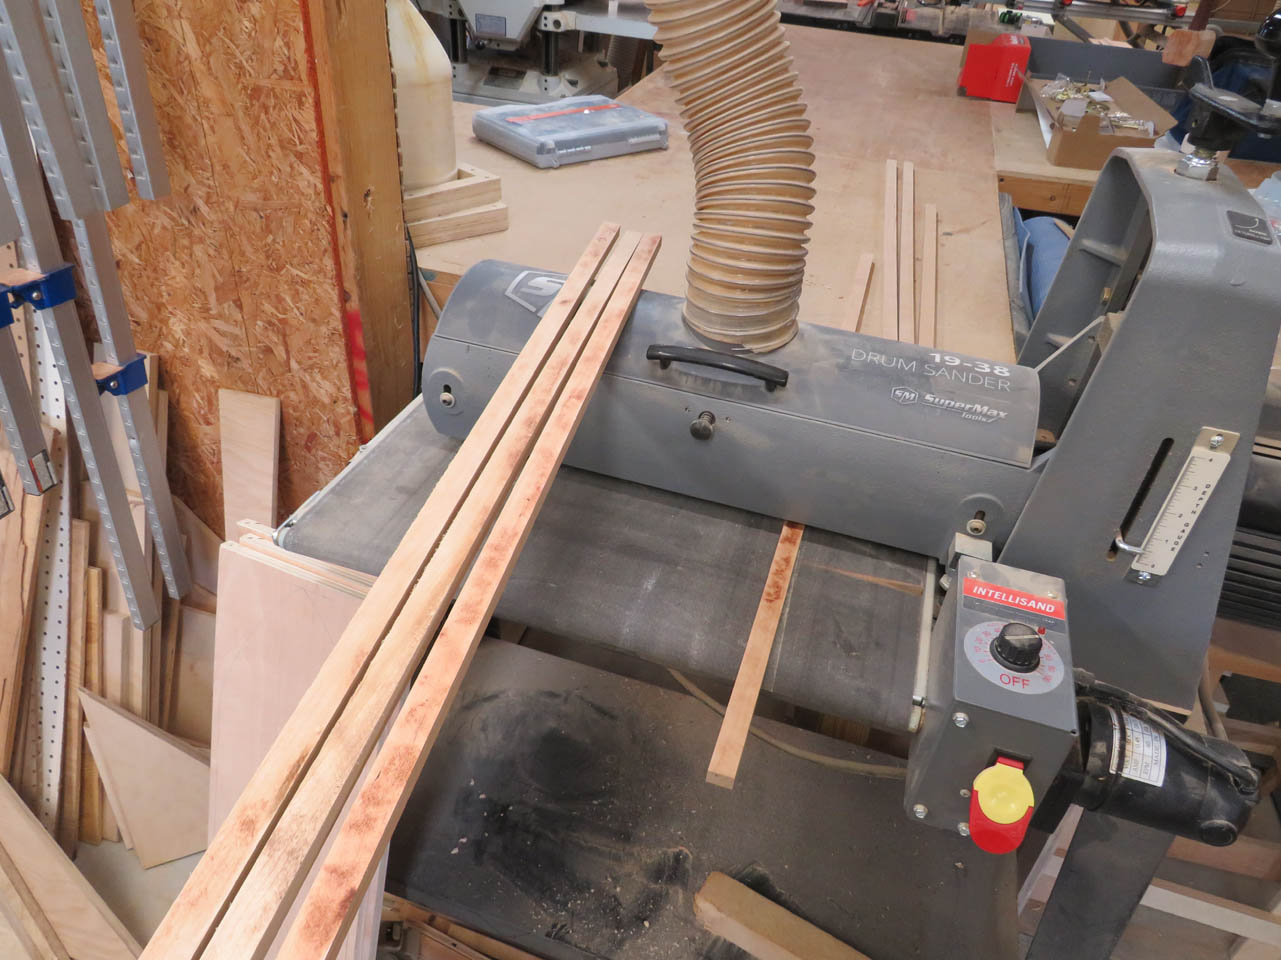
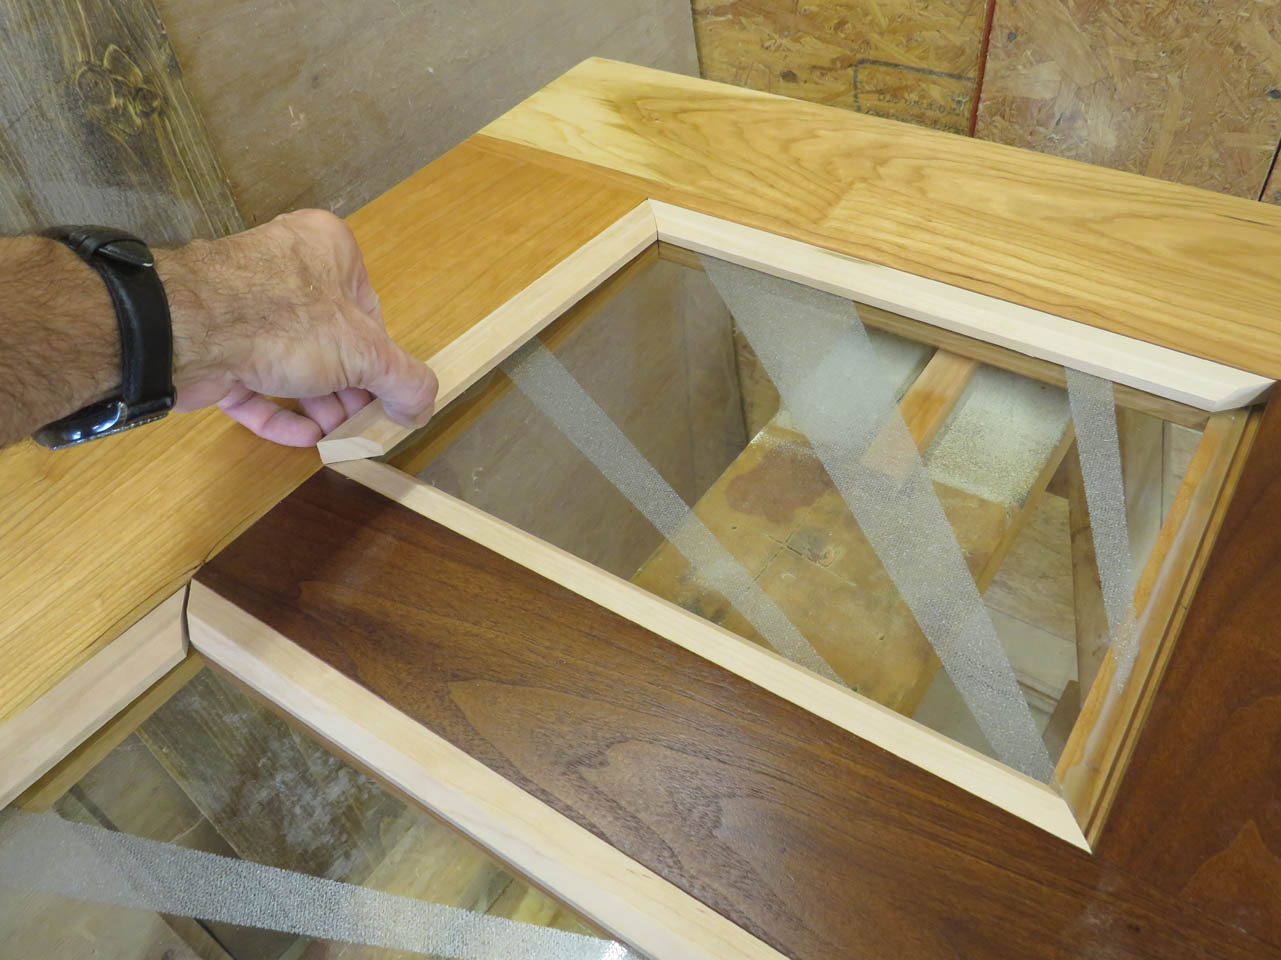
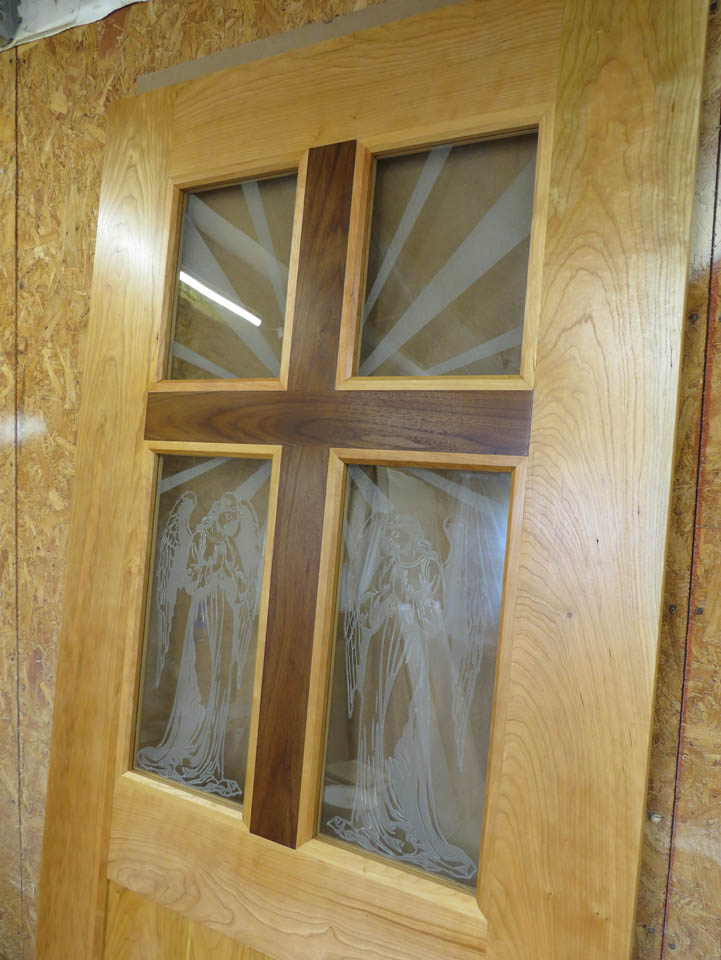
The window trim is 3/4″ wide cherry that will contrast and highlight the walnut cross in the center of the door.
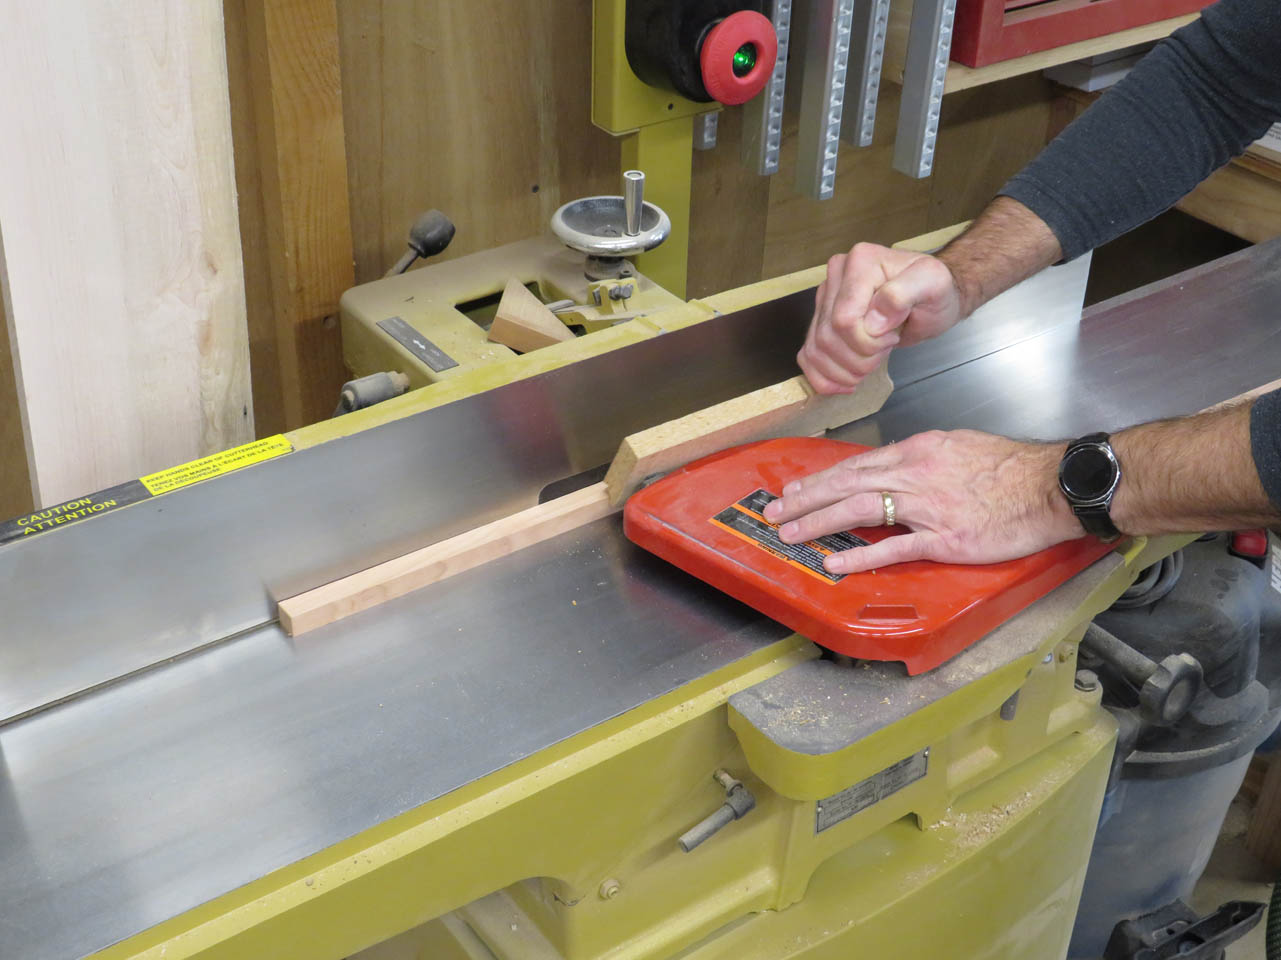
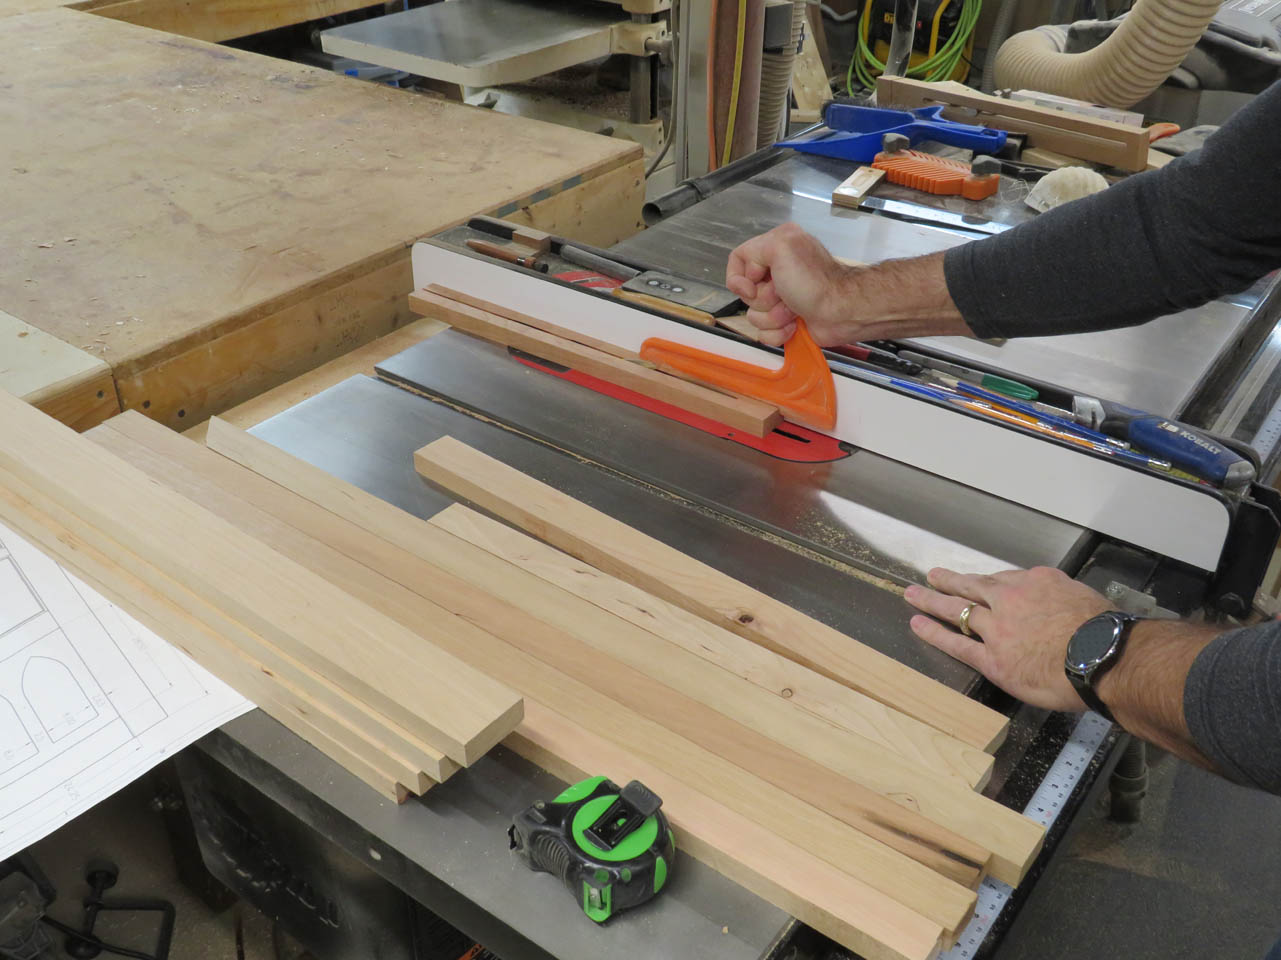
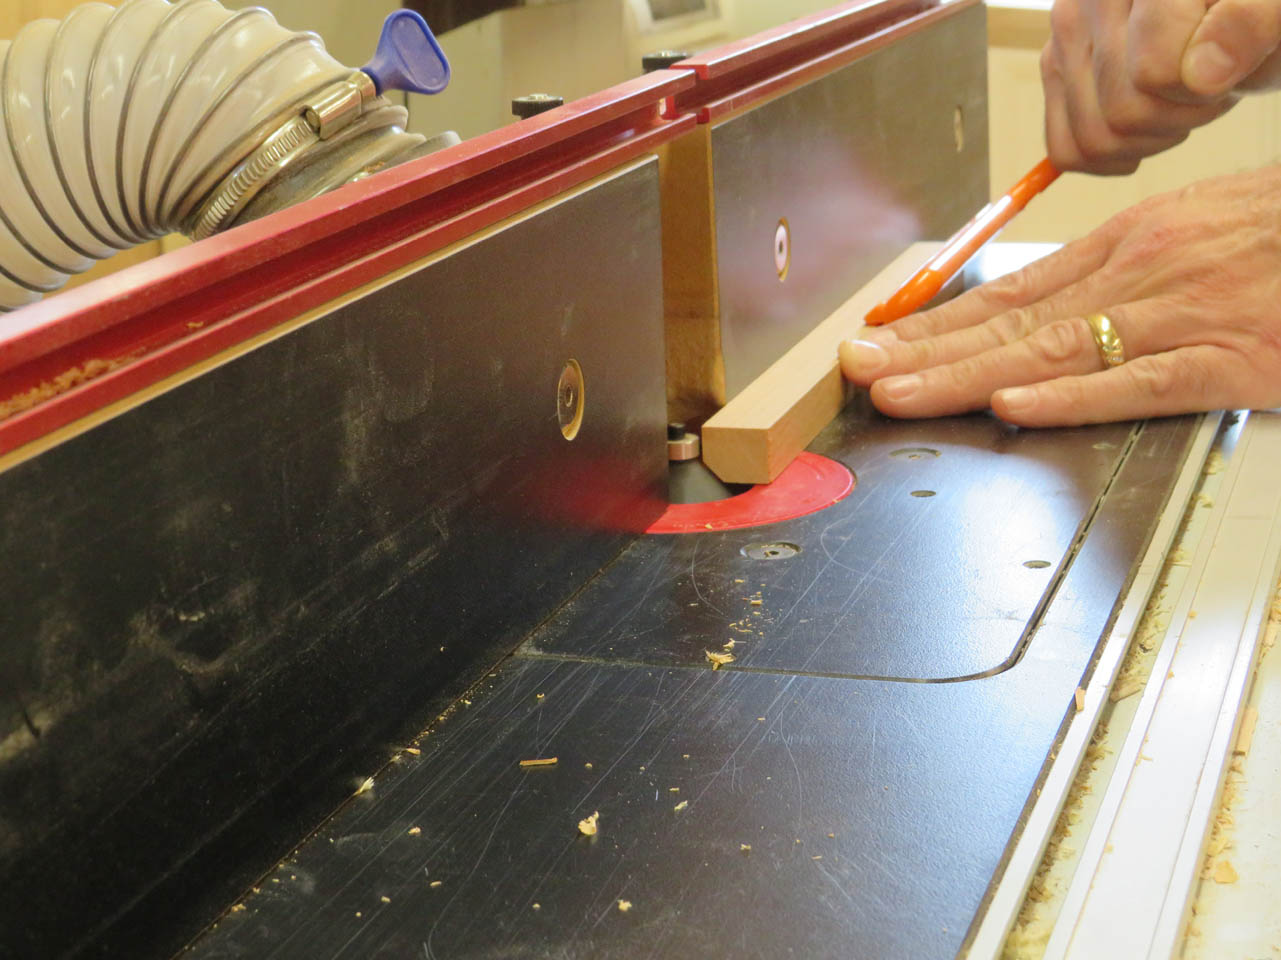
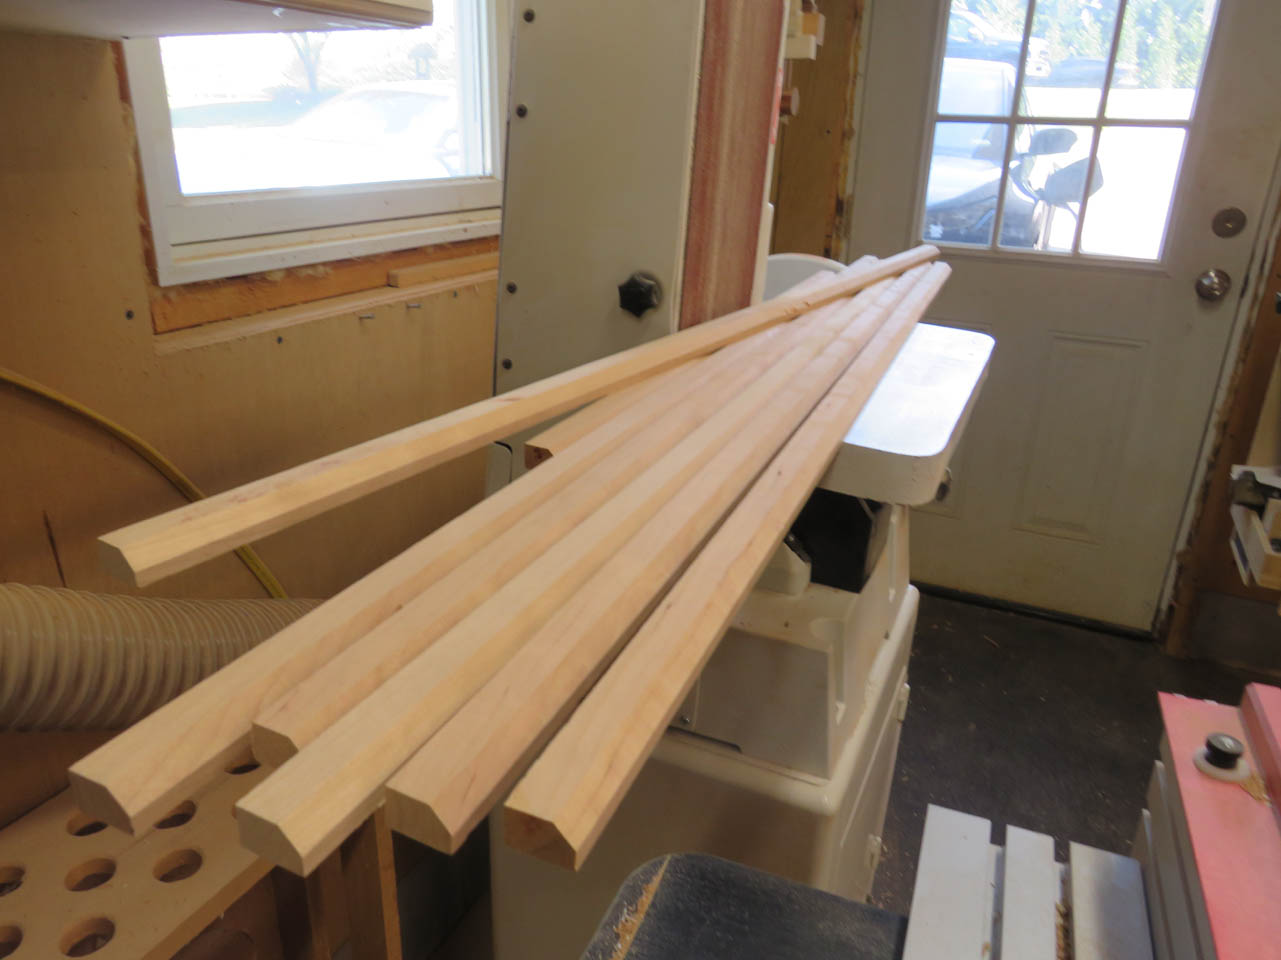
For the front side of the door, I cut 3/4″x3/4″ square pieces of cherry then beveled one edge on the router table, after that I sanded them all and eased any sharp edges.
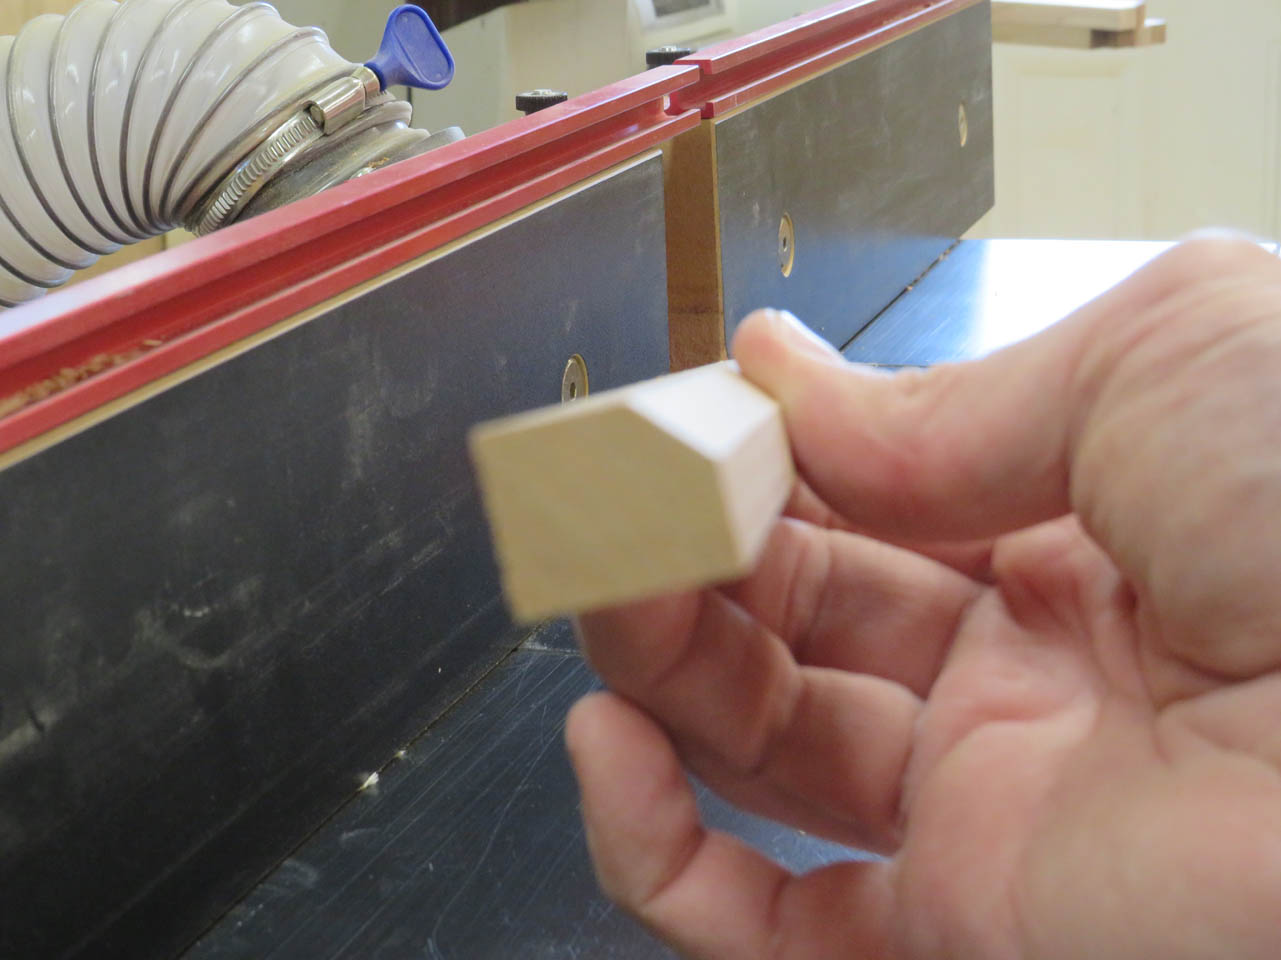
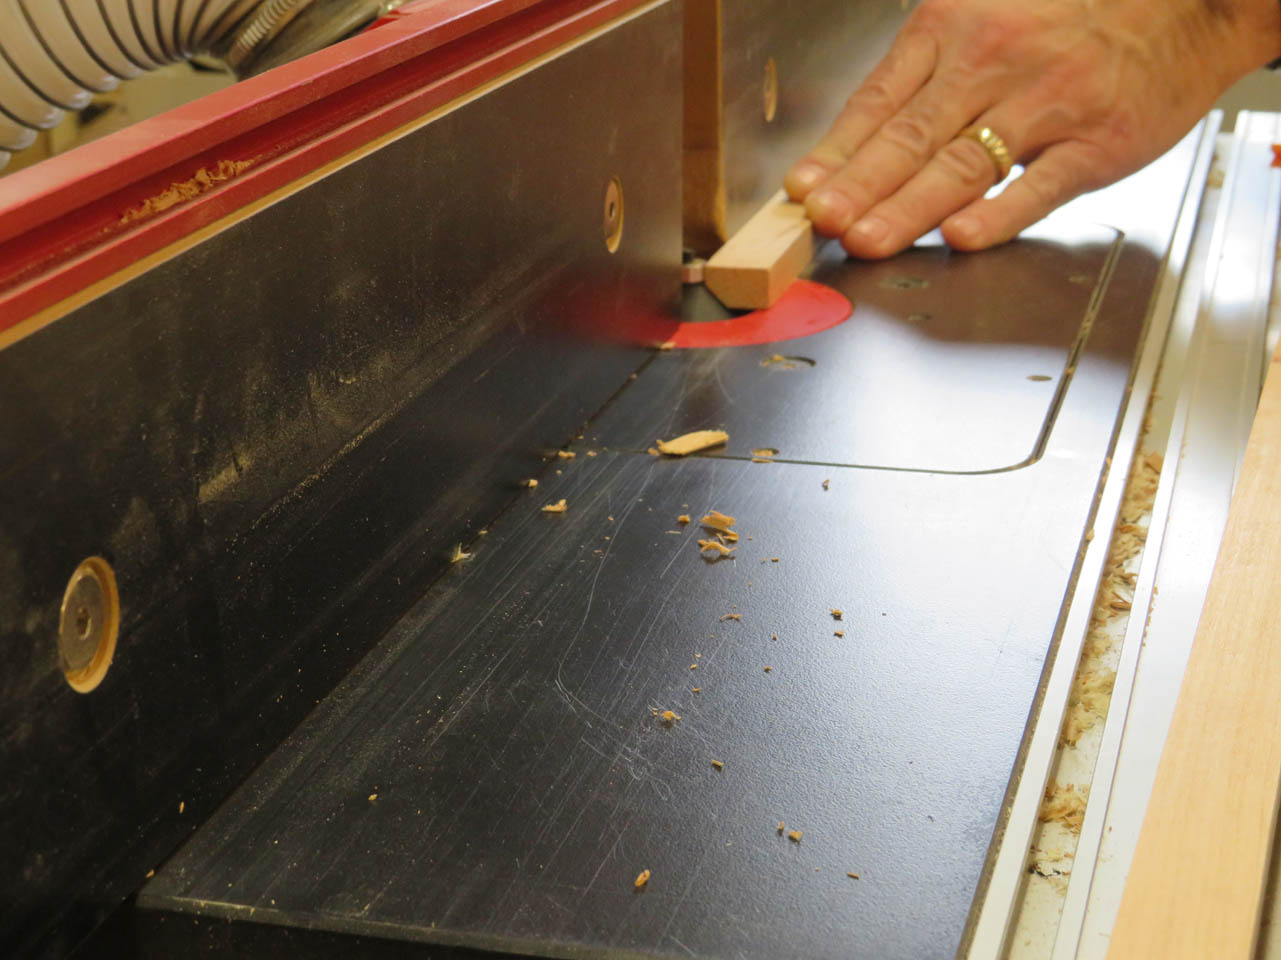
Once the trim stock is made, I can start cutting the 45° miter on one end.
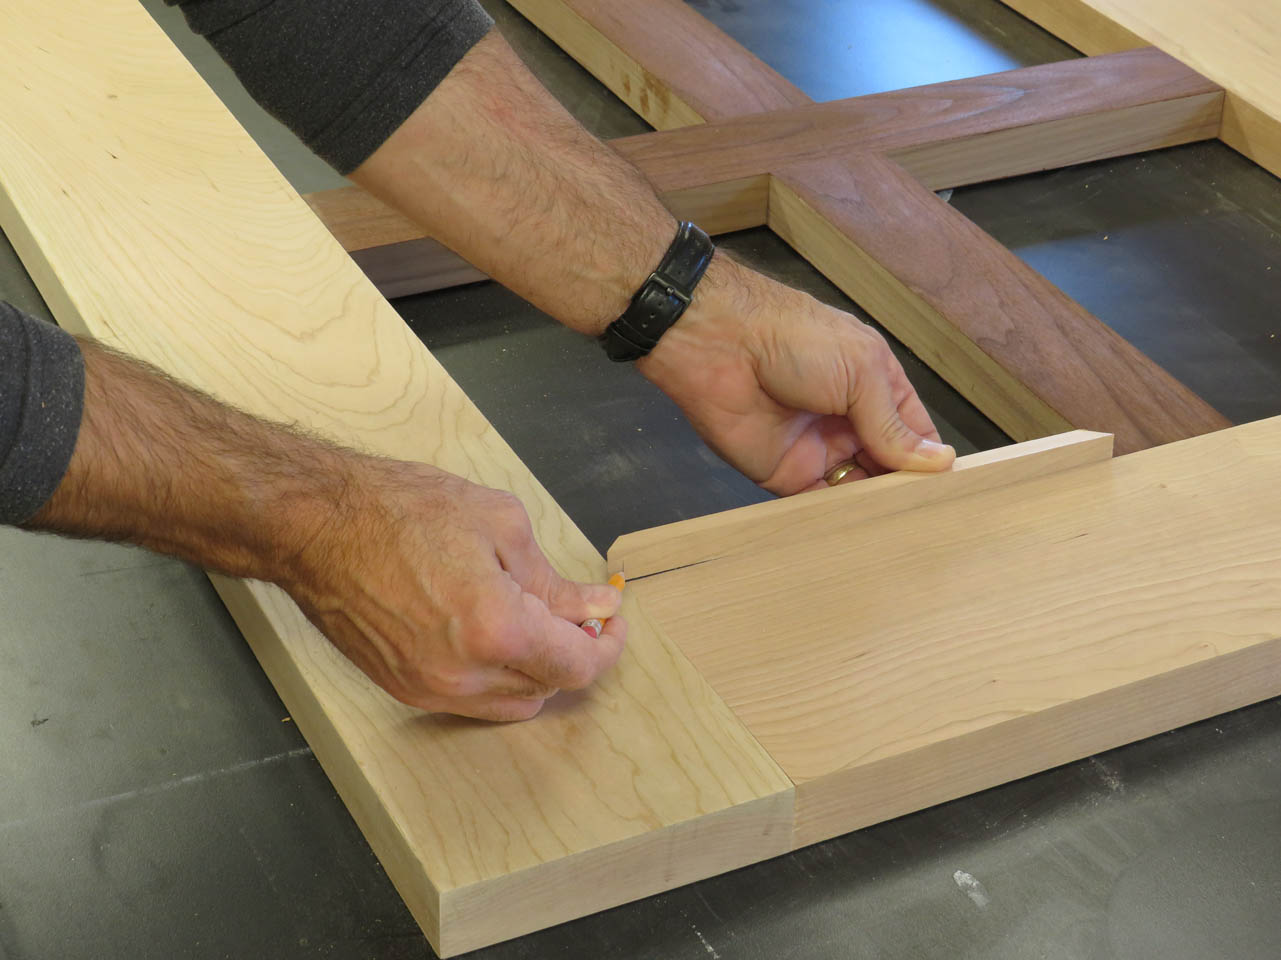
Then I can lay them in place and mark the opposite side.
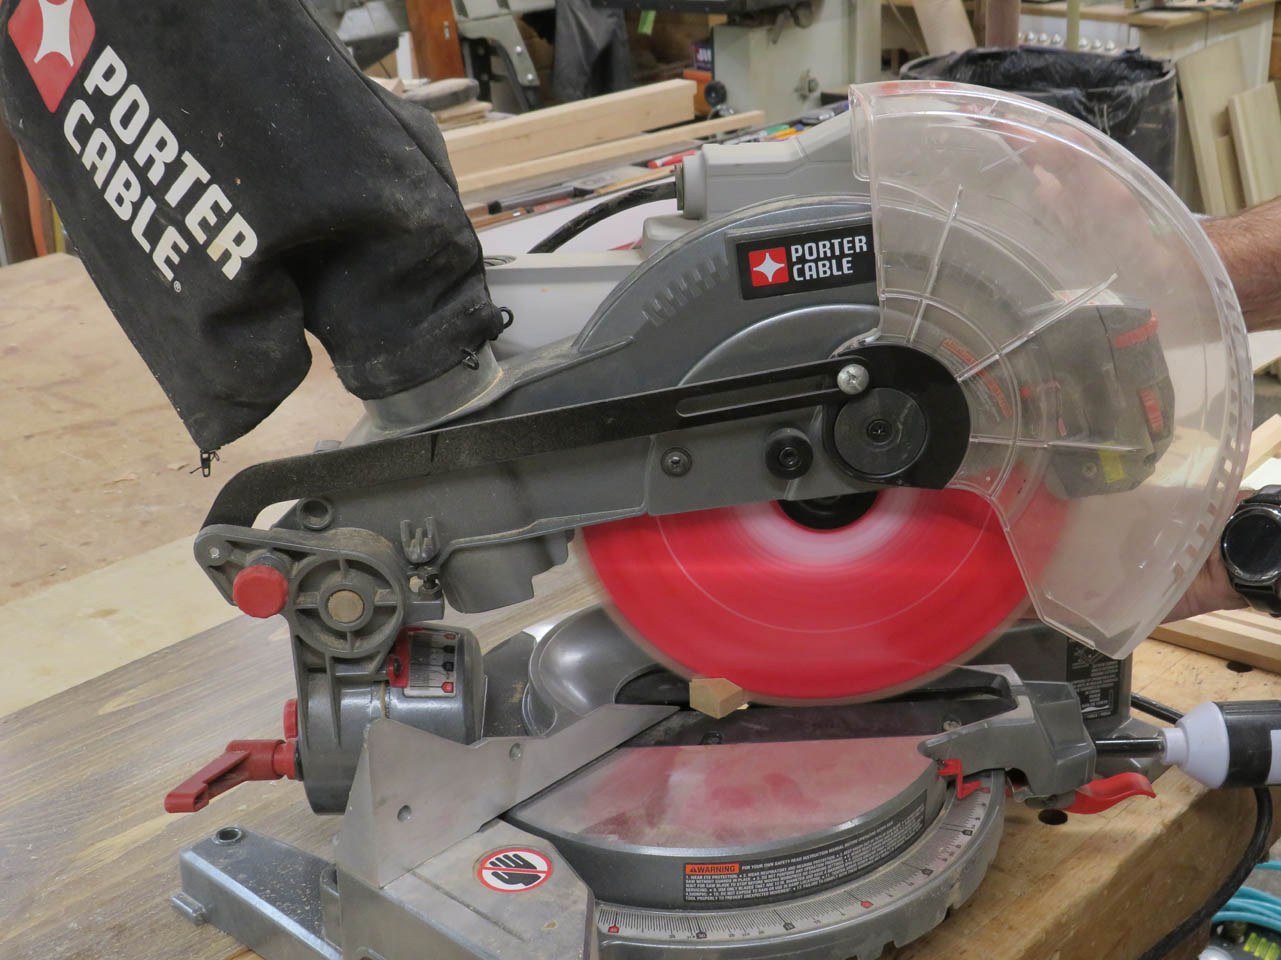
I take my time and over-cut the length for each, then sneak up on the perfect length by shaving off a tiny bit at a time until I get a perfect fit.
This is repeated all the way around each frame.
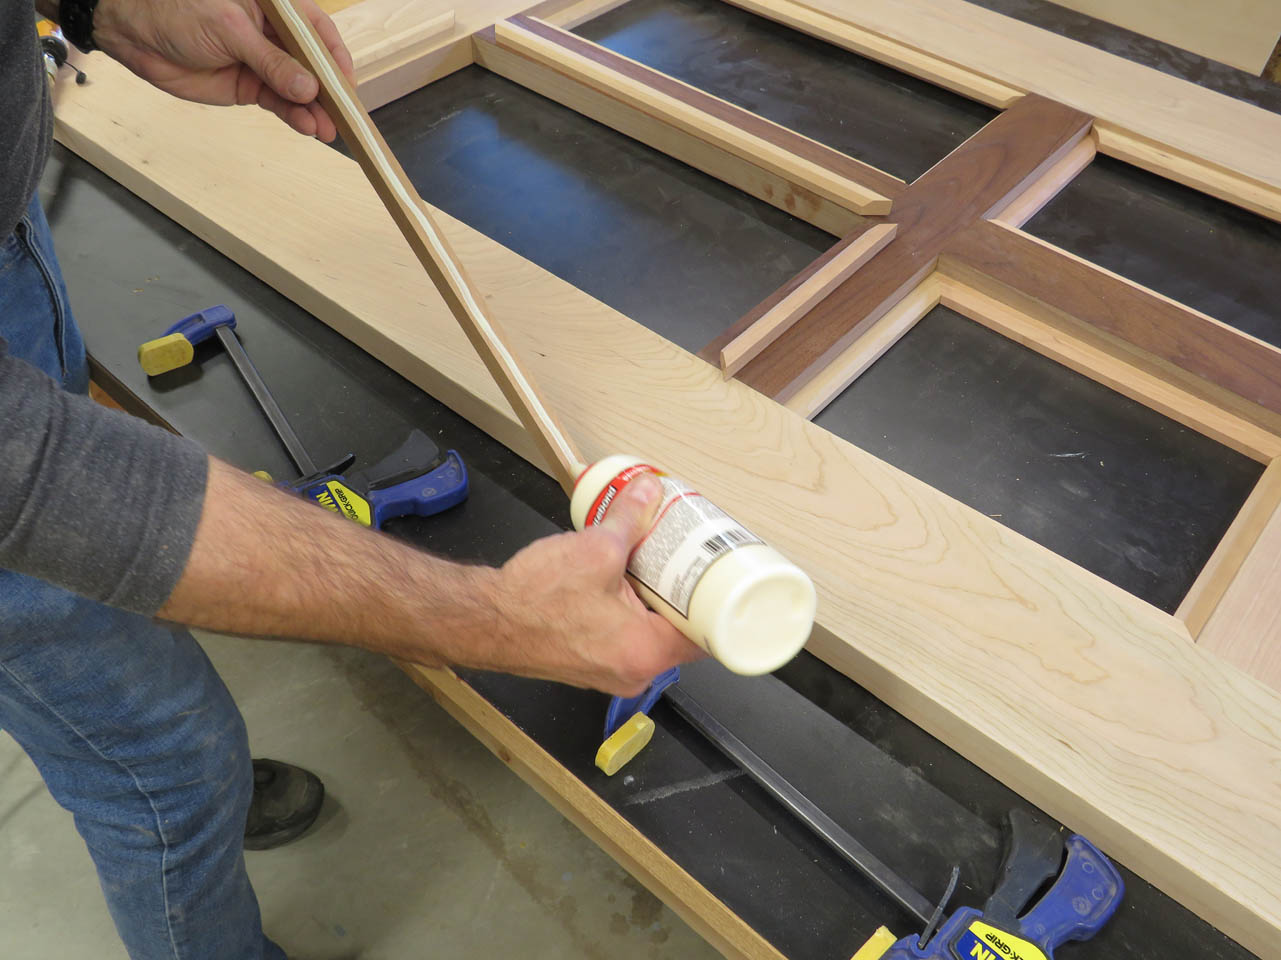
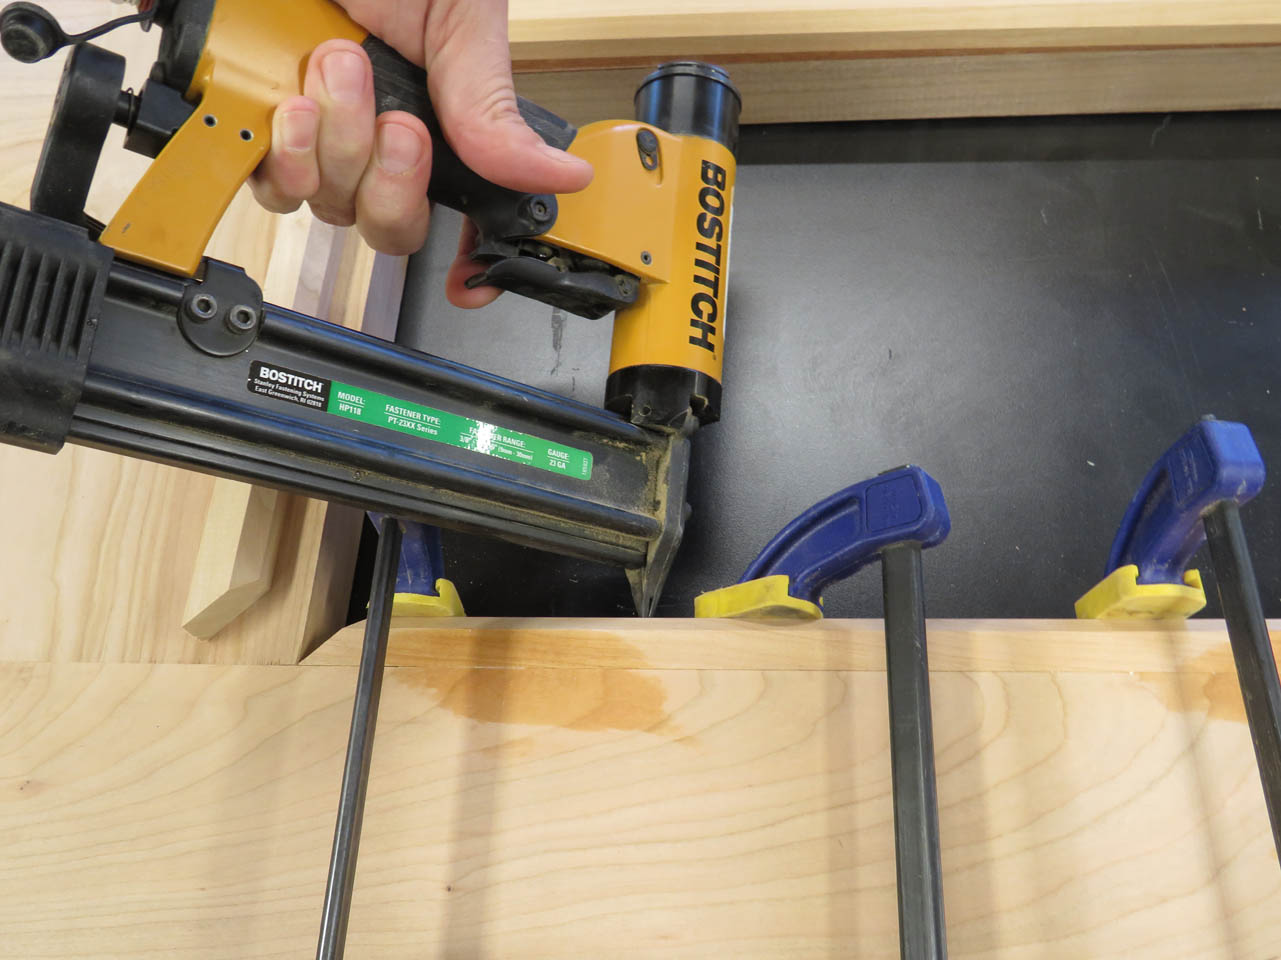
When all the trim pieces are cut, I apply a thin layer of wood glue to one side and clamp the trim in place, one at a time.
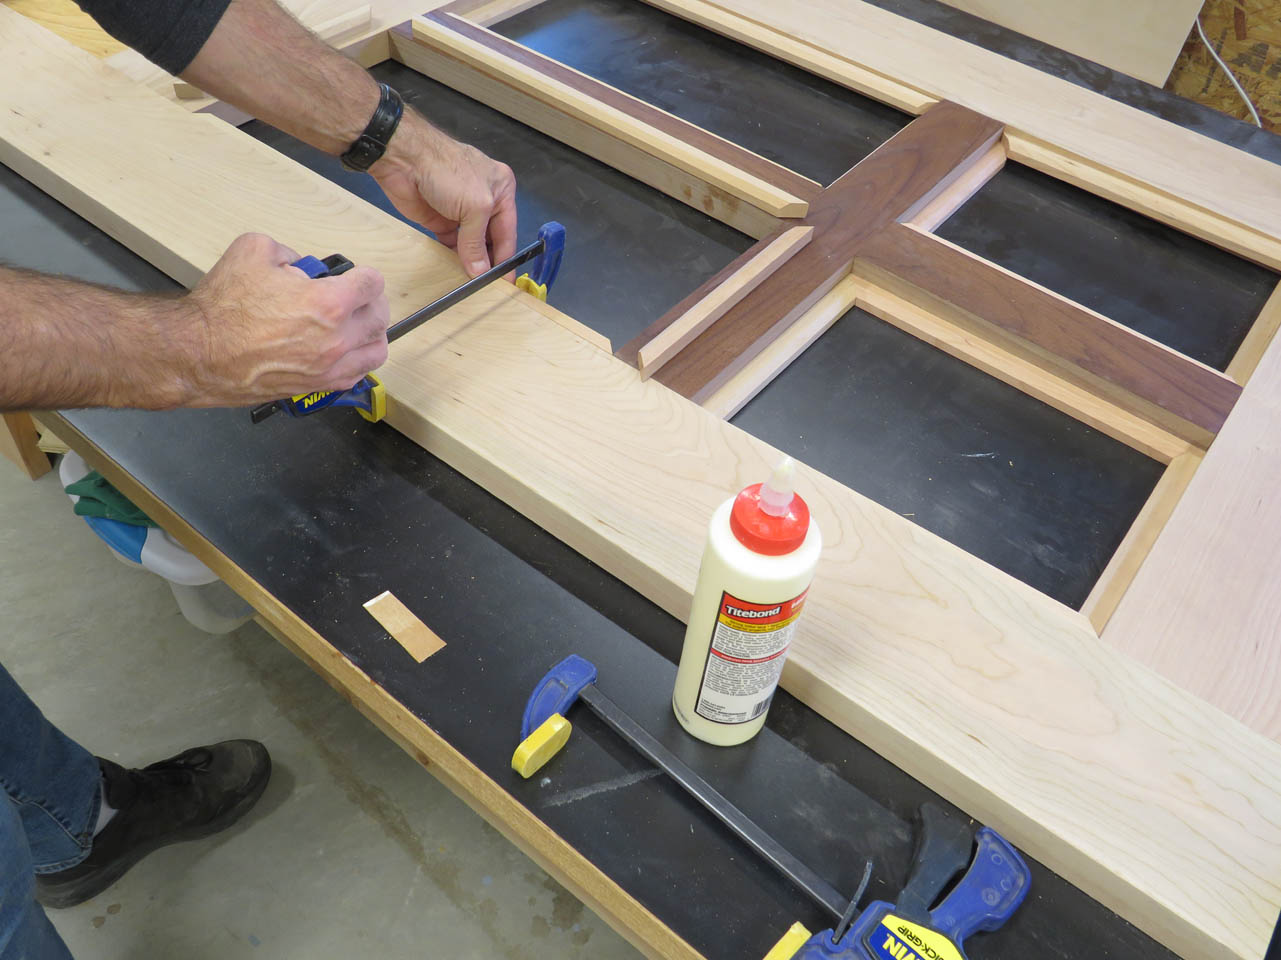
I am careful to wipe away any glue squeeze-out with a wet paper towel.
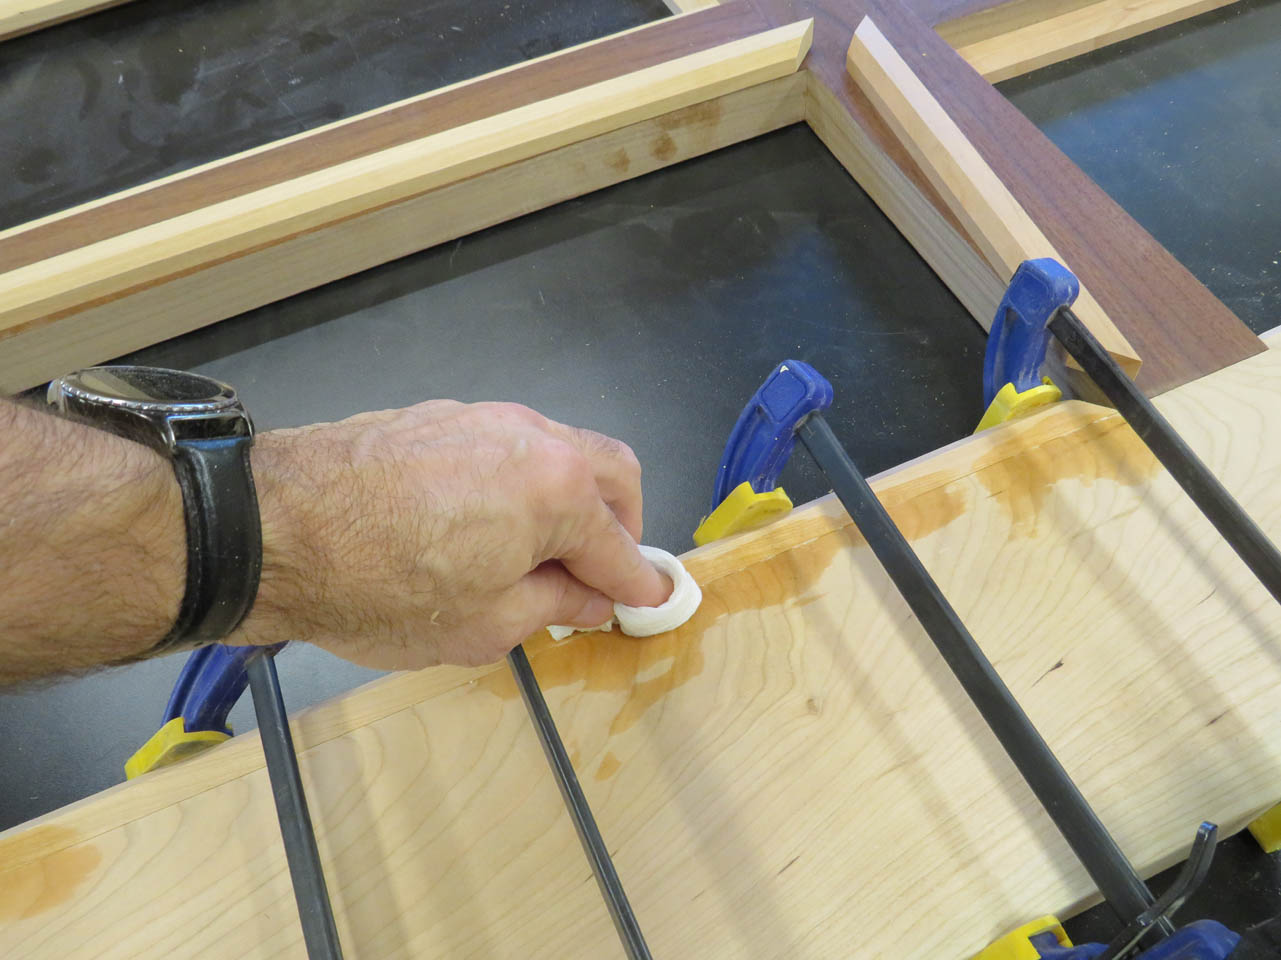
I add a couple of pin nails to each to prevent the trim from moving as more clamps are added.
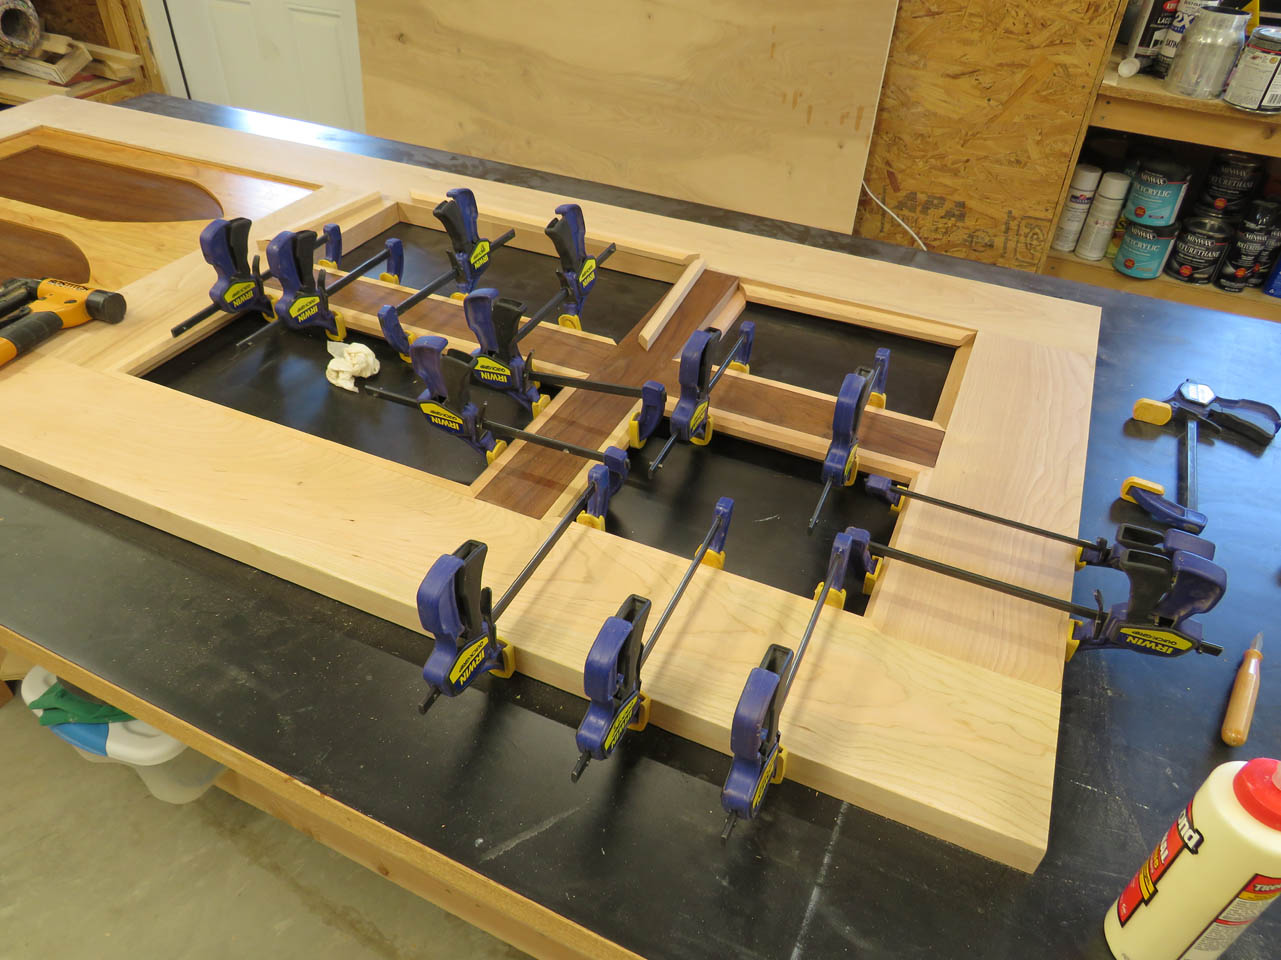
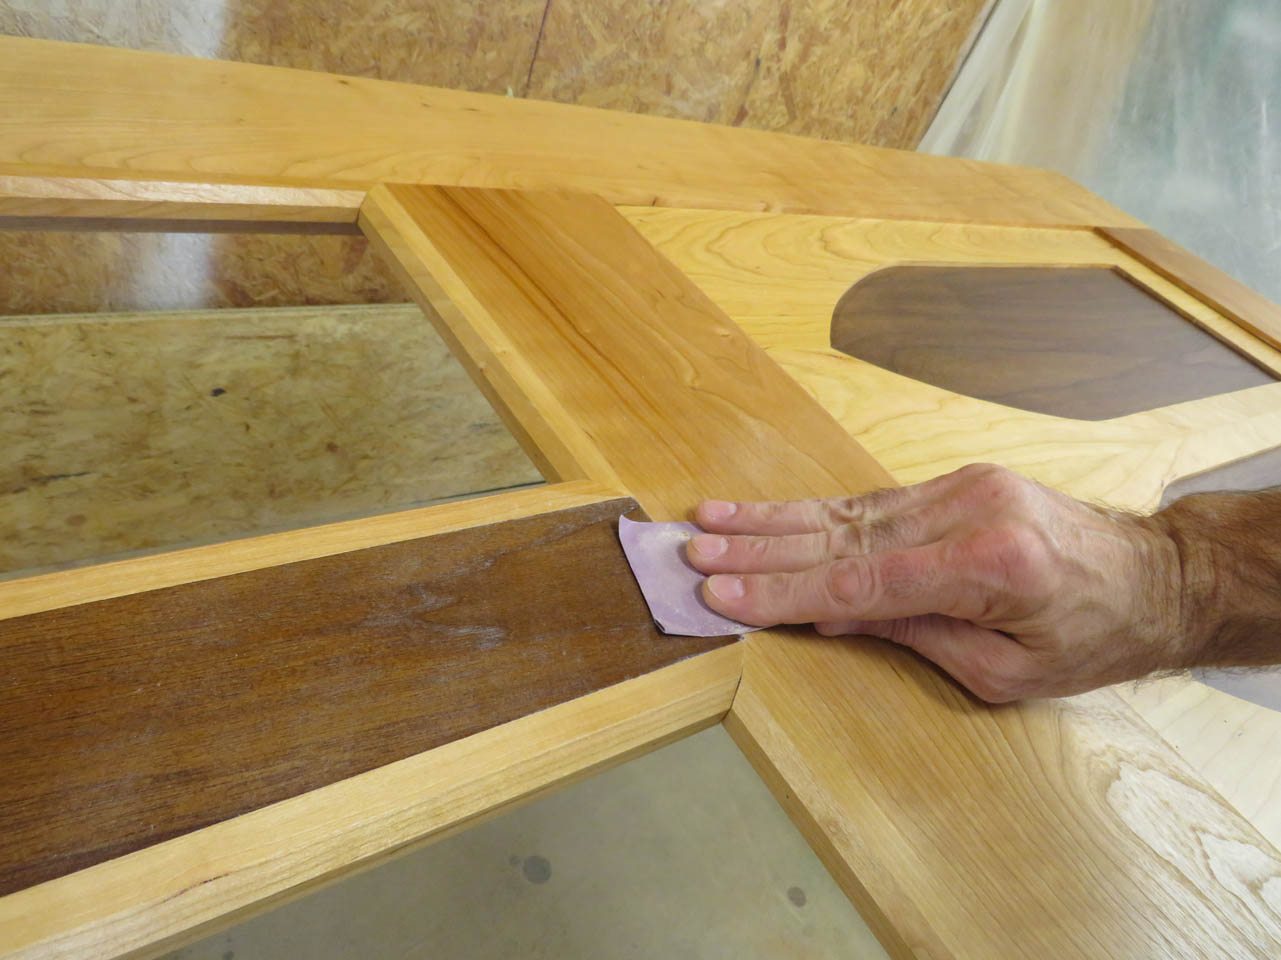
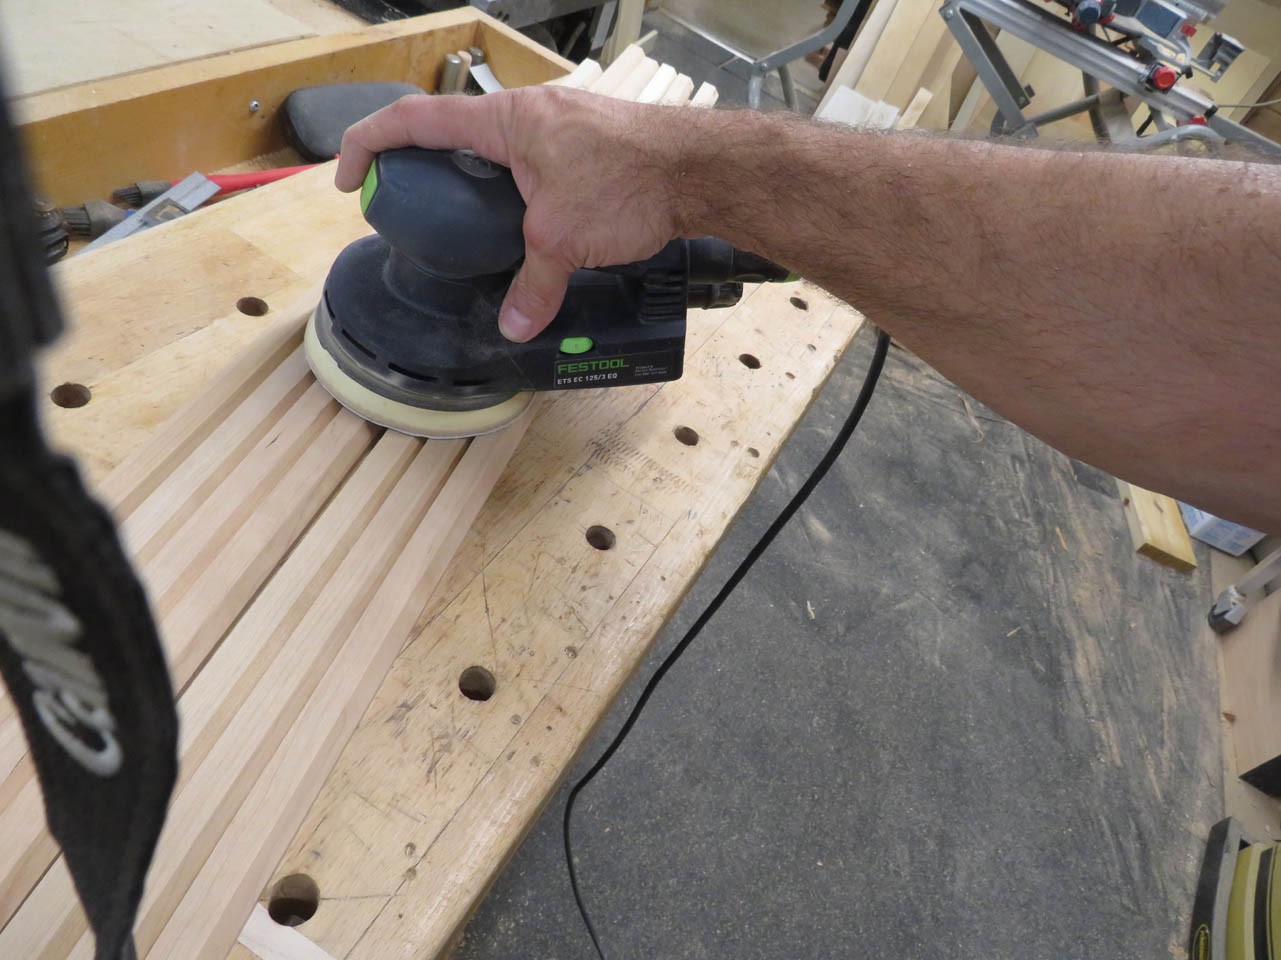
After the glue is dried, I can remove the clamps and sand everything flush.
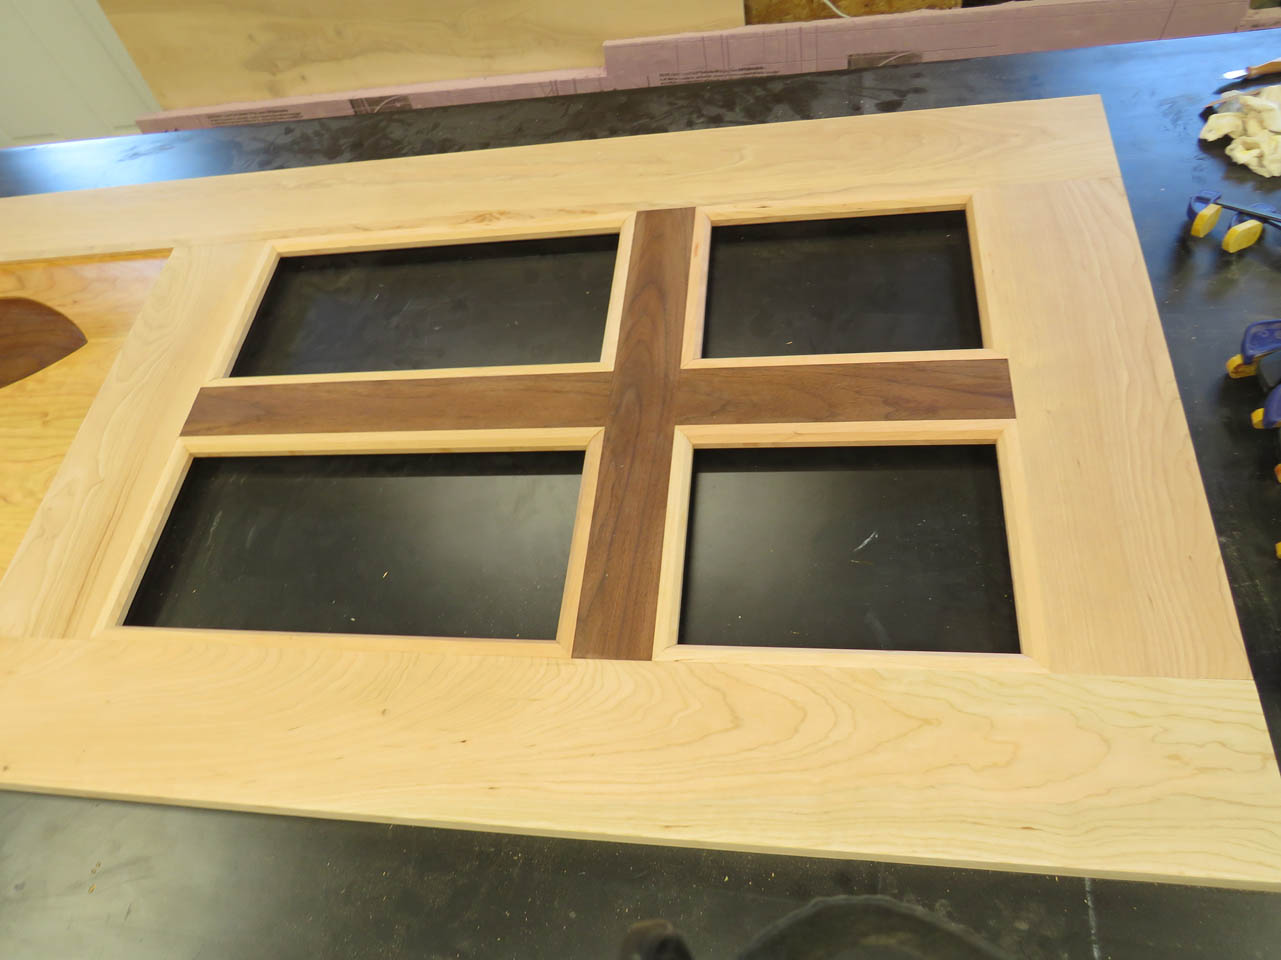
I think the trim looks really good against the walnut cross.
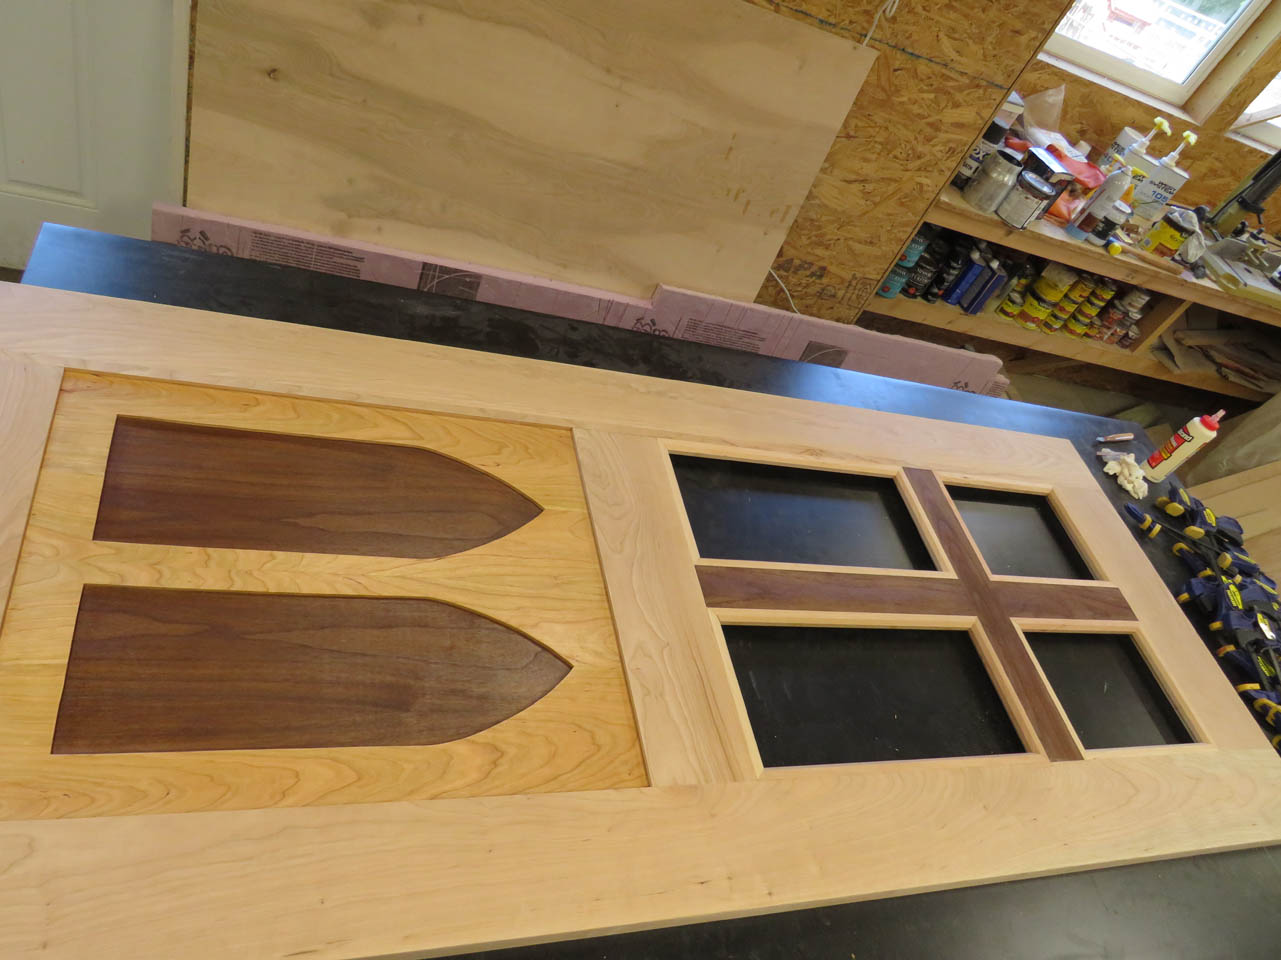
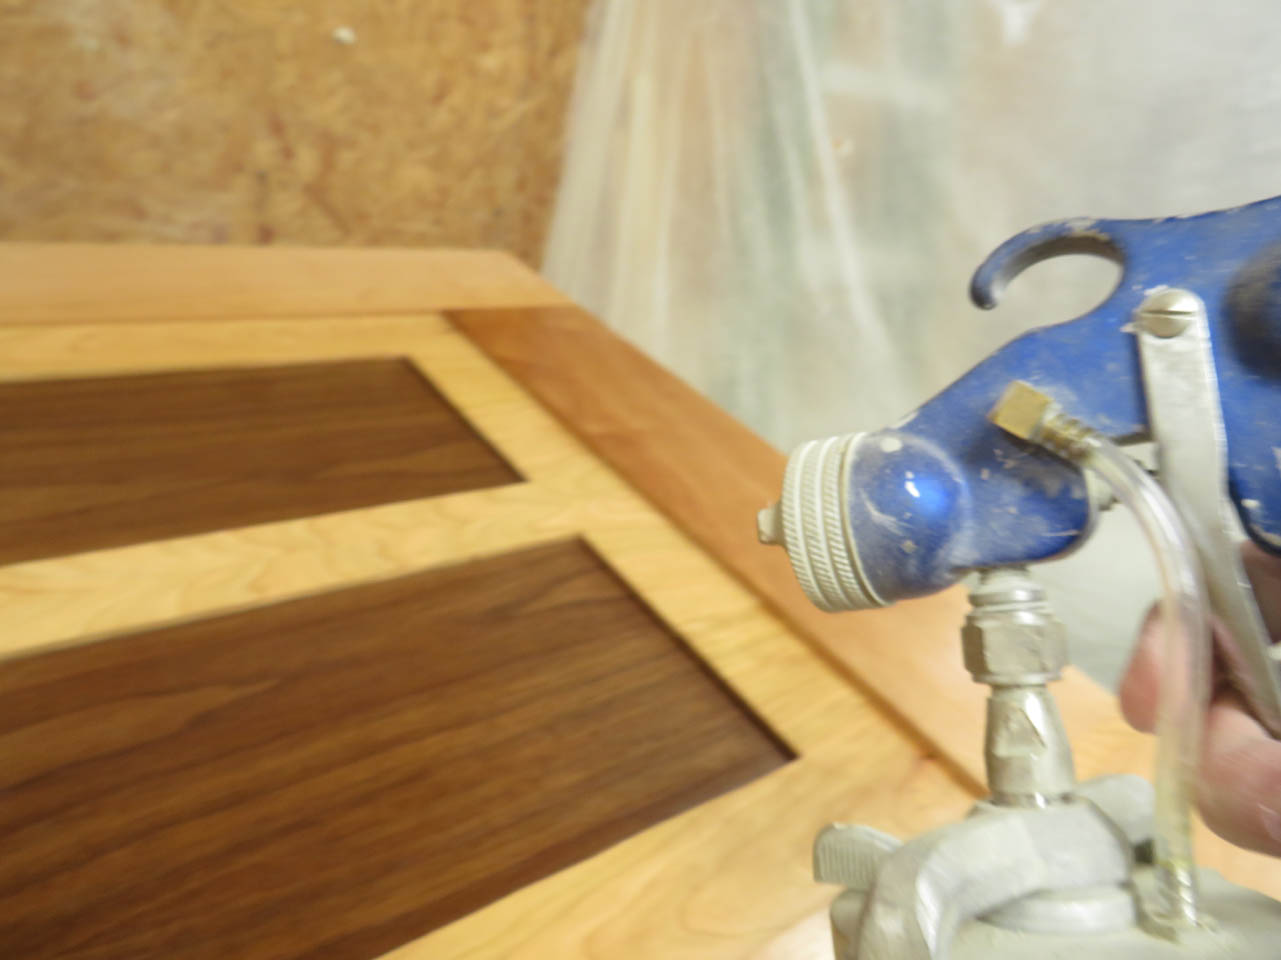
Now I can start applying finish to this side of the door.
Starting to look really good.
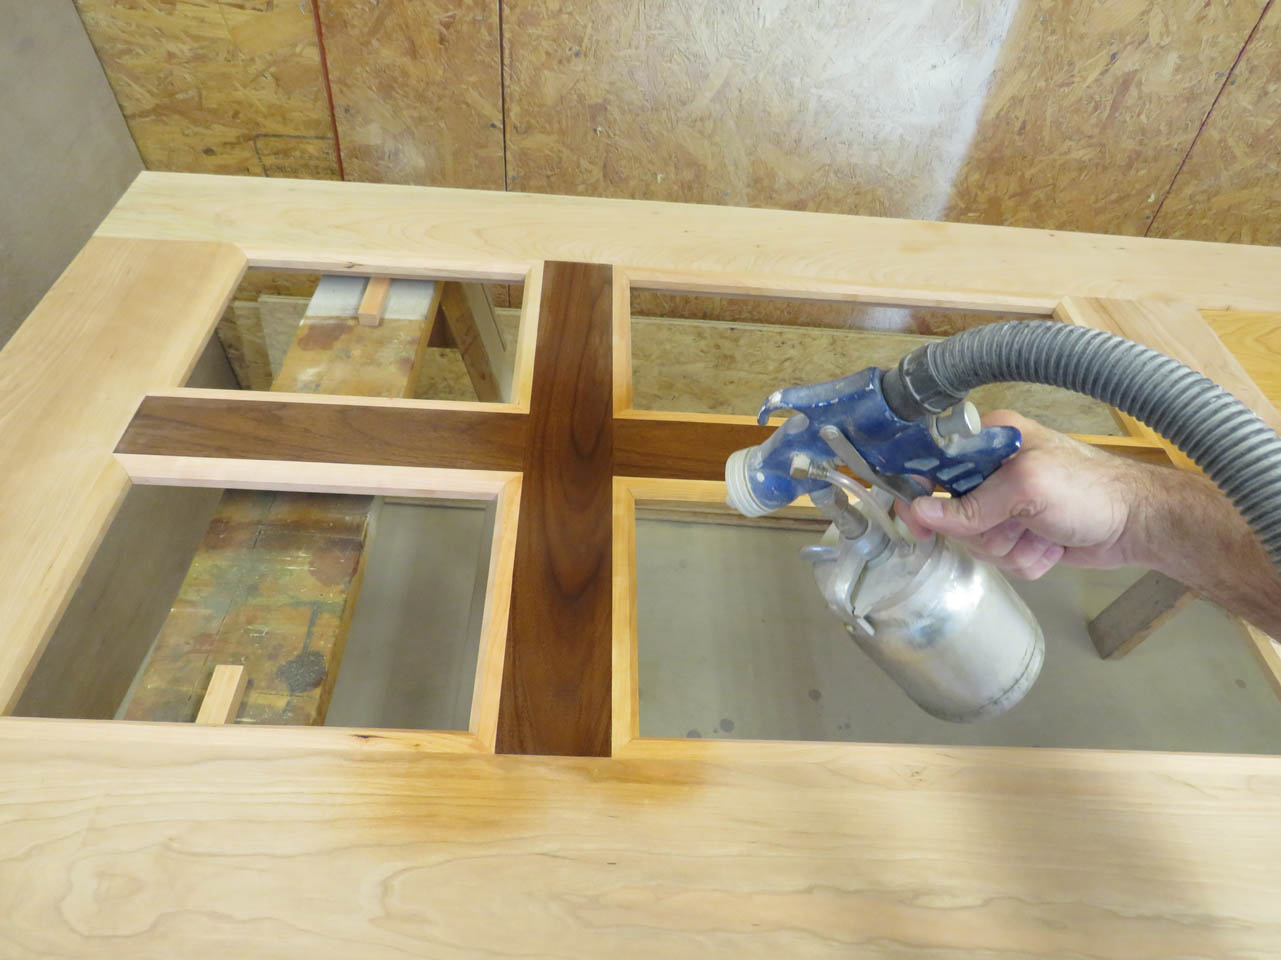
The first coat always gets sanded back with 400 grit paper before the second coat is applied.
I vacuum away all the fine dust before spraying the next round of polyurethane.
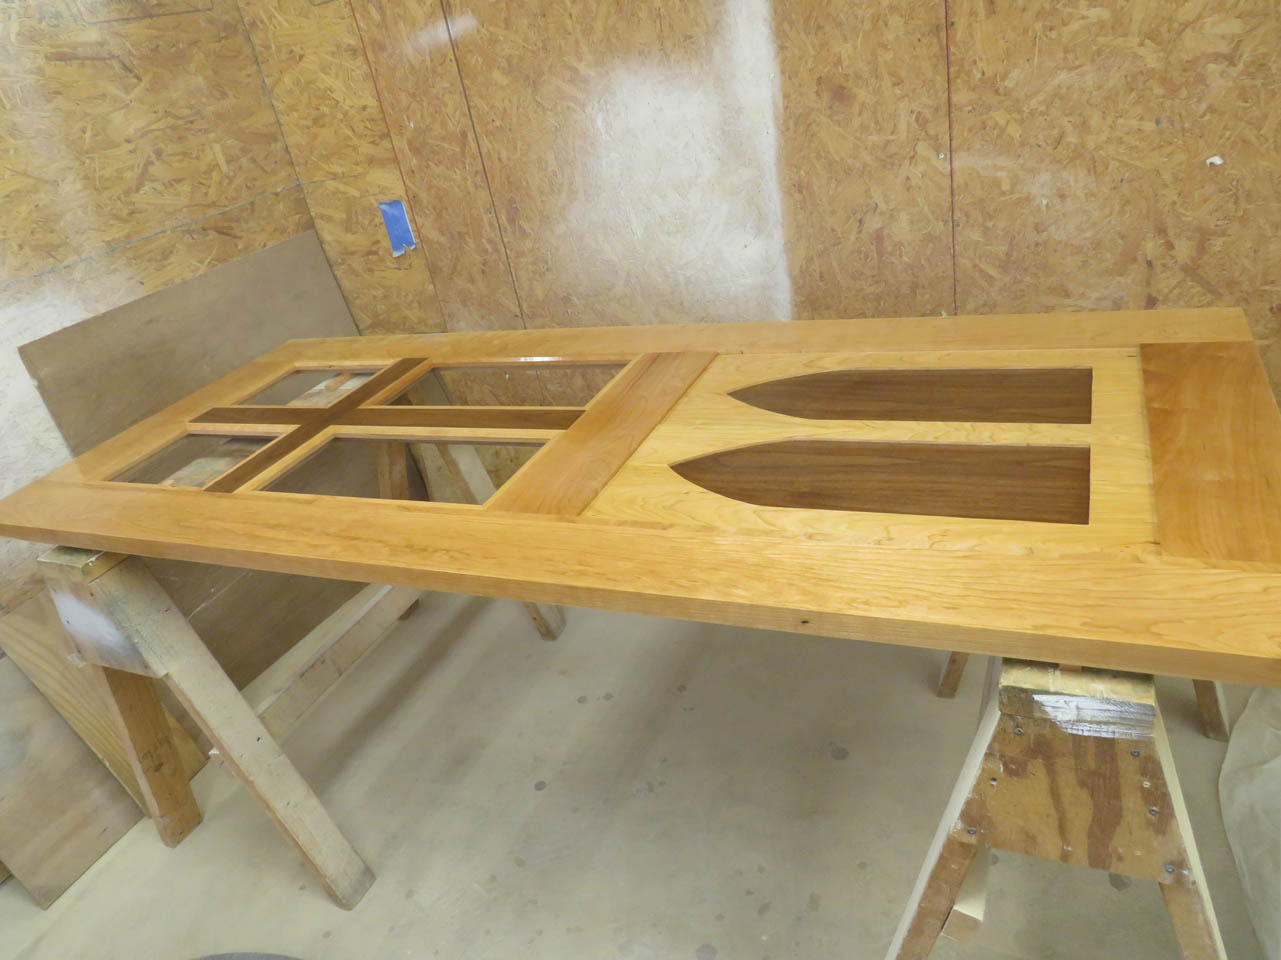
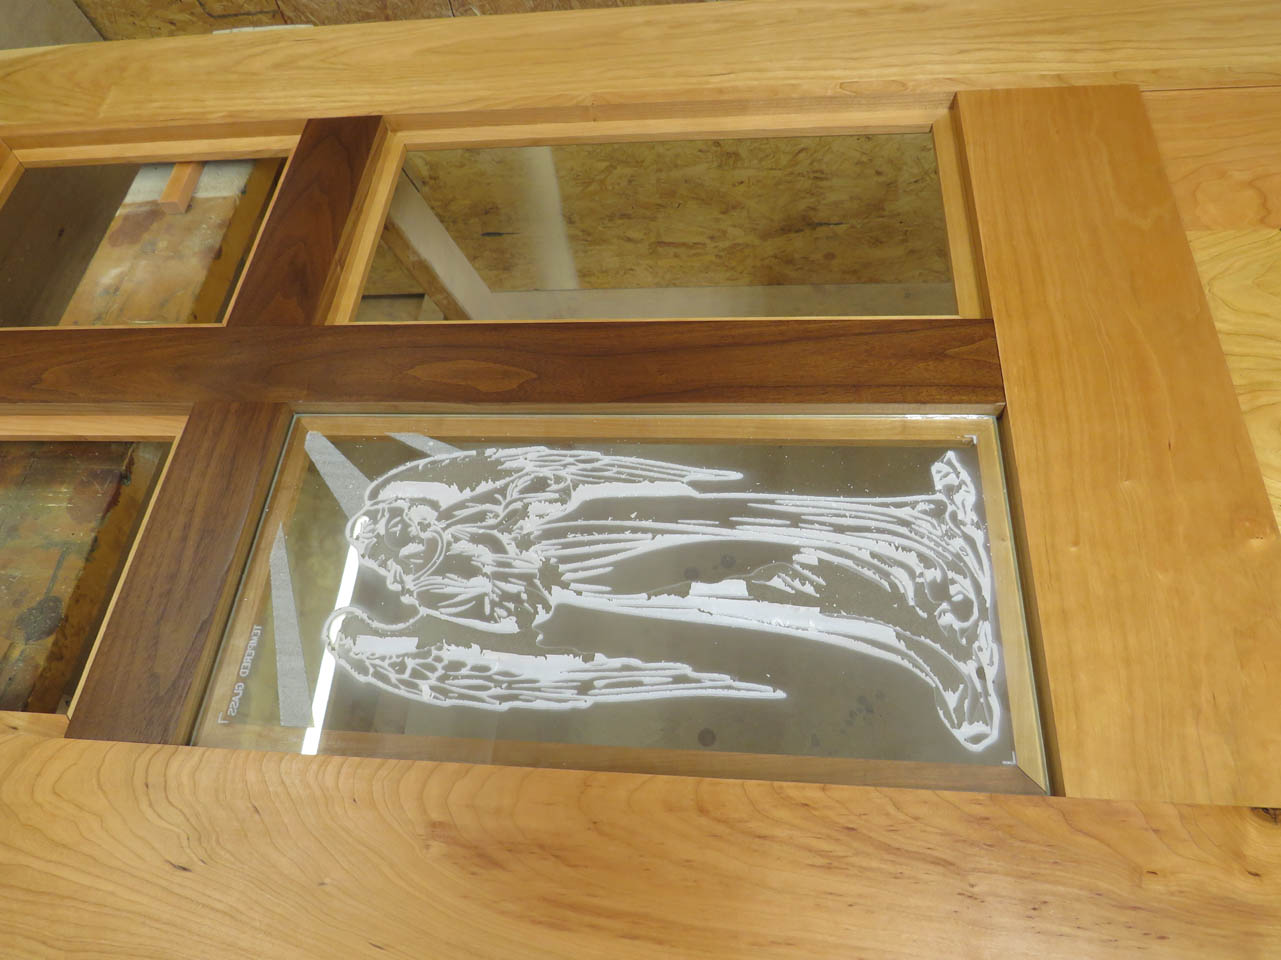
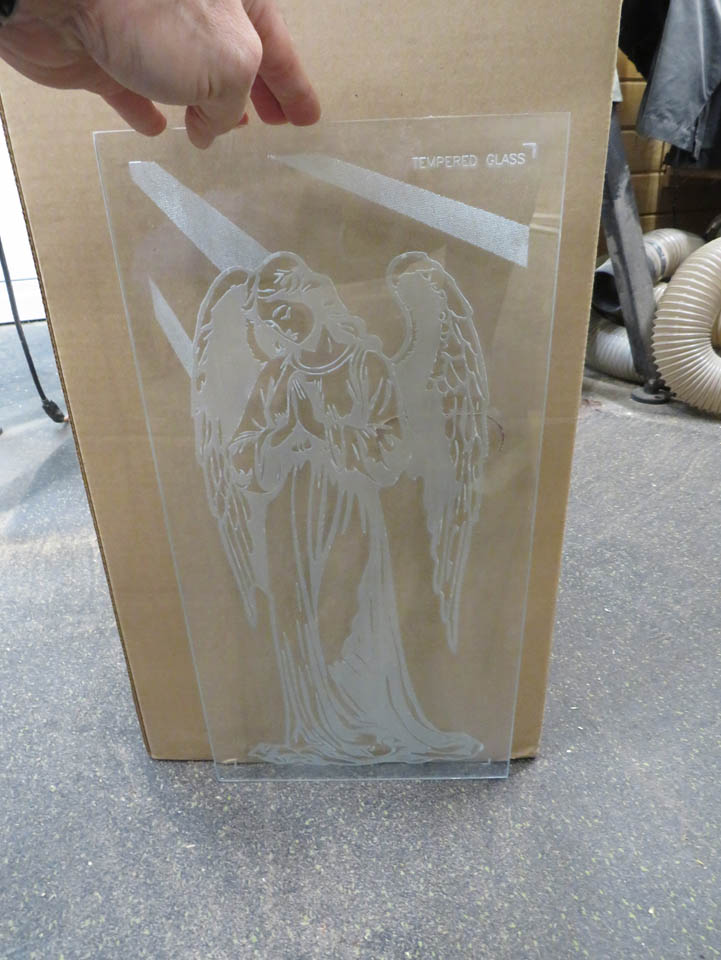
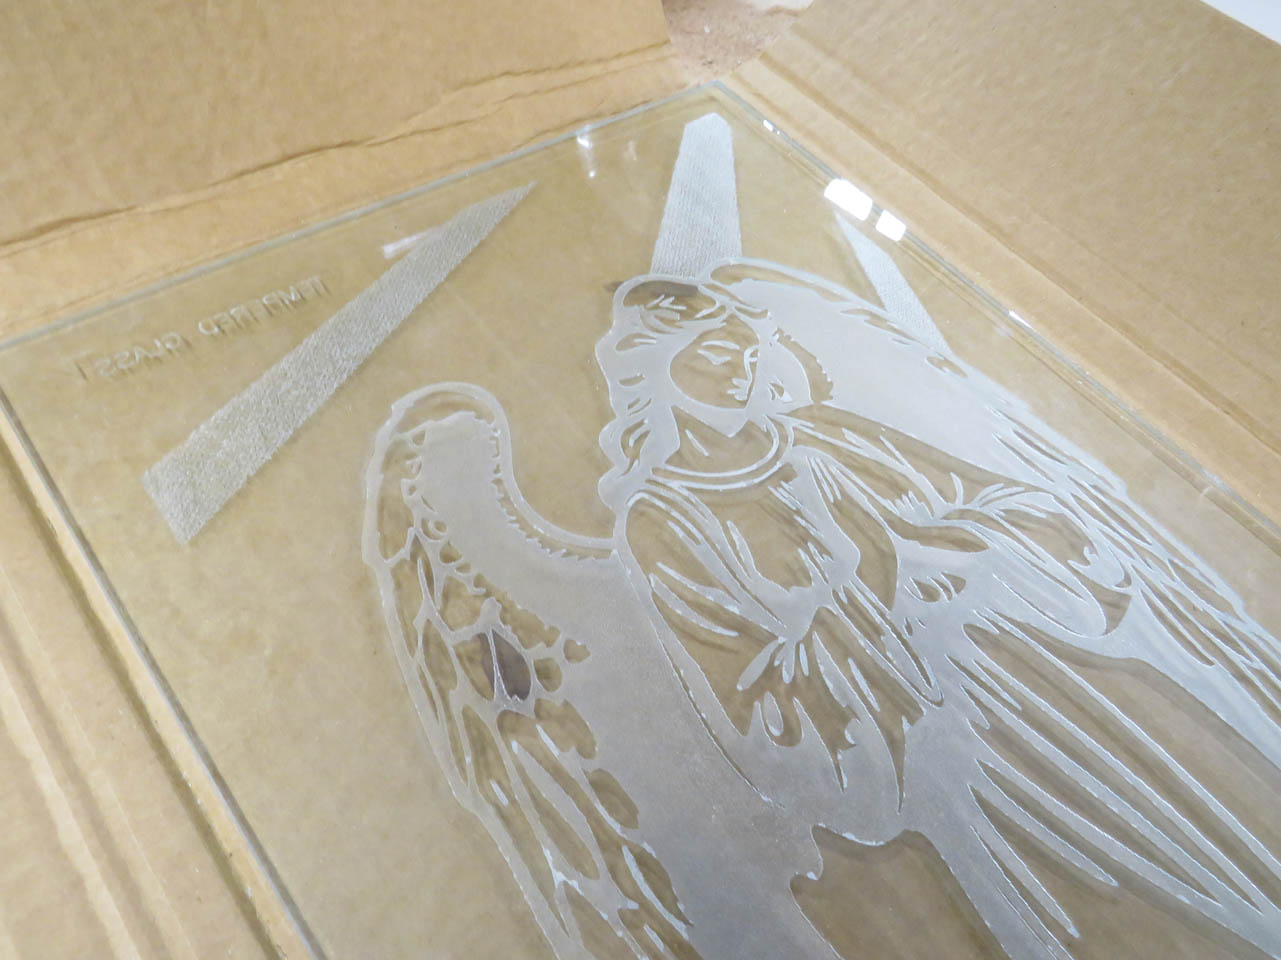
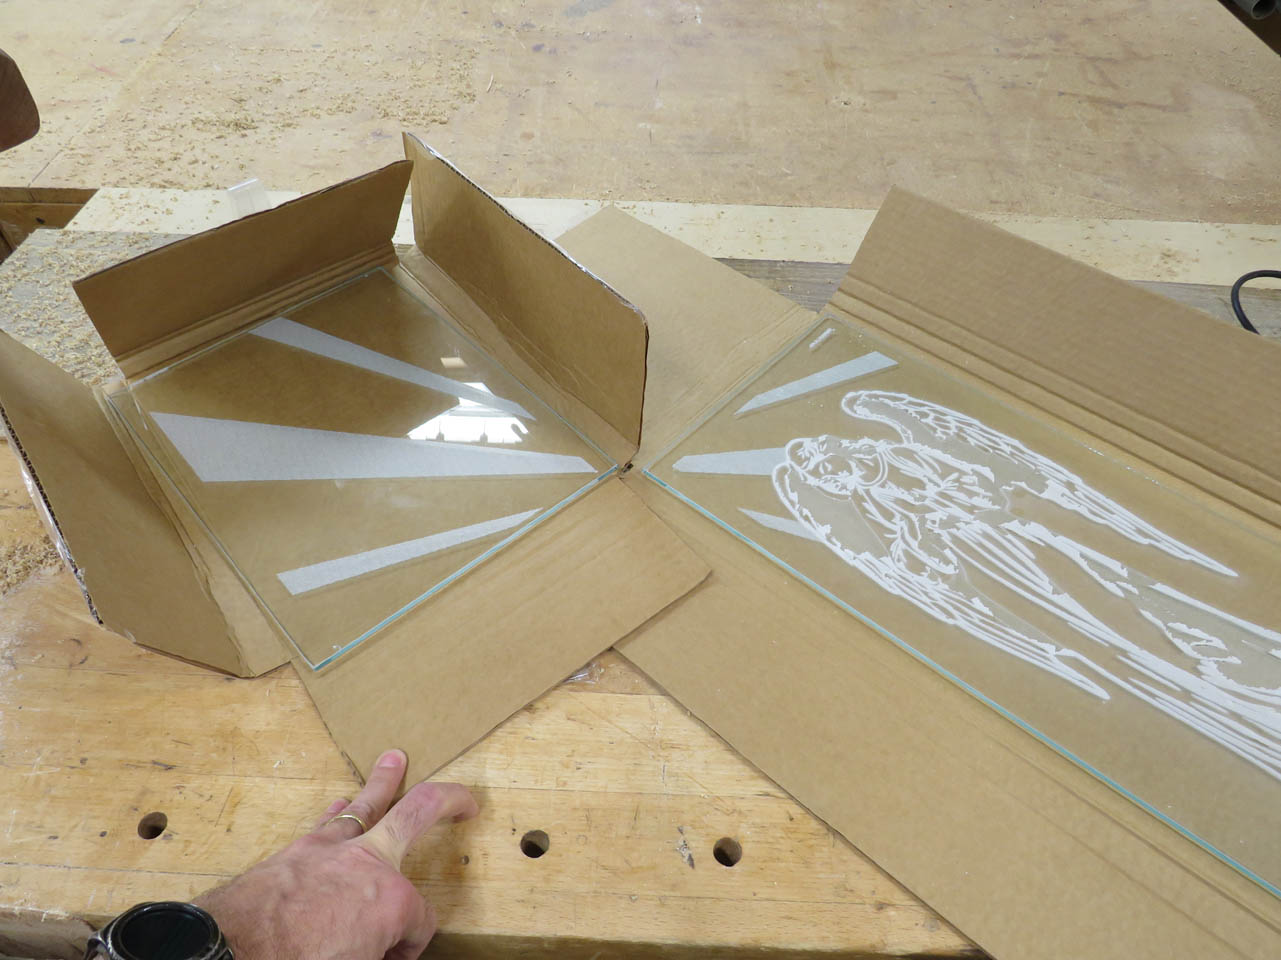
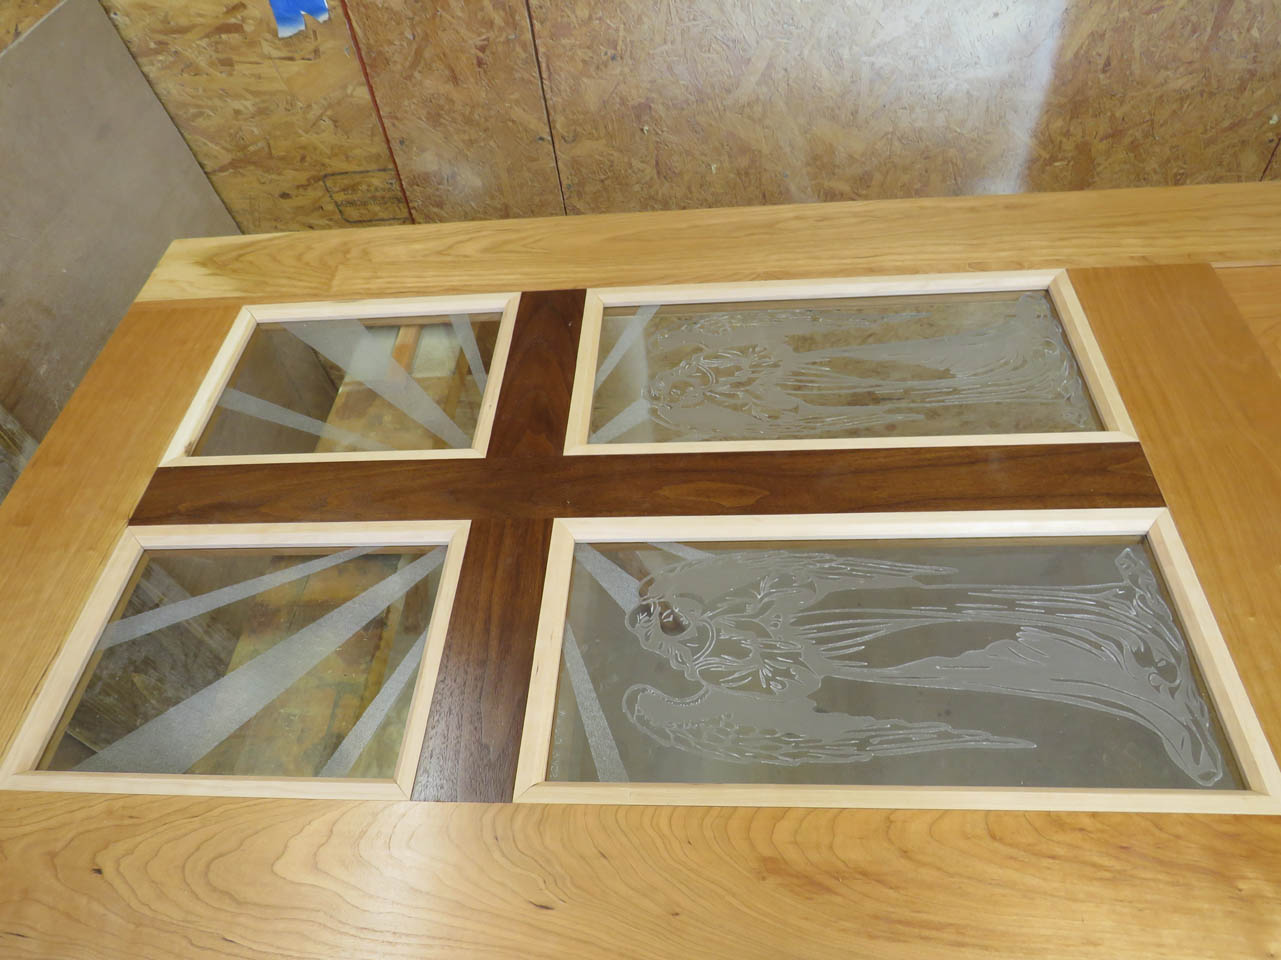
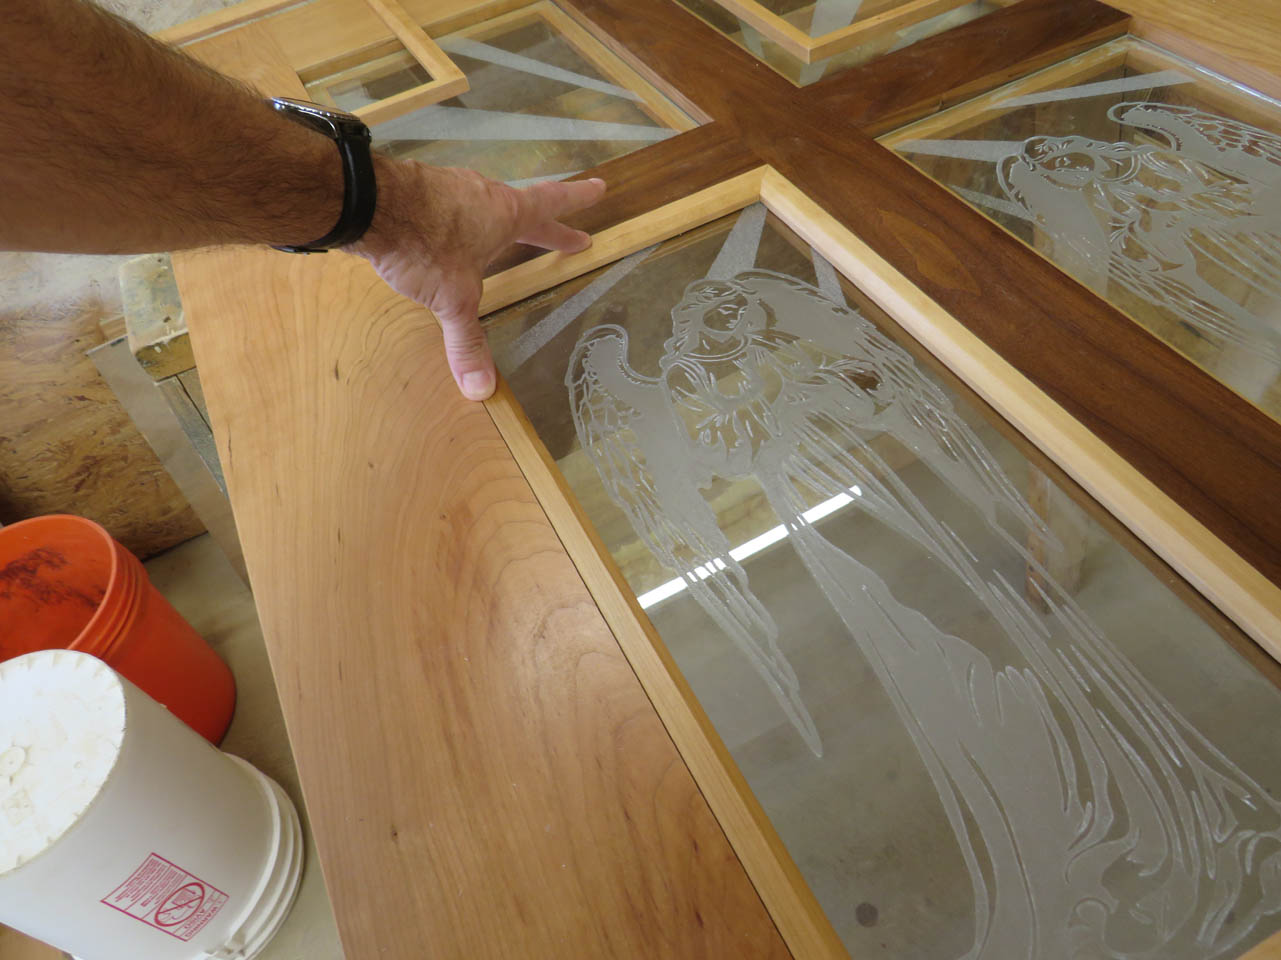
The front side is done, and the tempered glass has arrived.
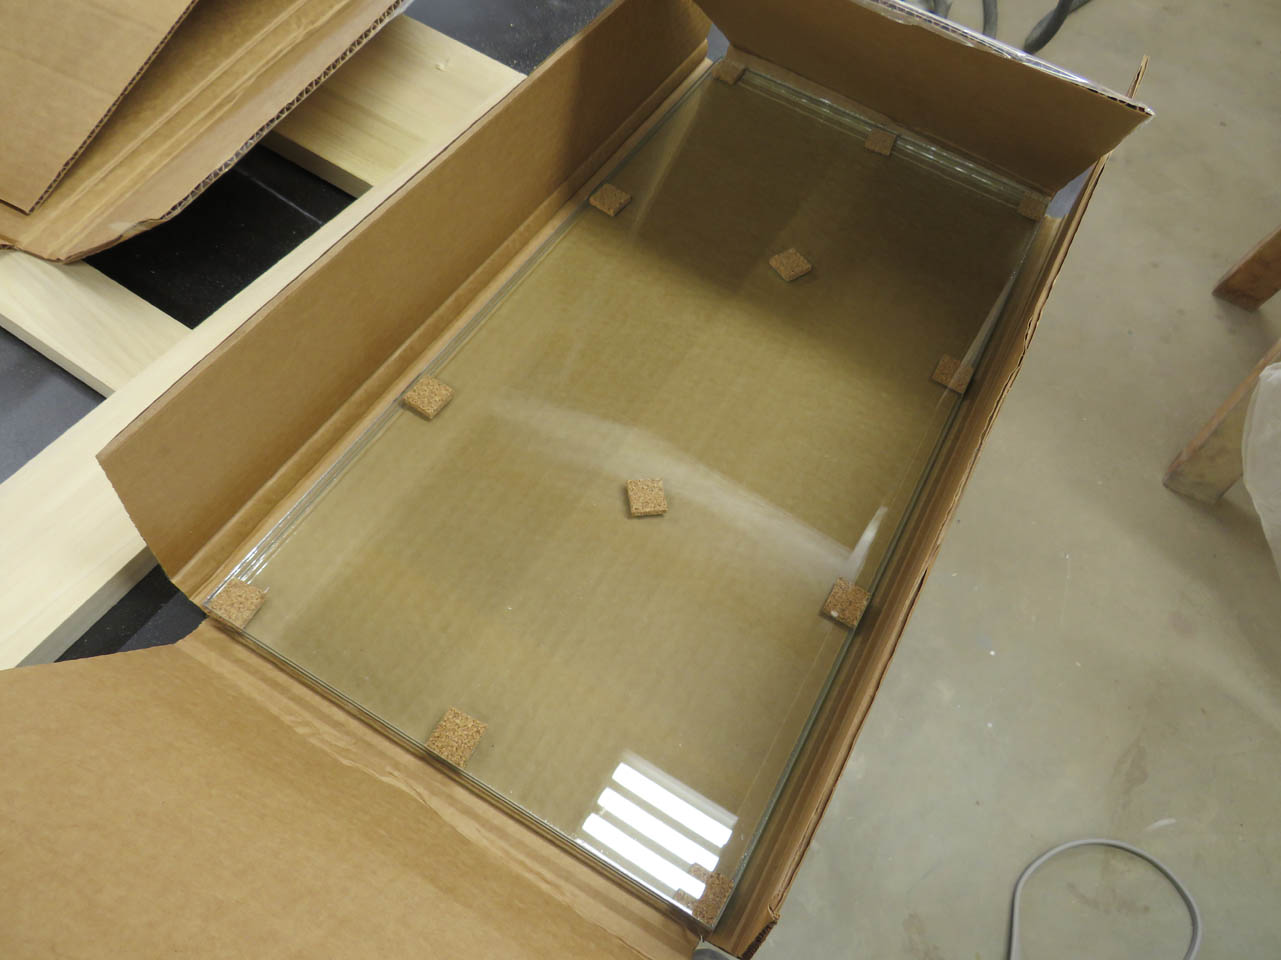
First thing I do is verify the fit.
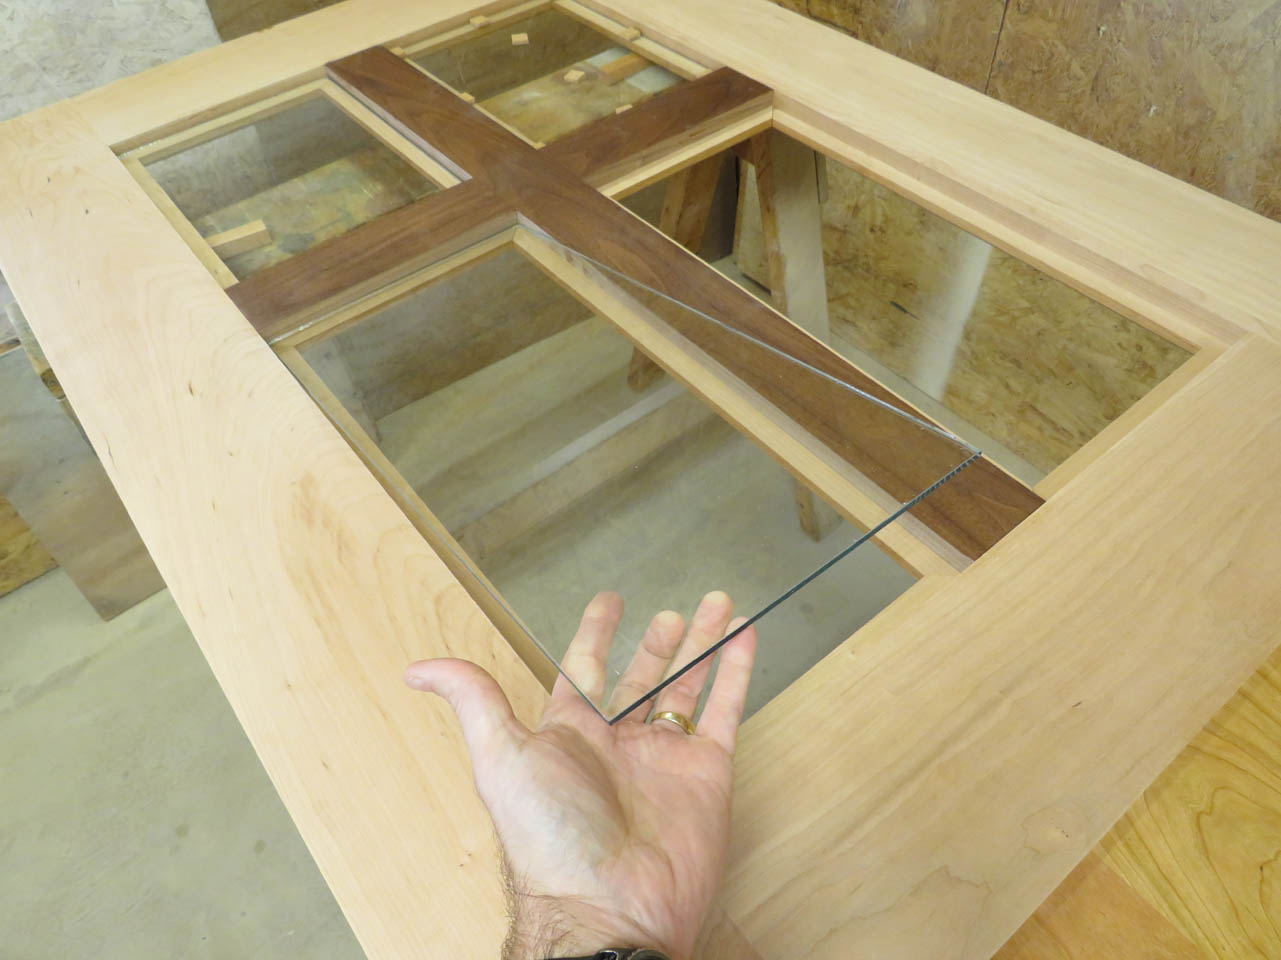
There is approximately 1/8″ clearance all the way around to prevent any pressure on the glass if the wood expands.
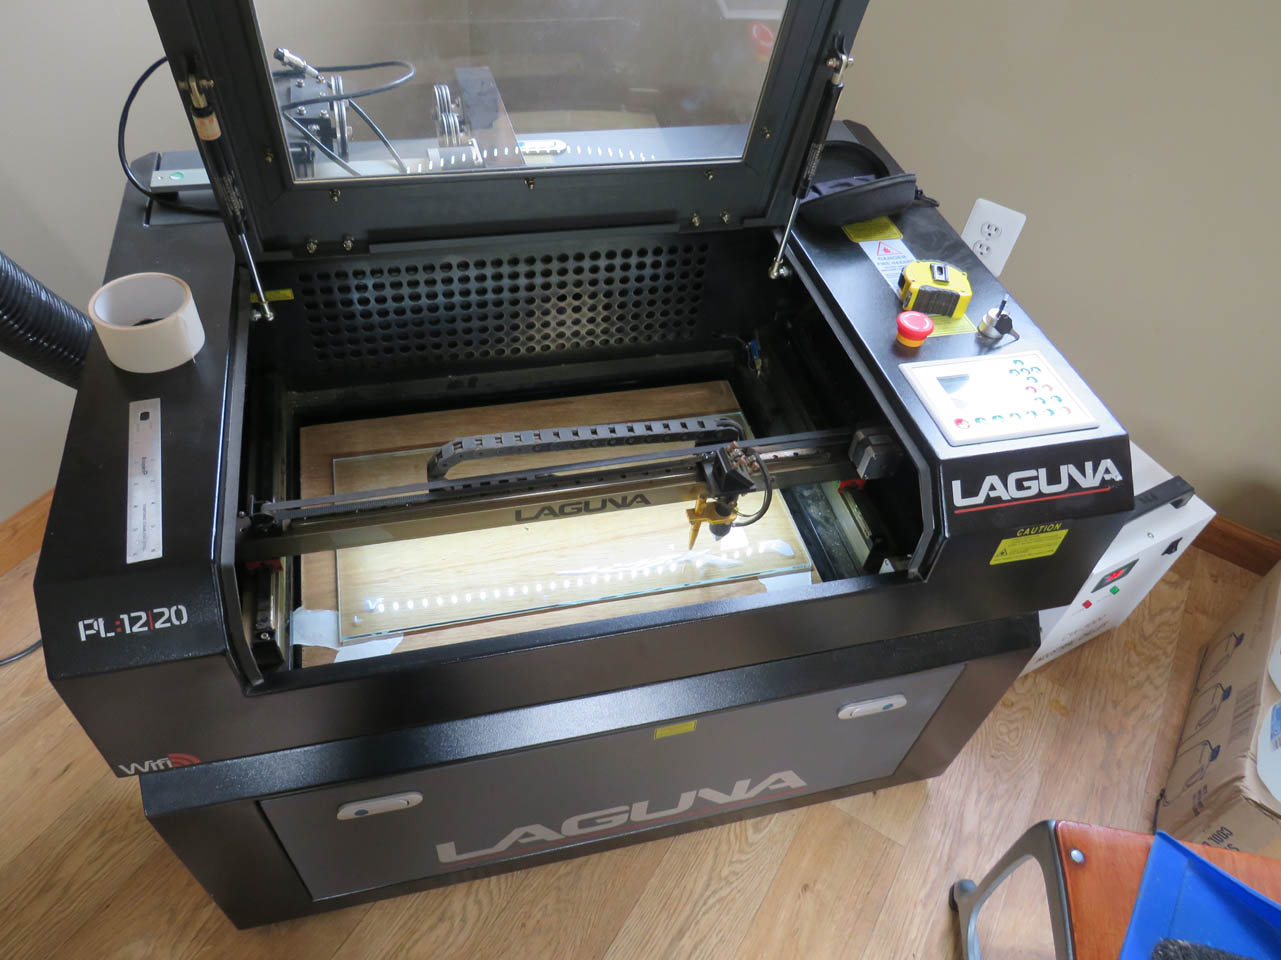
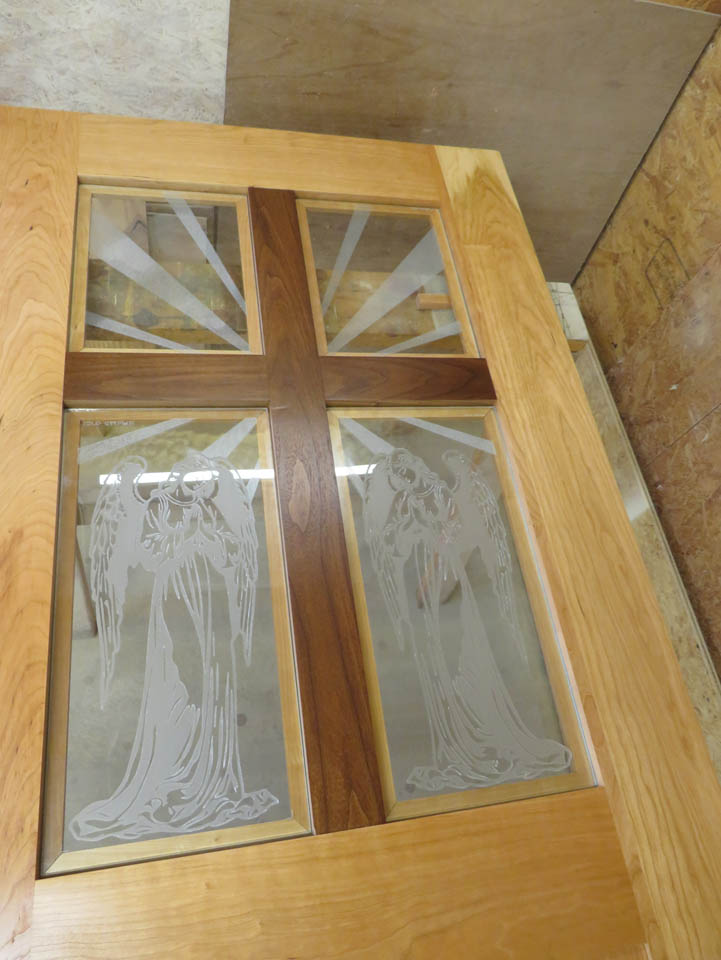
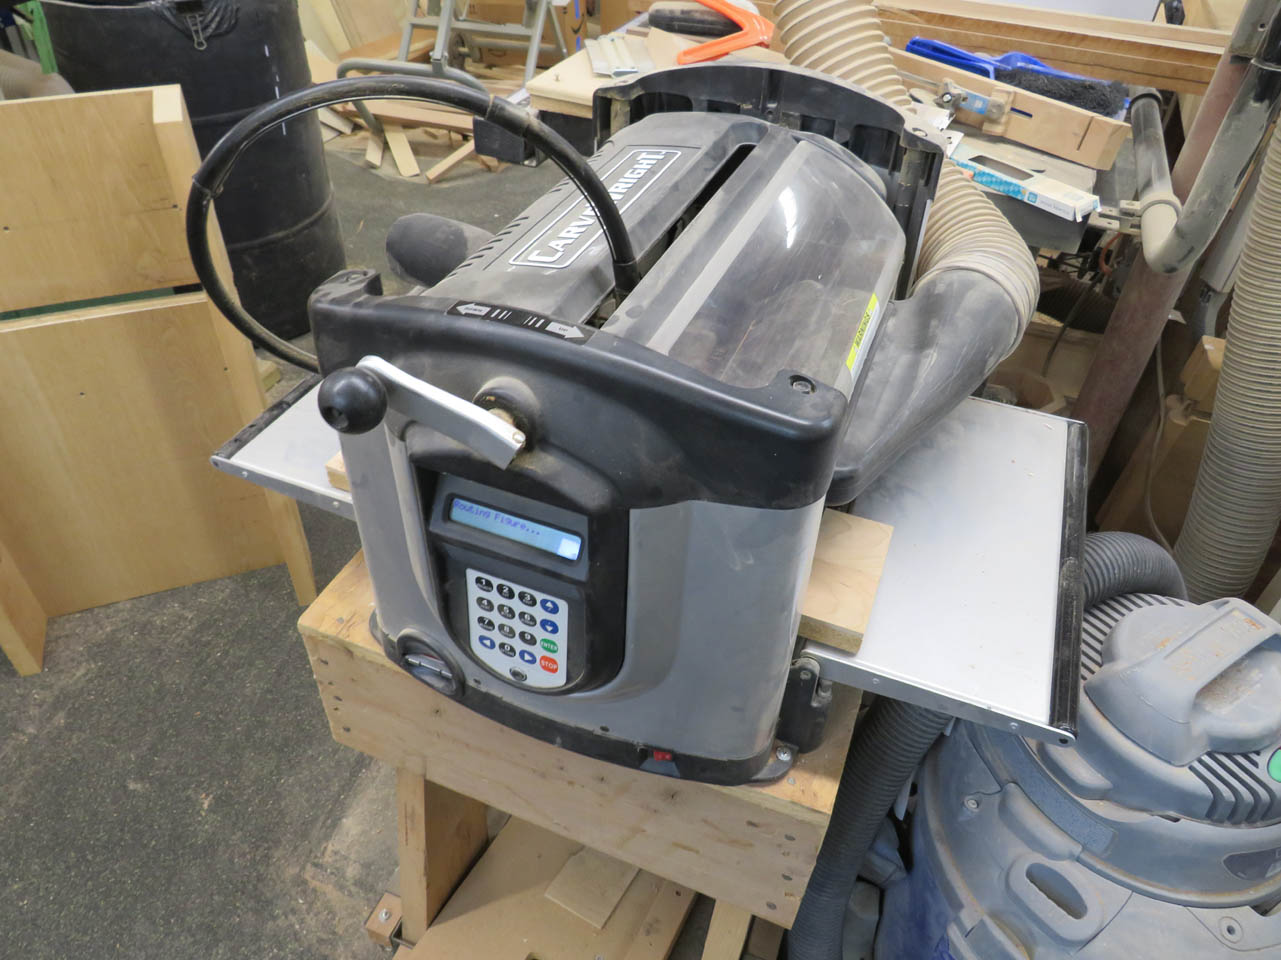
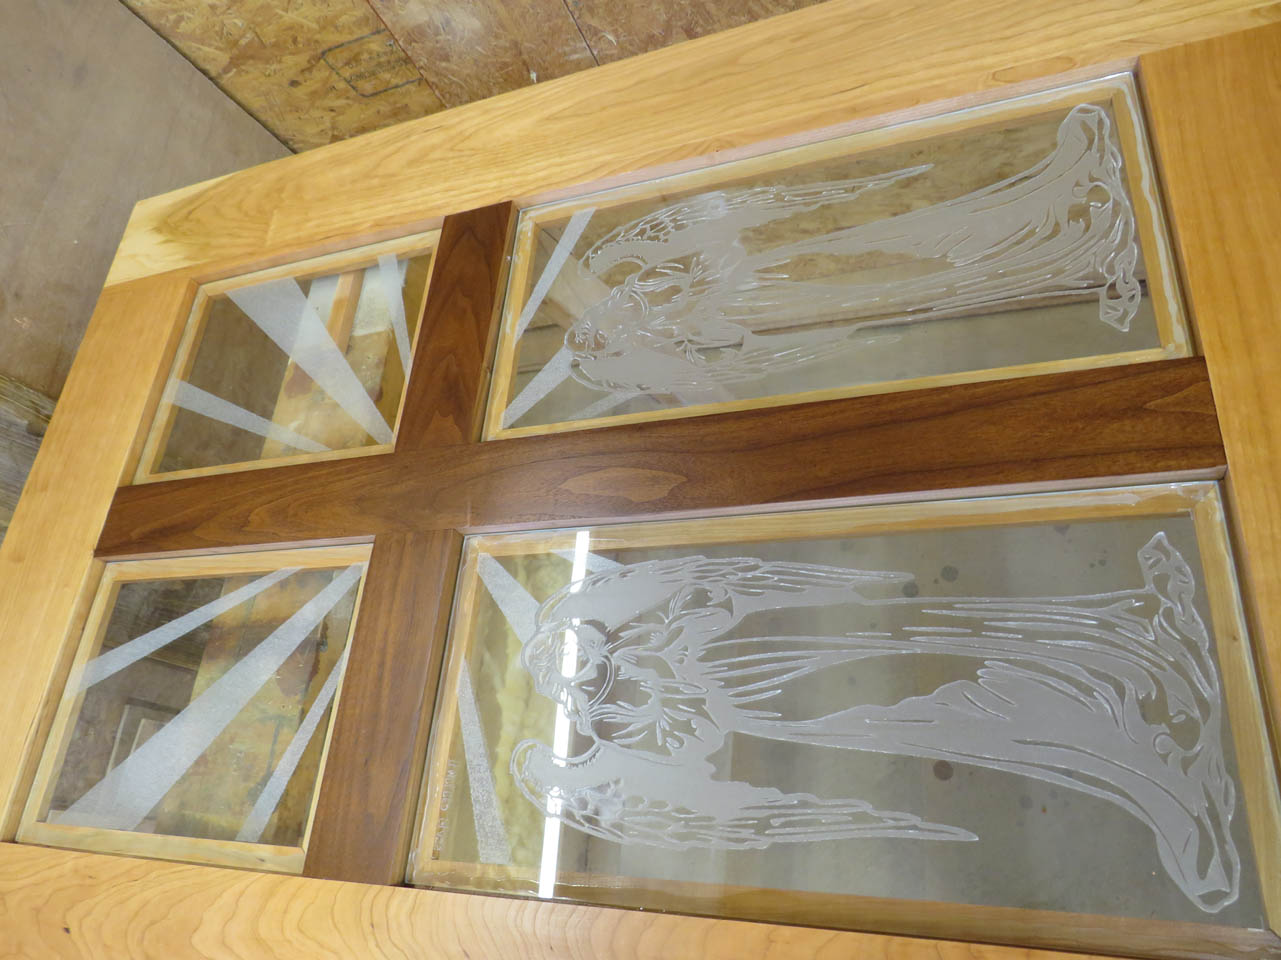
Now that I have my glass, I can fire up the Co2 laser and start engraving the angels.
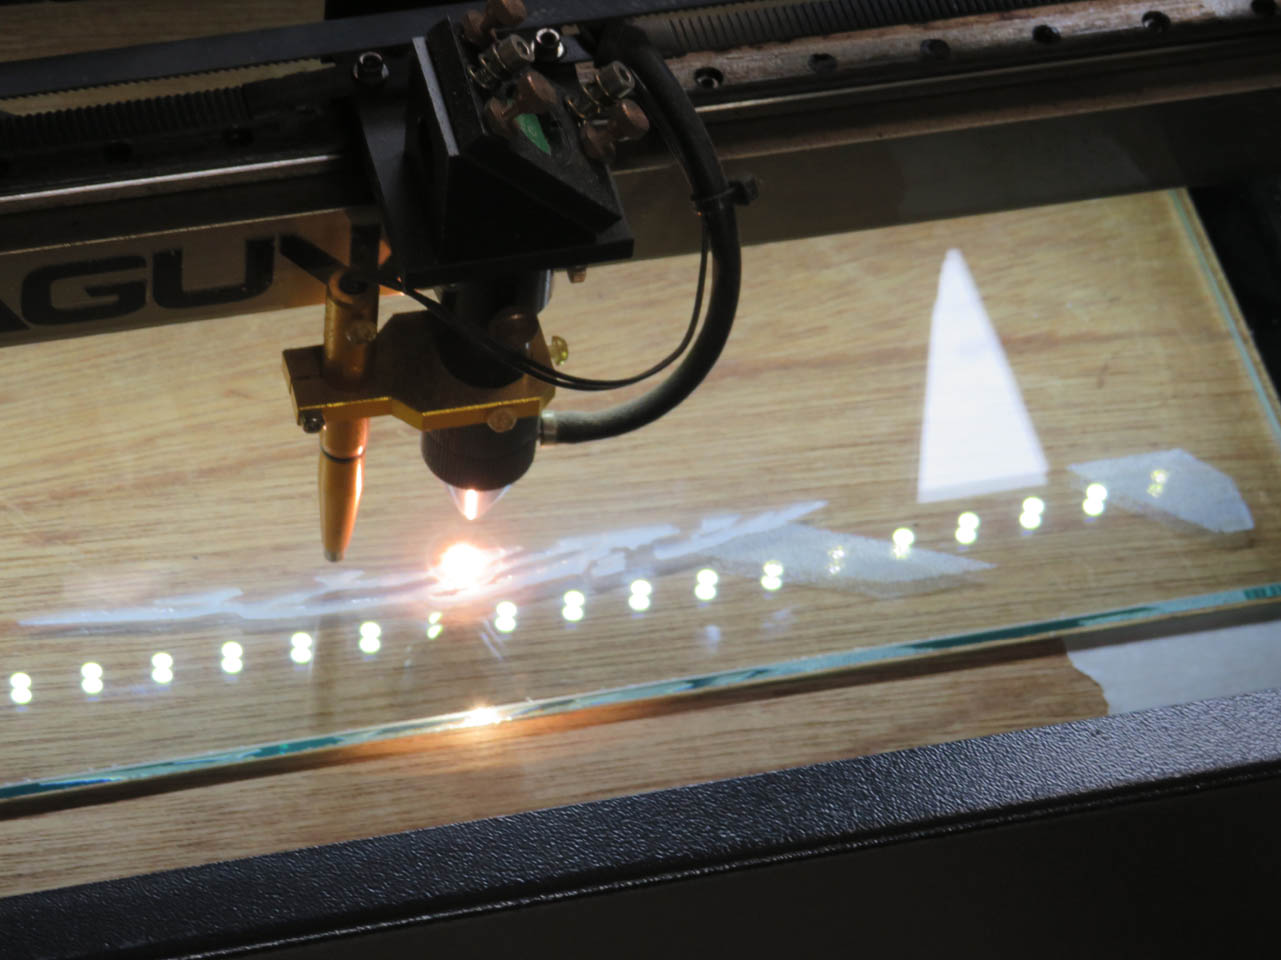
I have only experimented with etching glass once before and never with tempered glass, so this will be the critical test on some very pricey glass.

While that is etching, I flipped over the door and started applying polyurethane to the back side.
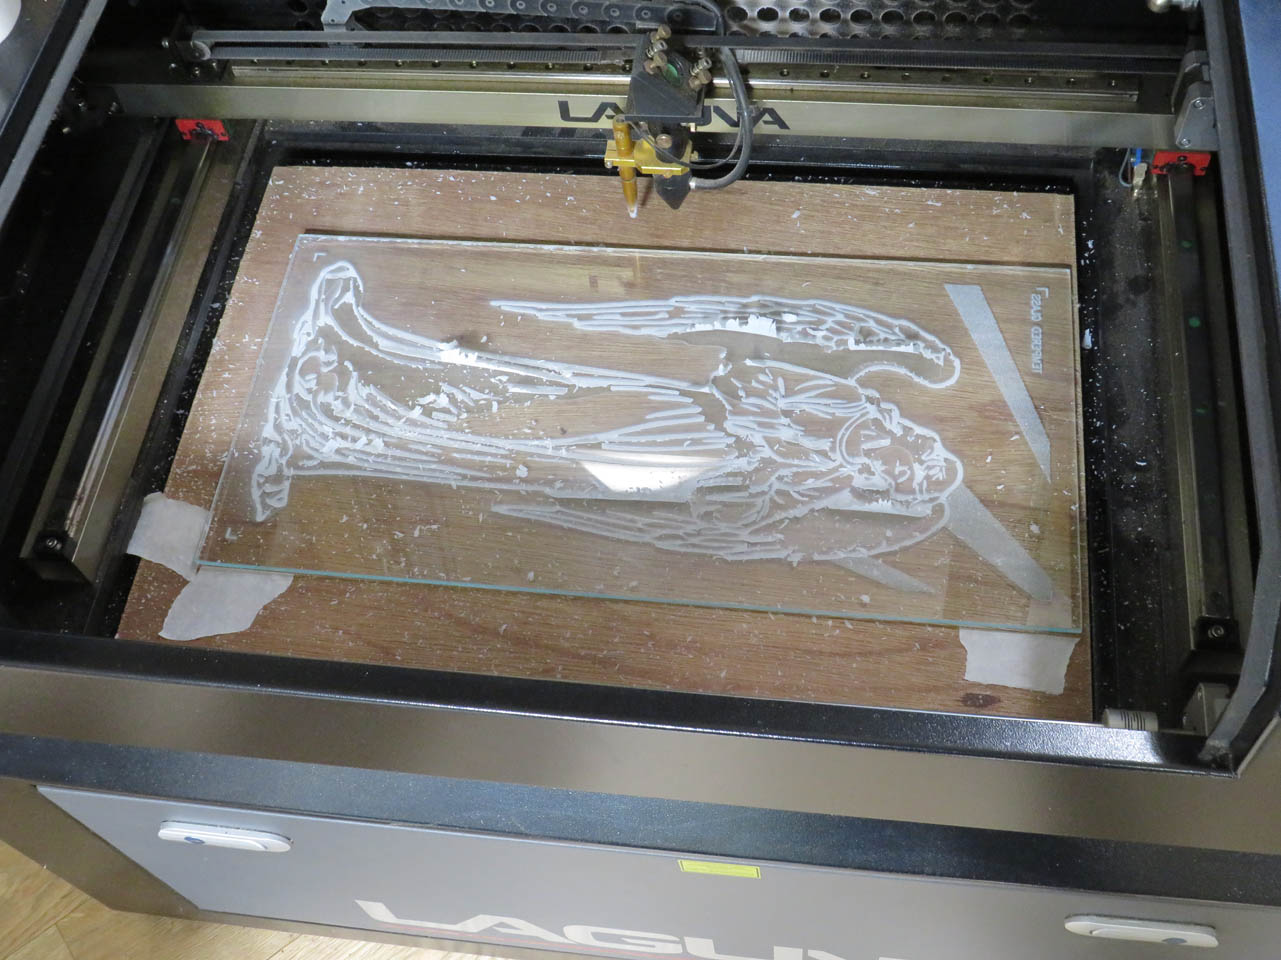
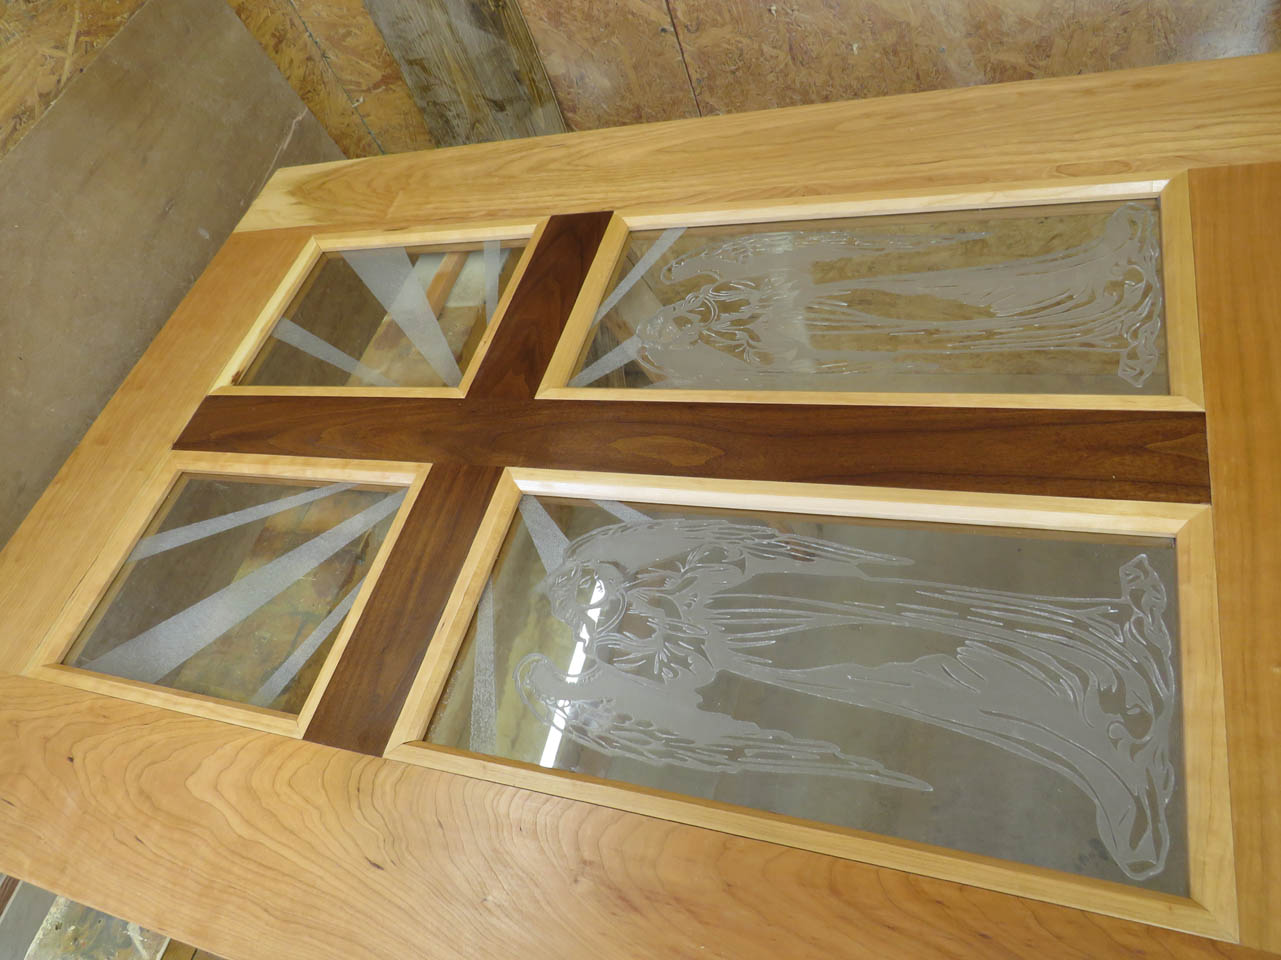
Wow, the first panel of glass is done. The image is approximately 20″ tall and 10″ wide. It took about 15 hours to etch a single panel.
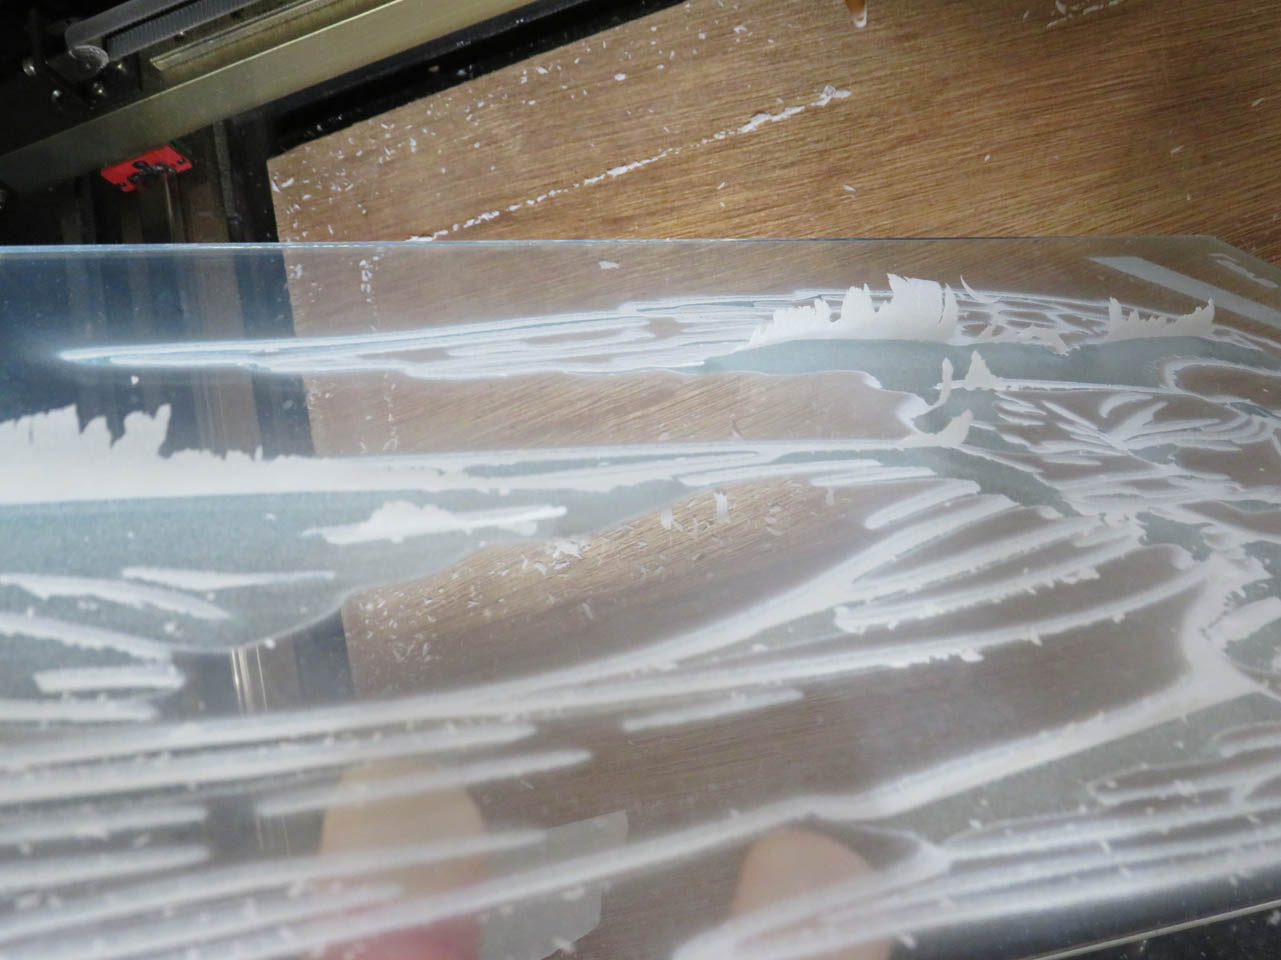
Also, somehow there is a film peeling up off the surface, after it has been etched.
The engraving looks really good, but that skin will have to be removed.
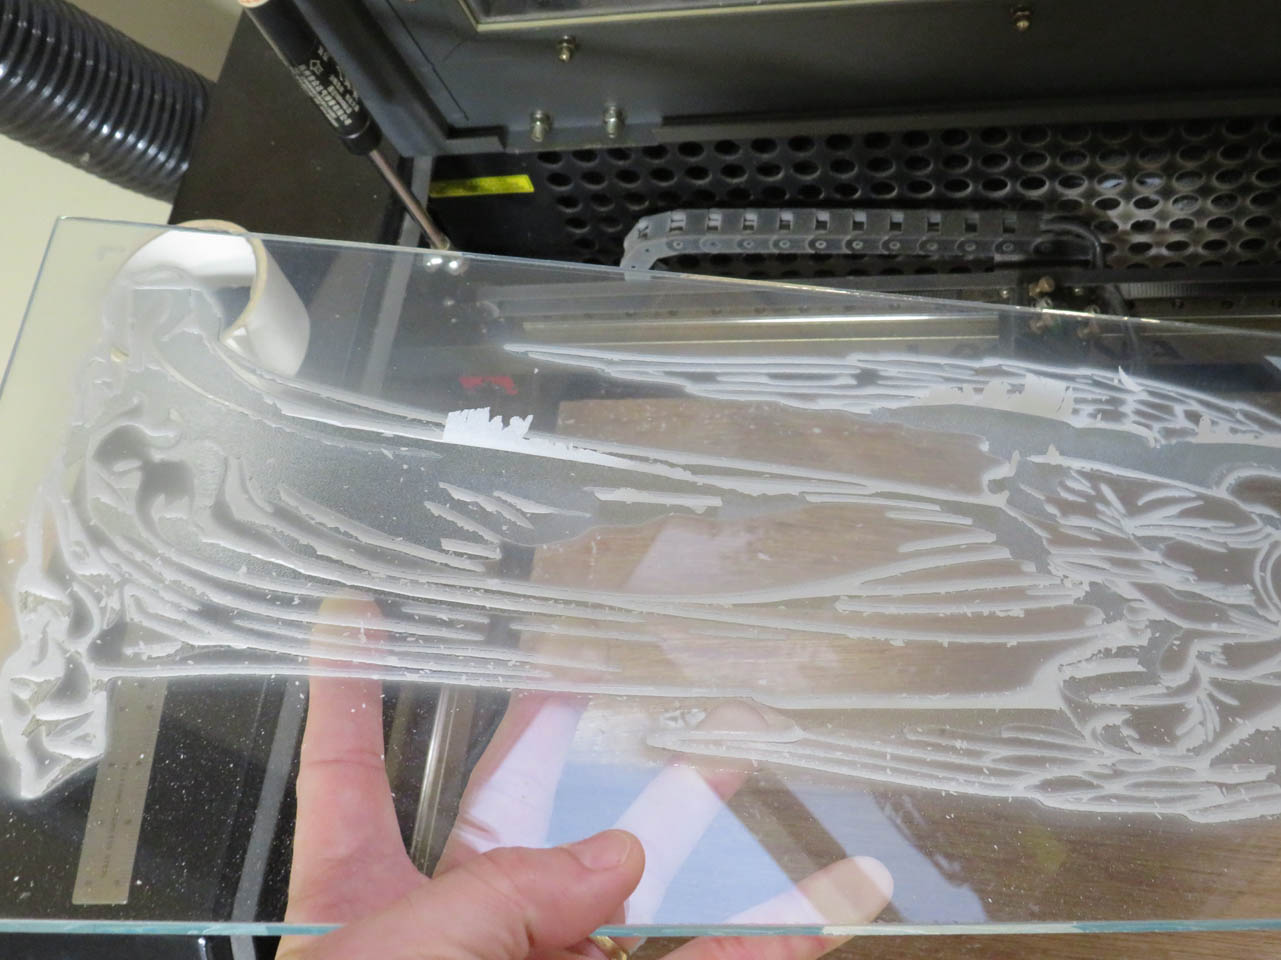
It is really hard to photograph how nicely the etching looks, the light reflects weird for the camera. I tried to photograph from a couple different angles, but it doesn’t do it justice.
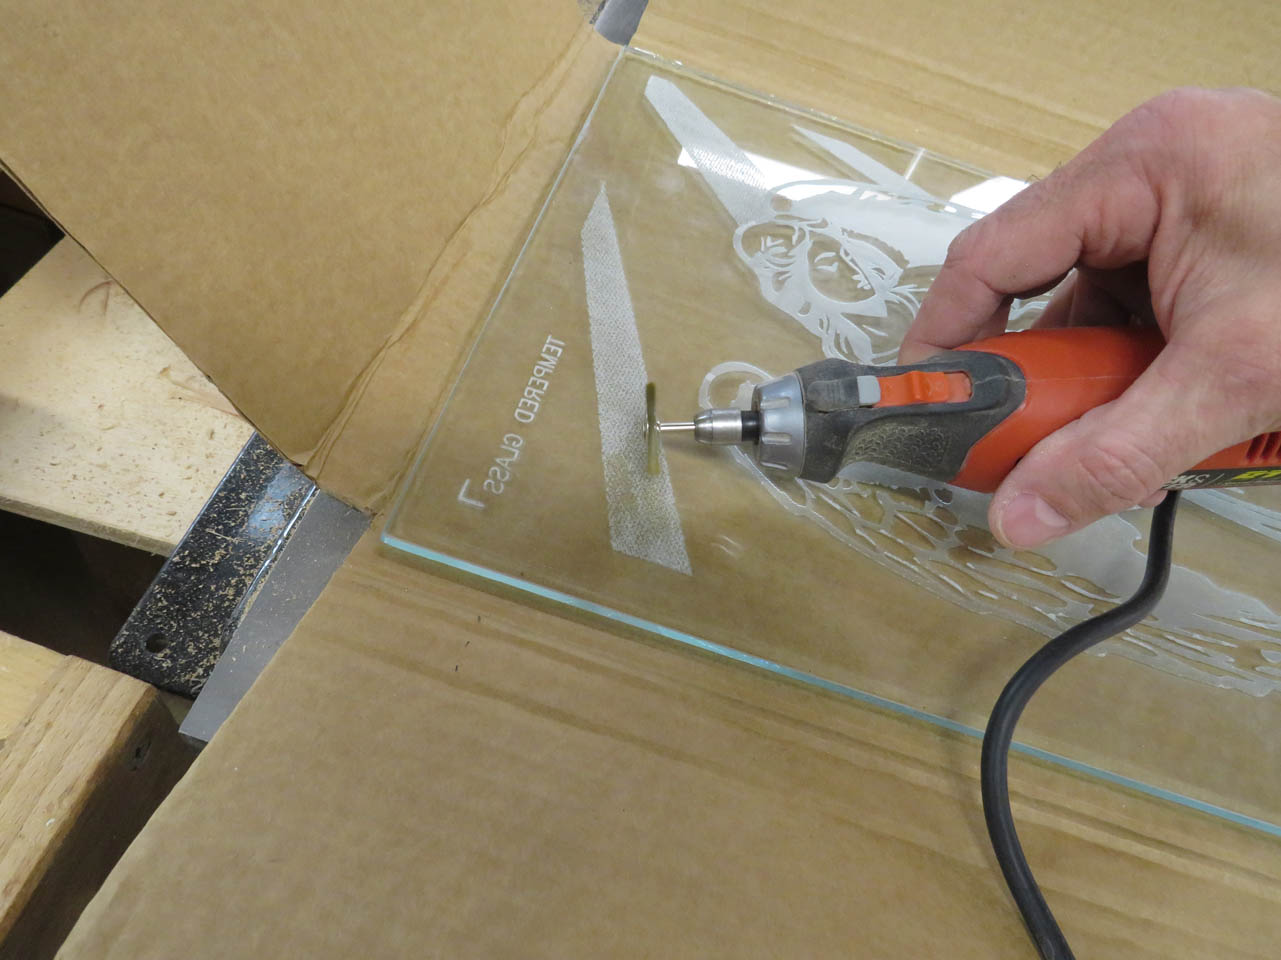
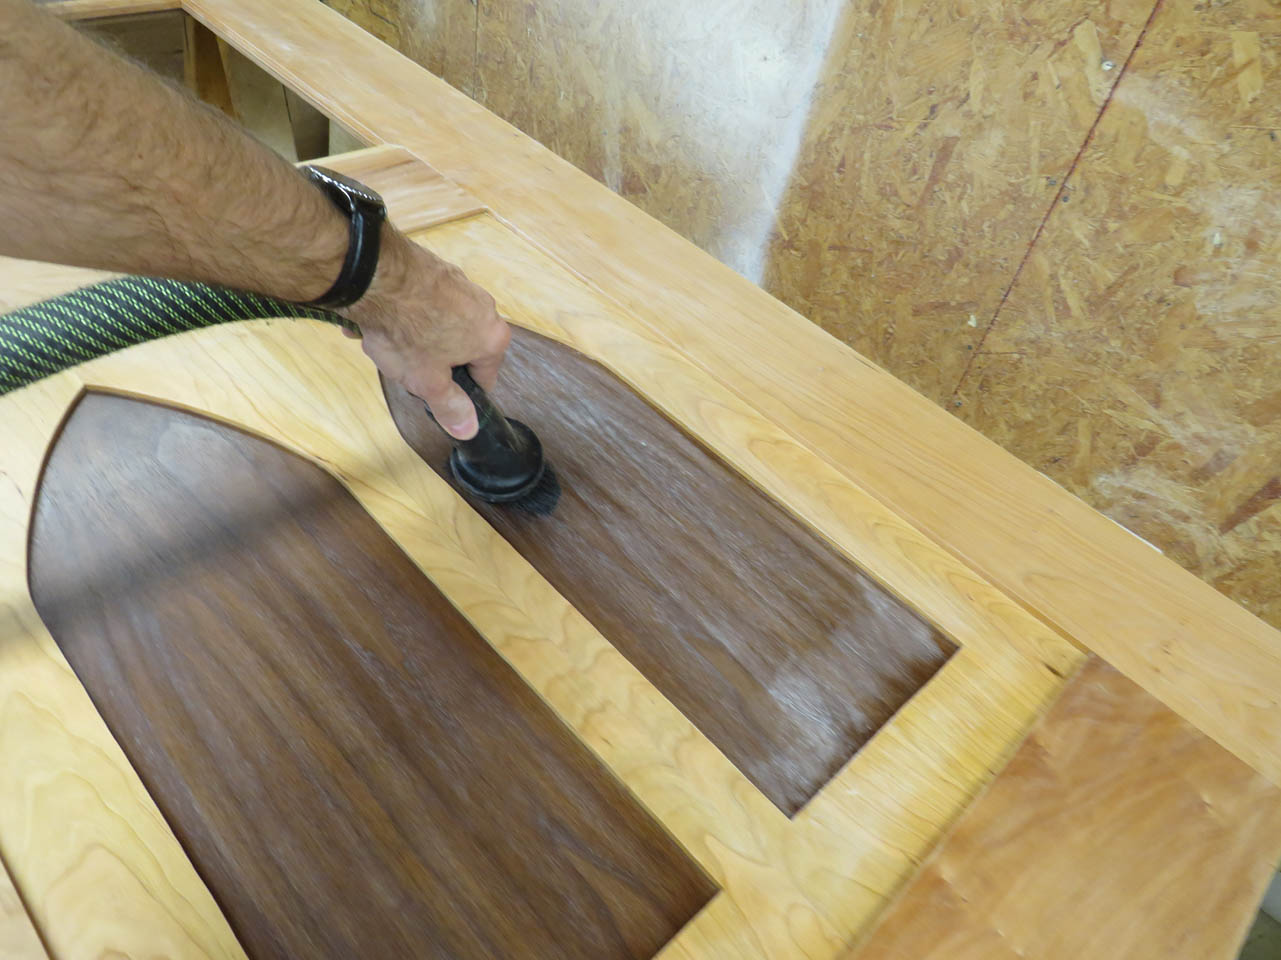
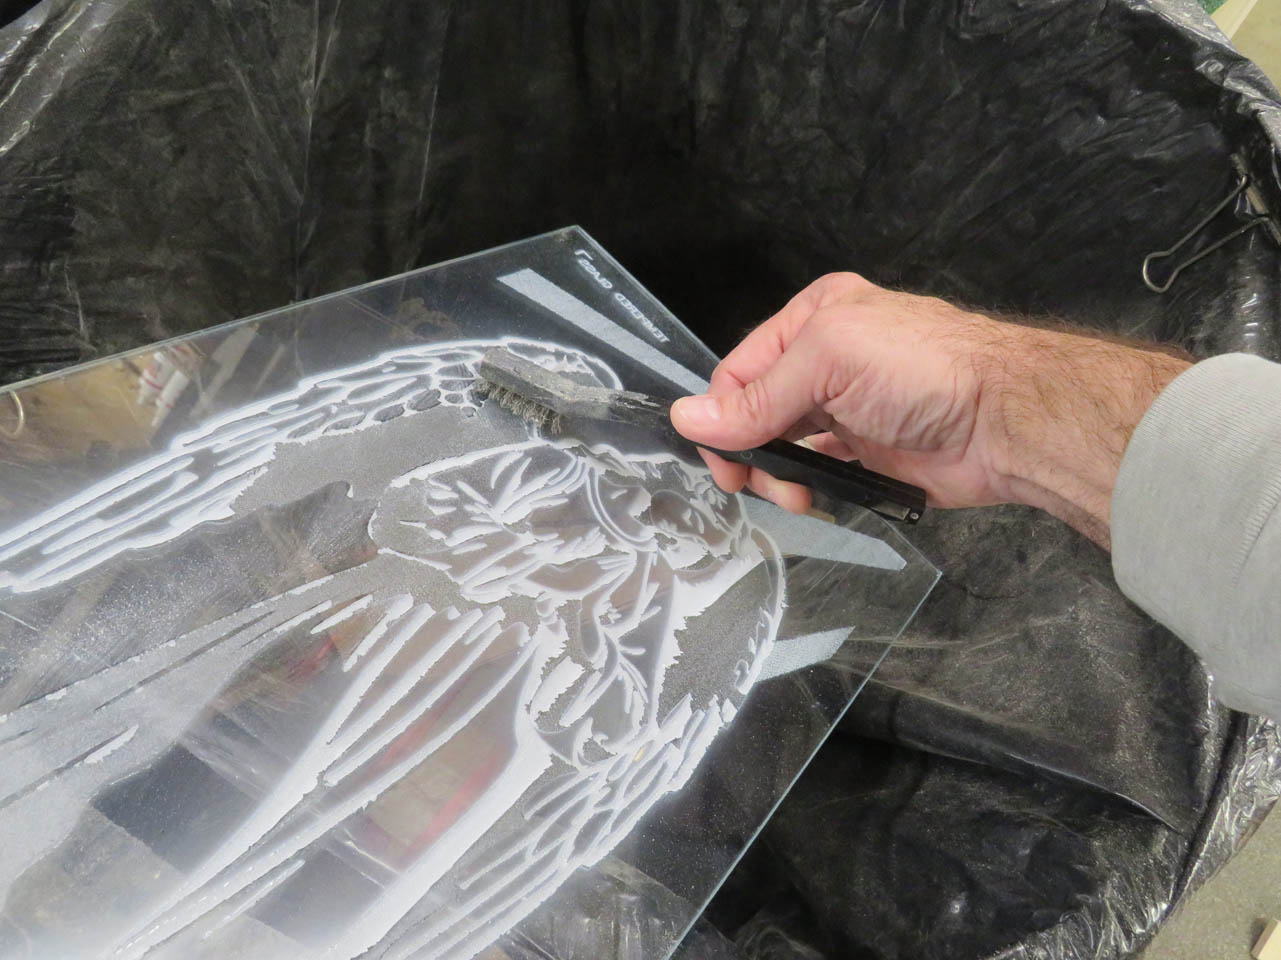
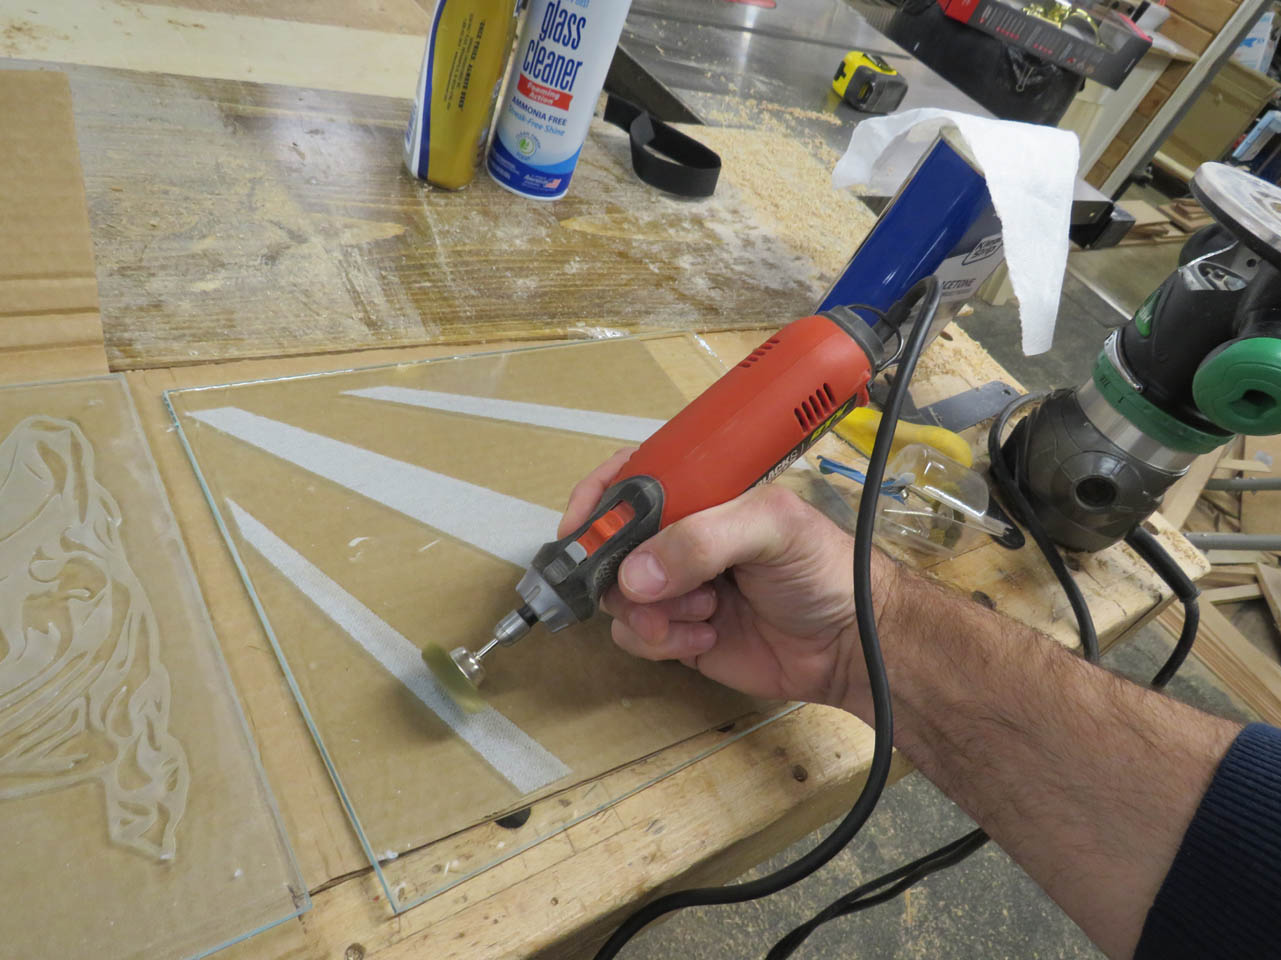
To clean off the scale, I started using a wire brush. It removed 75% of it, but it couldn’t get into the tiny detail areas. Next, I started using a small wire wheel on my Dremel tool.
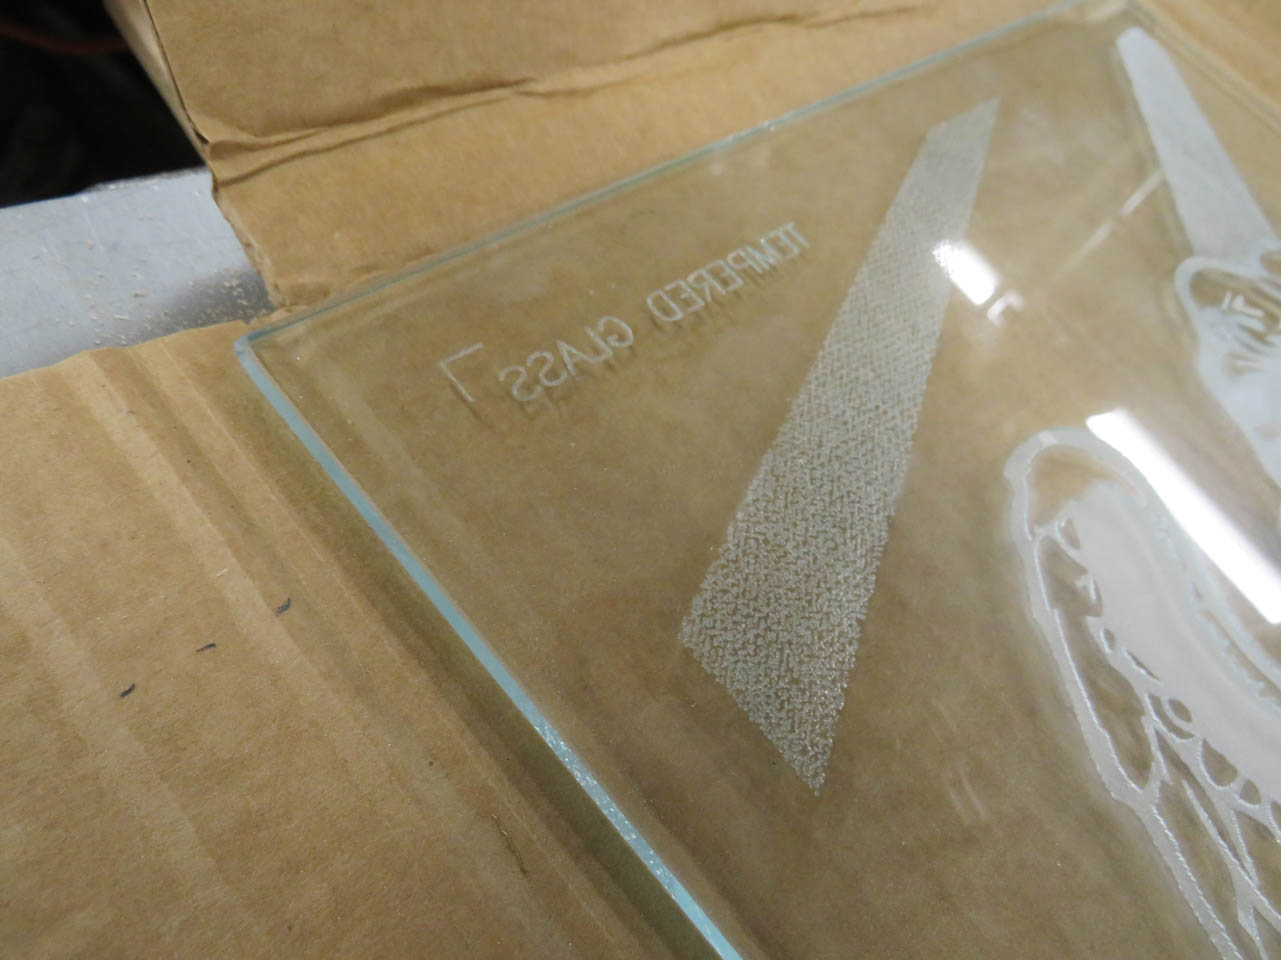
This did a good job, but burnished the glass with a brass sheen.
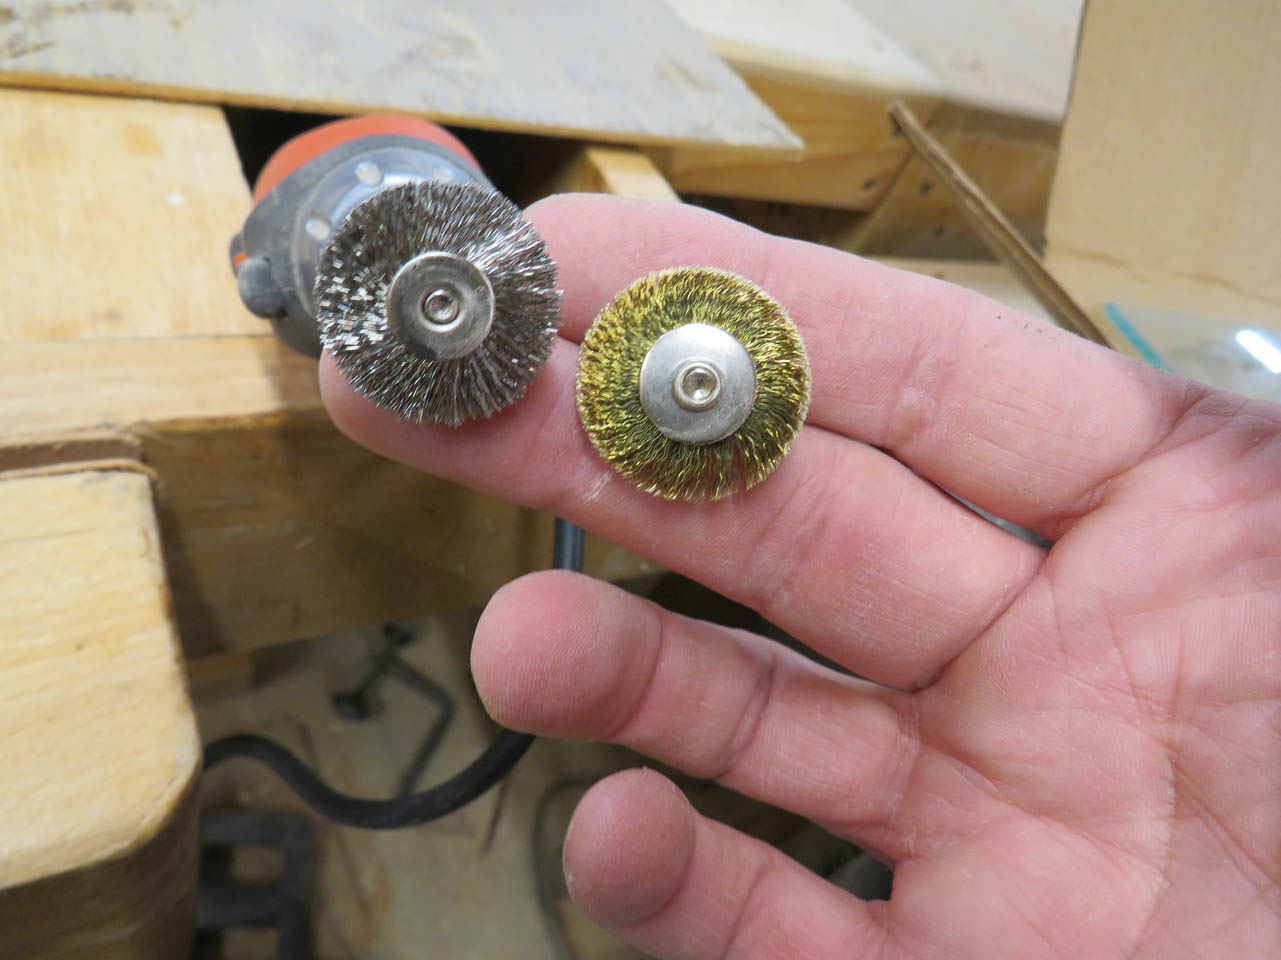
So I switched to a steel wire wheel, but it was even worse, leaving a dark grey sheen on the glass. Uggh!
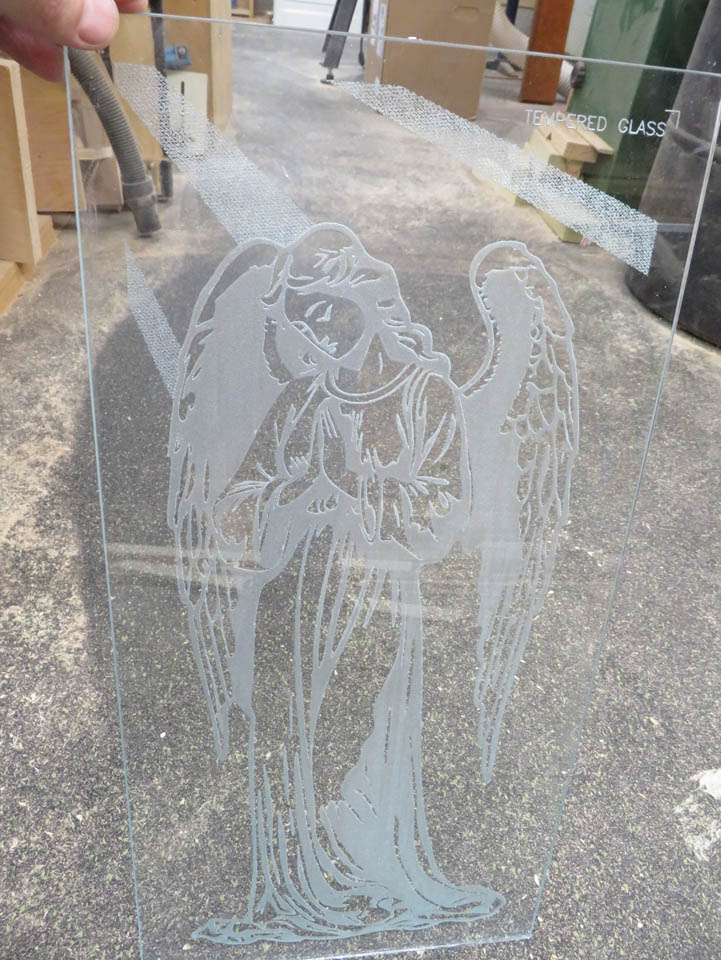
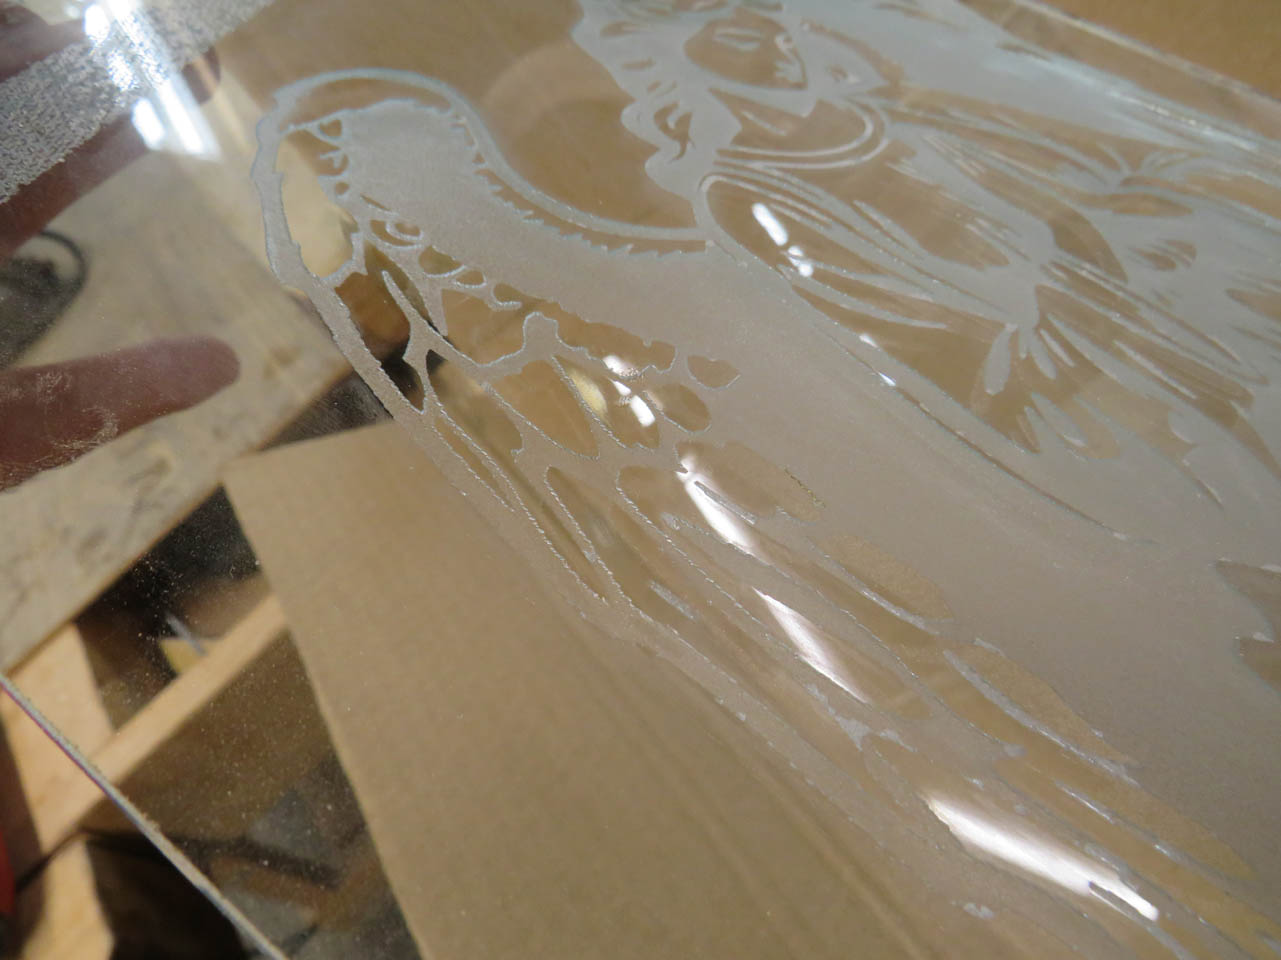
I switched back to the brass and finished the cleaning of the scale. Fifteen hours later, the second angel was done and ready for cleaning too. The smaller panels took about ten hours each. It was a long weekend for the laser running day and night…
I also spent a lot of time with the wire wheel cleaning scale.
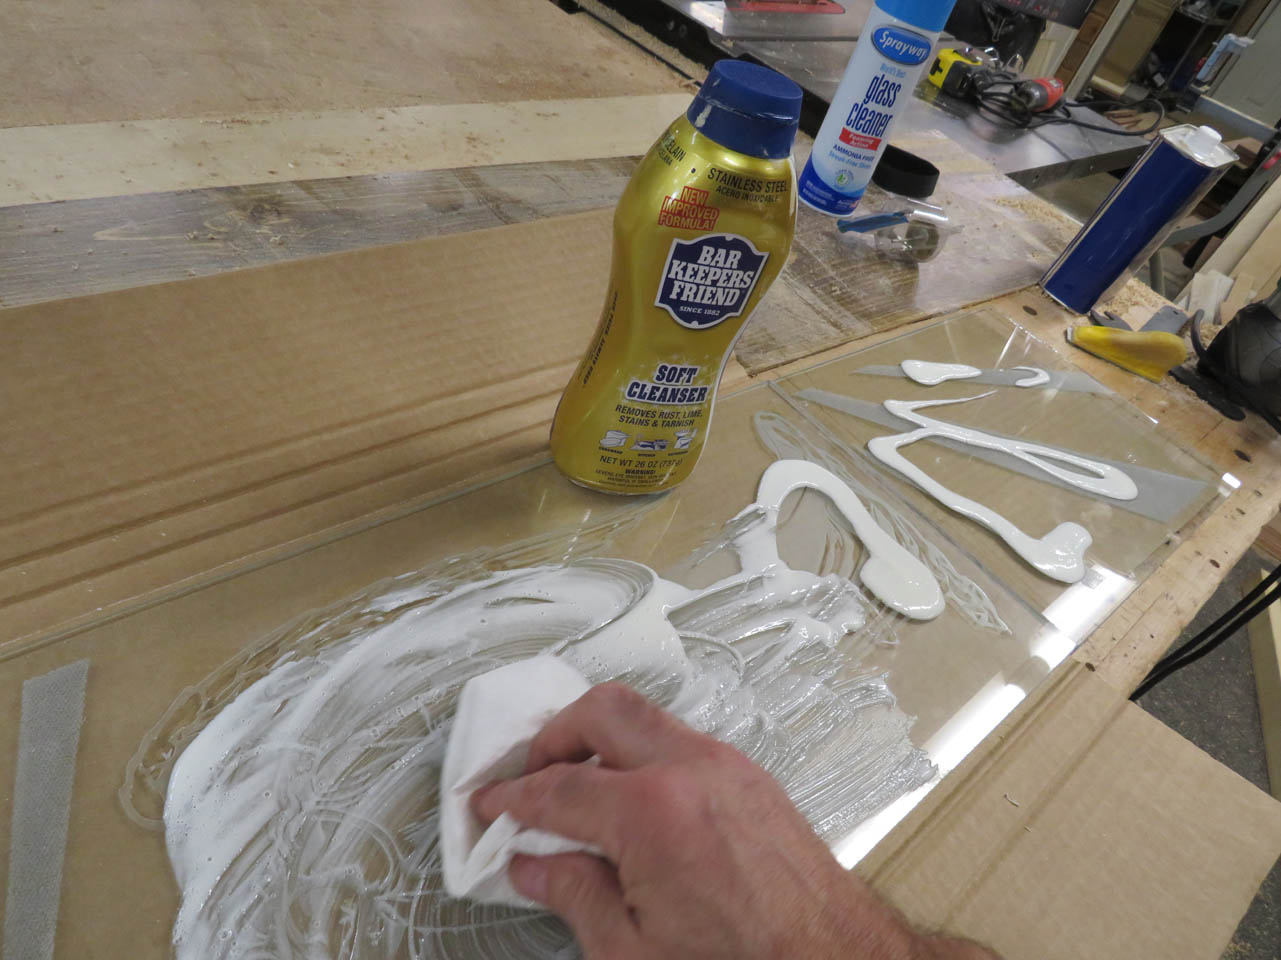
To remove the brass burnishing, I tried a tarnish remover that worked pretty well.

Then I cleaned that off with acetone and followed that with glass cleaner.
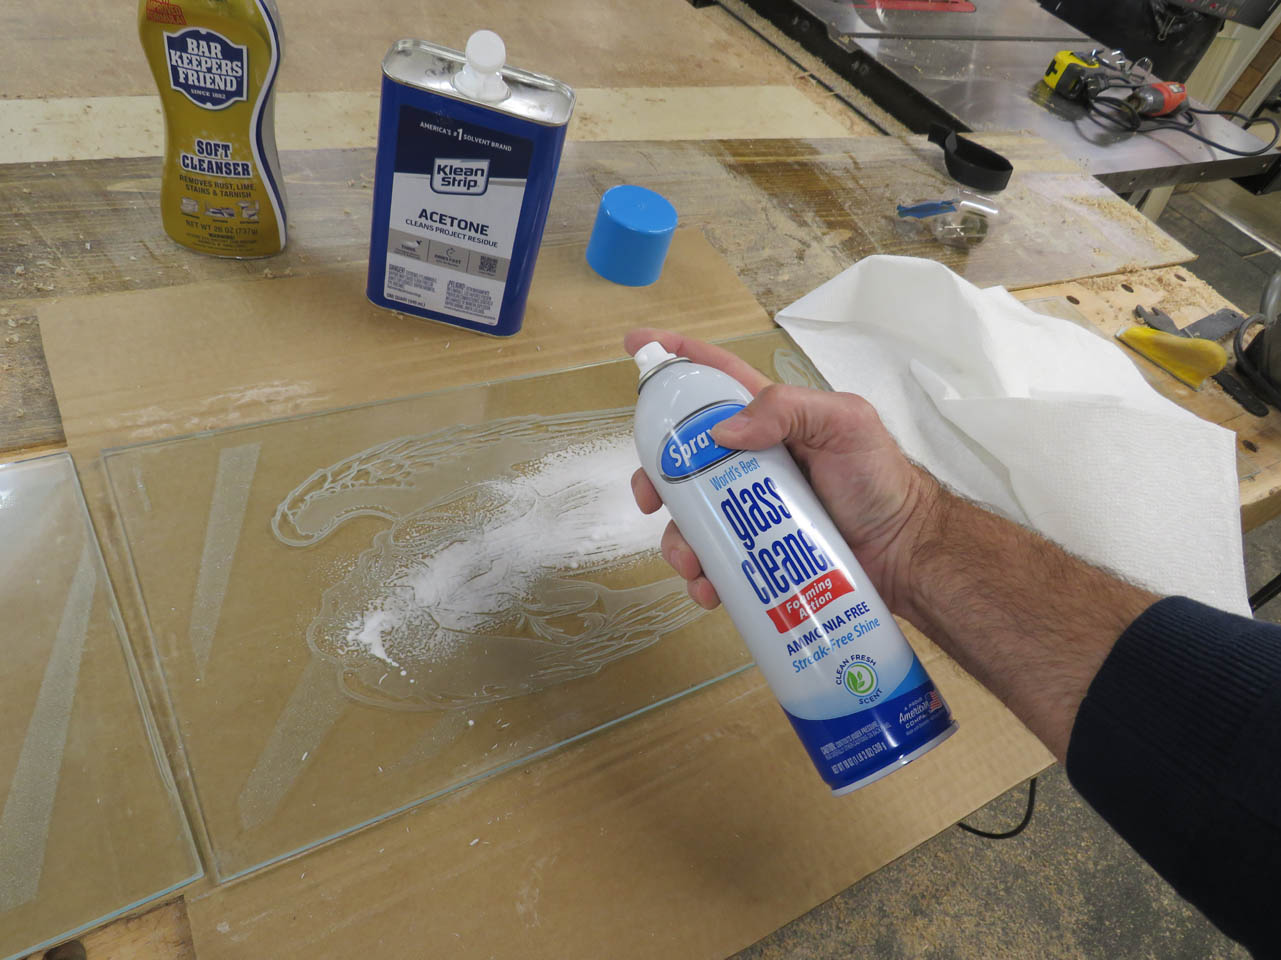
I think it cleaned up nicely. Way more effort than I expected, but that is usually the case…
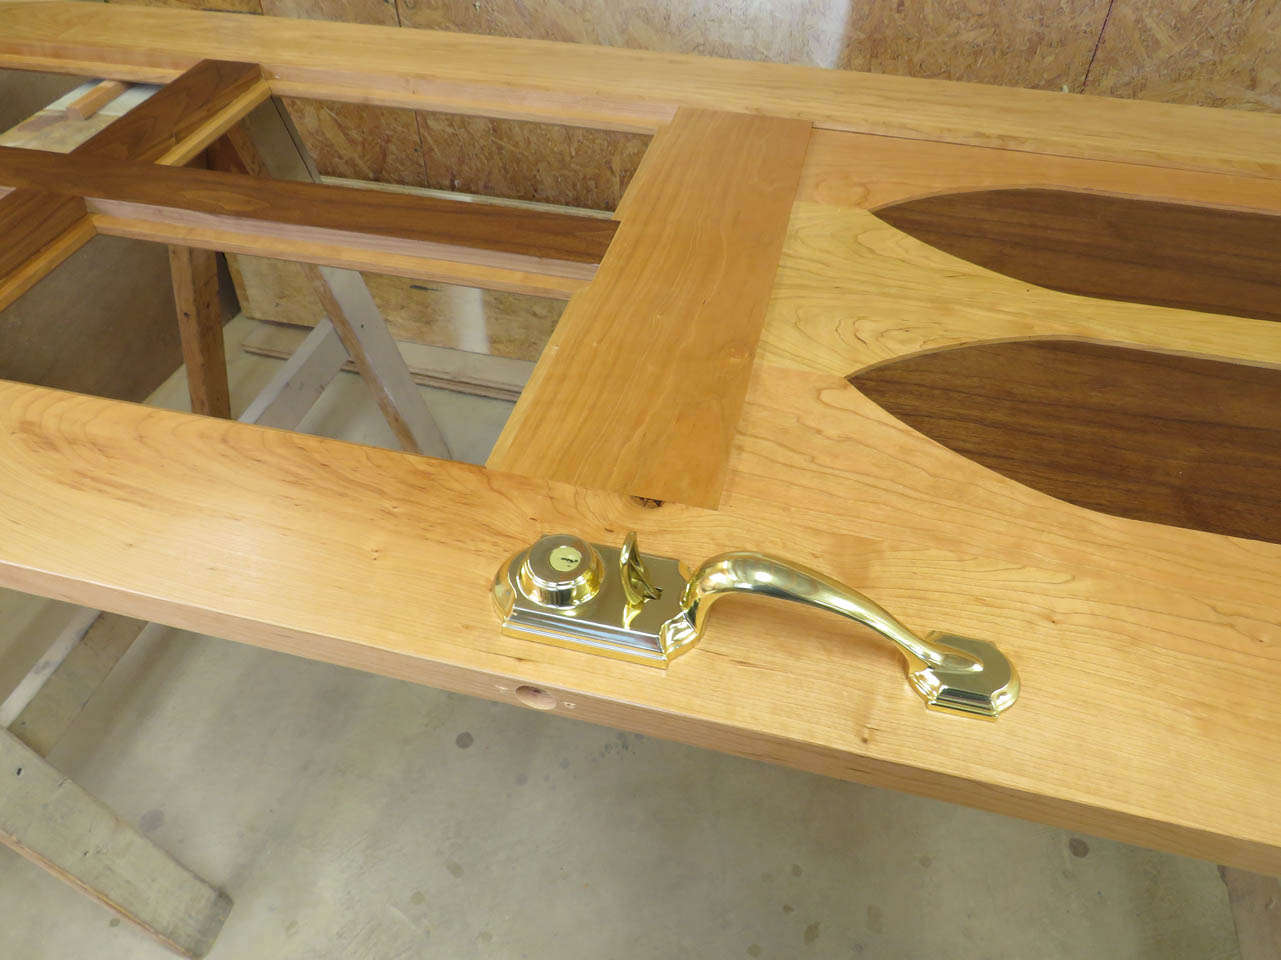
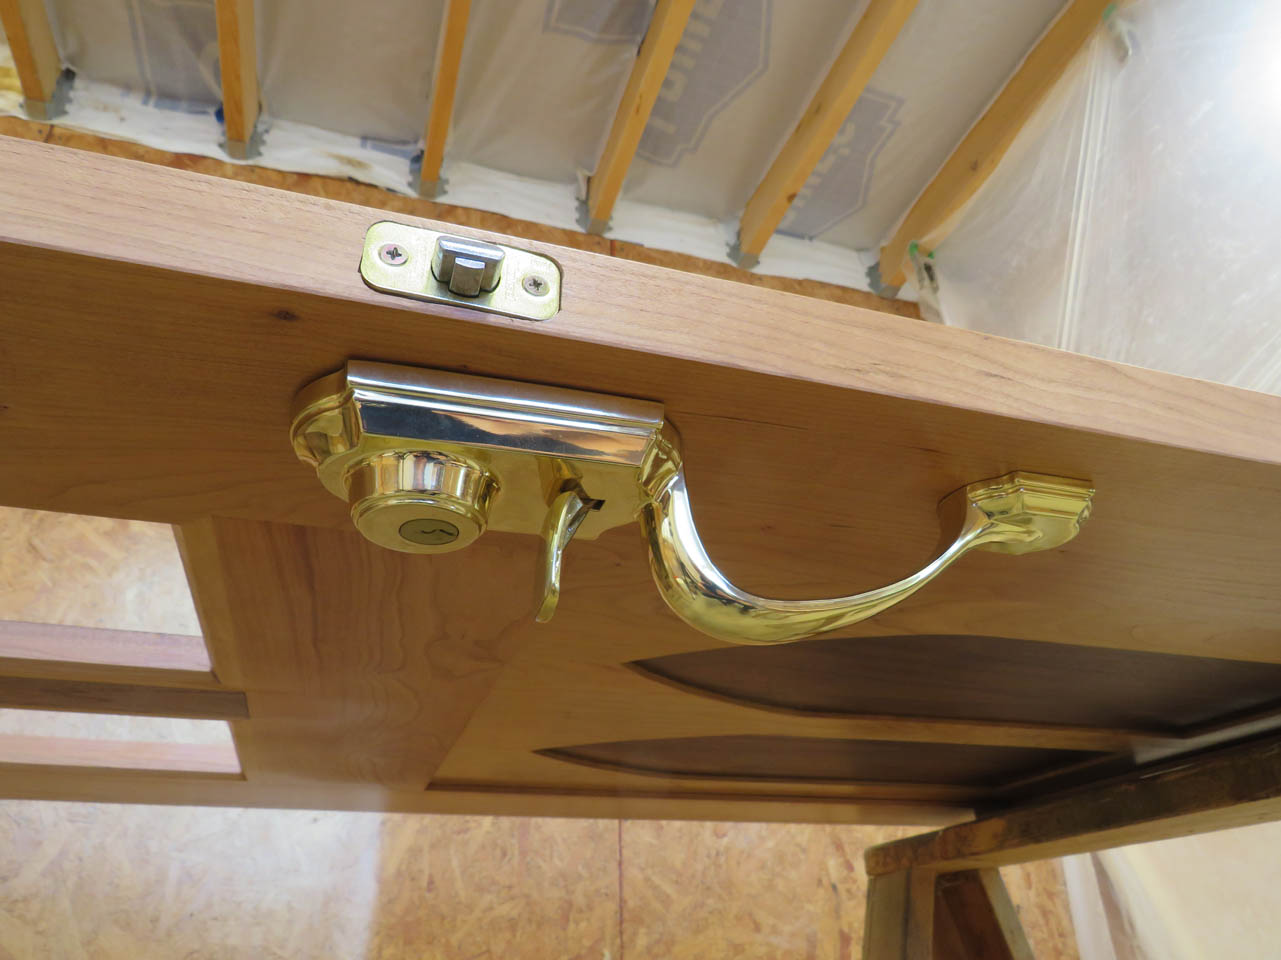
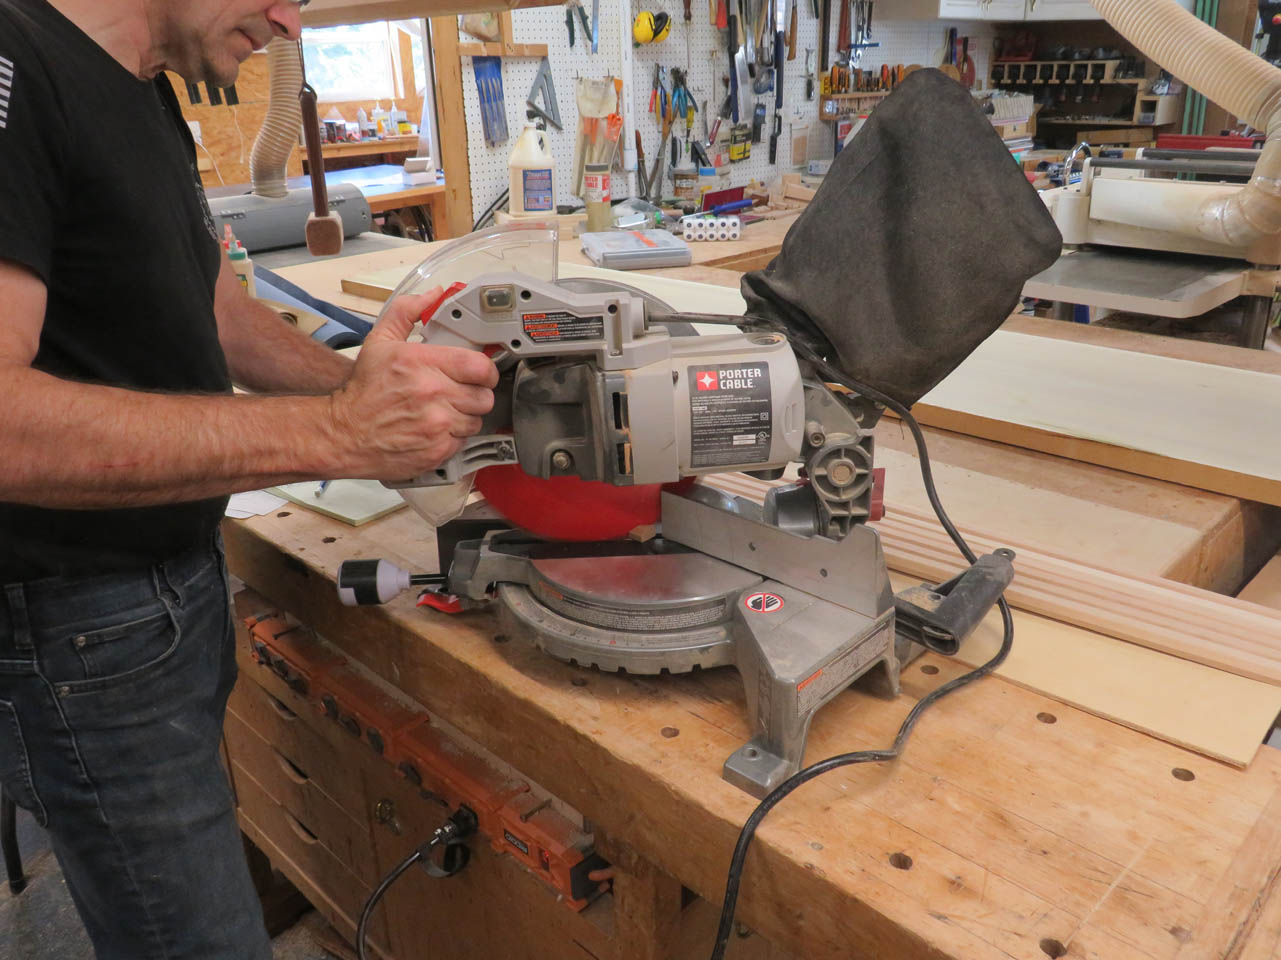
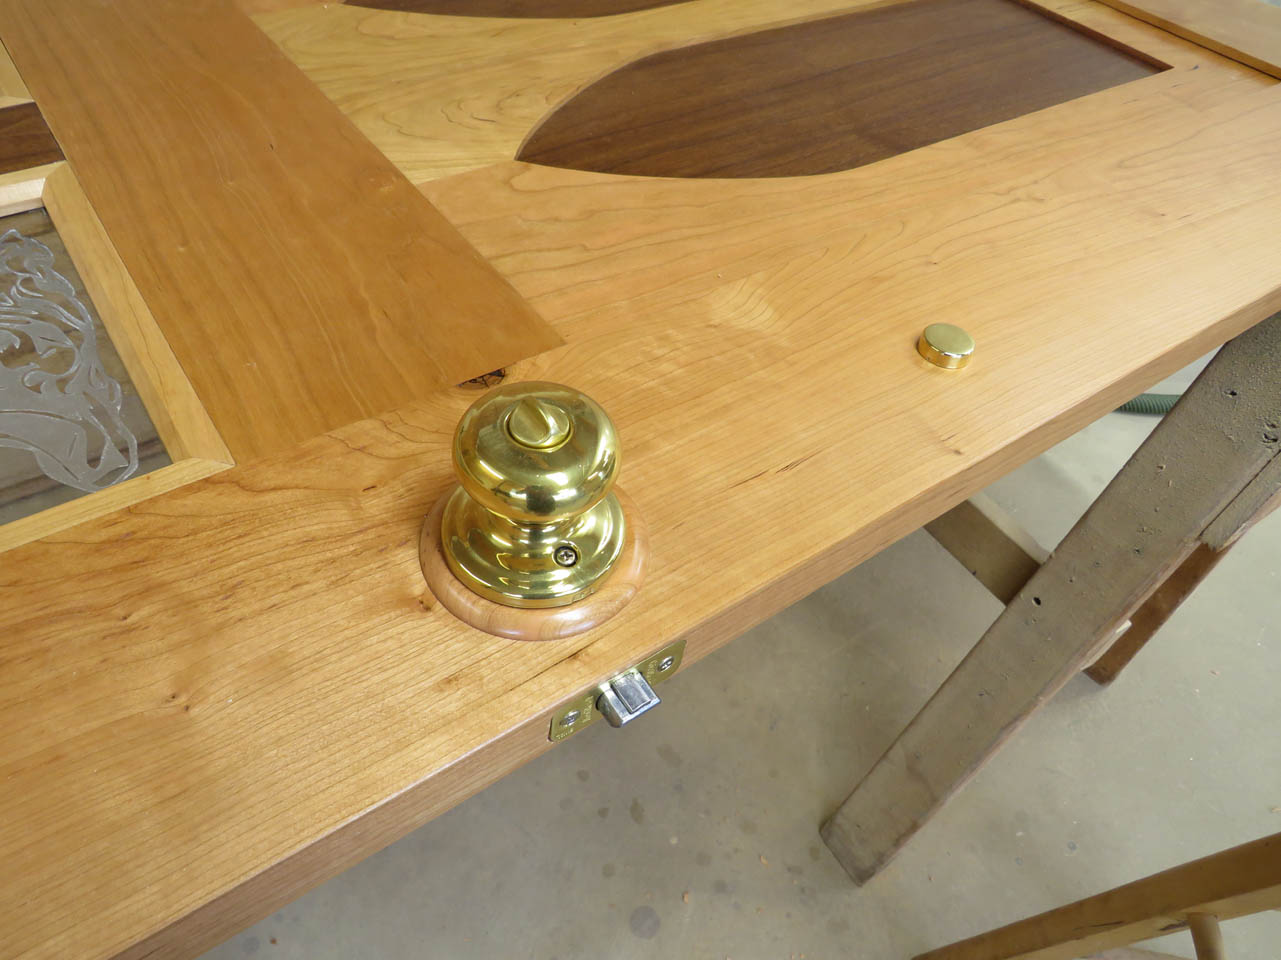
Taking a break from the windows for a bit, I decided to install the door handle.
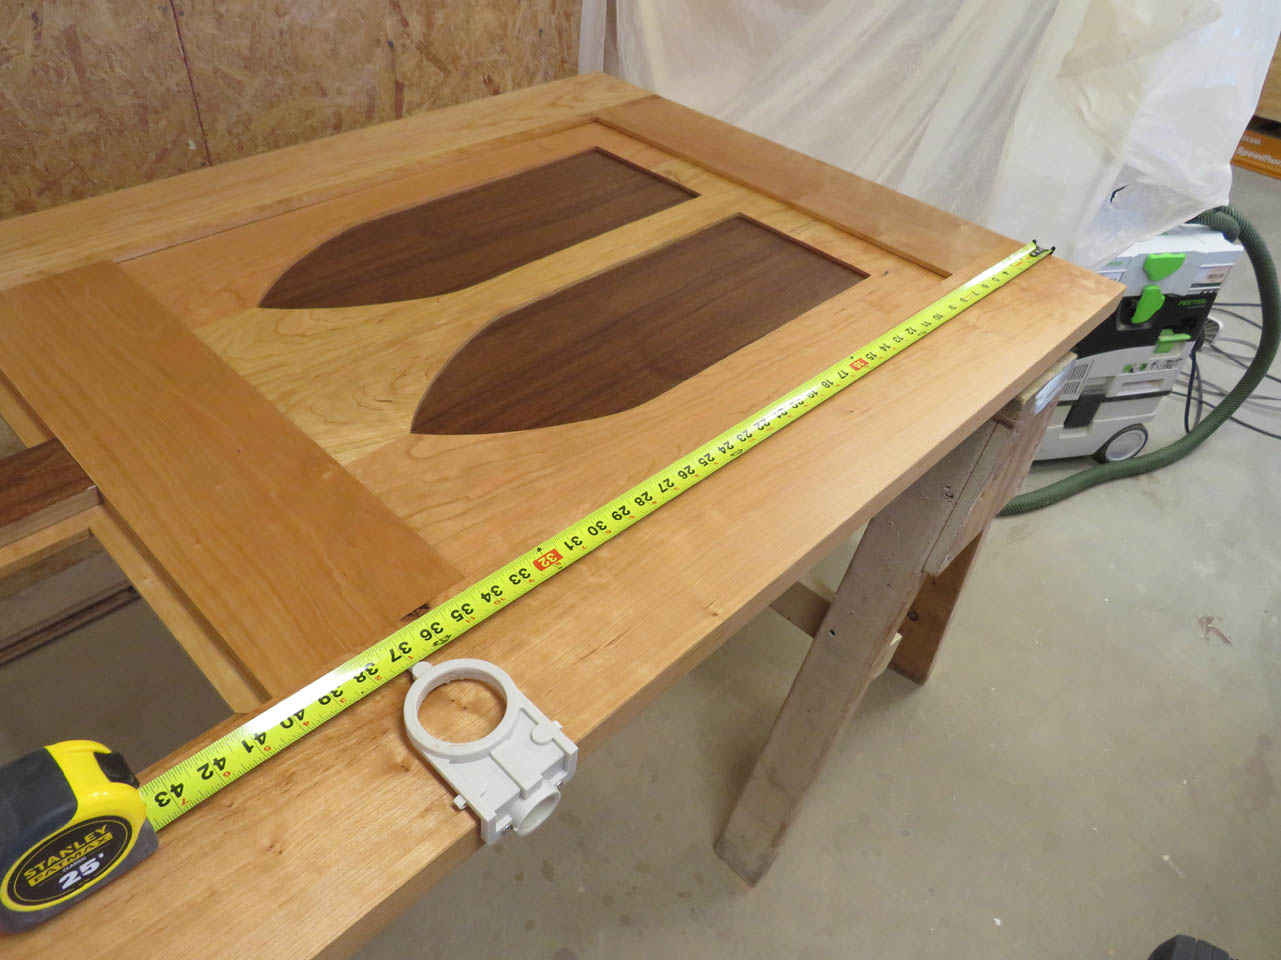
This handle will have a latch style handle on the front and a door knob on the back.

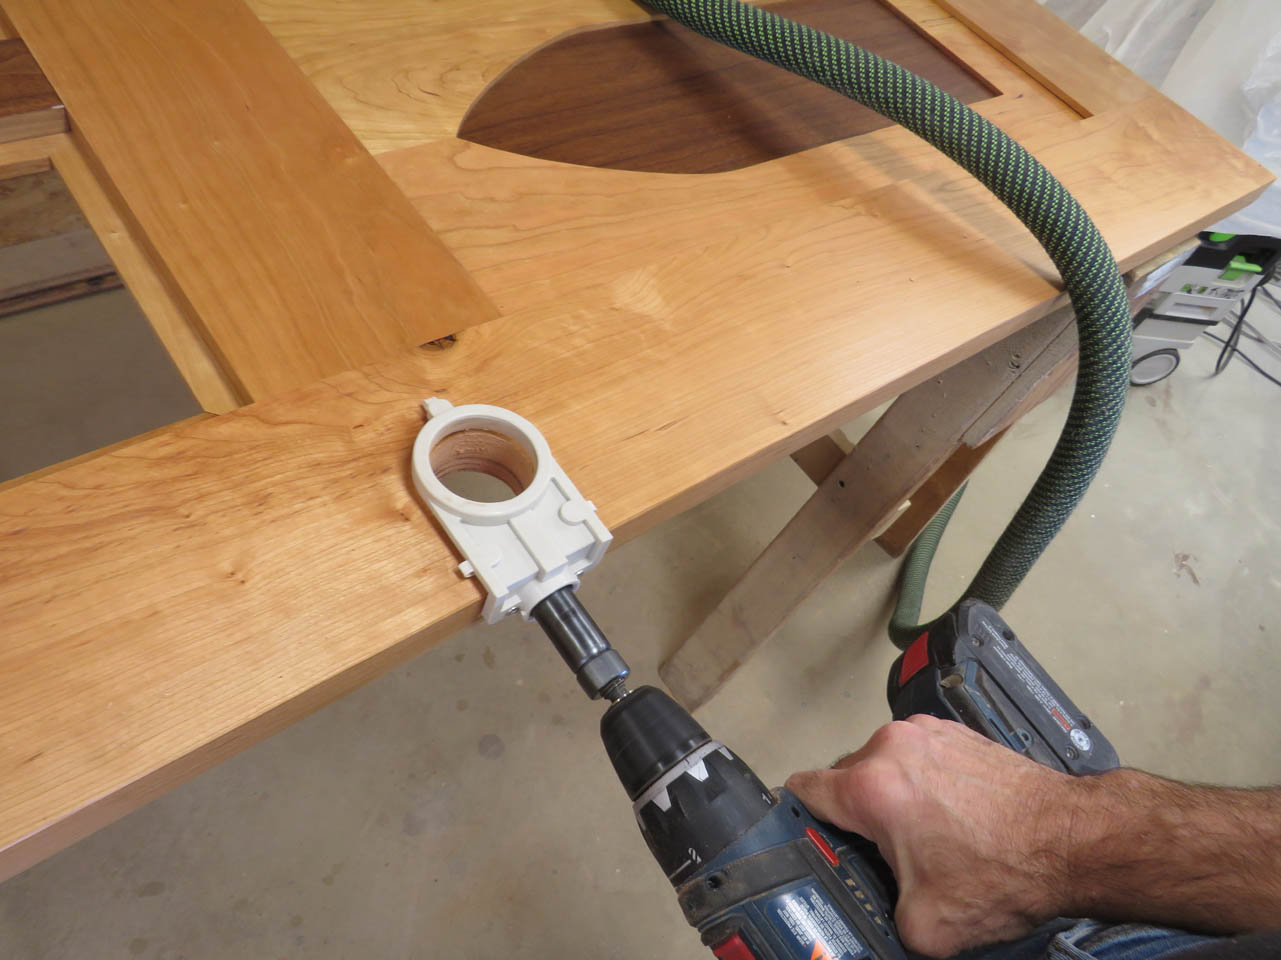
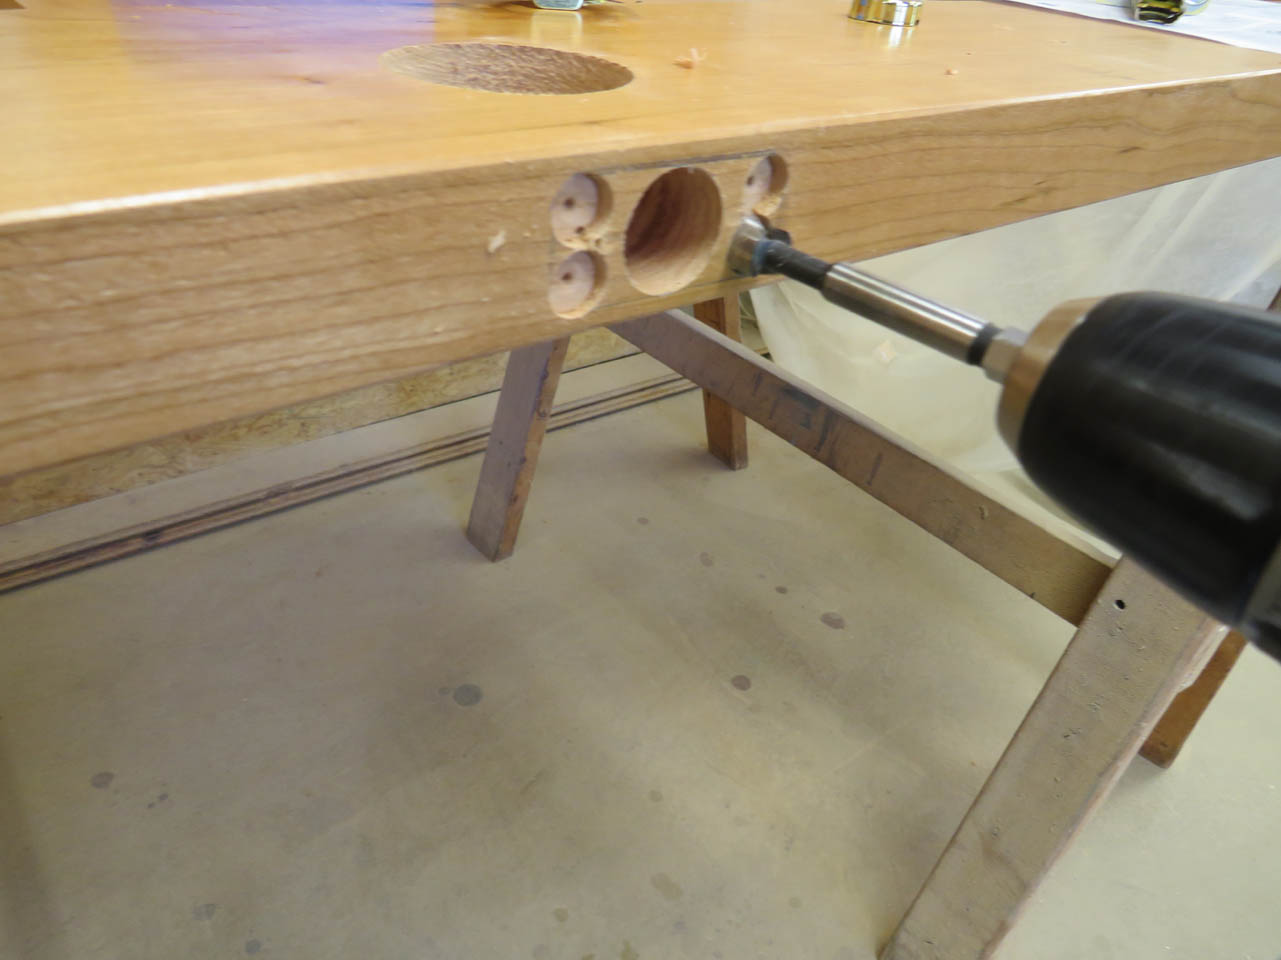
I have a jig for drilling standard holes for a door knob. I screwed it on then started by drilling the larger diameter hole through the face.
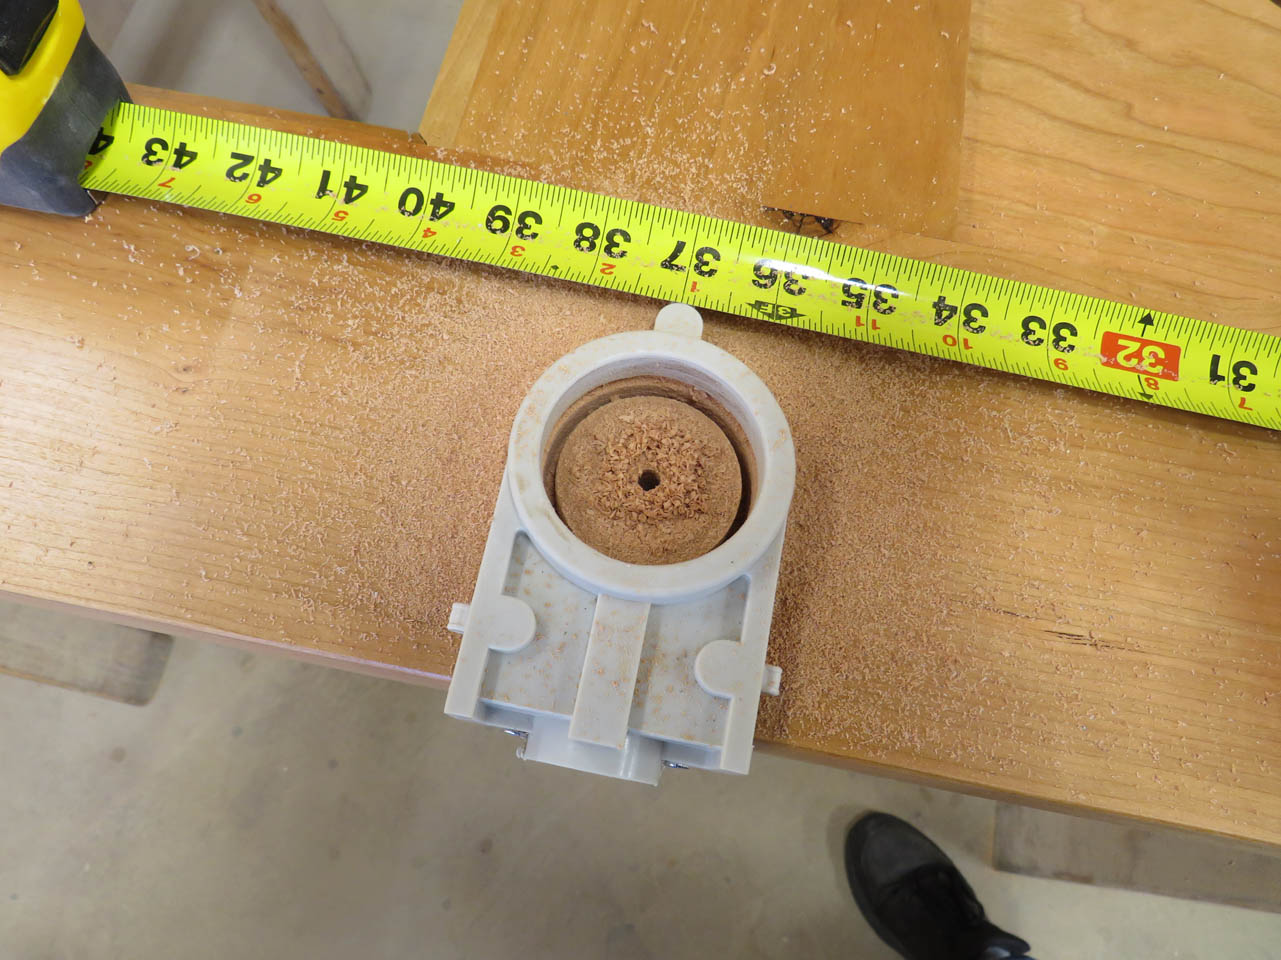

When the hole saw was almost through, I flipped the drill to the opposite side to break through without tearing out any of the wood around the edges.
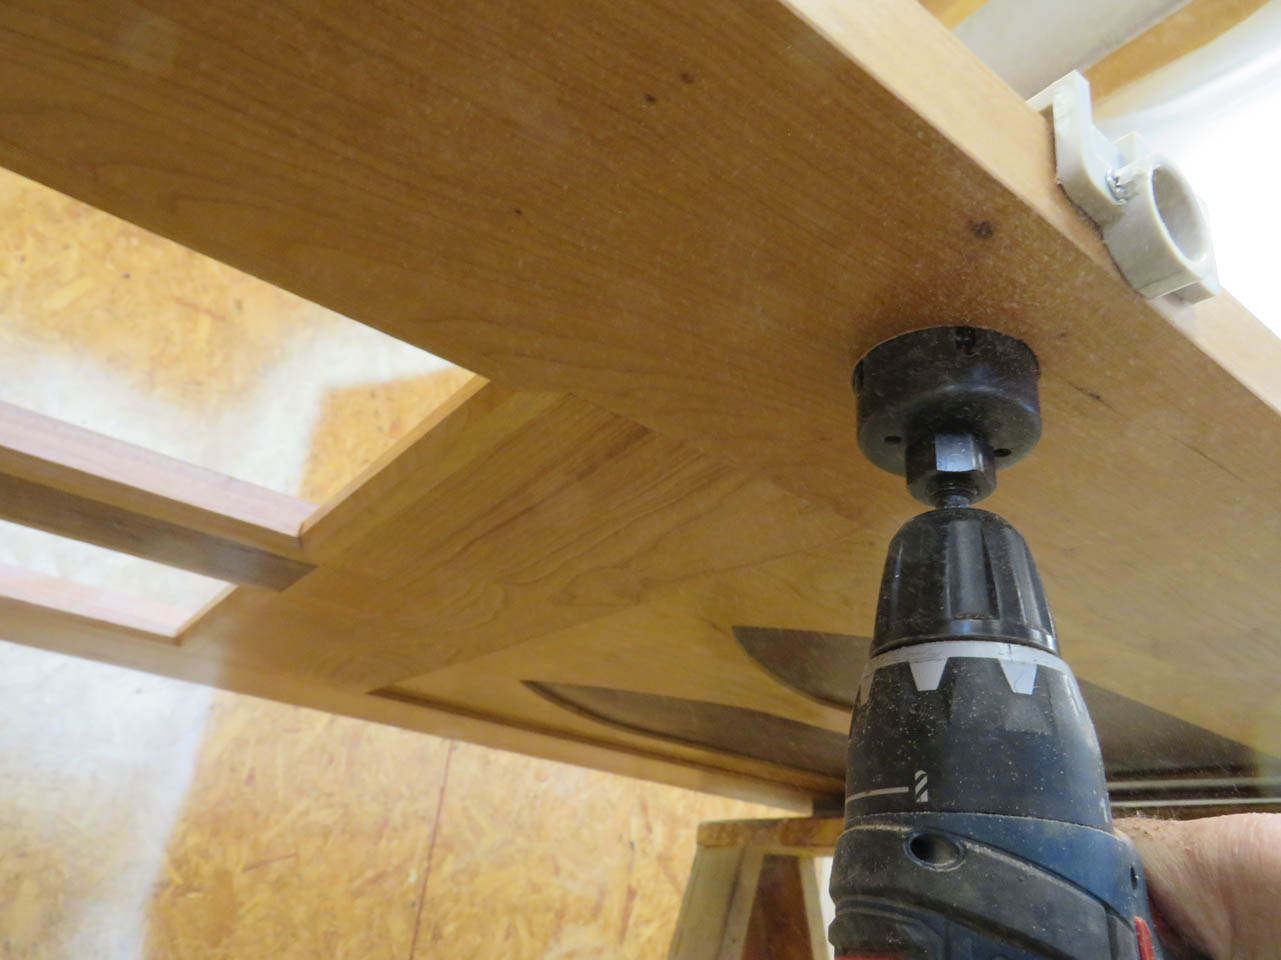
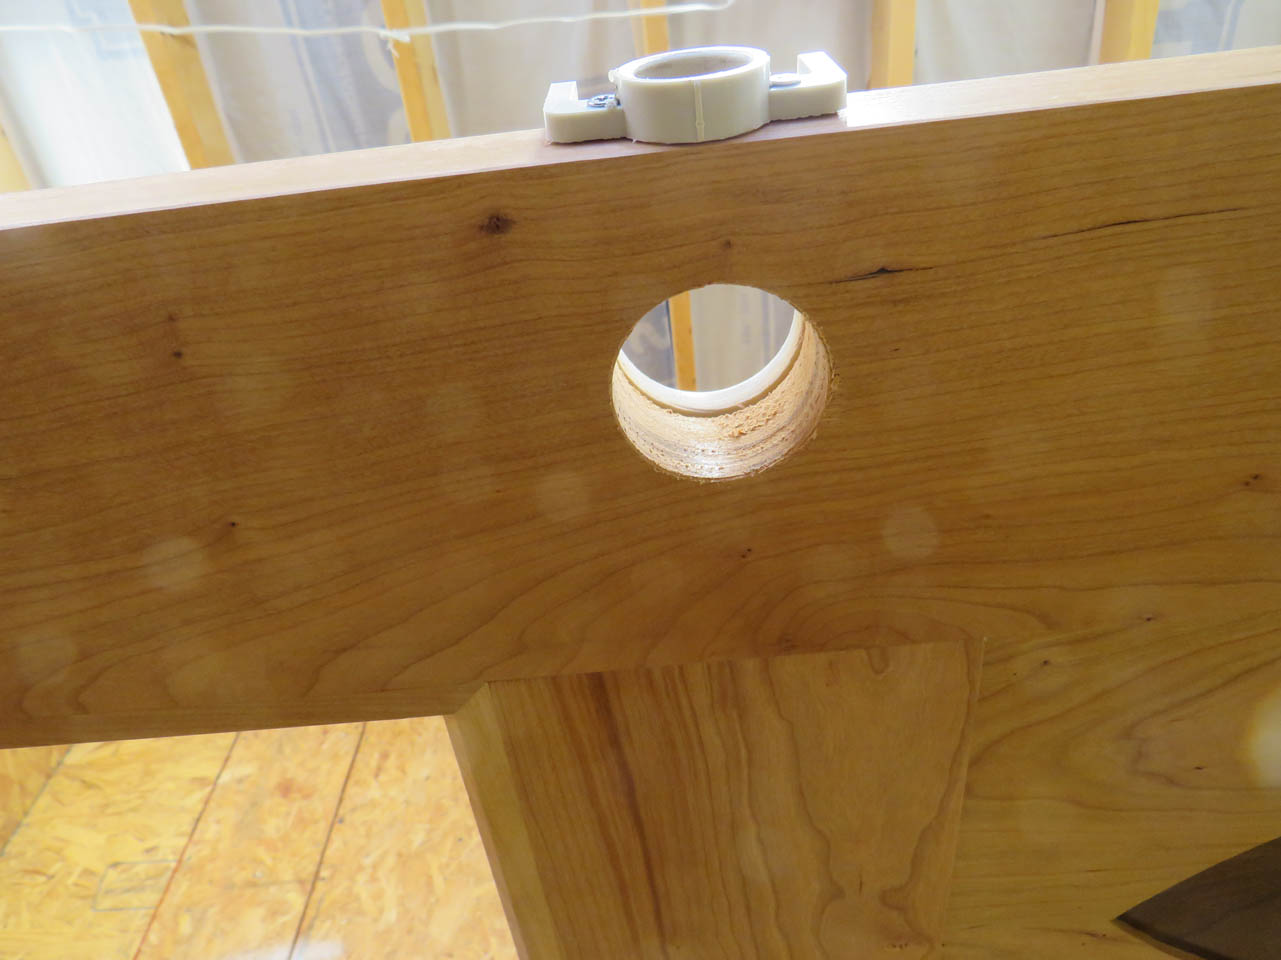
When that was done, I switched to the smaller hole saw and drilled out the hole for the latch.


The holes from mounting the jig are also the same holes that will be used for attaching the latch.
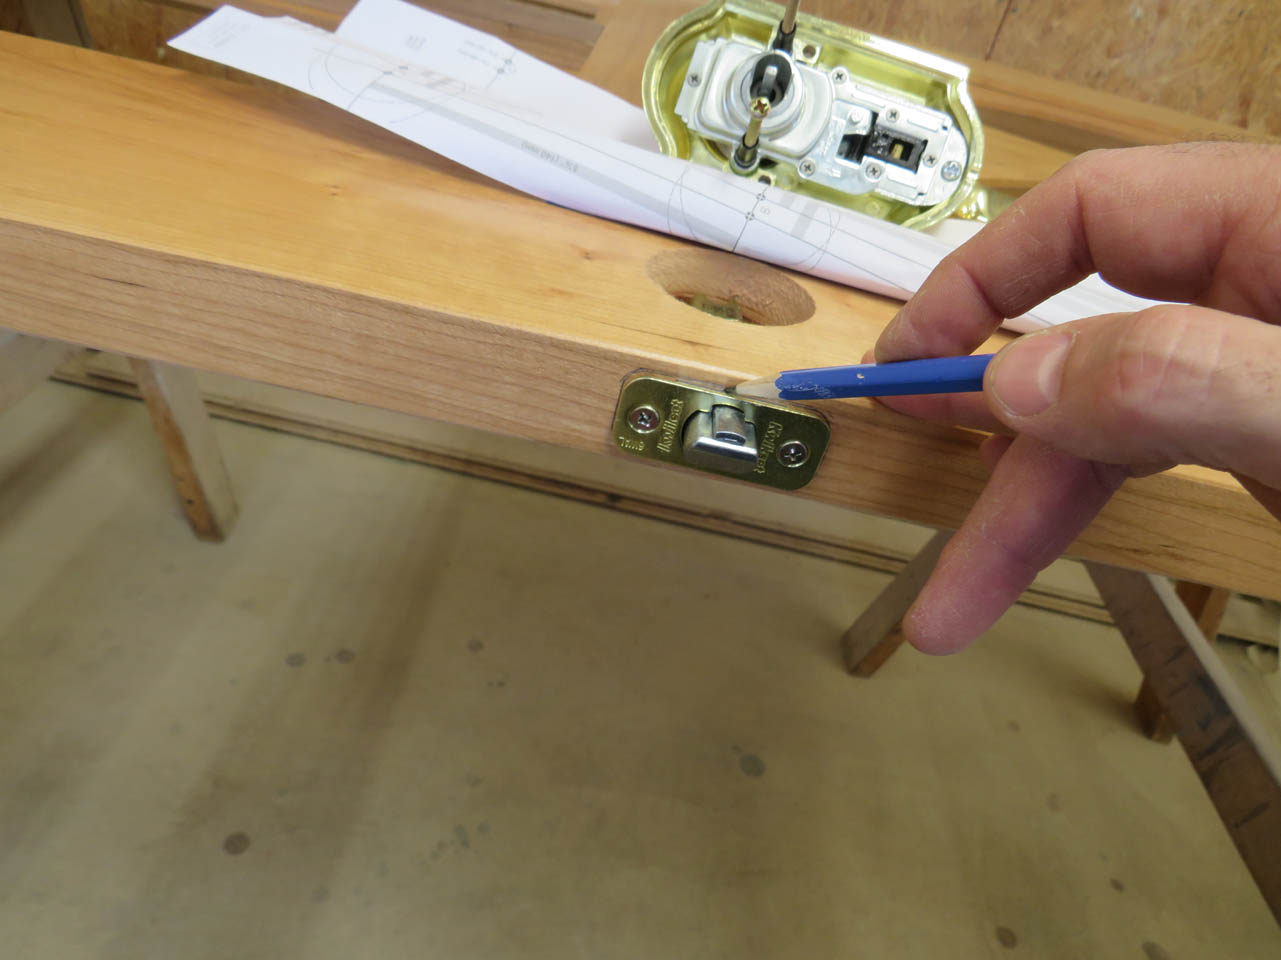
I screwed the latch into place and marked it’s outline, then removed it again.
I also taped the door handle template in place to locate and drill out the bottom mounting hole for the handle.

The latch plate needs to be recessed so I drilled out the corners of my marked area, then cleared out the rest with a chisel.
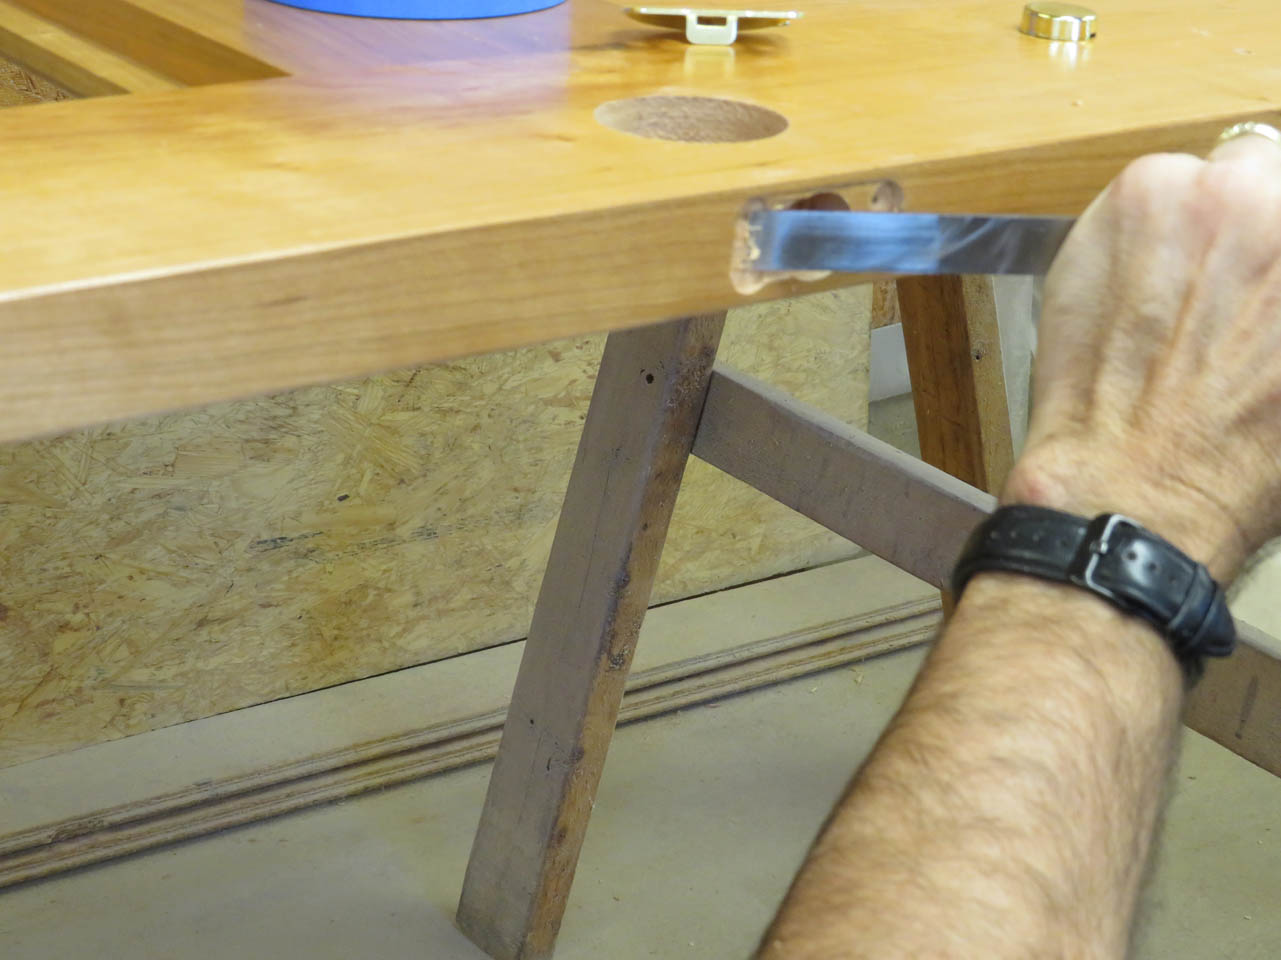
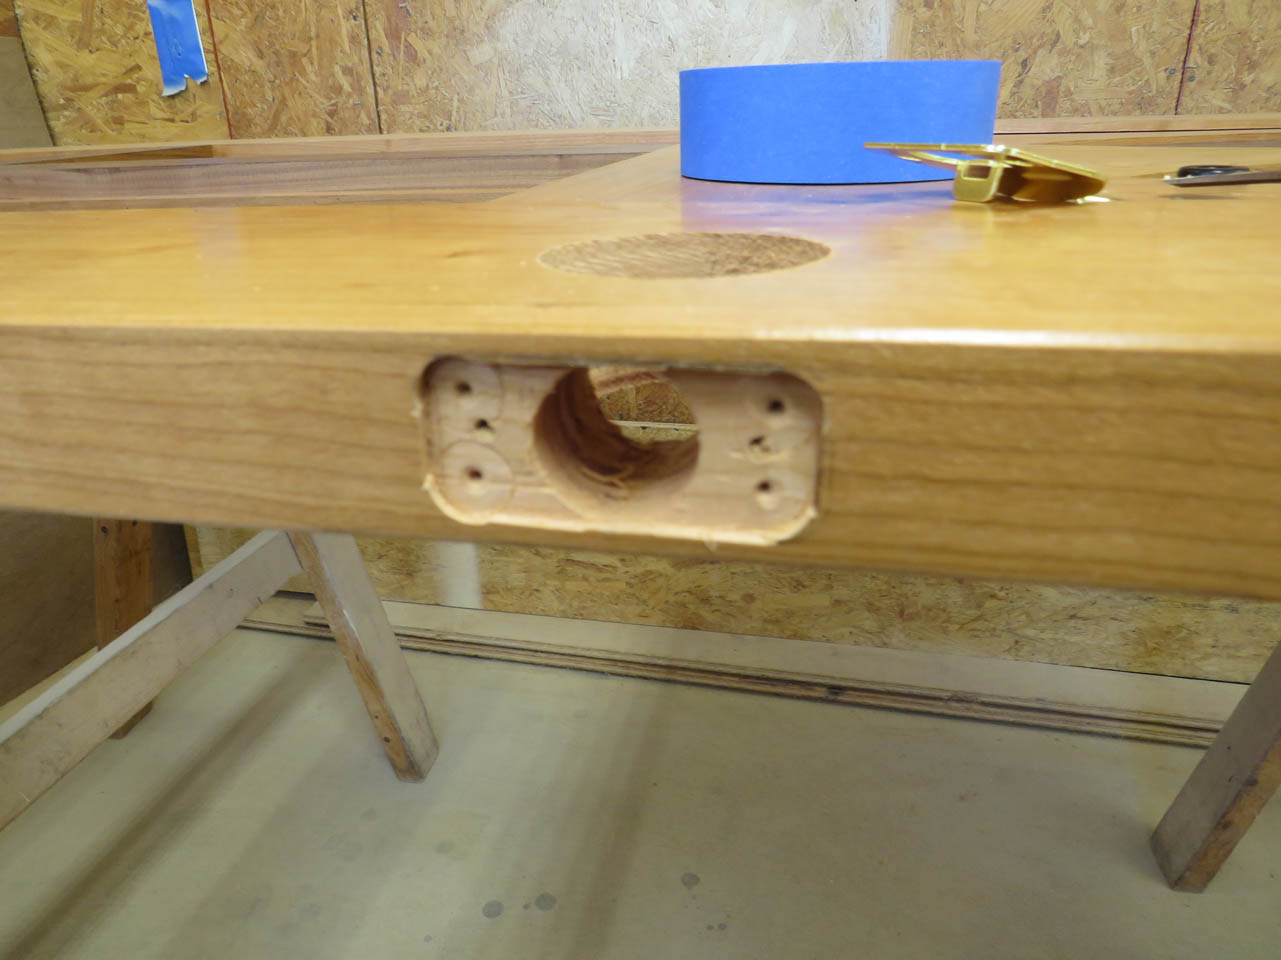
Now the latch sets slightly back from the surface of the wood so that it does not hit the door jamb.
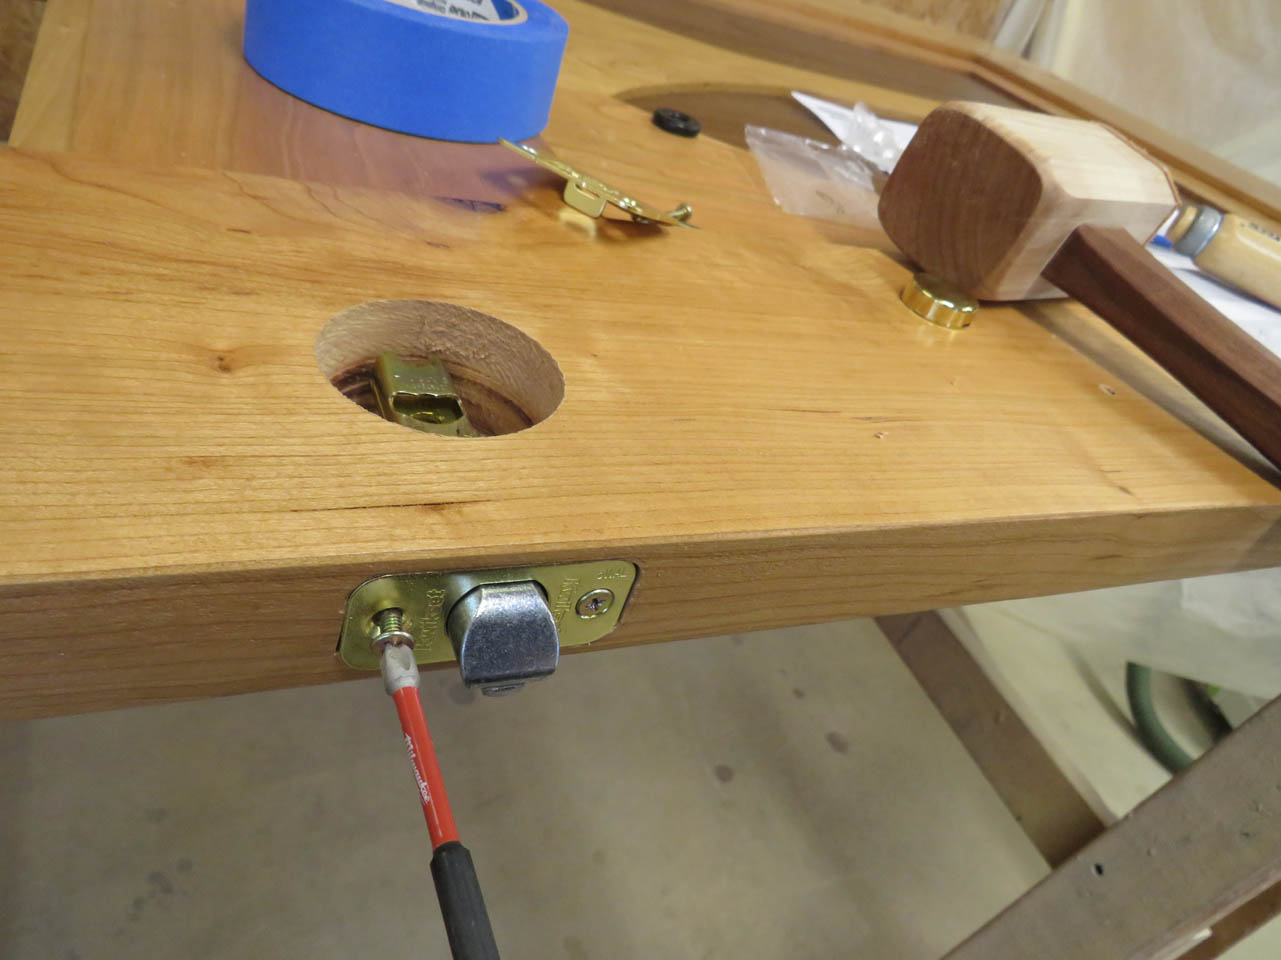
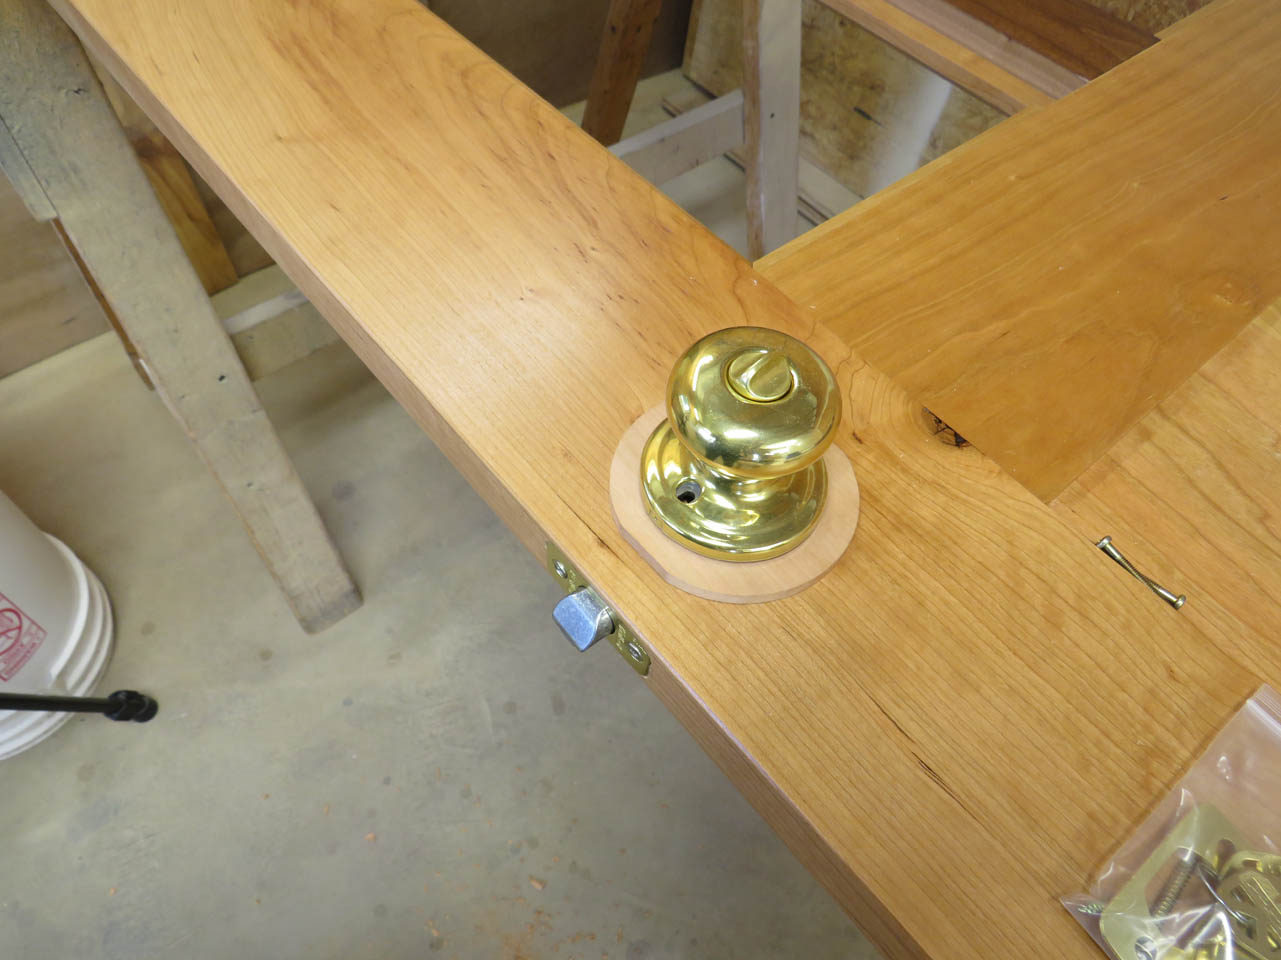
I attached the door handle to the front and found a new problem.
The screw to mount the bottom of the handle was 3/8″ too long. That was fixed with a cut-off wheel on my Dremel tool. Then I realized the knob did not touch the back side of the door.

It was also almost 3/8″ too long.
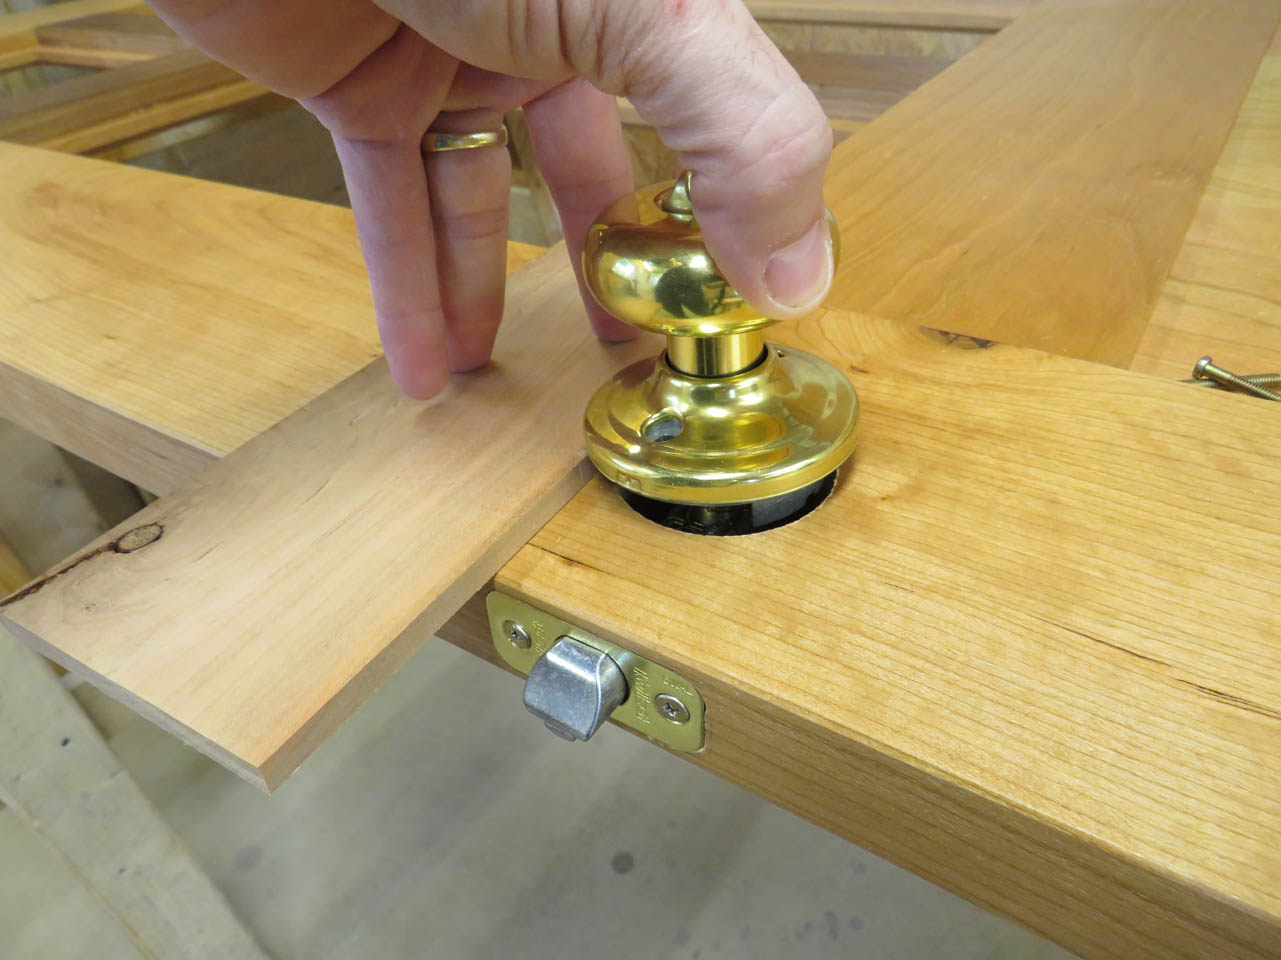
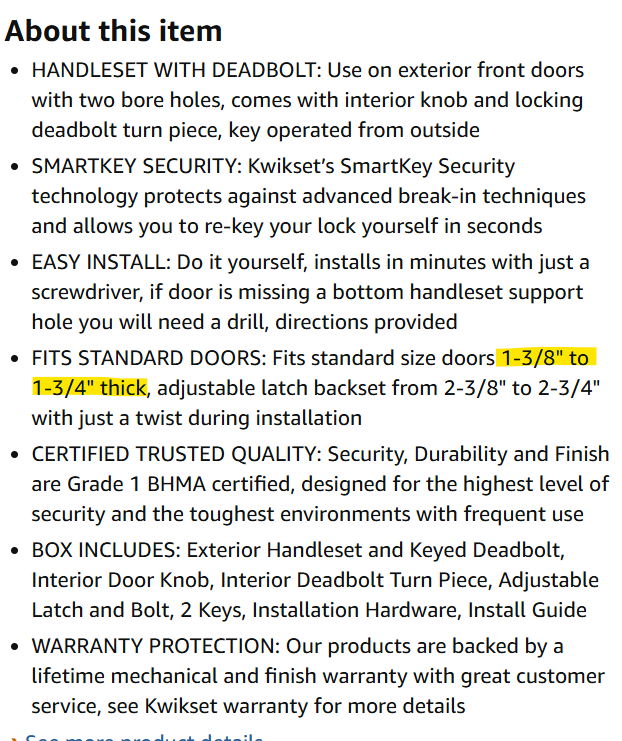
The manual for the door specifically states that it is made for 1-3/8″ or 1-3/4″ thick doors. I only had a screw for the thicker door and I found no adjustment or instructions to shrink the distance between the handles.
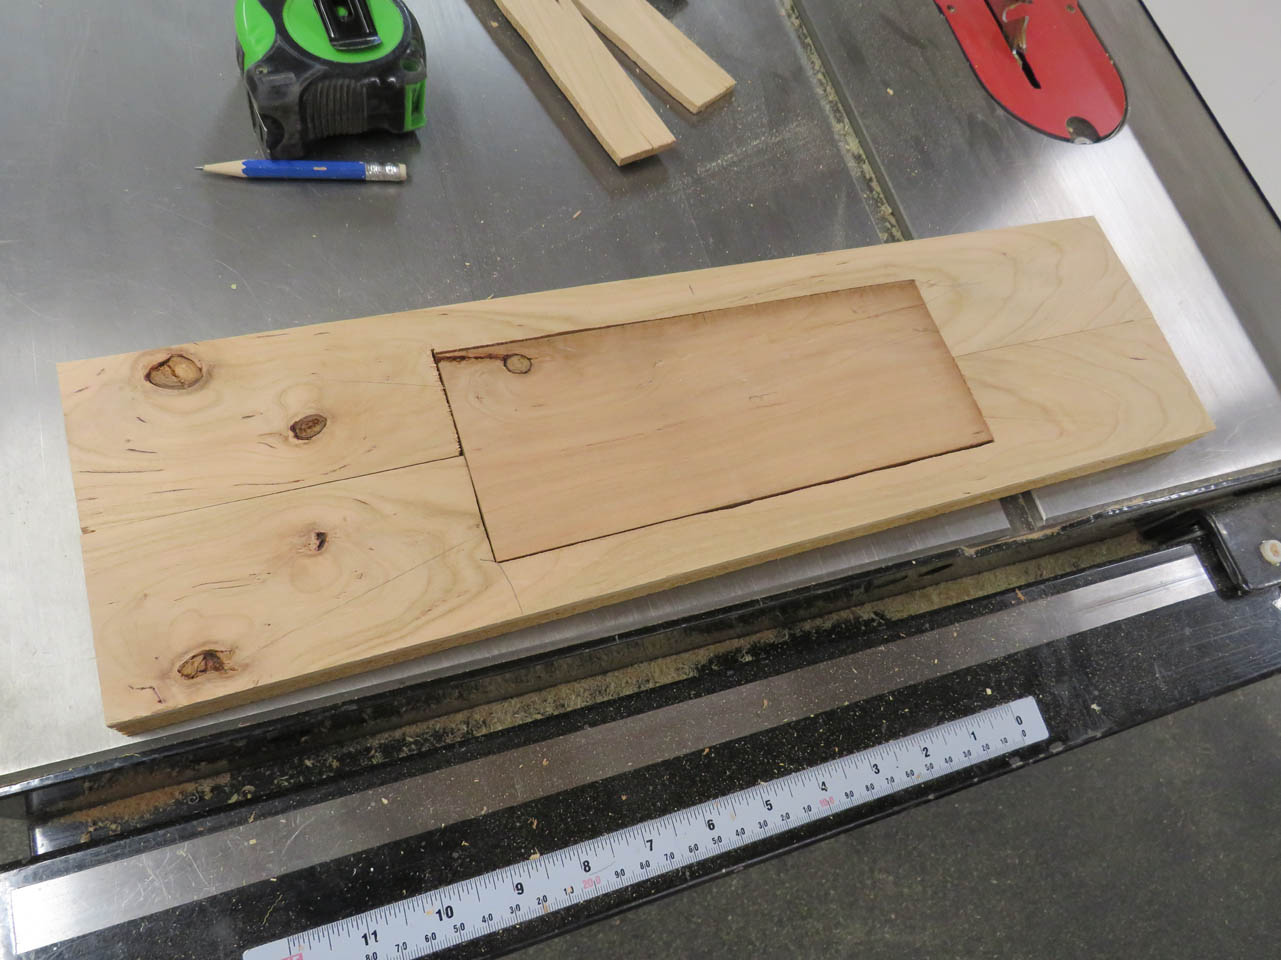
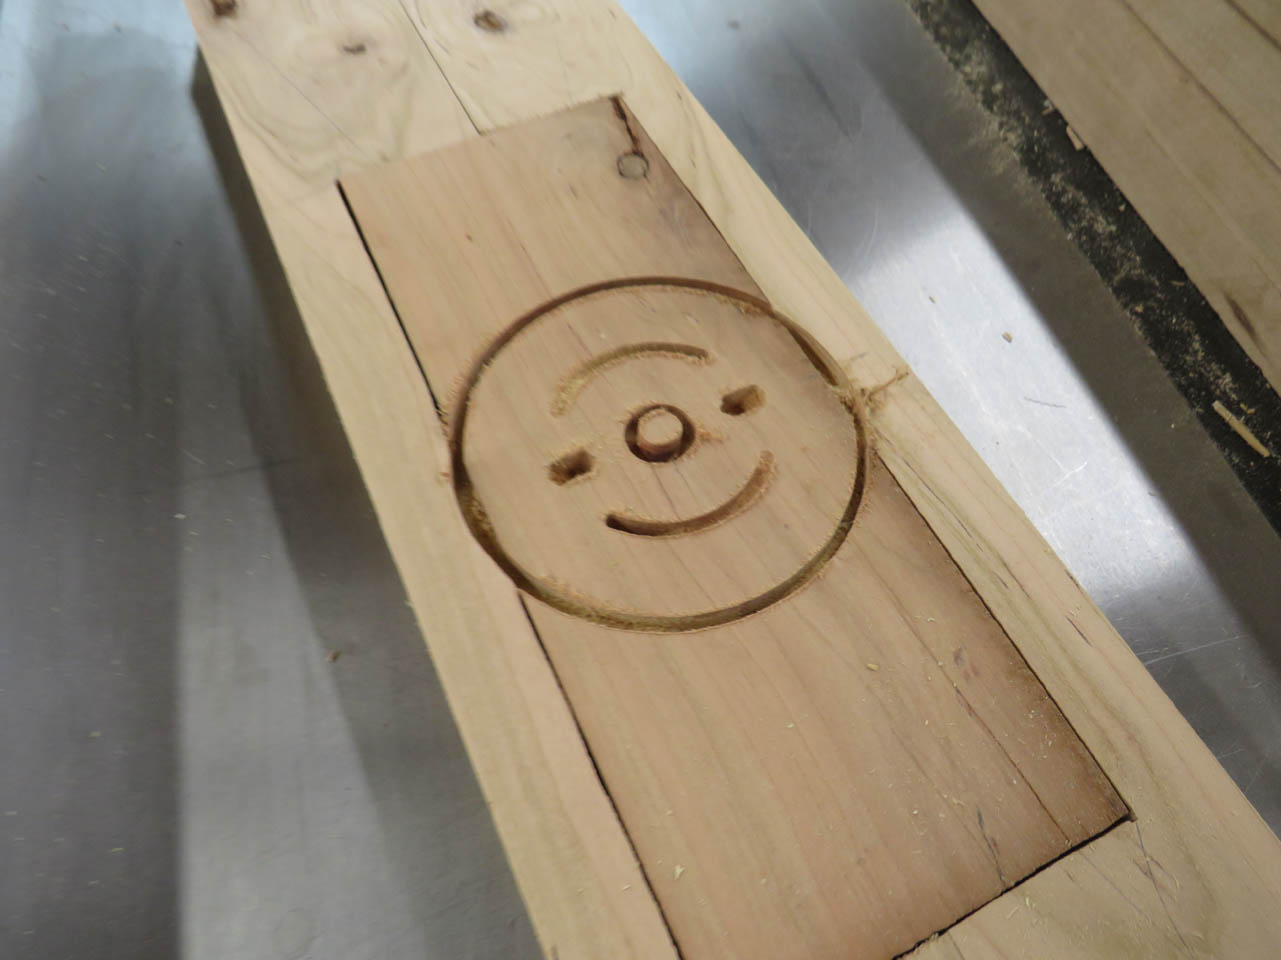
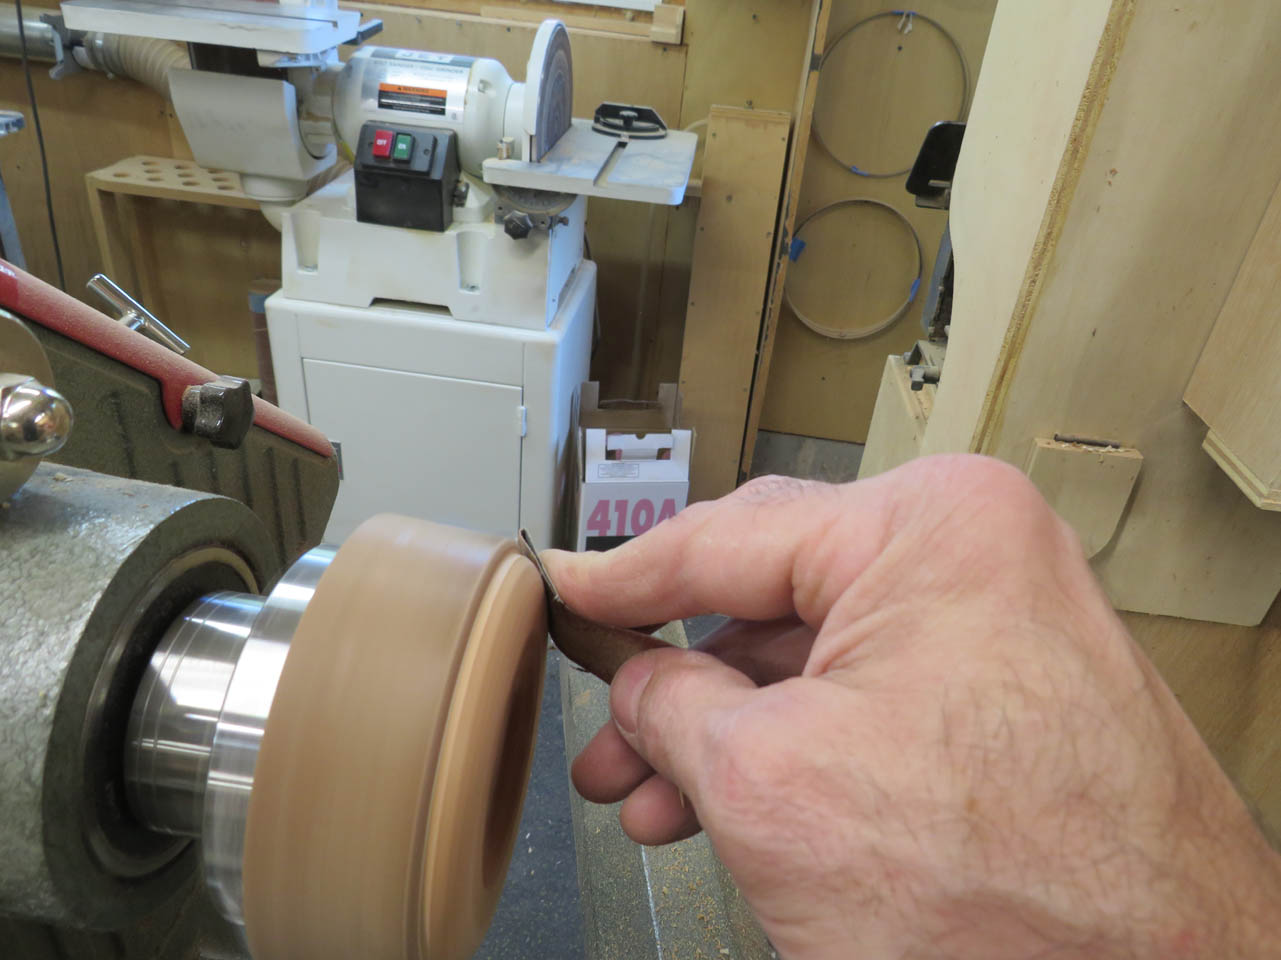
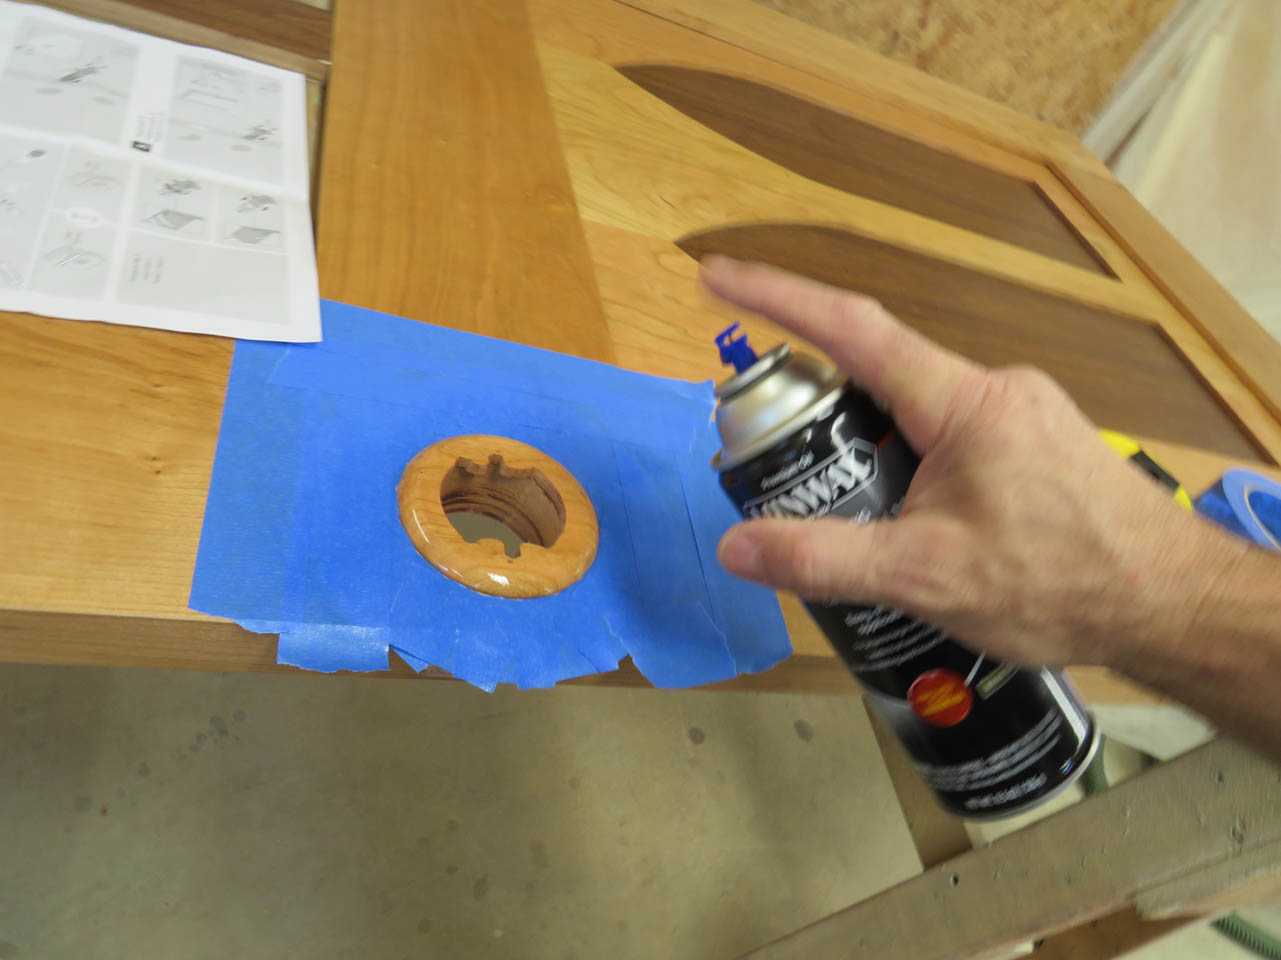
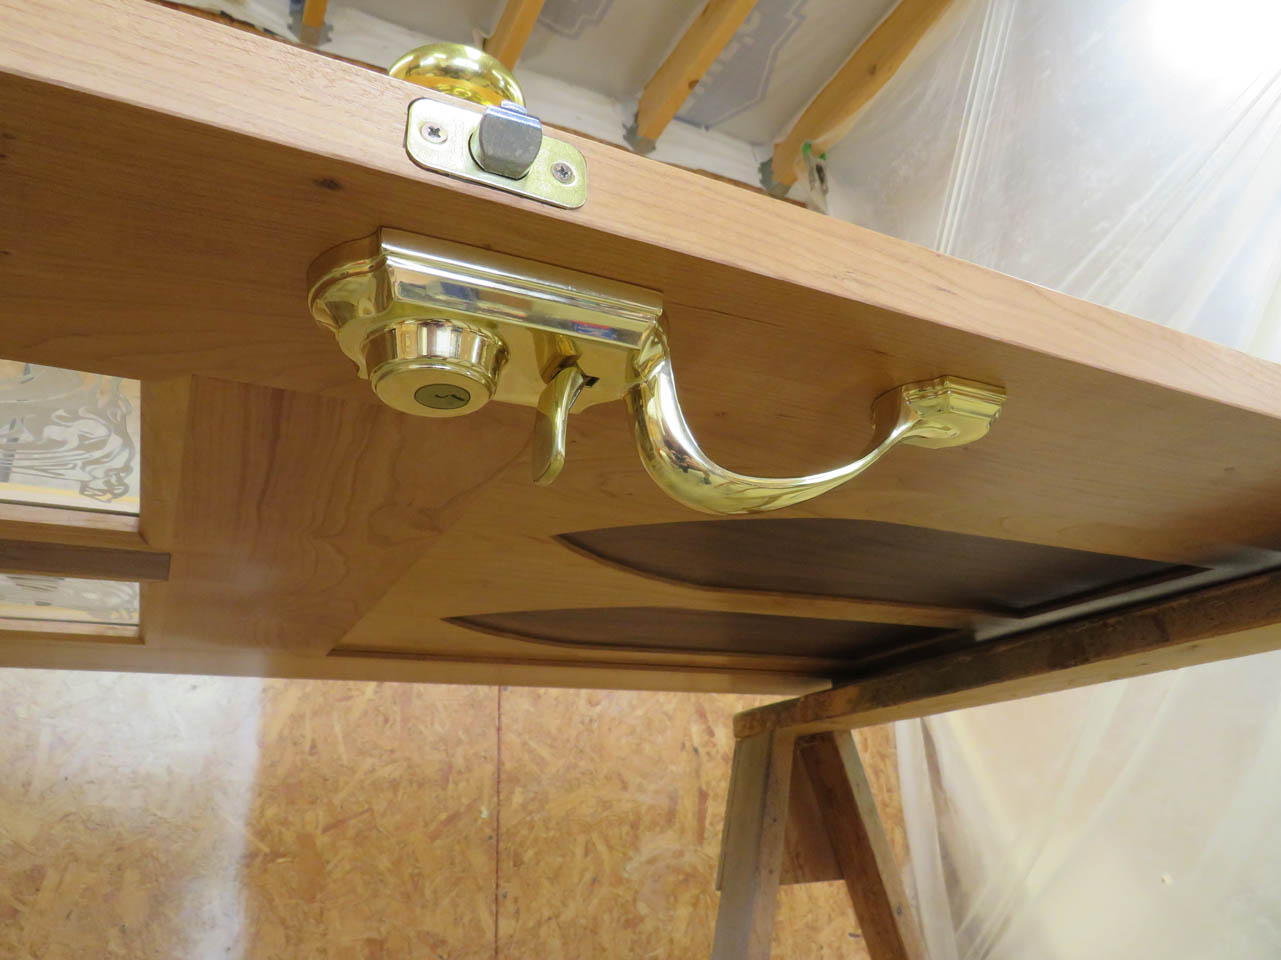
So I jigged up a 1/4″ thick piece of cherry and set my CNC router to carving a round plate to make up the difference.

The spacer plate seems happy with the situation…
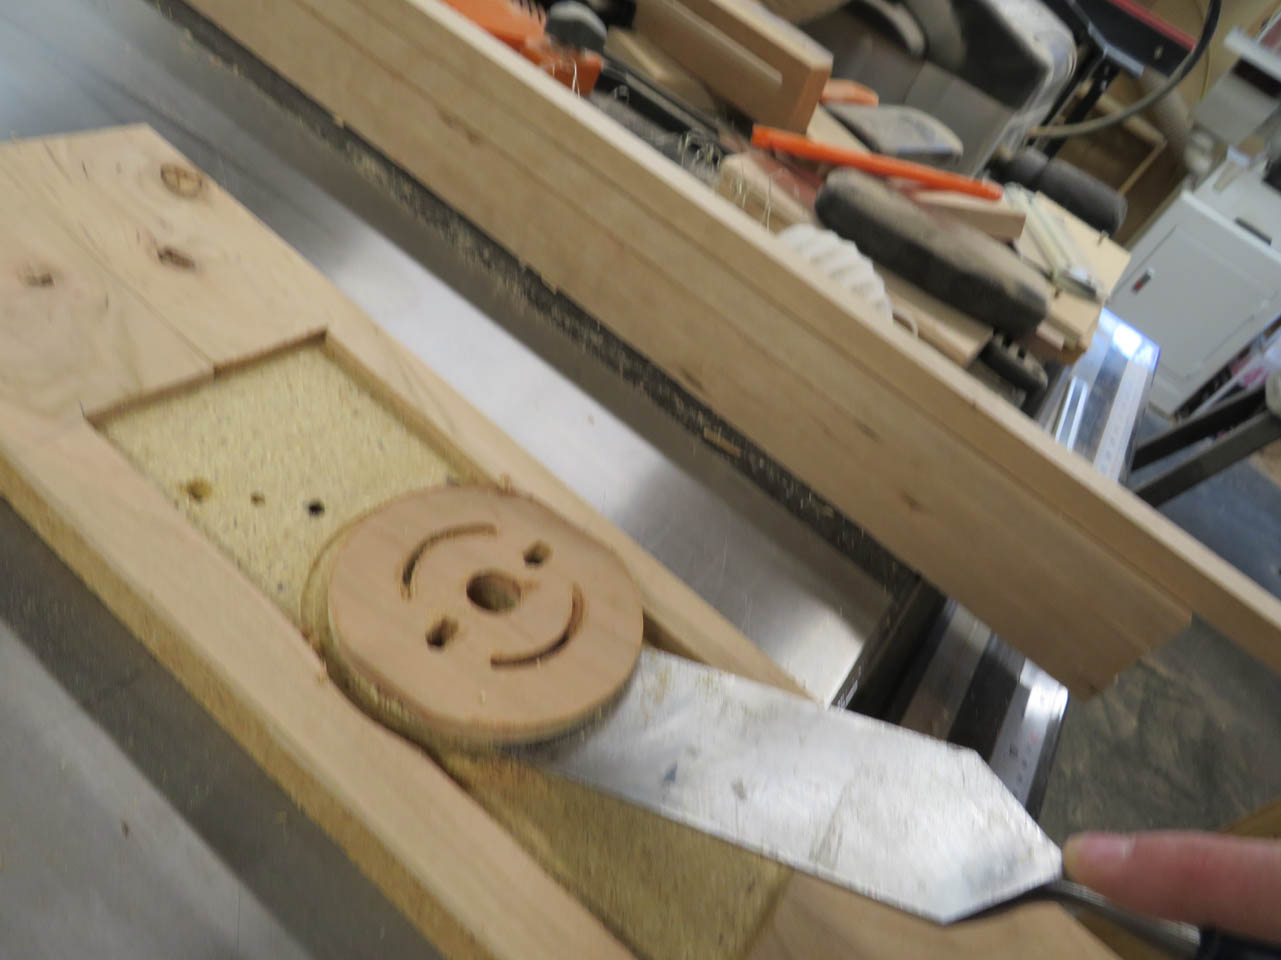
I popped the plate off the jig and set it in place.
I made some adjustments. Ultimately removing most of the center (effectively wiping the smile off it’s face…), but eventually got a good fit.
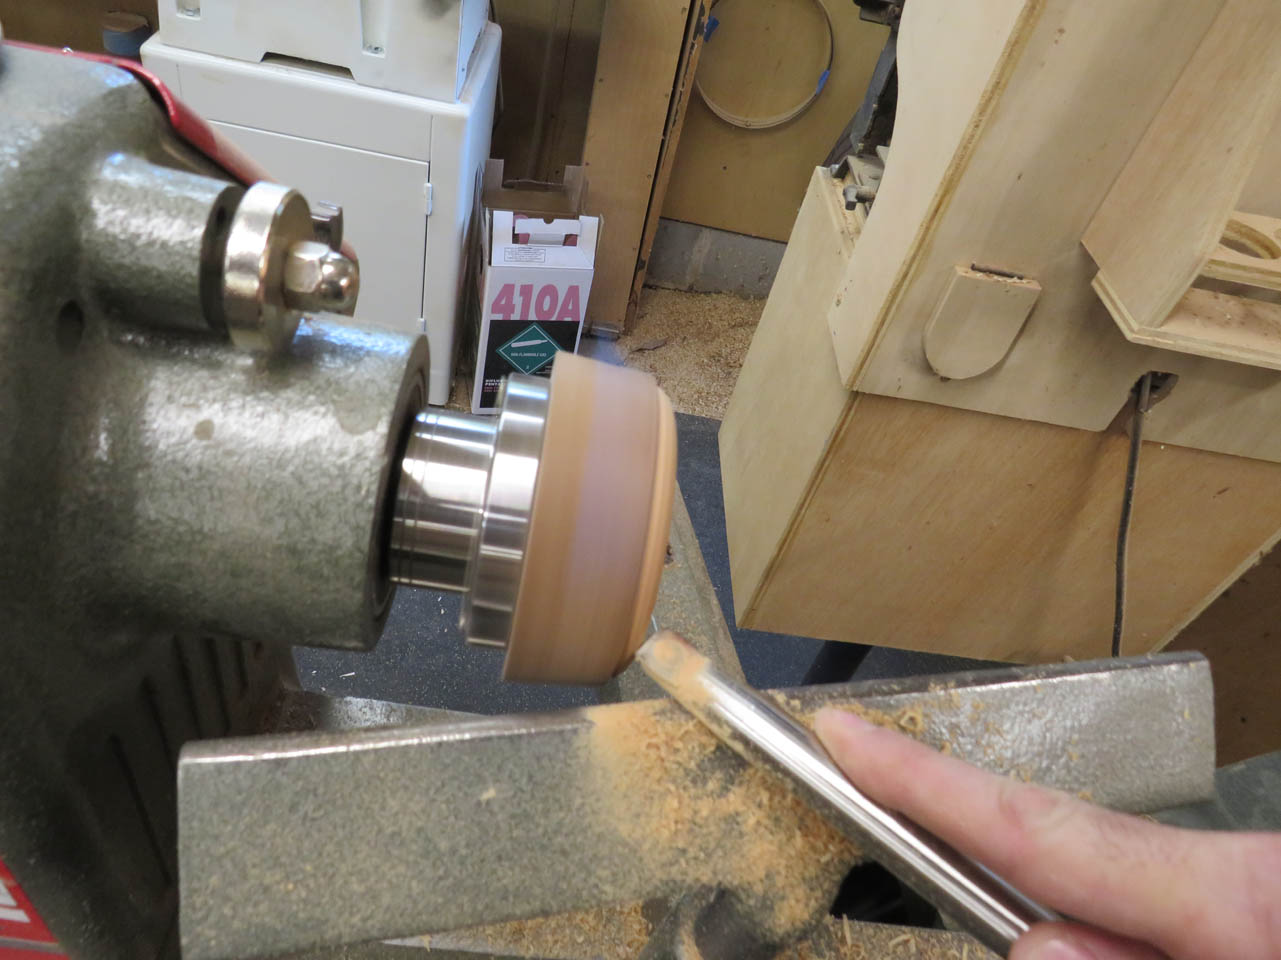
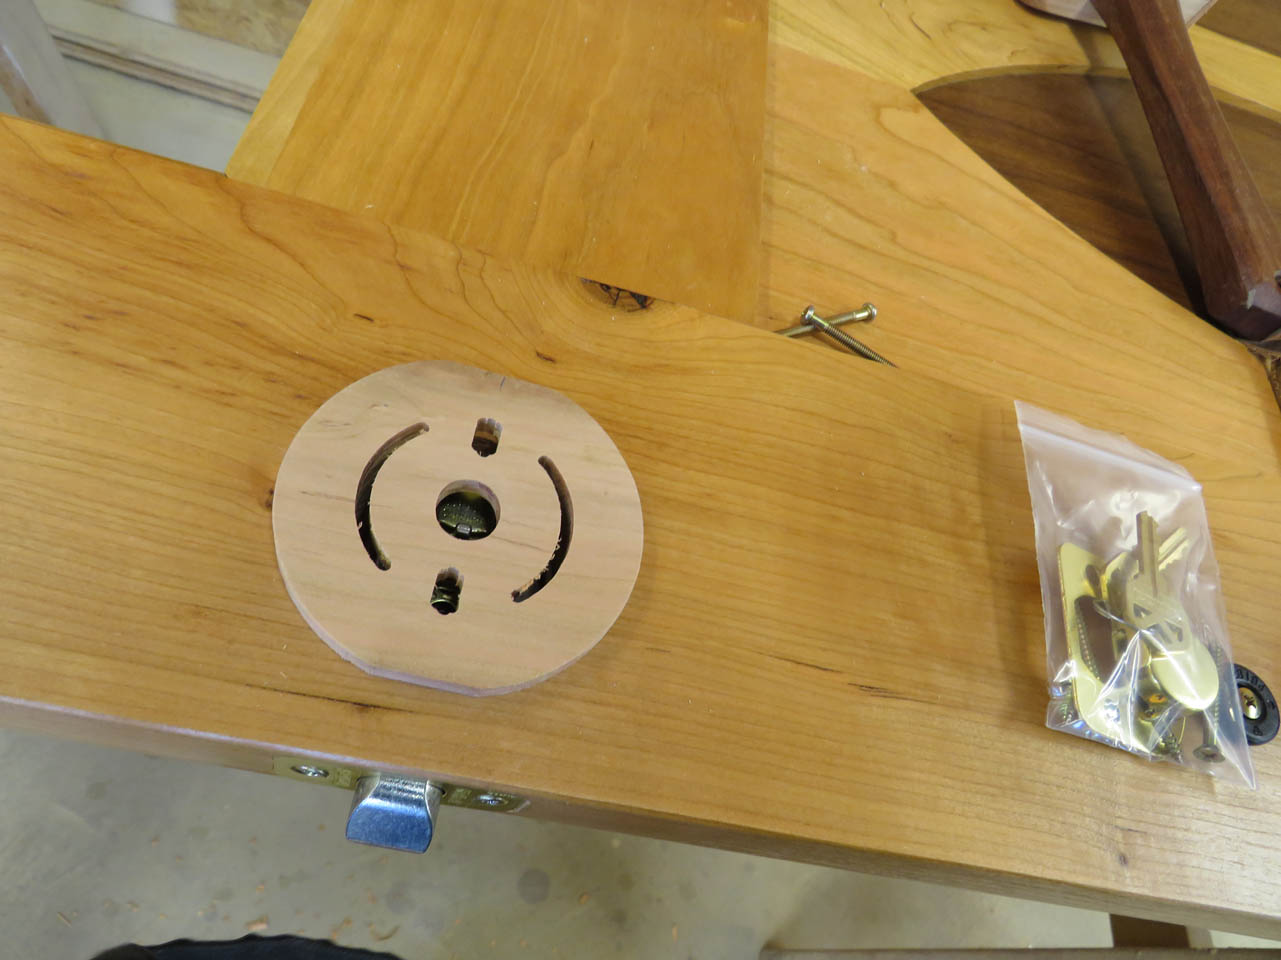
To make it look nicer, I mounted it on a faceplate, on the lathe. Then rounded the edge over and sanded it smooth.
That looks much nicer and fits well. I glued the plate in place with some CA glue.
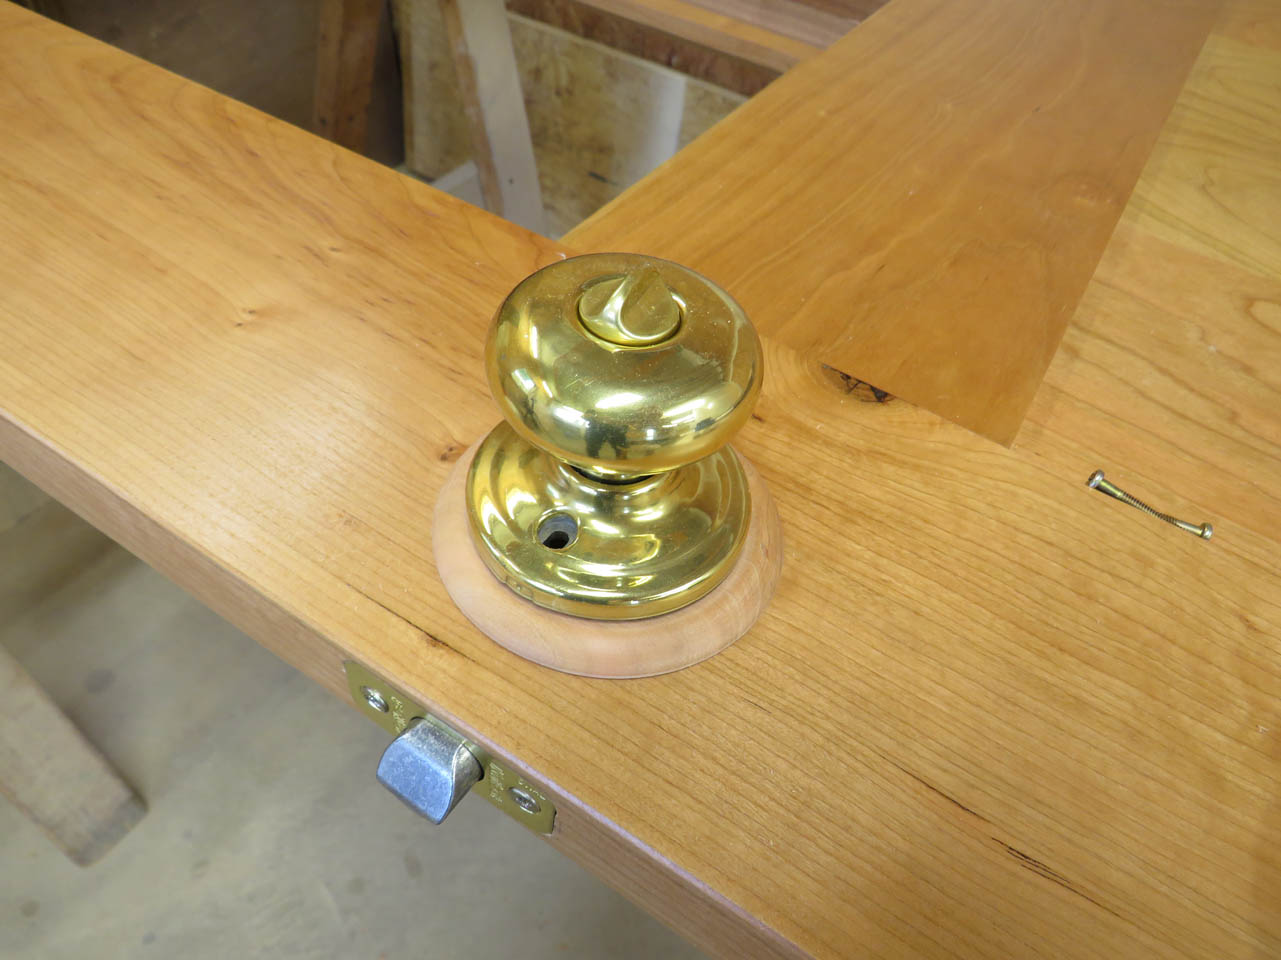
Then masked off the area and sprayed the base with a couple coats of polyurethane to match the door.
With that problem solved (and drying), I started installing the glass.
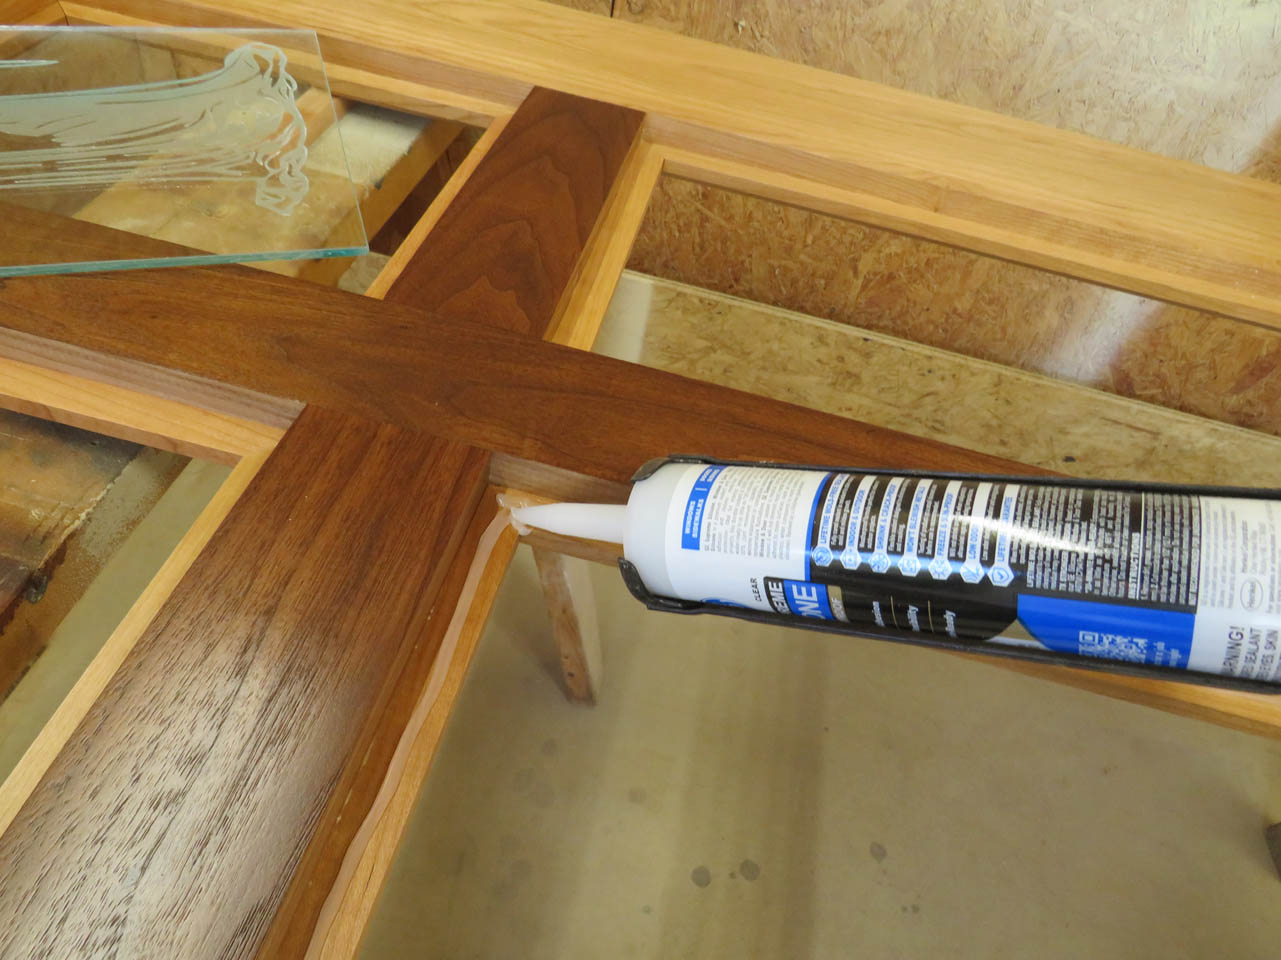
To prevent the glass from rattling, I apply a thin bead of silicone around the outer edge where the glass will sit, then press the glass onto it.
I used a spacer to make sure the glass sat evenly down from the edge so that I can make trim for the back side as well.
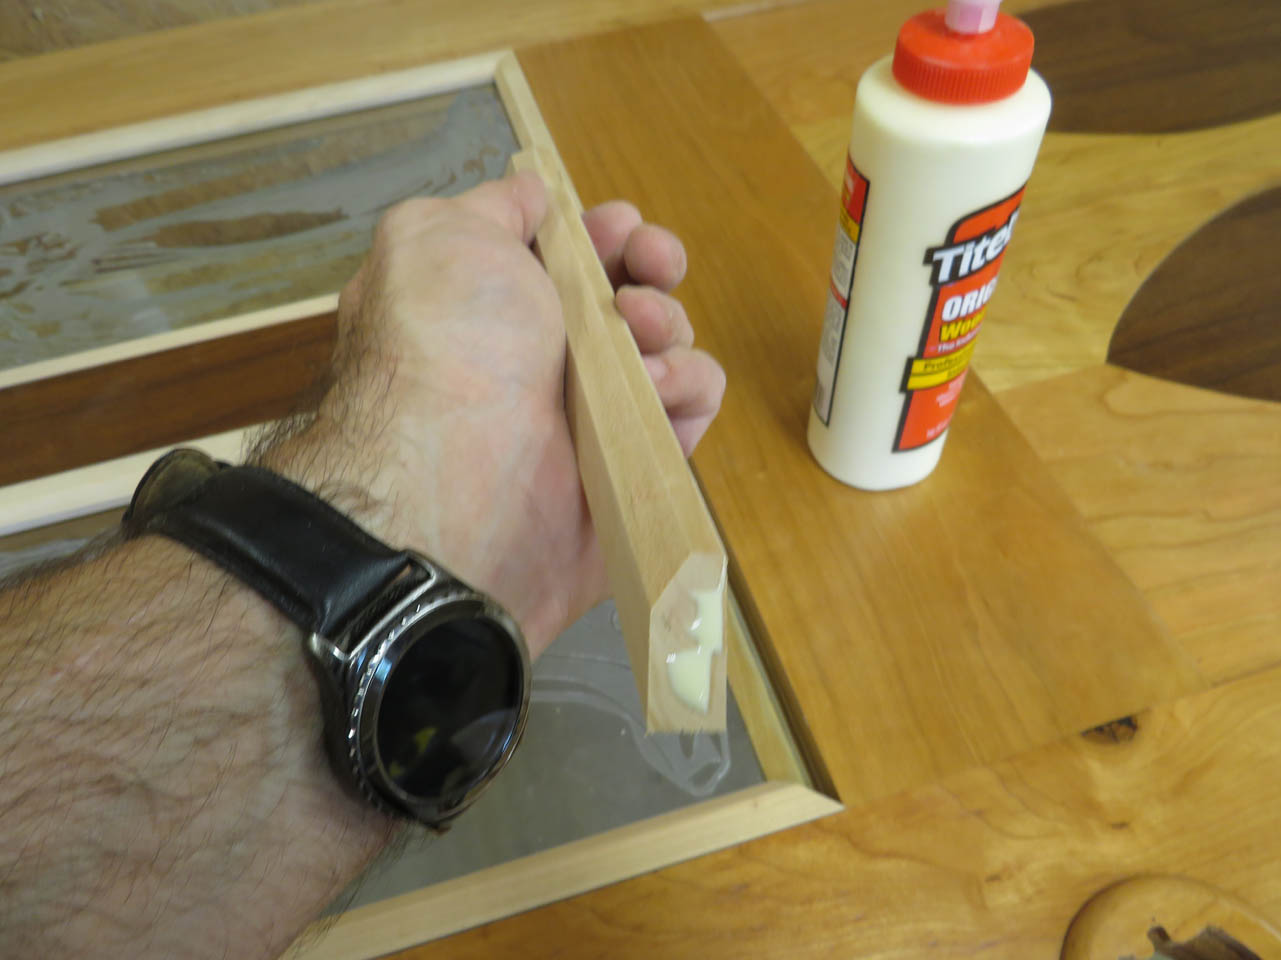
The trim on the back is the same width (3/4″) as the front but a little thinner.
This was cut, sanded, and beveled to match the front.
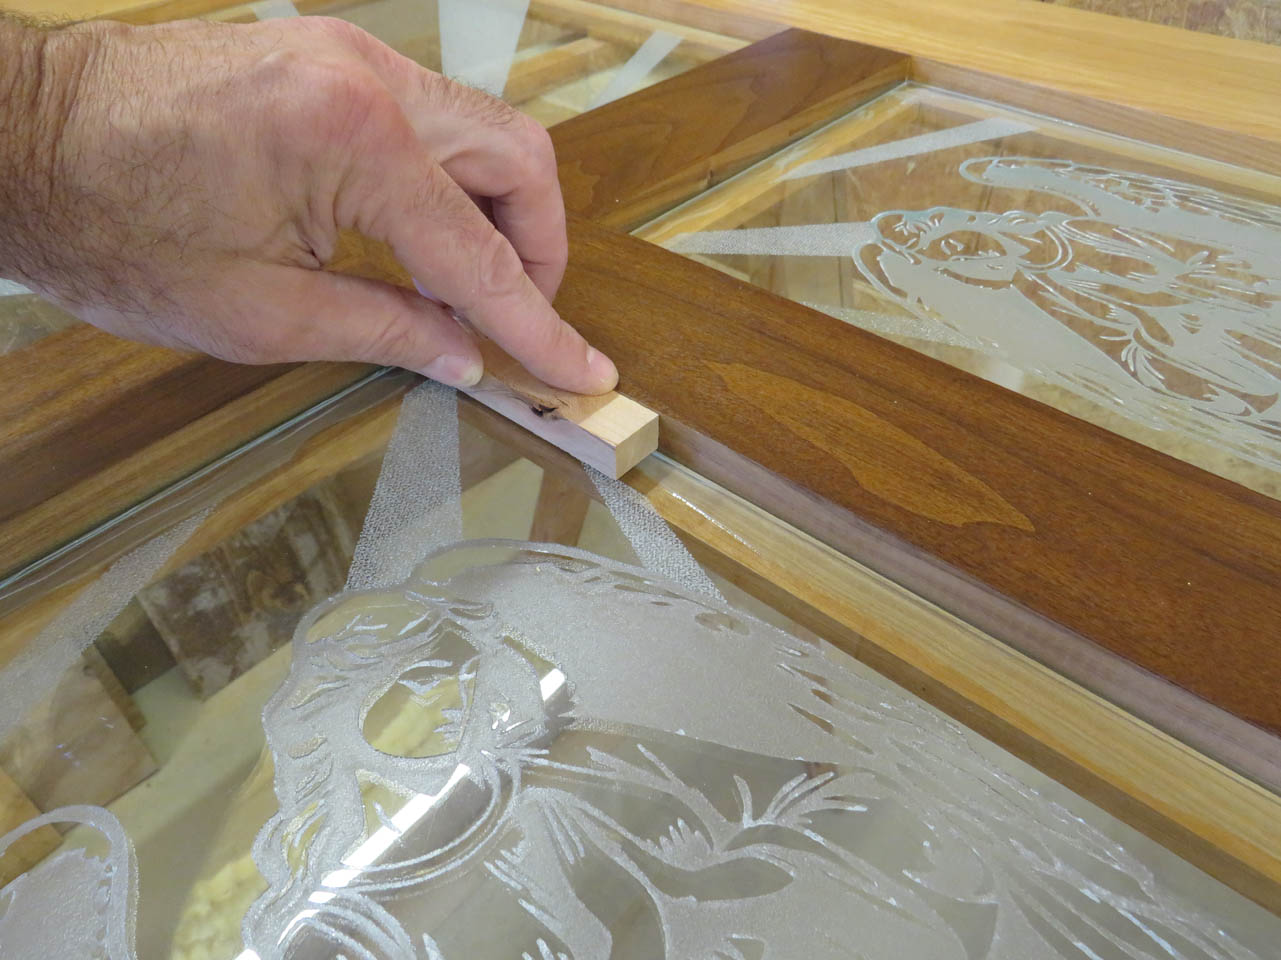
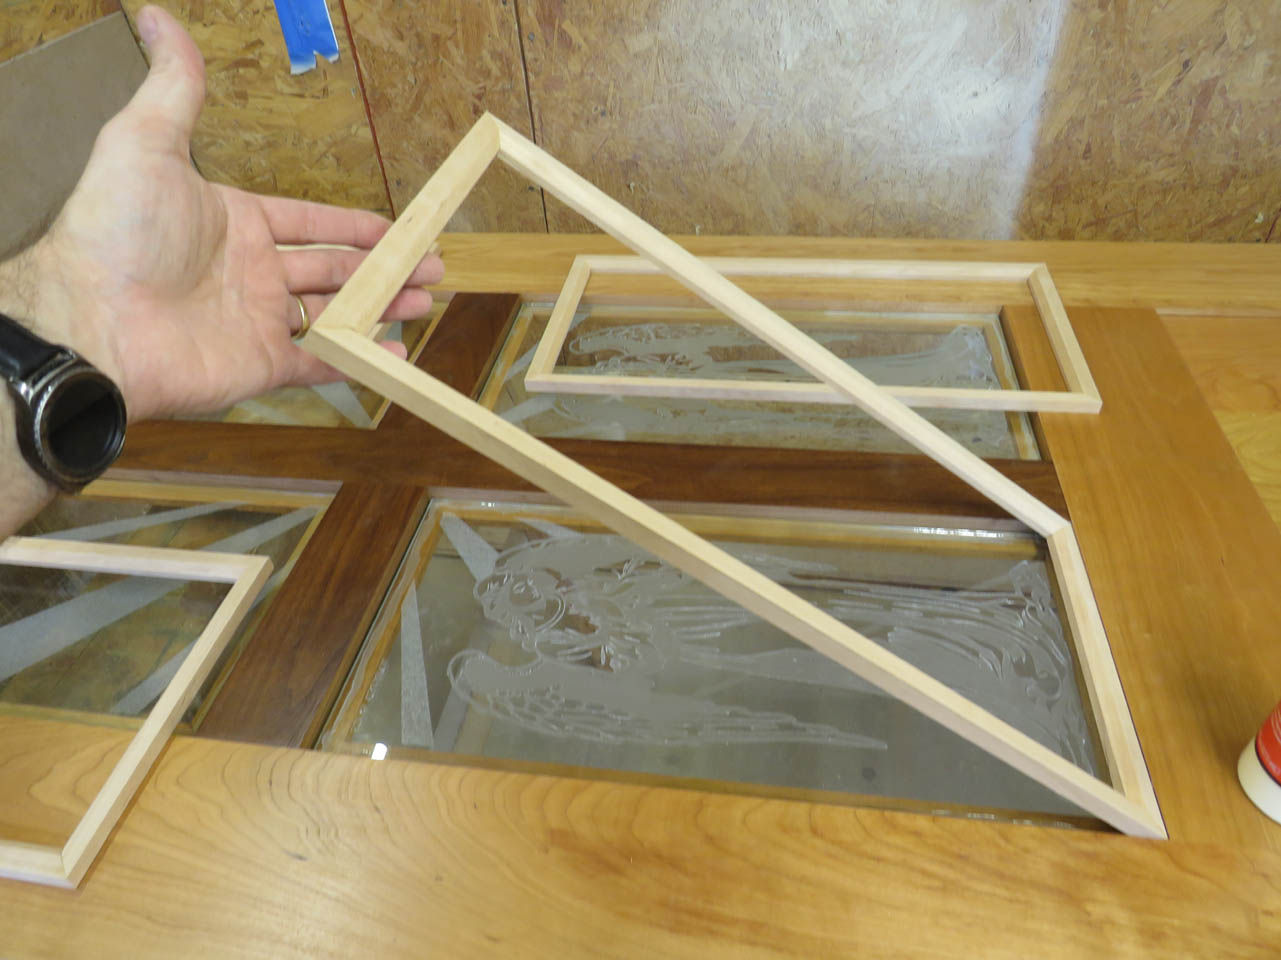
Then it was time to start cutting the miters and press-fitting each into place.
I need to finish these but I don’t want to spray them in place. I want finish on all sides to prevent moisture from creeping in to swell the wood.
I decided to add glue to the miters only then press them back into place to dry.
When dry, I can pop the frames back out for finishing.

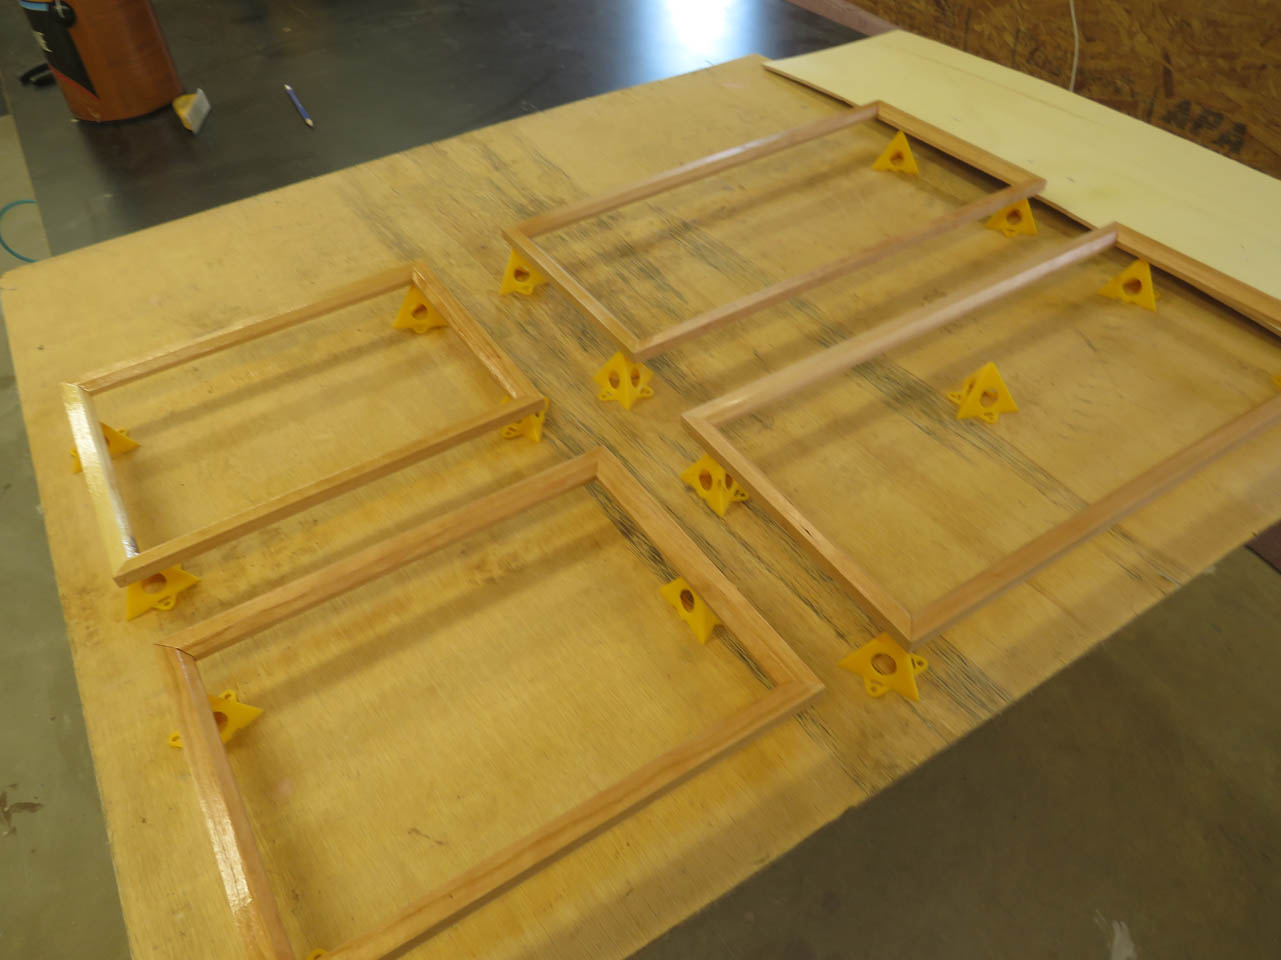
I actually added two pin nails to each corner for a bit more strength.
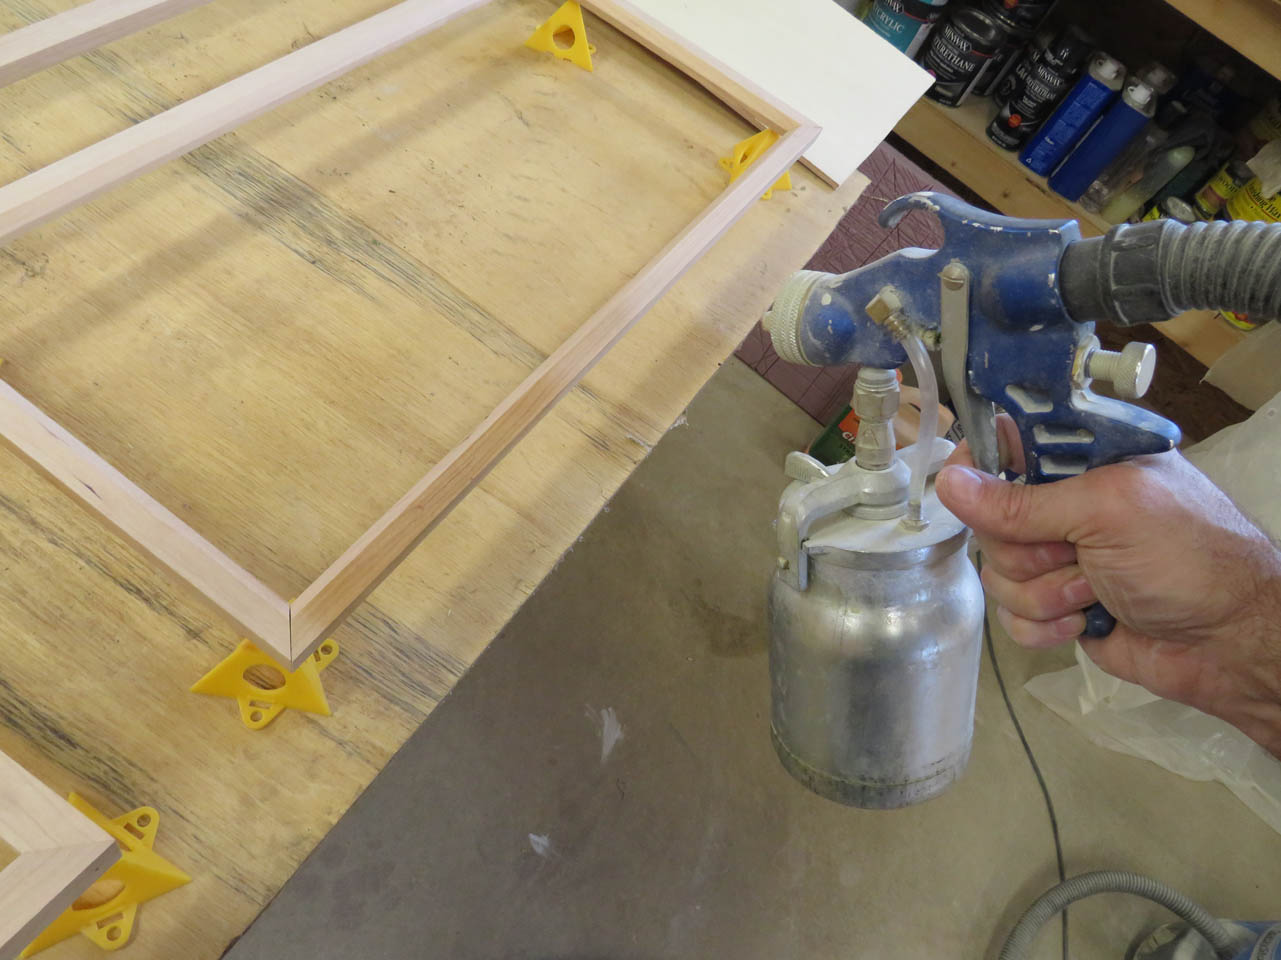
I set the frames up on painter’s pyramids and gave them a couple of coats of urethane.
I added a small bead of silicone to the edge of the glass as well as the back side.
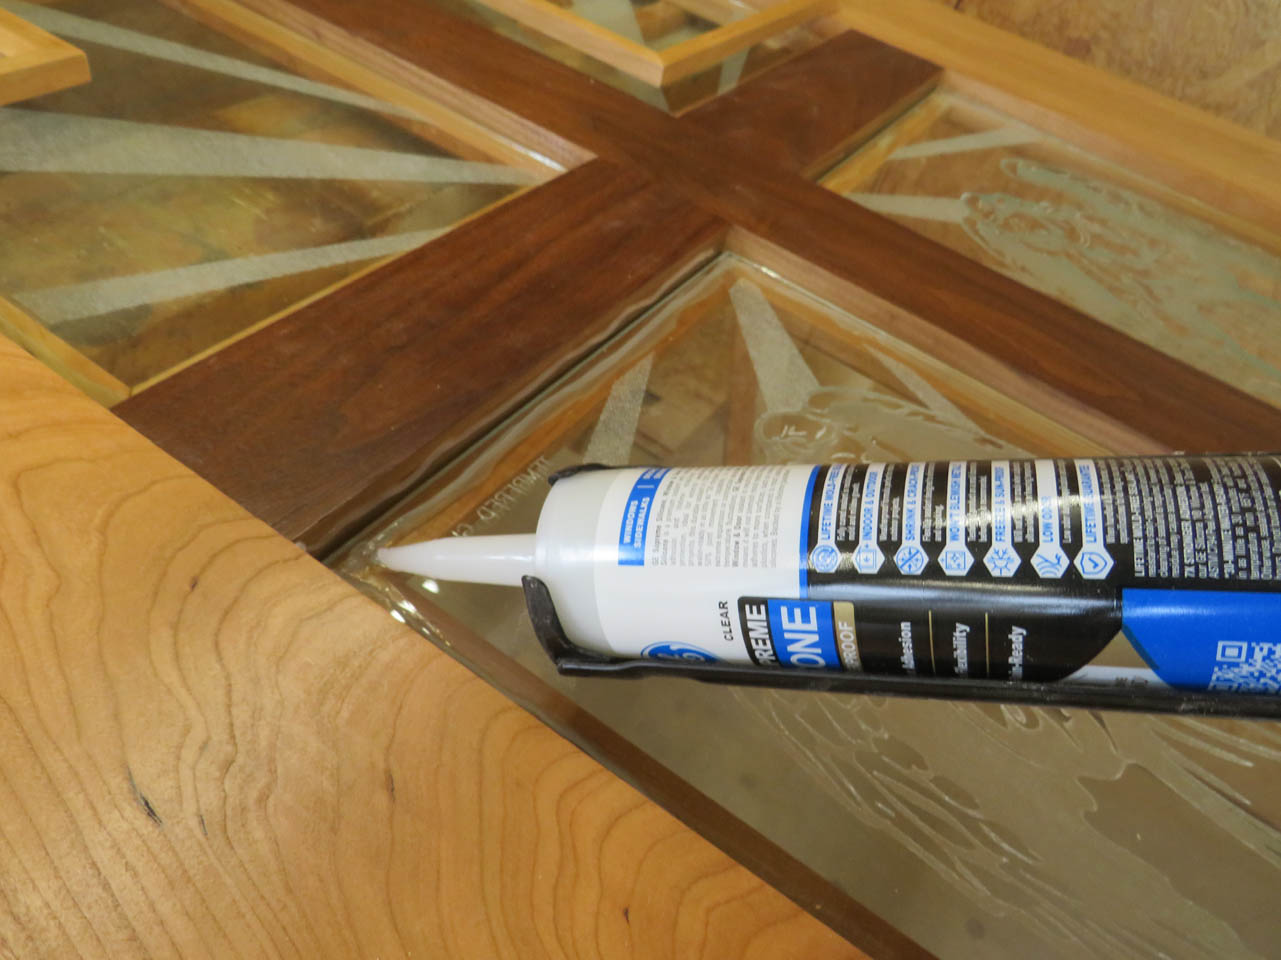
Then pressed the frames back onto their places, making sure they sat flush.
No nails went into the back side frames because I didn’t want to risk a single one hitting the glass and breaking it. Also, if a panel breaks, I should be able to remove the frame by cutting away the silicone, then be able to replace the glass.
The glass is installed, and the door knob/handle as well.
I think it looks pretty good.
Still hard to photograph the glass because of all of the reflections. Perhaps I will get a good picture when it is installed.