
Trimming an arched window
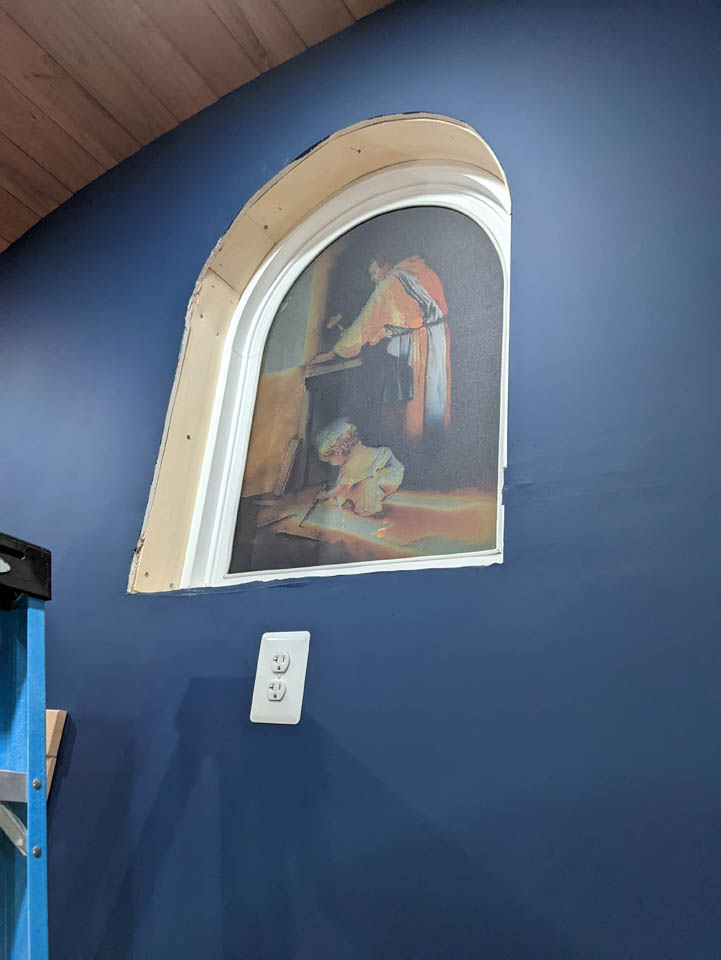
The last bit of trim I need for my office addition is this window’s casing. Before the drywall went in, I attached a few pieces of 1/8″ plywood to see if they would smooth out the curve. They worked pretty good, but I didn’t have any pieces long enough to go all the way around. So, not only do I have to make the curved outer trim, I also want to make a curved jamb extension. That means I need some maple cut really thin and bent around a form to match the shape of this opening. All of the trim in this addition was made from the left-over hardwood flooring. As it happens, I have one 8′ long piece of 5″ wide maple flooring left. That should work for the inside casing and all the rest of the trim can be made from shorter pieces.
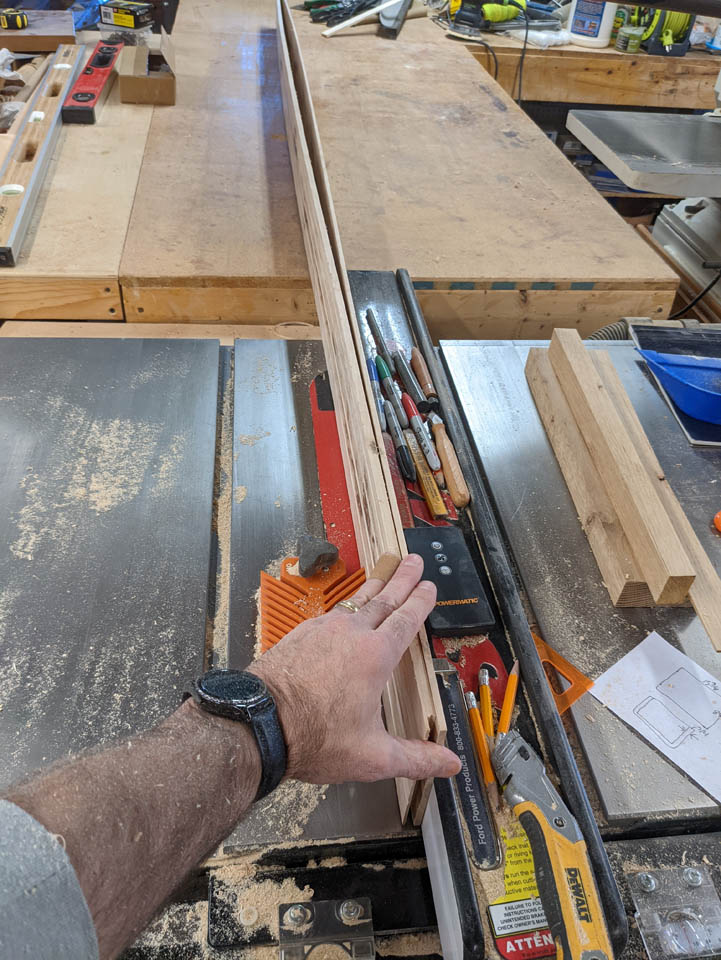
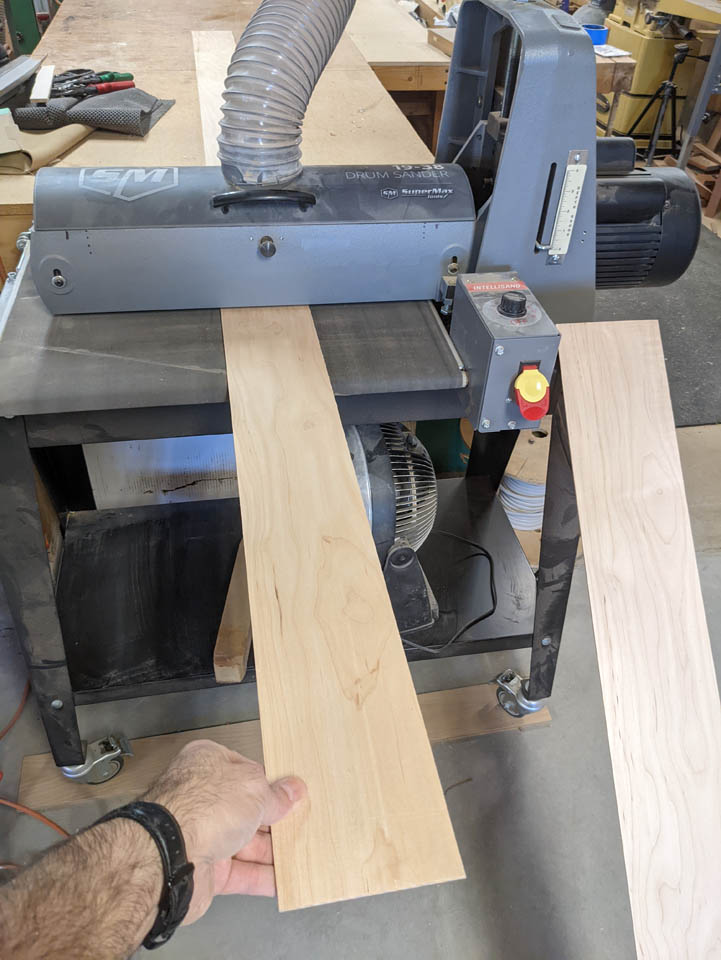
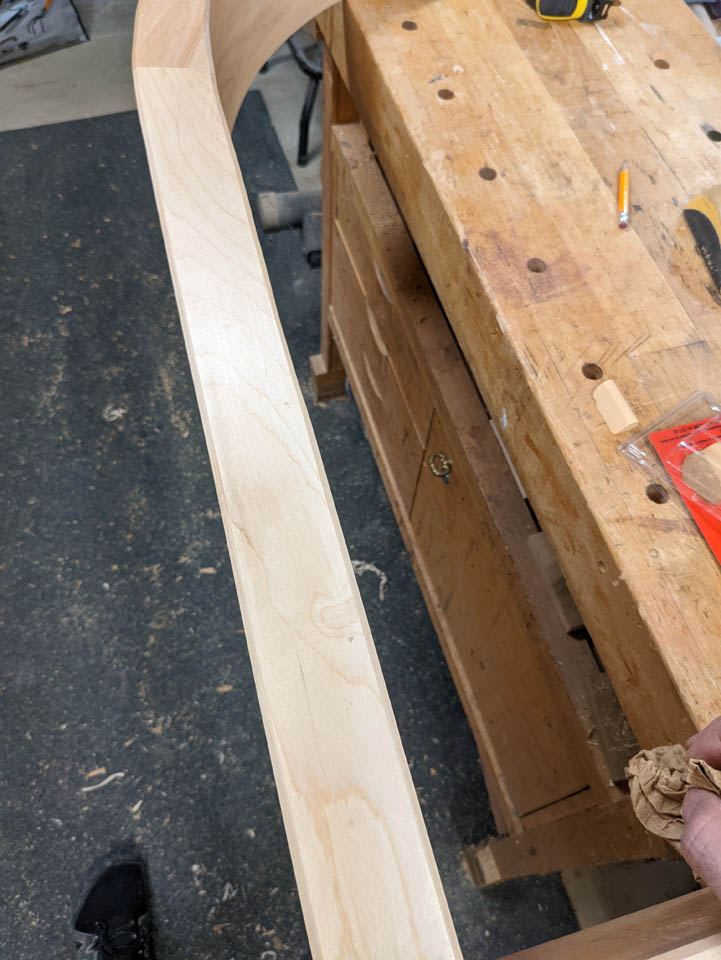
I started by re-sawing the 8′ board down to two thinner pieces, approximately 3/16″ thick.
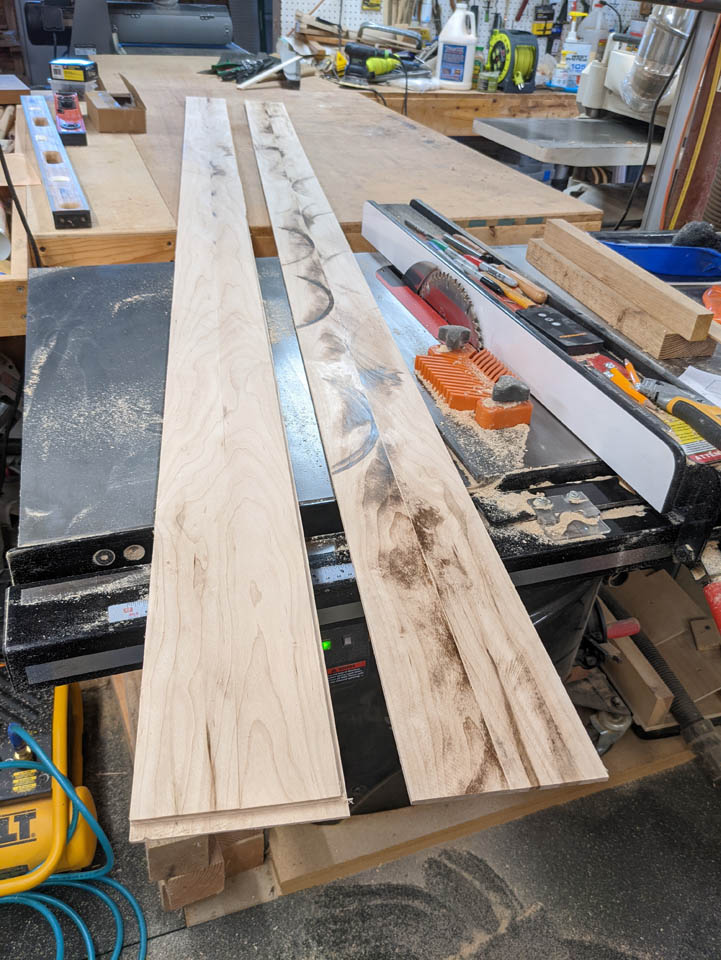
Next, I ran both pieces through the planer to smooth them out and get them closer to 1/8″ thick.
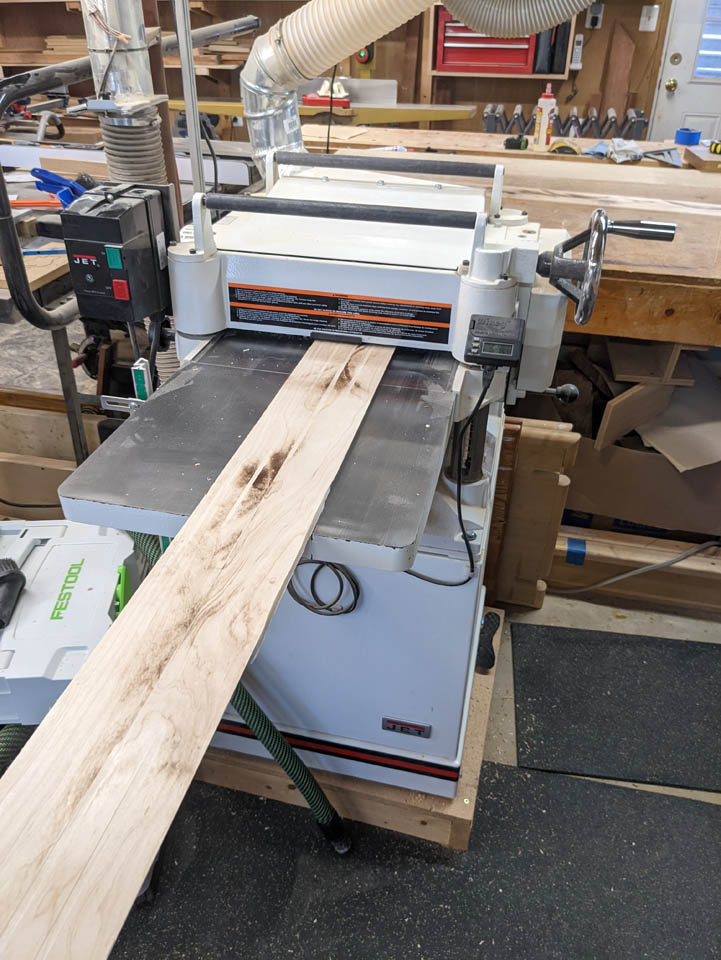
That is about as thin as the planer can go. I ran the thin strips through the drum sander as well. Since I will want the casing to be closer to 1/2″ thick for stability, I also cut down a 2″x6″ piece of pine to create 2 additional strips, giving me four 1/8″ thick strips total.

To bend these into shape, I took careful measurements of the window and found the exact inside dimensions of the trim so I could create a bending form.
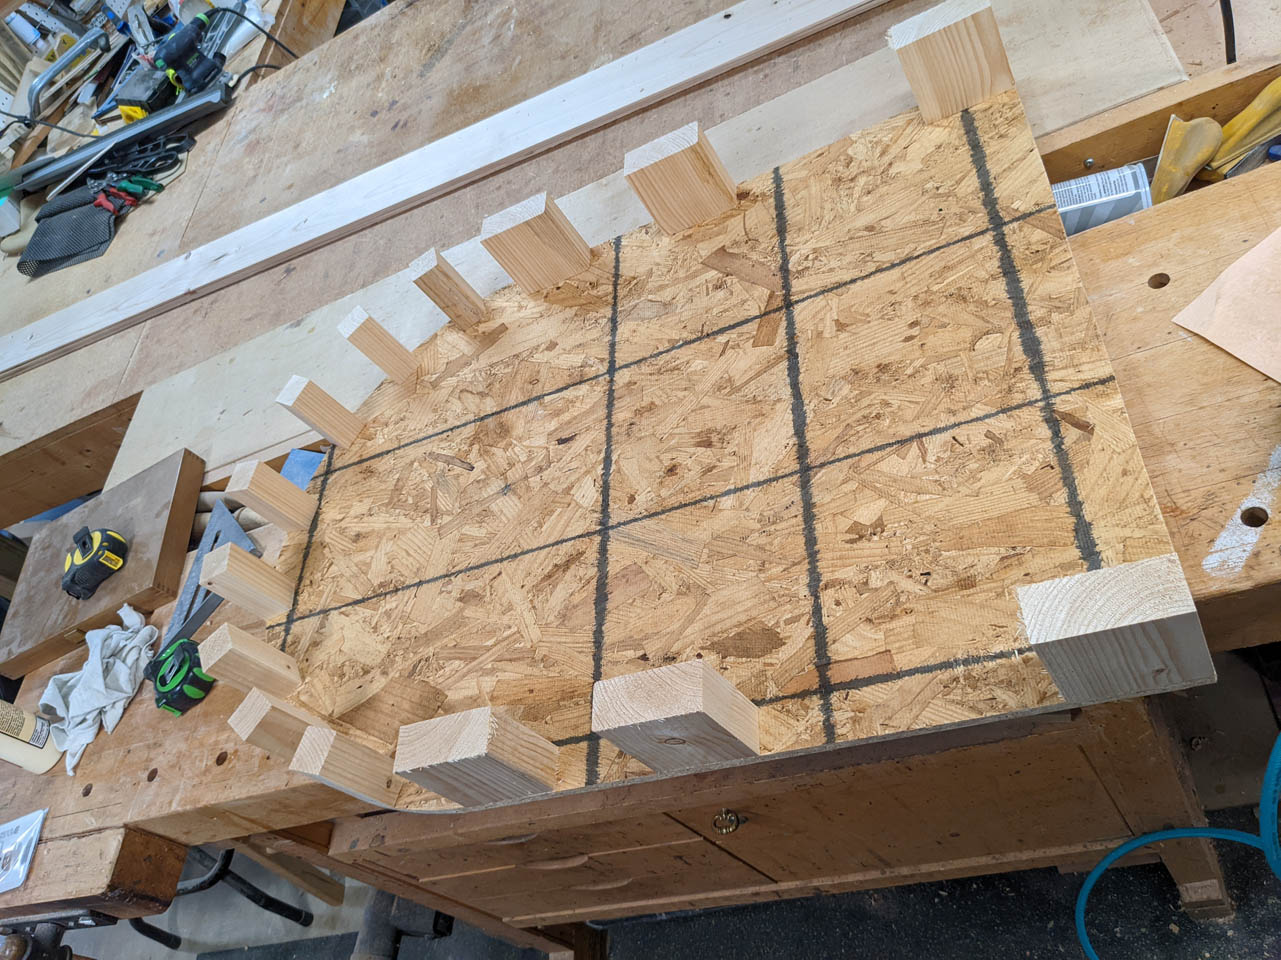
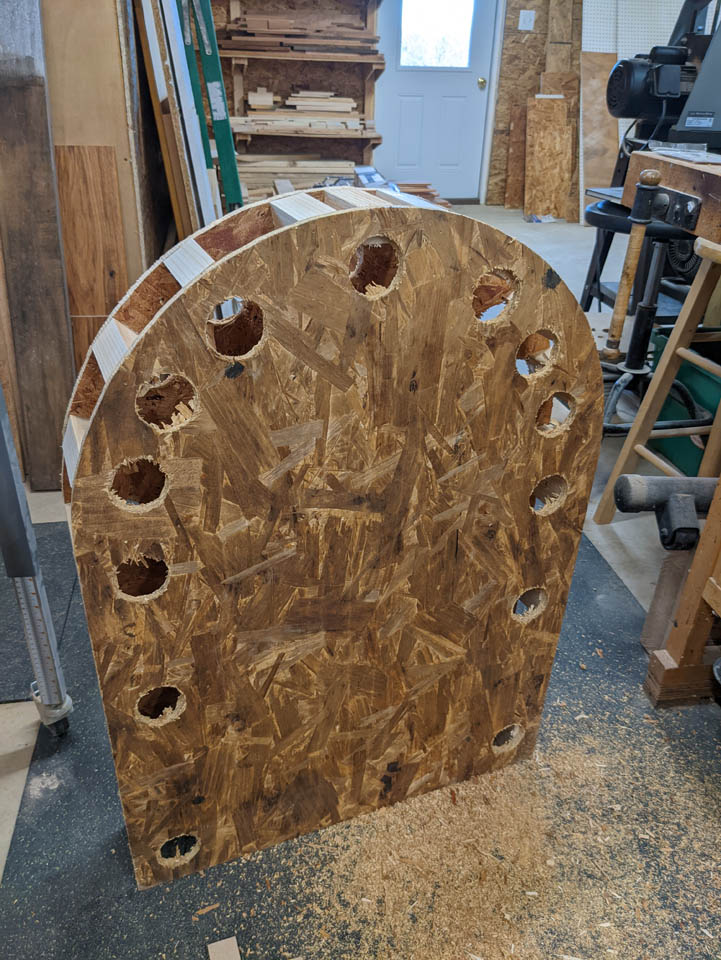
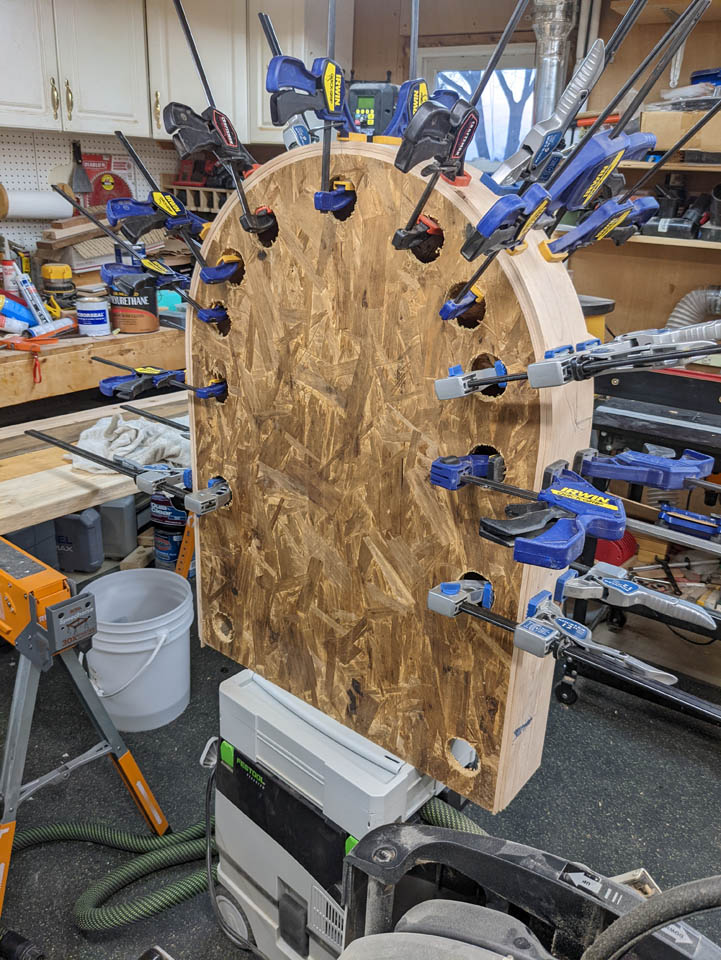
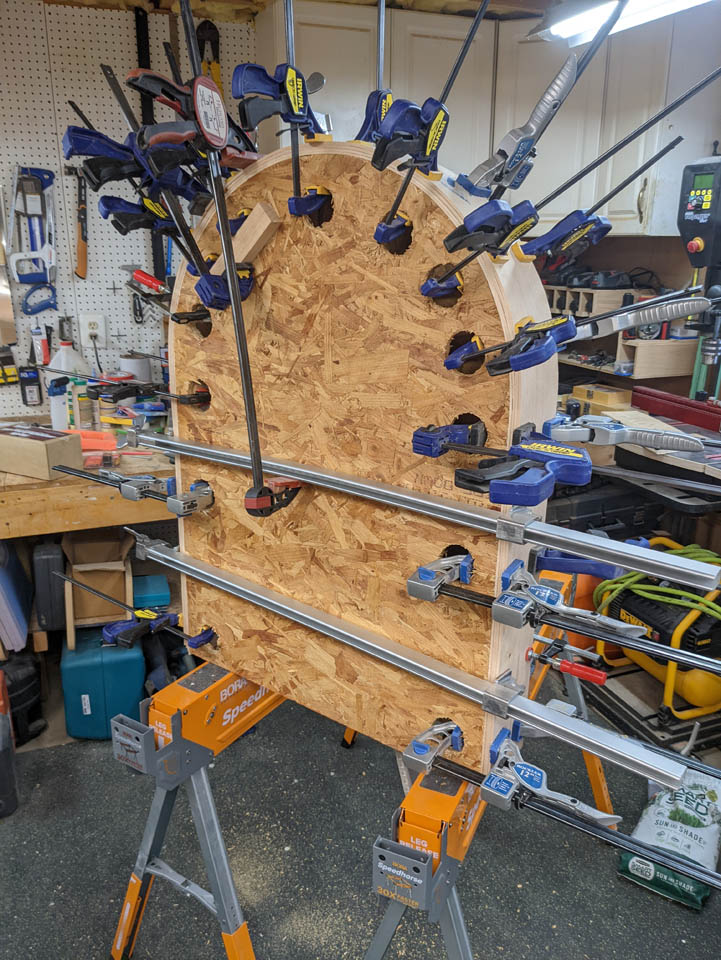
I cut two pieces of left-over OSB to the final dimension and used left-over pine to create stand-offs to attach both panels to. I nailed both panels to the pine blocks with 18 gauge brad nails.
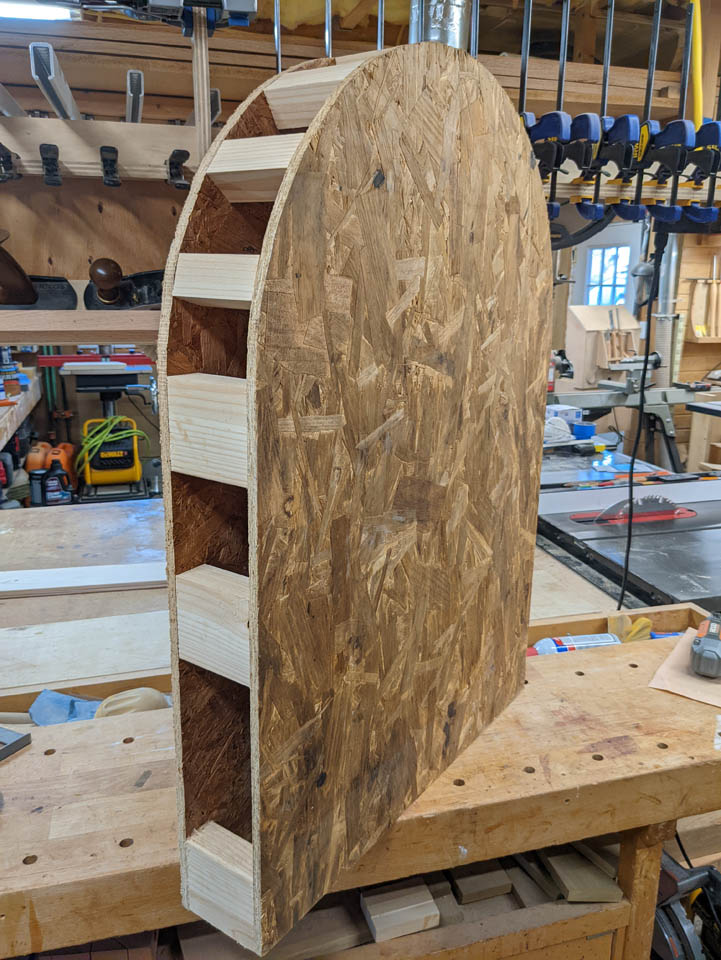
Next, I used a hole saw to drill a large hole behind each block so I can attach clamps to hold my strips in place.

When the form was ready, I asked my wife to help me steam the strips. She heated up the iron while I laid out all four boards and applied a wet towel to the middle 4 feet of the strips. After she ran the iron back and forth over that side, I flipped all the boards and re-soaked the towel. We repeated the process on the opposite side as well.
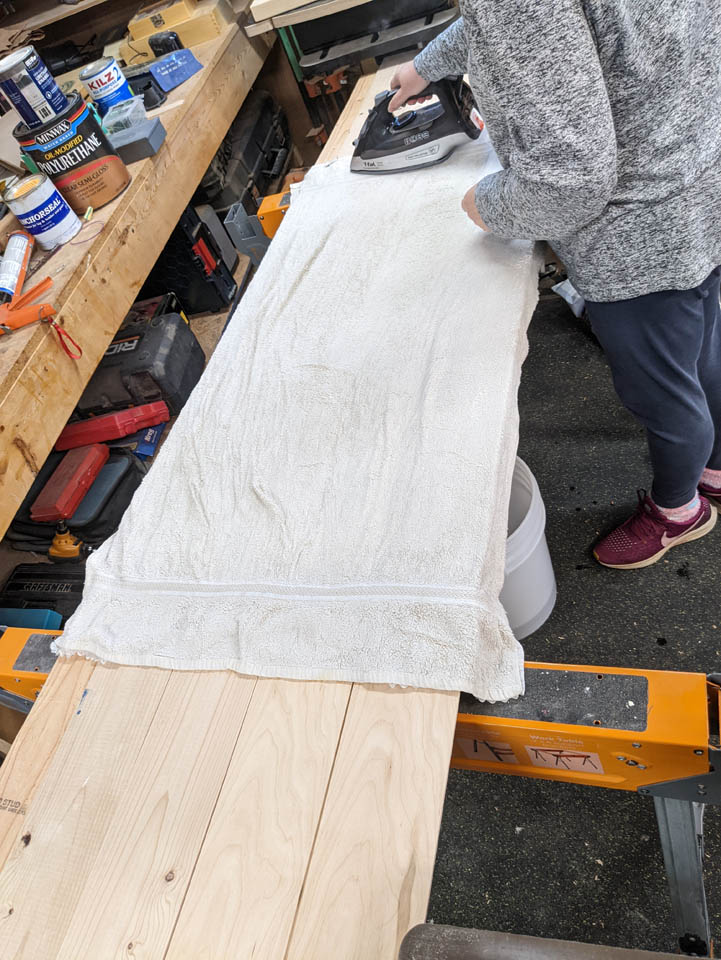
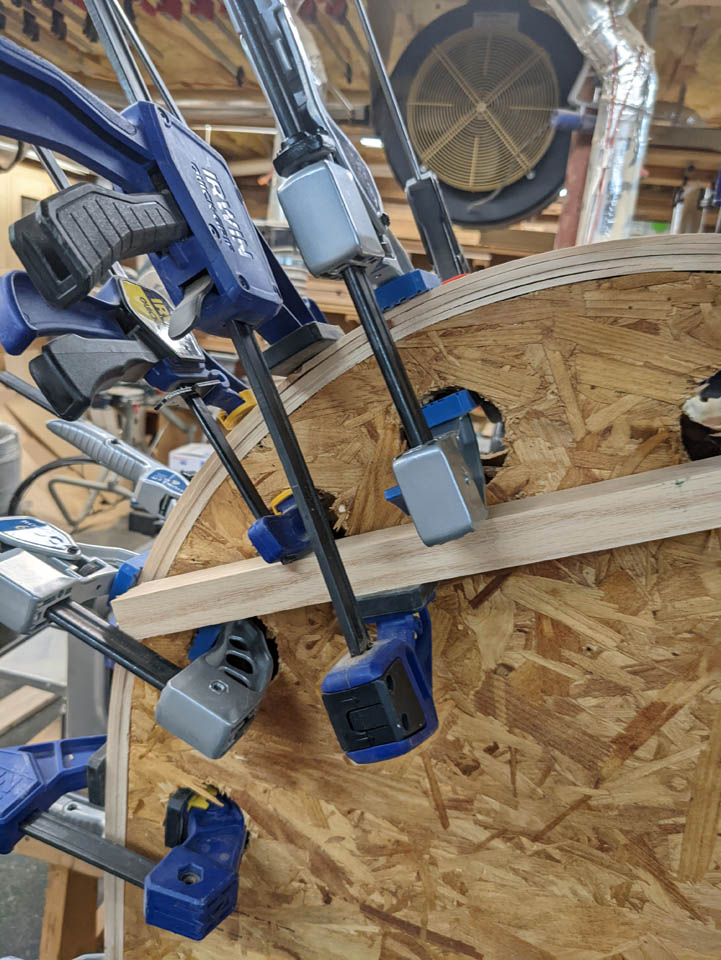
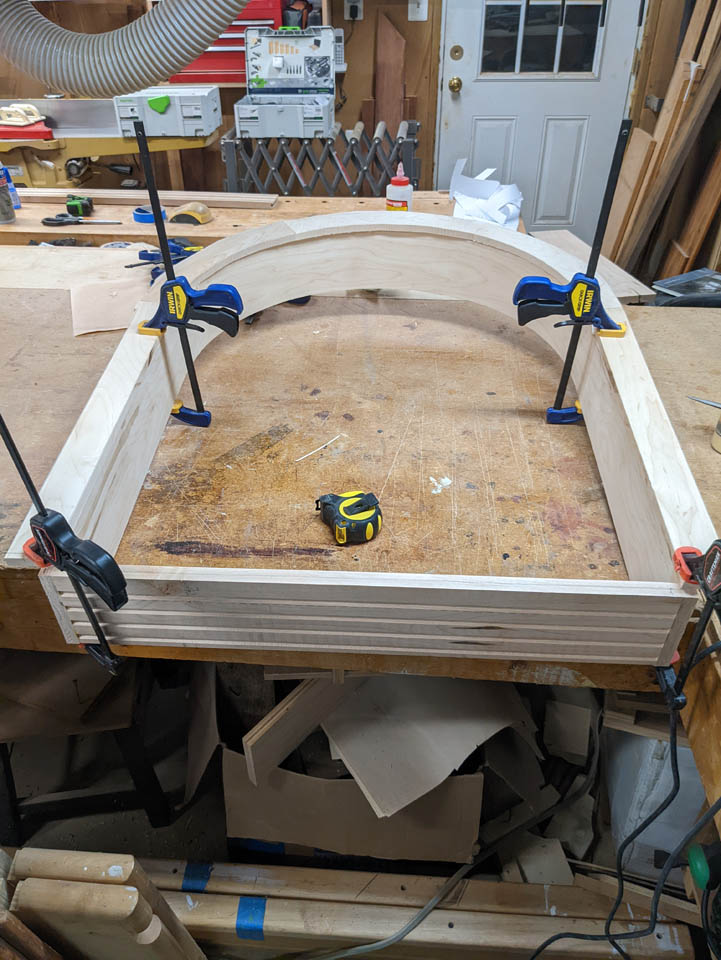
Placing the maple strips closest to the form, we carefully bent and clamped the strips down to the form, starting at the top, in the center of the boards, then bending and clamping as we went working our way down both sides evenly.
I had one piece of pine crack at a small knot. This was on the outer layer so it was not critical but I added an extra clamp to keep the crack from getting worse.
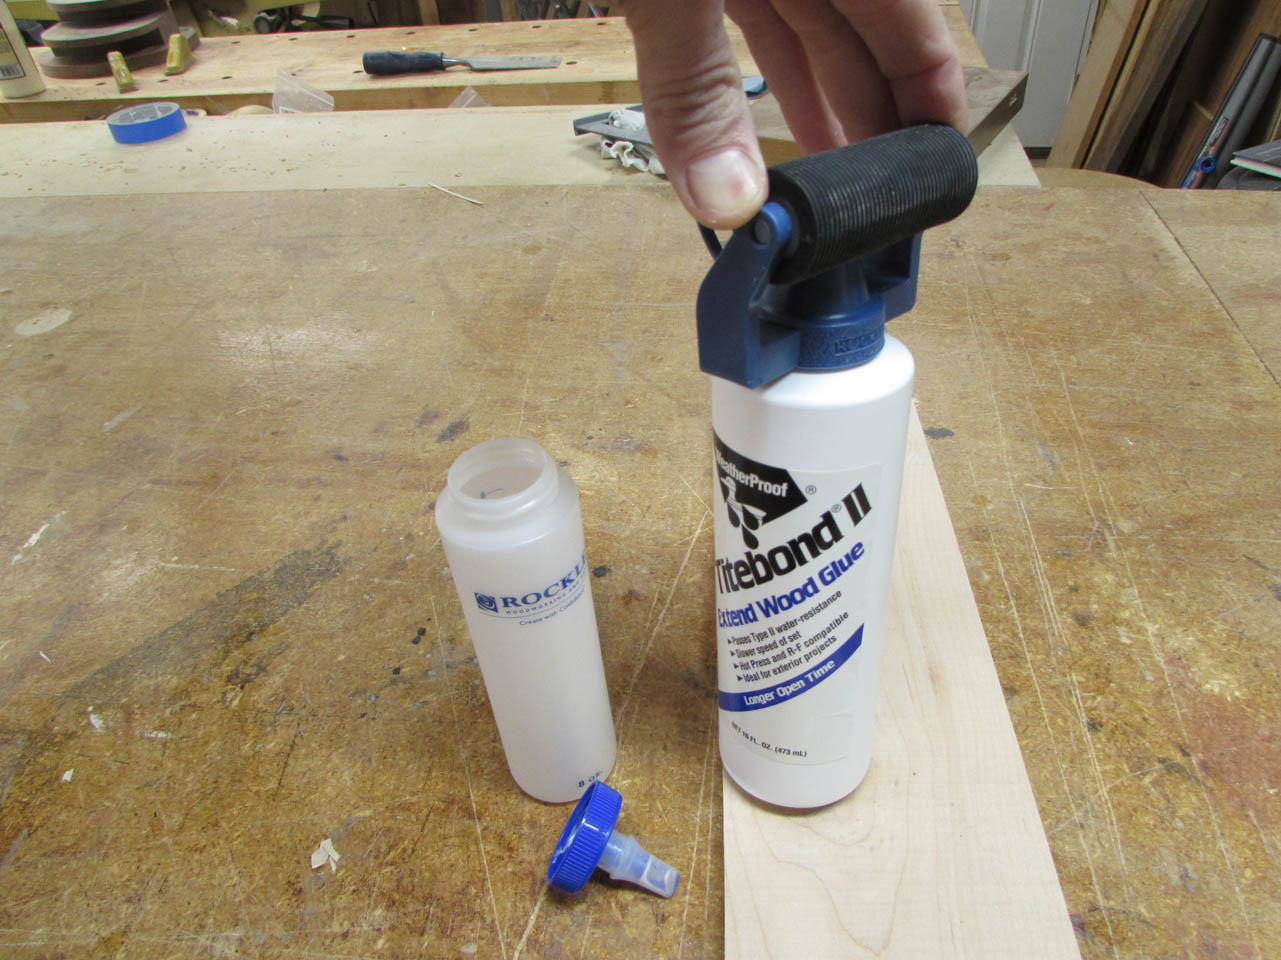
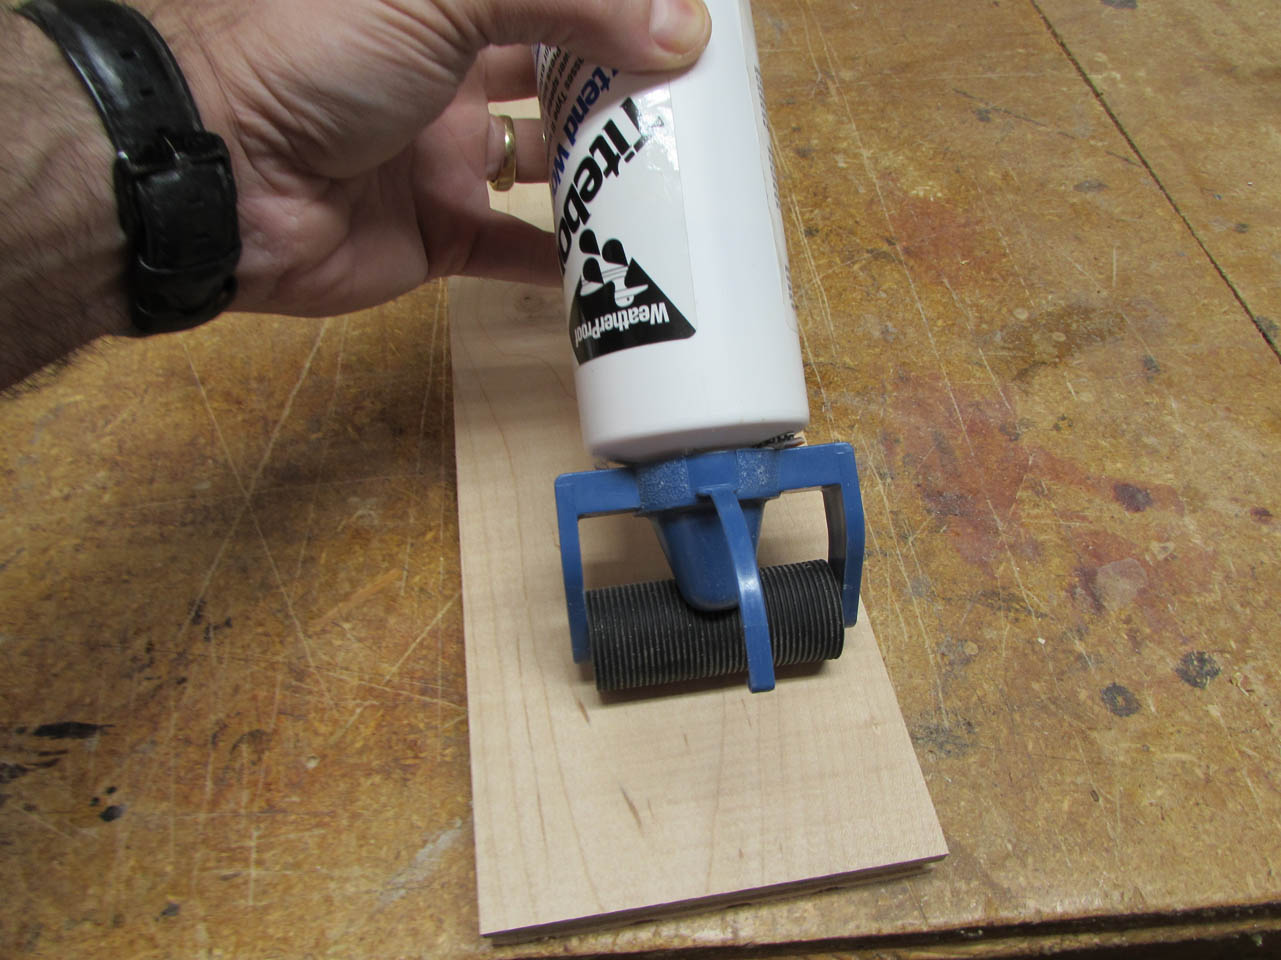
I allowed the strips to stay clamped up and drying for about 24 hours. After they were unclamped they sprung about half-way back to straight. Without waiting for them to flatten out any further, I got out some Tightbond extend and affixed a roller head to the top of the bottle. This glue has an extended set-up time so I could take a little more time applying glue to each strip and clamping them all back to the form. This was a bit messy since the glue is thinner than regular yellow wood glue so I didn’t get any pictures of us getting it all clamped back up.
I did not have any trouble with any additional cracks and I even added some glue to the section that cracked before.
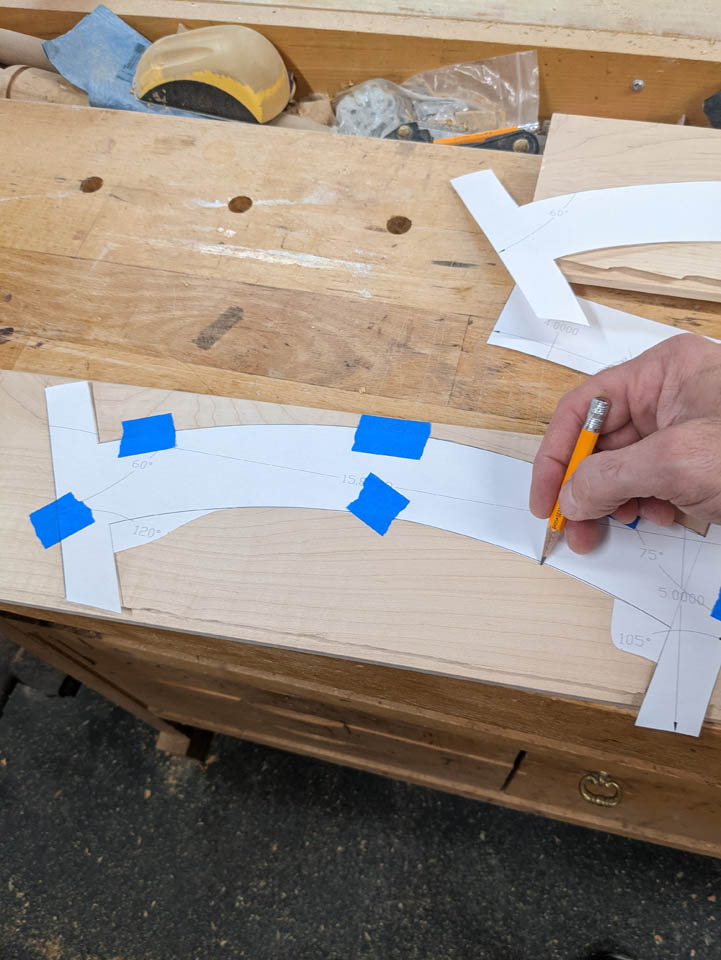
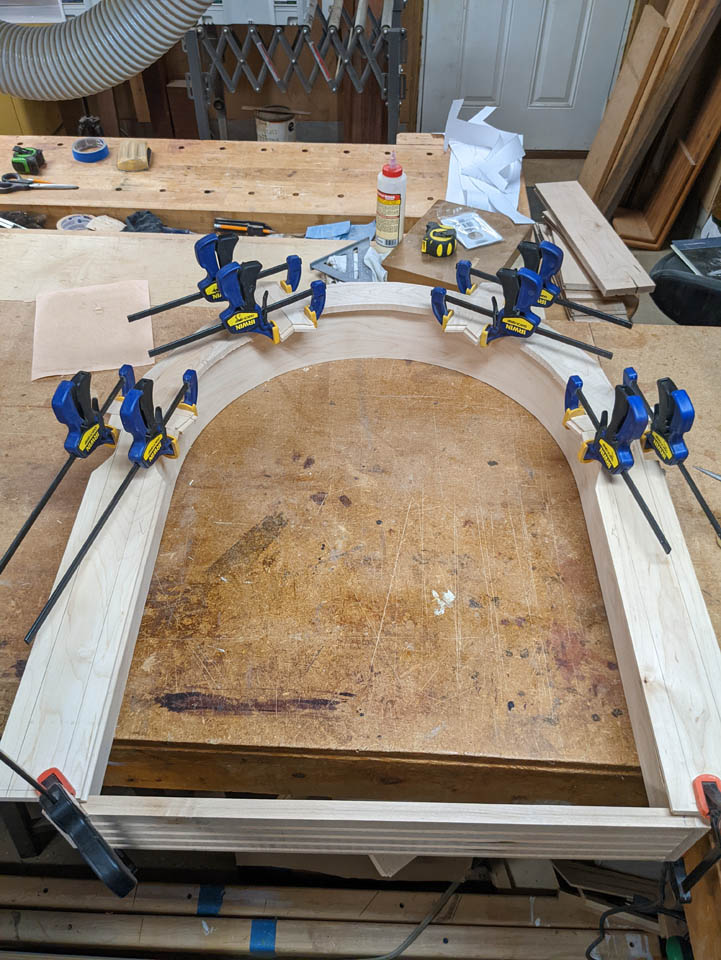
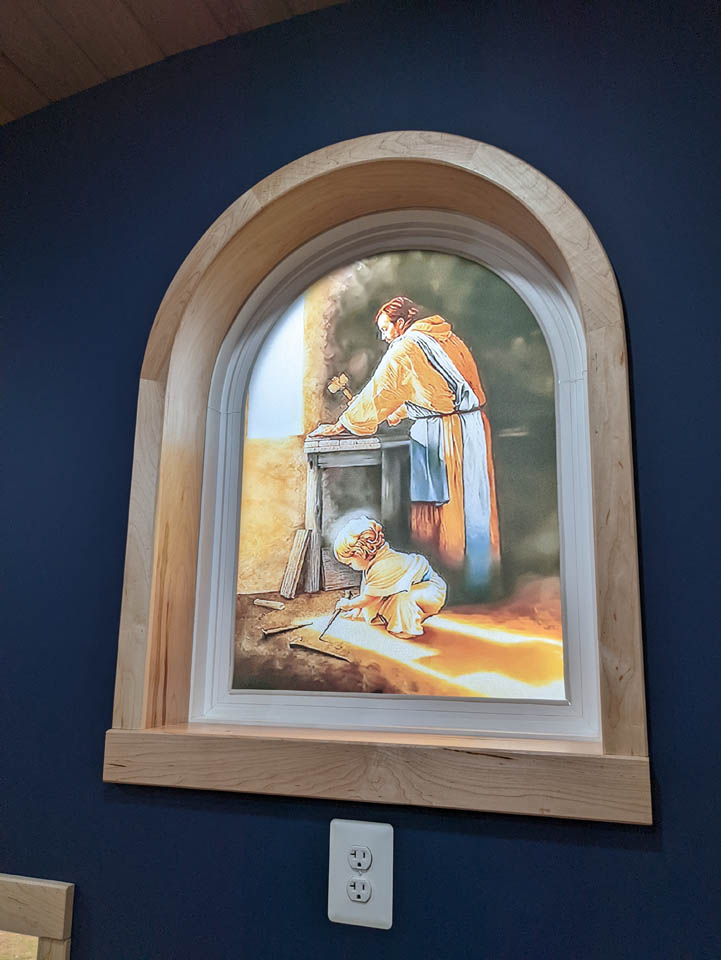
While that was drying, I went onto the computer and started working out the trim for the front of the window. I am keeping the profile simple, a 2″ wide casing with 3/16″ bevel on each side. The trim around the arch will be 1/2″ thick and the bottom piece of trim will be 3/4″ thick. The arch will be made up of three separate pieces mitered together. Since it is curved, I decided to leave little arms at the ends so I would have somewhere to attach clamps for gluing.
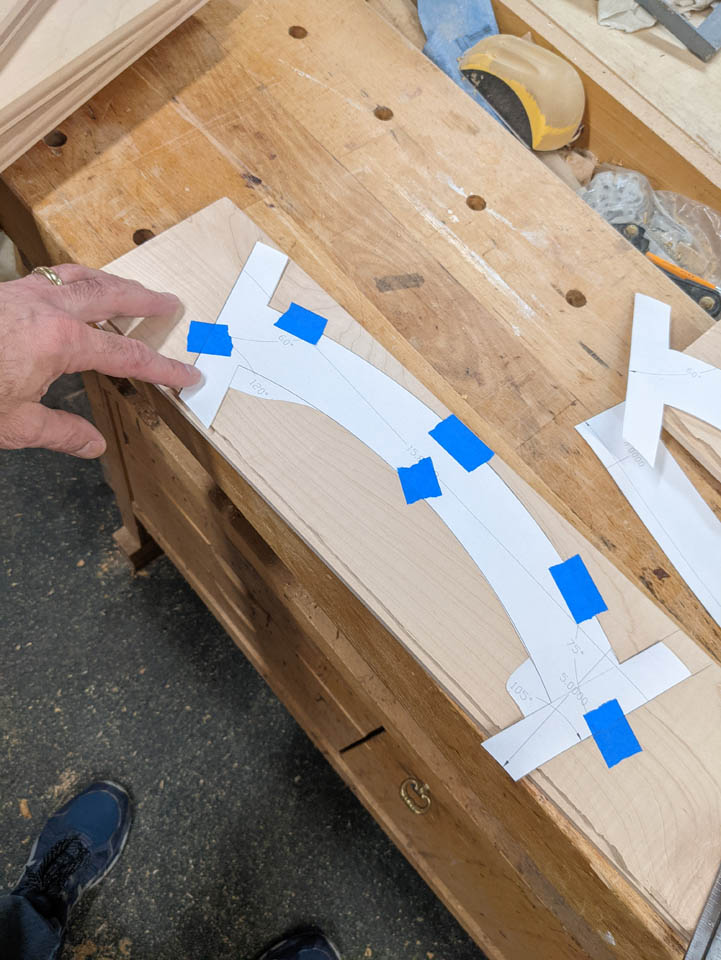
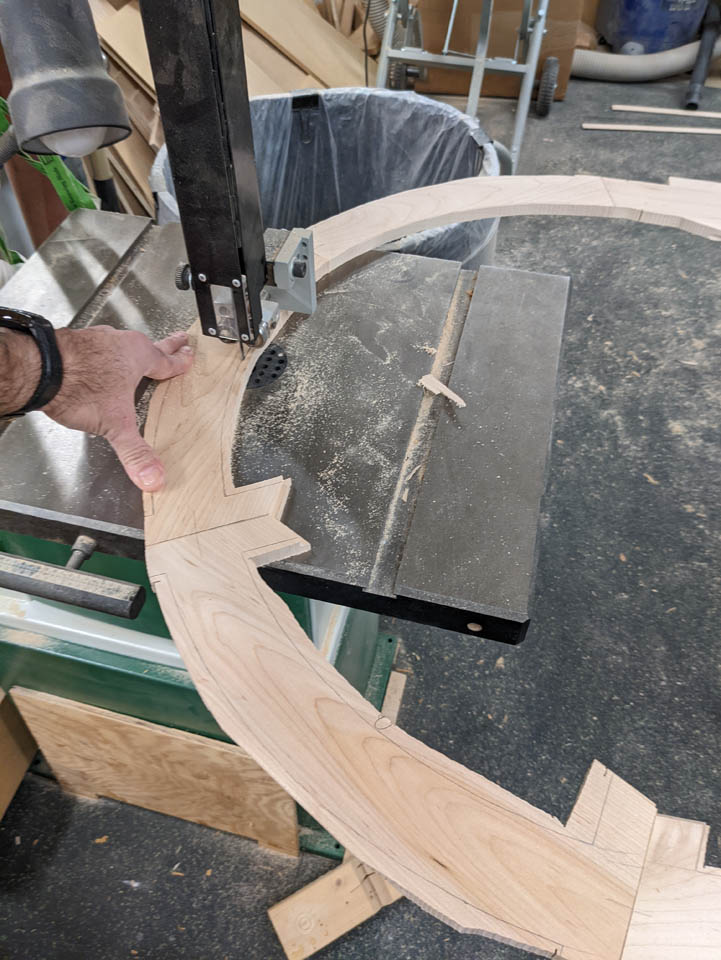
I made paper templates and traced them onto pieces of 5″ flooring that had been planed down to 1/2″ thick. Next, I cut each of the miters on my miter saw. I then rough-cut these shapes on the band saw.
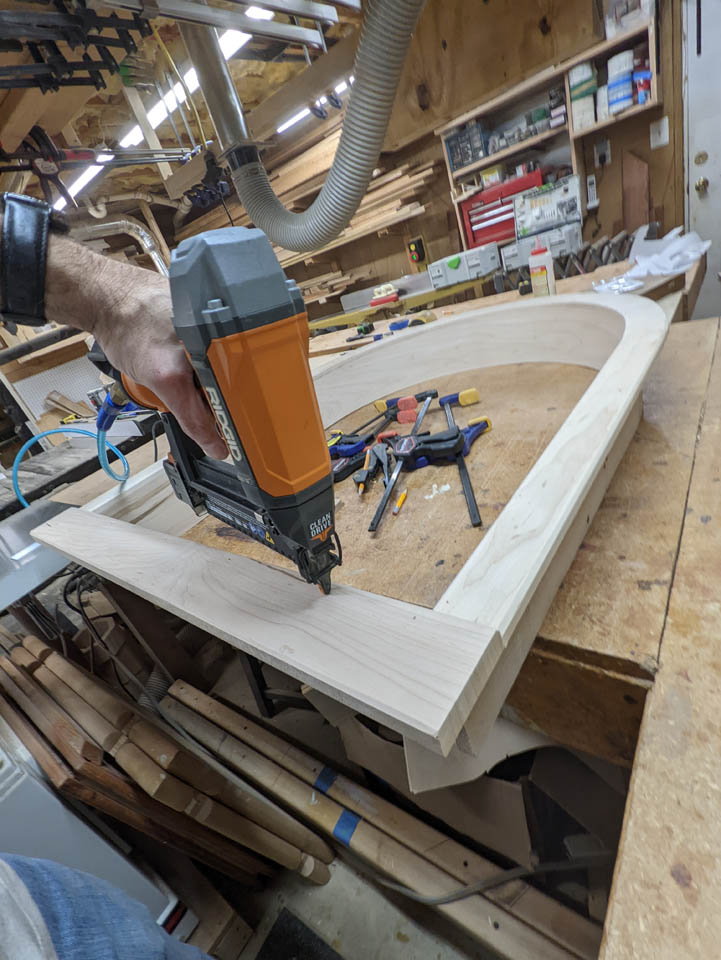
Before I can assemble the frame, I needed to pull the jamb extension from the bending form and figure out how to attach the bottom section. I kept it simple, once I had the clamps pulled the shape held pretty close to what I needed. I figured out my final inside width and cut my bottom piece to that length. After trimming the sides down, I used glue and brad nails to attach the bottom.

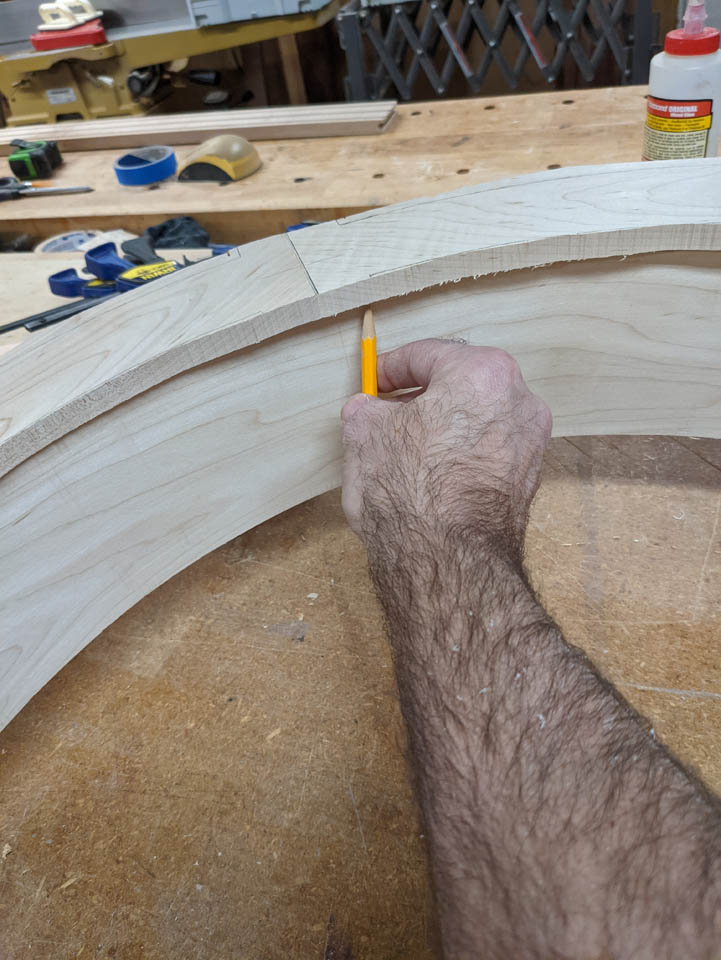
With the bottom in place, I could clamp together the pieces or the trim and mark the center of each joint.
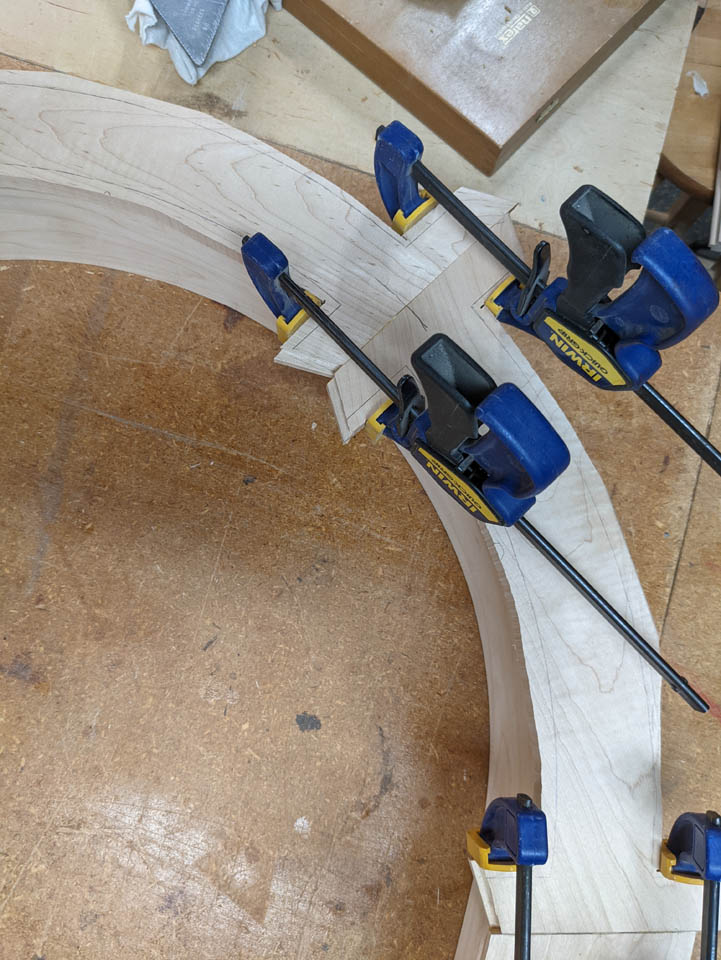
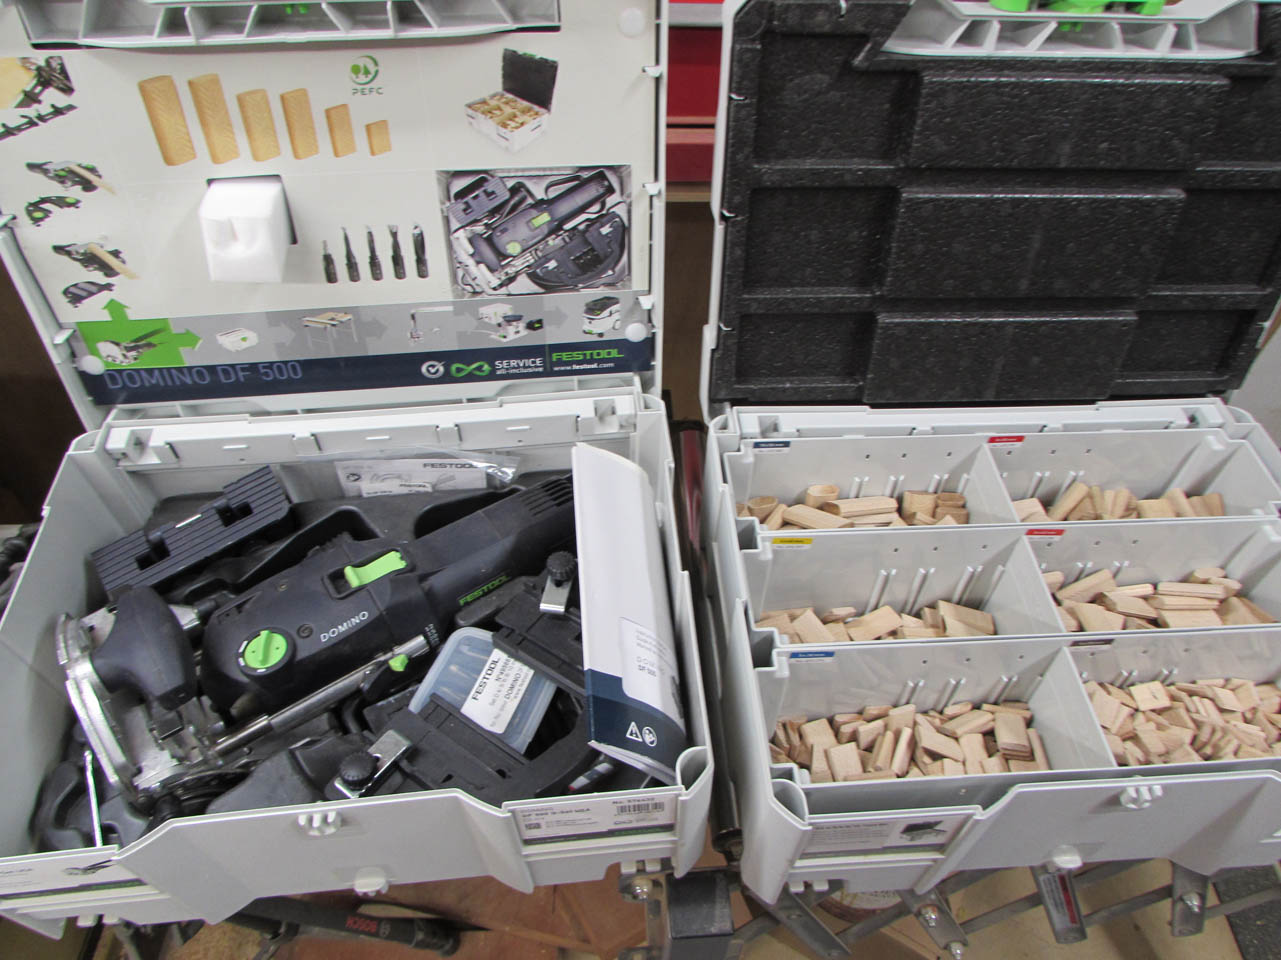
With the centers marked, I could pull it all apart and cut some mortises into each miter with my Festool Domino.

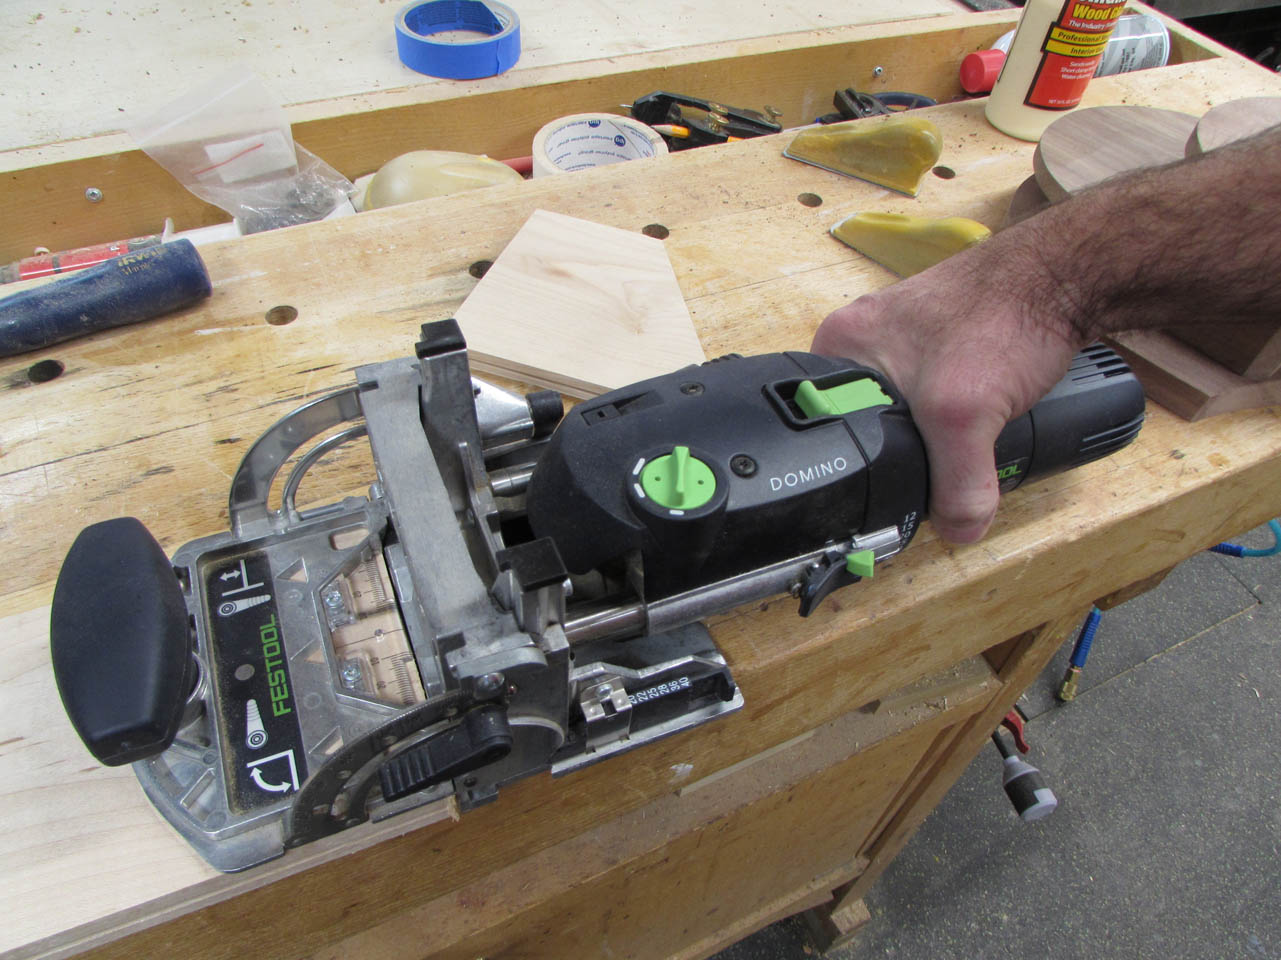
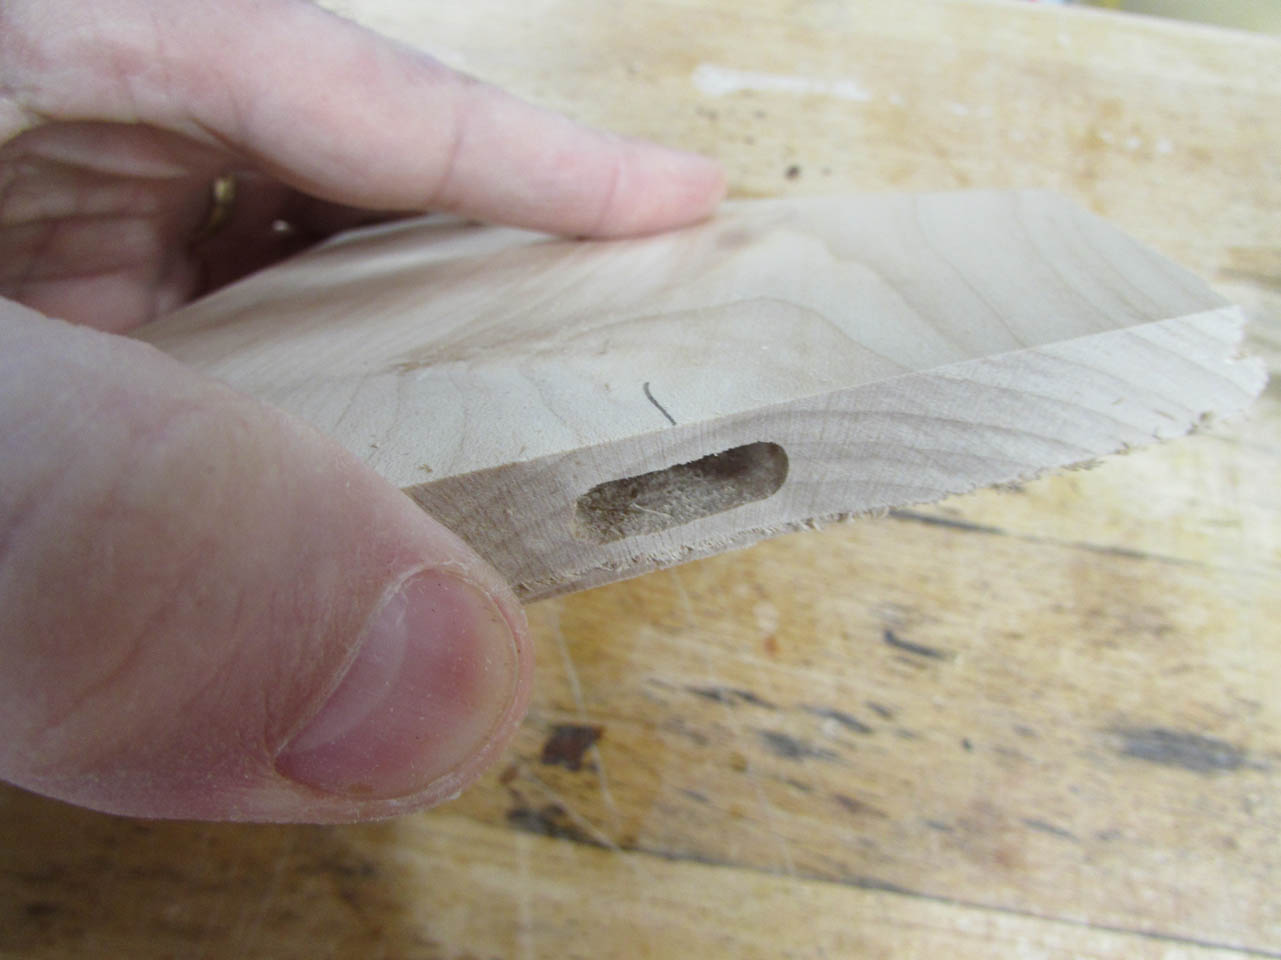
These miters will not see a lot of stress, but the addition of the tenon will avoid the glue joint cracking apart at a later date.
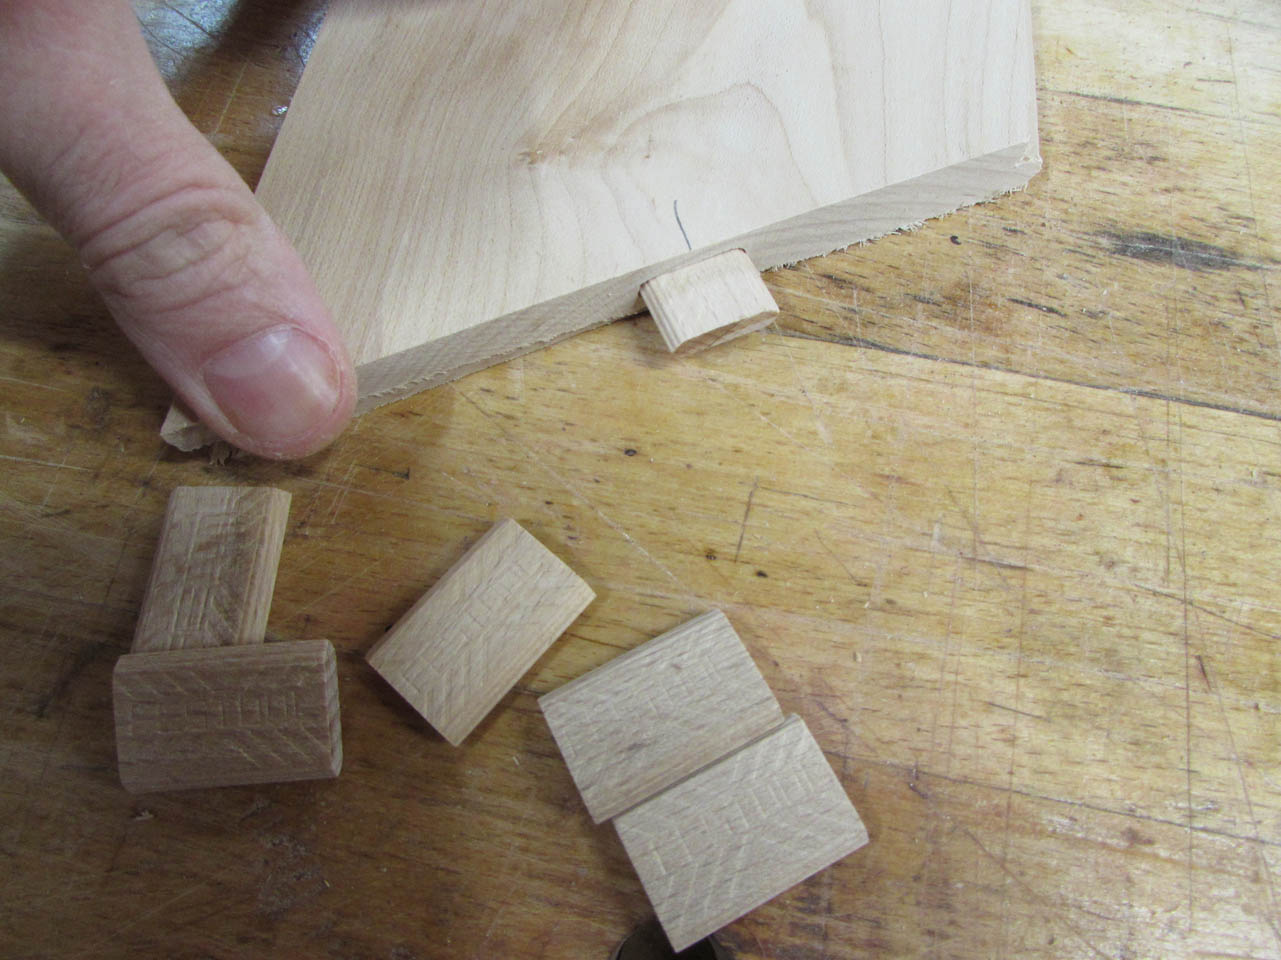
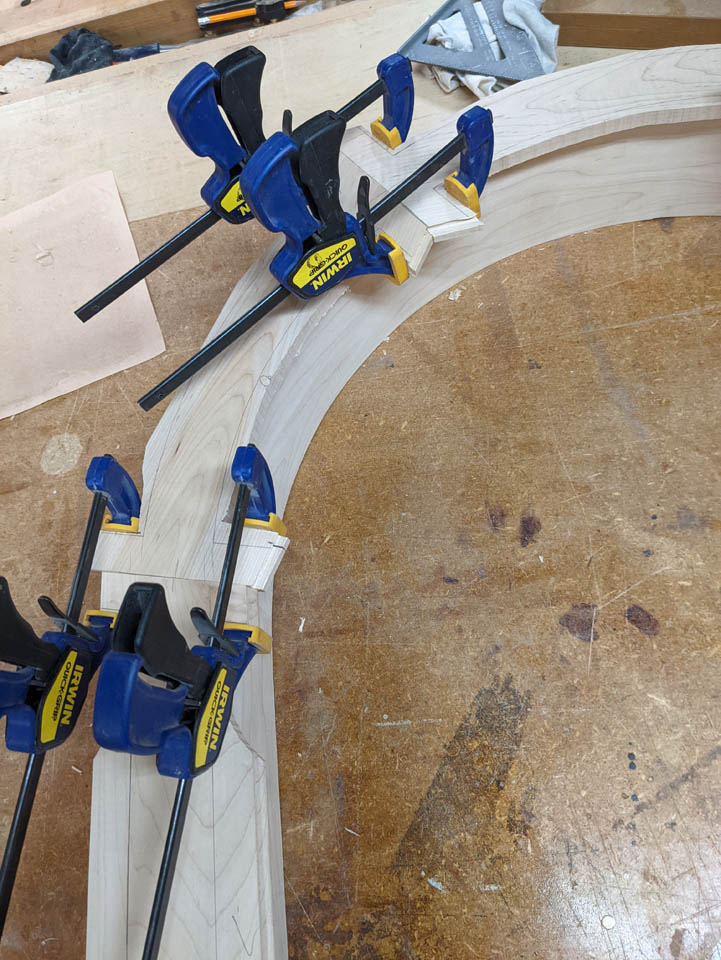
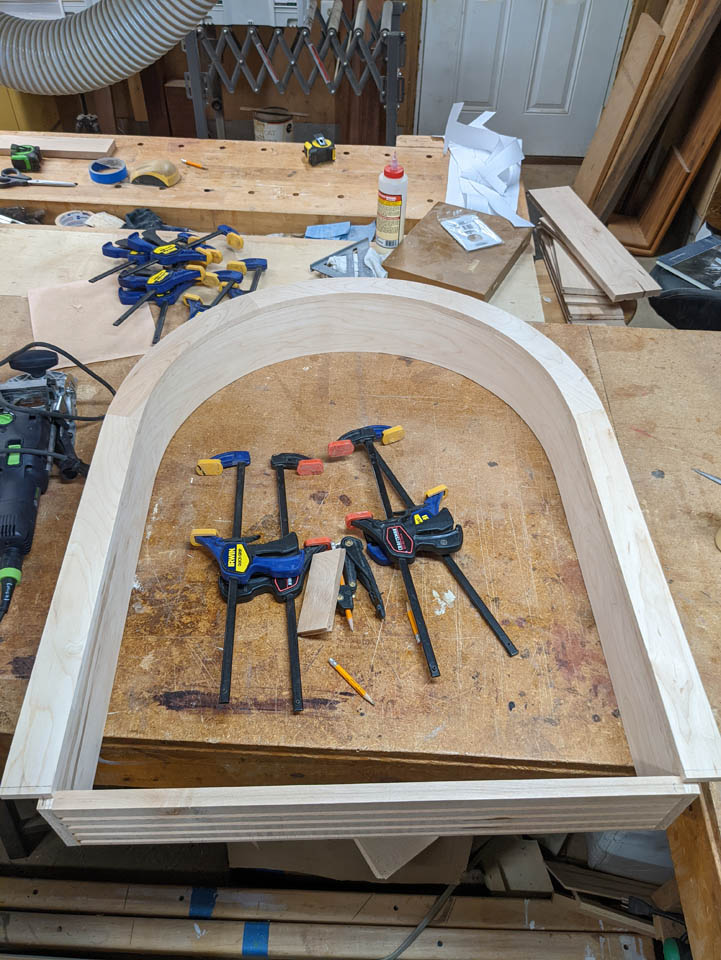
After gluing in all the Dominos, I glued and clamped all of the miters while holding everything flat.
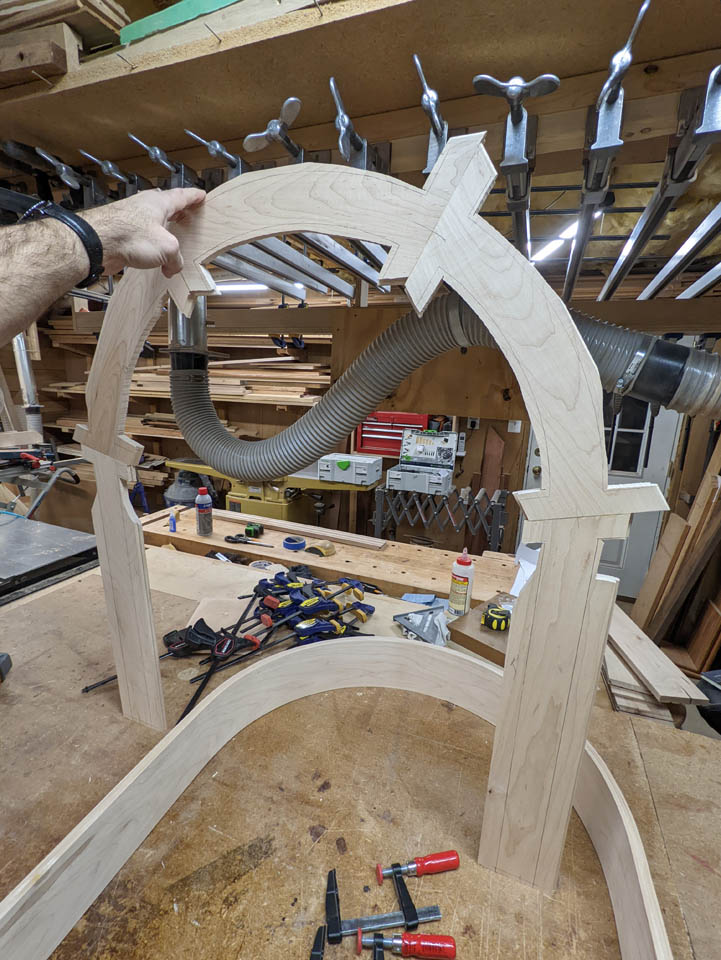
When the glue was dry, I could cut off the little clamping wings on the band saw.
I also cut the straight sections on the table saw as well.
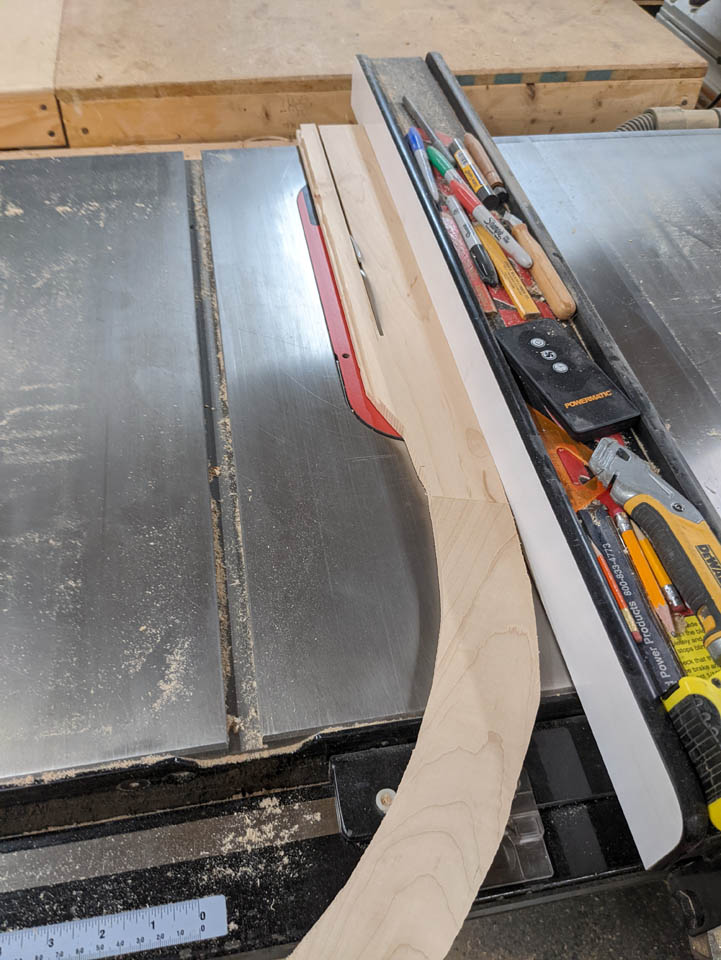
Now I can clamp the trim in place and mark the inside of the curve.
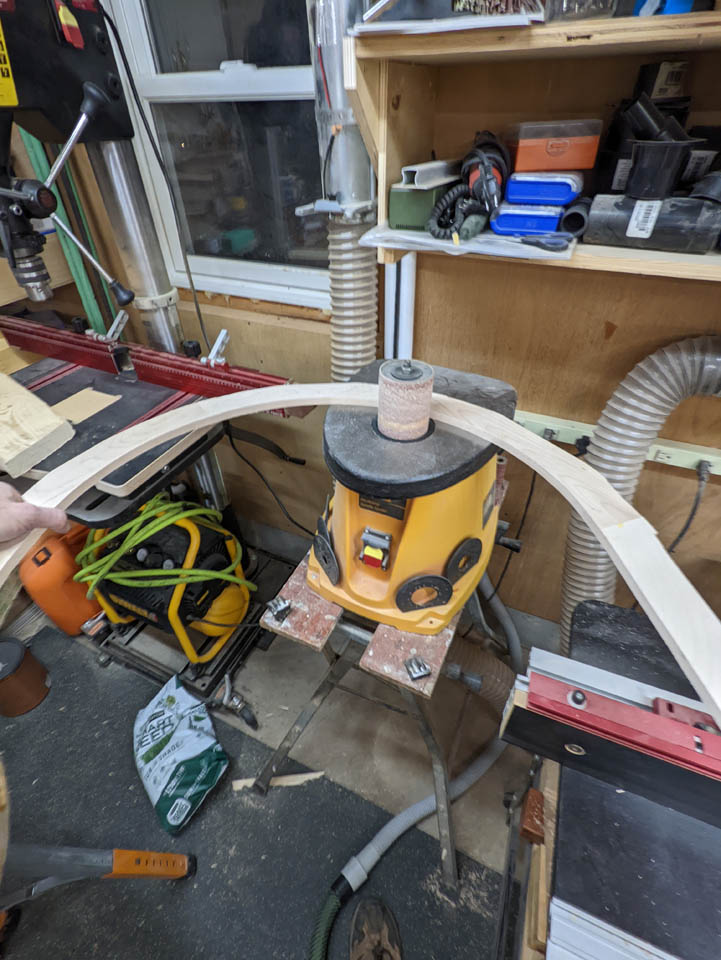
I used the band saw and the spindle sander to cut down to my pencil mark.
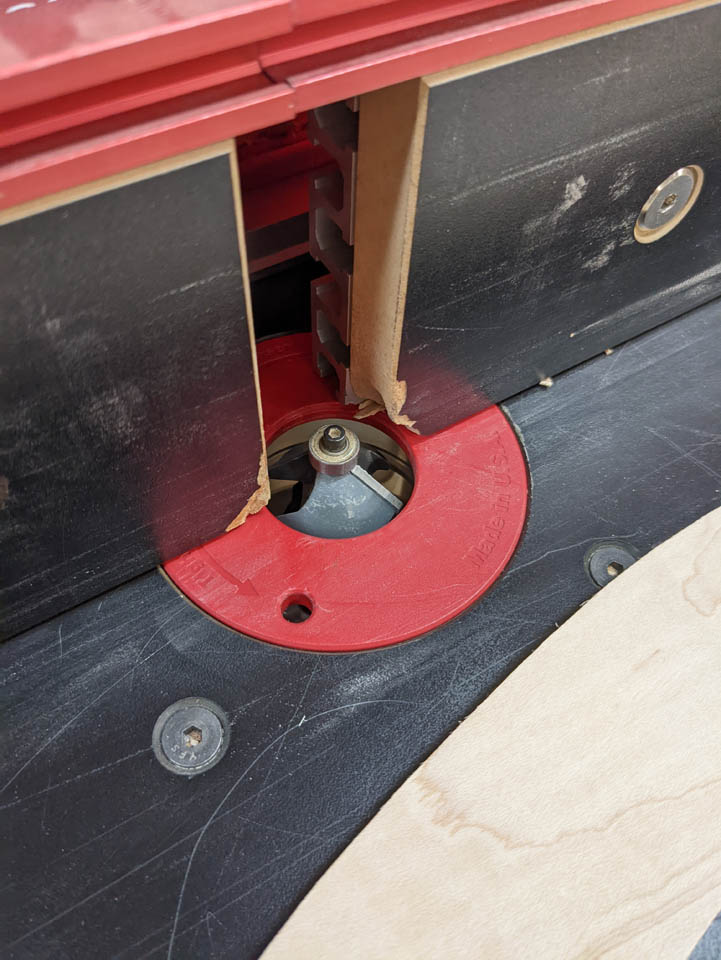
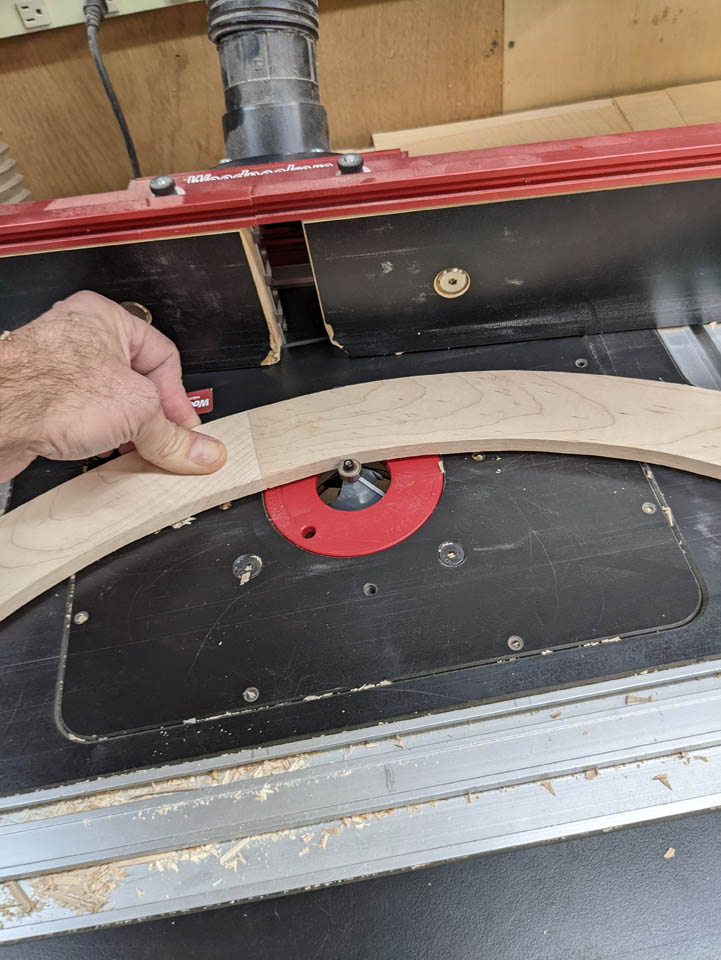
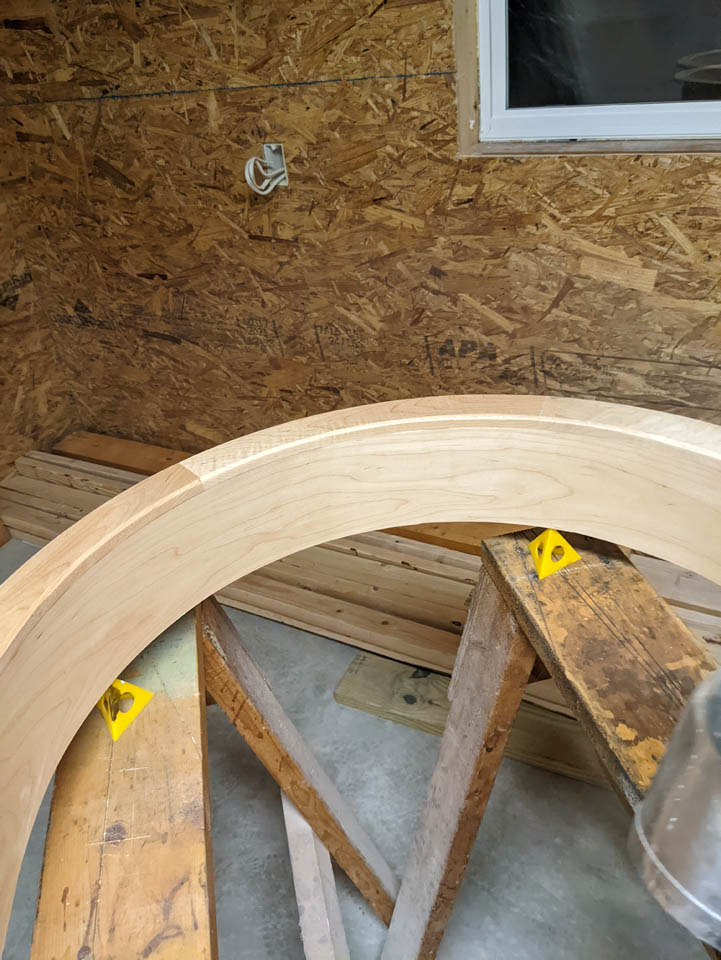
When I was happy with the fit, I installed a 45° chamfer bit into the router table and set it to about 3/16″ deep.
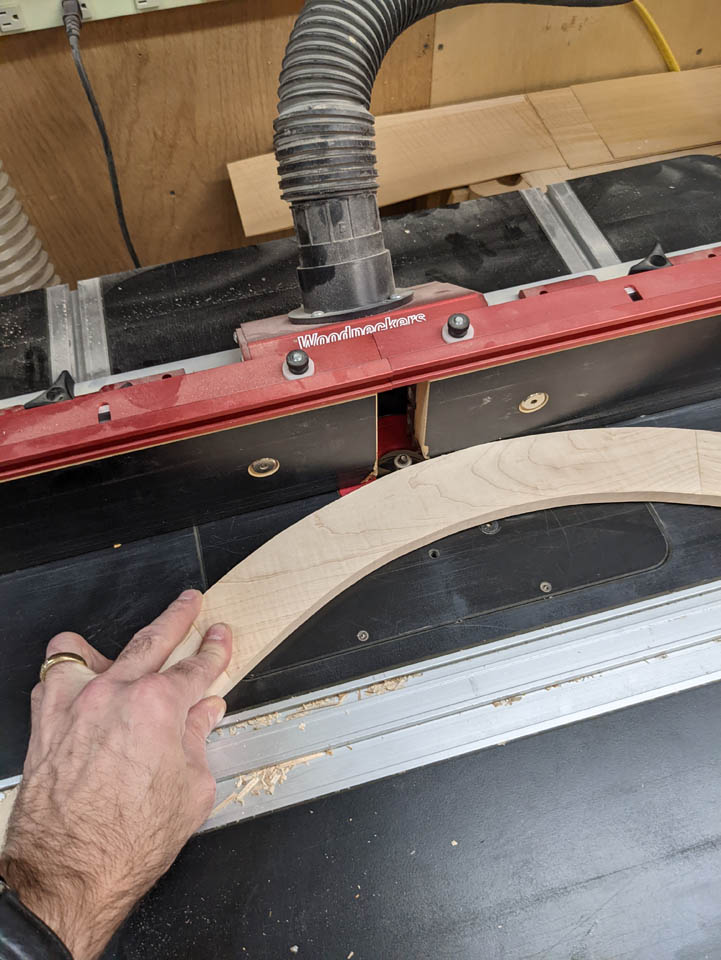
I cut a bevel along the inside and outside edges, then cut the ends down to the correct length.
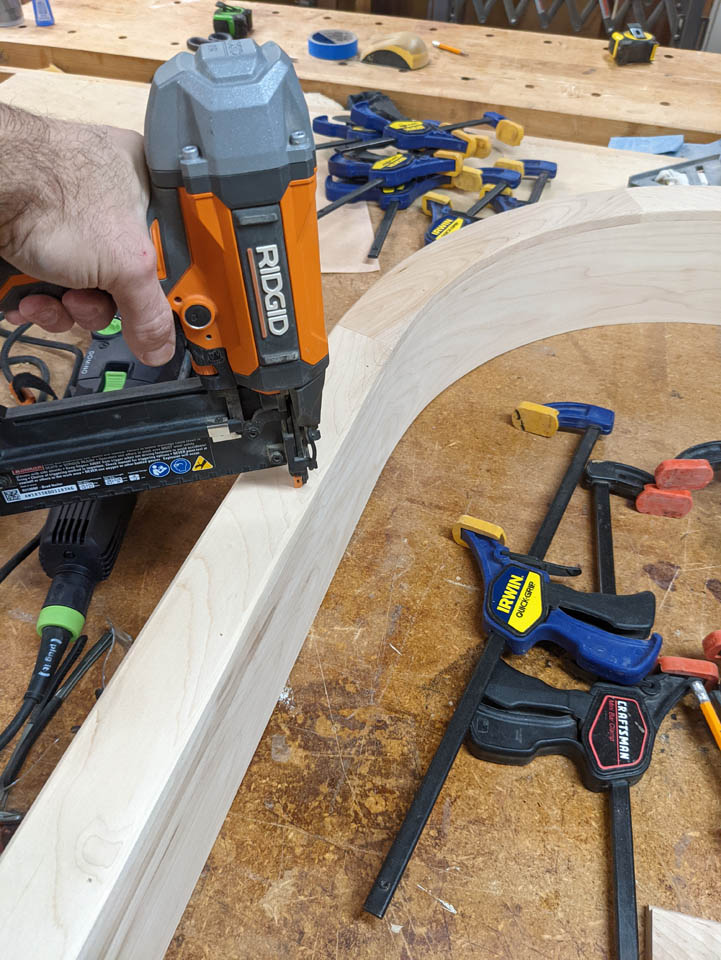
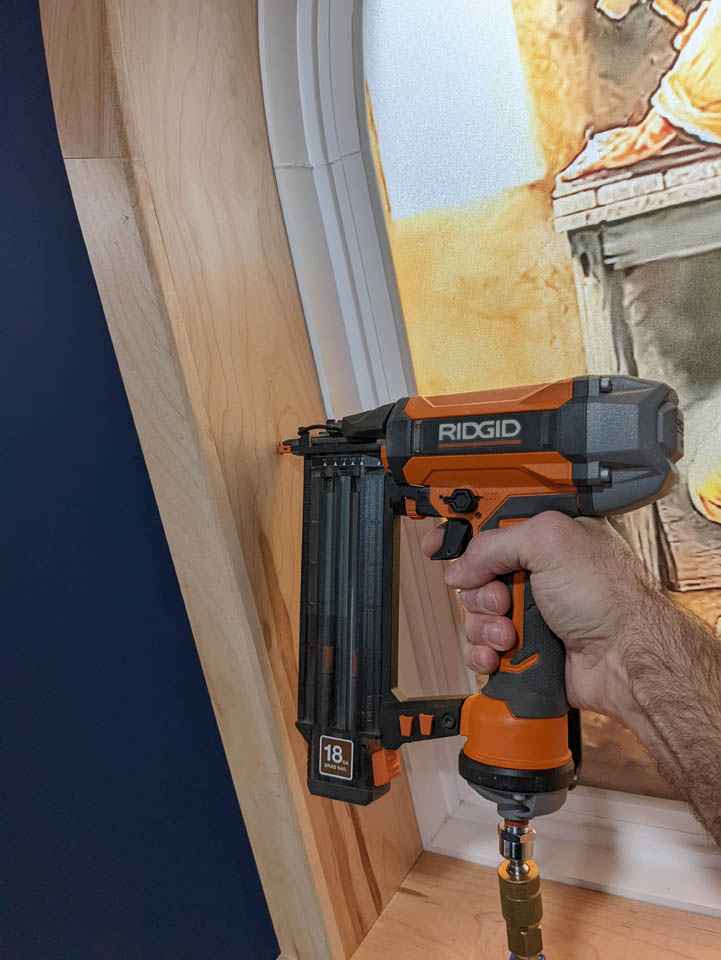
I had also quickly cut and beveled a 3/4″ piece for the bottom. All of these pieces got installed with 18 gauge brad nails.
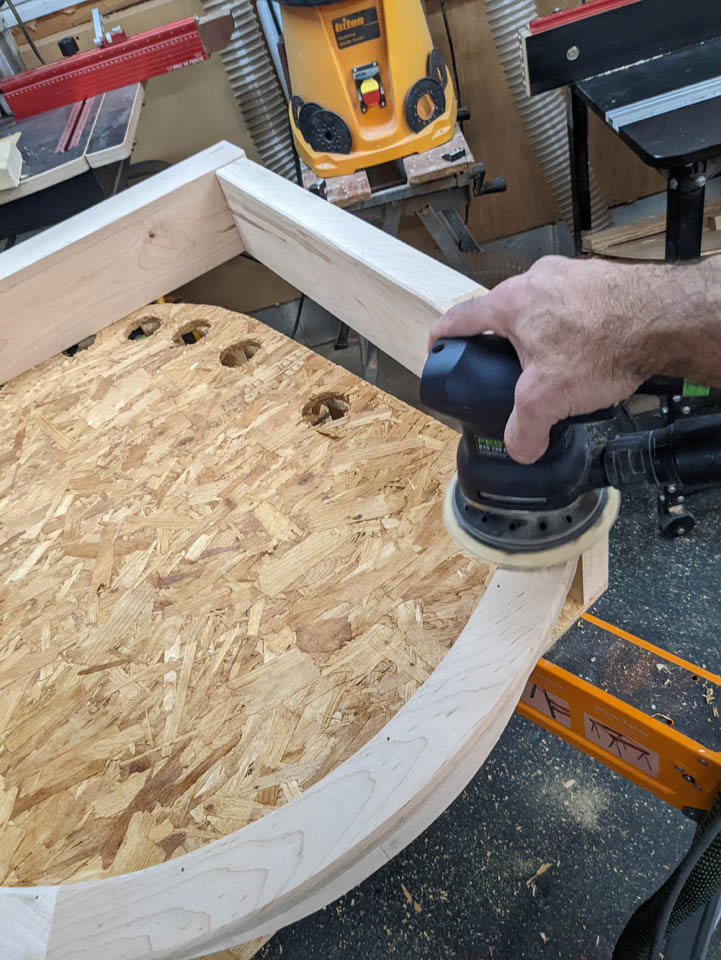
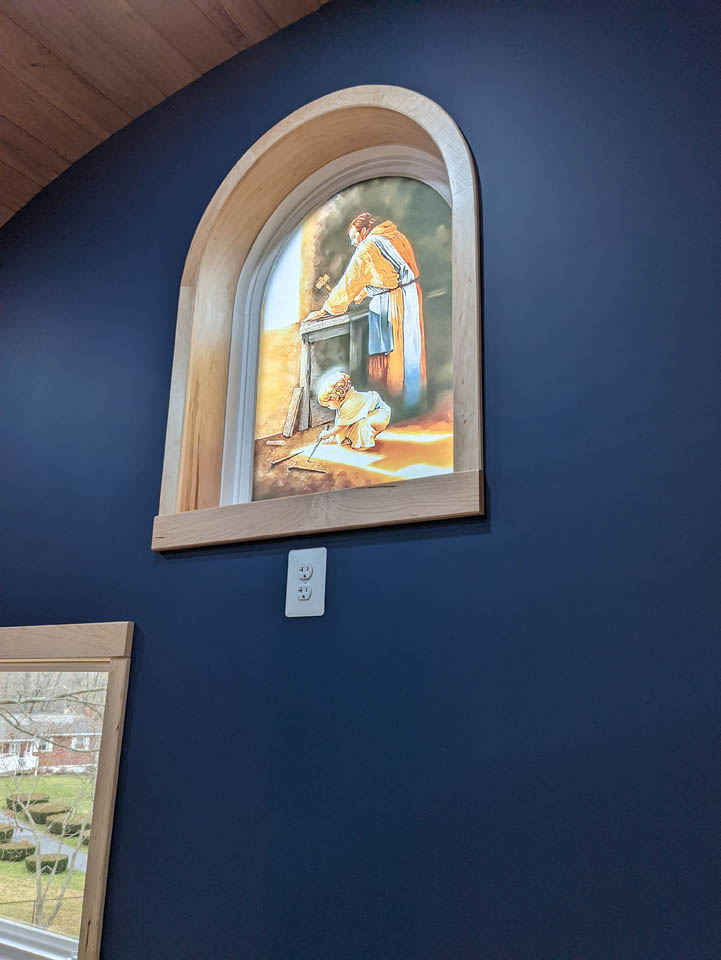
After a little sanding, It was time for a test fit.
I had to trim back a little drywall, but once that was done, it fit perfectly.
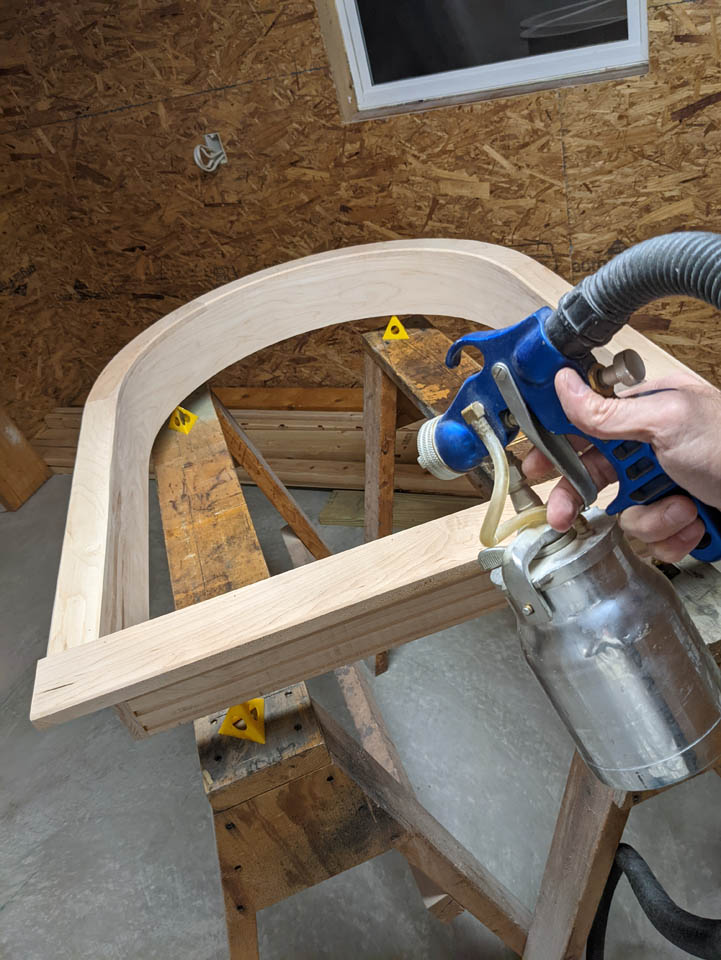
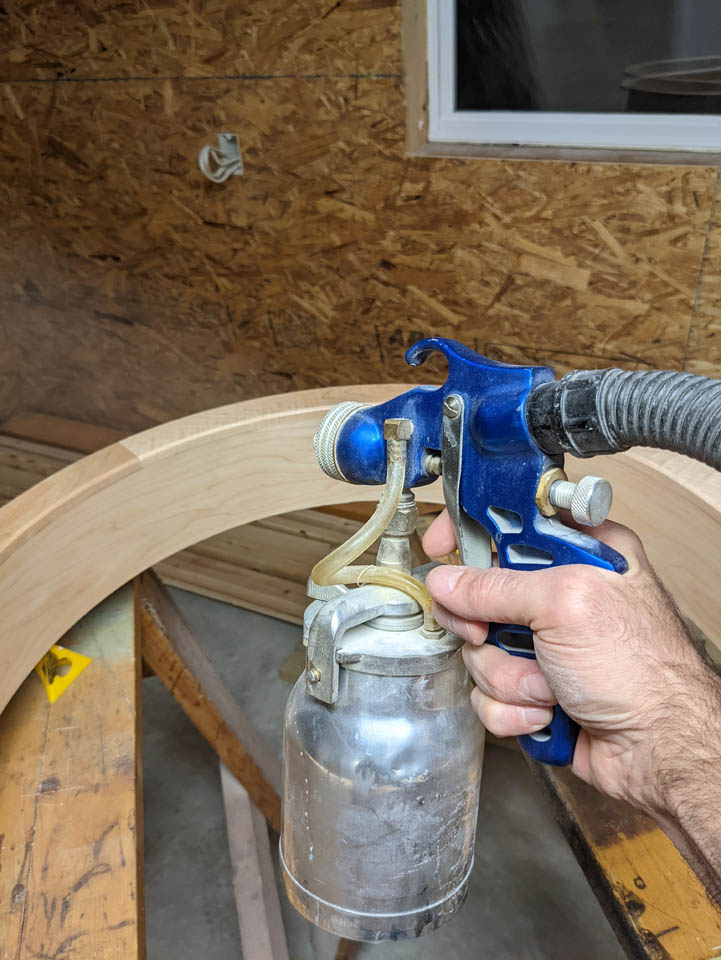
Time to apply finish. I used a water-based polyurethane with a satin finish in my HVLP sprayer.
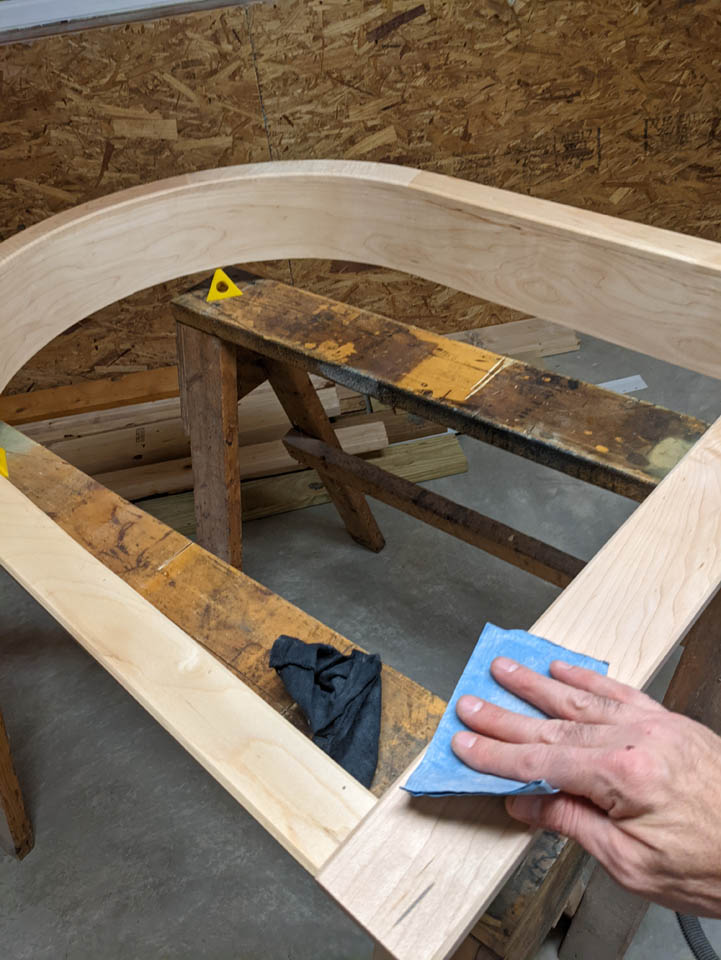
After each coat, I sanded with a piece of 400 grit paper.
I applied a total of three coats.
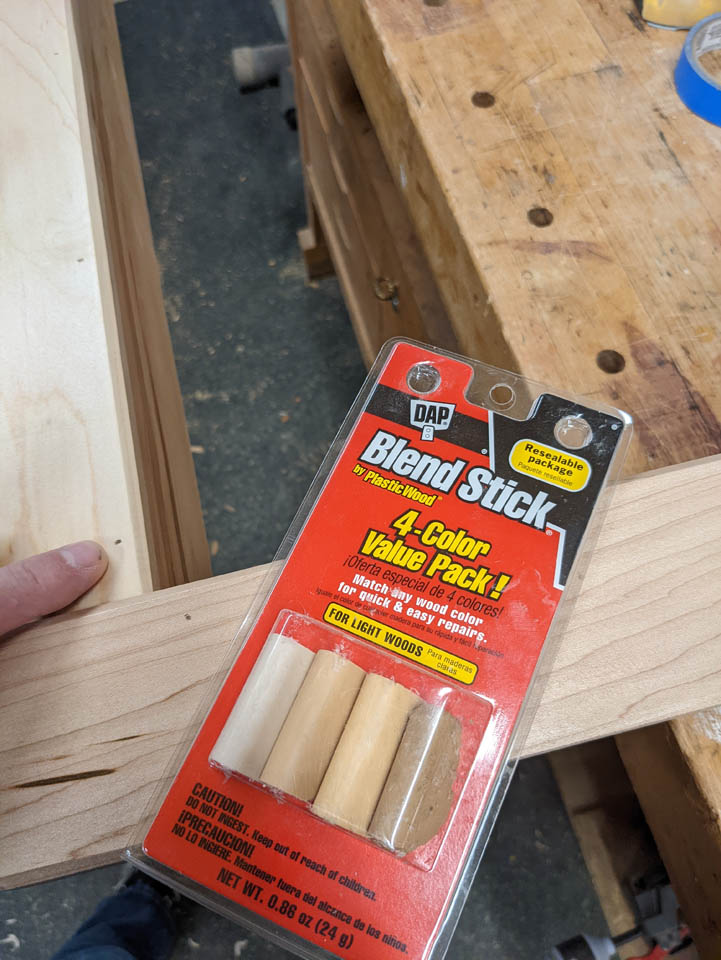
I decided to fill the nail holes with some blend sticks I picked up. I believe they are mainly wax, so I waited until after I applied finish so that the excess could be rubbed away easily. I was afraid that If I did it before finishing, the wax would have filled the pores of the wood making it repel the finish.
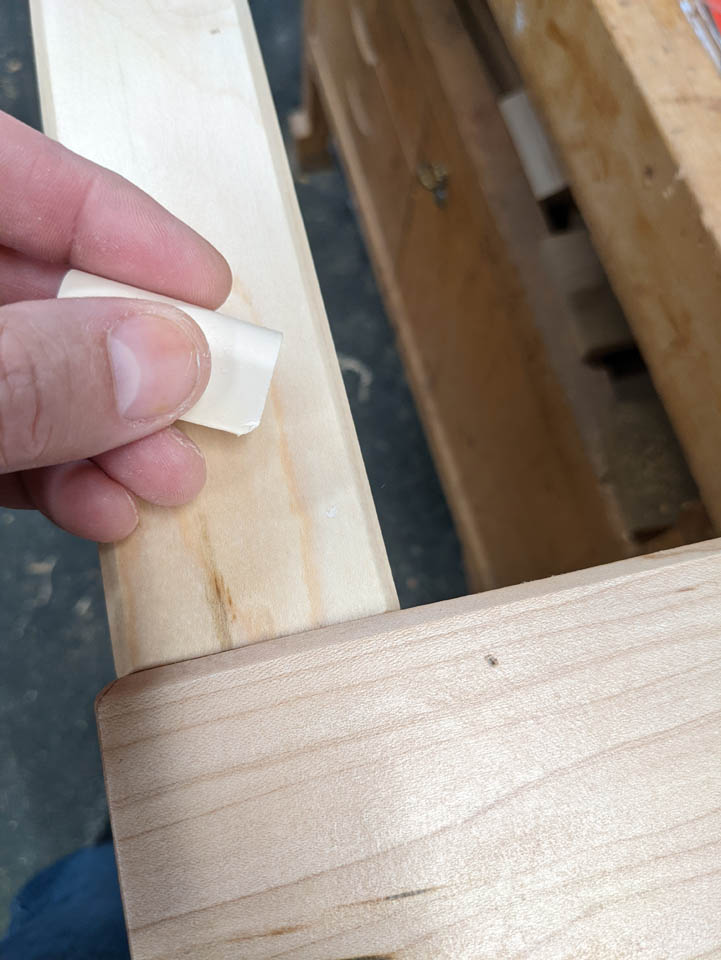
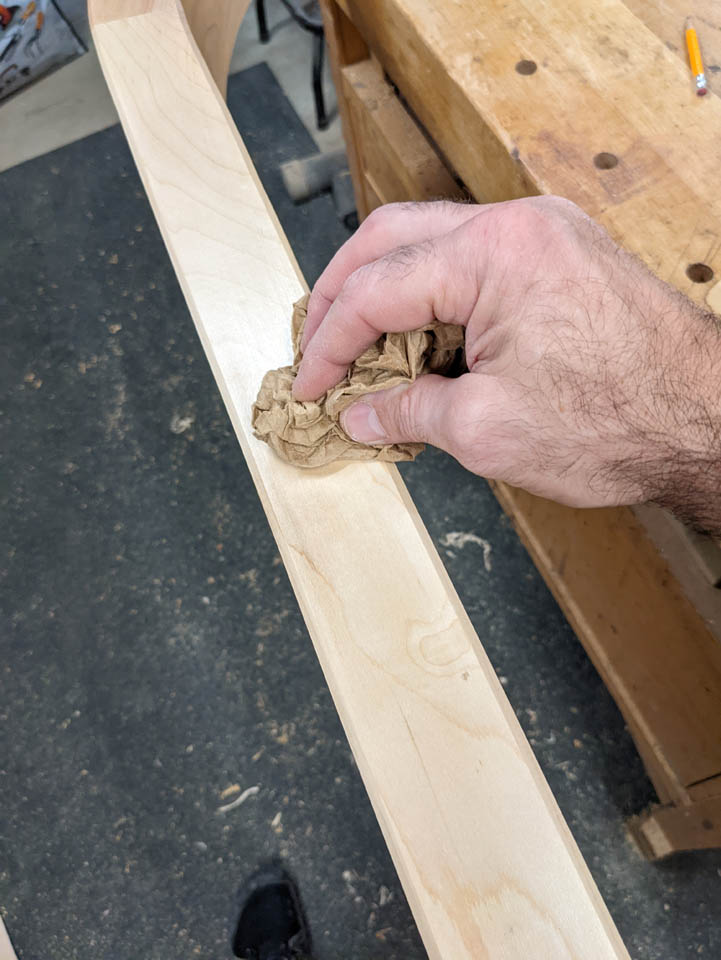
After rubbing off the excess, I think it looked great. I used different colors depending on the tone of the wood in the area of the holes. It blended really well. Up close, you barely notice, from a few feet away, you cannot see it at all.
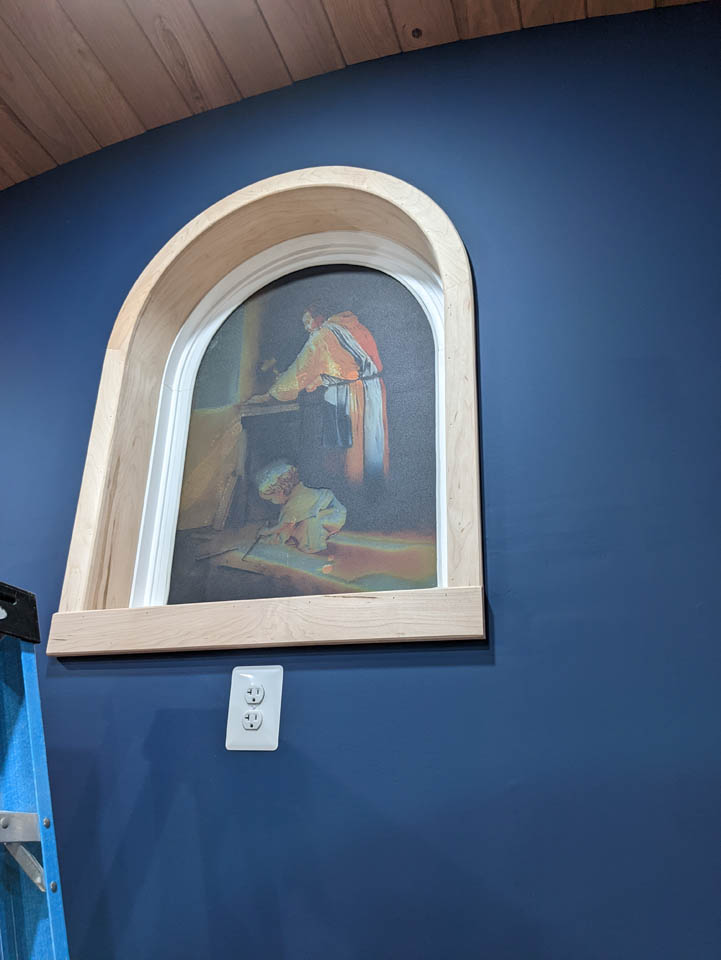
Final fit looks great. I used a few more brad nails to hold everything in place.
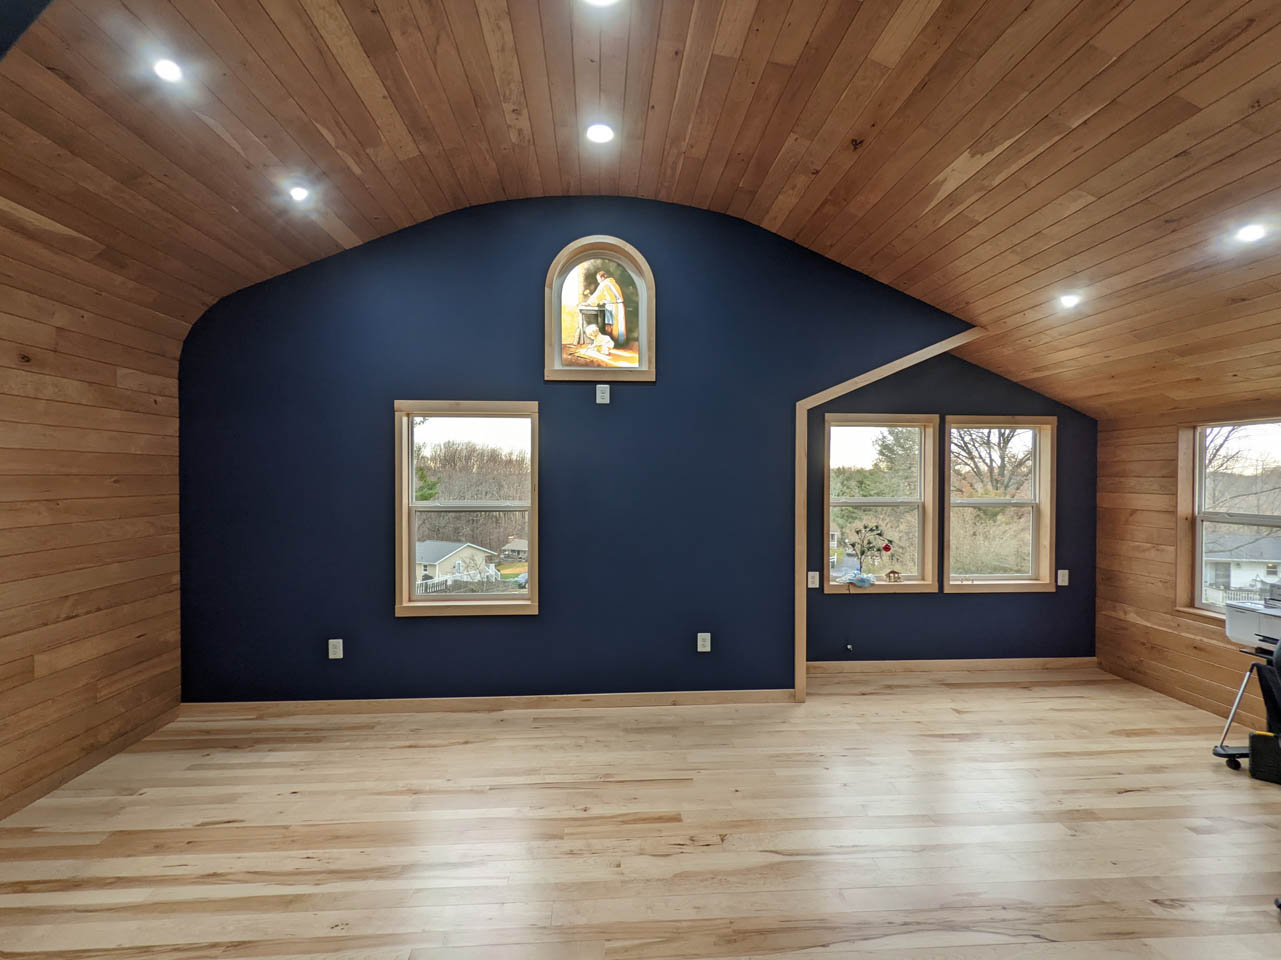
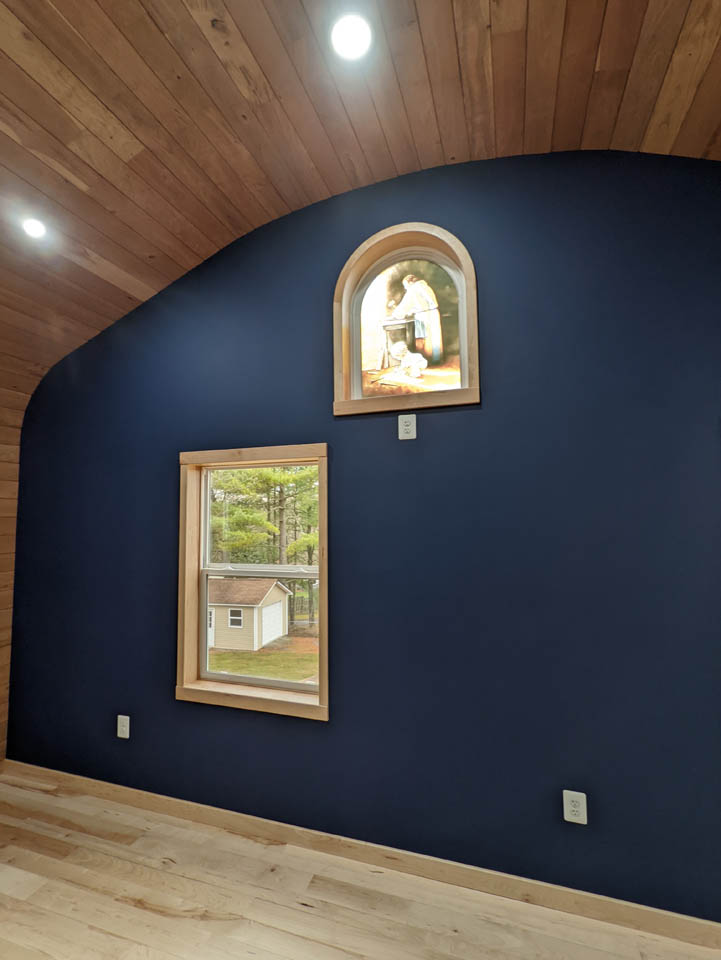
The room looks a lot better with the last piece of trim in place.

Very nicely done. Always fun to read how things get figured out and put together. Every little aspect of this took careful attention to detail and problem solving.