
Personalized park bench slats
I have gotten a lot of inquires from people wanting to buy replacement slats. If you would rather buy them instead of building your own, check out my friend Bryan: Atkins and Sons park bench slats. Anyone interested in building your own, please continue reading.
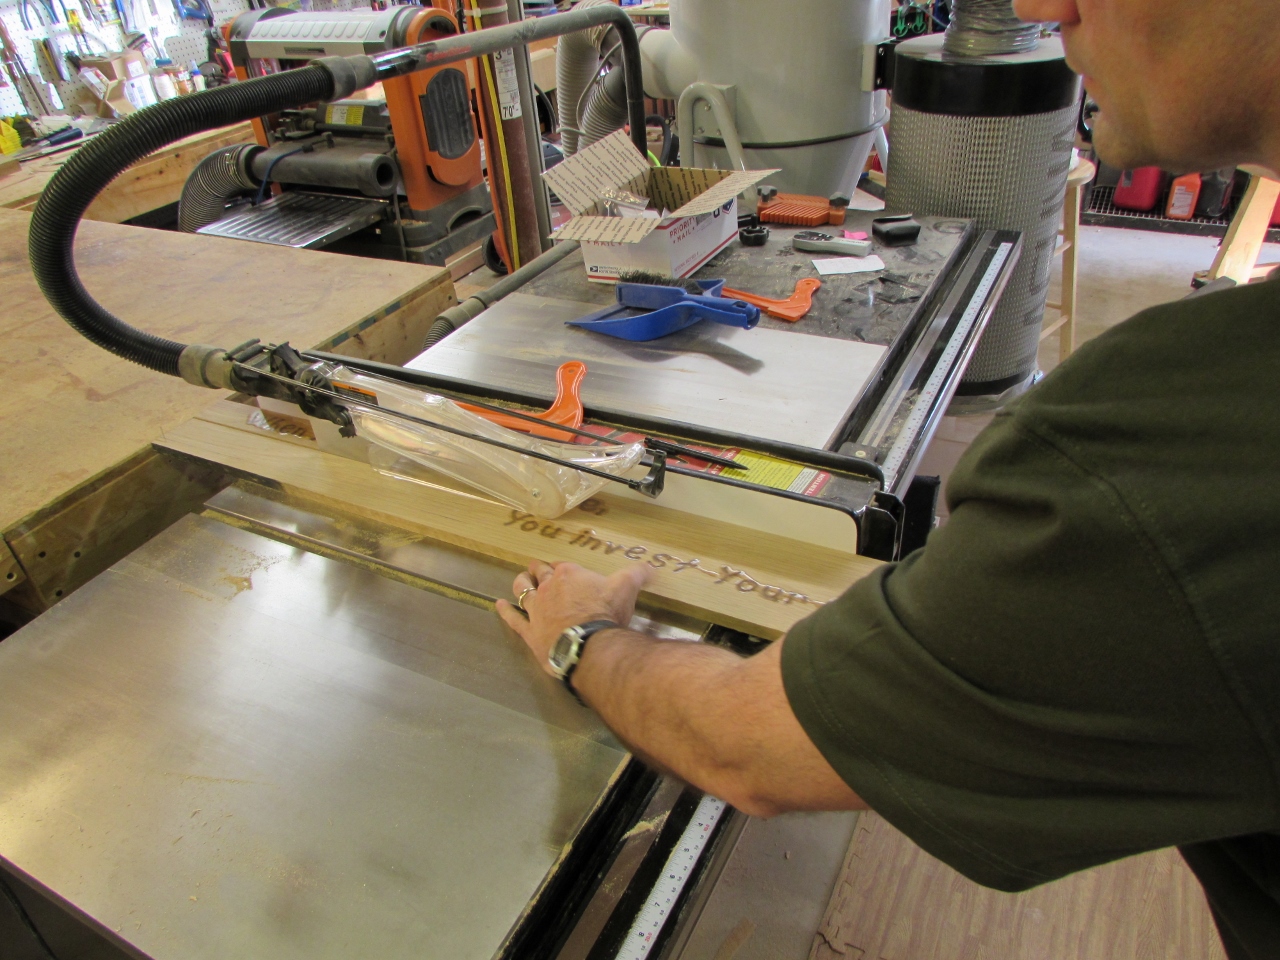
I have done a couple of different posts about park bench slats, so this one will be a little different. This set will have a quote routed into the bench slats. I started by cutting the boards down to a little over 48″ long, then just cleaned up the edges on the table saw.
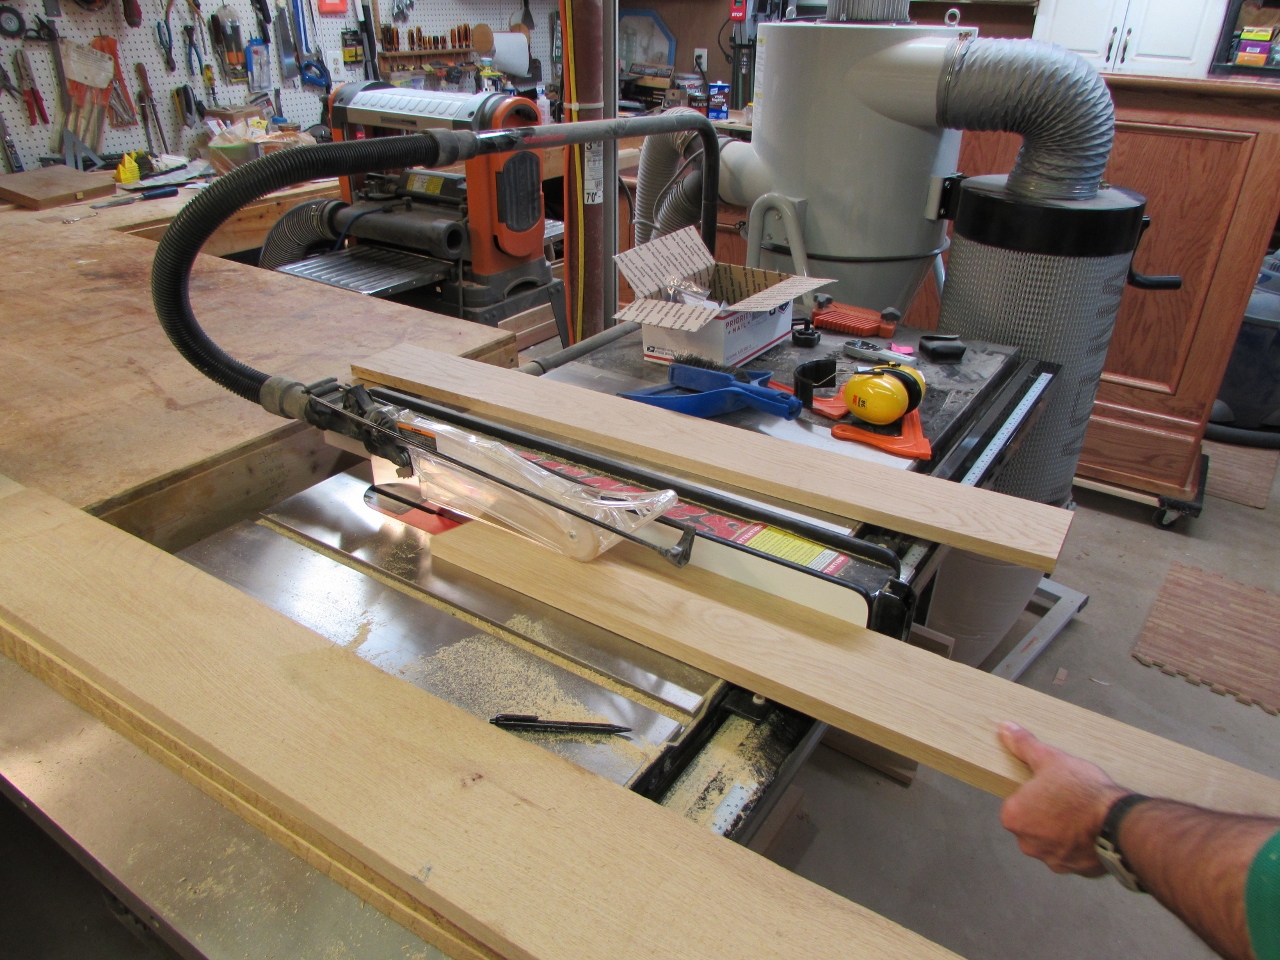
Cleaning up the edges
I planed all the boards down to their required 5/8″ thickness.
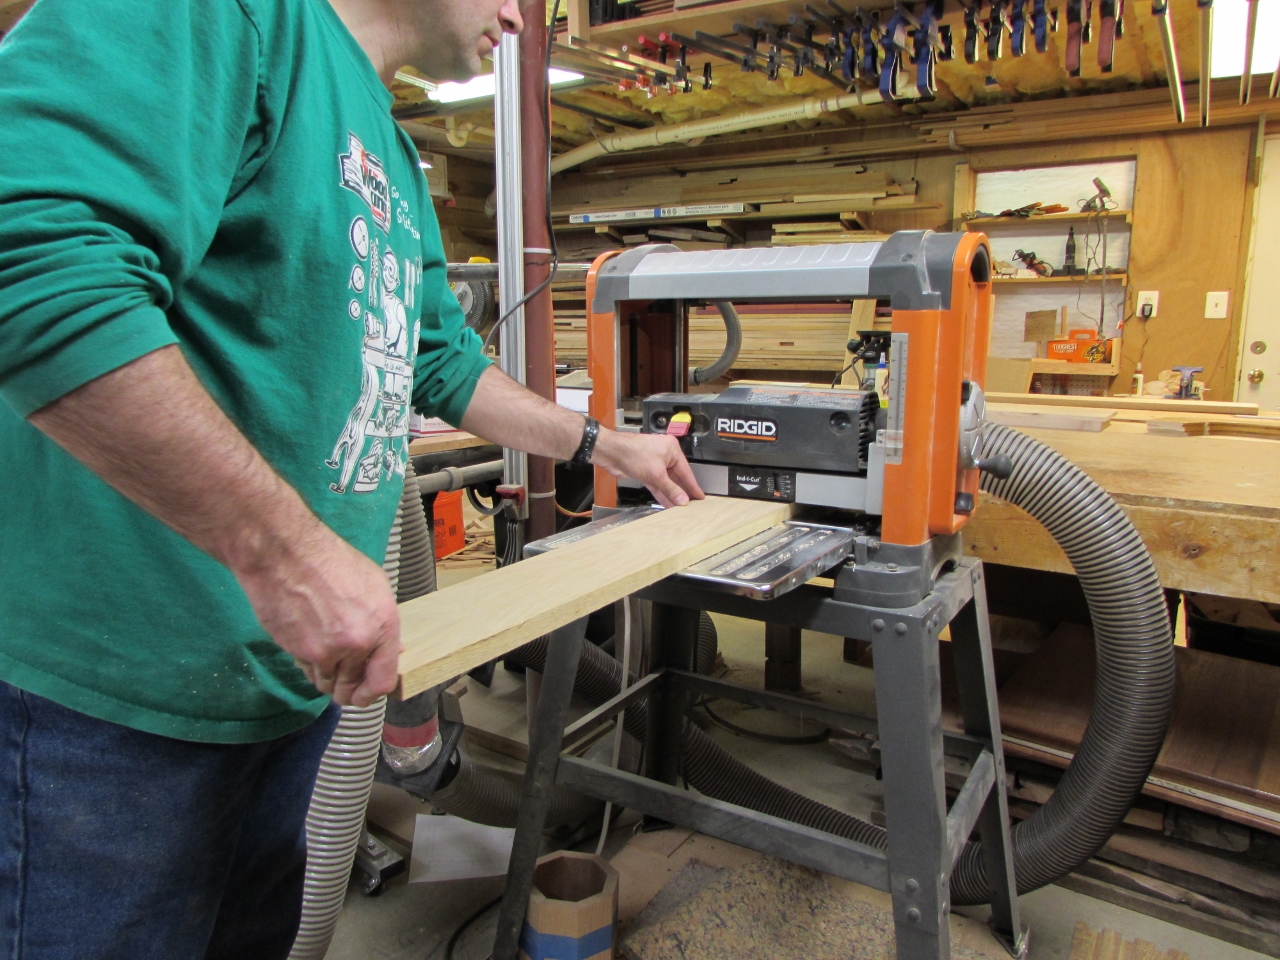
Planing down to 5/8″ thick
Now that all the boards are planed, I lined them up and cut them all to exactly 48″ long. I left them long for planing because the planer will sometimes snipe the ends. I just cut off the sniped ends and the boards are now uniform.
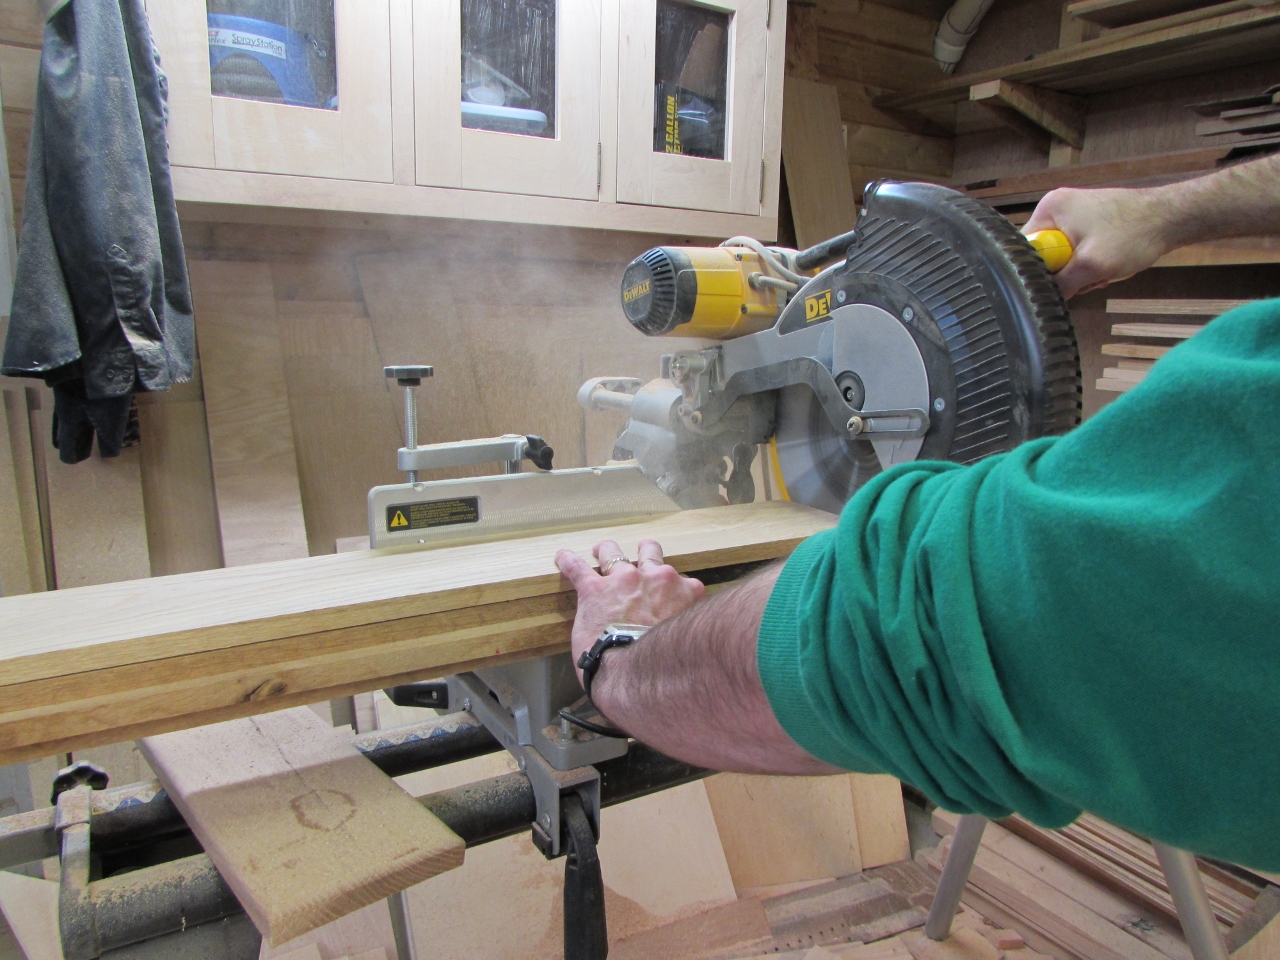
Cutting all the boards to 48″ long
Normally I would cut them to their correct width first, but I needed a wider platform for routing text. I laid out the width of each slat, then marked 1/2″ in from each edge to set a limit for my text height.

Laying out two slats

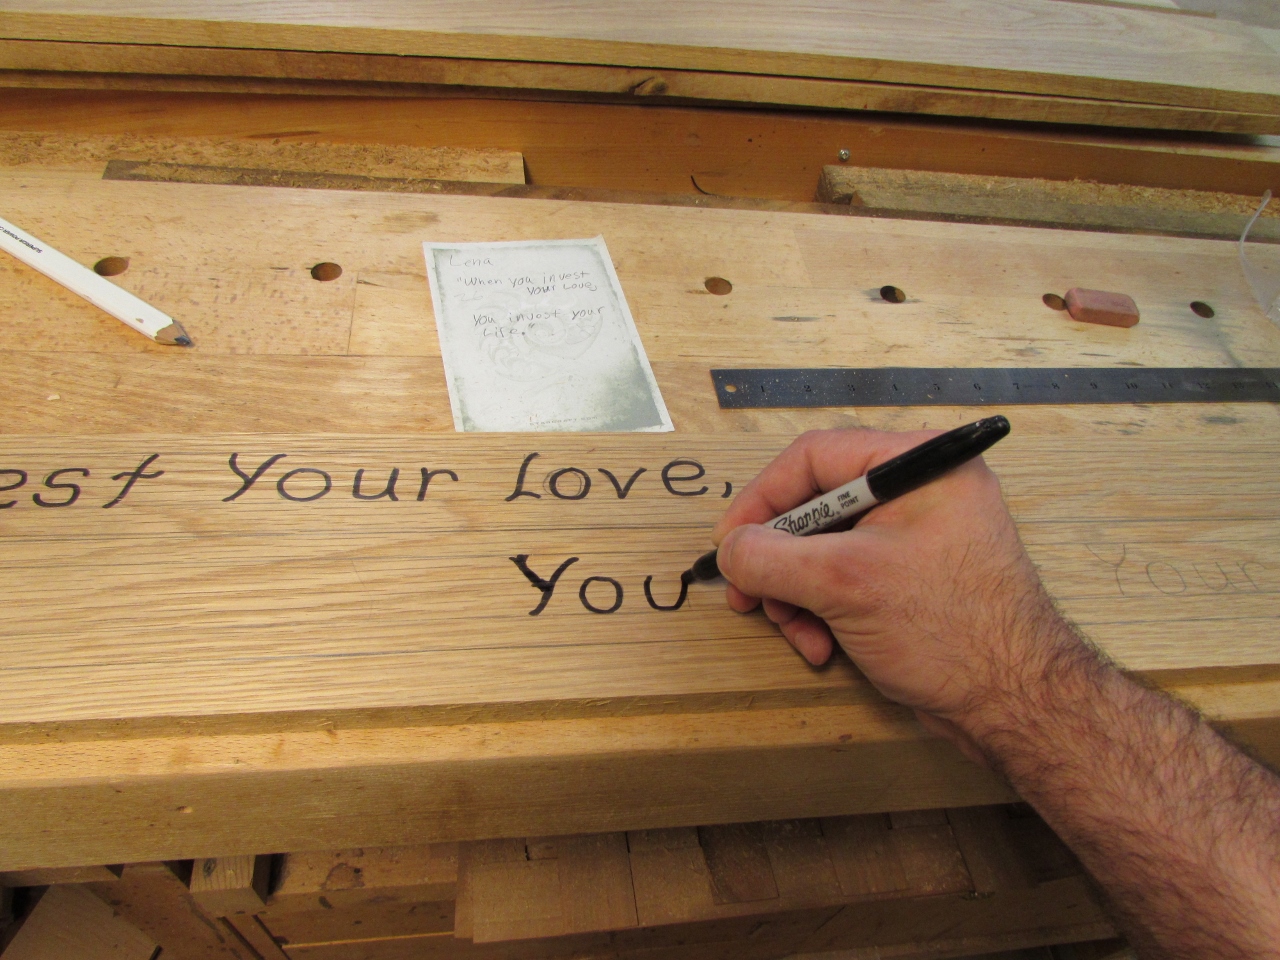
Writing in pencil first
I laid out the text by hand, with pencil so I can easily adjust spacing and fix errors. Next I follow up with a magic marker to make the letters easy to read. I also thicken the text to the size of my cutter so I don’t cut any parts of the letters to close to any others. If the letter is too tight, some pieces can tear out, like the center of the loop in the letter “e”.
Darkening and thickening up the letters with a magic marker

1/8″ round point bit
Since my letters are about 1-1/8″ tall, I decided on a 1/8″ round-point bit.

routing each letter by eye
Turn the router on, then lower it onto the board, directly over one of your lines of text. Holding the router firmly, trace each letter patiently.

So far, so good
It is probably best to practice on a scrap first. Each type of wood routes differently. This is white oak, it is a bit stringy. If you relax too much, it will try to follow the grain instead of going where you want. I usually rest both hands firmly and try to use the heel of my hand as the pivot point for curves. If you want straight letters, you can use a template.

All the letters cut
After you finish routing the letters, they will have fuzzy pieces of tear-out sticking out all over the place. Just sand the surface and they all get removed.
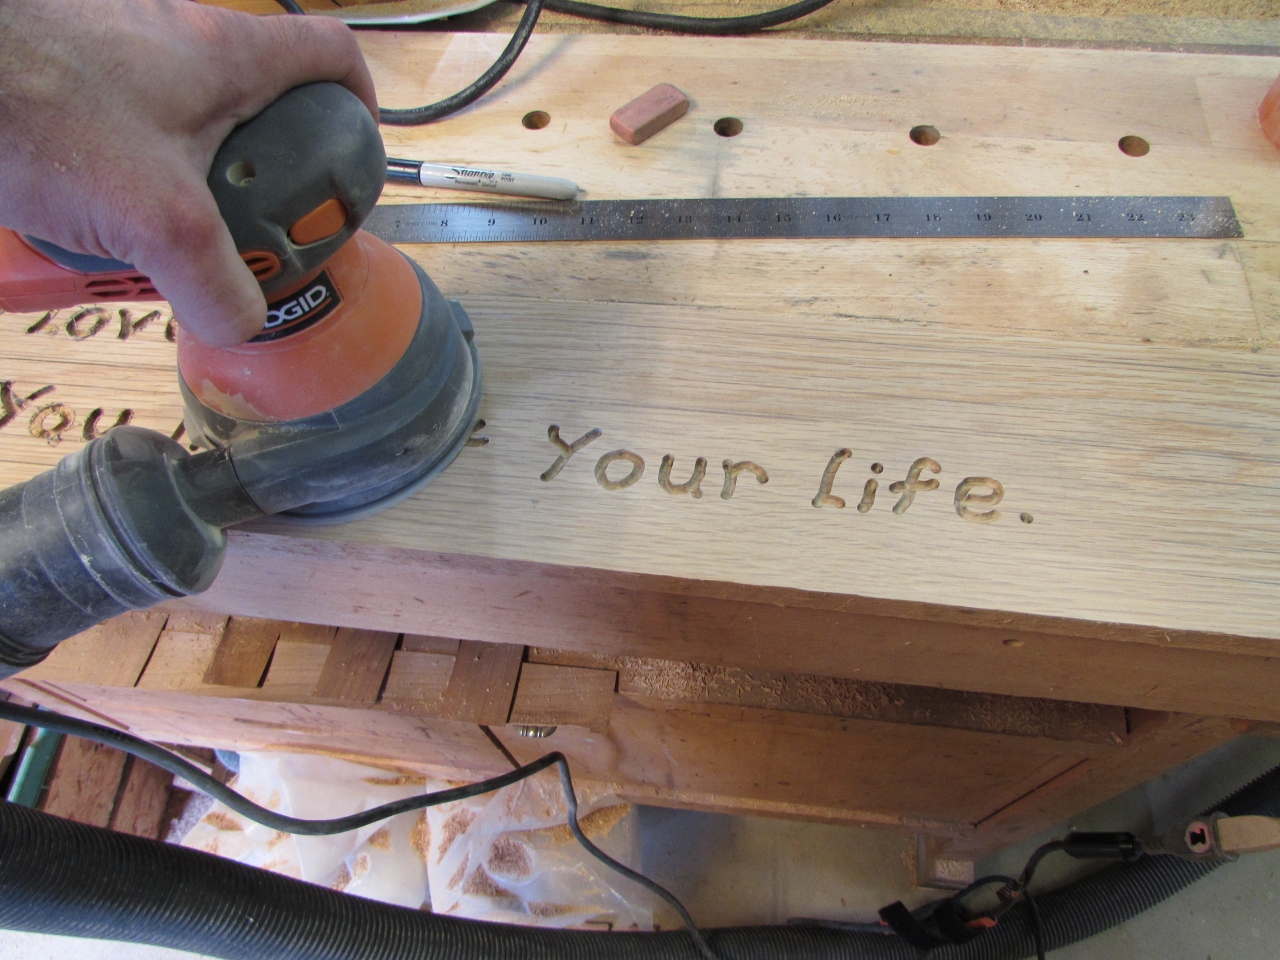
Sanding away the fuzzy bits
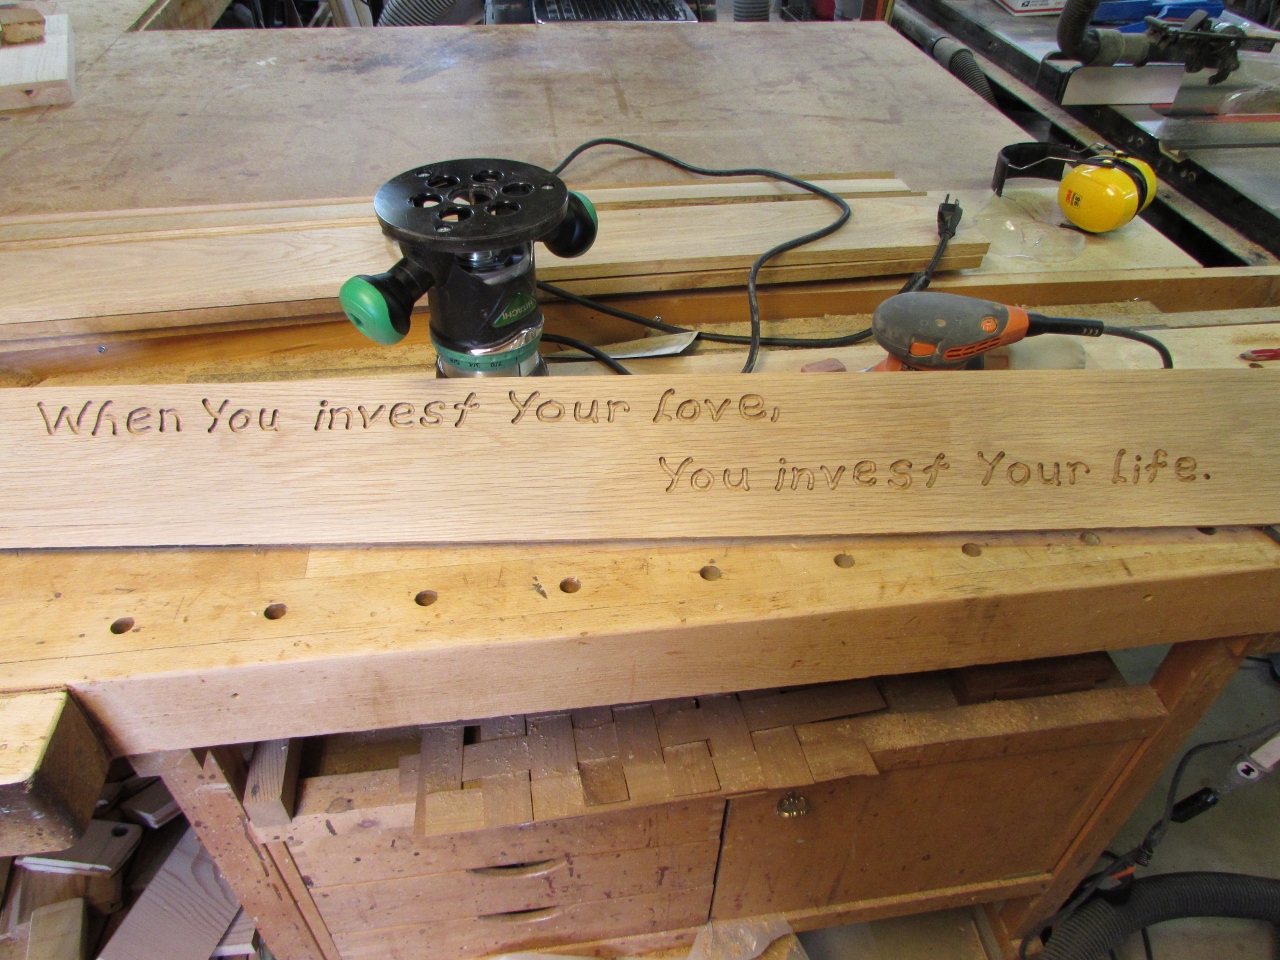
Cutting complete
This bench will be an outdoor bench, so I am going to fill the letters back in with a clear epoxy. This will prevent dust from getting in the letters and keep water from sitting in the text pockets.
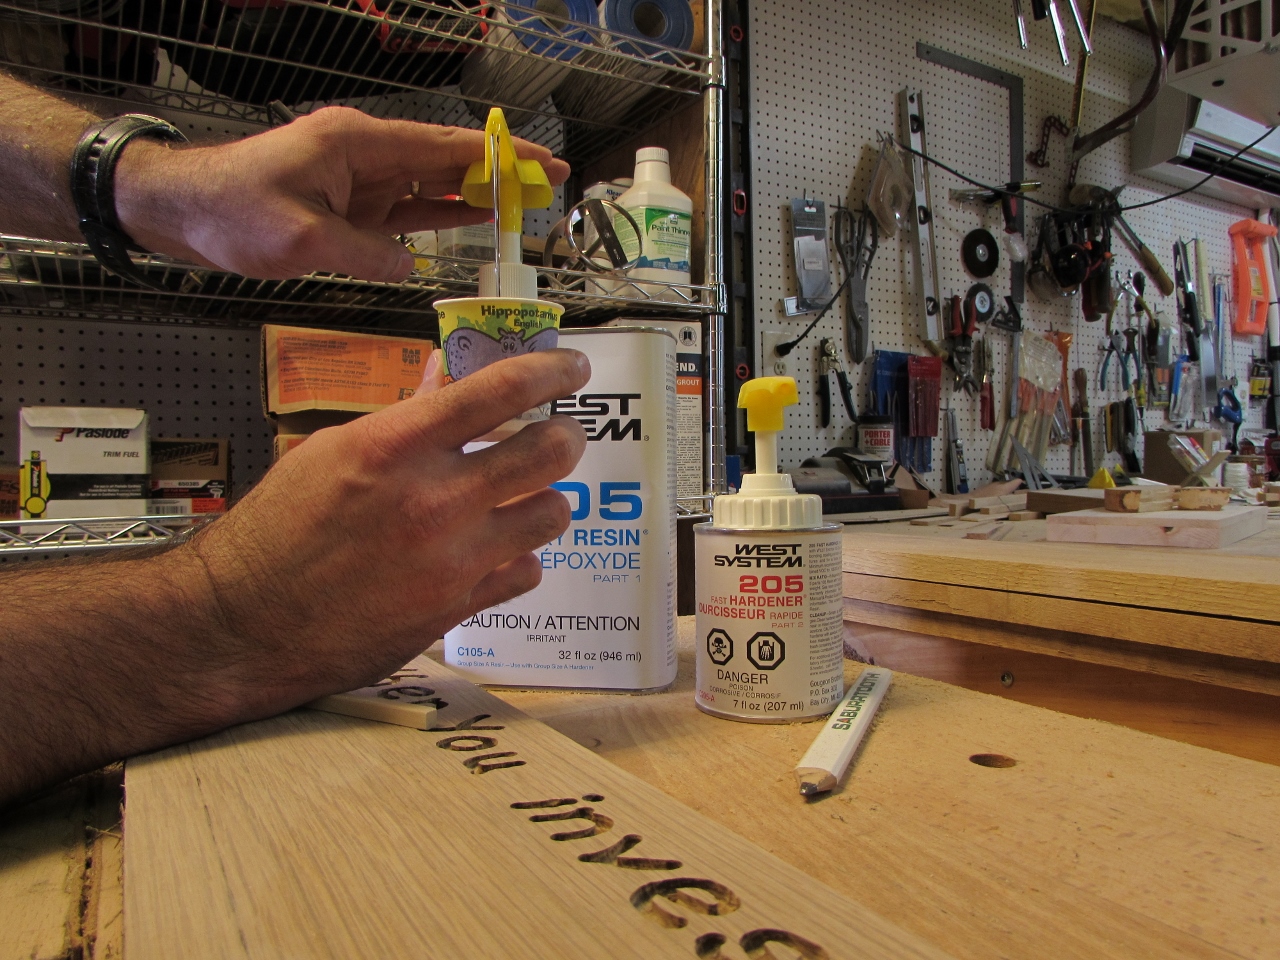
Mixing 2-part epoxy
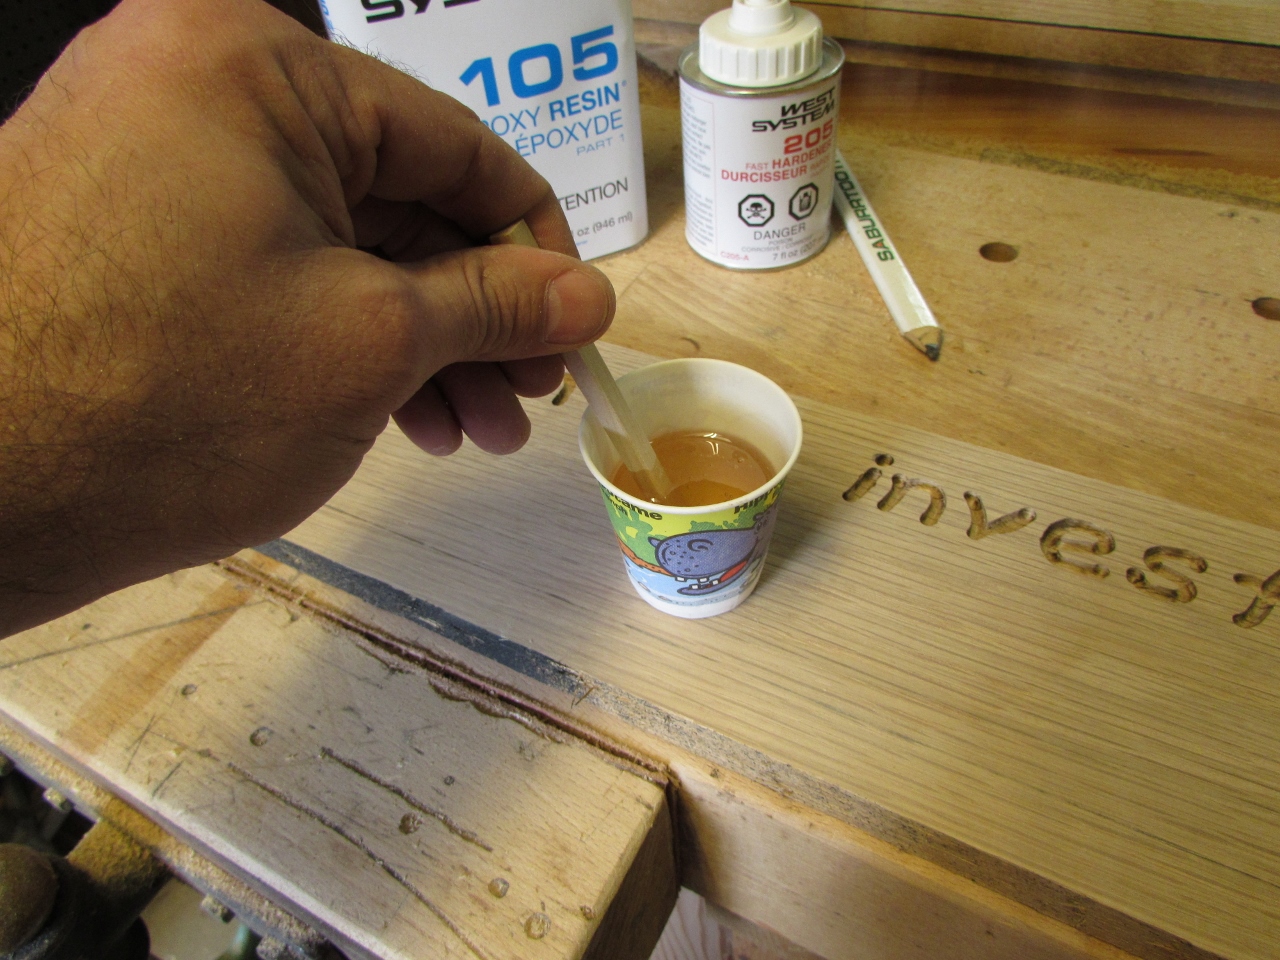
I am using a 2-part epoxy from West System. I believe it is mainly used for patching boats, but it works great on wood. This is a 5-1 mixture, so I bought their pumps. They pump out exactly the correct amount for mixing. I am using some old kiddie cups that my boys have grown out of, and mixing them with a stick.
Kiddie cups are just the right size
Squeeze the cup to create a pour spout and fill each of the letters.

Fill each letter
Actually, you over-fill them since it will shrink up a bit as it dries.

Allow to cure

Should have double-checked before cutting…
Remember the old adage? Measure twice, cut once! Well, that also applies to re-reading the email that has the quote you need to carve. I made the very first word wrong. My understanding client pointed out very politely that it should have been “Where” not “When”. She said it would be fine, but it only took ten minutes to make a new one, so I figured I may as well get the quote right…

This mistake also afforded me the opportunity to move the entire line of text, a few inches to the right, so the entire quote would be better centered on the bench.

This one has the correct wording
After letting the epoxy cure over night, I cut the slats down to their final width on the table saw.
Cutting out the slats
There are several ways to remove the excess epoxy. You can use sand paper, hand planes, card scrapers, even really sharp chisels. Me, I am lazy! Just one pass through the planer and all the excess is cleanly removed.
Planing off the excess epoxy
The epoxy is now very cloudy. To fix this, I worked my way through different grits of sand paper. I started with 120 and worked my way down to 400 grit.

Sanding the epoxy down to 400 grit
It still looks dull until you wipe it down with some Naphtha. This mimics the look you will get once the final oil or varnish has been applied.

What it will looked like finished
Another thing that I did different with this project was to buy a 5/8″ bull-nose bit for the router. Last time I used a 3/8″ round-over bit on each corner. I didn’t like the way the rounded edge finished out. This bit should give me a full round-over in a single pass and remove any need for shaping with a sander.

5/8″ bull-nose bit
It definitely cut my time on the router table in half, as well as the time doing the final sanding.

Final sanding
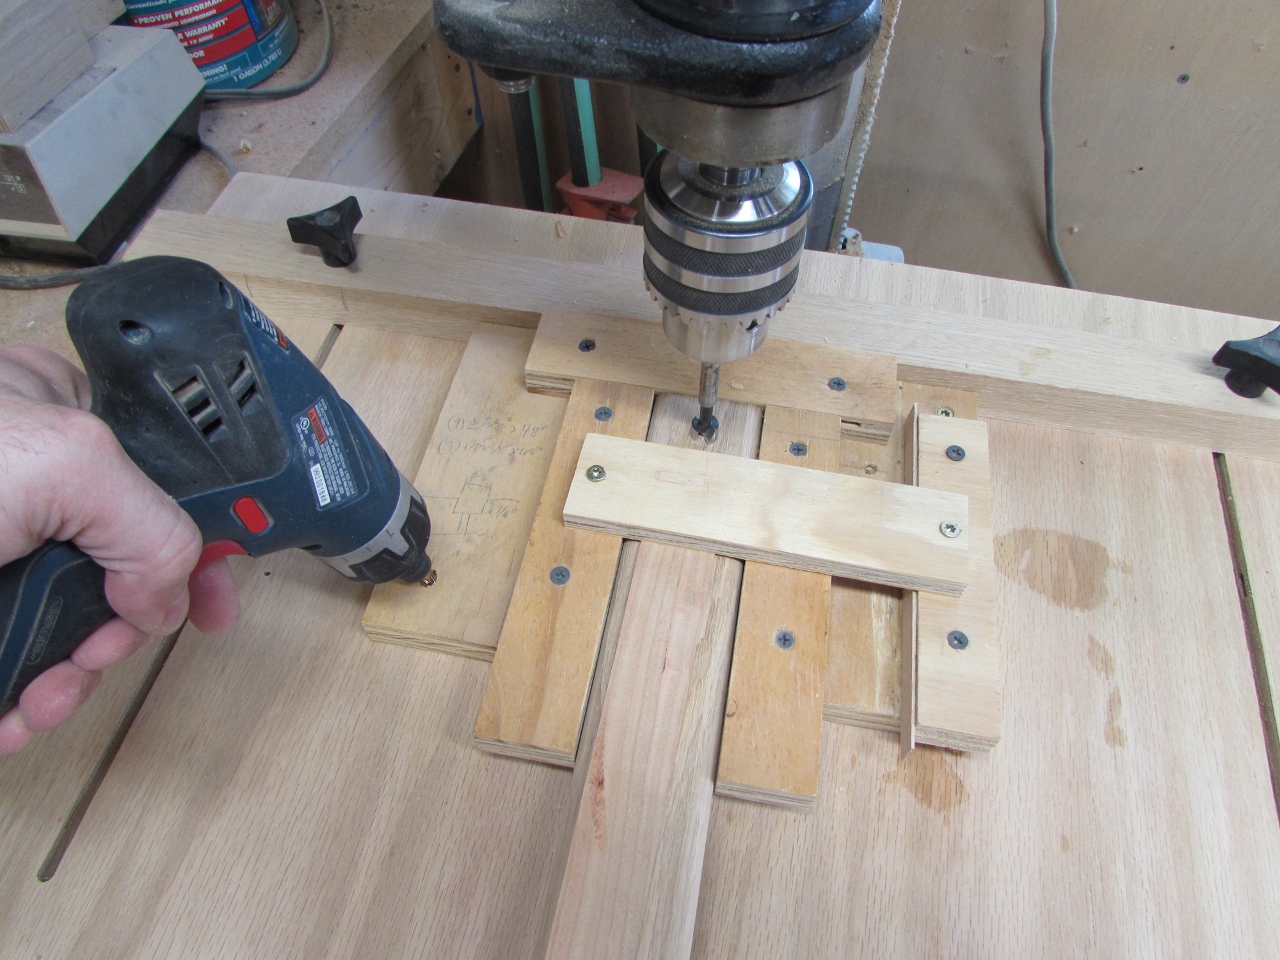
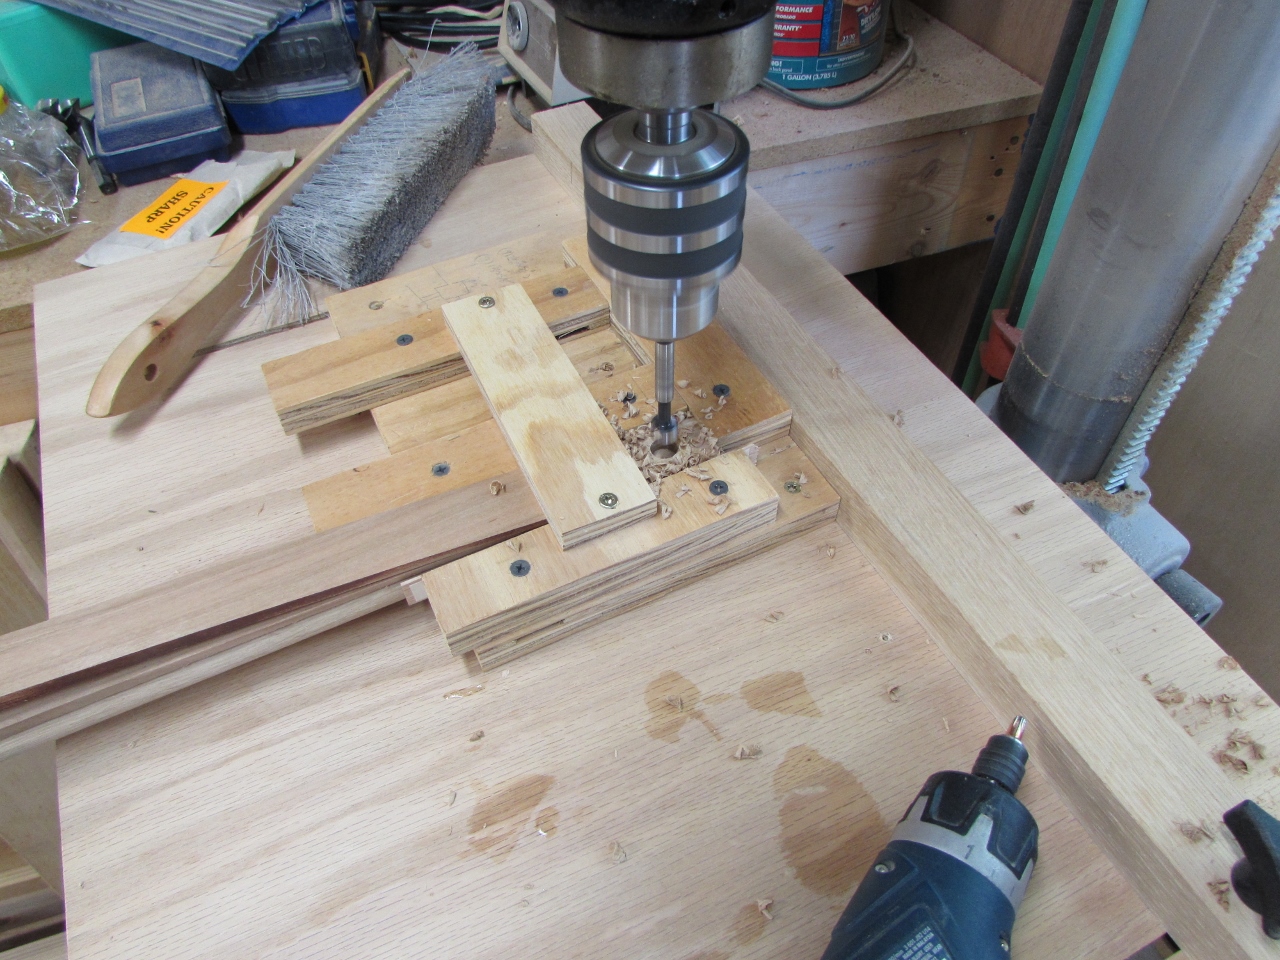
The final step is to drill out the screw pockets.
Lining up the bit
I have created an incredibly simply jig for this. It is just a plate that captures the end of the slat. I marked the location of the hole and centered the jig under the bit. After screwing down the jig, I can drill all the rest of the wide slats without measuring anything.

Drilling the counter-bore
I started by drilling a 1/2″ counter-bore, with a forstner bit, 5/16″ deep. Next, I loaded up a 3/16″ drill bit and drilled through the slats, leaving the jig in place.

Drilling the through-hole
When the wide slats were done, I repeated the process on the smaller ones with the other side of the jig.
Repeat on the smaller slats
Well, this was a quick project. It only takes an extra hour or two to add the text, and I think it personalized the bench very well. Assuming I haven’t made any more typos, the new owners should be happy.

Slats complete
They promised to send me pictures of the bench, stained and finished. So, stay tuned and we will see if I got it right…

Pingback: Park bench slats – delivered and installed | Midnight Woodworking