
Church Altar and tabernacle stand – day 25
I usually don’t get much done on a monday, but I took off sick yesterday. I had nothing better to do, so I spent the day in the shop. I started out by planing down a few more boards to finish making the top plates.

Planing the top plate

Marking the other top plates
Using the one I made the day before as a template, I marked the ends then cut them out on the band saw.

Cutting out the new top plates

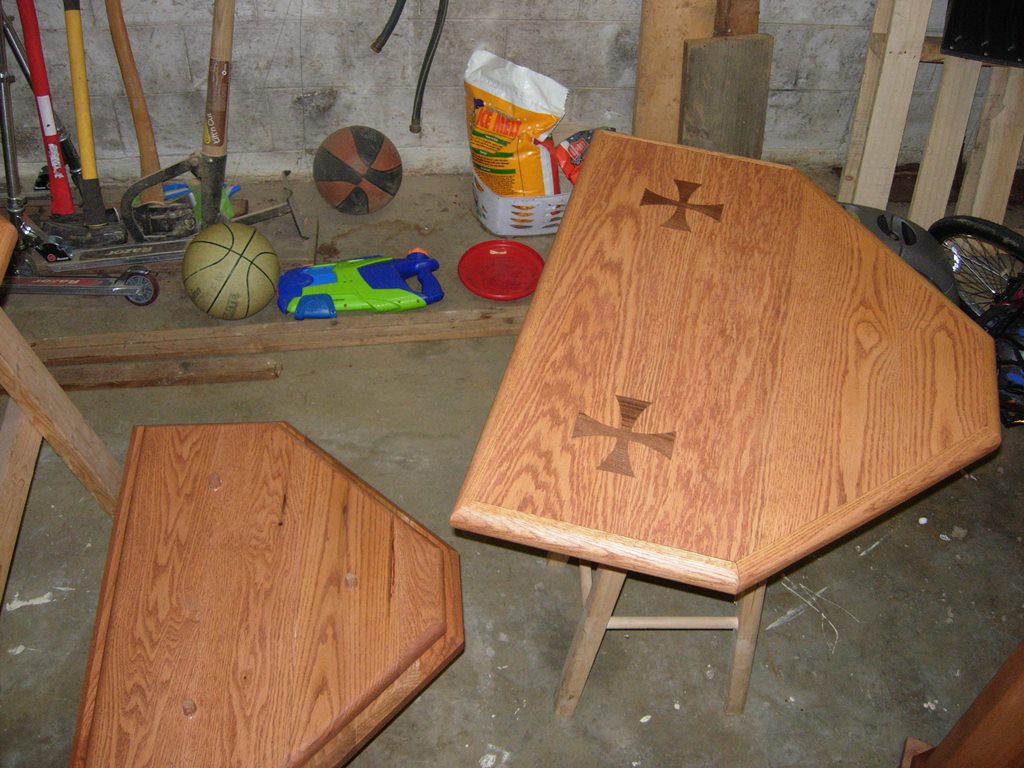
Top plates dry fit
I set the plates in place. They fit good, but I won’t attach them until I have fully assembled panels.
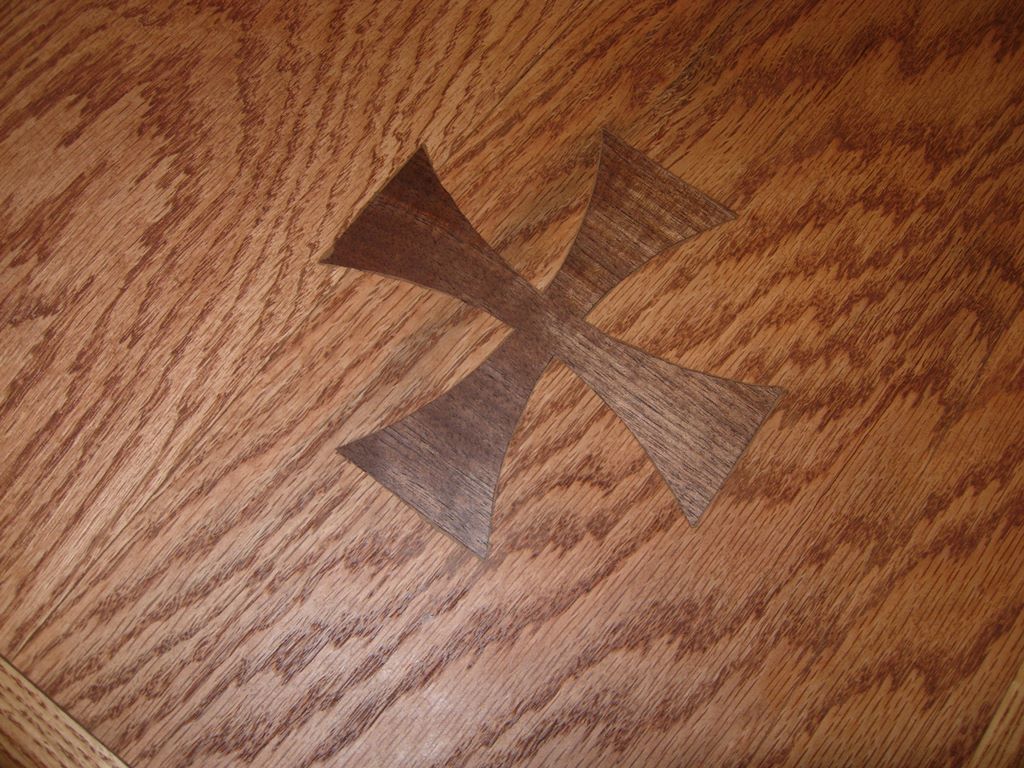
Father Jason and I finally hammered out the images that will go on the front panels, so I loaded up the first panel in the Carvewright and started it carving.

Setting up the carvewright

Routing a test panel
Since I have never done raised panels before, I thought it would be prudent to do a test run on a scrap panel. I ran the cut with the grain first, then the end grain. This caused some tear-out, so I will be cutting the end grains first on the real panels.

A little tear-out, but not bad
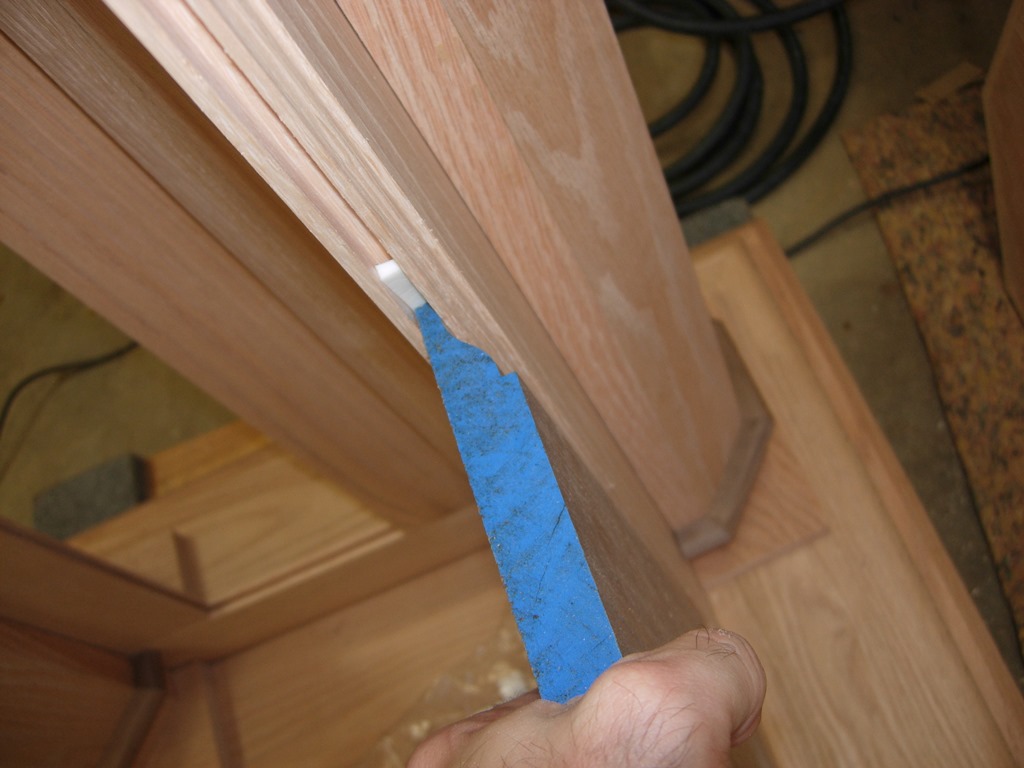
Testing the fit
I did a test fit into a corner of one of the frames. I think it fit well. I will be using some spacer foam to keep the panels from rattling, while leaving room to expand and contract.

Looks pretty good

Cutting the side panels
I won’t be carving anything into the side panels, so I used some walnut, for them, that had a prettier grain. I went ahead and cut the side panels while I was waiting on the front panels in the carver. I started by routing the end grain first, then cut the sides of the boards. No tear-out at all.
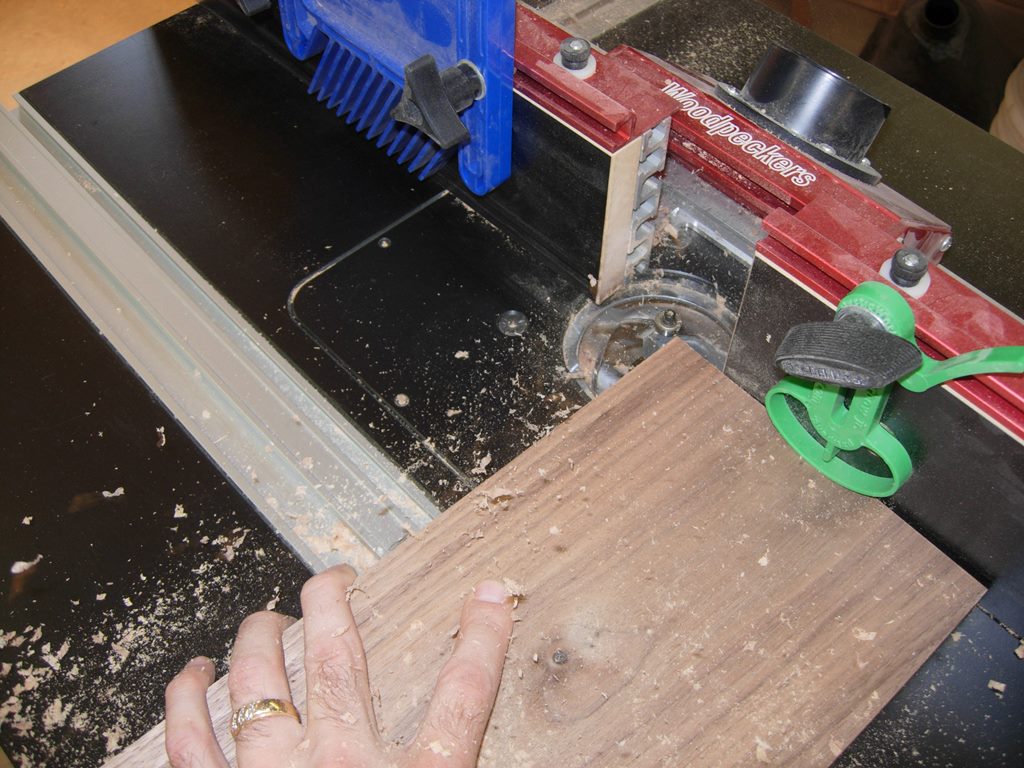
Routing the ends first

First panel cut
The first panel fit well in the dry-fit, so I went ahead and cut the second.

First panel dry-fit

First carved panel finished
After about an hour of carving, the first panel was complete. I am not entirely sure why it cut a recessed square around the image, but it is only about 1/32″ deep, so I think I can feather that out. I ran the buff sander across the image and cleaned up the fuzzy bits.

Cleaning it up

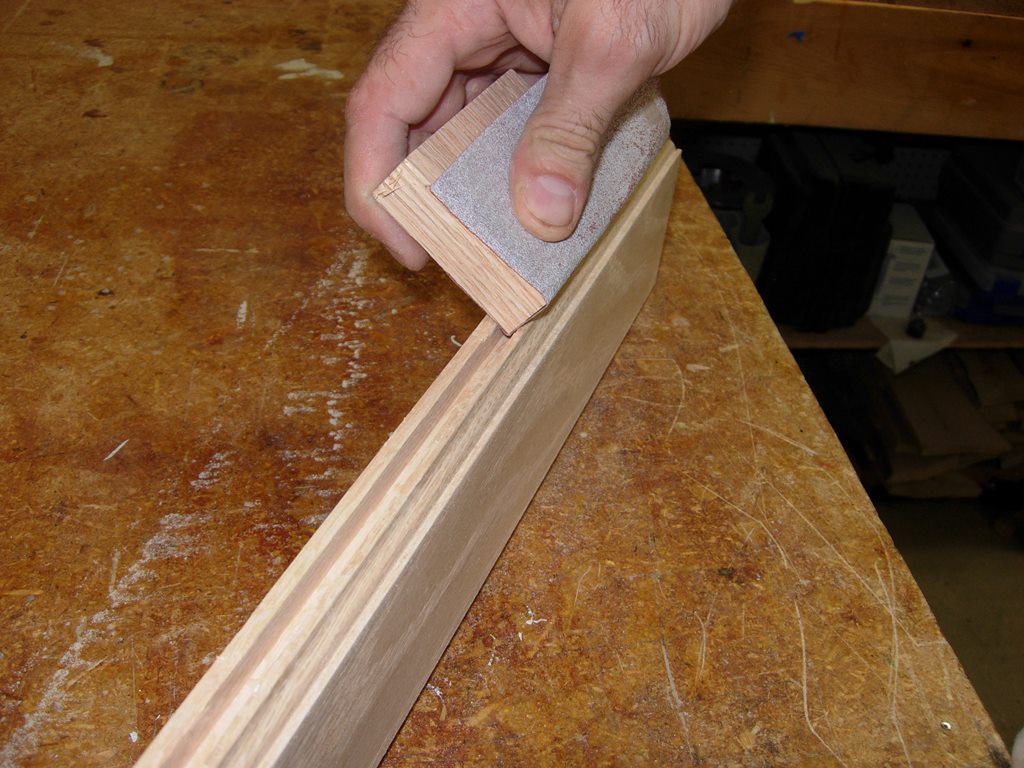
Feathering the recessed edge
I started the next panel in the Carvewright then set the first panel on the bench and started working on feathering the square edges into the panel. I used 120 grit paper on my orbital finish sander. I didn’t want to be too aggressive, I just kept working around the edges until the lines faded away.

Routing a front panel
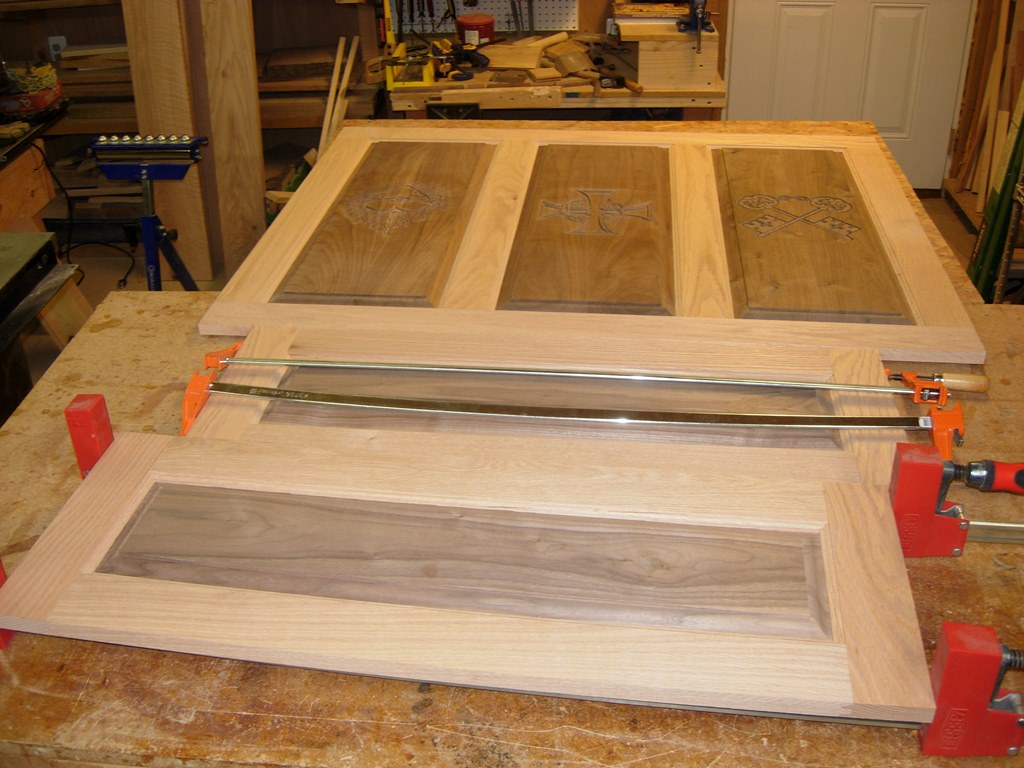
When all of the panels were done being carved, I cut them down to size, then routed the edges. I dry-fit them into the front frame on the altar.
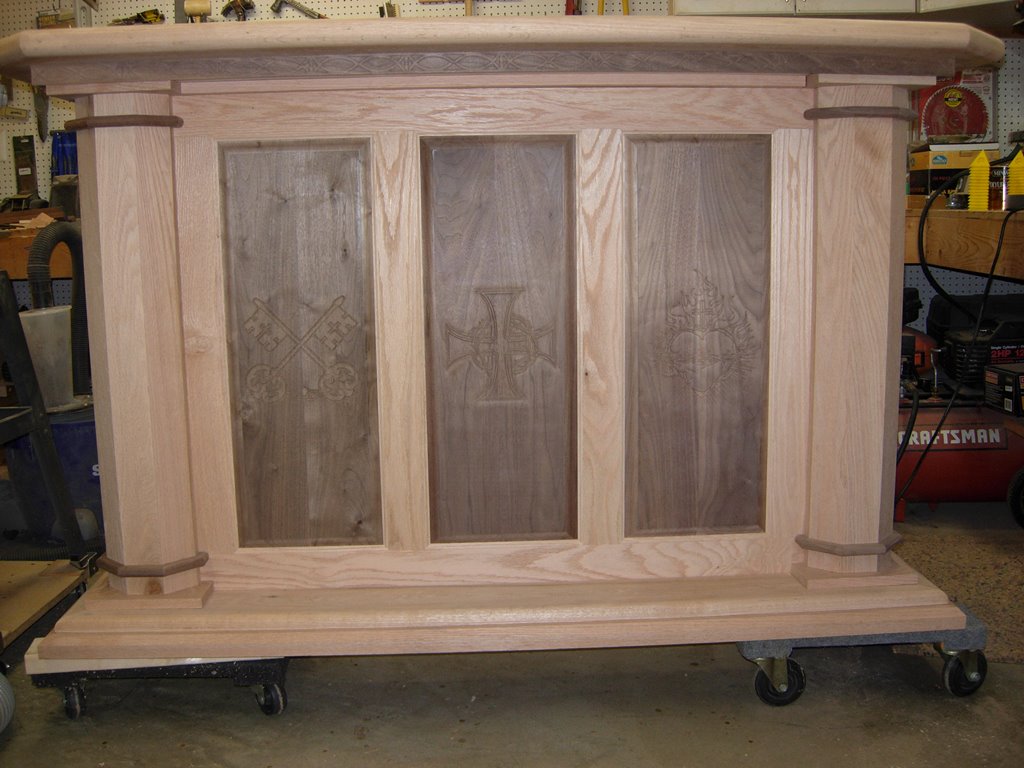
Front panels carved and dry-fit
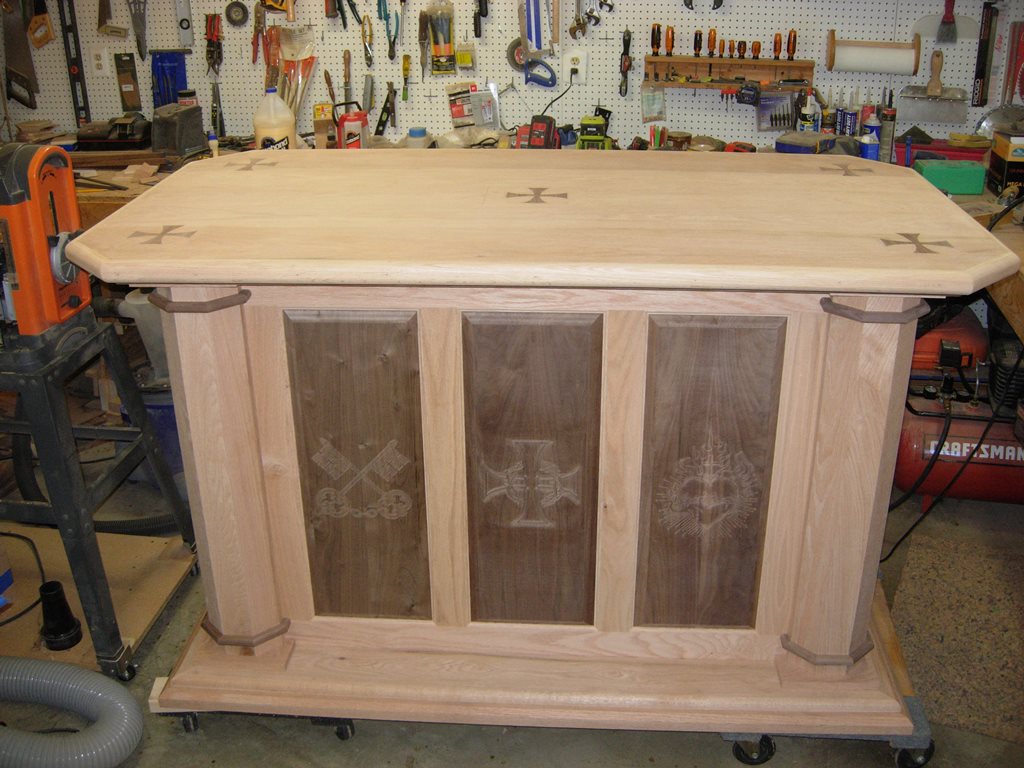
Fully assembled
Just for grins, I had my son help me lift the top into place. I think it looks pretty good. I love the contrast in colors of the two woods. It would look awesome if I just put a clear coat on right now, but all of the other wood at the church has a cherry stain applied, so I will be staining everything.
Since my shop is so full of dust at the moment, I moved a few pieces out to the garage to start the finishing. The bottom of the altar is needed for fitting and assembling the raised panels, but the rest is pretty much complete and ready to finish. We moved the altar top and tabernacle stand out to the garage and I started staining.

Starting the staining
Tabernacle top and bottom
I don’t have any fancy sprayers or a spray booth. I usually just rub the stain on with a rag, then add a couple of coats of polyurethane with a brush. If I take the time to sand in between coats, it usually turns out nice.
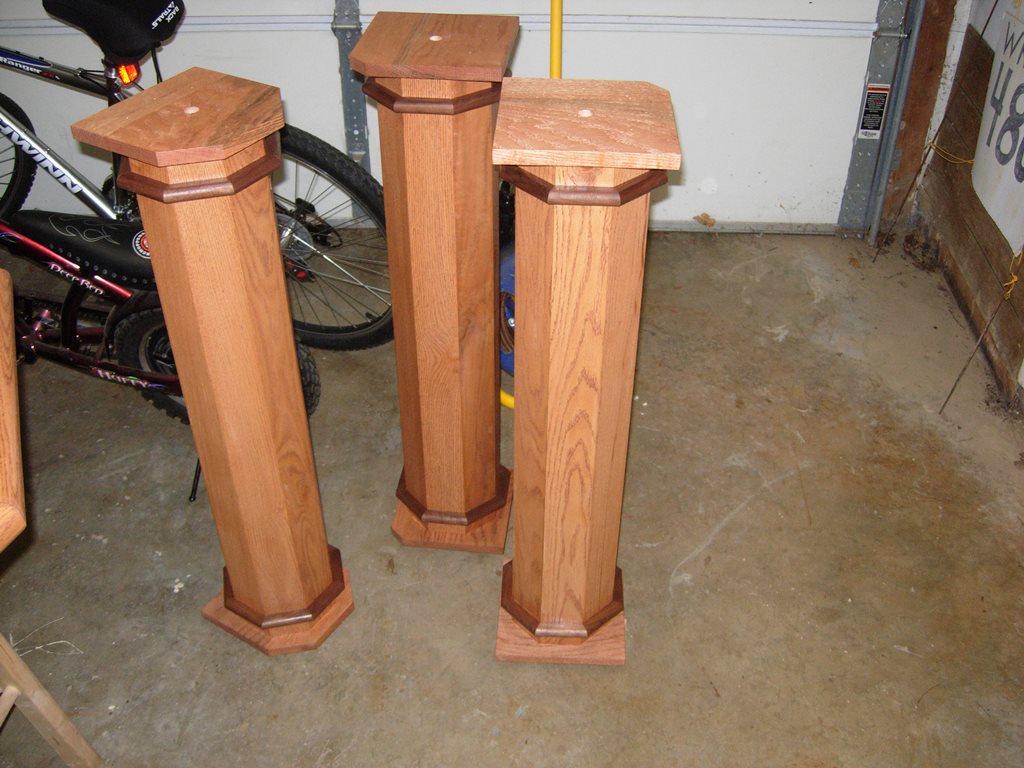
First three columns stained

Top fully stained
The wood filler doesn’t seem to stand out too much after it is stained, so I guess that is a success. The two woods seem to blend nicely together when stained. I personally prefer the contrast of the natural color, but that wasn’t what was required for this project.
Wood filler doesn’t look too bad
Cleaning up the frame channels
With the stain drying, I moved back to the dusty shop. I had some tear-out in the channels of the frames, so I took some sand paper to them so at least it wouldn’t be as noticeable. I am not sure how to avoid the tear-out, I may need to slow down the router speed, or run the cut with the grain, or something. It is not terribly noticeable, so I am just touching it up.

Drilling some pocket holes
I am drilling a few pocket holes on the bottoms and sides of the frames before assembling them. Since I am assembling the altar on-site, I need a way to draw everything together and keep it assembled. The weight should be enough, but the screws will keep it all stable and square.

Installing spacer foam
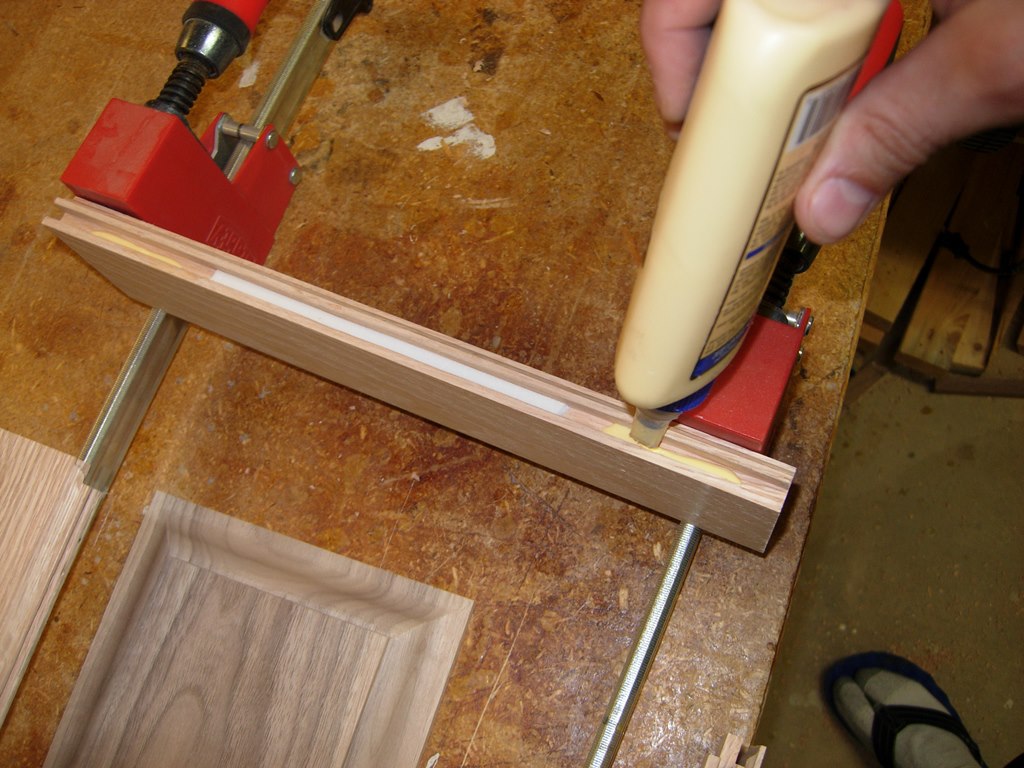
I cut all of the spacer foam, leaving it about an inch shorter than the panel so no glue would get on it, then peeled off the adhesive back and pressed it into the grooves before installing the panels. I put a little glue into the channel on the horizontal pieces then assembled everything and clamped it up.

Starting the glue-up

Front panel glued up
Since I only have four clamps long enough, I had to come back a few hours later to do the side panels.
Glueing up the side panels
All of the panels are now glued and curing. I am pretty sure that all I have left to do is the finishing.
Panels all glued

Lawrence, this is looking beautiful!!!!!
This is masterful work, Lawrence!! Your gift bespeaks the glory due to God!
You are an artist! I cannot wait to see the altar being used in our church!
Lawrence, I really like the etchings on the front. Beautiful work!