
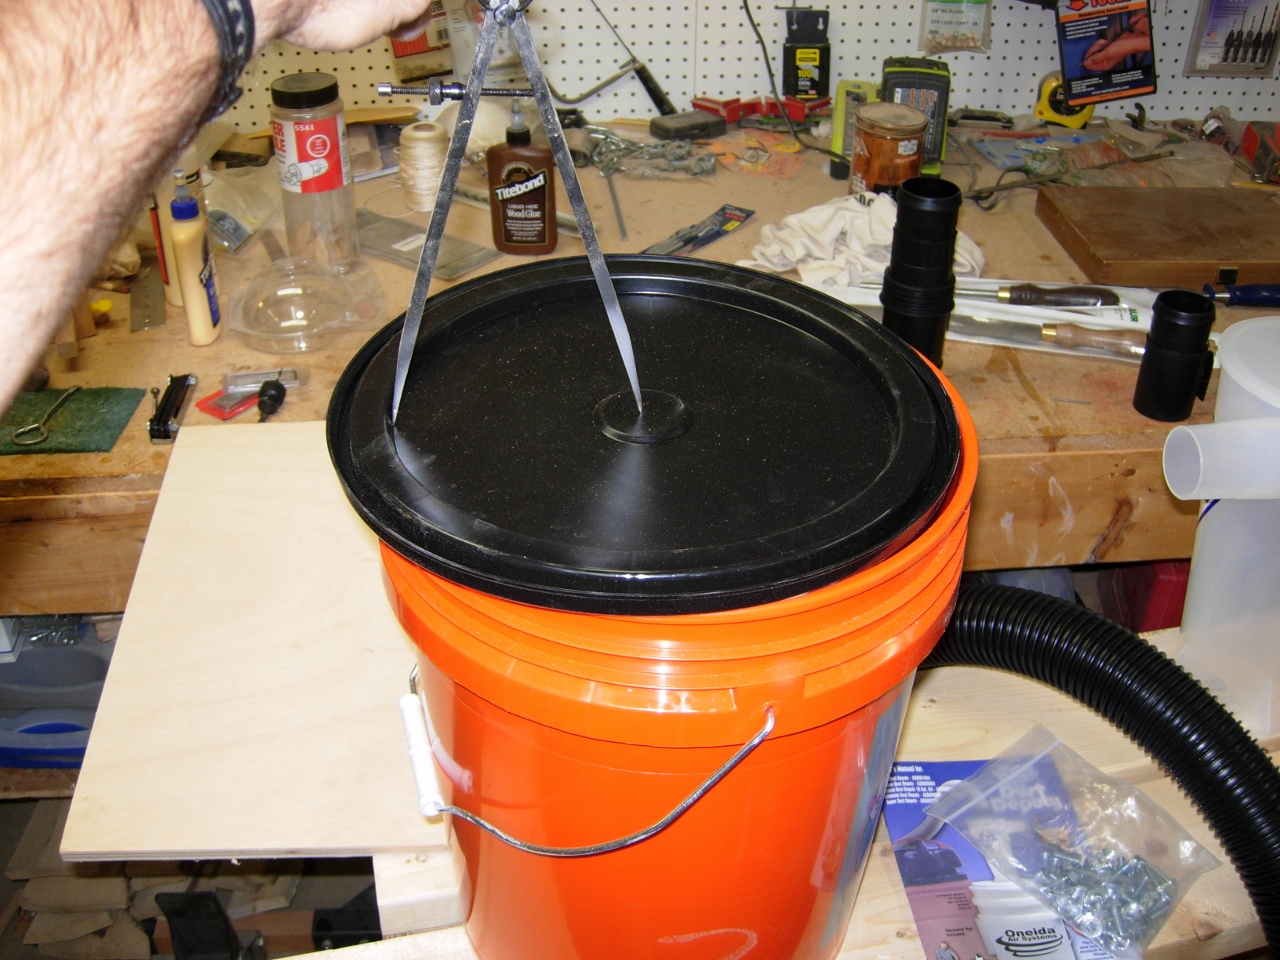
Dust Deputy set-up
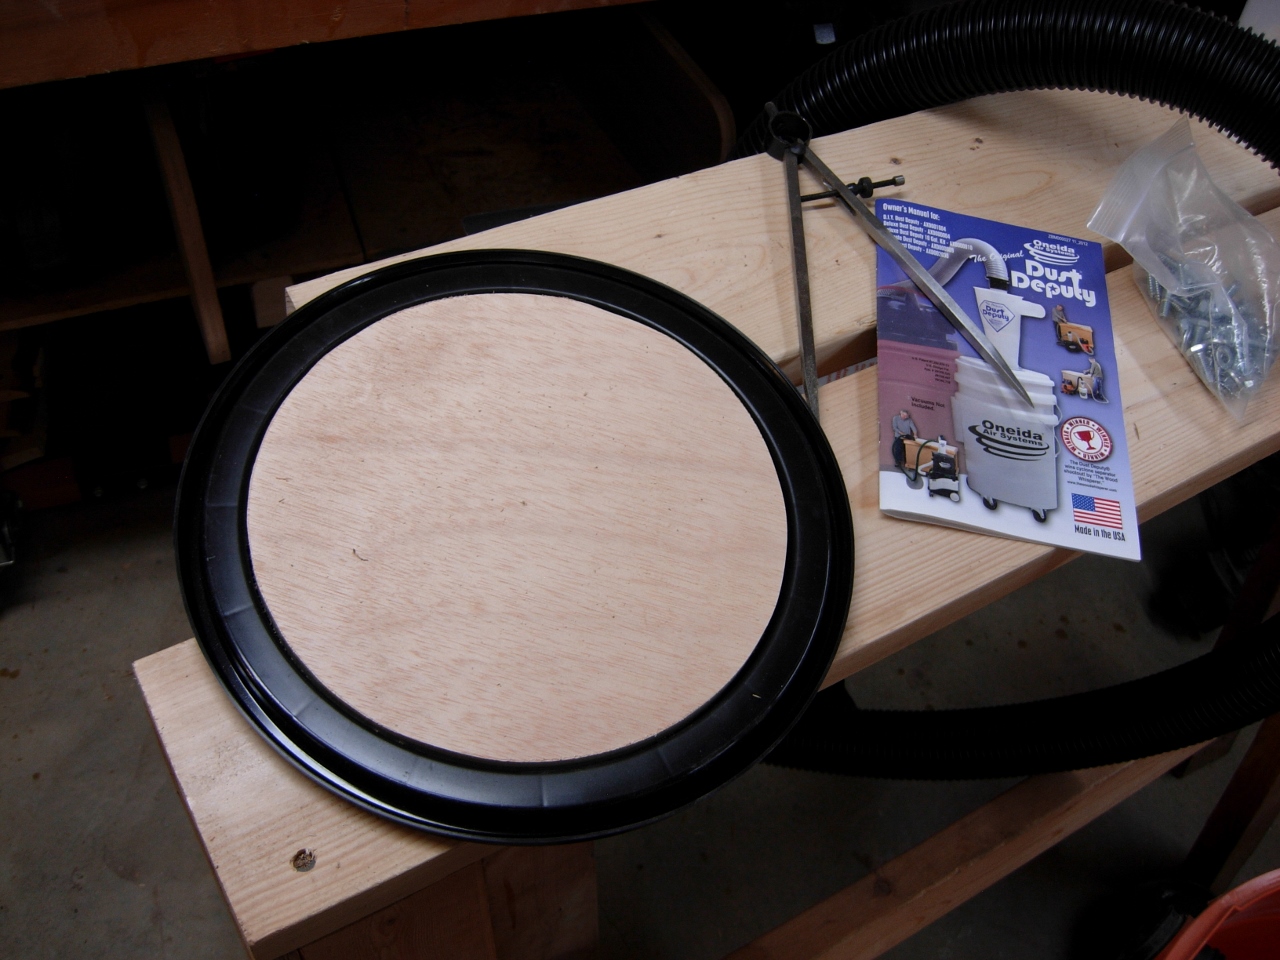
My kids gave me a new tool for father’s day that I hadn’t had the time to set up yet. It is a Dust Deputy. I had been looking for something that would help me to avoid cleaning out my shop-vac so often.
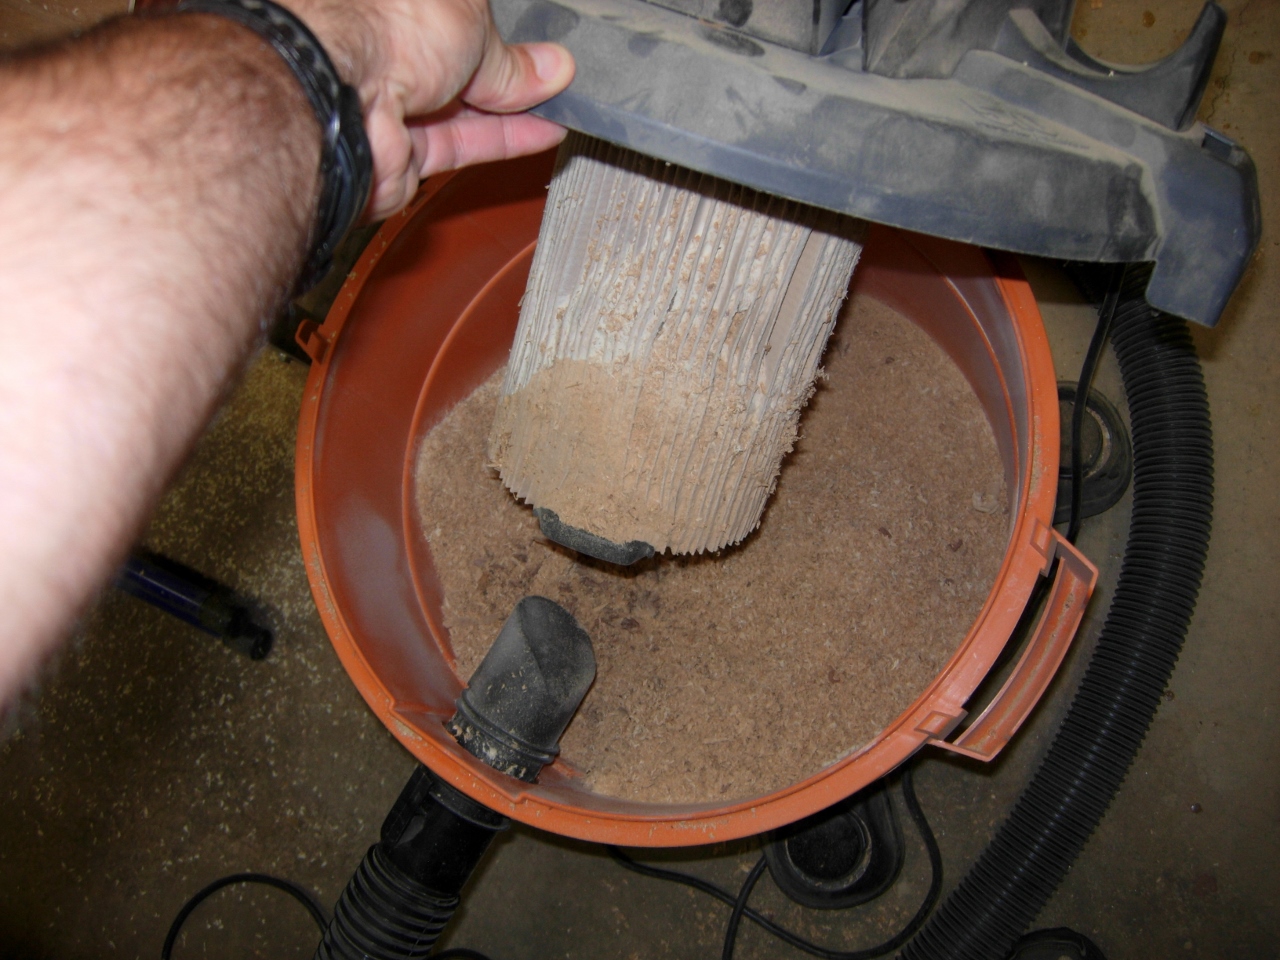
Vac needs to be emptied
I didn’t get the full kit, just the cyclone piece, so I picked up a bucket, lid, and extra 2″ hose. The lid is rather flimsy so I will have to reinforce it. I don’t have a compass that is big enough so I grabbed a pair of dividers to determine the diameter of the inside of the lid.
Sizing the stiffener
I transferred the dimension over to a piece of half inch plywood.
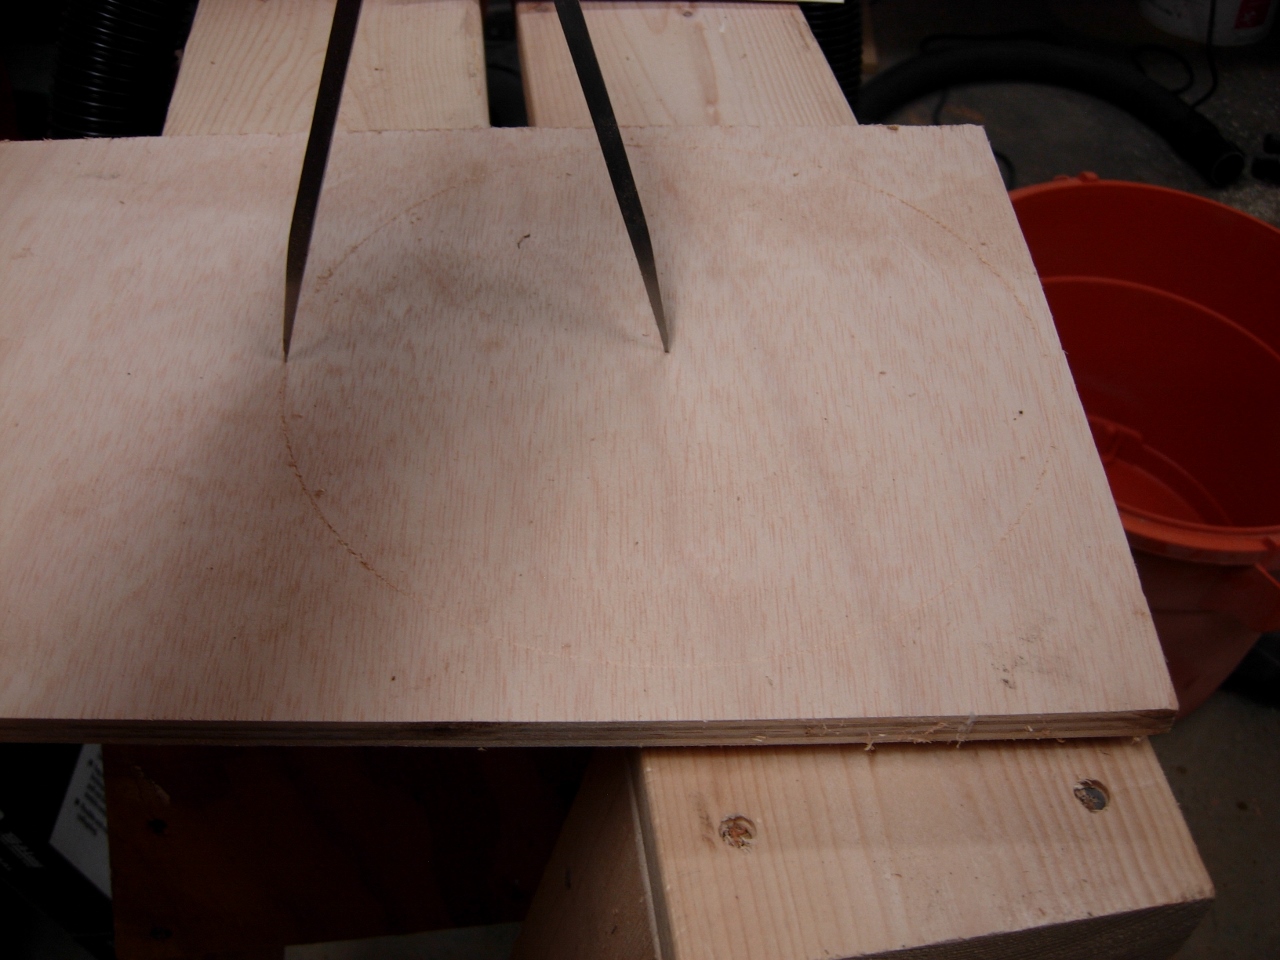
Transferring the dimension
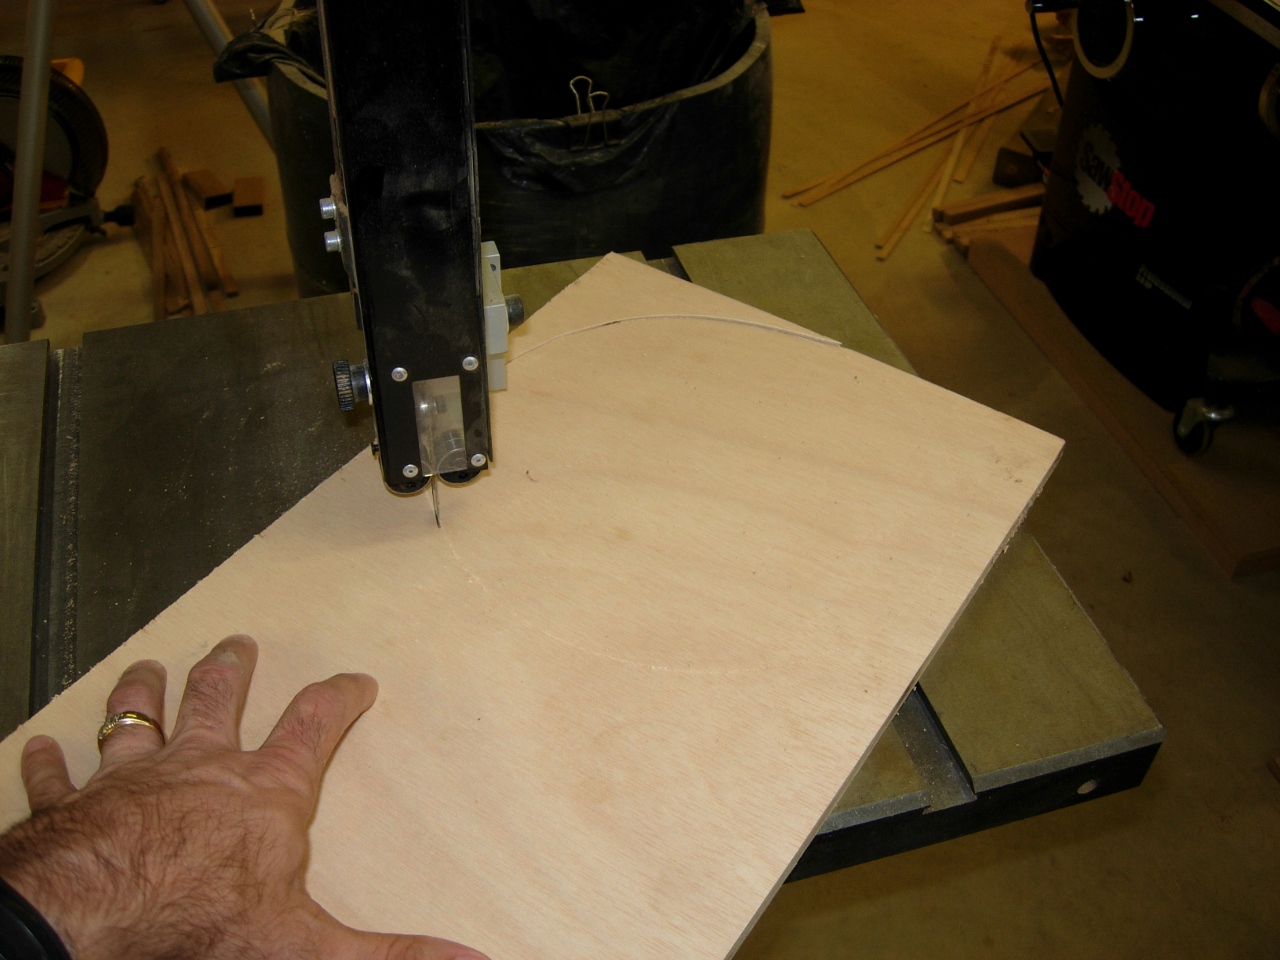
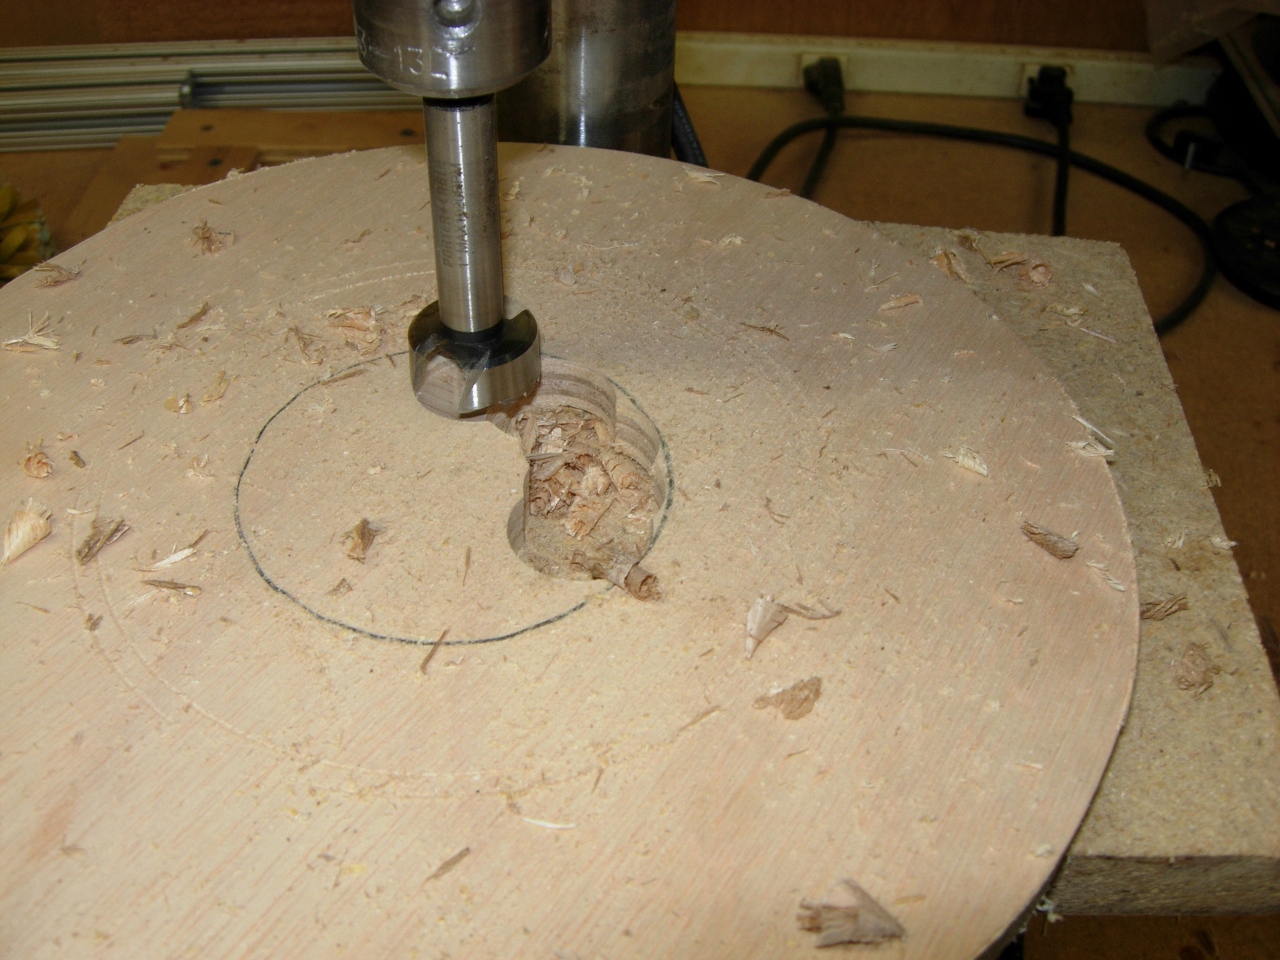
Cutting the circle on the bandsaw
With the circle drawn, I took it to the bandsaw to cut out.
Perfect fit
The new support plate fit perfectly.

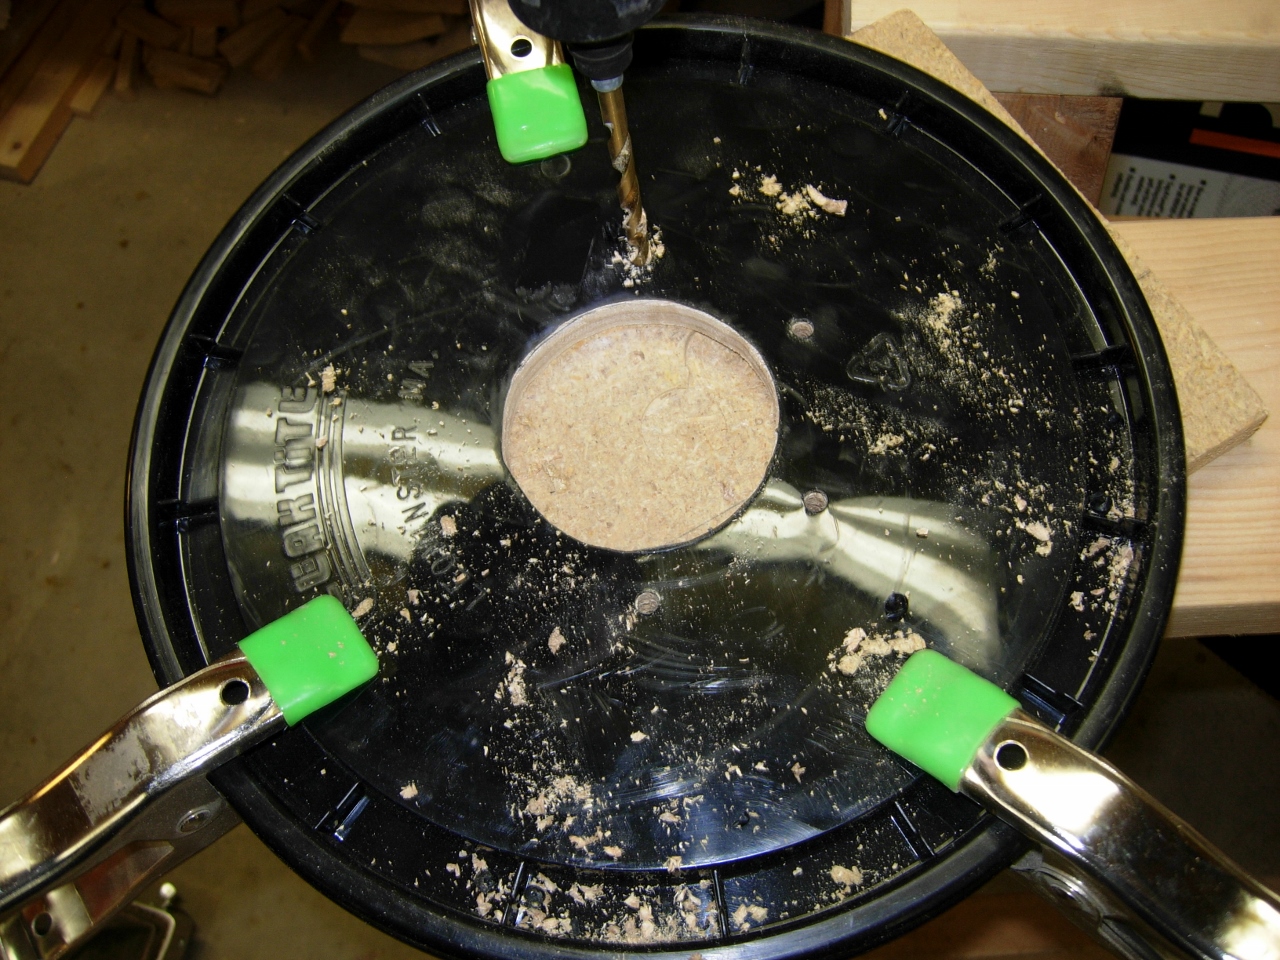
Cutting out the hole in the lid
I cut out the center hole in the lid with a utility knife. I don’t have a hole saw large enough to drill out the center hole in the plywood so I traced the hole location from the lid and drilled out most of the hole with a 1″ forstner bit.
Cutting out the hole in the stiffener
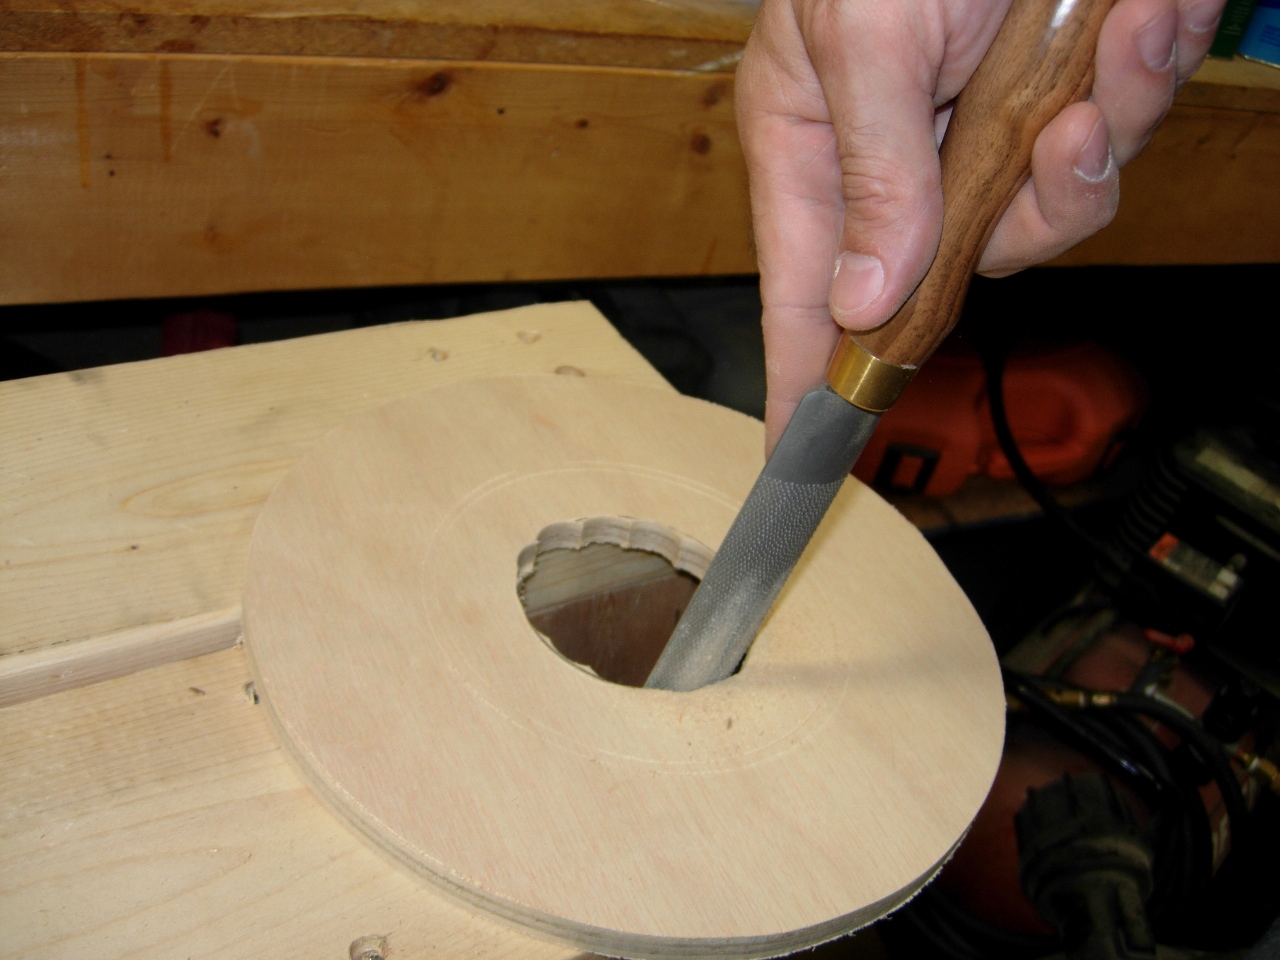
Smoothing out the opening
I smoothed out the opening with my large cabinet rasp. Next I centered the Dust Deputy on the lid and marked the mounting hole pattern with my dividers since they were handy.
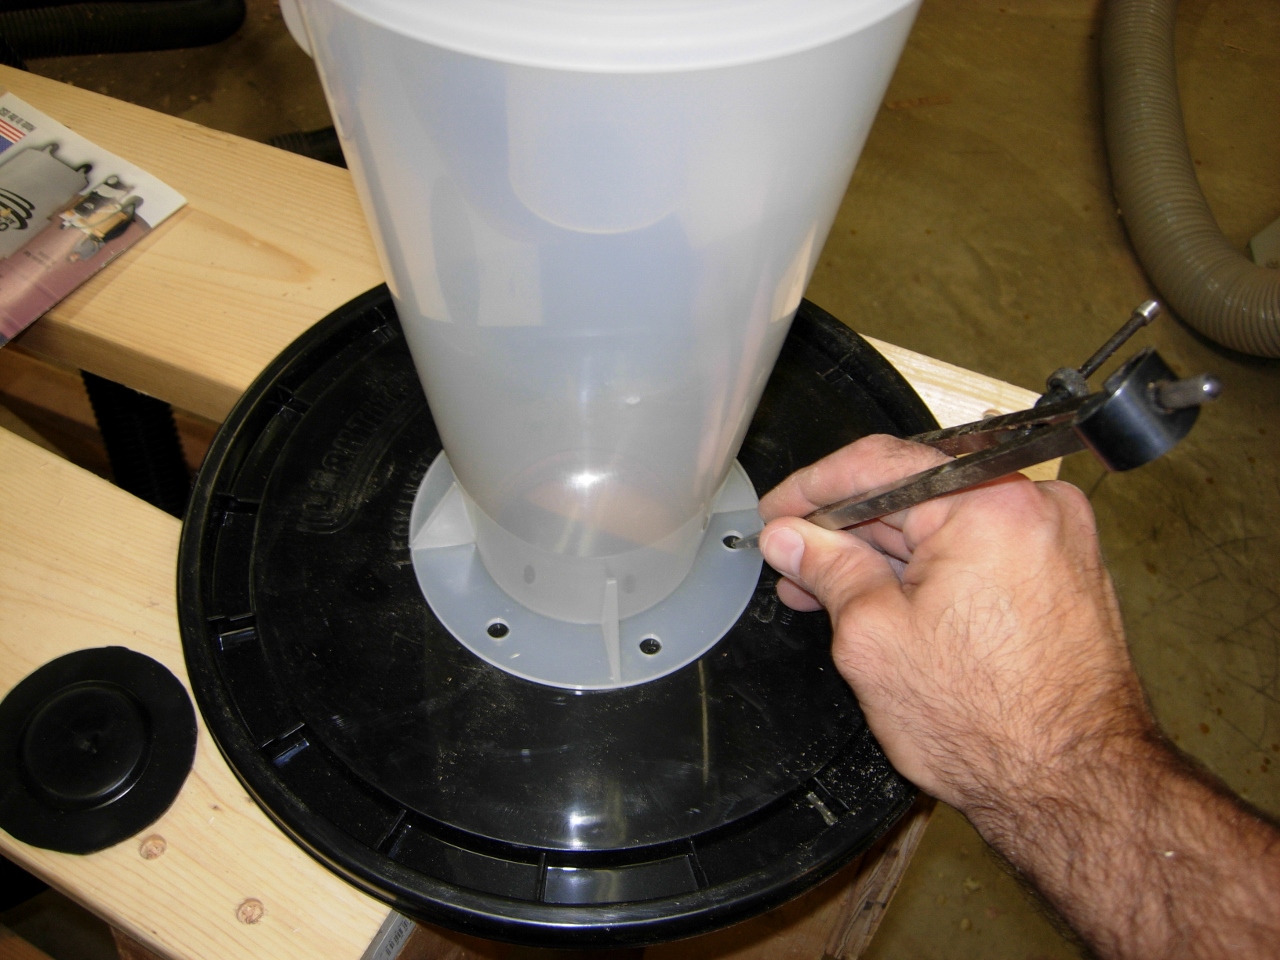
Marking the bolt holes
Drilling the bolt holes
With the lid centered over the plywood, I drilled the clearance holes for the bolts. When those were done, I flipped the plywood over and counterbored the back about an eighth inch deep. This was necessary because the bolts I have are a little short.
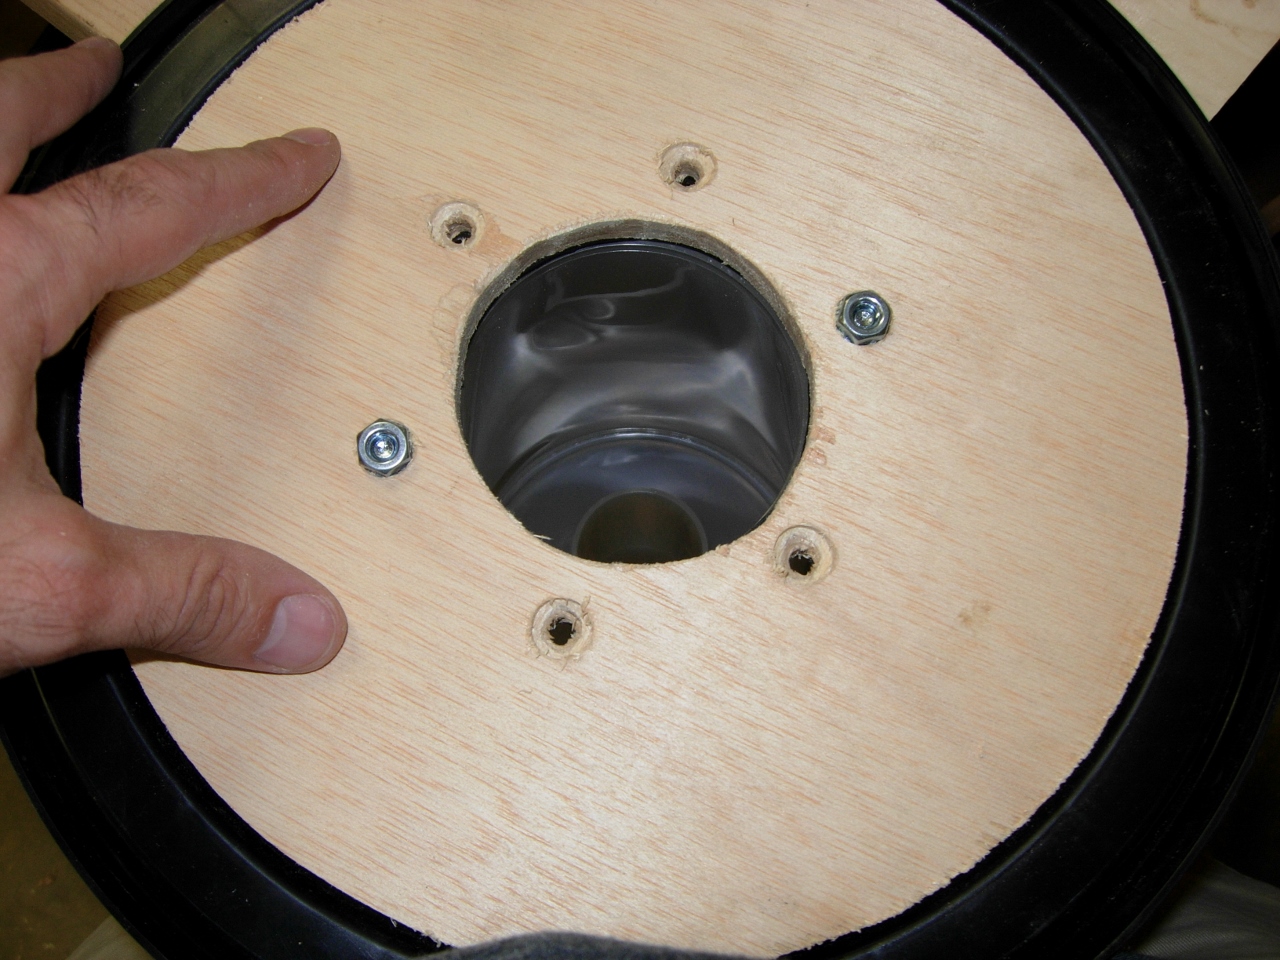
Counterboreing the nuts
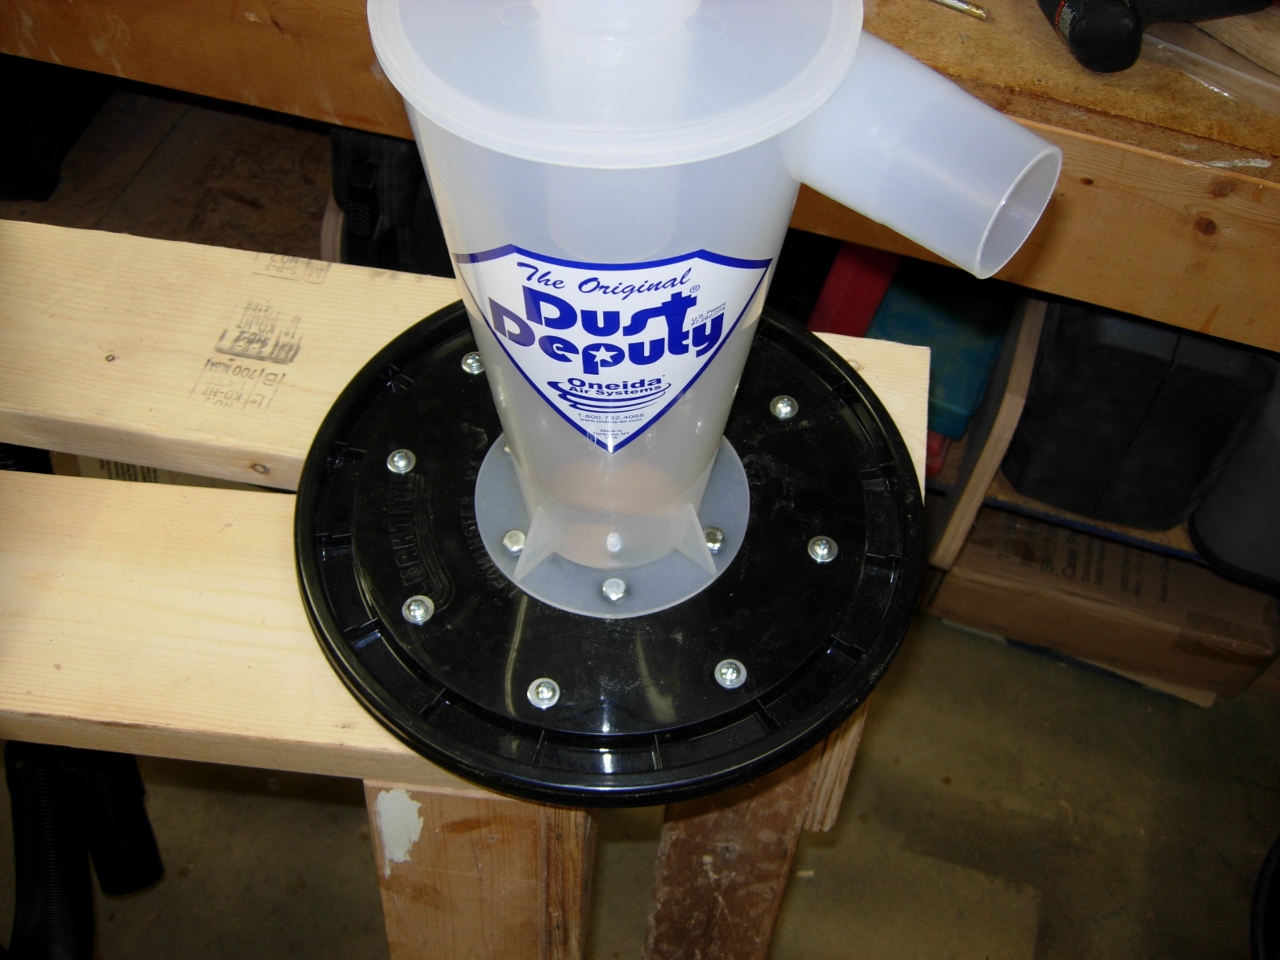
Top assembled
I ran some wood screws with washers through the outer perimeter of the lid to secure the plastic lid to the plywood better.

Tied into the vacuum
With the lid assembly complete, I put everything together and cleaned up my mess to test it out. It seems to tip over easily, so I will have to either weight down the base or strap the bucket to the shop-vac. Once I got the bucket to stay upright, I vacuumed up all the dust I could reach. As you can see from the last picture, it worked great. Hardly any particles made it past the bucket and into the vac or my filter.
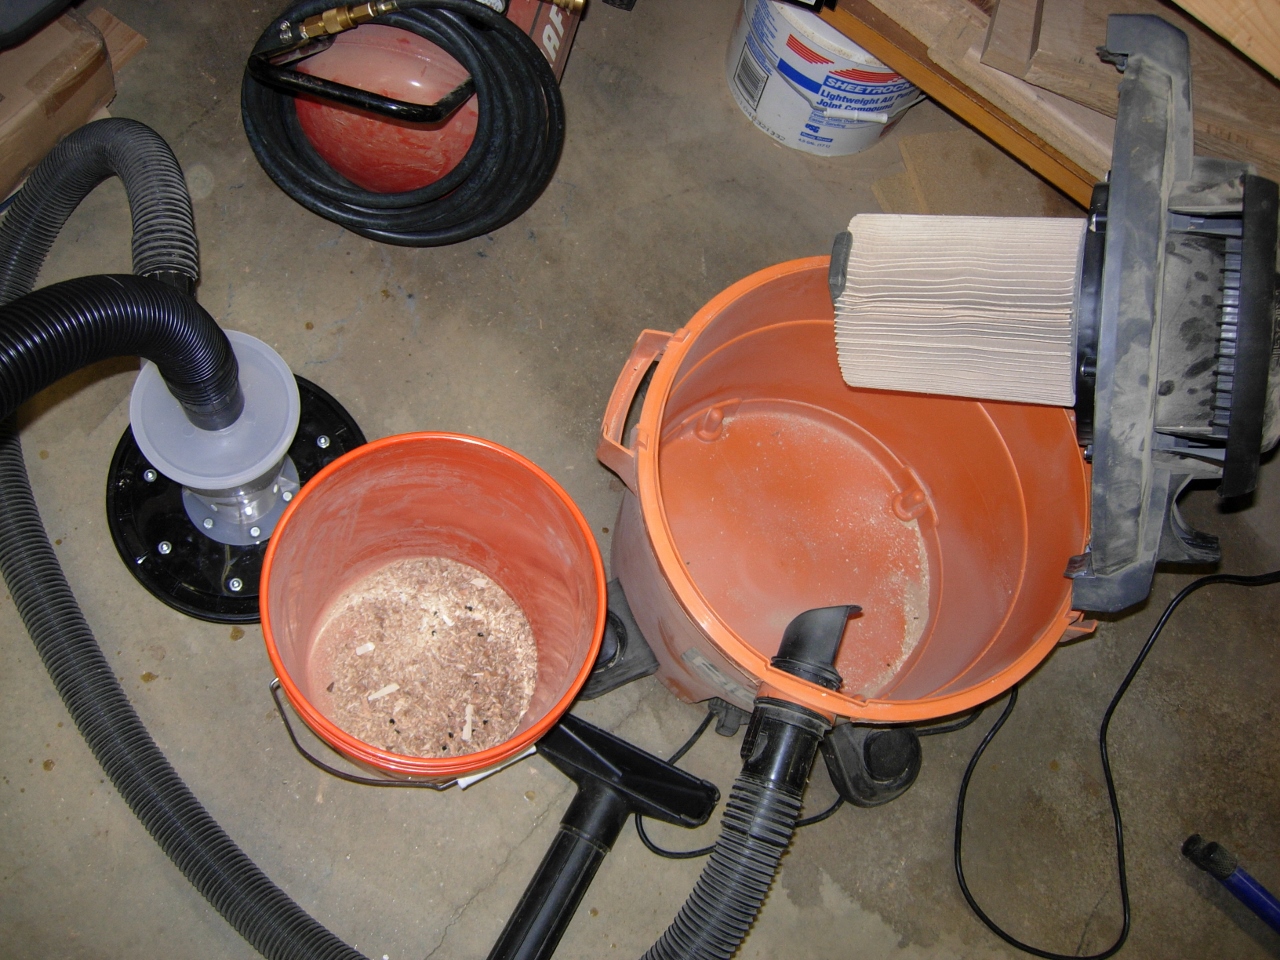
Successful test
