
Cherry ambo
I have an interesting new project that I am starting on this week for The Sisters Poor of Jesus Christ – Baltimore Mission. They are staying at the Baltimore Basilica and want to update their chapel. I built the tabernacle for them a couple years back and they want the new chapel furniture to compliment it. I recommended we build the furniture from cherry to contrast the brown of the walnut. The cherry starts out pink in color but will turn a much darker red/brown as it is exposed to sunlight over time.
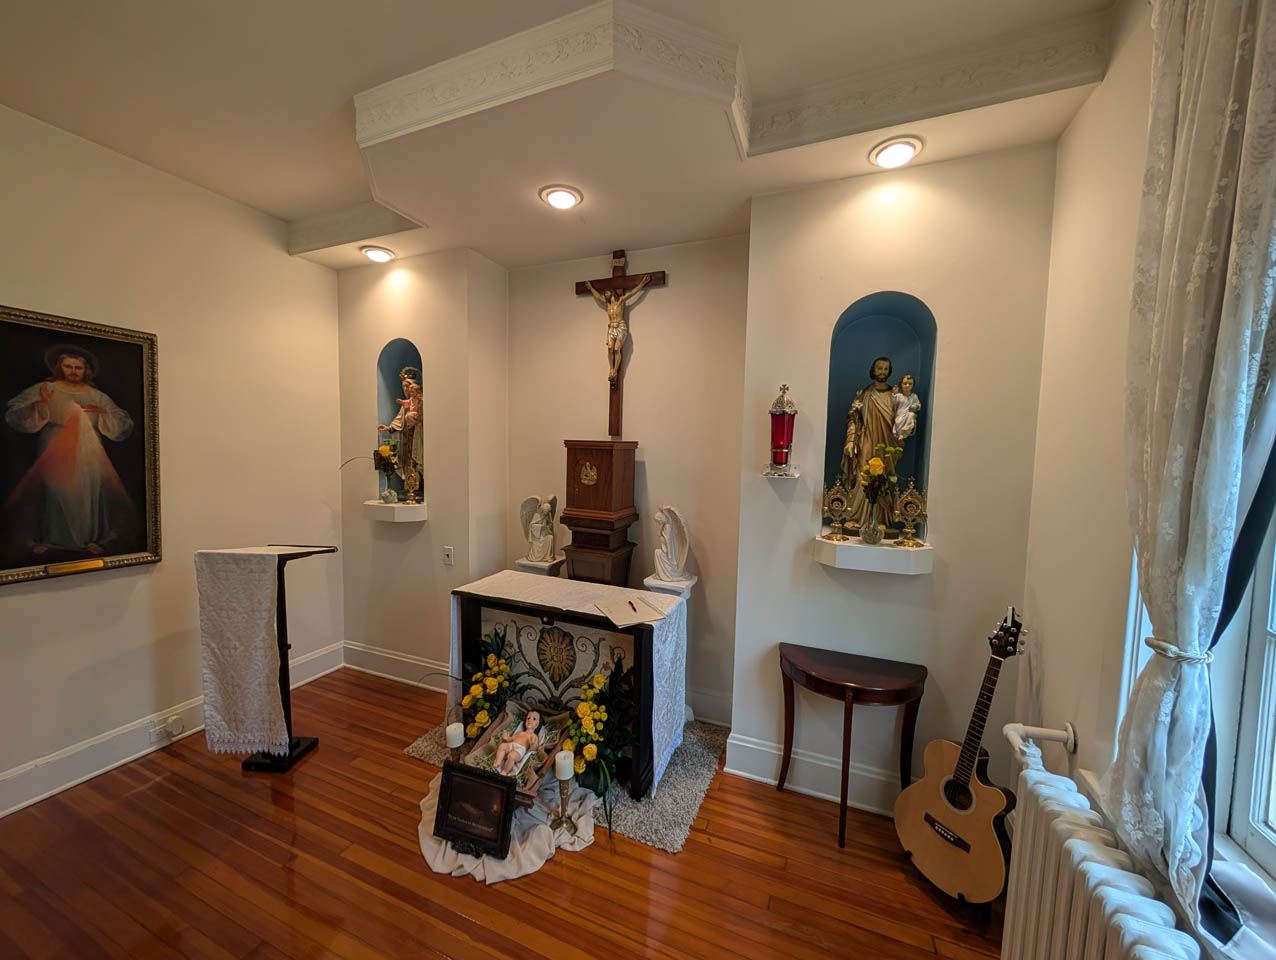
After meeting with the Sisters to discuss what they wanted, these are the designs I came up with: Chapel furniture.PDF

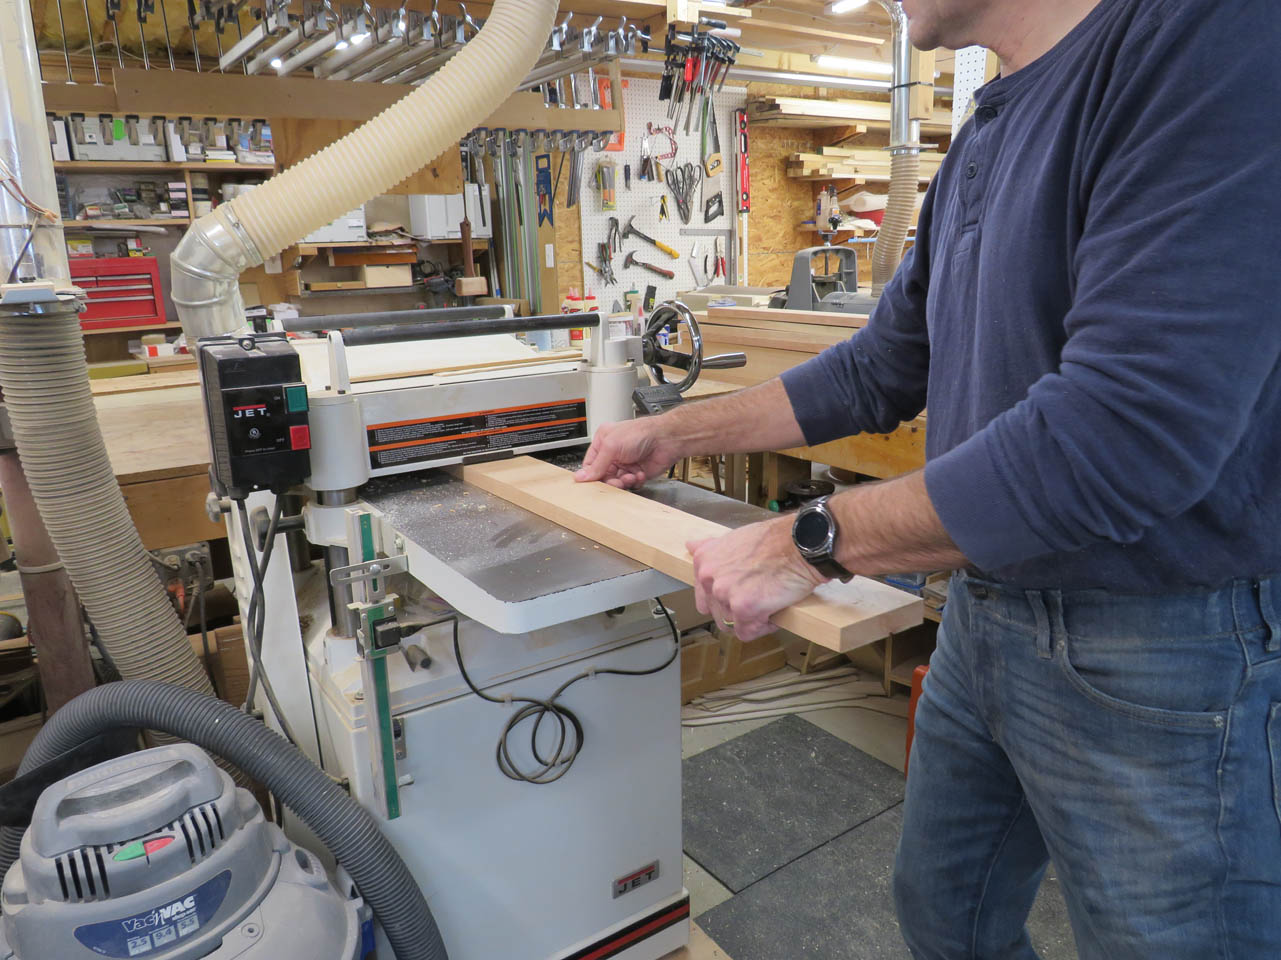
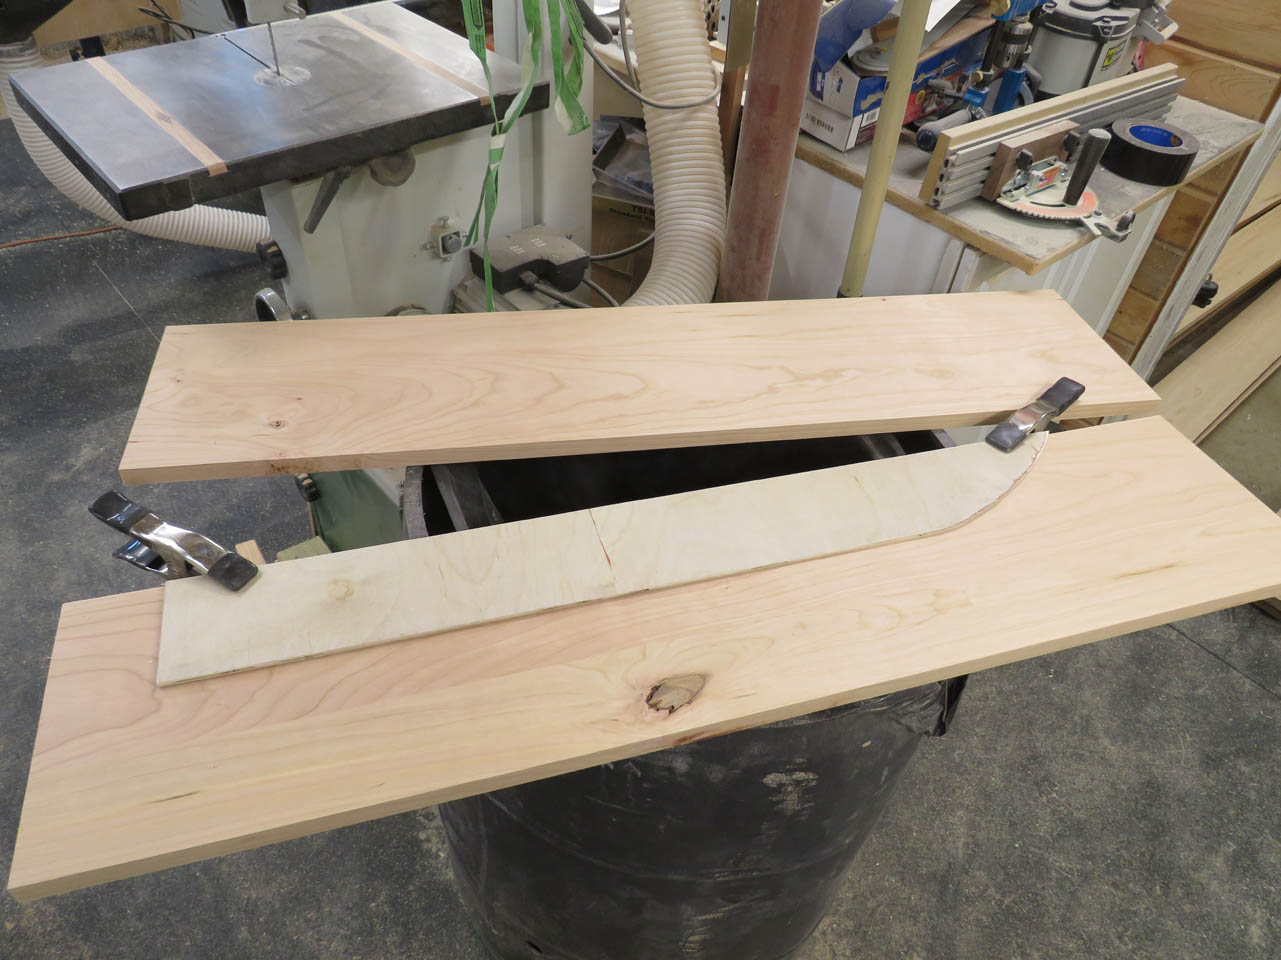
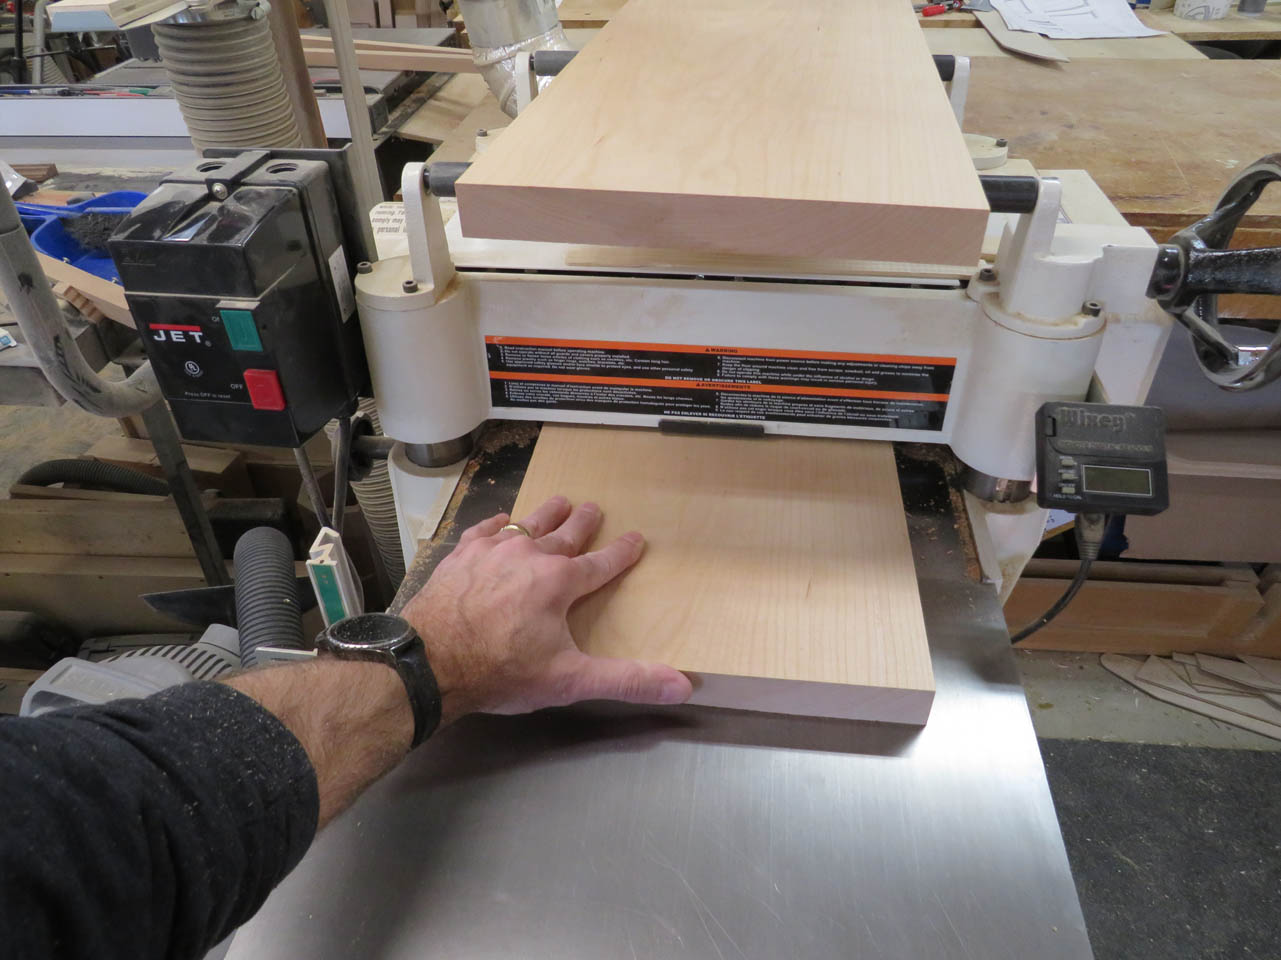
For the most part, all of the furniture will be built from solid cherry. Some components will be a veneered plywood to protect against wood movement, mainly in the arched areas in front of each piece. Wood expands and contracts with changes in temperature and moisture and we want to avoid cracks in the wood in detailed areas like the arches. I picked up a truck load of cherry from the mill and had them skip-plane both faces and straight line cut one edge to save me some time and from disposing of a lot of sawdust…

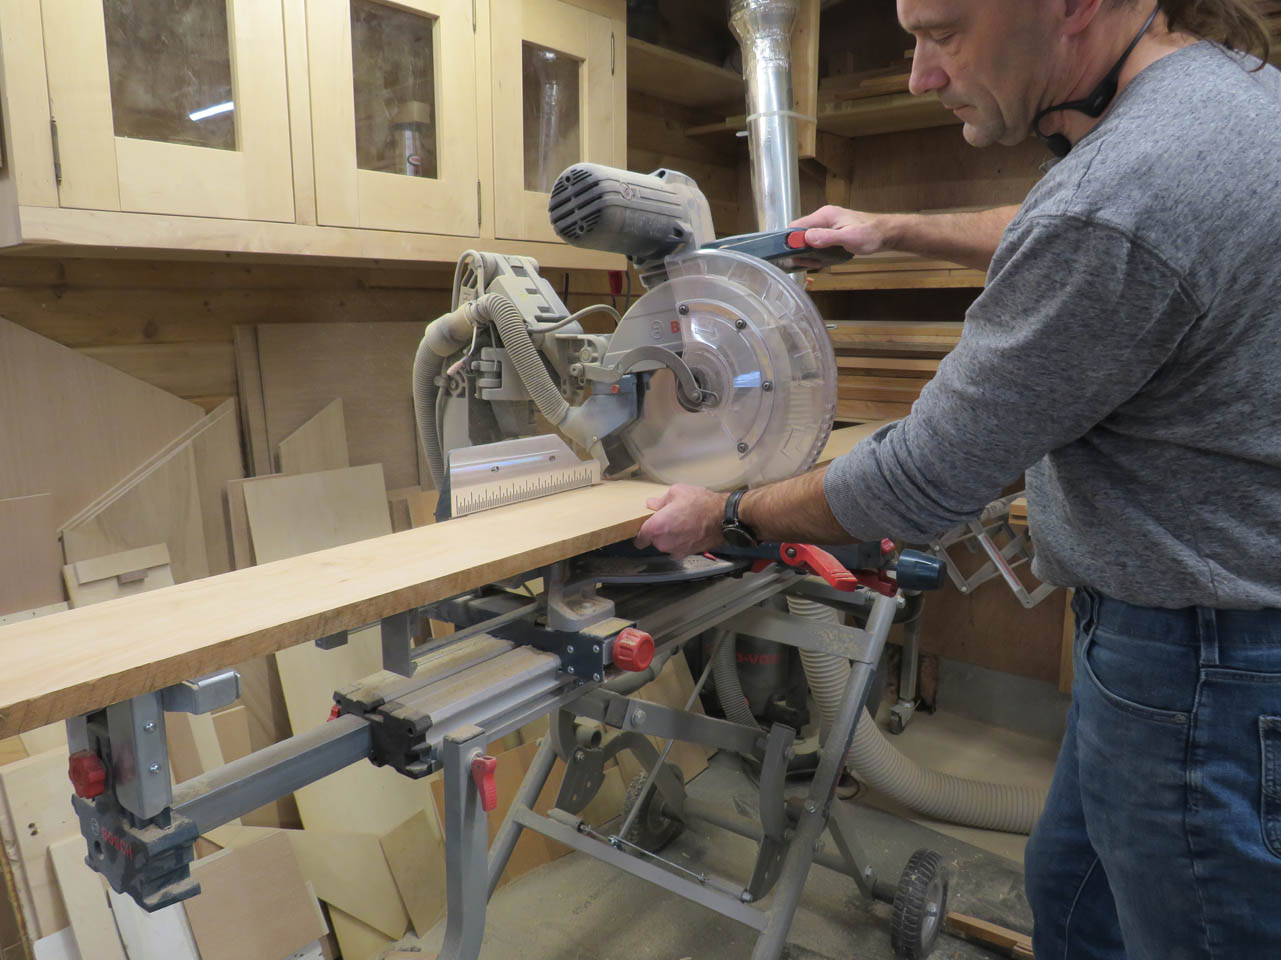
All of the pieces on this Ambo are less than 48″ long so I can rough cut them to length to make processing easier.
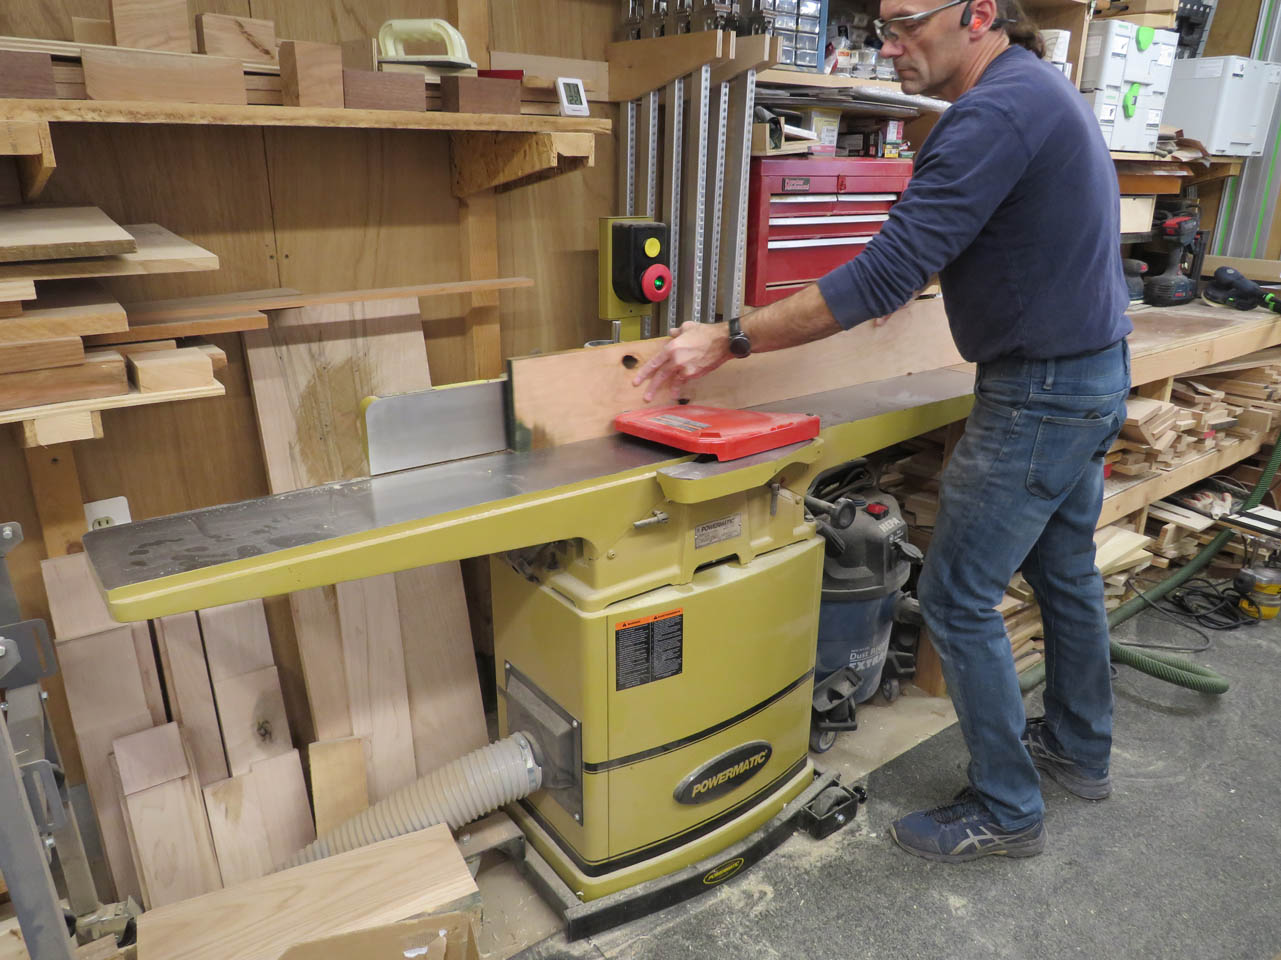
I am starting with the fluted columns because I haven’t done them before and I want to figure out how they are going to work so I joint my roughed out pieces and cut them to width.
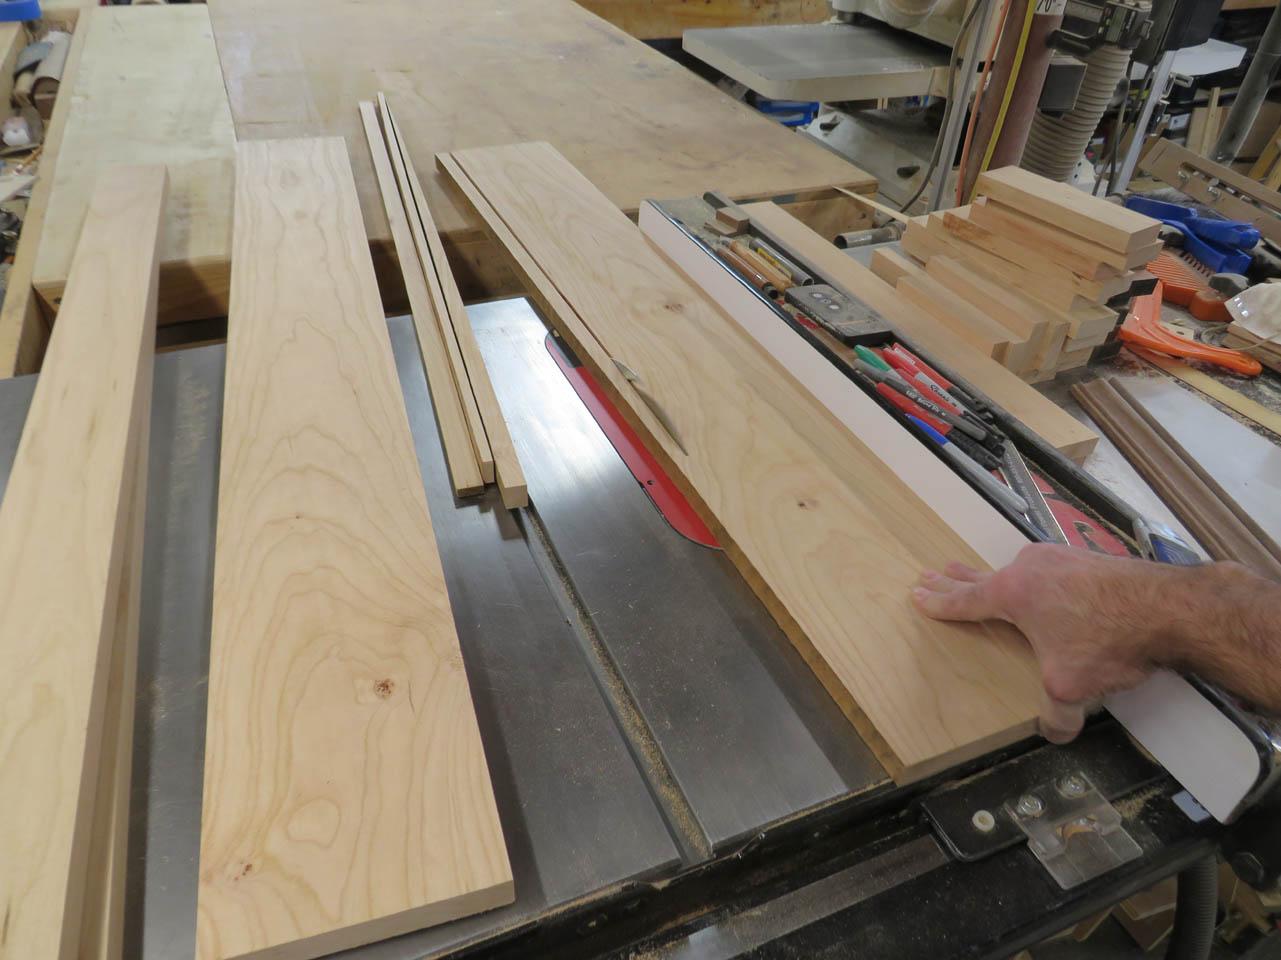
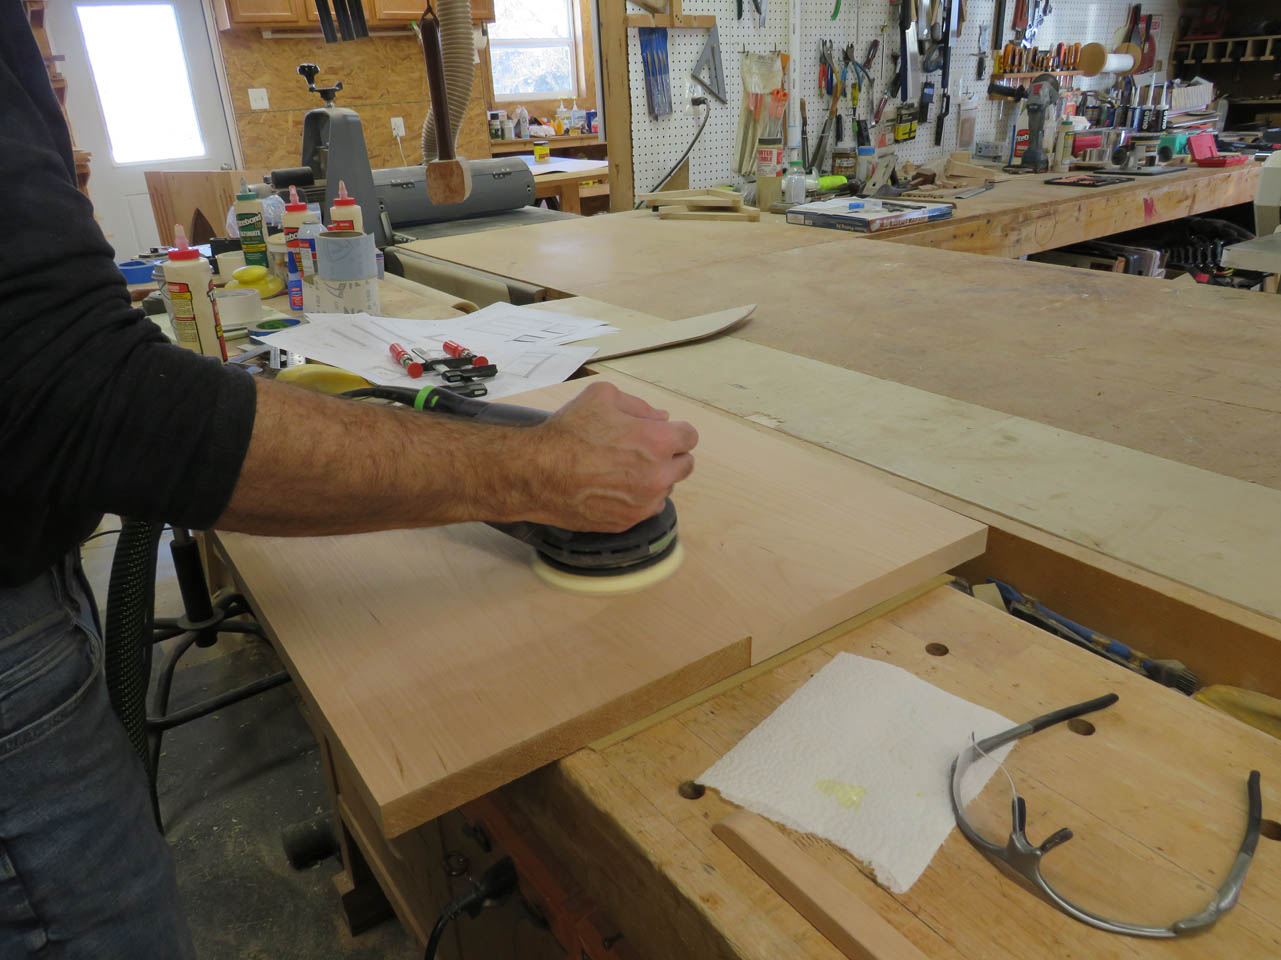
The skip-planing took the wood down to approximately 1/16″ over size so that I only have to finish plane one pass down each face of the boards to make them the finished size.
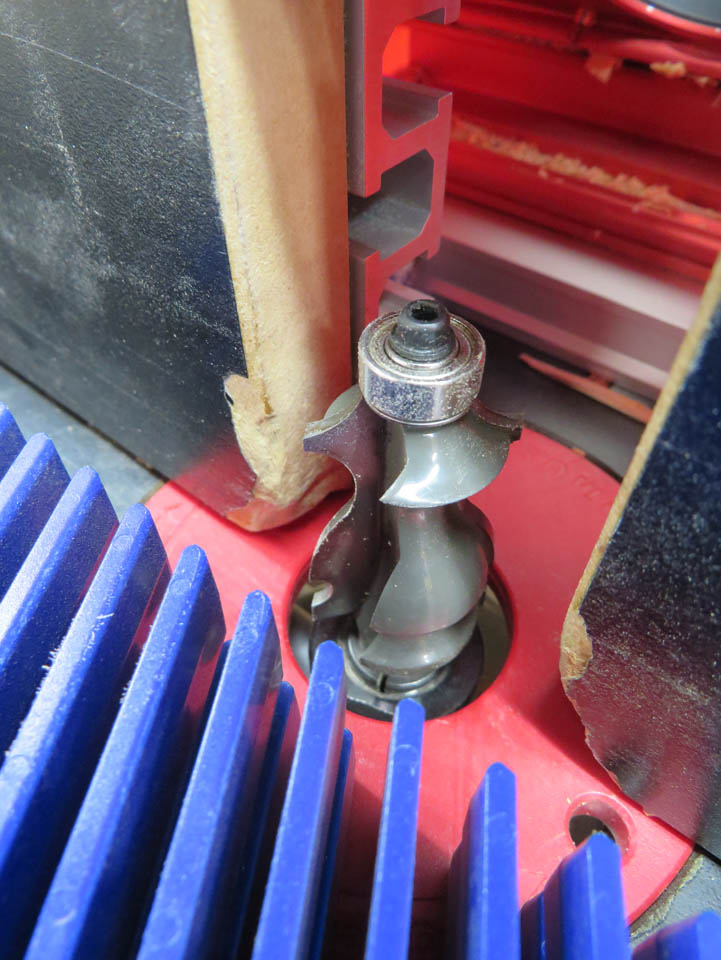
I bought a fluting jig for one of my routers so I am experimenting with the best way to setup so I can repeat three passes on twelve different boards.
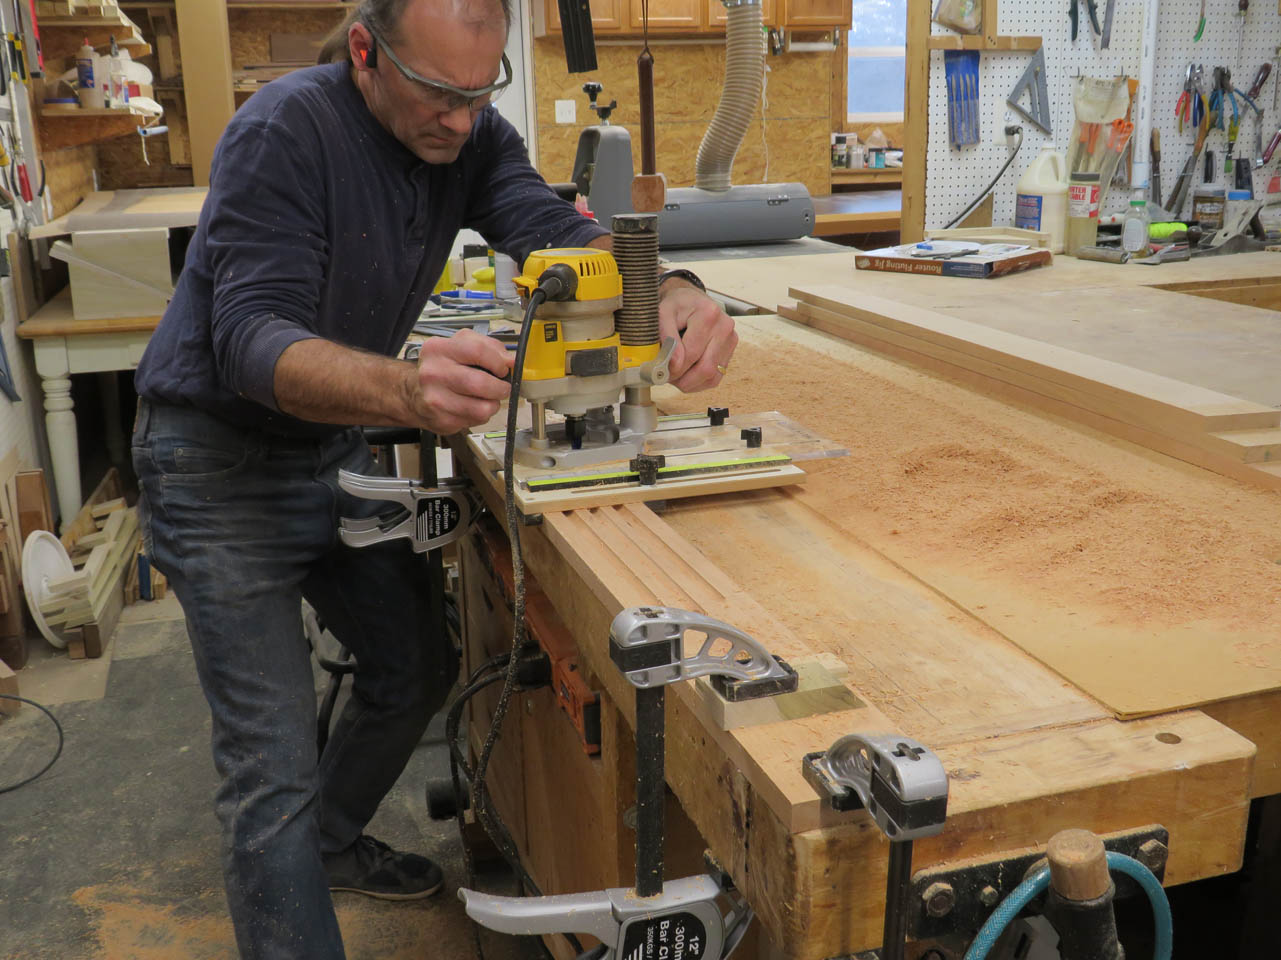
I measured from the center of the bit to the edge of the router sled and clamped a block at the furthest point on each end. Then I made a 1″ block to lay against it as a stop for the shorter two sides. This worked well so I repeated the process for each piece.
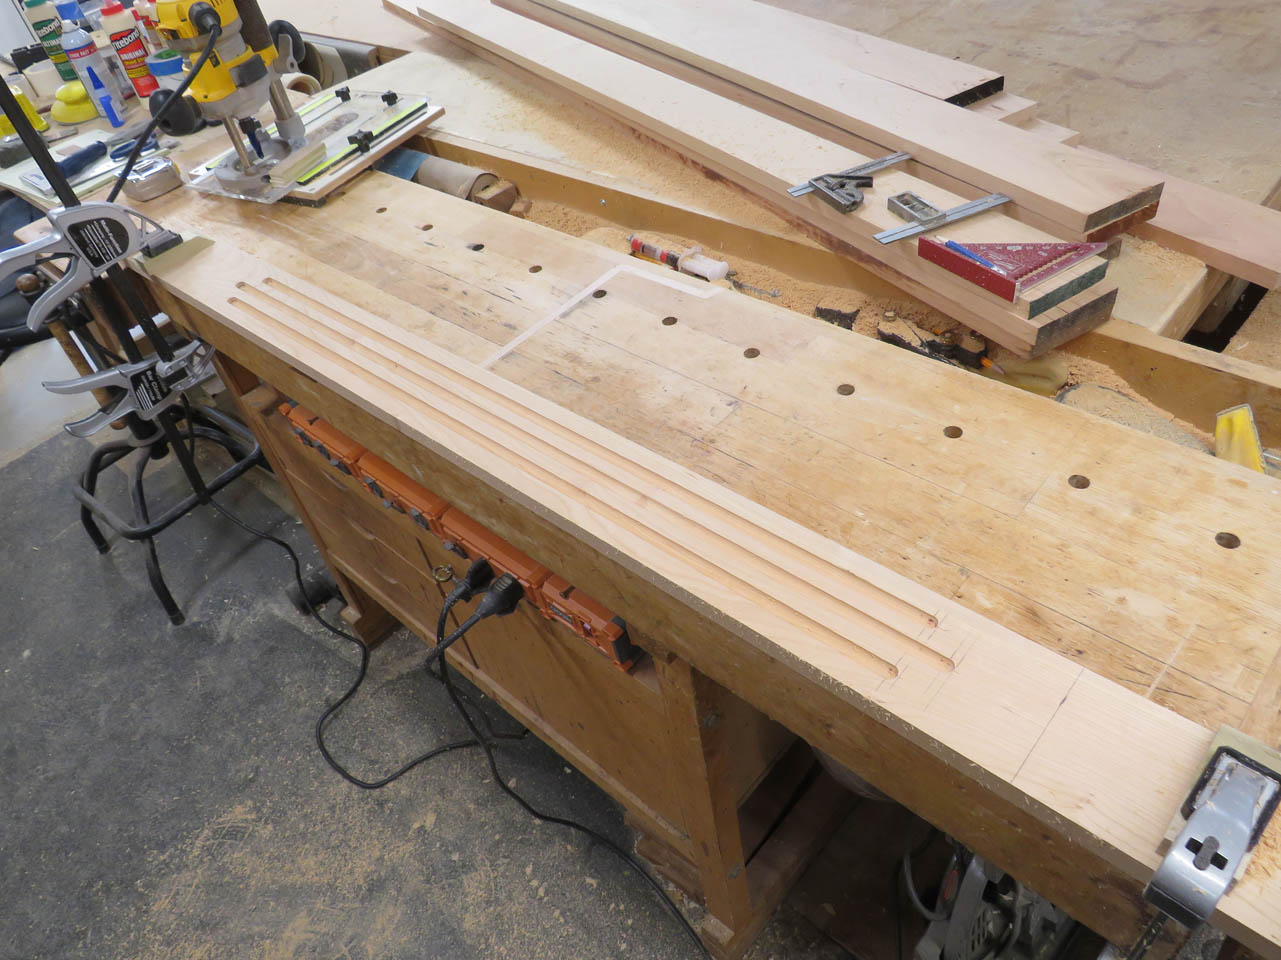
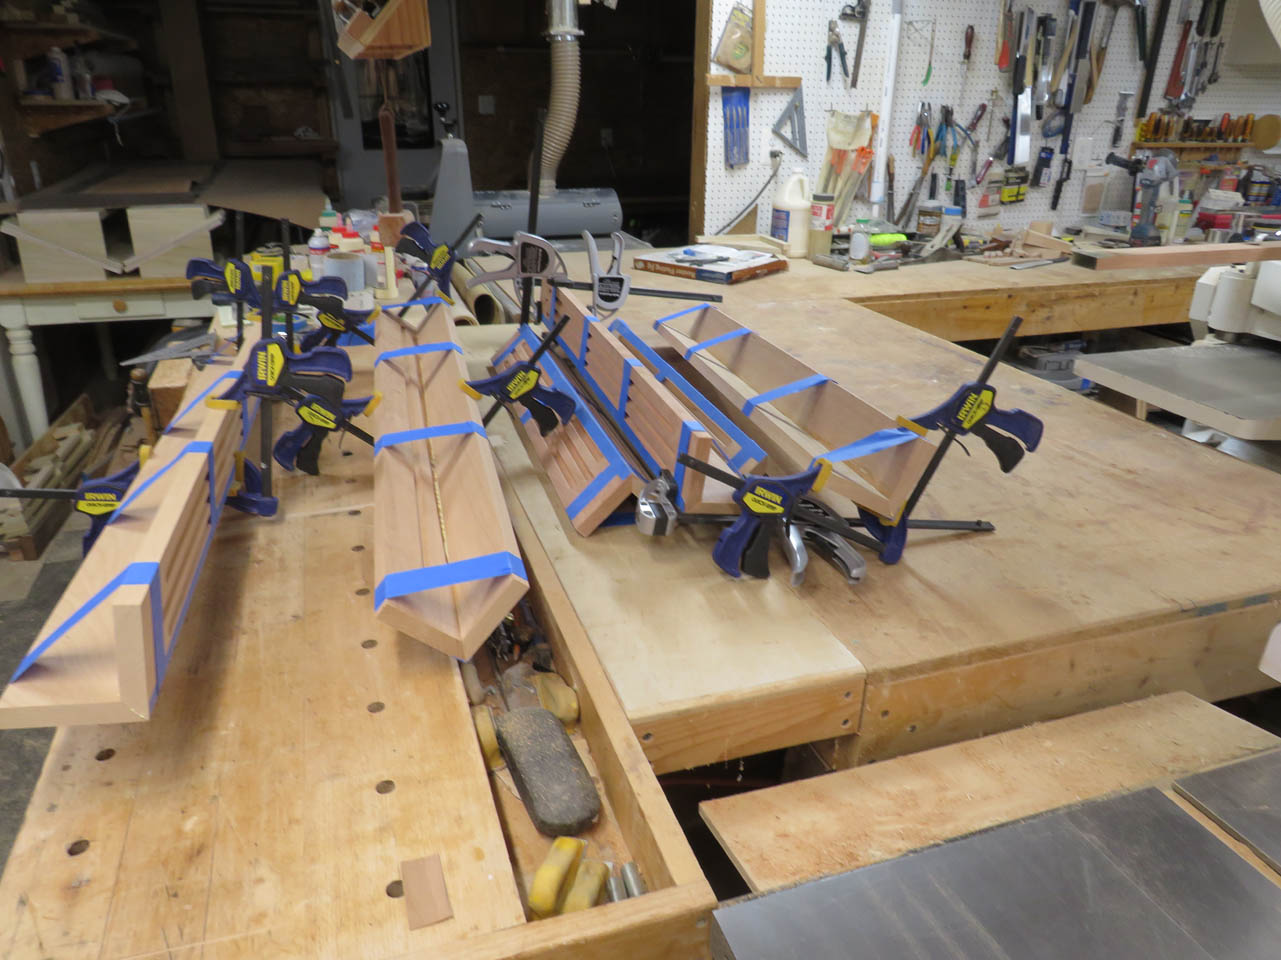
I left all of them long so that I had a place to clamp the boards. When all of the flutes were cut, I can cut each board to the final length.

Since there was a lot of setup involved, I went ahead and cut all the column faces for the Altar and side table as well.

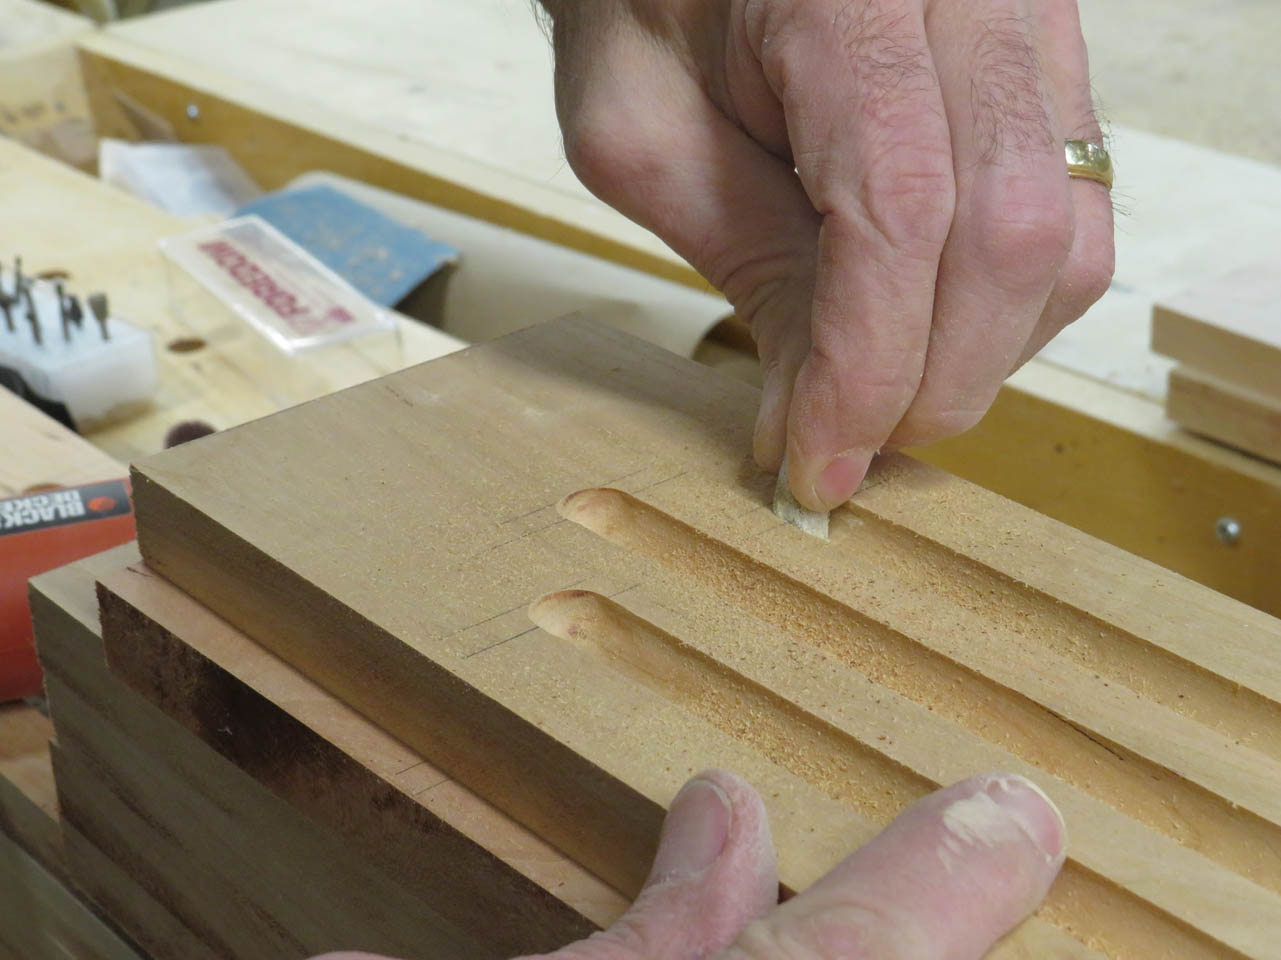
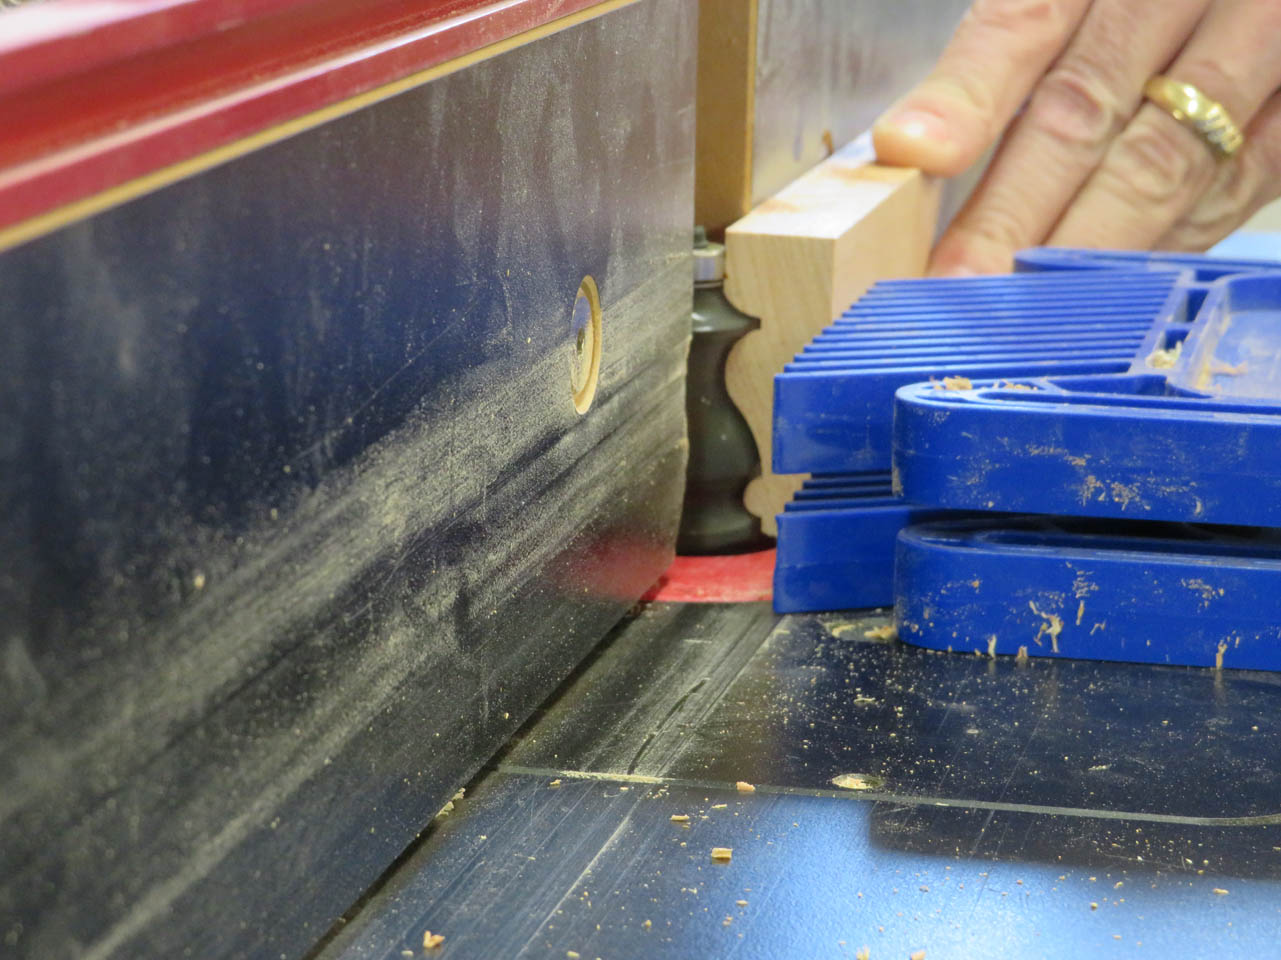
The biggest problem with cherry is that it burns anywhere your cutting tools pause. Unfortunately that is at the beginning and end of each flute. I dug through all of my dremel bits until I found a suitable bit for scraping out the burn marks.
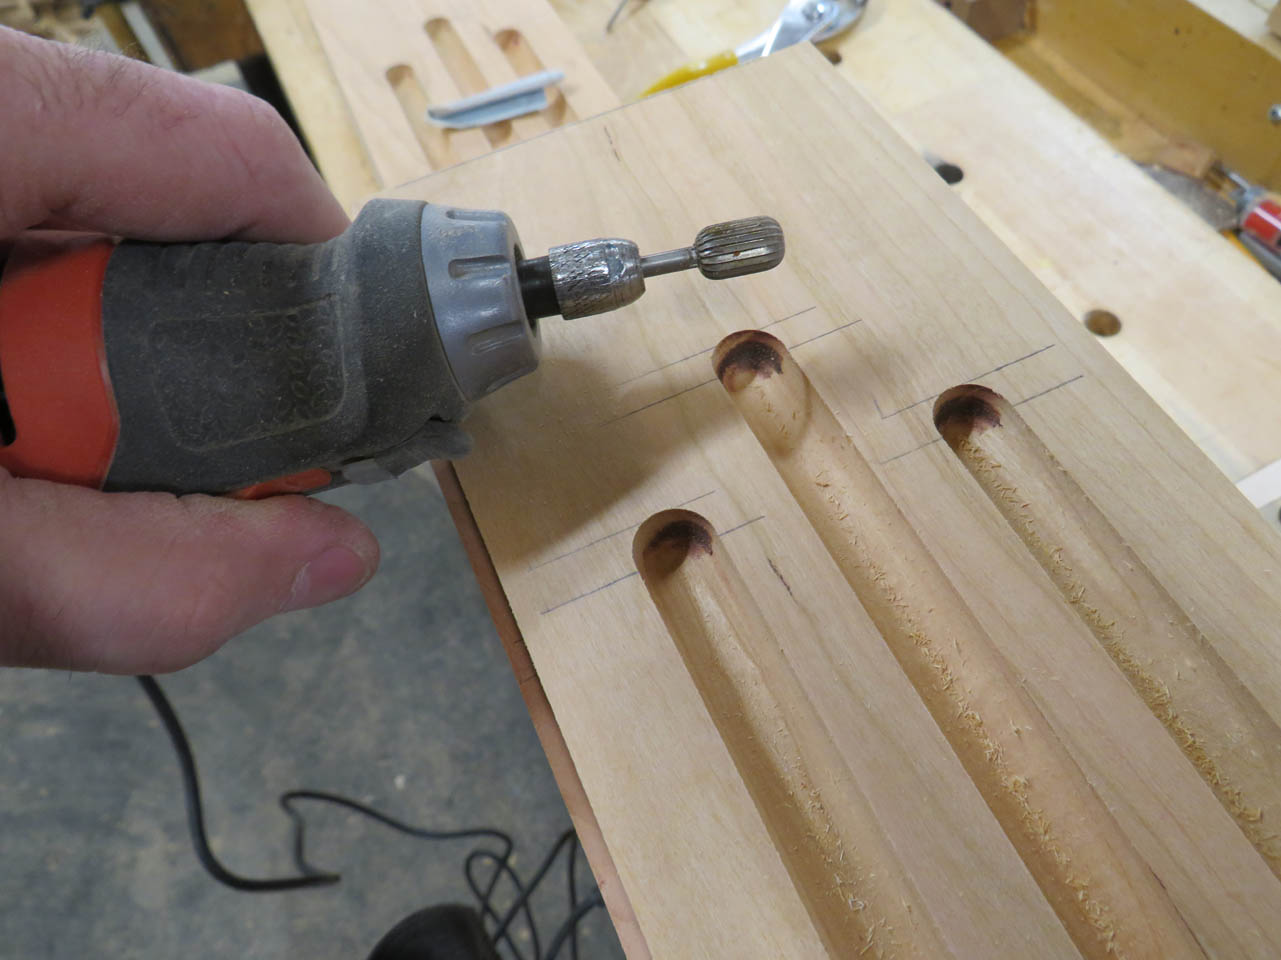

This finned bit worked really well and I just had to follow up with some hand-sanding.

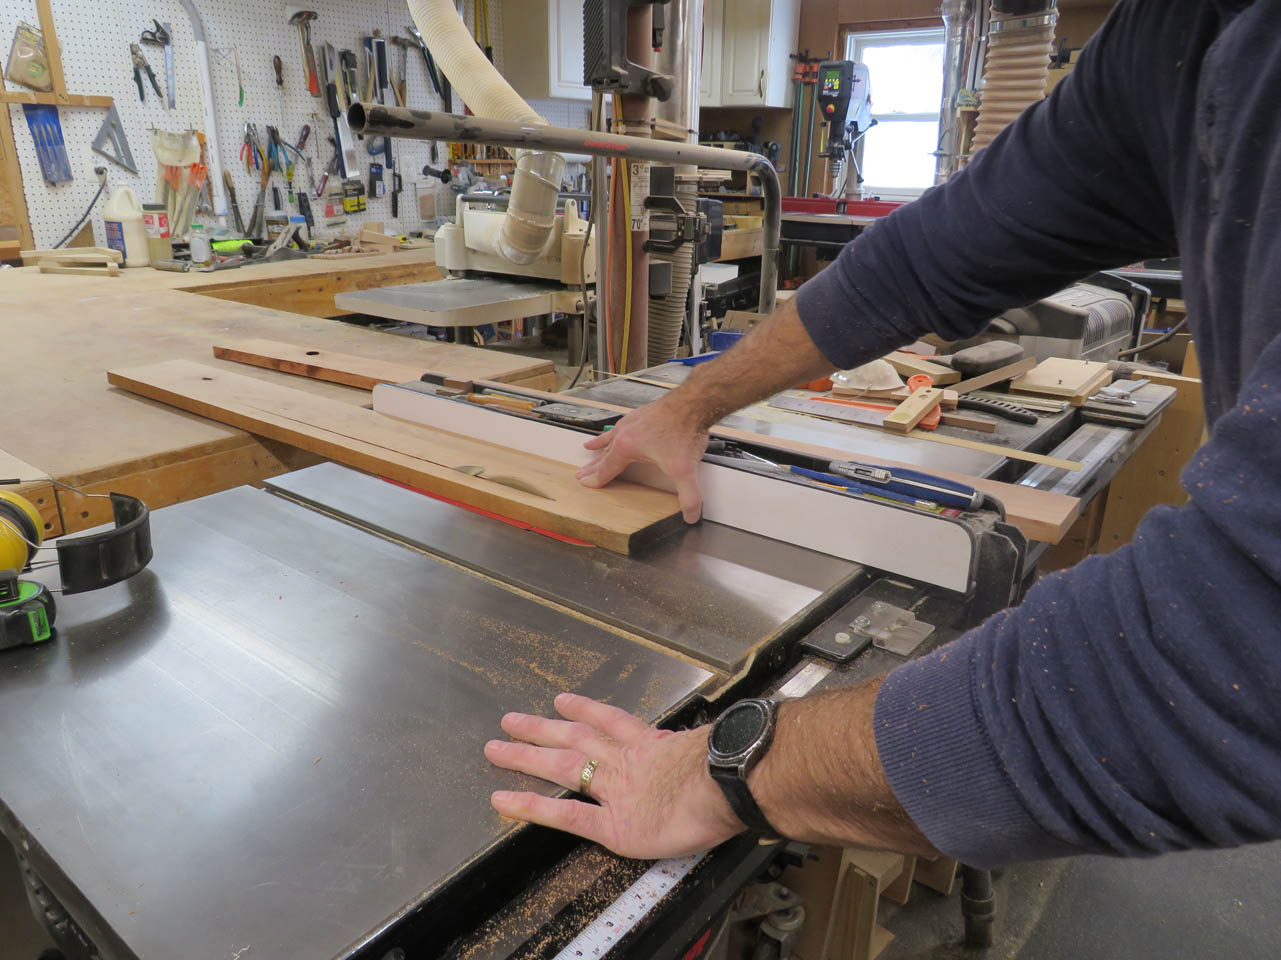
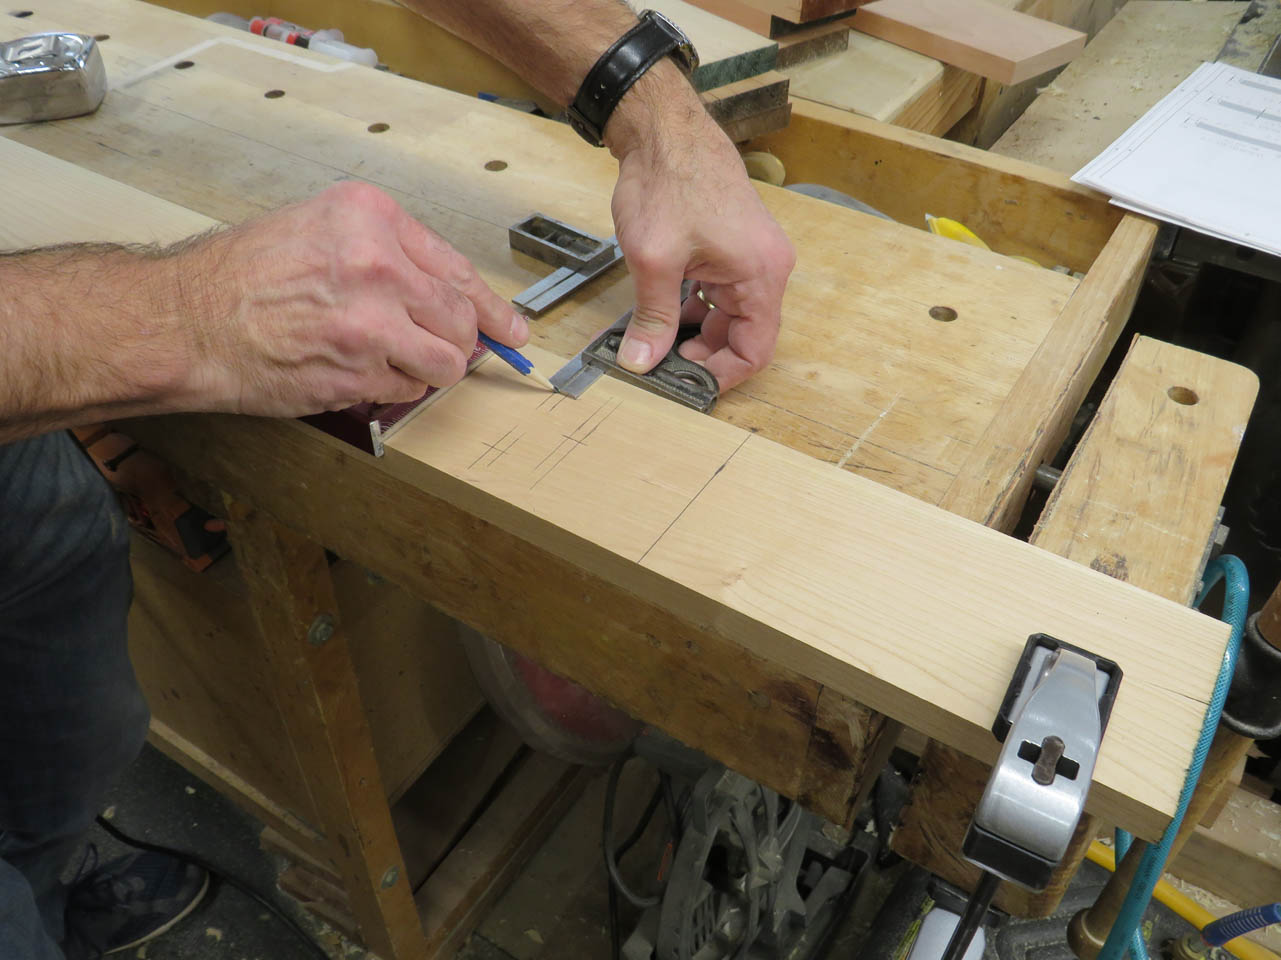
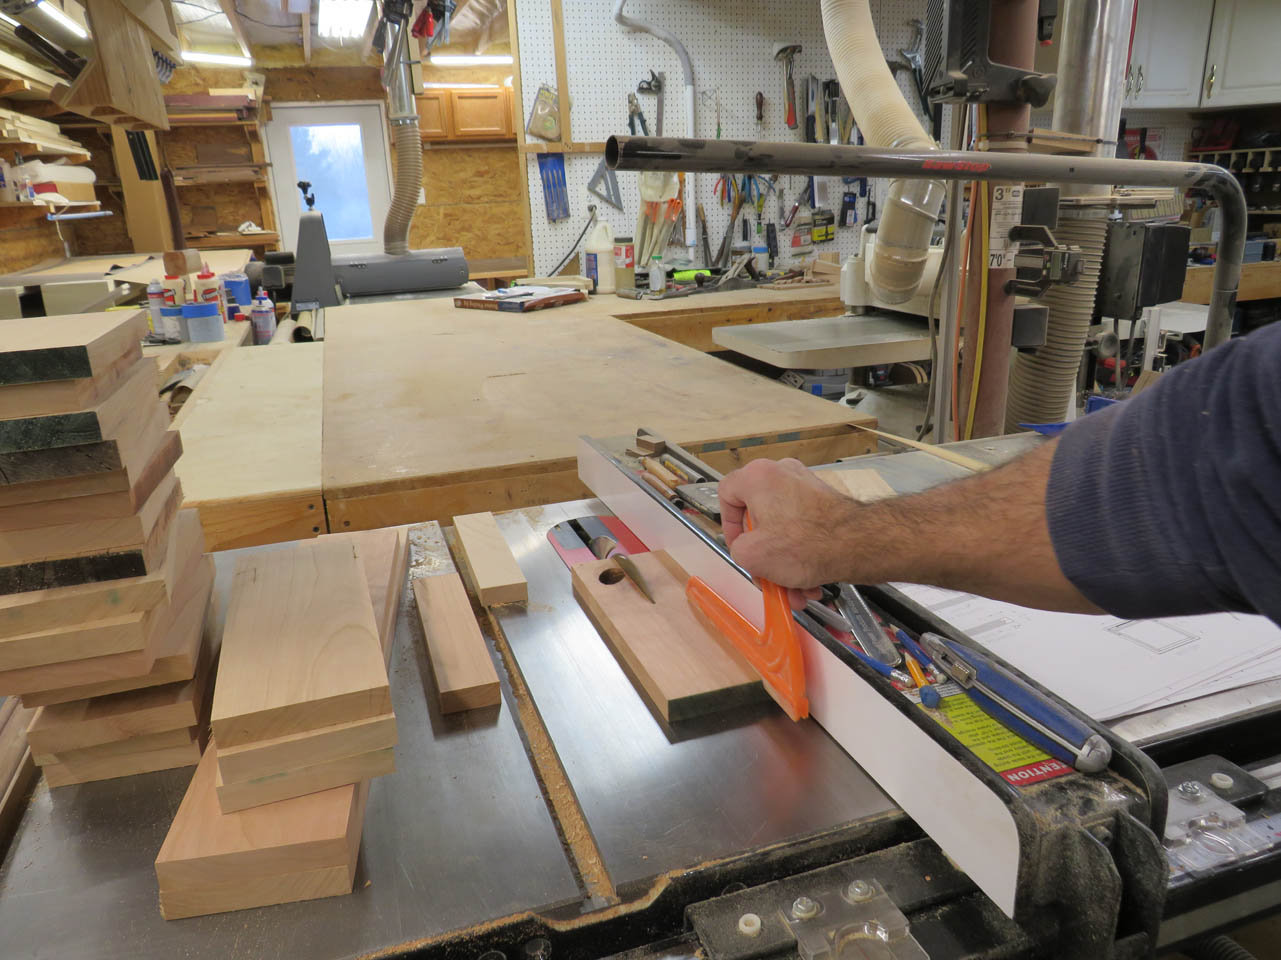
The last thing to cut is the 45° edge so two pieces can be mitered together to make a corner. I set the blade of the table saw to 45° and cut each one.
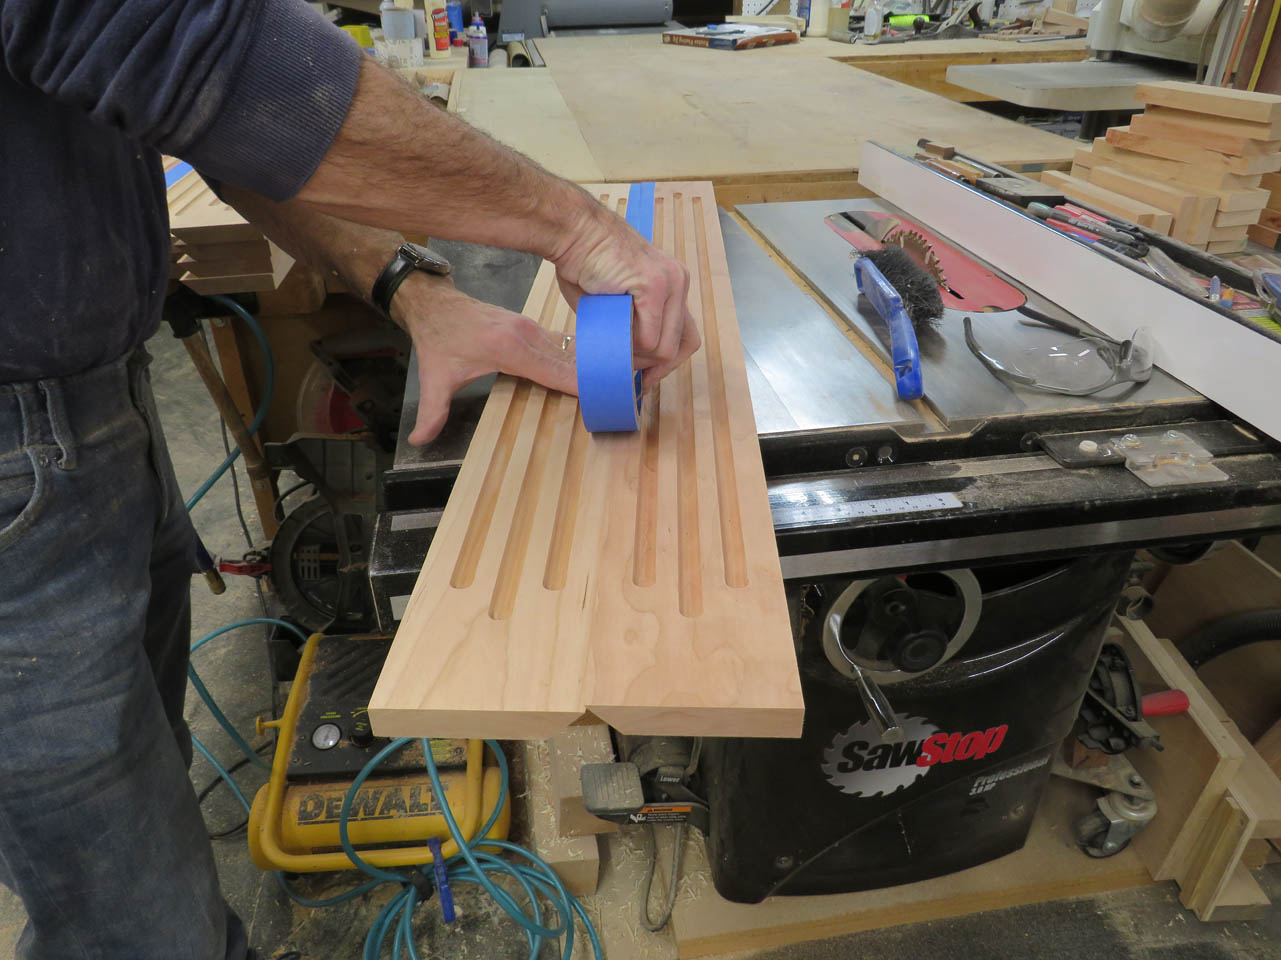
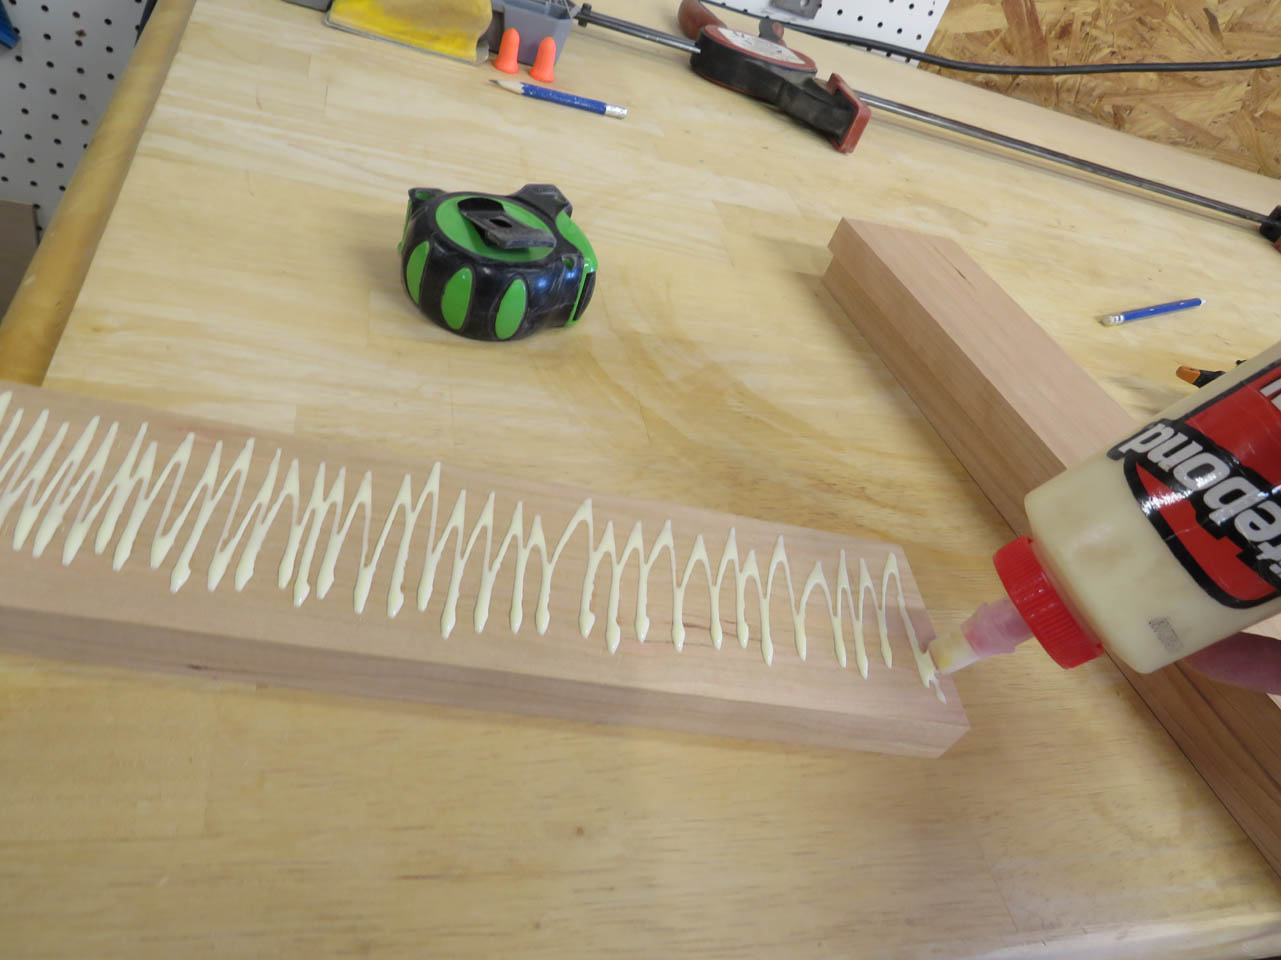
Laying two pieces together with the beveled edges touching, I applied a piece of 2″ painter’s tape along the joint to create a hinge.
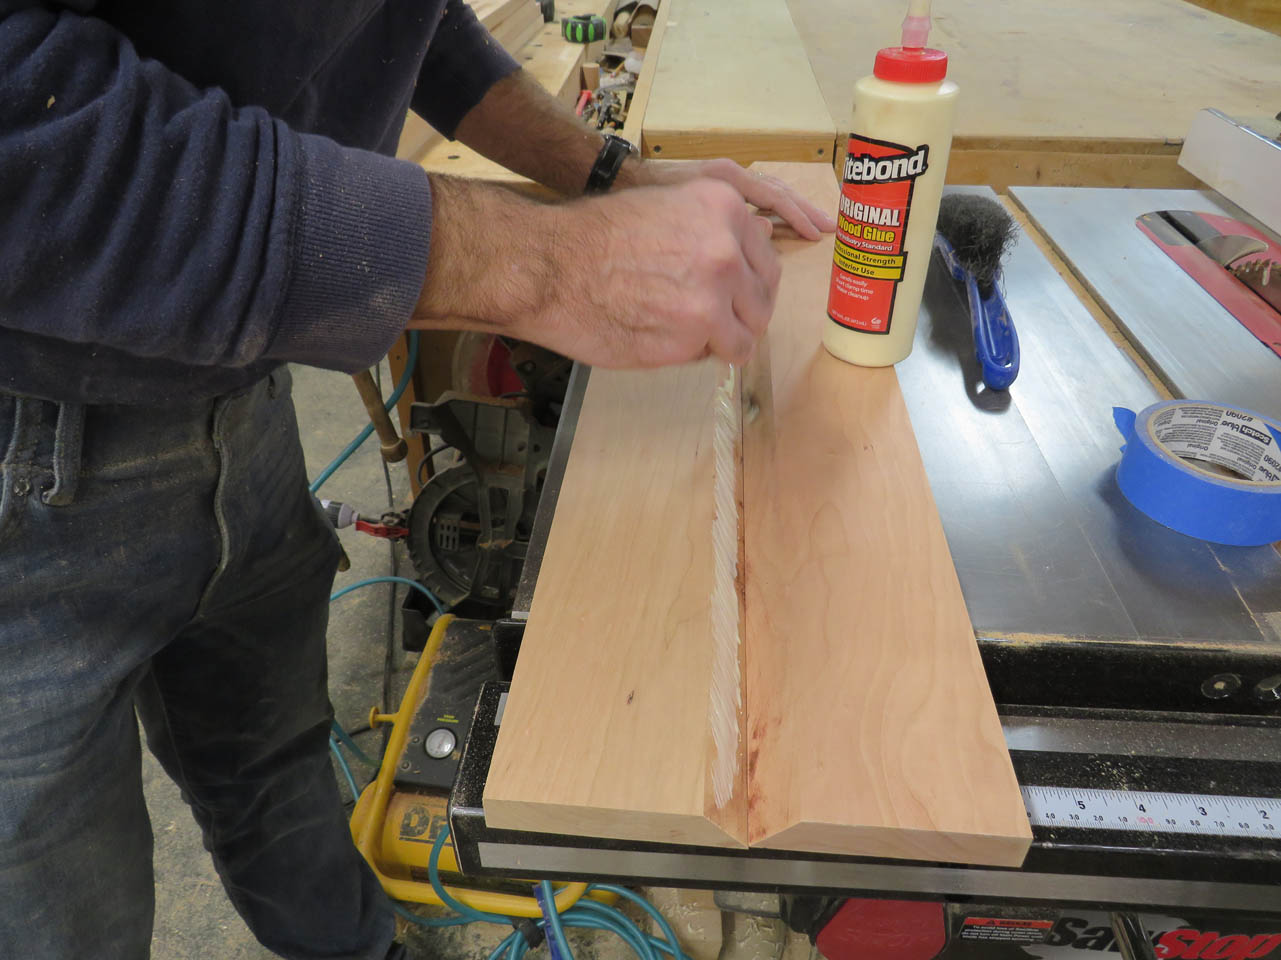
Flipping the boards over, I can apply glue along the bevels and fold the corner up.
I use additional tape to hold the corner square.
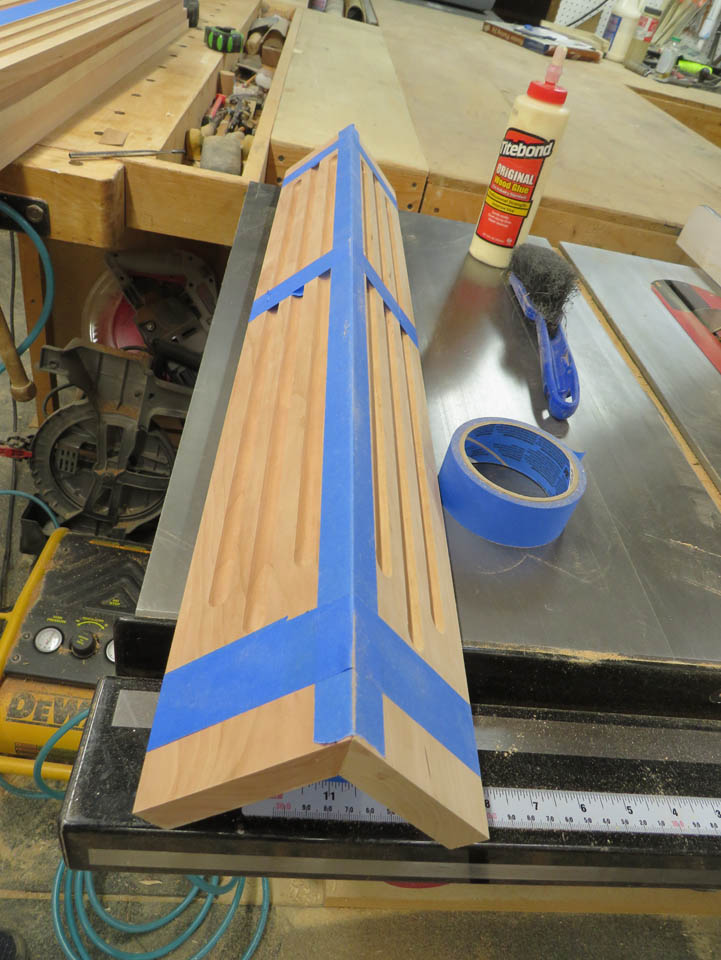
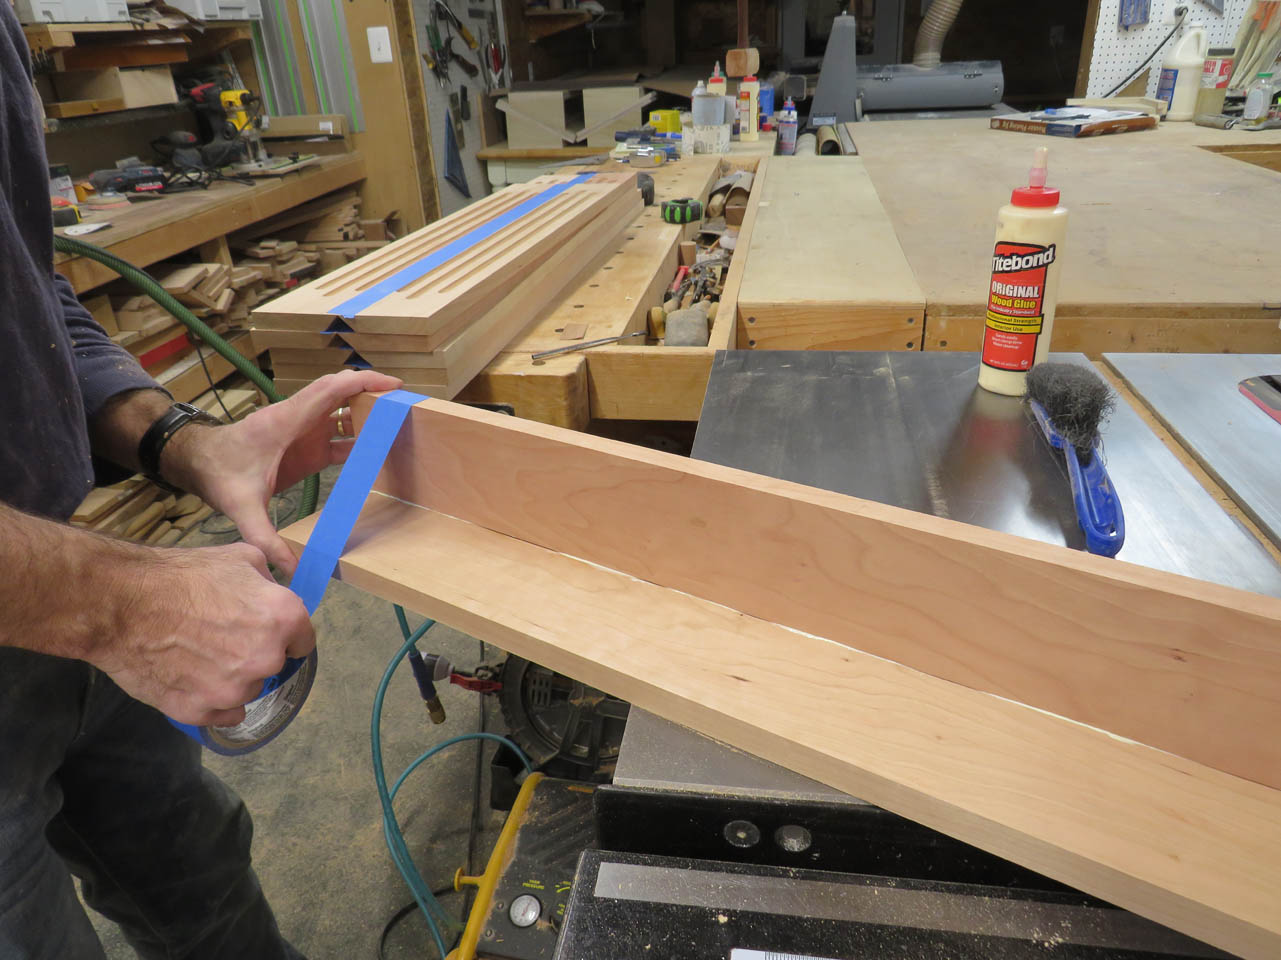
Anywhere that didn’t line up was additionally reinforced with a clamp.
After the glue was dried, I hand sanded the corners to ease the very sharp edge.
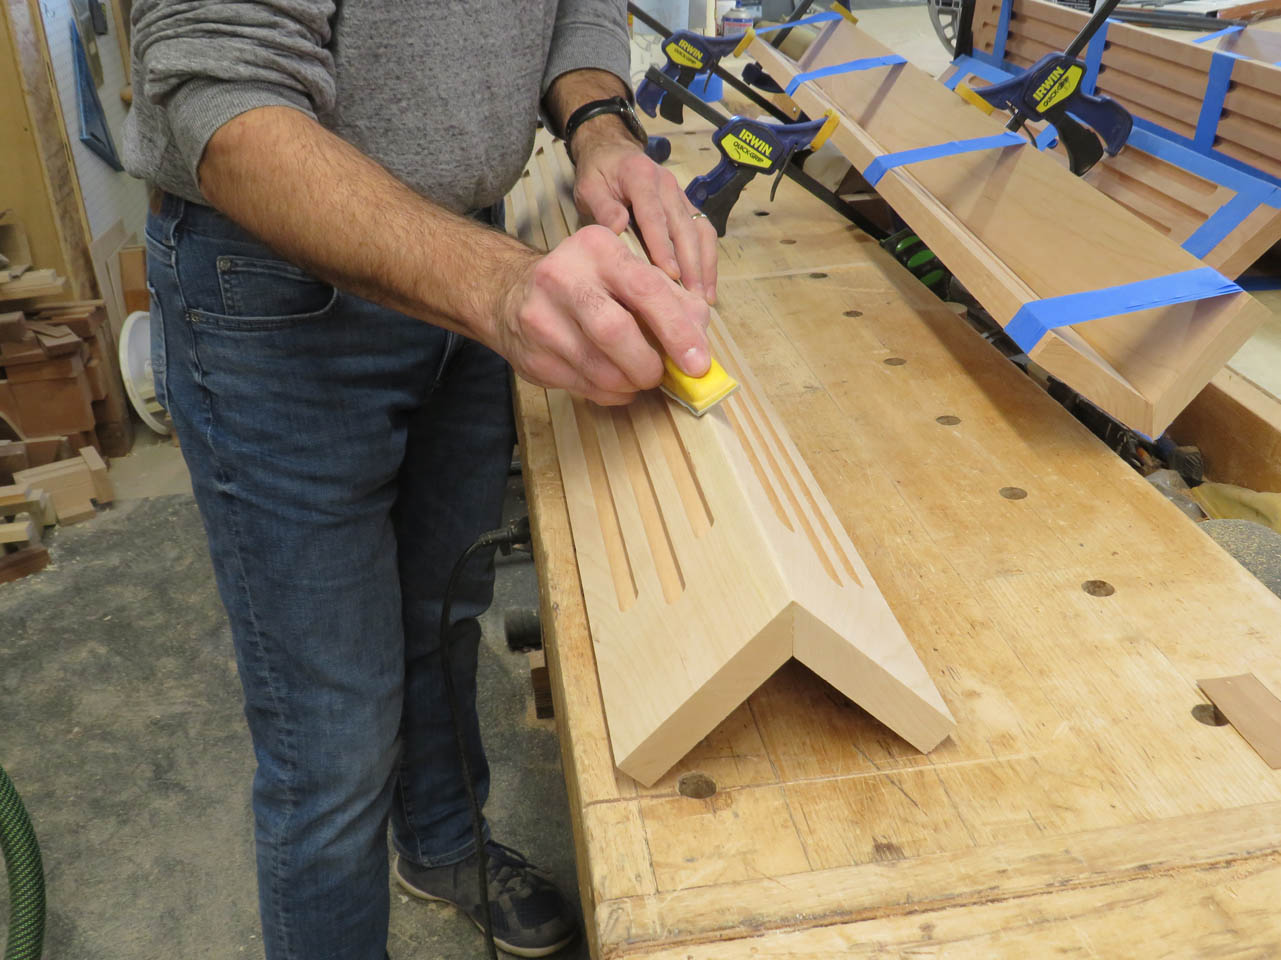
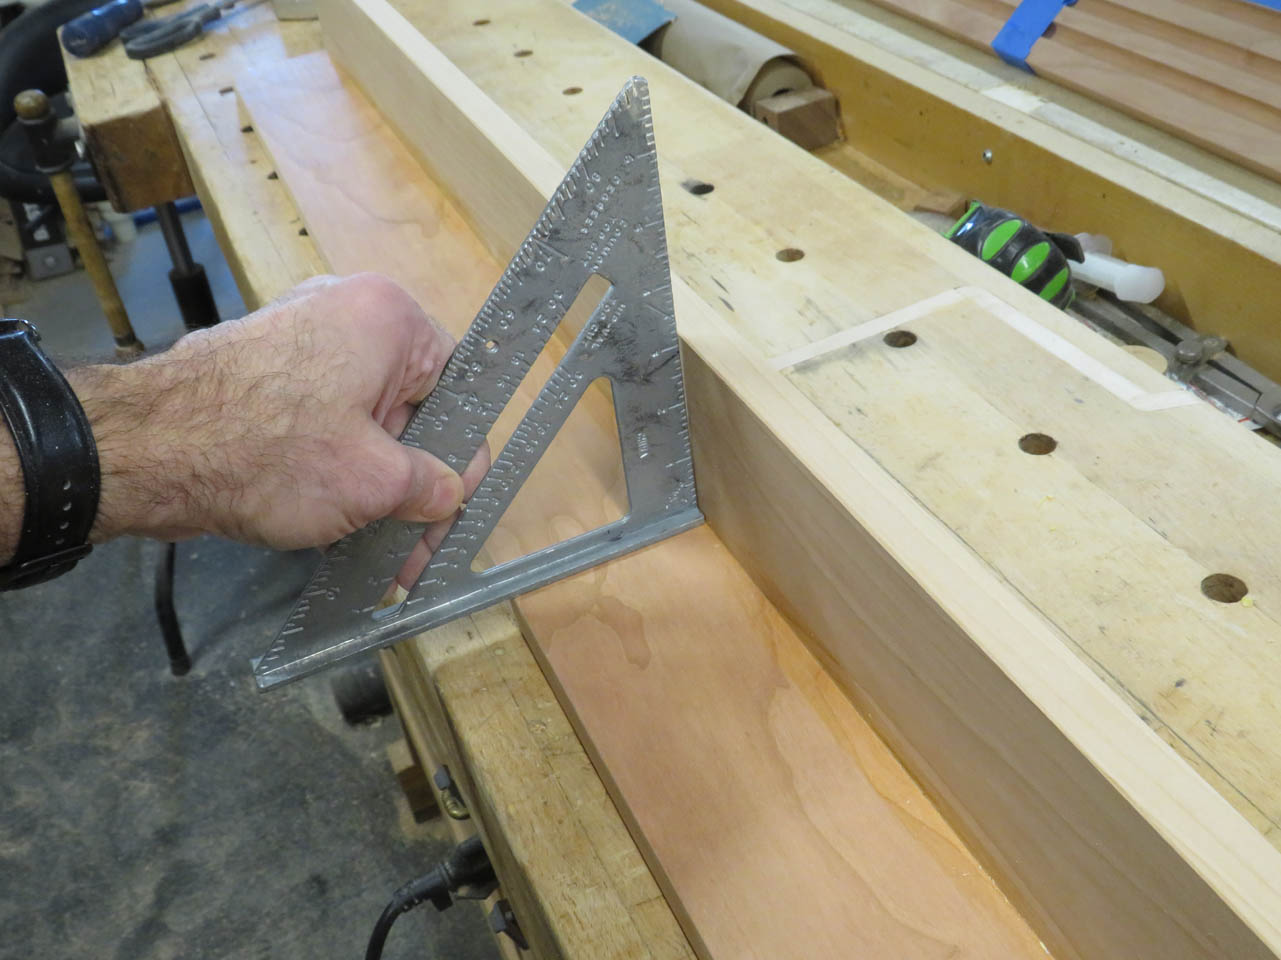
I also checked to make sure the corners dried square.
Here are my completed corners. Now I have to build the rest of the ambo to see how they fit.

The next piece I want to work on is the front arched panel.
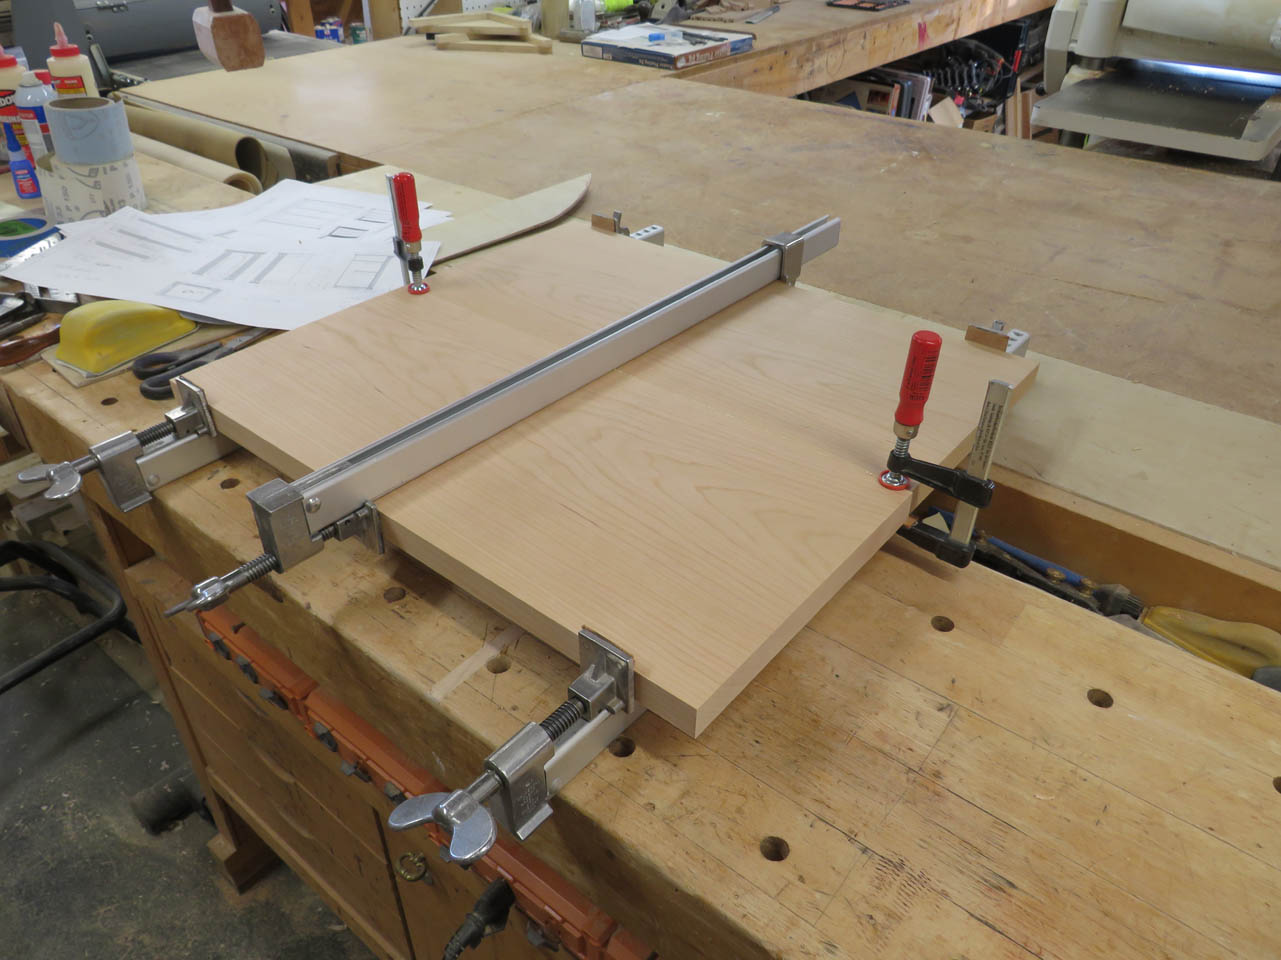
To make this, I think I want to start with gluing up two panels that will each be half of the front panel.

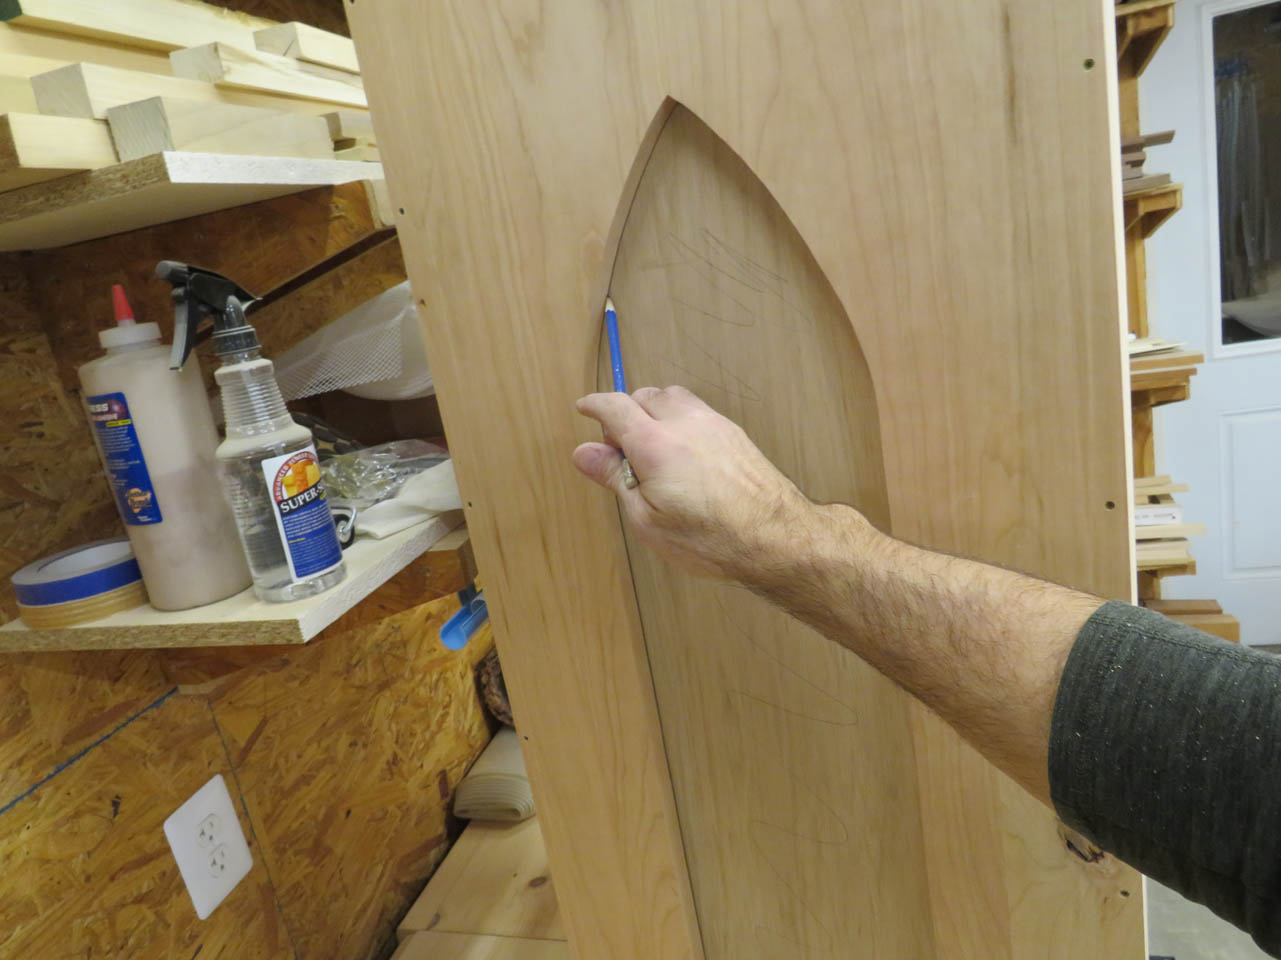
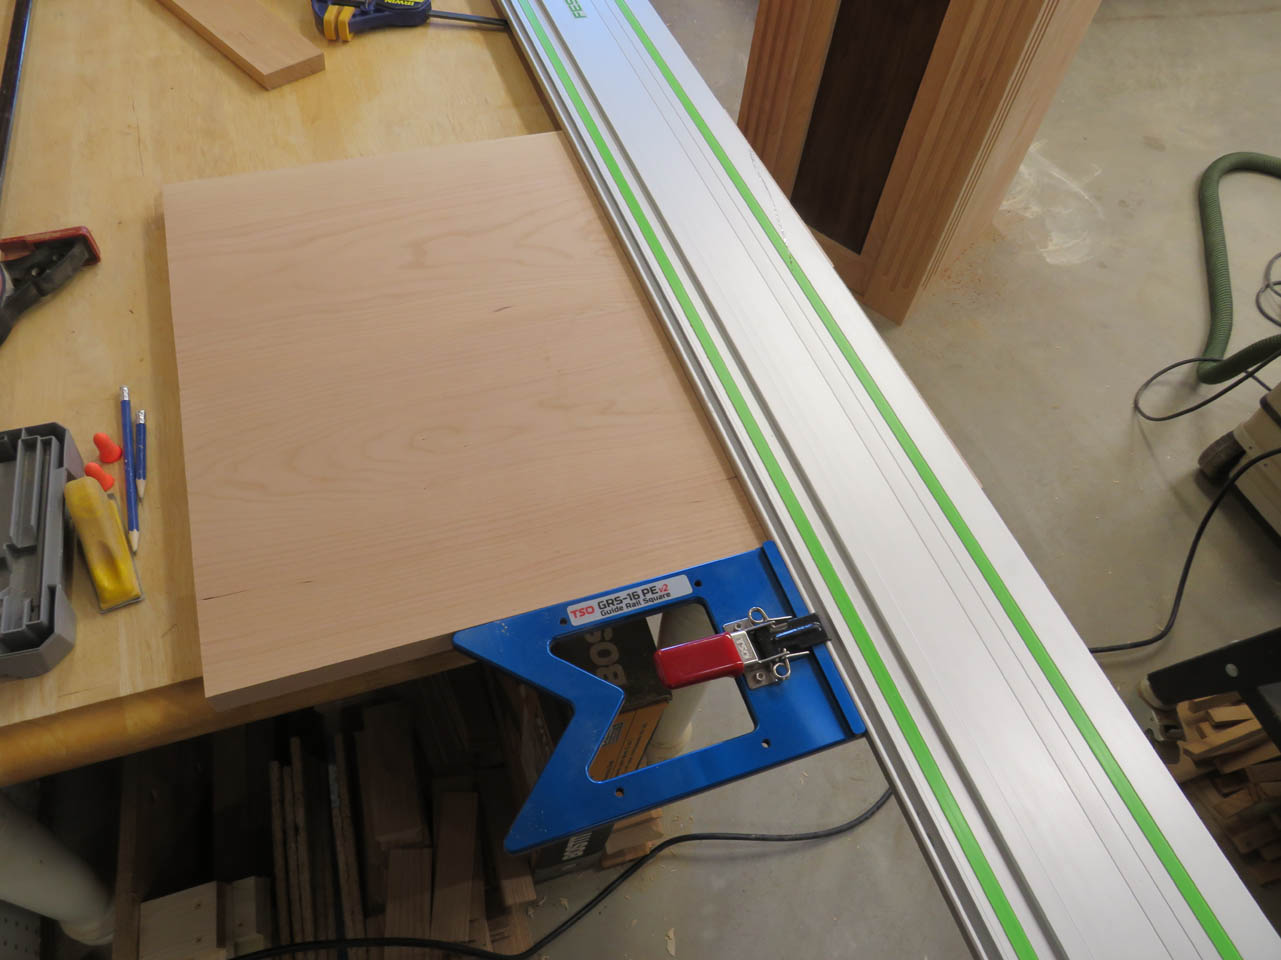
When they have dried and been planed down to 3/4″ thick, I can layout half of the arch on each.
I made a template of half of the arch. This will allow me to trace the exact same arch on each piece.
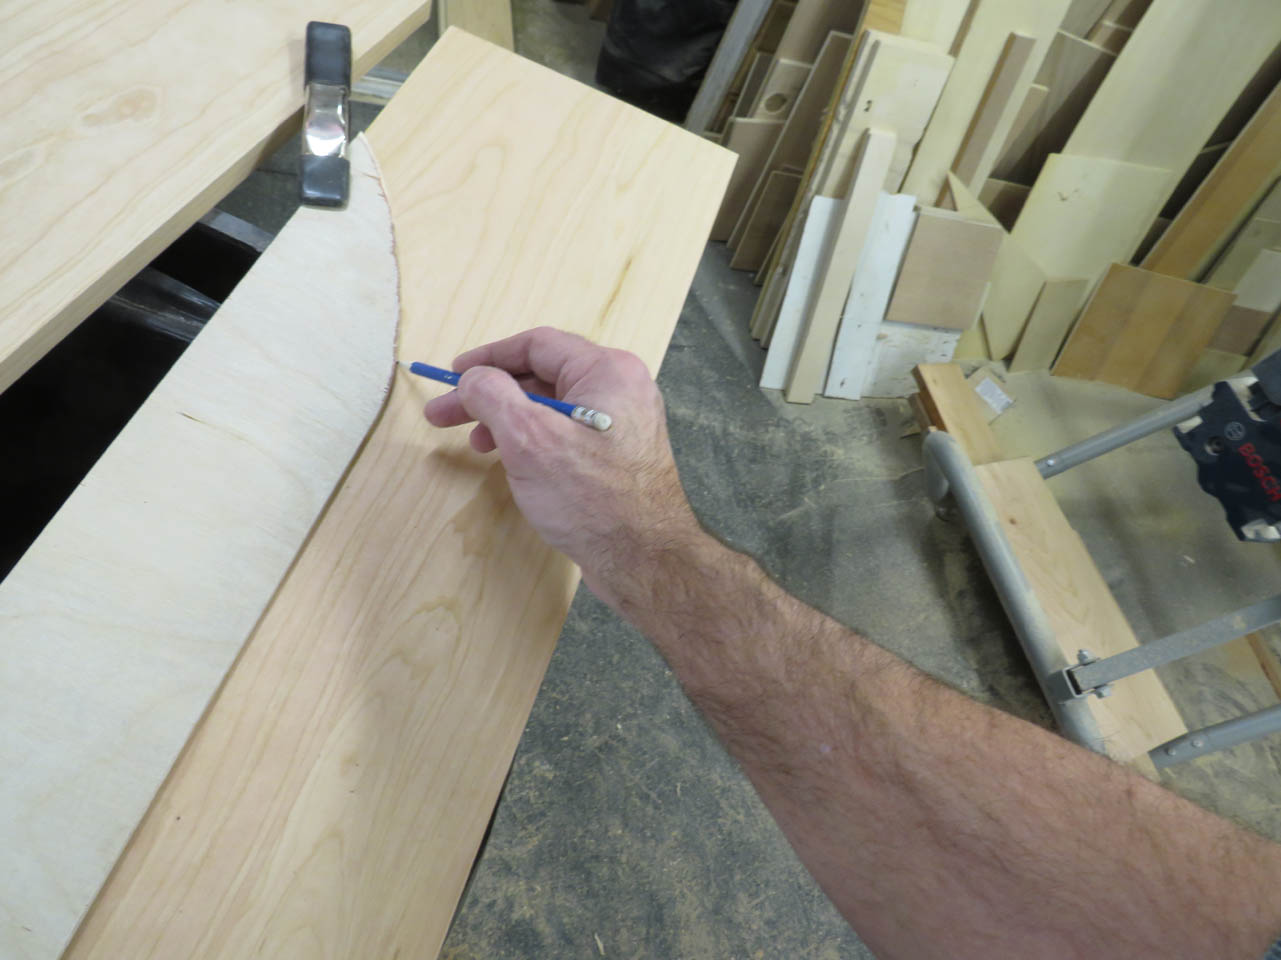
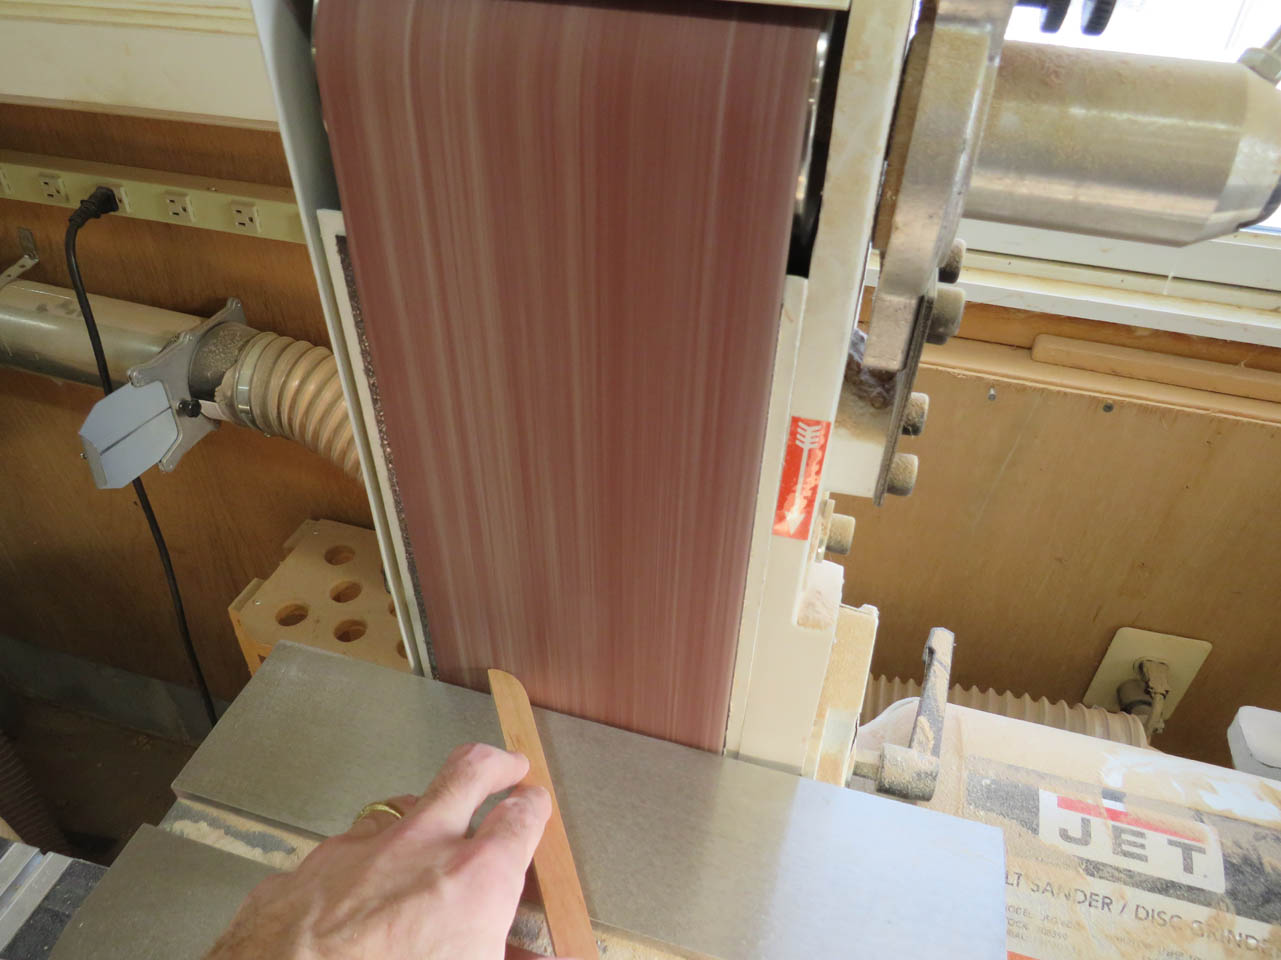
After tracing my template, I can cut the waste away on the bandsaw.
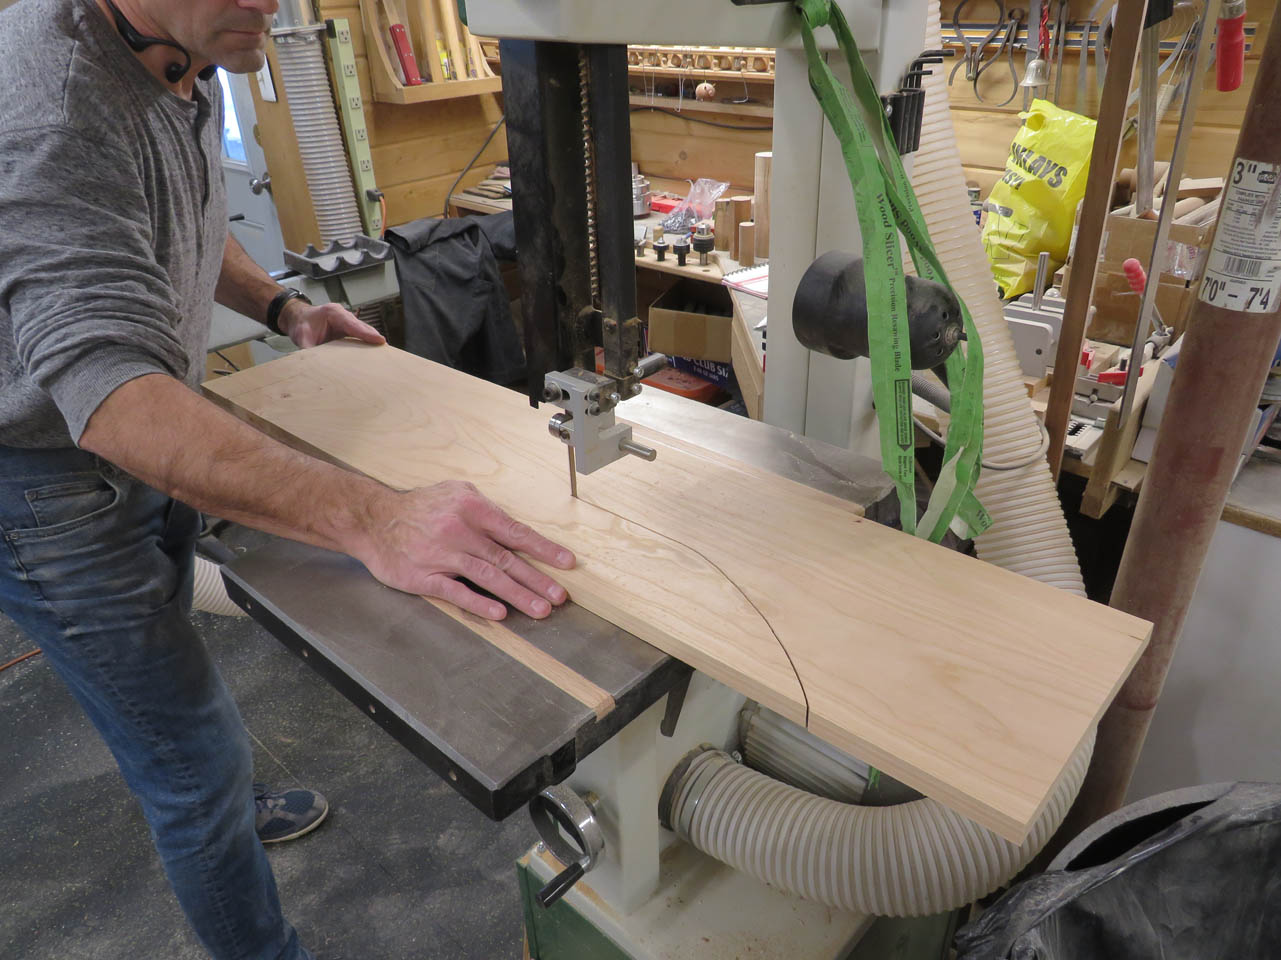

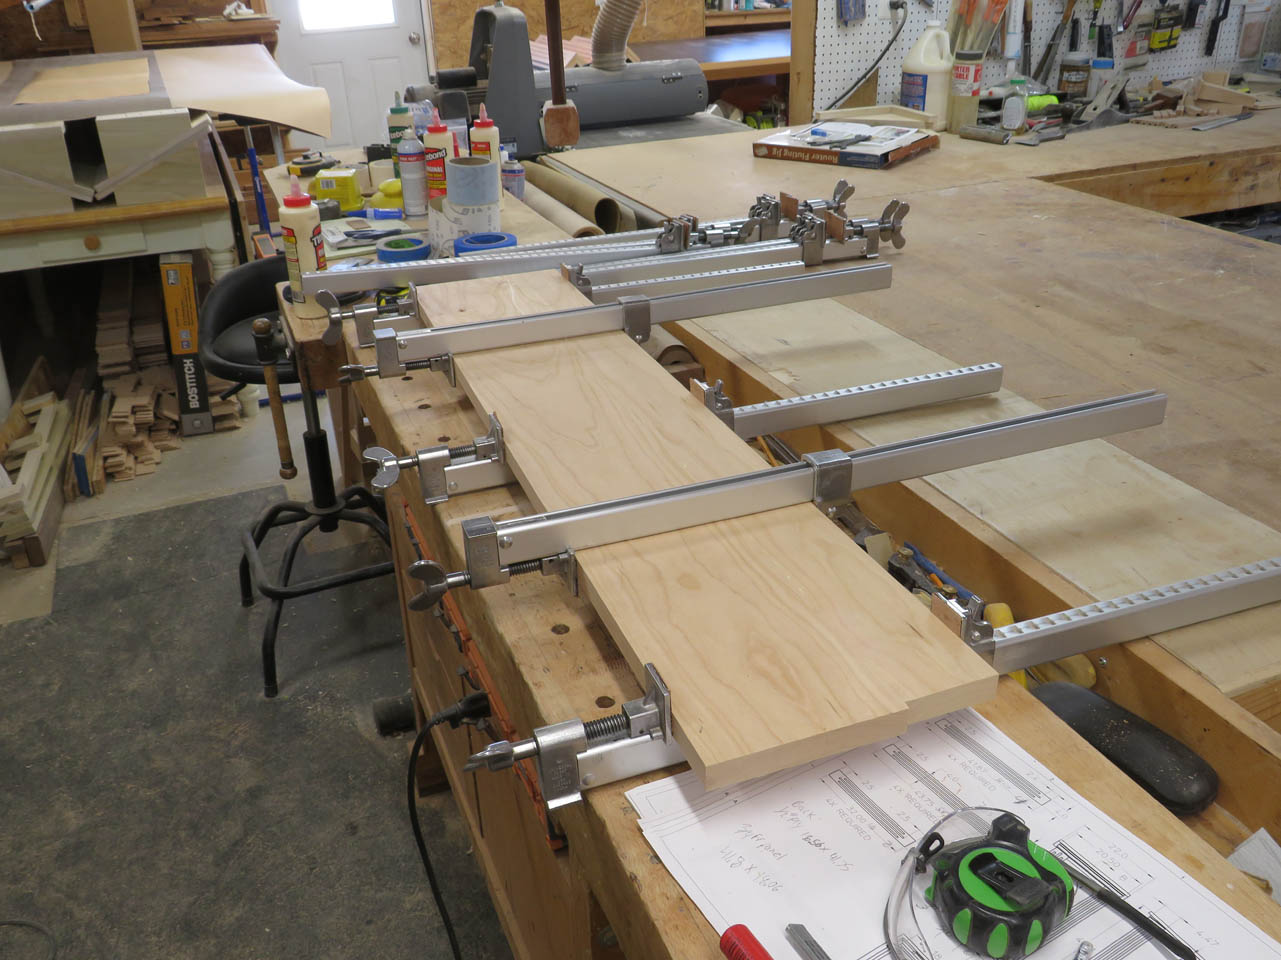
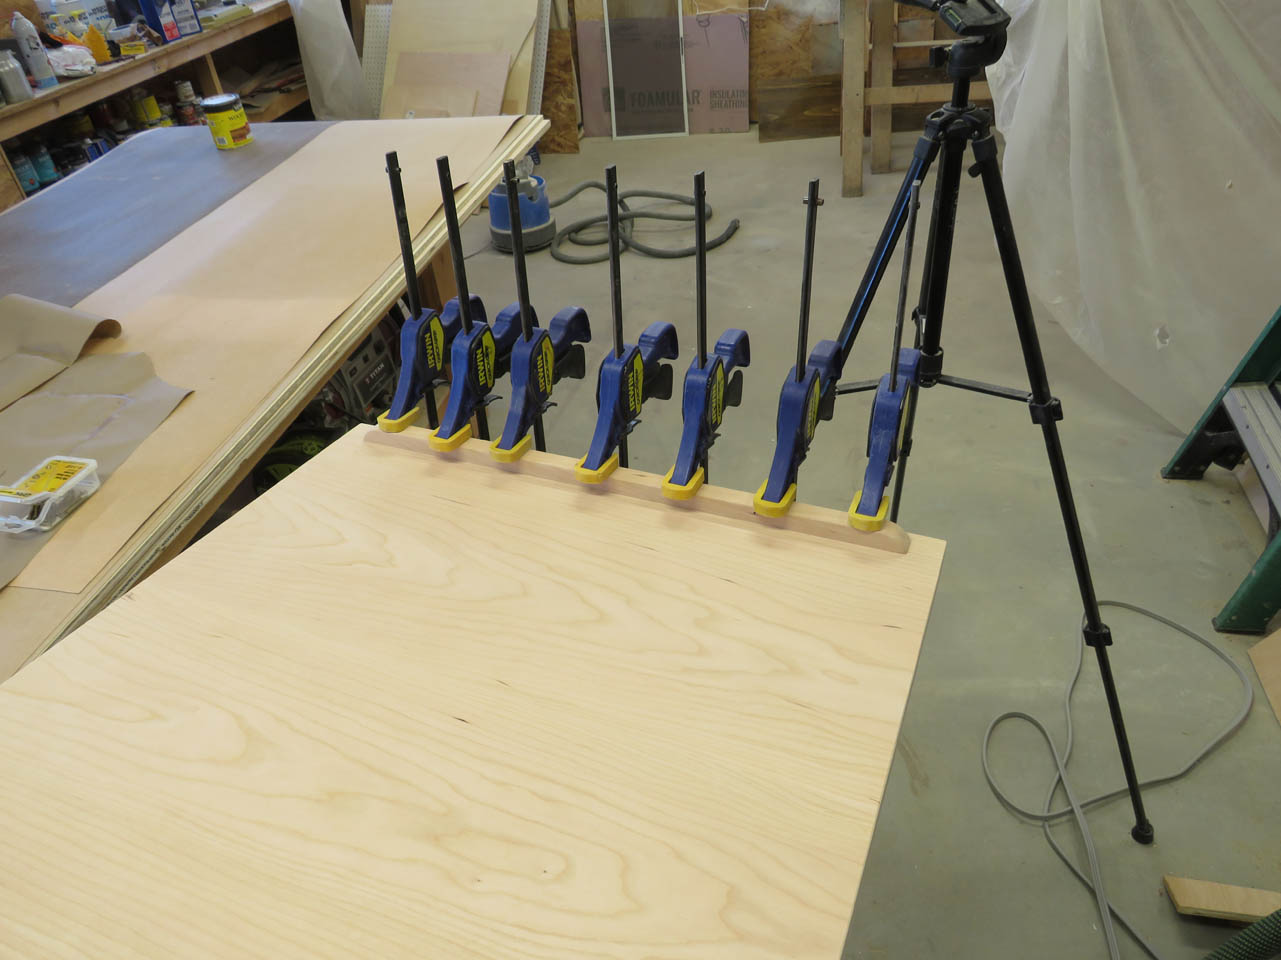
I use the spindle sander and my orbital sander to smooth out the cut edges. With both halves cut, I can glue the edges and clamp it together, creating the full front panel.
While that is drying, I can also clamp up boards to create the side panels for the ambo.
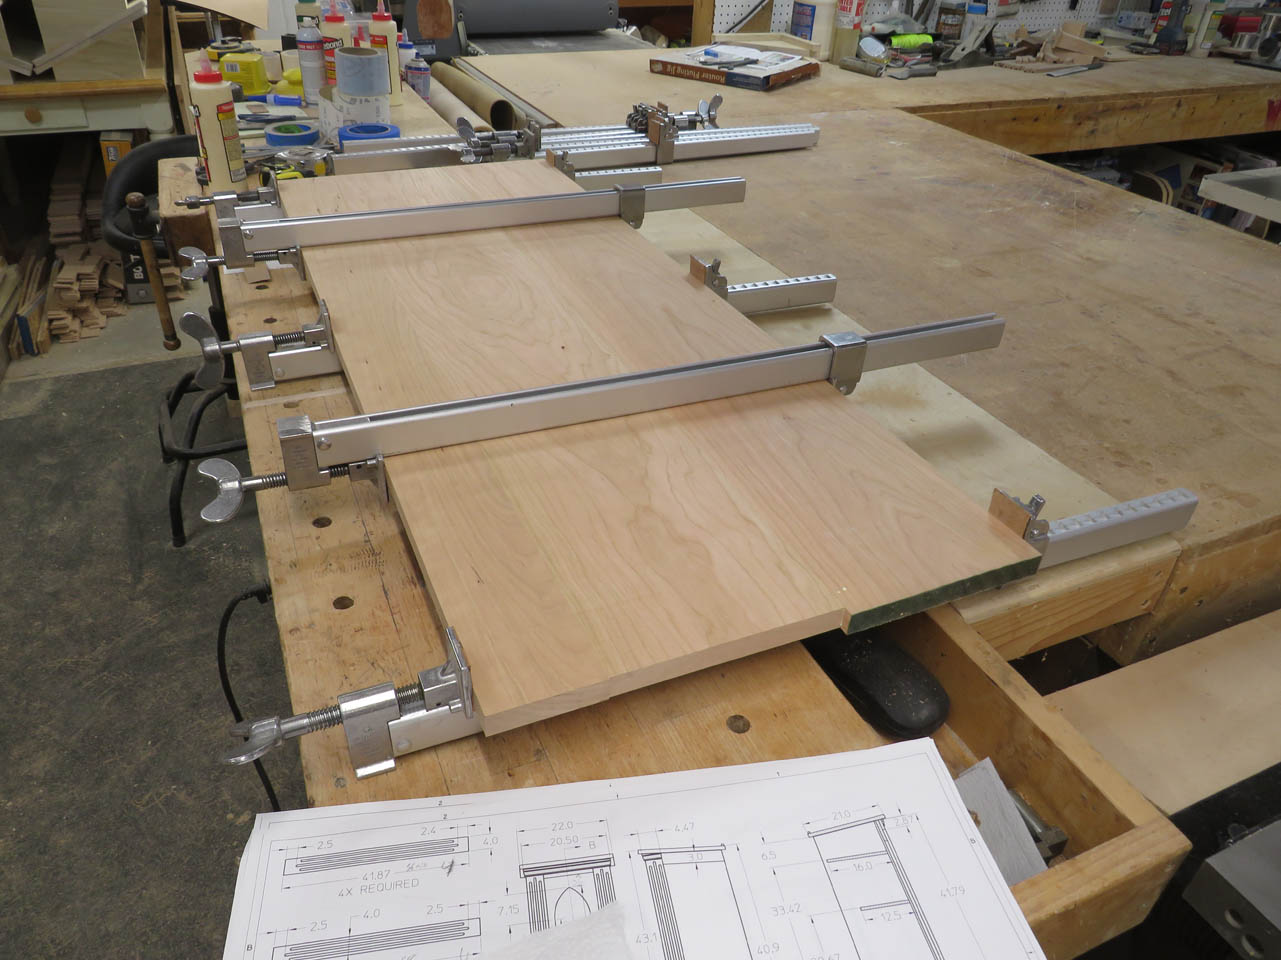
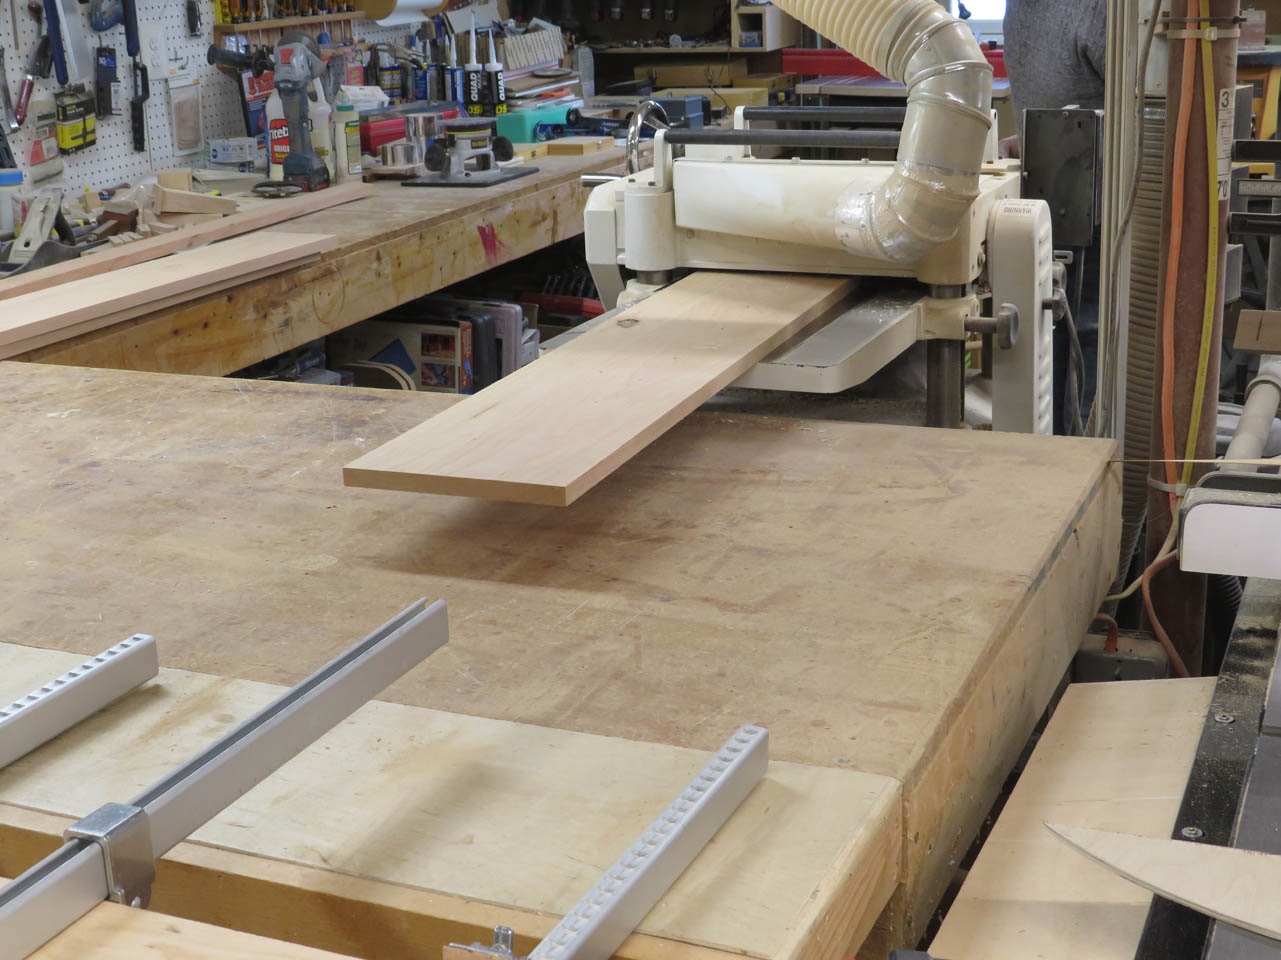
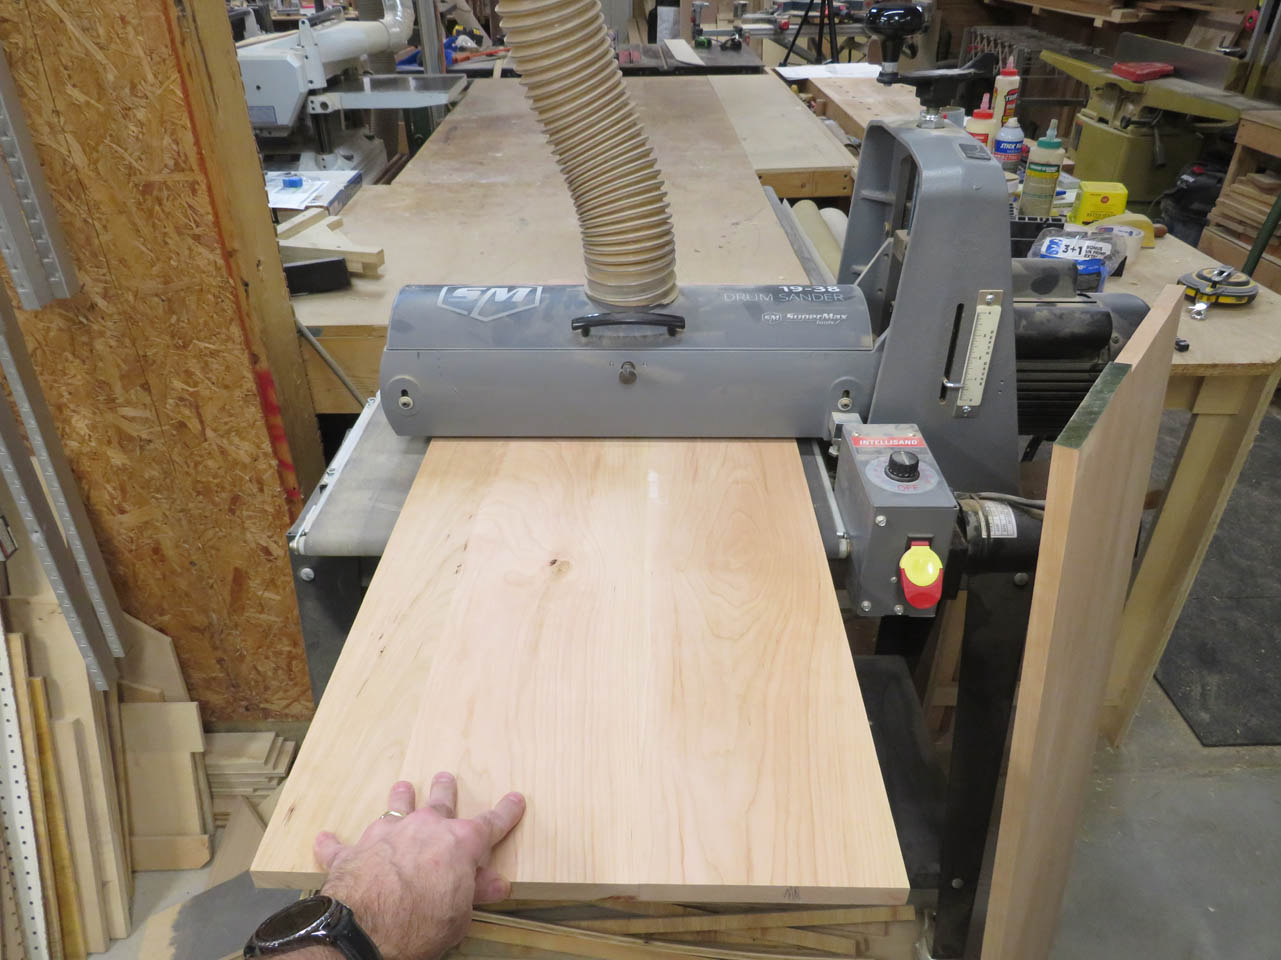
Since the side panels are now wider than my planer, I use my wide drum sander to smooth out the glue joint.
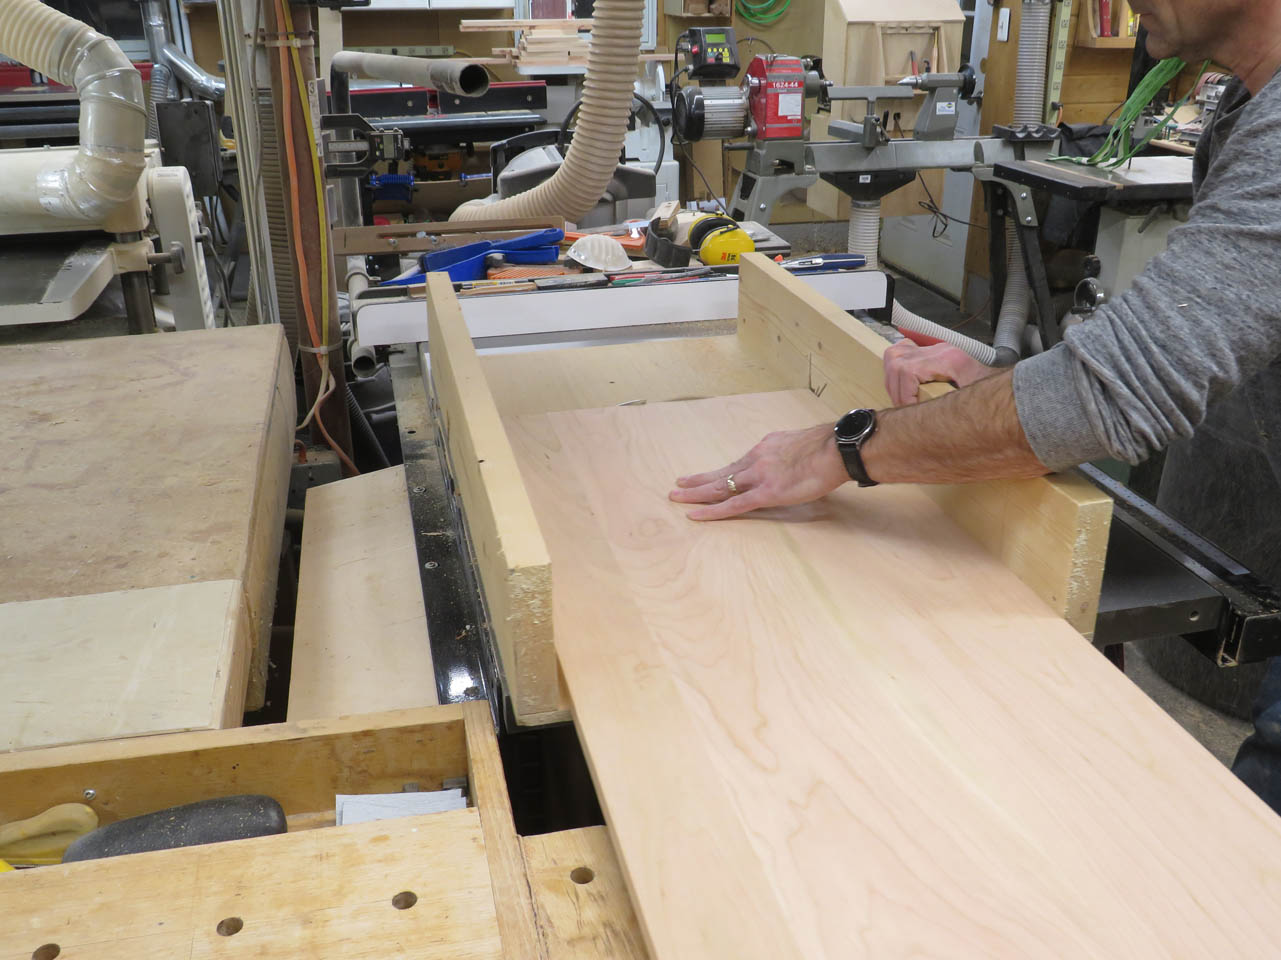
Each of the panels can have the 90° edges cut down on my table saw with a cross-cut sled.
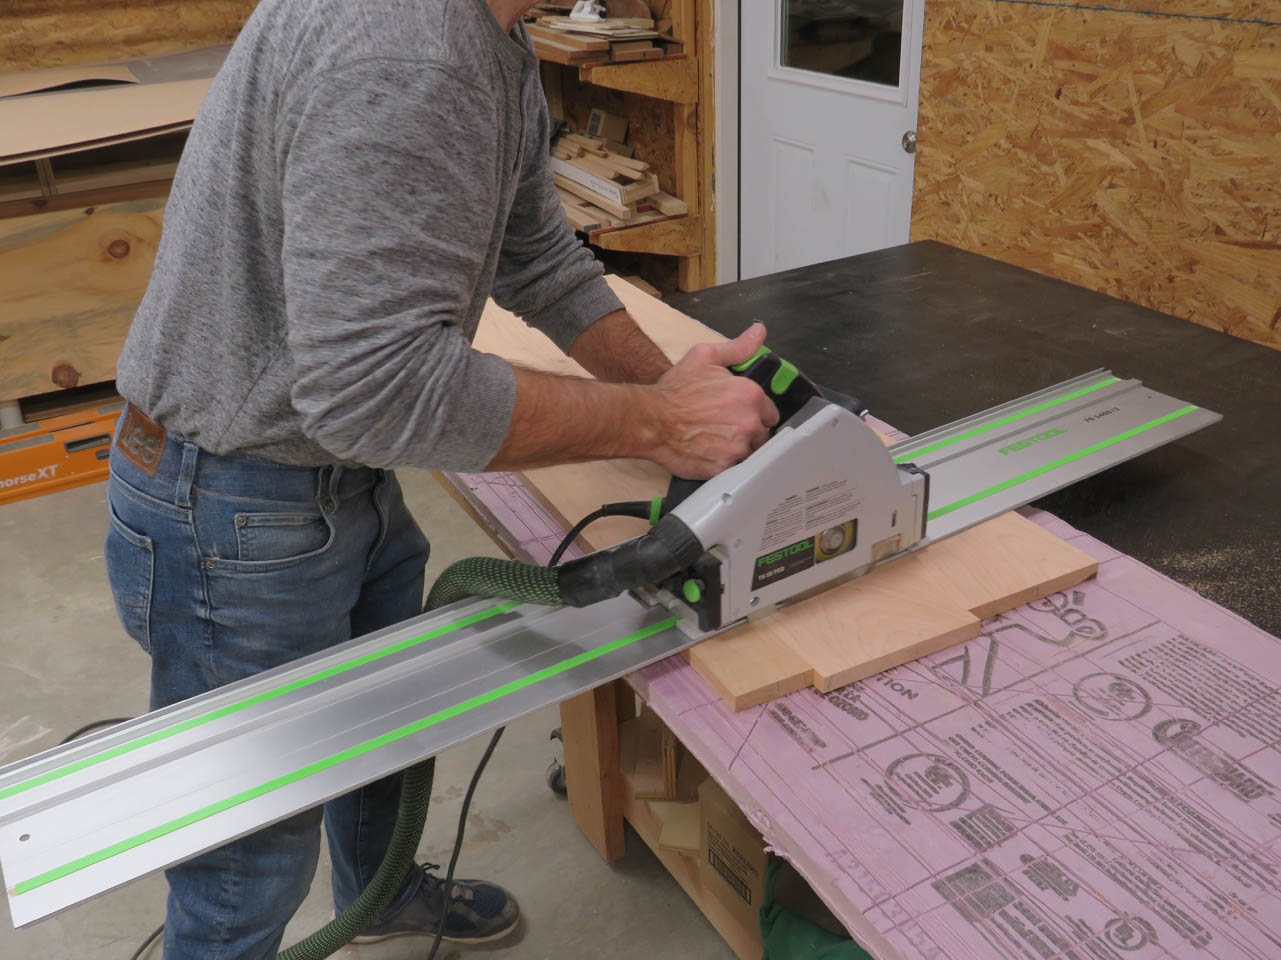
The 6° angle, on top of the sides, can be marked and cut with my track saw.
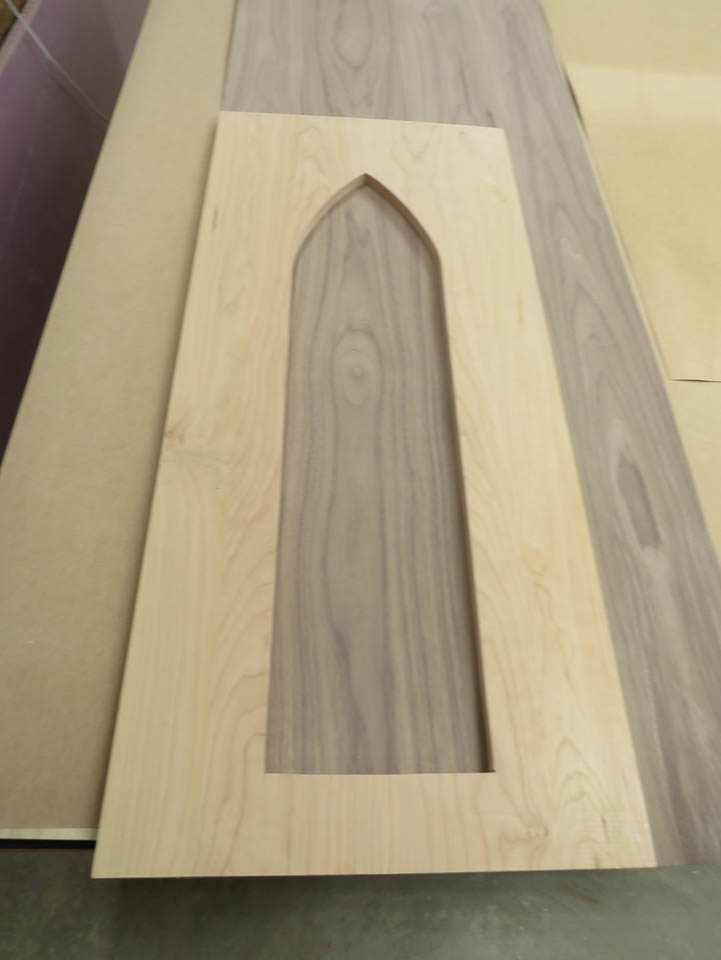
I think the center of my arches should be filled with walnut to match the tabernacle instead of more cherry. I purchased some walnut veneer for this. I laid the front panel on the veneer to see how well it would contrast.

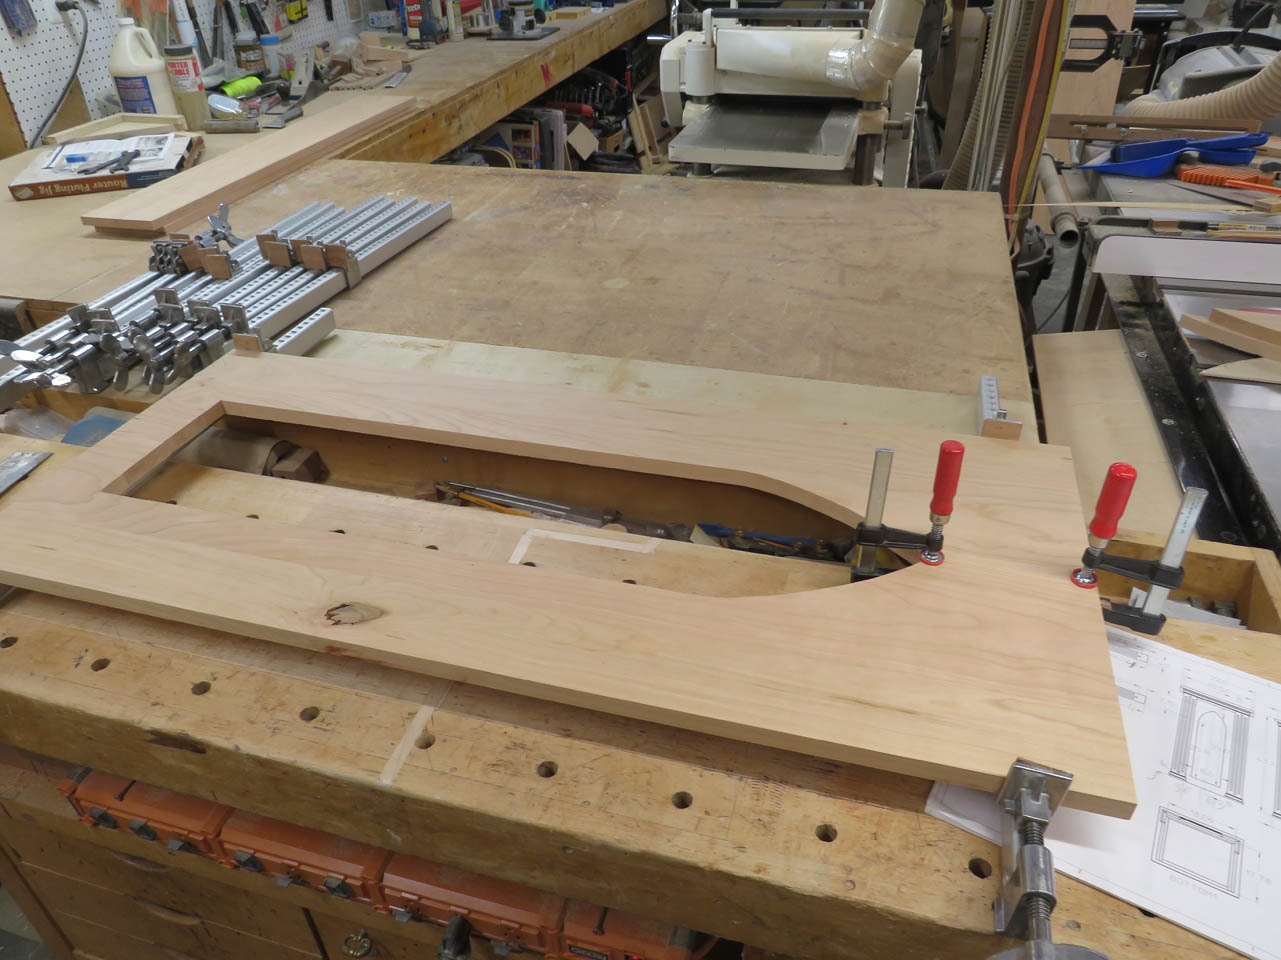
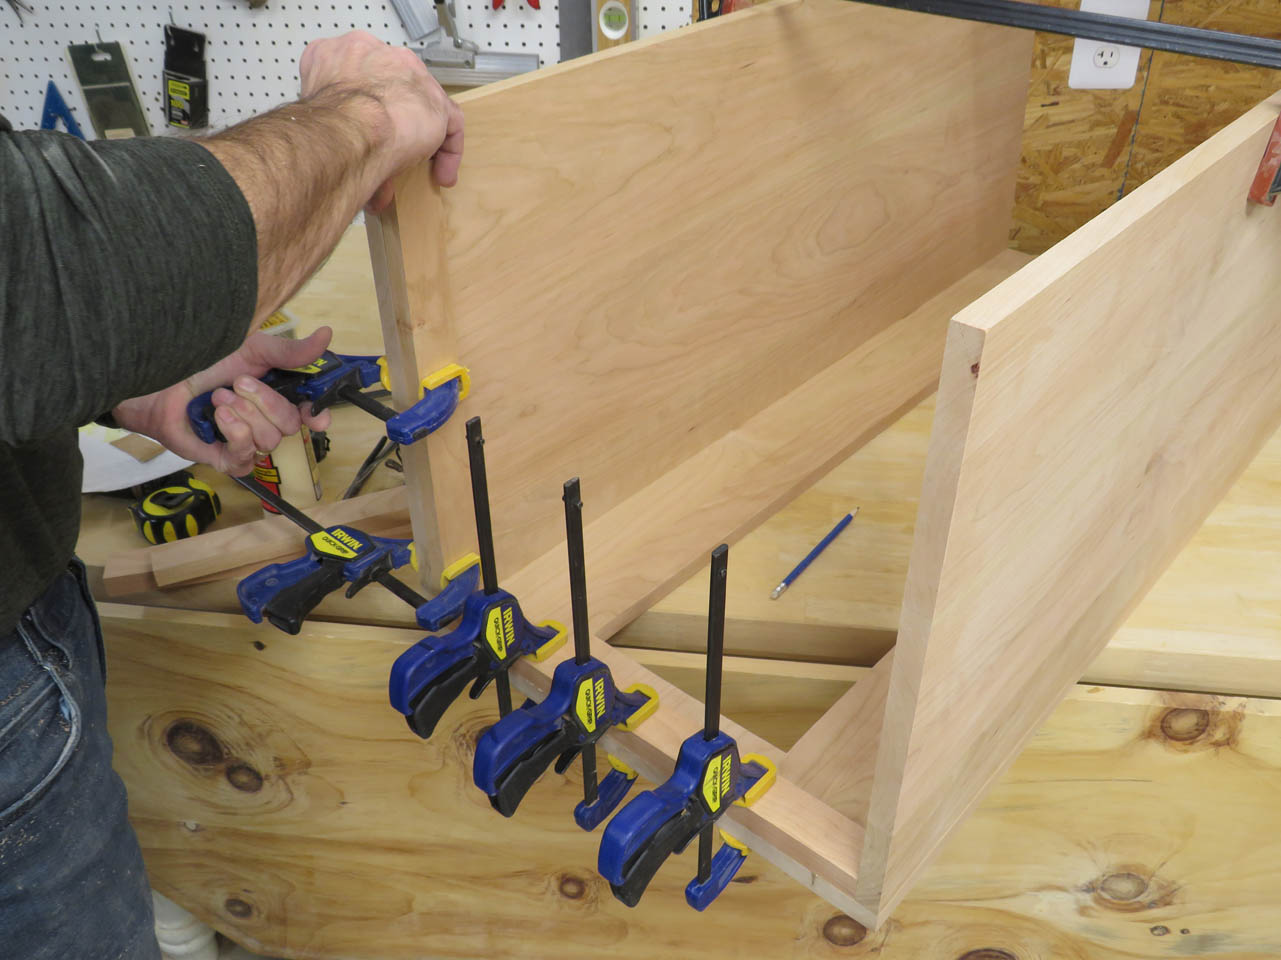
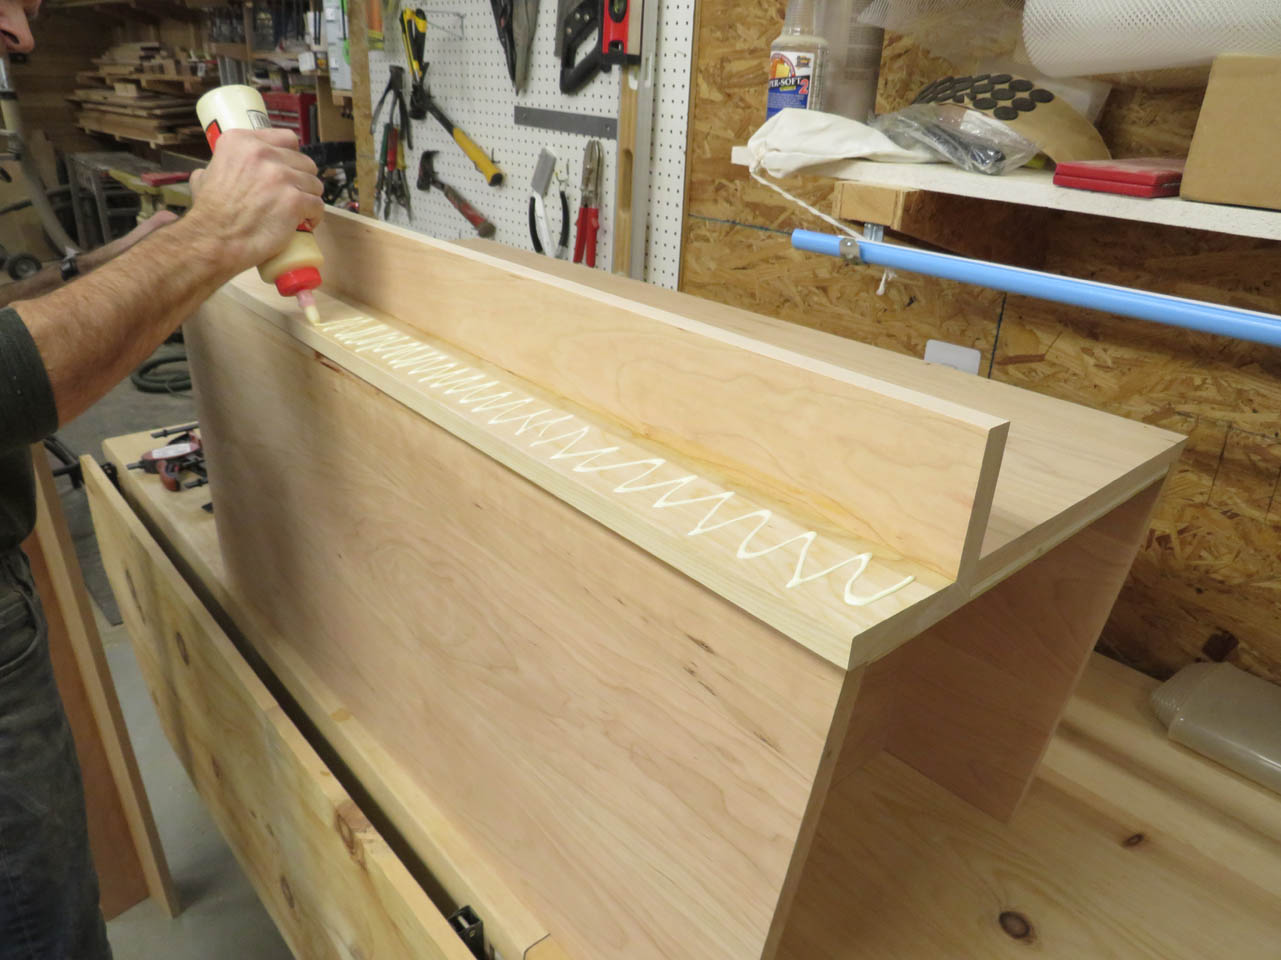
To attach the sides to the front panel, I applied glue to the long edges of the sides and clamped them to the front panels.

This will be strong enough, but for additional reinforcement, I added some trim screws along the front. These will be covered up later with the fluted columns.
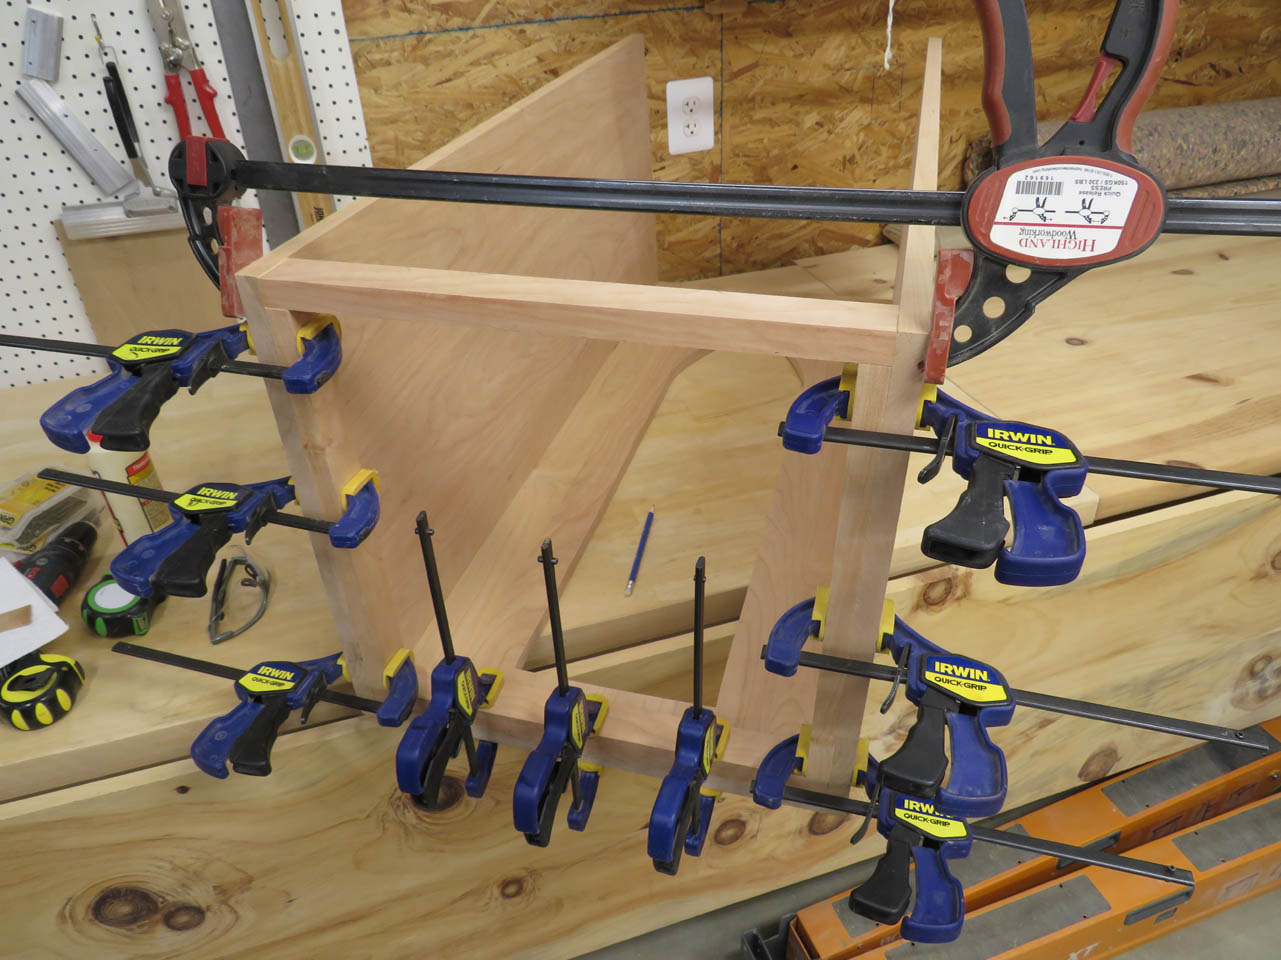
To keep everything square, I built a rectangular frame around the bottom and glued it in place for the bottom panel to sit on.
Which reminds me, while that is drying, I can create panels for the shelves and bottom panel. These will be planed and cut to size when they dry as well.

I do a lot of bouncing back and forth while things are drying. I hope it doesn’t get too confusing…
When I pulled the clamps from the main body, I measured and cut a piece of 1/2″ plywood to be the backer panel behind the arch. I traced out the arch location so I knew where to apply the veneer.
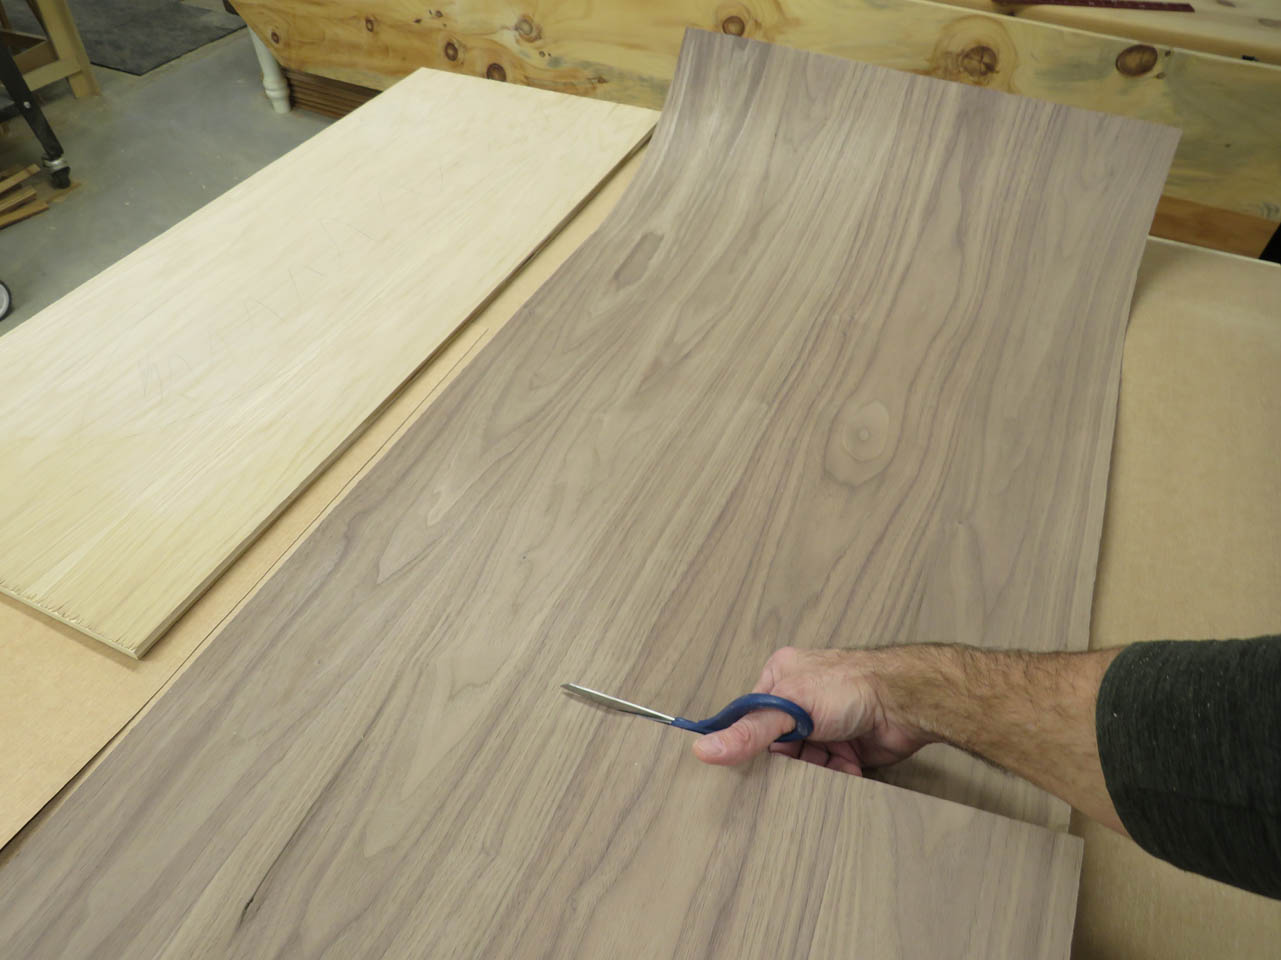
Then I cut a piece of paper-backed veneer a few inches over-size.
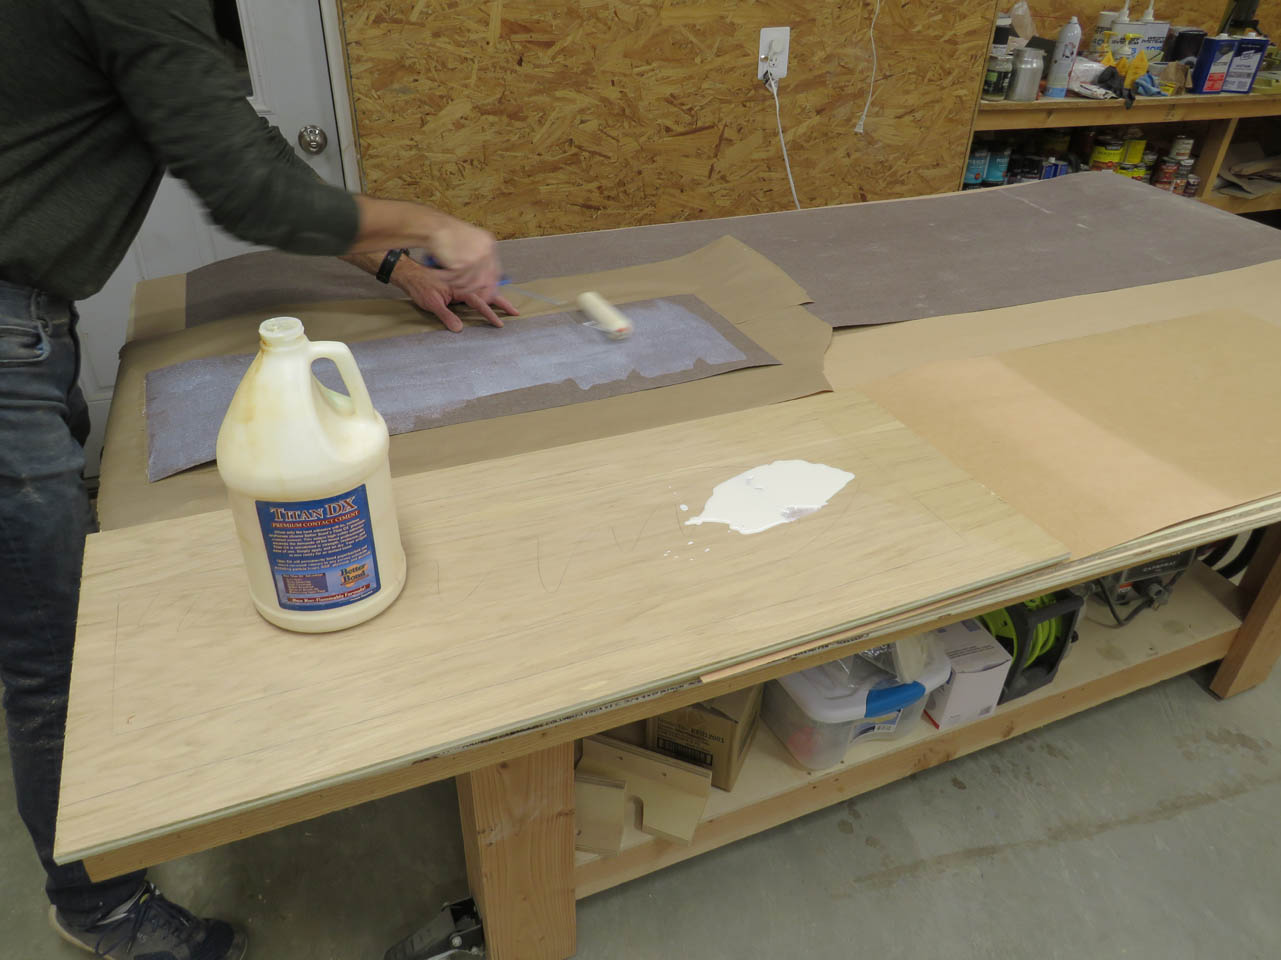
I use a roller to apply a water-based contact adhesive to the back of the veneer as well as the front of the plywood.

After waiting about 15 minutes for both to dry, I can then carefully apply the veneer and press it evenly in place with a scraper.
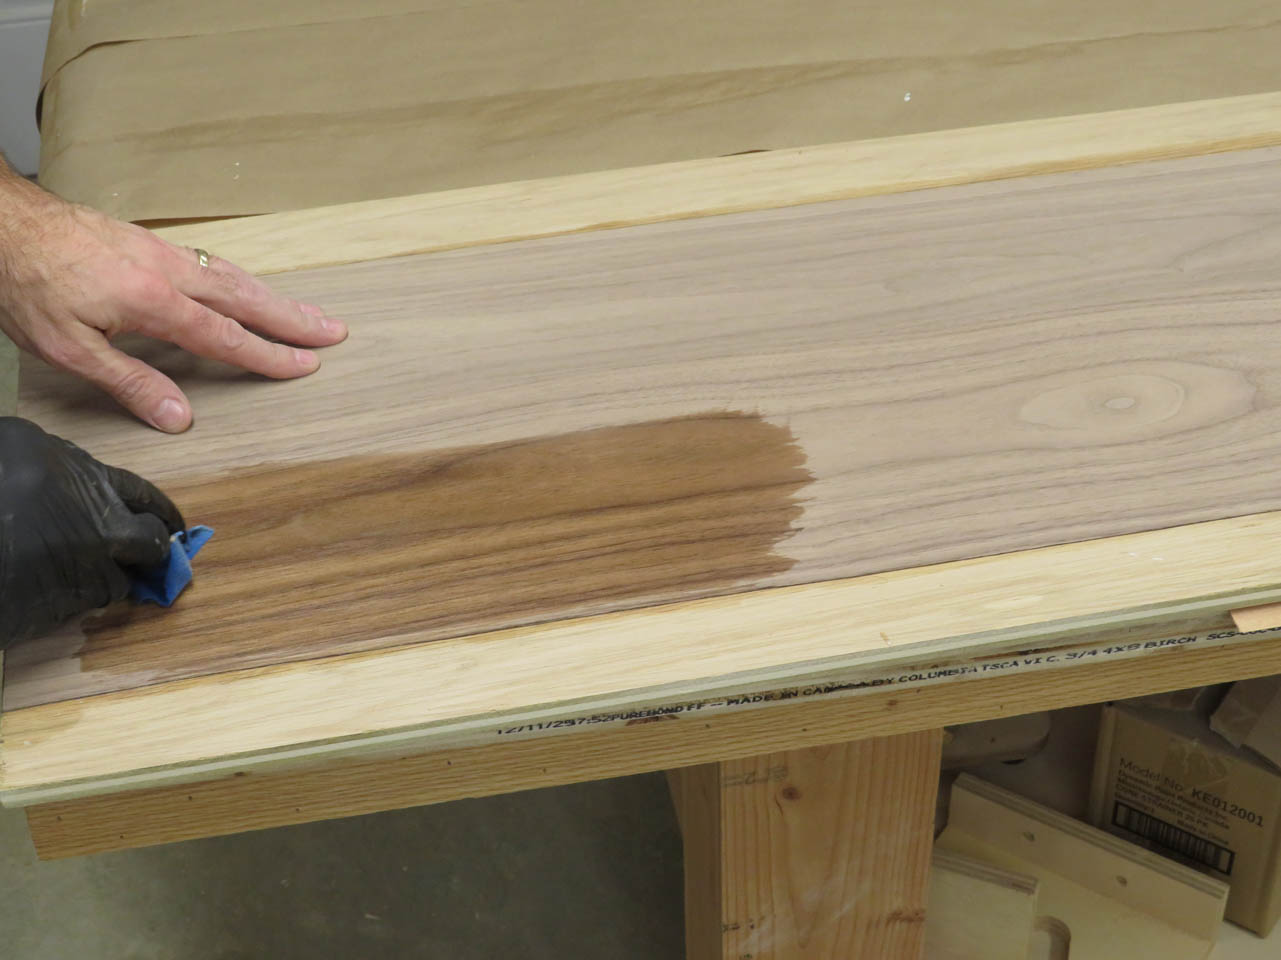
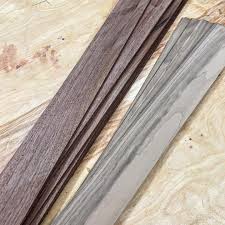
A little lesson on walnut. My favorite type of walnut to work with is air-dried walnut. It is beautiful with tones of greens and purples mixed in with the deep chocolate brown of the heartwood and the white of the sap wood. Most of the furniture industry prefers kiln-dried and steamed walnut because the steaming process evens out the color to be lighter but all the same tone. I find it to be flat and boring. The tabernacle I built for the Sisters was a rich brown because it was air-dried but the veneer is steamed and flat colored. I applied some Naphtha to the veneer in the picture above to see what it would look like when finished with a clear coat. It was very light and lifeless. Below is a picture contrasting some air-dried vs. steamed veneers. You can really see the difference.
To bring the veneer back to life, I am applying an “English Chestnut” stain to bring out some of the reds and browns. This will more closely match the tabernacle when finished.
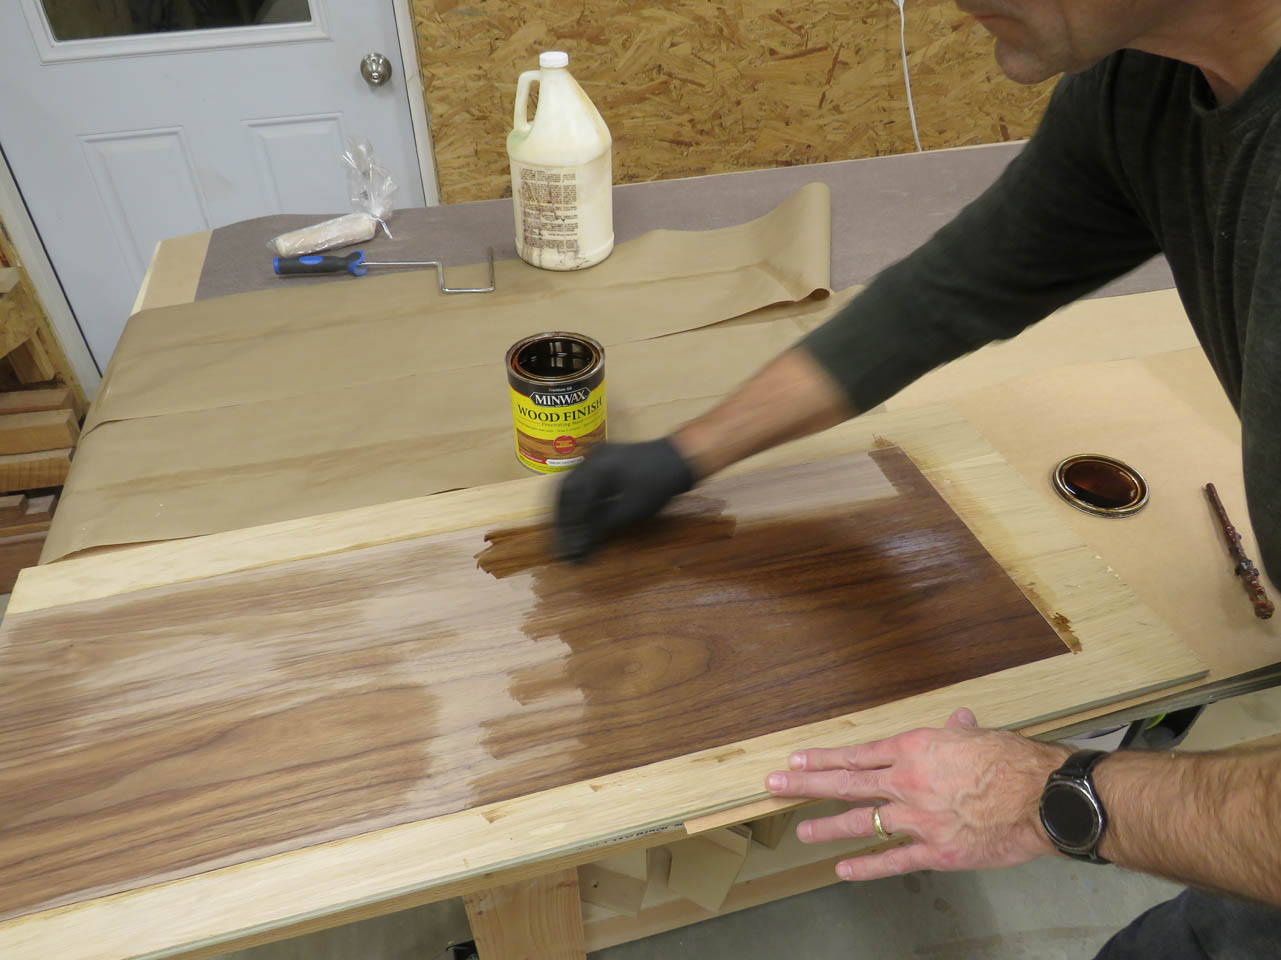
I also flipped over the plywood panel and applied a cherry stain to the back to more closely match the cherry color. This part will be inside the ambo and will be mostly out of site, but it doesn’t hurt for it to blend in better.

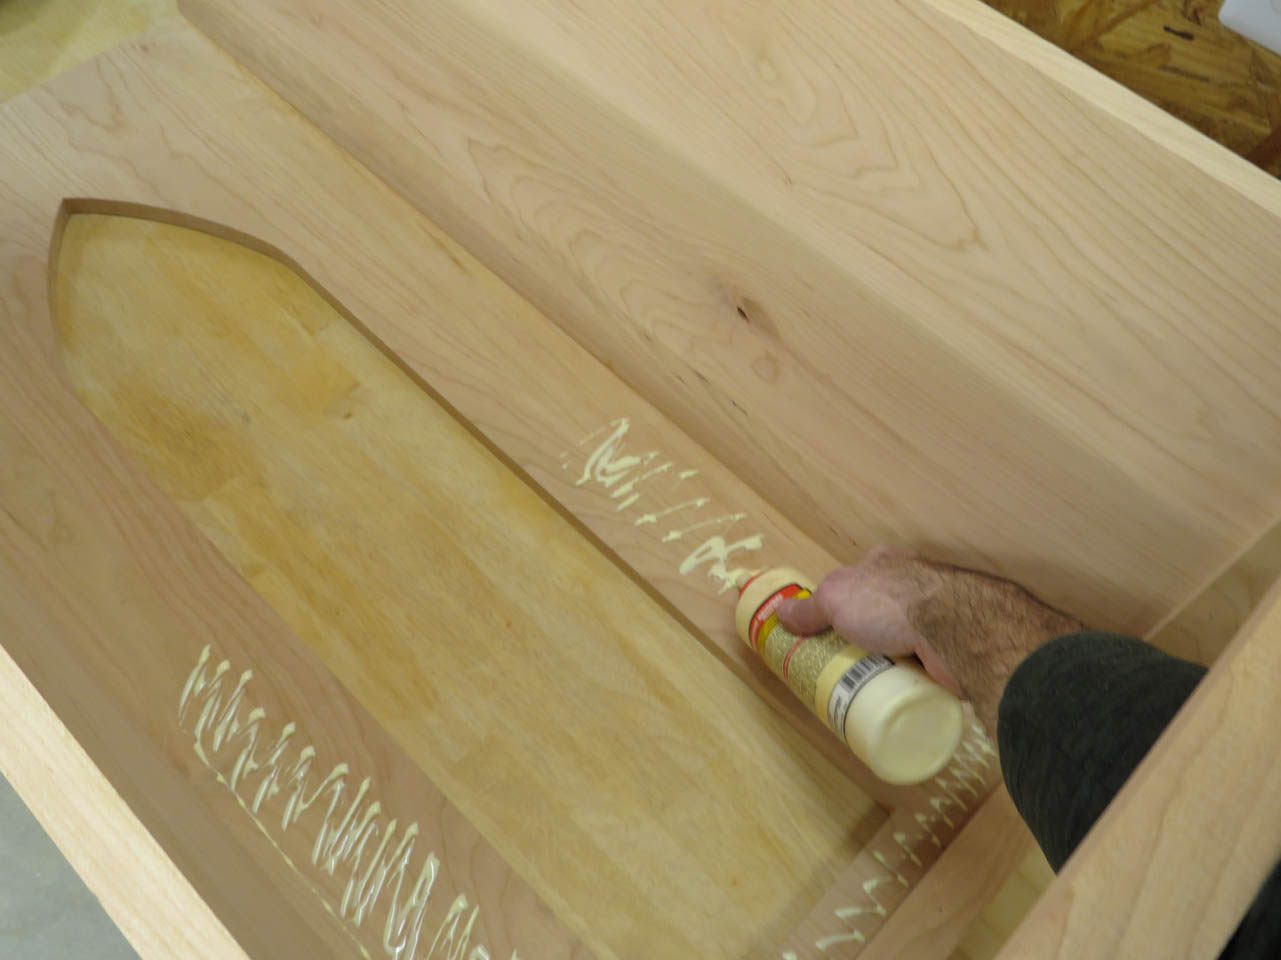
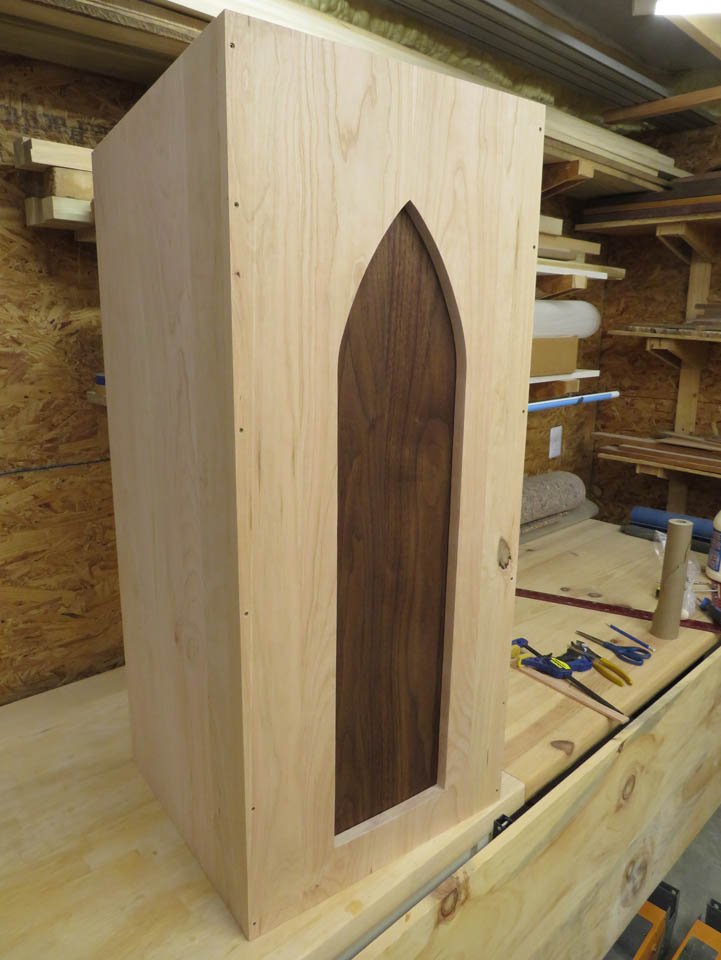
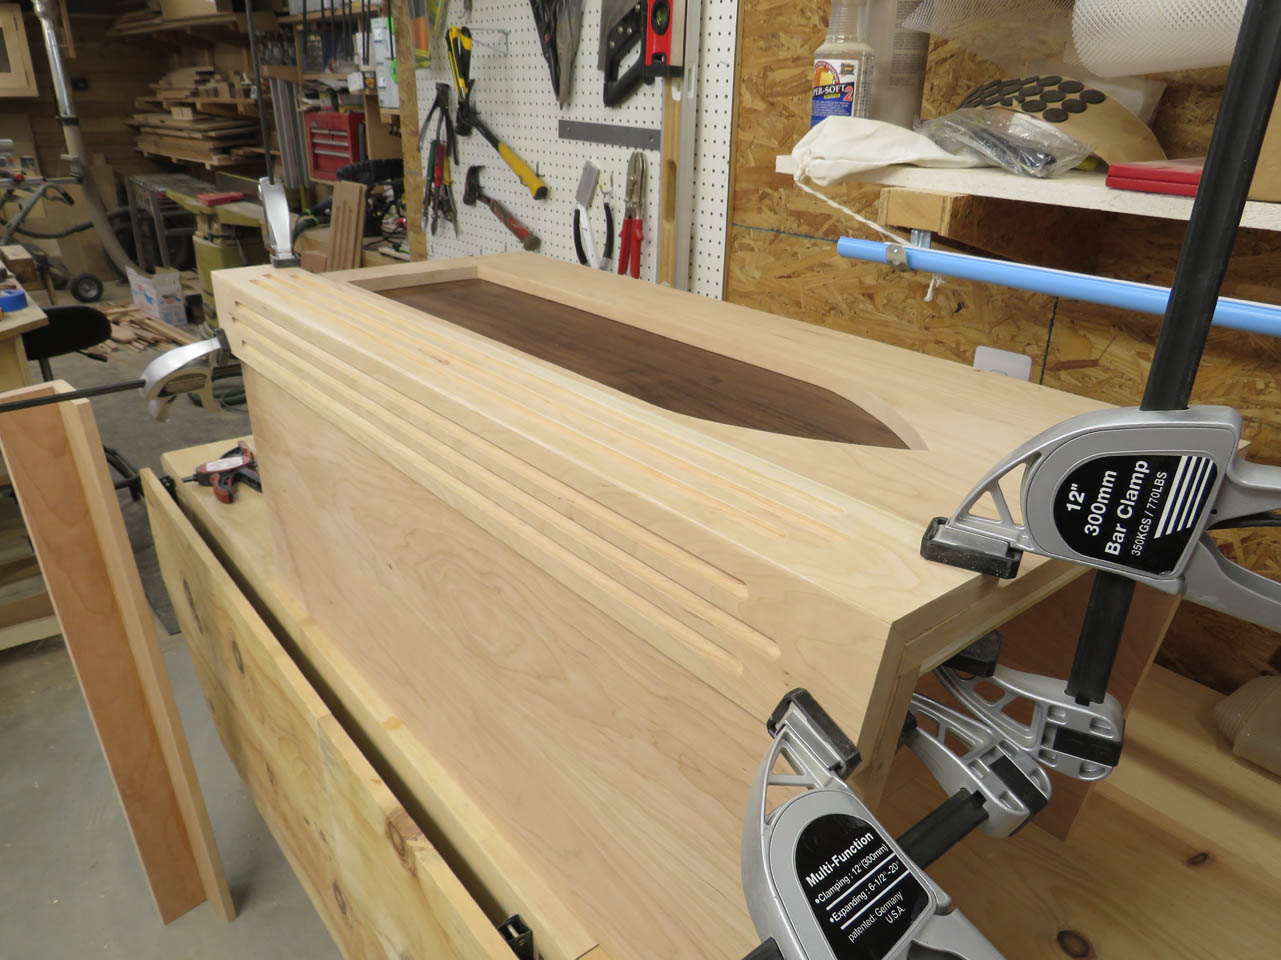
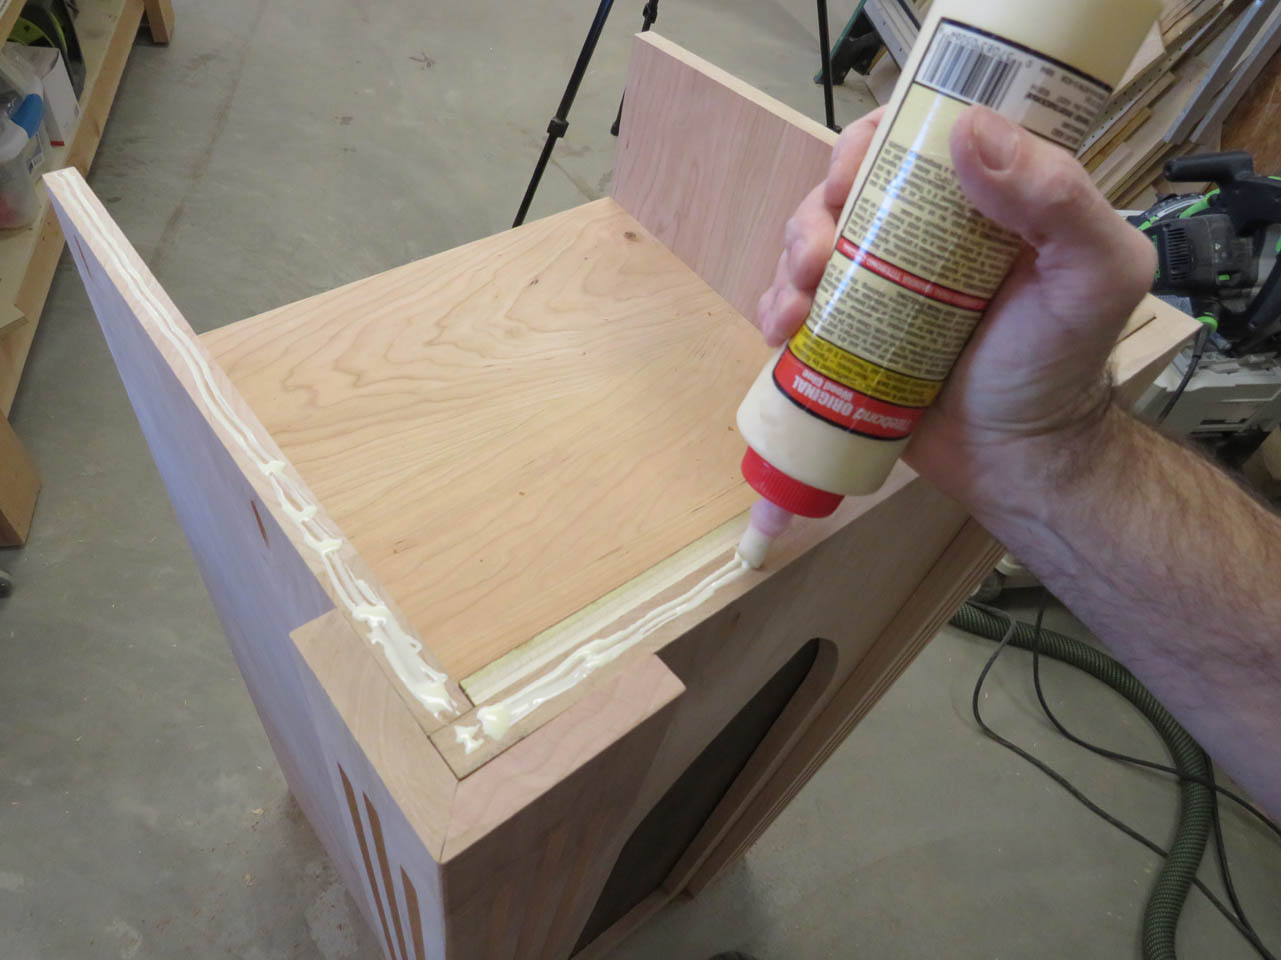
I applied glue to the inside of the front panel on the ambo, then installed the plywood with some brad nails.

I think it has a nice contrast. Finish will darken the cherry and it will continue to deepen in color over time.
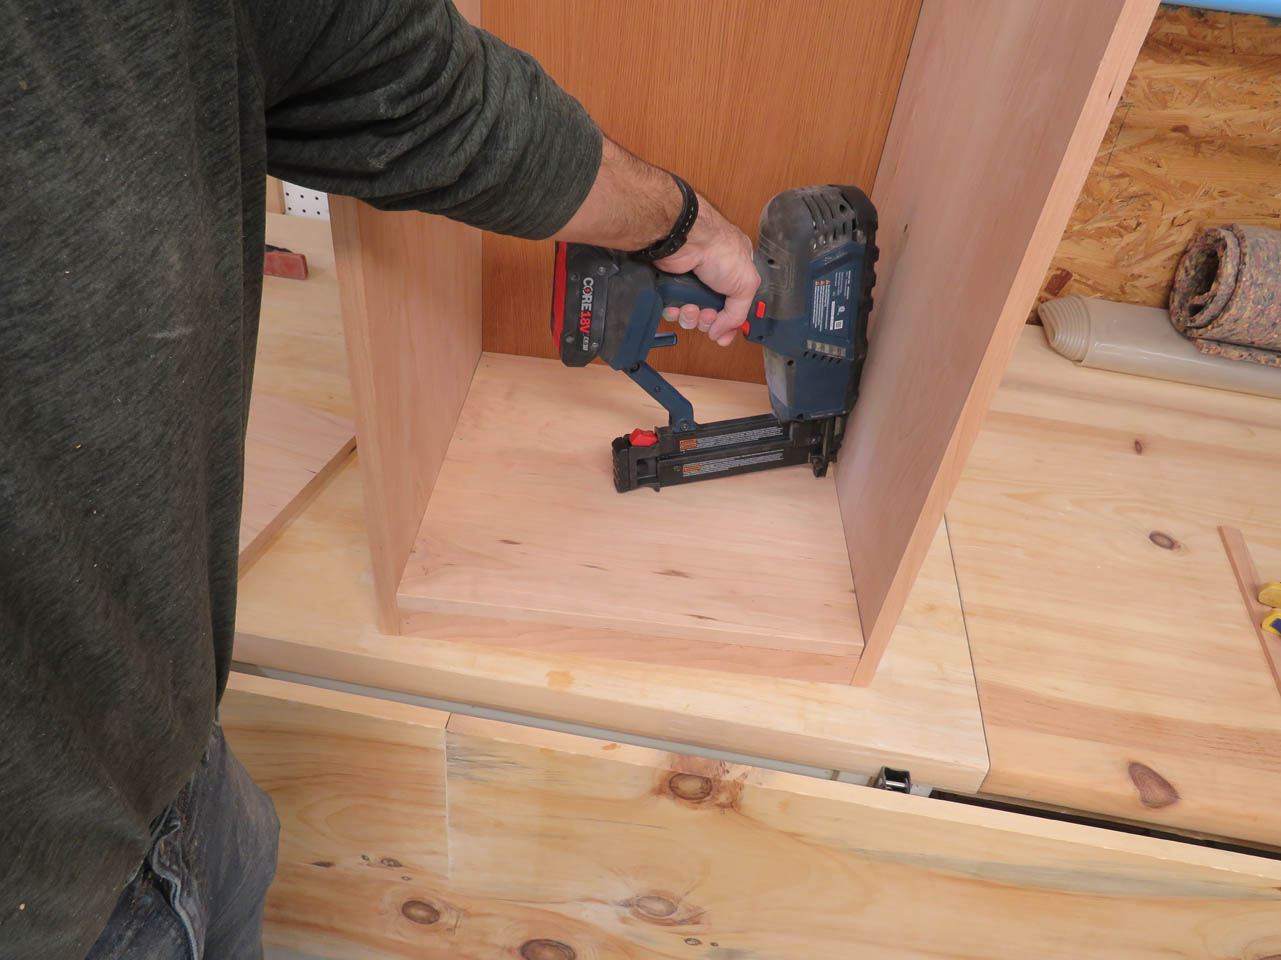
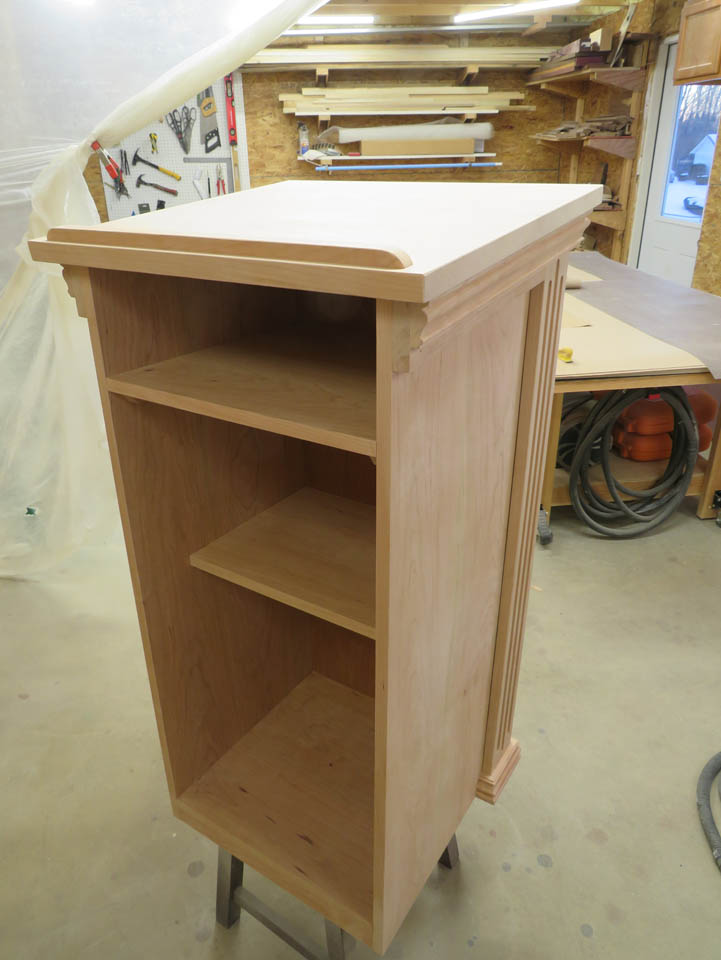
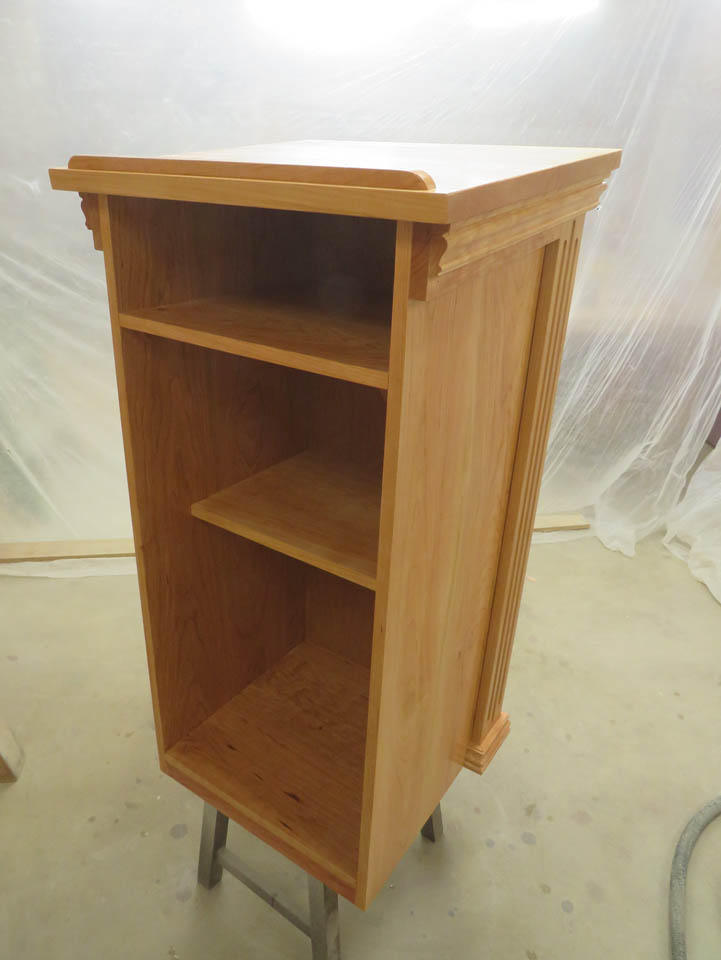
Now I can install the bottom plate and the shelf brackets.
I used a couple of sticks to set the height exactly the same on each side and attached the shelf brackets with screws so the shelves could be removed if necessar.
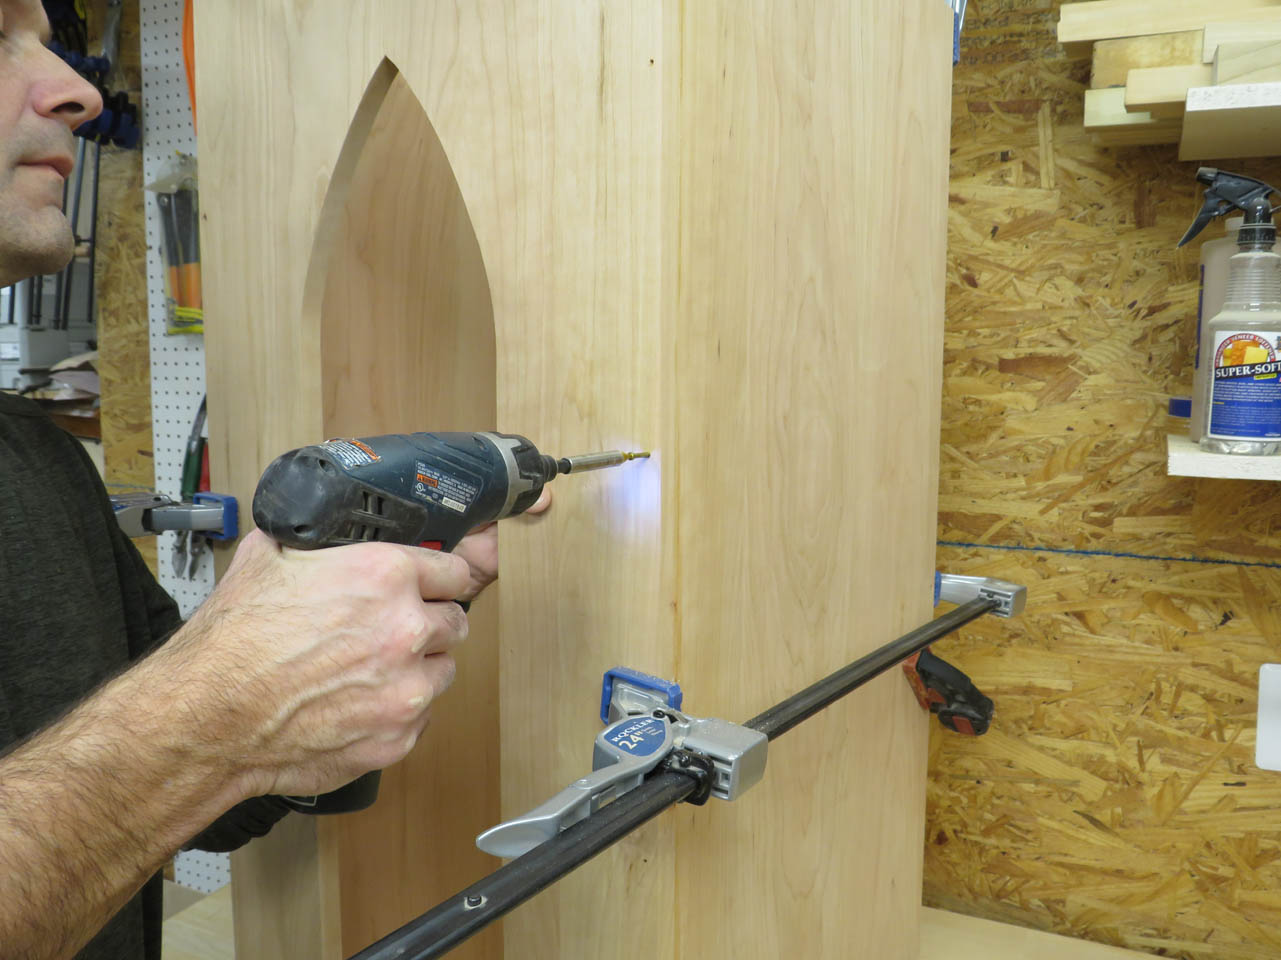
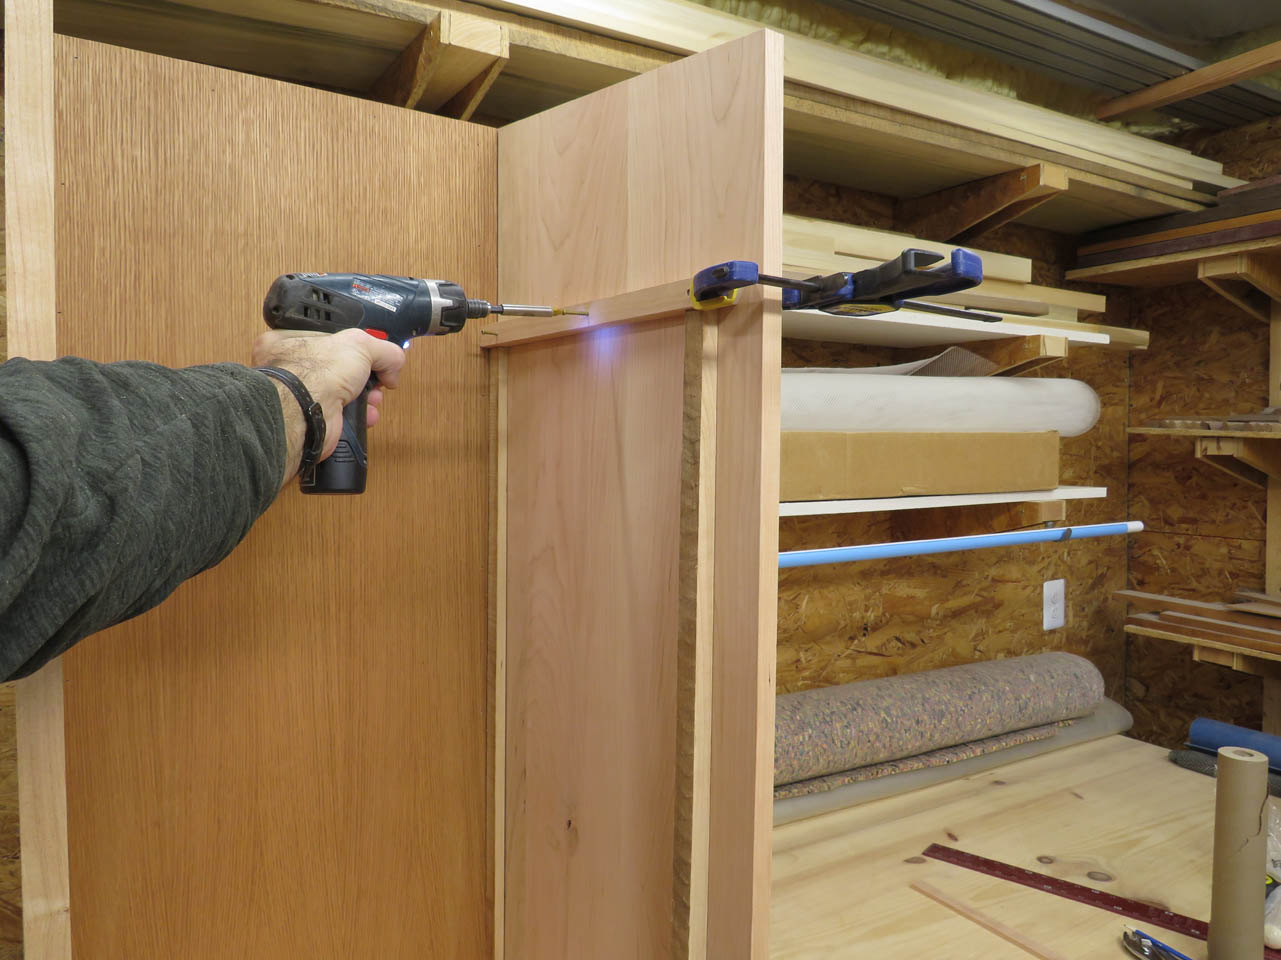
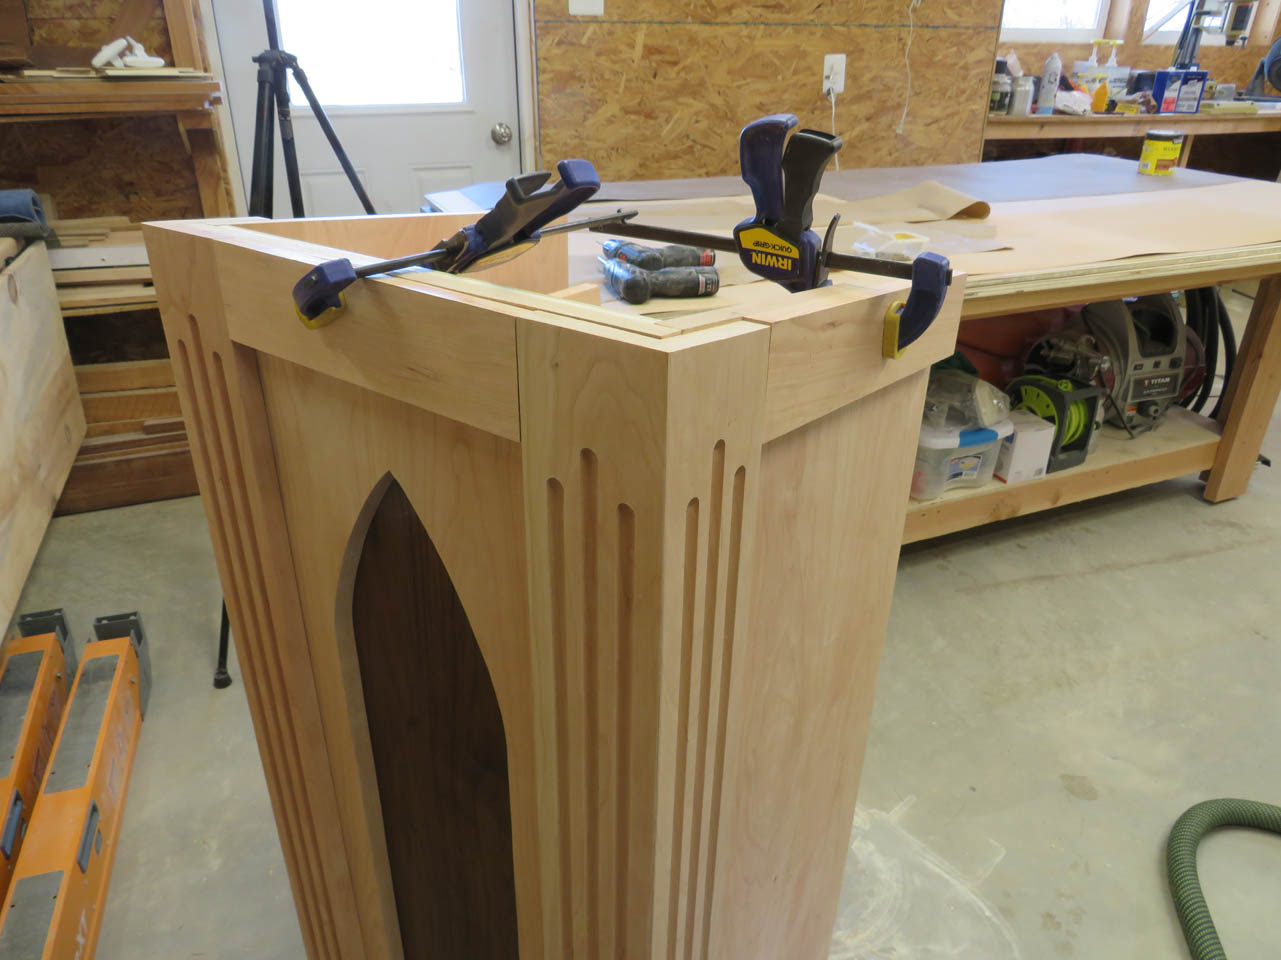
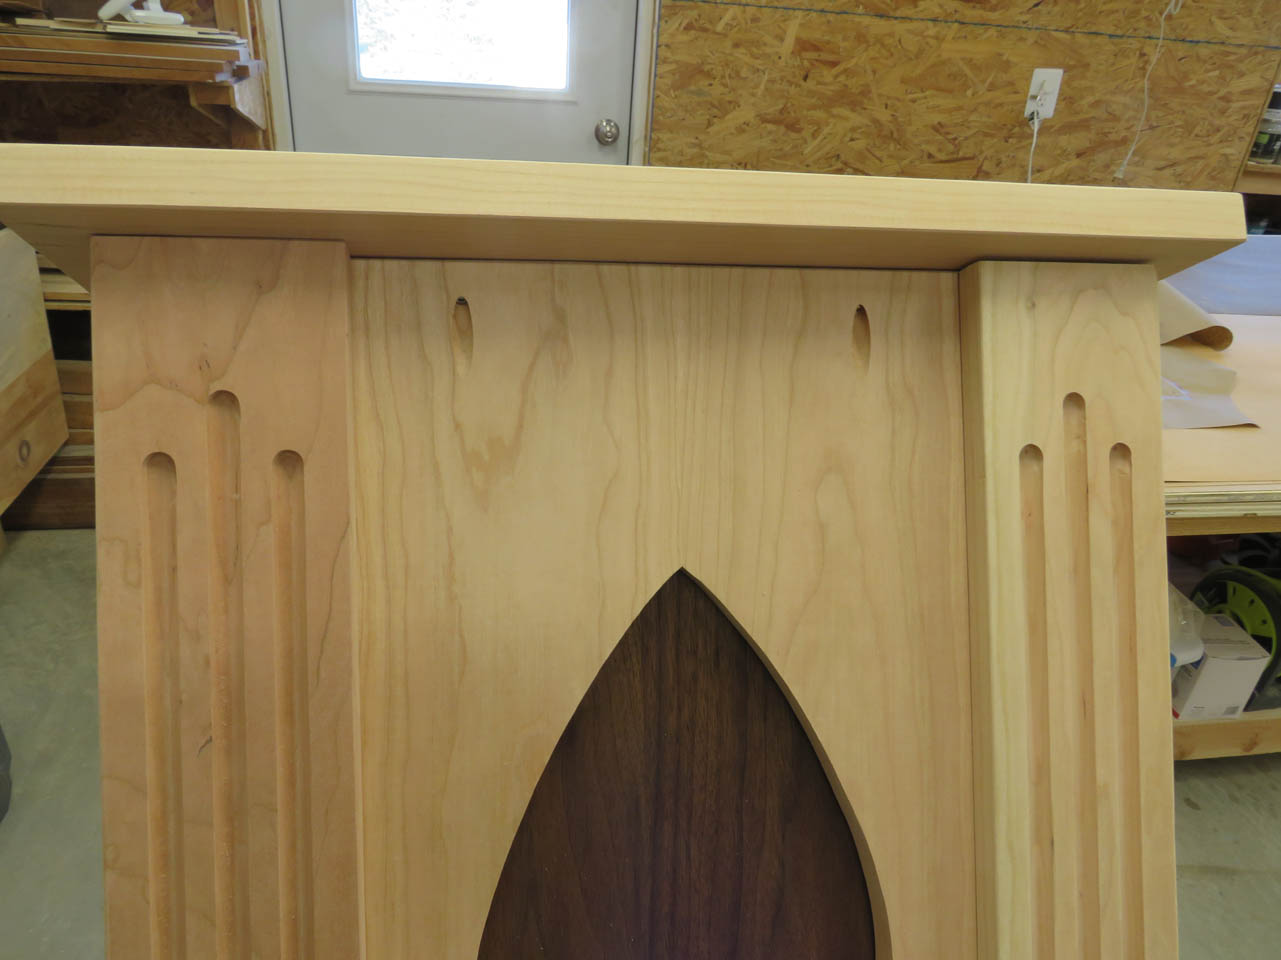
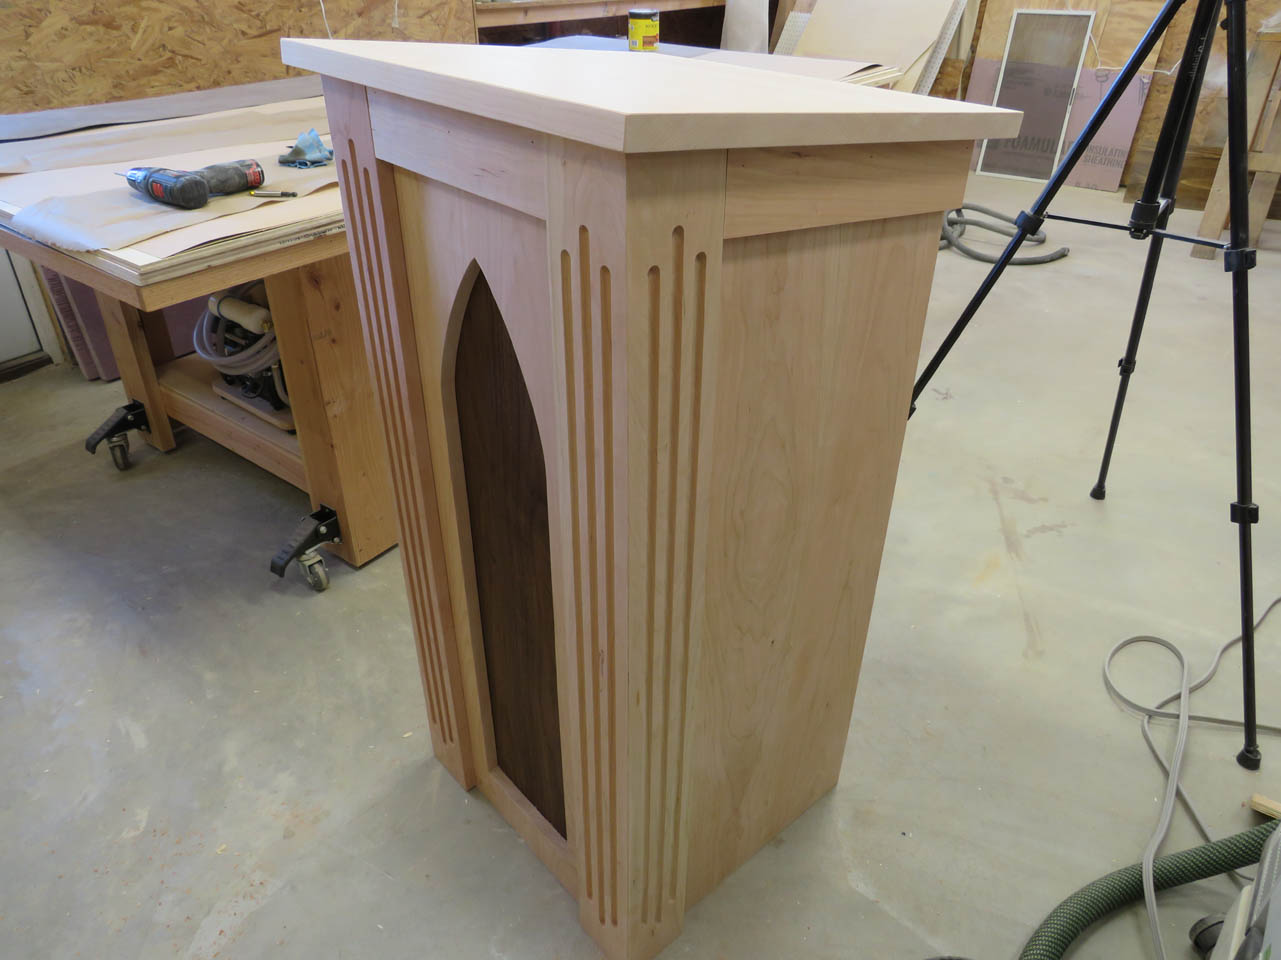
After the shelves were installed, It was time to apply glue to the fluted column corners.
These were clamped in place. After the second corner was attached, I clamped across the middle as well.
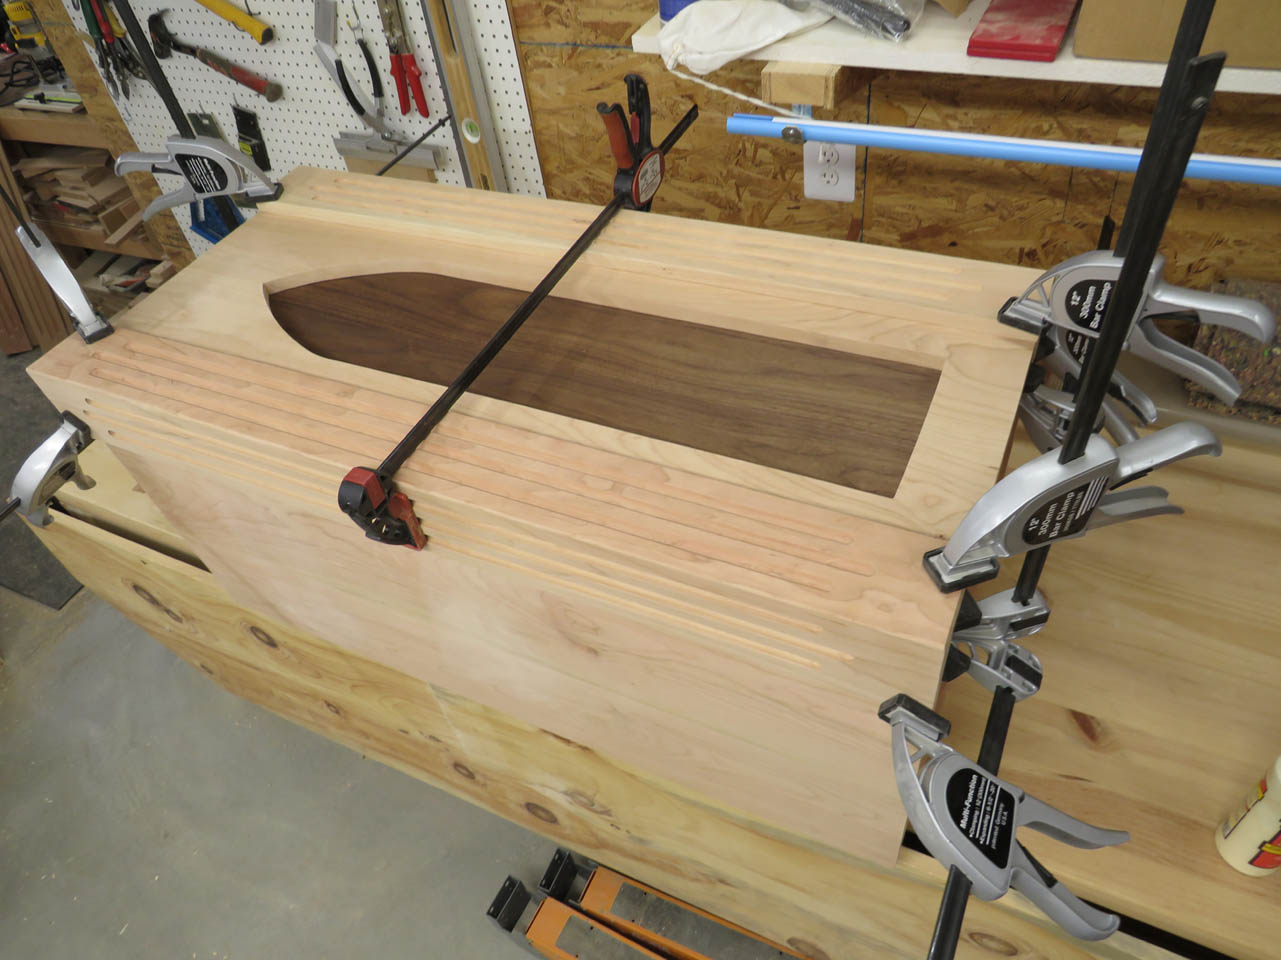
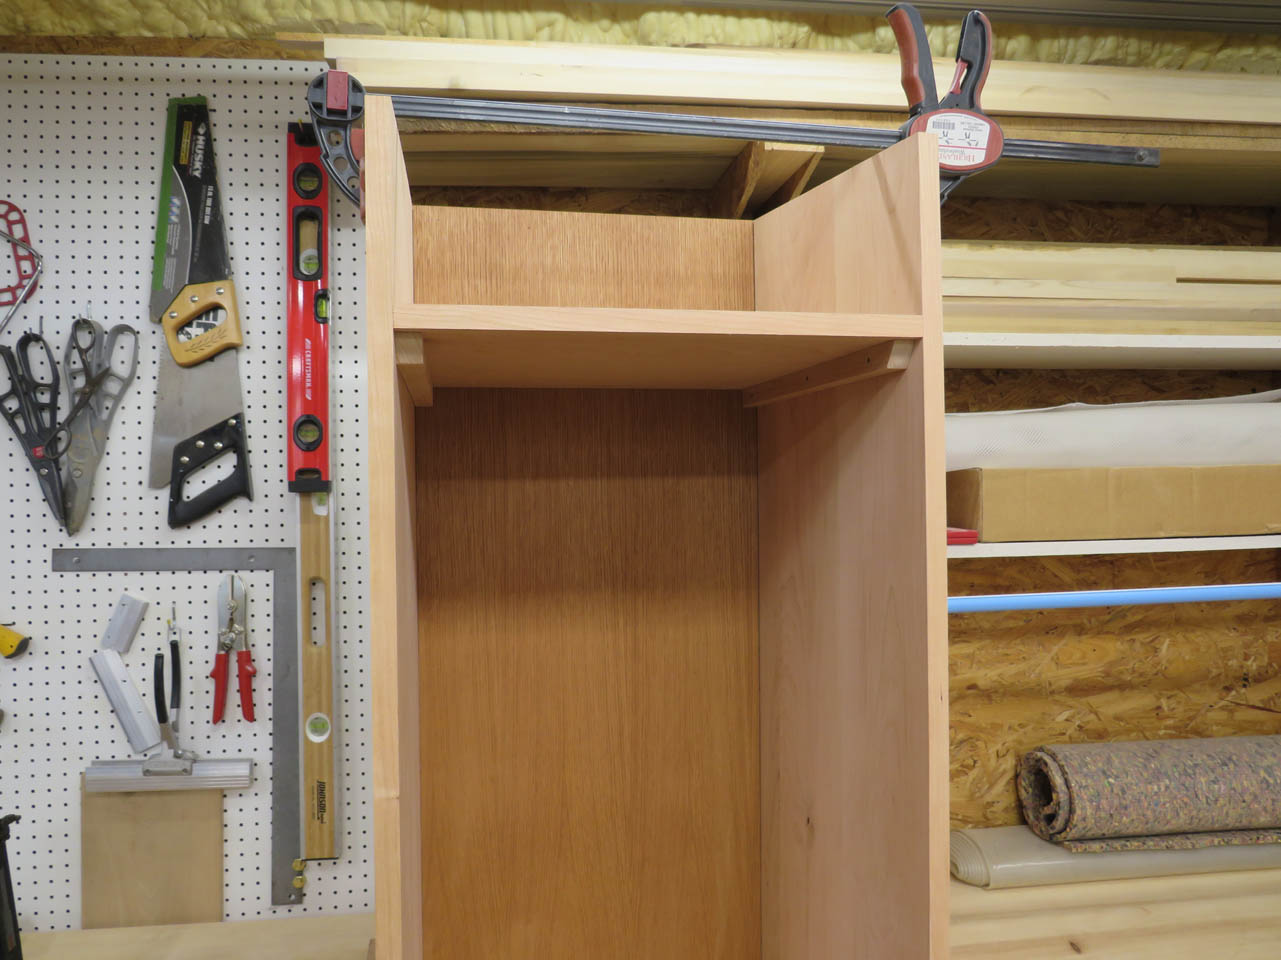
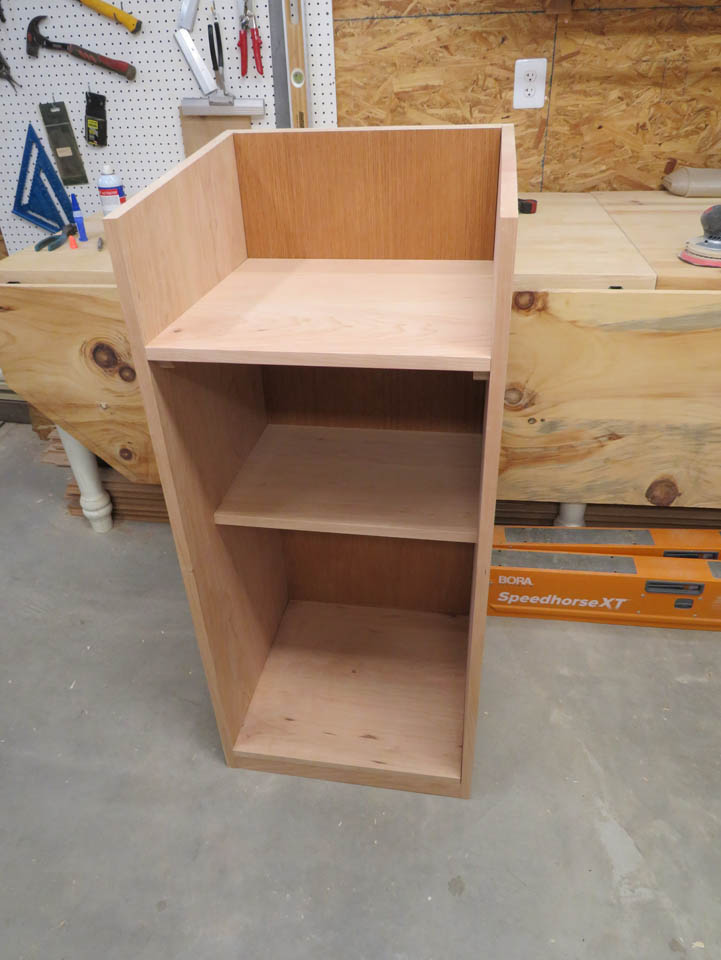
Starting to come together.
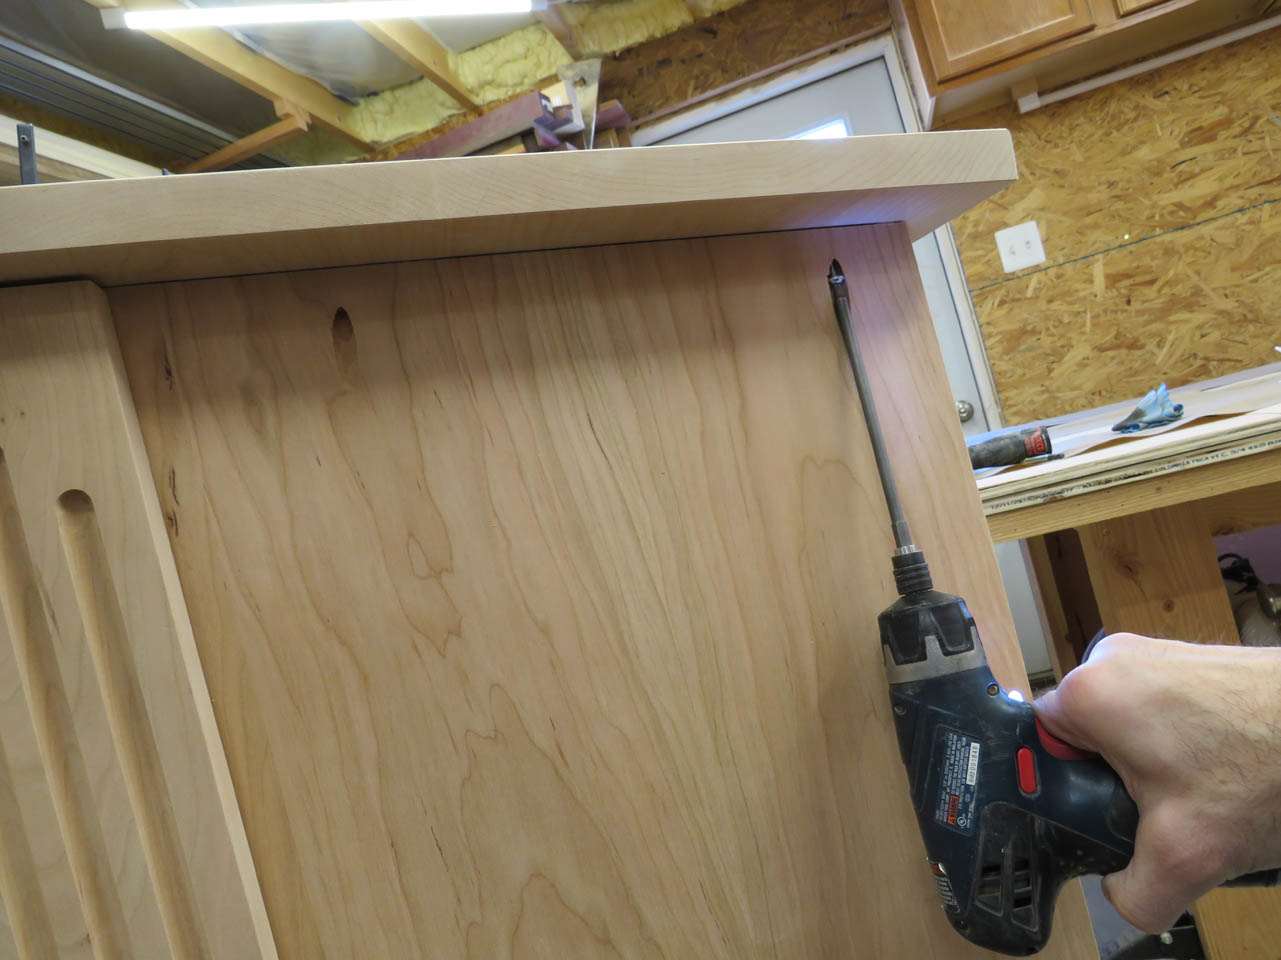
As I was cutting the trim boards for the top, I was thinking of the best way to attach the top. I was originally thinking that I would have to screw down from the top and plug it, or something more complicated involving hidden tenons when I realized I could hold it on with pocket screws from the outside and cover the screws with the trim.
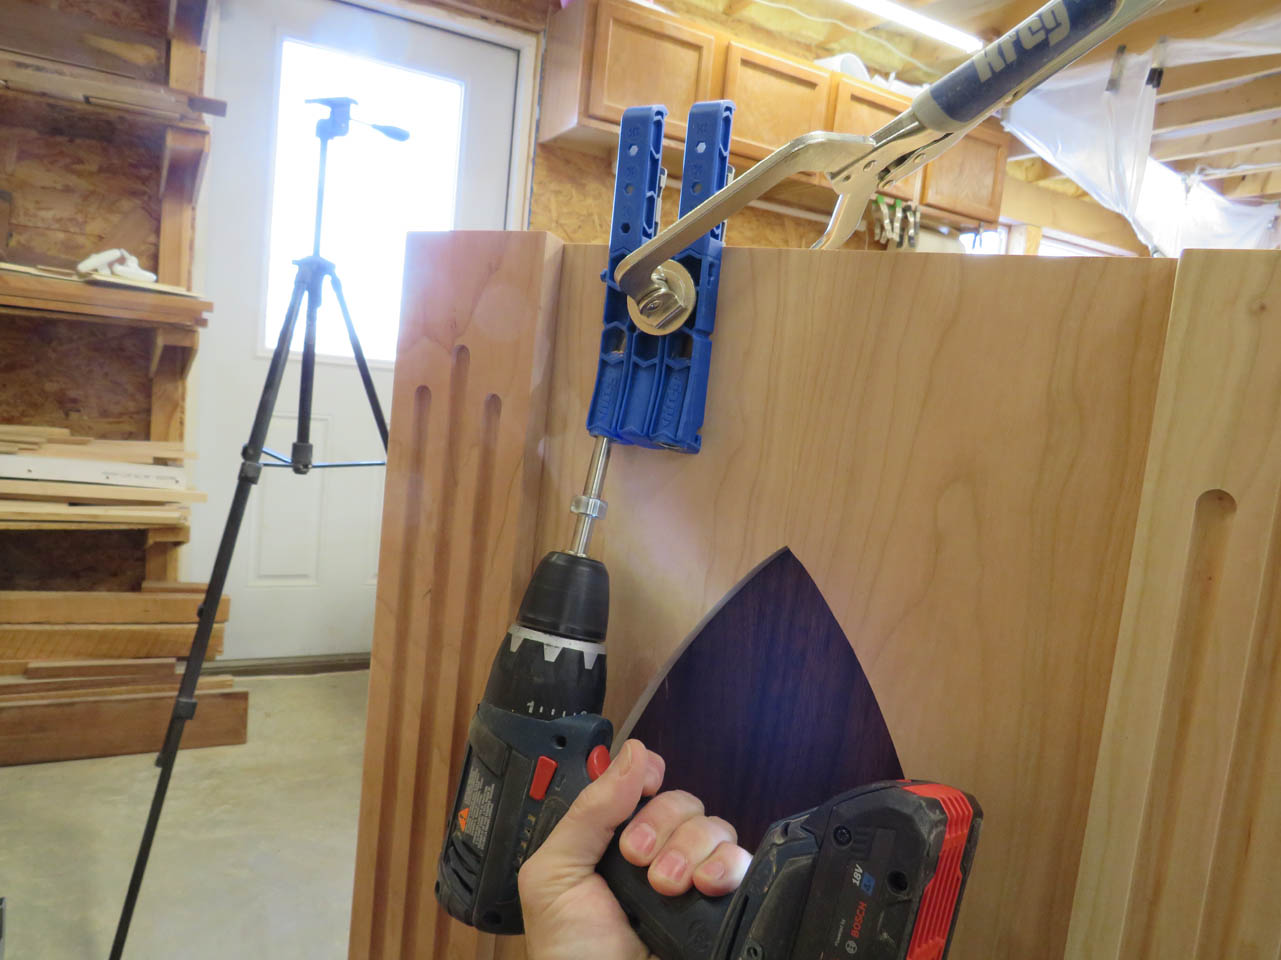
This simplified things a lot. I drilled two pockets on each face.
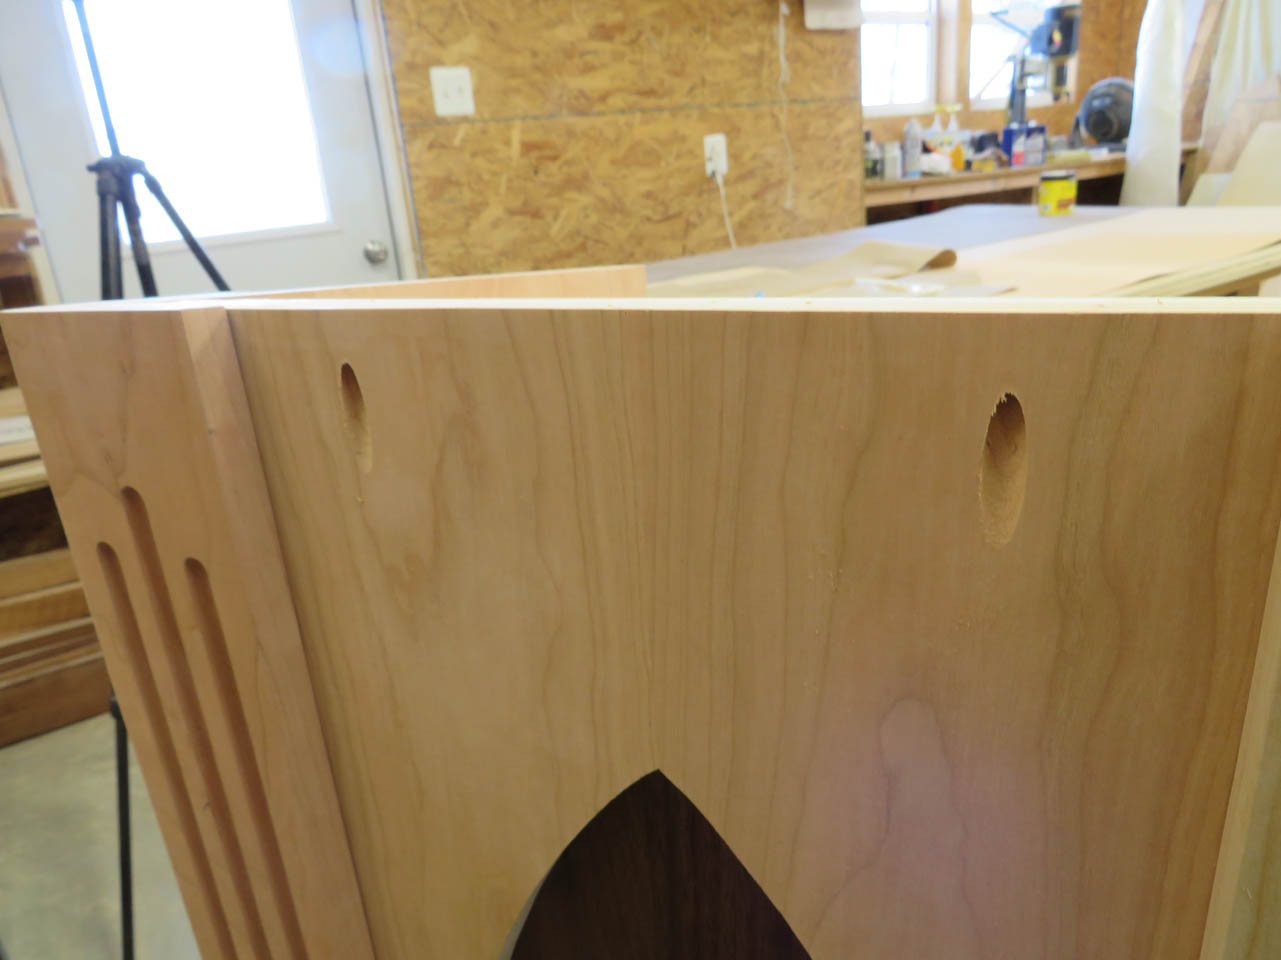
The 3″ trim pieces will cover the pockets nicely.

I am making the tops 1″ thick just to look heavier than the sides.
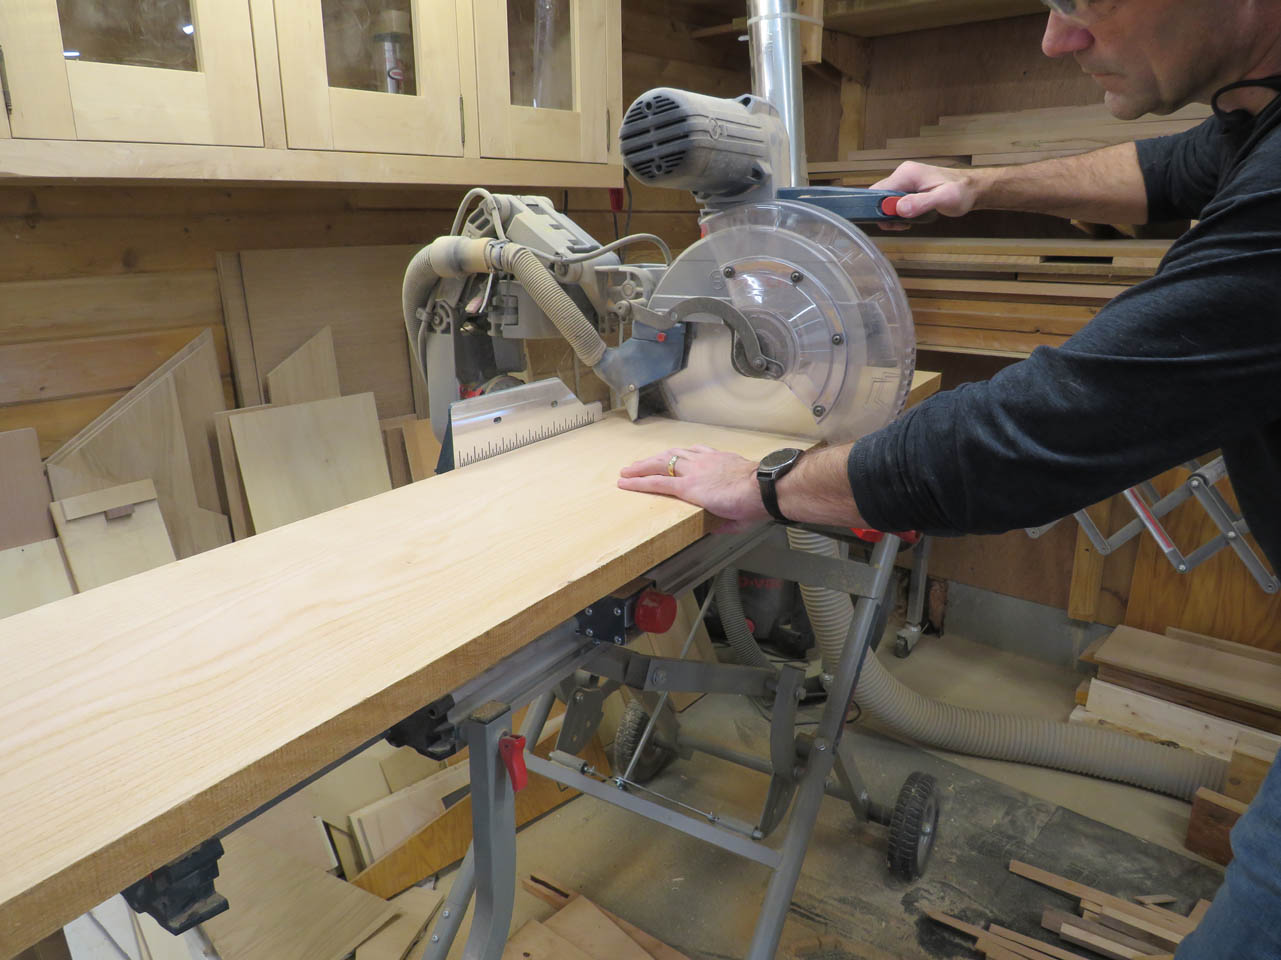
I pulled some thicker 5/4 boards and cut them roughly down to size and planed them to the proper thickness.
Then I glued them up.
While that was drying, I made the thin strip with rounded ends to make the book ledge.
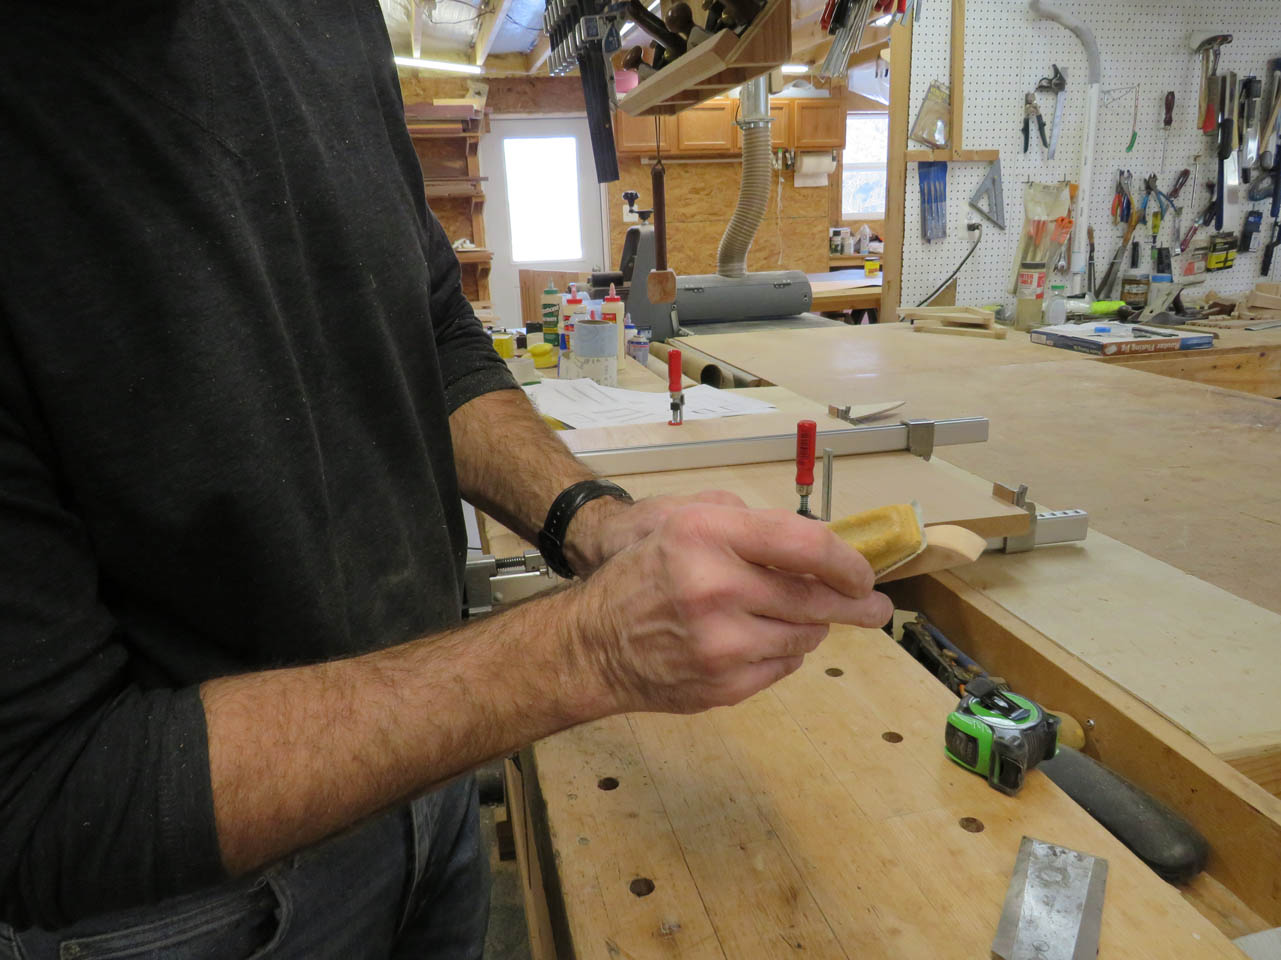
The sharp edges all got hand sanded, then I sanded the top panel when it was dried as well.
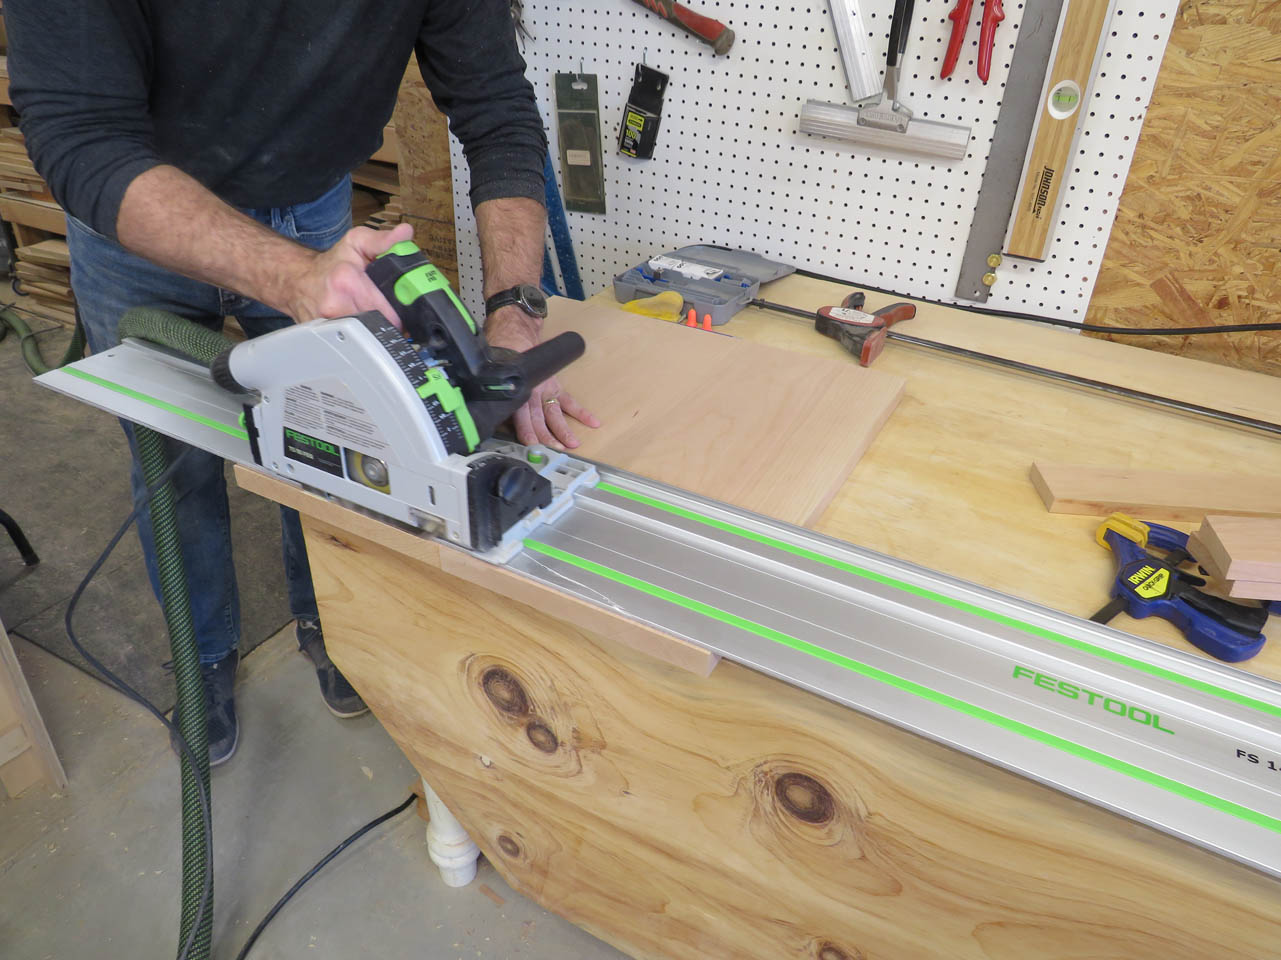
Since this panel is too large for the cross-cut sled on my table saw, I used the 90° angle jig on my track and cut the top panel to size with my track saw.
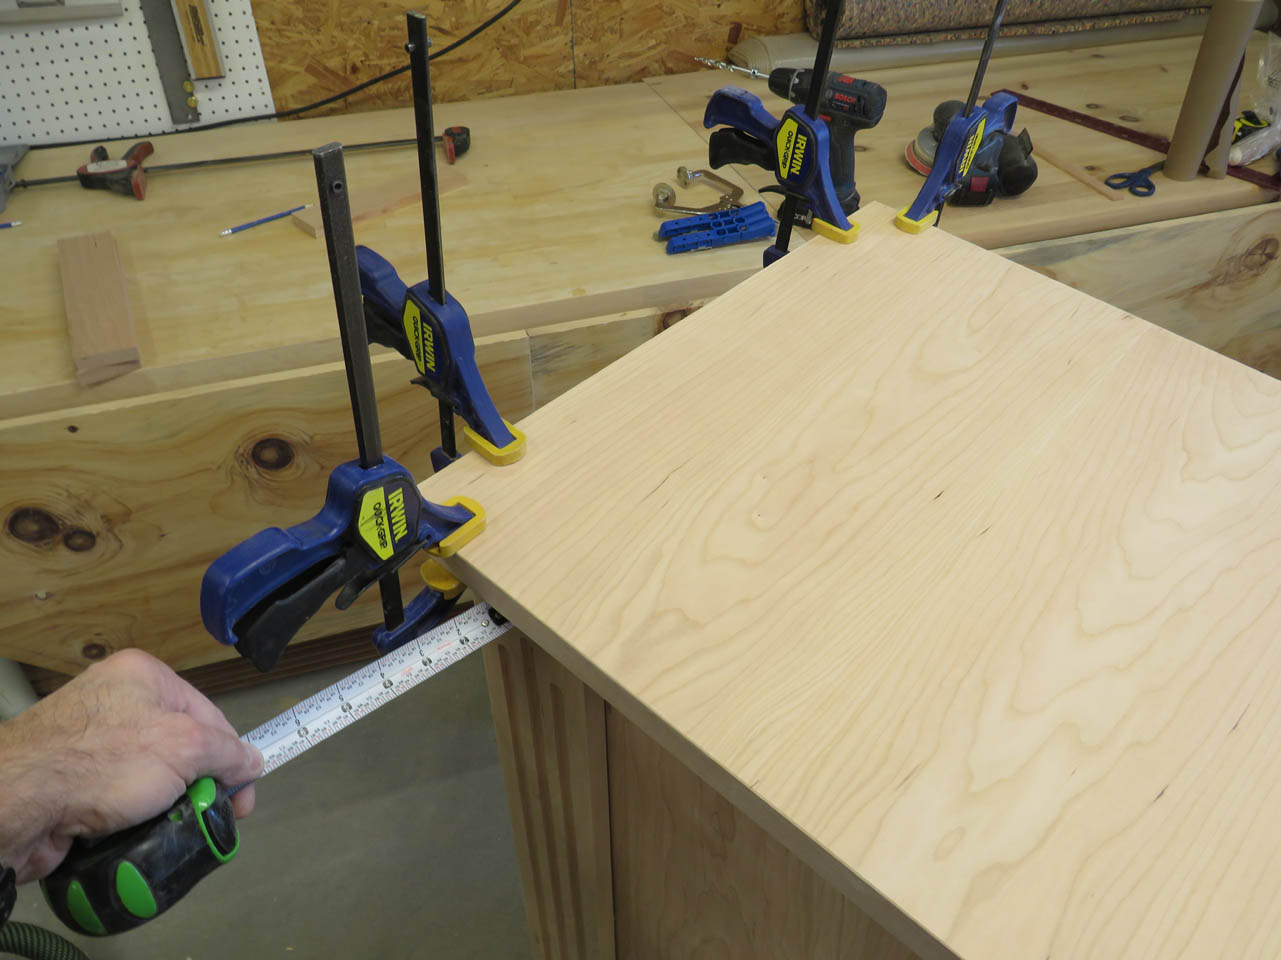
I spent some time centering the top panel on the ambo and used clamps as stops to mark the location.
Then I could remove the top and apply glue.
With the top reinstalled, I can attach it with the pocket screws.
Then I can apply glue to the trim and tack in in place to dry. I placed all the brad nails in the top 2″ so they would be covered by trim later.
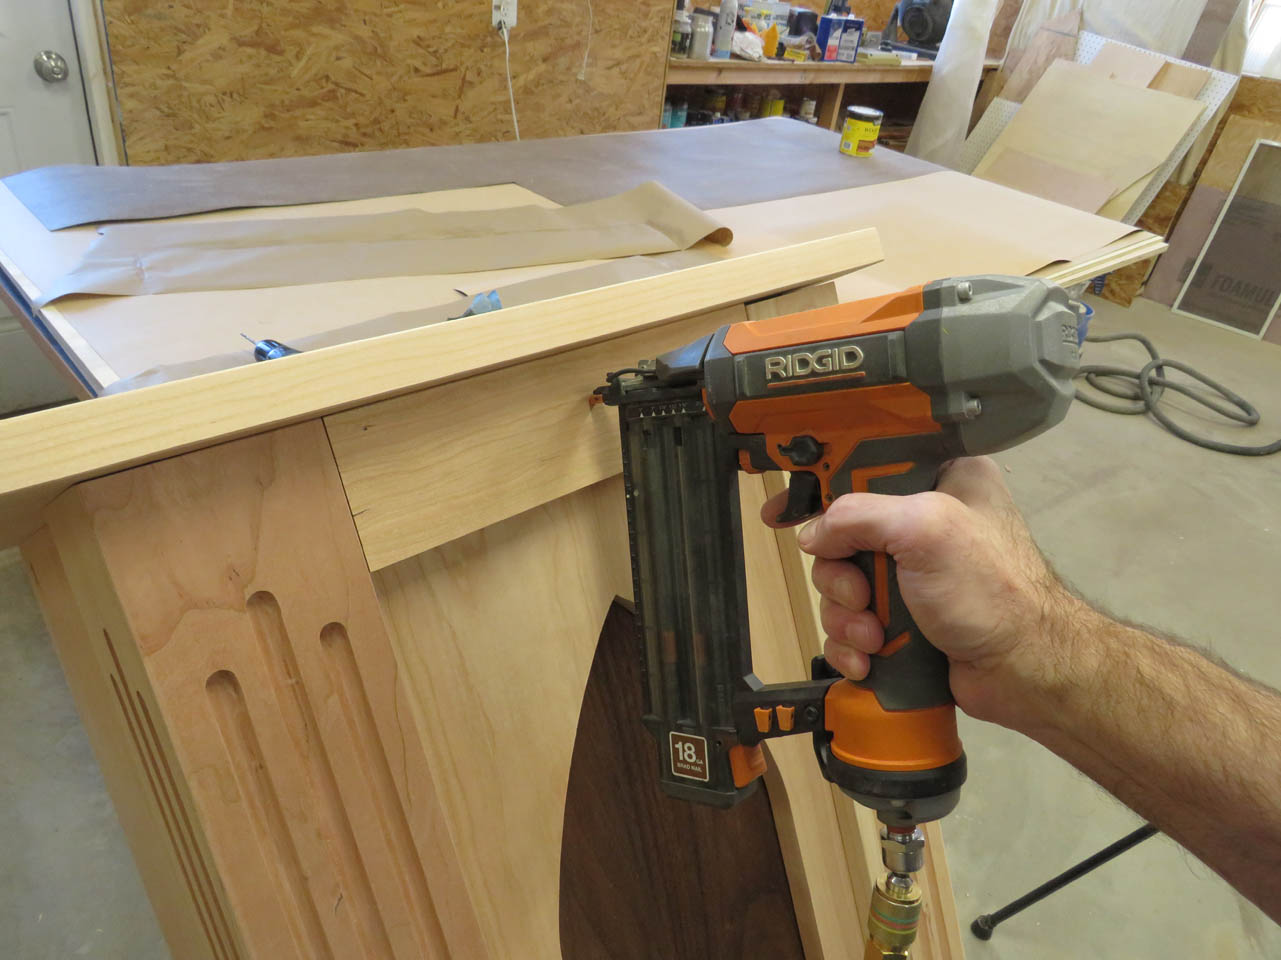
After the top was installed, I glued and clamped the book ledge in place and left it to dry.
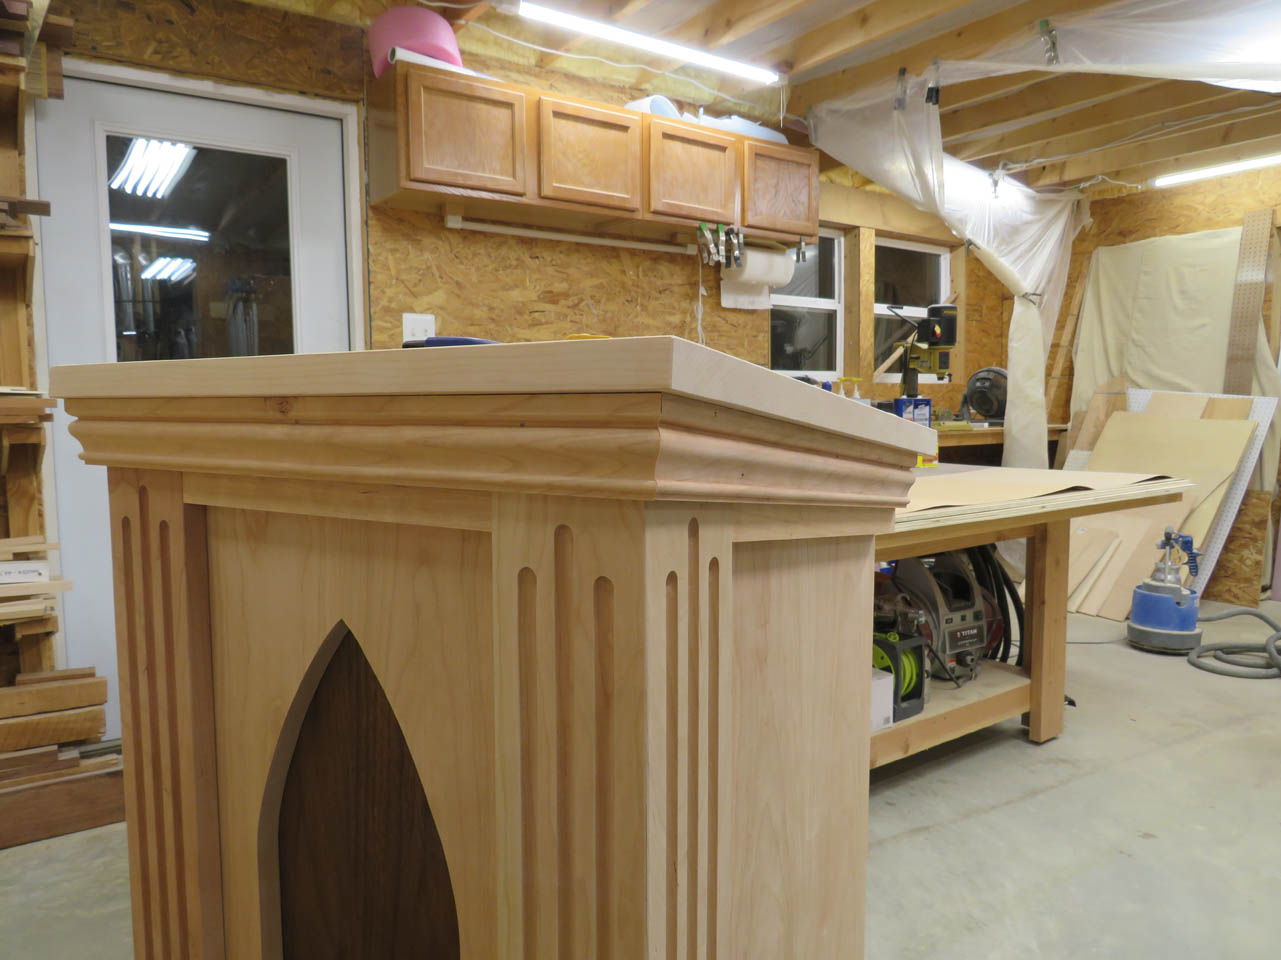
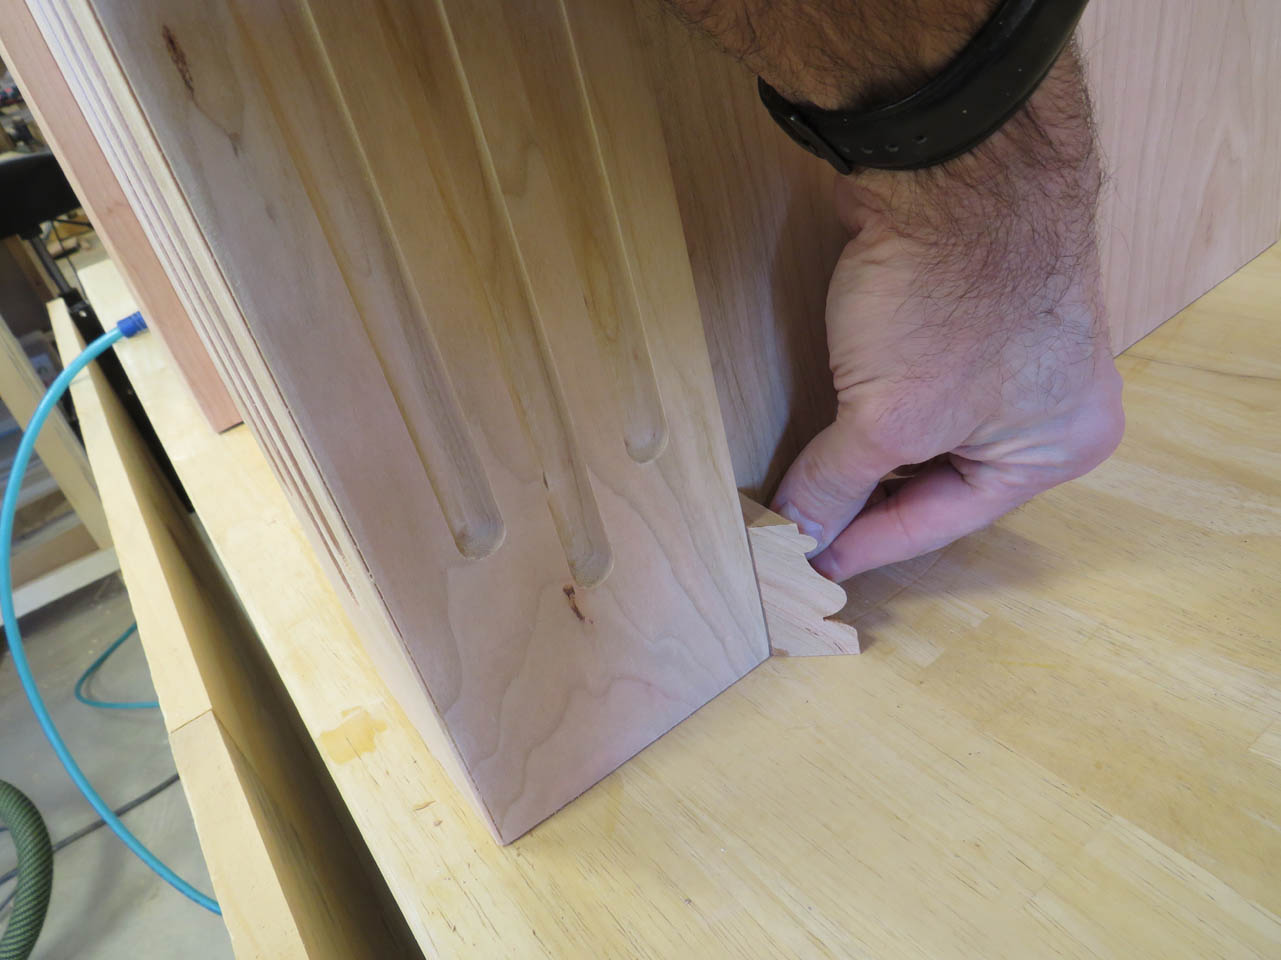
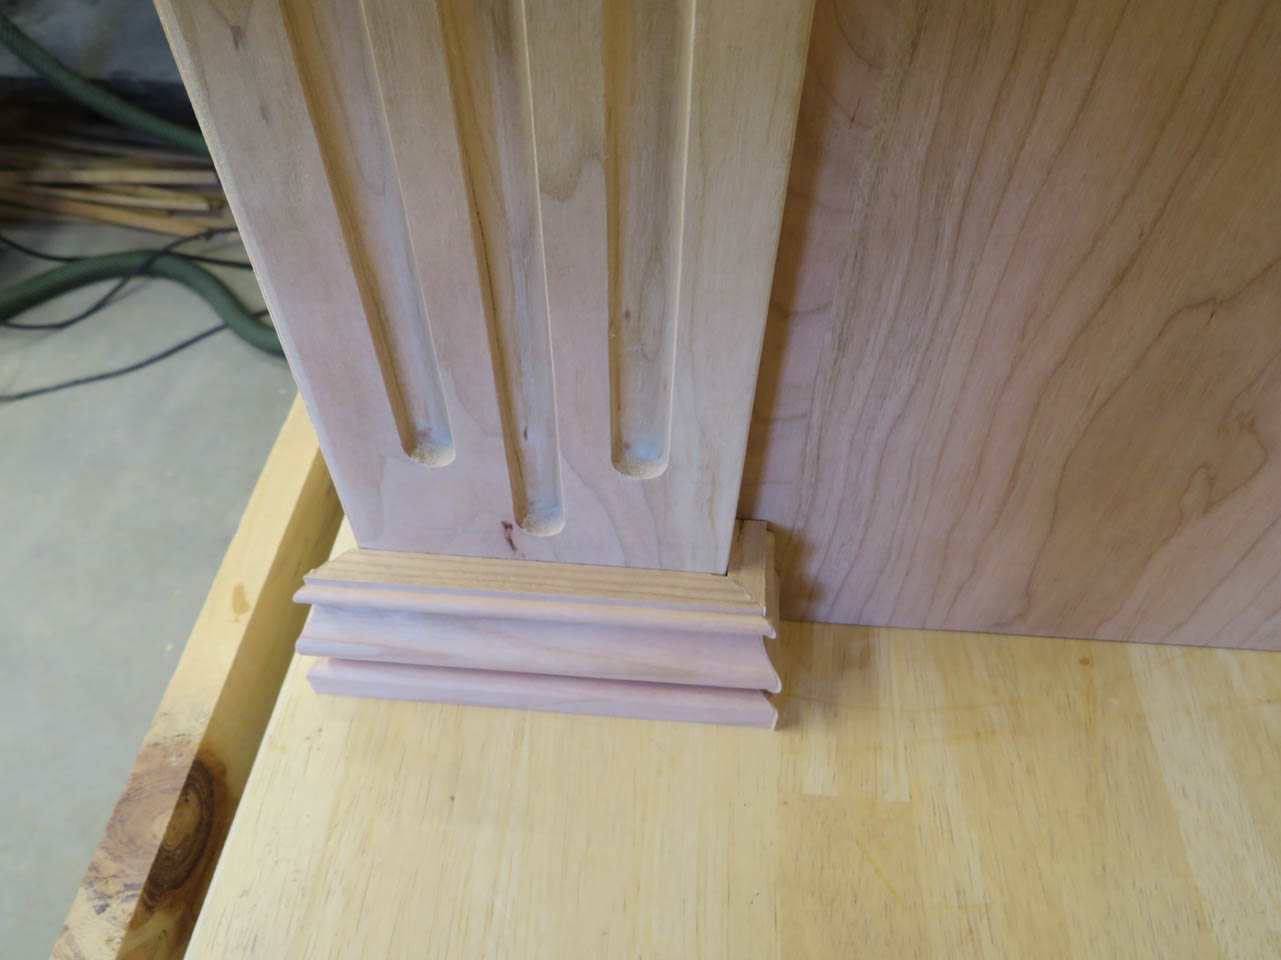
When I make up trim for the first time, I usually save pieces of it so that I can replicate it later. This is an off-cut from the original tabernacle trim that the sisters wanted me to match on this furniture. These furniture pieces are much bigger so I am going to make the cherry trim about 1/2″ taller to thicken the top edge. This will look better on the larger furniture, keeping the trim details from vanishing into the shadow of the overhanging tops.


I culled through my off-cuts to find suitable pieces to cut down for trim. Most of what I need will be short, wrapping around the columns so I can use a lot of pieces that would normally get wasted.
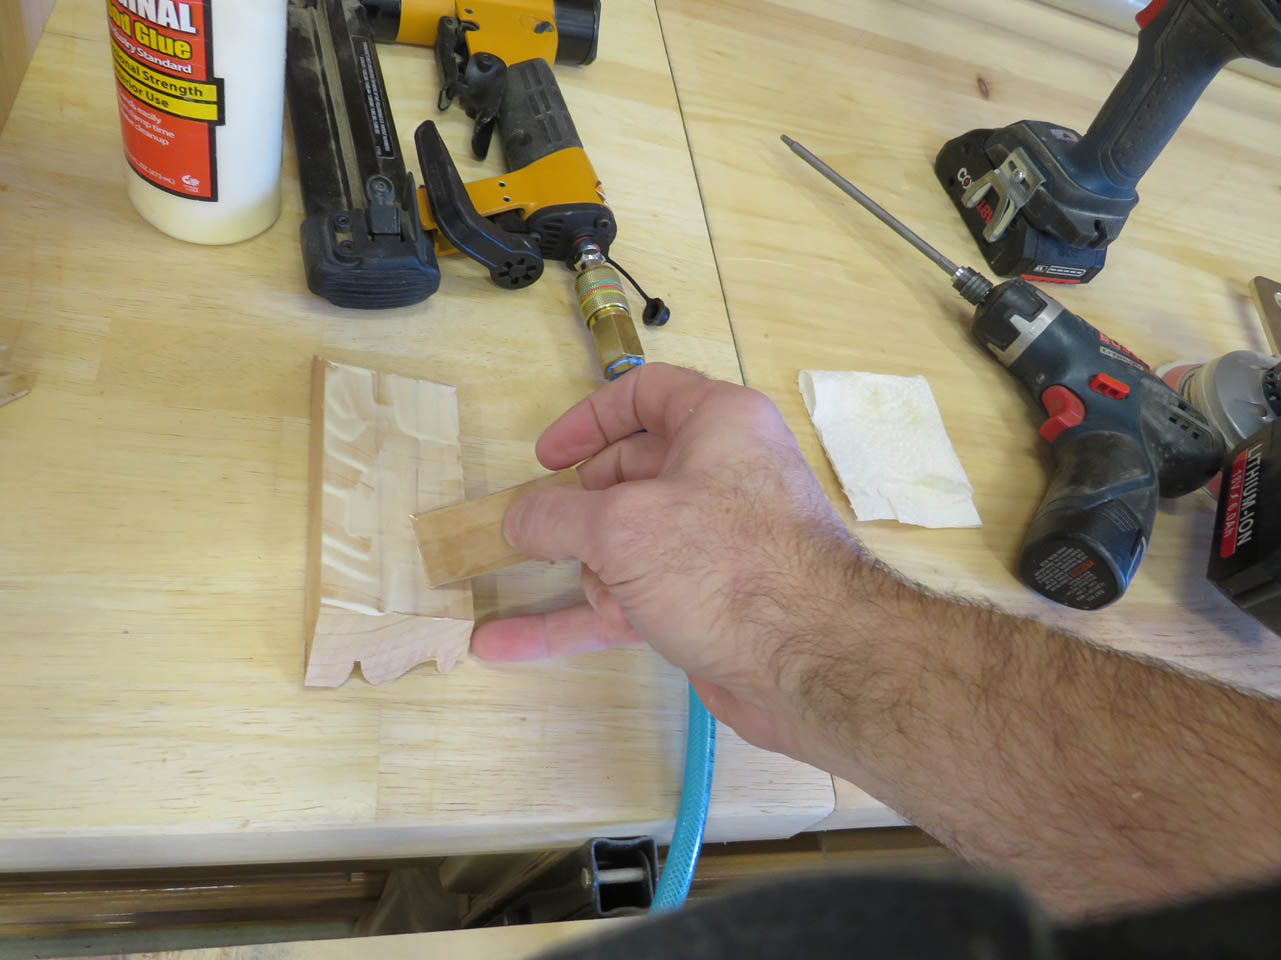
I set up my trim bit in the router table and experimented with speeds and feed rates to get the best cut.
After some experimentation, I got a decent pile of stock to start trimming the ambo.

The 6° angle on the top was a difficult compound angle to figure out. I made several failed attempts before finding two angles that matched up well.
For all of the rest of the trim, I setup my small miter saw that makes perfectly accurate 45° cuts and started trimming the columns.
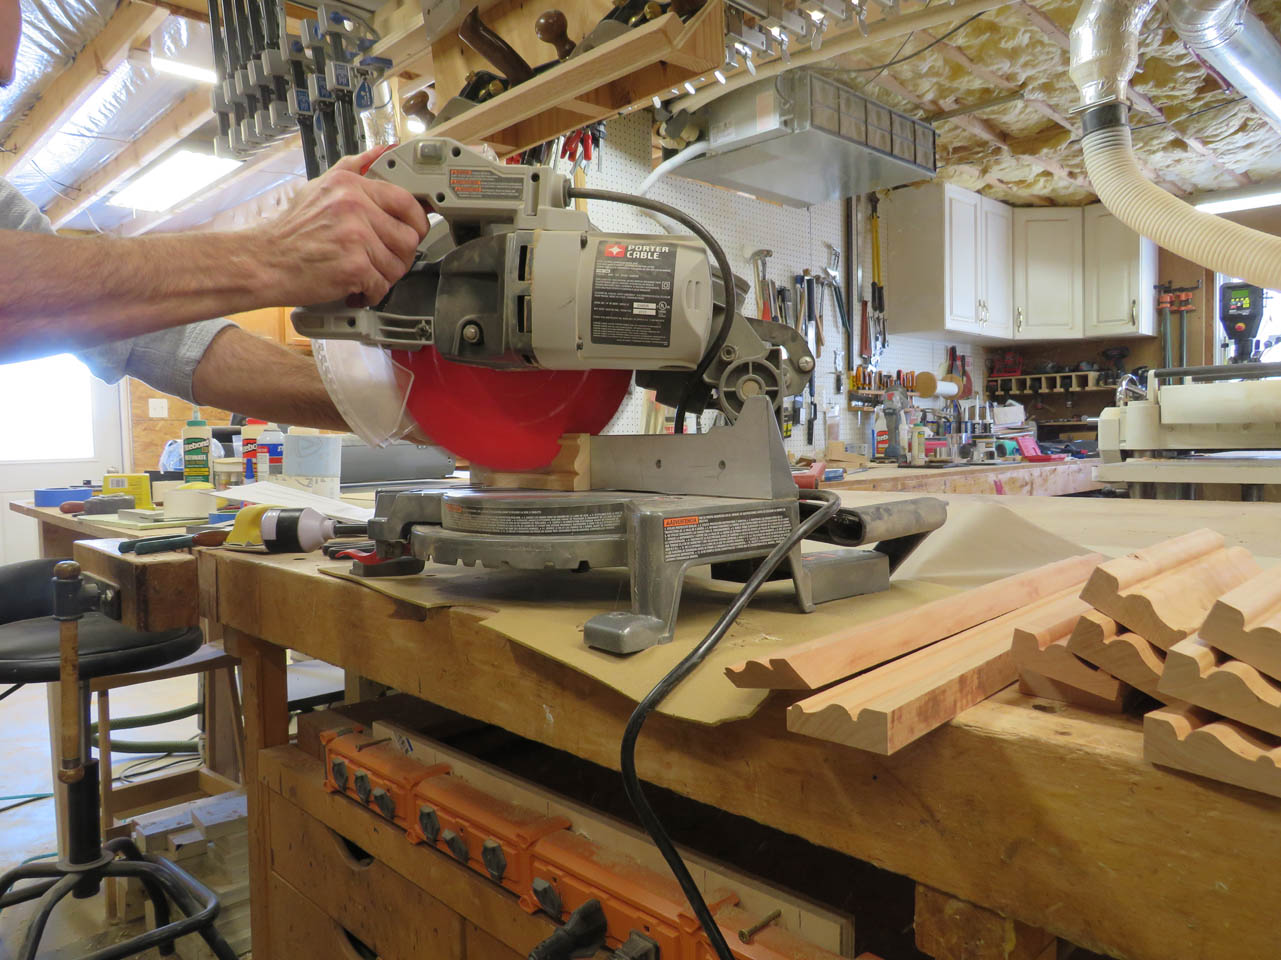
I start by cutting one side, then work my way around slowly creeping up on the exact length of each piece.
When I was happy with my pieces, I apply glue to them one at a time and attach them with my pin nailer. The 23 gauge pins are almost invisible. They don’t do much but hold things in place until the glue dries.
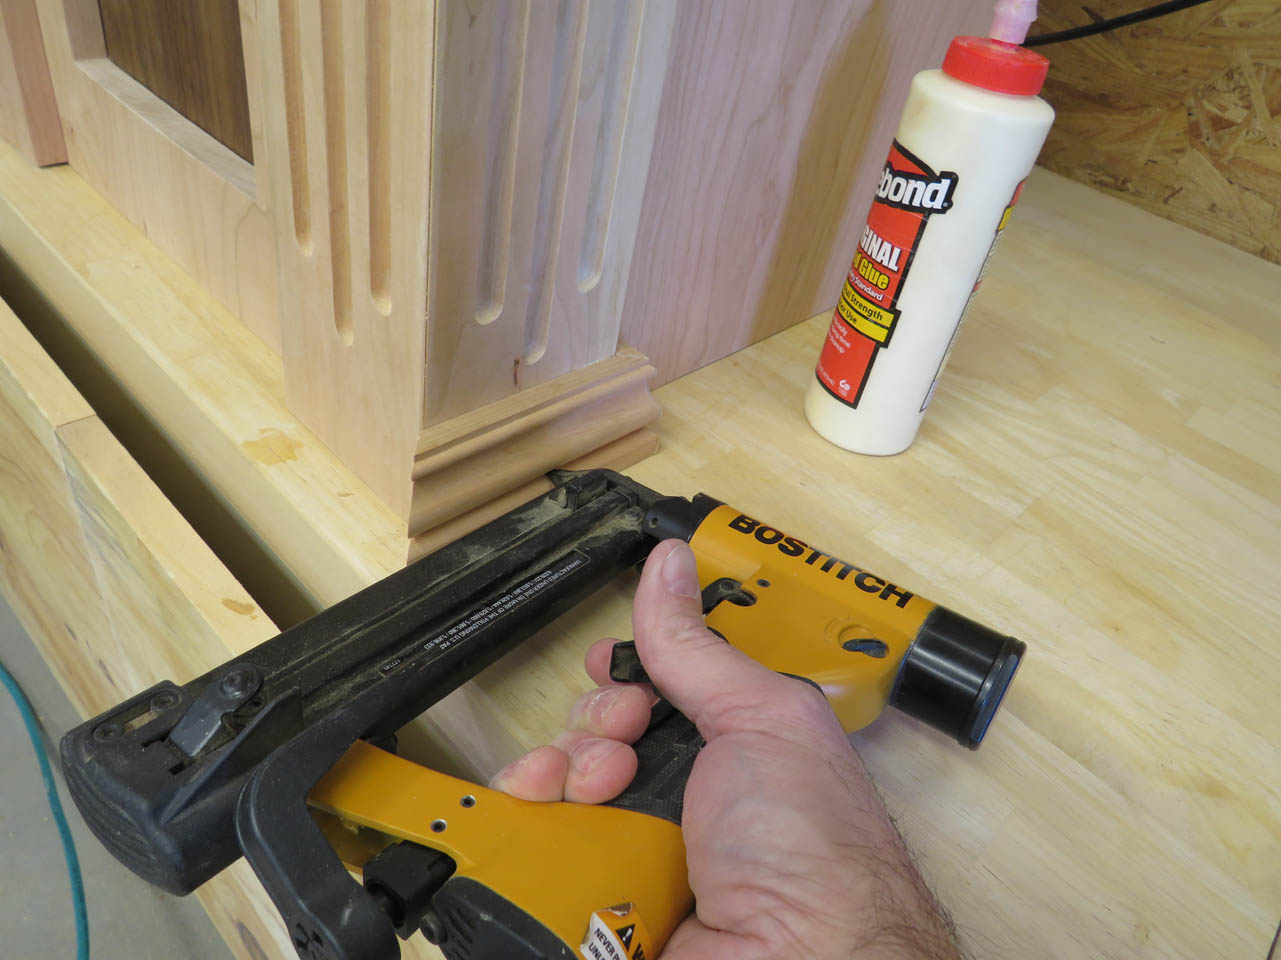
Then I can carefully hand sand each miter to knock off the sharp edges.
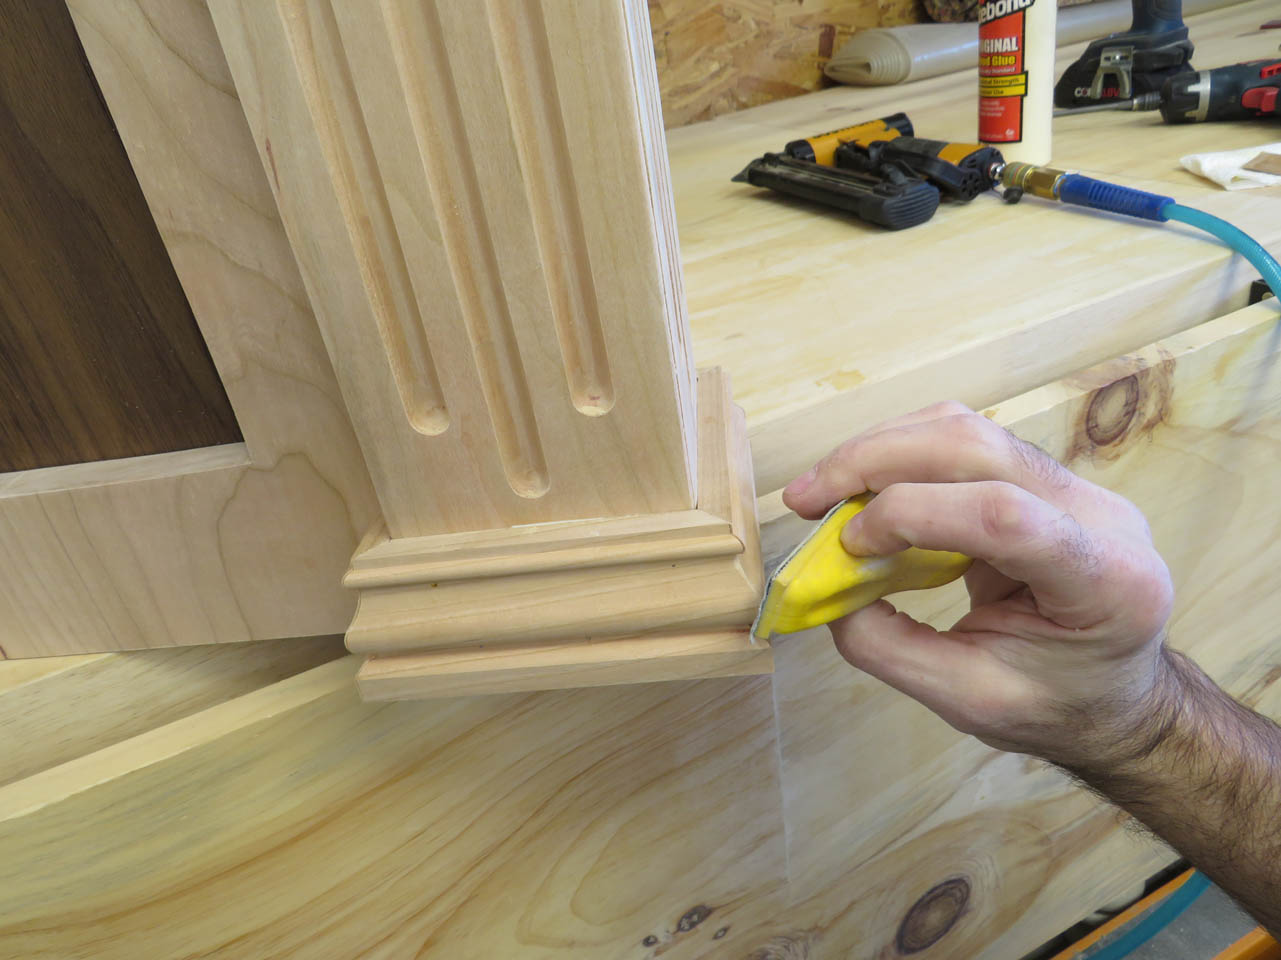

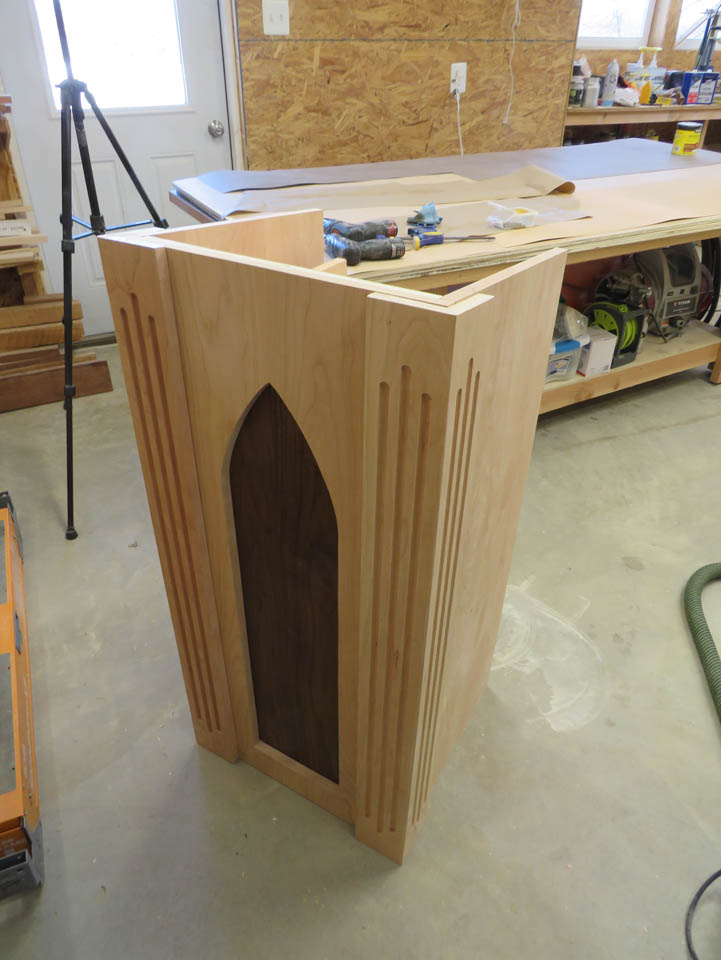
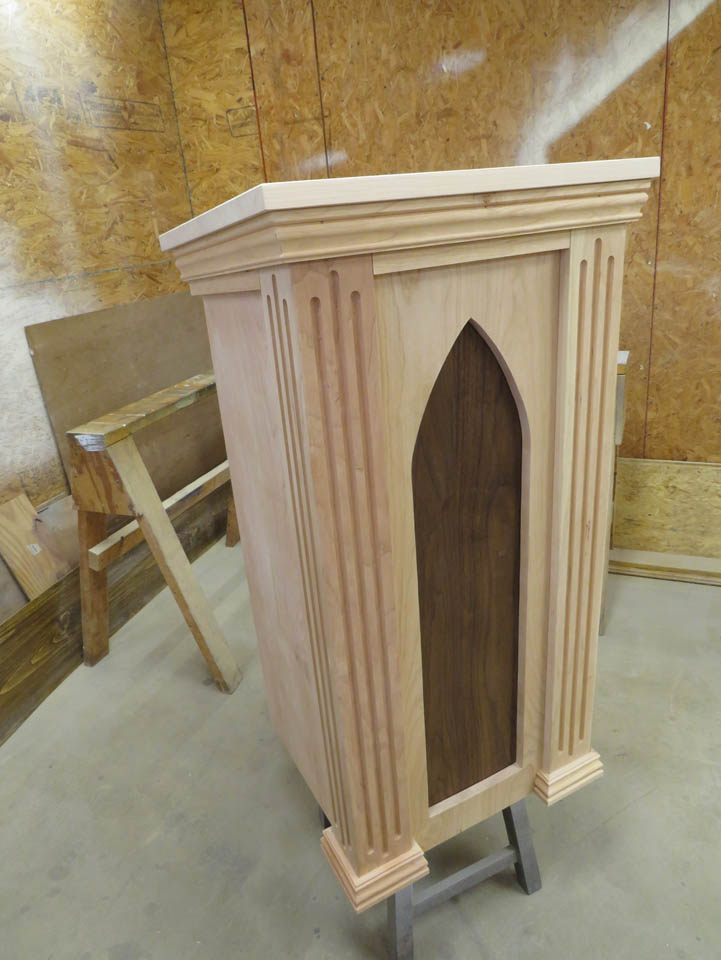
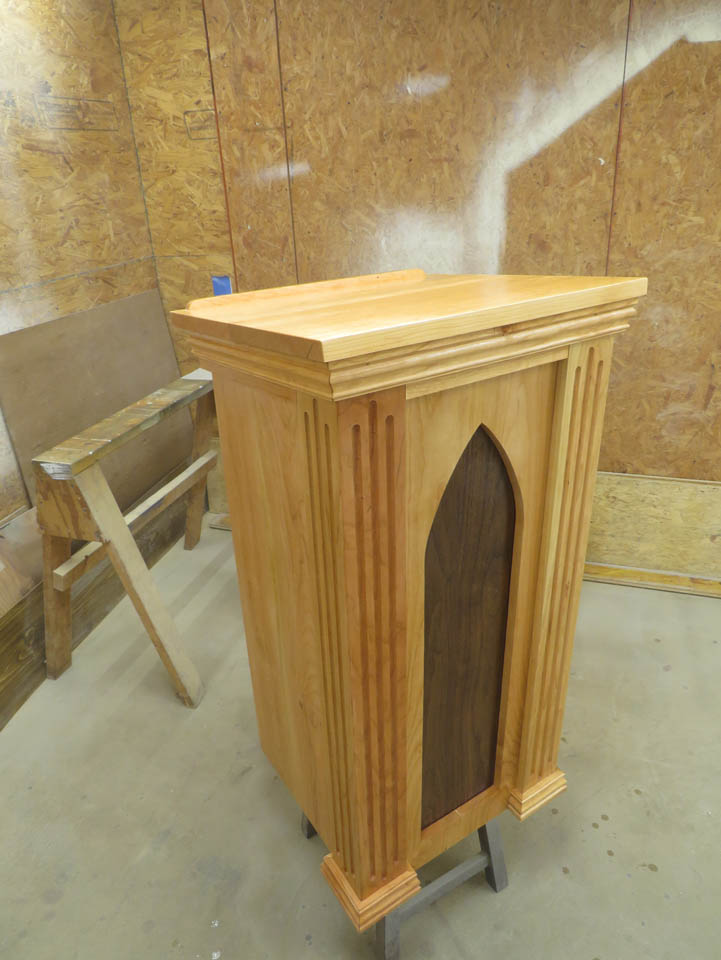
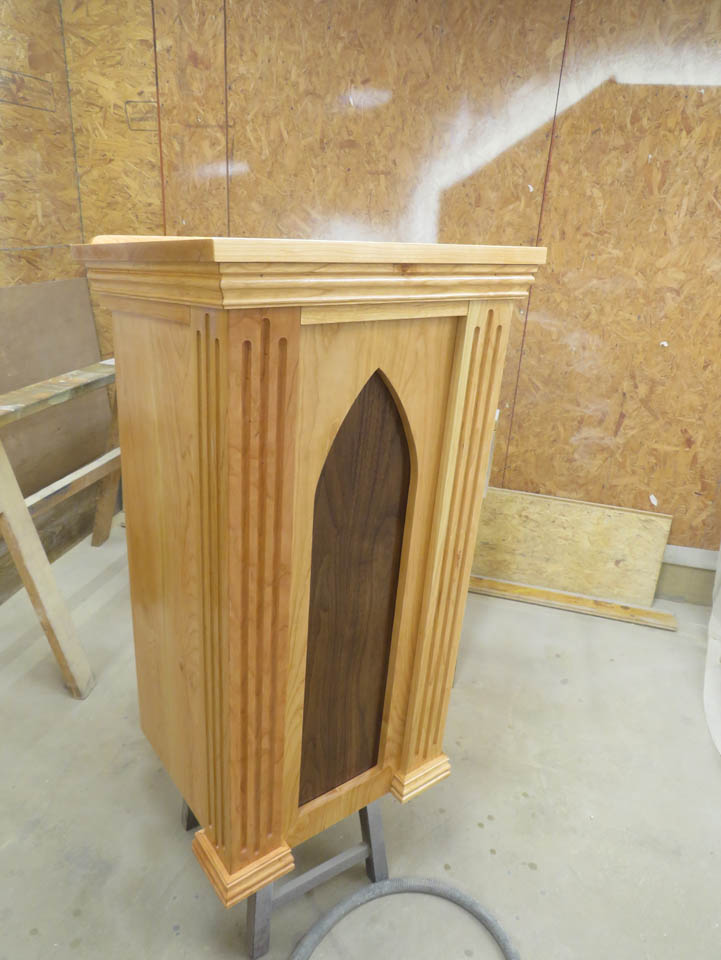
And the ambo is complete and ready for finish.
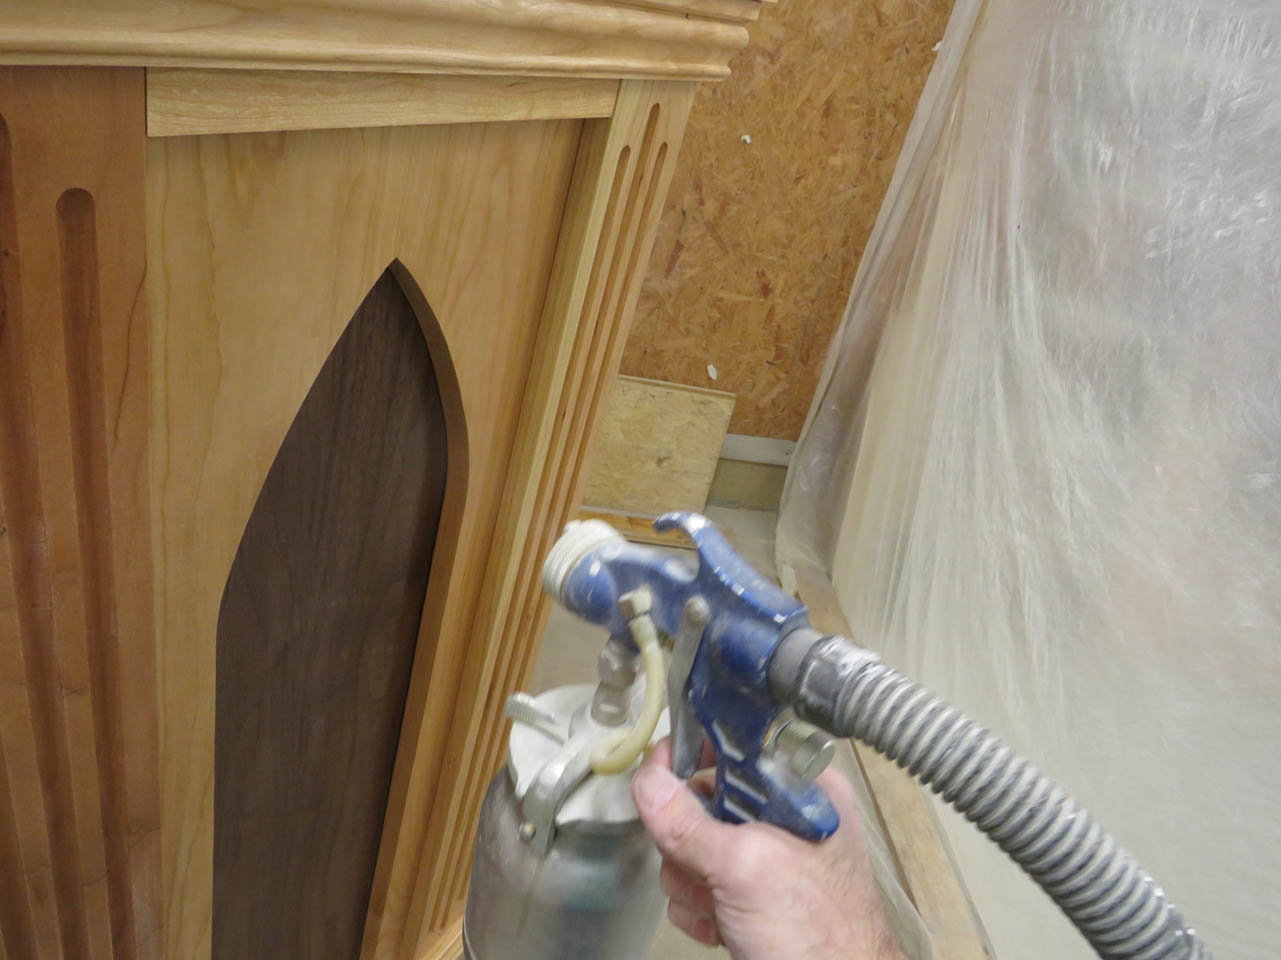
The last thing to do is apply finish. I load up some semi-gloss polyurethane in my sprayer and set the ambo up on a stool so I can start applying finish.
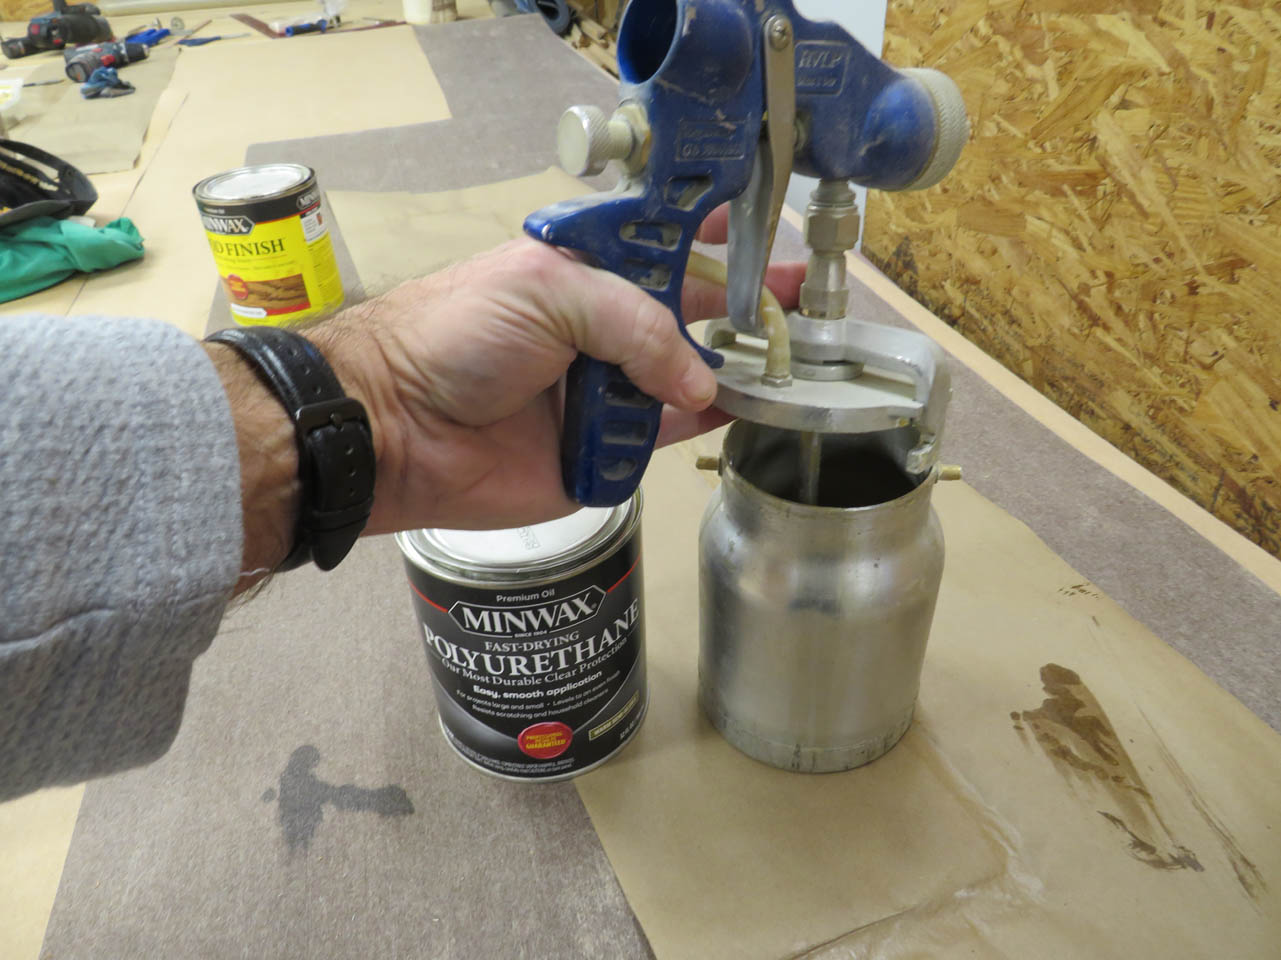
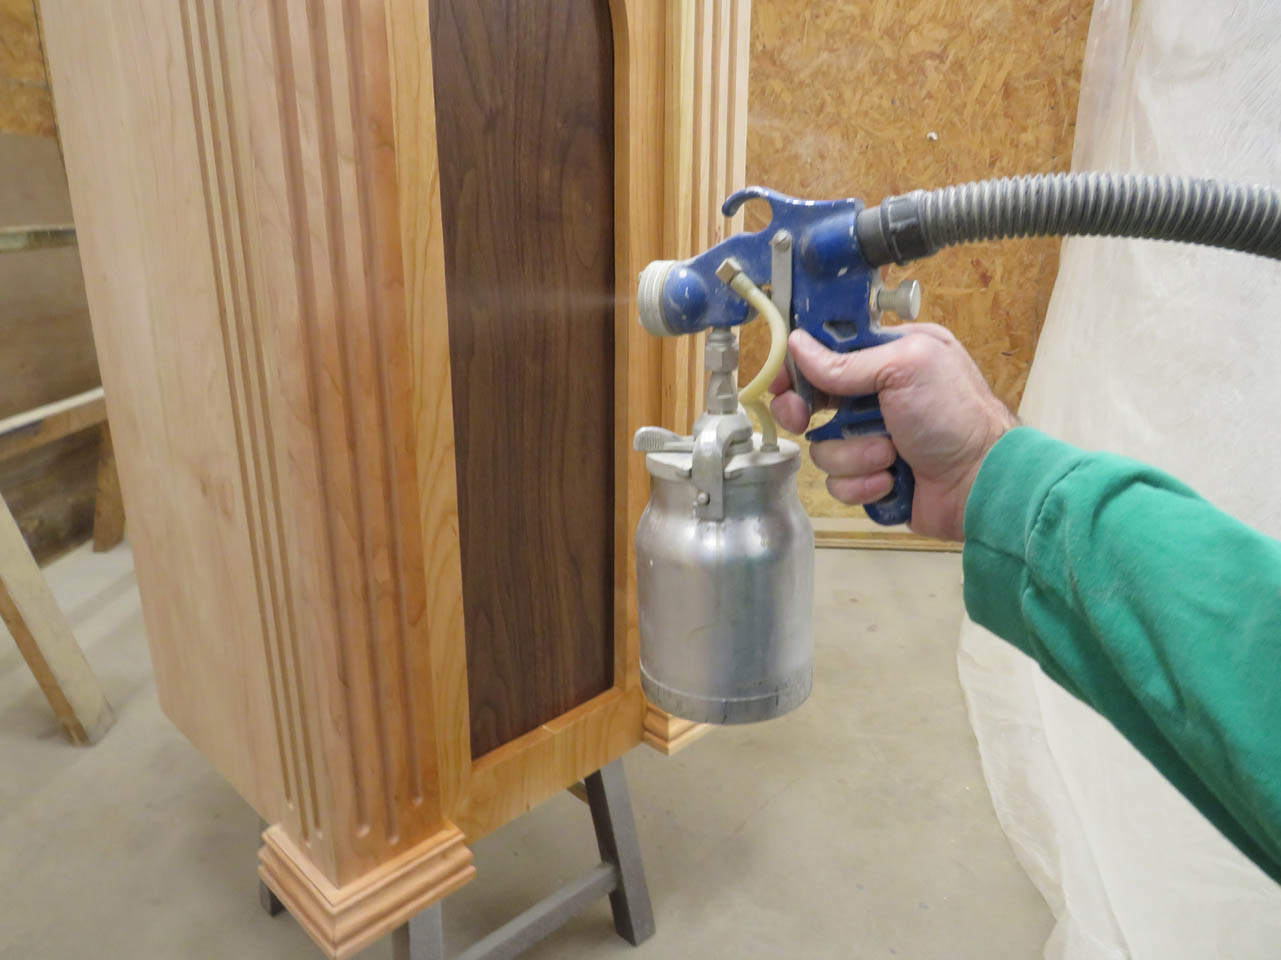
I applied a coat to the entire surface, then let it dry overnight.
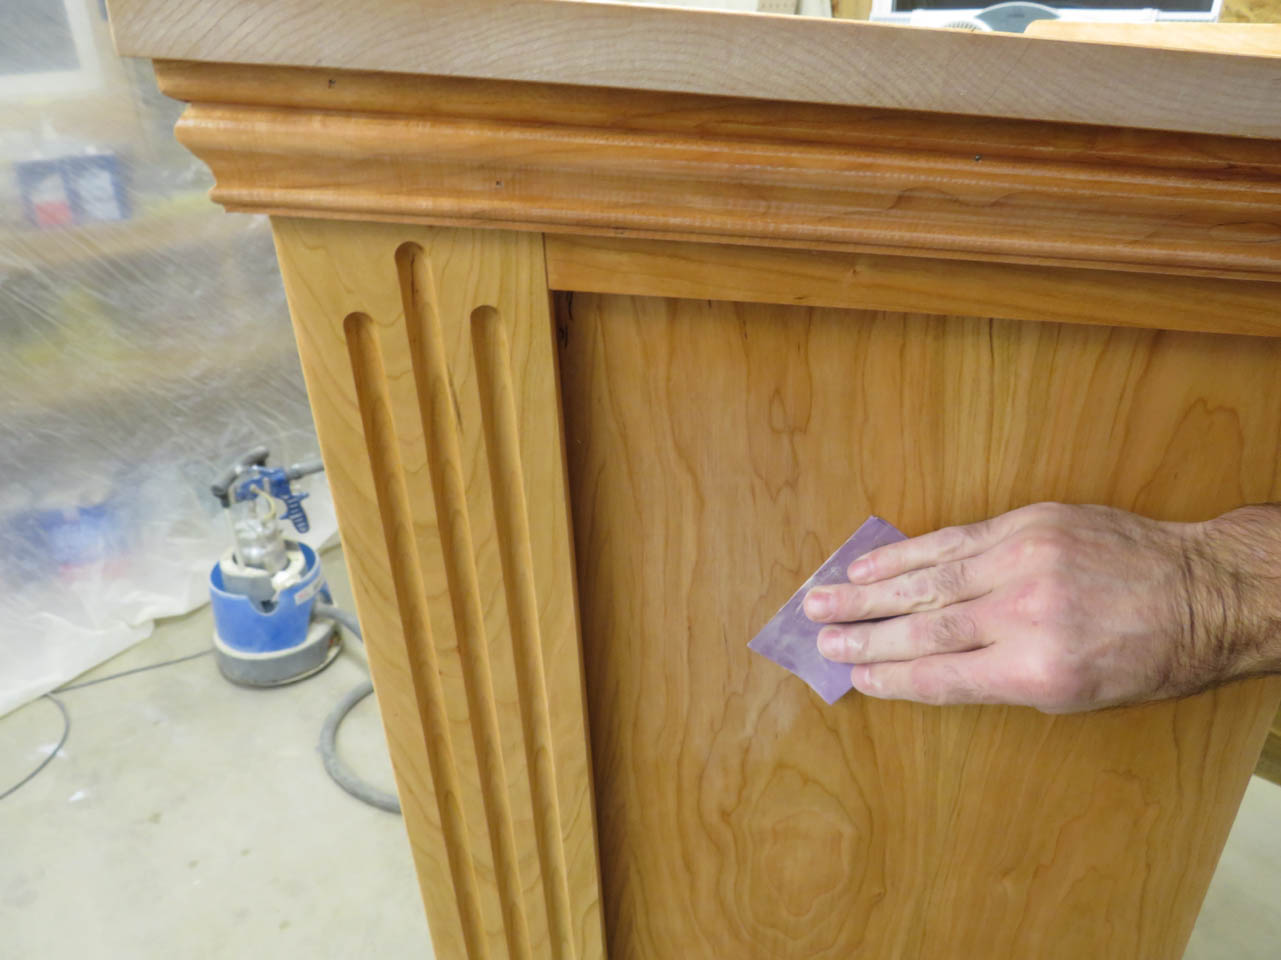
The next day, before applying a second coat, I sand down every surface with 400 grit sandpaper. This removes any dust that settled on the surface while the finish was drying.

Then I carefully wipe away all of the dust and start spraying on the second coat.
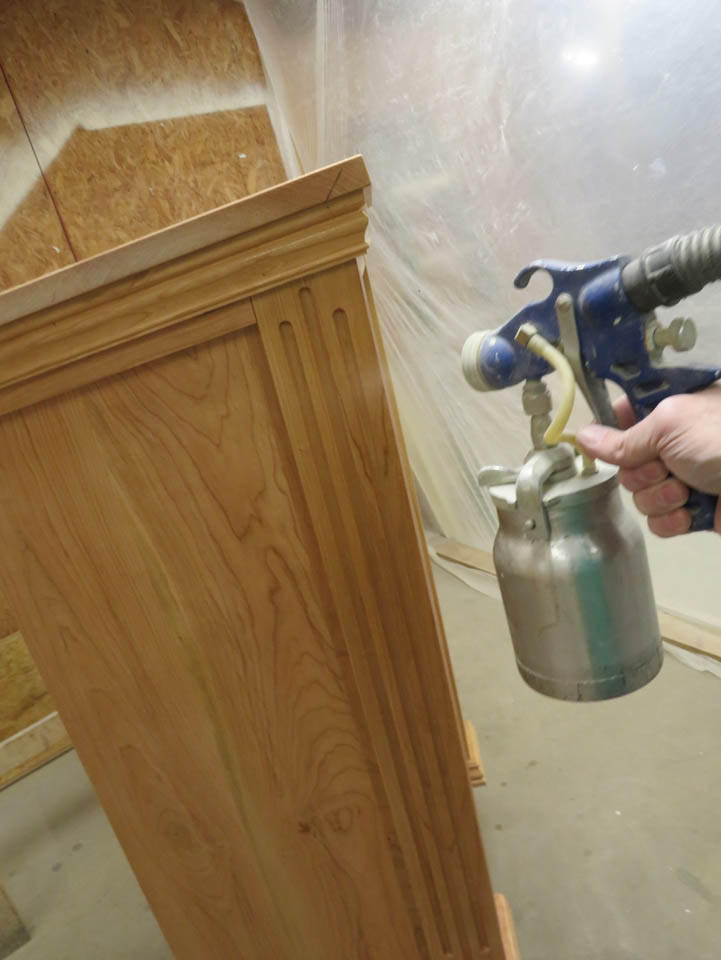
This process was repeated again for a third coat.

The last step will be to buff the surface when it is dry. I usually use crumpled brown paper. For some reason it is the perfect medium for smoothing down any rough spots on the finished polyurethane.

Well the first piece is complete. Several more to go…

Pingback: Cherry front altar | Midnight Woodworking
Pingback: Cherry credence table | Midnight Woodworking