
Credence tables for Holy Spirit Church – part 3
With the legs done and set aside for now, I can move on to the table tops and shelves.
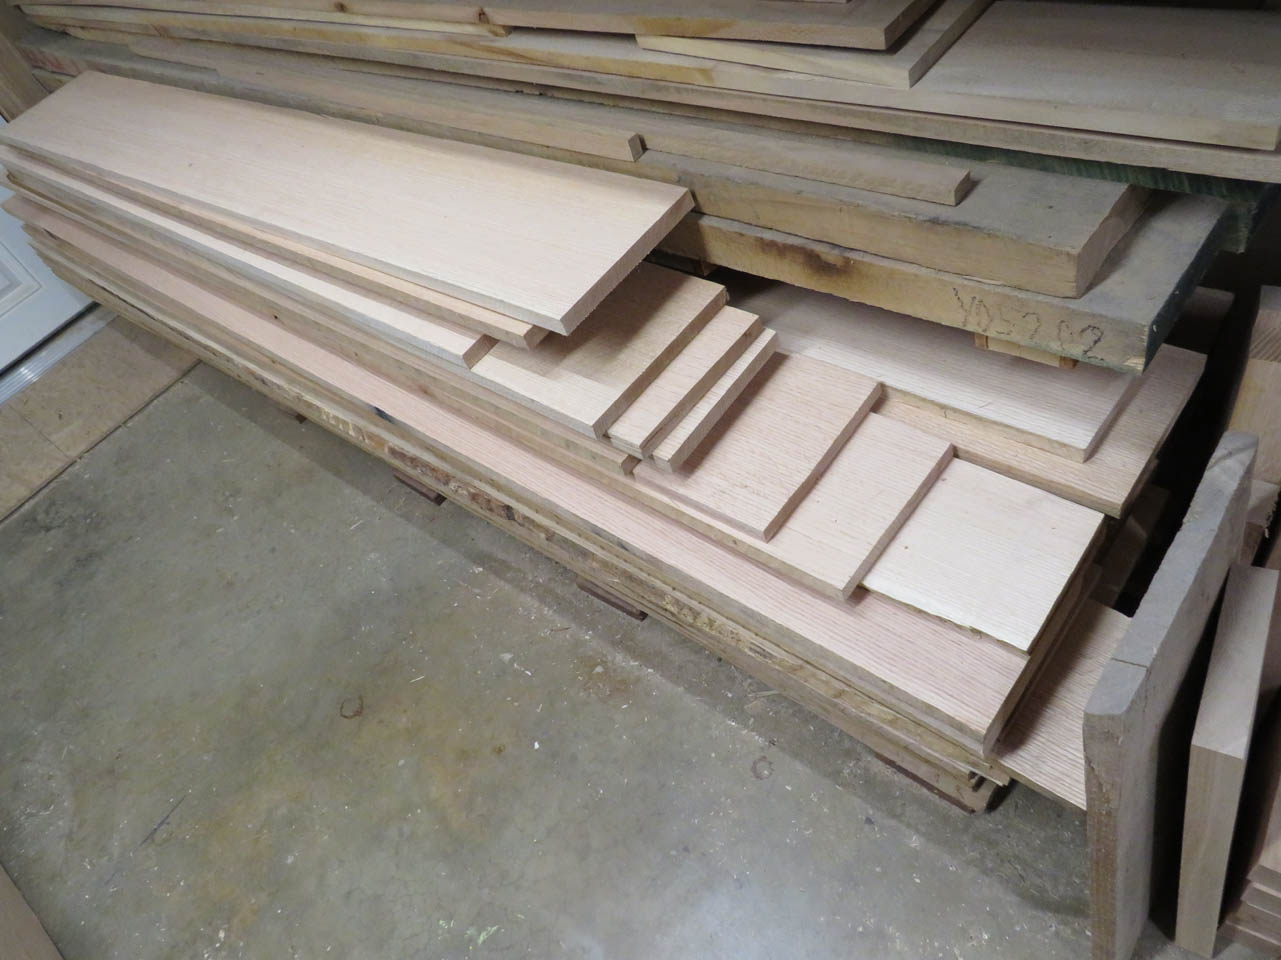
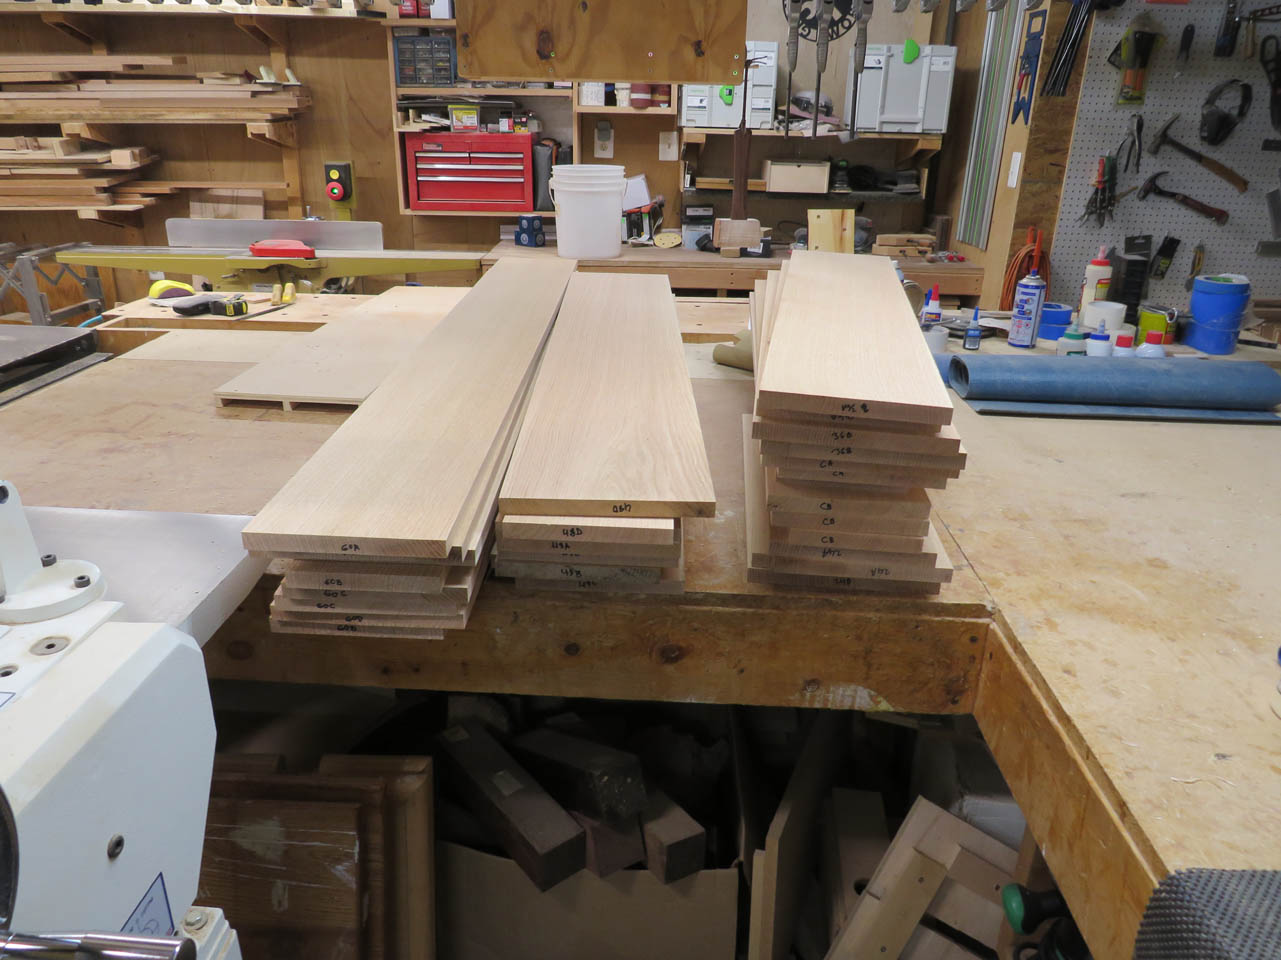
I have a large pile of quarter-sawn oak to start with so I pulled a couple of boards and rough-cut them down to size.
I am building seven tables with lengths from 2′ to 5′ long.
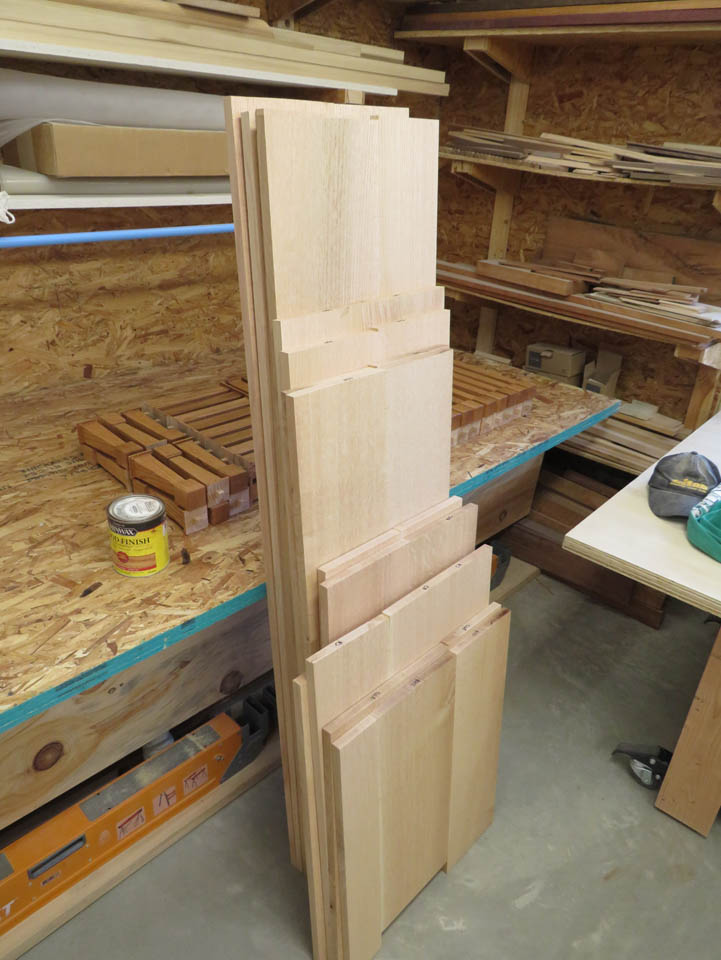
For most of the tops and shelves, I will need to join two pieces so as I pre-cut boards down to the approximate length. I am also matching grain and color.

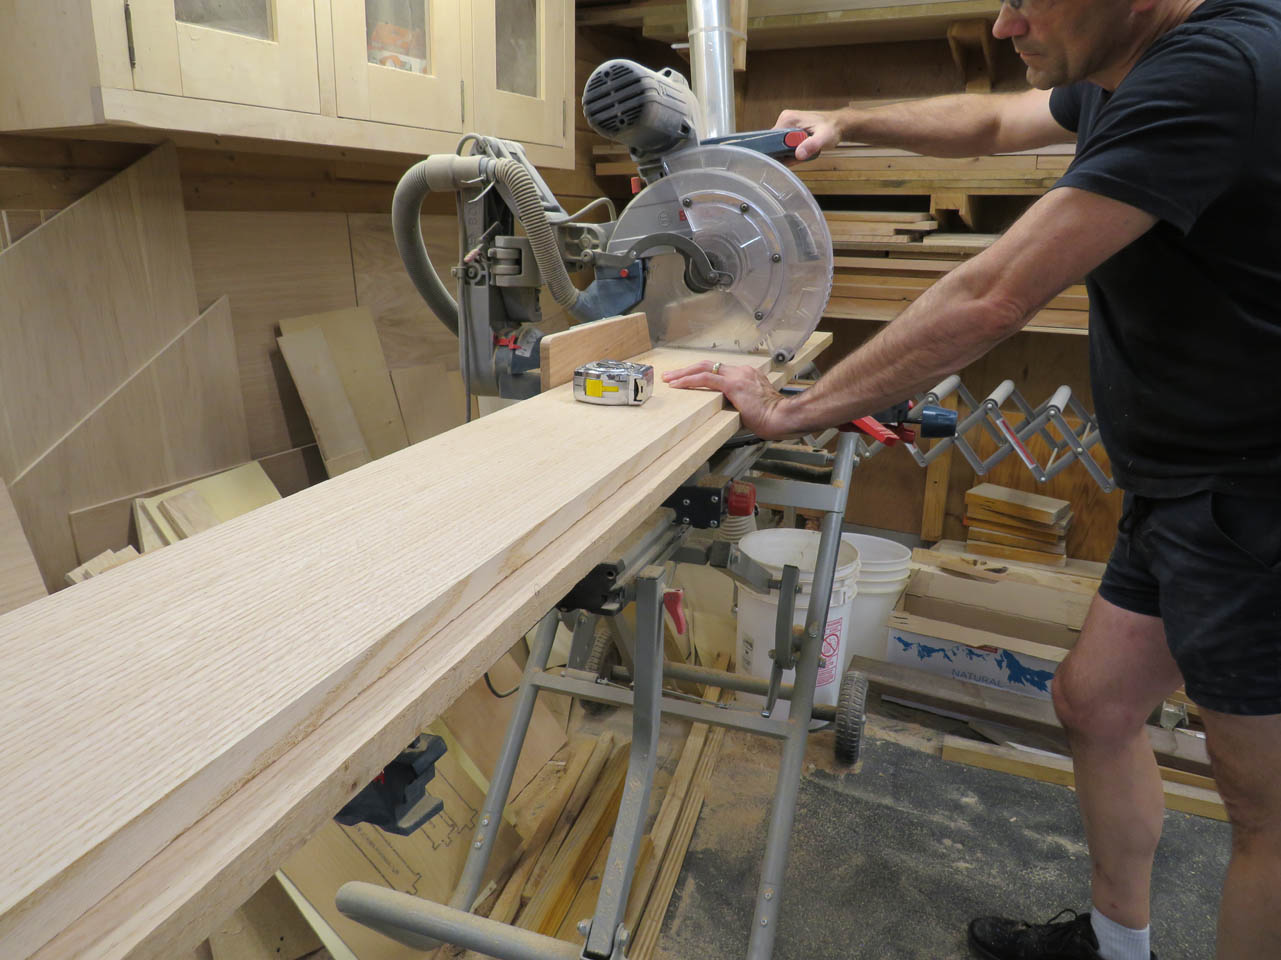
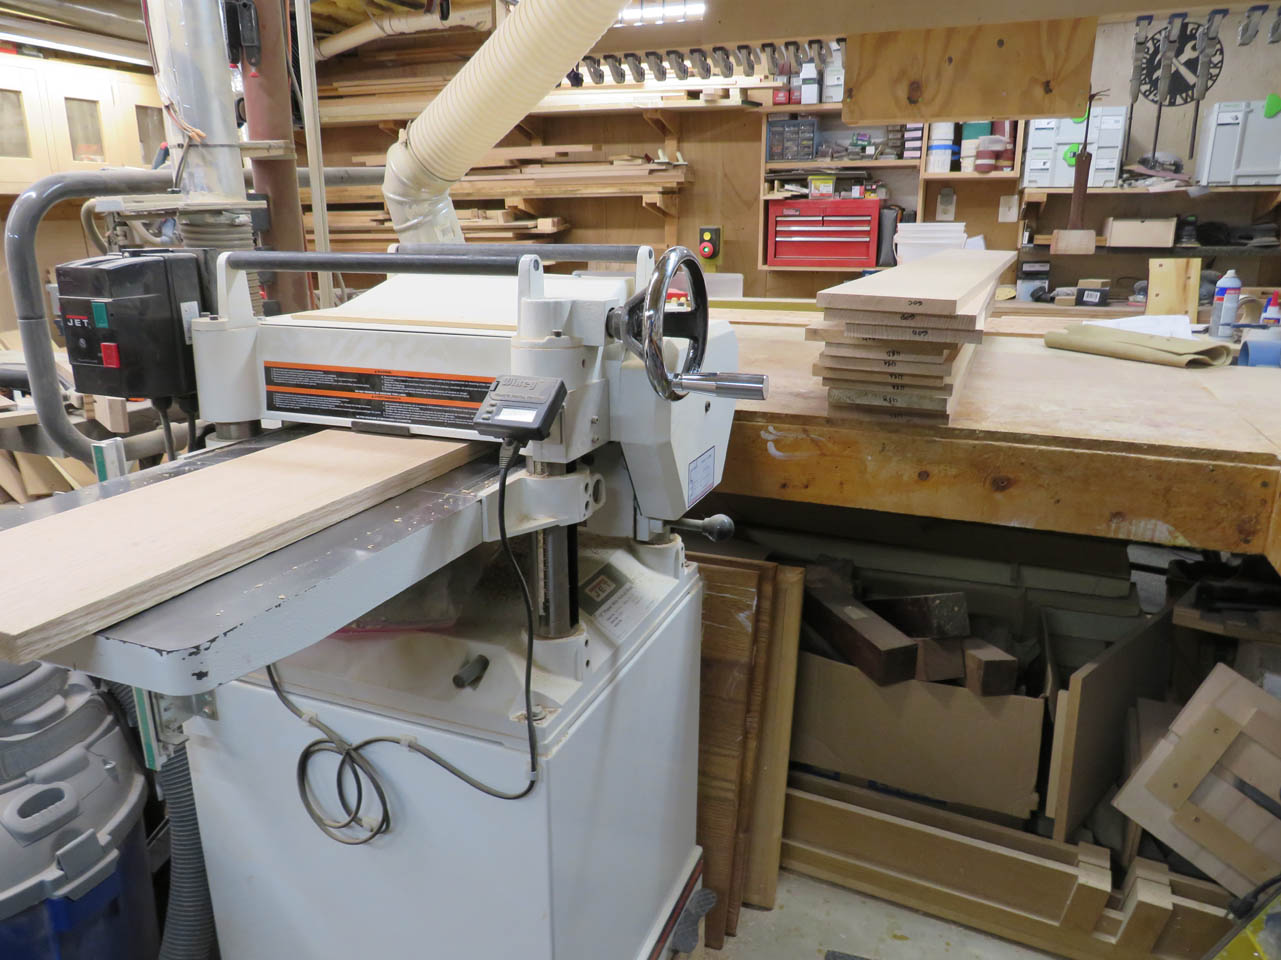
After I get all of the pieces cut and sorted, It is time to plane them all down to the final thickness. I had the mill plane the boards down to 1/16″ over the size I need so I only need to make a clean-up pass across each side to get my final thickness of 3/4″.
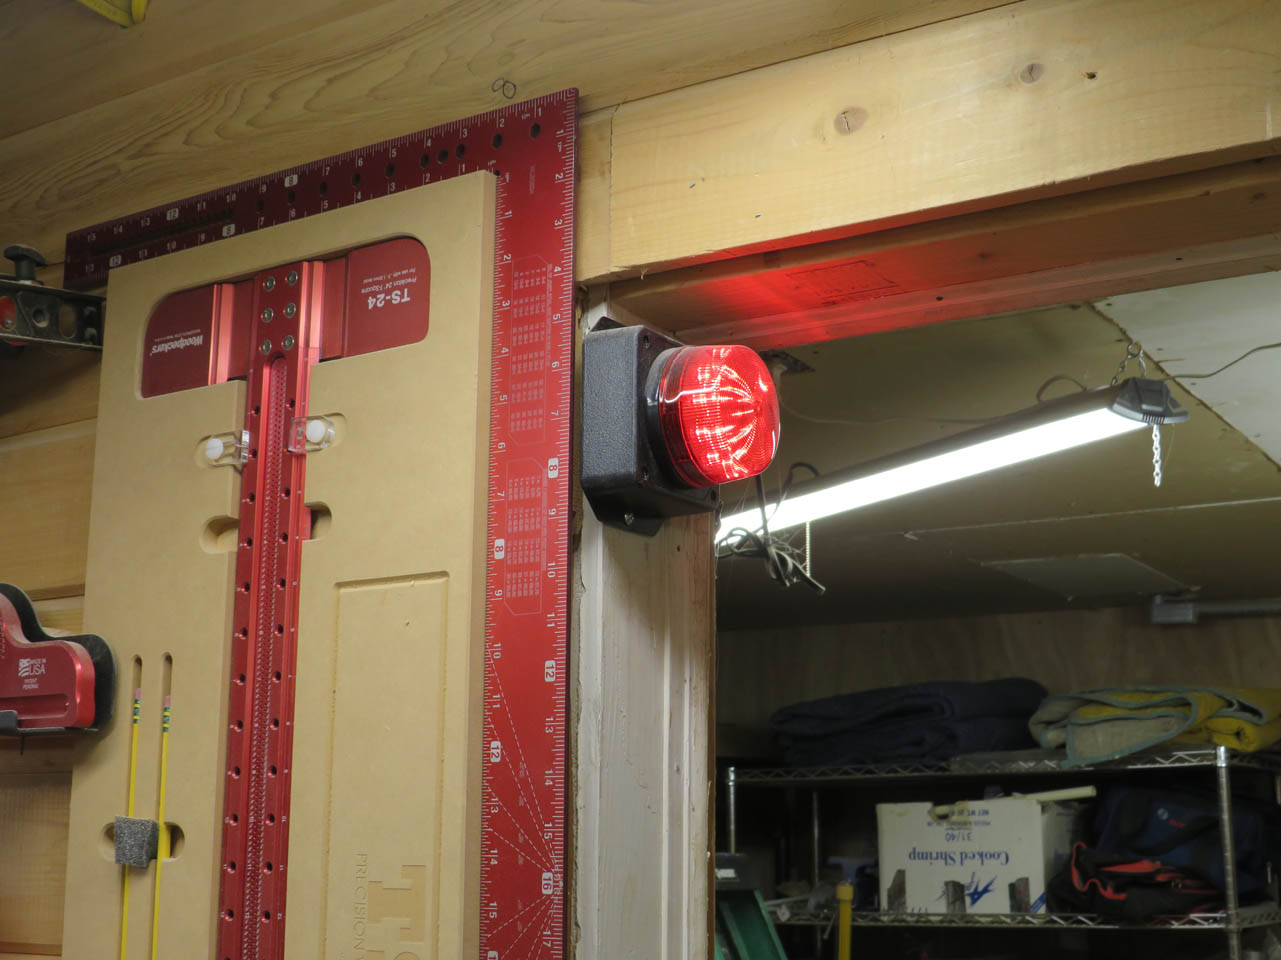
Before I can finish the warning light, connected to the dust collector, started flashing…
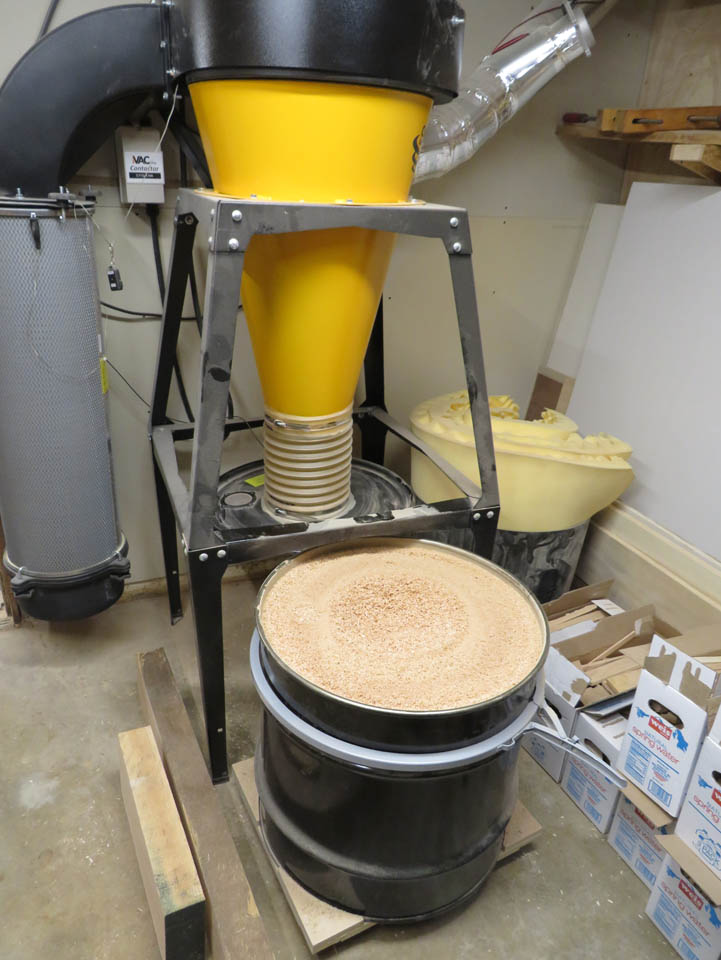
After bagging up my fifth, 35-gallon bag of sawdust from this project, I could get back to planing.

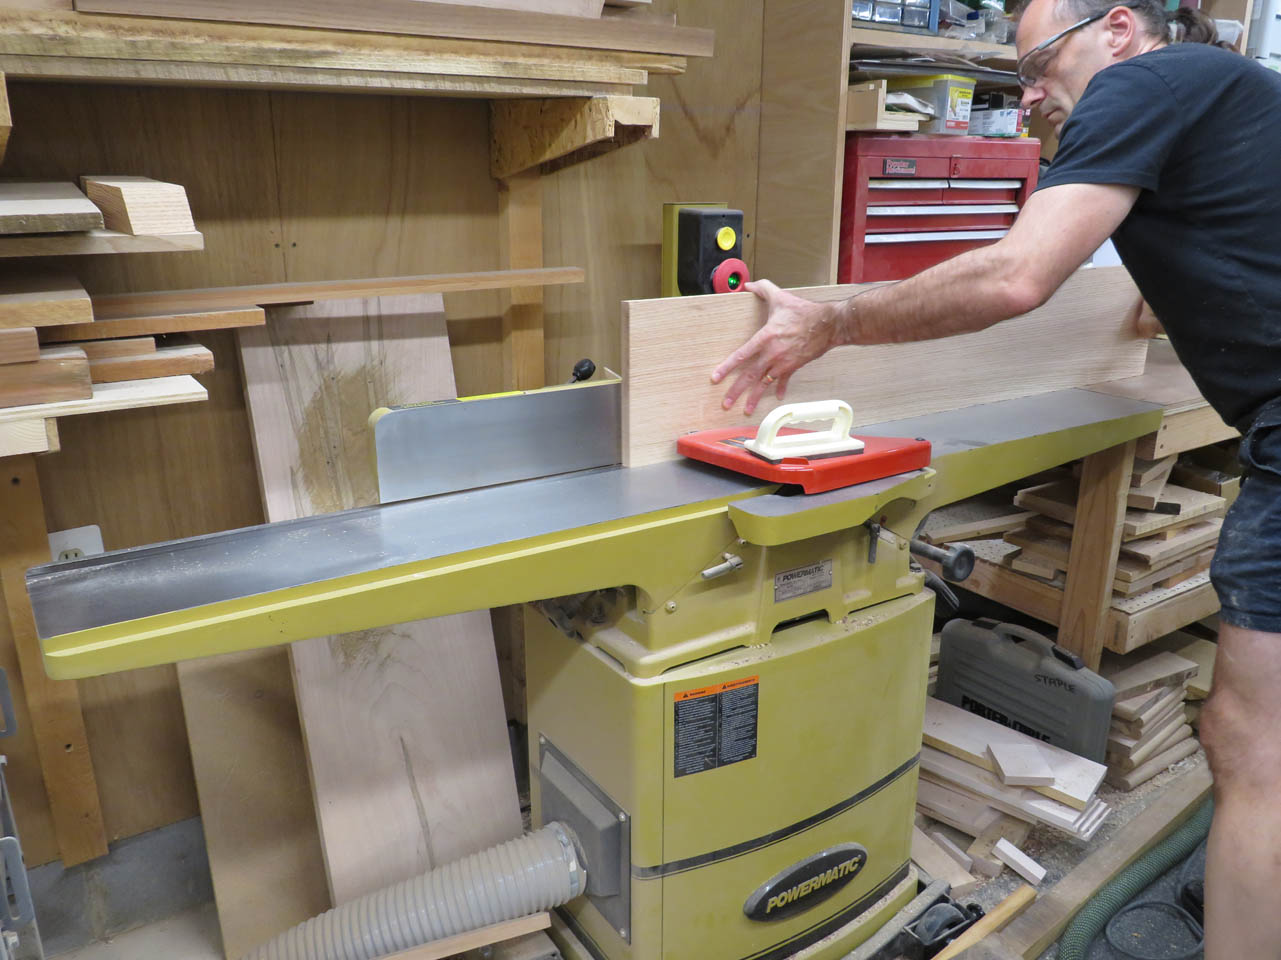
Since they will be too wide for my planer when joined, I had to plane them to the final thickness. I normally prefer to do that after joining to keep the panels perfectly flat. Since I can’t do that, I will be using floating tenons to keep the panels aligned.

To prepare for using the Domino jointer, I align the boards and draw a line across the joint to mark the location of each tenon.
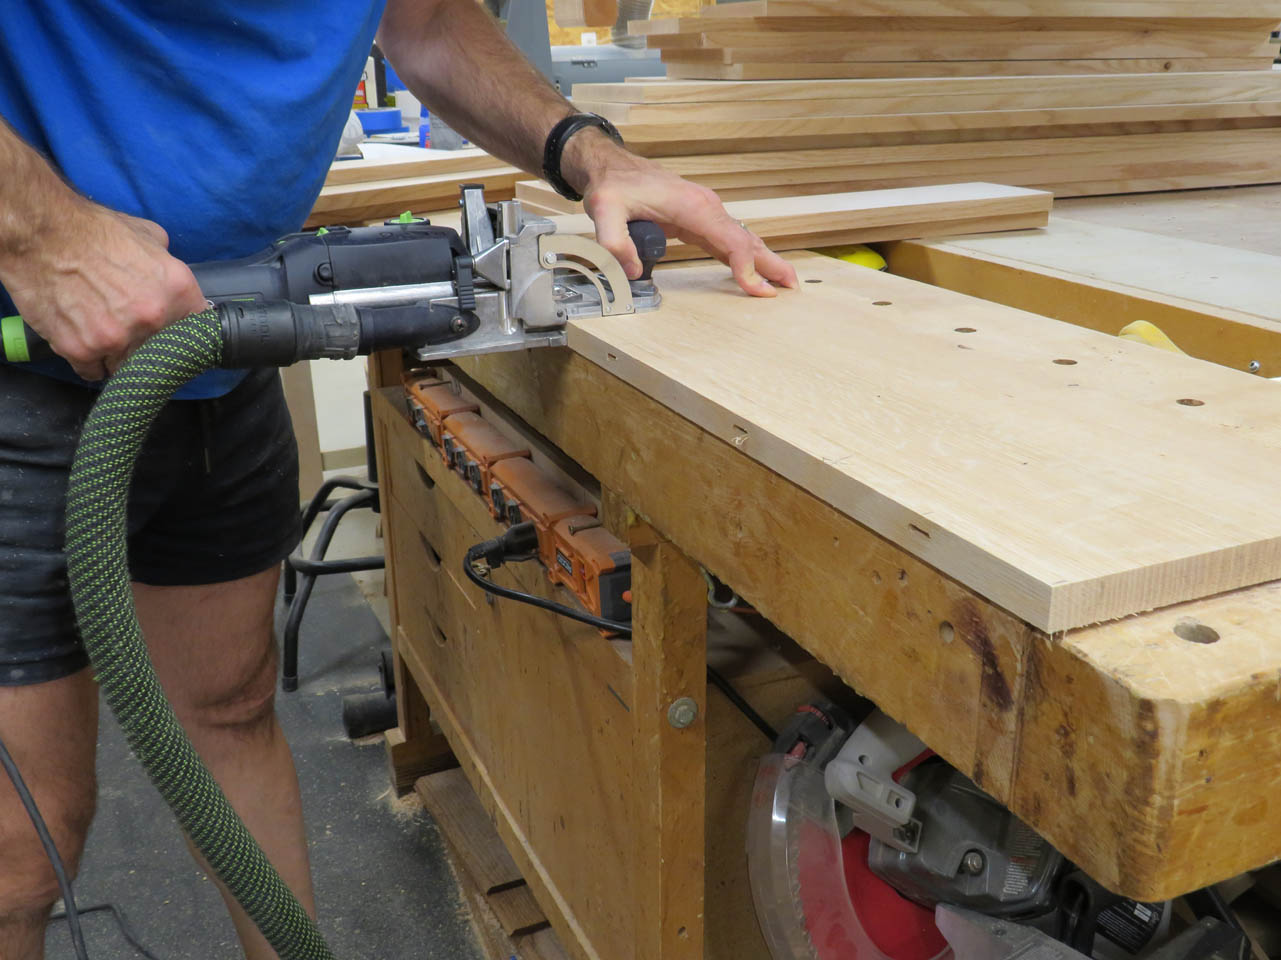
Then I can align my Domino jointer to the mark and plunge cut a mortise that is a perfect fit for the tenons.
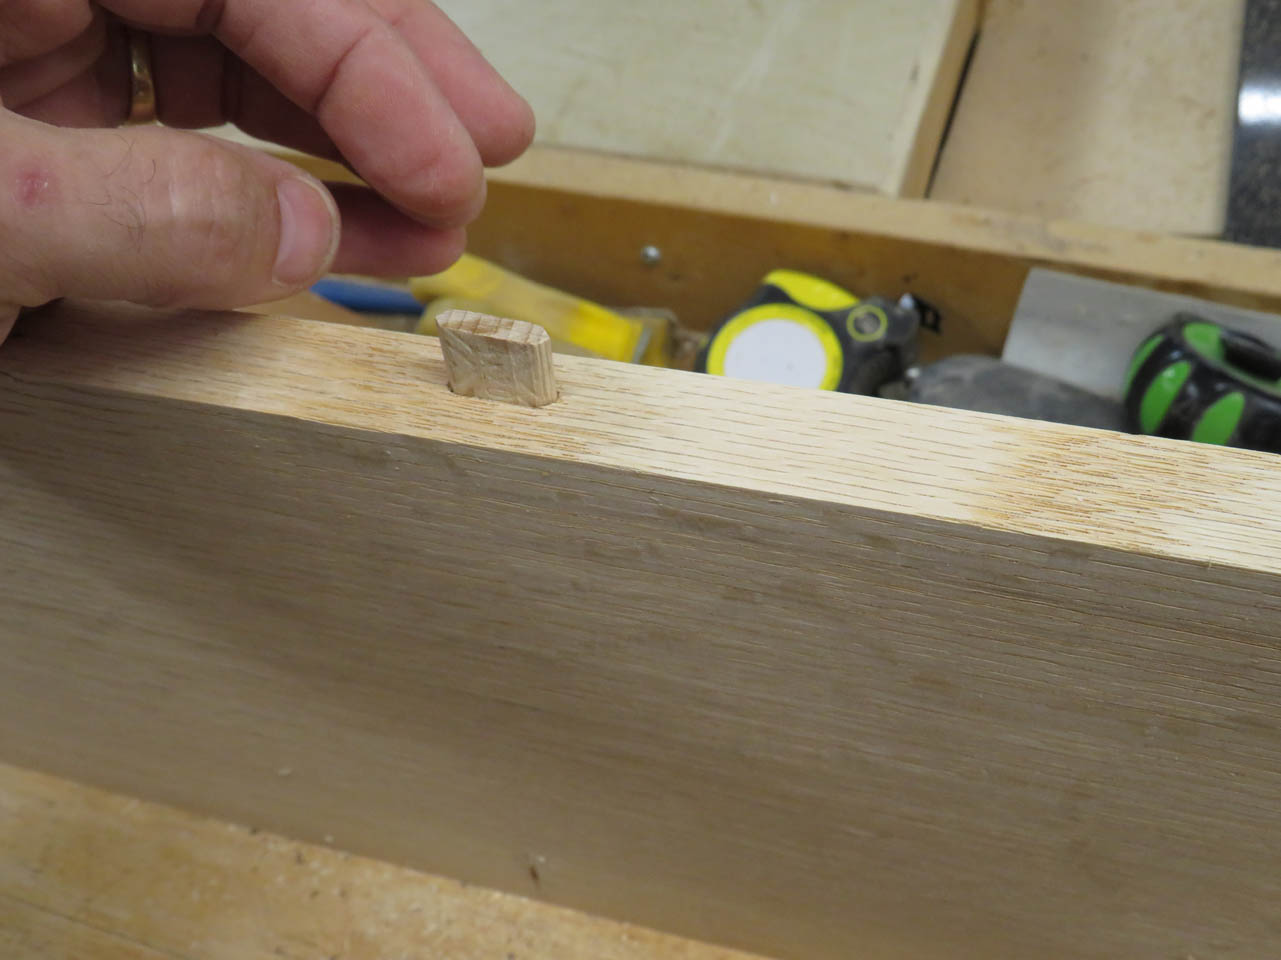
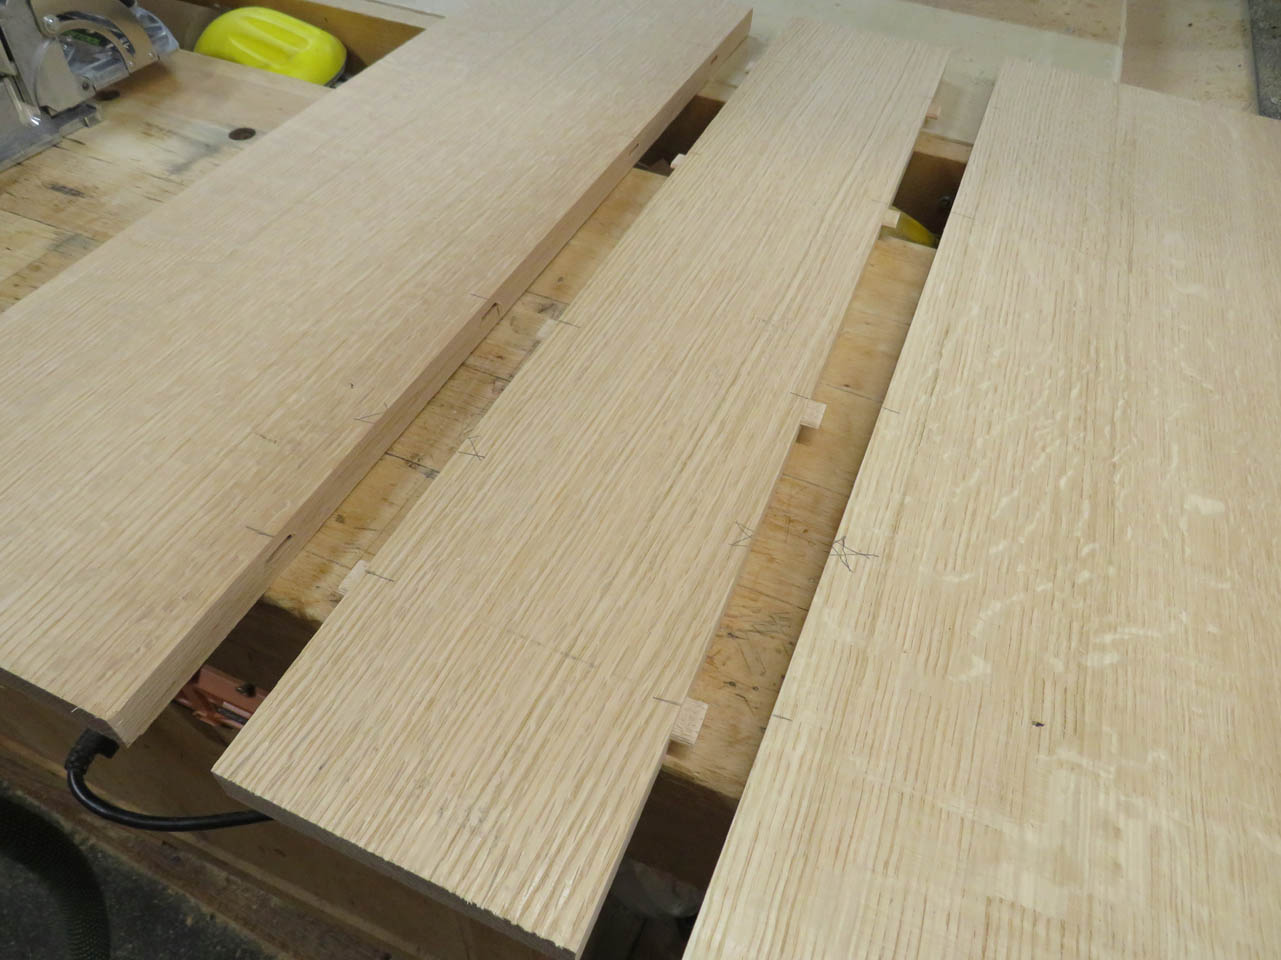
I pressed the tenons into one side of the joint and apply wood glue to the opposite side.
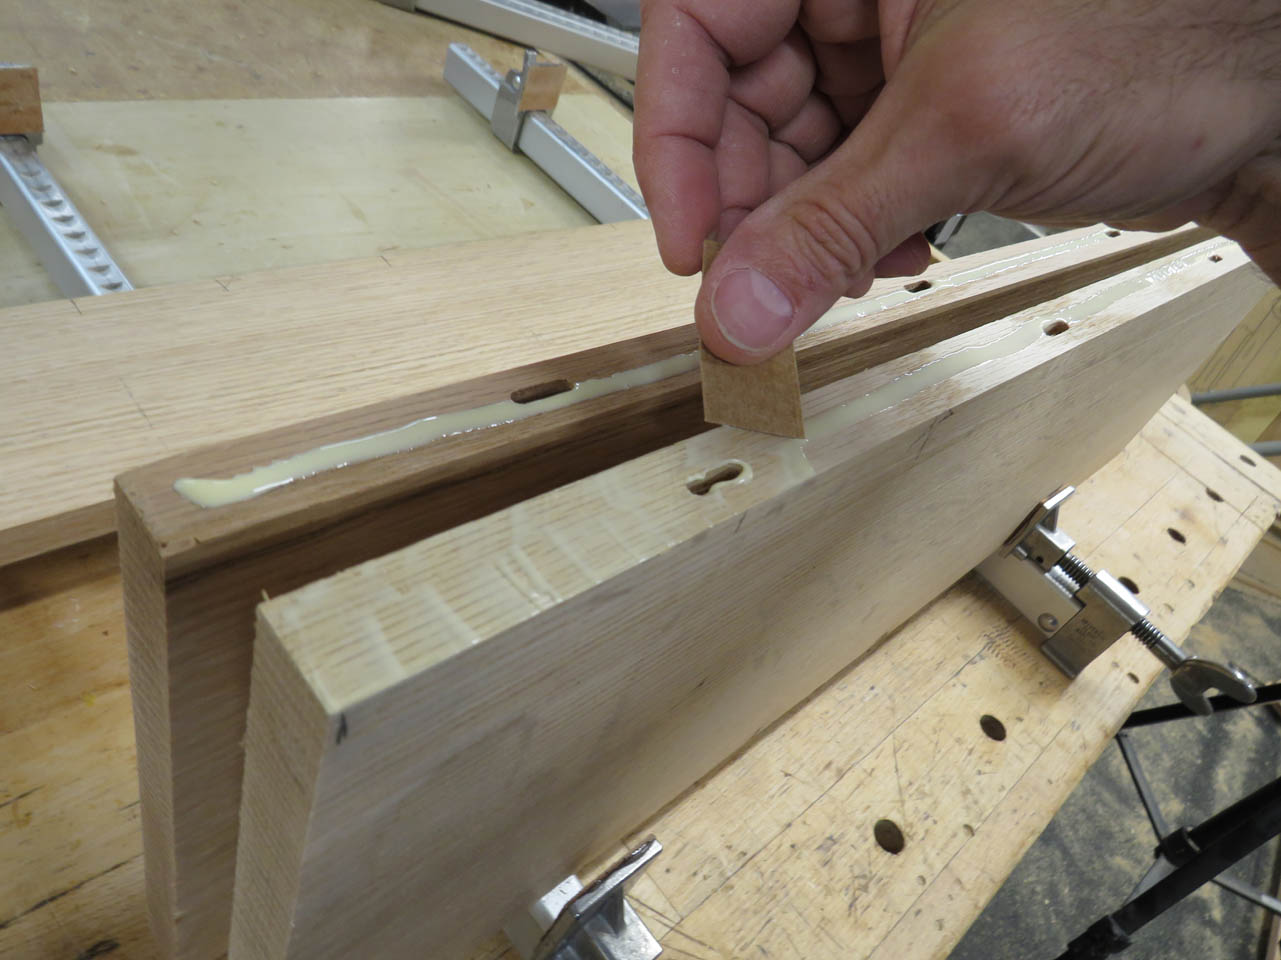
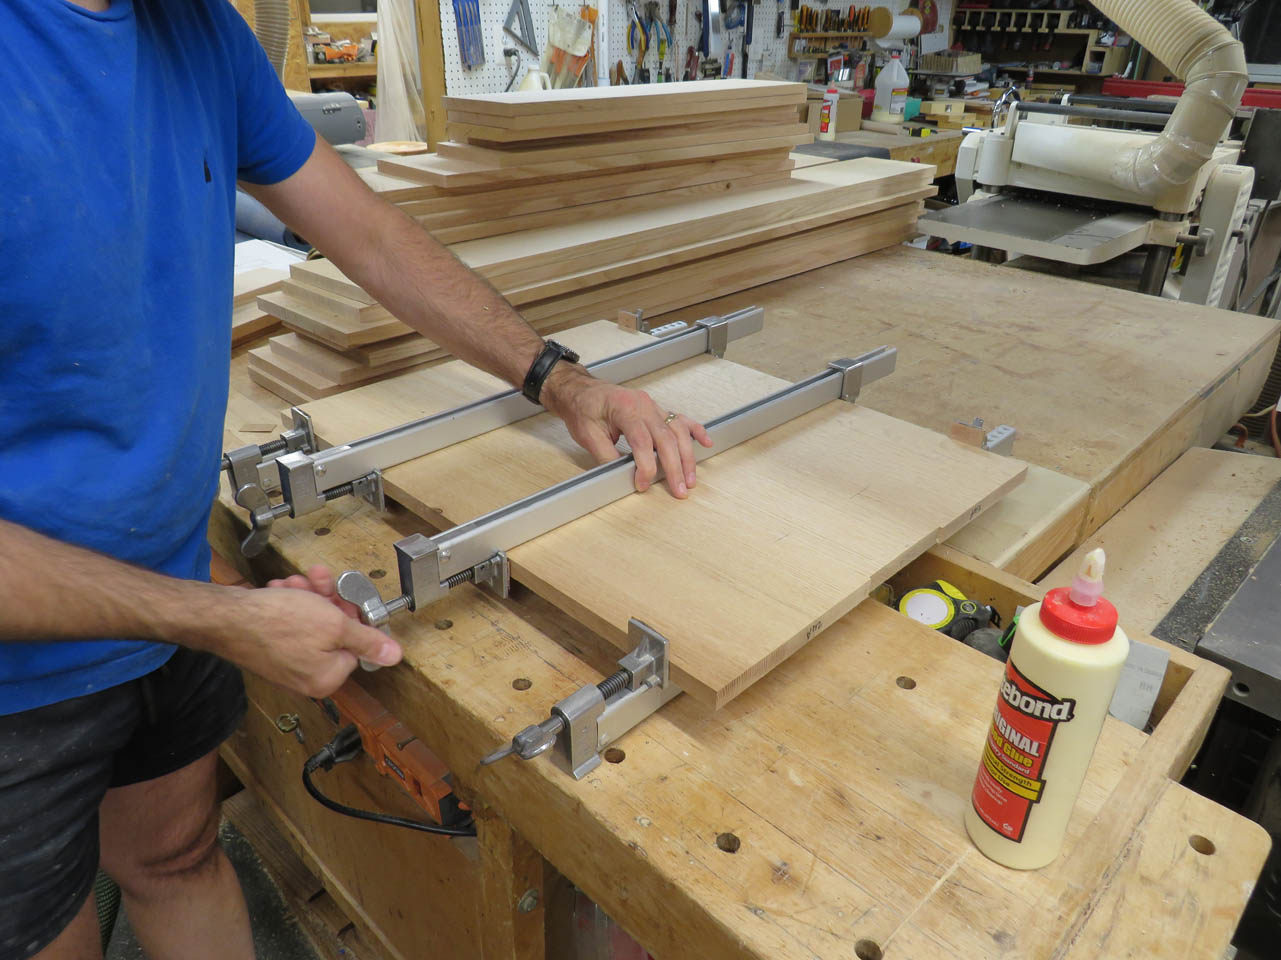
Then I clamp the boards together making sure to clamp over the top as well as the bottom to prevent the boards from cupping as they dry.
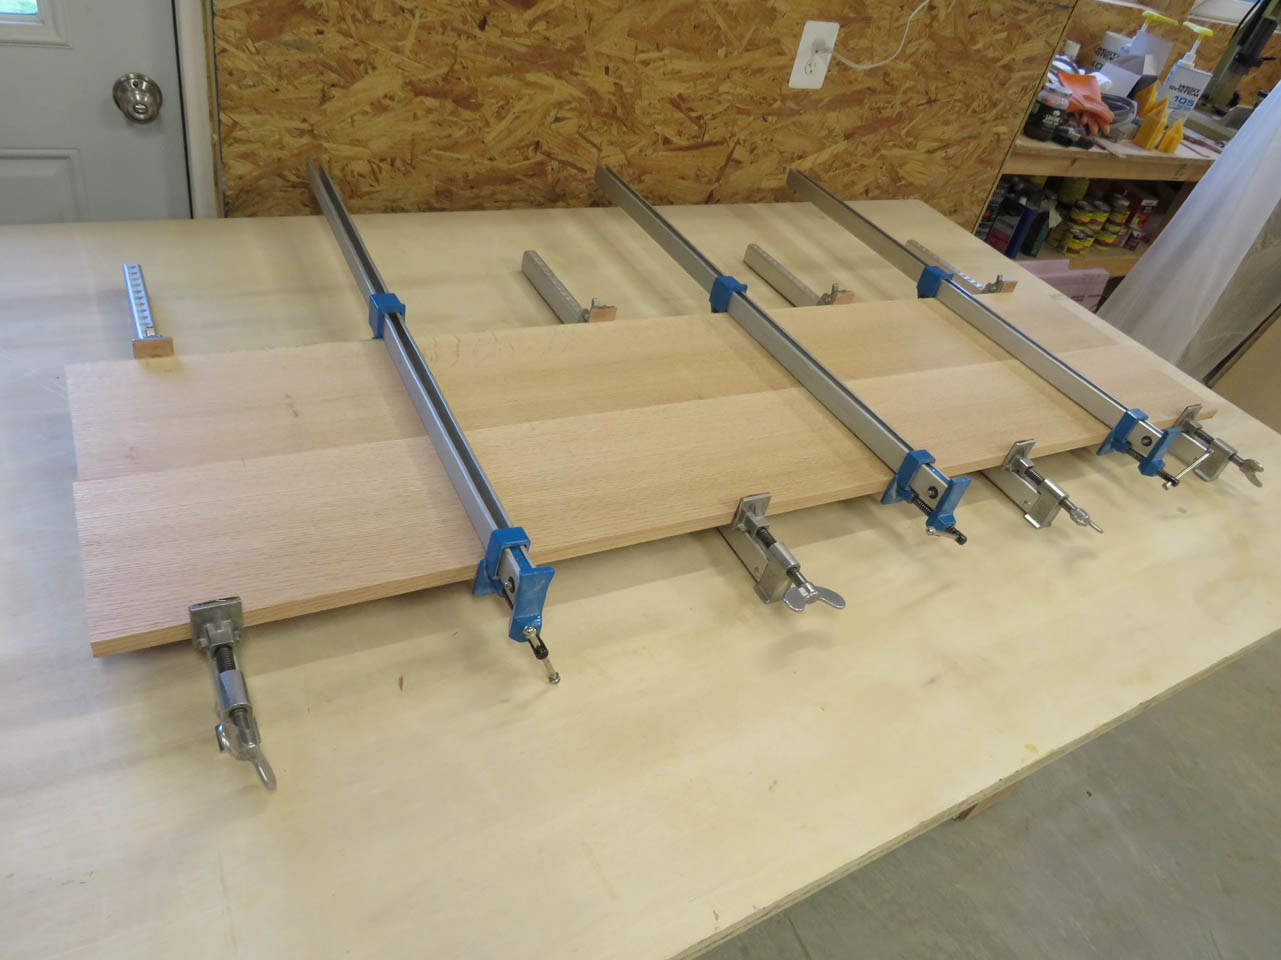
I can only do two or three panels at a time so I spent the day doing a couple of glue-ups, then waiting an hour or two for them to dry before gluing up the next batch.
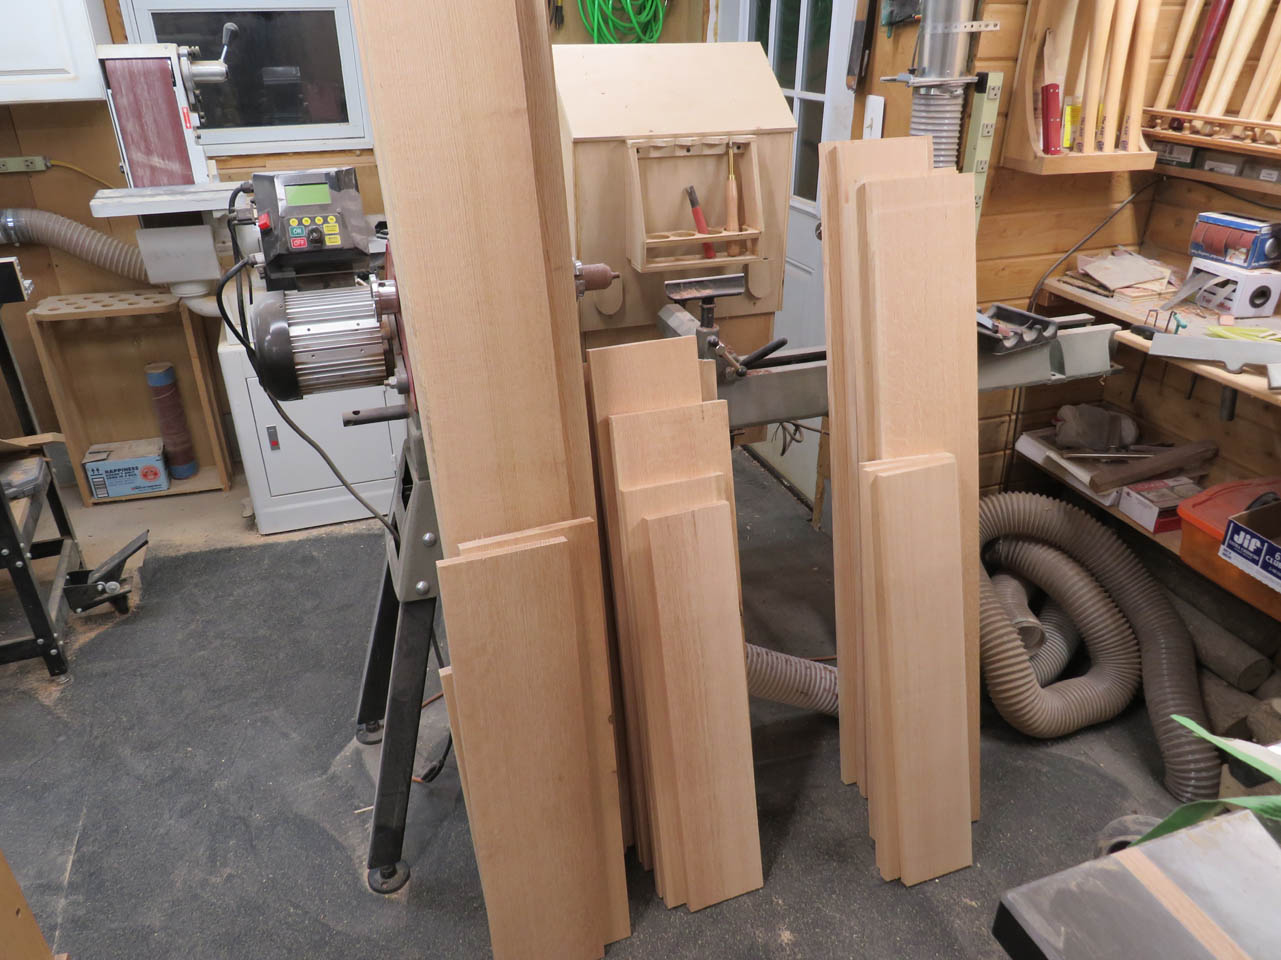
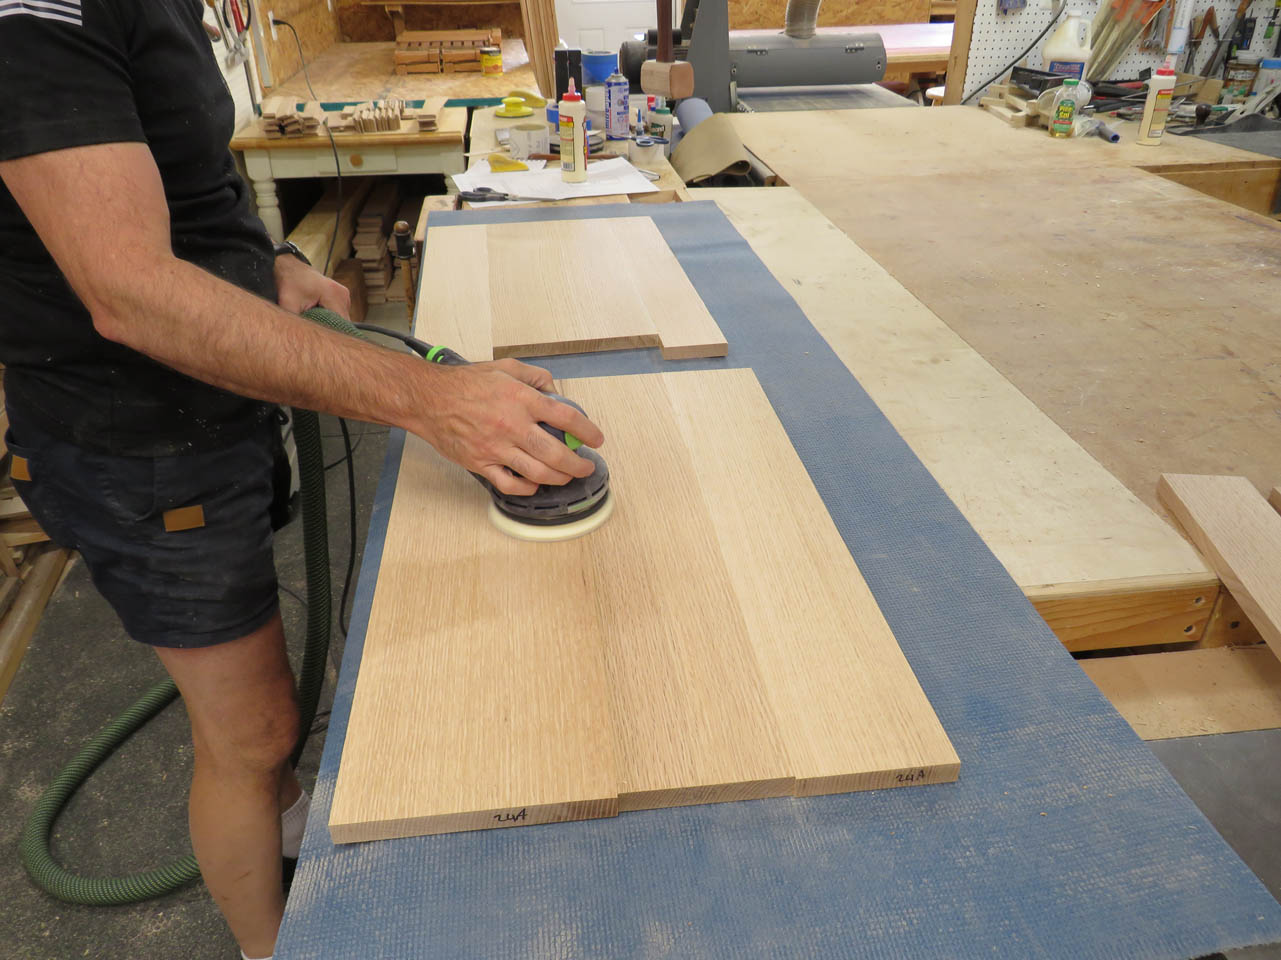
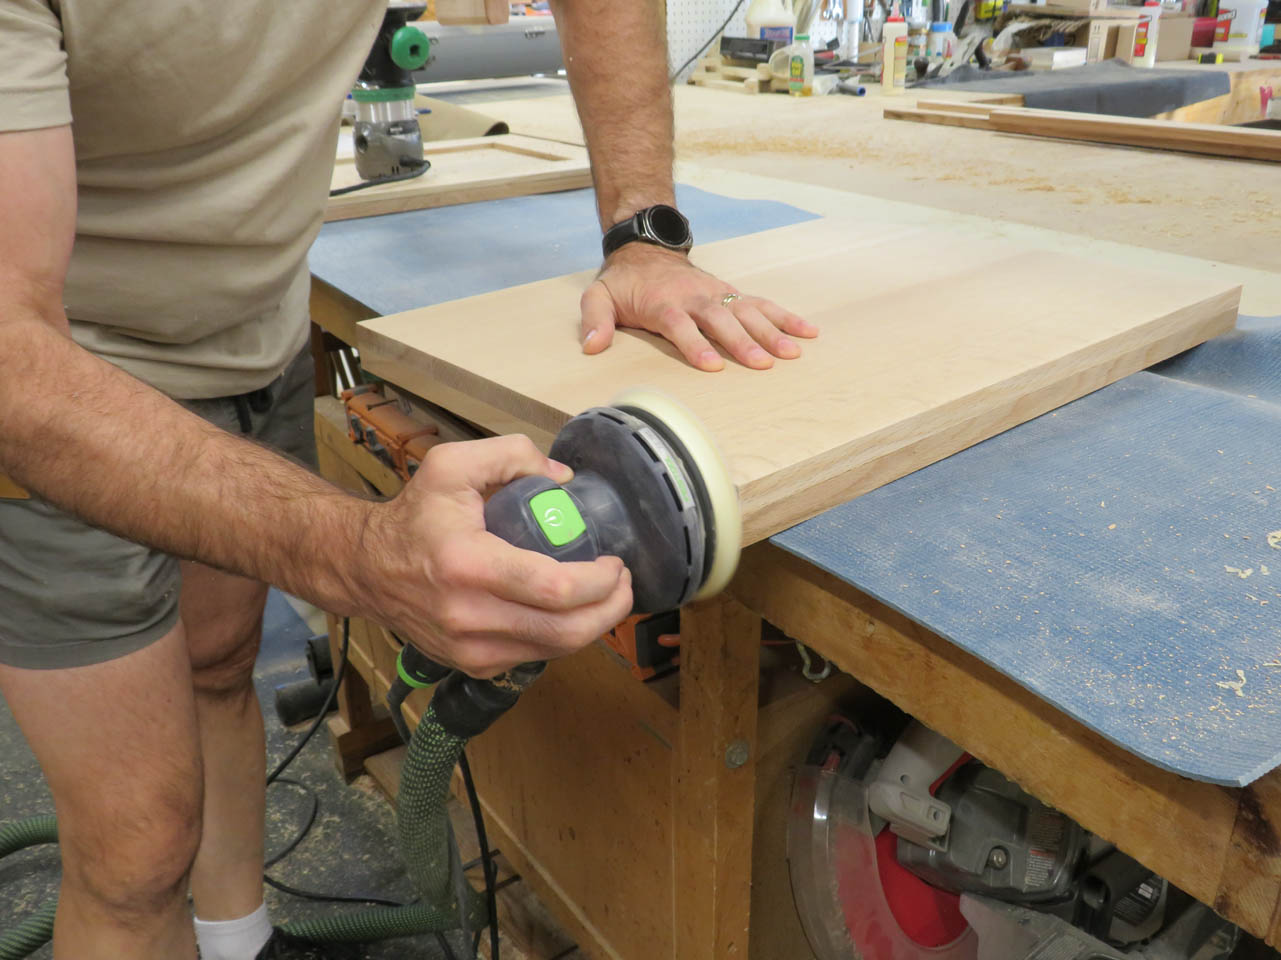
After all of my panels were dry enough to work with, I scraped off the glue squeeze-out and cut them down to the final width. Using the tenons to keep alignment helps keep the panels flat enough that a quick sanding with the orbital sander flattens the joints smooth.
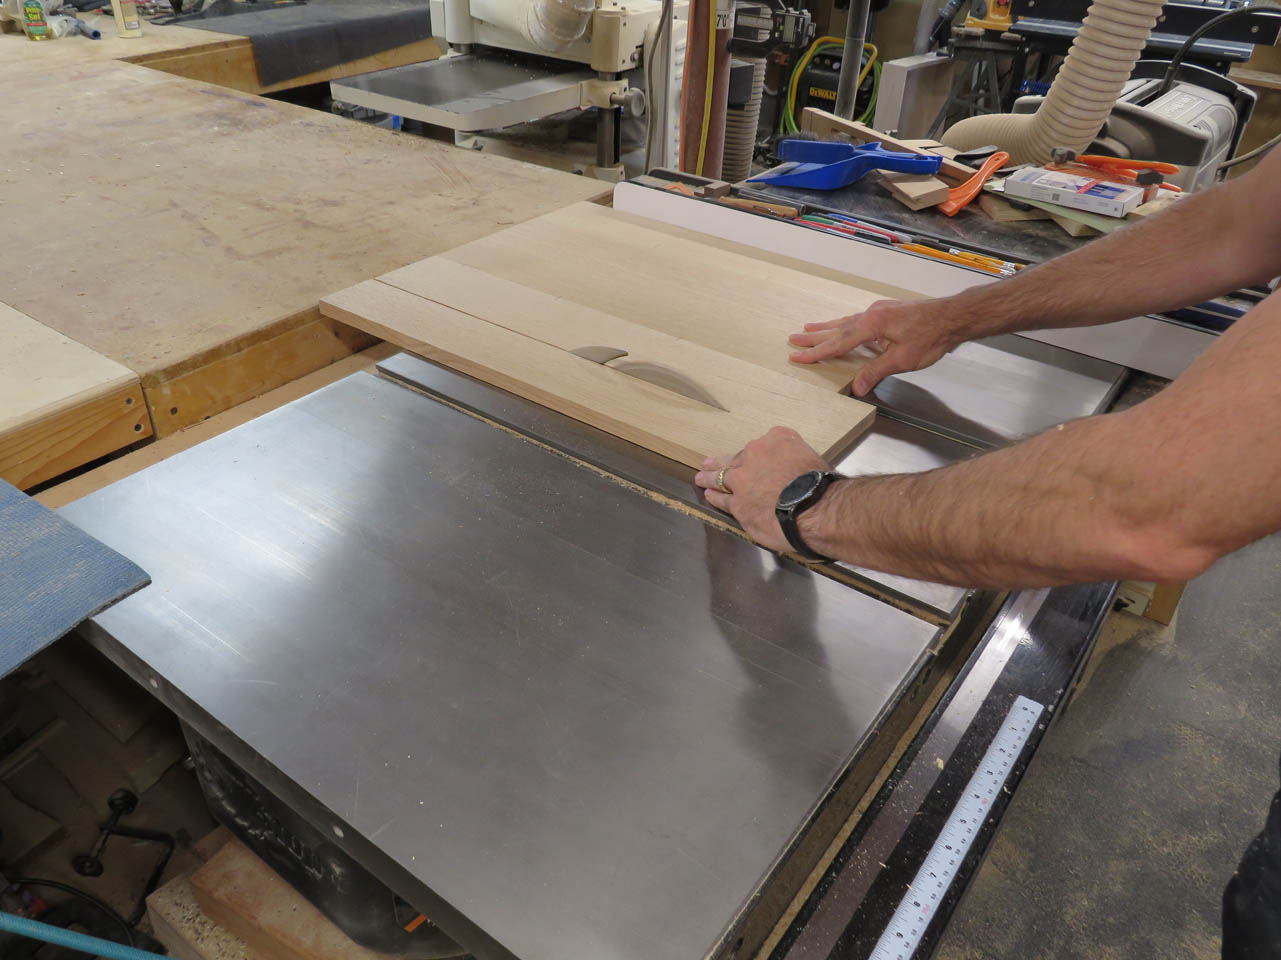
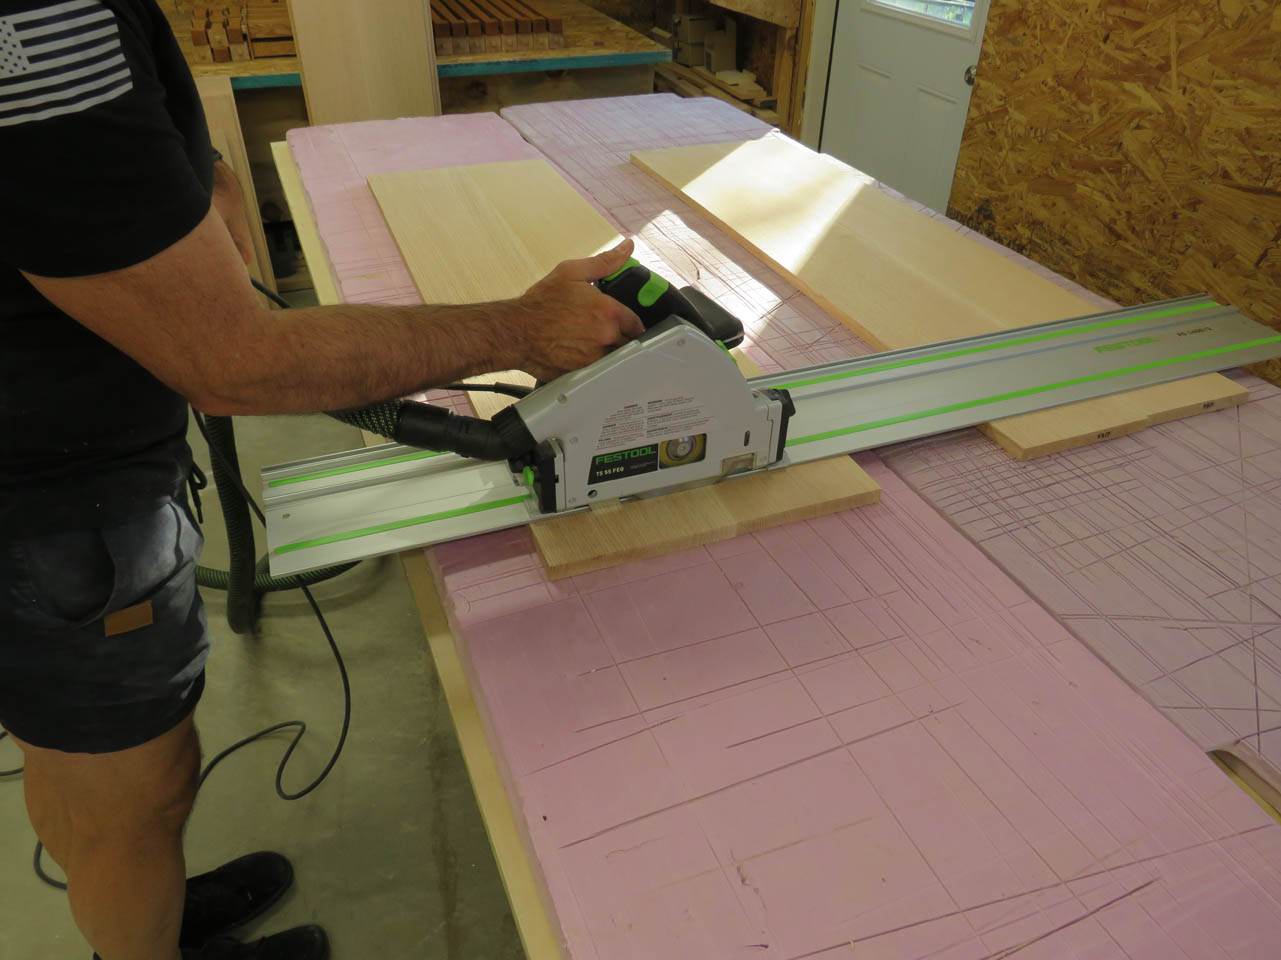
The next step was to mark a cut line on each side so that the boards could be cut to the correct length.
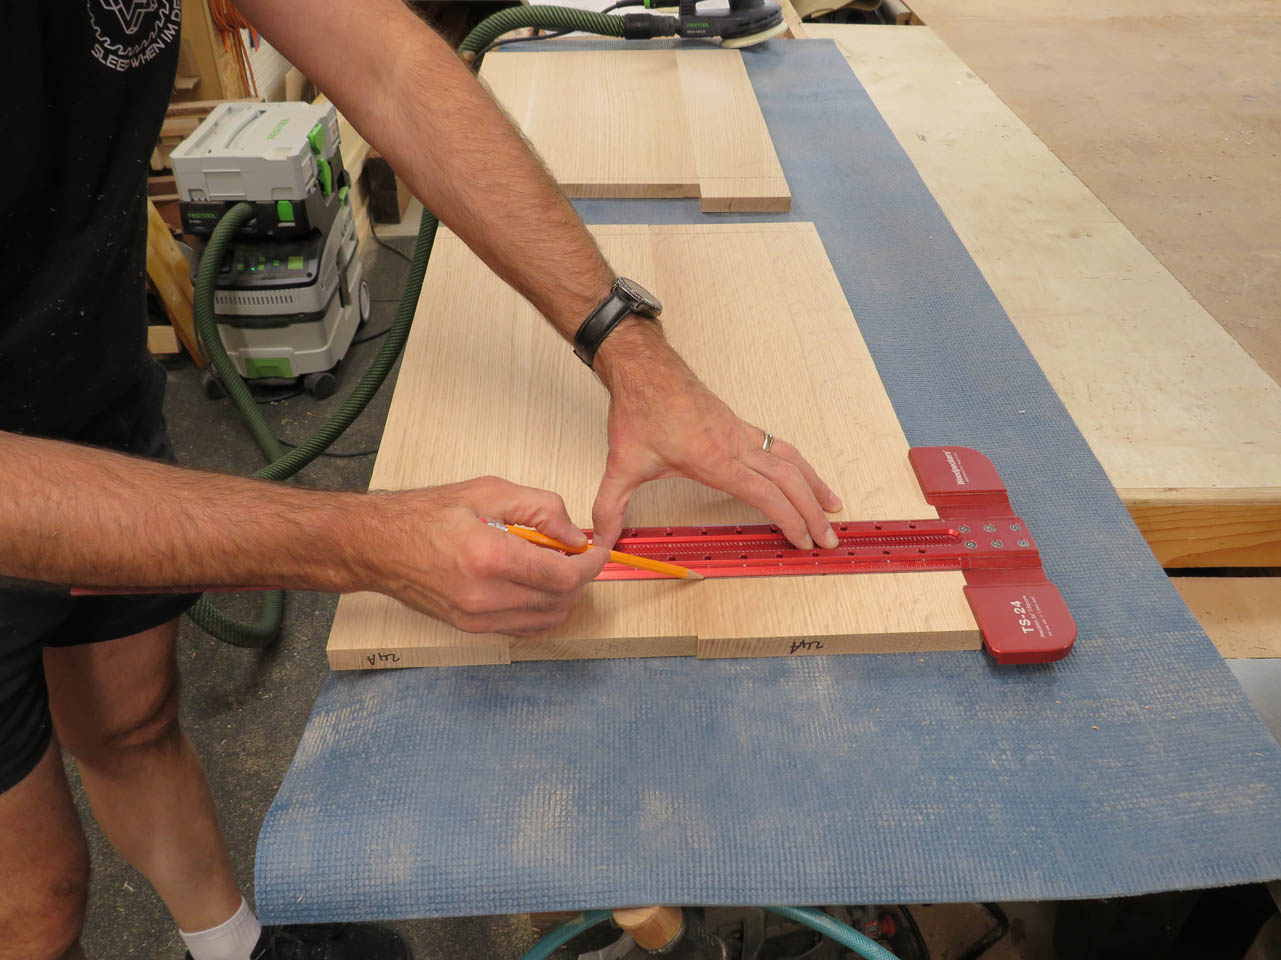
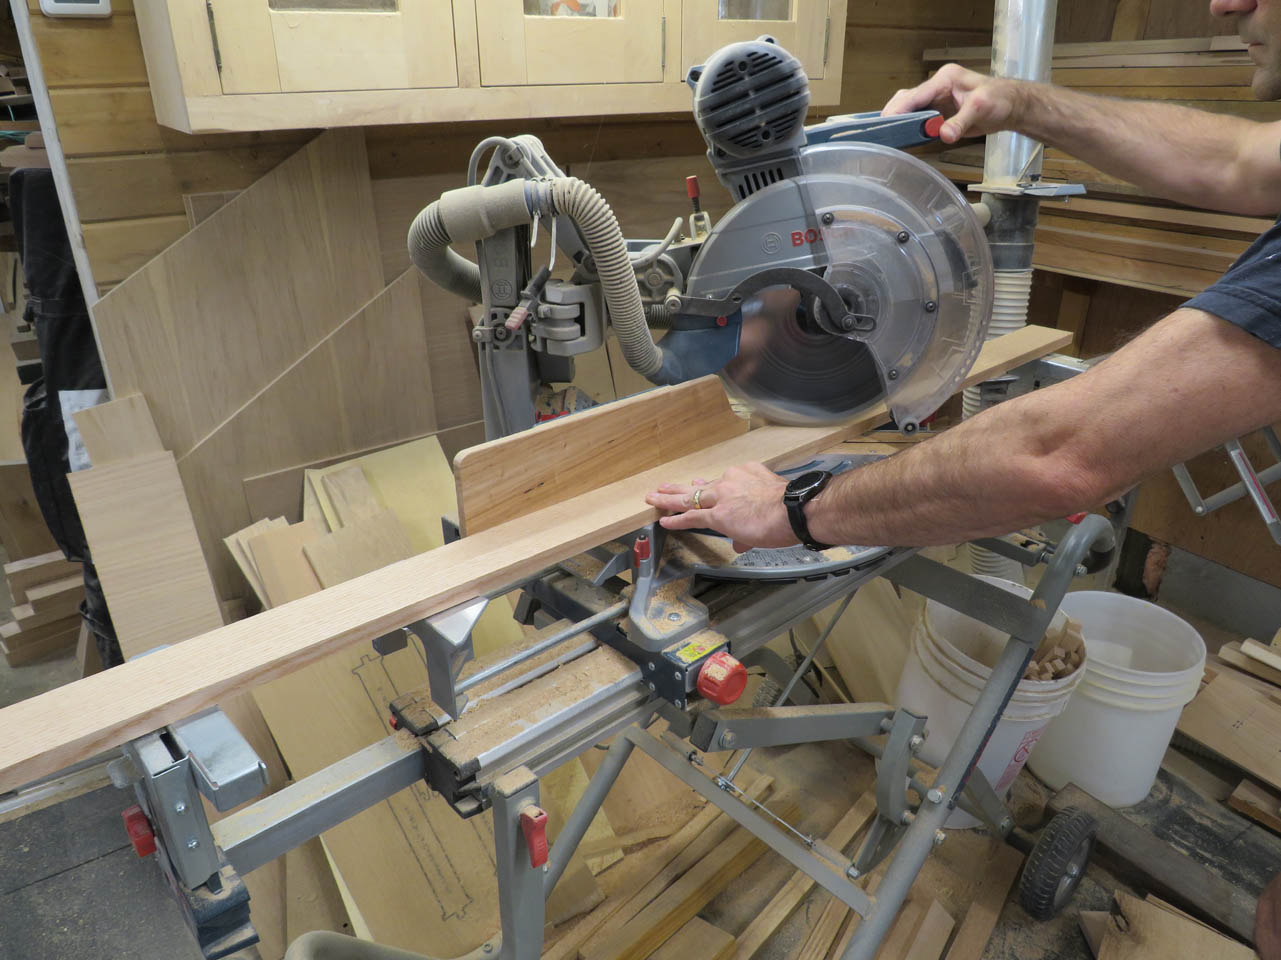
The best way to make this cut is with the track saw.
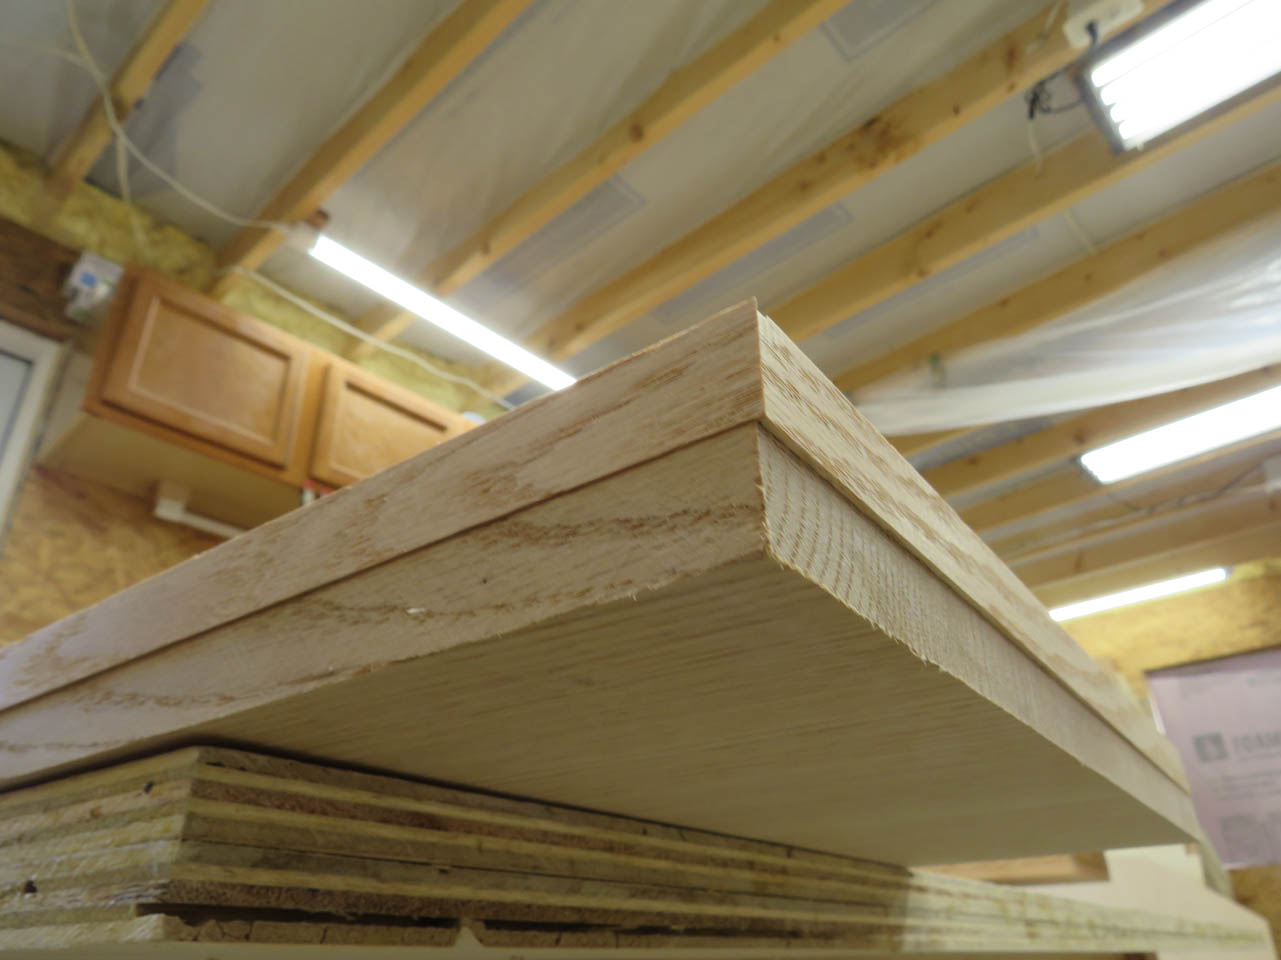
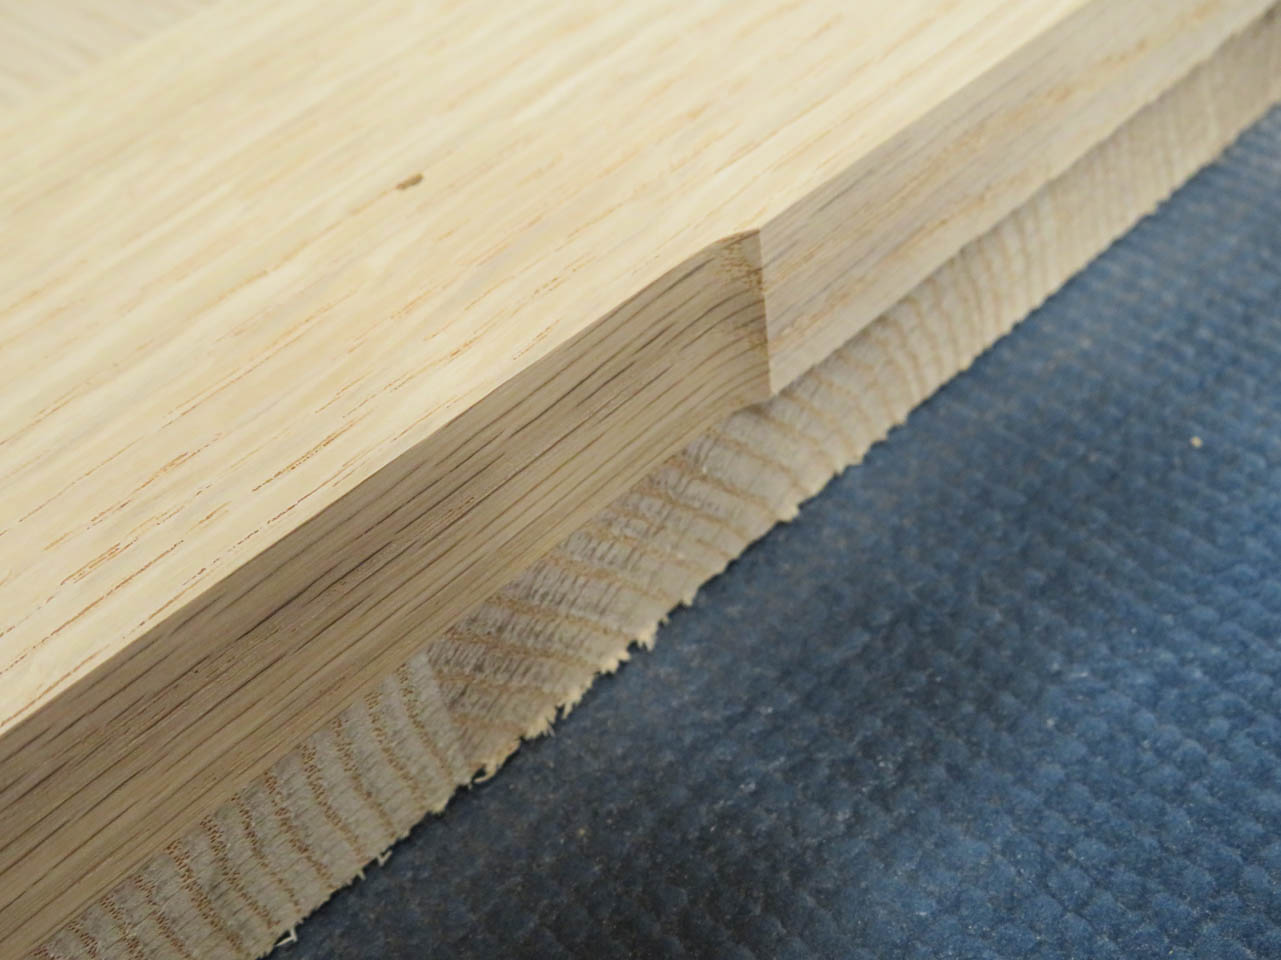
Each of these shelves needs to be thicker than 3/4″ so I am adding a 3″ wide strip along the bottom perimeter of each. For the table tops, the total thickness is 1-1/2″ so I need to add an additional 3/4″. For the shelves, I will need to add 3/8″ thick strips to total 1-1/8″ thick.

So I start picking through my off-cuts to find 3″ wide short pieces.
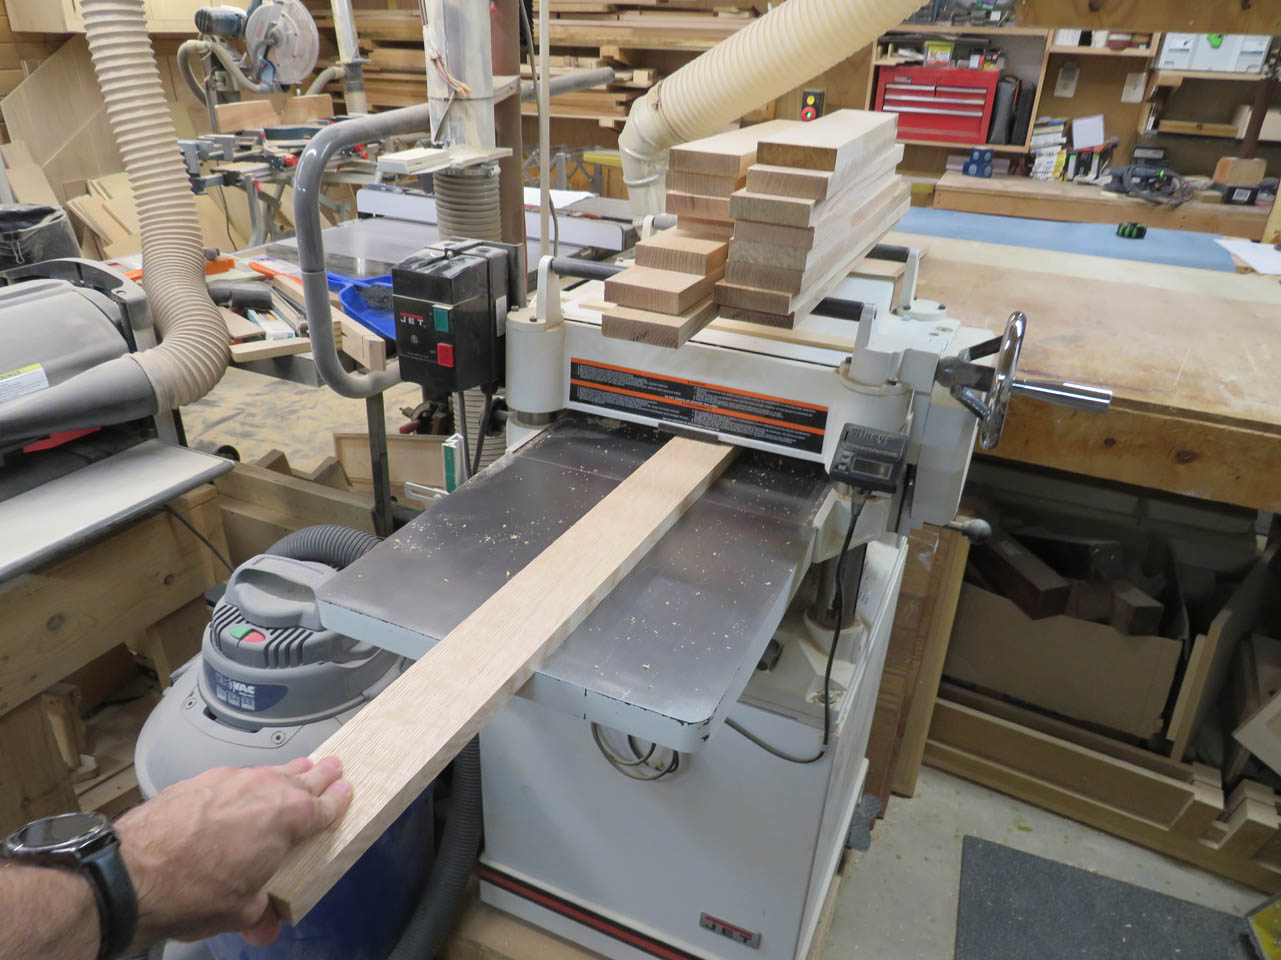
Then cut down and plane some new boards for the longer ones.

These strips will be mitered and joined around the bottom of the shelves.
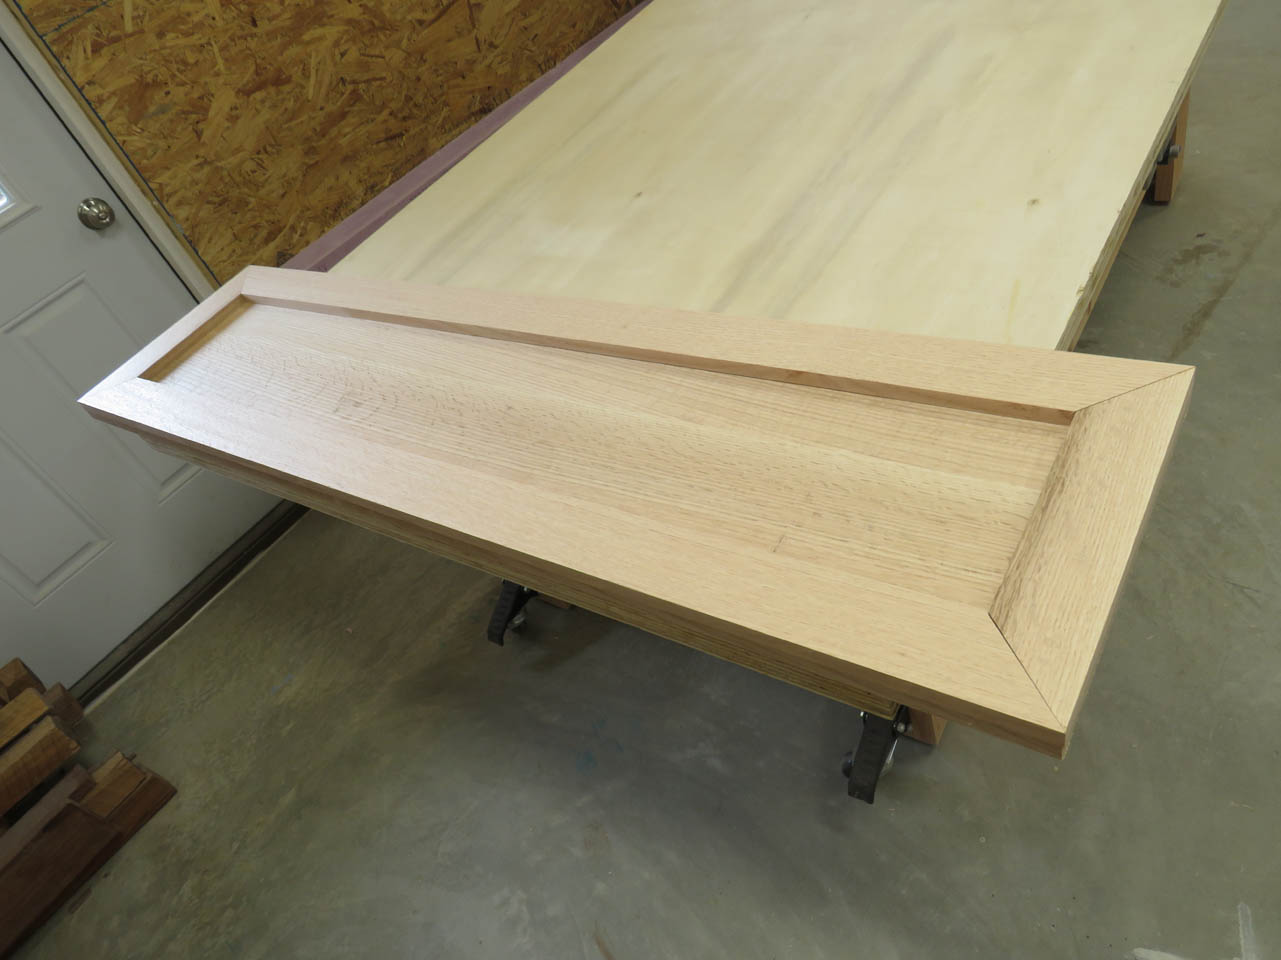
I cut them intentionally oversized so that they would overhang slightly when glued in place. This will be flush-cut later.
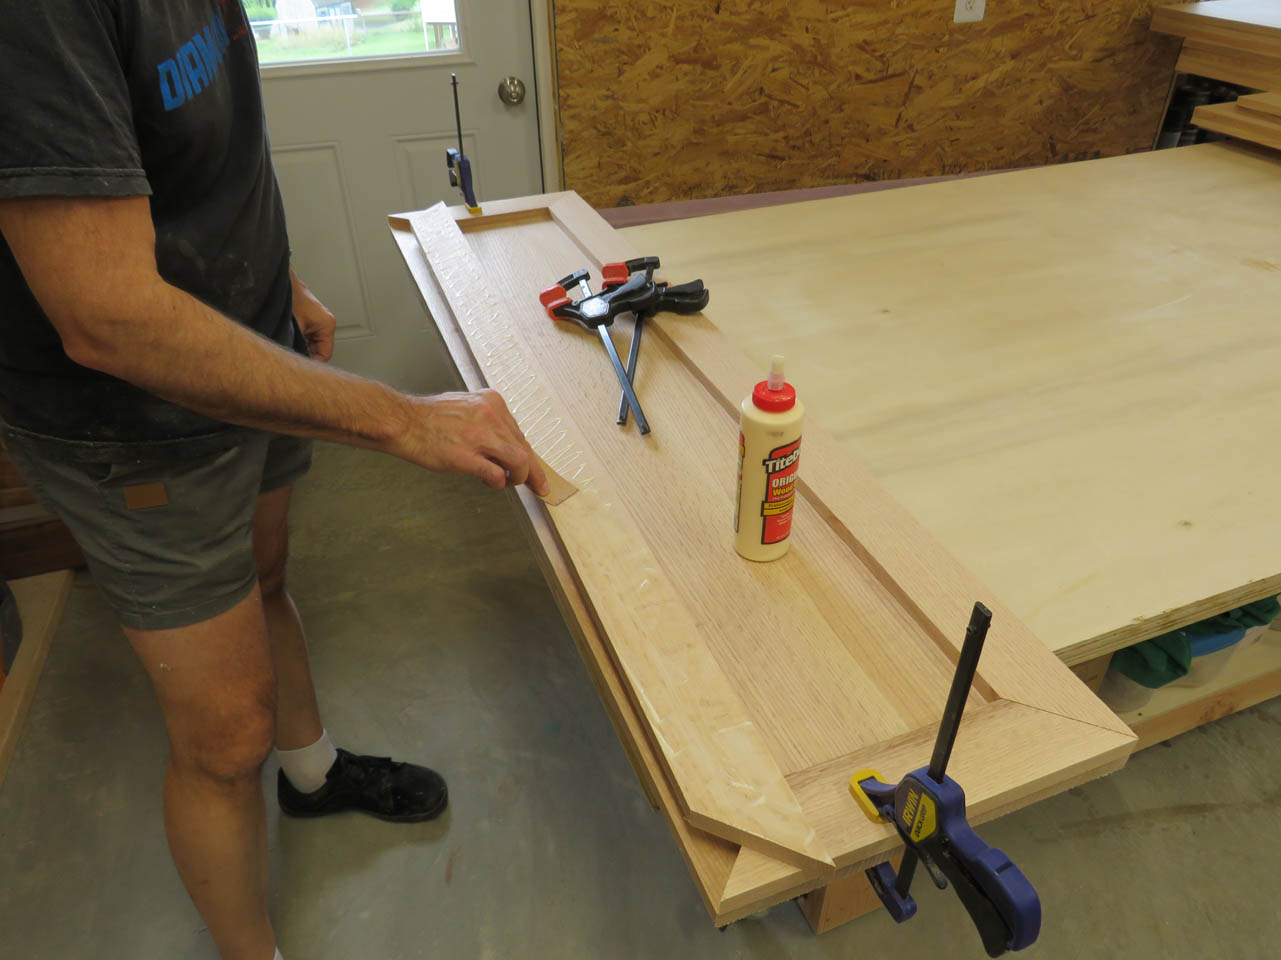
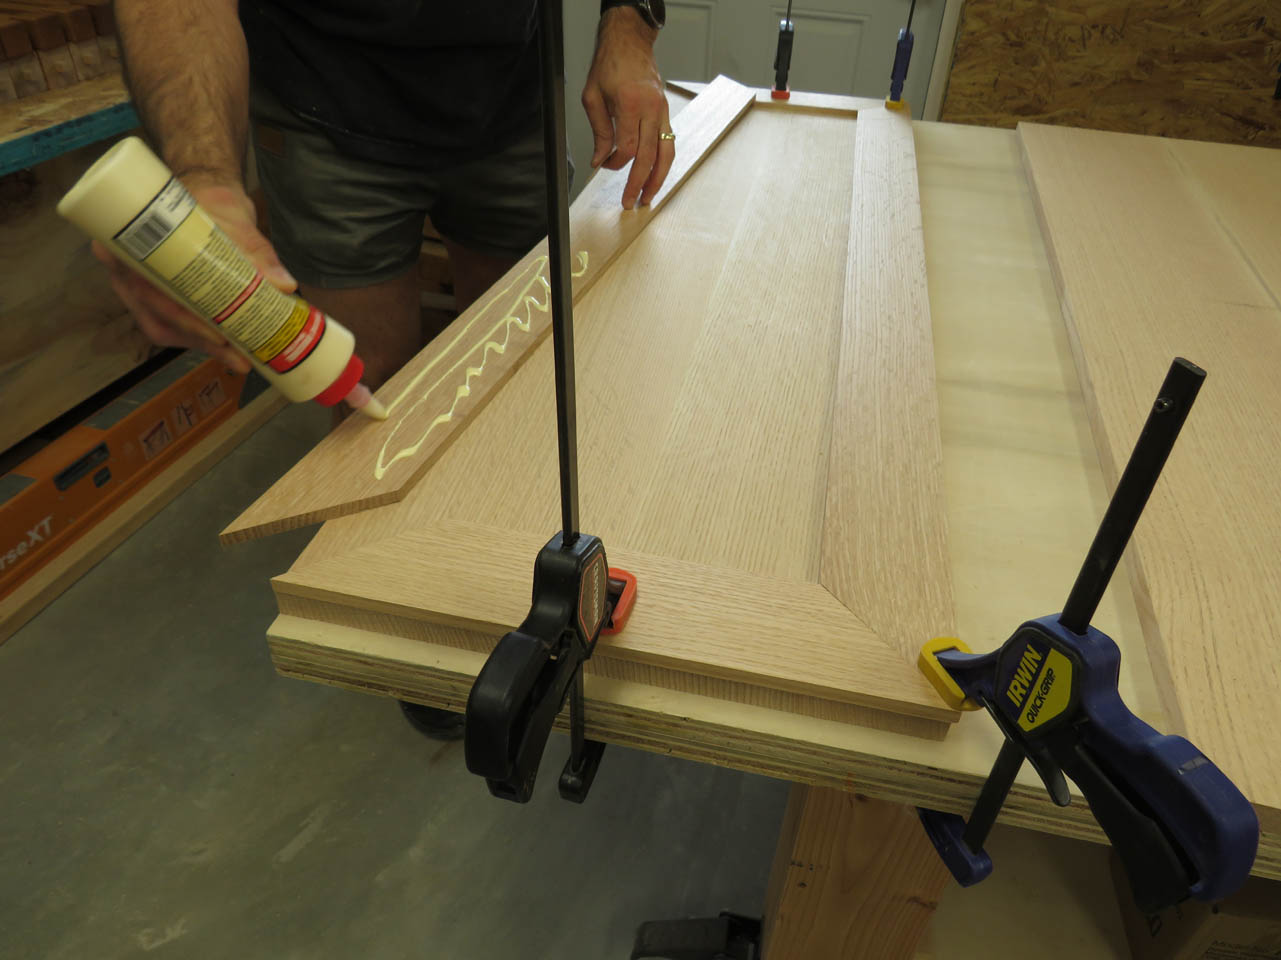
Each strip gets a thin layer of wood glue applied, then gets clamped in place before attaching with 18-gauge brad nails.
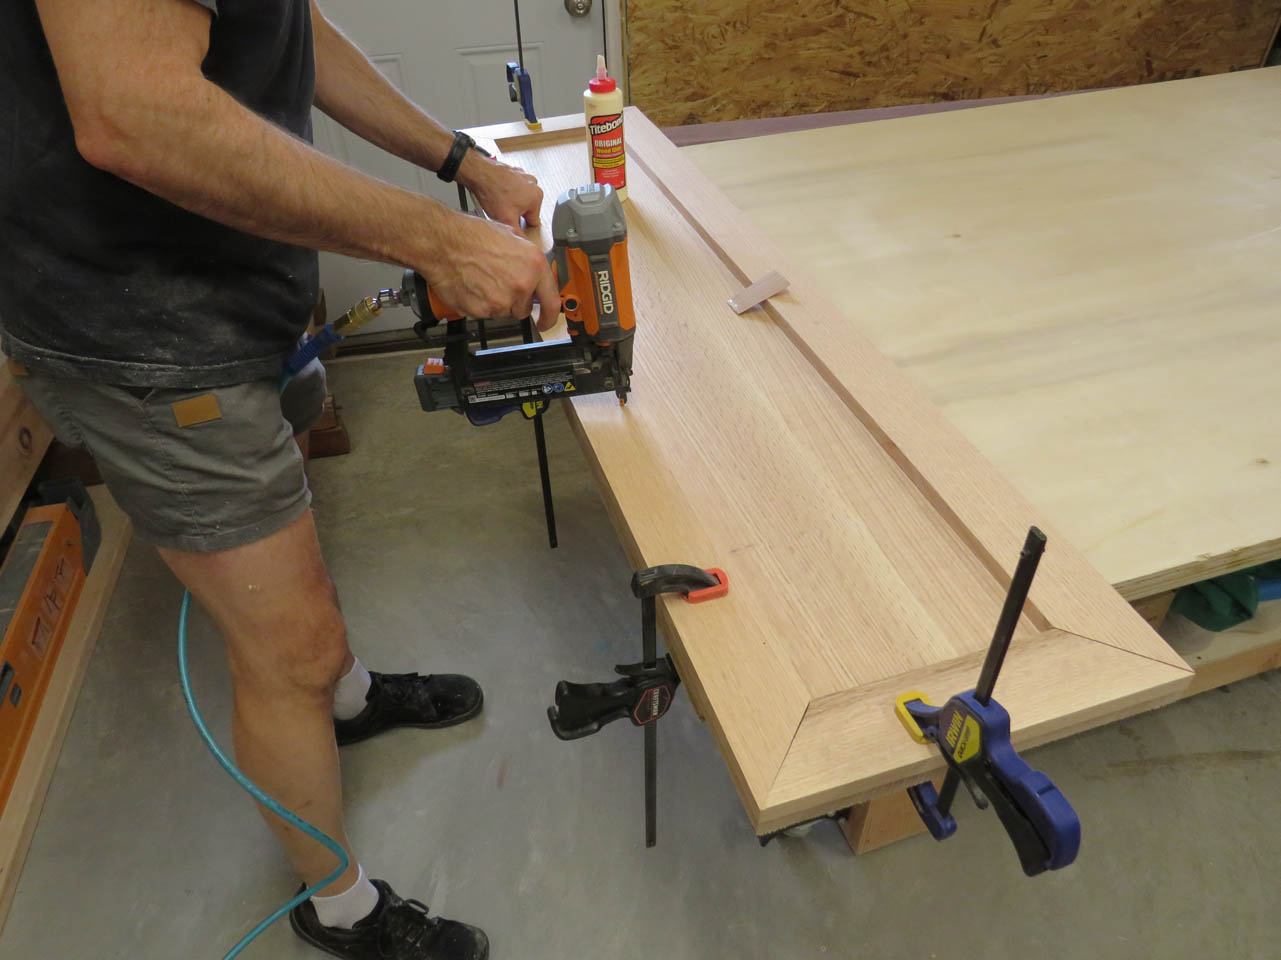
The nails will hold the boards in place while the glue dries, but I clamp the shelves dead flat while they dry to avoid twisting and cupping.
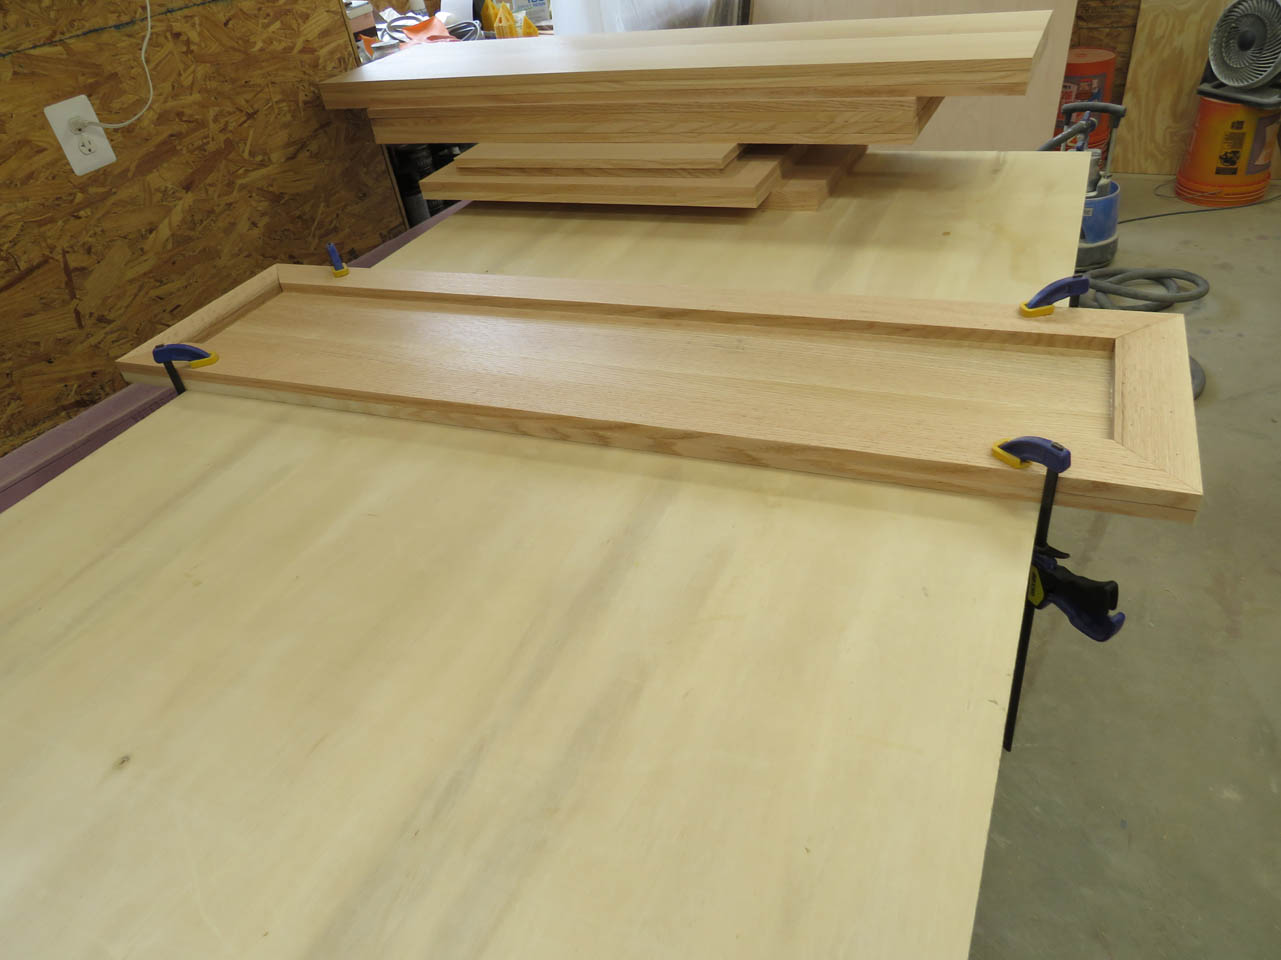
I slowly work my way through the tops, clamping them down as I go.

Then I move on to the thinner strips for the shelves and repeat the process.
The next day, the glue is dry and the shelves are perfectly flat.
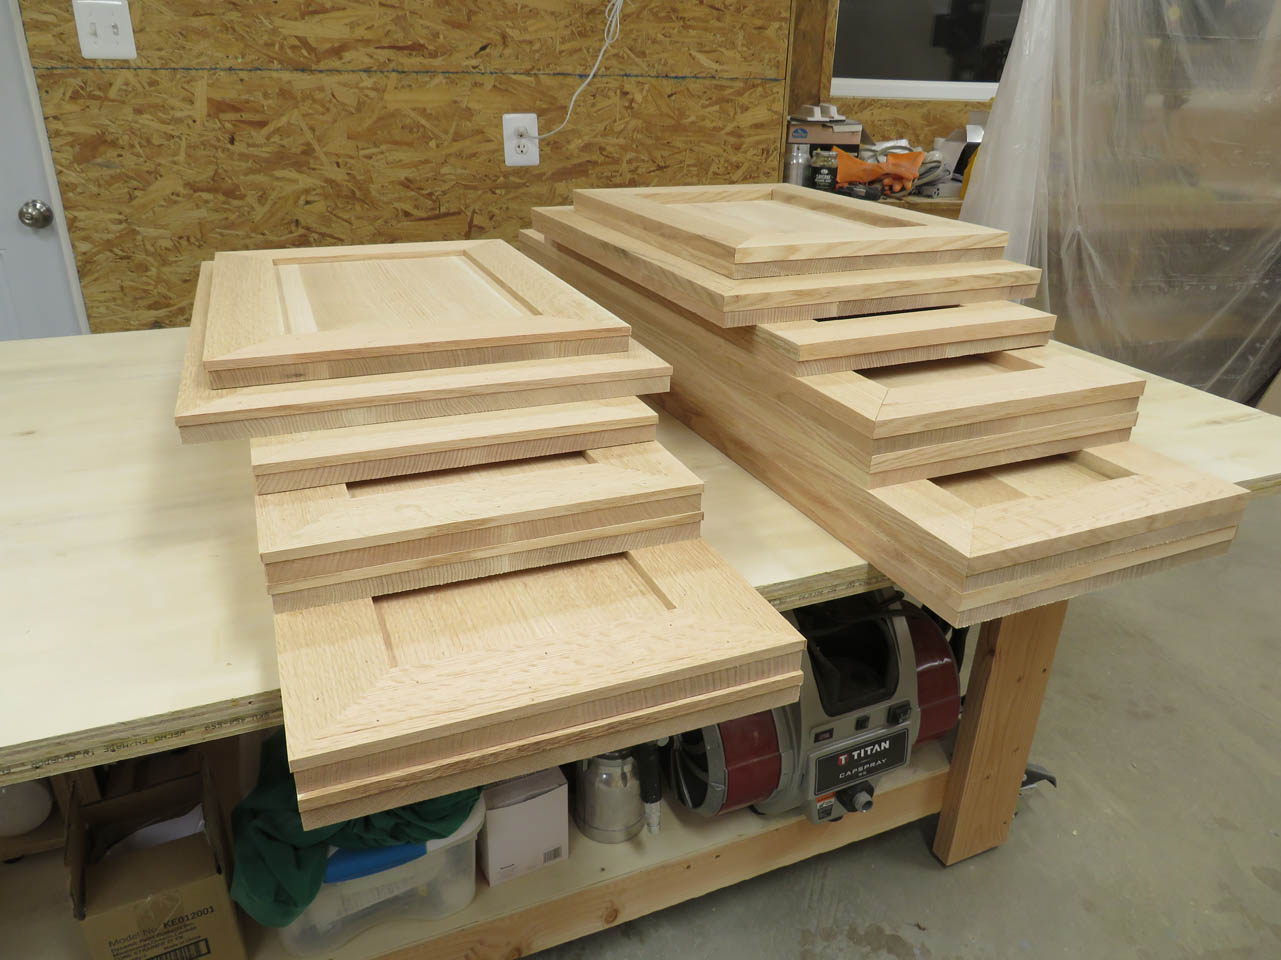
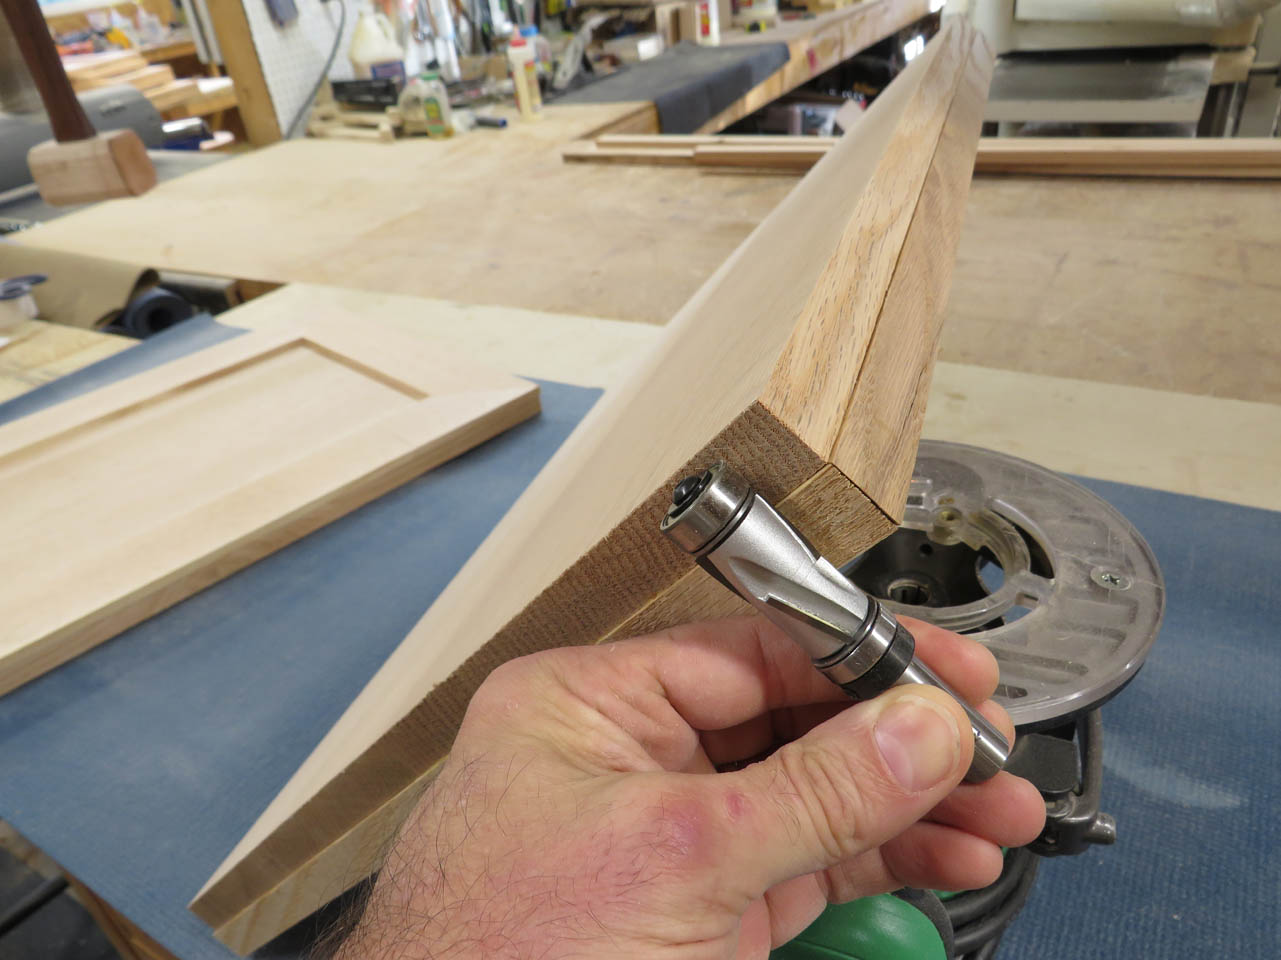
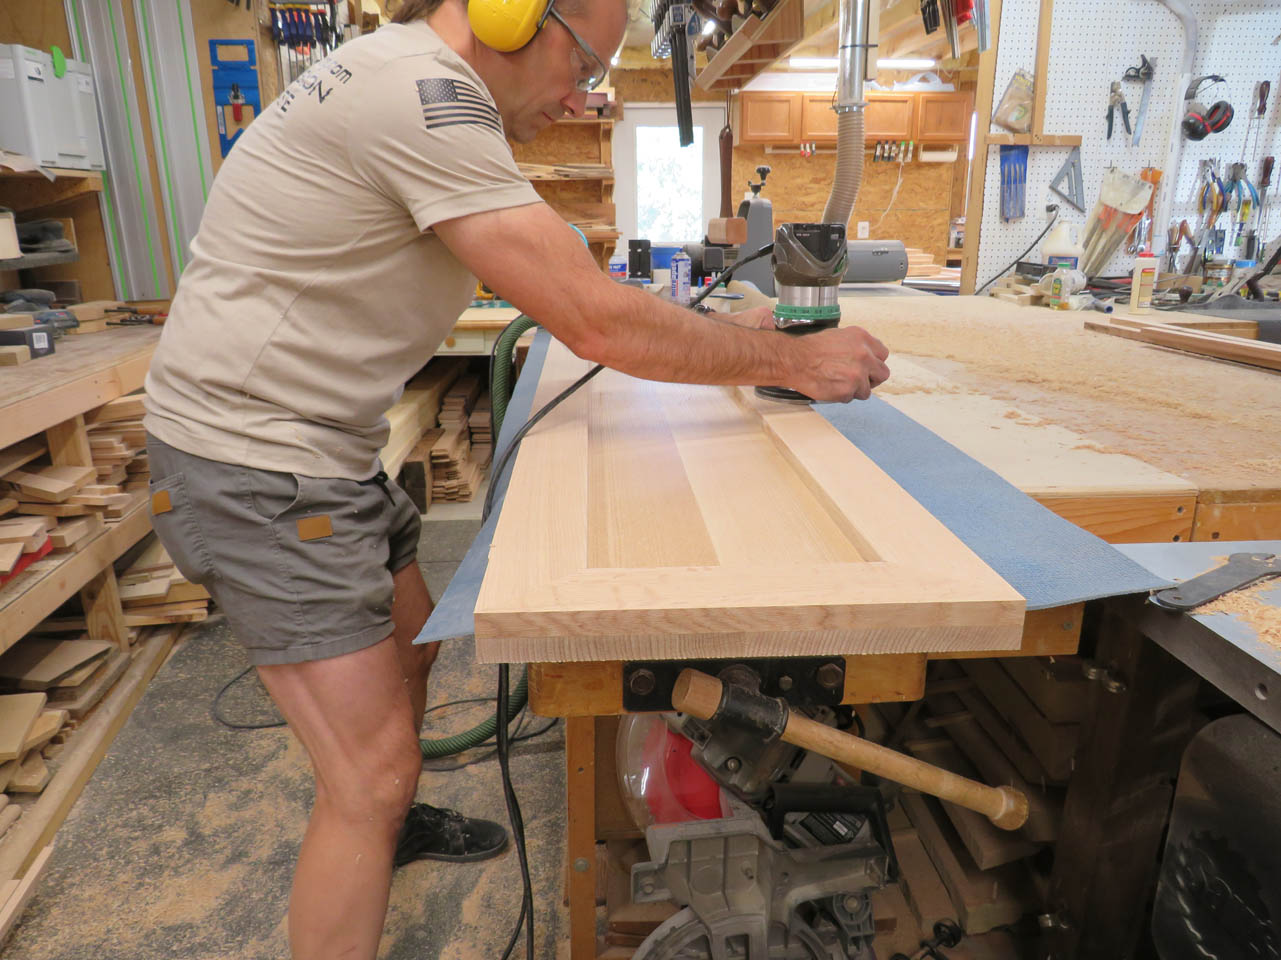
Time to trim the outer edges flush. To do this, I am using a flush trim bit that has a bearing on the top and the bottom. I can set it in my router and have the bearing run along the shelf while the cutter trims the overhang flush. The bit I am using has blades running in an up-cut direction as well as a down-cut direction. This design is supposed to prevent tear-out if it runs against the grain.
It works very well on the table tops.
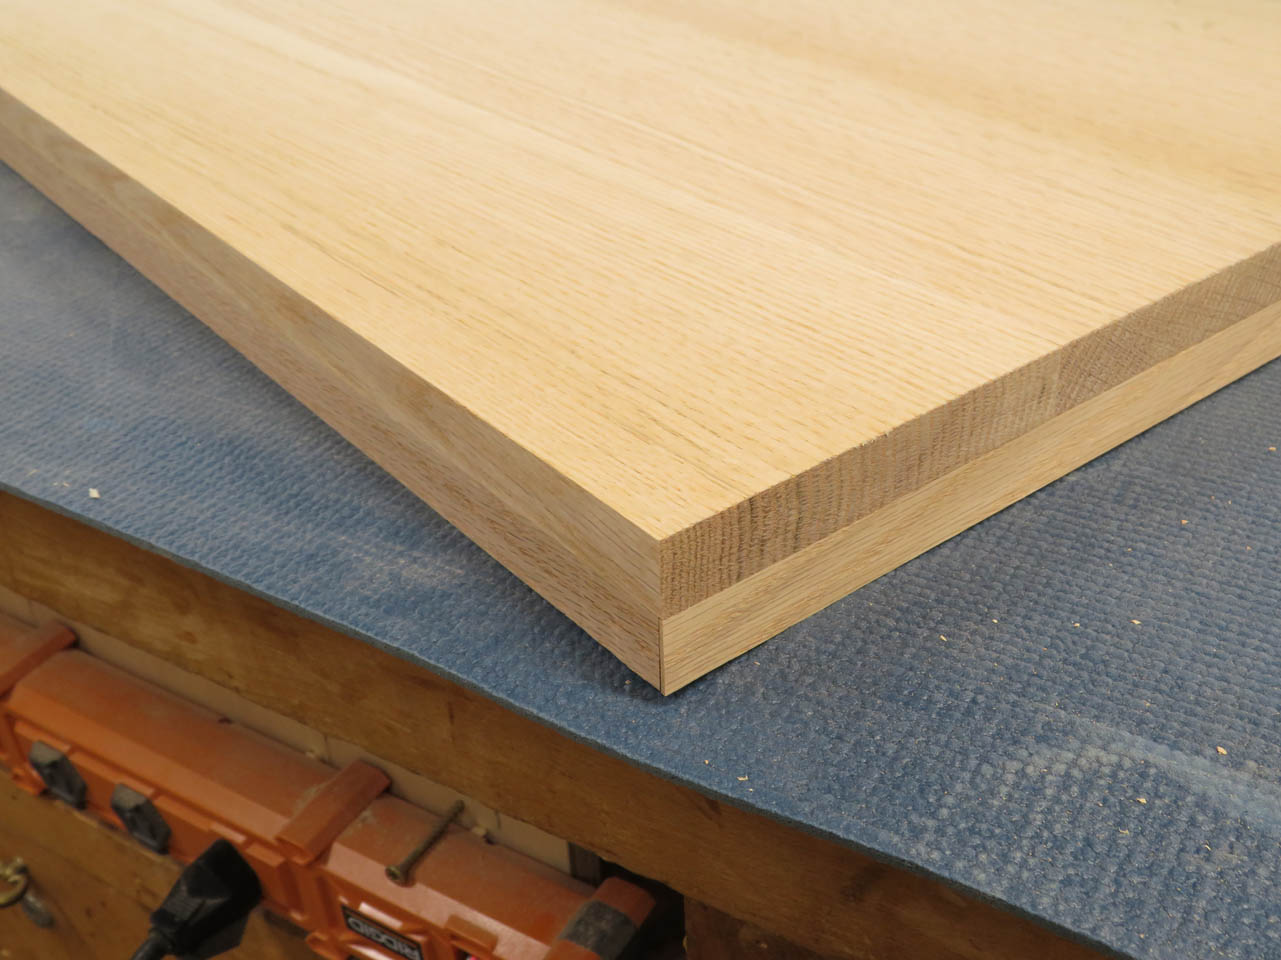
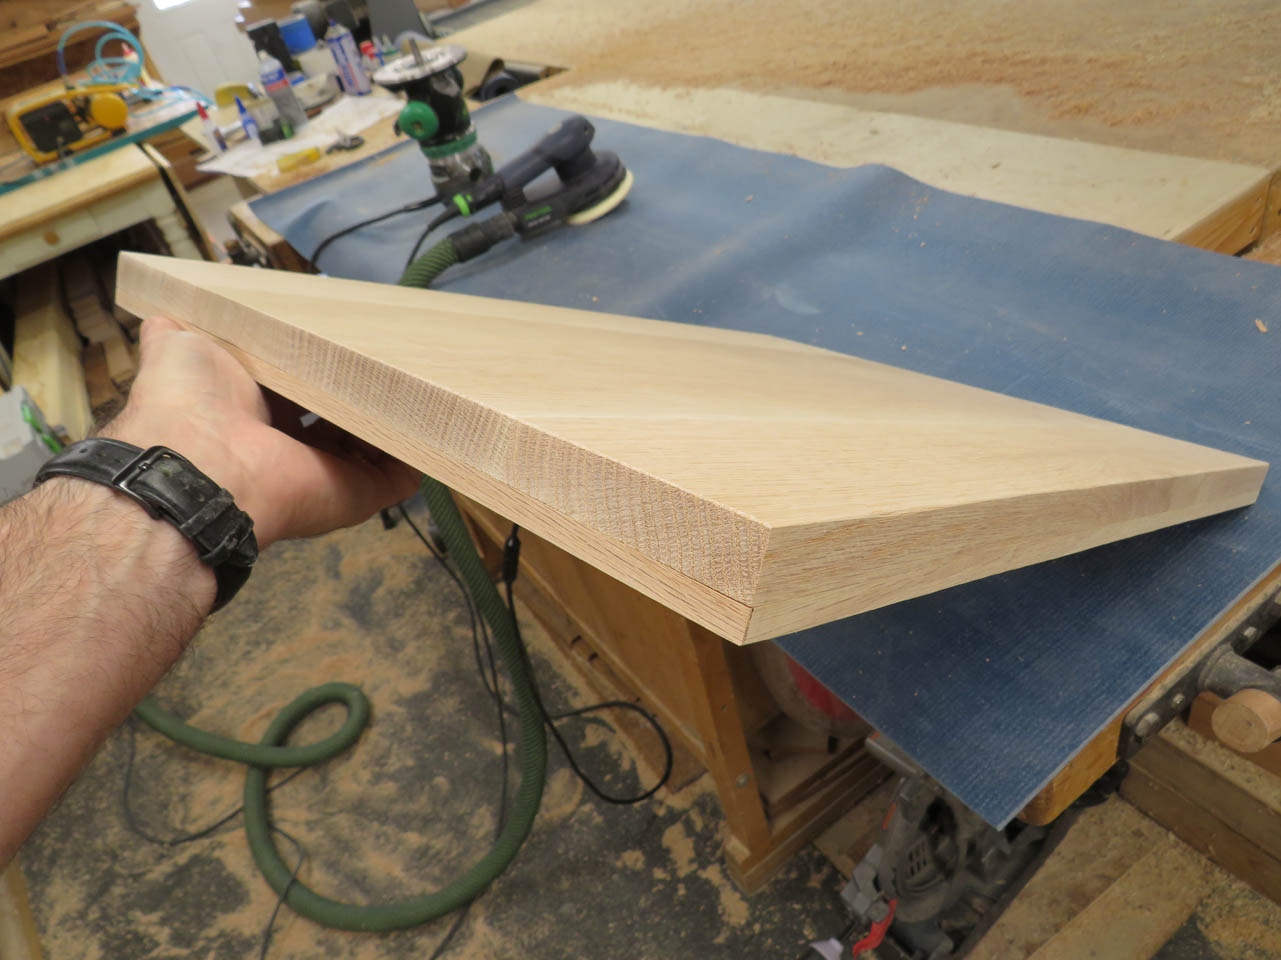
After trimming each of the tops, I sand all of the edges with the orbital sander.
First the short ones, then the longer ones. (makes a big mess)


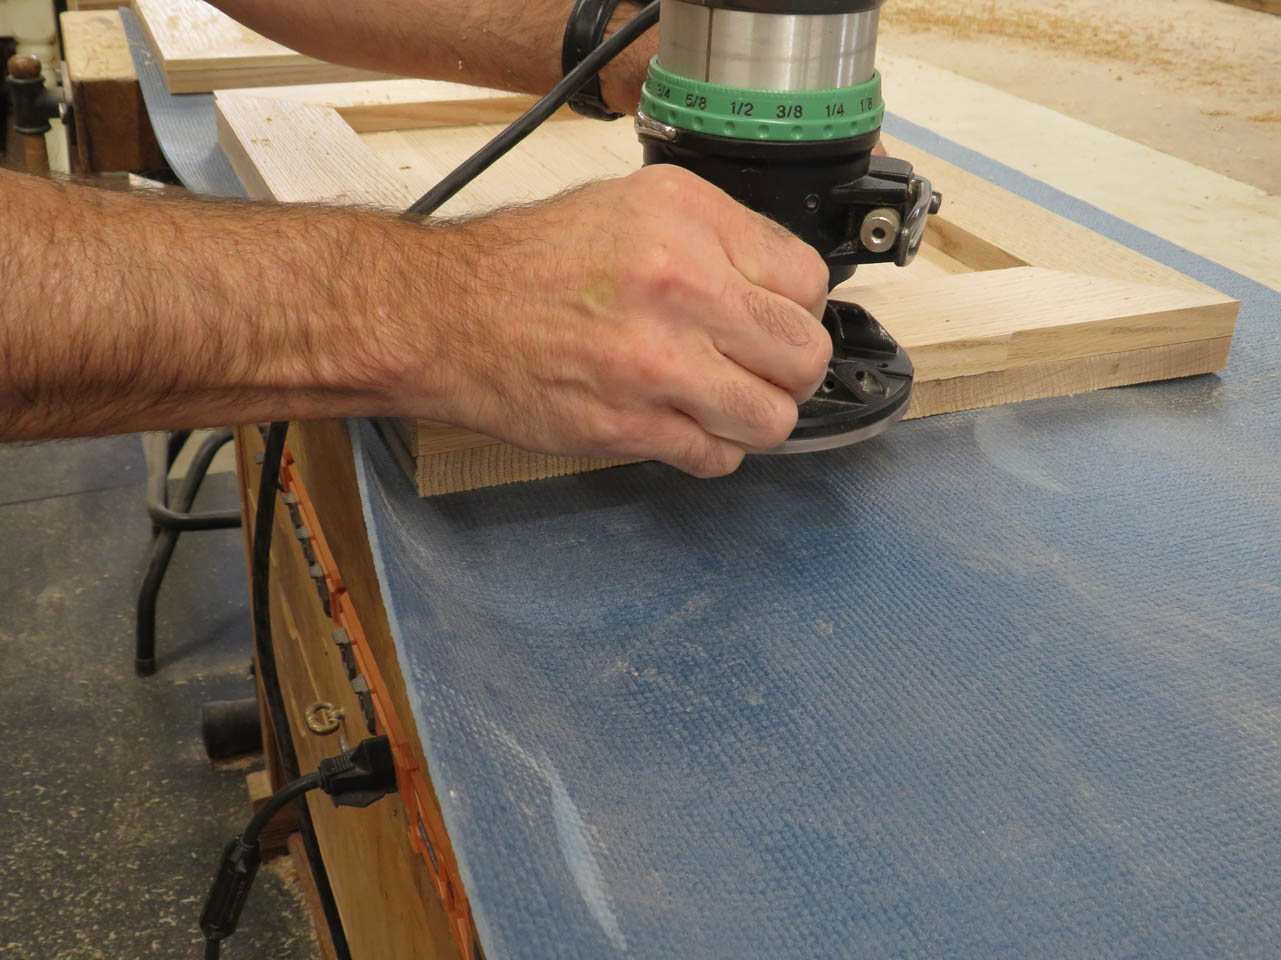
Unfortunately the big flush trim bit is too long for the thinner shelves and I won’t get the anti-tearout benefit because I will only hit one side of the bit. I have several other flush trim bits to use, so I switch to the spiral, compression bit on the right. This one also has blades running in two different directions and also has the benefit of cutting in shear because of the spiral. It only has a bearing on the top, so I have to flip the boards over and cut with the bit hanging below the bottom of the board, so I have to be careful to hang the board over the edge of the bench while cutting.
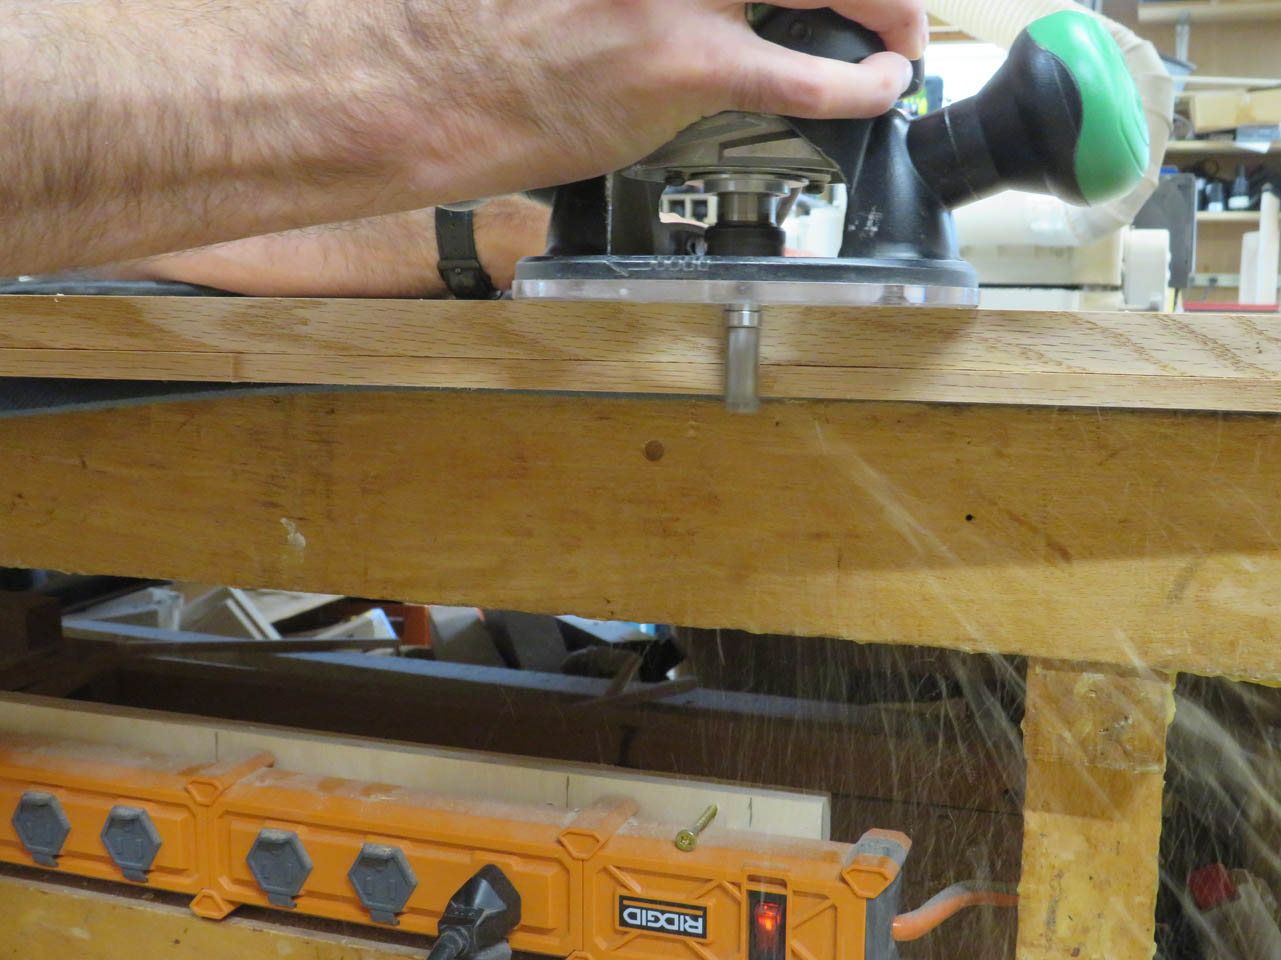
It cuts very nicely.
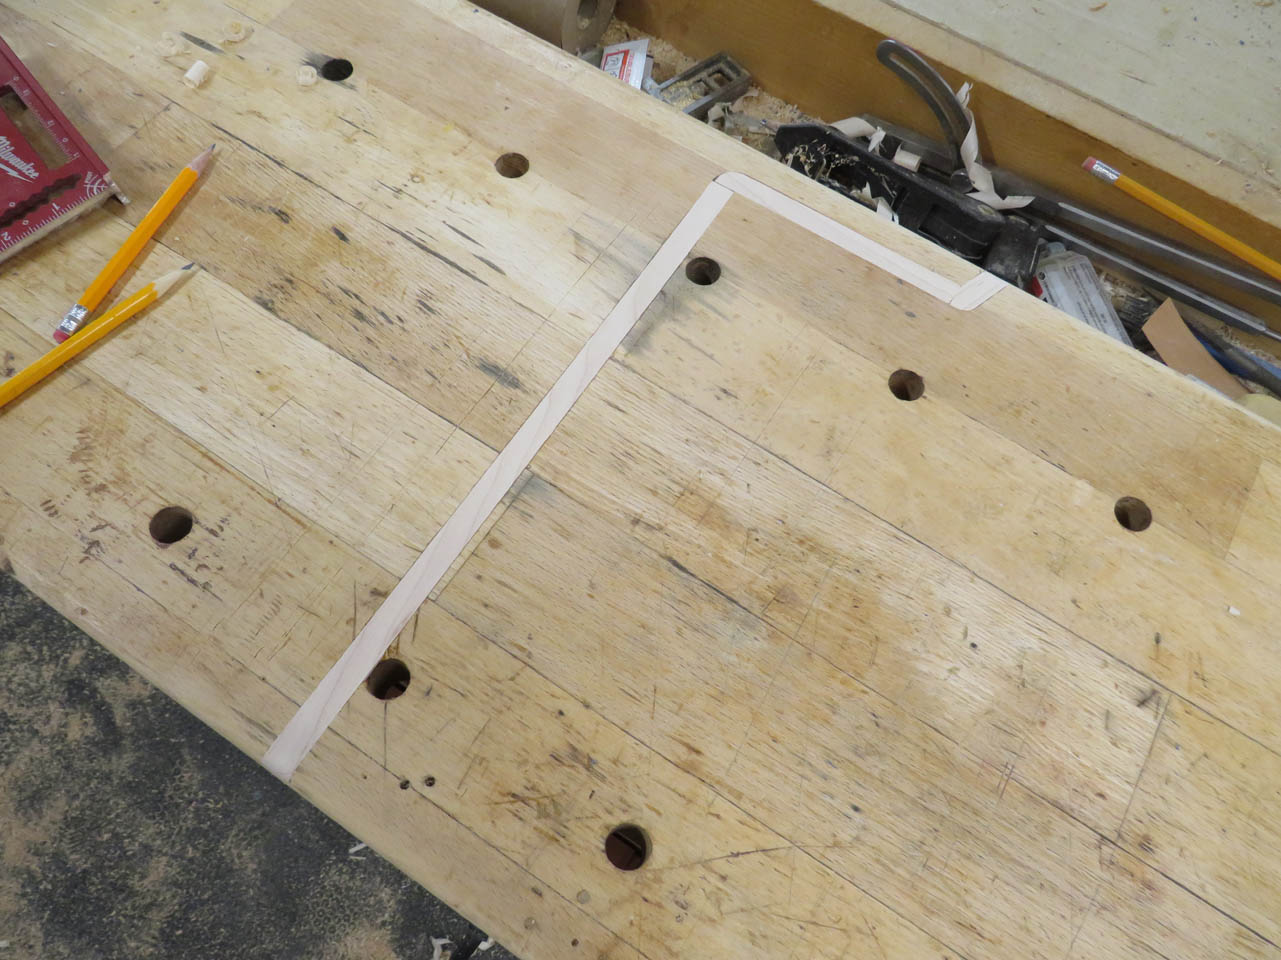
Unfortunately, I decided to take a lunch break and forgot that I needed to hang the board over the edge to trim the next shelf and I managed to cut through my rubber mat as well as my bench top when I started cutting the next one. Sharp bit though, I didn’t even notice the extra load of cutting the bench as well…
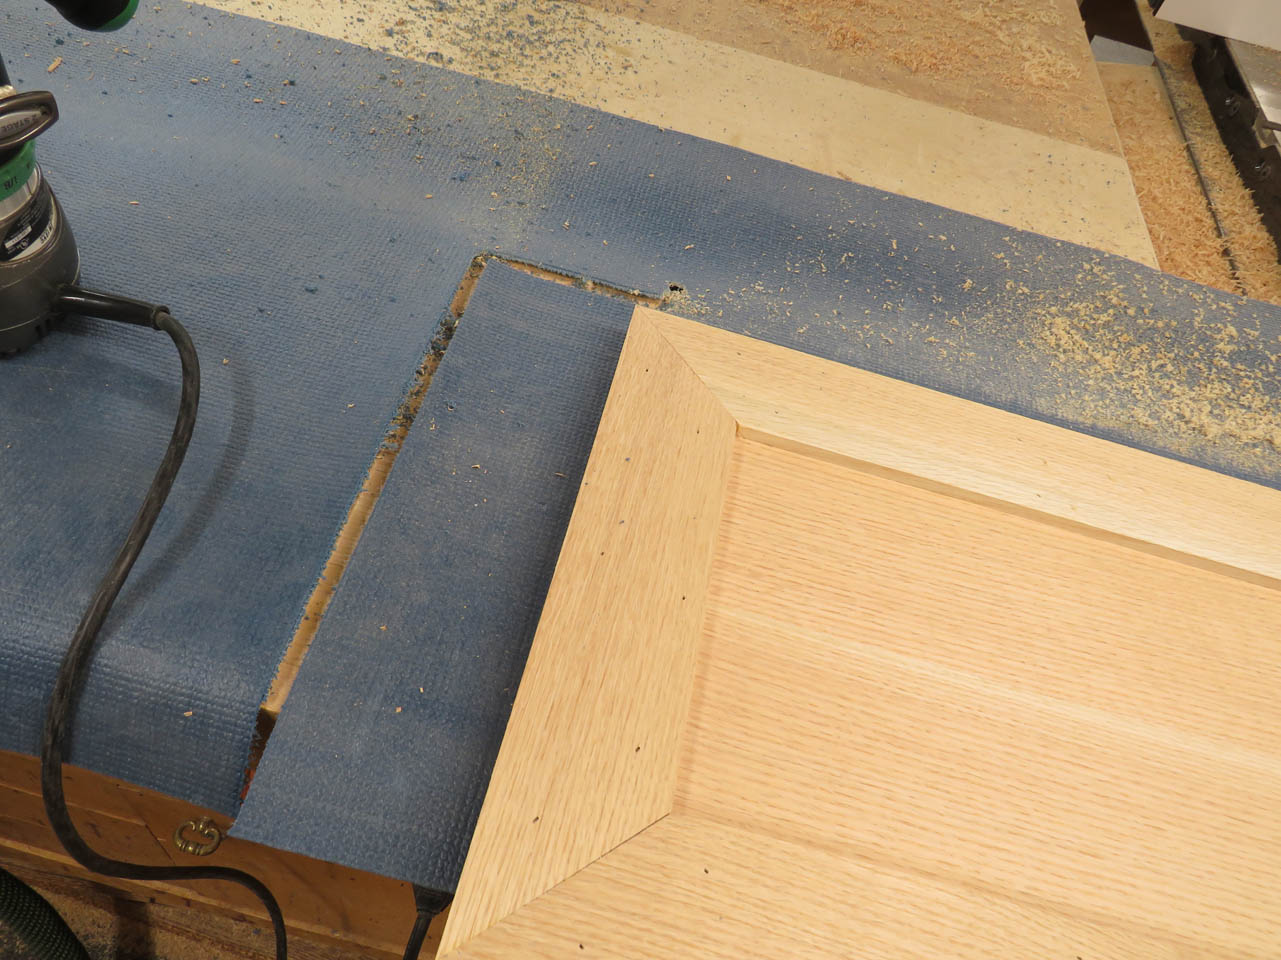
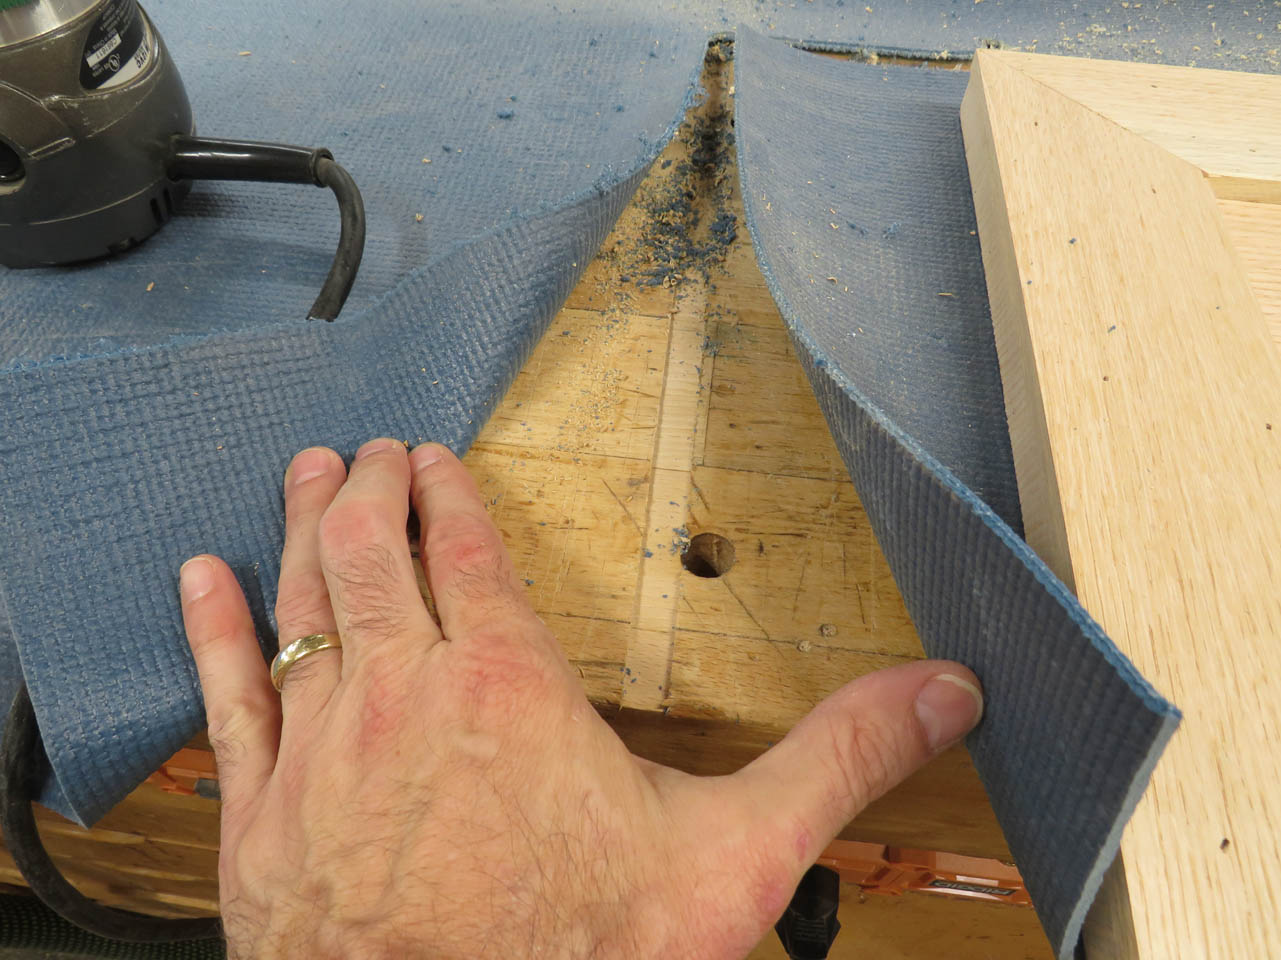
So I took a 20 minute break to inlay some maple into my very obvious mistake, then proceeded to finish trimming and sanding the rest of the shelves.
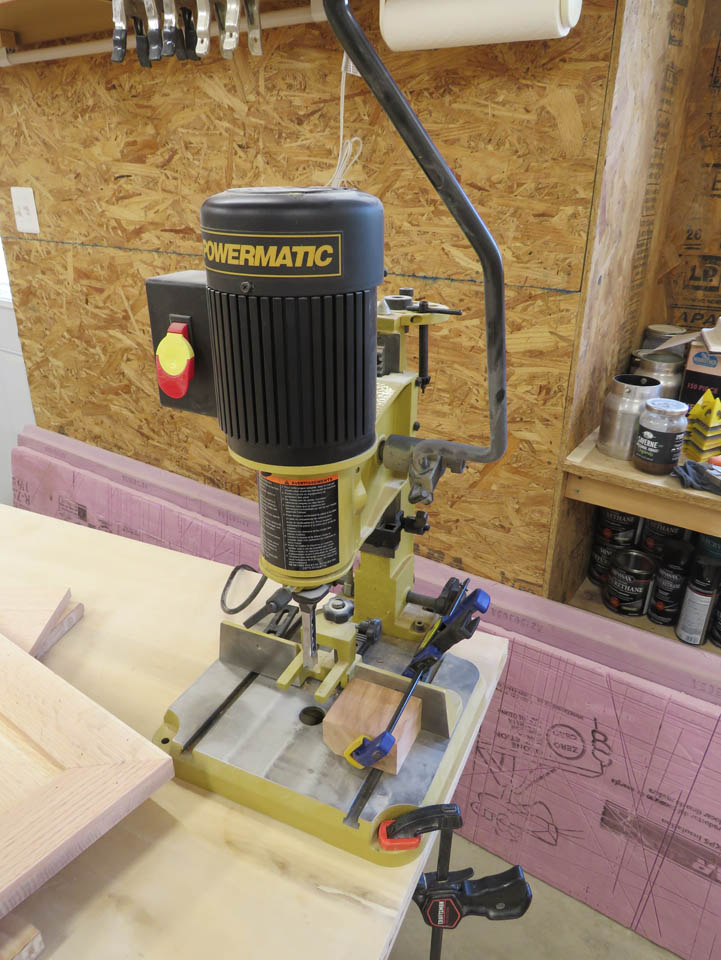
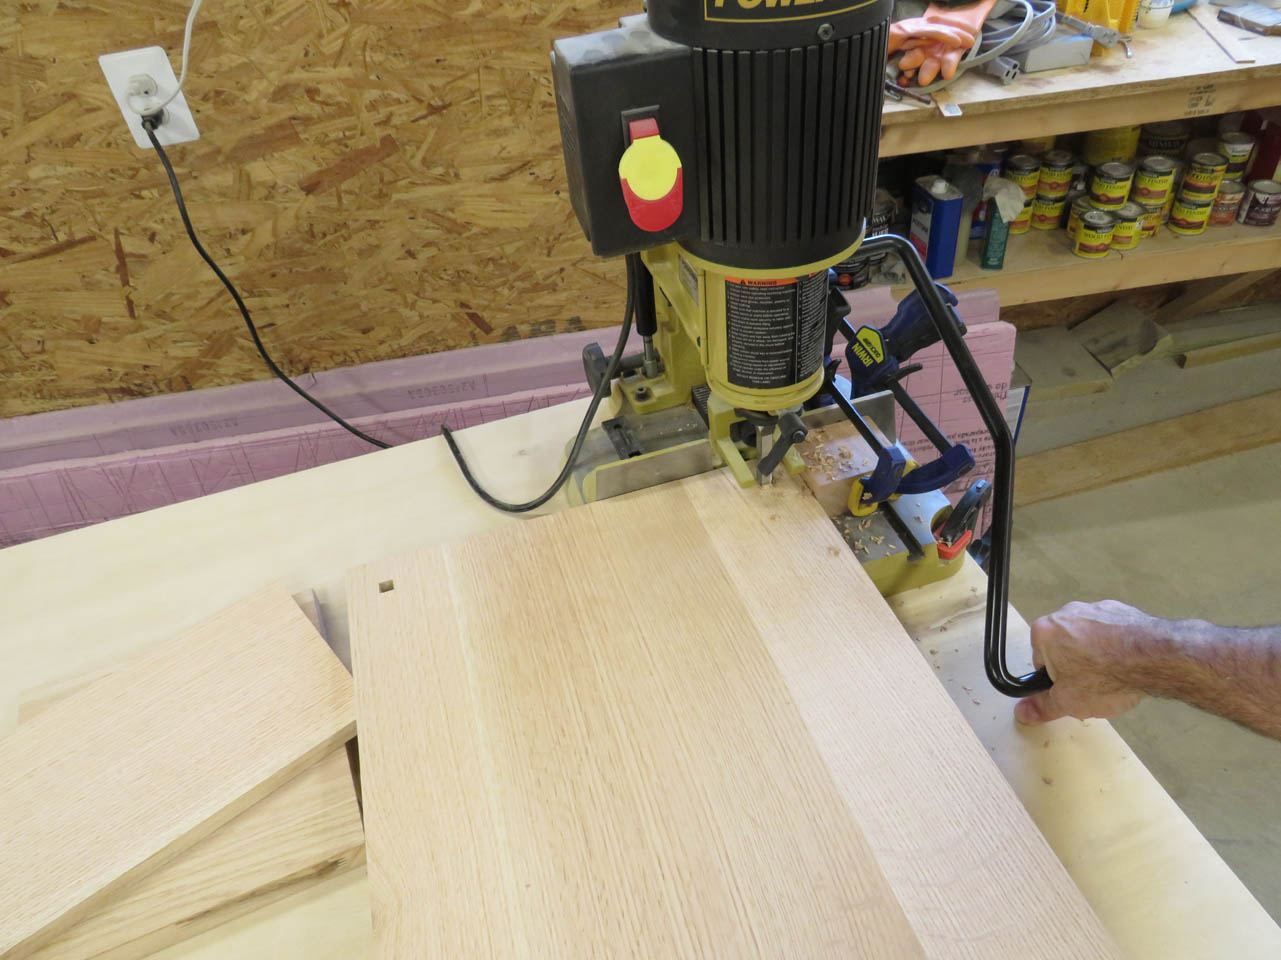
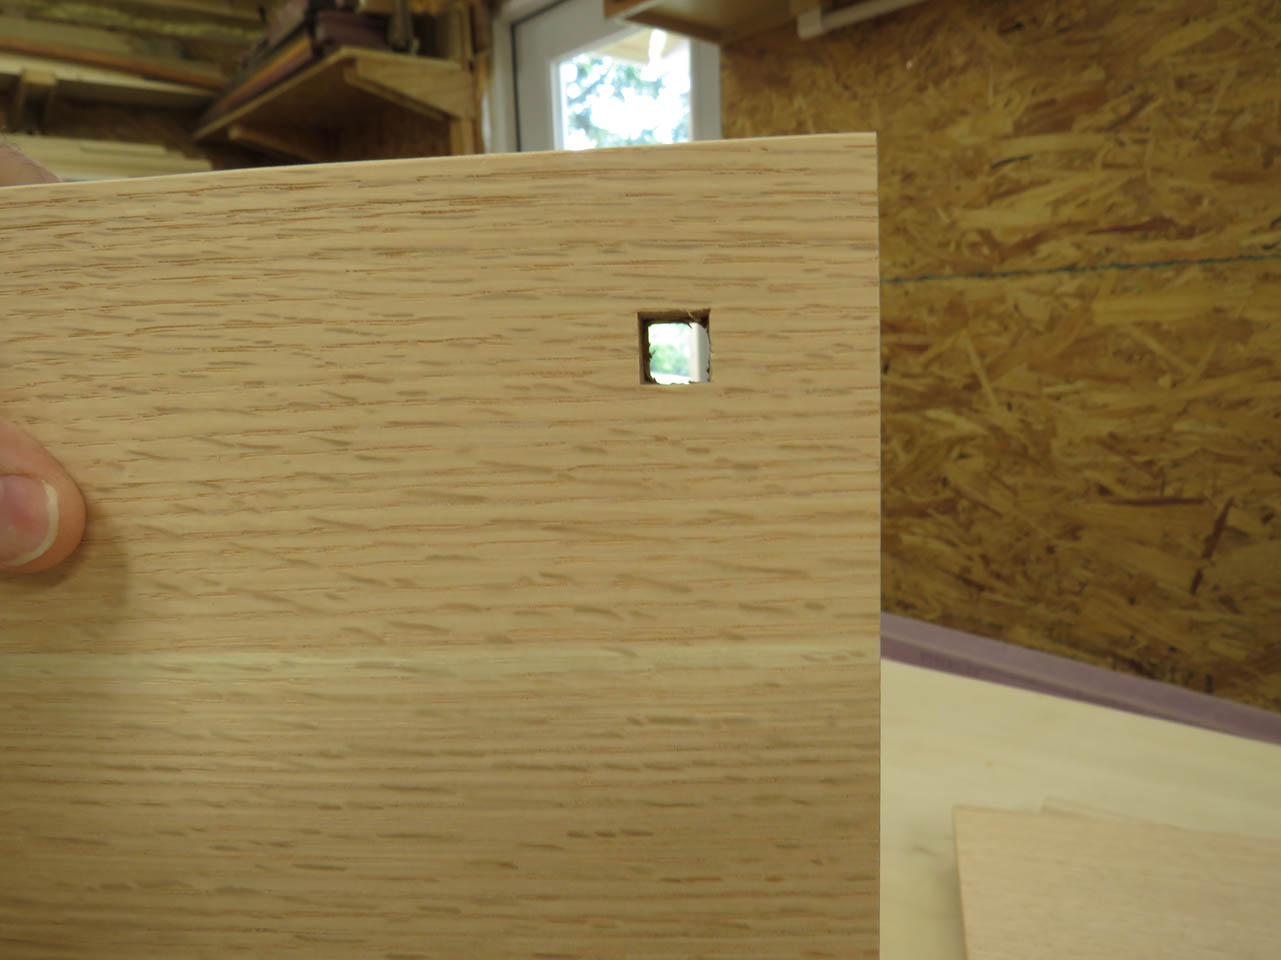
Well, moving on… To create the square mortise in each shelf, to locate and orient each leg and column. I am using my hollow chisel mortiser. It functions like a drill press, but uses an auger-style drill bit wrapped with a square chisel. There is a long lever arm to drive the square chisel into the wood while the auger clears most of the wood away.
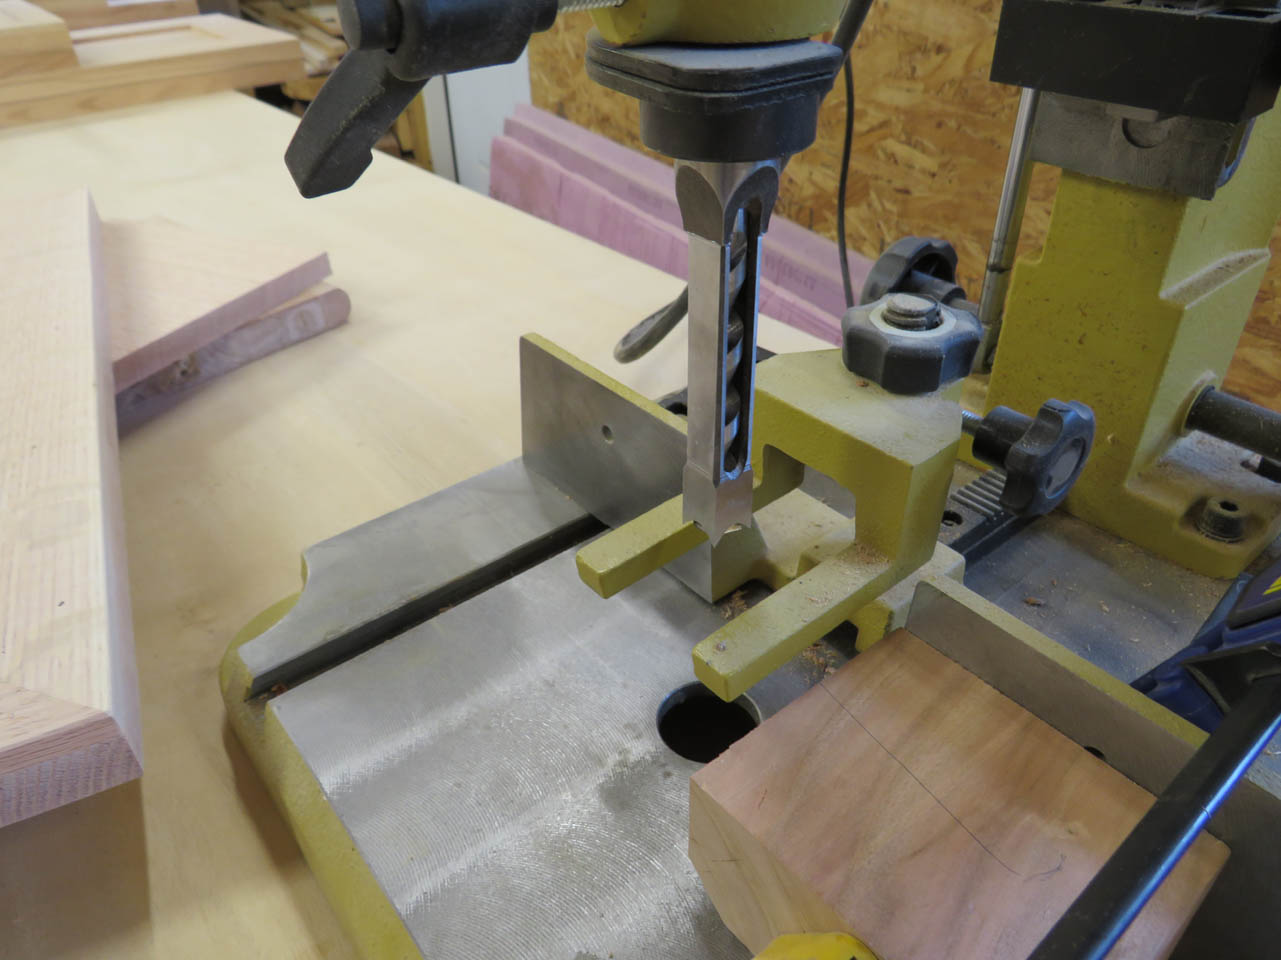
I set the fence and a stop block so that I could center the cutter 1-3/8″ in from each side at the corner of each shelf.
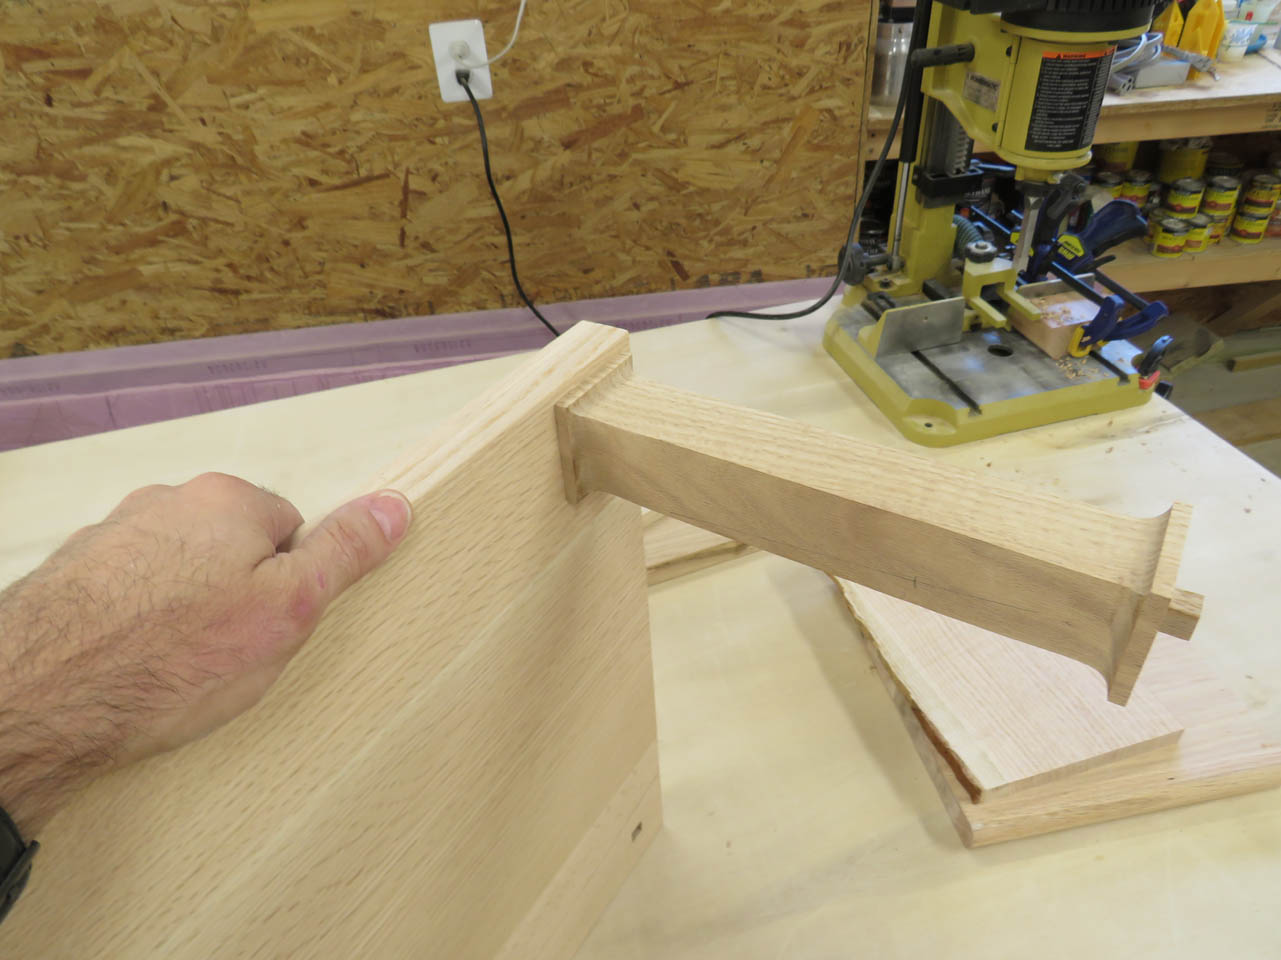
After drilling the first couple of mortises, I did a test fit of a column, perfect fit!
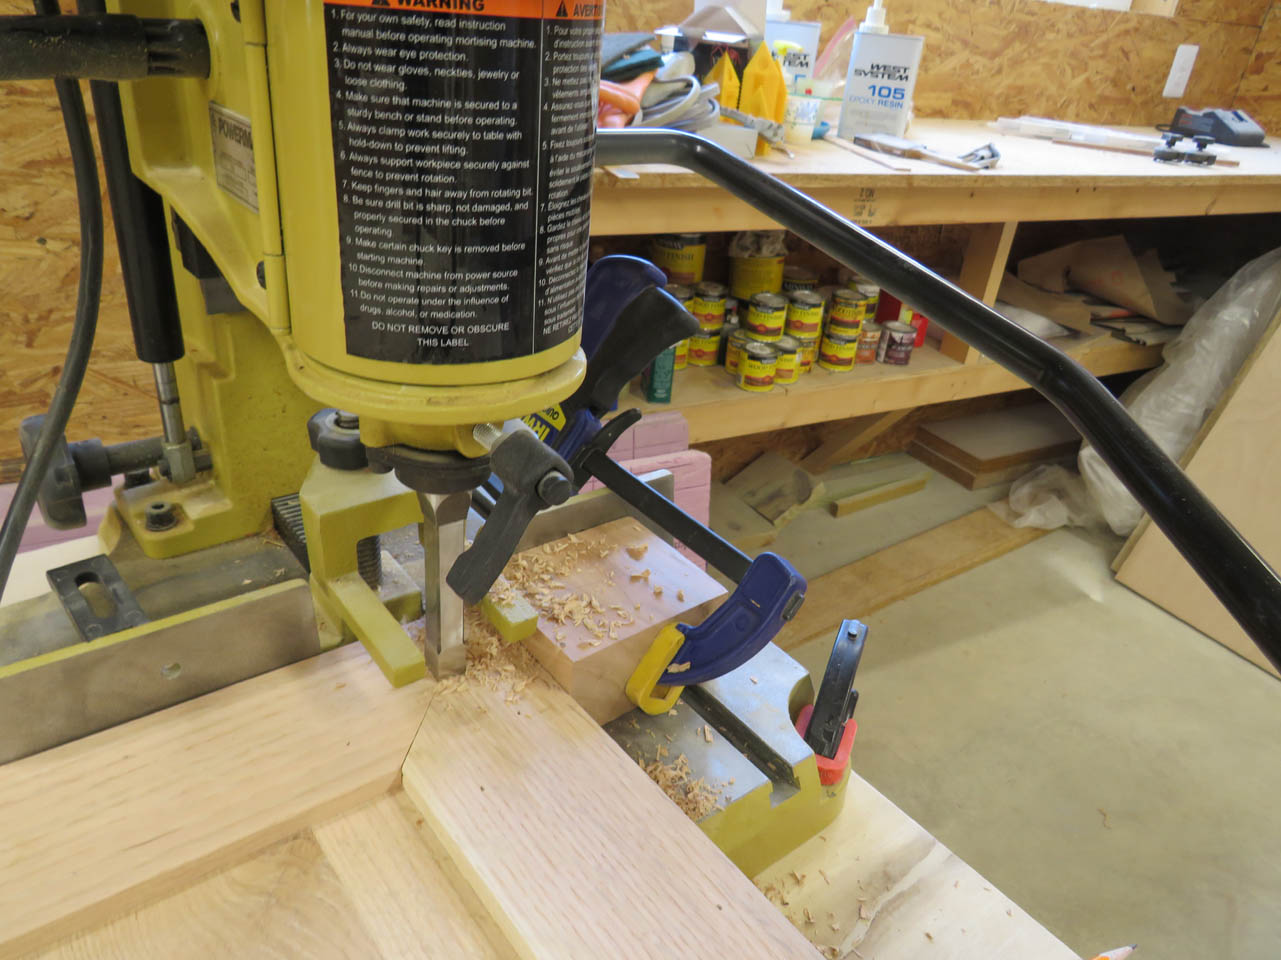
I set a couple of boards, planed to match the height of the base to be out-feed support for the rest of the shelves, then proceeded to mortise the rest of the corners.
I cut through both sides of the lower shelves because the legs and columns will be mounting through the top and bottom at the same location.
I only mortised the bottom of the top shelves though.

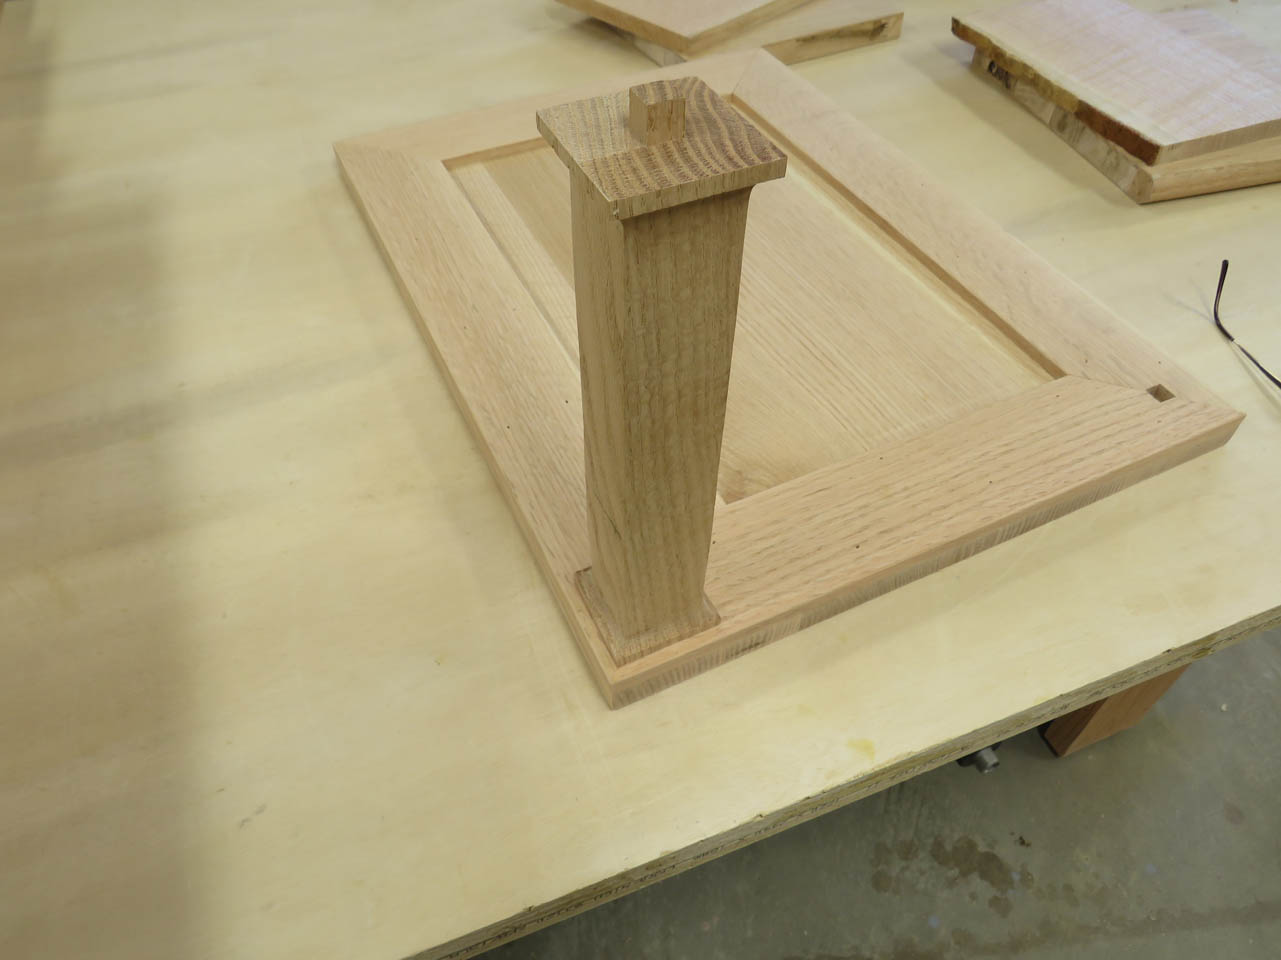
After the first set of top and shelf were mortised, I did a full dry-fit. Looks fantastic.

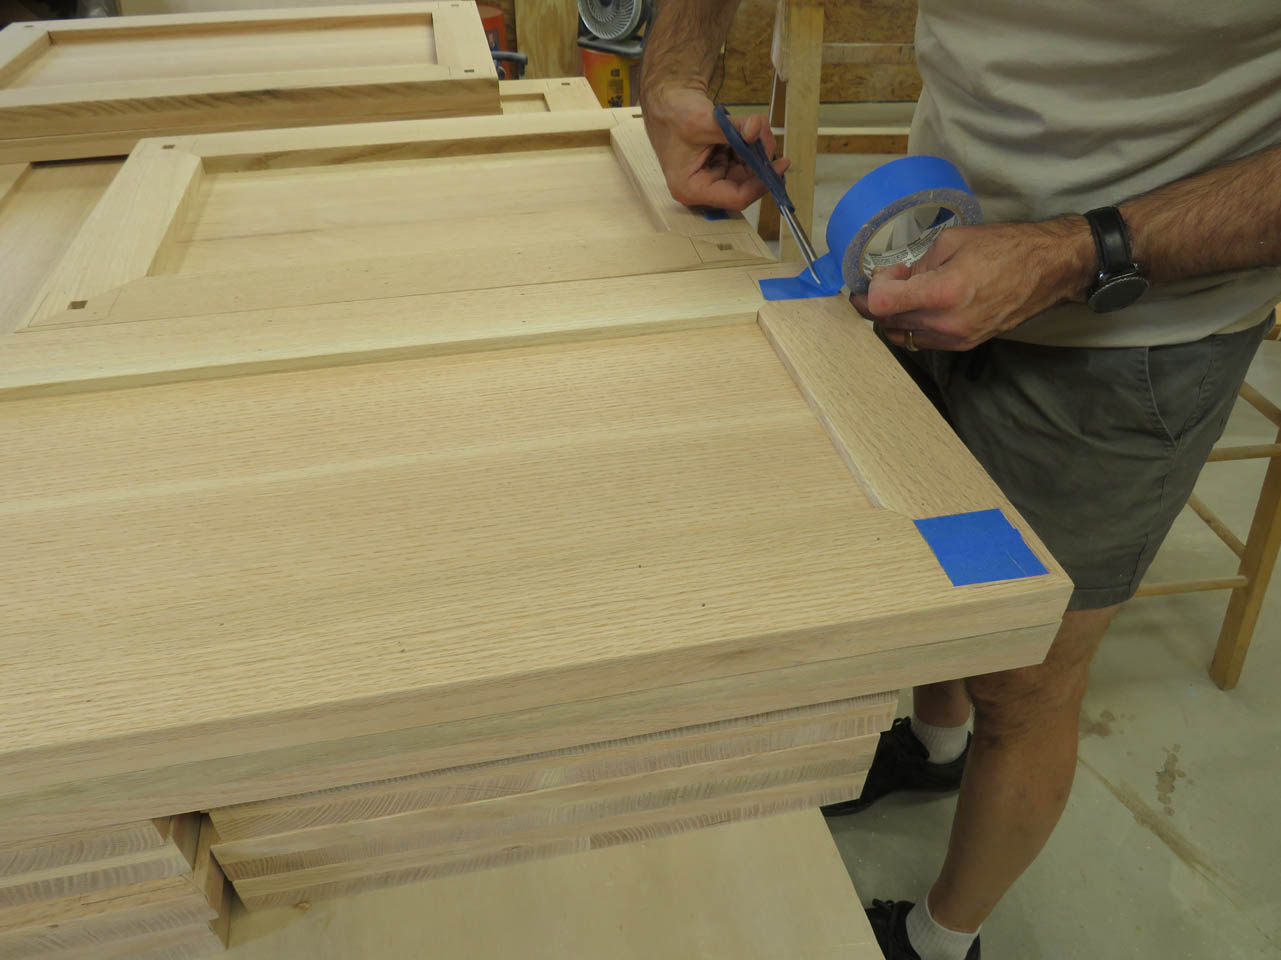
While the legs were in place, I traced around them to mark the location.

I did this on all of the shelves and table tops so that I could mask the area for pre-finishing.
I just need to cut the half-round bead that goes around each shelf and install them, then I will be ready to apply finish.
