
Raphael’s desks – part 1
A friend from work was interested in building two custom desks for his apartment. He will be getting married soon and wanted a desk for him and his future wife. I recently acquired a large pile of air-dried pine that I don’t have the room to store, so I offered it to him for the build. Raphael wants to learn how to build it himself, so he will be coming over to the shop to help with the construction. Since he is an engineer, I assigned him the task of designing the desks in as much detail as possible. This is what he came up with:
Pine is a soft wood and I would not recommend it for a writing desk, but this will mainly be used for computers so the softer wood should not be a problem. Since the wood is air-dried, the boards did not go through the normal kiln-drying process that would typically dry out the wood and kill any bugs that may be still alive.

I picked through the pile and using a moisture meter, I selected several boards that were around 10%-12% moisture content. I left the rest stickered and stacked on the covered porch so that the breezes outside would continue to dry out the remaining boards.

Some of the boards show signs of former insect habitation. These boards were cut a couple of years ago and the insects are surely dead or gone by now, but to insure that they will not be a problem, I load the entire stack into my vacuum bag.

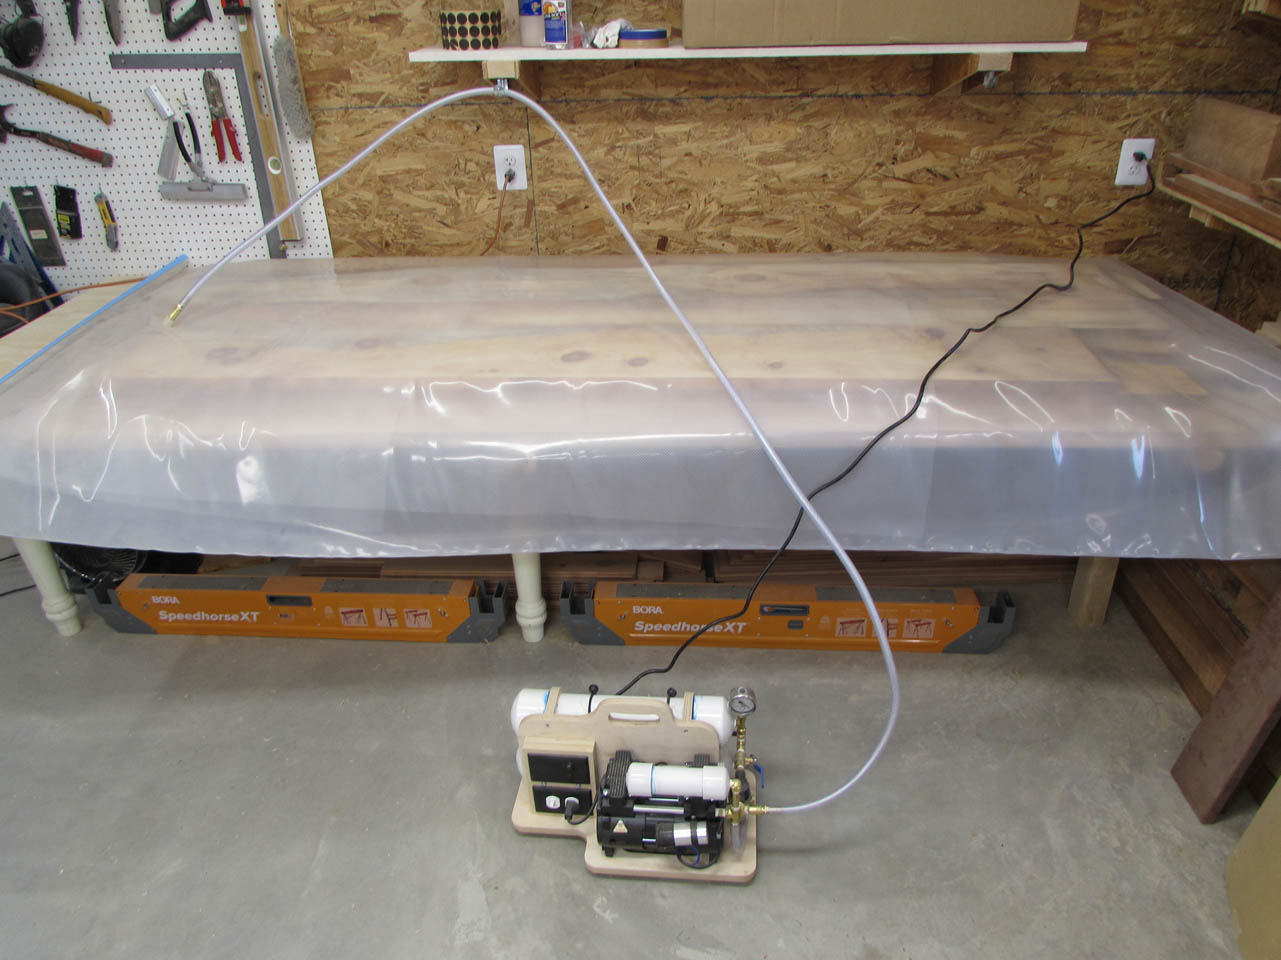
I sealed up the bag and pumped it down.

Once fully under vacuum, I shut off the valve and left the entire thing under vacuum for several hours. Long enough to kill any insects that could possibly still reside inside.

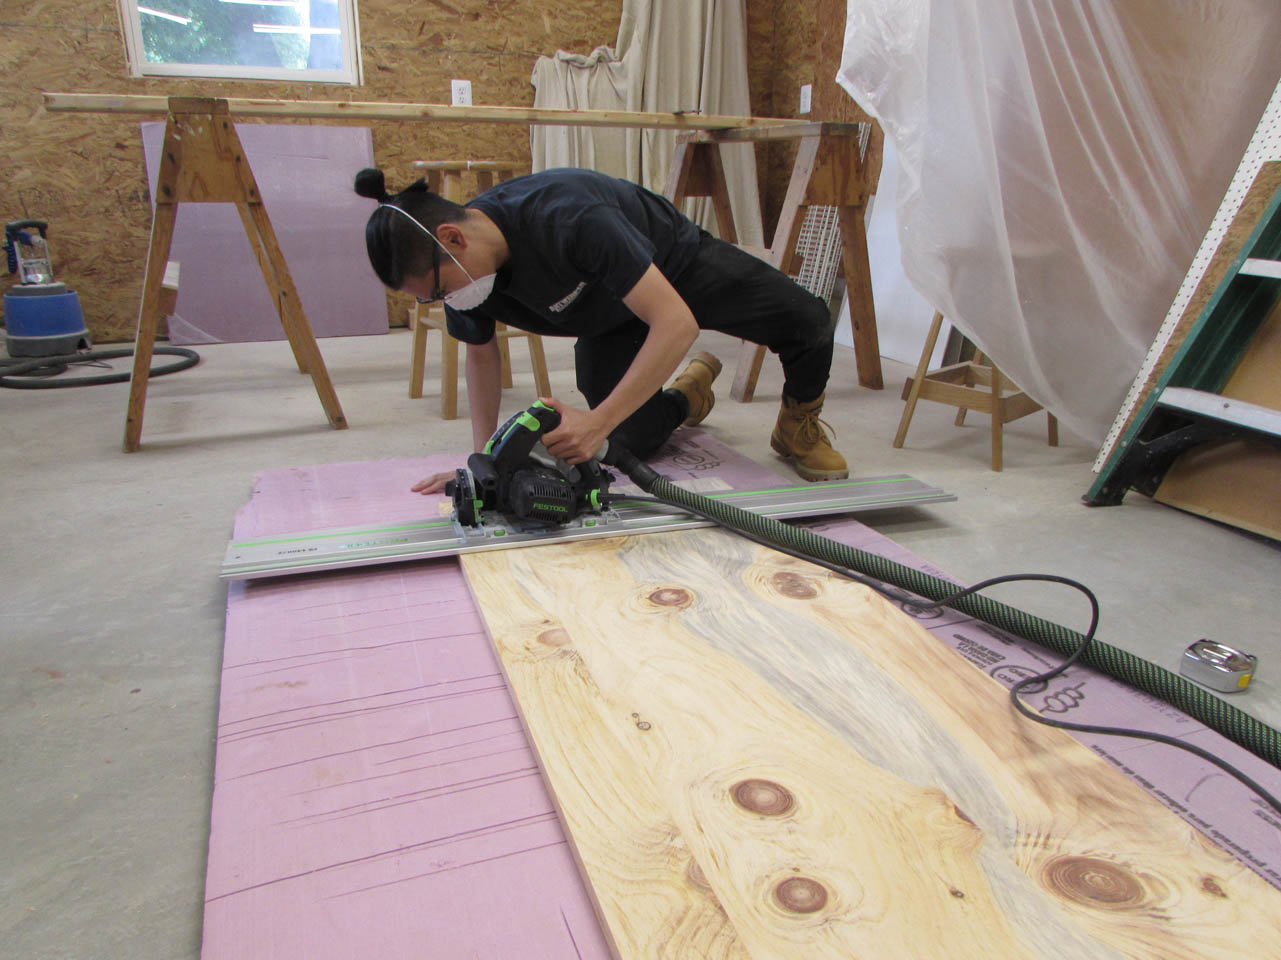
Once the boards were ready, Raphael came over and got to work cutting them down.

Finish length of the desktop will be 70″ long. To make the 8′-9′ boards more manageable, we cut them down to just a few inches longer than we needed. We will cut the desk down to the final length after the top is glued up.

These boards were originally rough-planed down to 1″ thick but they have a few saw marks and dirt on them still. We took another pass off each side through the planer to clean the surfaces up.

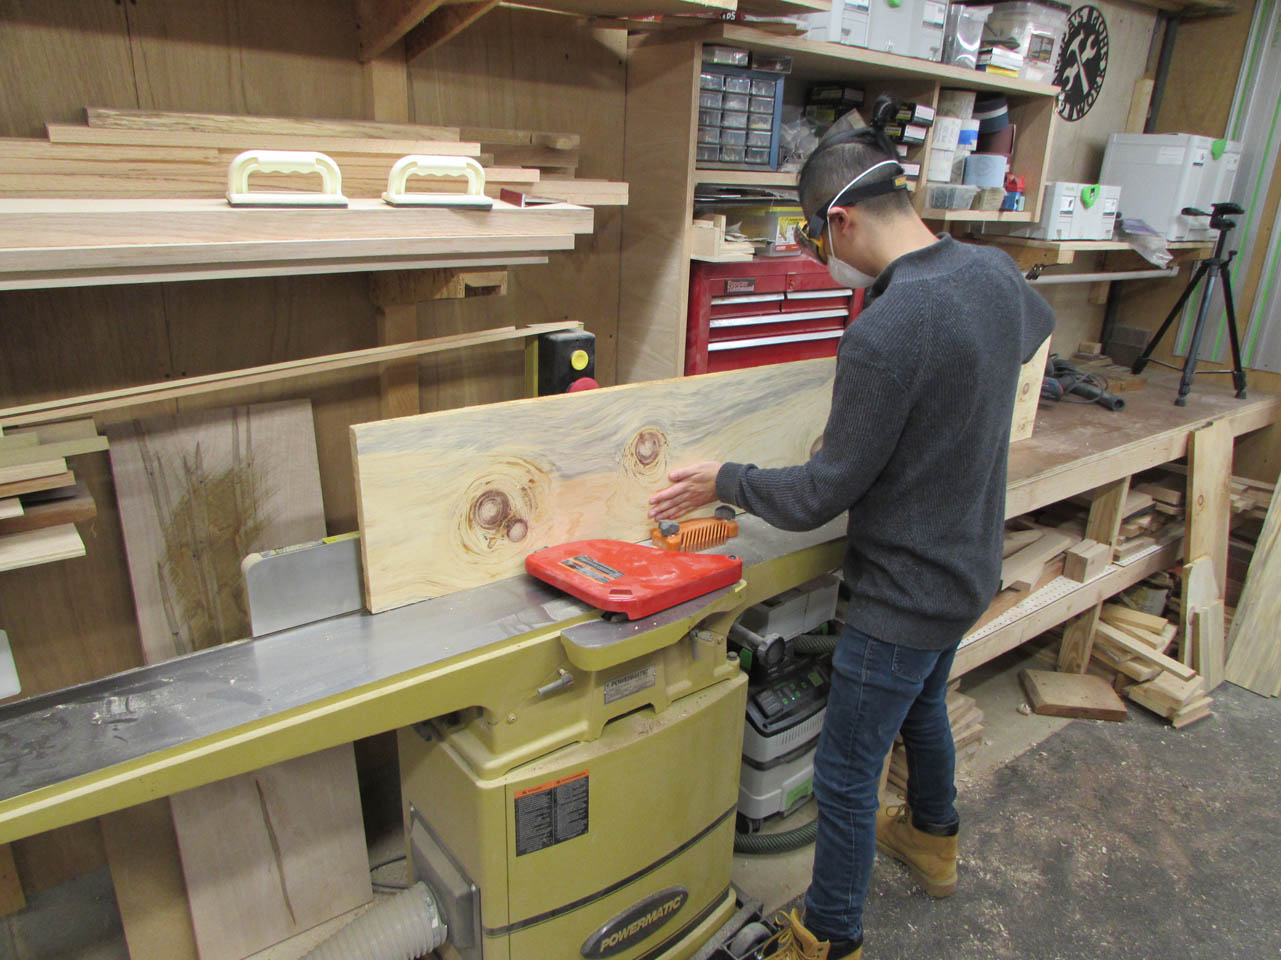
After planing the faces, Raphael ran one edge through the jointer to straighten one side and make it 90° perpendicular to the face. This is crucial to be able to join the edges together and create a flat desktop.
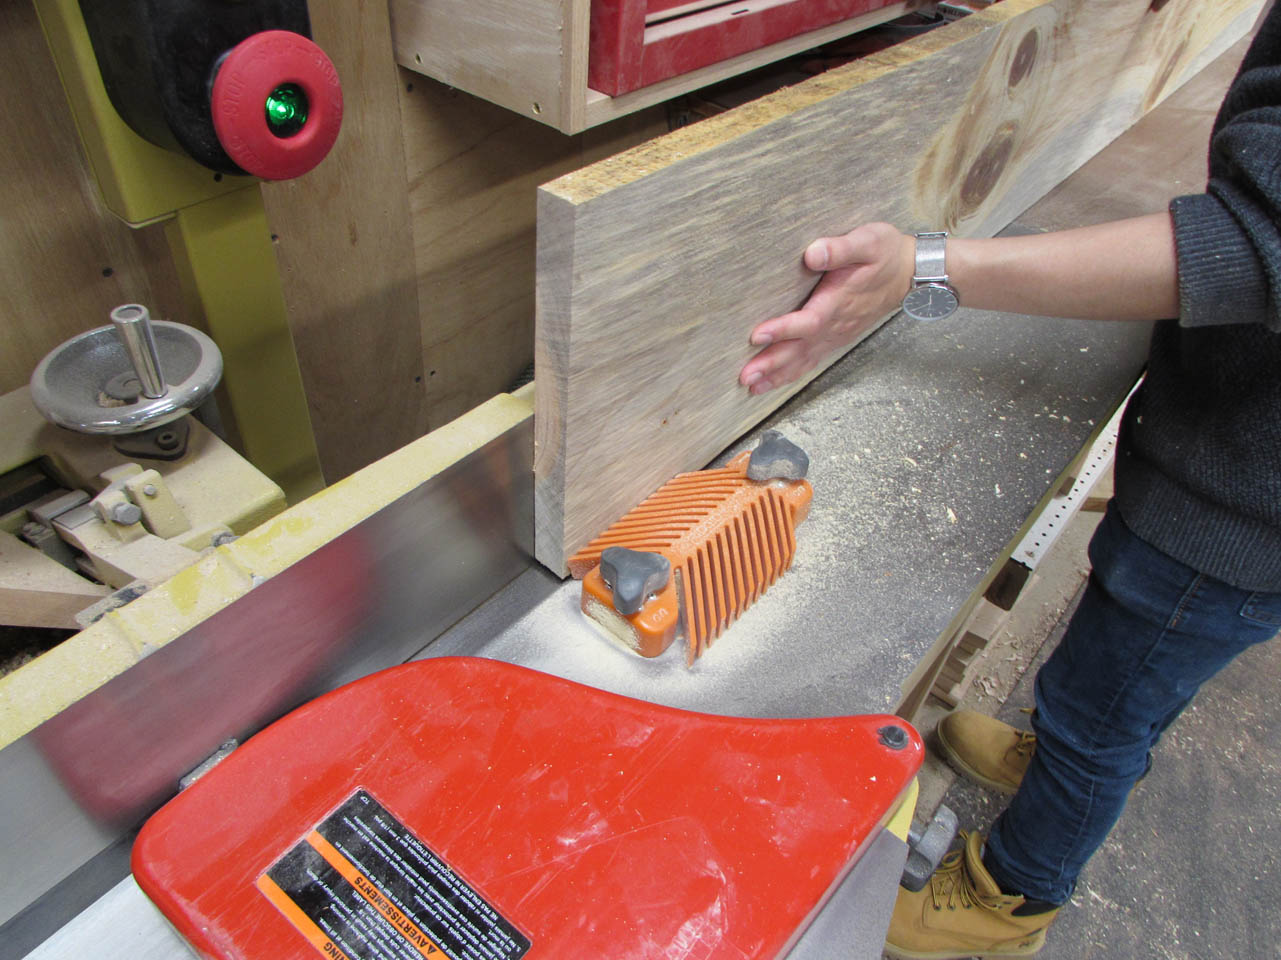
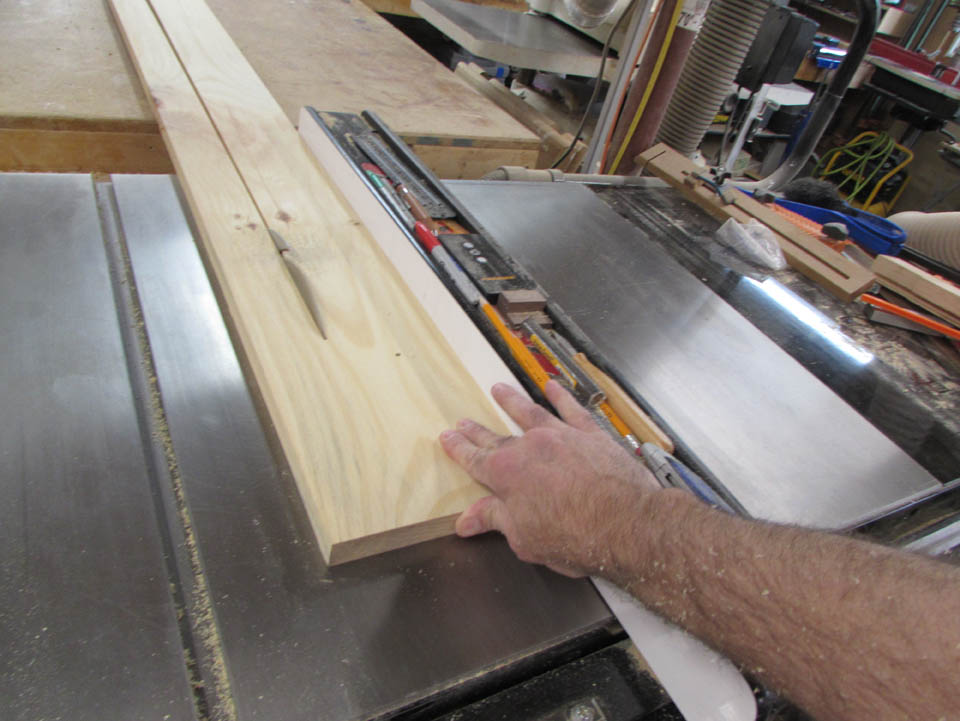
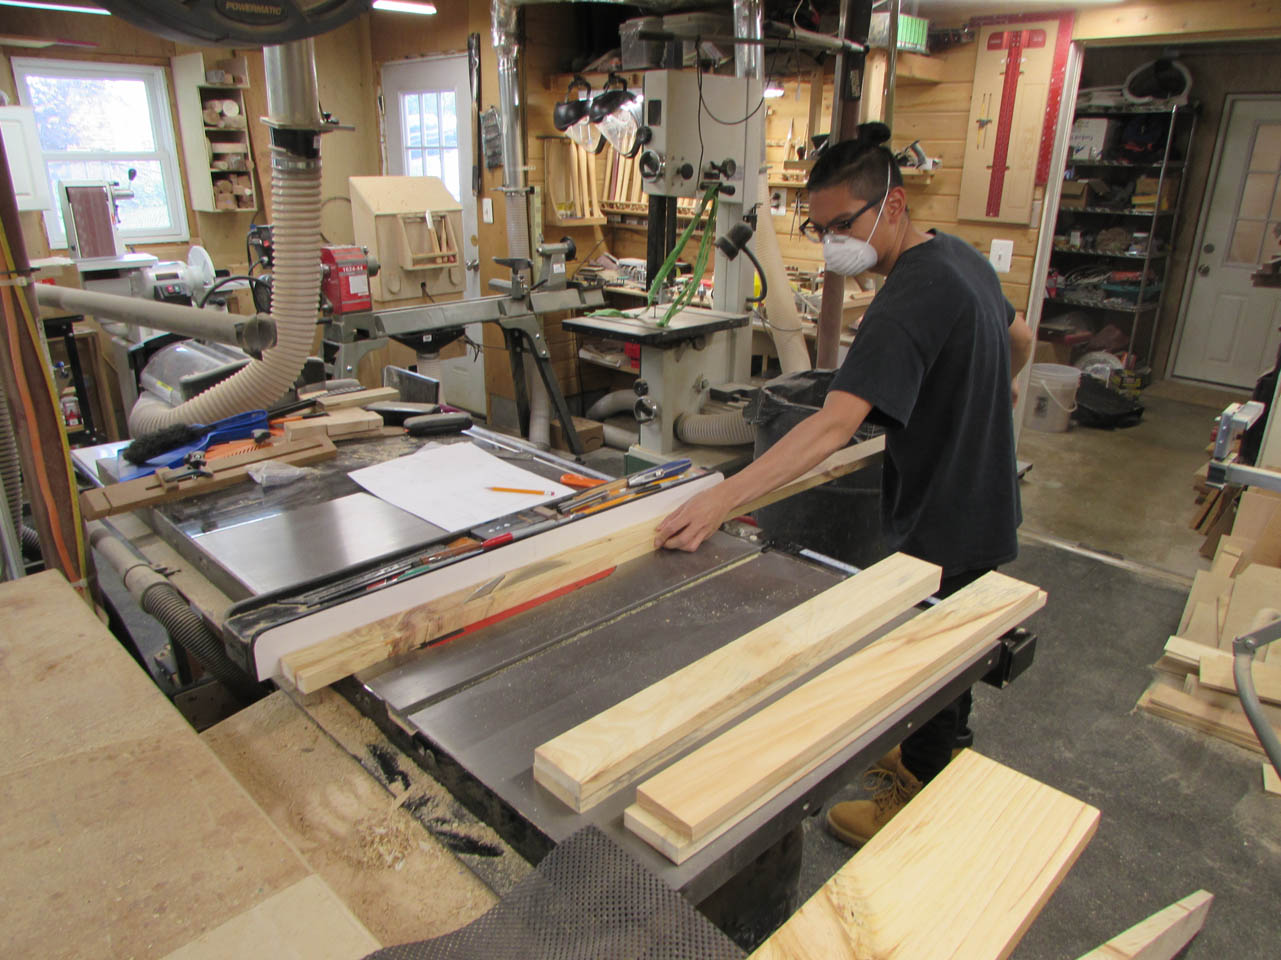
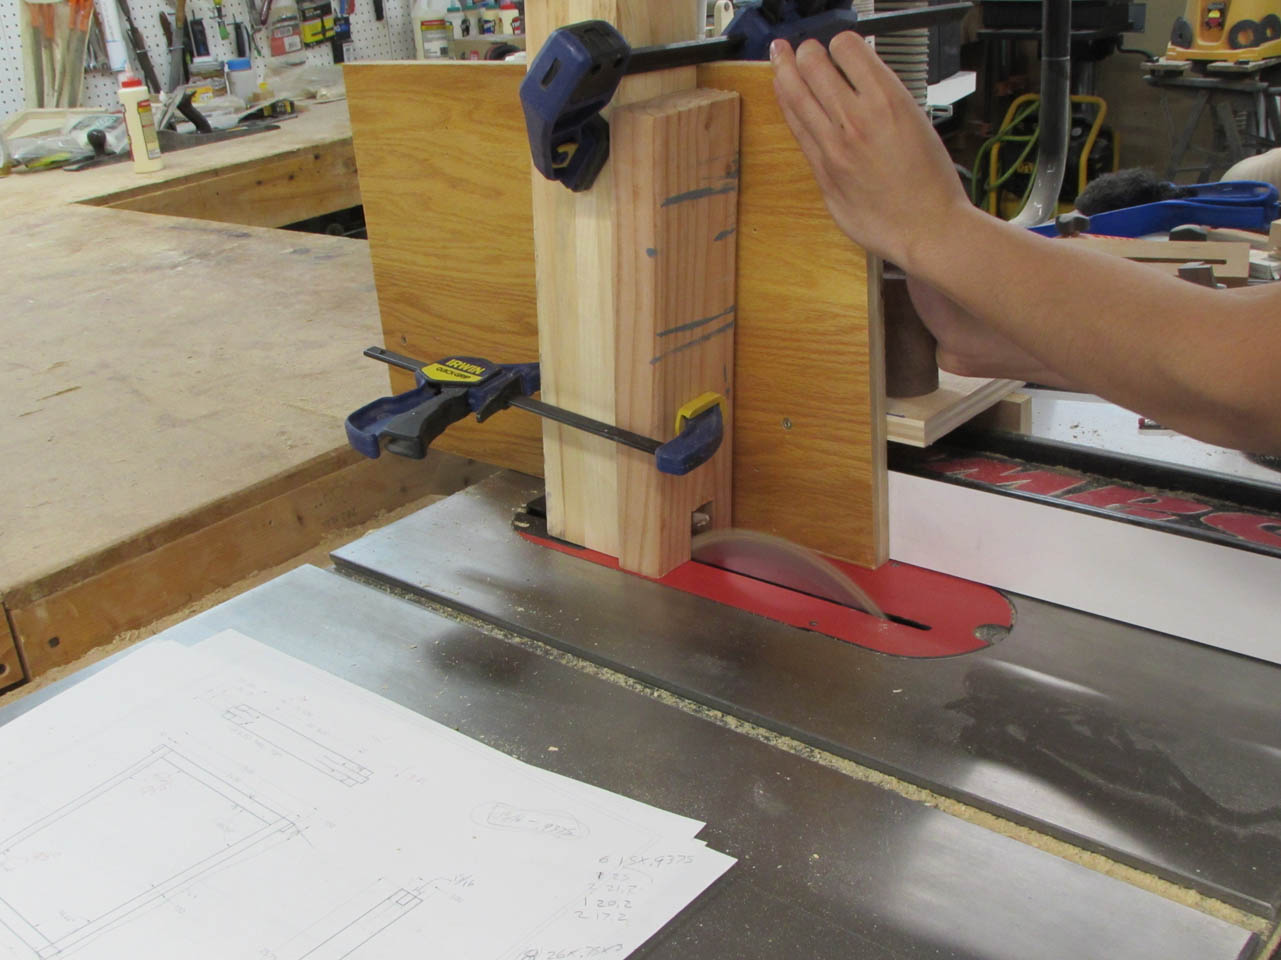
Once the first edge is jointed straight, the opposite edge is cut parallel on the table saw. Another left-handed student in the shop. I will never get used to how awkward it looks to work left-handed on the table saw. I moved the fence to the left side of the blade to make it a little easier for Raphael to work.


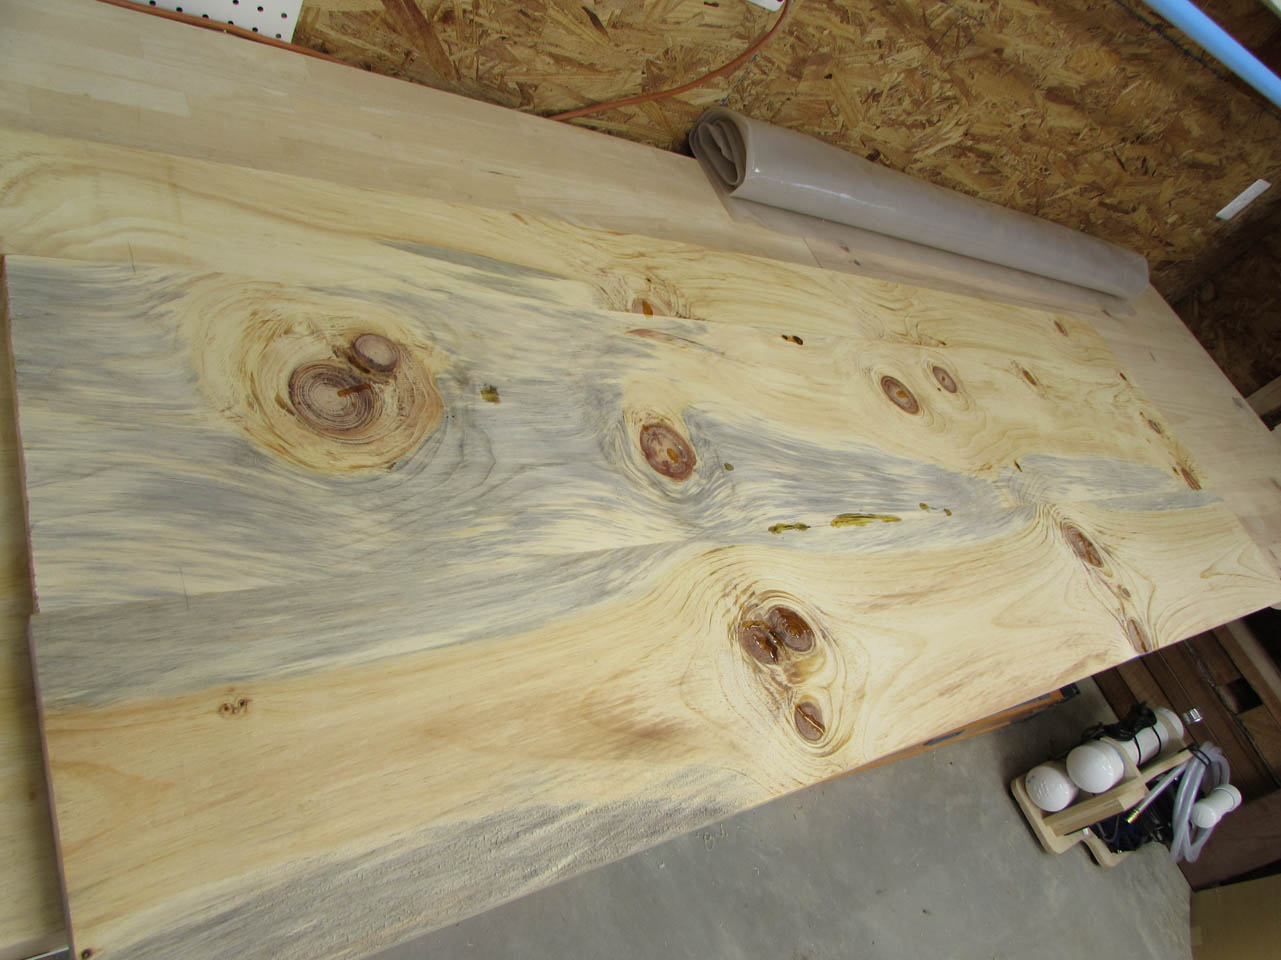
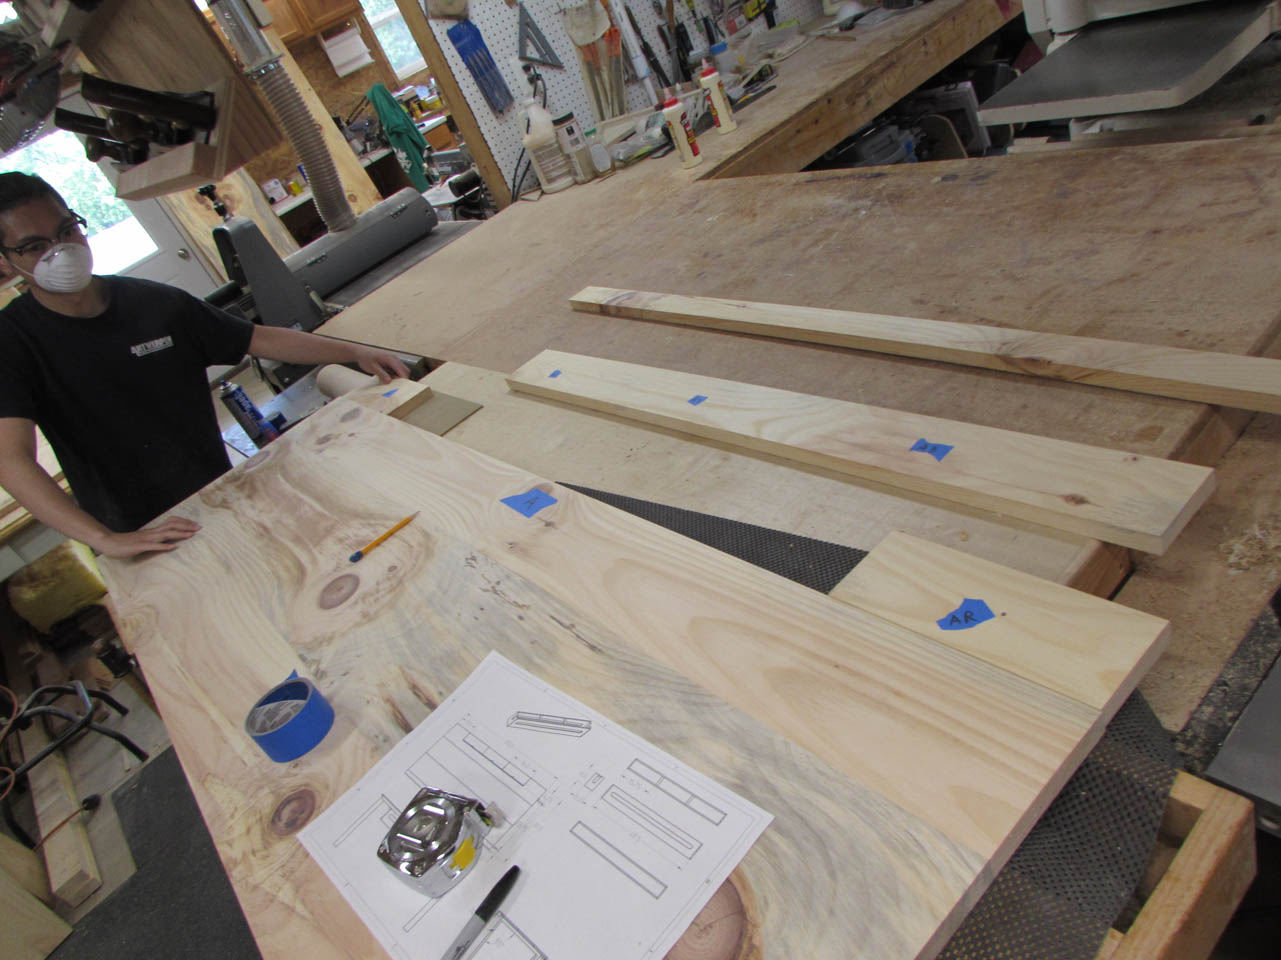
I am not a fan of working with pine, mainly because of all of the sap that gets left on the tools that I have to clean off regularly, but this stuff has a lot of character. Between the large knots and the grey weather-staining, it creates a dramatic picture when all put together.

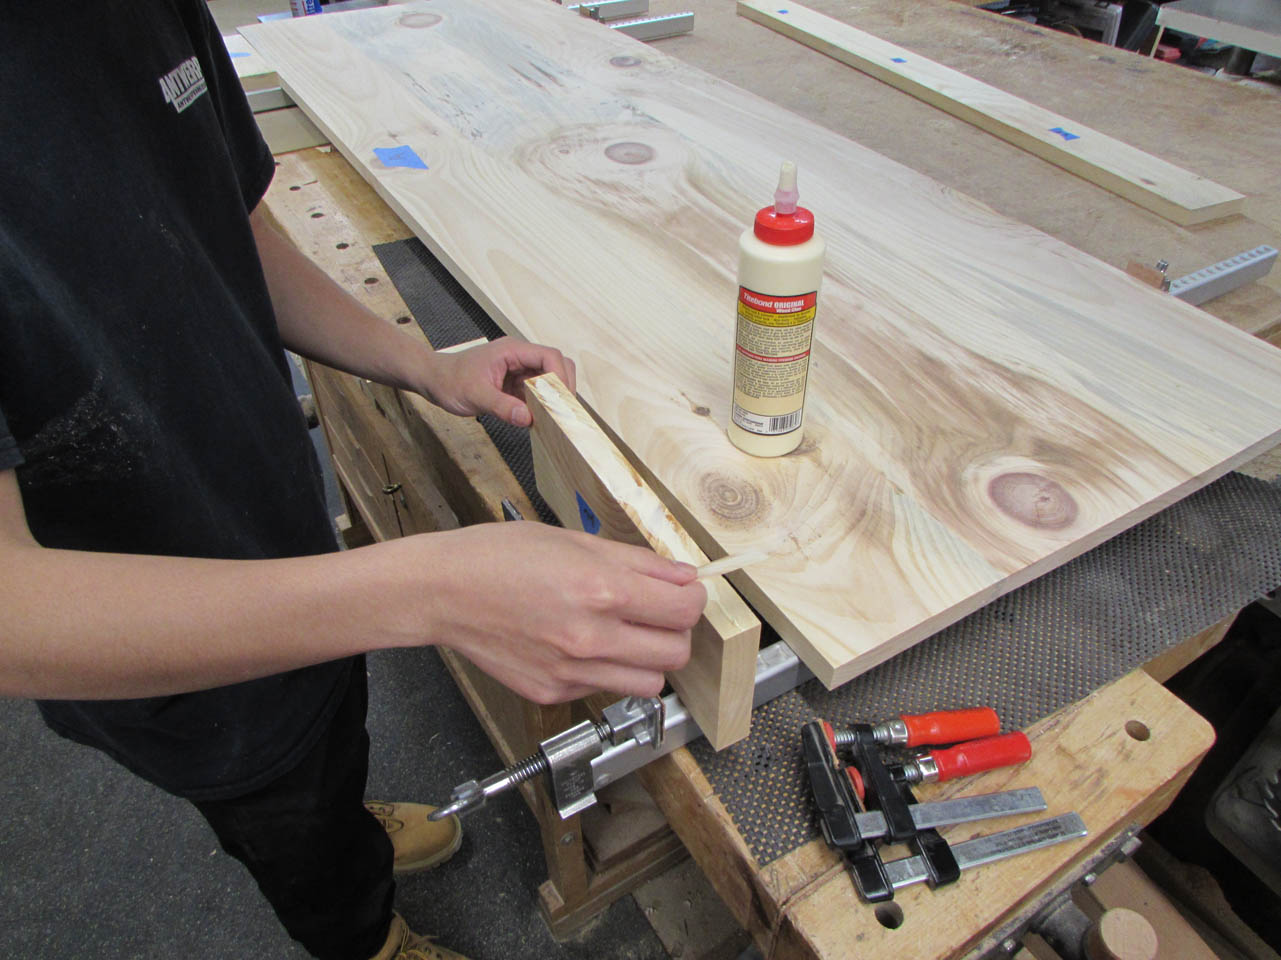
Raphael picked through the boards and matched up the grain, then we started gluing the panels up.
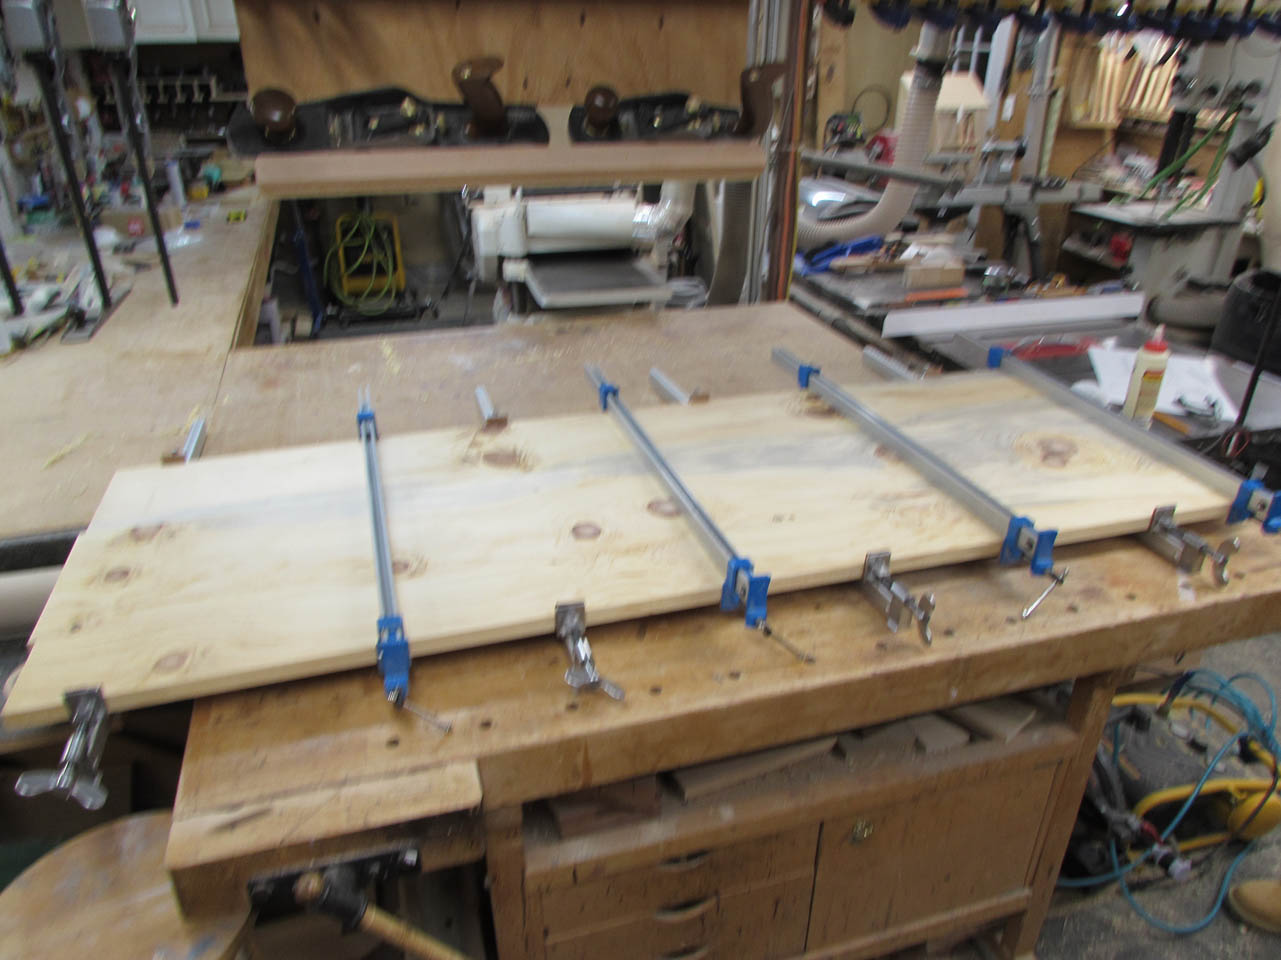

We worked together to get glue spread across all the joining edges so that none of it started drying out before we could get it all clamped up.

Any dry spots will not join properly and that area will separate again later. Once glued, we clamped the top and the bottom of the panel so that it would have even pressure. If you only clamp one side, the panel will want to cup slightly and that can sometimes be a problem.

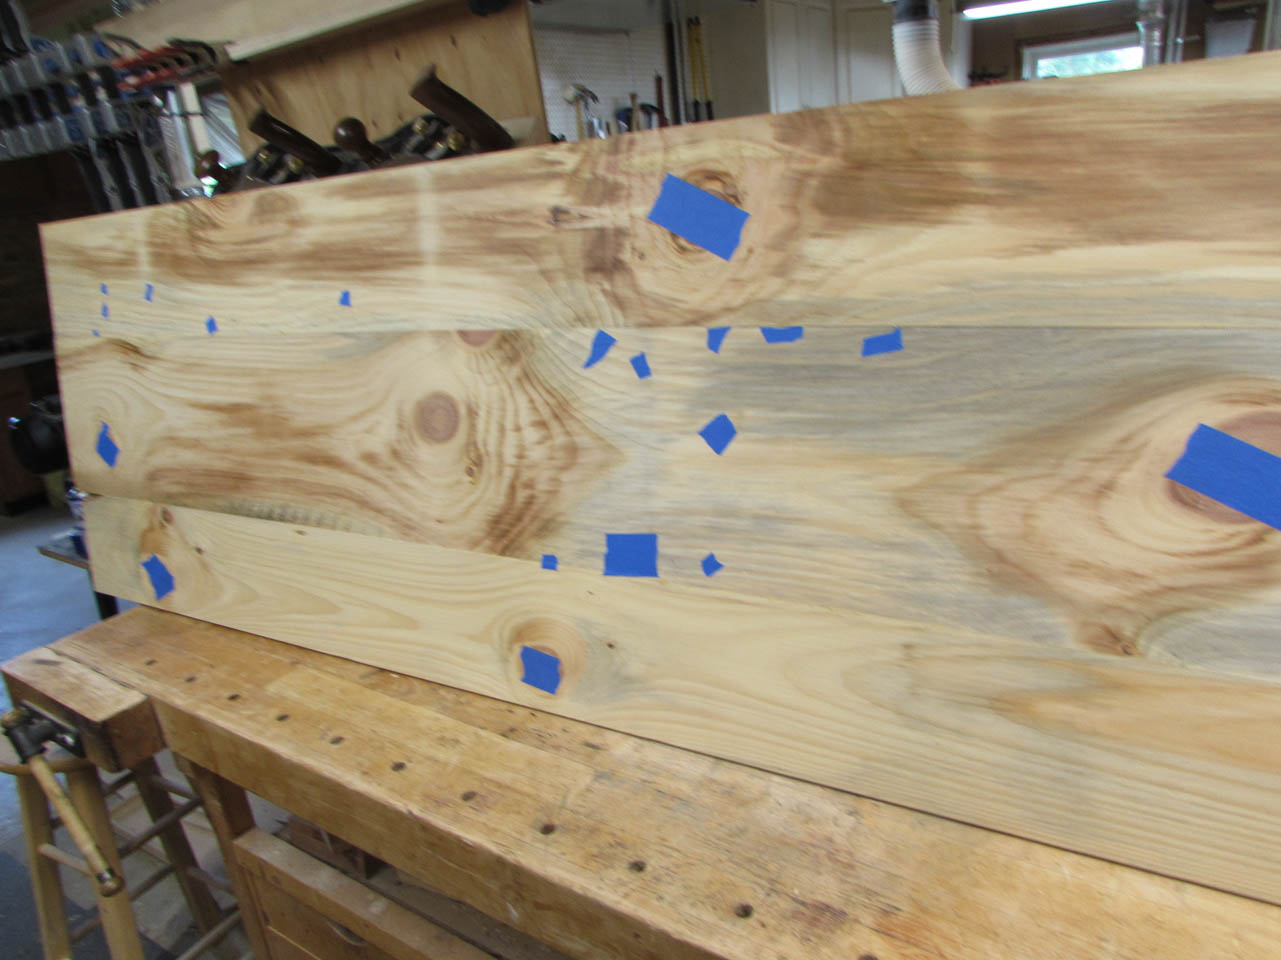
Since Raphael only has one day a week that he can come over and work, I will work on some of the more time consuming tasks in between his visits like filling the holes and cracks with epoxy.

The epoxy I use is thin so that it will work it’s way down to the bottom of a crack. This means that I have to seal the holes and cracks on the bottom side of the desktop or it will just leak out.

Painter’s tape works well. I just have to place a small piece everywhere I can find a potential leak or I will wind up gluing the desktop to my benchtop by accident…
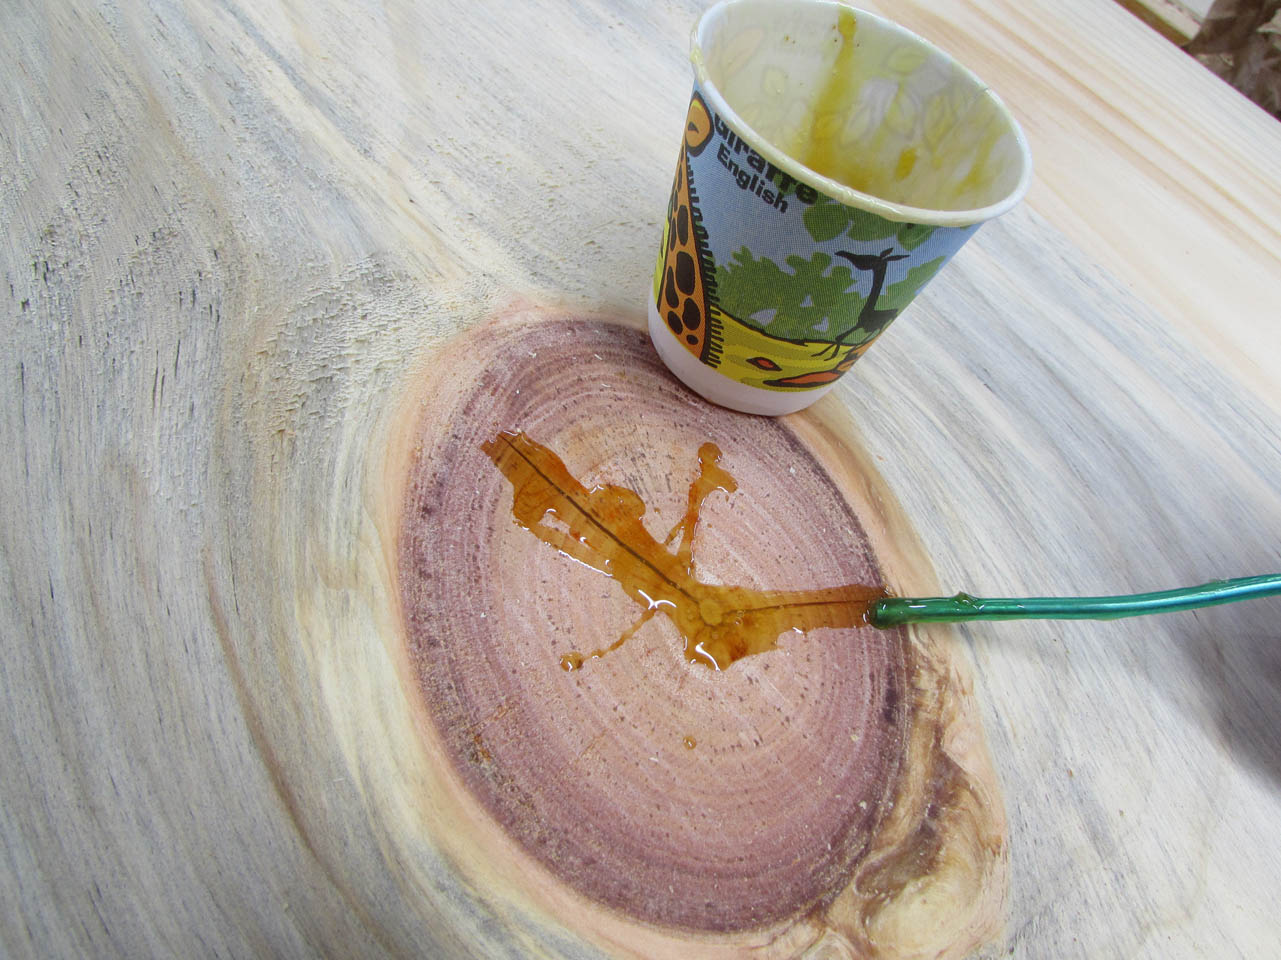
I am using West Systems marine epoxy. It is a 2-part mix that will heat up as it cures.
Because of the heating it can sometimes draw air bubbles from the wood into the epoxy.

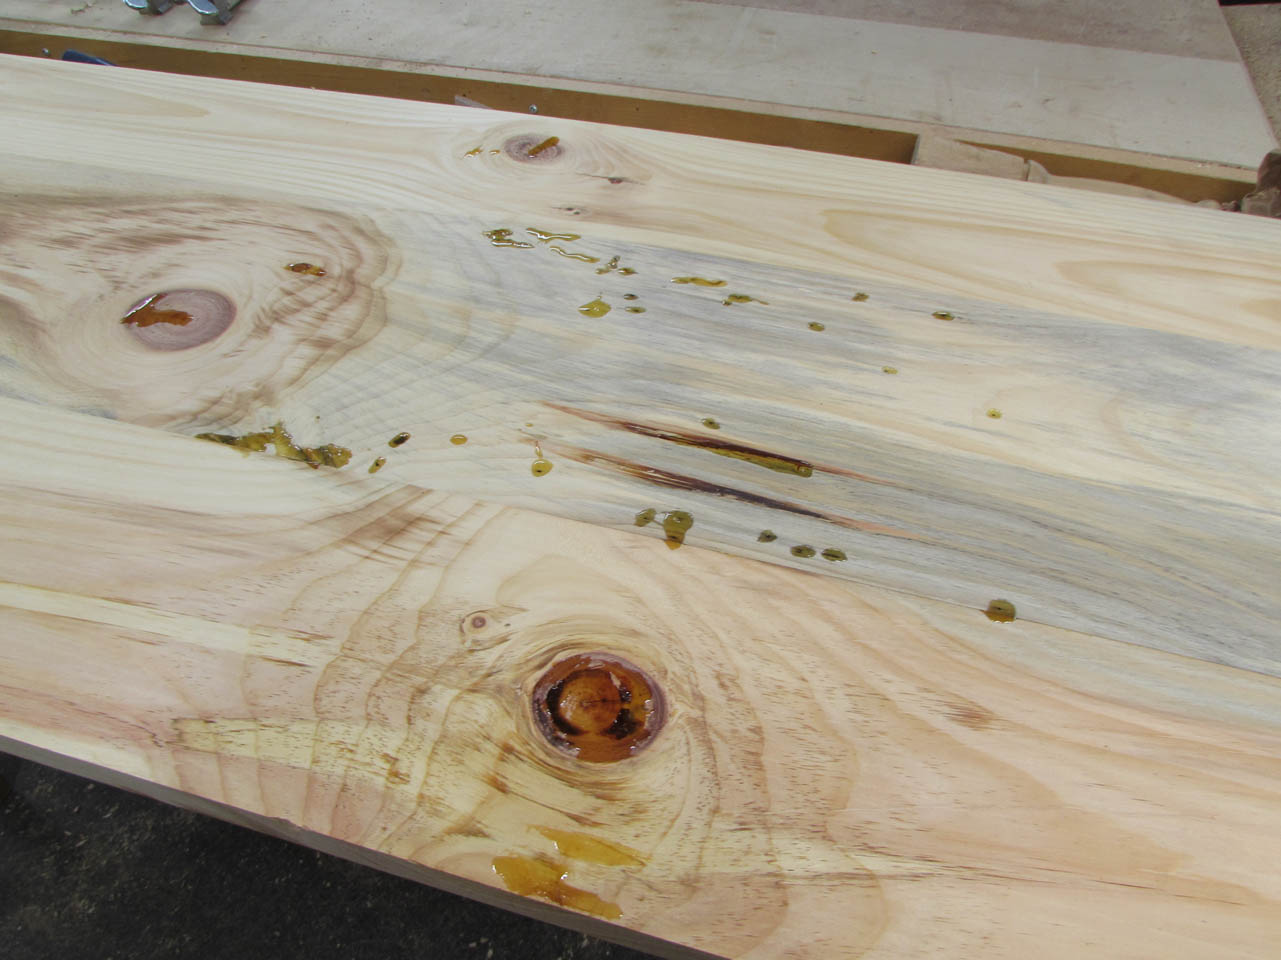
So after applying the epoxy to all of the cracks and crevices, I have to continually monitor them until the epoxy sets. I continue to push epoxy into the holes as it sinks in or pop the small bubbles that rise up. Otherwise, I will just have to repeat the process again.

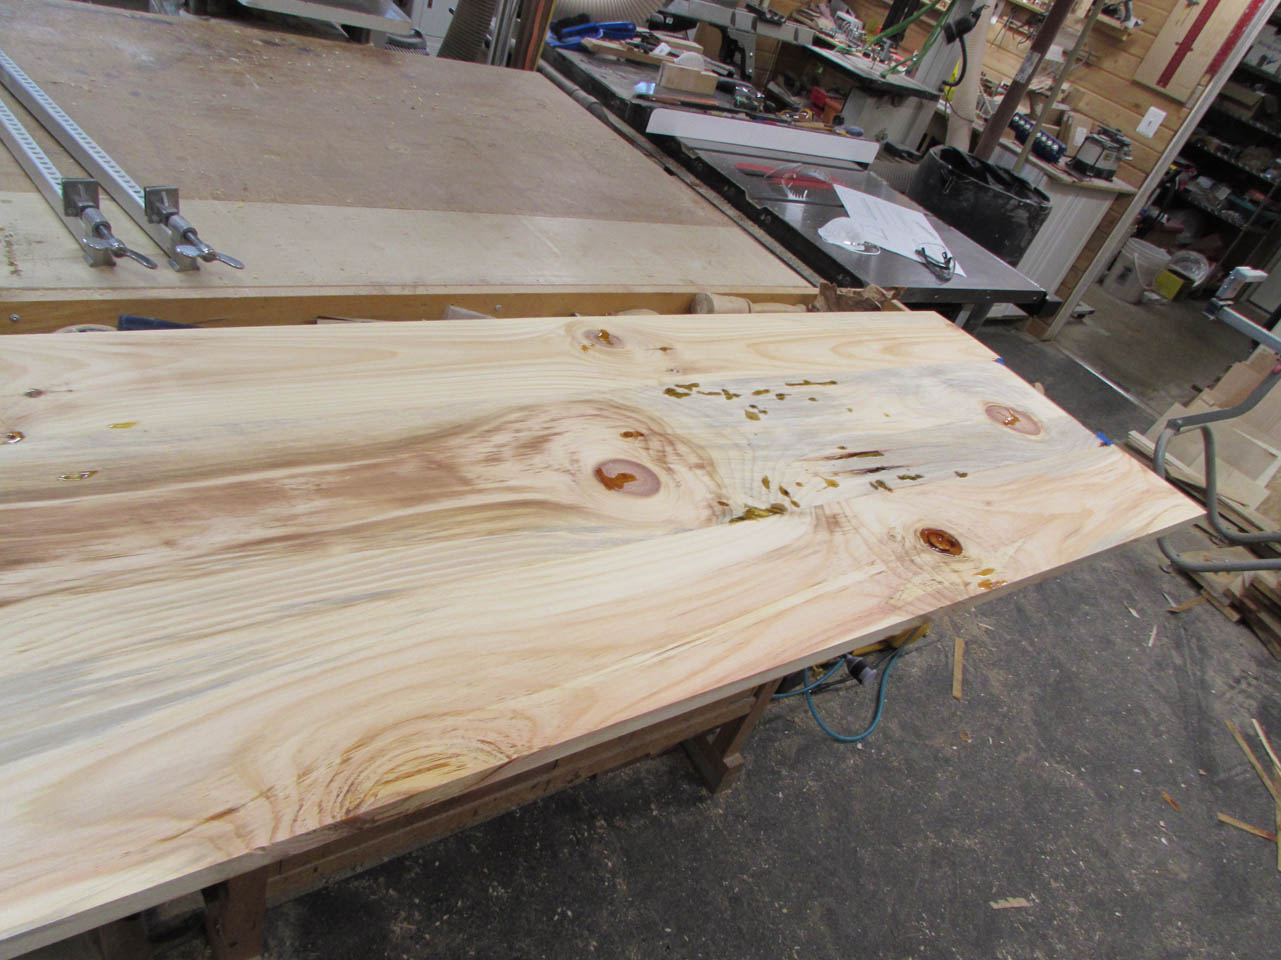
I usually allow at least 8 hours for the epoxy to cure, but this actually gets several days until Raphael comes back to sand the desk surfaces.

This was not an exciting day for Raphael. I normally work with hardwood and rarely with pine. When I sand hardwoods, I primarily use 120 grit paper or finer. The 120 grit paper gums up very quickly with the air-dried pine. The resins in the wood combine with the dust to clog up the sand paper almost immediately. I think we went through seven or eight sheets of paper just on the top surface of one desktop.

Unfortunately I think that one top was all we accomplished that day. We also managed to use up all of my 100 and 120 grit sandpaper.

When I sat down to order more sandpaper, I was a little irritated by the cost. I have two orbital sanders left in my shop and each has a proprietary hole pattern for dust collection. The Festool sander has a 9-hole pattern and the 3M has a “universal” hole pattern that they created so it is not really universal since they also make the paper for it. Either one takes sandpaper that costs almost $1 per sheet and we just used eight sheets to sand one desktop. After ordering a 50-pack of 3M paper and a 100-pack of Festool paper, Grand total of about $140, I decided to but a $50 Bosch sander that has a standard 8-hole pattern and an 80-pack of cheap sandpaper off of Amazon for $10. Seems stupid but it was cheaper than wasting the good paper on pine. One piece of Festool sandpaper can usually sand an entire project or two when using kiln-dried hardwood.
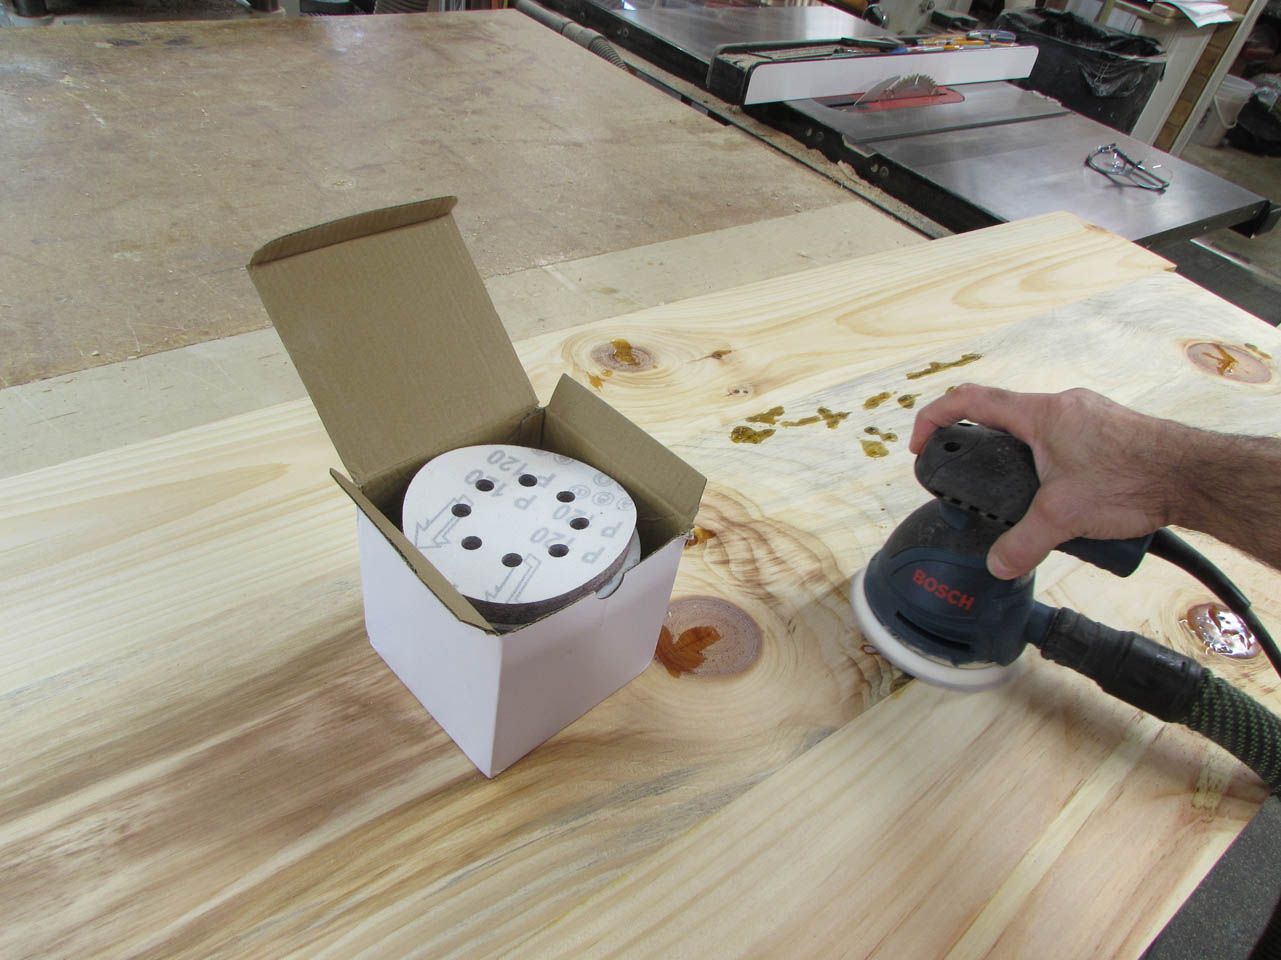
I also had a word with my buddy Dave about the gummed up paper problem and he suggested starting with 60-grit paper and working down to 120 grit. Even though the boards were already smooth, it seems to handle the the gummy mess better and by the time you get down to 120 grit it doesn’t seem to clog the paper as much. Learn something new every day…

I took pity on Raphael and sanded down the epoxy on the second top leaving him the job of finish sanding with the 120 grit. It went substantially faster this time and we were able to move the project forward a bit more this week. With the tops sanded, we can cut them to the same width. We are actually going to make the top deeper but we want to make the back a grain-matched section that has doors to access the wires so that will get added after this is cut to a smaller size.
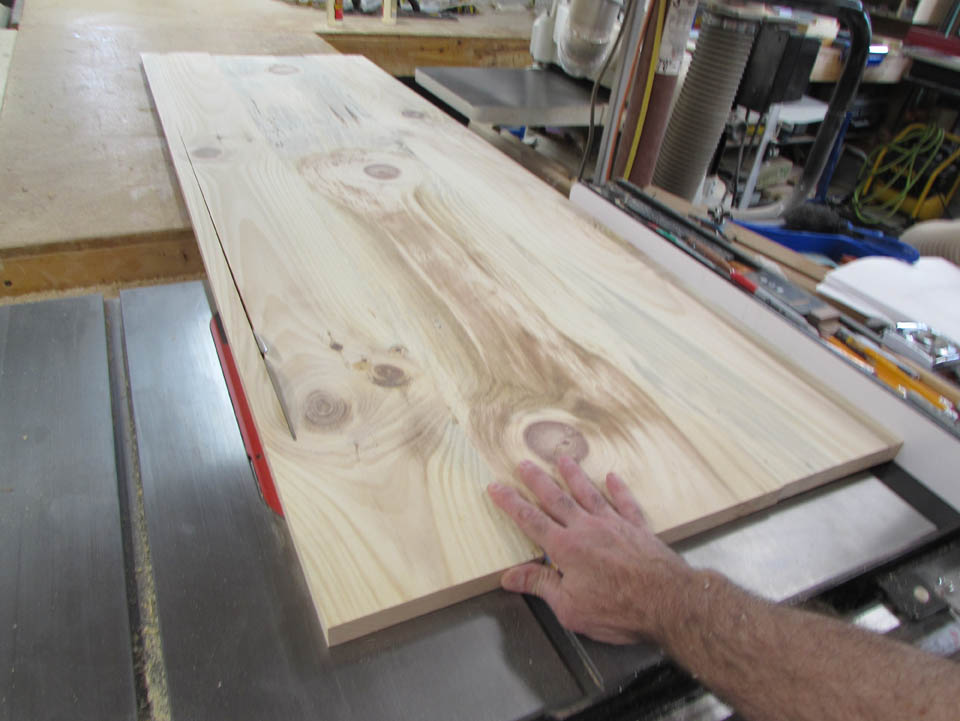
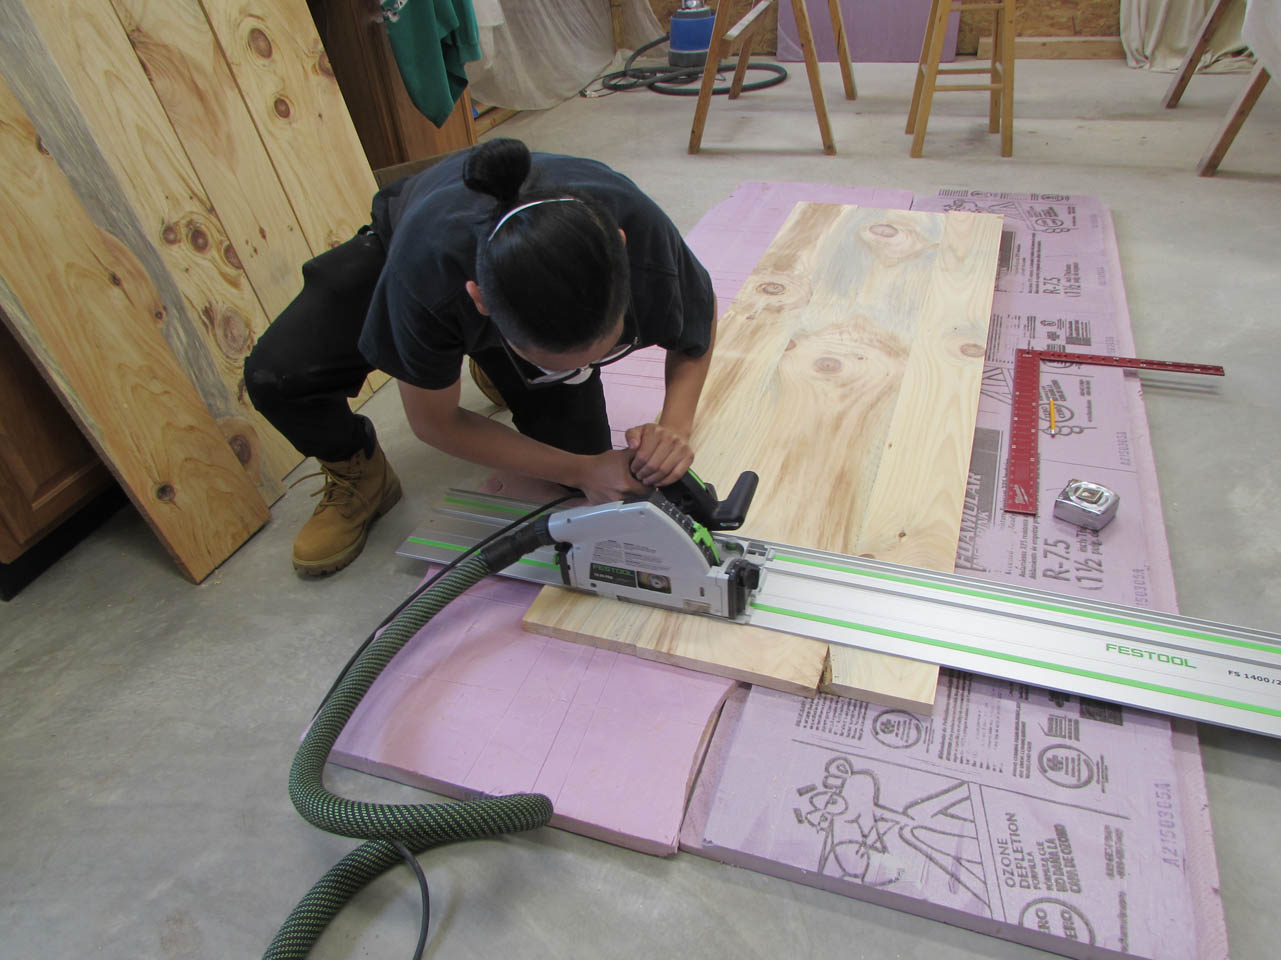
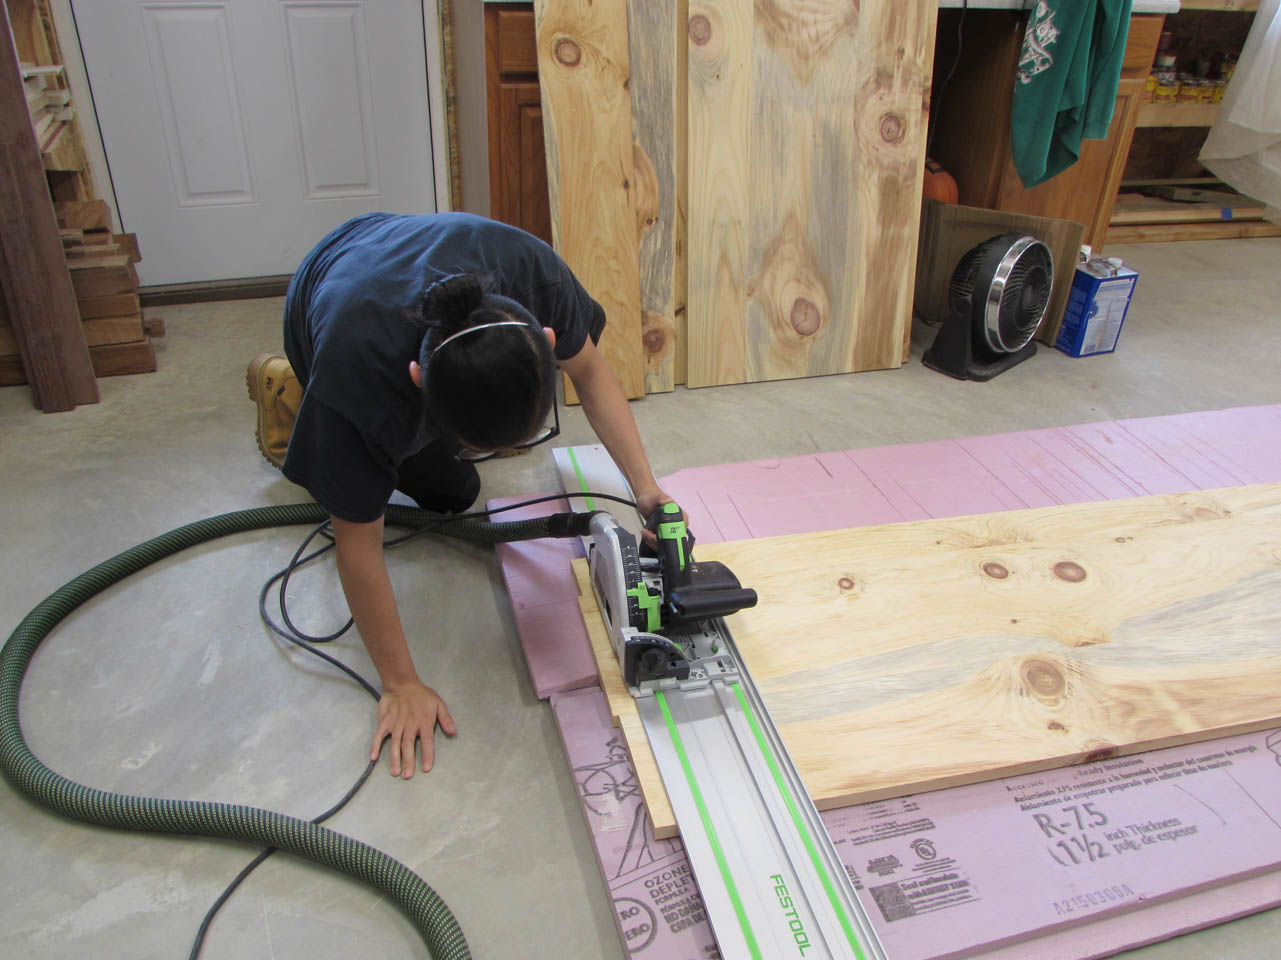
Raphael also got to use the track saw to cut the desktops to length.


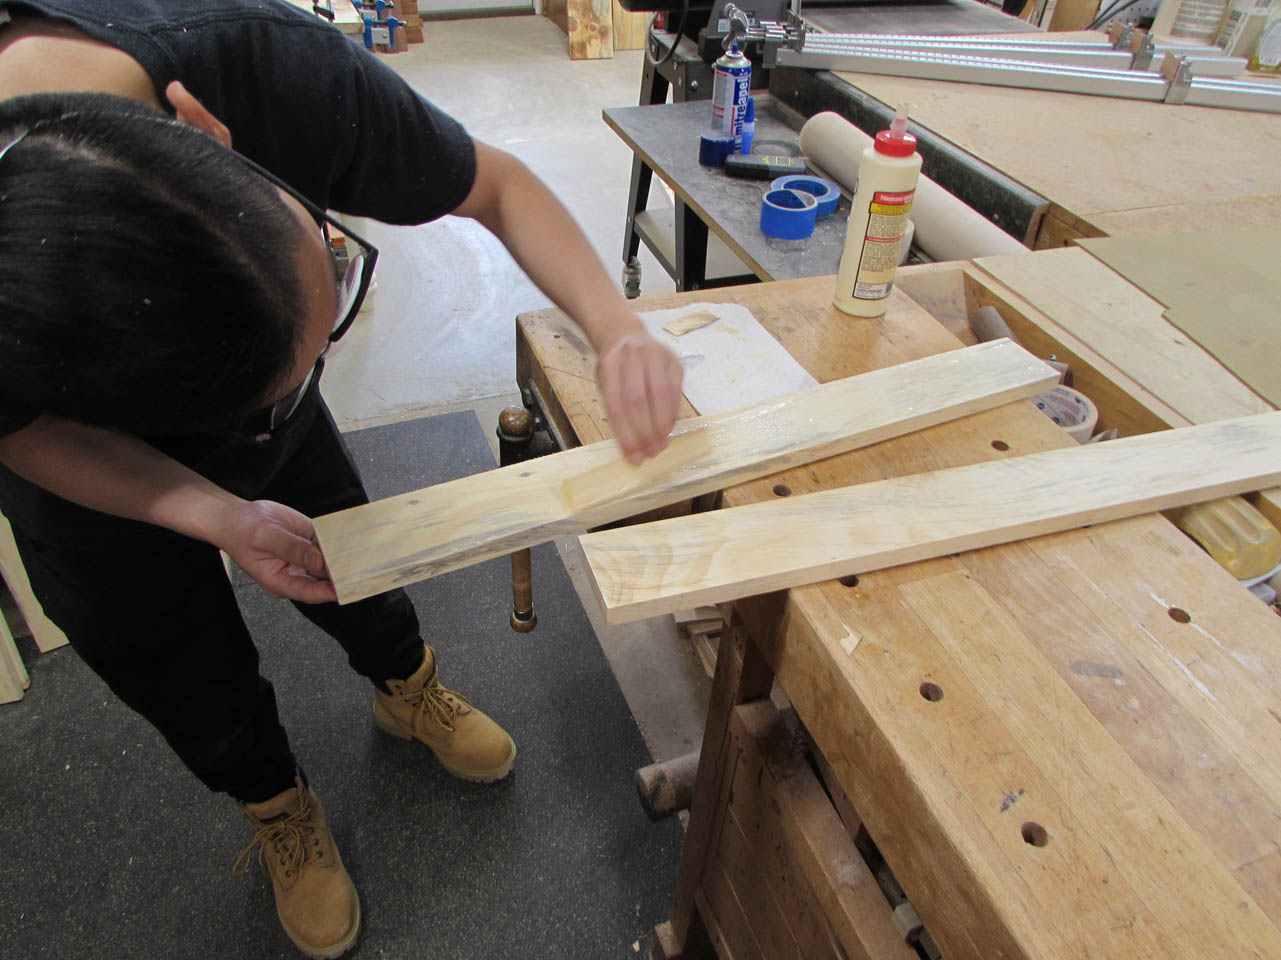
Next, he selected a board to match the desktop that will be used for the wire harness area. We cut them down to 4-1/4″ wide on the table saw.
Instead of joining the board, then cutting the access doors back out, we are marking everything to keep the grain orientation correct, then cutting off the 11″ long piece that will be joined to either side and saving the middle section to make the access doors later.


After everything was marked, Raphael cut off the 11″ long section for each side.
These were glued and clamped into place.

Setting the desktops aside for a while, it is time to get started on the legs. This is the design Raphael wants: Desk Legs.PDF
The front and back are 3″ wide x 1-1/2″ deep. To make them, we planed some off-cuts down to 3/4″ thick.
We left them longer than needed and glued them together to create a couple of pieces 1-1/2″ thick.

After they were dry, the front and back pieces were cut to length on the miter saw at the required 5° angle.

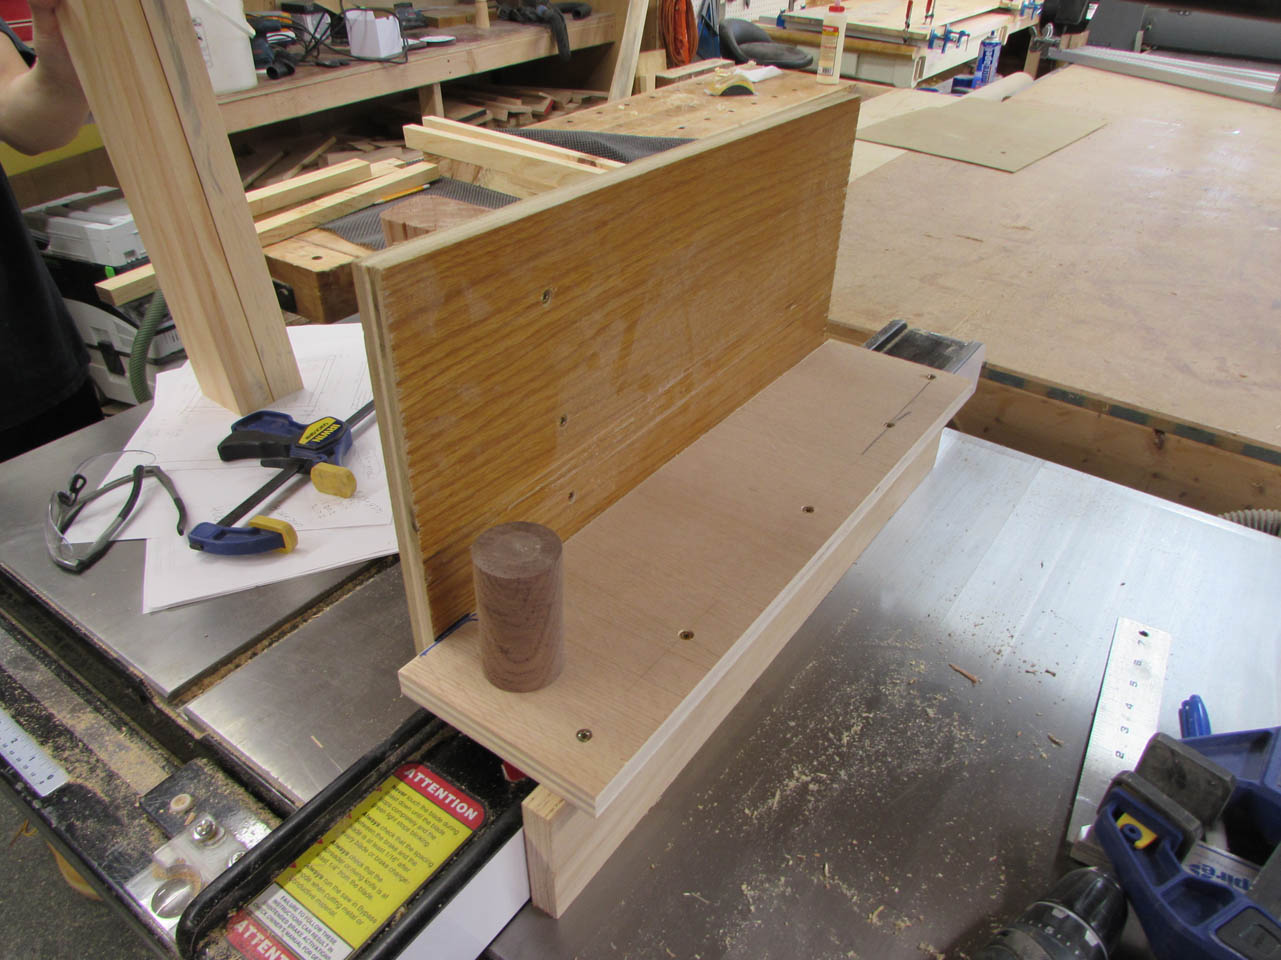
The front and back pieces will be joined to the top and bottom pieces mainly through a notch in both ends to repeat this notch eight times (at a 5° angle), I created a quick jig on the table saw fence and laid out a 15/16″ wide notch that will line up with the center of the 3″ wide legs.


We clamped the legs to the jig, two at a time then ran them through the blade, moving the fence over 1/8″ at a time until the entire slot was cut.


After one end was cut, we flipped the legs over and placed a scrap in the notch to keep the boards aligned and then cut the opposite side the same way.

Using three pieces of 15/16″ x 1-1/2″ we can create a lamination for the top and bottom. The center piece is pressed into place, then the front and back piece of the top and bottom are cut to fit with 5° ends. These are cut slightly long then trimmed to fit exactly.

The first leg seems like it will work well, now we just have to make three more identical assemblies when Raphael returns.

The stain is not from the weather, but from the beetles which infest the tree. It’s often called “beetle-killed pine” or “blue pine.” I have some wide boards of it from a sawmill in northern New Mexico.