Reclaimed pub tables
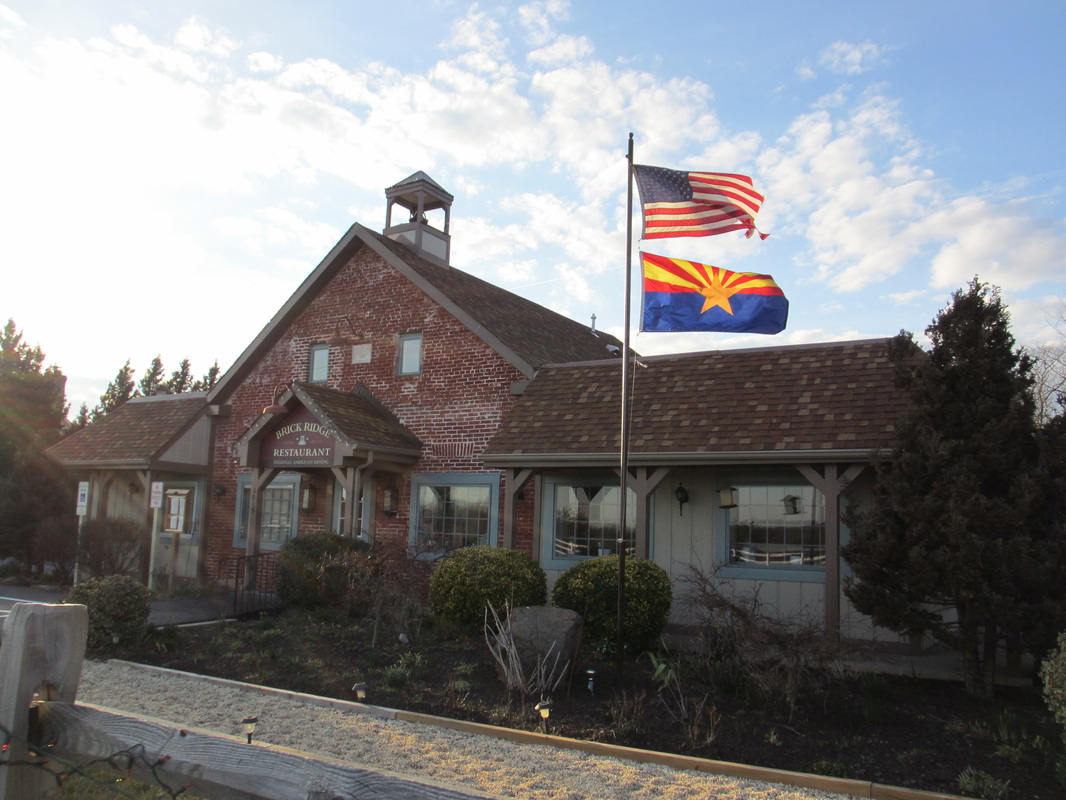
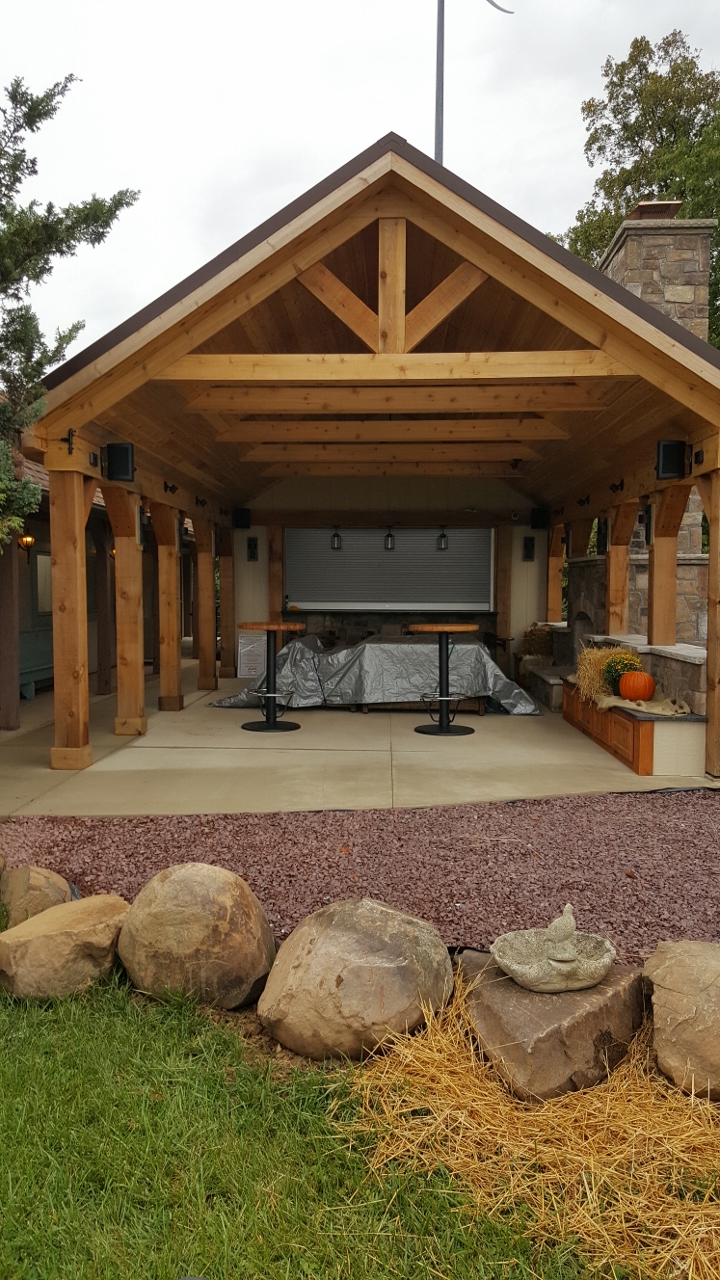
My friend Todd owns the Brick Ridge restaurant, just down the road from me. He asked if I would be interested in making a couple of pub table tops for him, to go into his new outside bar area, that has just finished being constructed. His restaurant is in an old school-house from the 1800’s. It is very rustic, so Todd asked for the tables to be made from reclaimed barn wood.
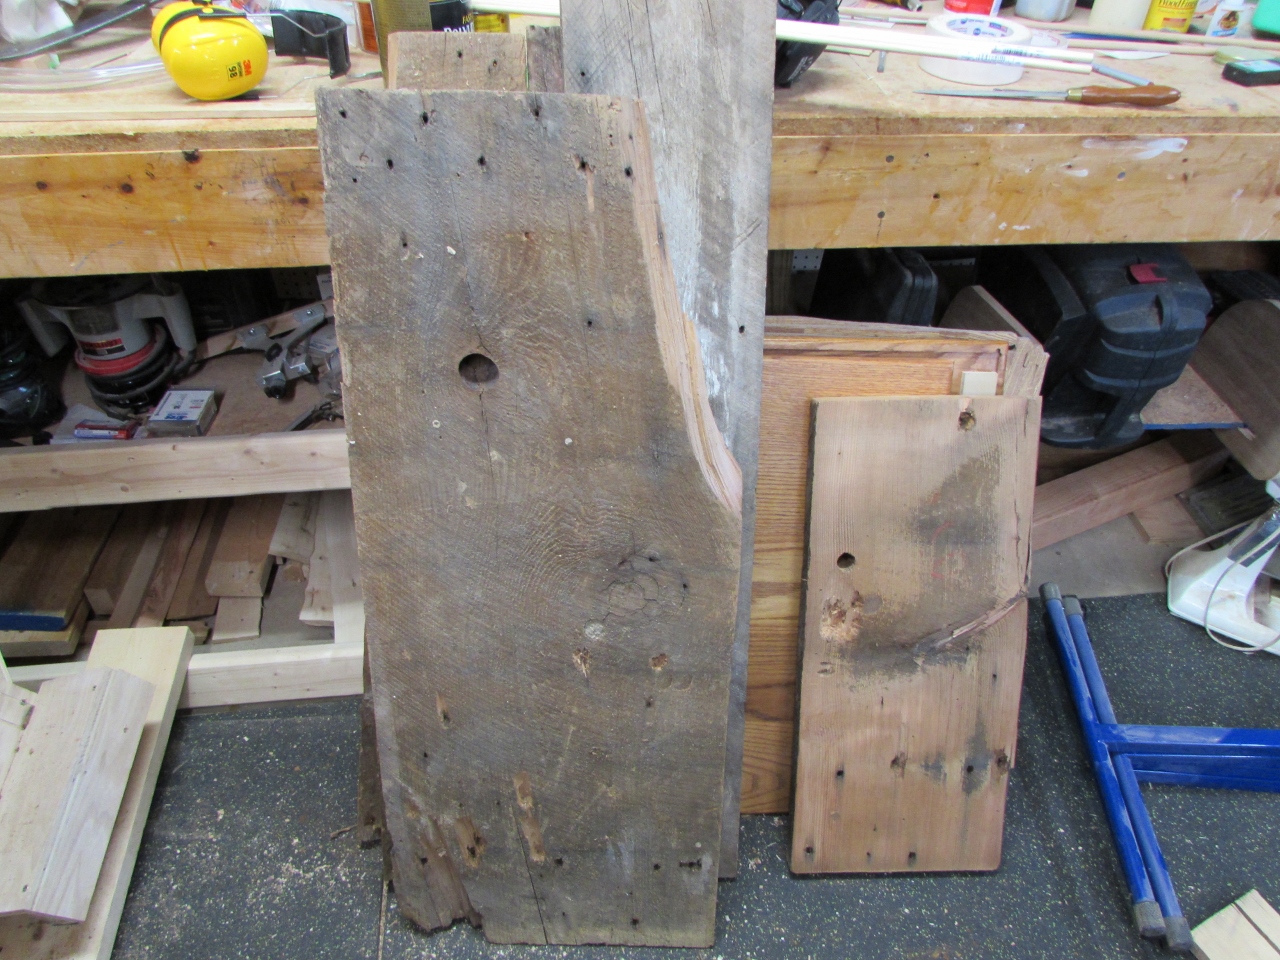
I happened to have a few pieces of old hemlock taken from a plank house in Kingwood West Virginia, that was built around 1910. They were extremely rustic, so I took a few pieces to Todd to see if it was what he was looking for.
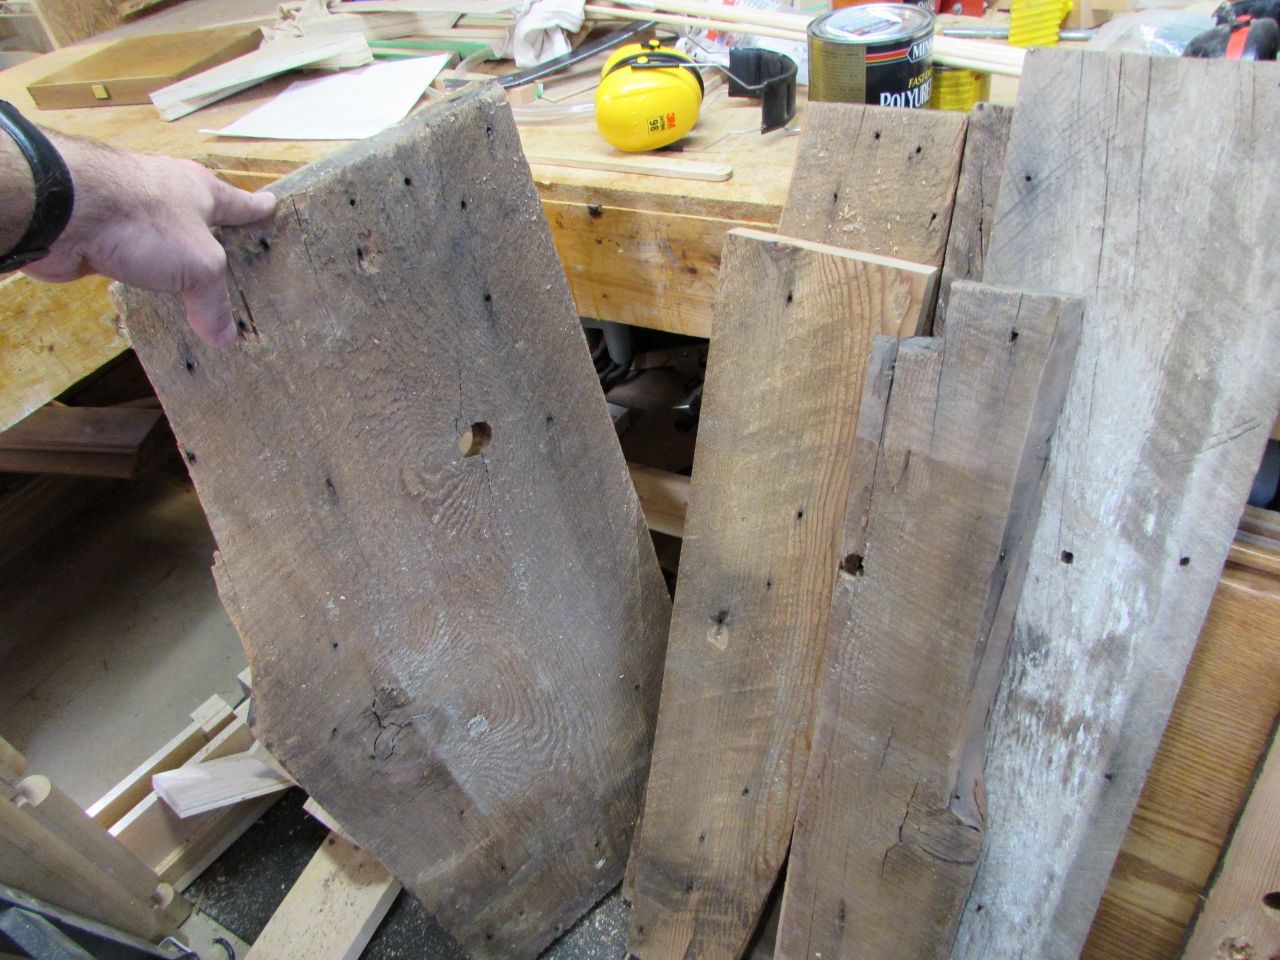

Apparently it was all a bit too rustic for an eating surface, so I showed him a piece that was planed down. It still had an aged look, but would definitely be easier to keep clean…

When I got back home and planed down all of my boards, I found a lot with cracks and some very large knot and nail holes. I also noticed that There wasn’t quite enough good surface area to make two tables.
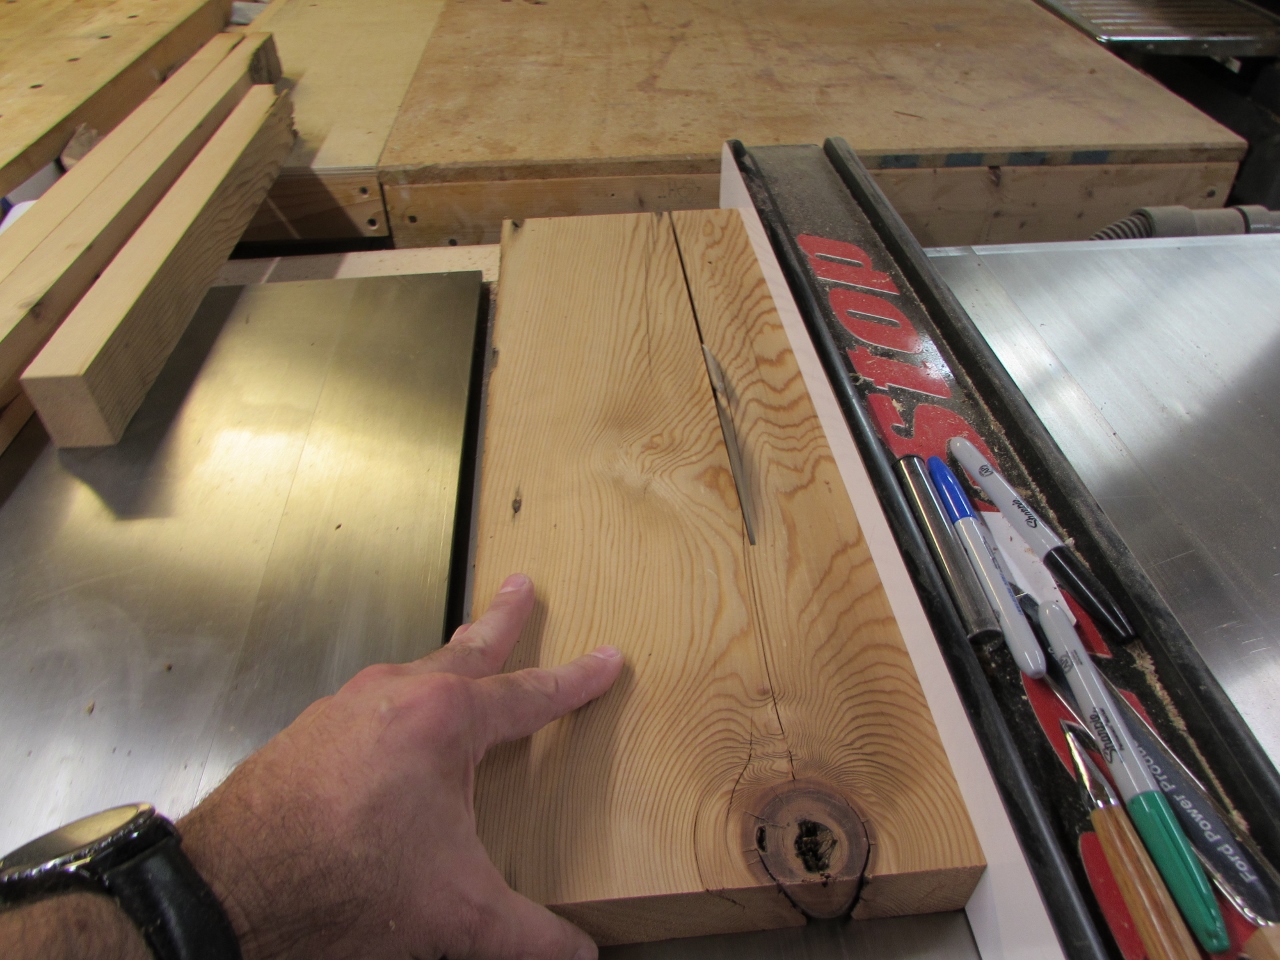
Since these were going to be outside and subject to temperature and humidity swings, I decided to saw all of the boards into 2″ wide strips, then rotate the strips 90 degrees to make 2″ thick, quarter-sawn pieces and join them up, butcher block style. This will make the tables far more resistant to expanding and contracting with the humidity.
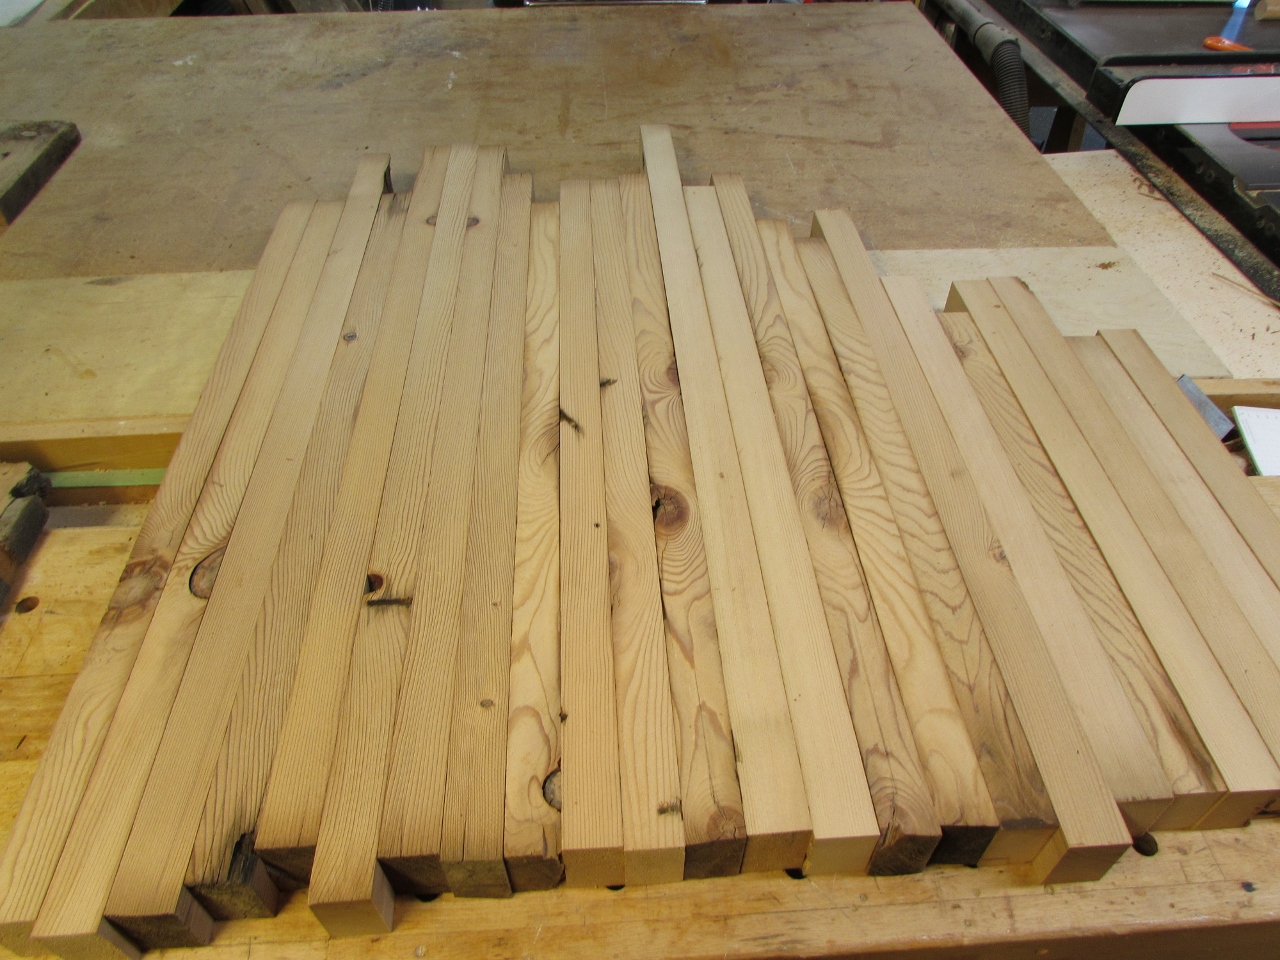
I had to plane down and cut up every last piece to have enough. For a quick template, just to see if I had enough, I borrowed a hula-hoop from the kids…
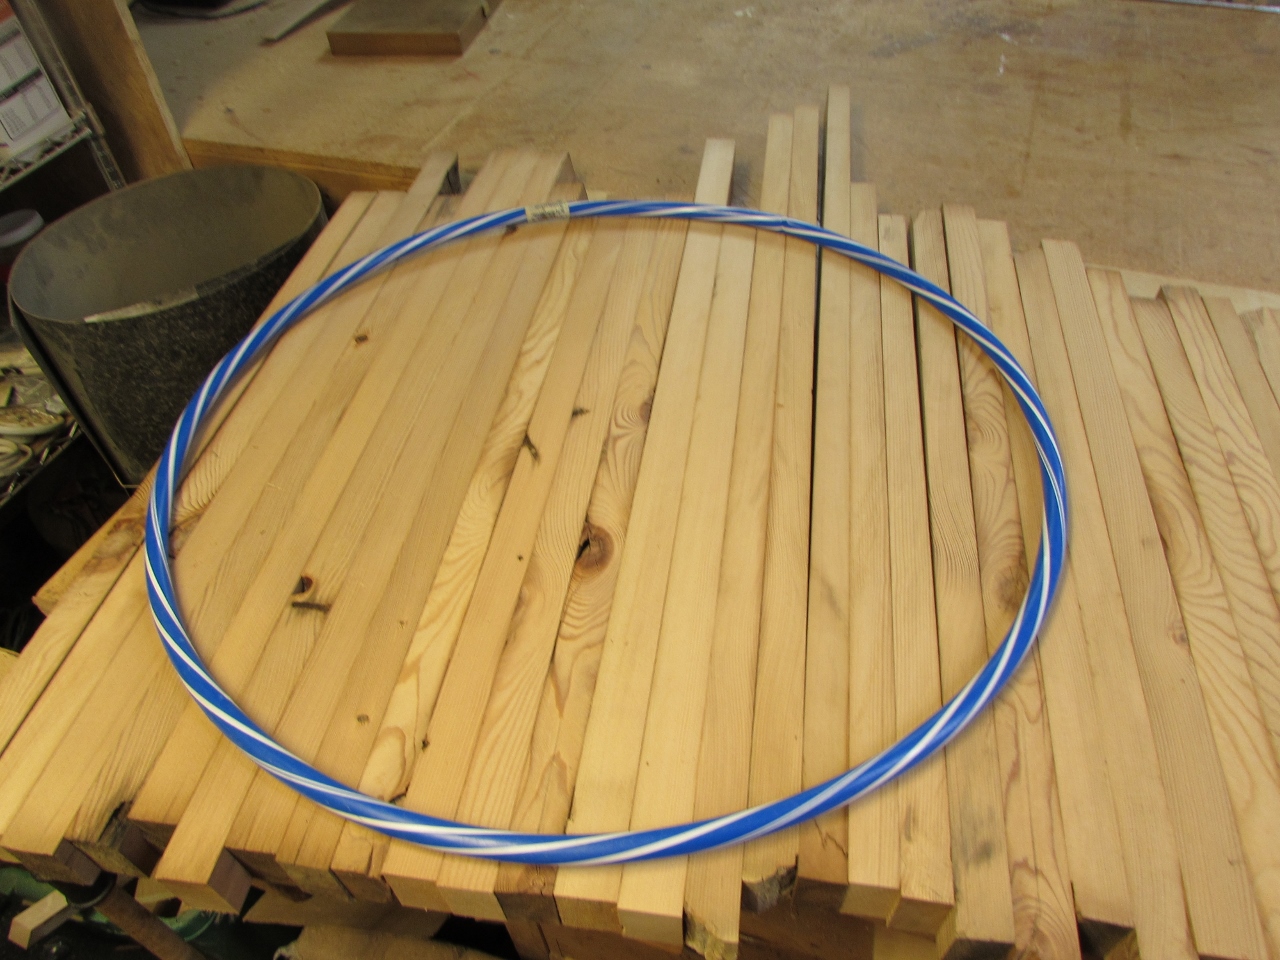
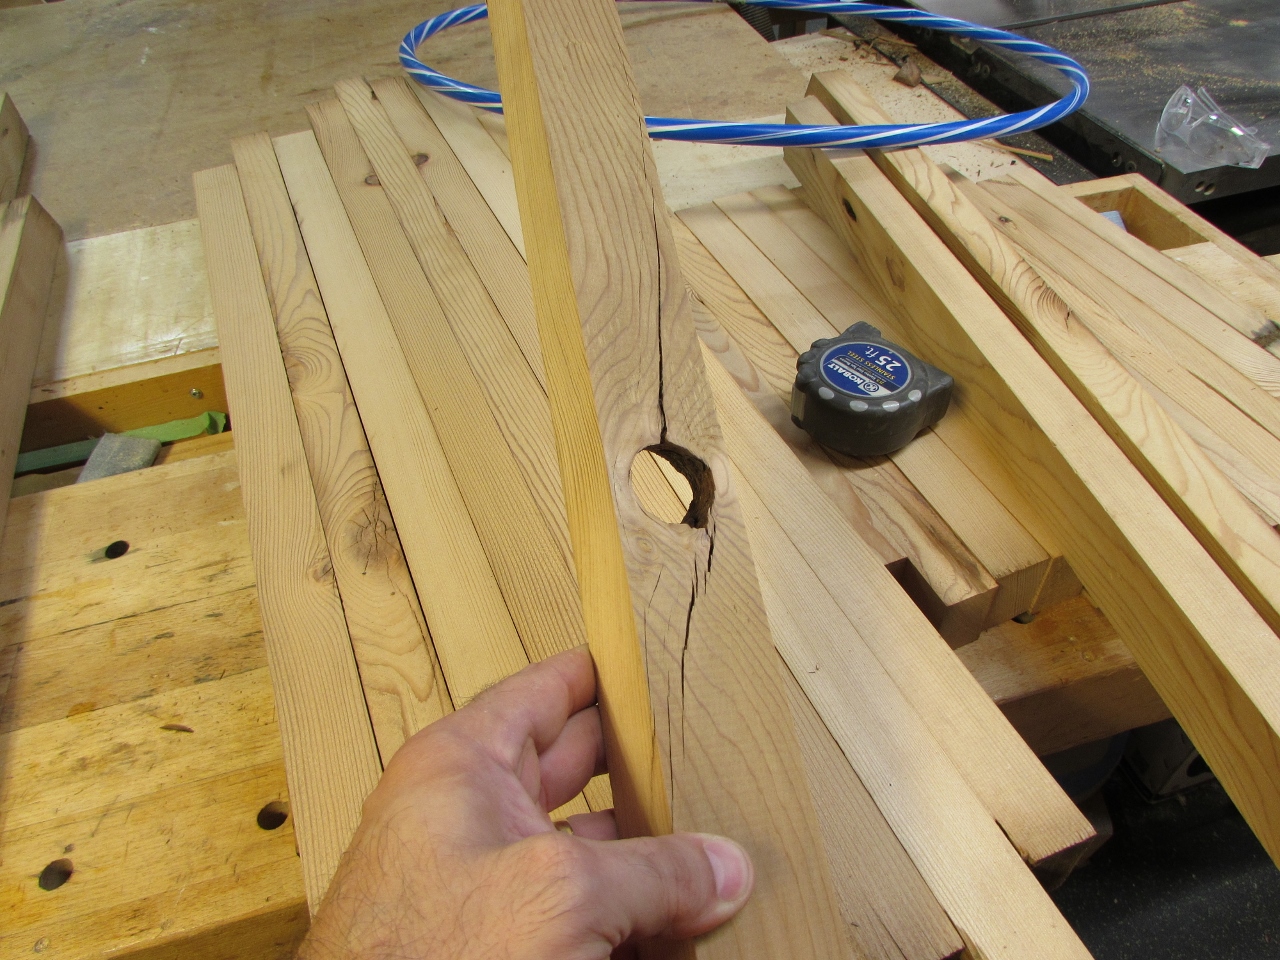
Rotating these pieces also had the added benefit of being able to hide a majority of the knot and nail holes.


After laying out two separate piles, enough wood to make up both tops, I oriented them how I wanted, then scribed a circle using a homemade beam compass.

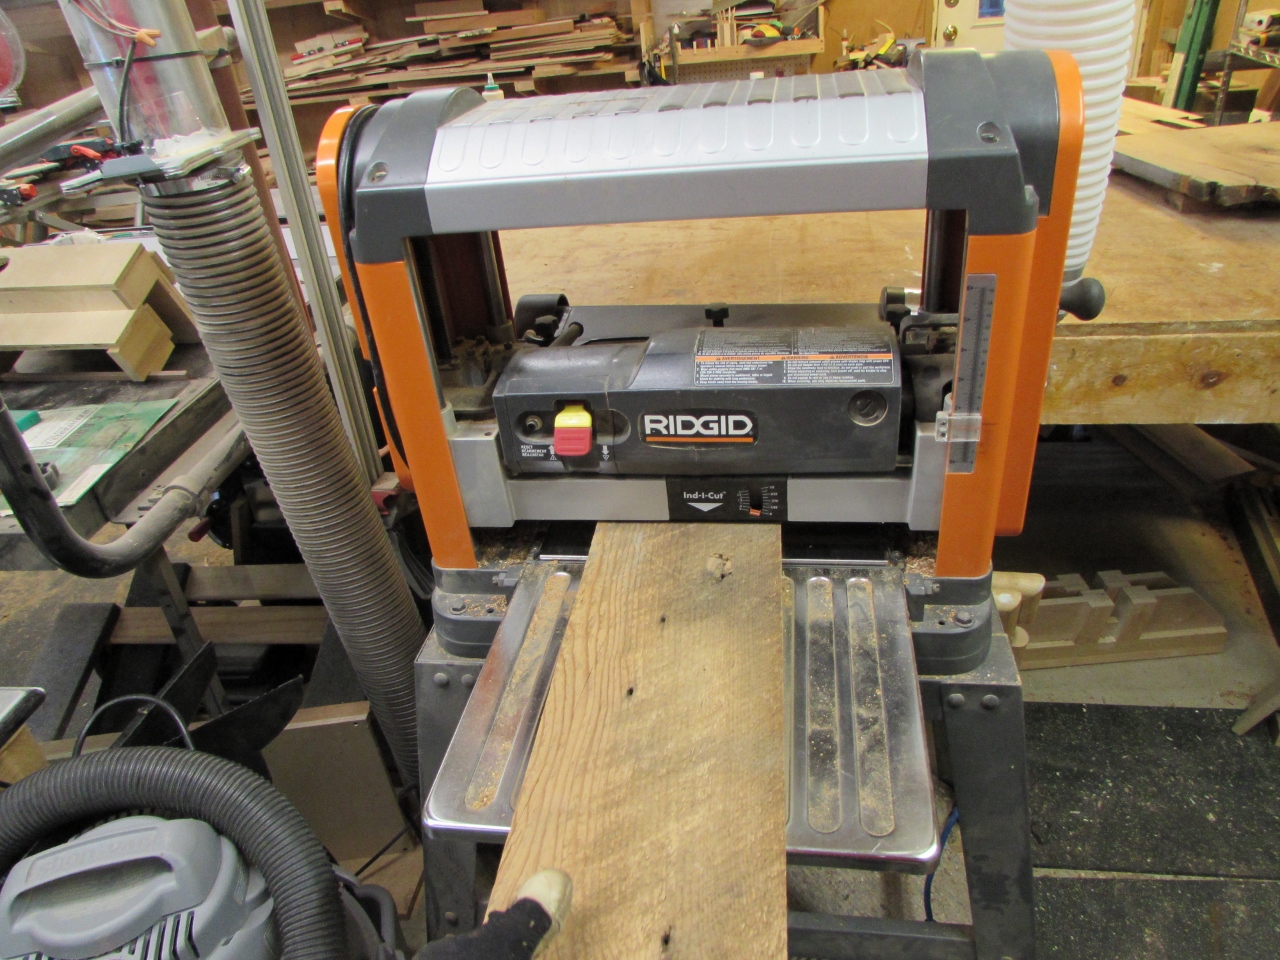
I separated each top into three sections, each under 12″ so that they would fit in my planer.


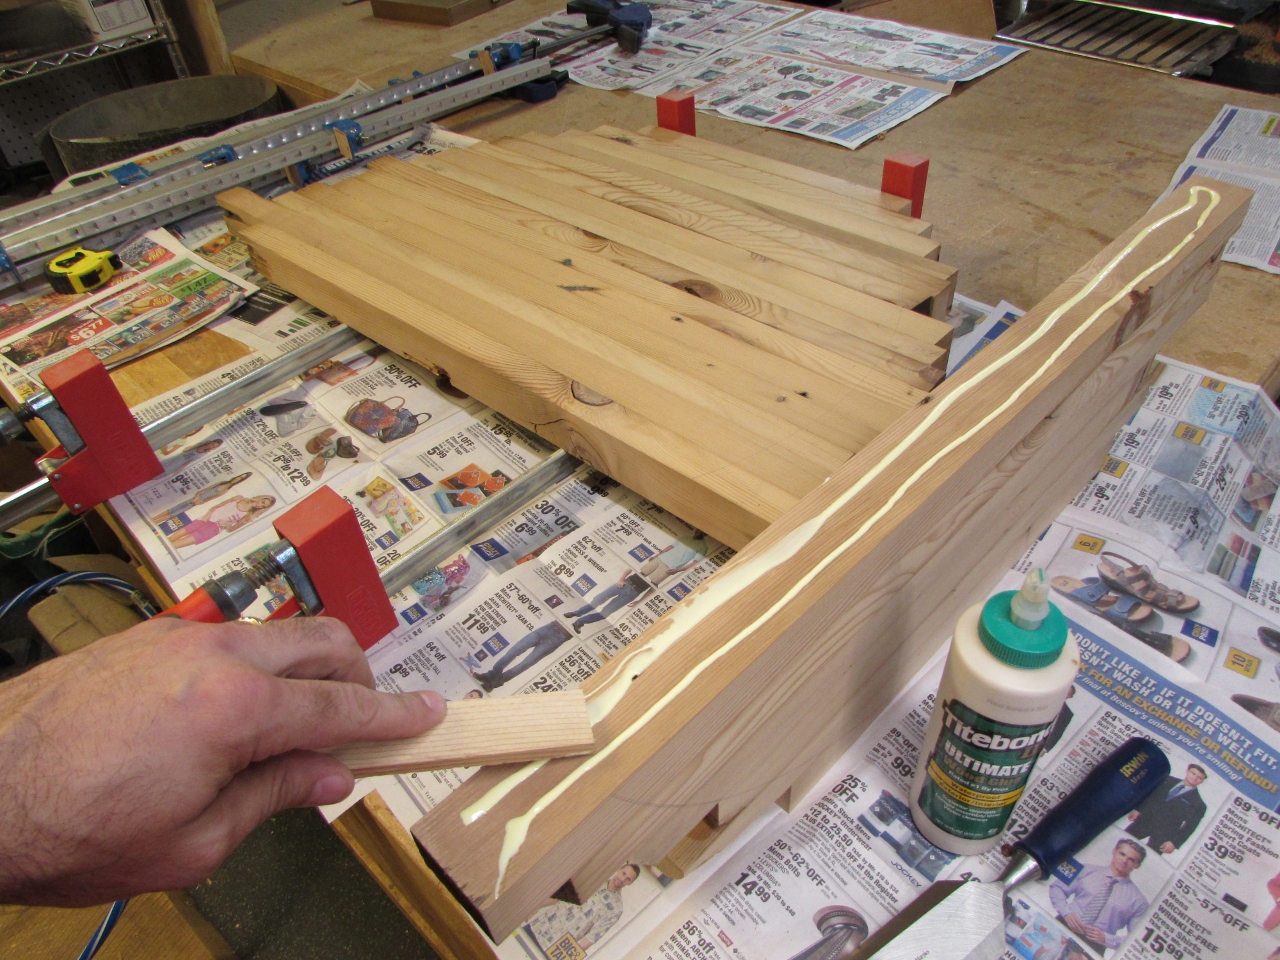
I applied water proof wood glue to all of the inside faces and clamped them tight.


After the panels were dry enough to pull from the clamps, I mixed up some west systems epoxy.

I poured the epoxy into any open knot holes or nail gouges that were on the top of the tables.

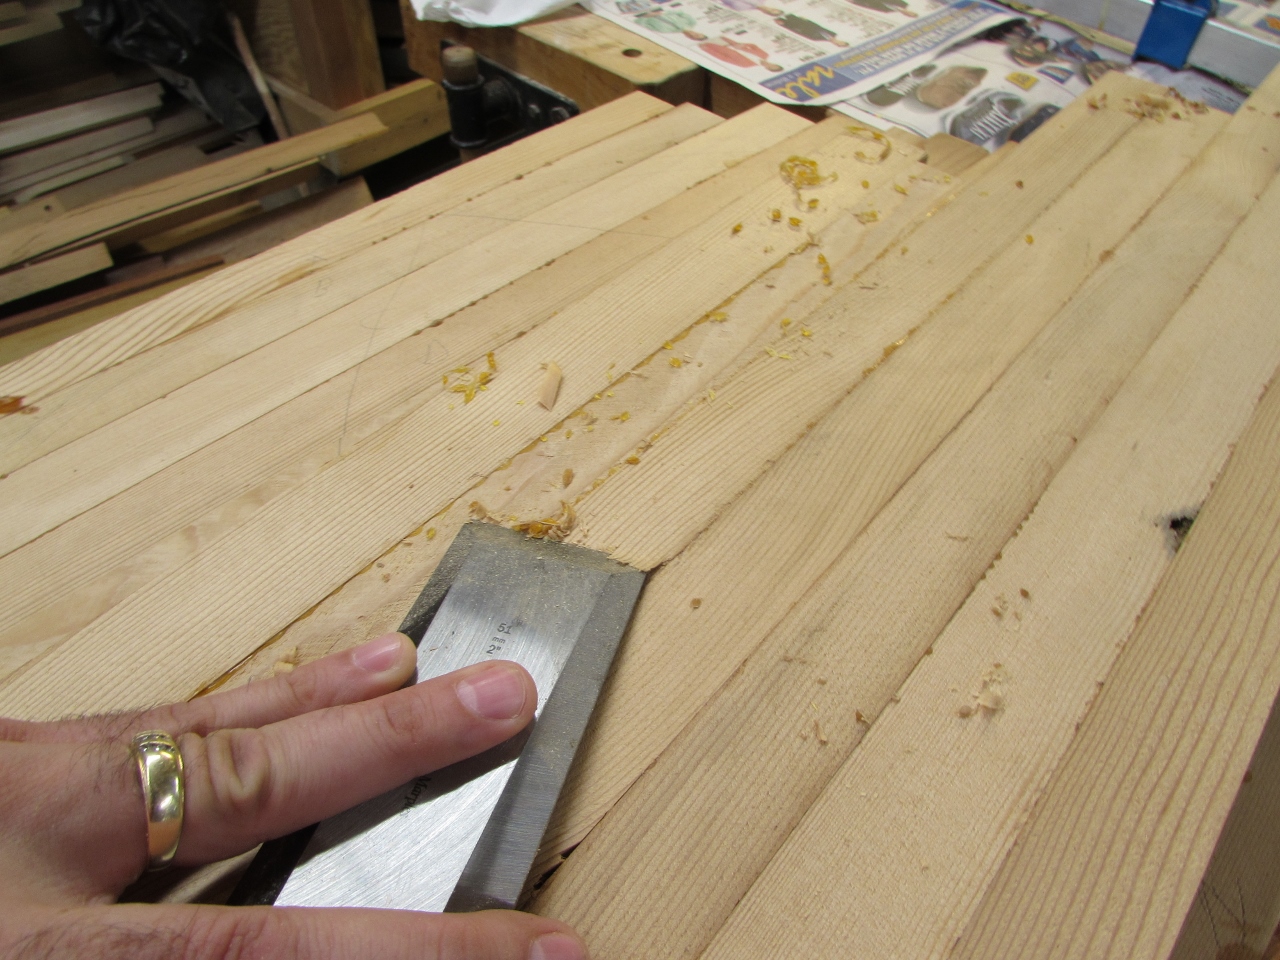
I left that to cure overnight, then scraped away as much glue squeeze-out as I could, to prep for planing the panels.

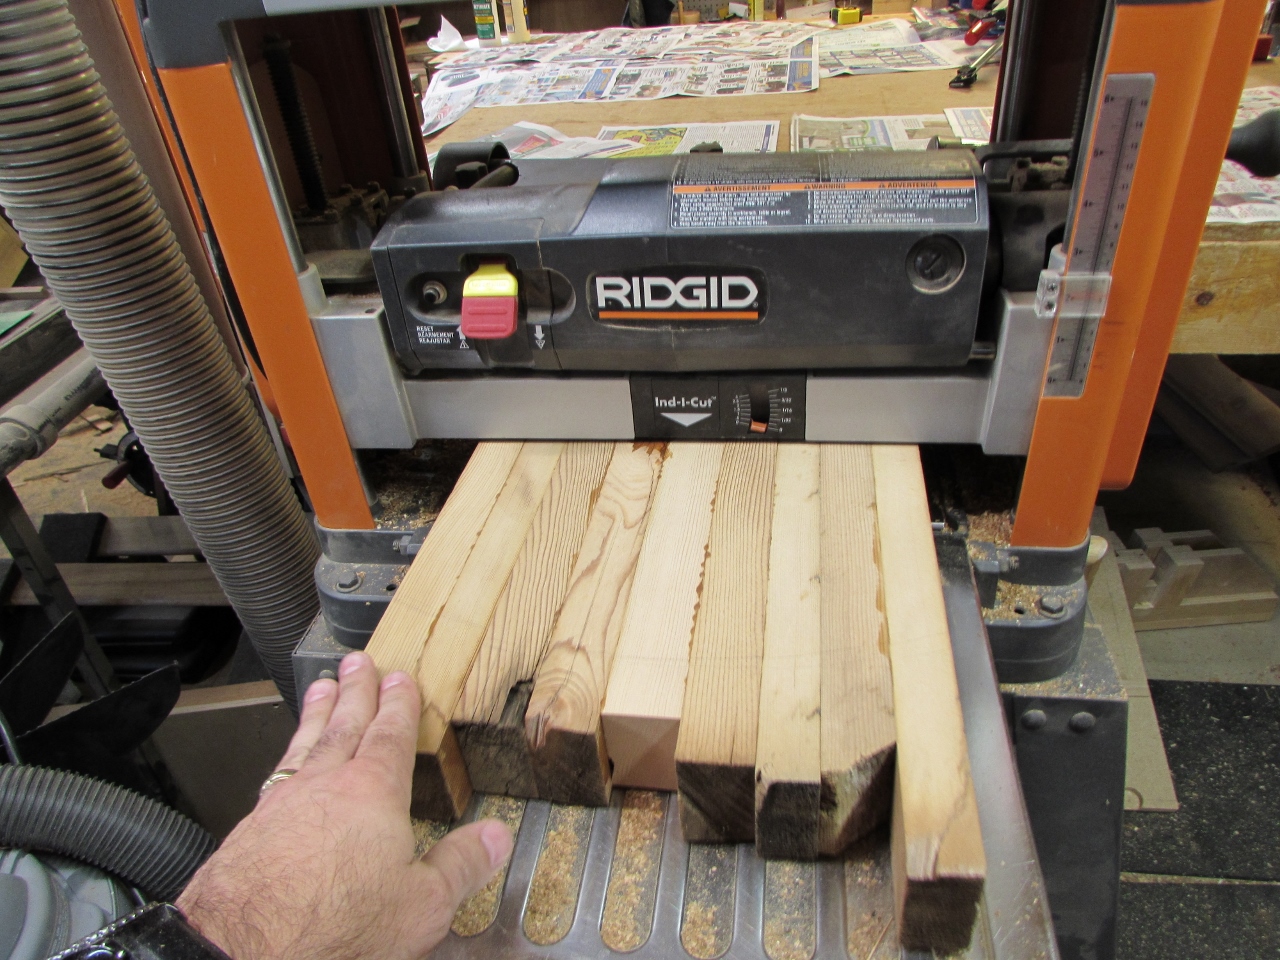
A couple of passes through the planer, on each side, and the panels were ready to be put together.

A little bit more glue and clamping…


Any areas where the epoxy sank too low, got leveled off with a bit of CA glue, then sanded smooth.

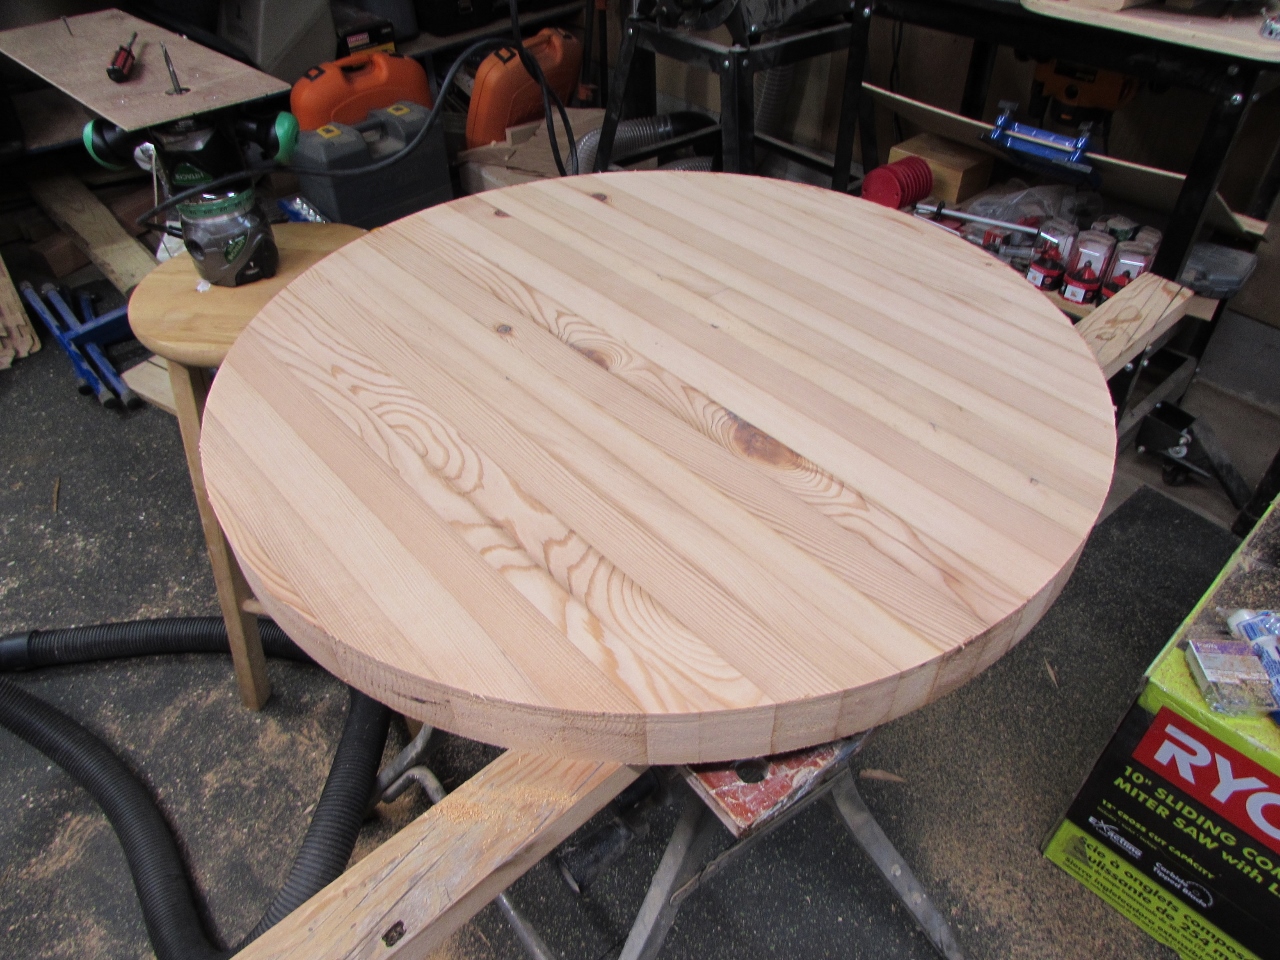
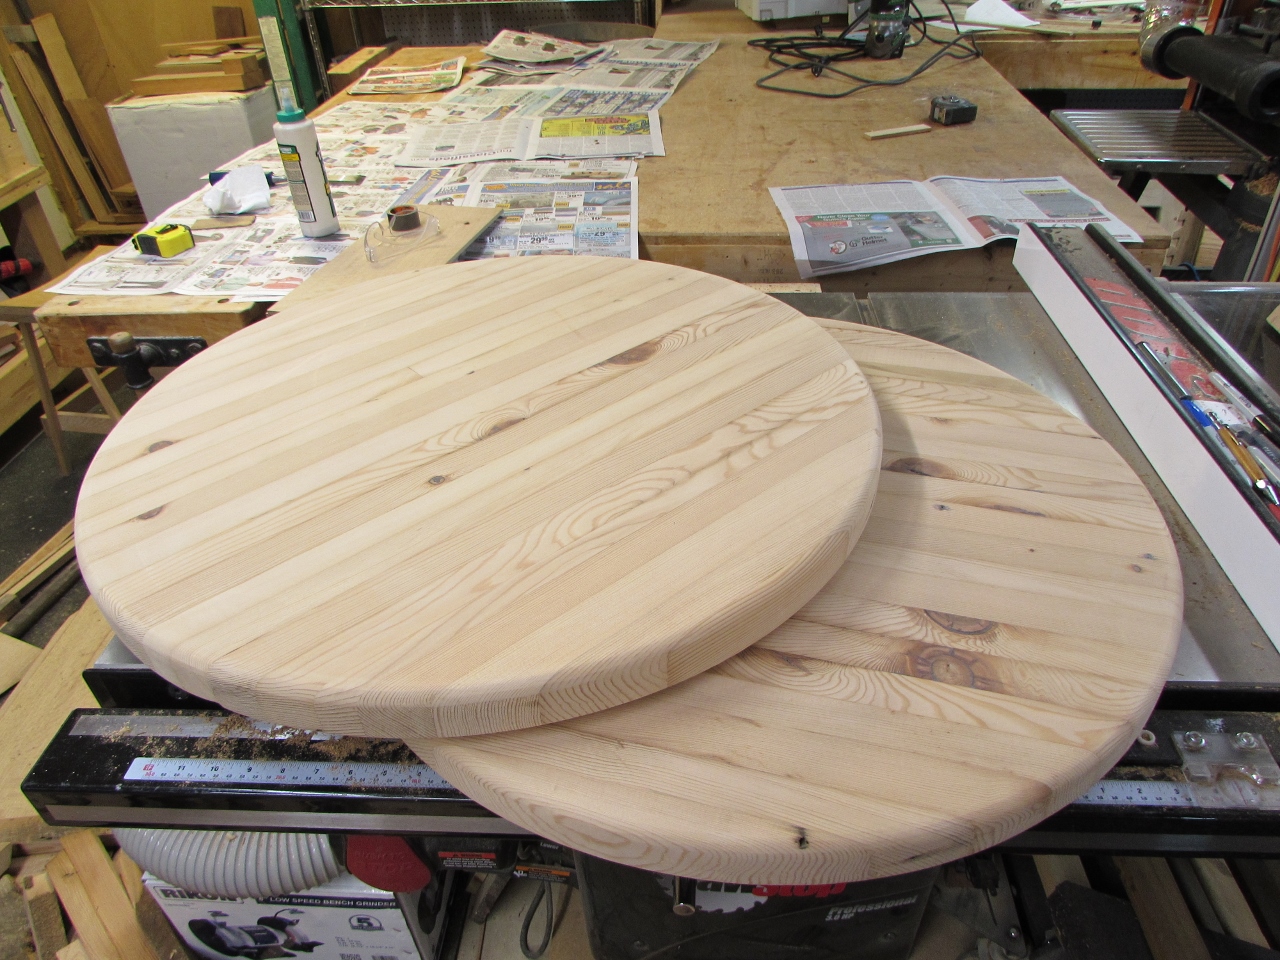
Then it was time to mark my circles again to see the largest diameter that I could fit onto each board. 28″ across was the largest I could manage.


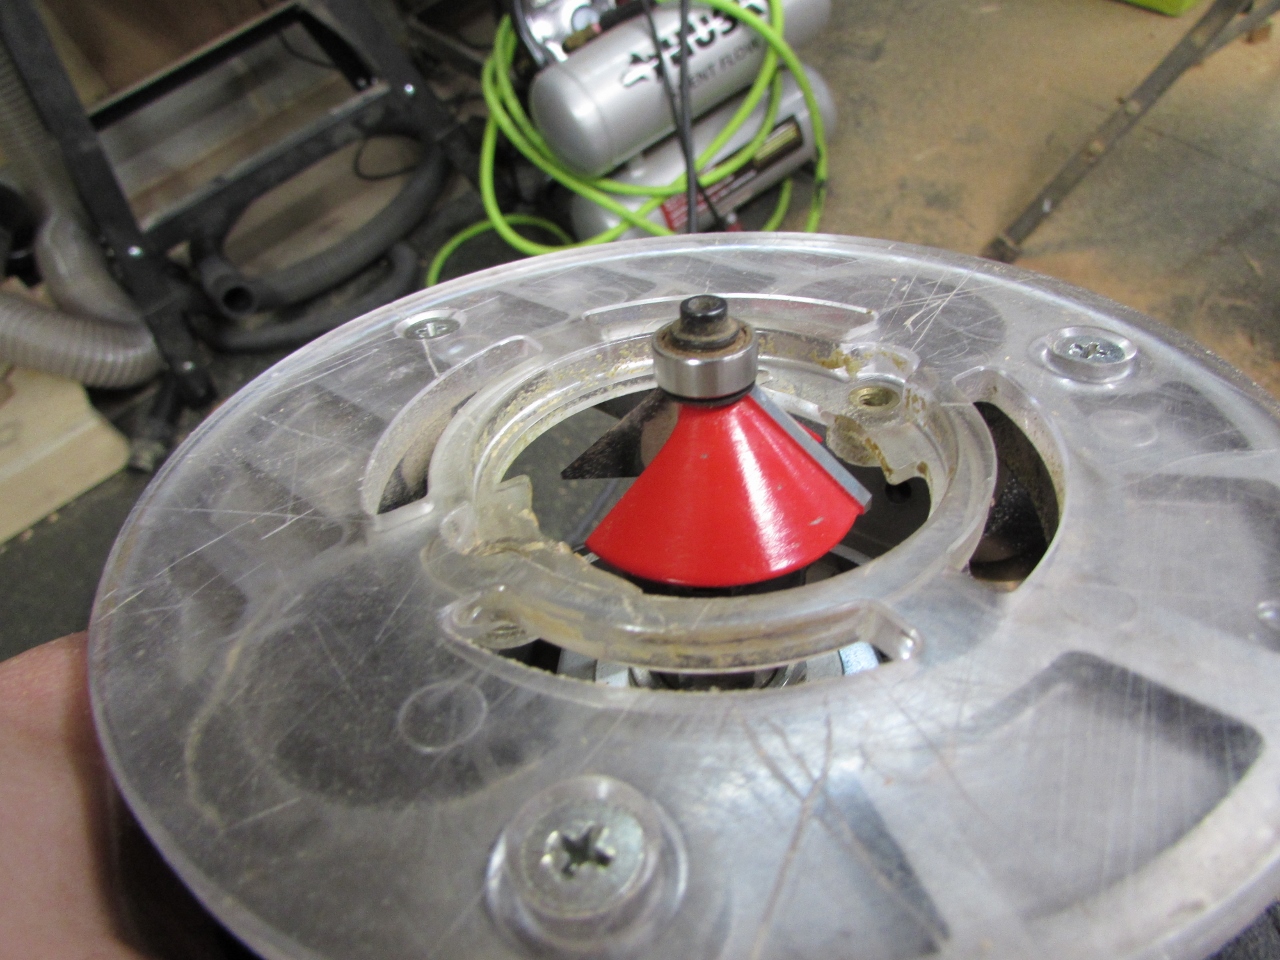
The best way that I have found to cut tables into a circle is to use a router, mounted on to a circle cutting jig. I grabbed a scrap piece of paneling, that was lying around and traced the holes of my router base.

I drilled and counter-sunk the mounting holes, and bored a large hole, in the center of the pattern, for the bit and collet.
I then drilled a hole 14-1/8″ away from the bit, to use as my pivot point.

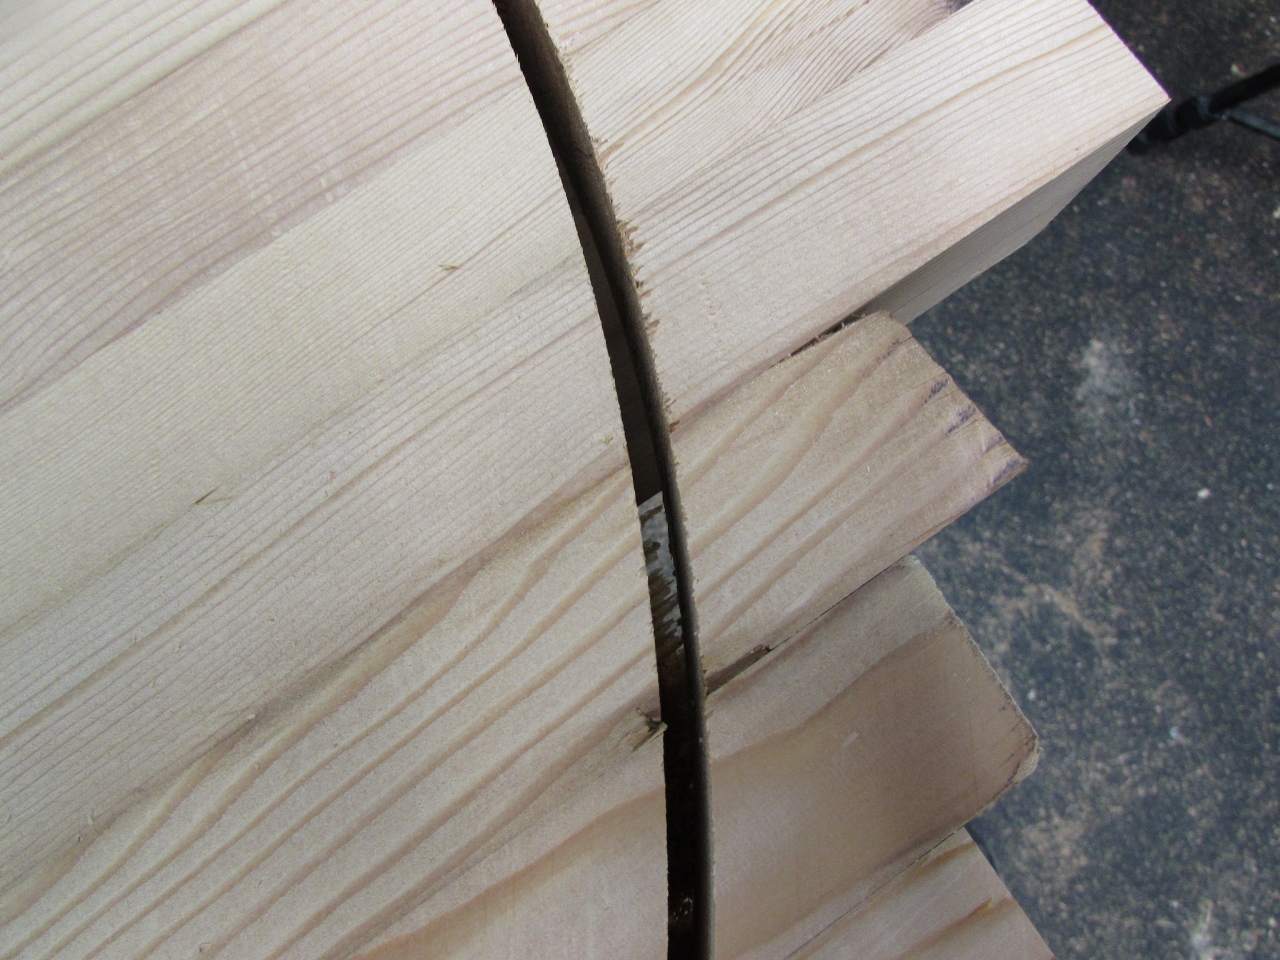
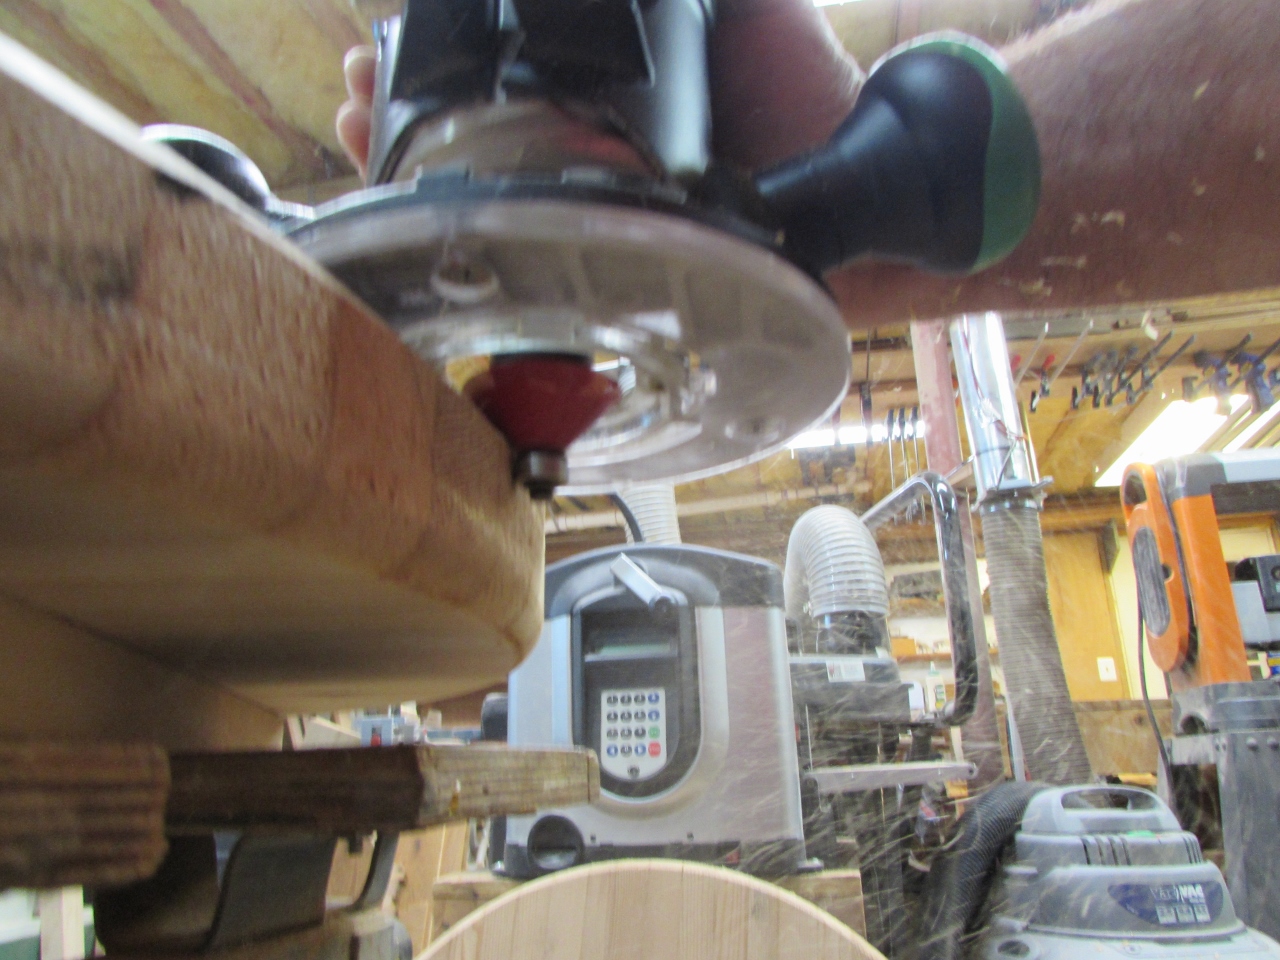
Attaching the pivot point to the bottom of the table, at the center, I dropped my spiral cutter down 1/4″ and slowly ran the router in a circle.


It works fantastic. Until the bit comes loose and rips up a much larger channel than planned, that is. Don’t worry, it was only on the second pass around so I have a plan to clean that up.

After several more passes, dropping the bit 1/4″ at a time, I reached the bottom.
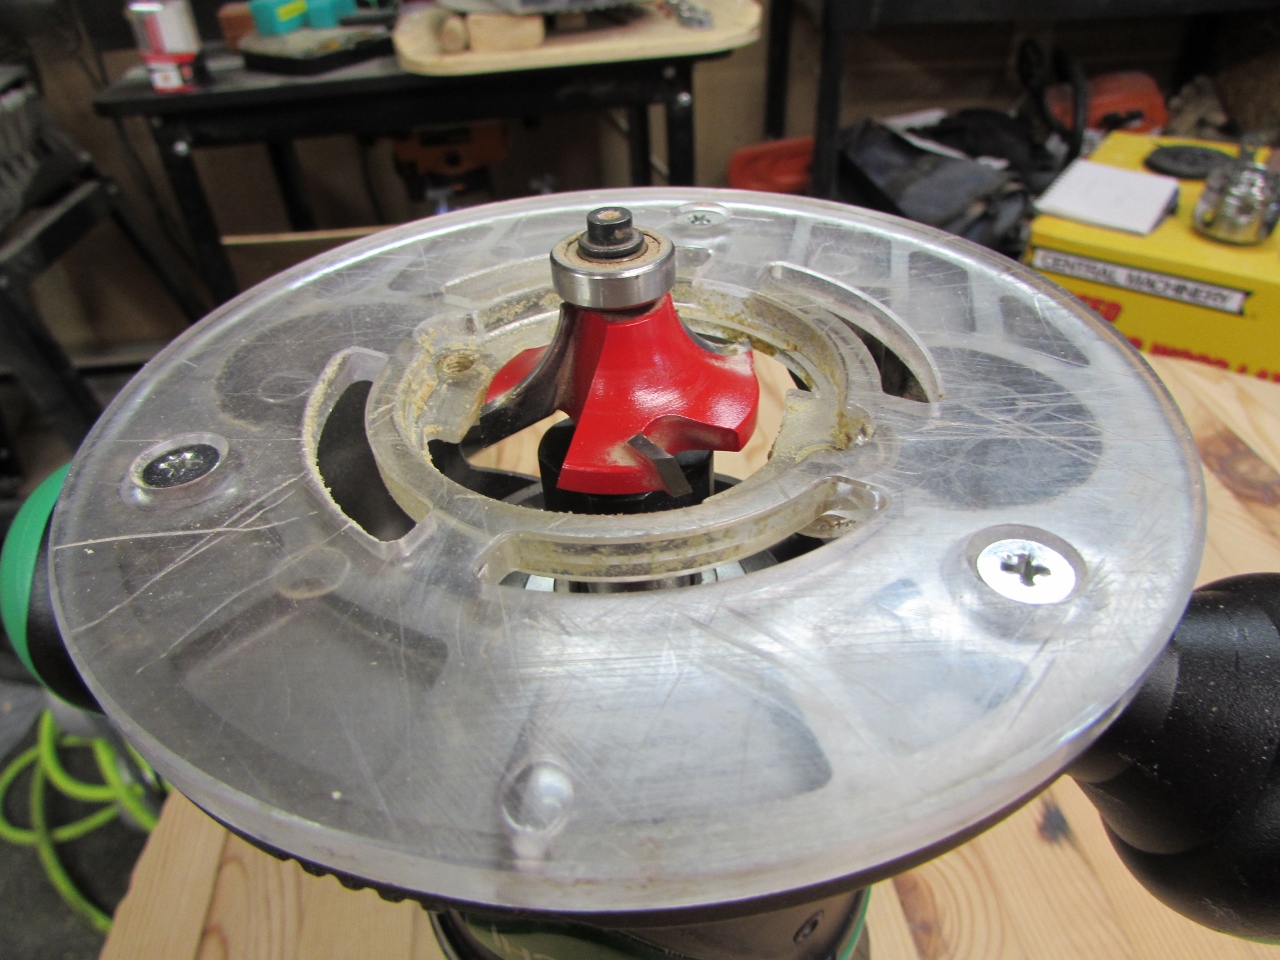
Since arms will be leaning on the top of the table, I opted for a 1/2″ round-over to smooth the edge.

And to clean up the extra wide channel on the bottom, I cut a large 45 degree chamfer. This also removes any sharp edges from the bottom of the table.

It turned out nice after a bit of sanding. I ran my orbital sander around all the edges as well as the top and bottom again, stepping down from 80 grit to 120 grit to leave a nice smooth surface.

Just one or two little gouges left in the problem area, but they just looked like the old nail holes, so it blended well with the rustic theme.

These tables will be outside, but under a pavilion area. I need to give them a protective coating in case drinks spill, but I don’t want to use a heavy film finish. They would look too plastic-coated for rustic.

I opted to use five coats of Tung oil with varnish. The varnish is very thin and it gets wicked up into the wood, along with the oil, giving the appearance of a simple oil finish, but the protection of varnish, just under the surface of the wood.


Five coats are about where the finish will start building a film at the surface.

Between the oil and the varnish, any liquid should bead up on top and be easy to wipe away. Before the final coat, I sanded all of the surfaces down with 400 grit paper, just to make sure no foreign objects were stuck to the surface.


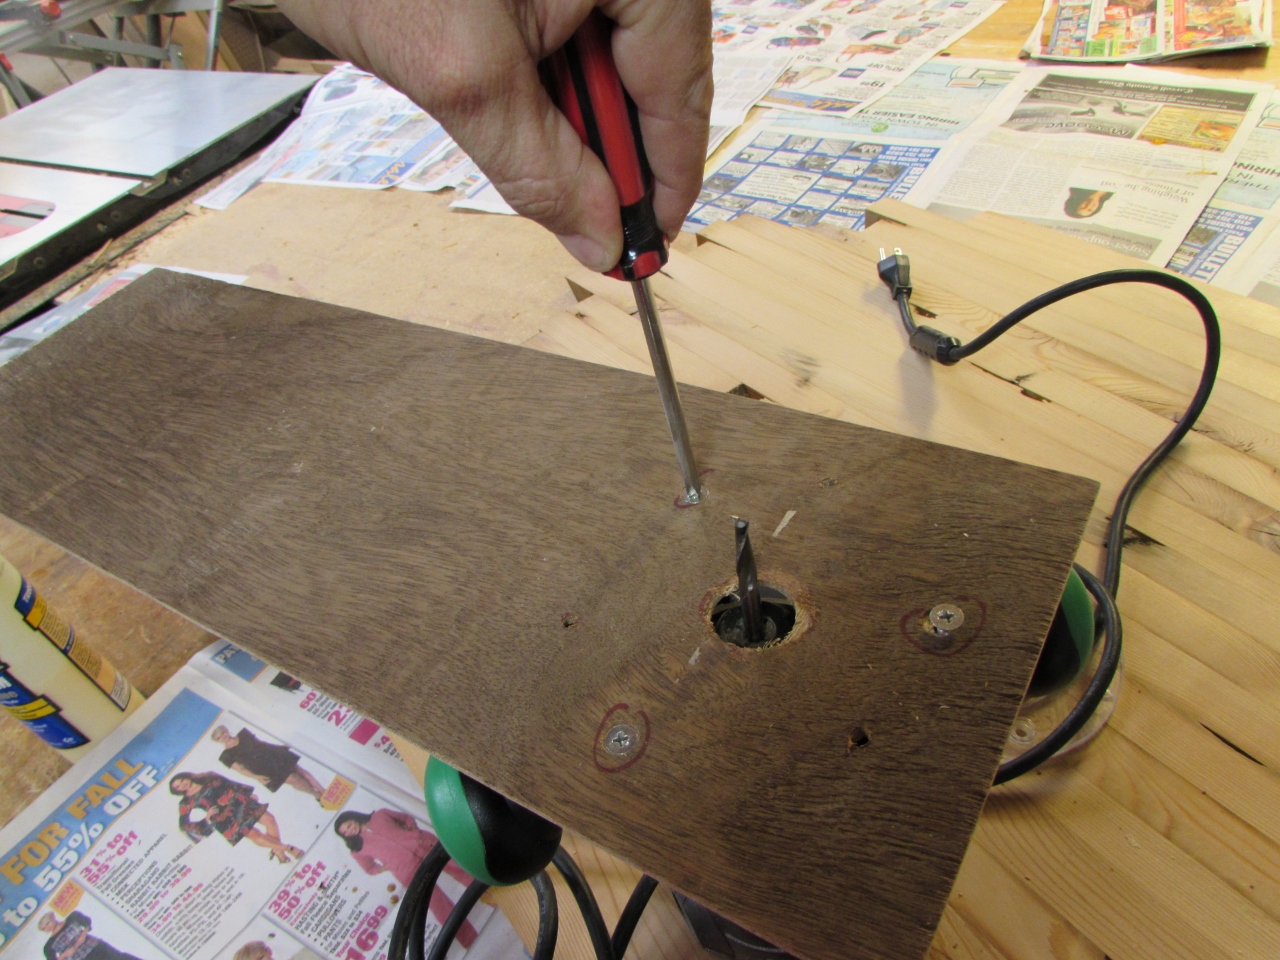
To locate the steel bases on the tops, I laid out two perpendicular lines, with blue painter’s tape, on the bottom.

After lining up the screw holes with the lines on the tape, I used an awl to mark the hole centers, then removed the tape.

I secured each top with 8 screws, then the tables were done.
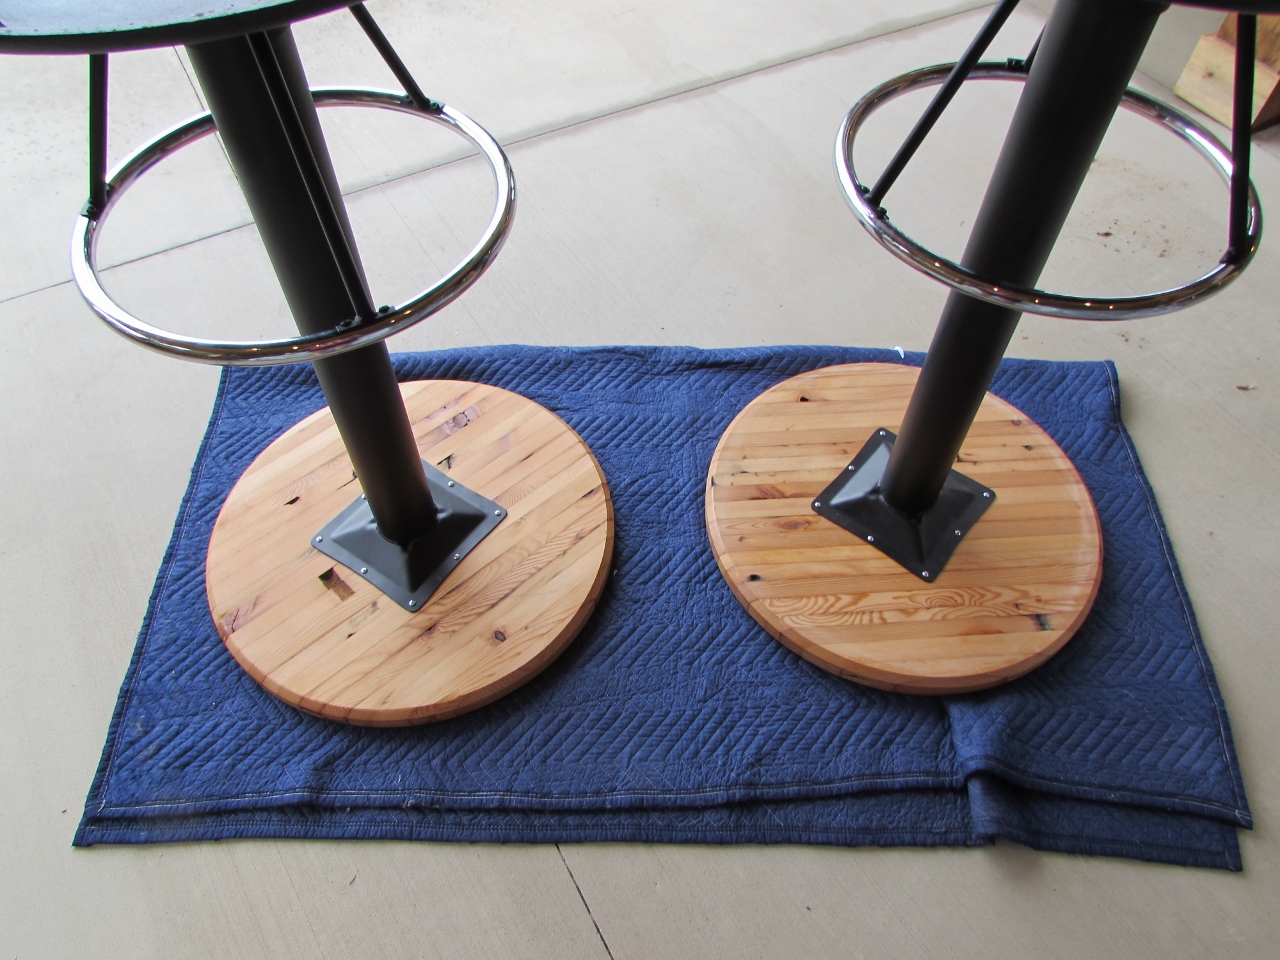

We flipped them over, and set them in place. Todd was very happy.
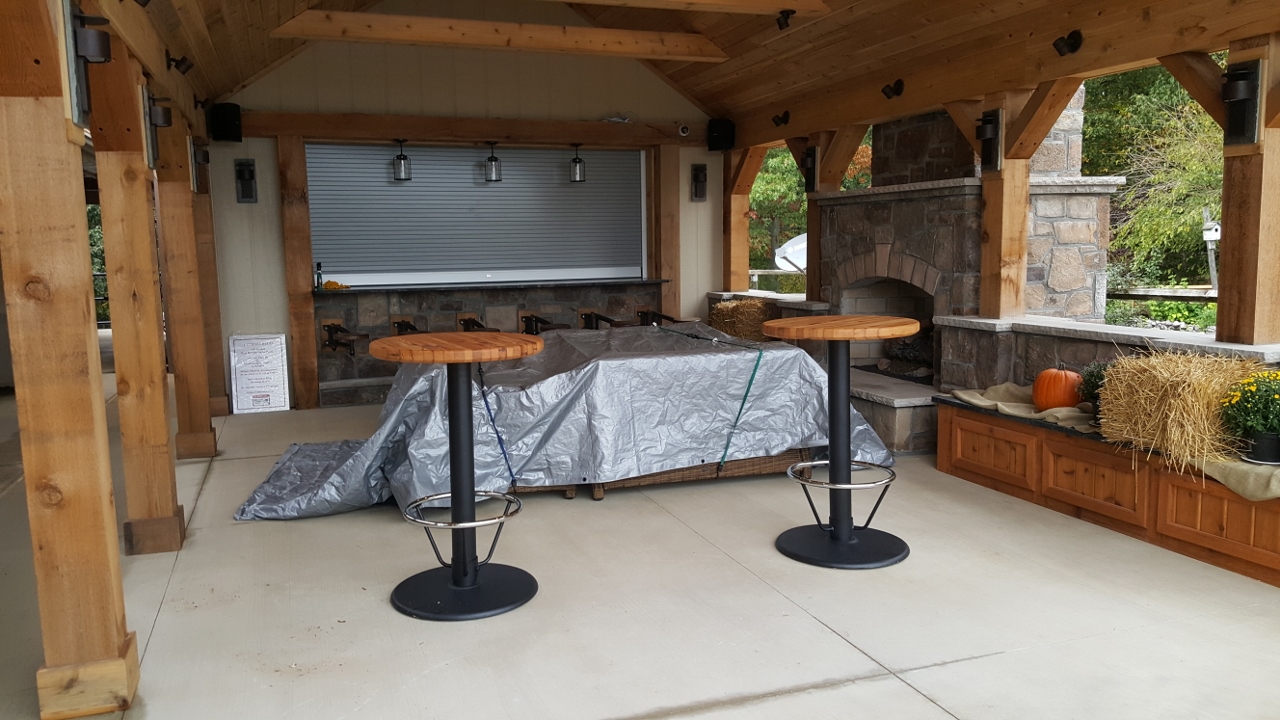
The new outside bar area is due to be opened up next weekend, for drinks and appetizers. Drop by if you are in the area and check it out.