Duplicating a cherry nightstand
My friend Pete asked me if I could reproduce a cherry nightstand that he and his wife bought 30 years ago.
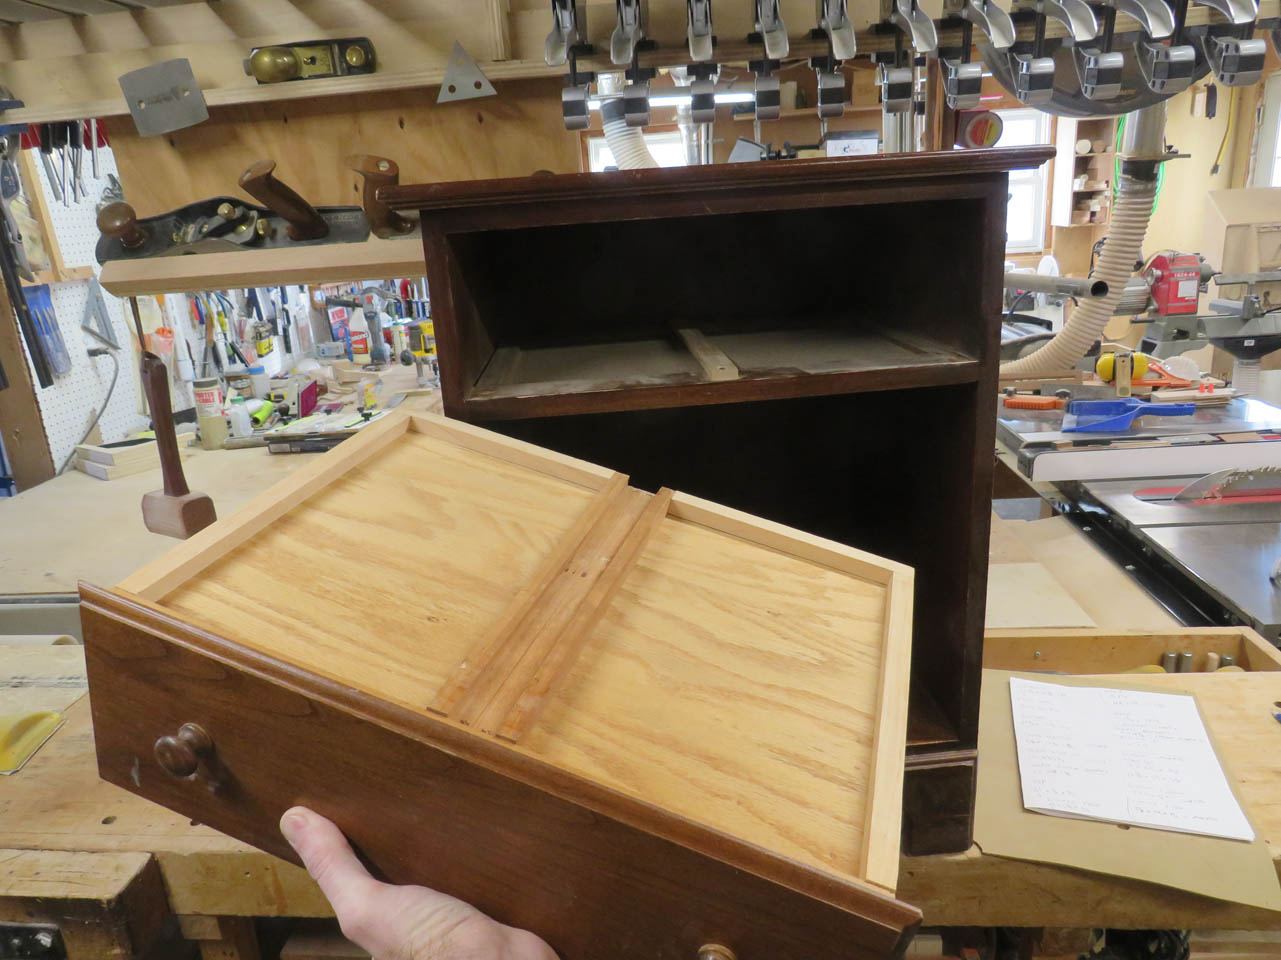
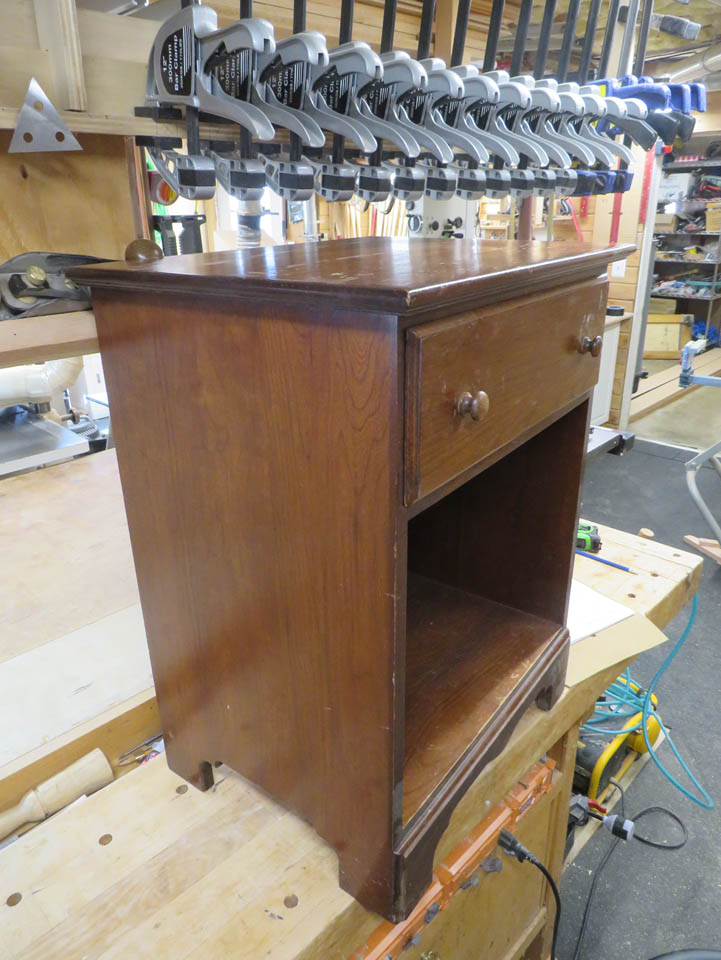
First thing I did was pull out the drawer and look at how it was built.
I found that the main form of joinery was pocket hole screws for the nightstand.
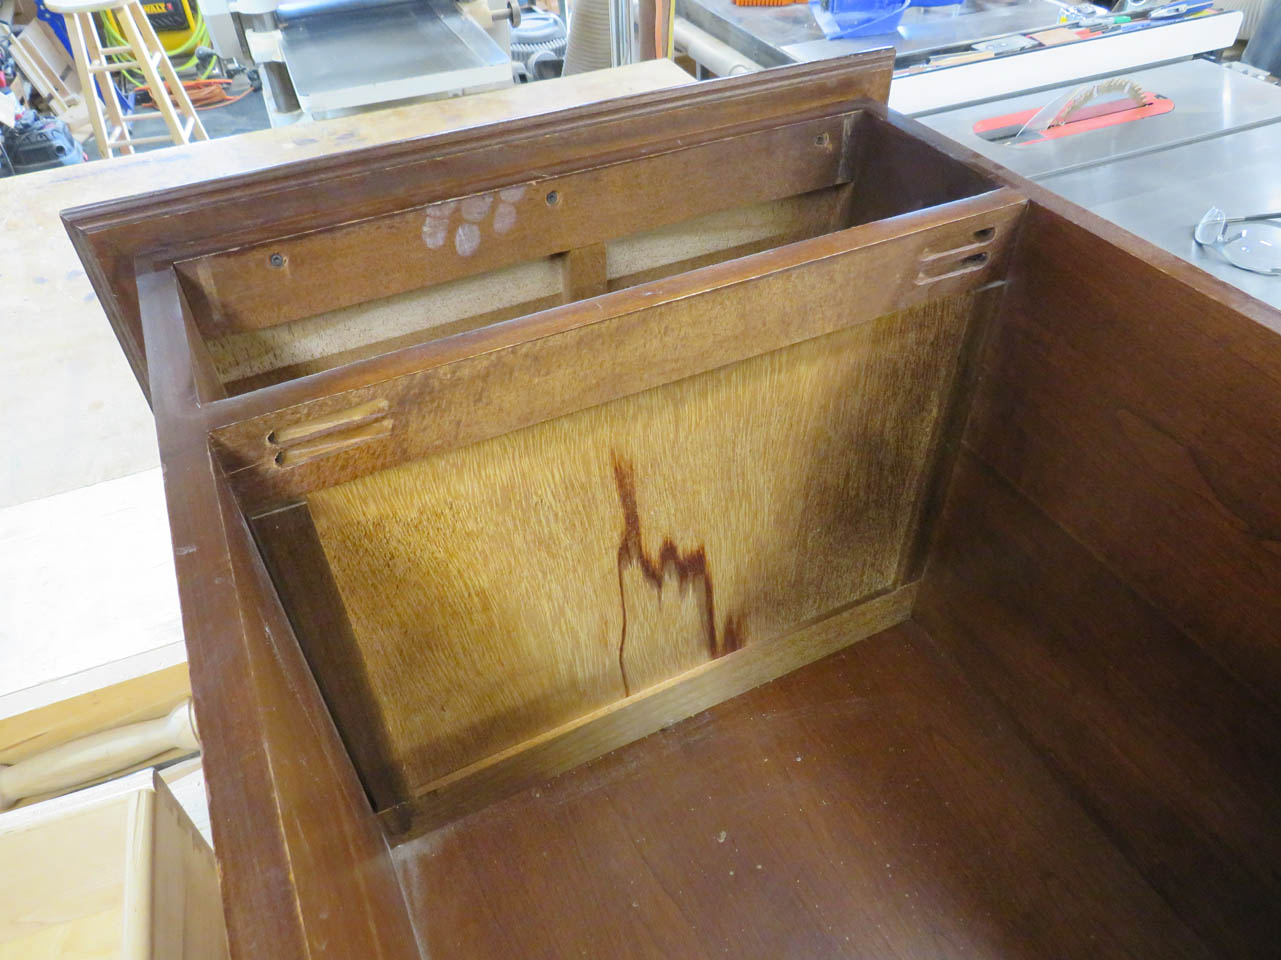
And, dovetails for the drawers.
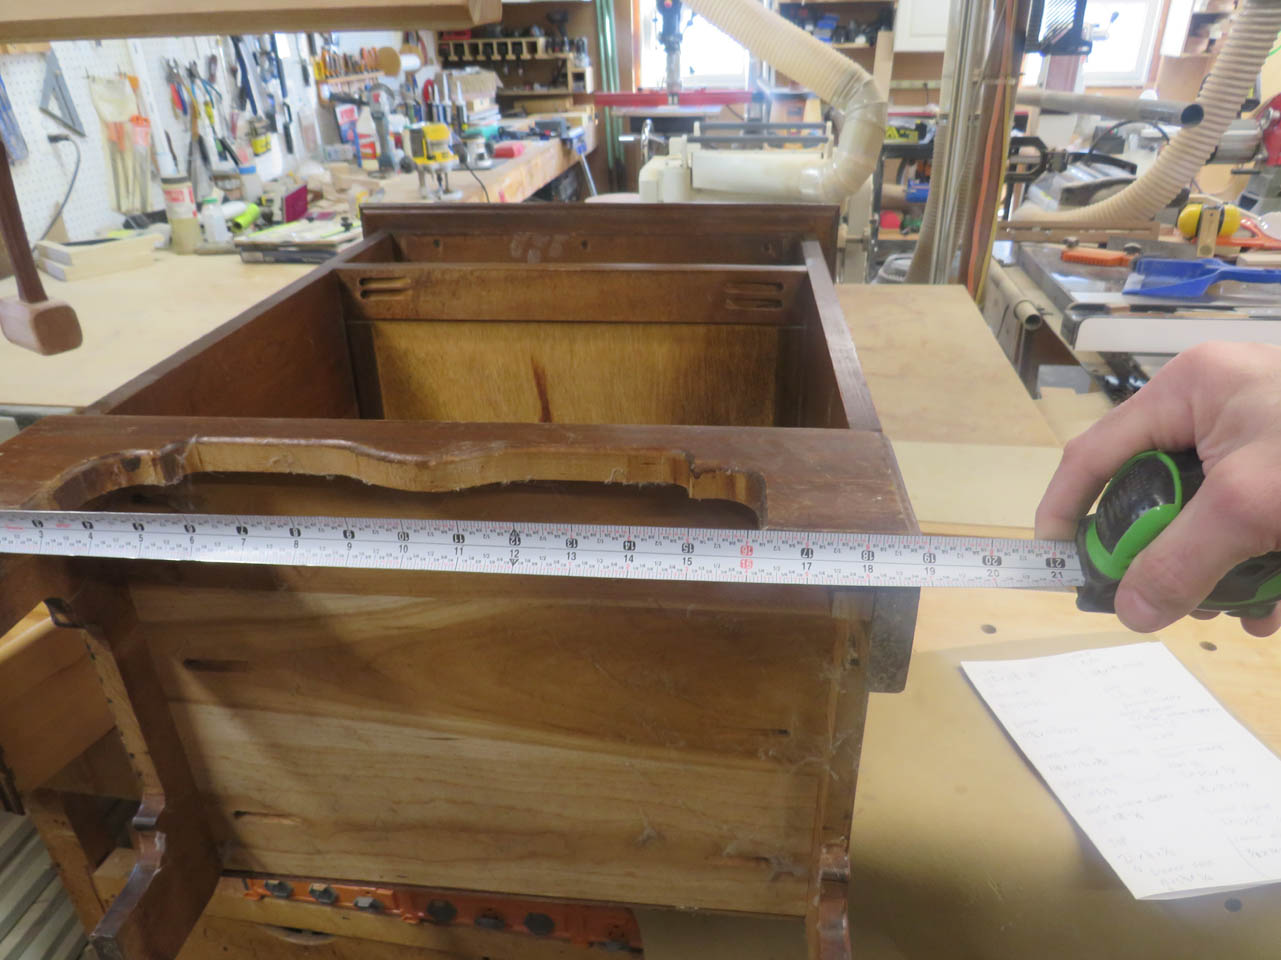
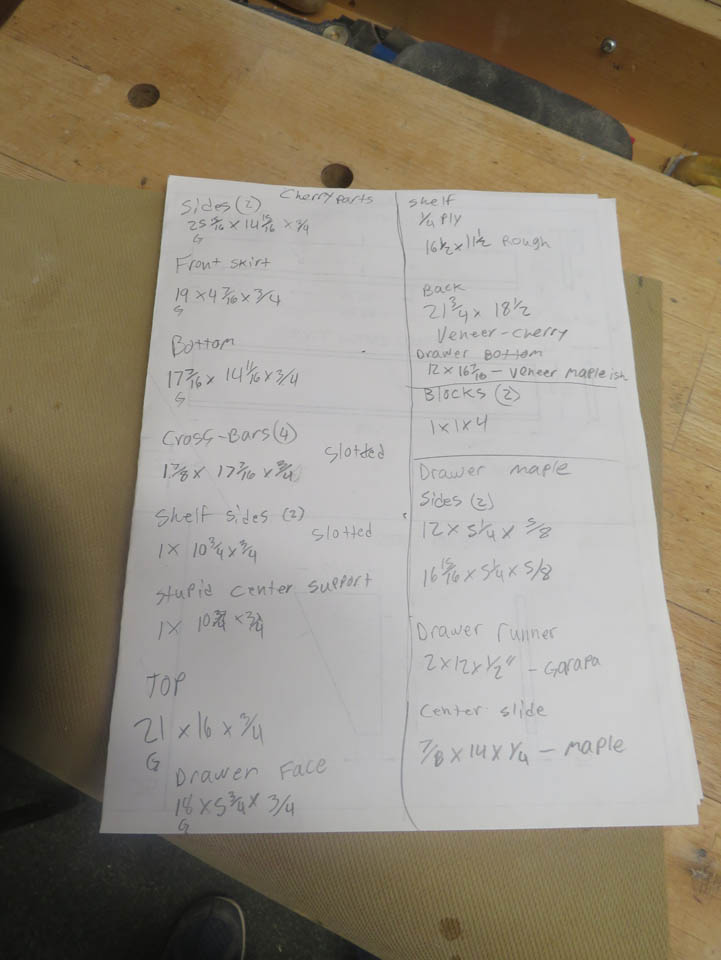
I measured everything and made a detailed list of panels I would need.
Most of what I need will be cherry so I pulled a couple of 9′ long boards.
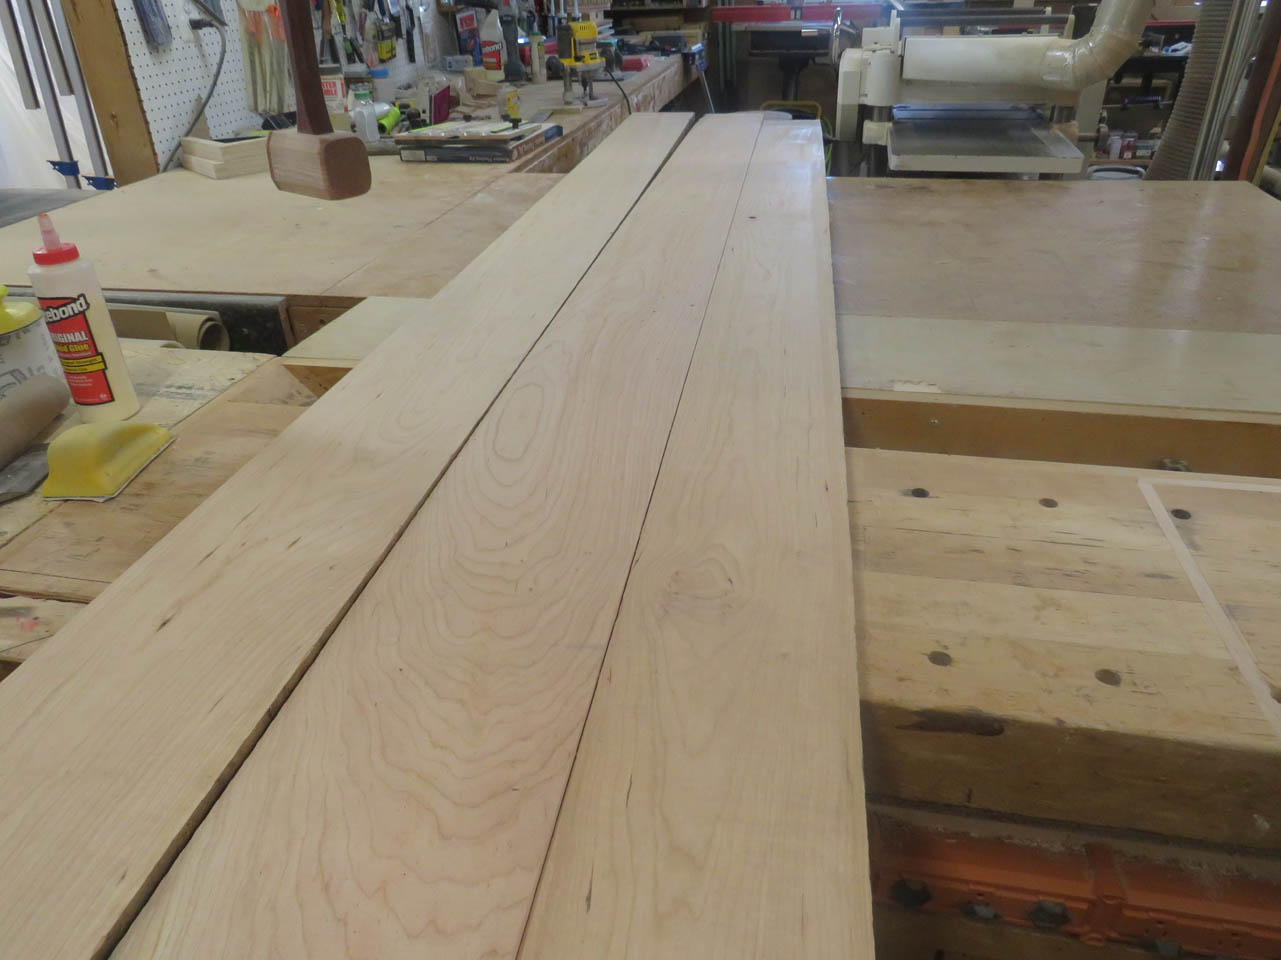
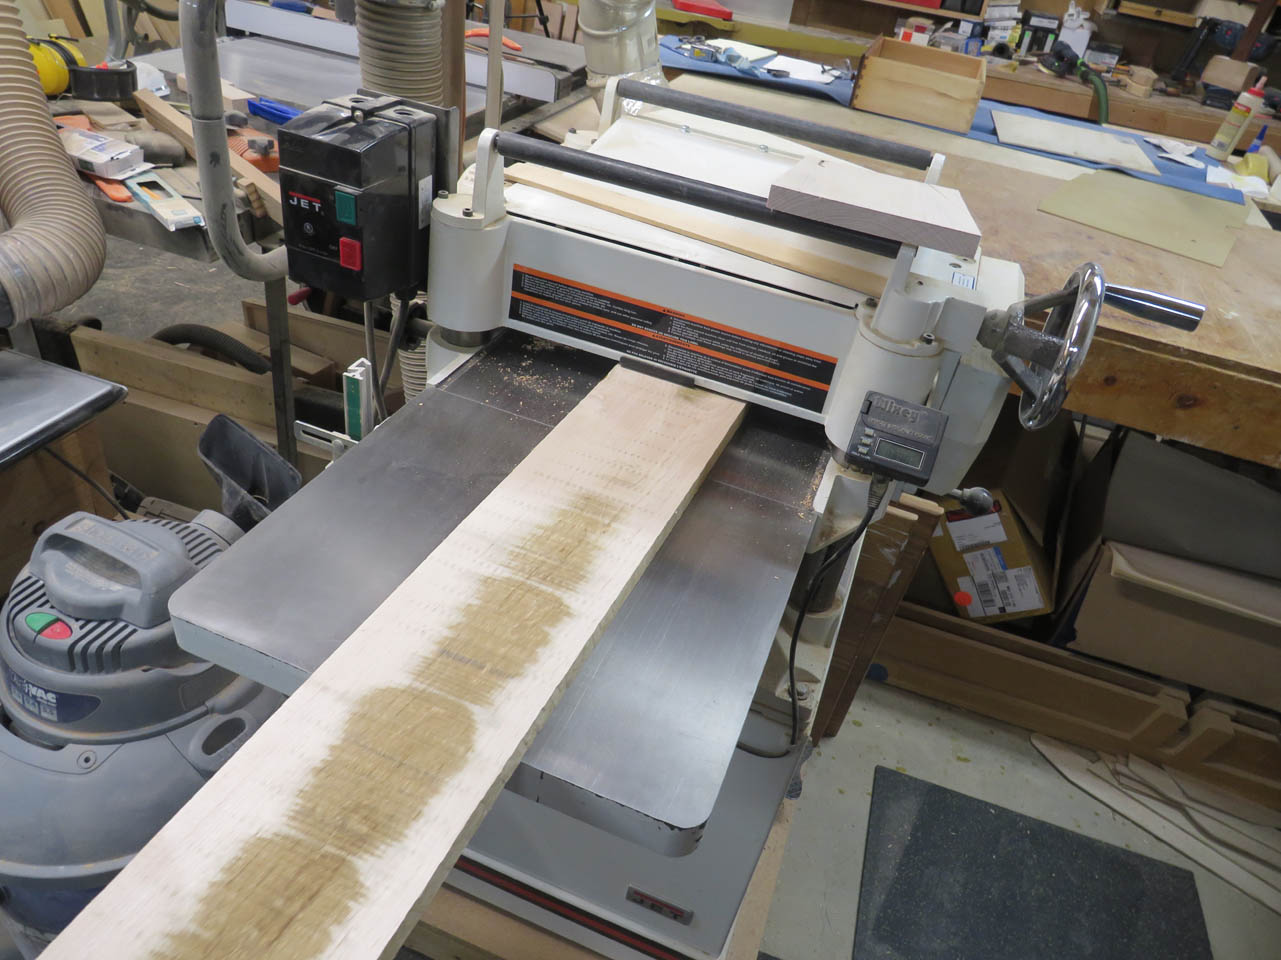
These I planed down to 3/4″ thick, then rough-cut them to length.
I jointed one side, then cut the board to width on the table saw and then jointed that side as well.
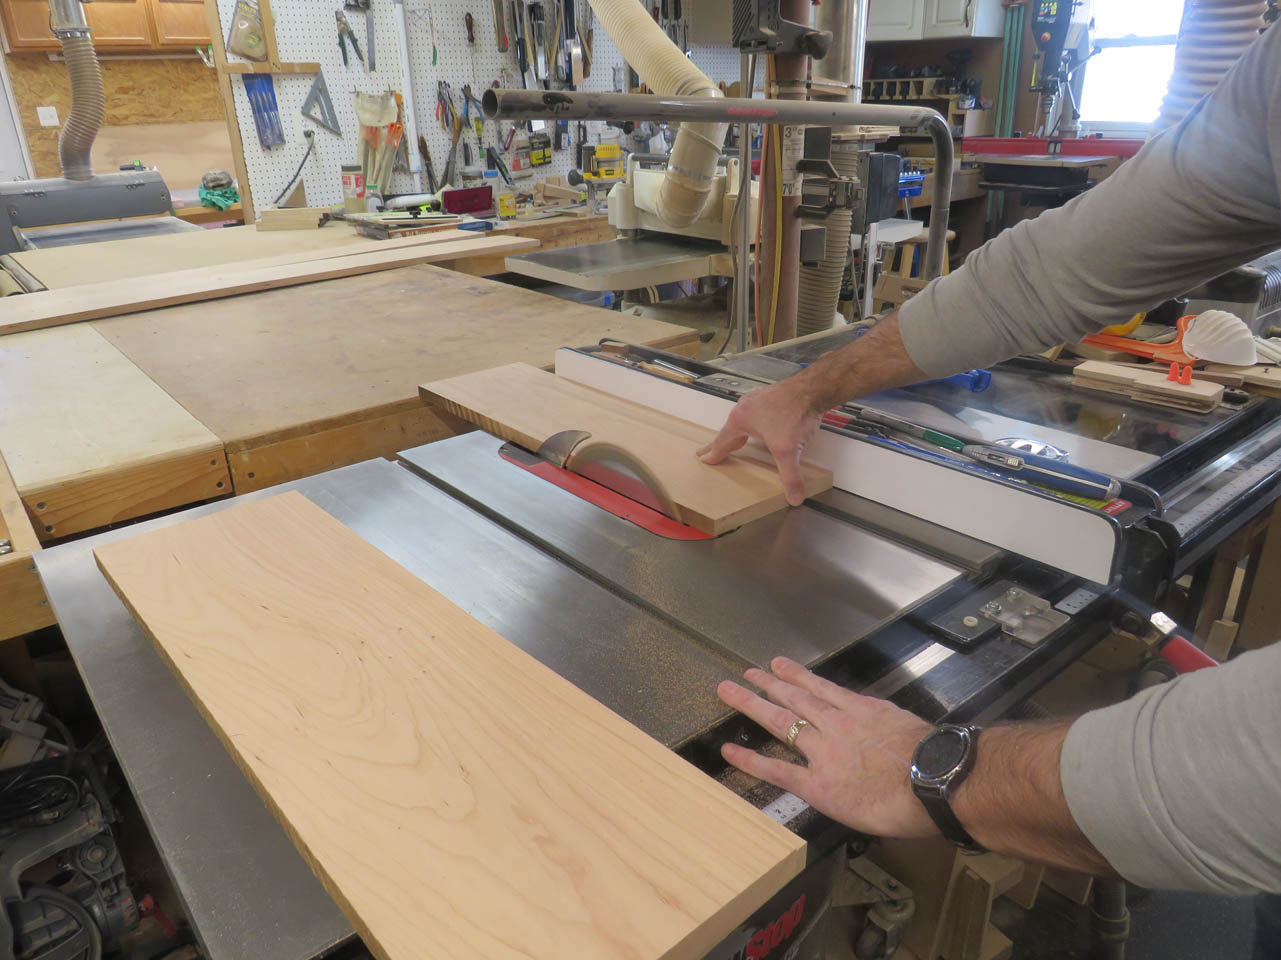
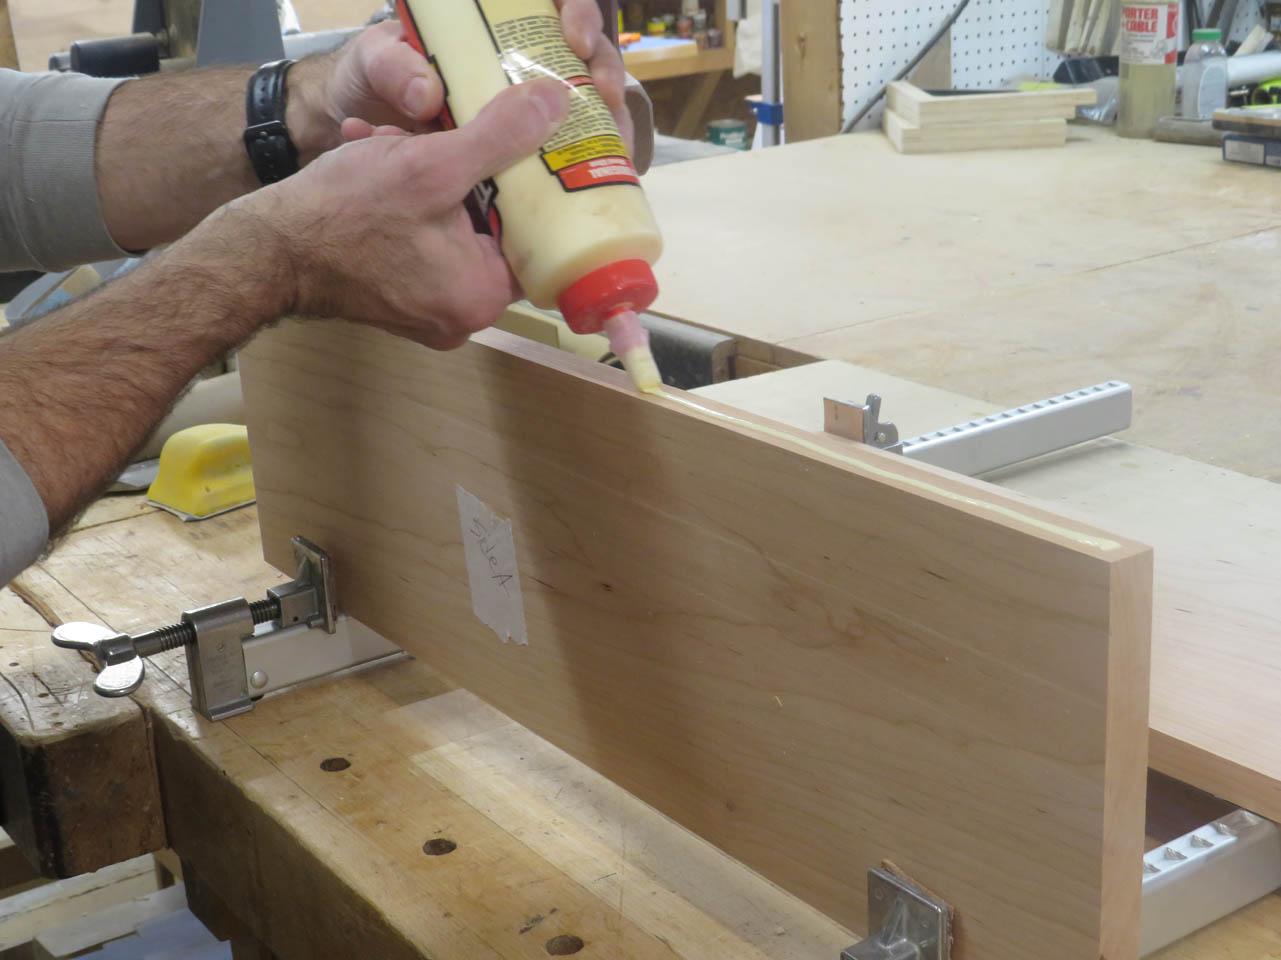
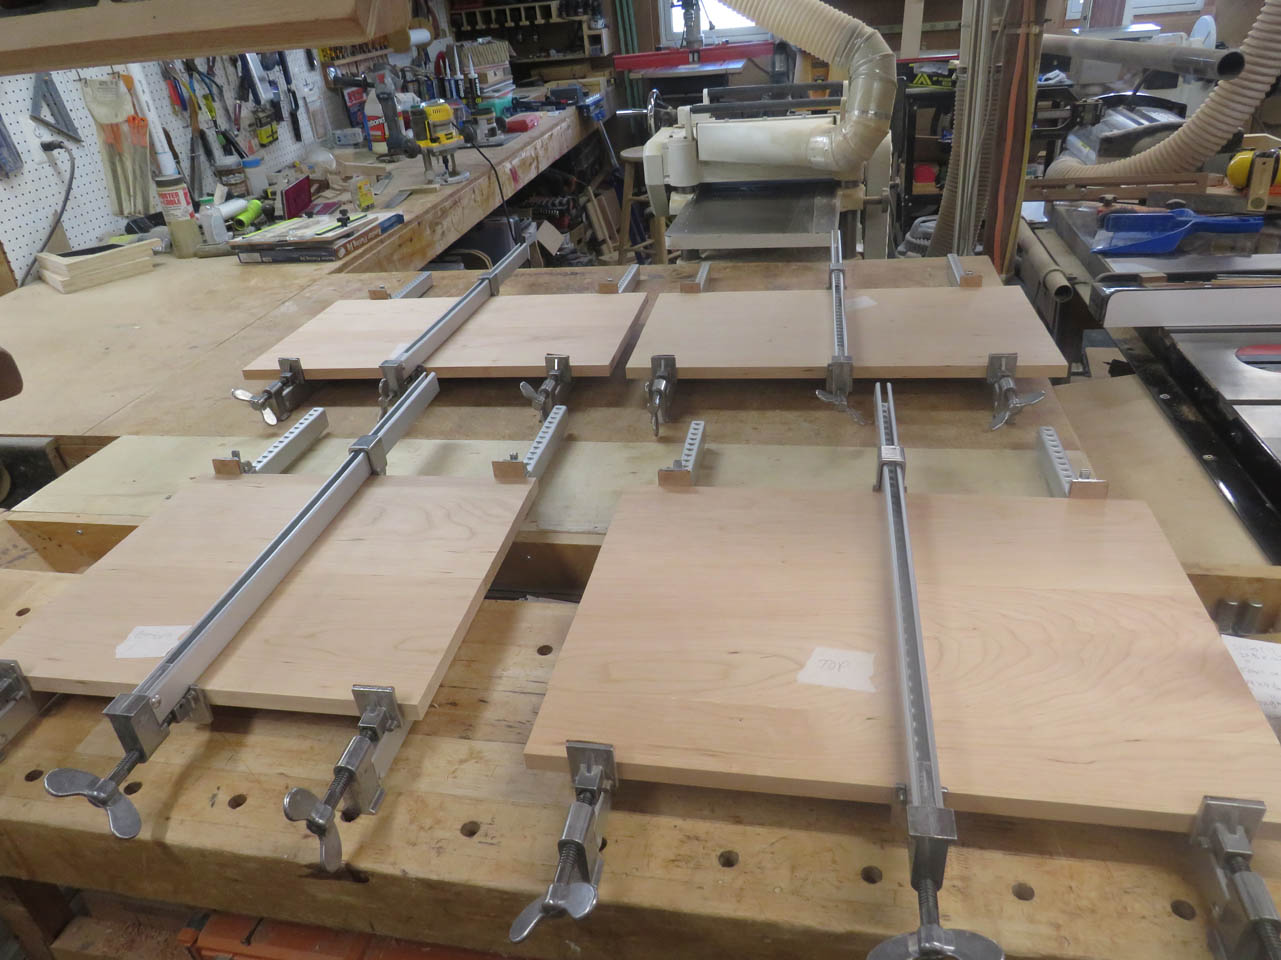
These were then glued and clamped into the panels I would need.

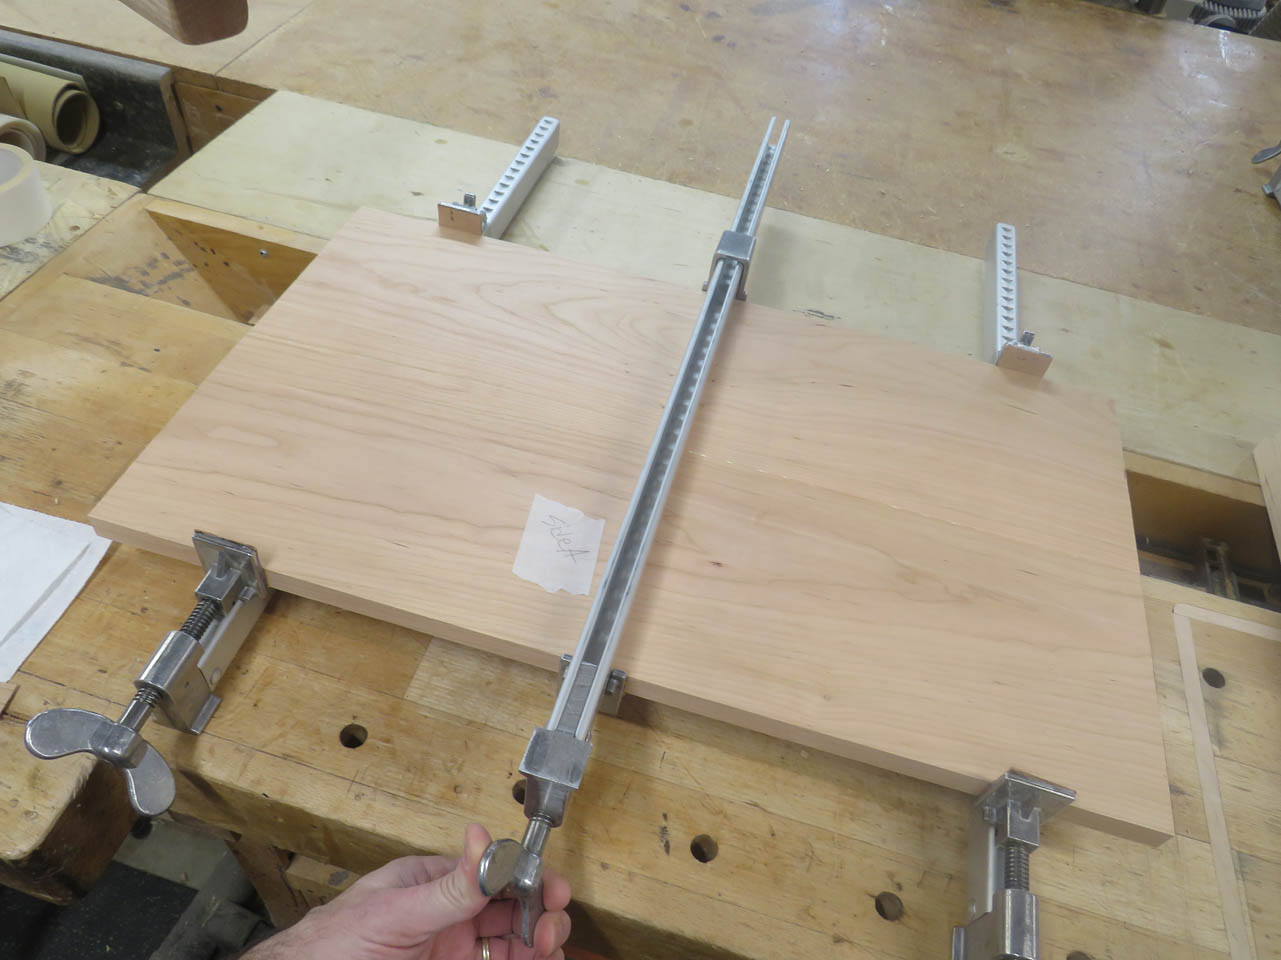
Top, bottom, and two sides.
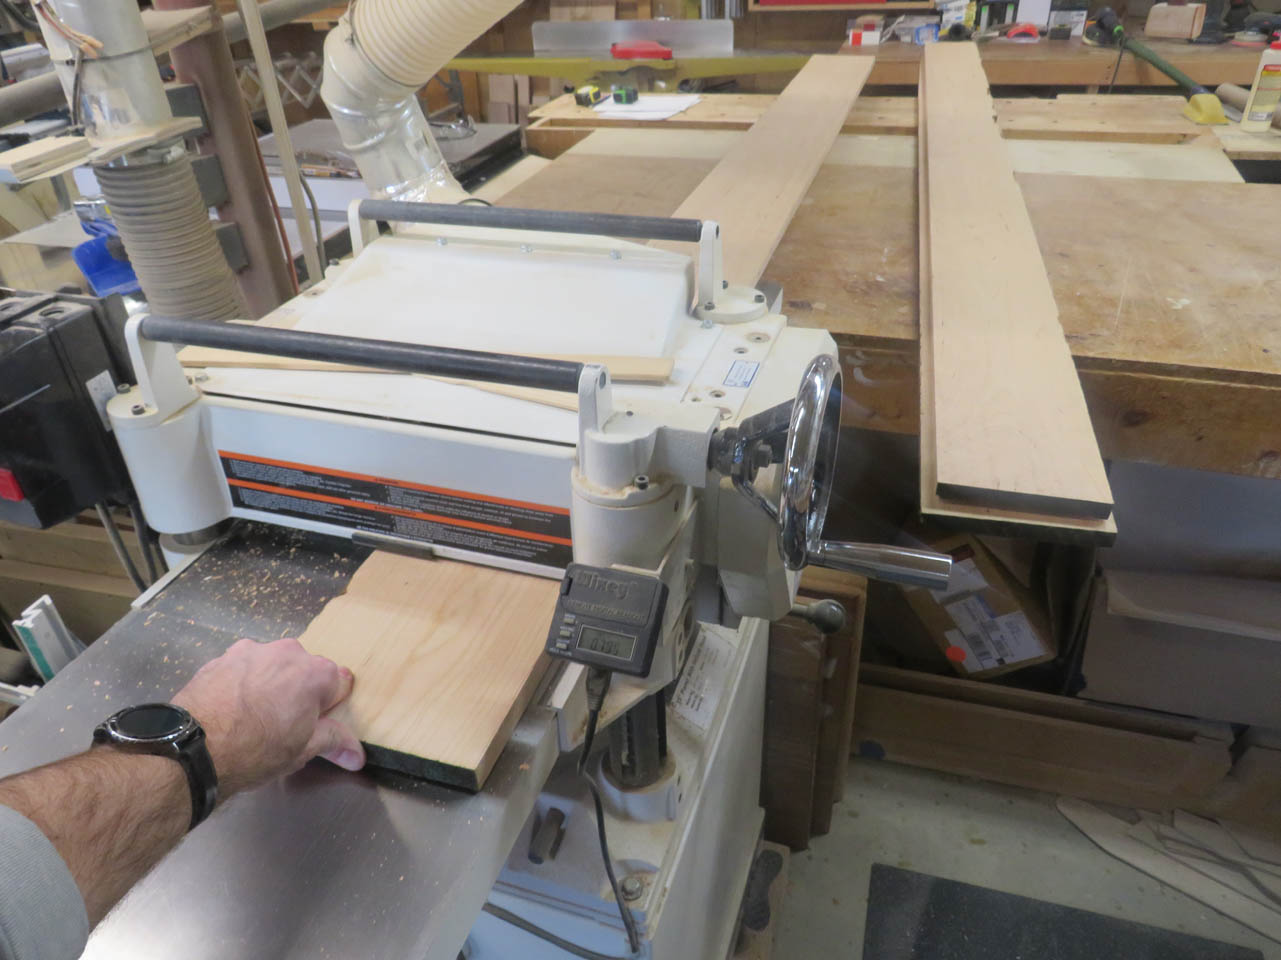
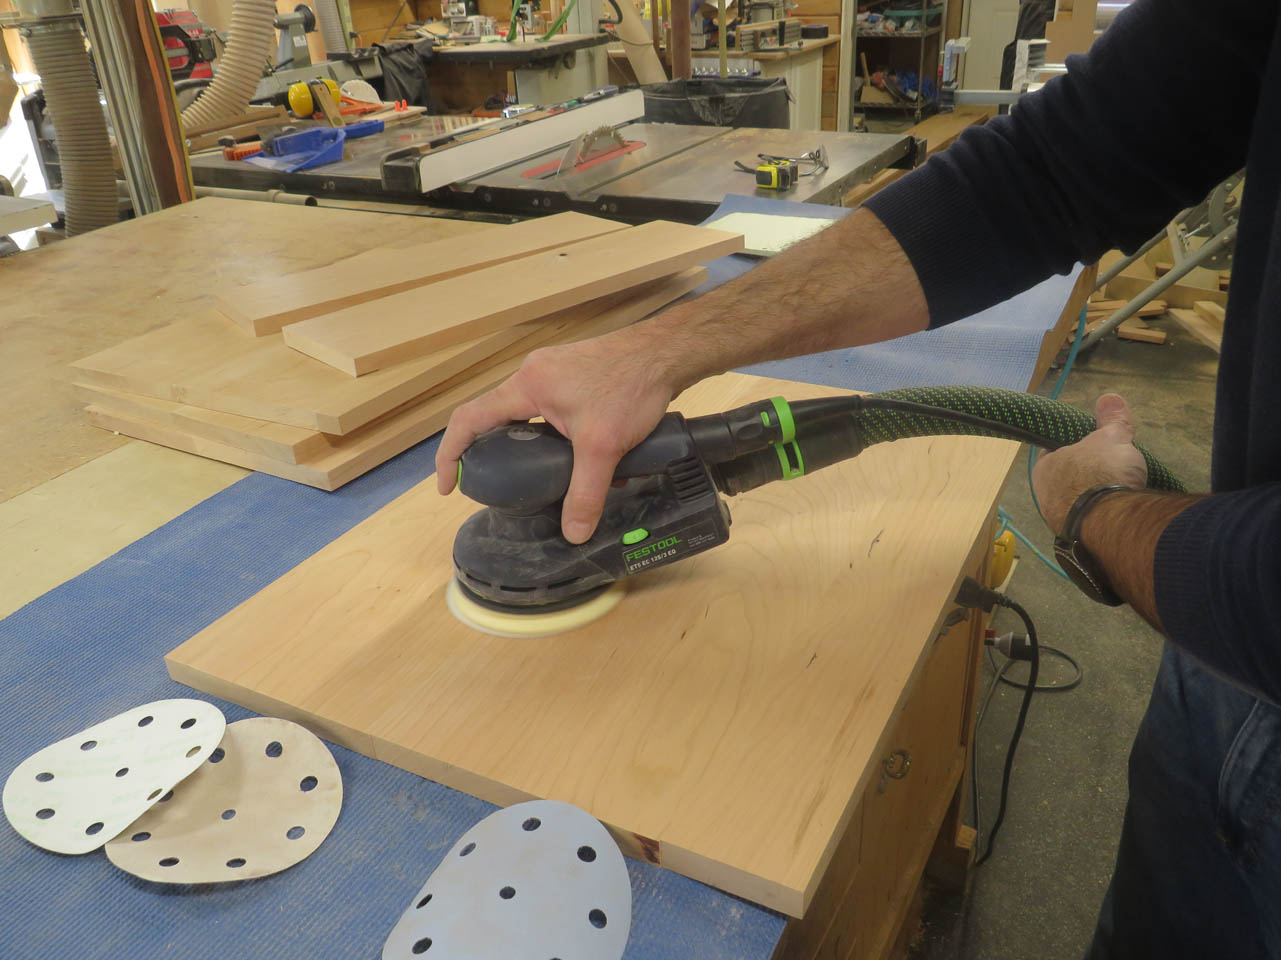
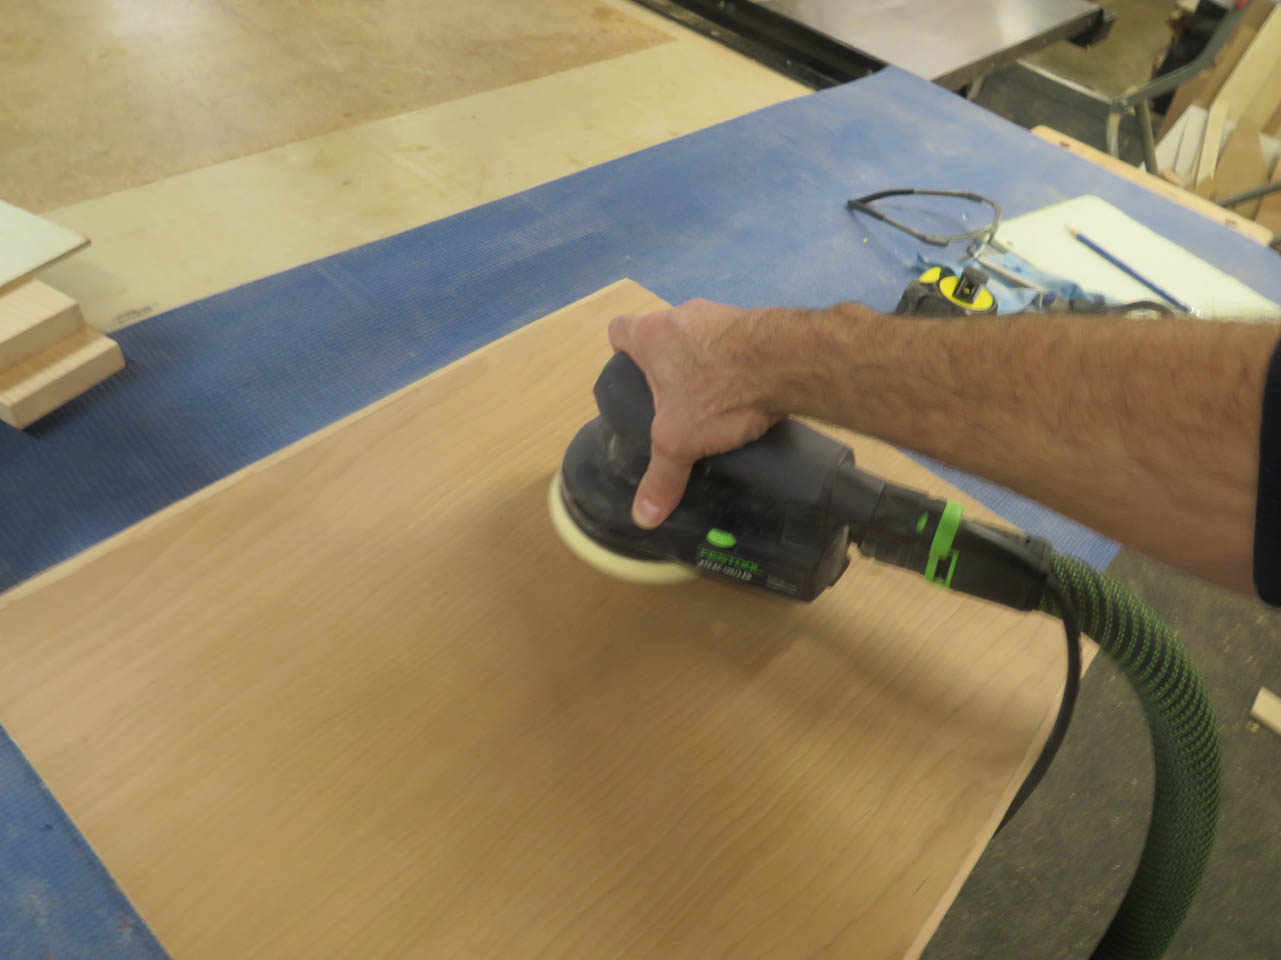
Since the panels are too wide for my planer, I used the drum sander to sand each face to smooth out the glue joint.
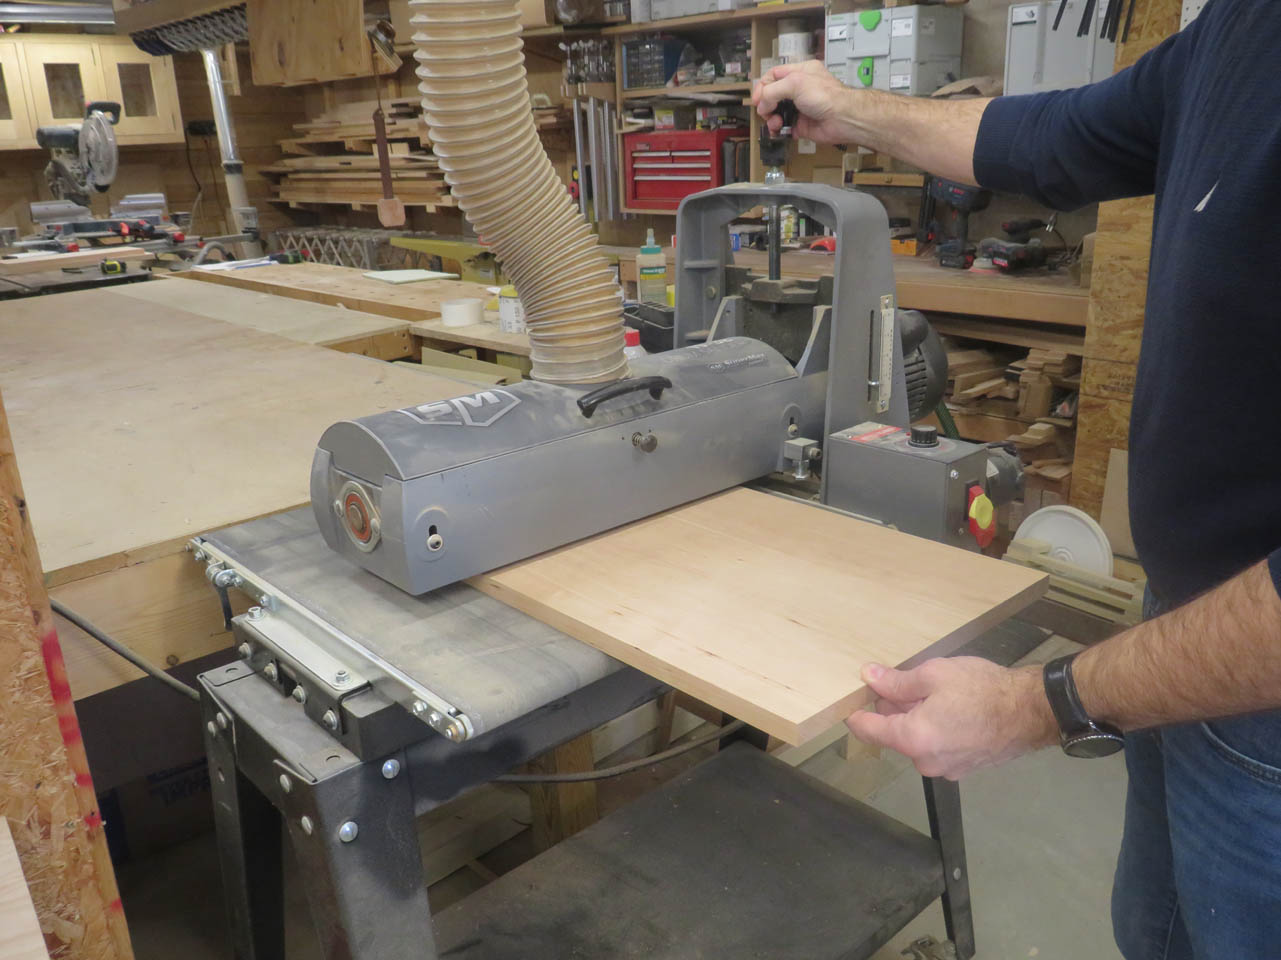
Since I will need to stain this cabinet I work my way through the sand paper grits from 120 down to 220. If I leave it at the courser 120, my stain will highlight any scratches. Better to have finer scratches from the finer paper.
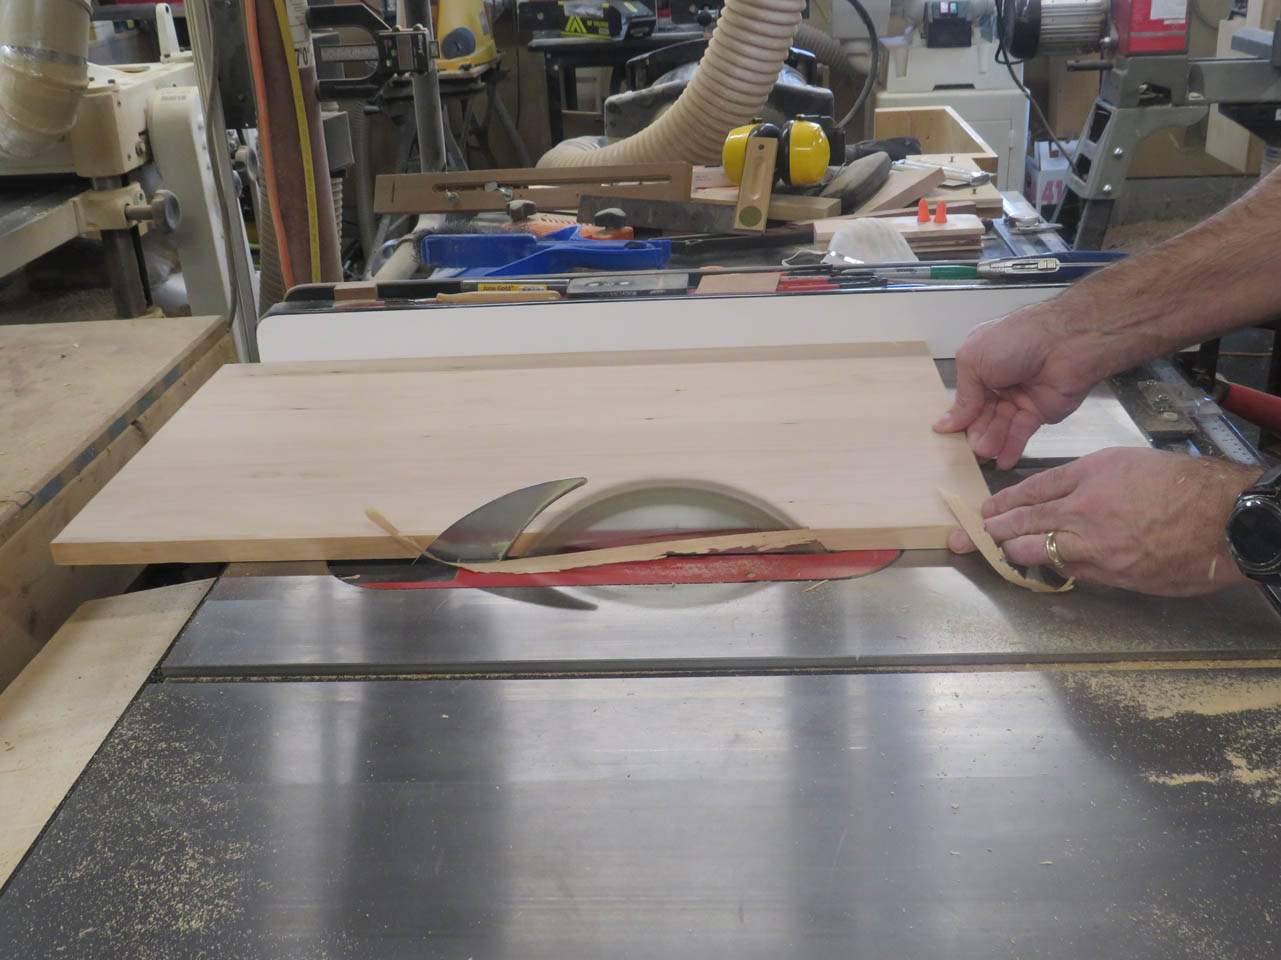
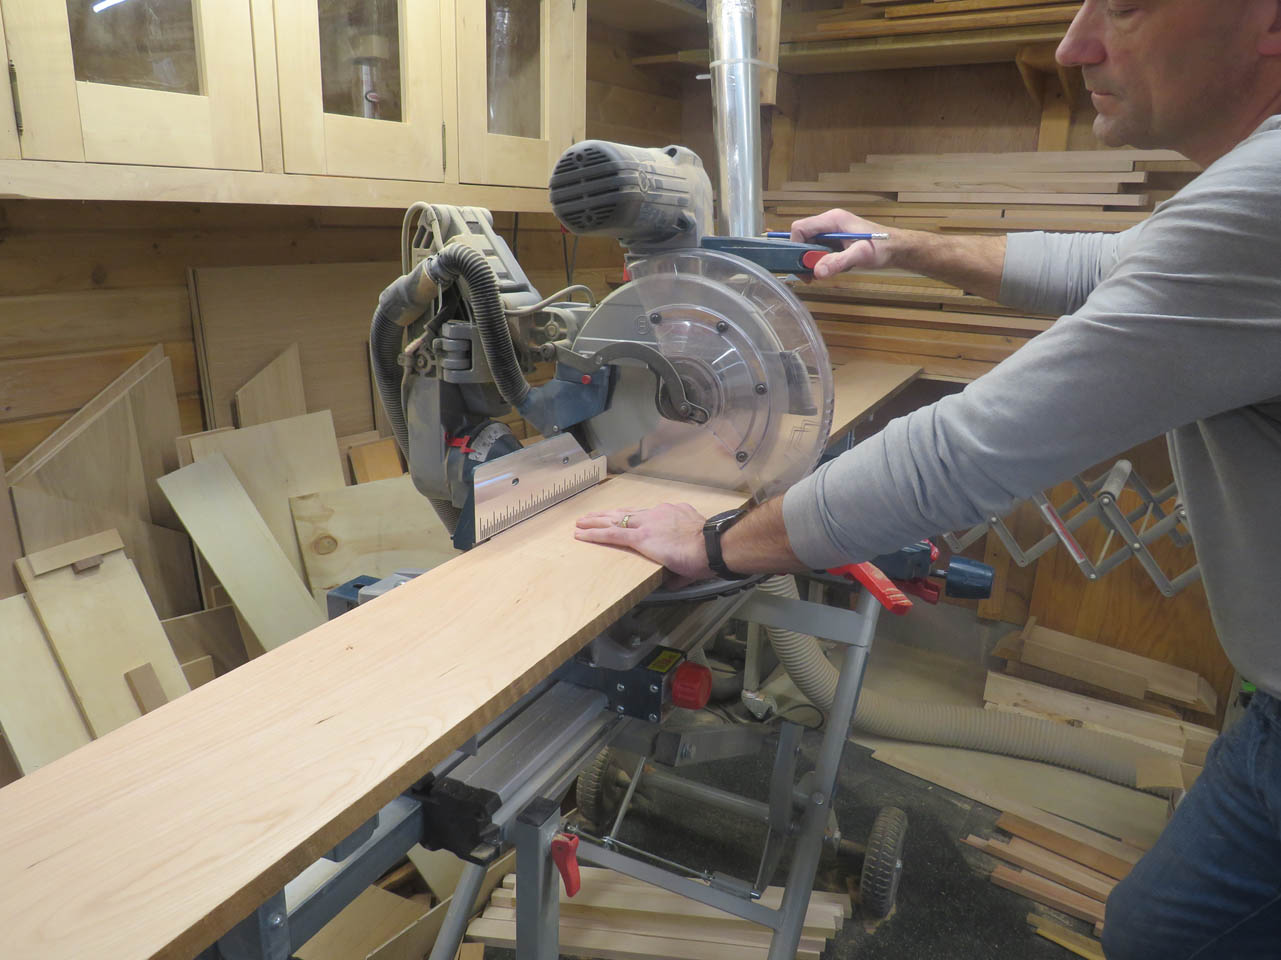
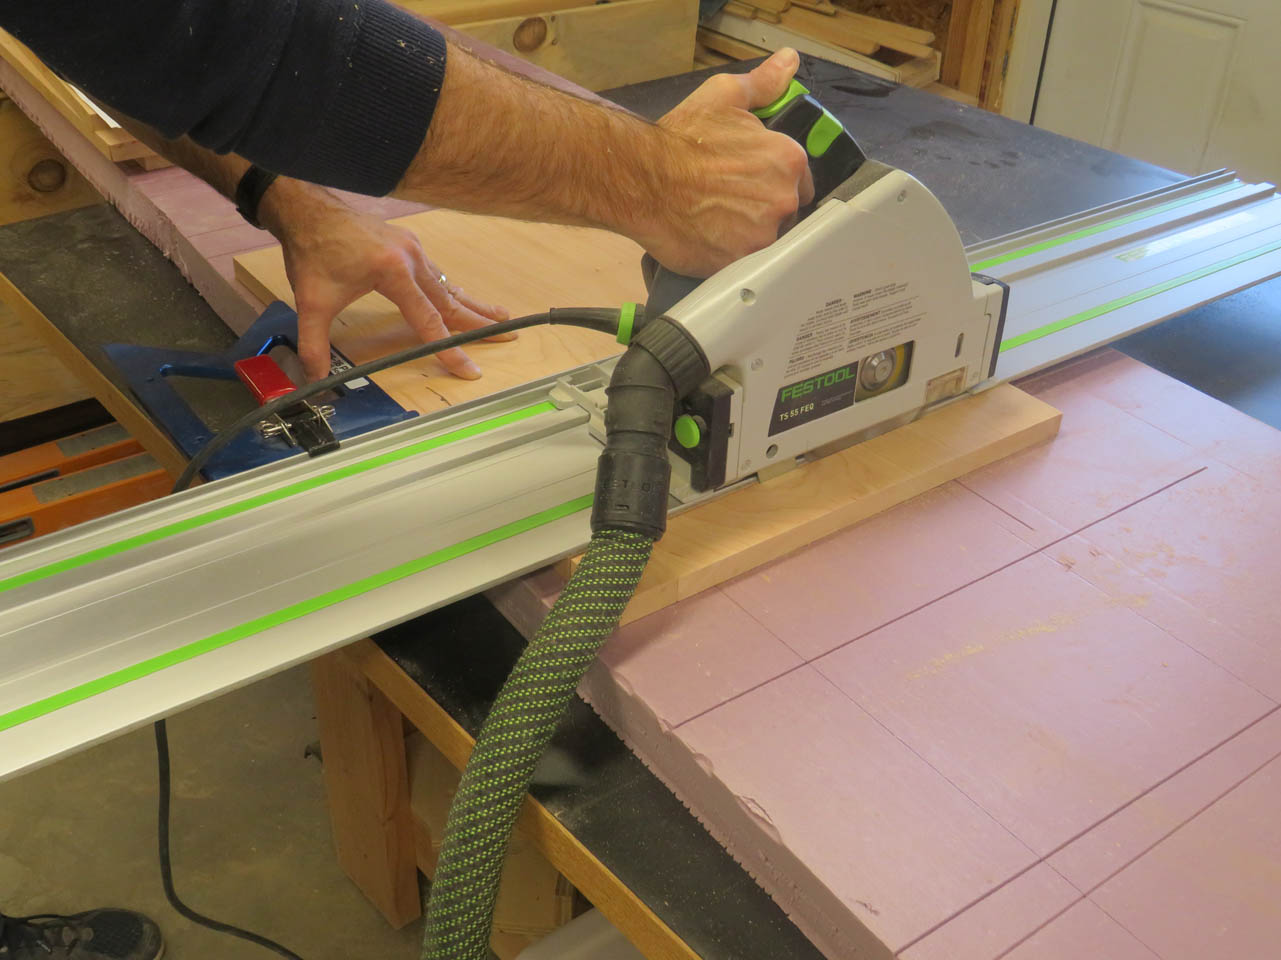
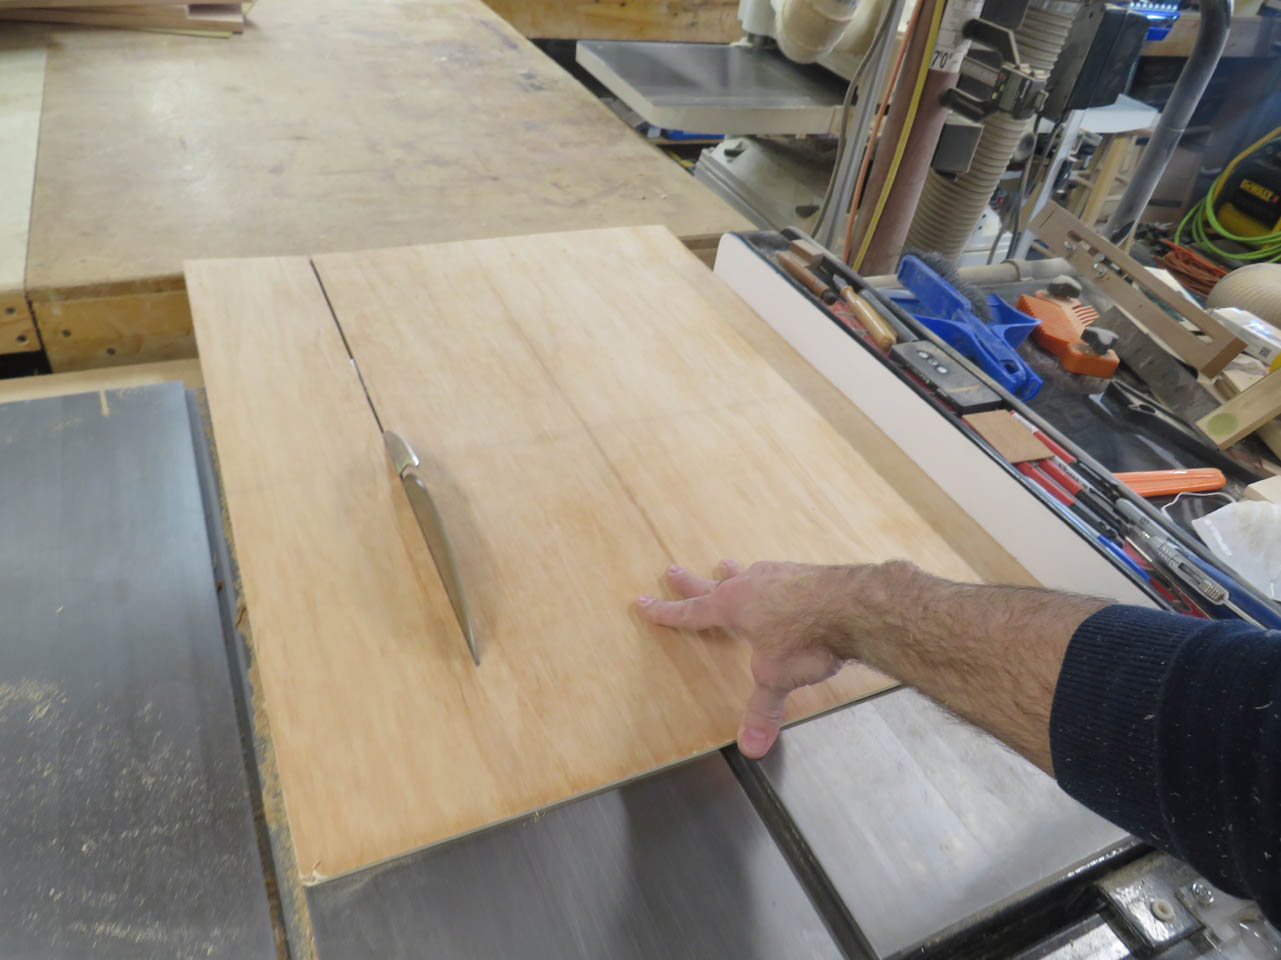
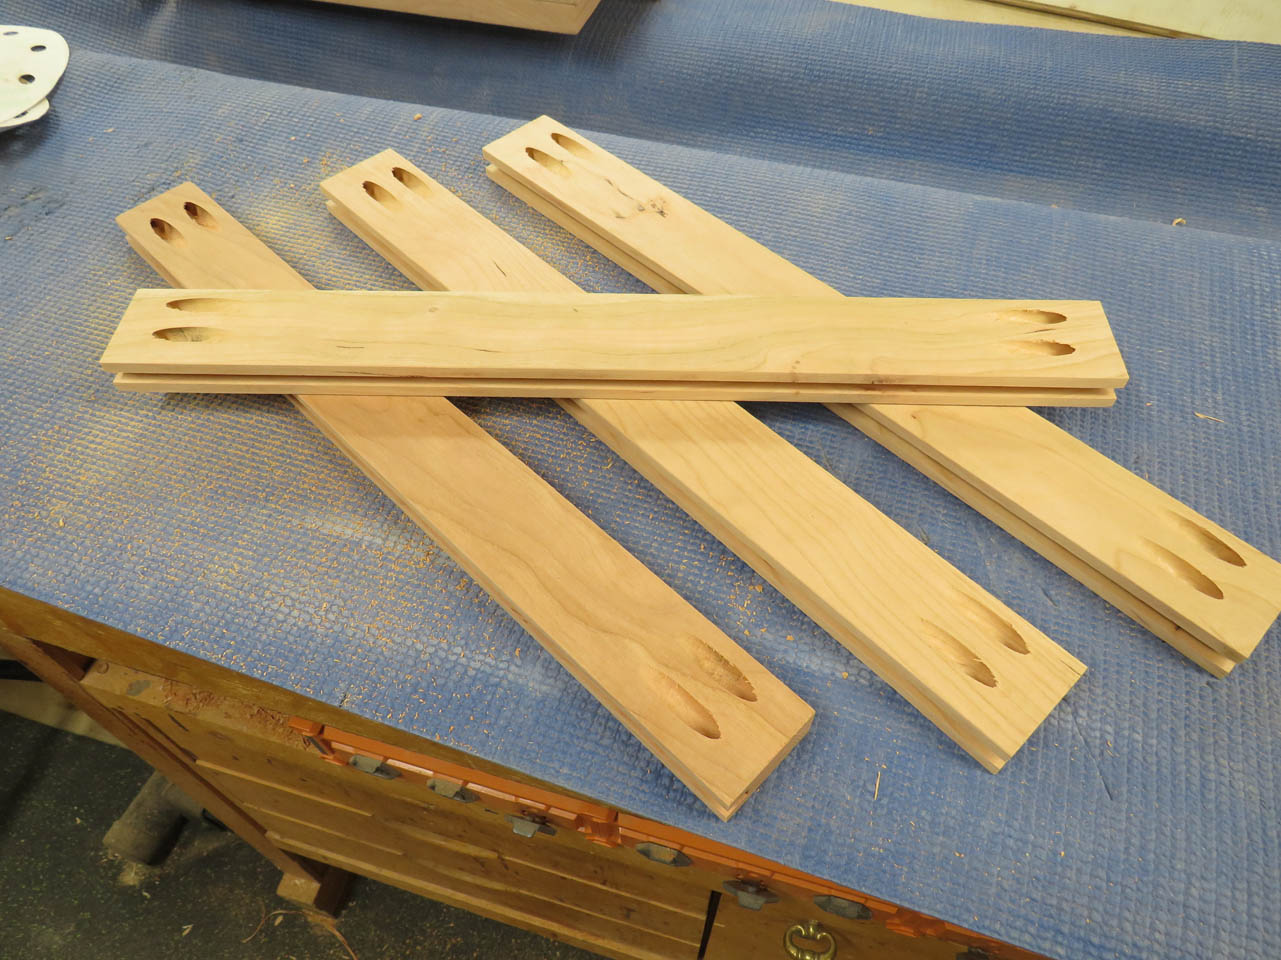
The panels were cut to the final width on the table saw, then cut square, to length with my track saw.
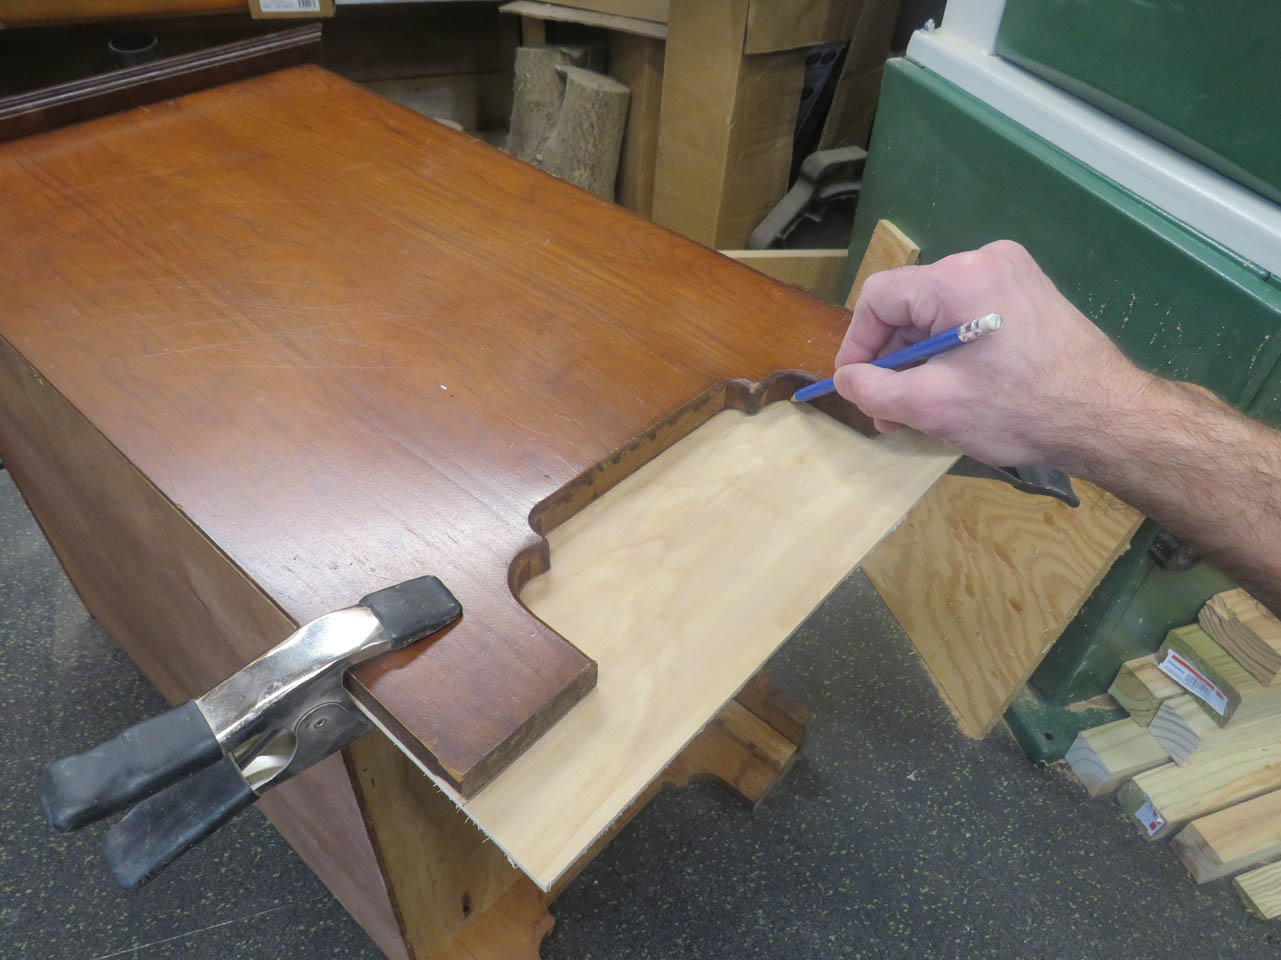
The sides and front have cut-outs at the bottom that I need to replicate. I clamp a sheet of 1/4″ plywood to it to trace for a template.
There are two different radii on each side. To match those, I drill relief holes with a 1-1/2″ & a 5/8″ Forstner bits.
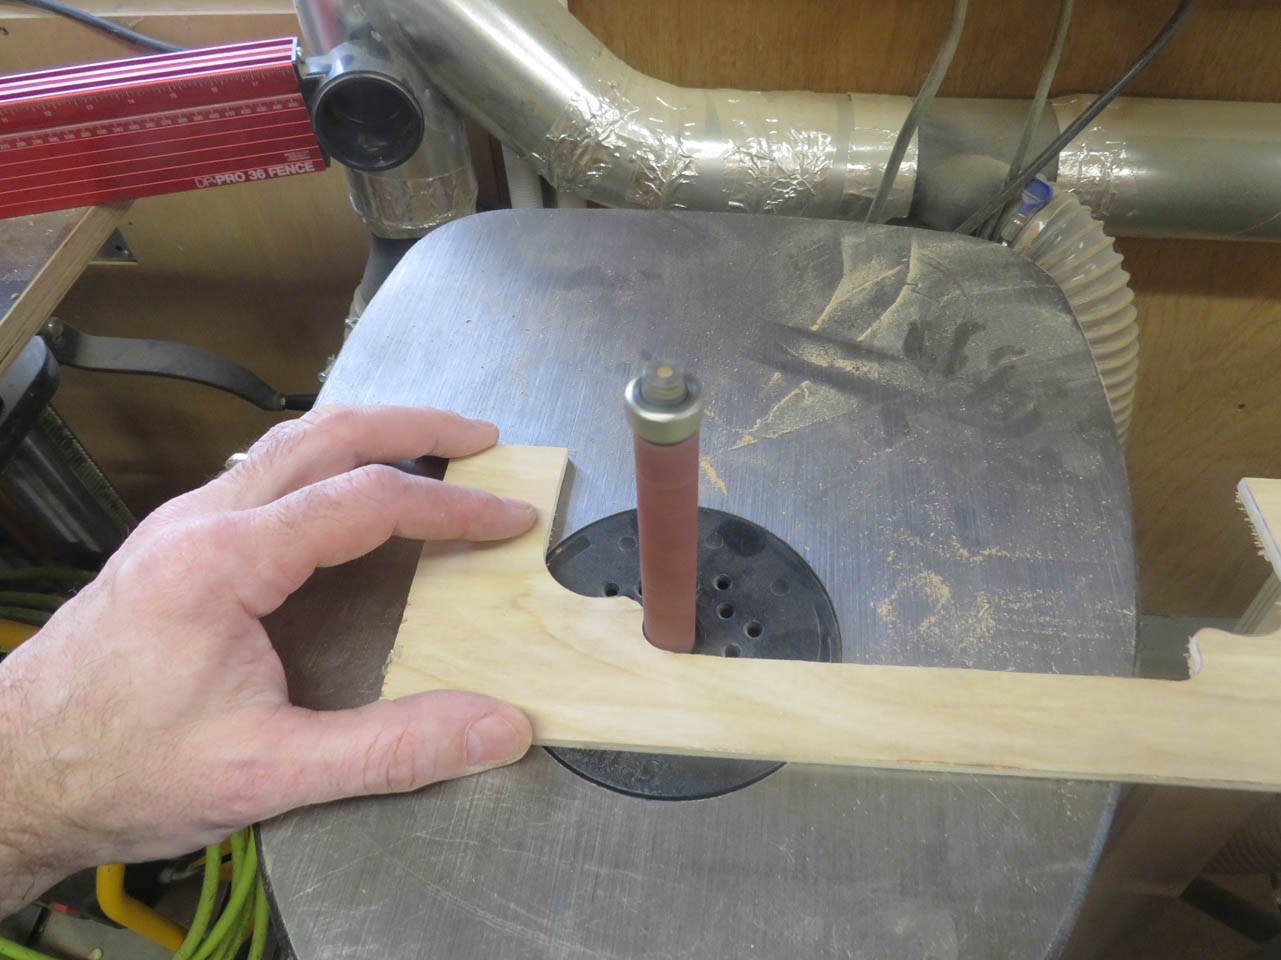
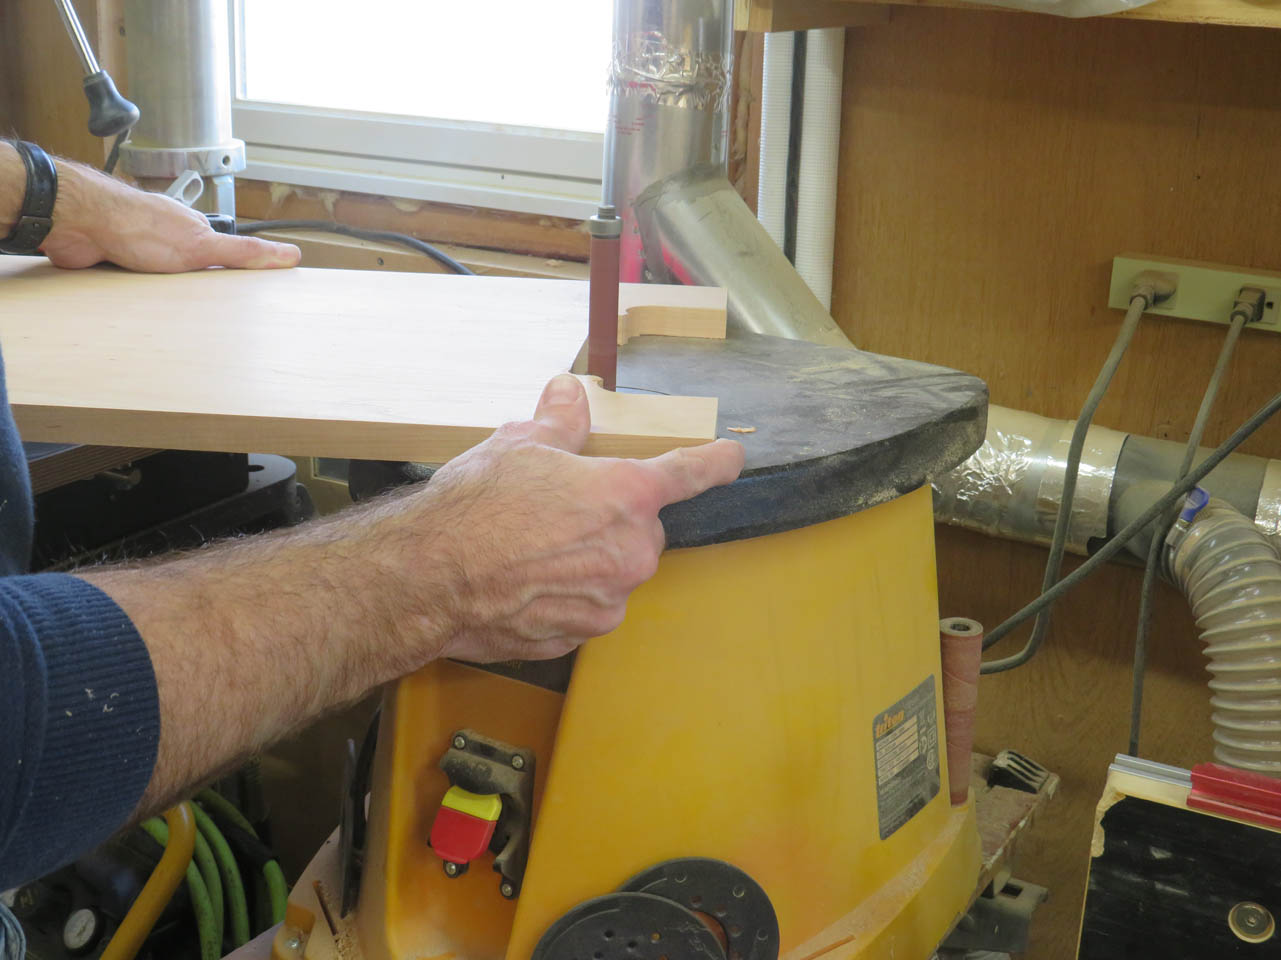
Then I can do a little cleanup on the spindle sander.
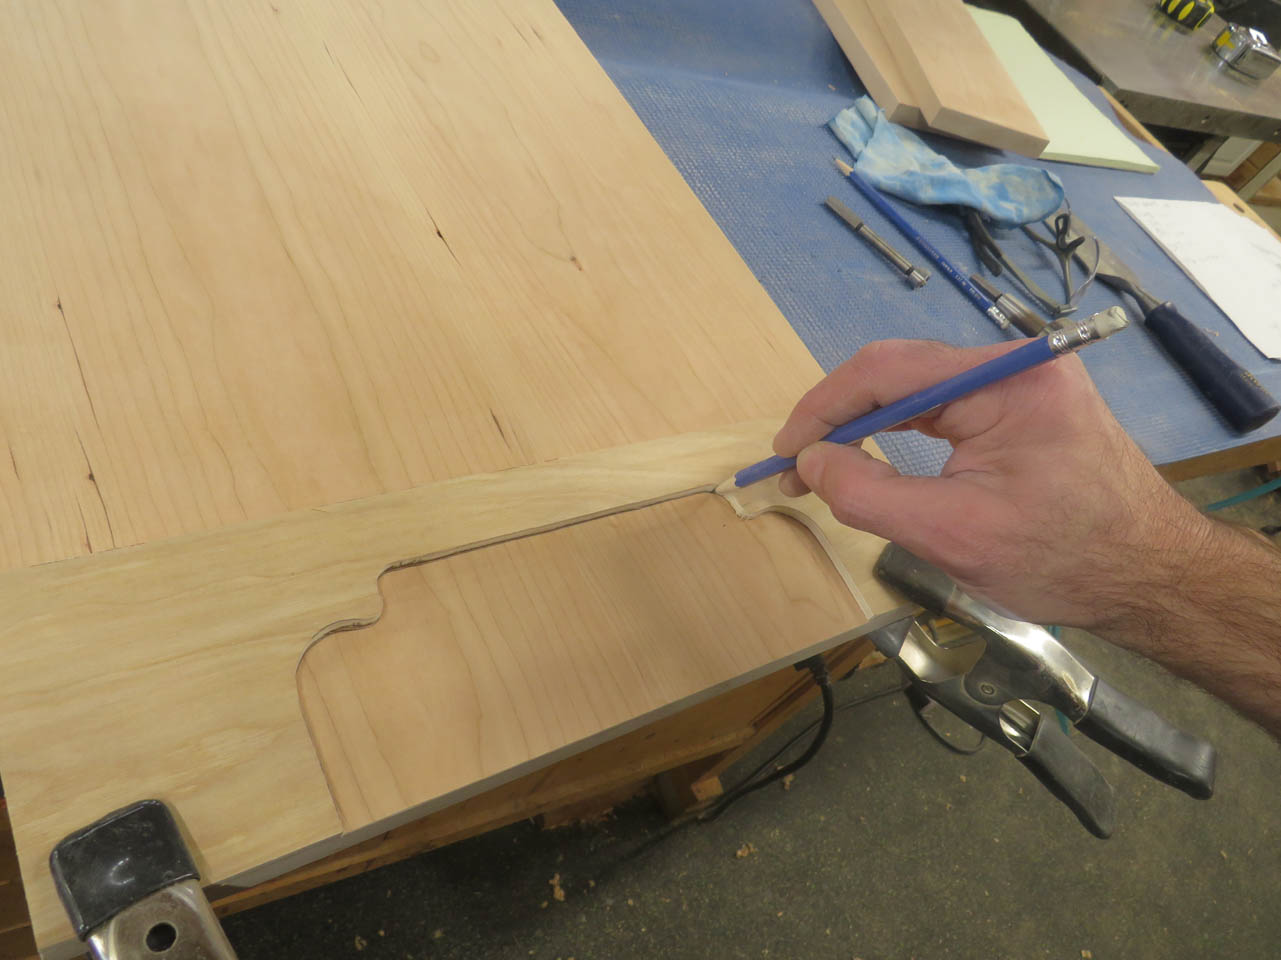
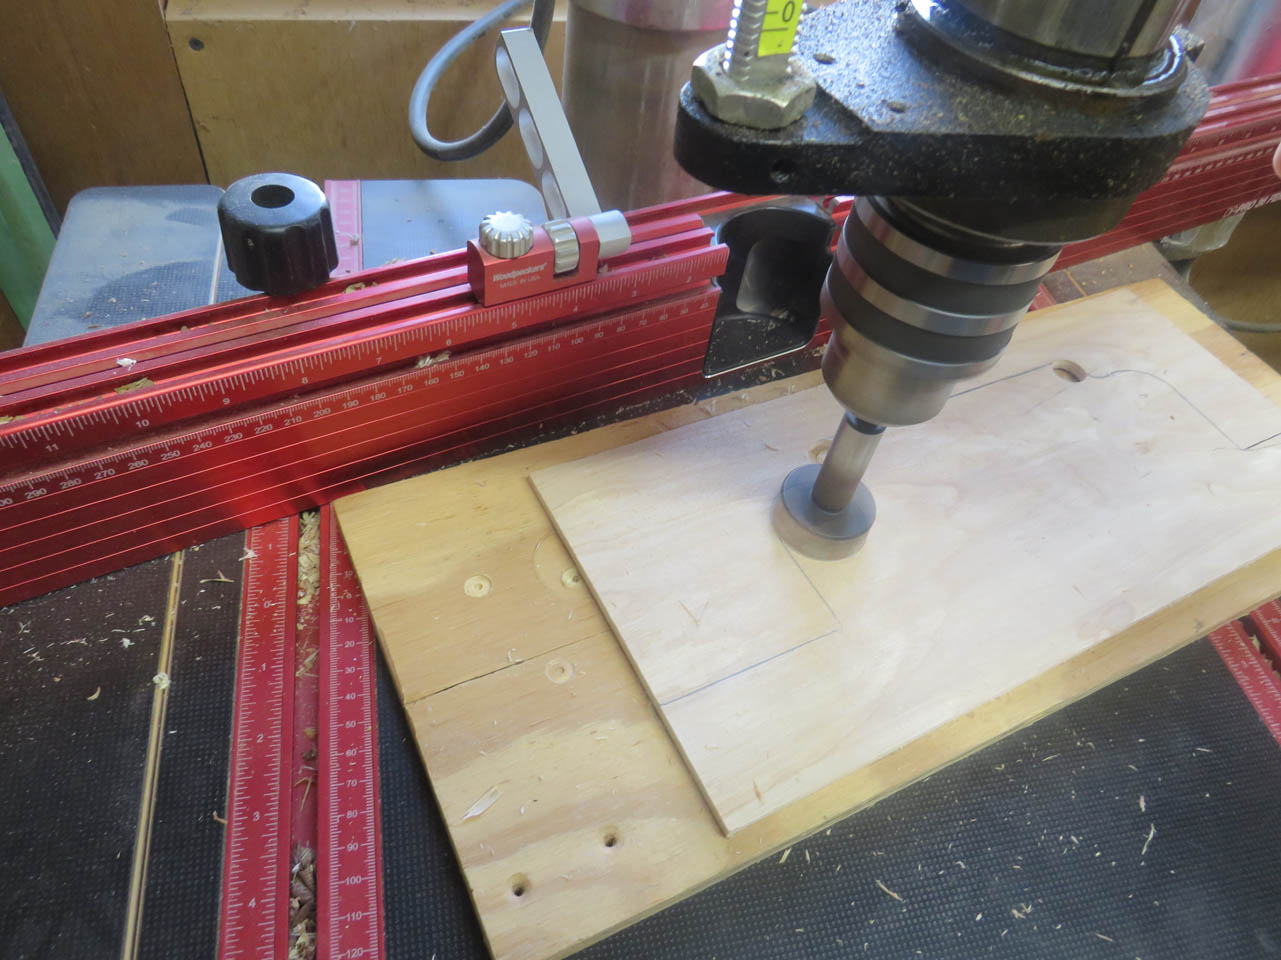
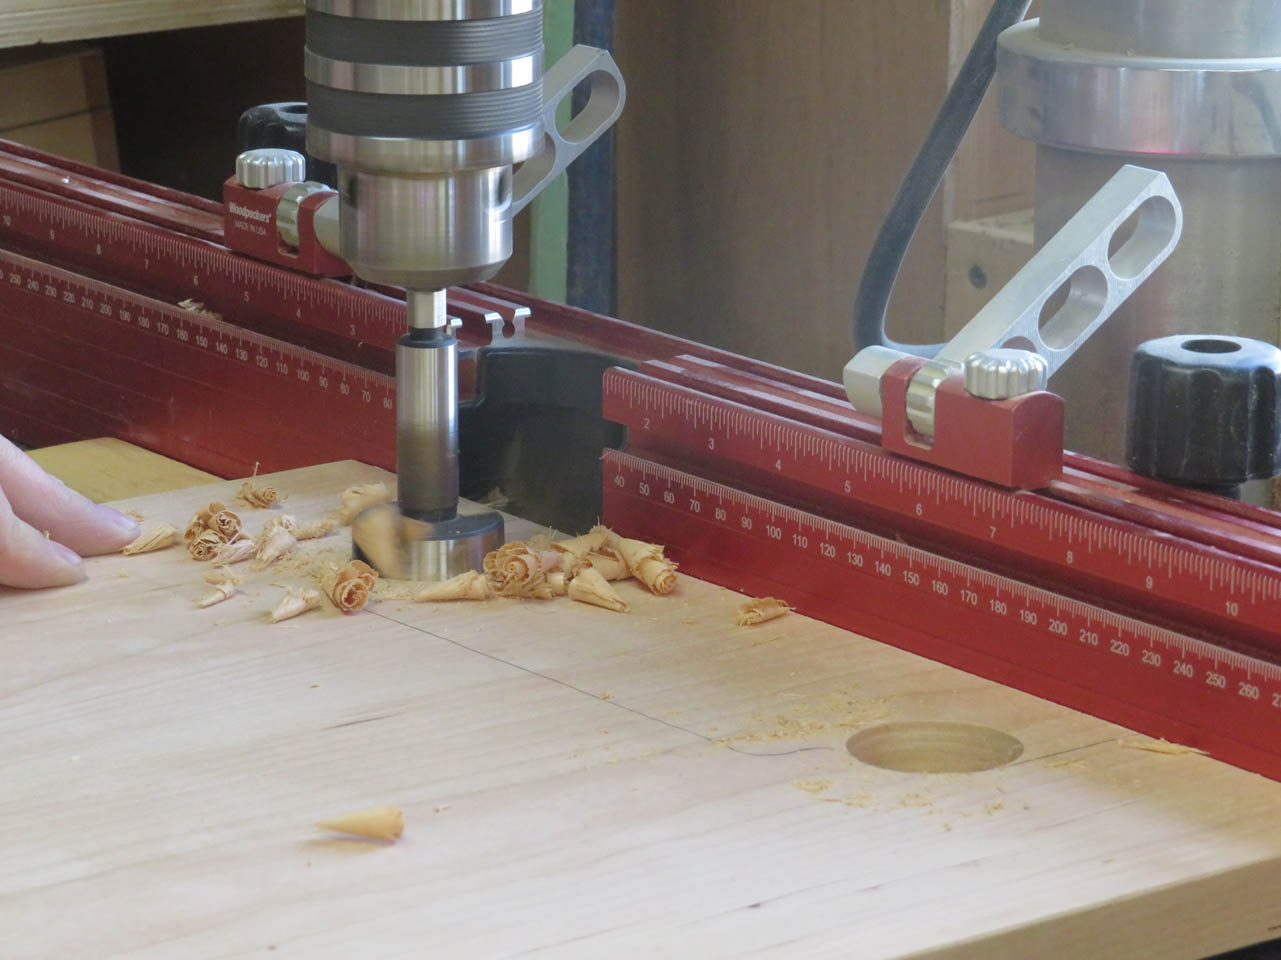
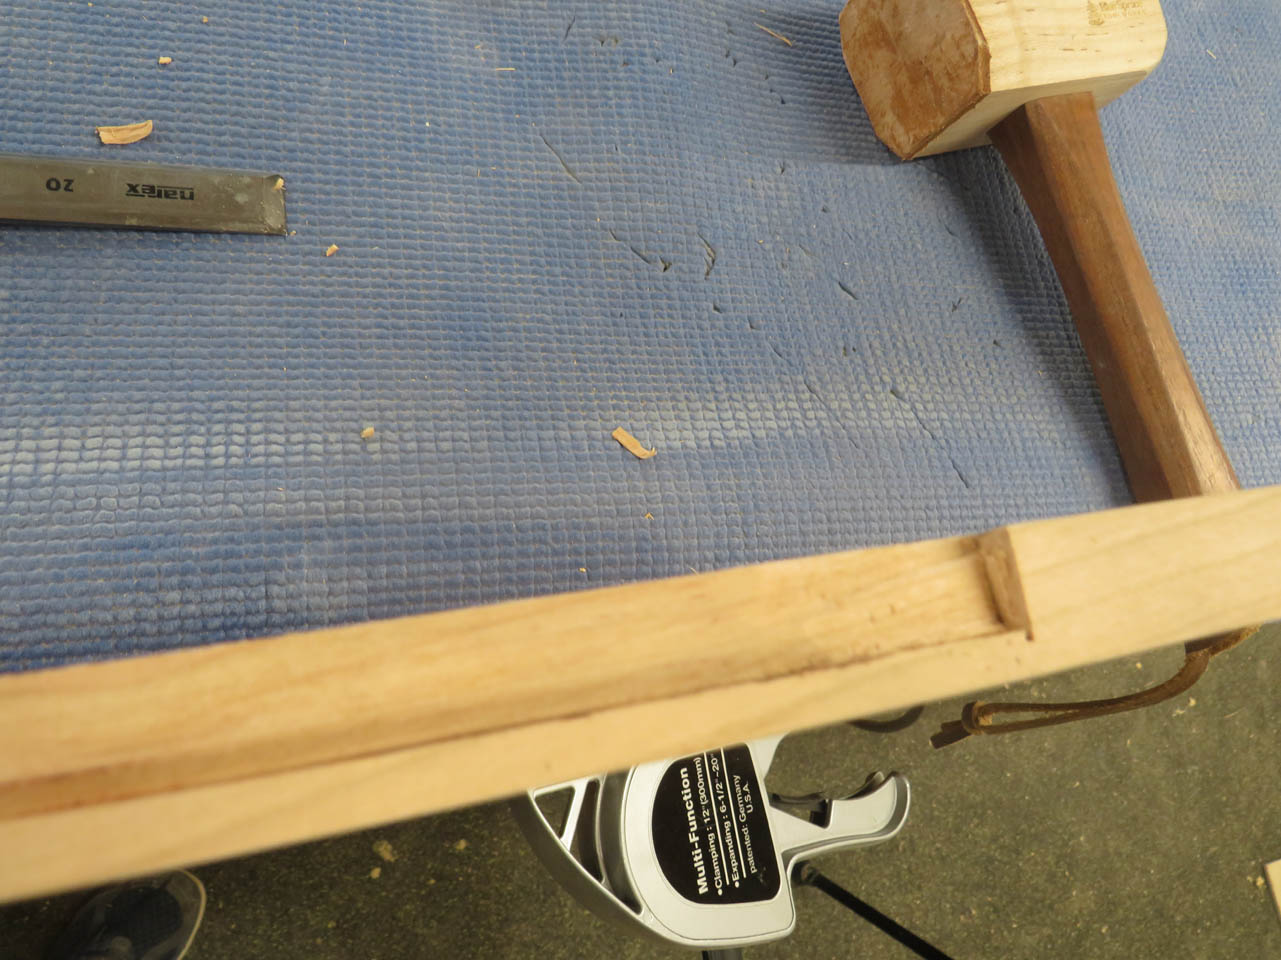
I then clamped the templates in place and use a Forstner bit to locate the center point and smack it with a mallet to create a center point for drilling.
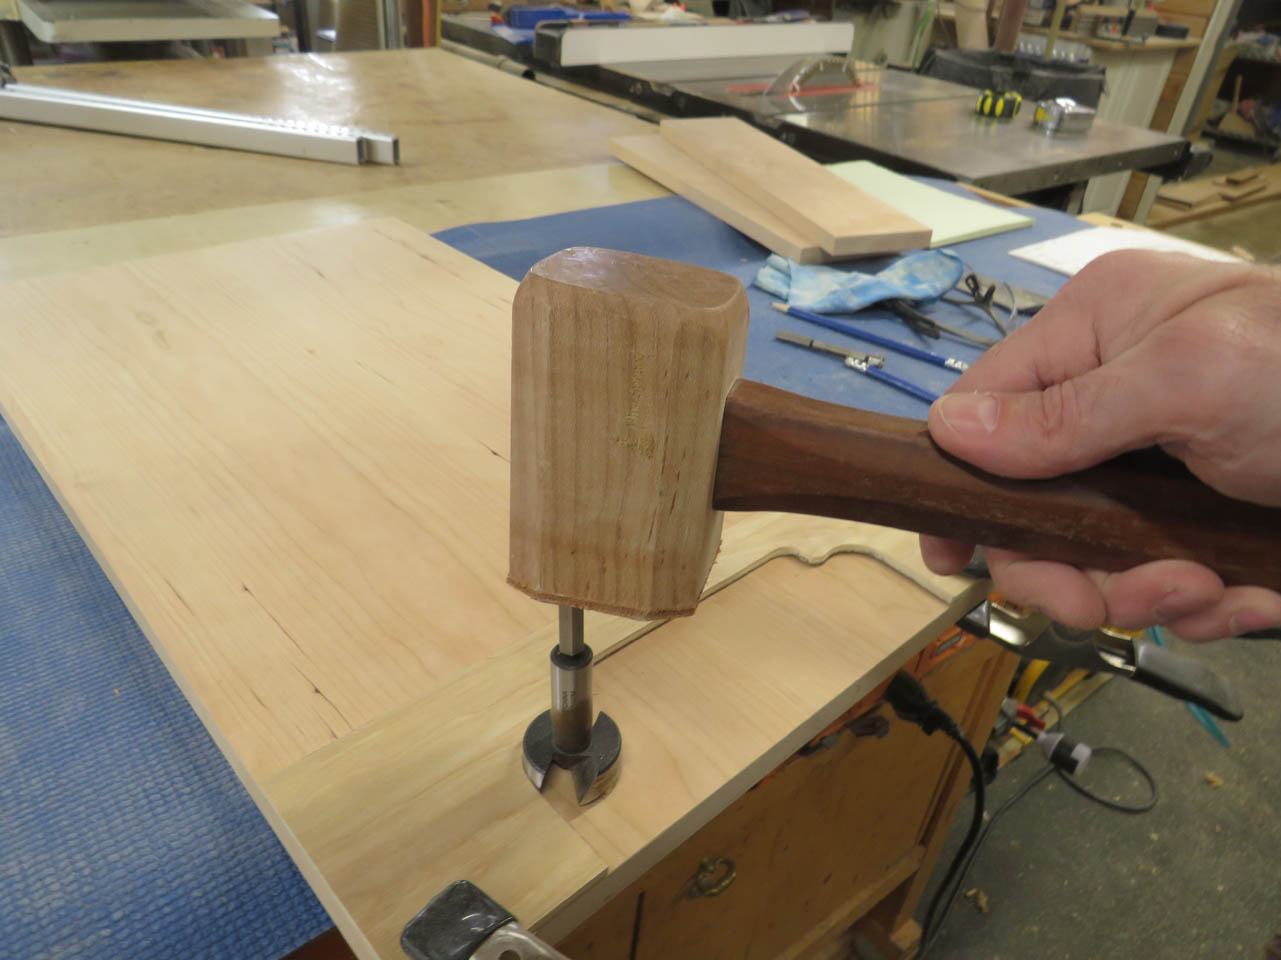
With the holes located, I can go back to the drill press and pre-drill them.
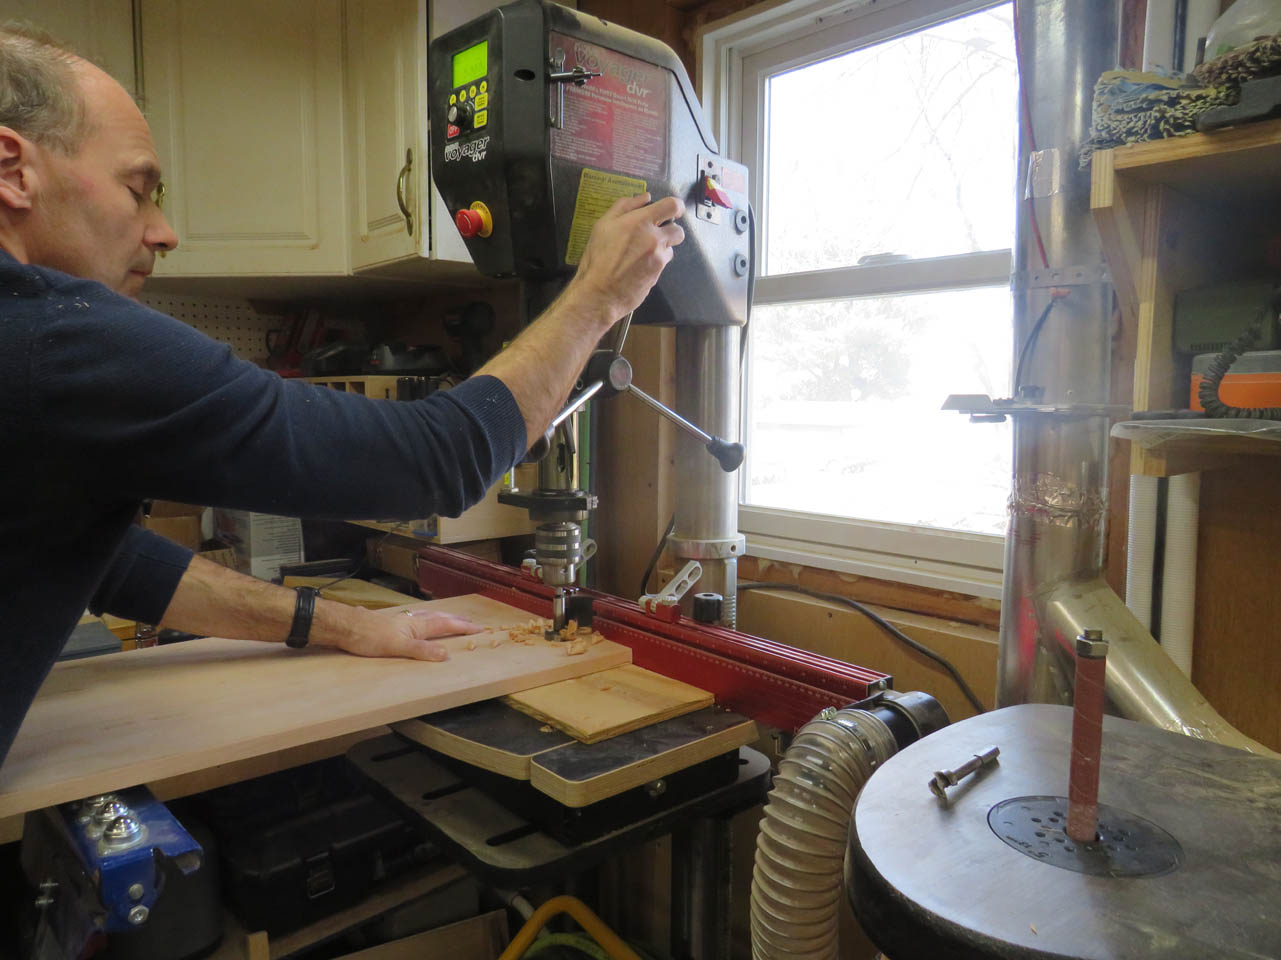

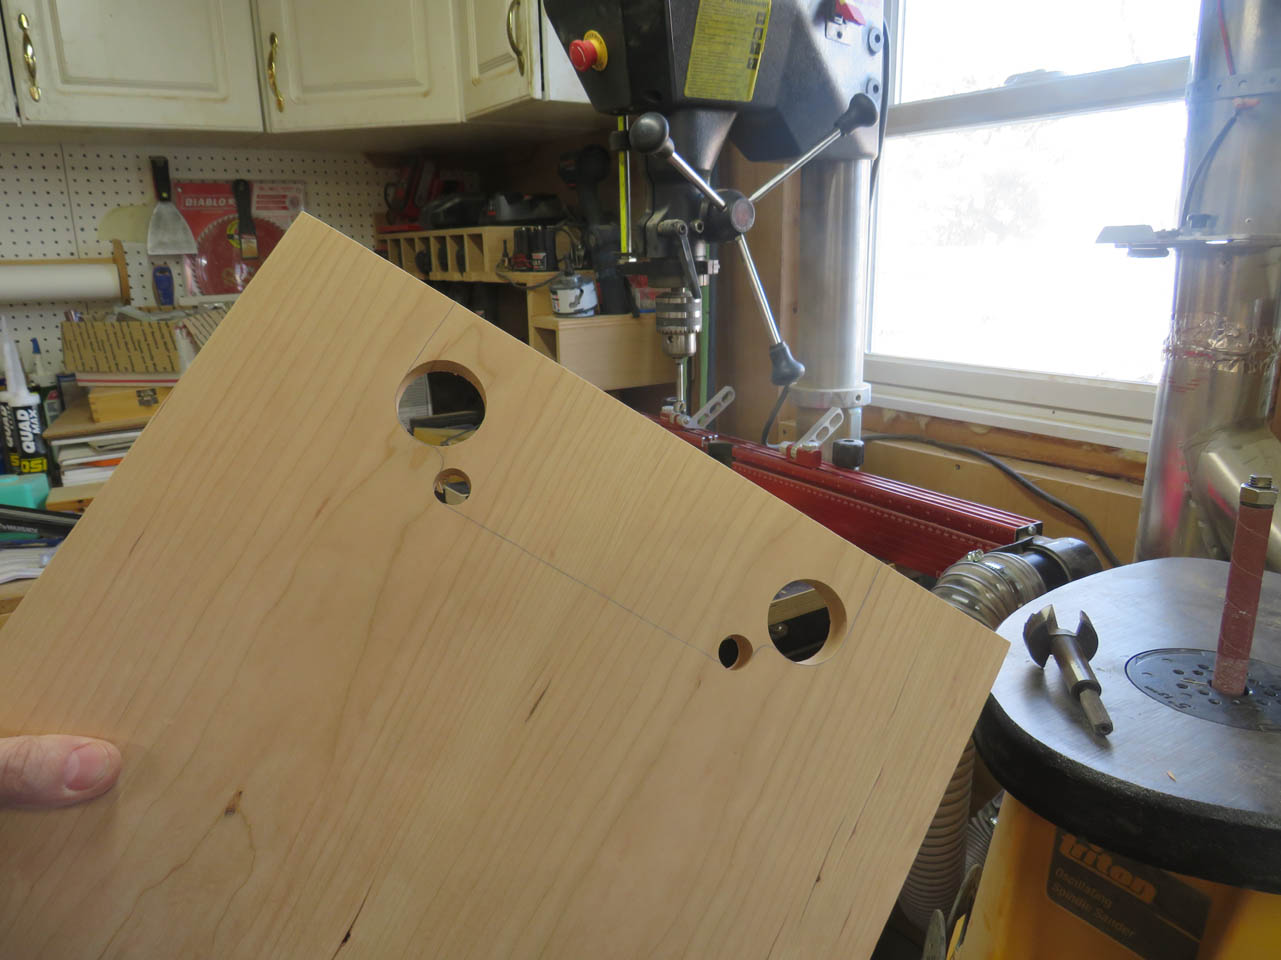
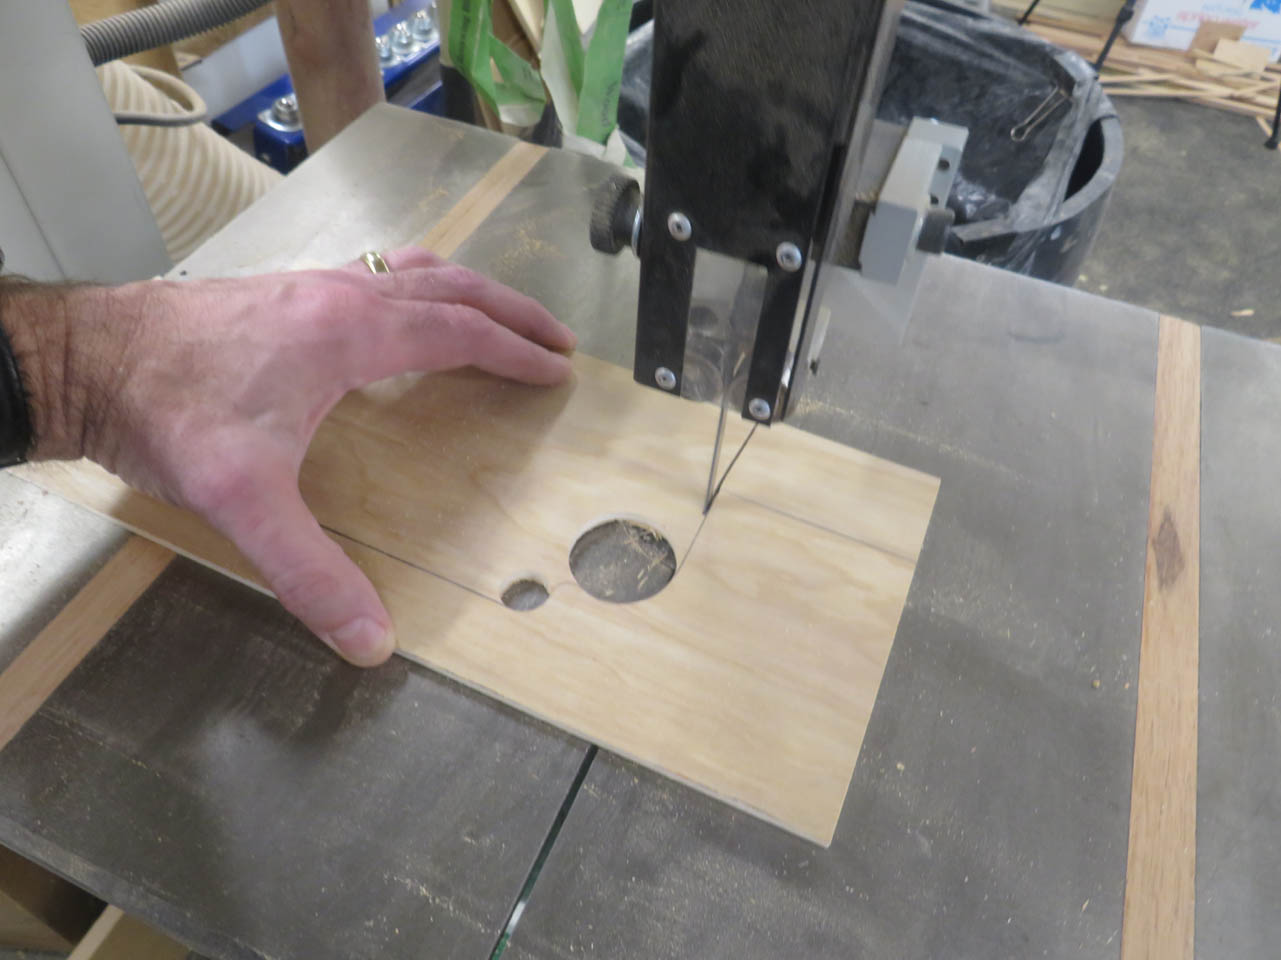
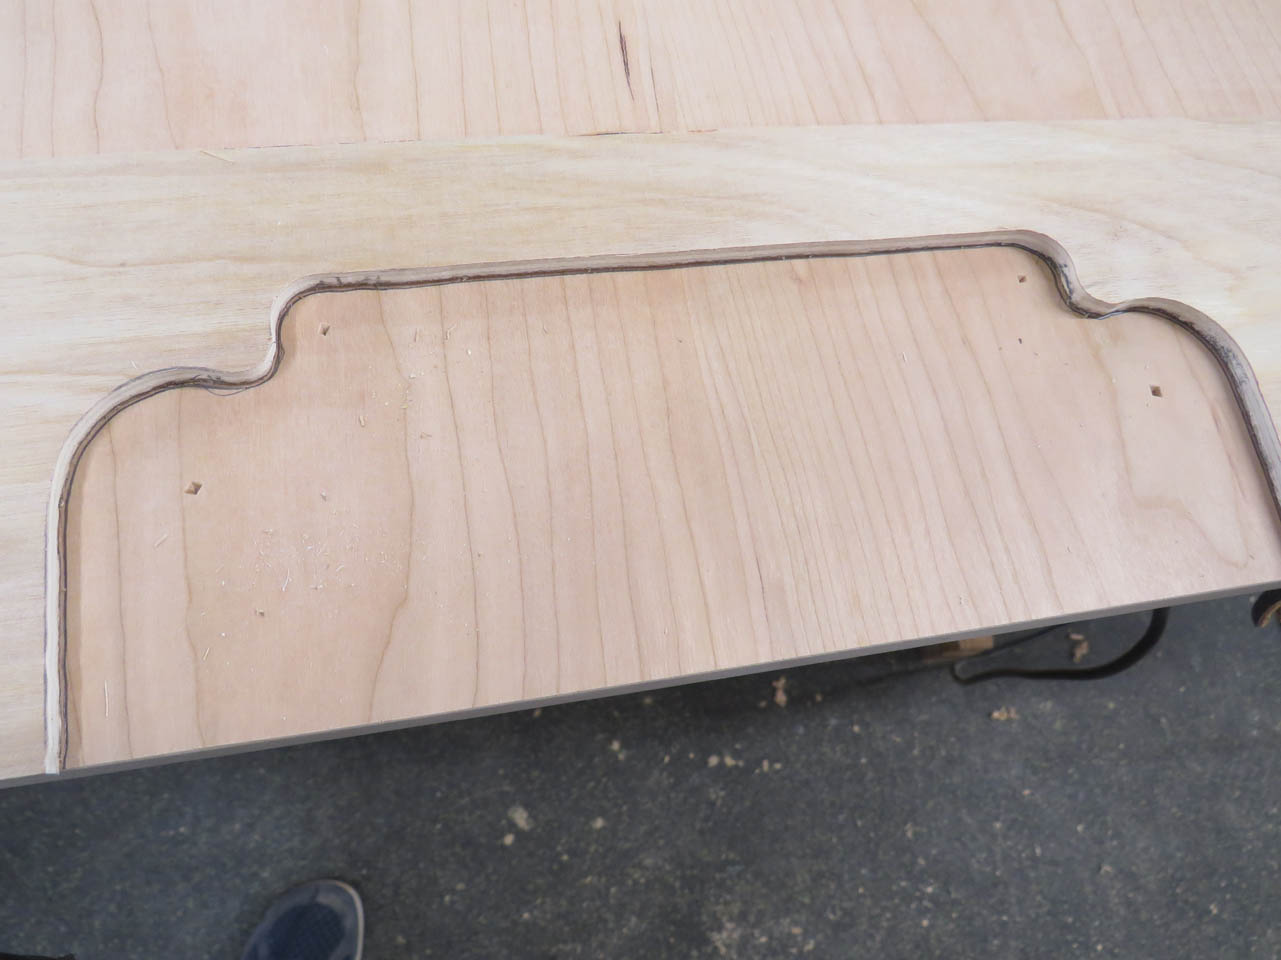
When that is done, I can go to the bandsaw and cut away the rest.
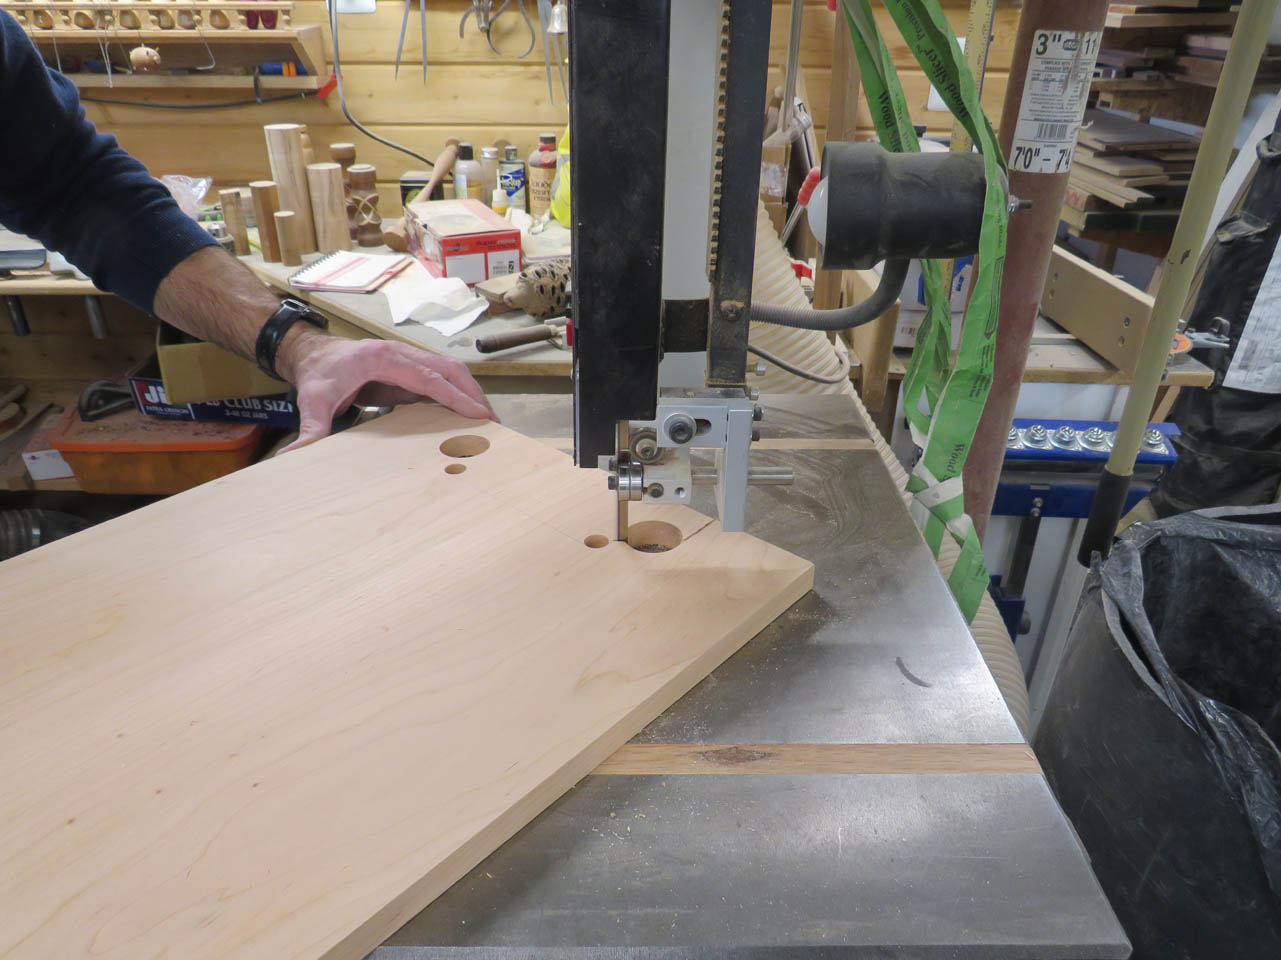
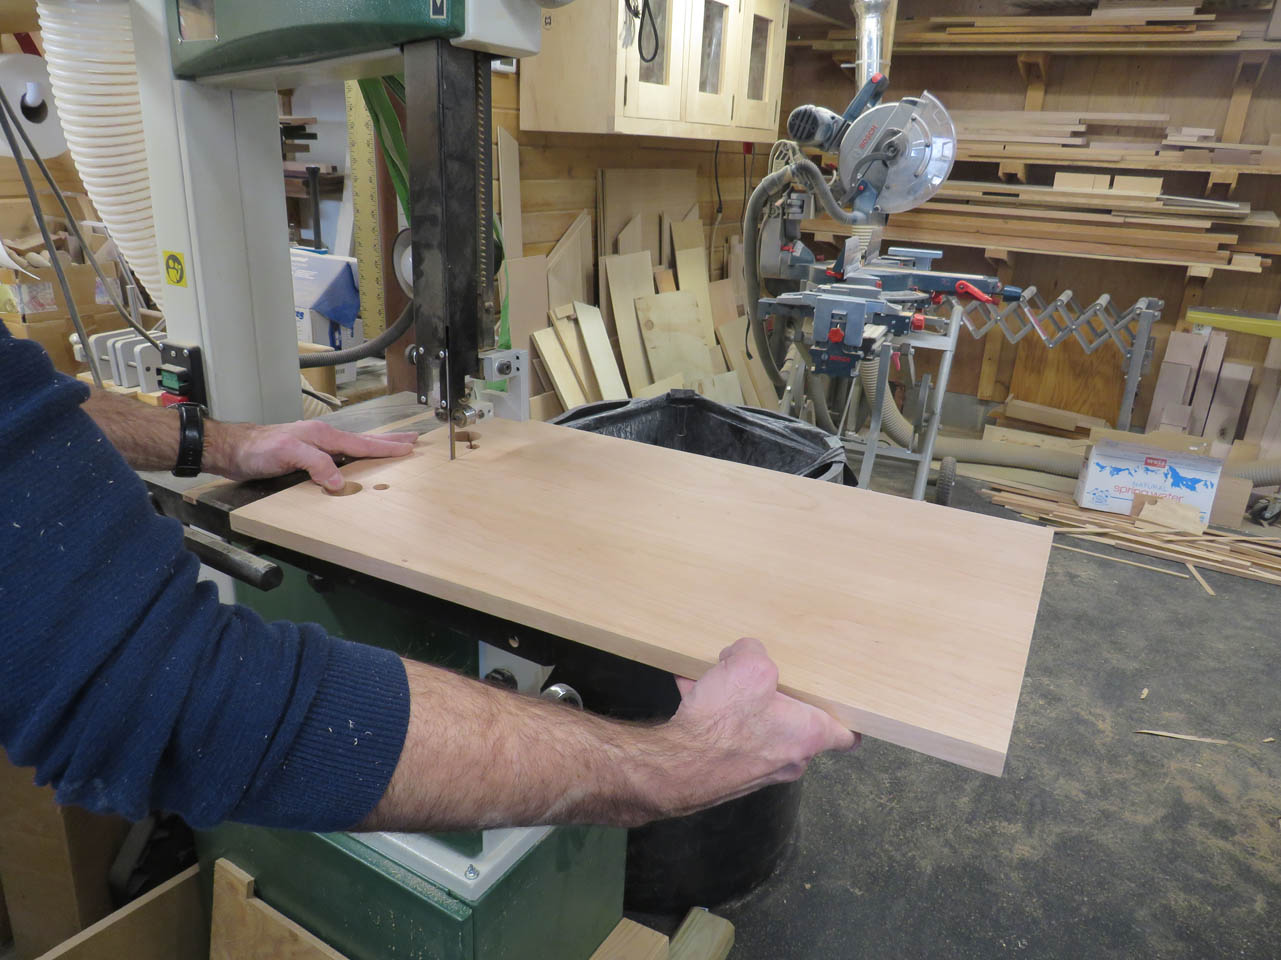
Then a little clean-up on the spindle sander and the first side is done.
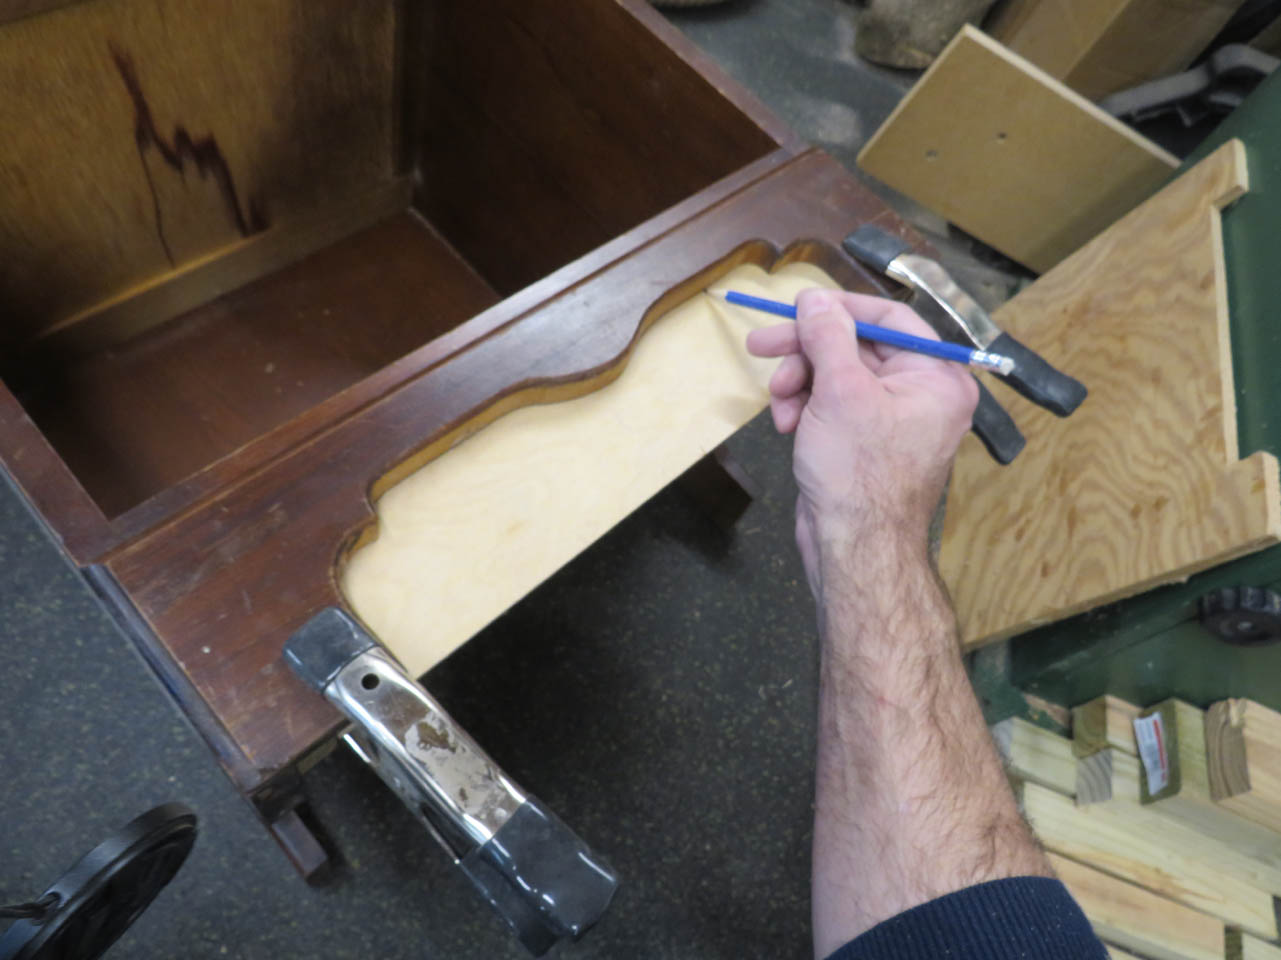
After both sides were done, I repeated the process for the front skirt.
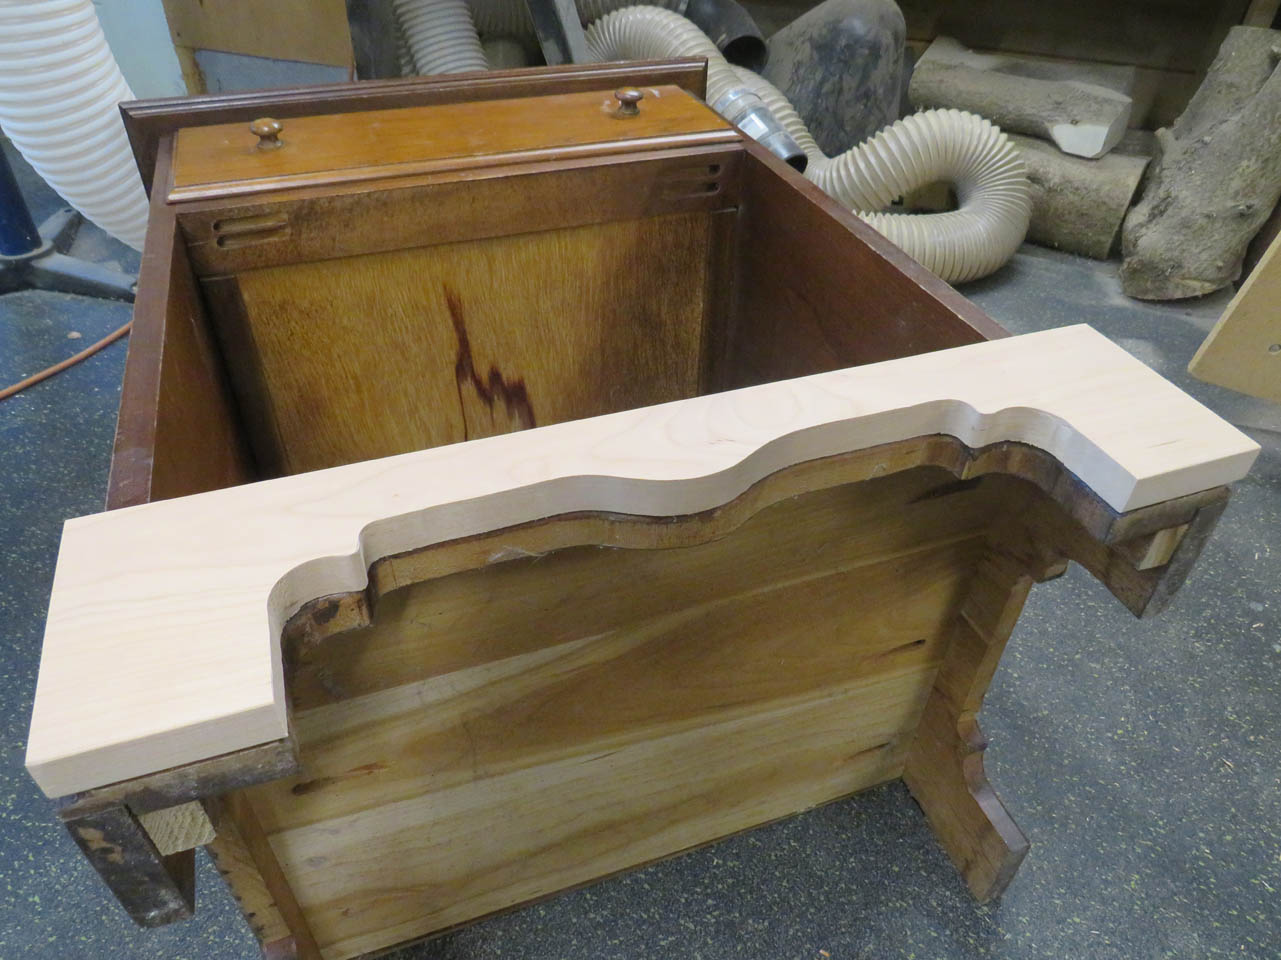
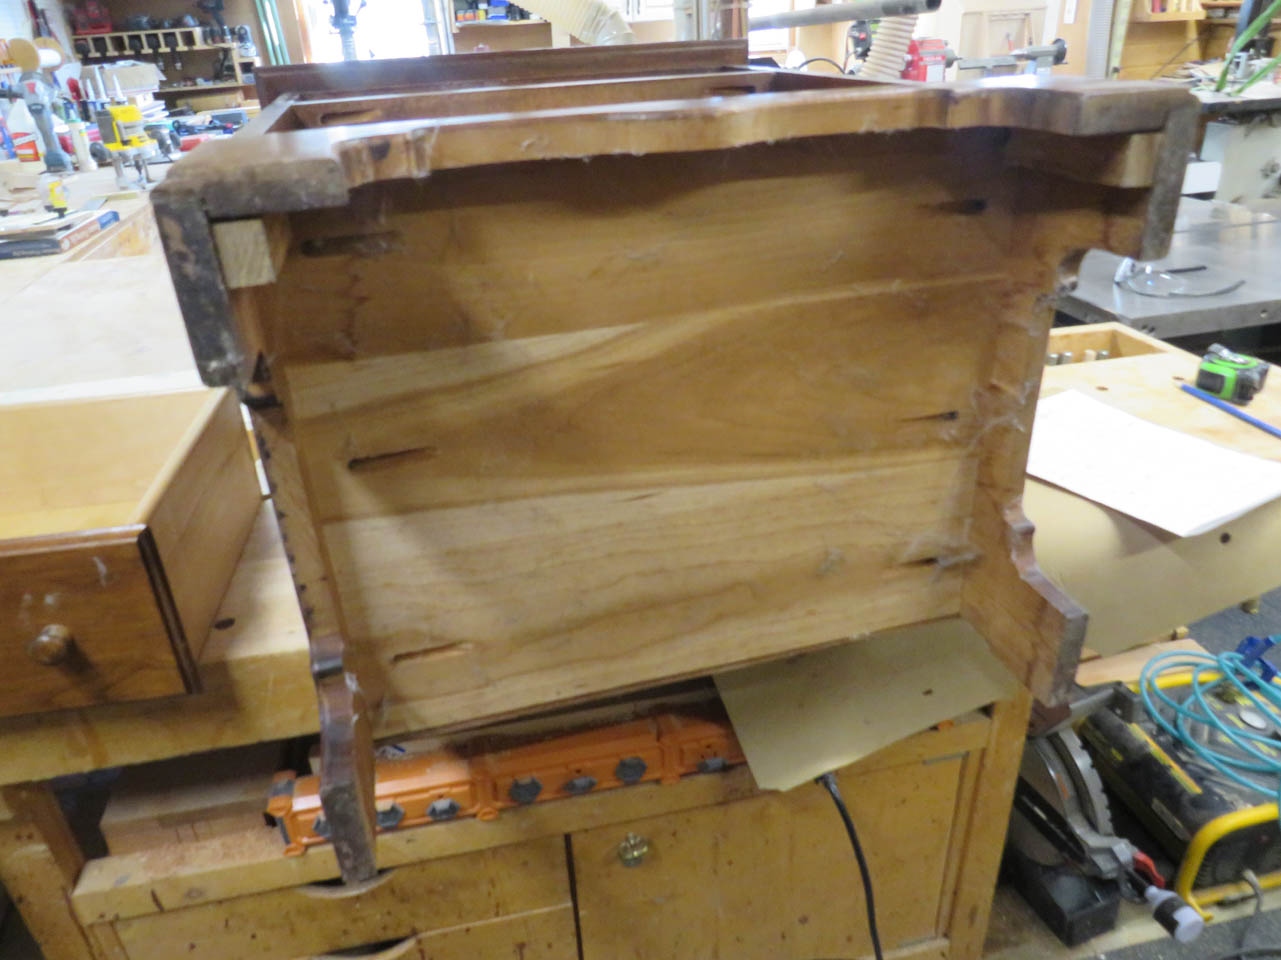
A couple things to note on the back panel: One, there are notches cut in the side panels to recess the rear panel. And, two, the panel has a cherry face to match the solid wood.
I happen to have some cherry veneer so I cut a piece to match the 1/4″ plywood I cut for the back.
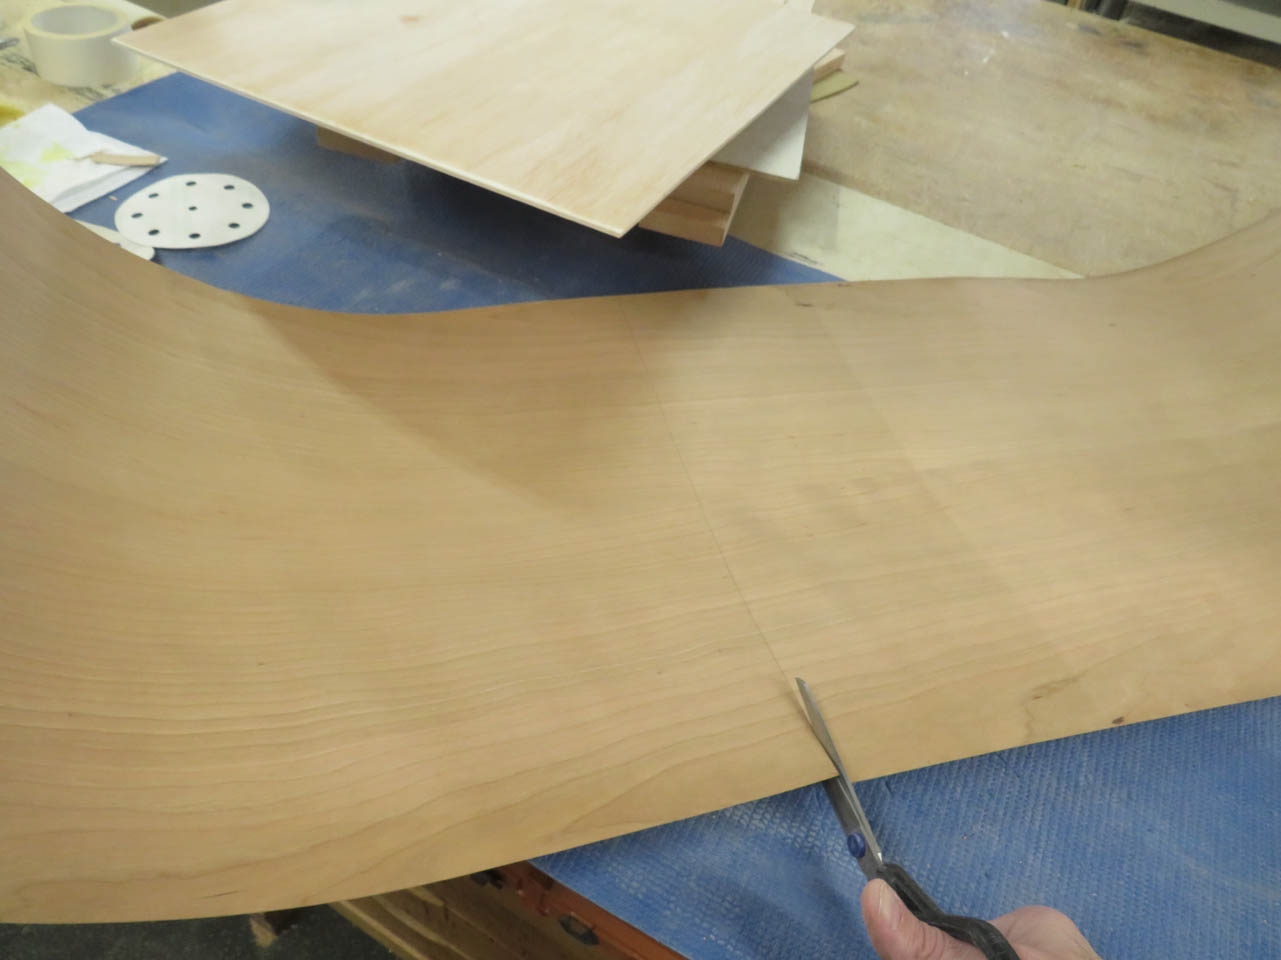
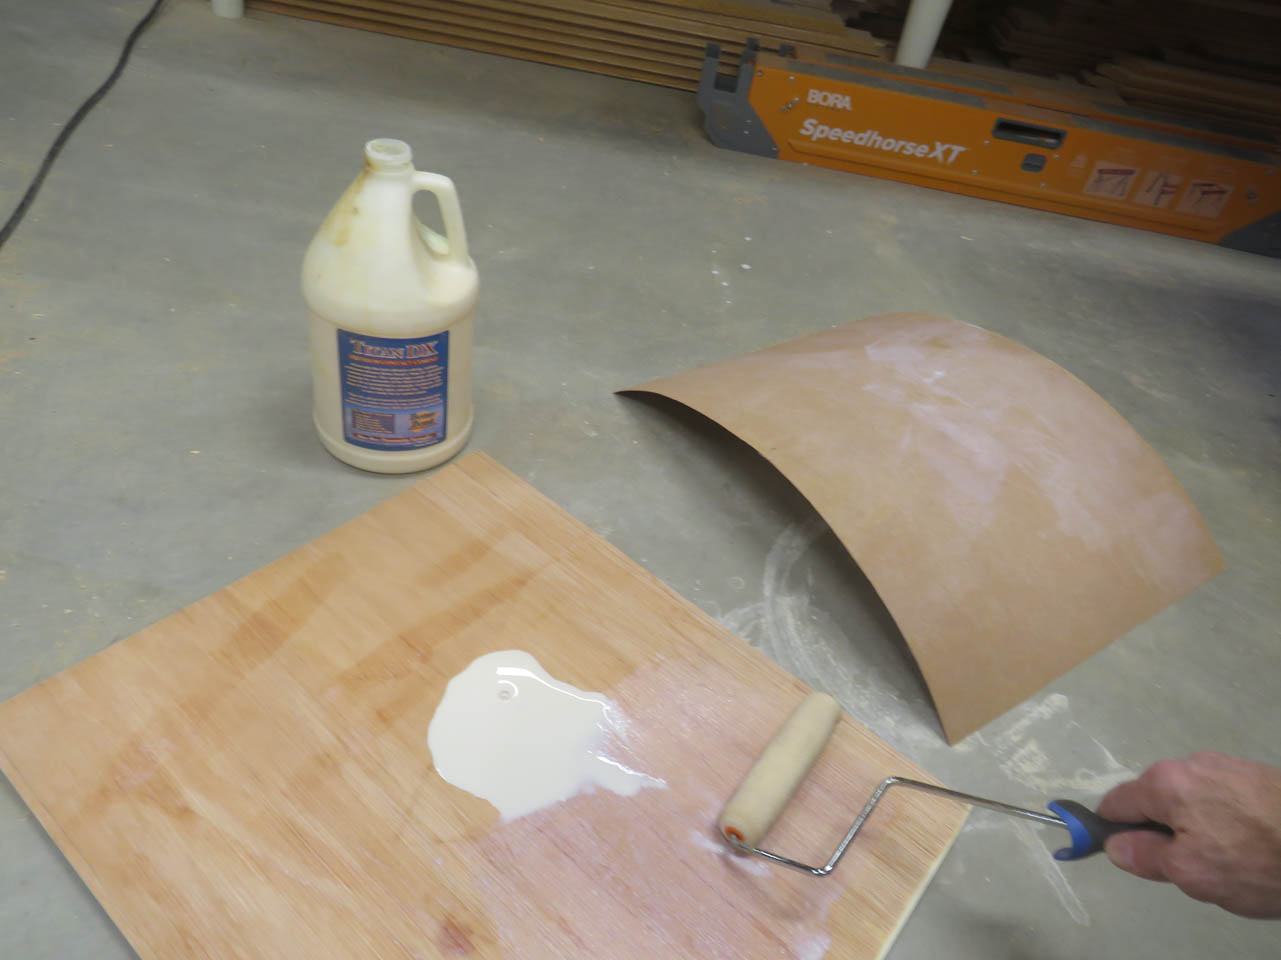
This is paper-backed veneer and it gets applied with contact adhesive.
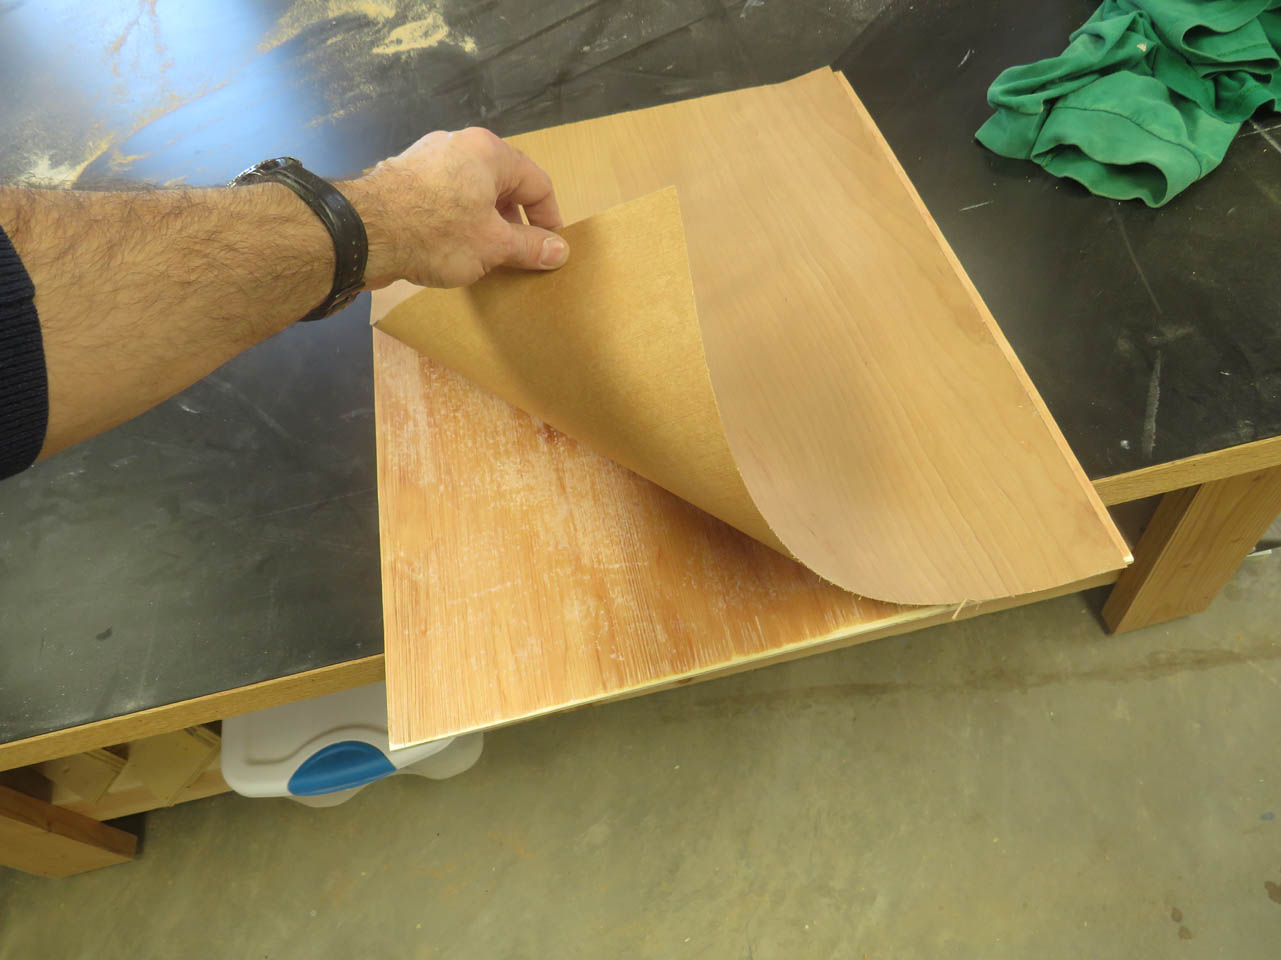
When the glue dries, I can apply it to the panel and firmly scrape down the veneer to remove any bubbles while setting the glue with pressure.
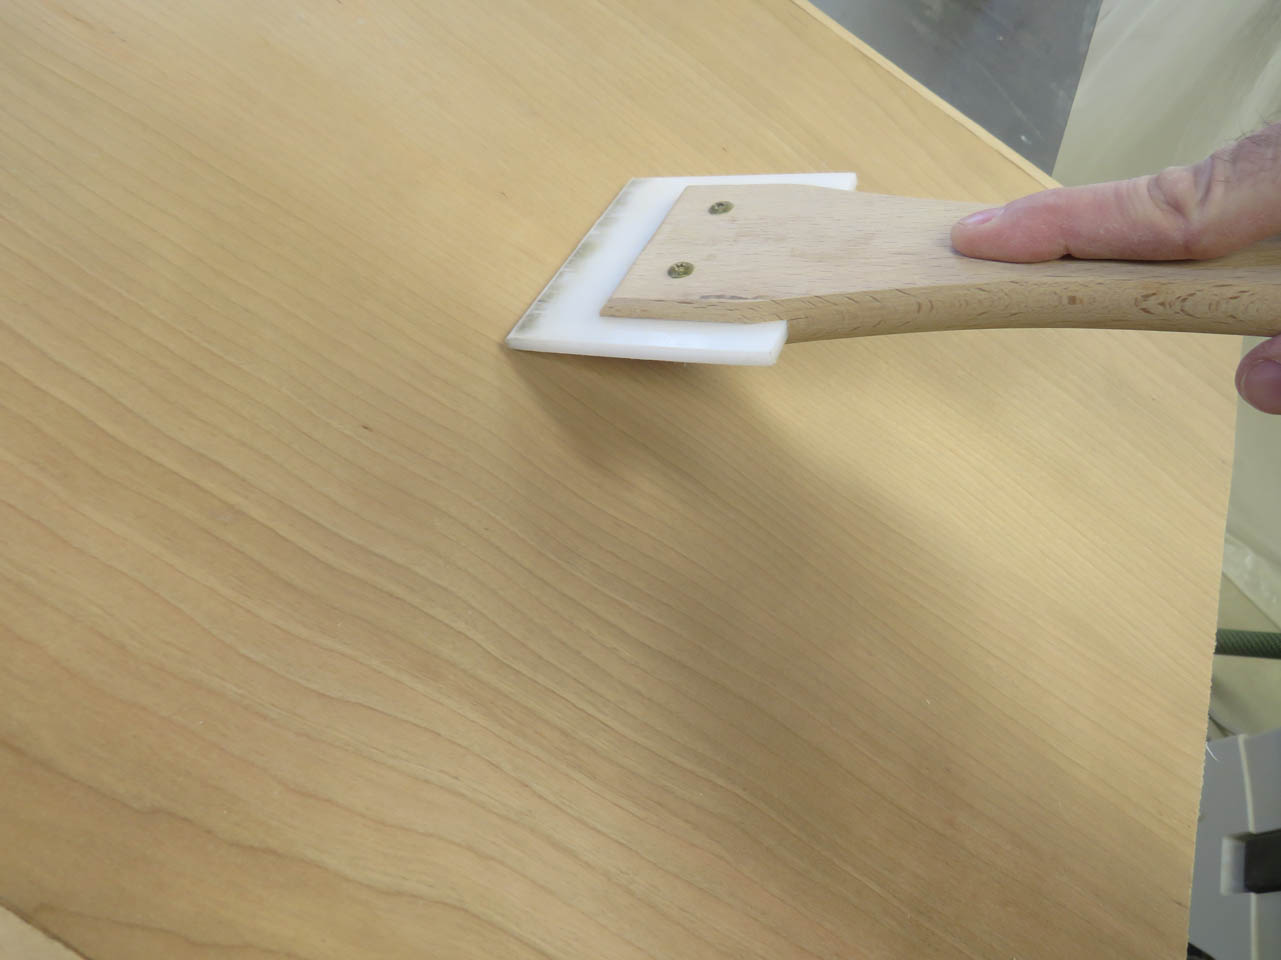
Then I can trim away the excess and sand it down to 220 like the rest.

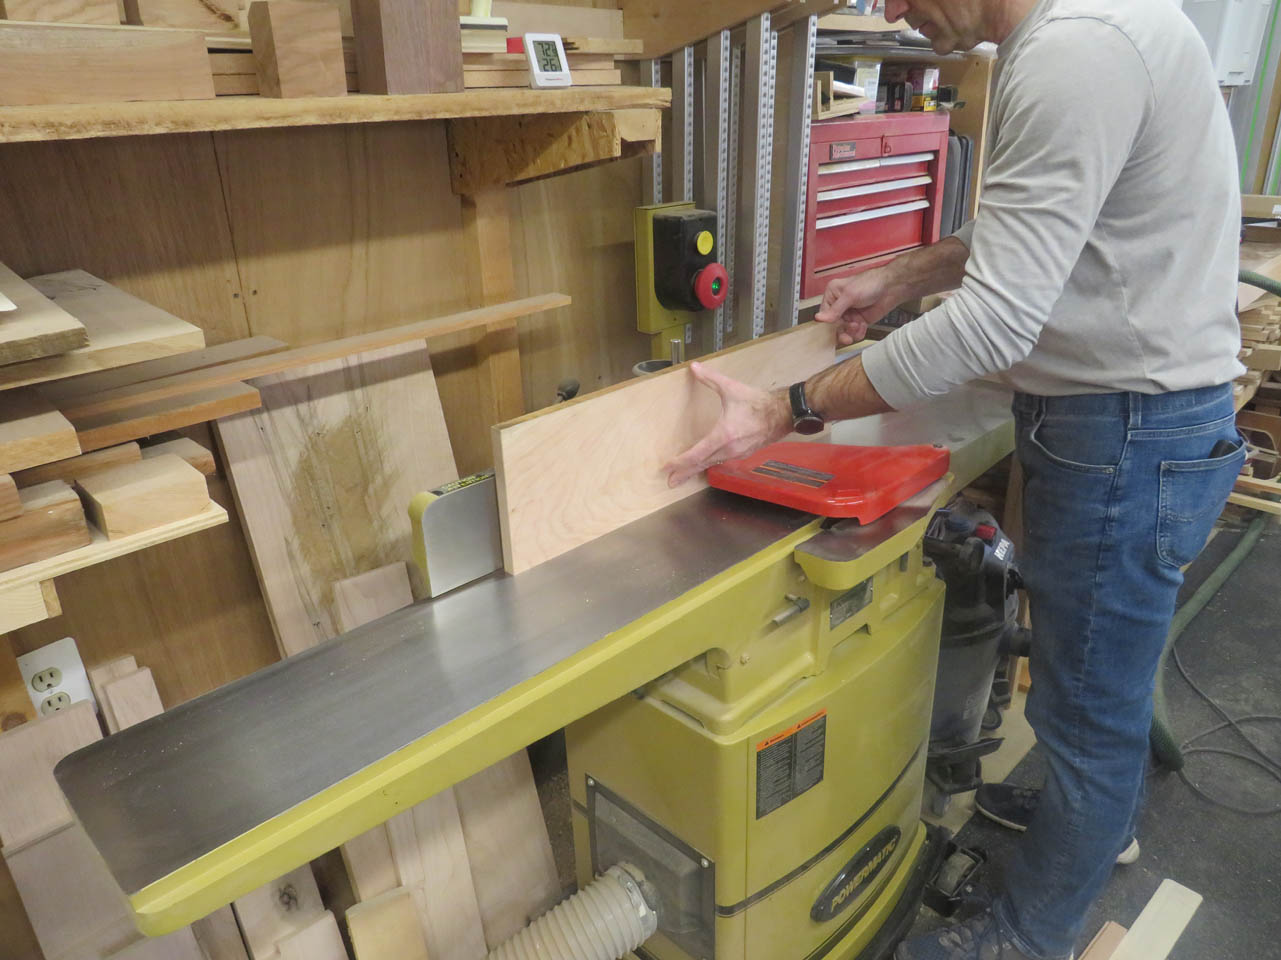
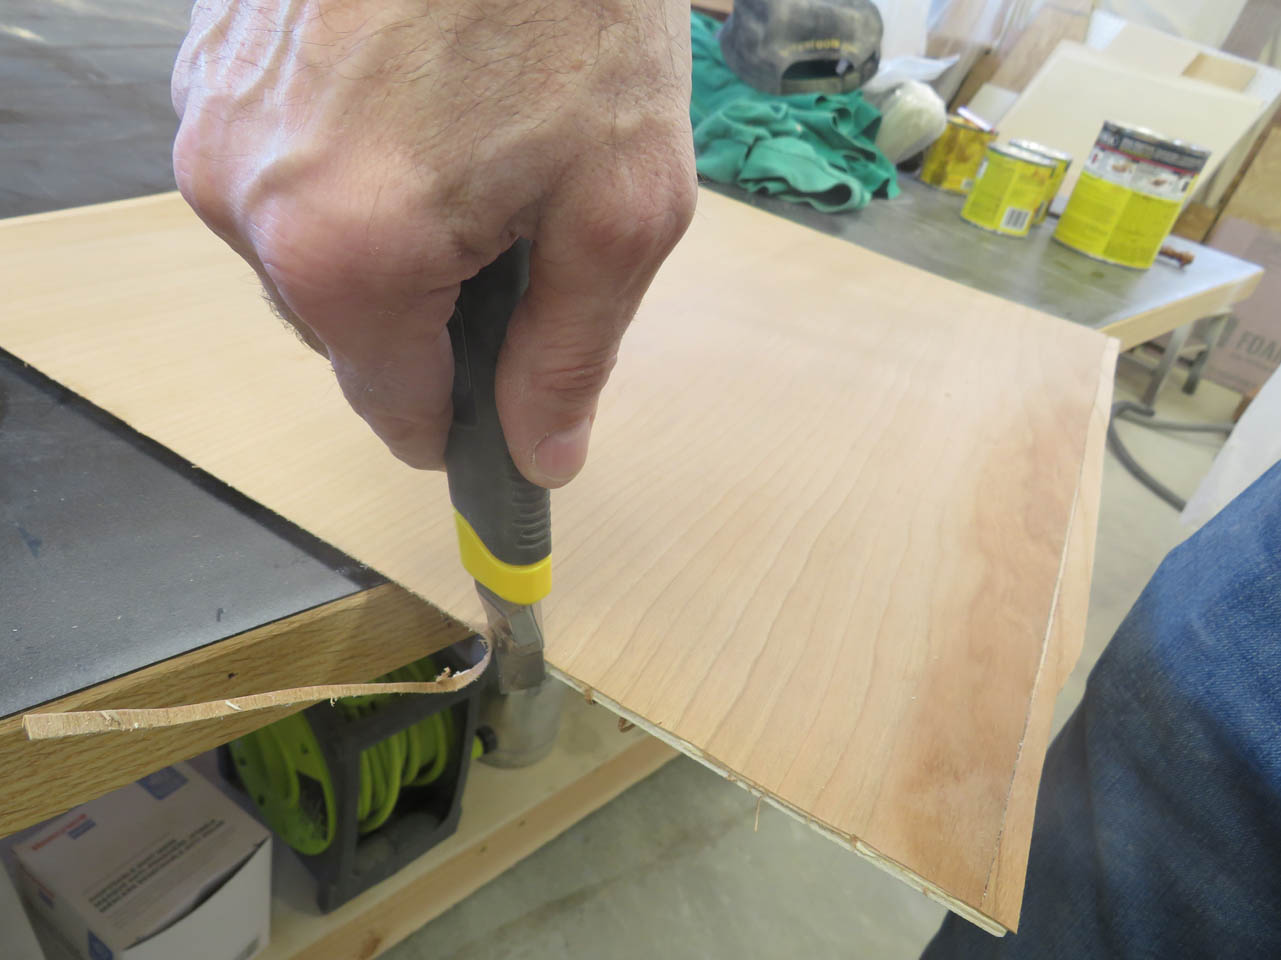
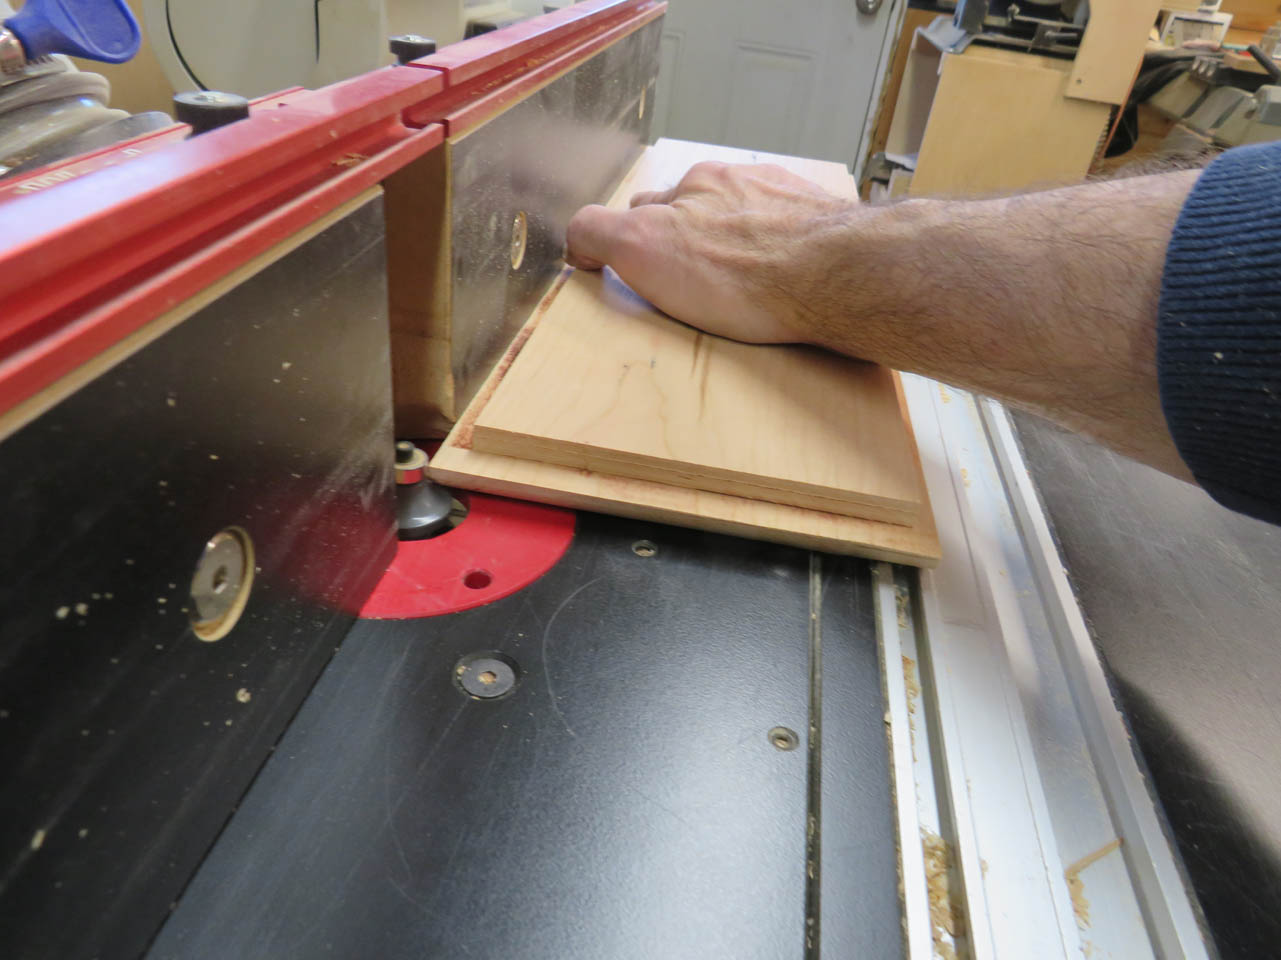
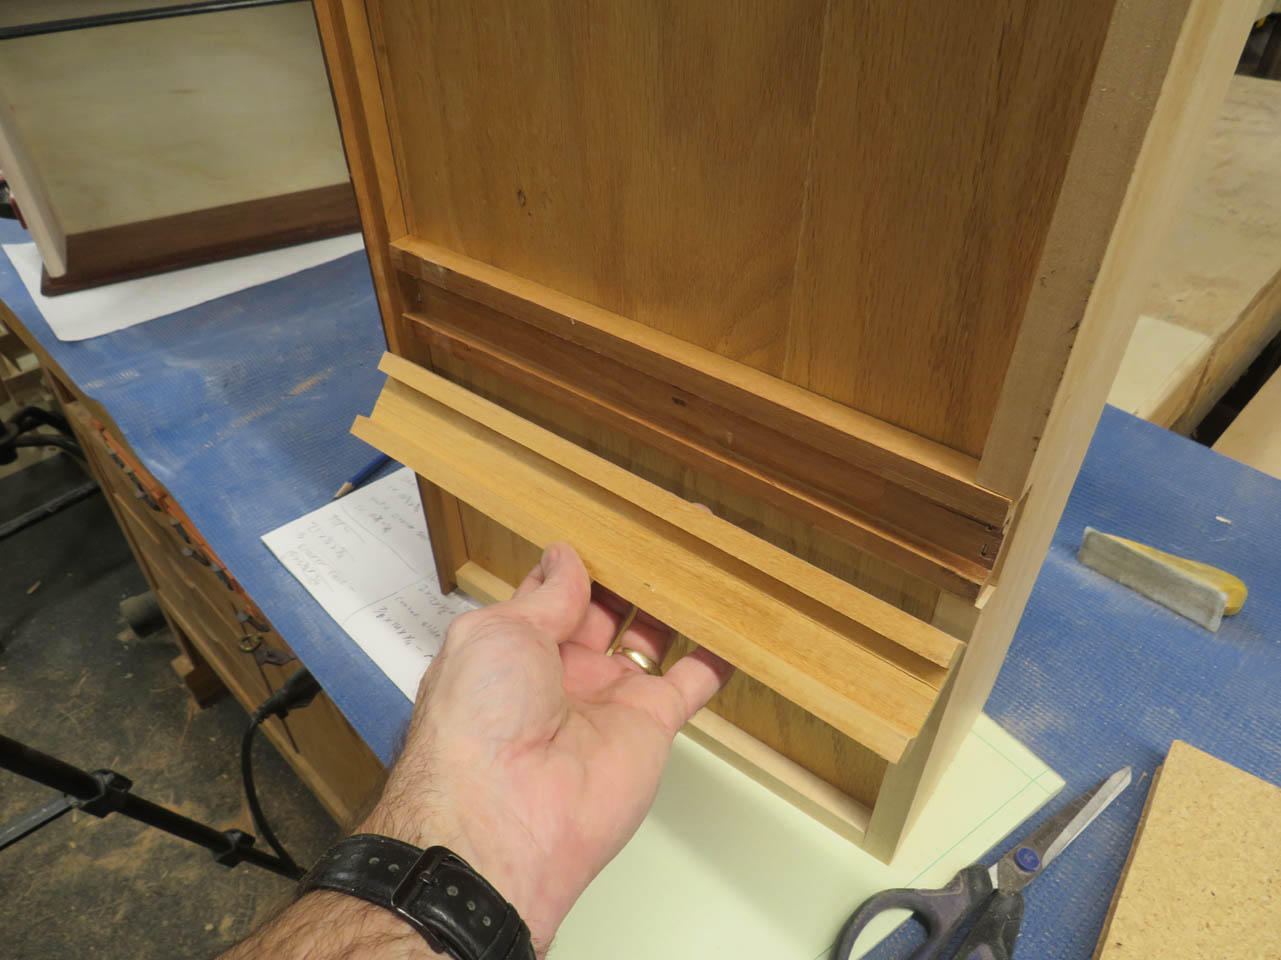
I use the table saw to cut the rabbet in the back of the side panels. This rabbet will receive the panel.
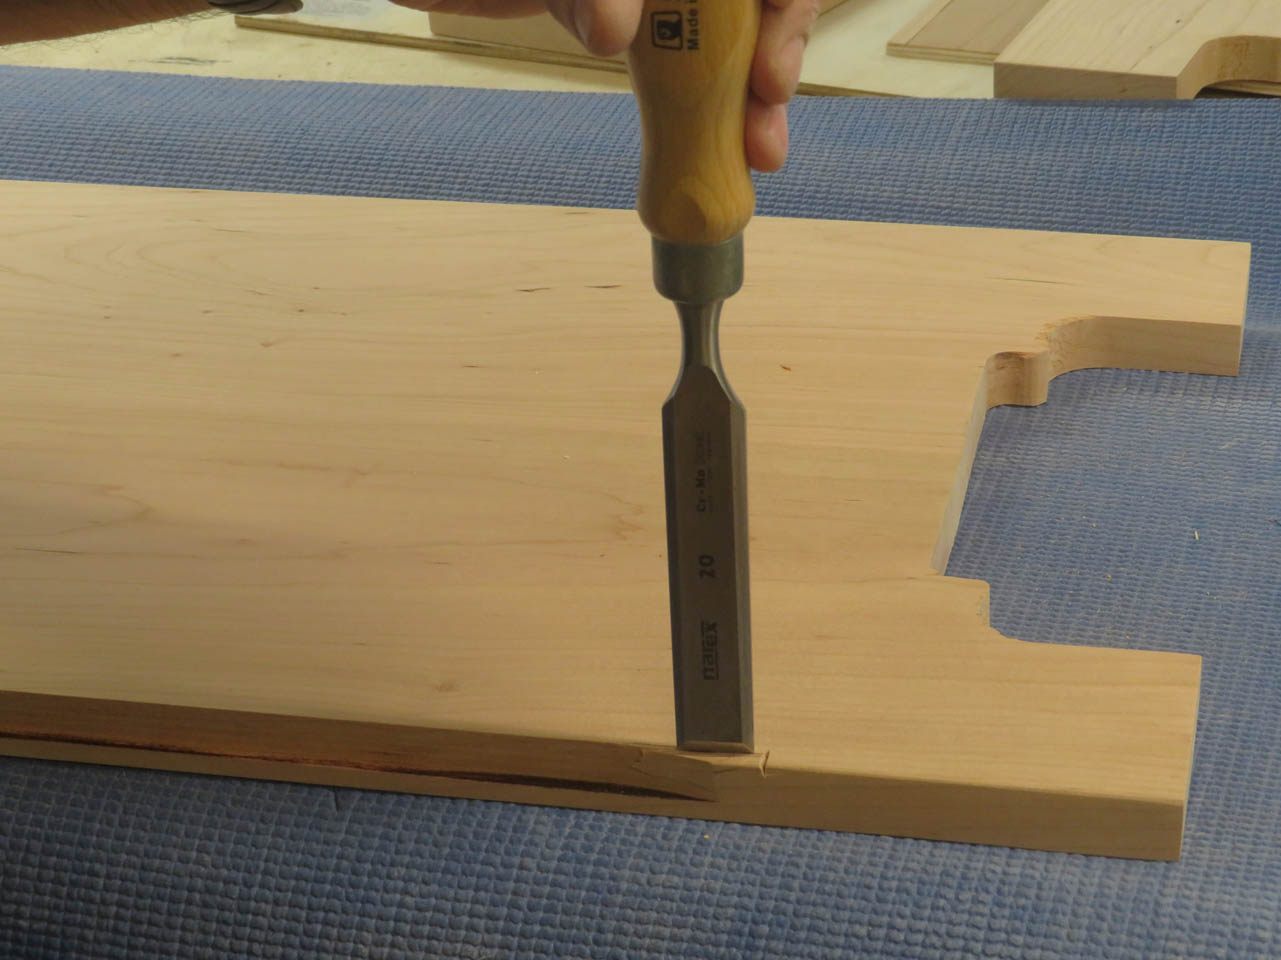
Since the table saw blade is round, I need to square off the end of the rabbet with a chisel.
When complete, the back panel sits nicely in the slot.

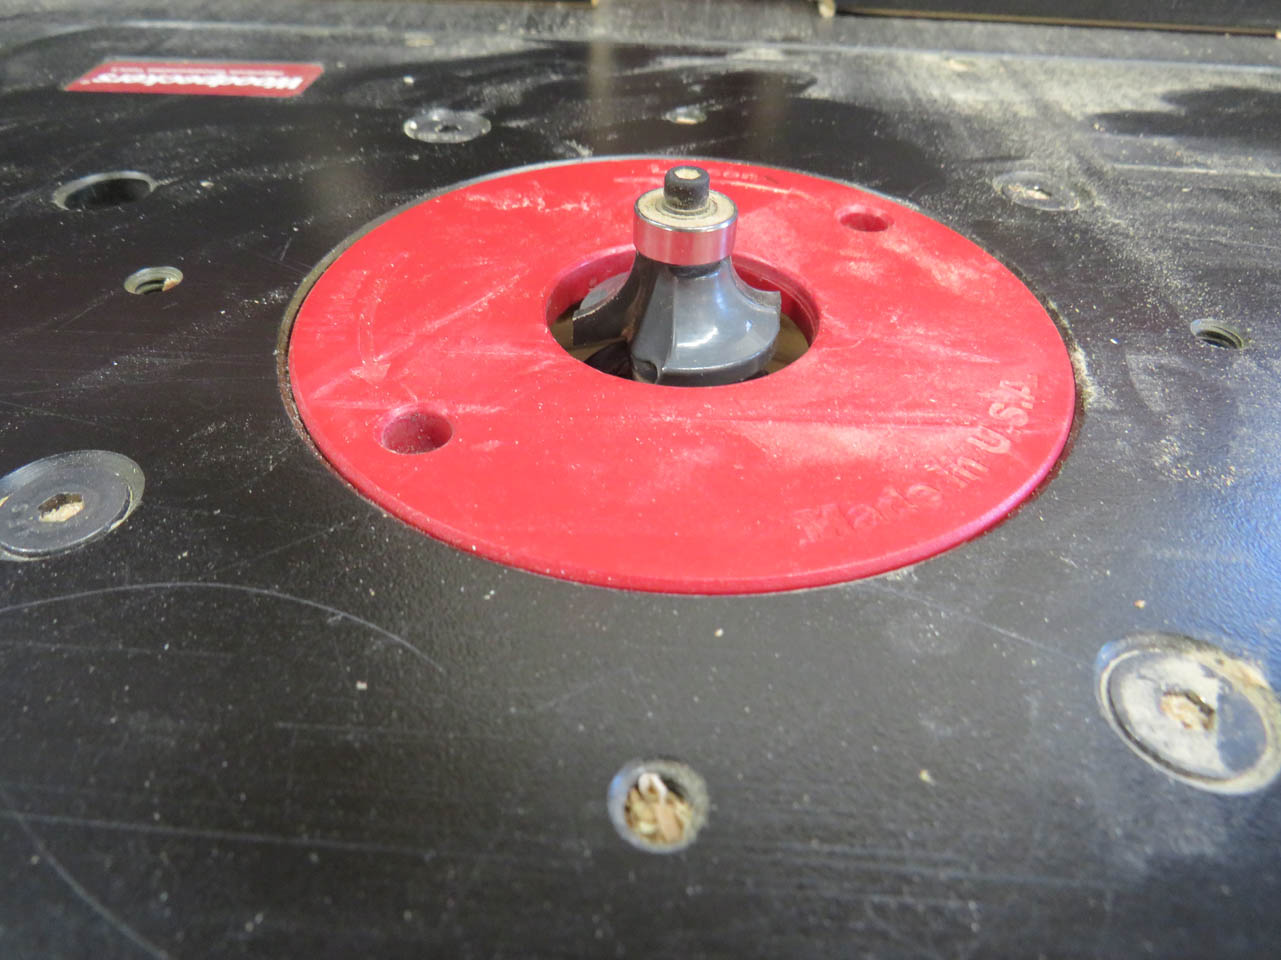
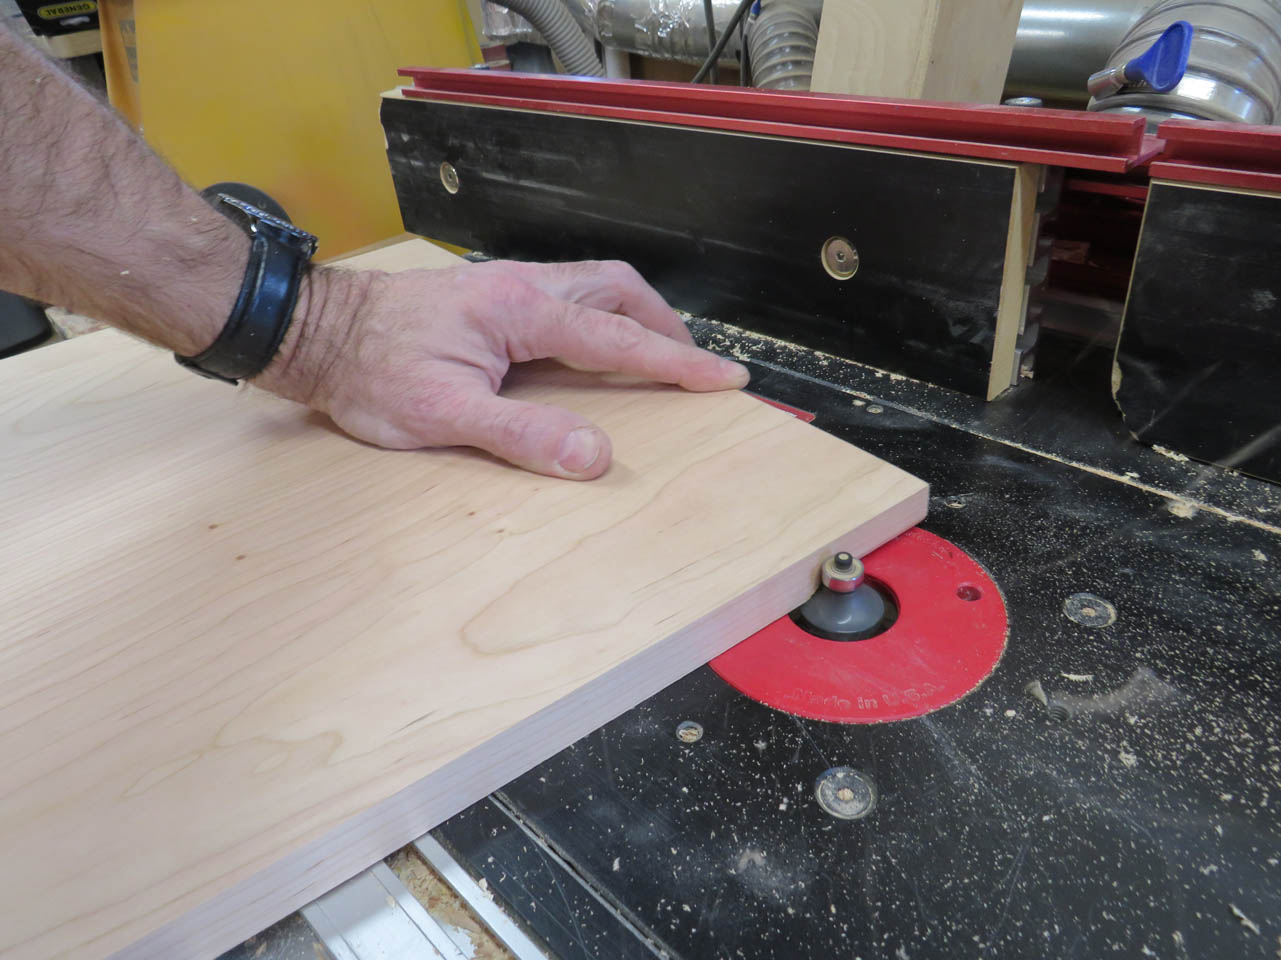
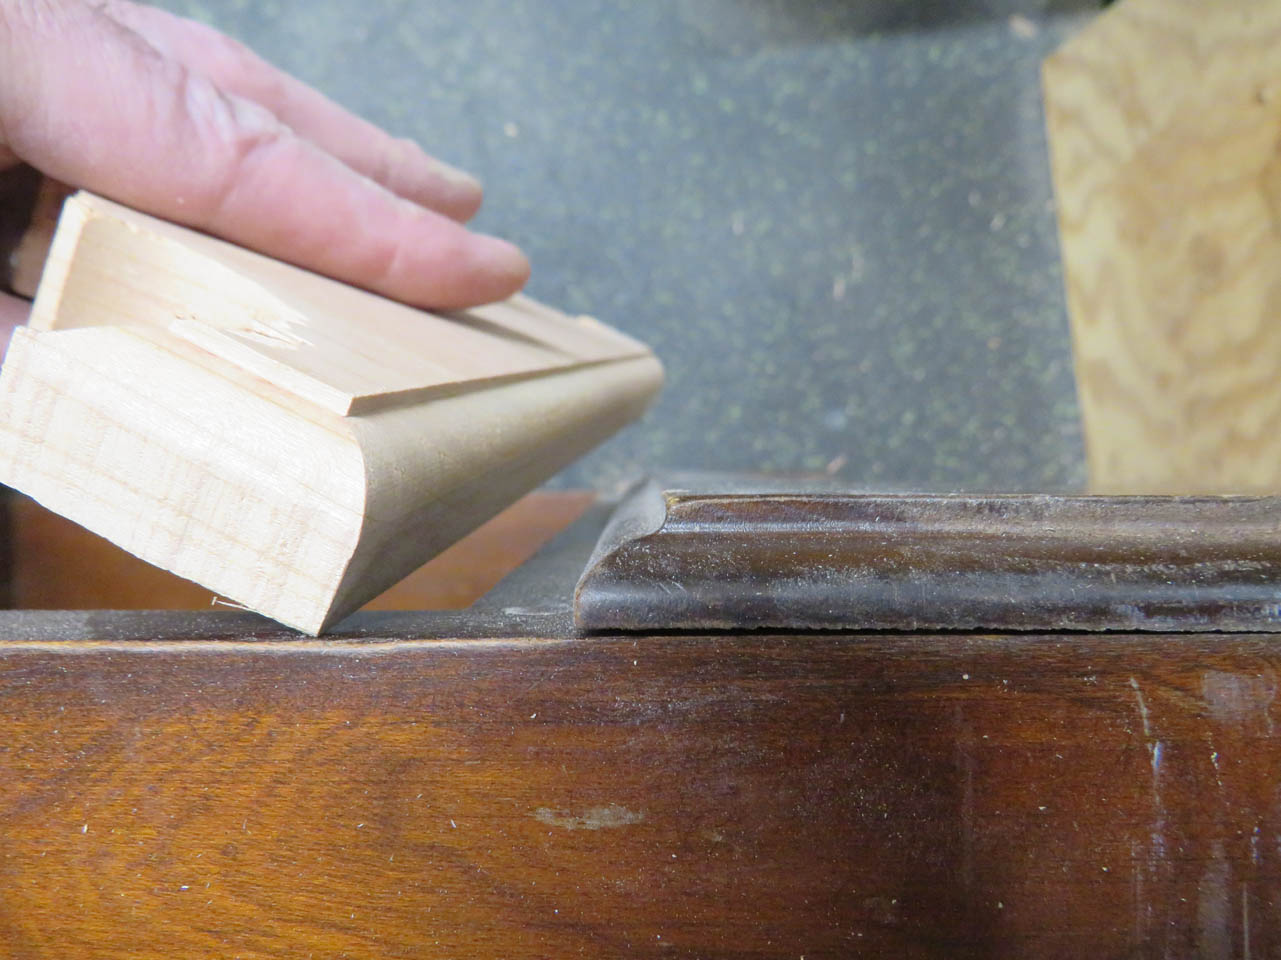
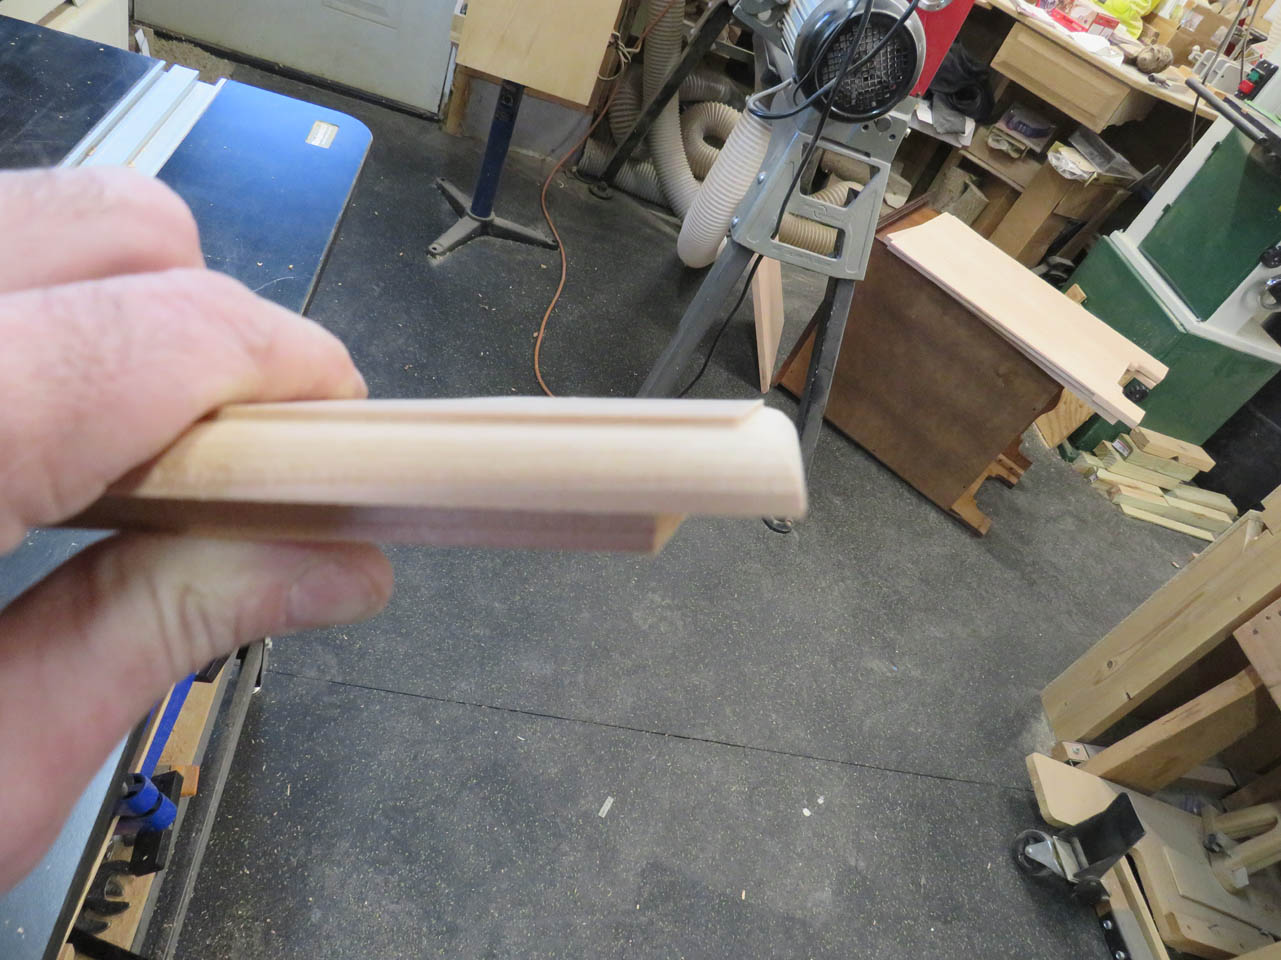
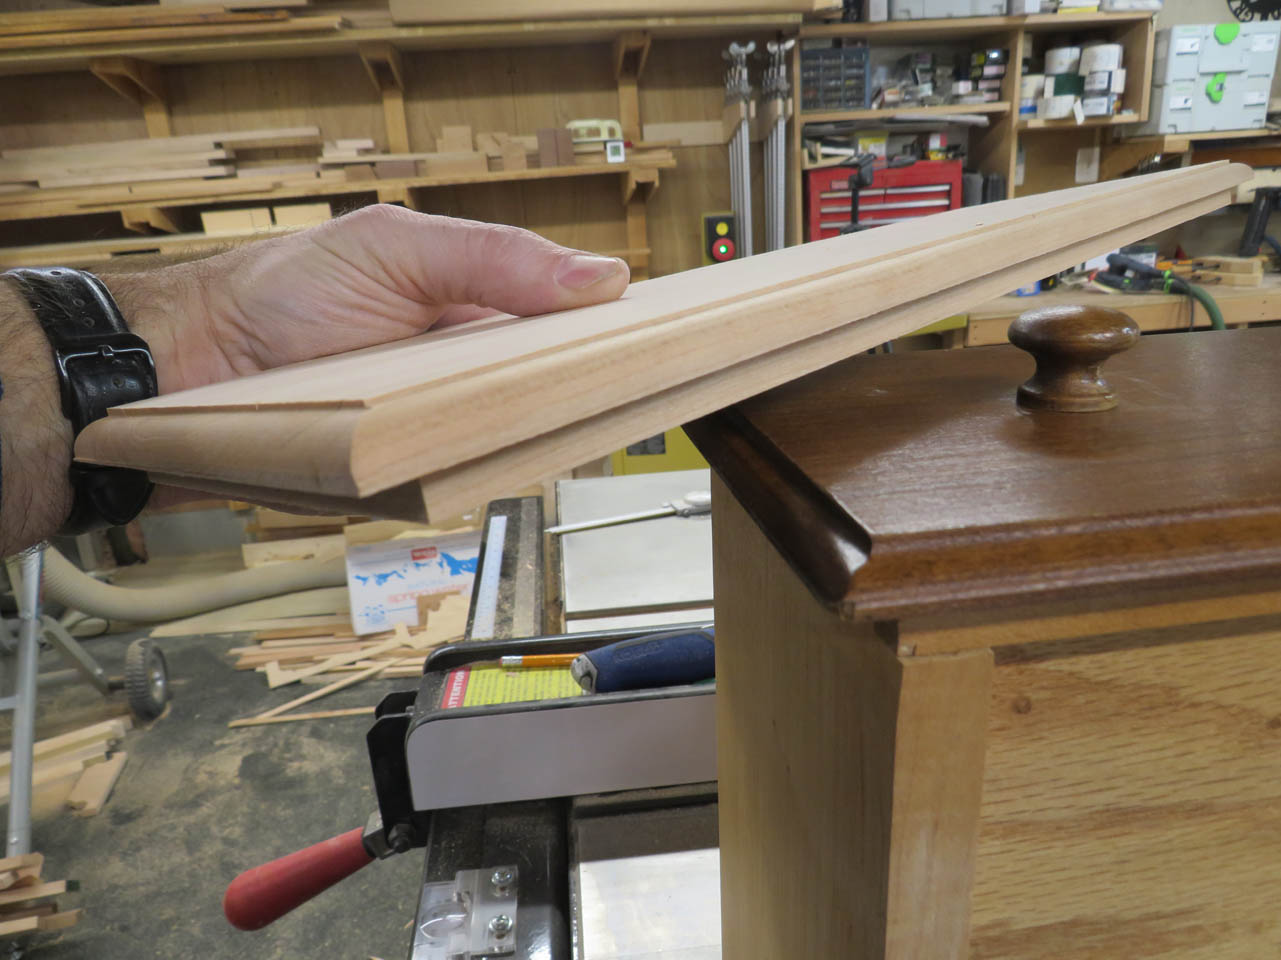
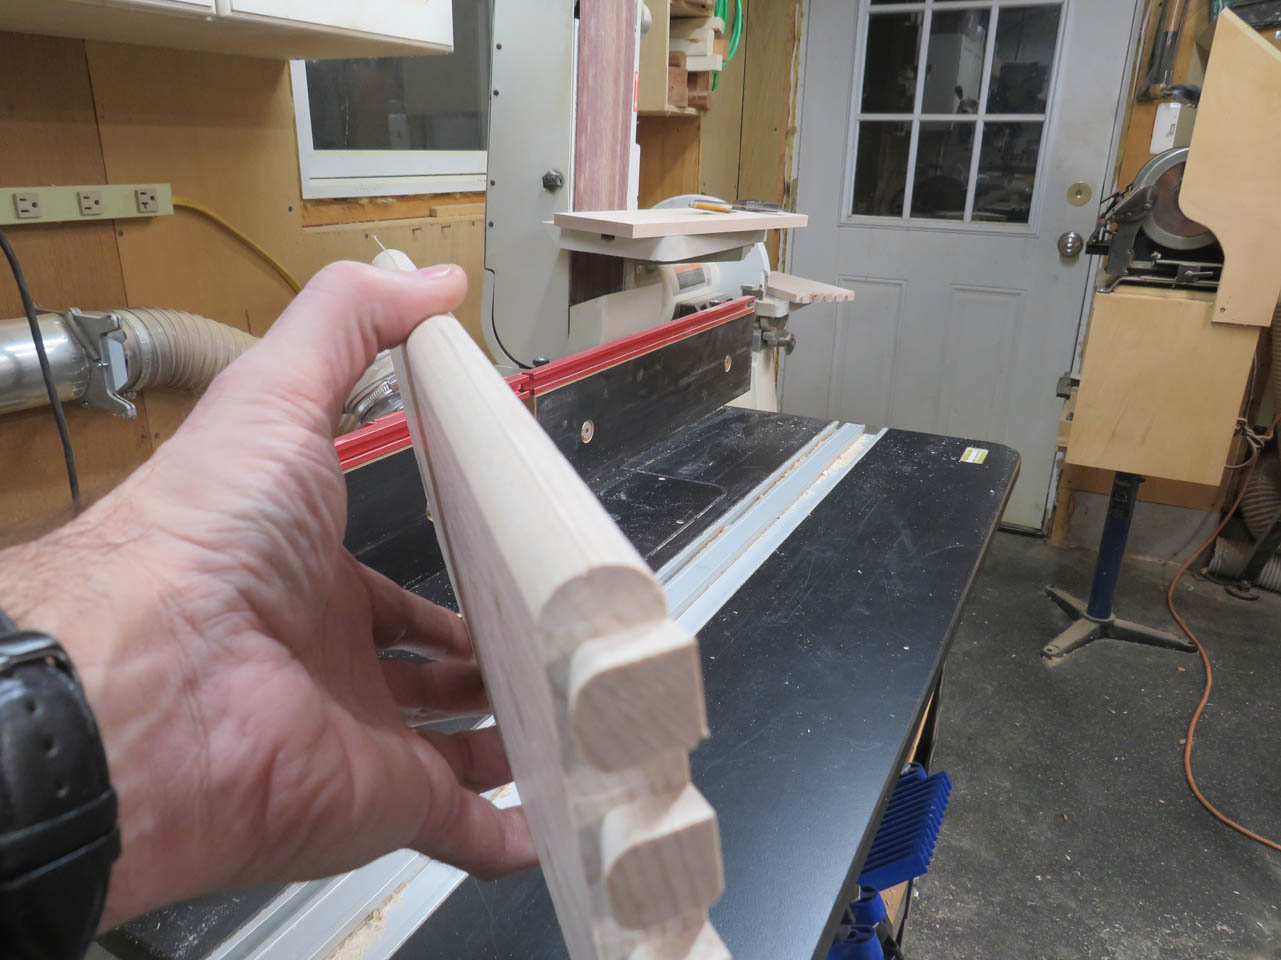
Next, I placed a 5/16″ round-over bit in the router table to round-over the decorative edges along the bottom.
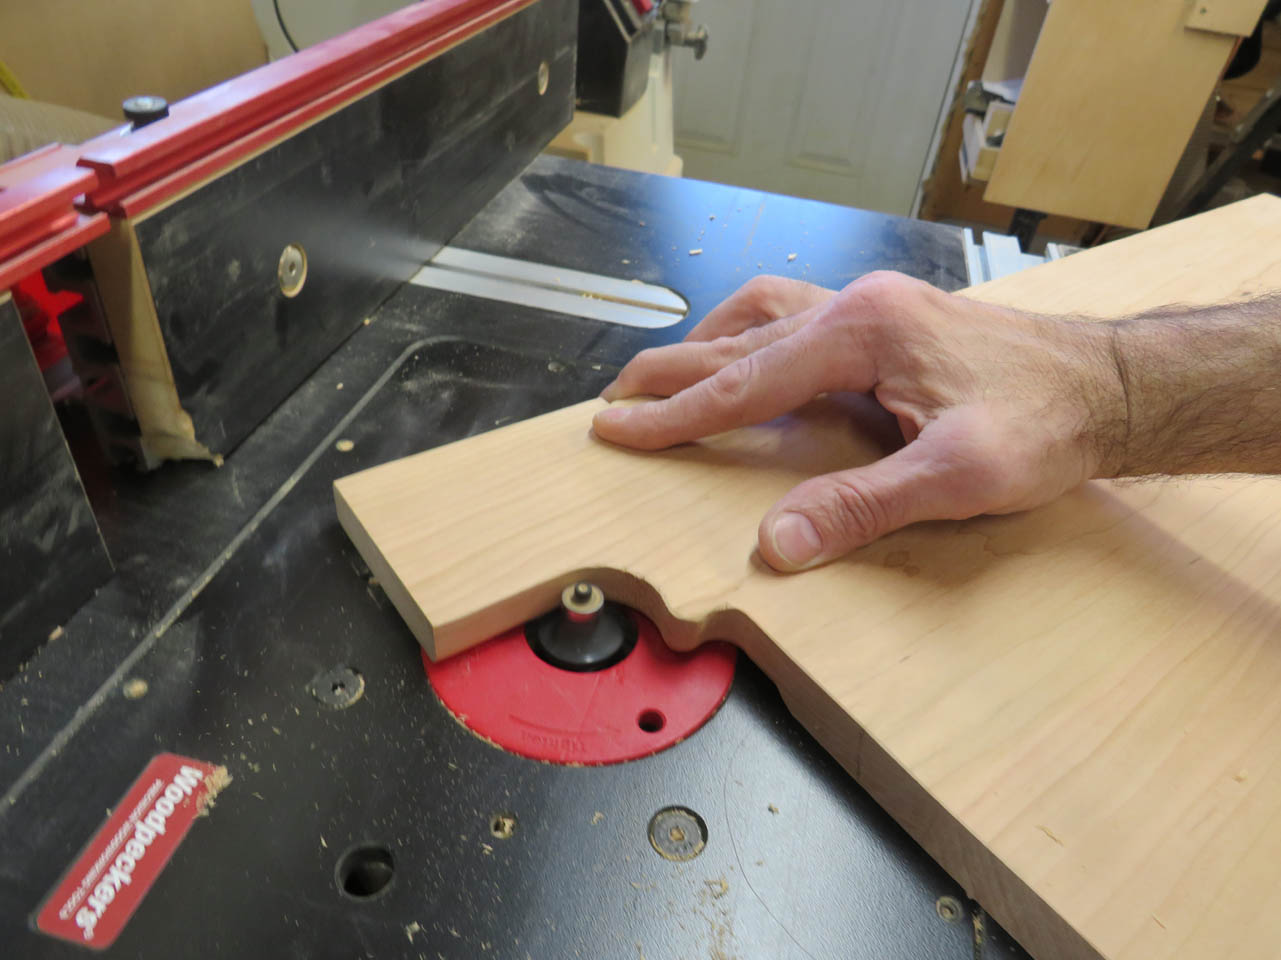
The sides and front were trimmed this way.
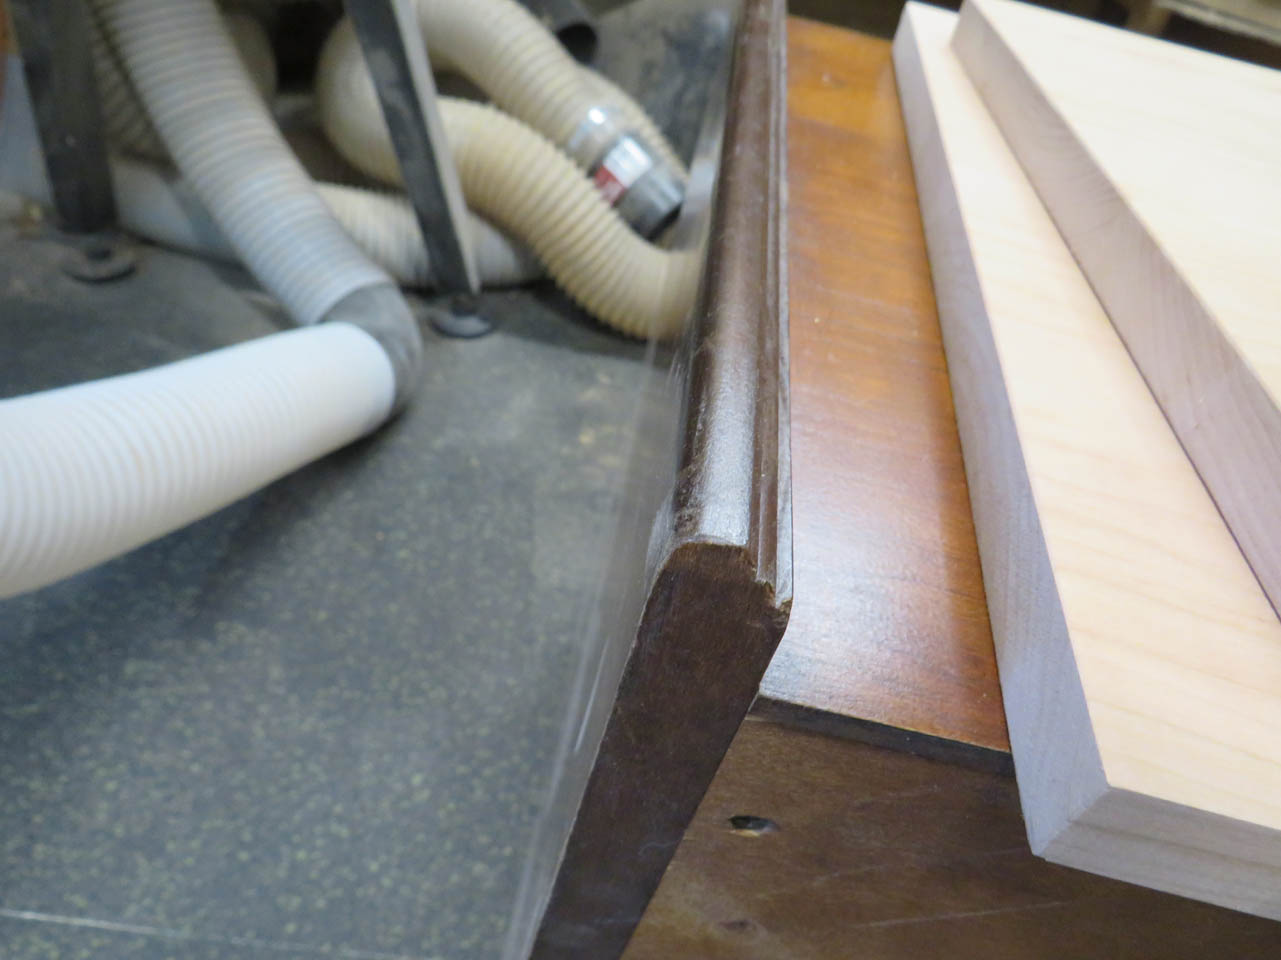
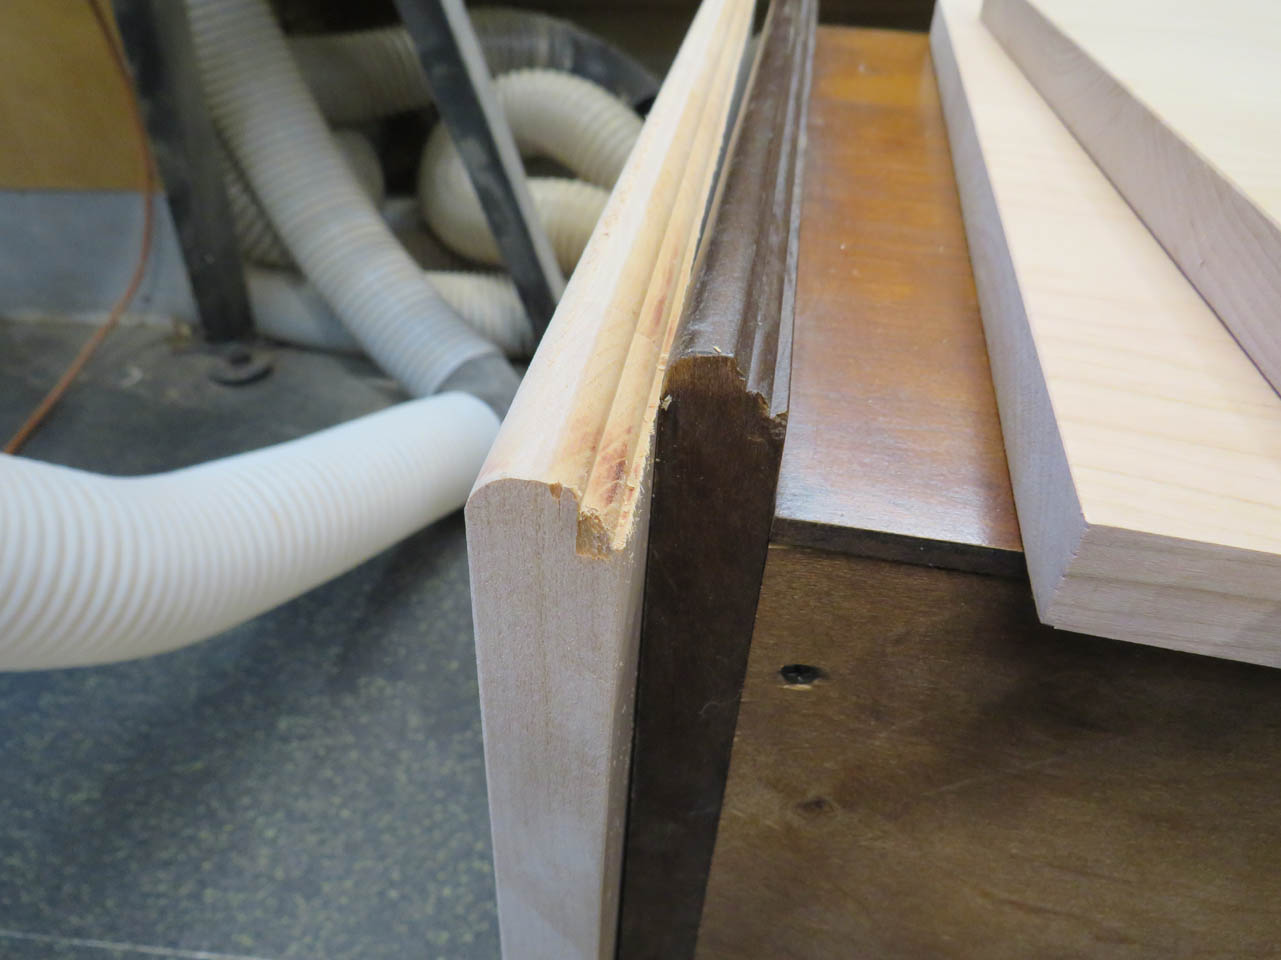
The top has the same round-over on the front and sides.
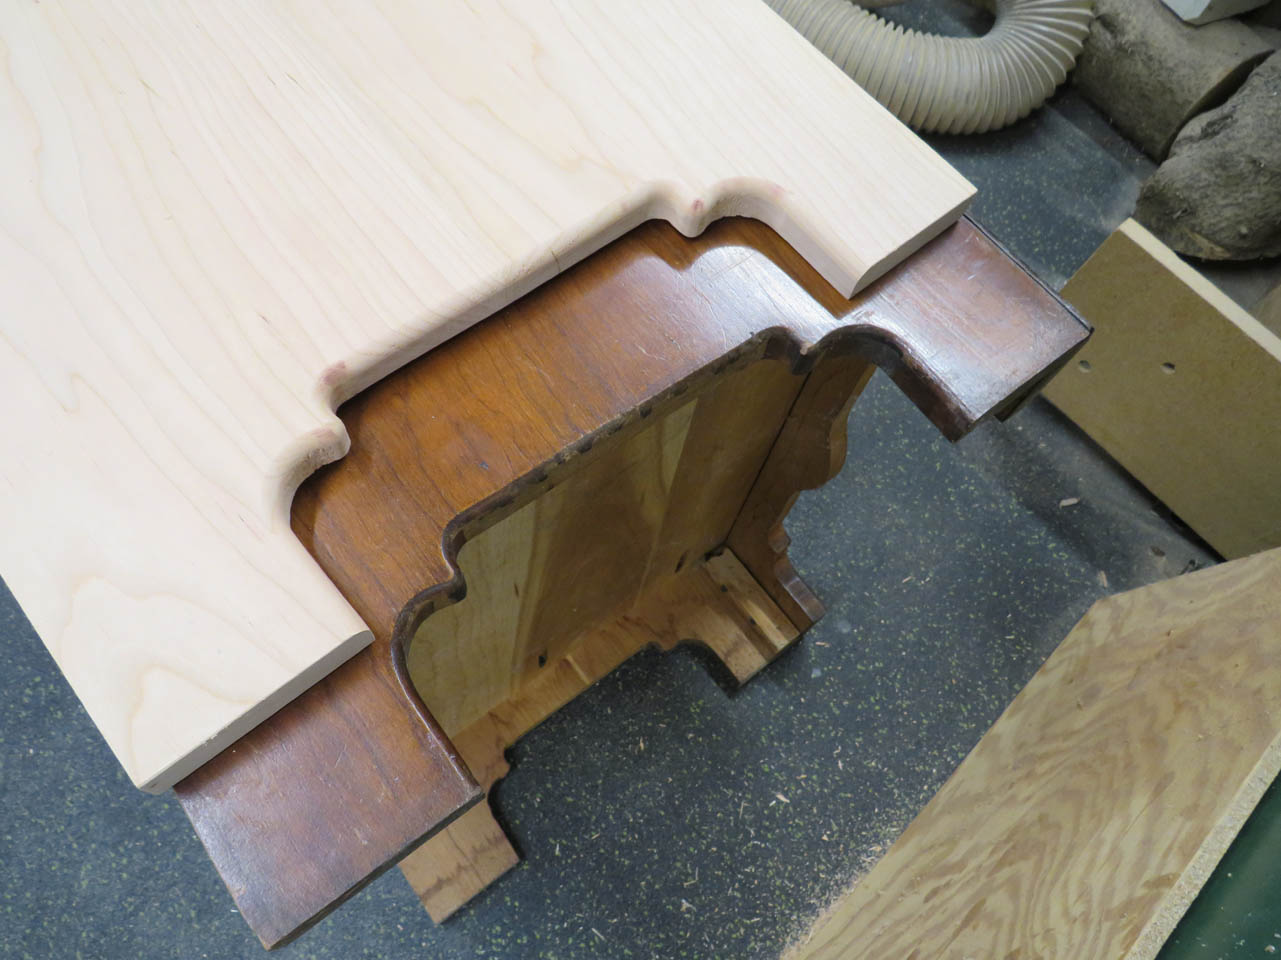
But a completely different trim along the bottom side. I happen to have a bit that I bought years ago, that is very close.
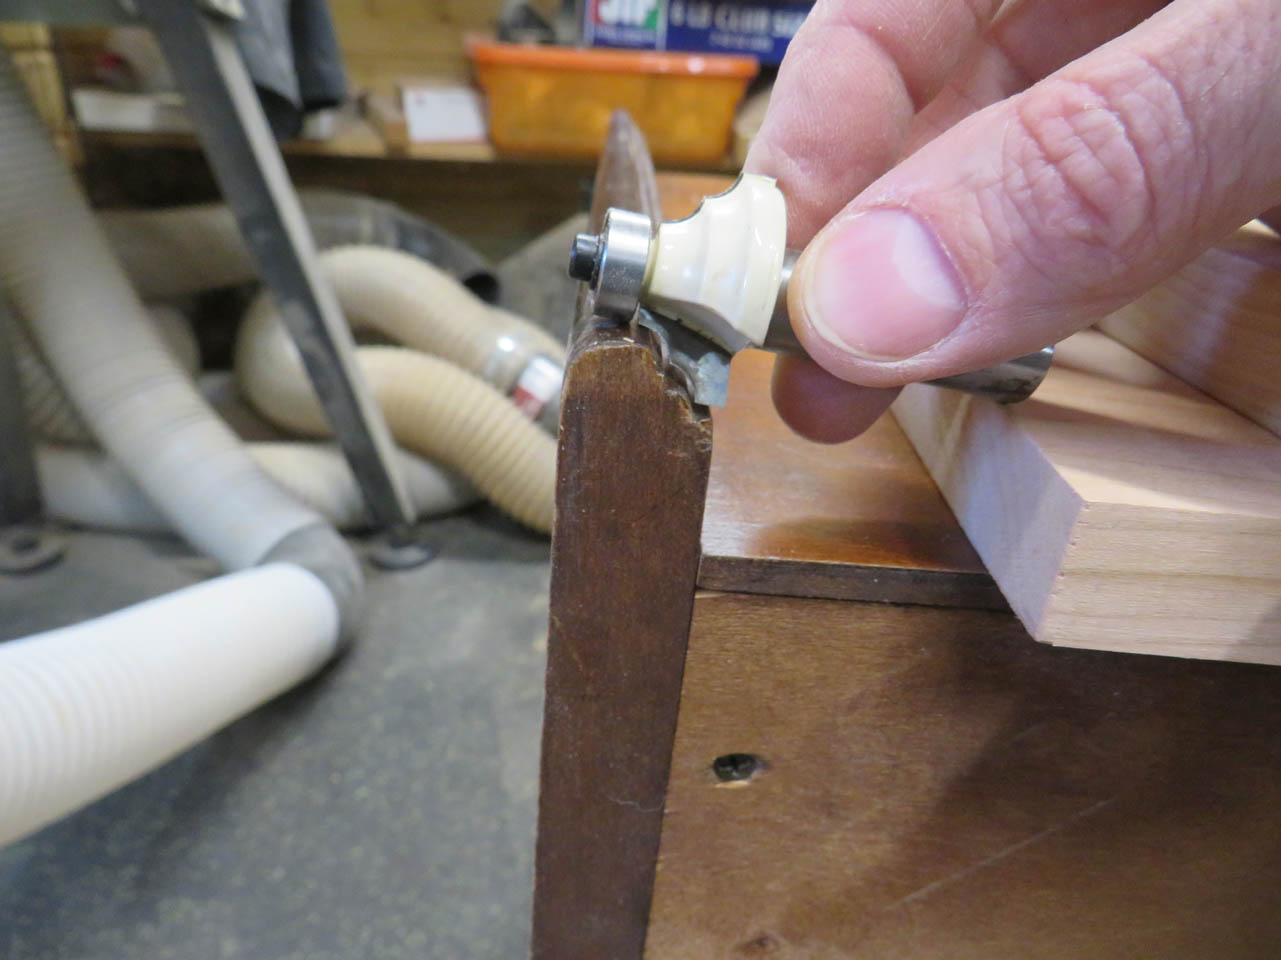

I replaced the bit in the router table with this one and cut the bottom edges along the top panel. I think it matches pretty well.
The front skirt piece has a recessed round-over along the front and a deep rabbet along the back.
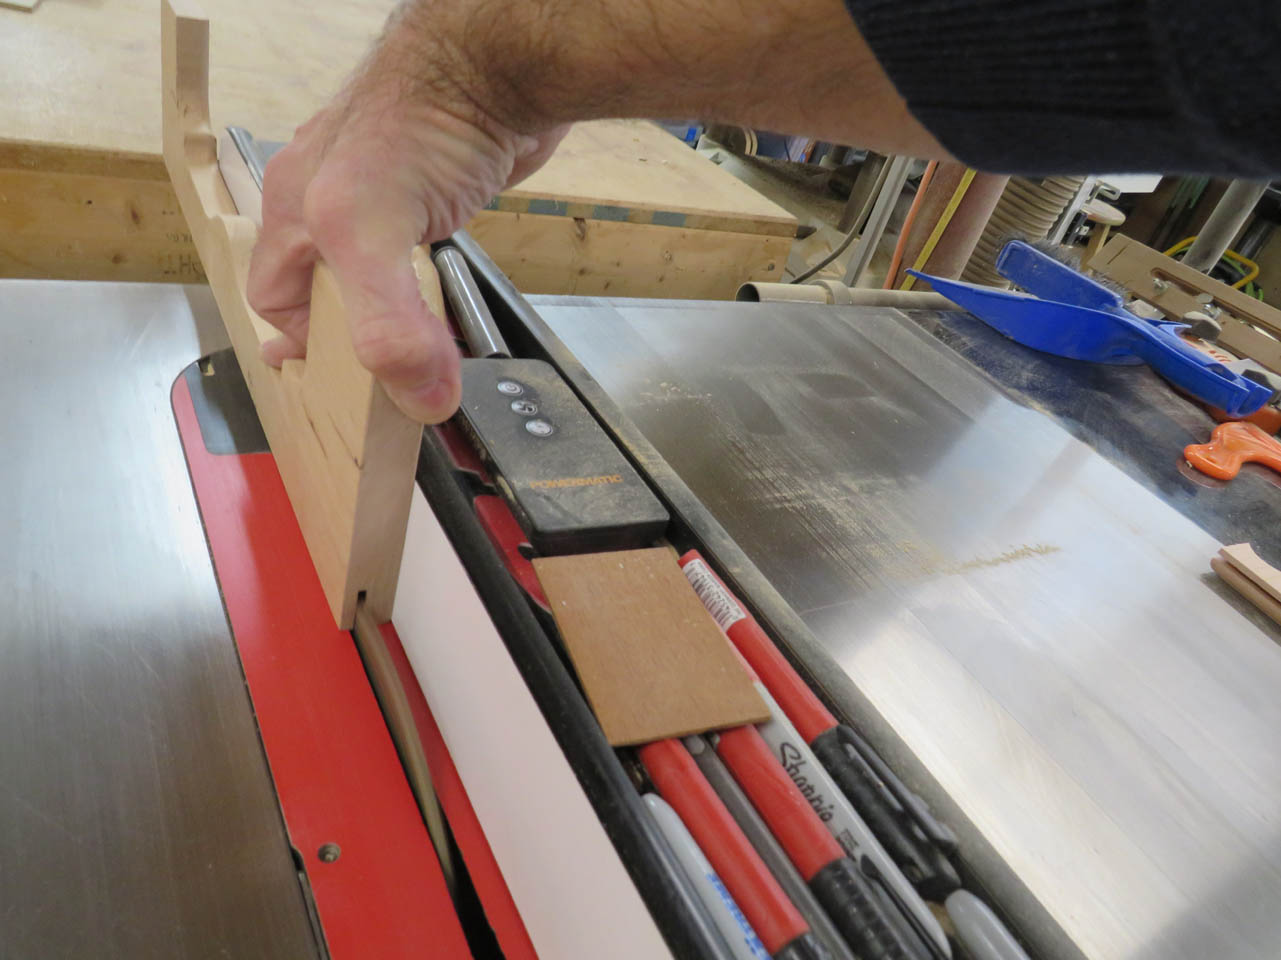
The rabbet was cut on the table saw. I made two passes to cut the 1/4″ deep rabbet.
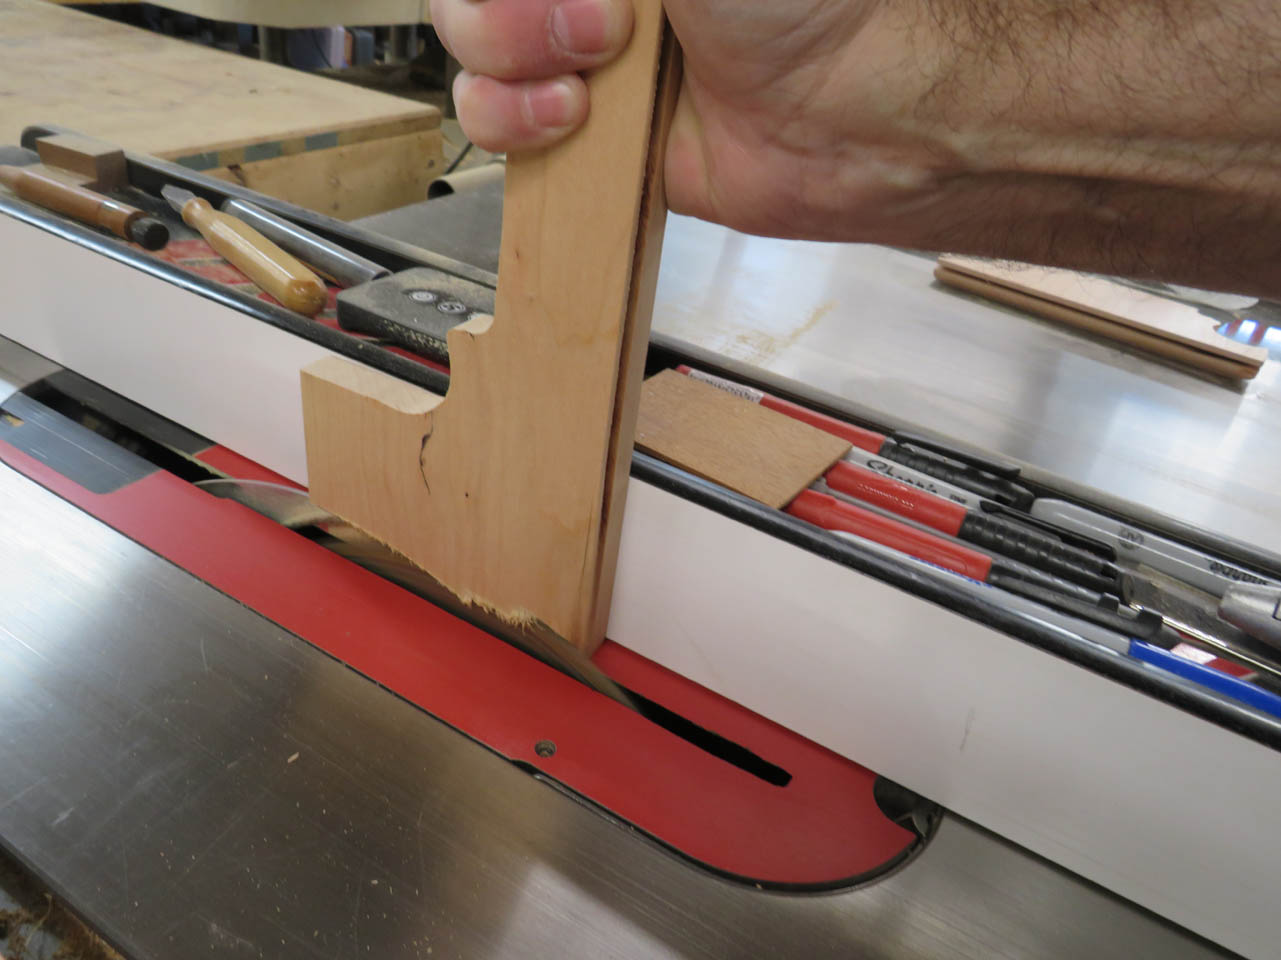
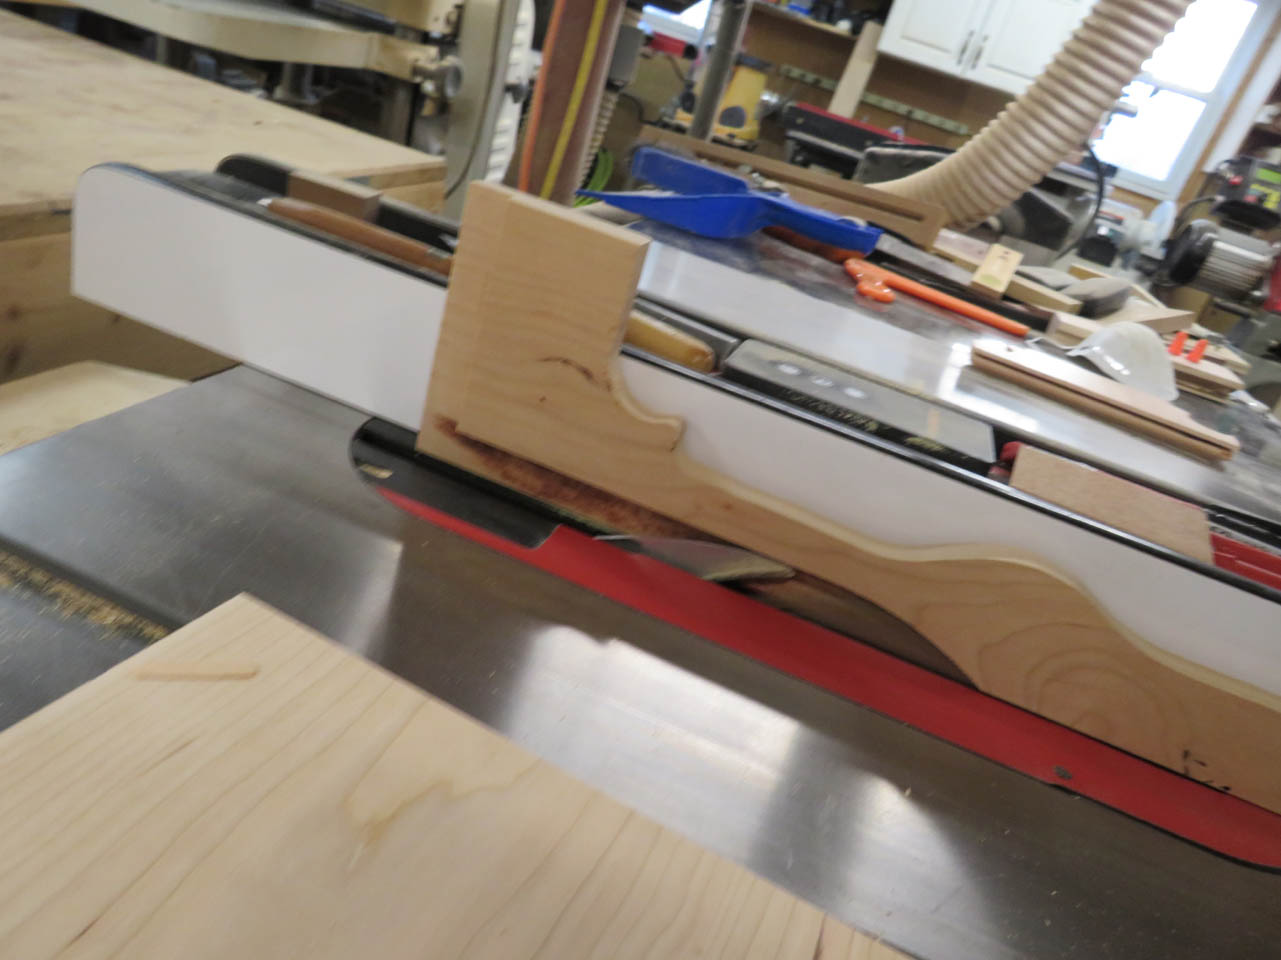
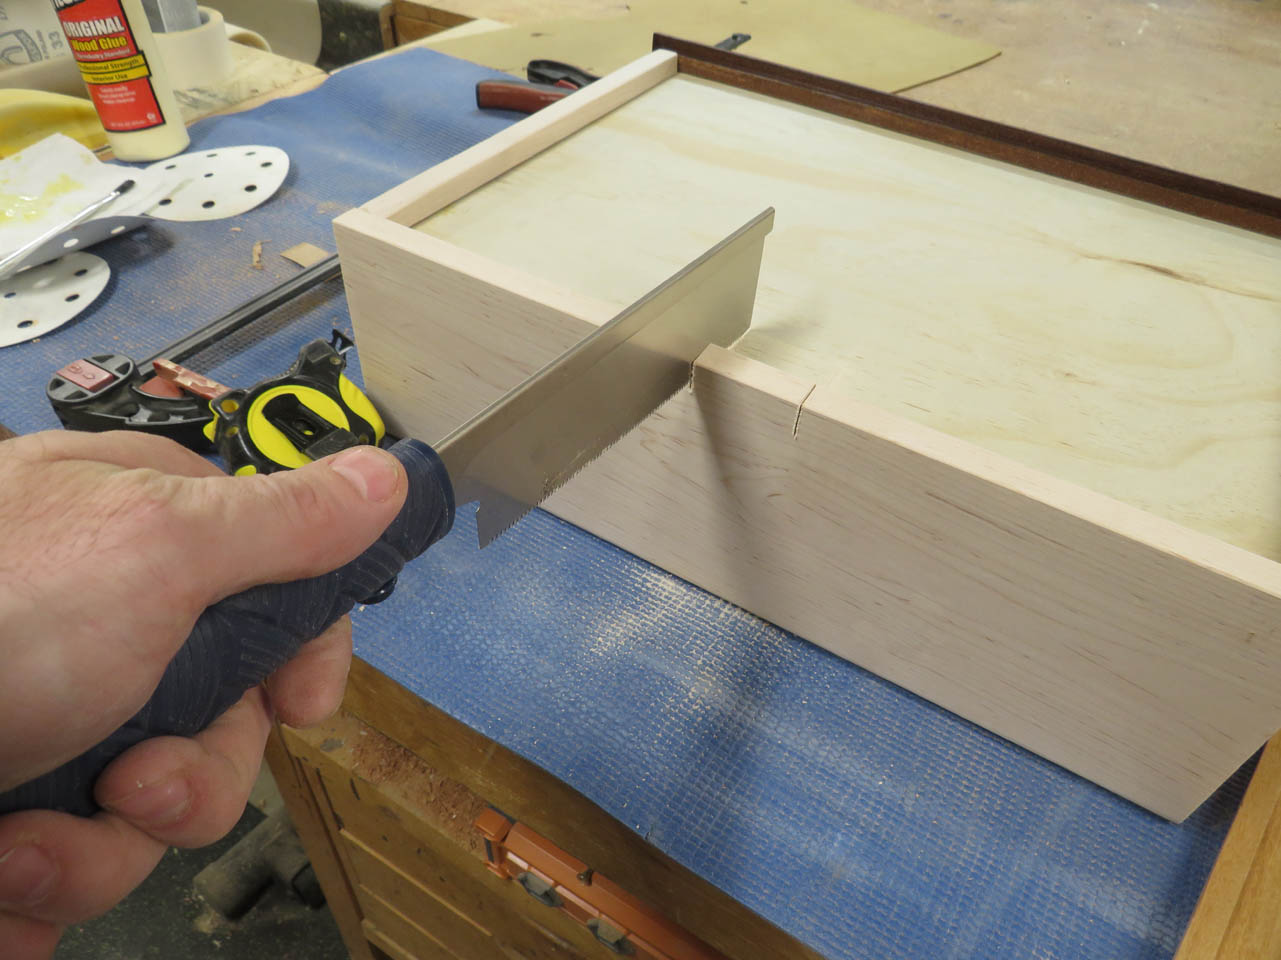
Now it matches the original. A similar rabbet needs to be cut all the way around the drawer face.
It also needs a recessed round-over on the opposite side.
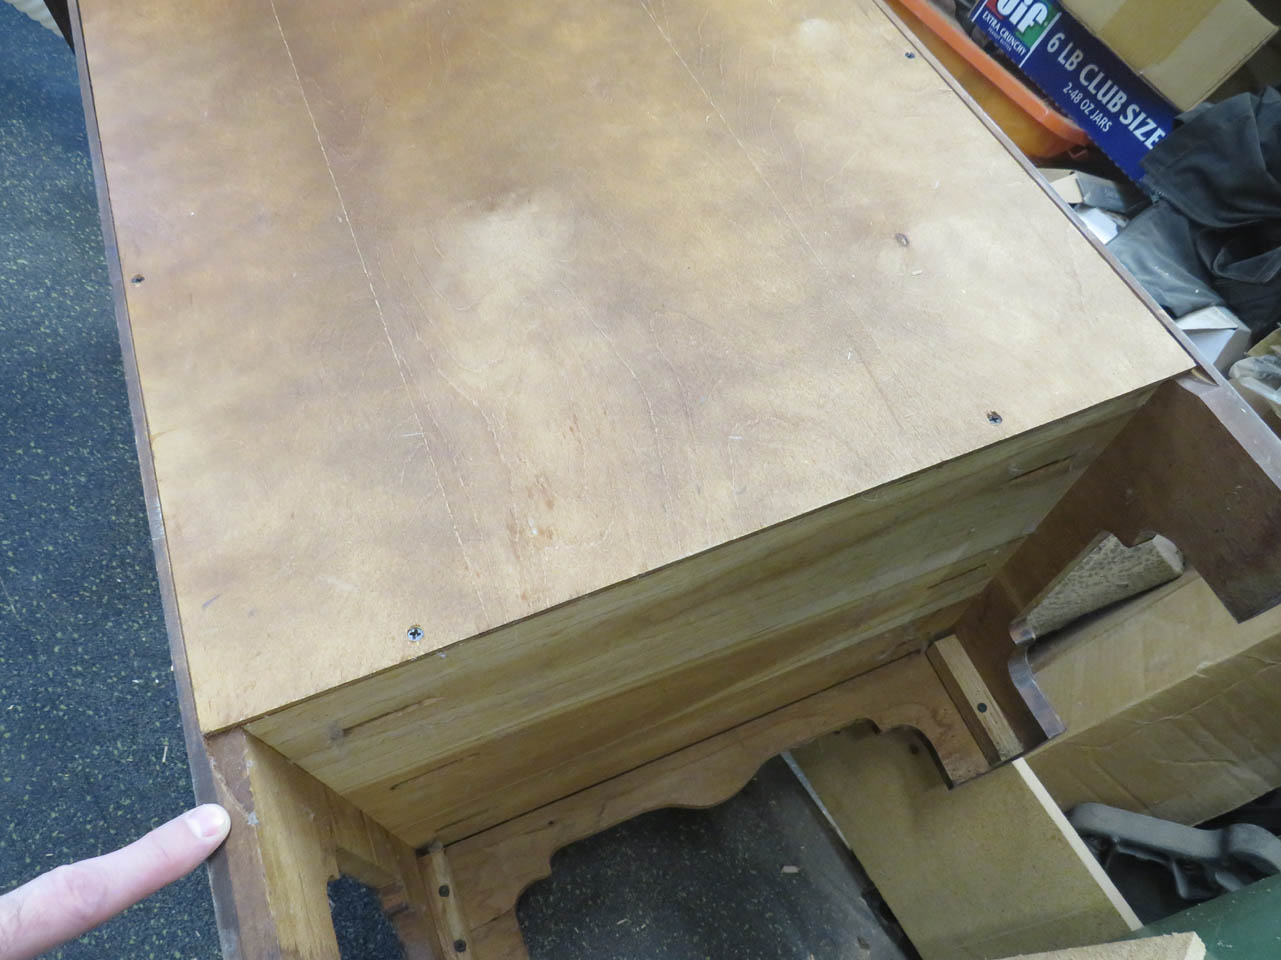
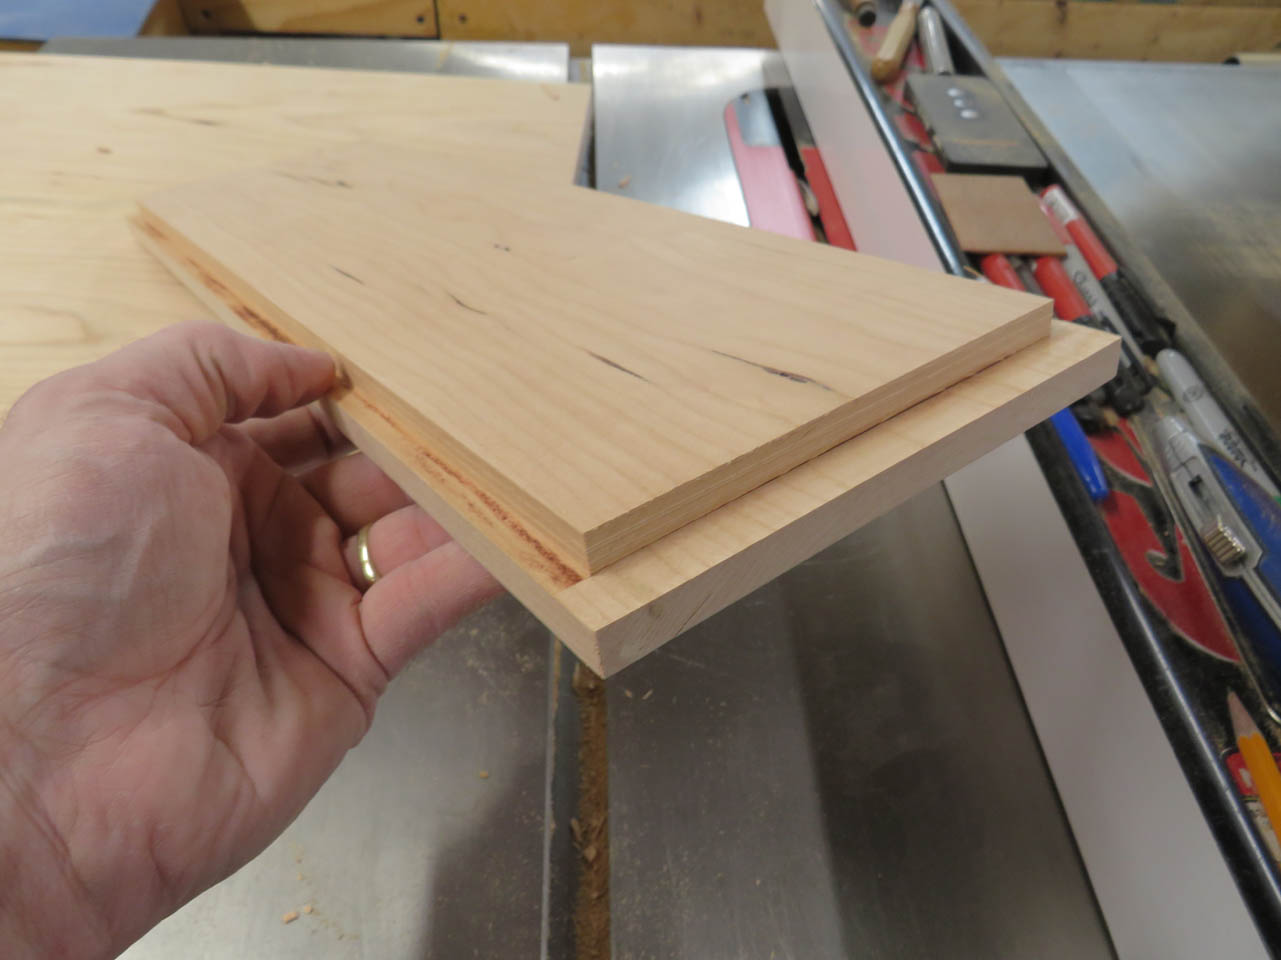
Now all of my cherry panels are cut to size and sanded.
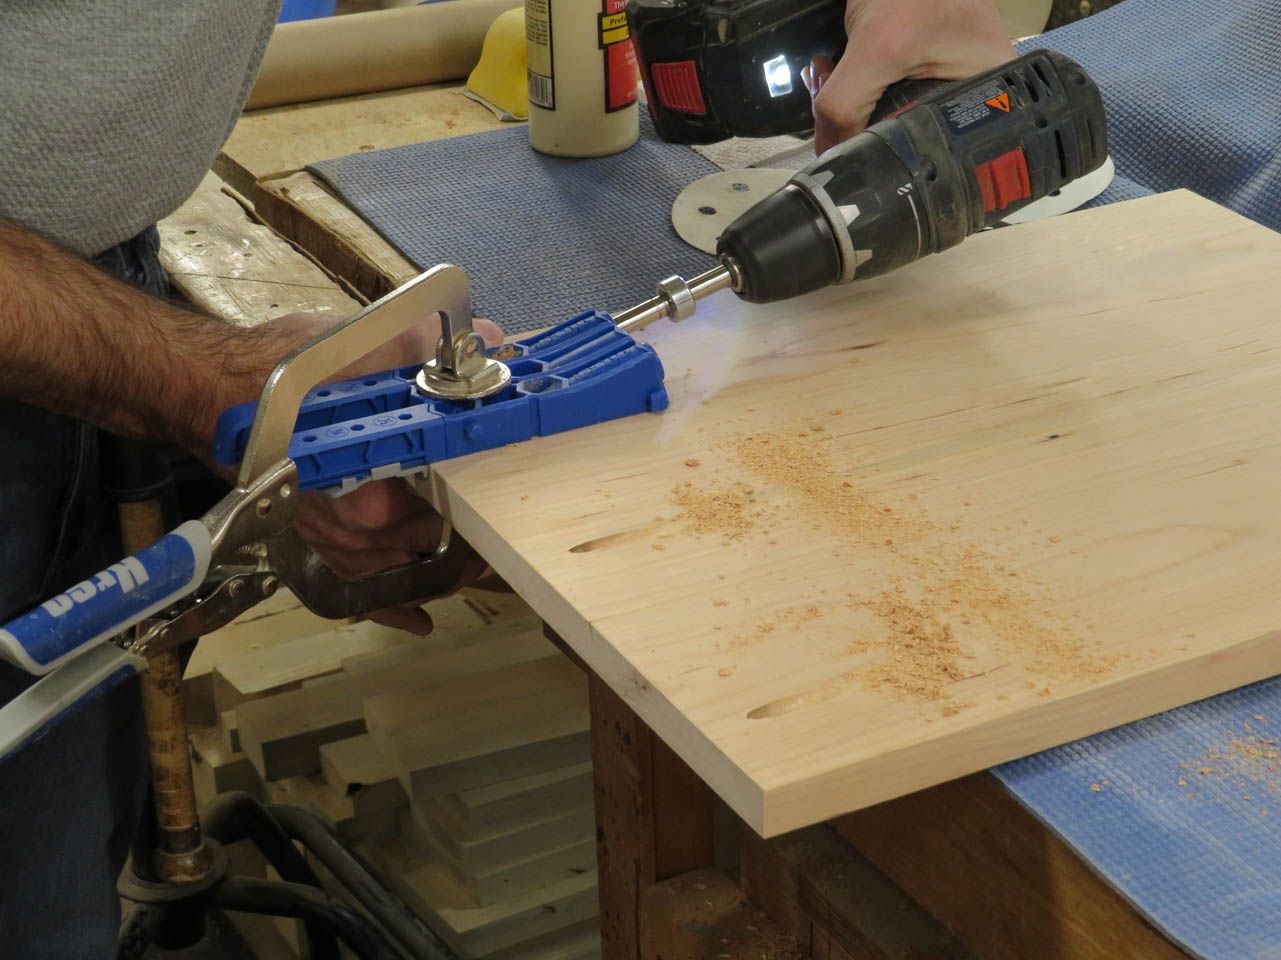
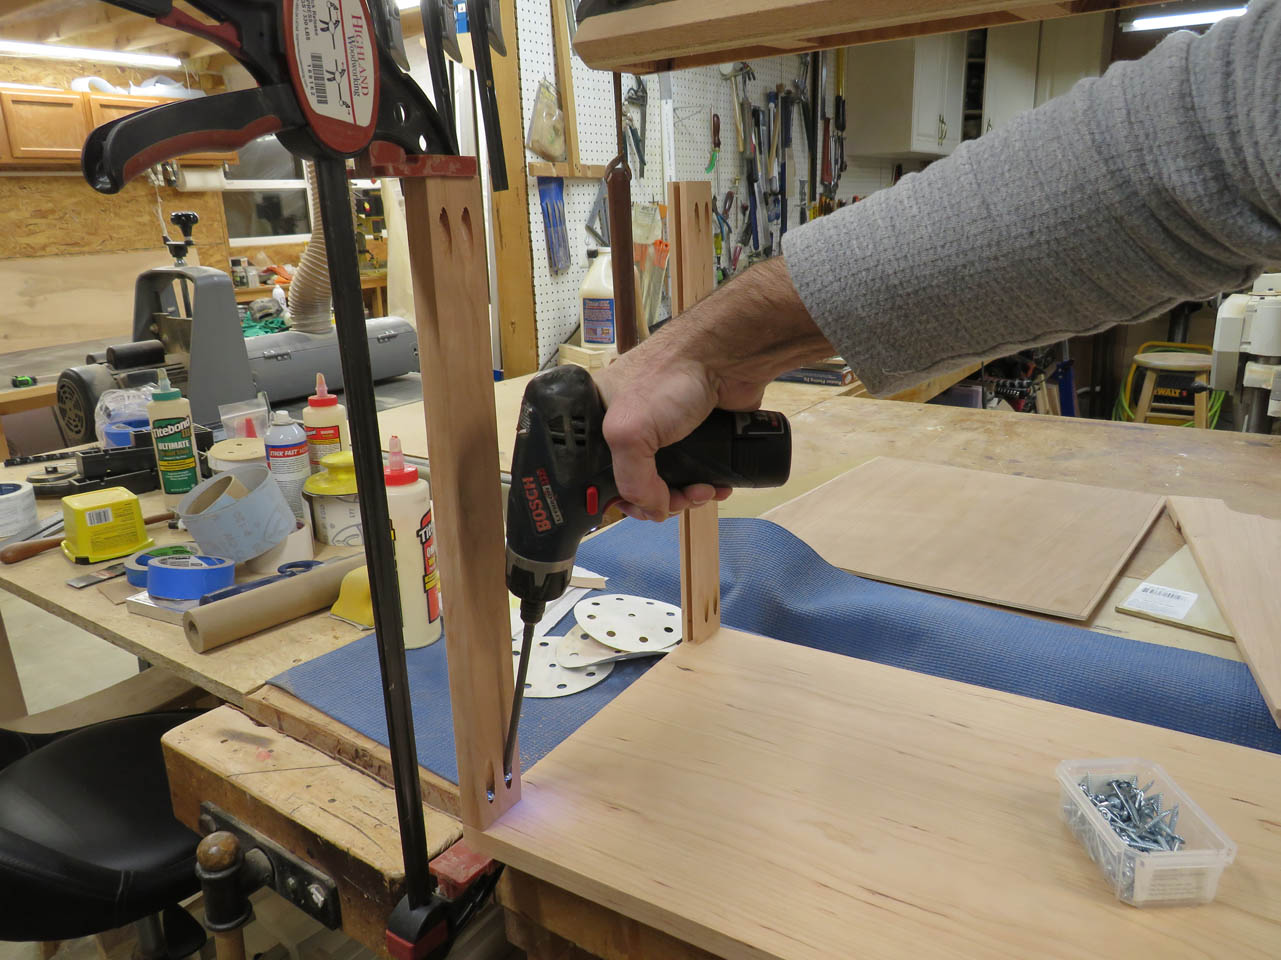
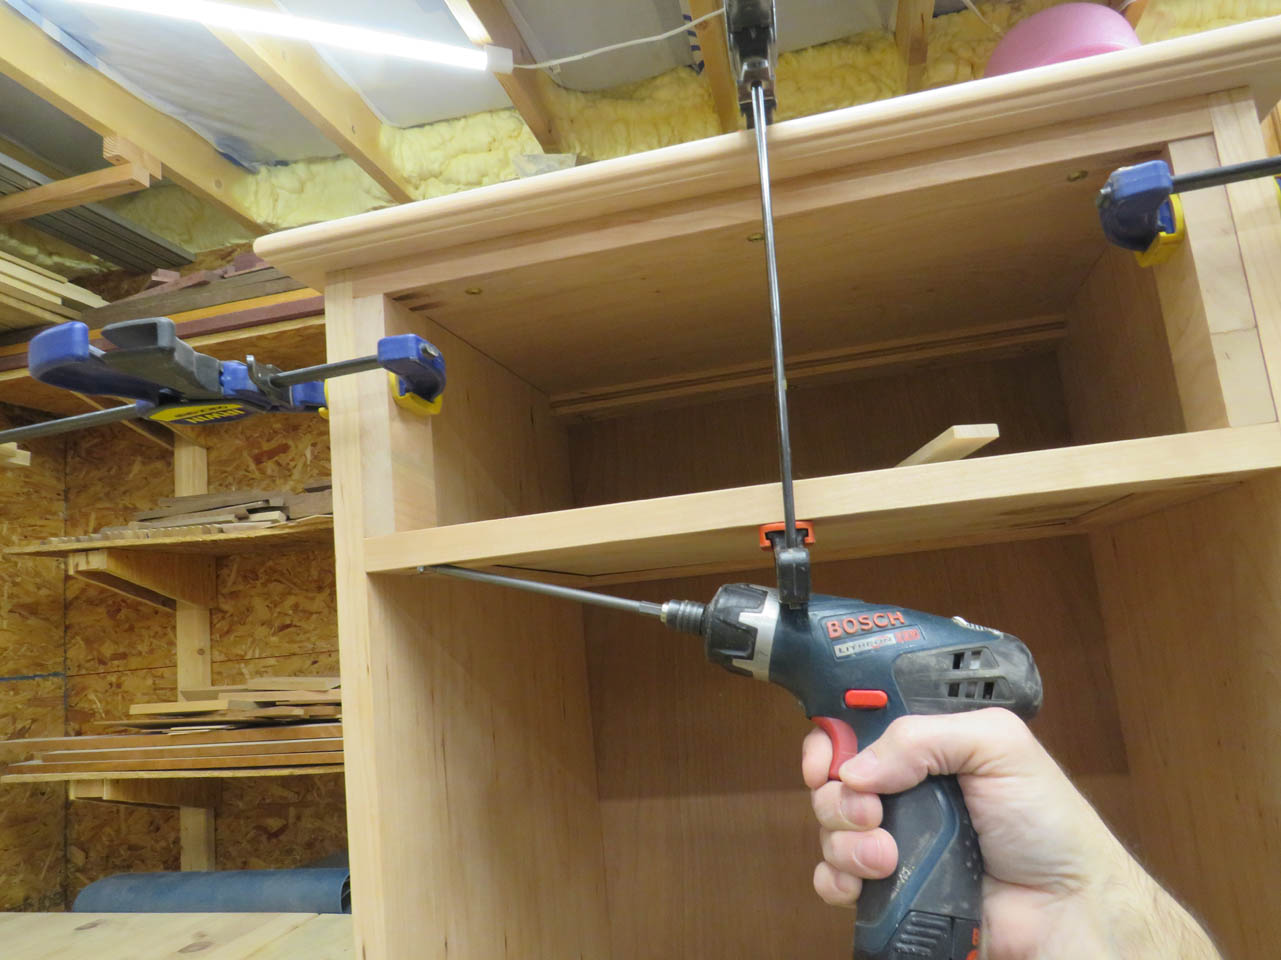
Time to prep for assembly. The first thing I did was drill pocket holes in the bottom panel.
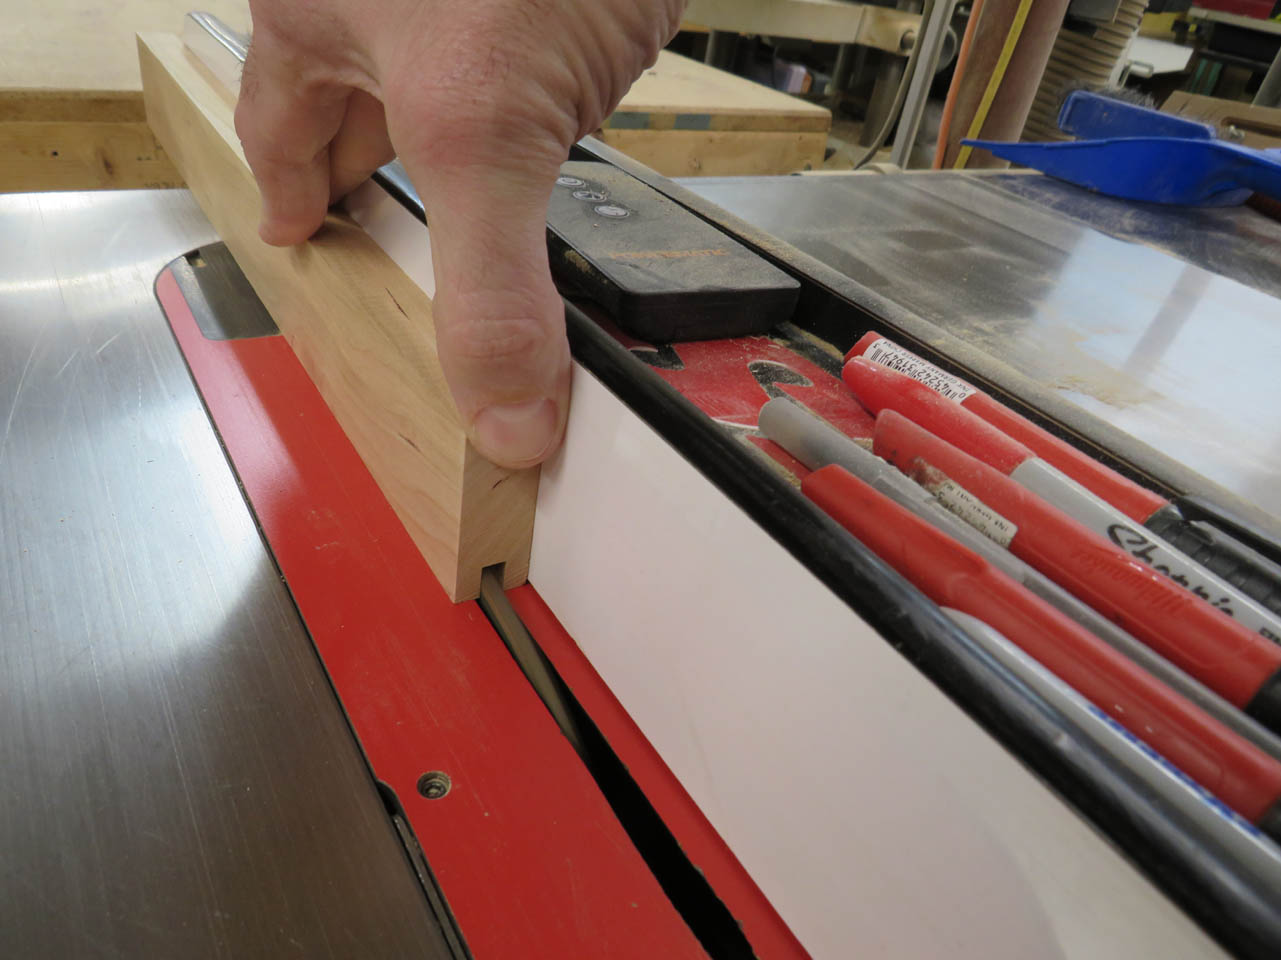
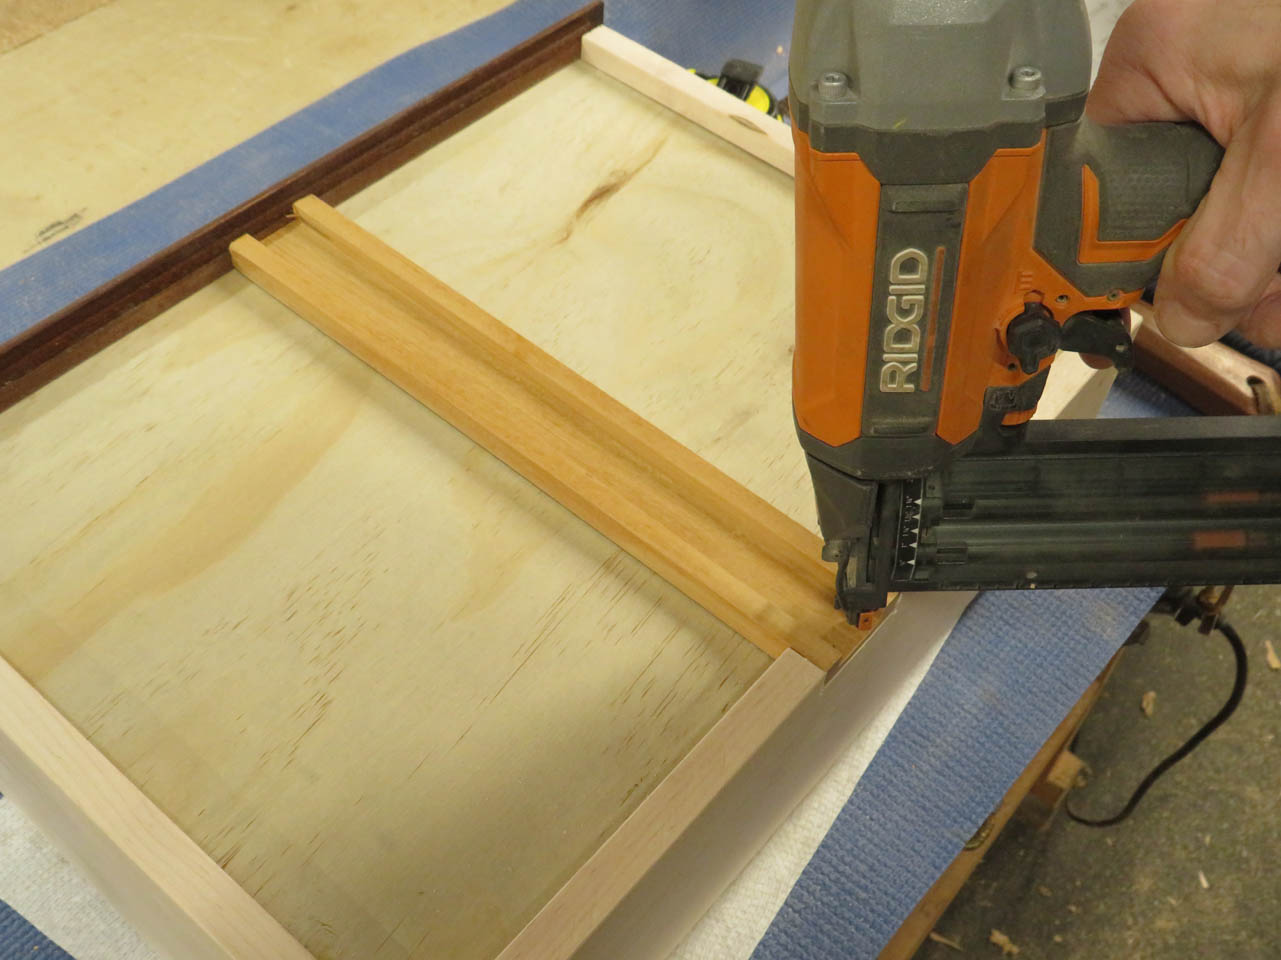
Then I cut some 2″ wide stretcher pieces that will hold the shelf below the drawer as well as the top.
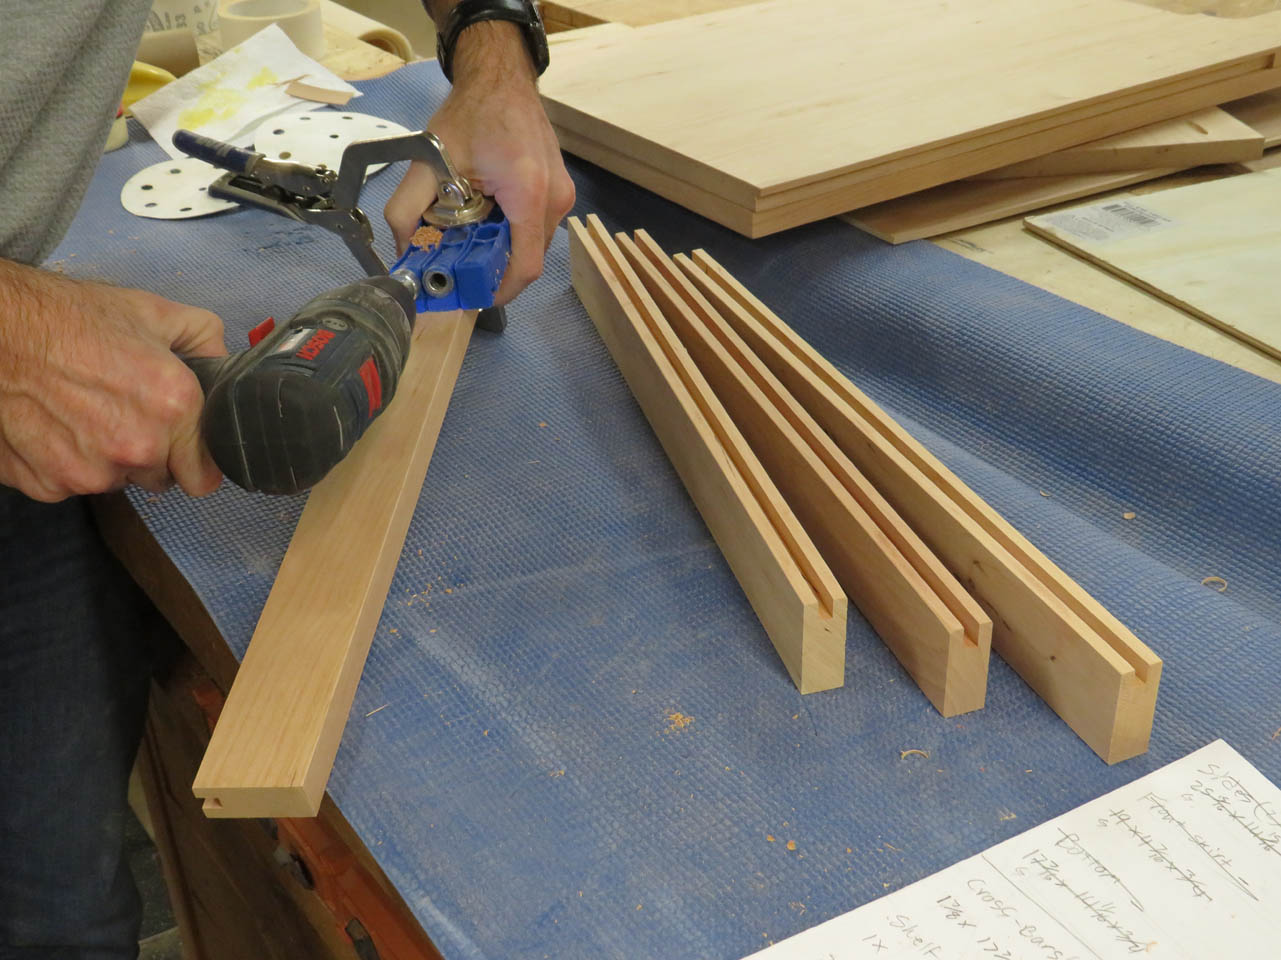
These pieces are grooved to hold a 1/4″ piece of plywood and pocket holes were drilled into each end as well.
These get attached to the top first. Then with blocks cut for spacers and clamped into place, I can attach the stretchers that go below the drawer as well. I only did the rear one for now because the front will capture a 1/4″ plywood panel, to be added later.
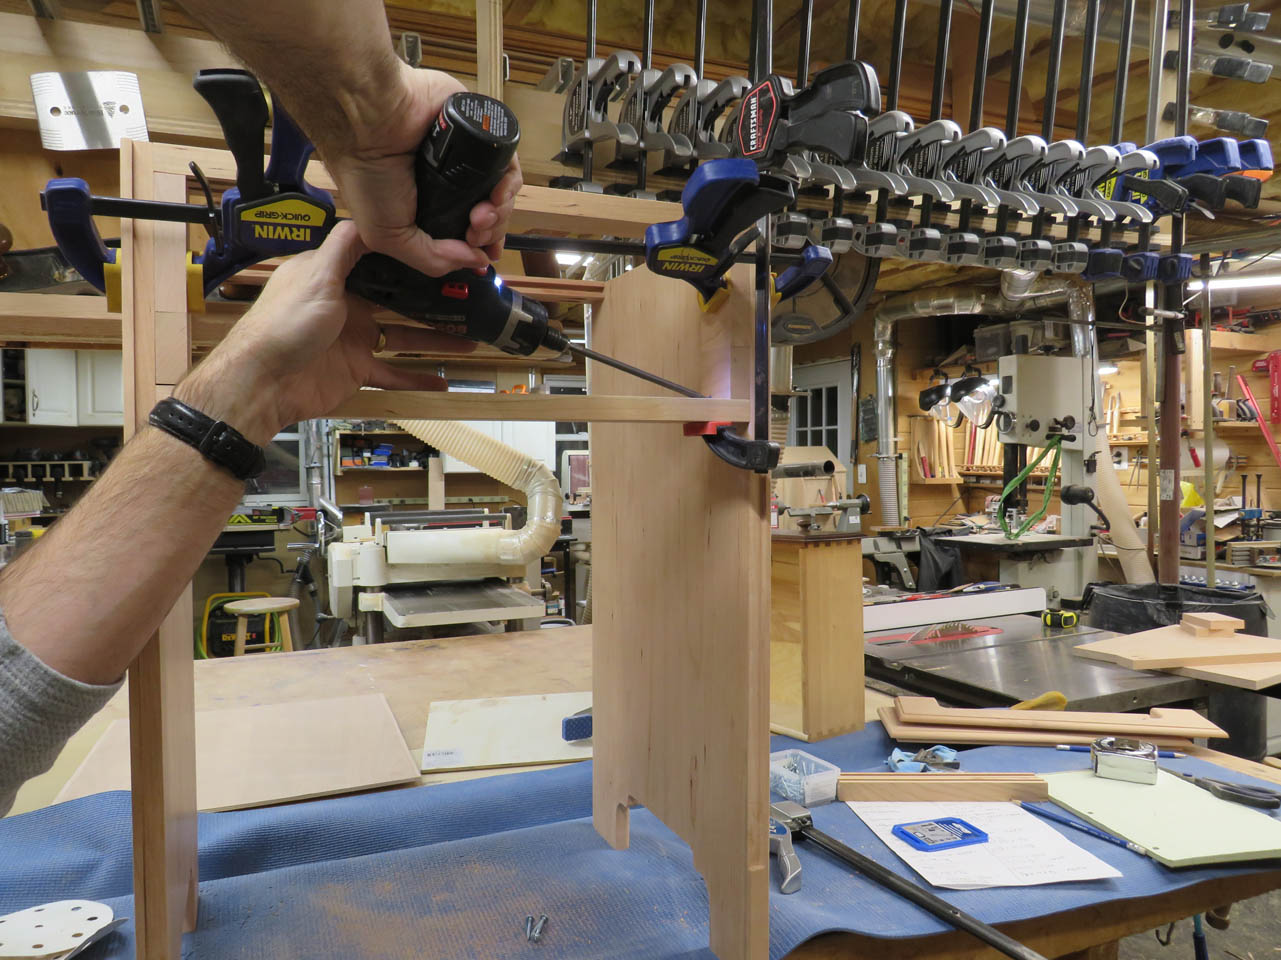
These stretchers hold everything in place while I clamp spacer blocks in place for locating the bottom shelf.
Then I can clamp in the bottom shelf so that I can flip it over for assembly.
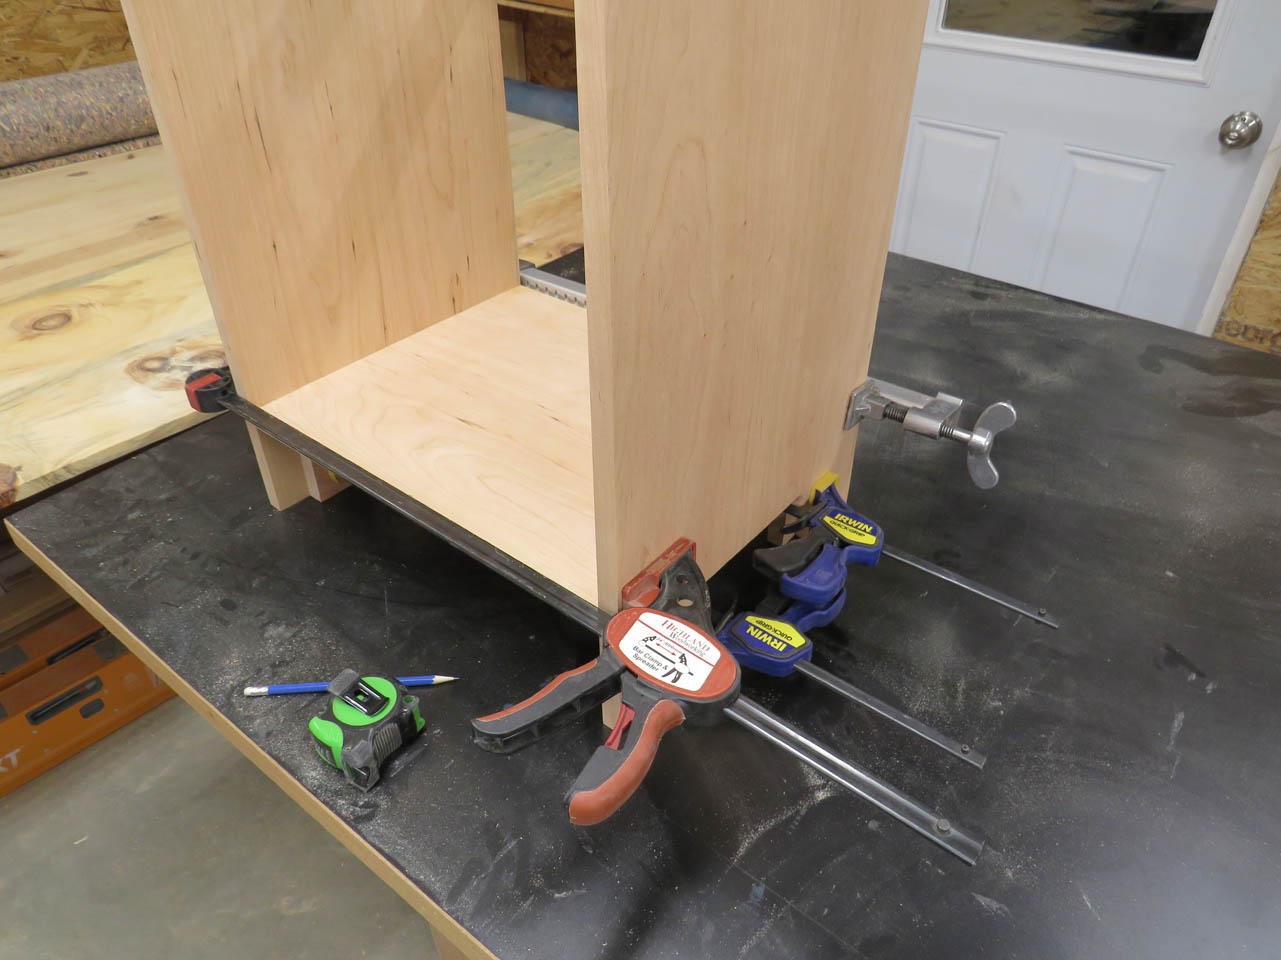
The pocket screws were added and the clamps removed.
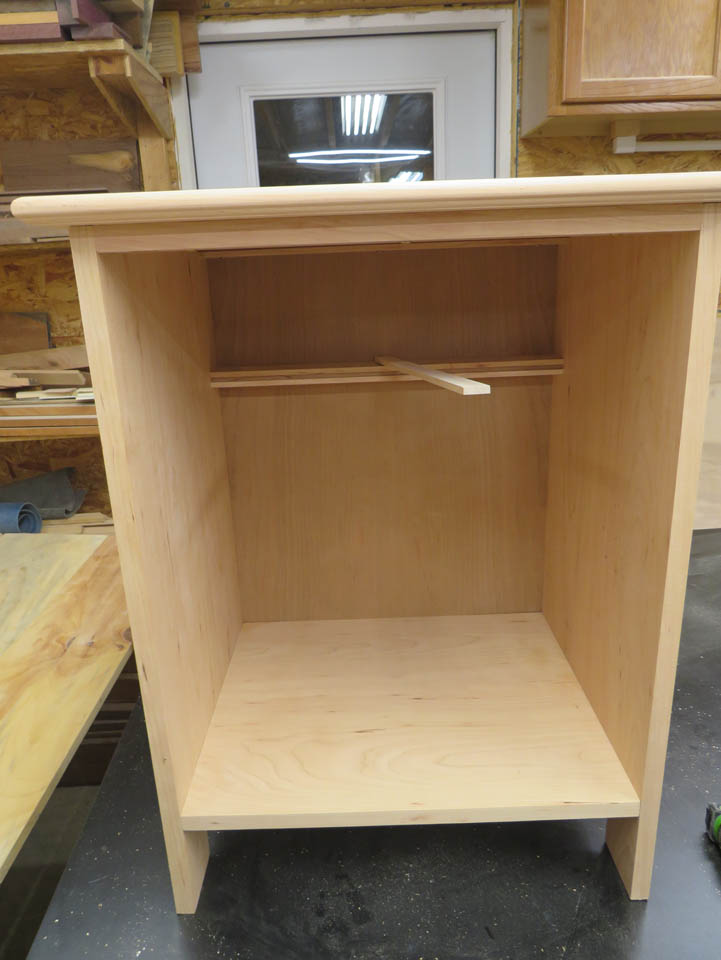
Next, I cut the 1/4″ thick plywood shelf and two side pieces that will just float along the sides to keep the plywood from moving much, then I can add the front stretcher.
I did a dry-fit of these to make sure everything was the correct size, then attached the center drawer rail to the back stretcher.
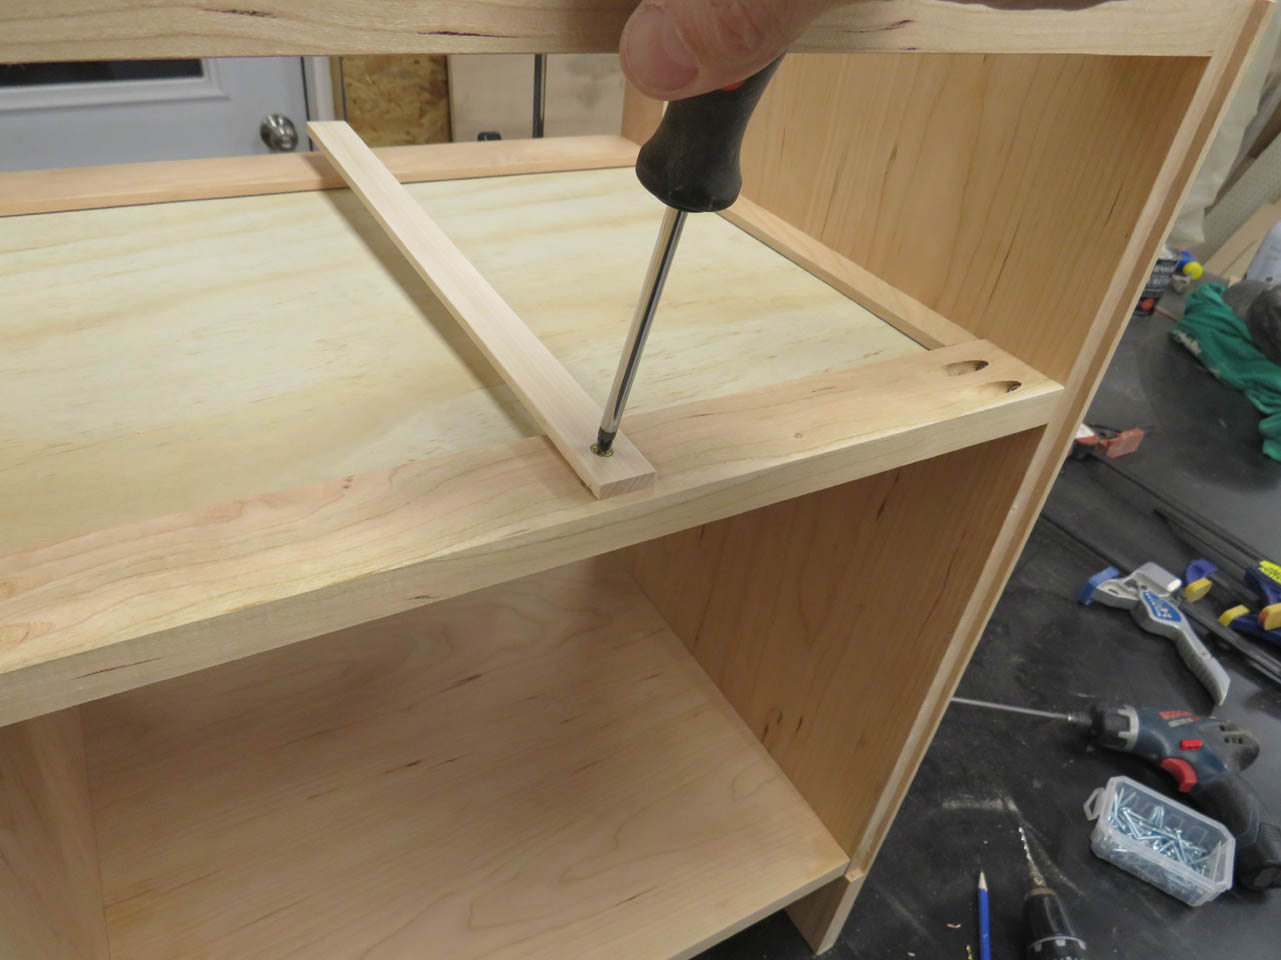
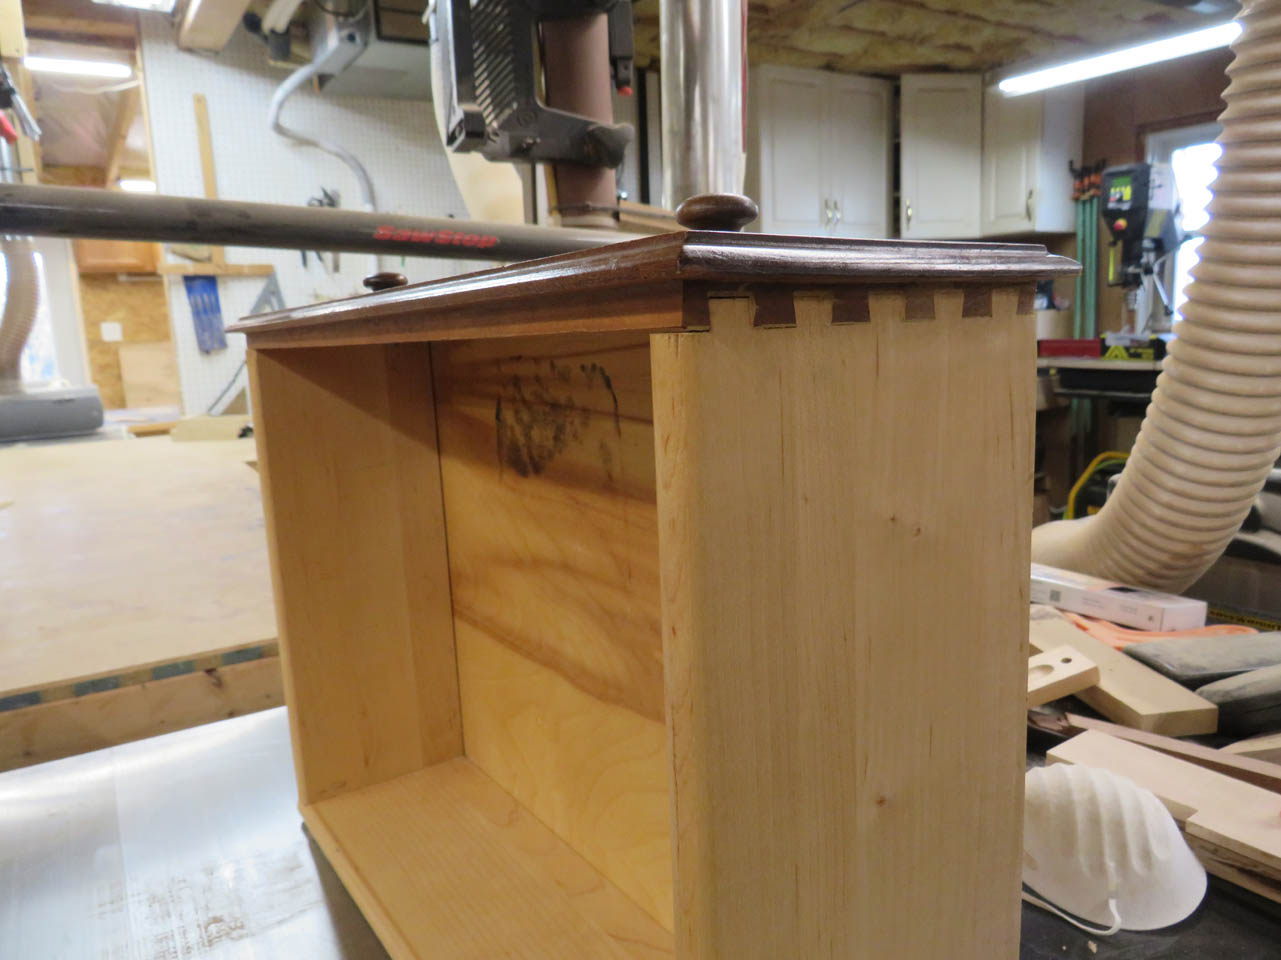
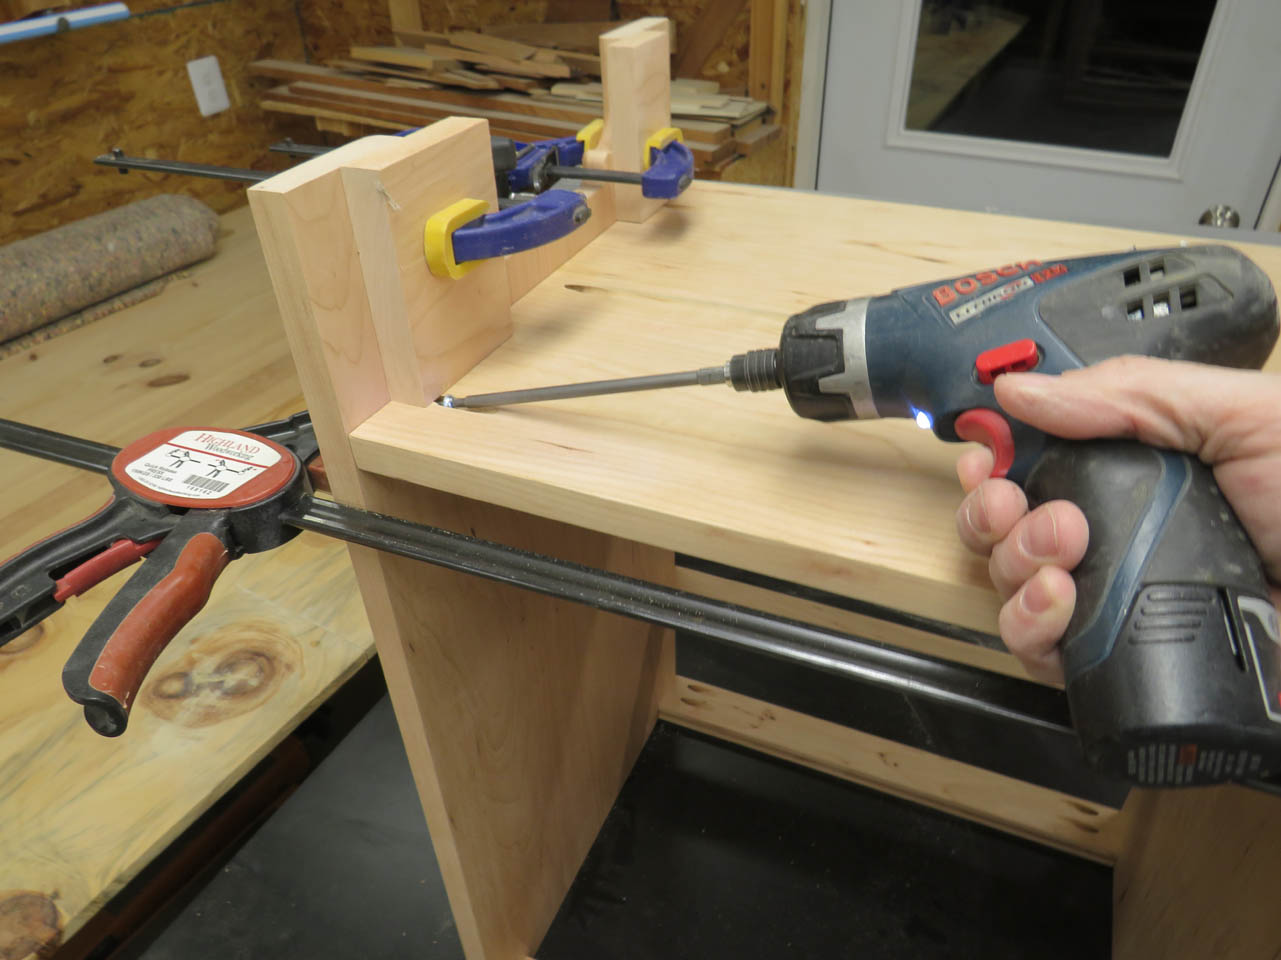
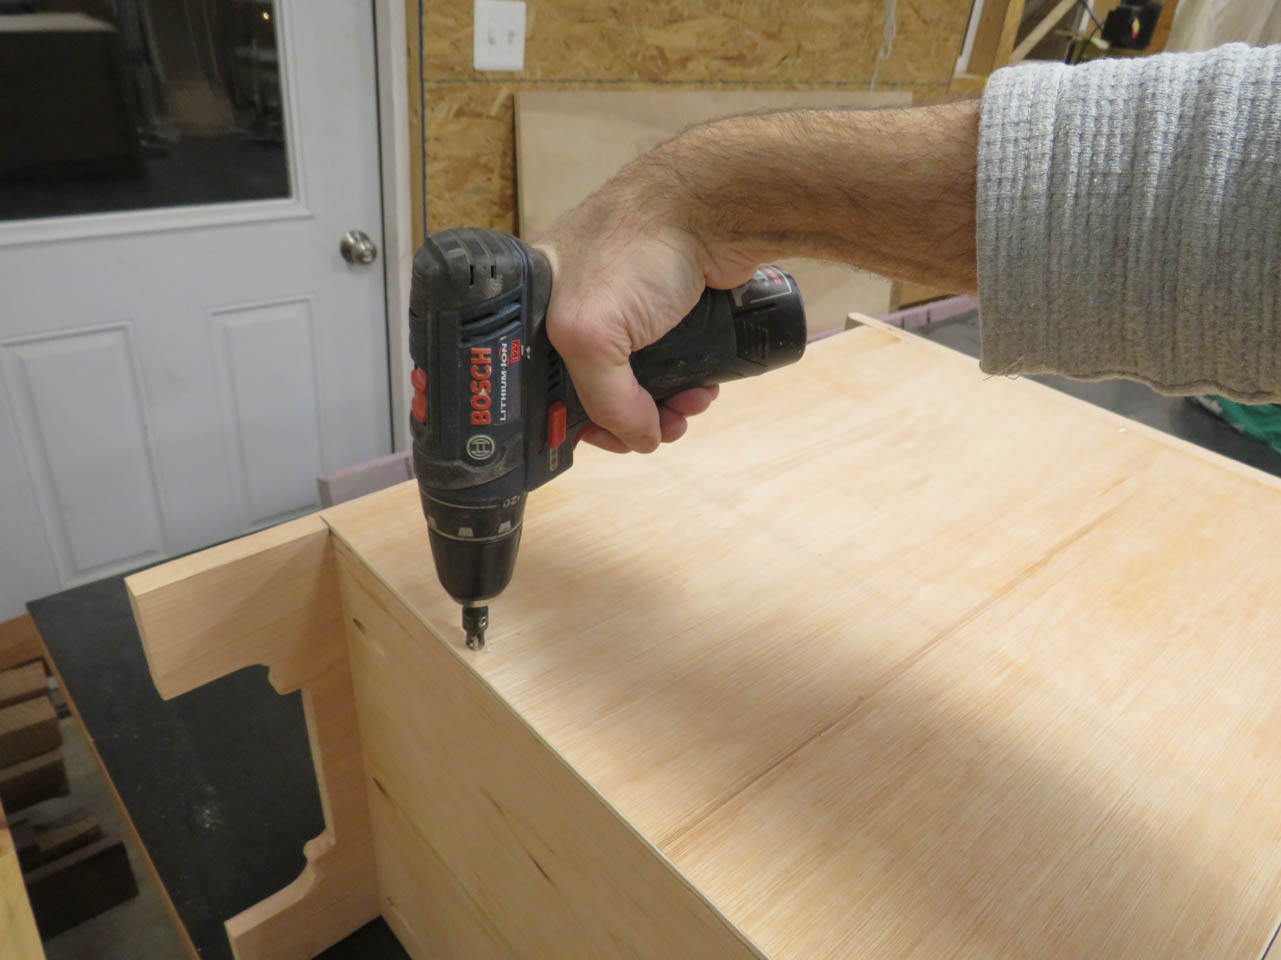
I removed the drawer shelf and stretcher so that I could flip the whole thing over and attach the top stretchers to the top panel with screws.
Then I attached the back panel.
I had to very carefully think about assembly process. Had I assembled the drawer shelf and back panel first, I would not have had access to attach the top.
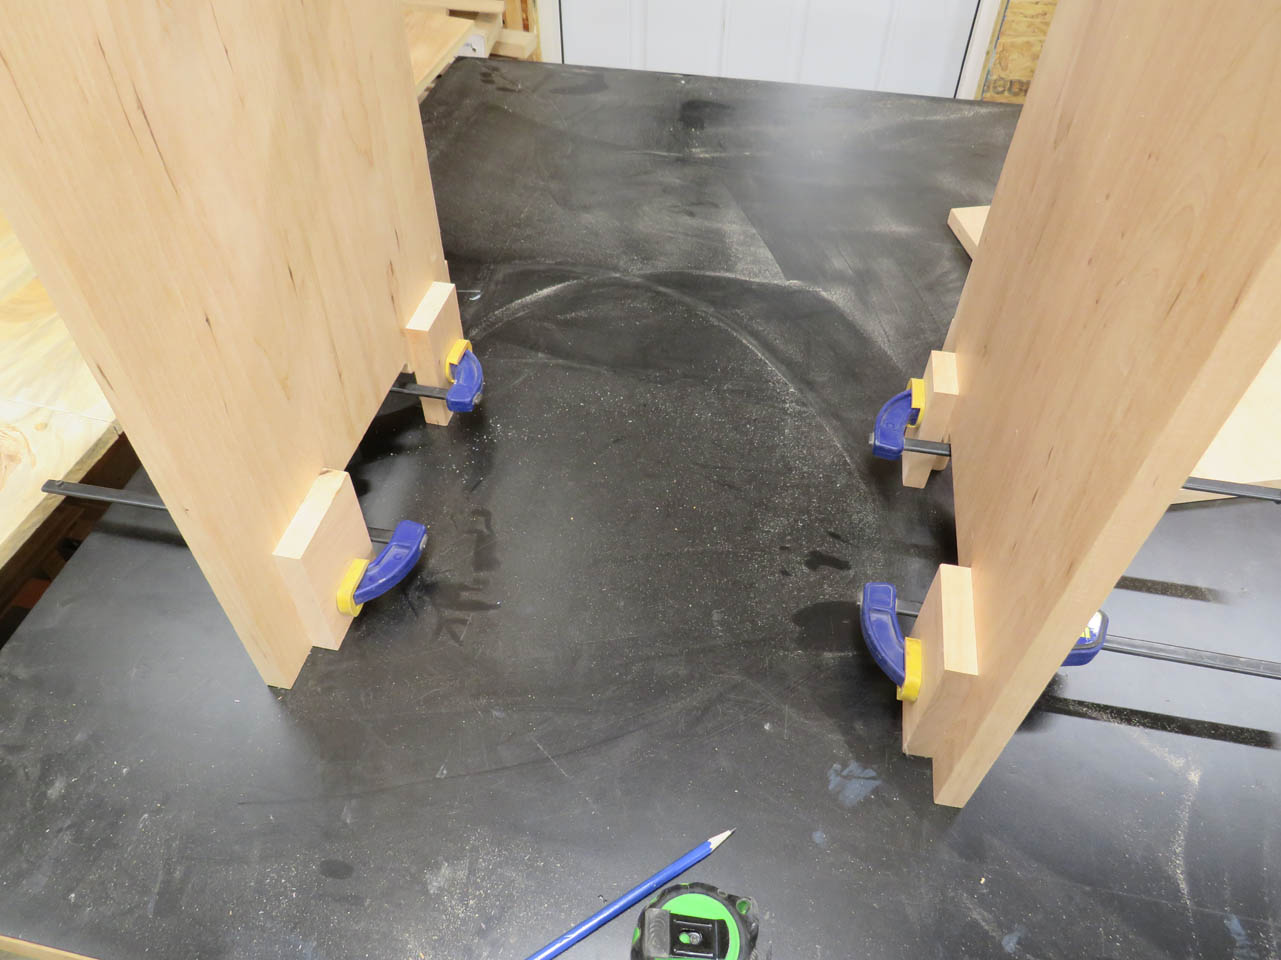
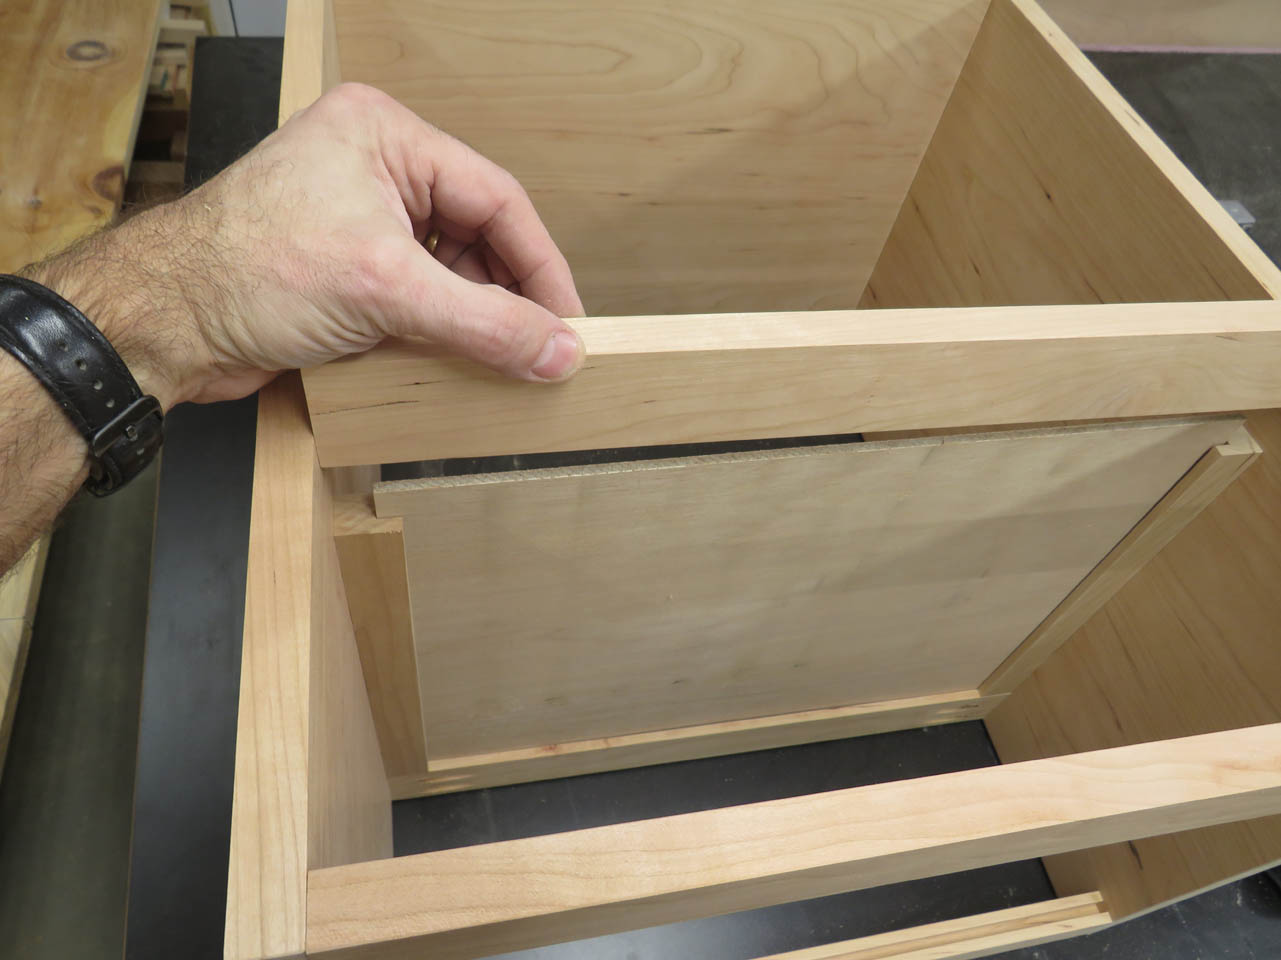
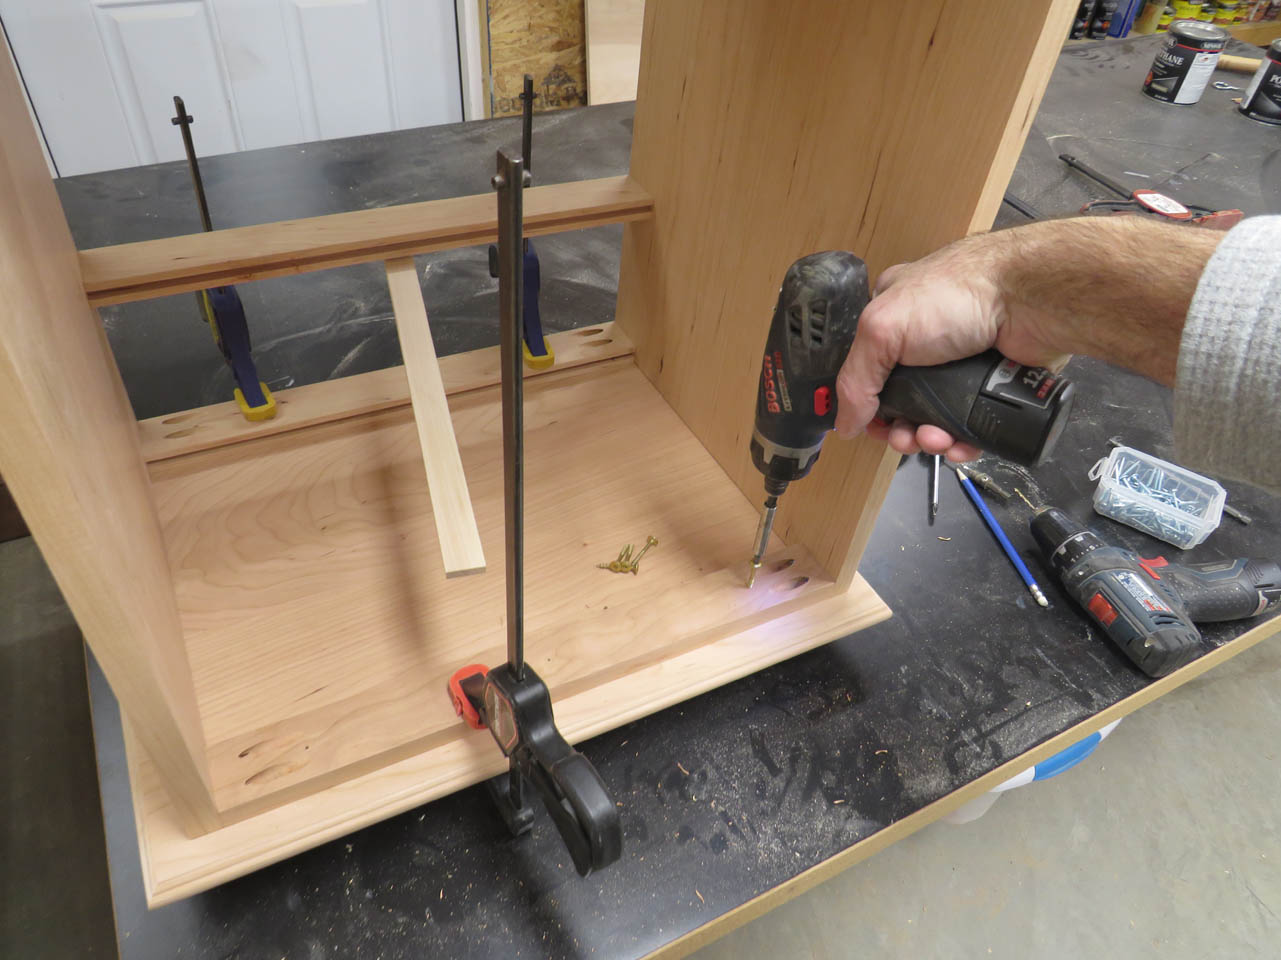
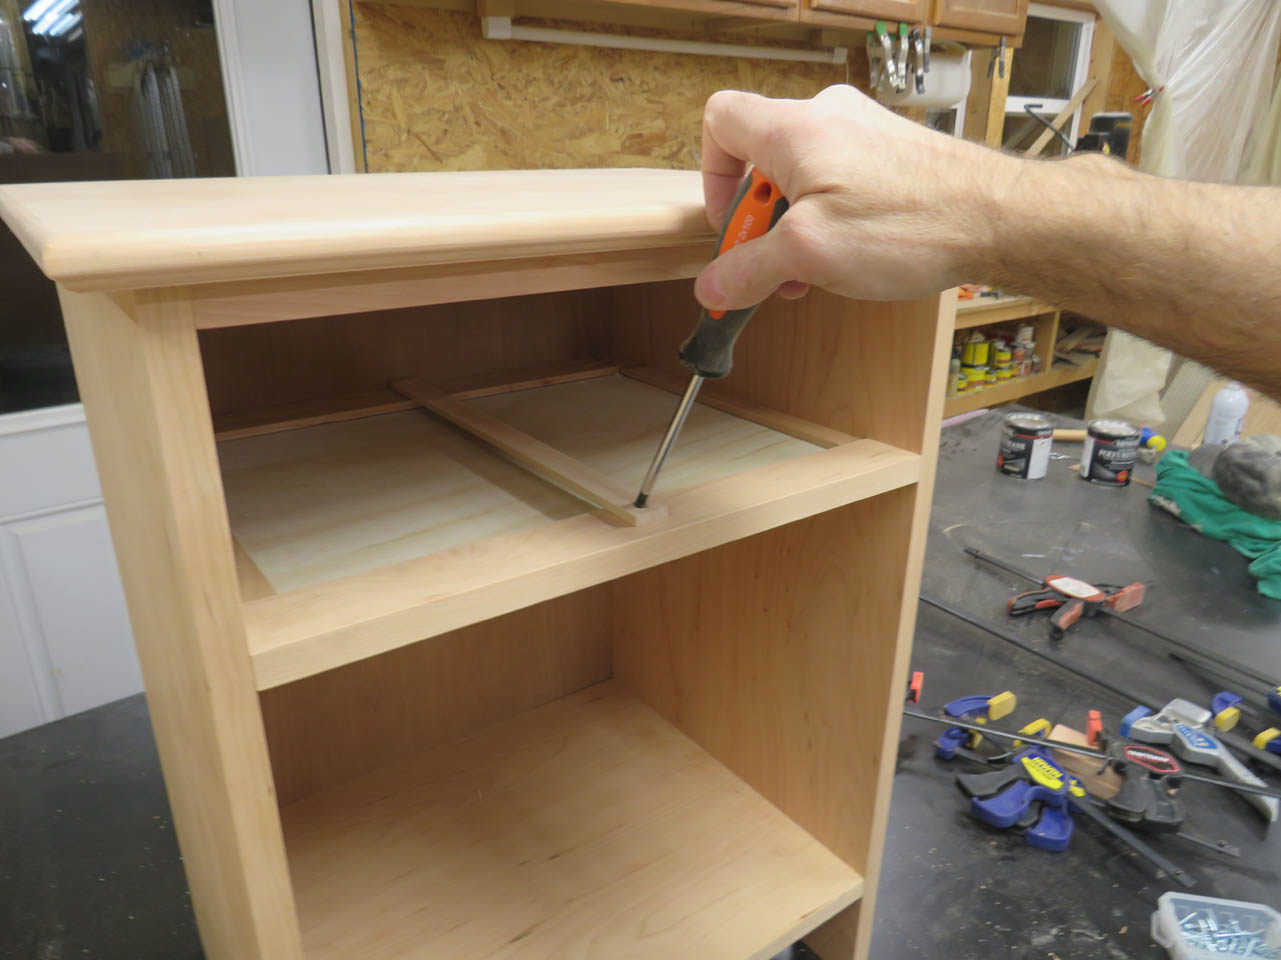
With all that done, I can now add spacers and attach the shelf and final stretcher.
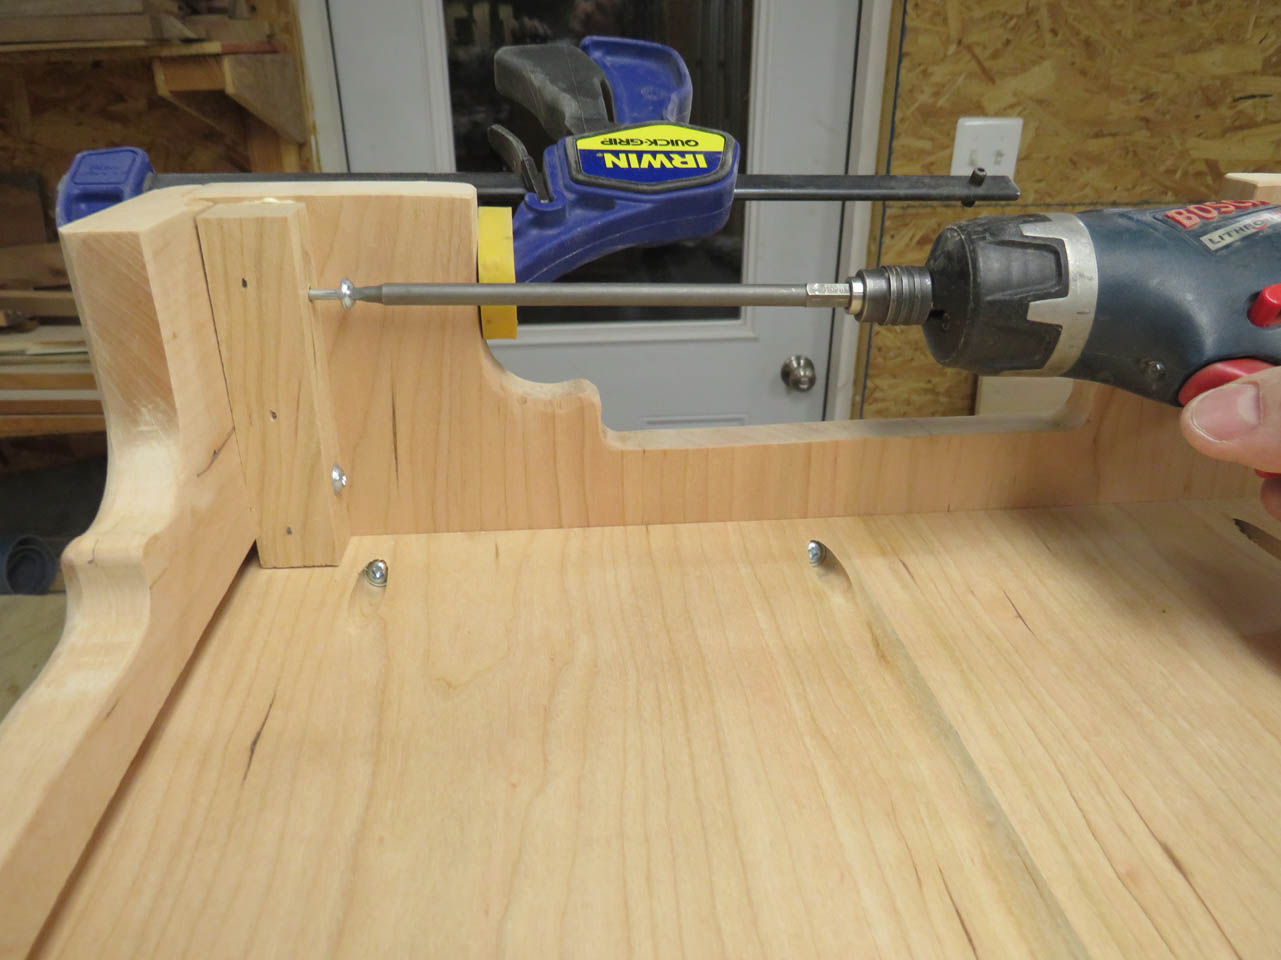
One final screw was added to hold the drawer guide in place.
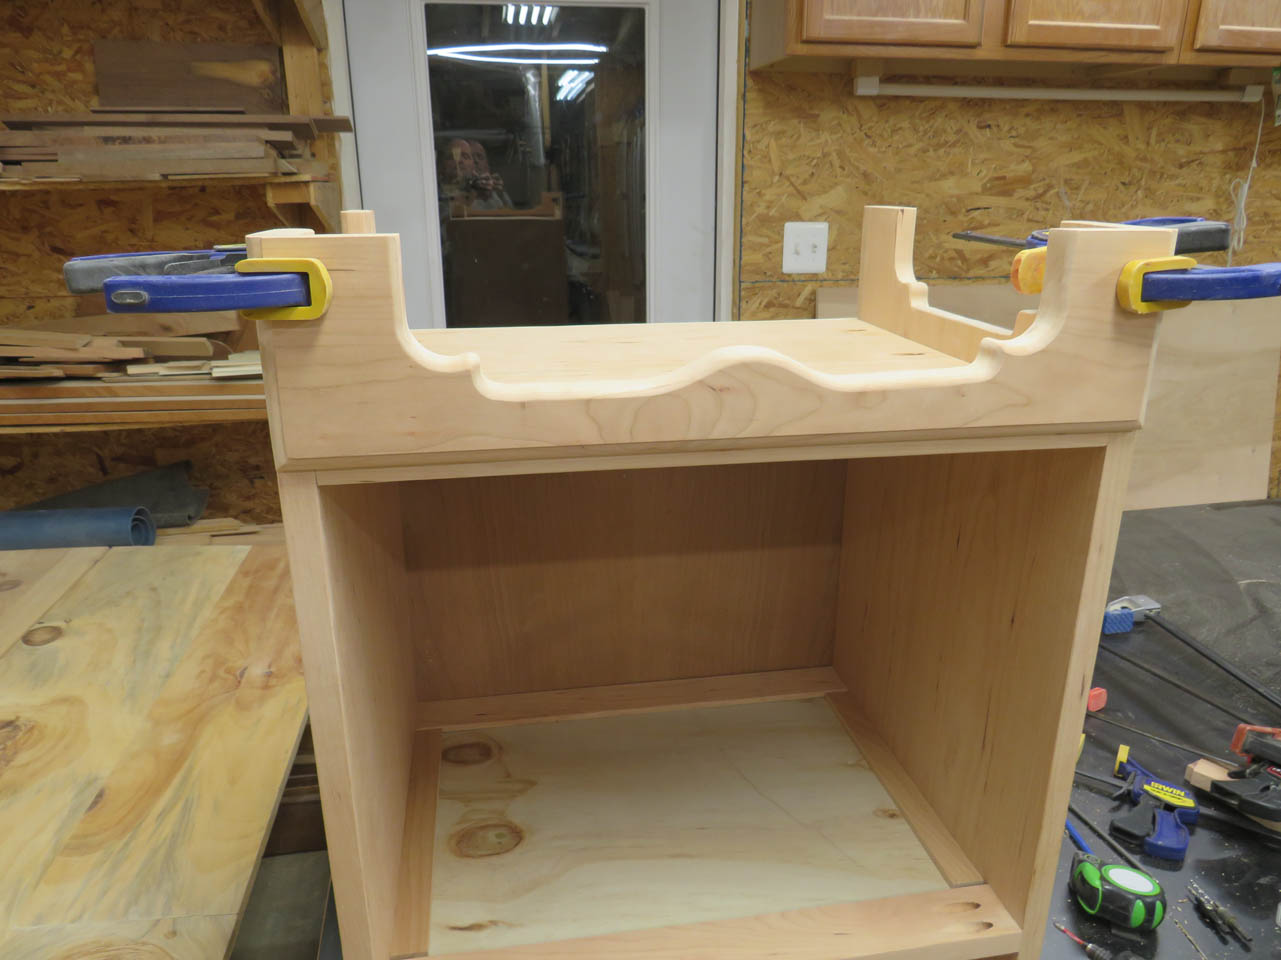
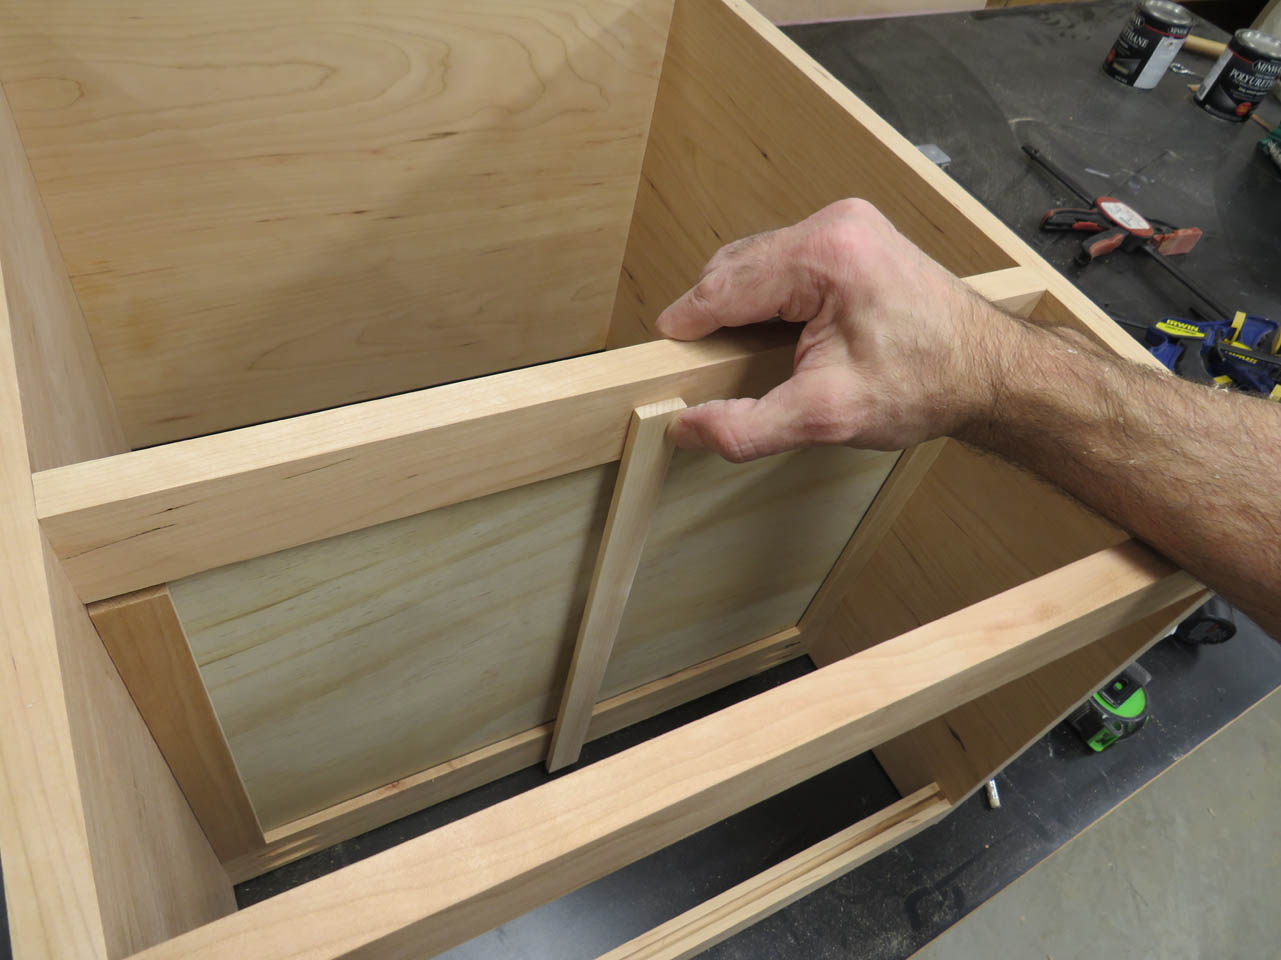
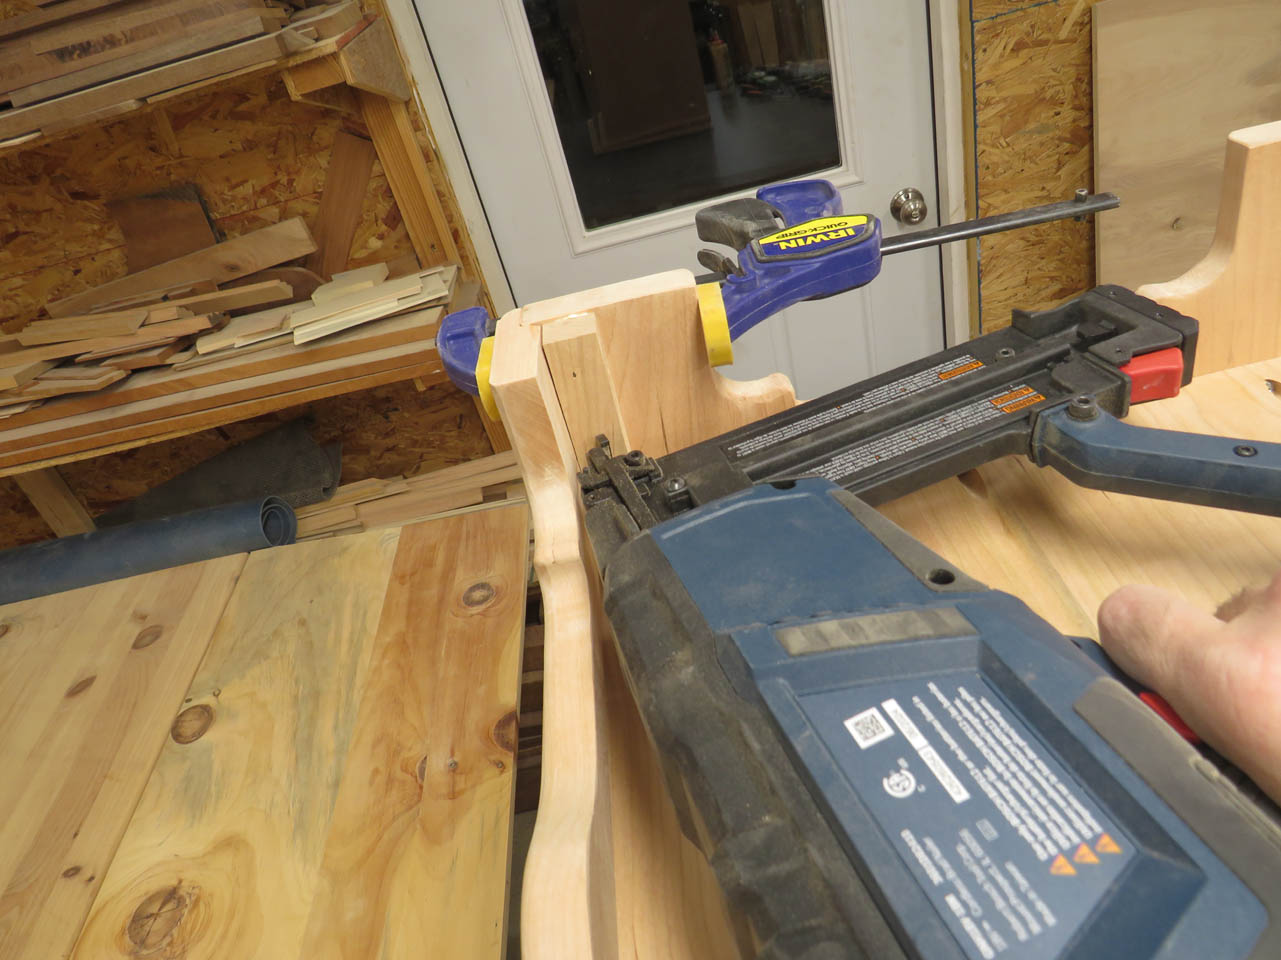
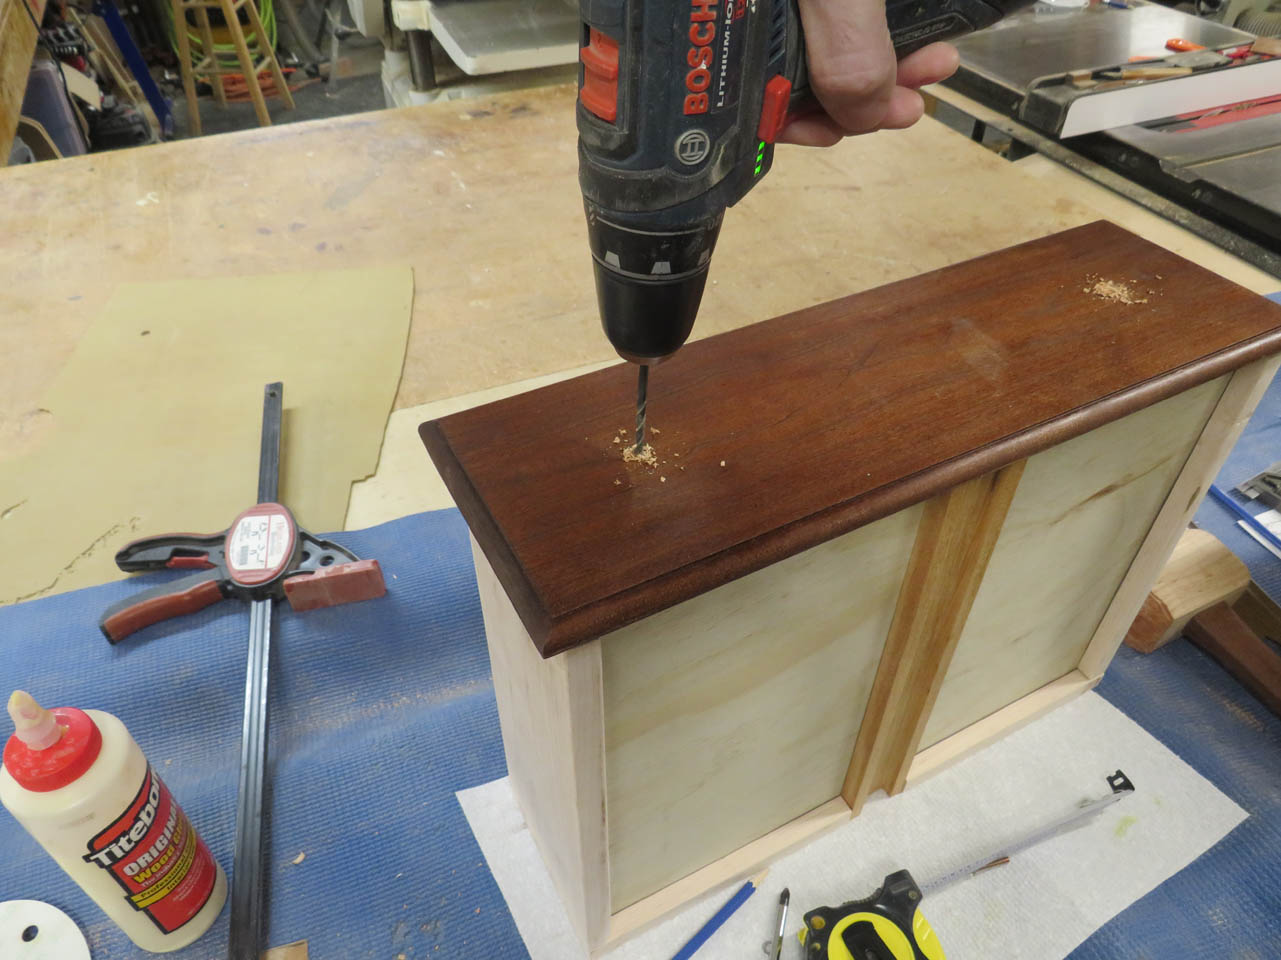
To attach the last piece, the front skirt, I had to glue and nail a couple of blocks into place along the front of the legs on the side panels.
These blocks were pre-drilled to attach the front skirt with screws.
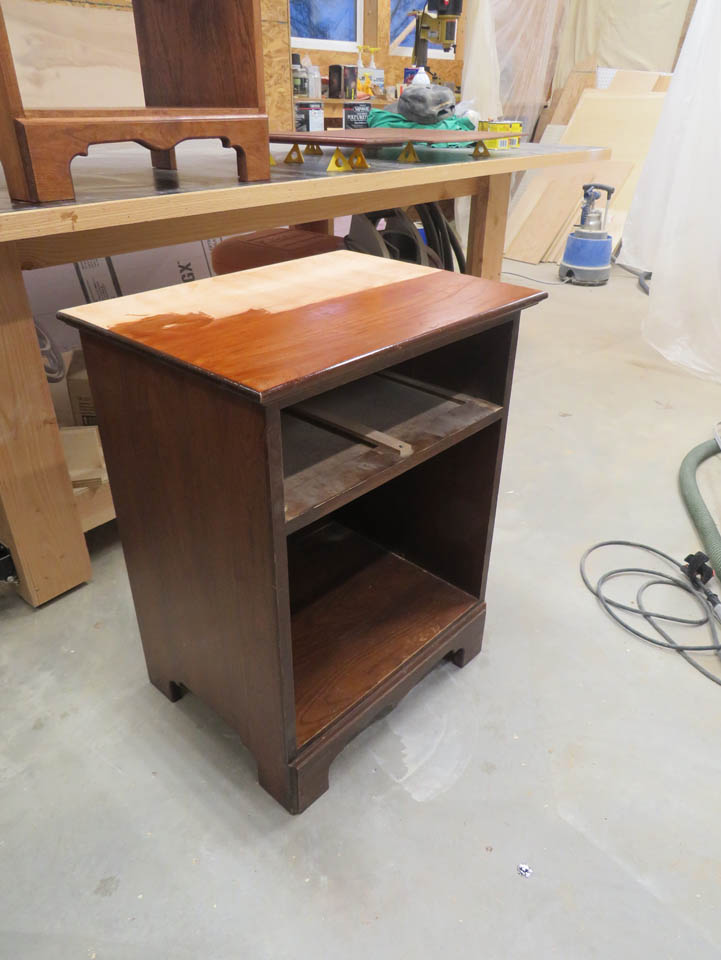
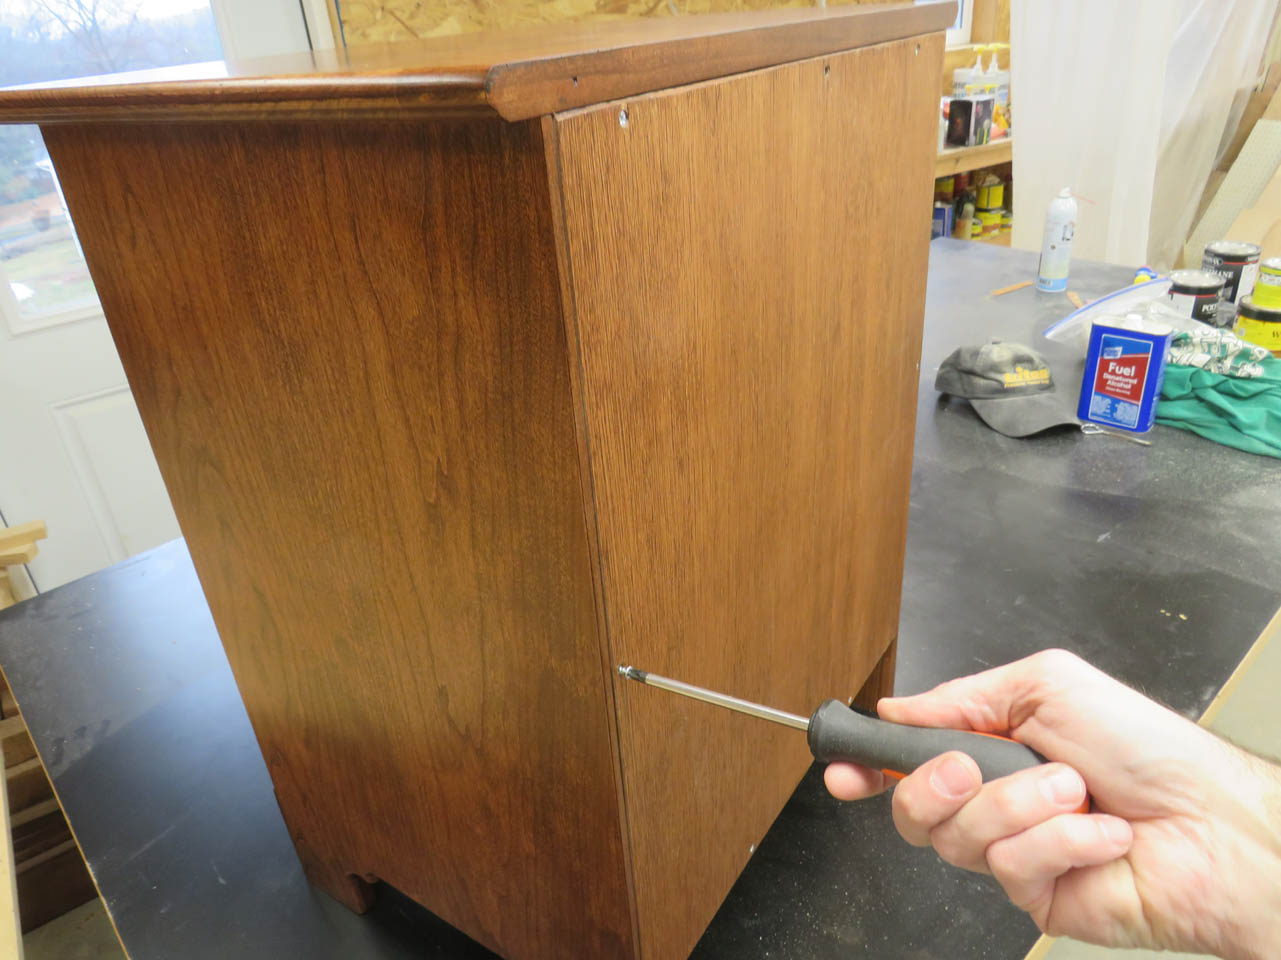
It was at this point that I realized all of the parts were screwed together to make it easier to pre-stain and finish all the pieces.
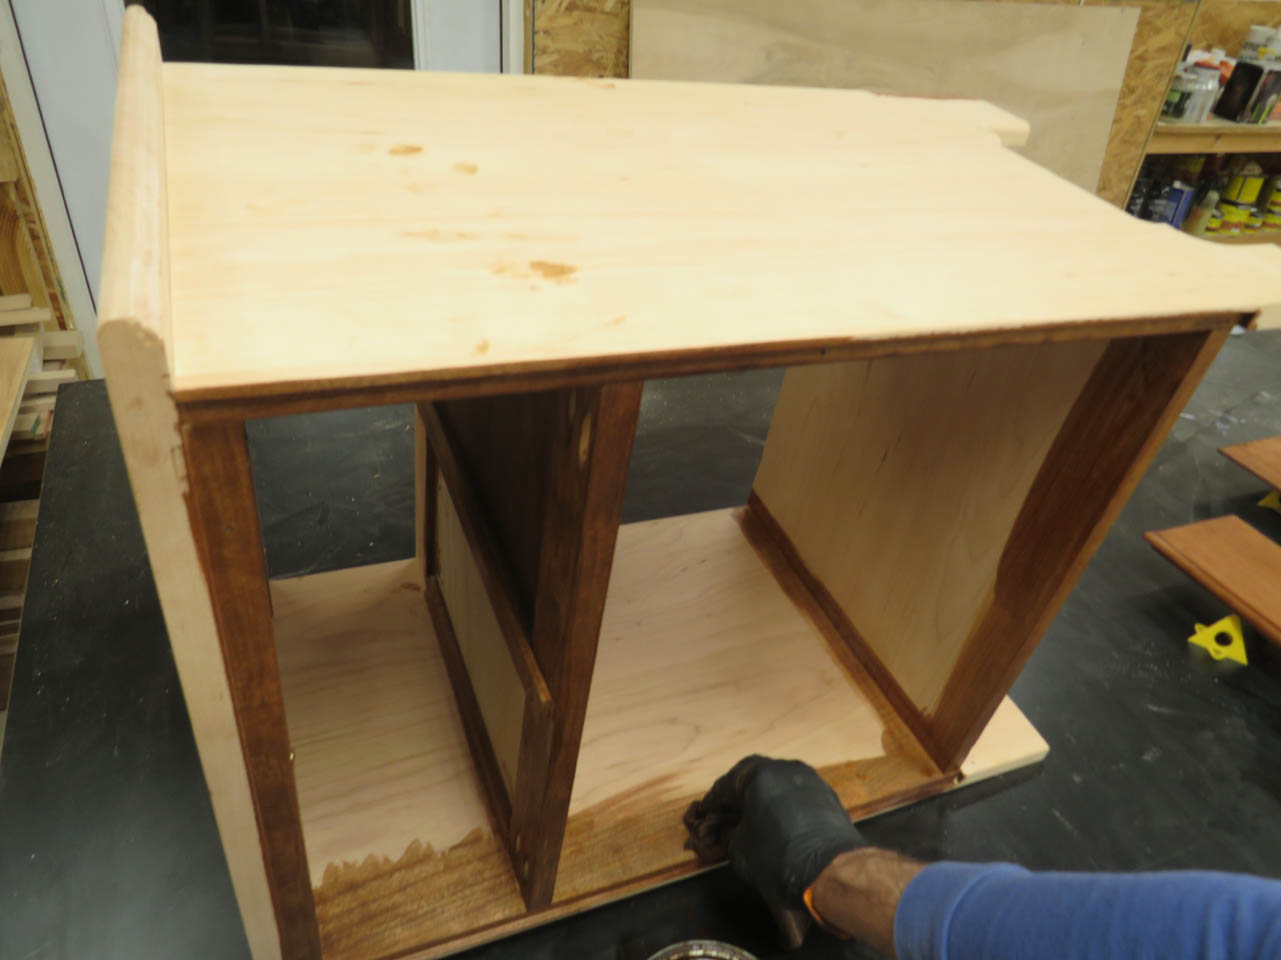
Since I already had it assembled, I only removed the back panel to get better access for applying finish.
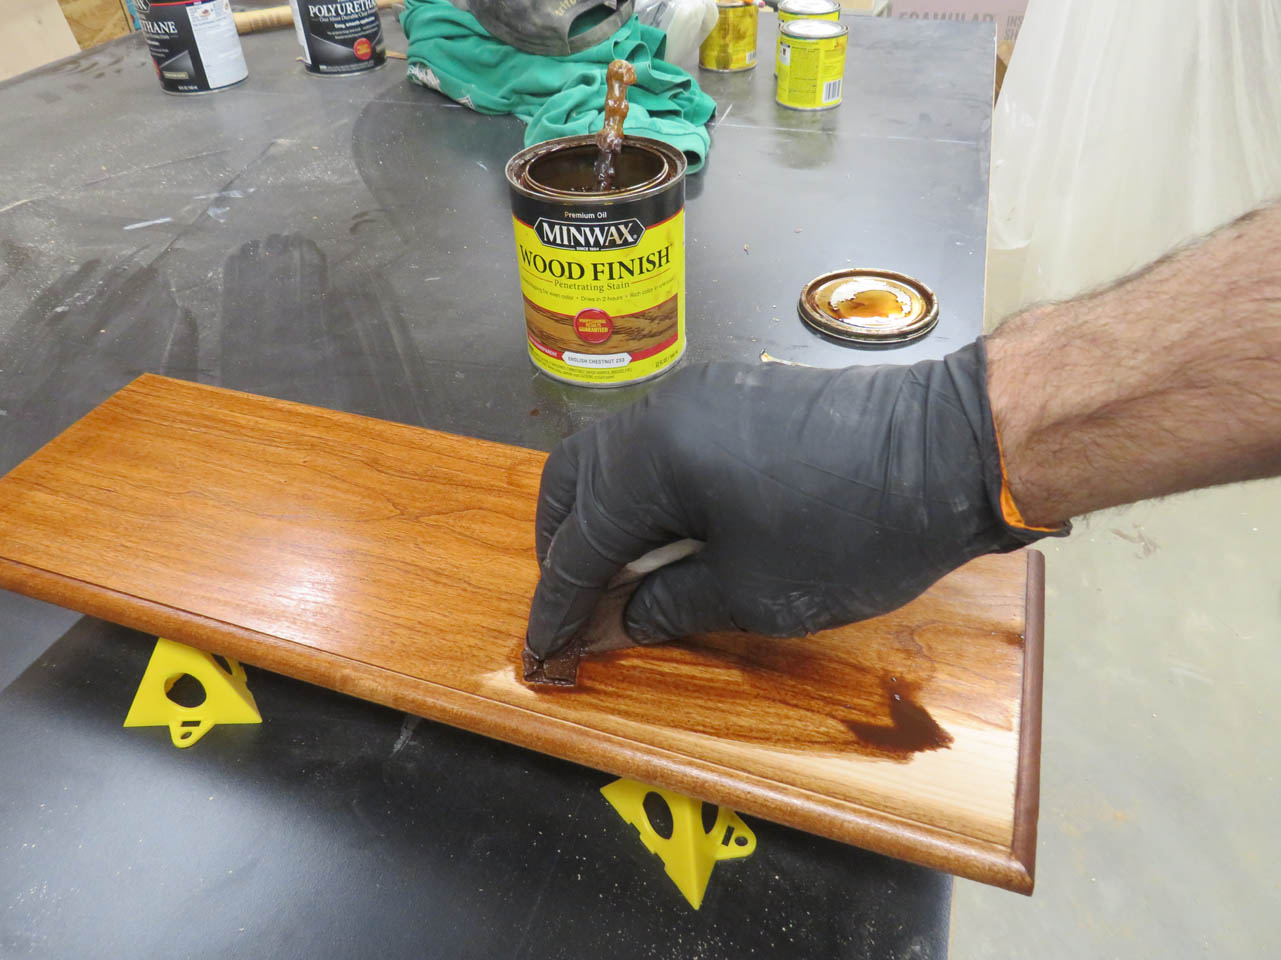
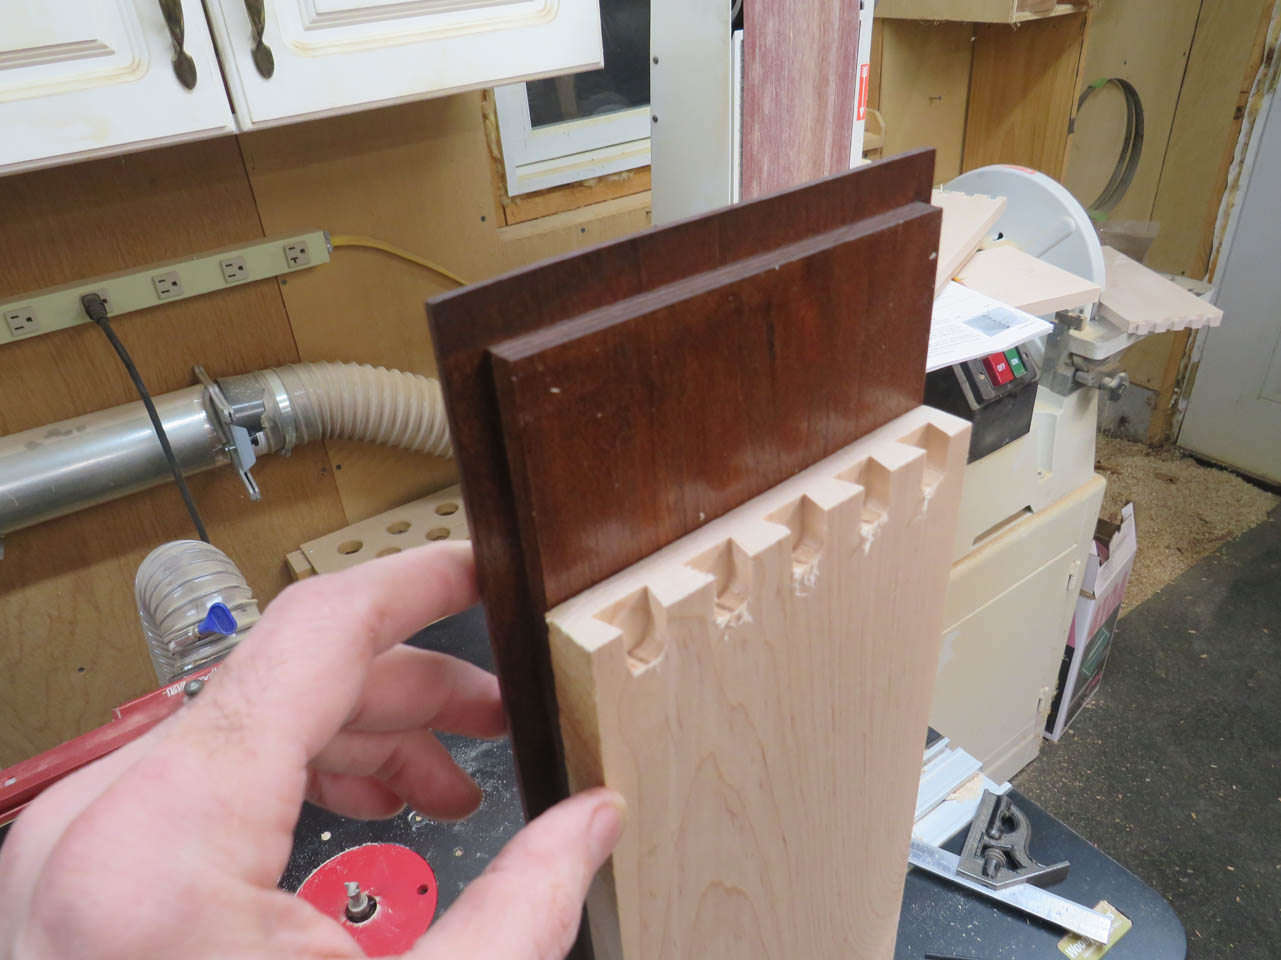
I don’t have the exact stain to match the original so I am starting with one that is close. Sort of a reddish brown in color and we will see what it looks like when it is dry.
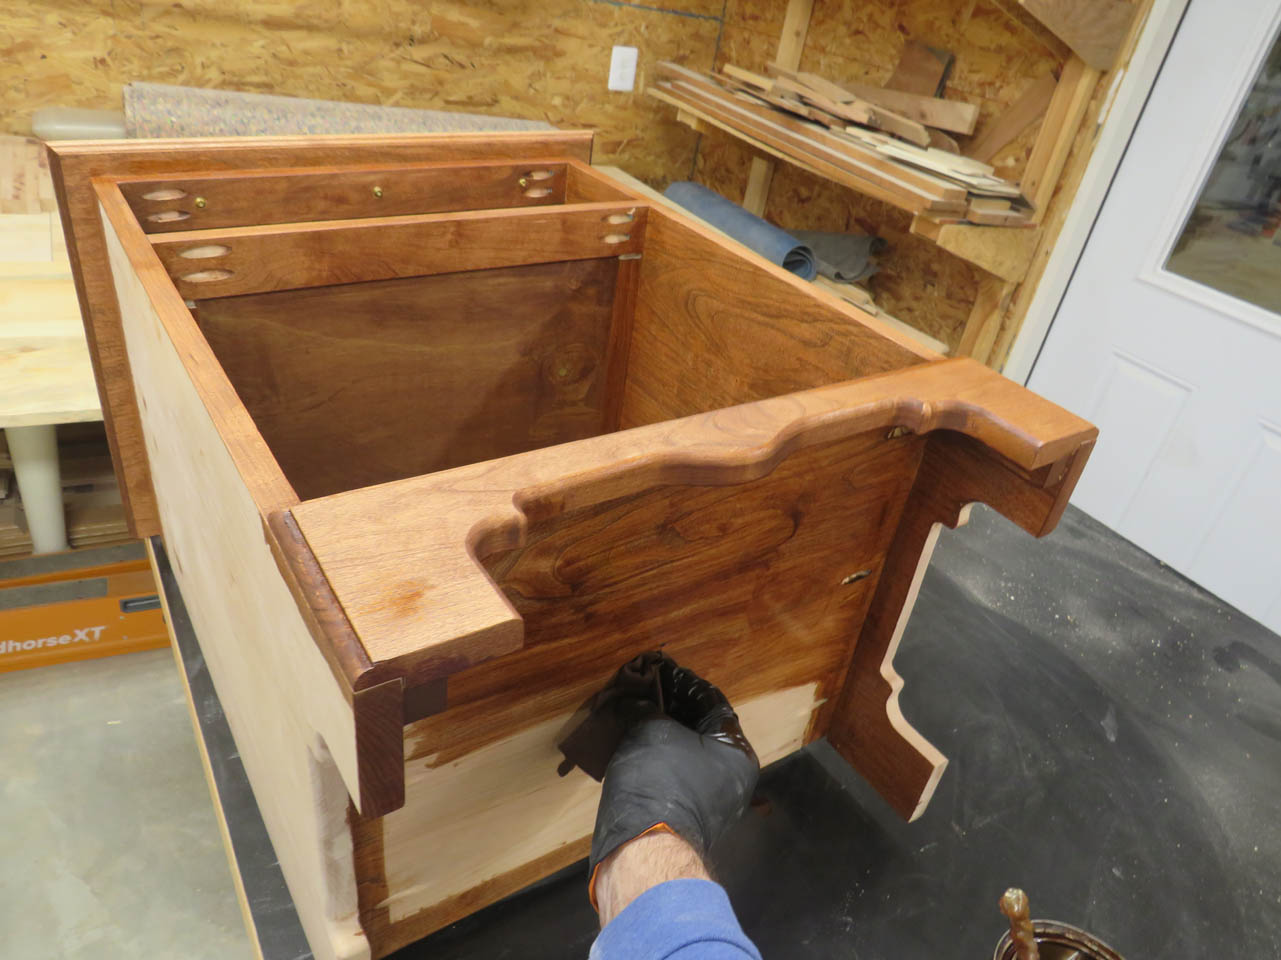
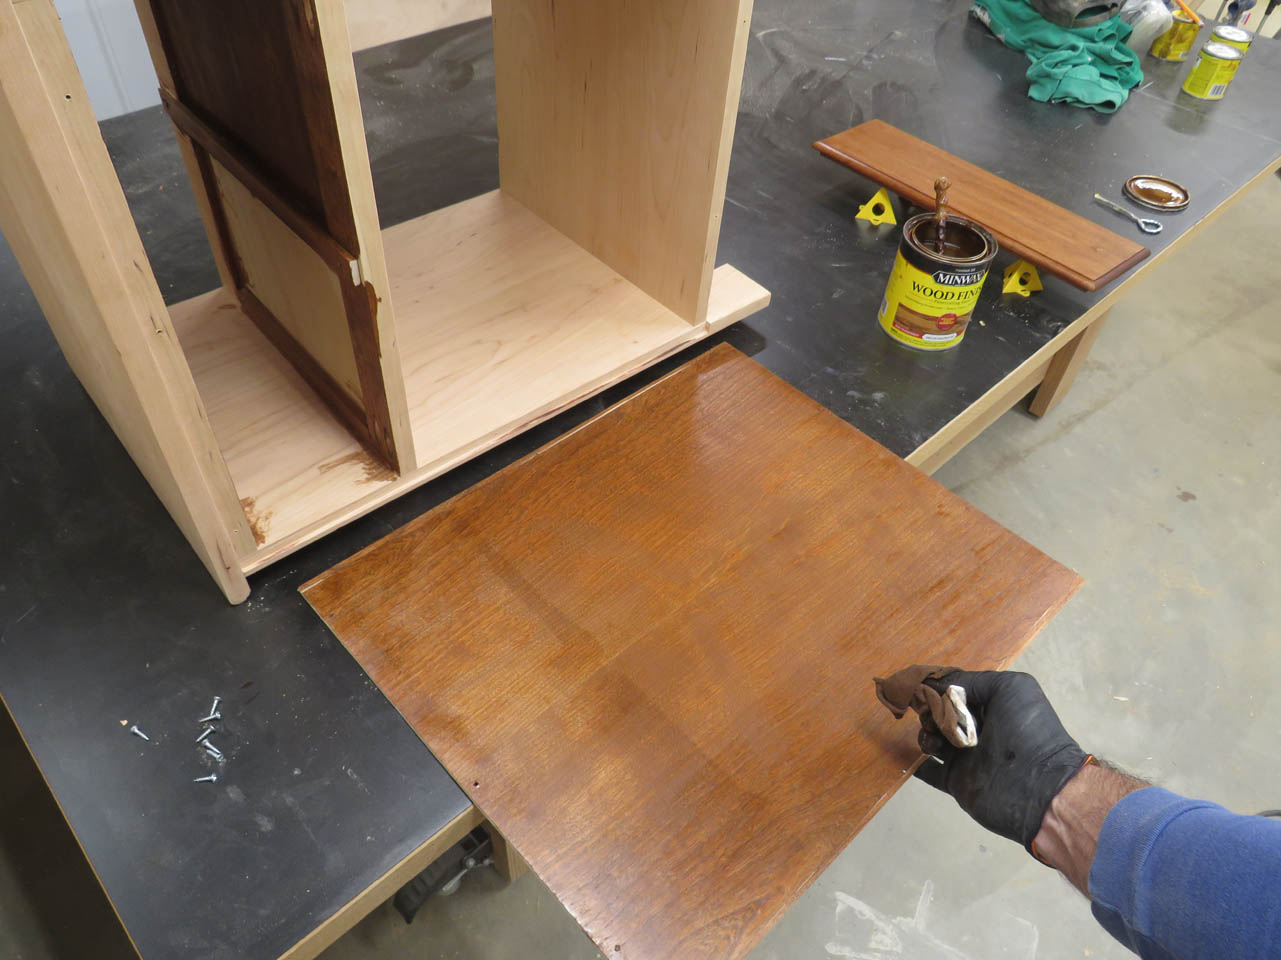
I stained the back, drawer face, and main body.
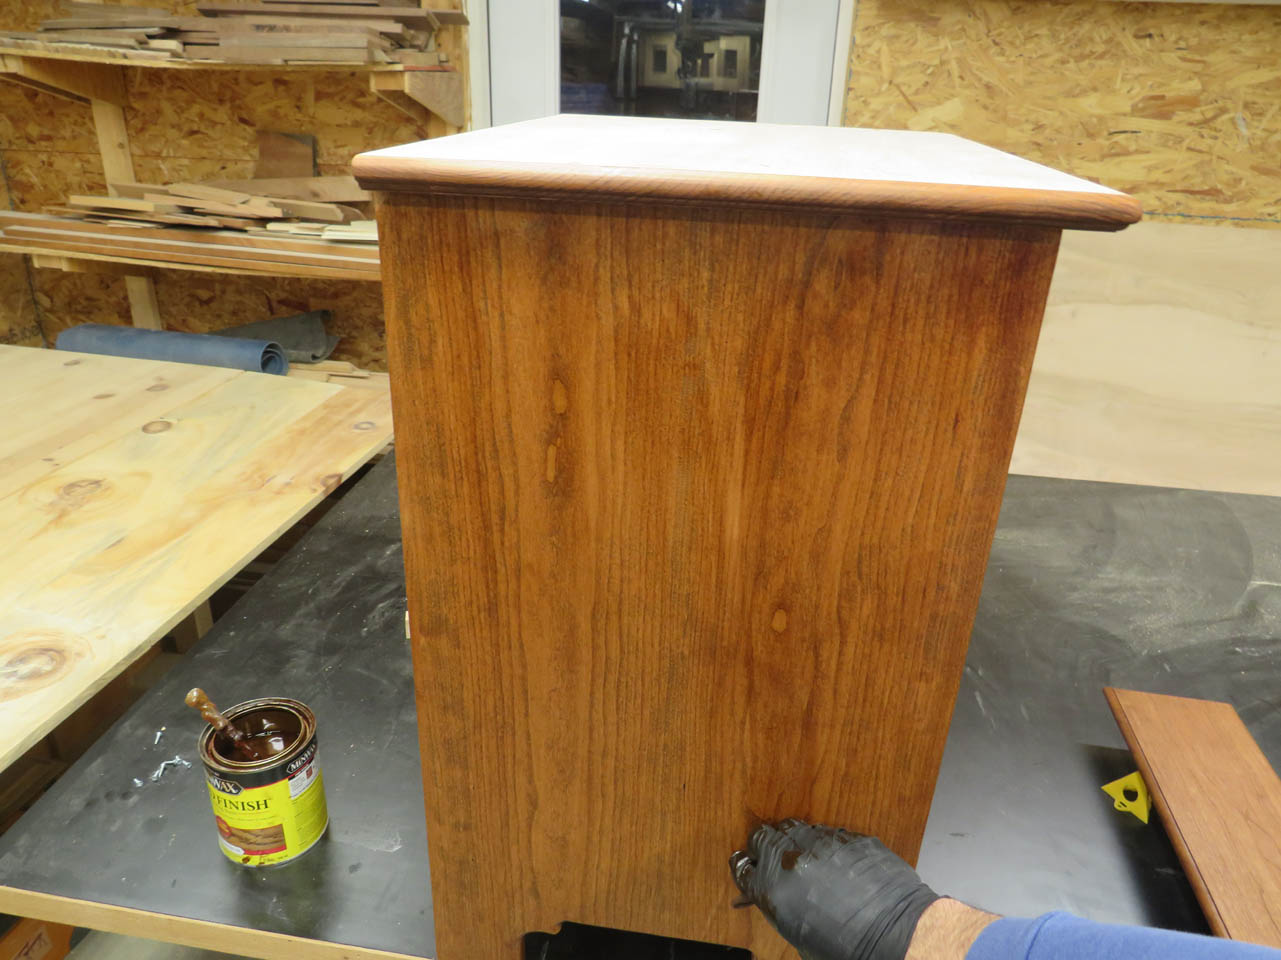
I also sanded the top of the old night stand since the finish had a lot of scratches. I also figured that if both of the tops were the same exact color the two would match better even if the rest was slightly different.
The top of this was stained to the same color.
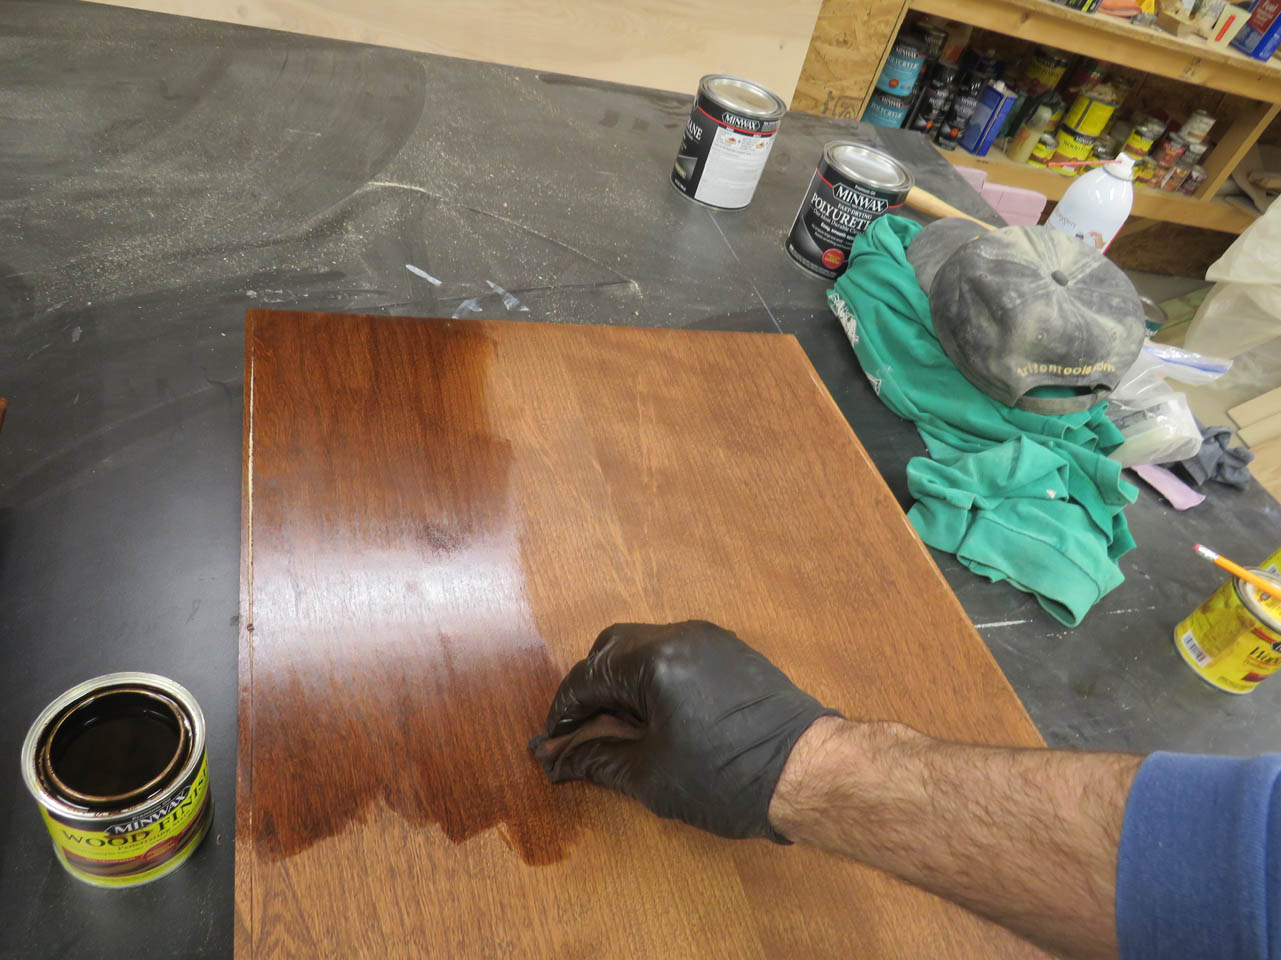
When that was dry, I came back with a slightly darker brown stain that had less red and stained over the previous to darken it up a little.
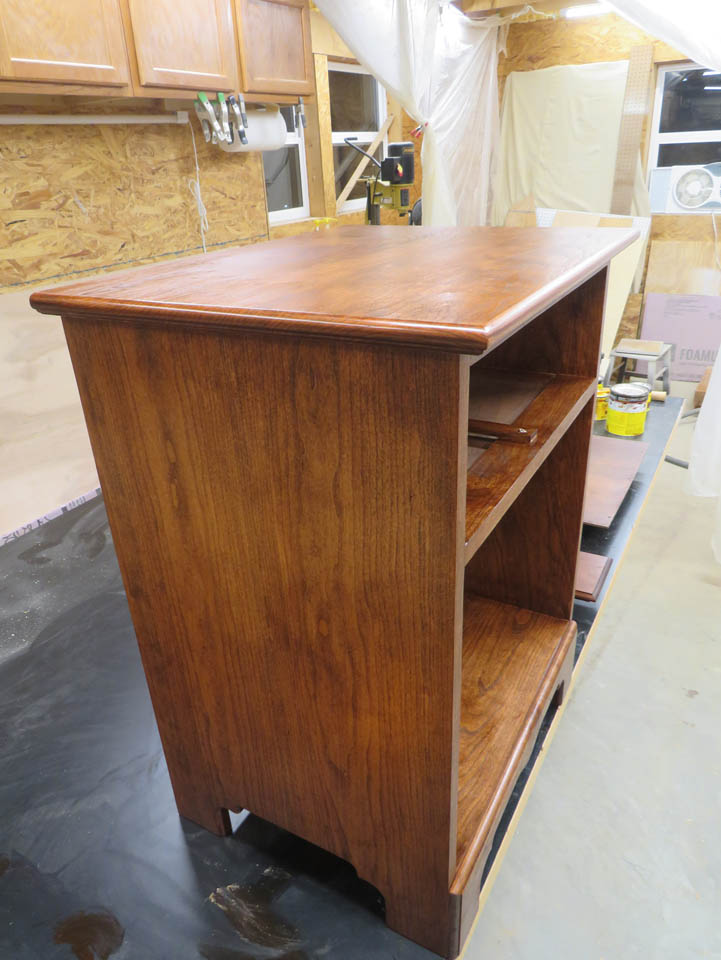
The color is really close now, so while that is drying, I get to make the drawer.
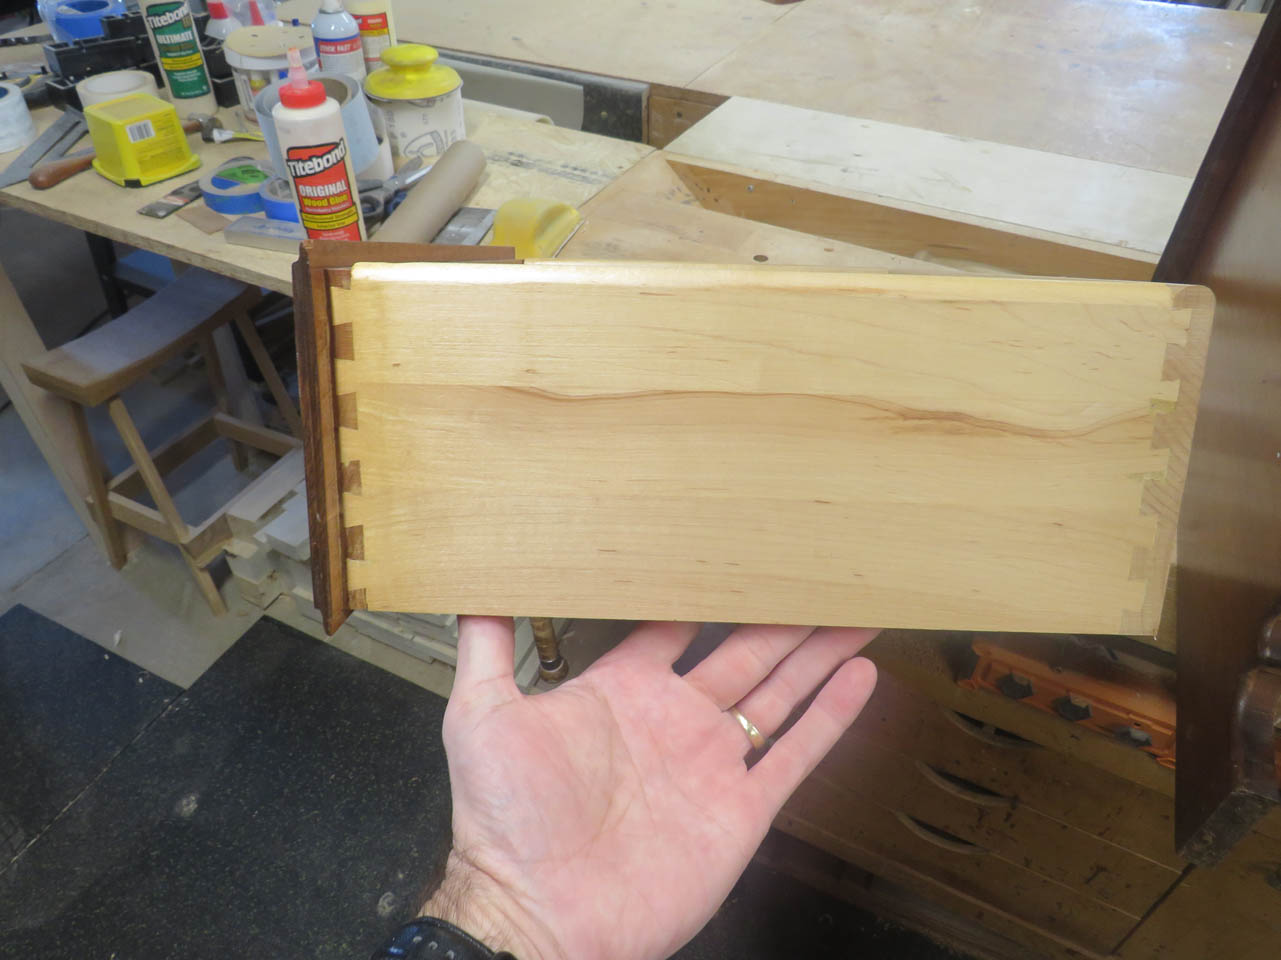
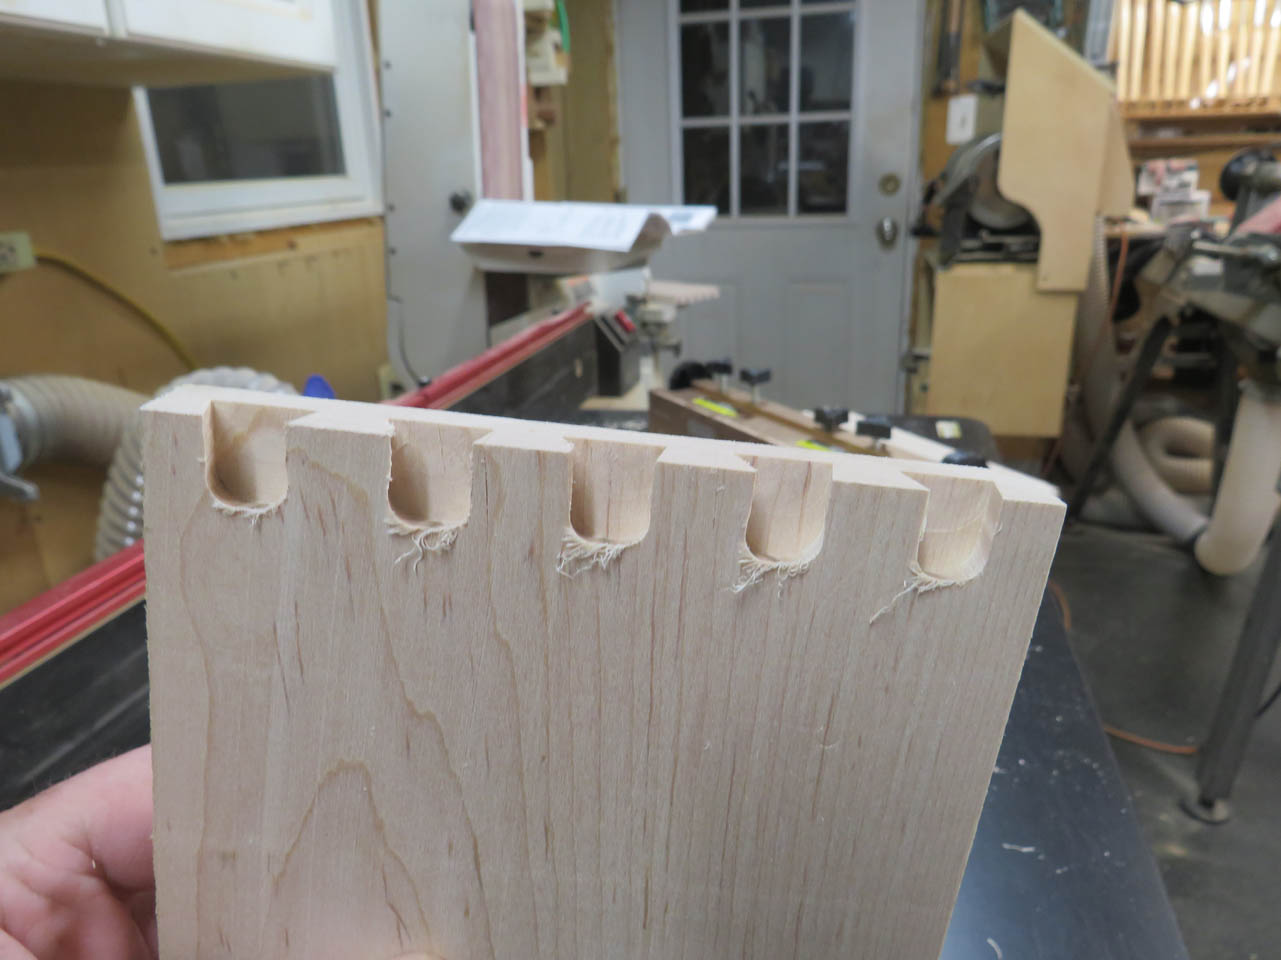
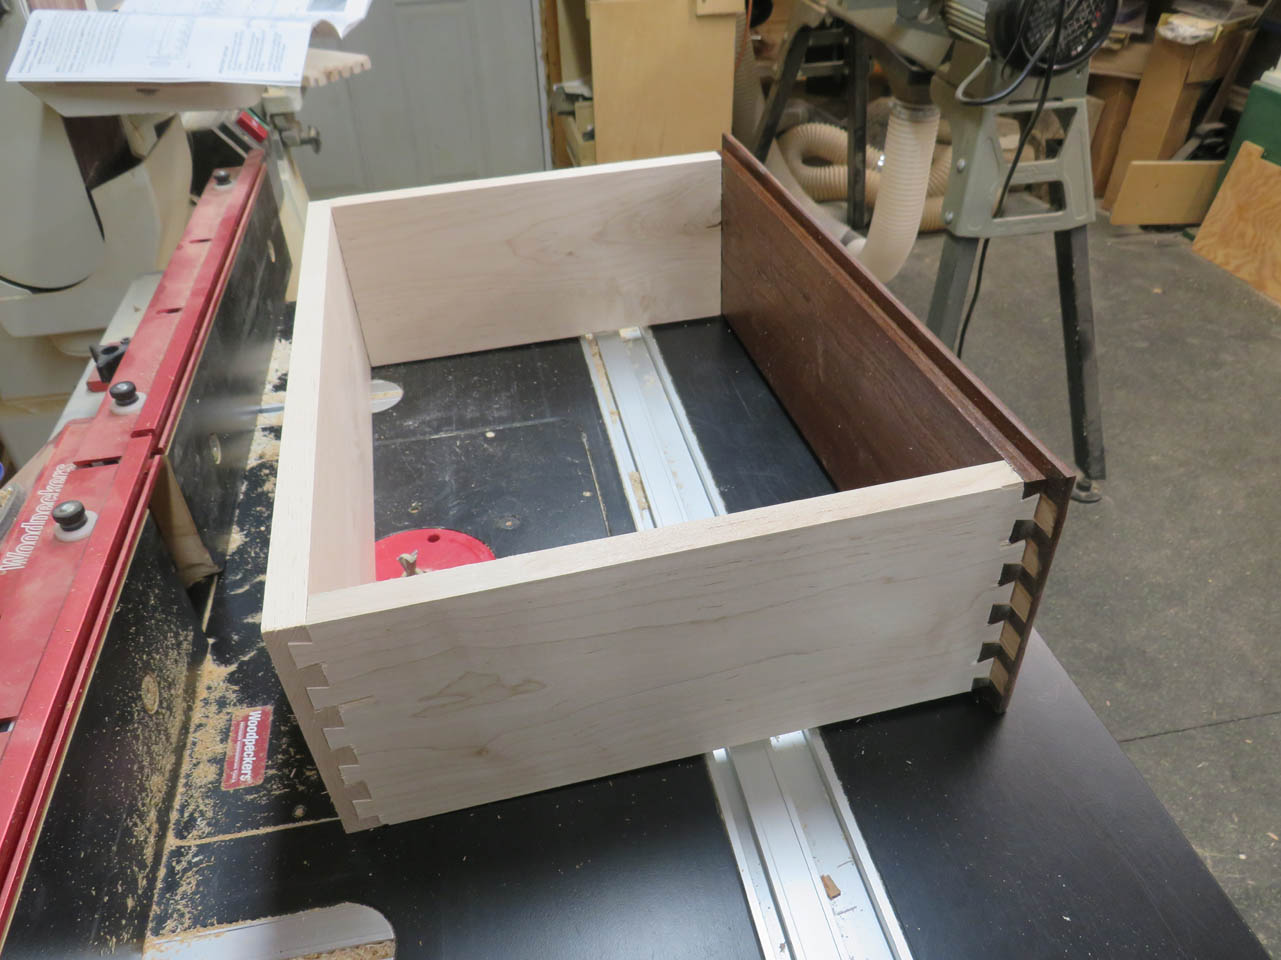
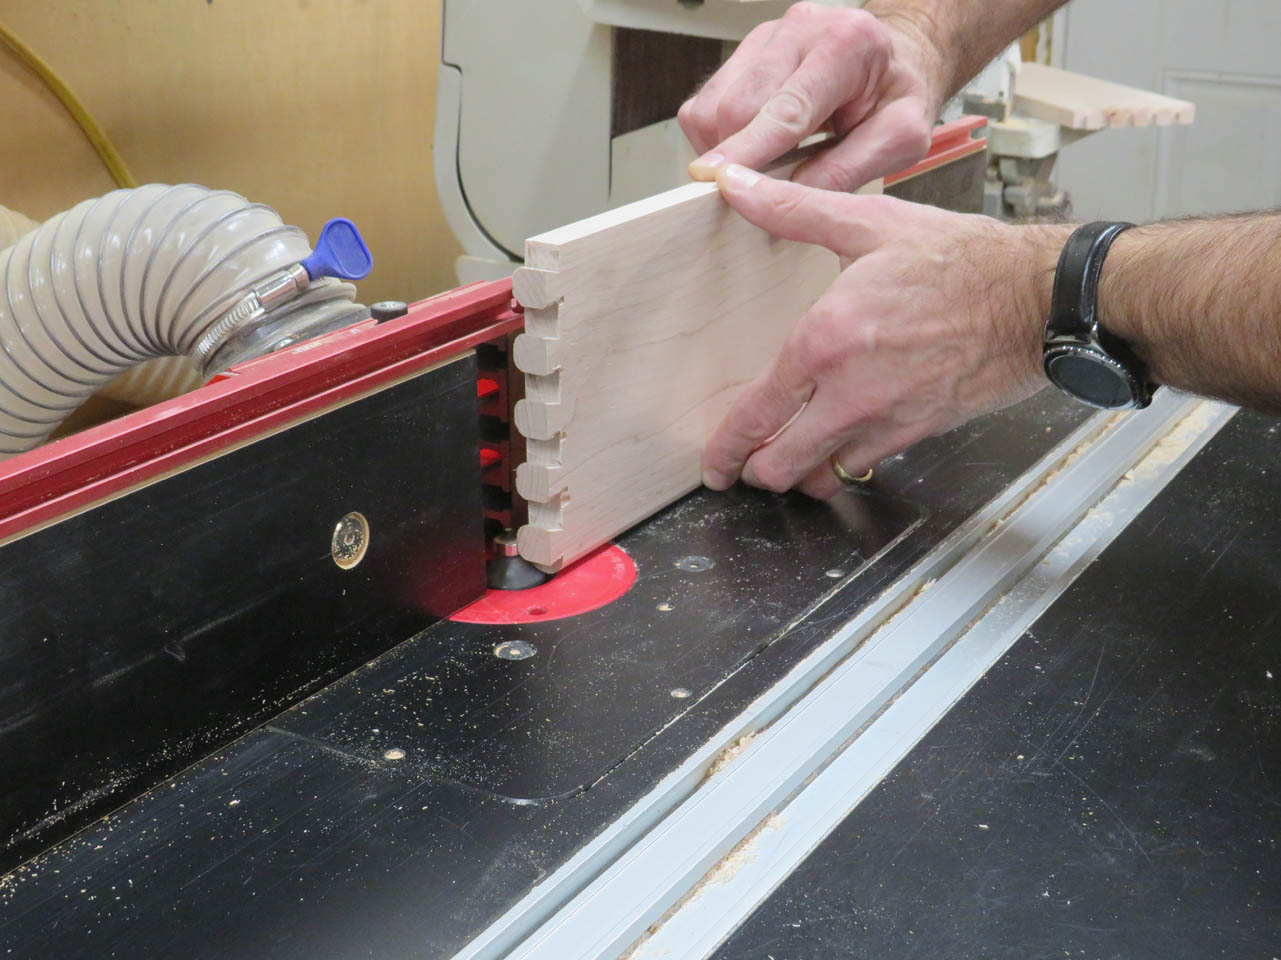
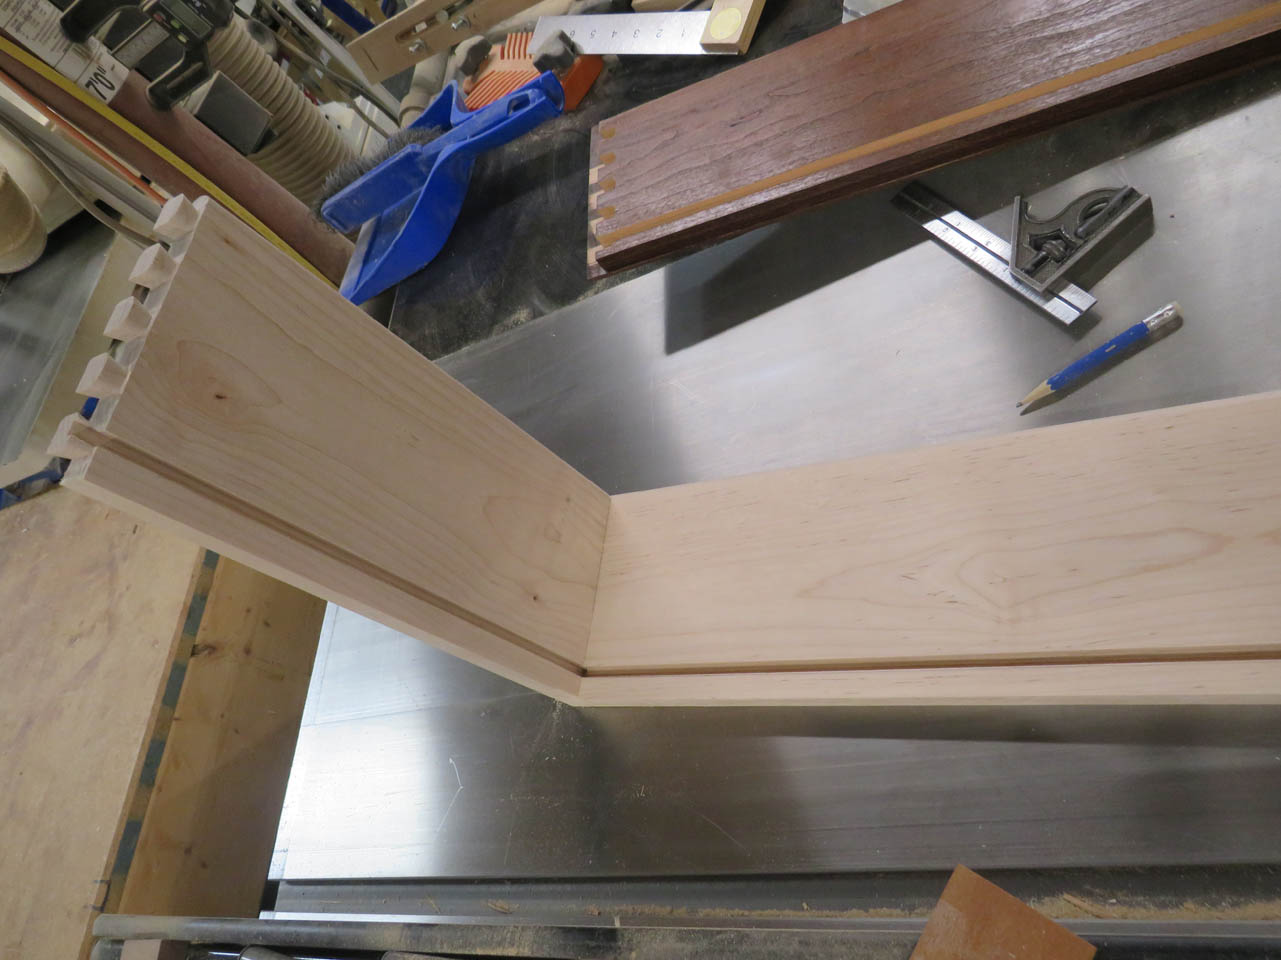
The original drawer was made with maple for the sides and back, and cherry on the face. The drawer was also held together with dovetails. I have never done dovetails before, but I wanted to match the original so I found a small inexpensive dovetail jig and gave it a try.
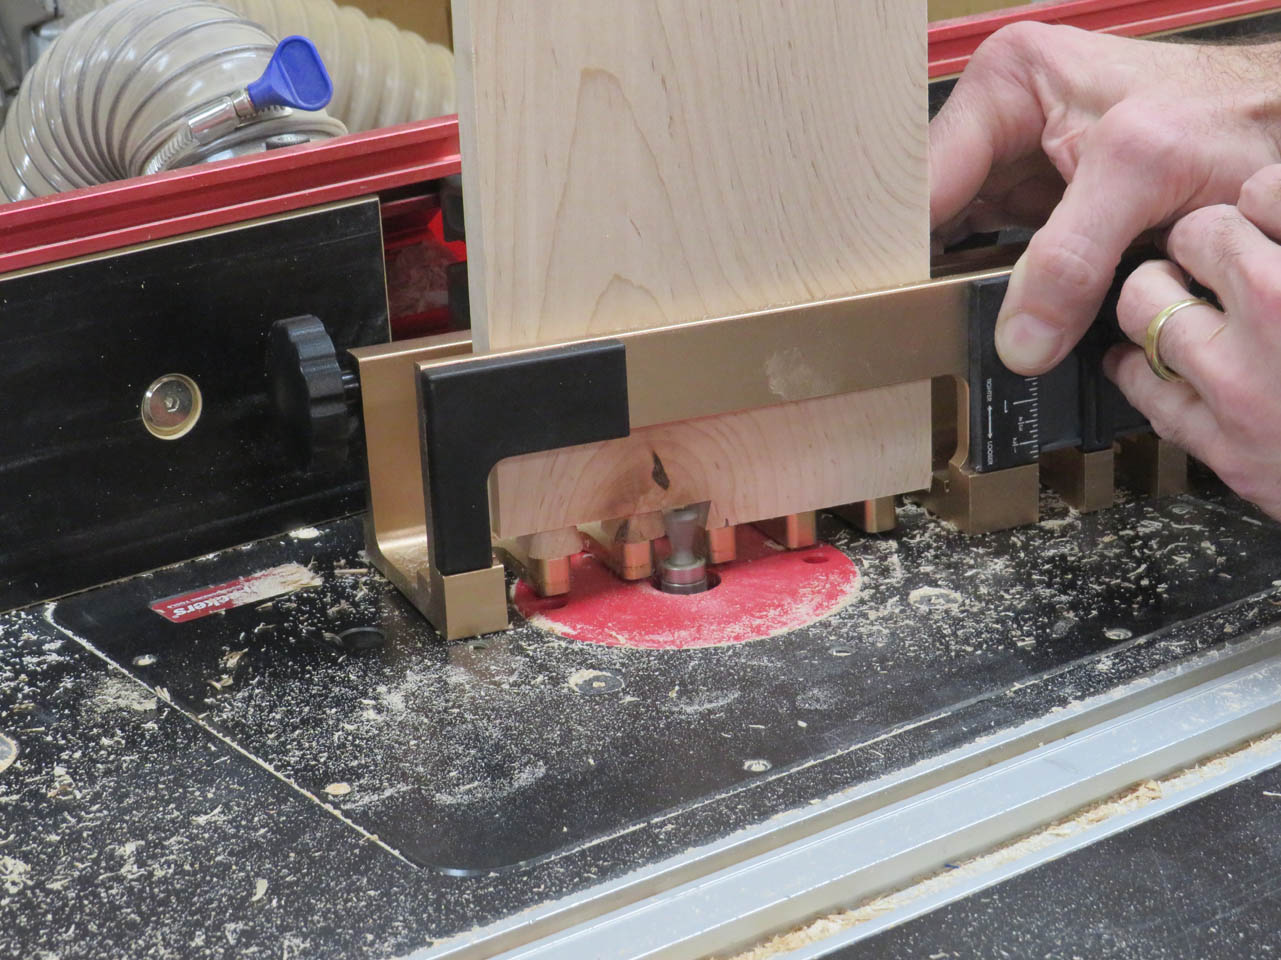
After about five minutes of YouTube videos, I was now an expert and I got to work. I did one test cut for the pins and one for the tails.
Everything worked as advertised the first time out.
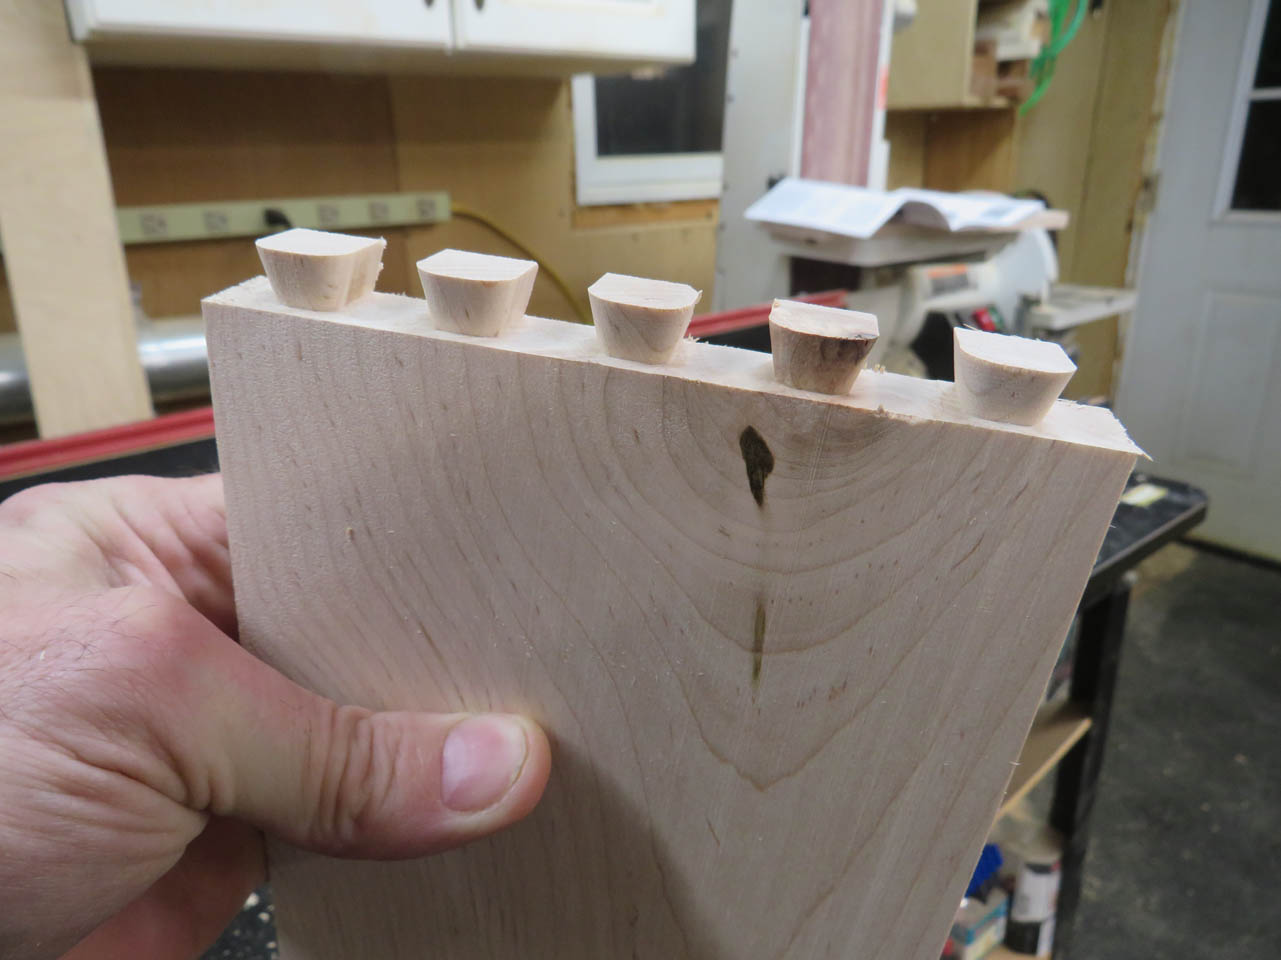
The sides and rear were easy and fit together perfectly.
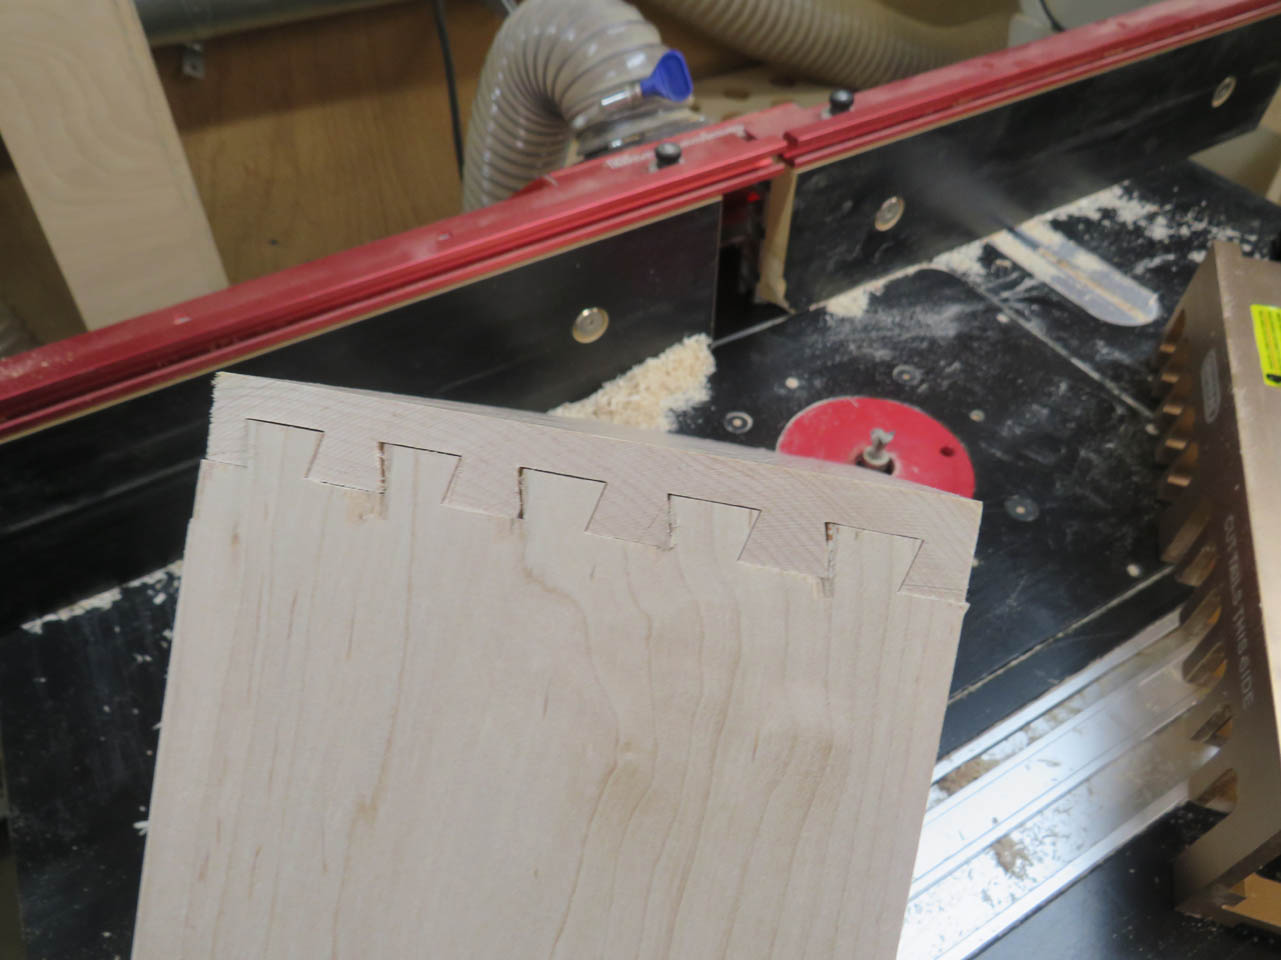
The front was a little more challenging because of the overhang all the way around. The shortest dovetail setting barely scraped the stain off the side overhangs.
But it fit perfectly so just a bit more sanding and stain and it will be fine…
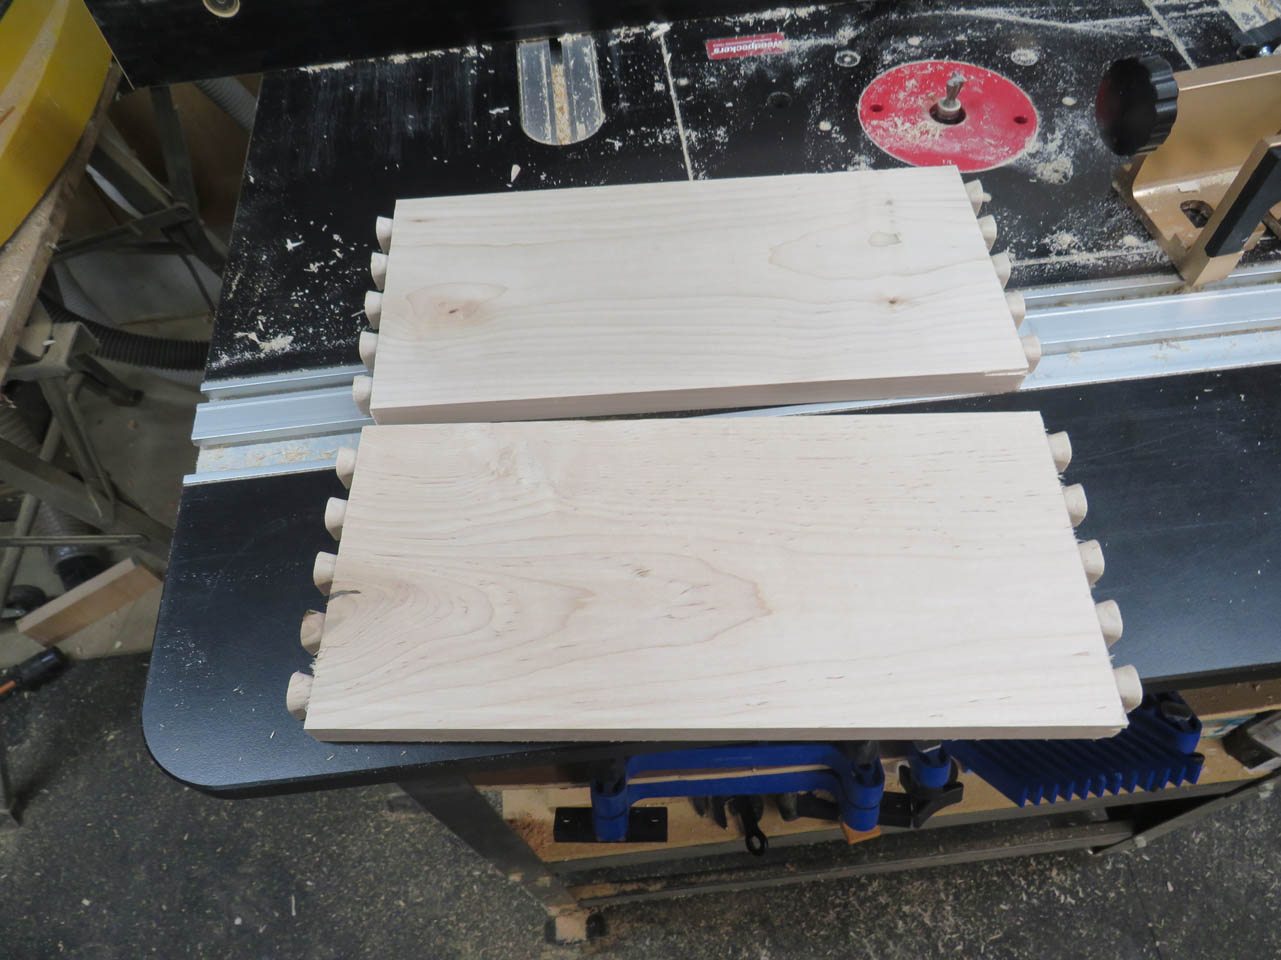
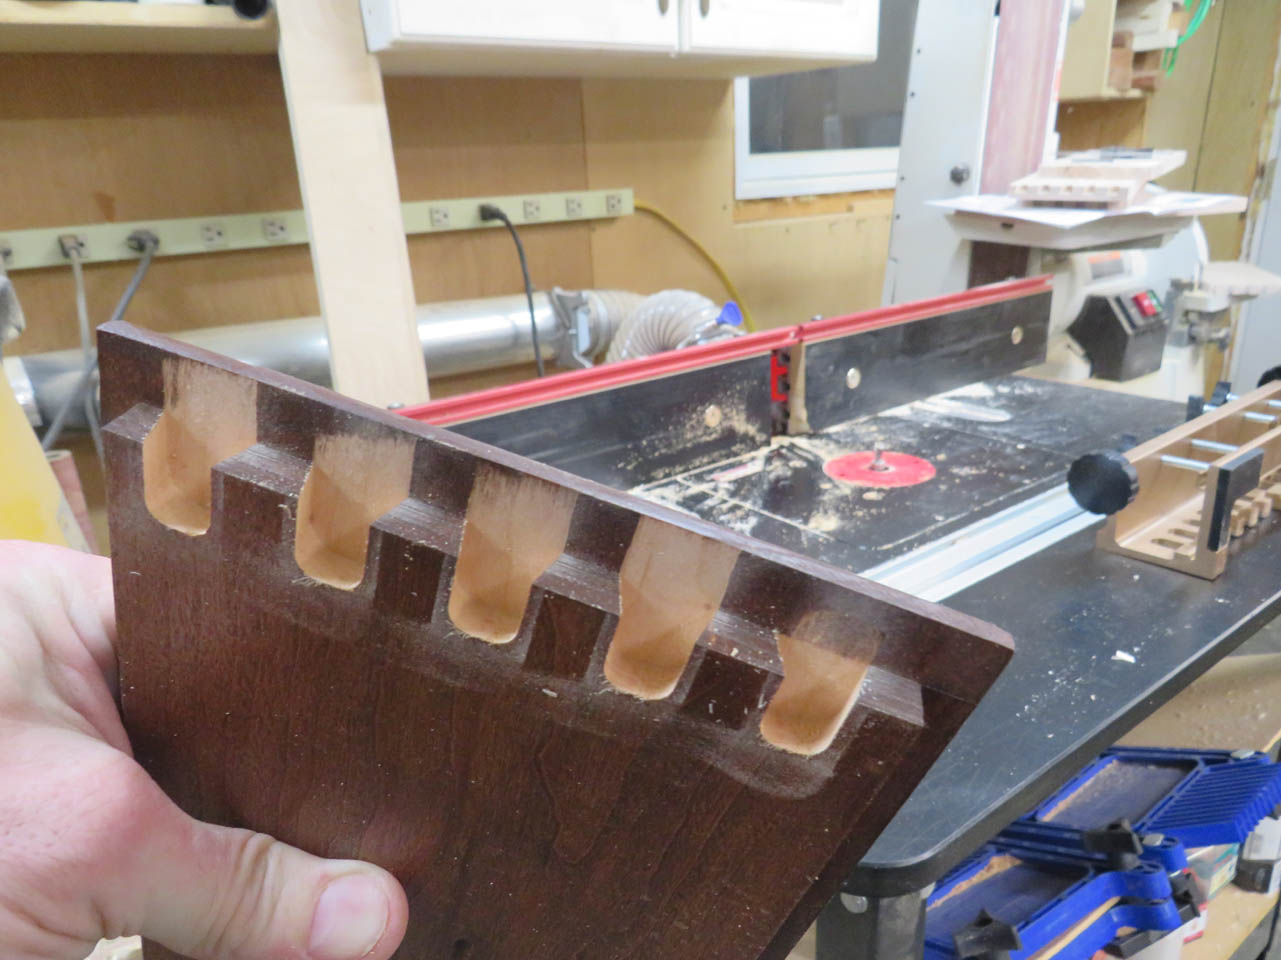
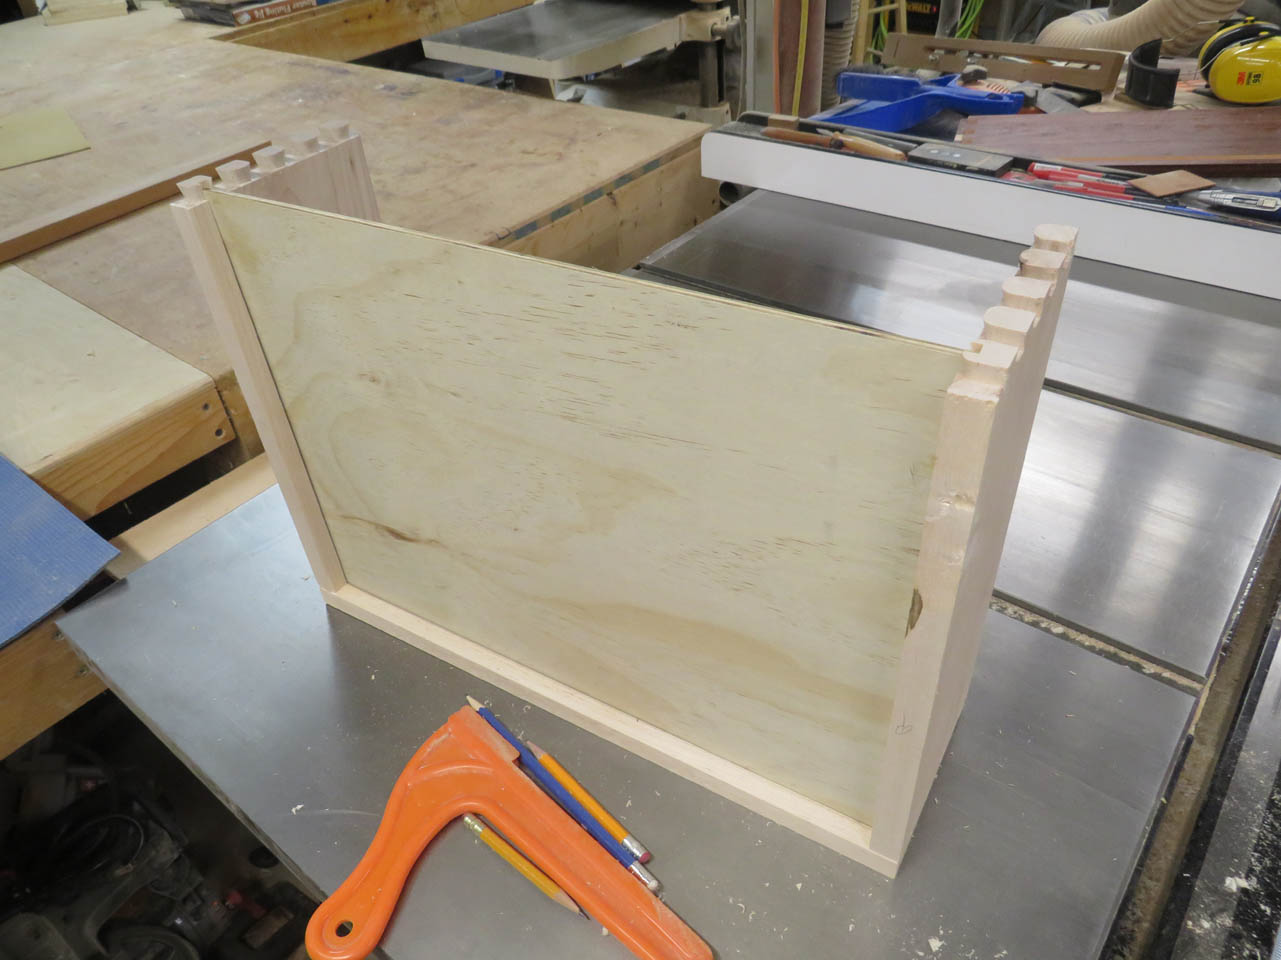
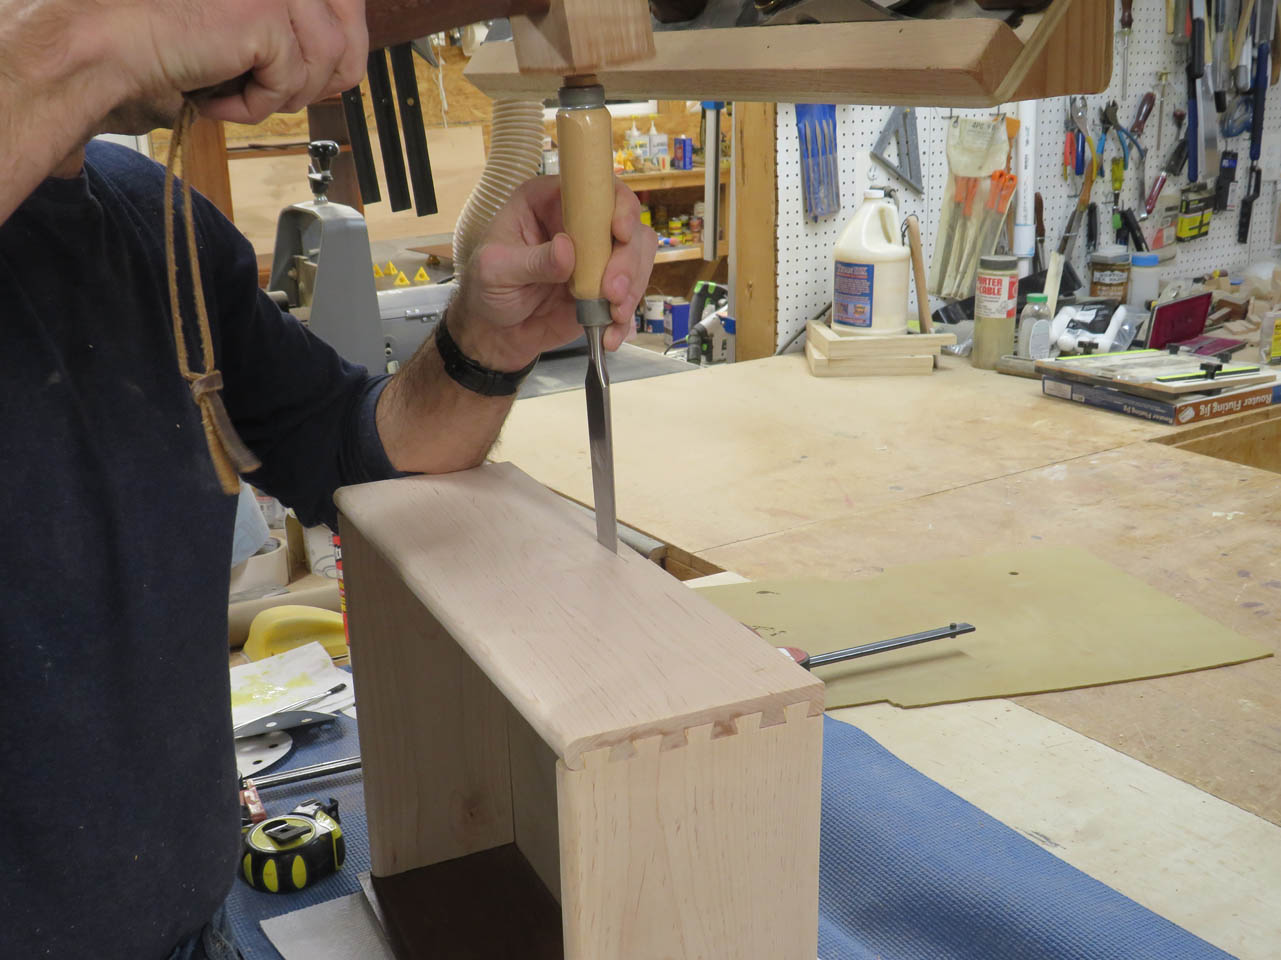
The top of the sides and rear of the drawer get a full bullnose so I put the 5/16″ round-over bit back in and cut both sides to create the bullnose.
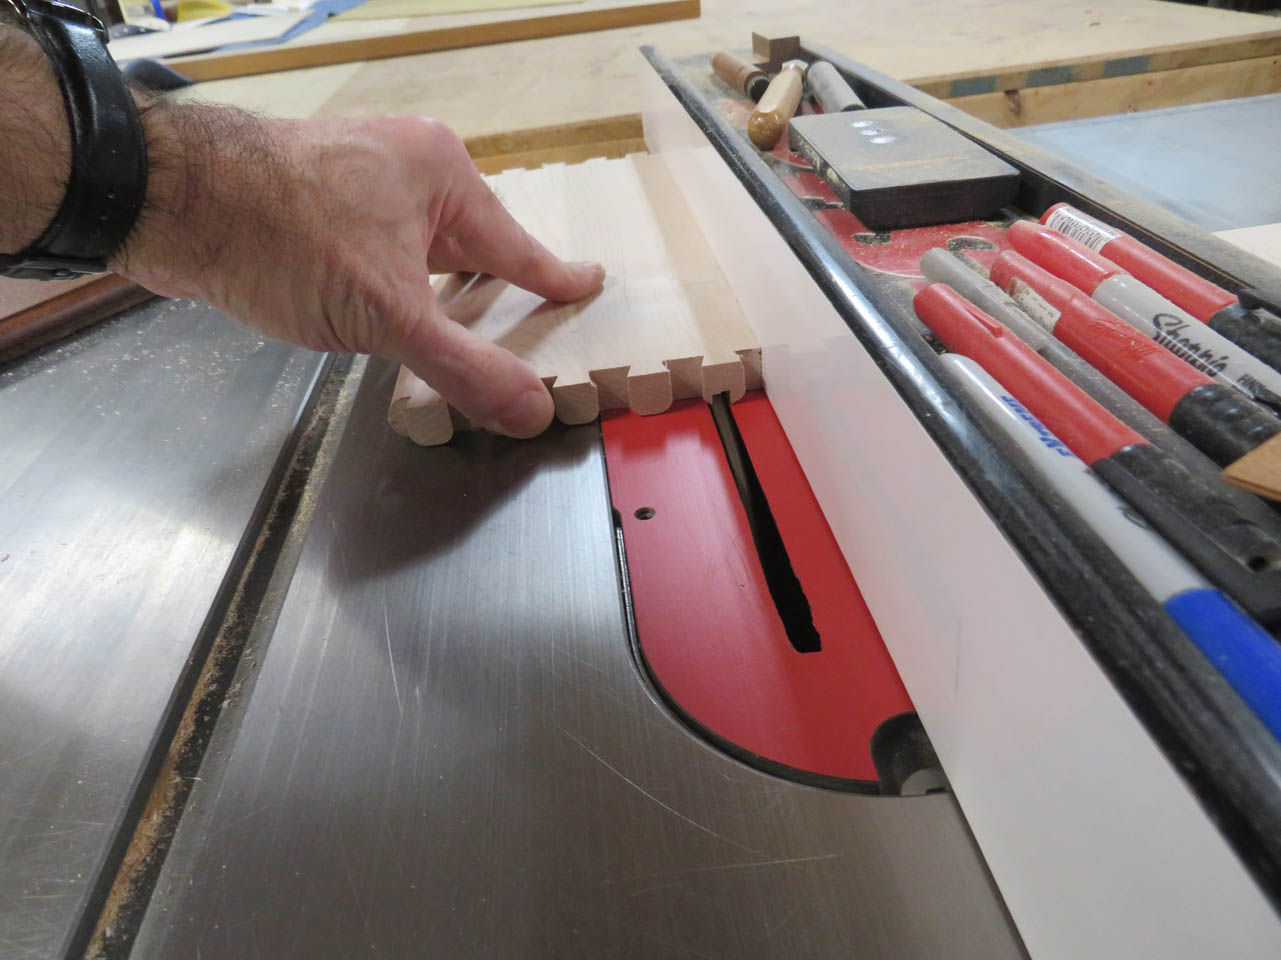
All that they need now is a 1/4″ channel for the plywood bottom to sit in.
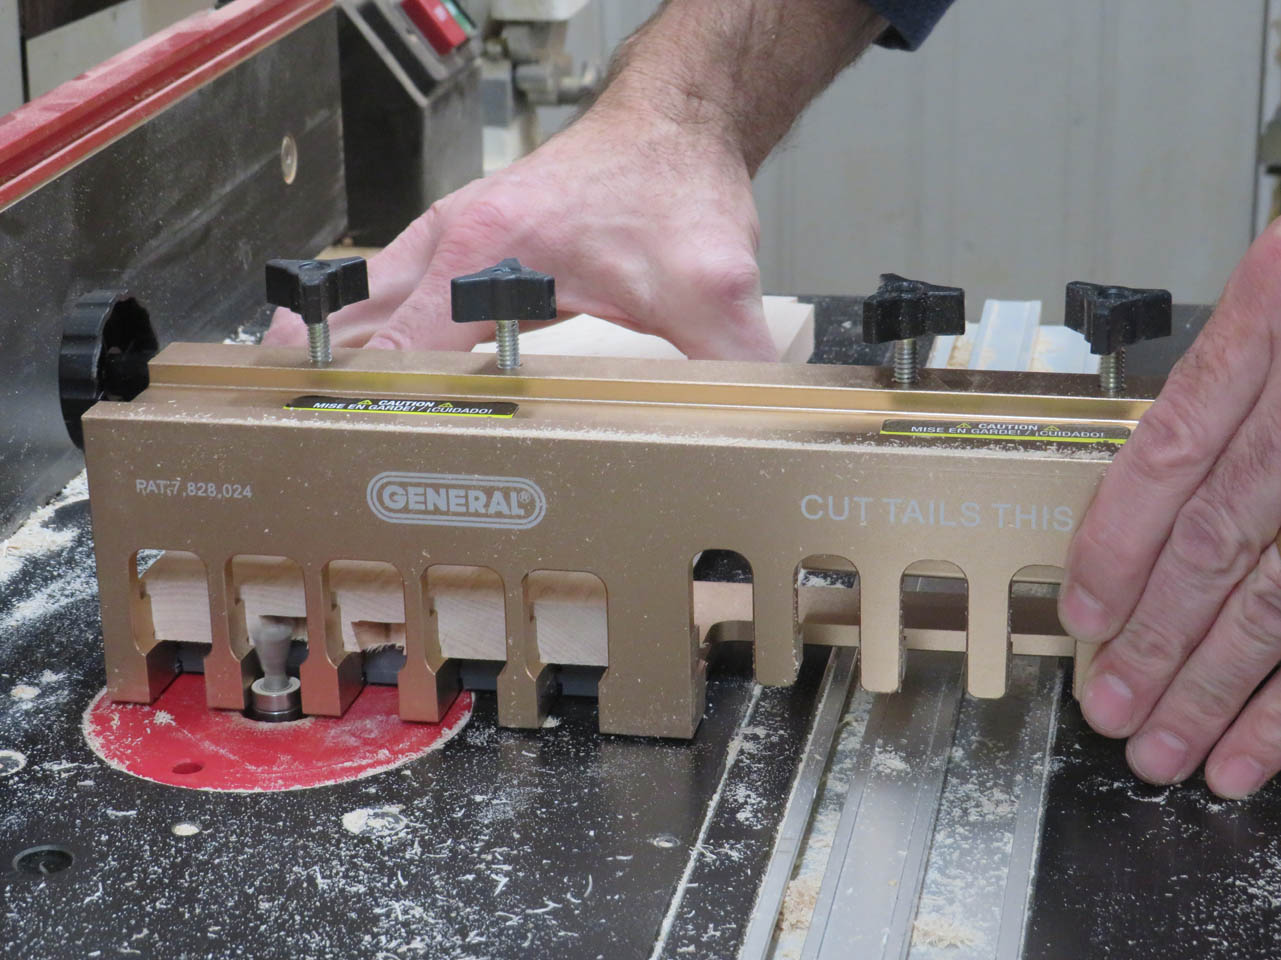
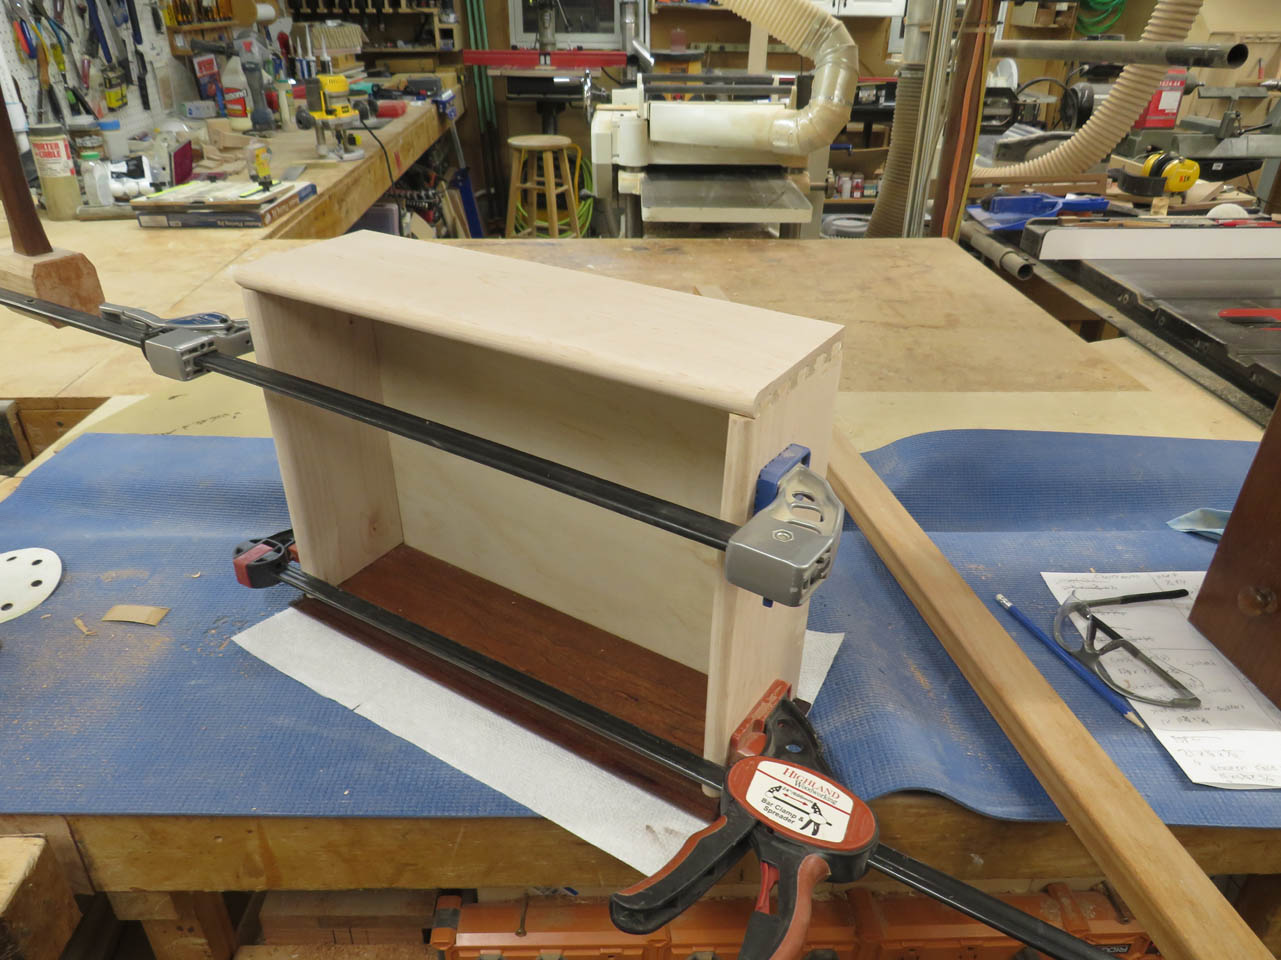
The dry-fit worked great so I got a brush and carefully applied glue to the dovetails.
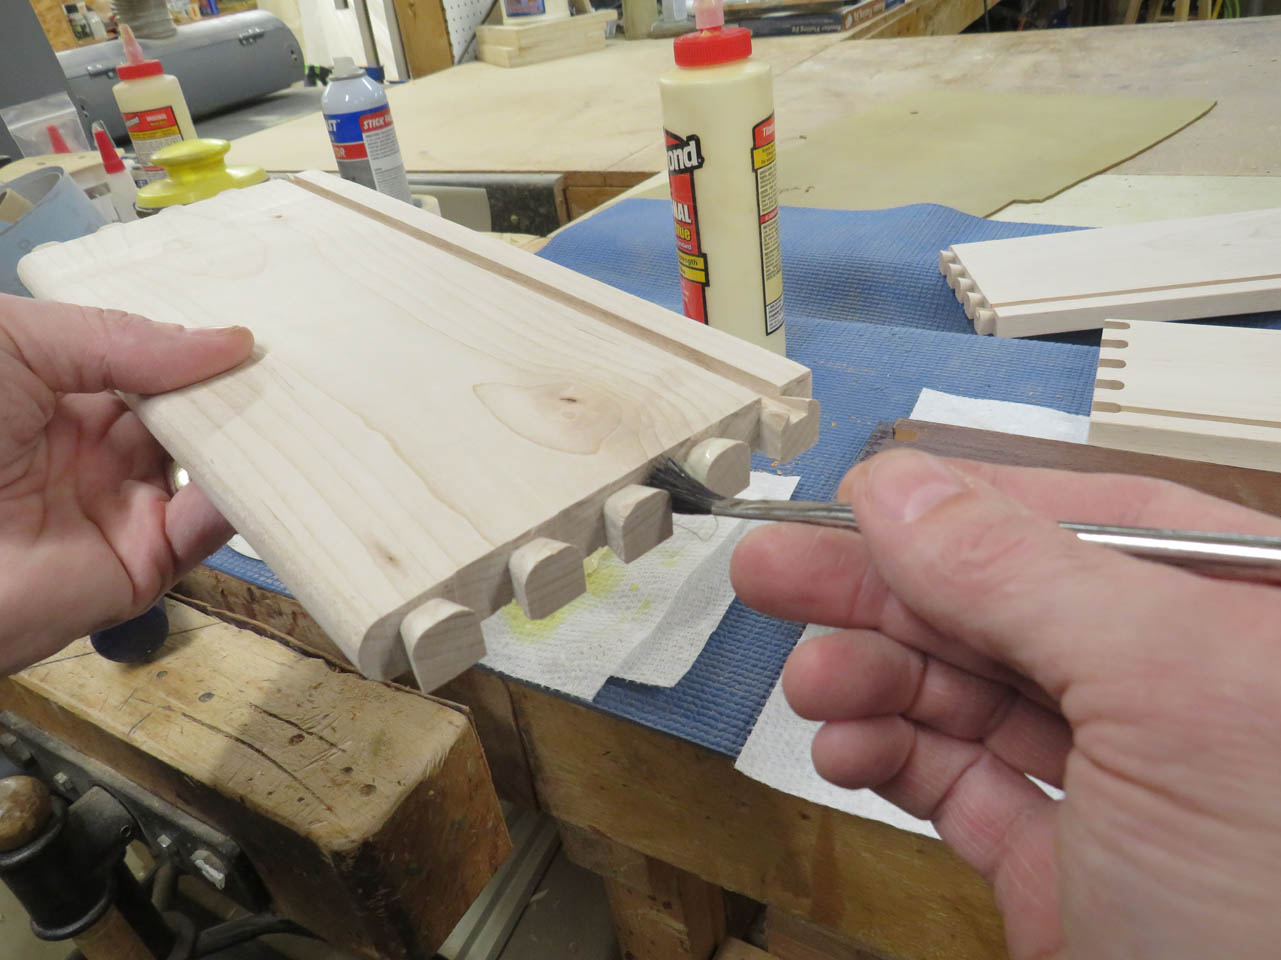
Then I clamped it all up to dry.
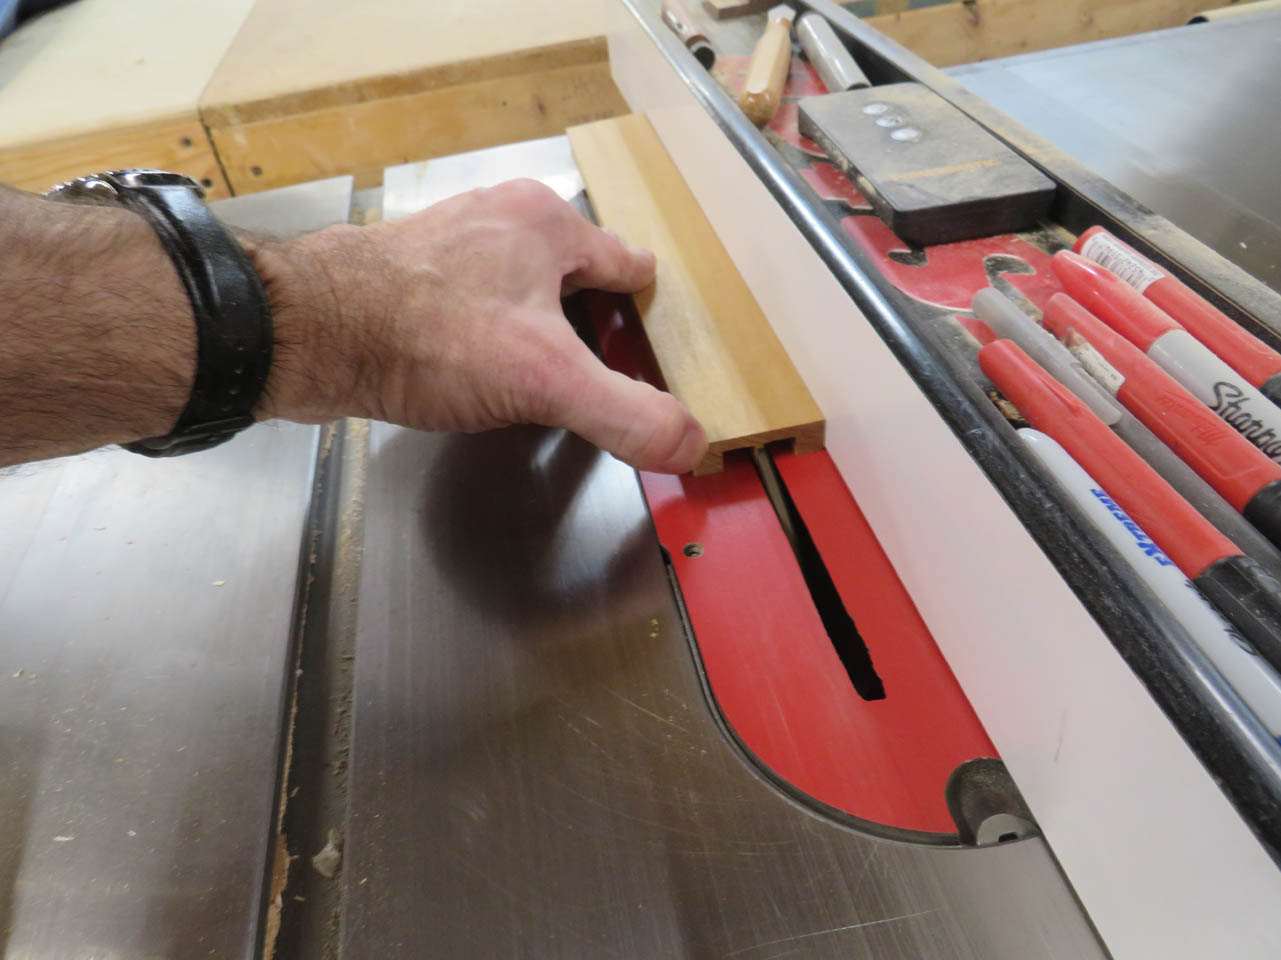
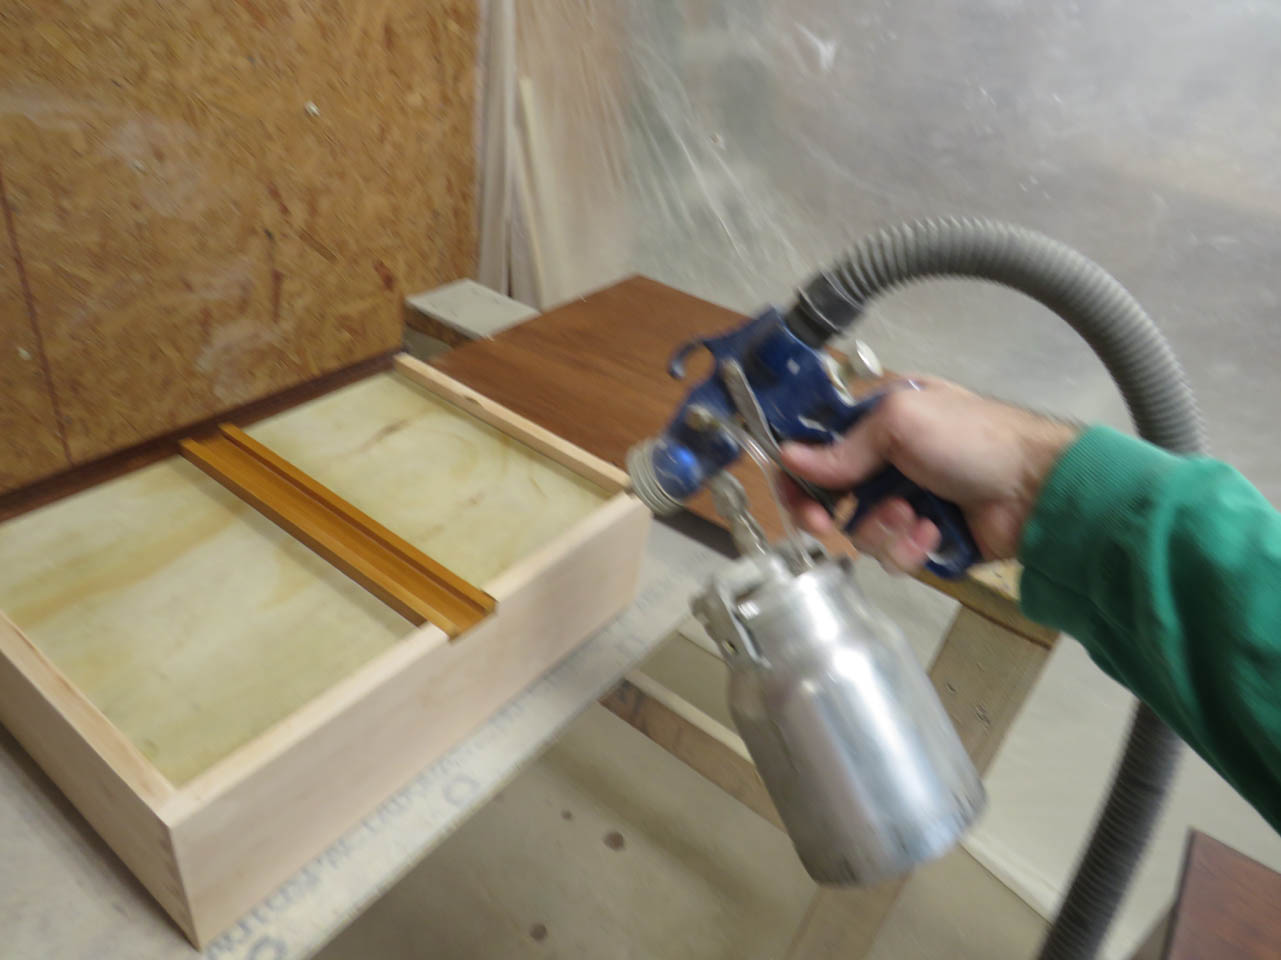
The original drawer has a channel along the bottom that rides on the center guide. This appears to be some kind of tropical hardwood. It makes sense because most of your tropical hardwoods tend to be self-oiling. That would help prevent the drawer from sticking over time. It would also leave it less prone to expansion and contraction since the oily wood is less likely to absorb moisture. I have some Garapa (Brazilian Ash) and it looks like a perfect match to the original, I cut a channel into one side with the table saw.
Then I cut a notch into the bottom of the drawer,
I used a chisel to clean up the notch and installed the Garaps piece with glue and a couple of brad nails.
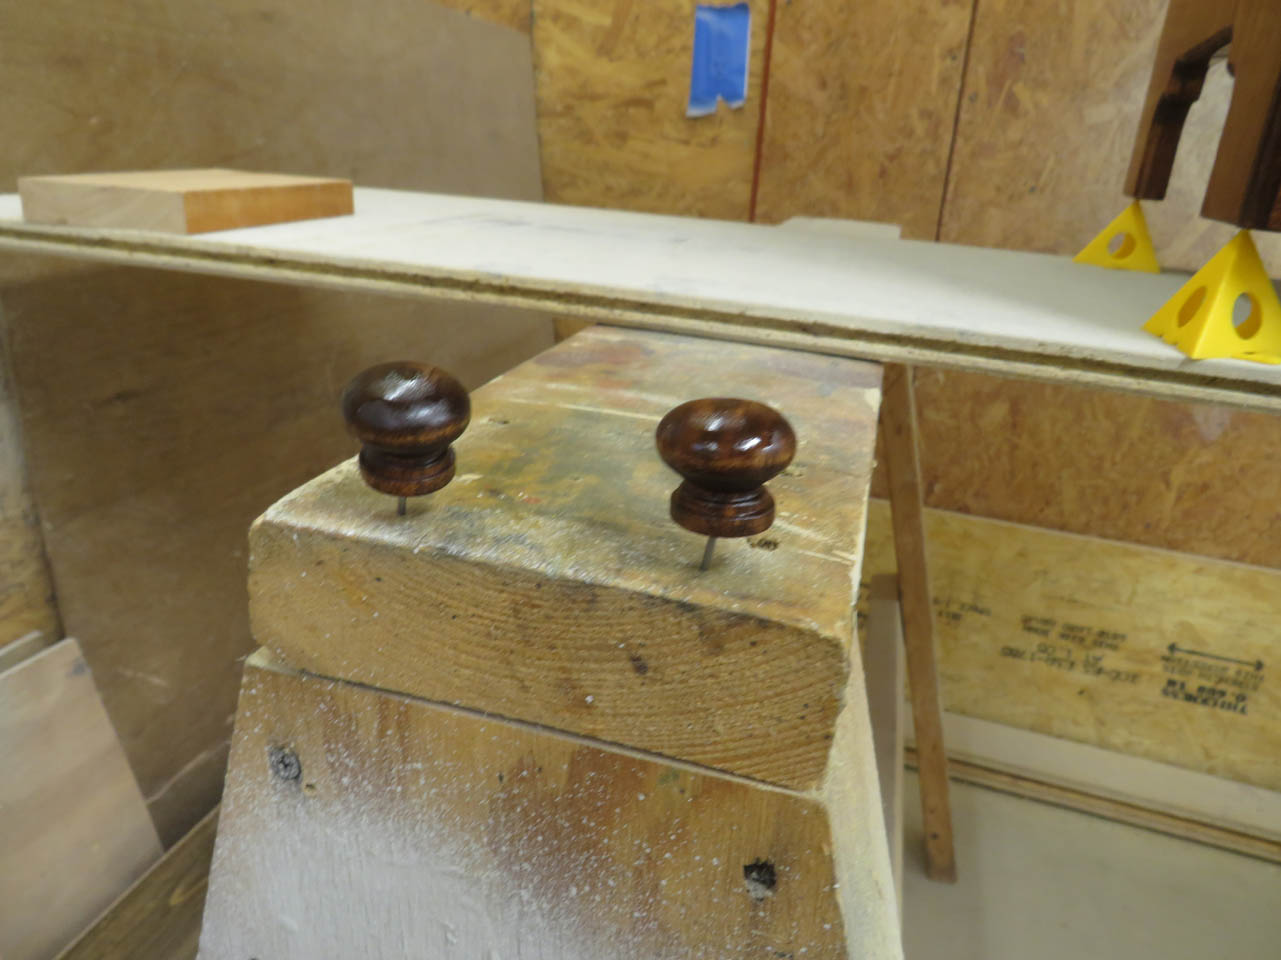
The final thing the drawer needs is a couple of holes for the knobs.
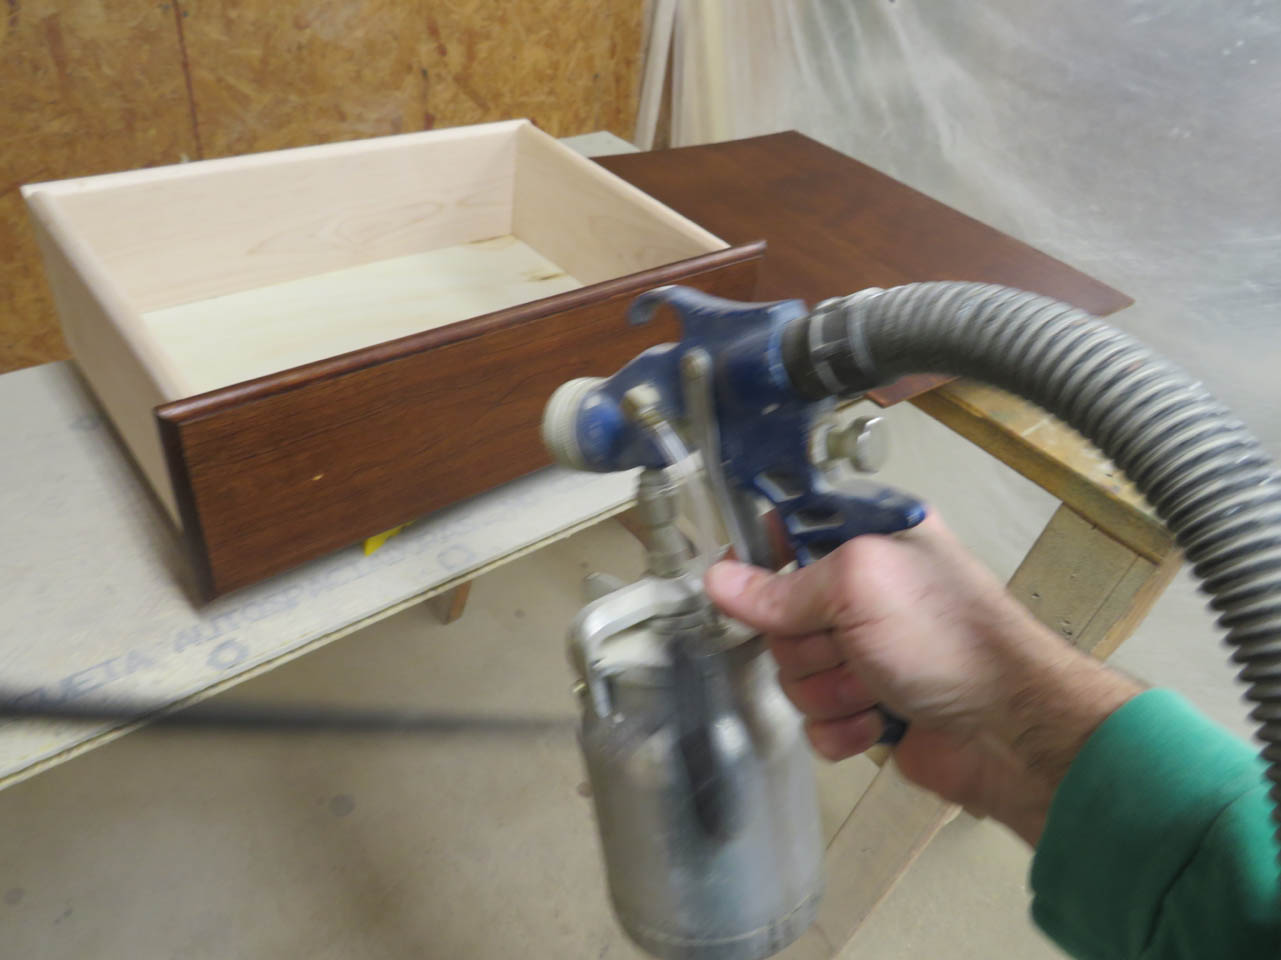
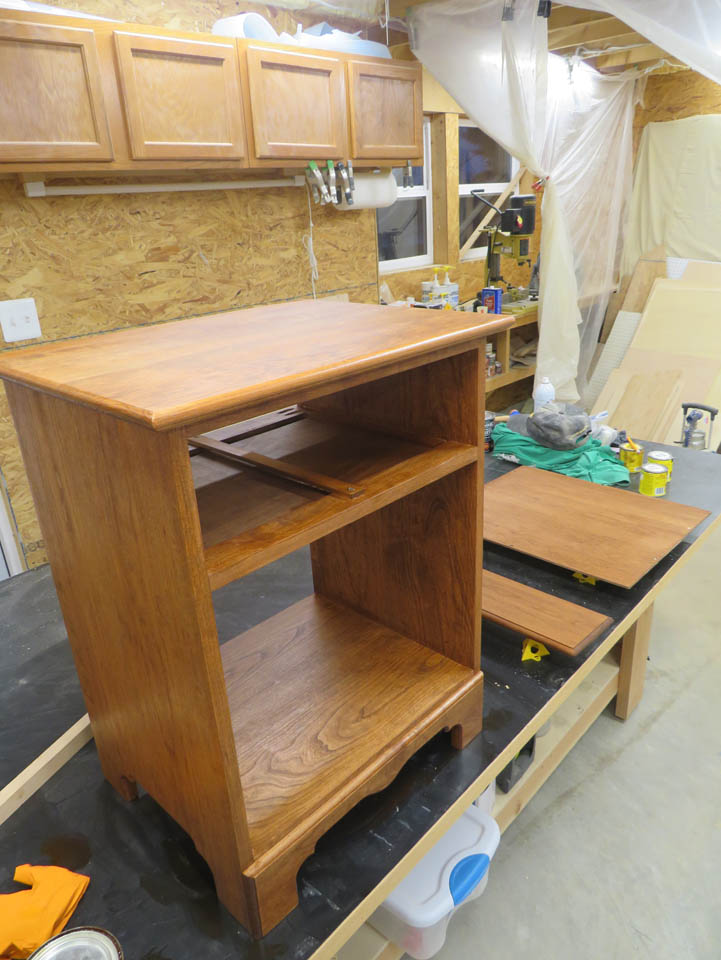
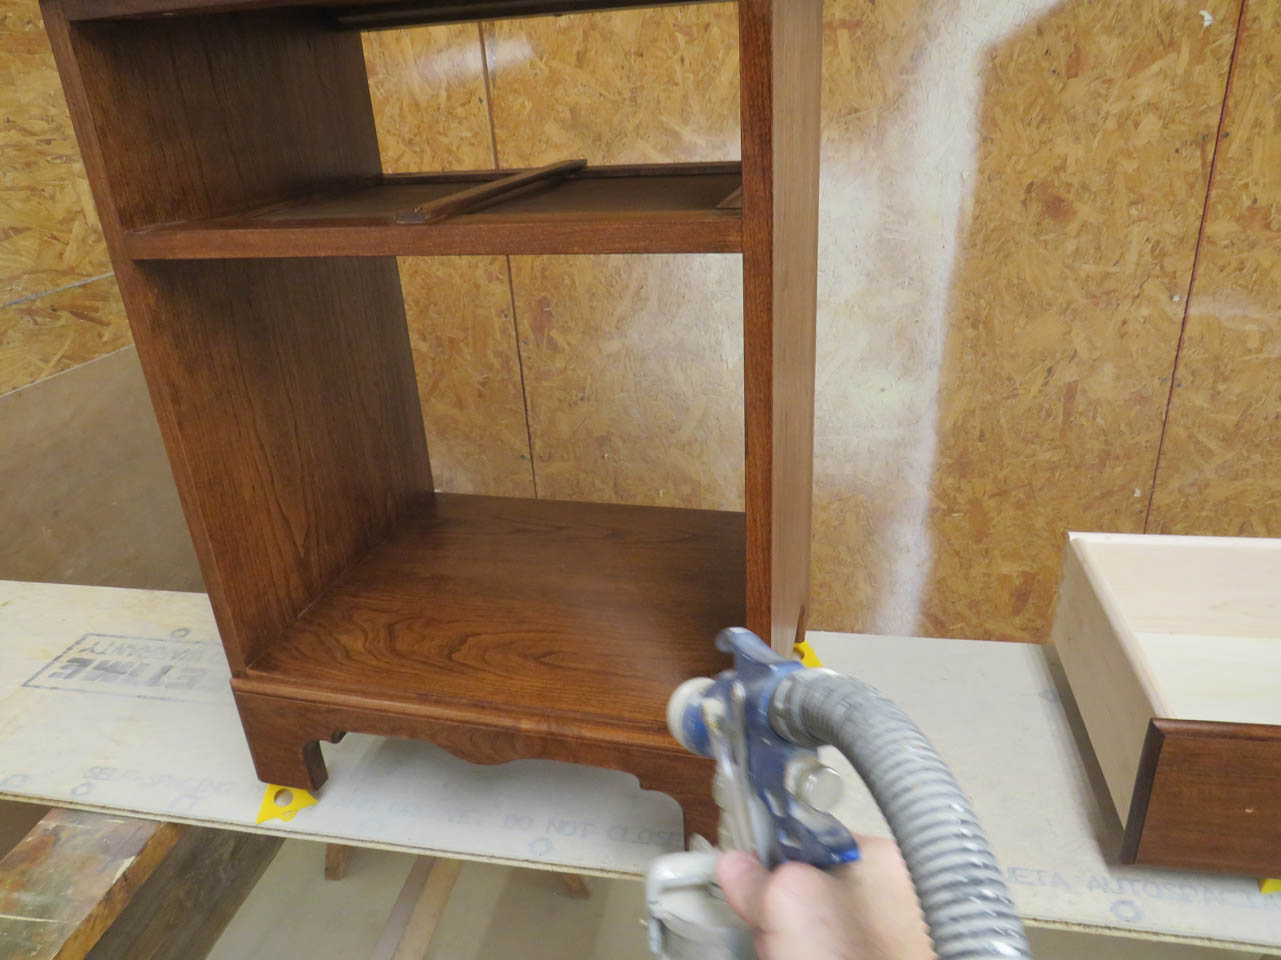
Then it all went into the spray booth and got a first coat of polyurethane.
The knobs I found online were maple but once stained, they will match perfectly.
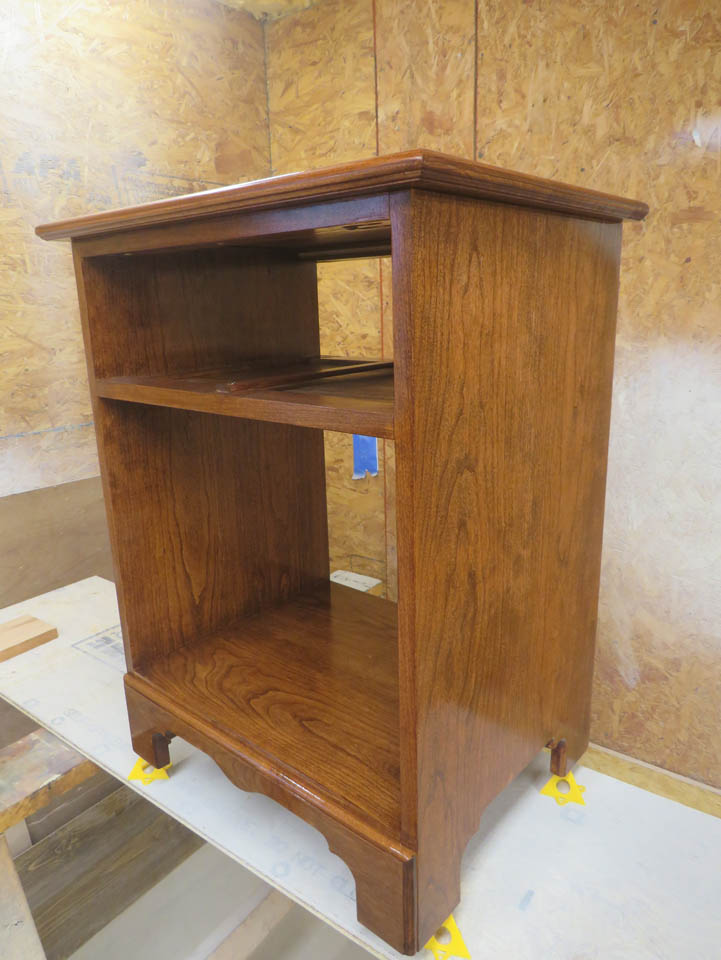
I finished the first coat and then remembered to get the original and spray it as well…
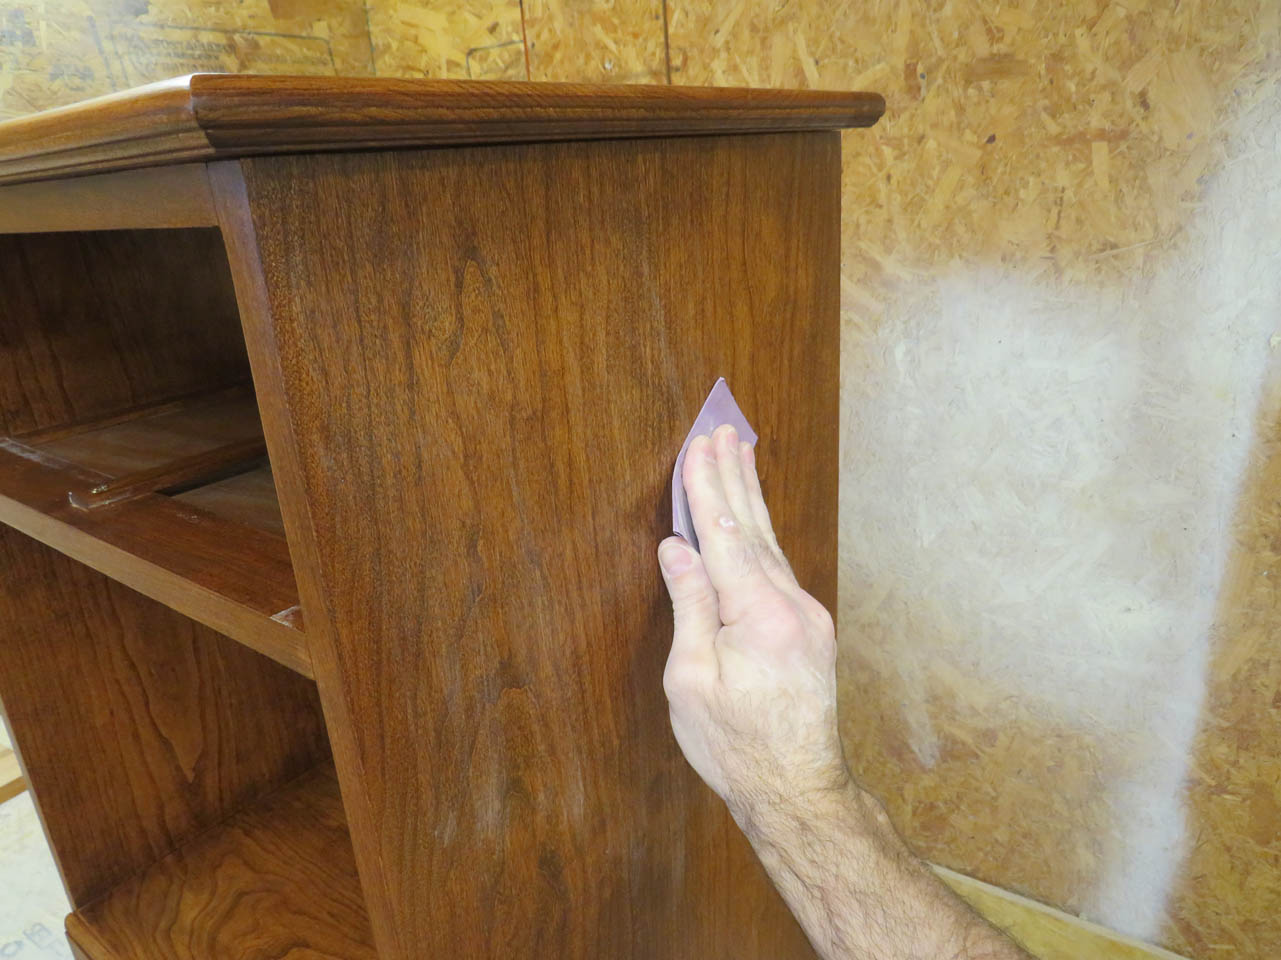
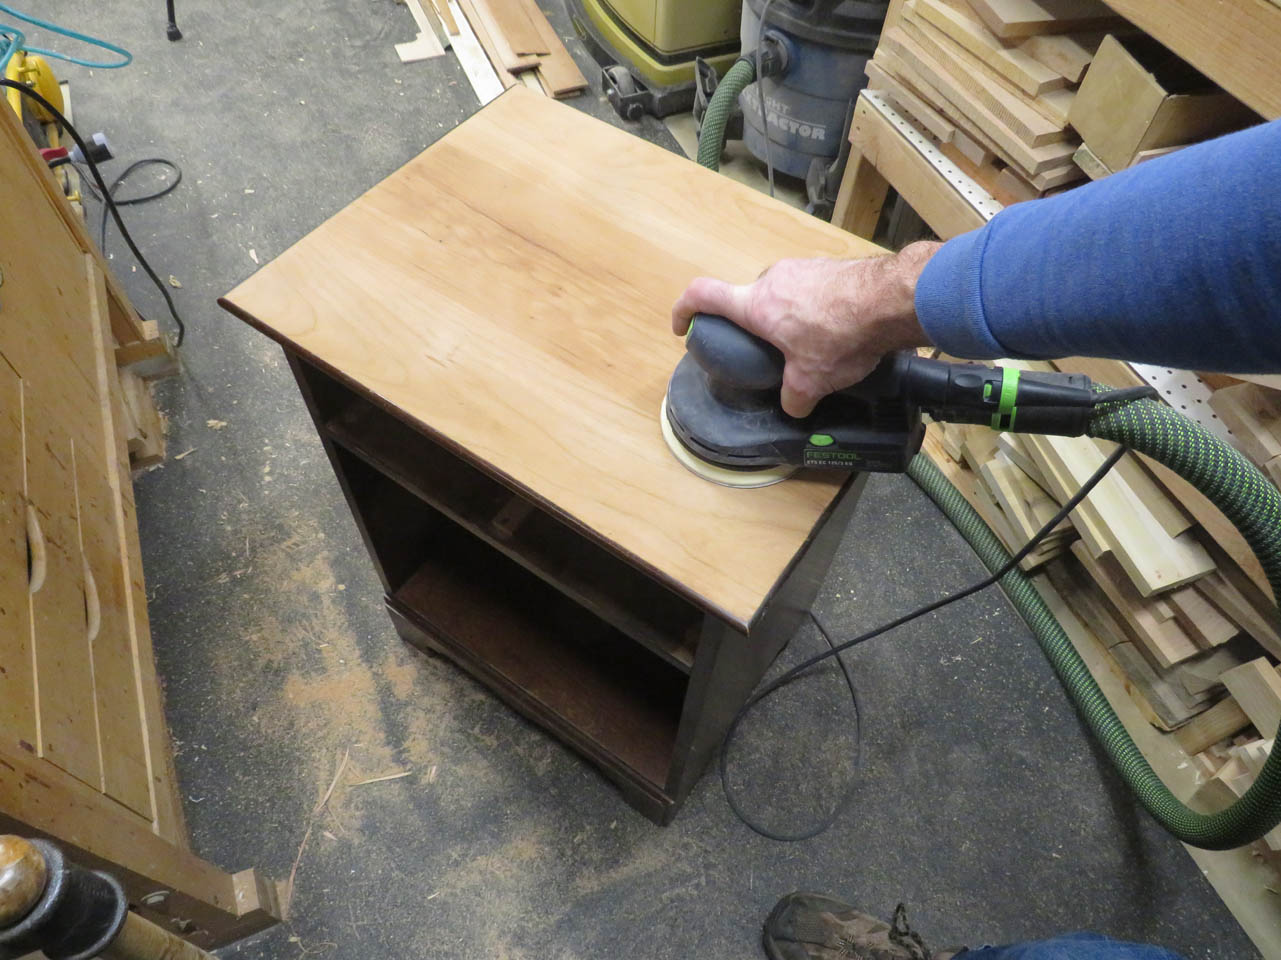
The next day, I sanded all of the finished surfaces with 400 grit sandpaper to remove any dust nibs and prep the surface for a second coat.

The second coat was applied and left to dry.
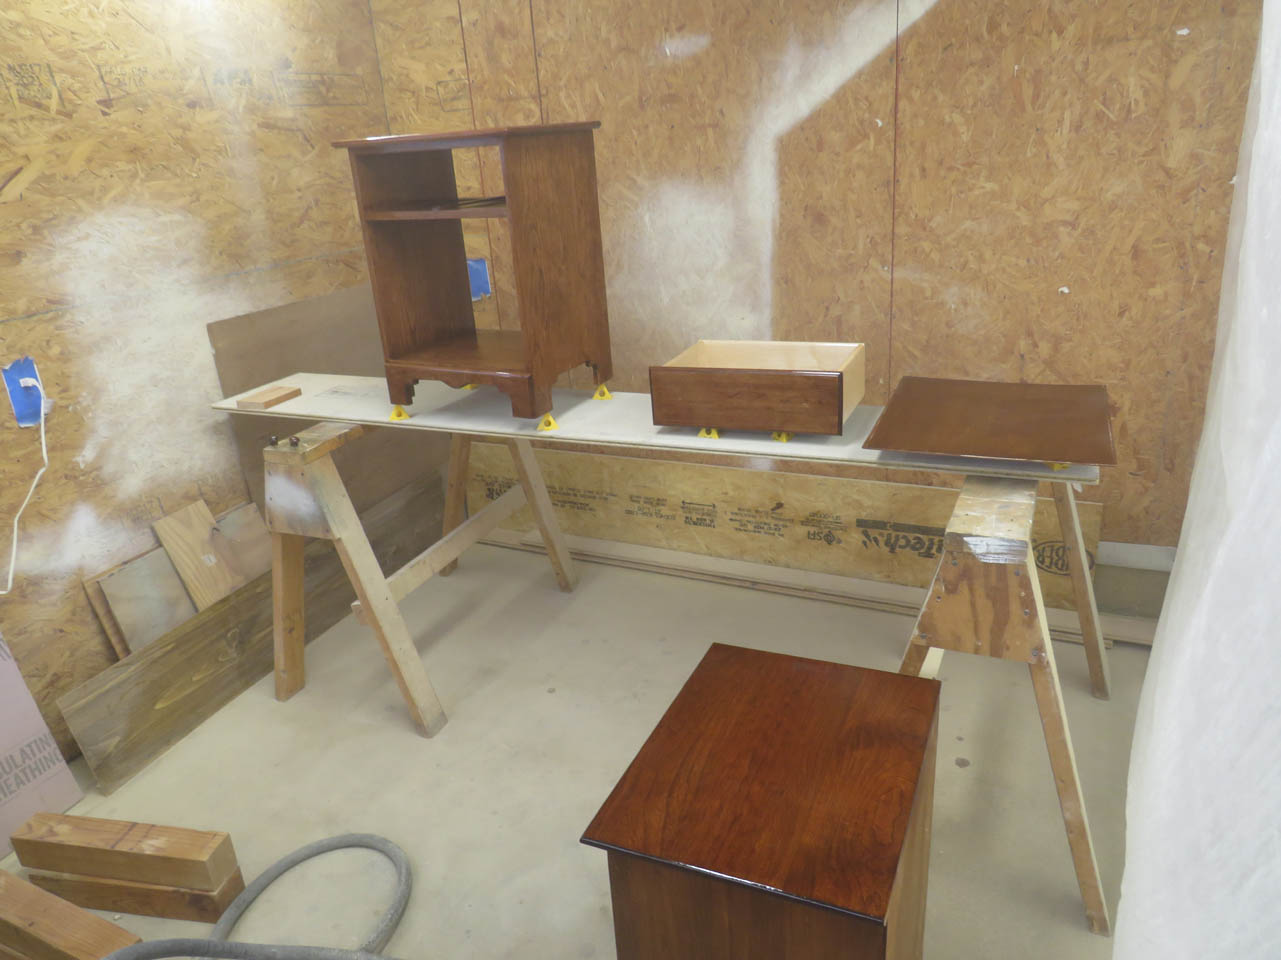
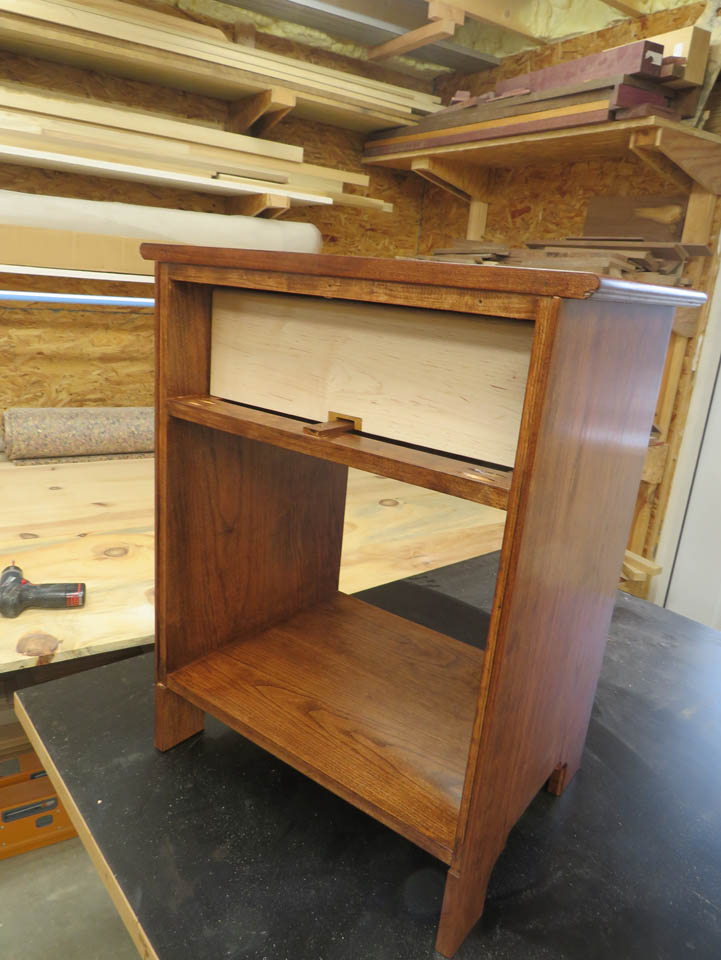
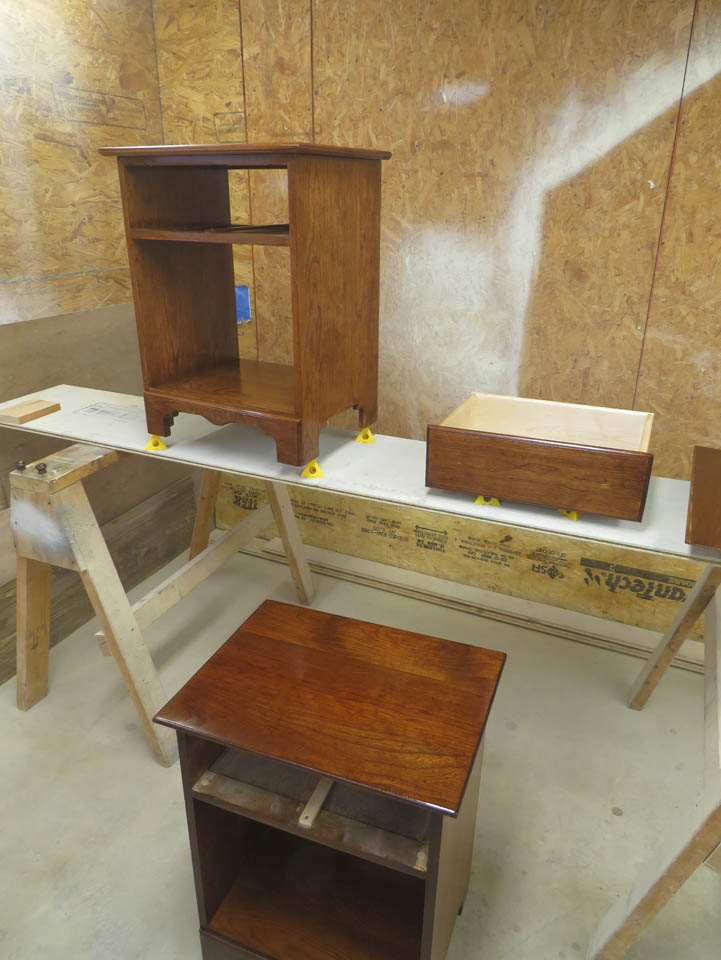
The next day I could do the final assembly.

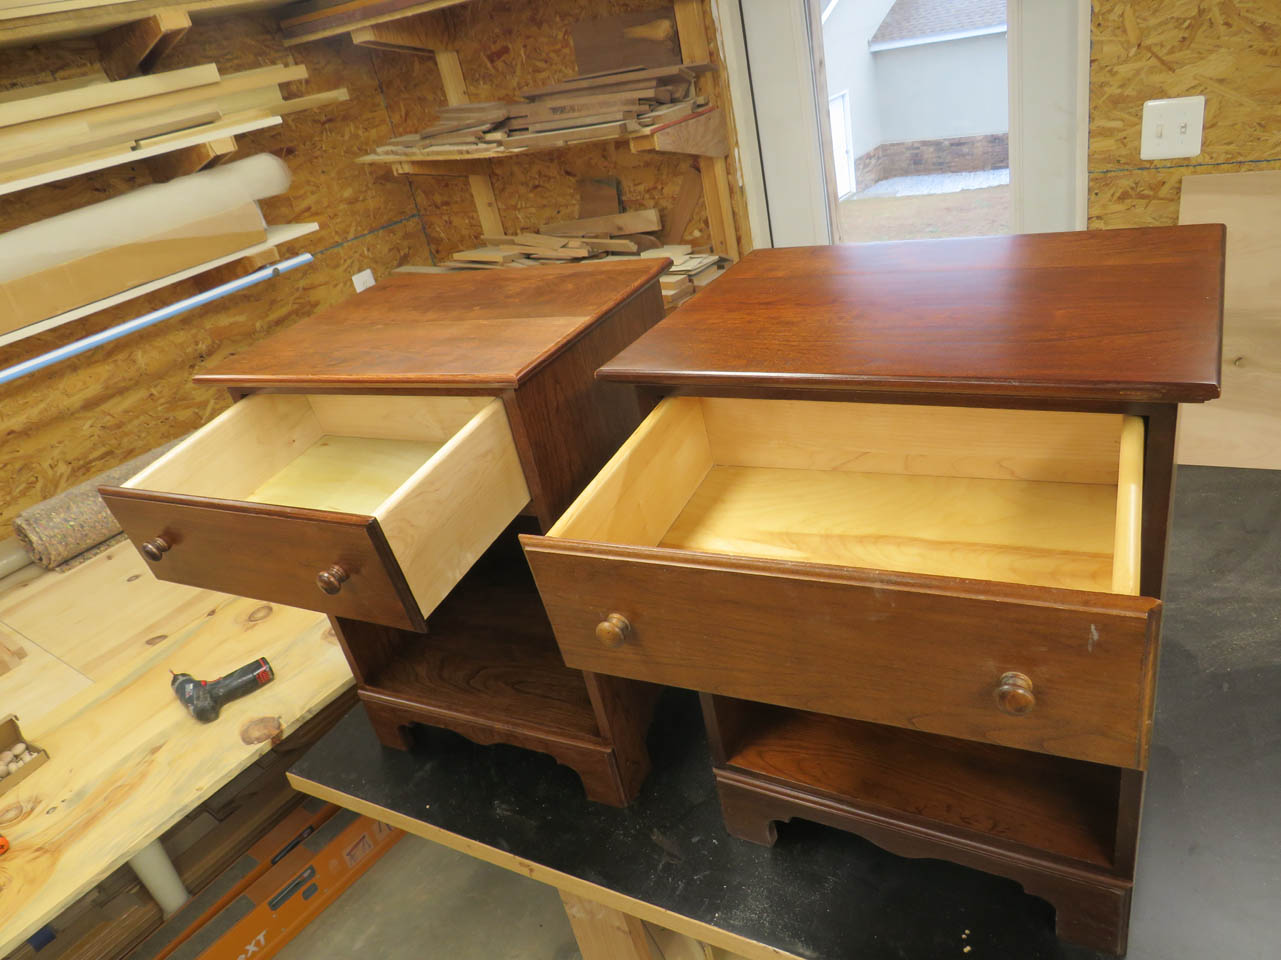
The nightstands are complete. I think they match pretty well. The grain stands out a bit more on the newer one, but I think that will change as the cherry darkens over time. Give it a year or two with the sun coming in the window and they will look identical.