Even more piggy ornaments
For the last couple of years, my wife and I have been making piggy ornaments as Christmas gifts for the staff of a local barbecue restaurant, Carterque, that we frequent. The ornaments are always pigs and we try to come up with something unique.

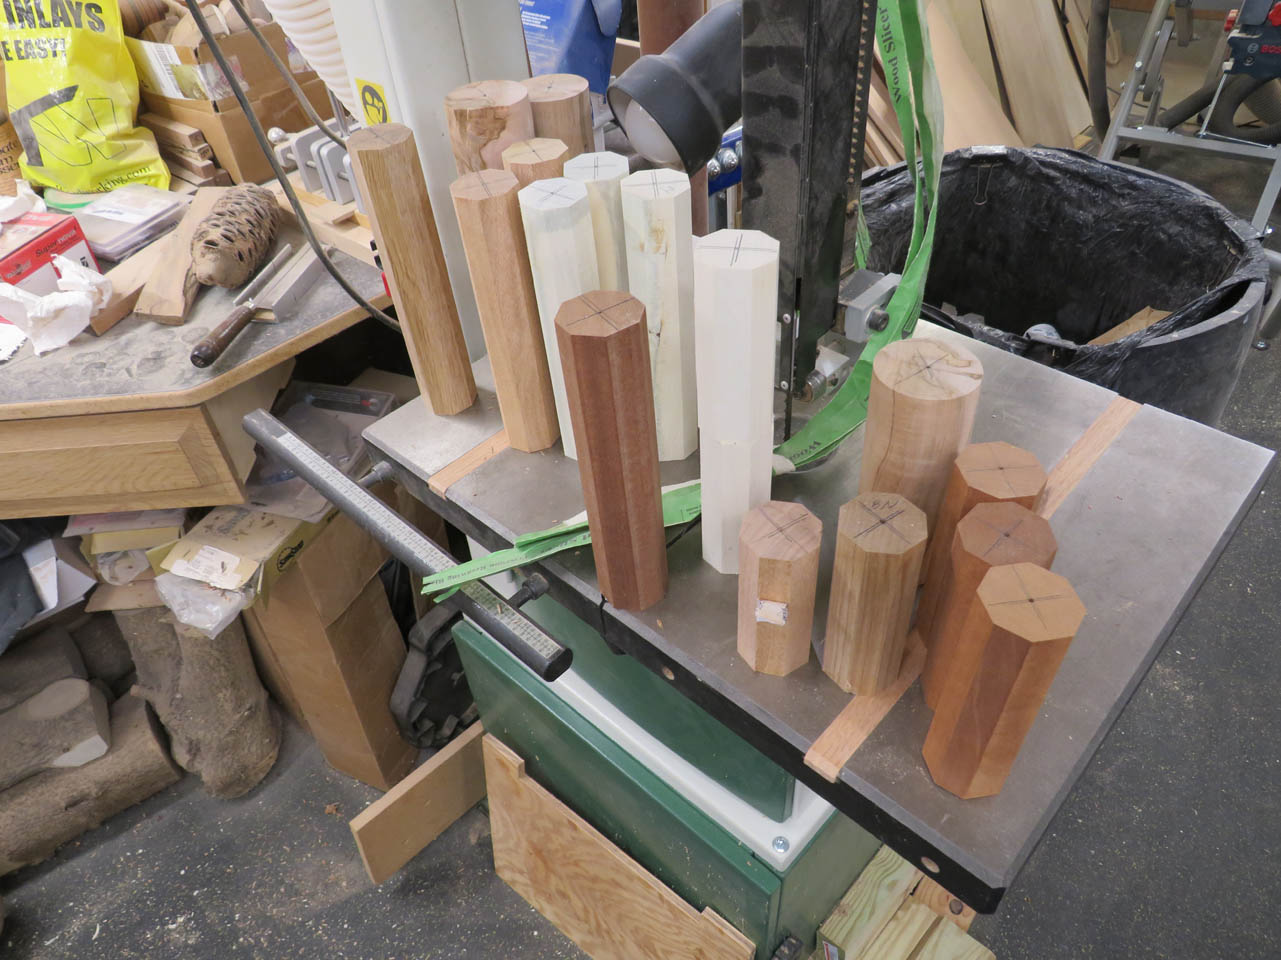
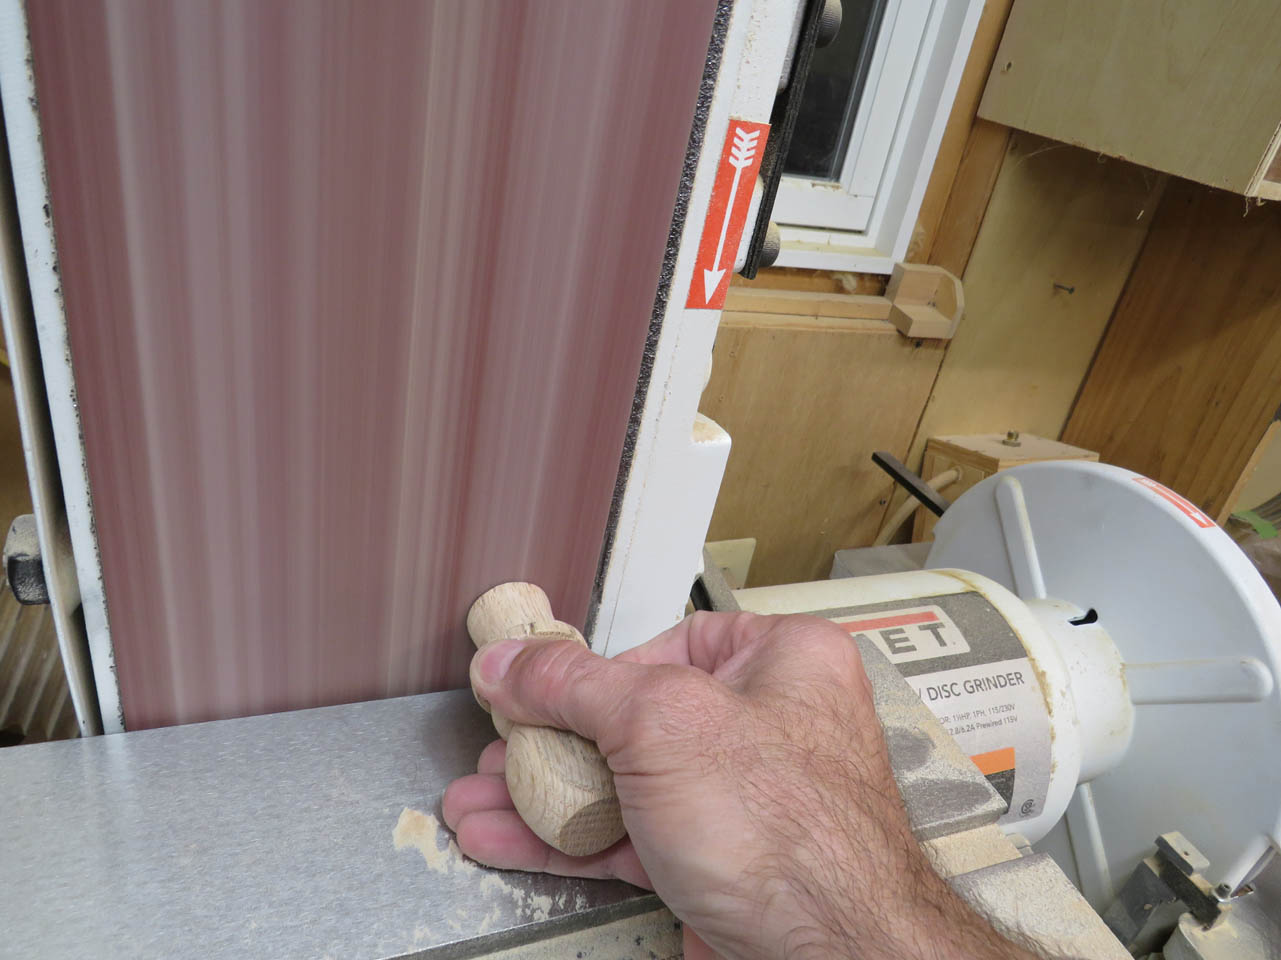
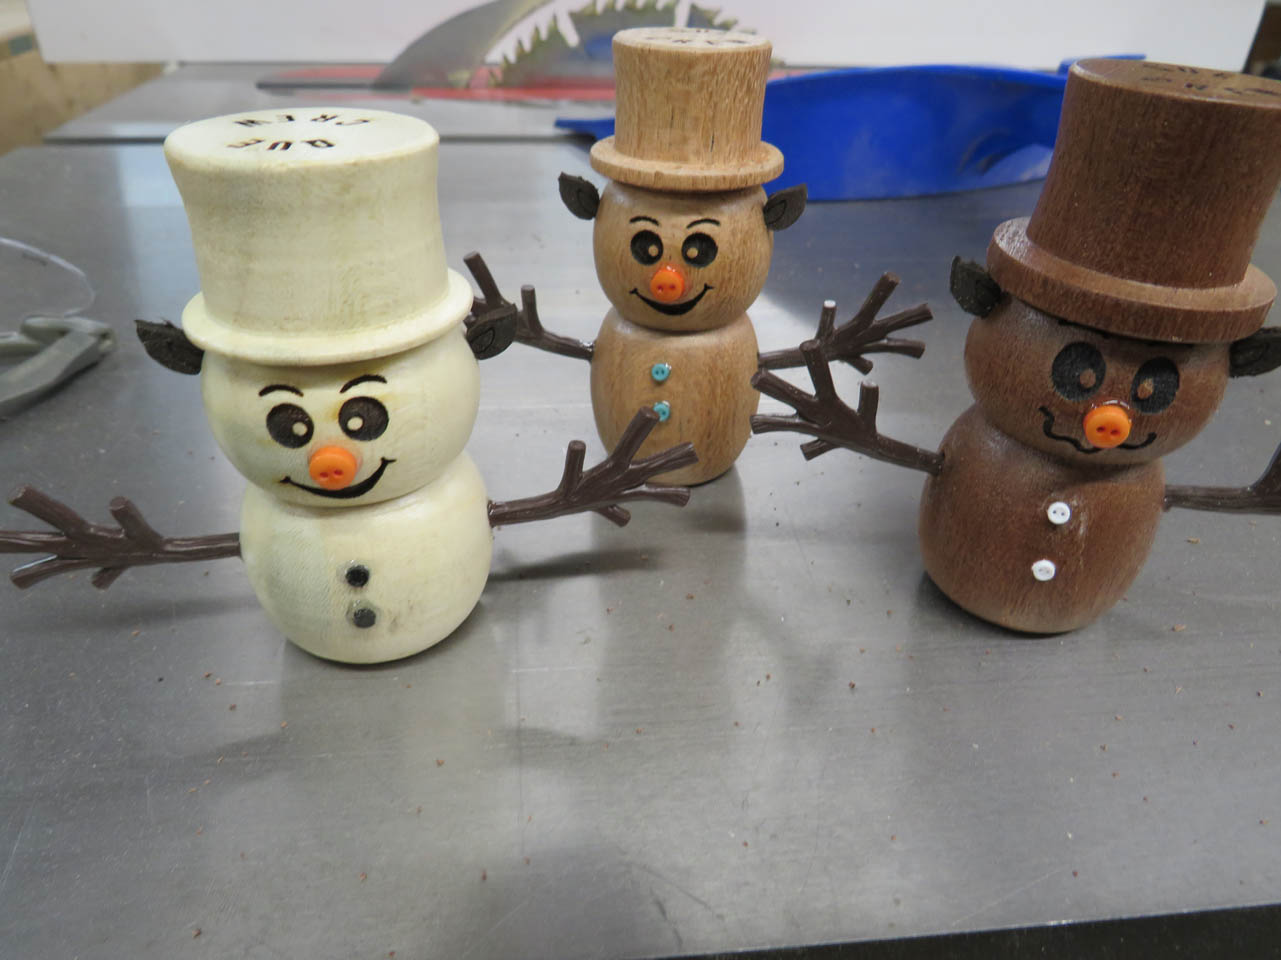
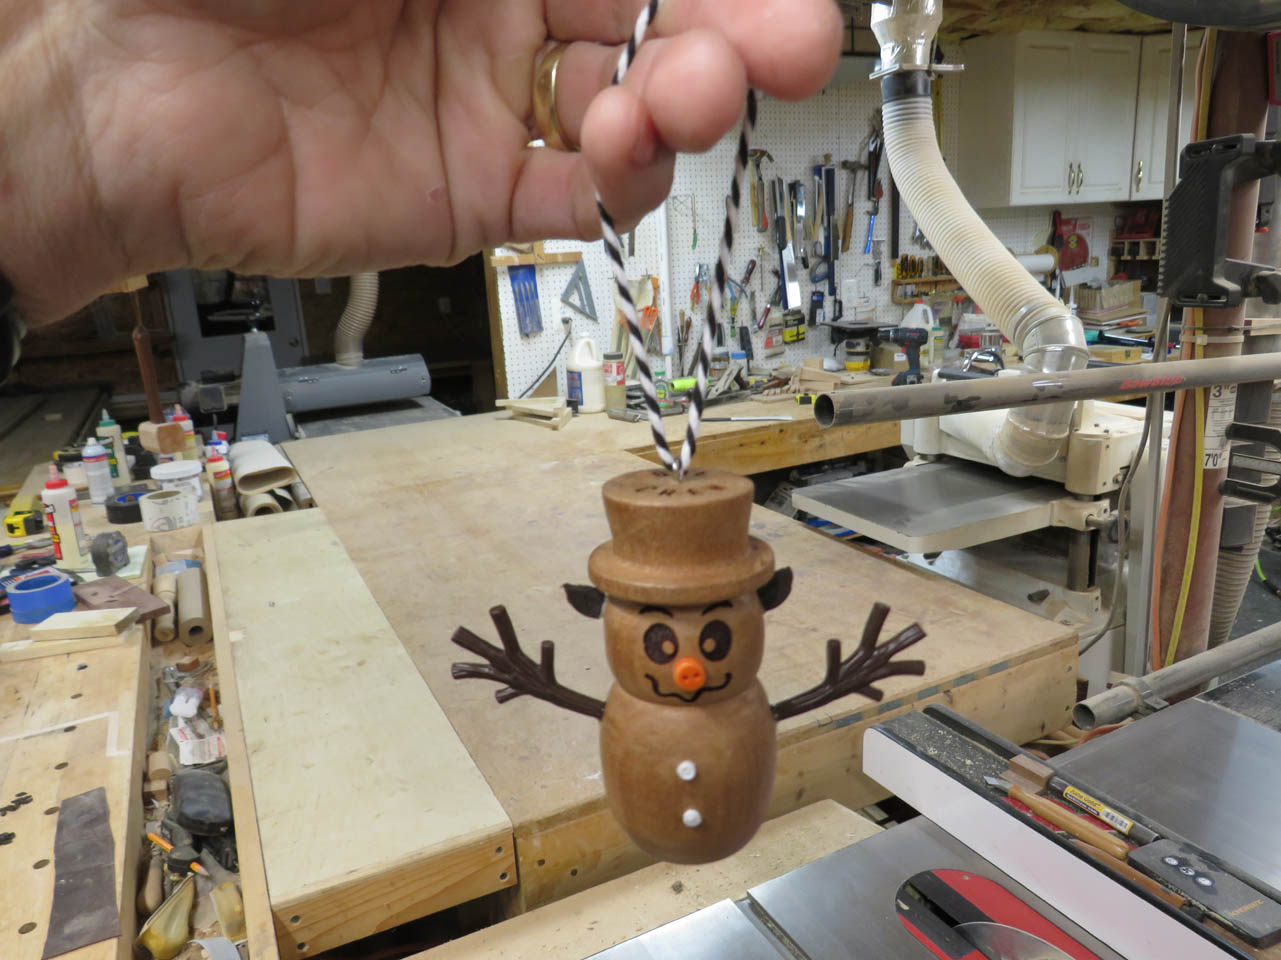
This year we are making snowman piggies on the lathe. I prepped a bunch of 1-5/8″ wide square blanks, marked the centers on each end, then cut them into octagons on my table saw. So that there is a variety, I picked through my stock of wood. There is walnut, mahogany, holly, ambrosia maple, cherry, poplar, and several different types of oak.

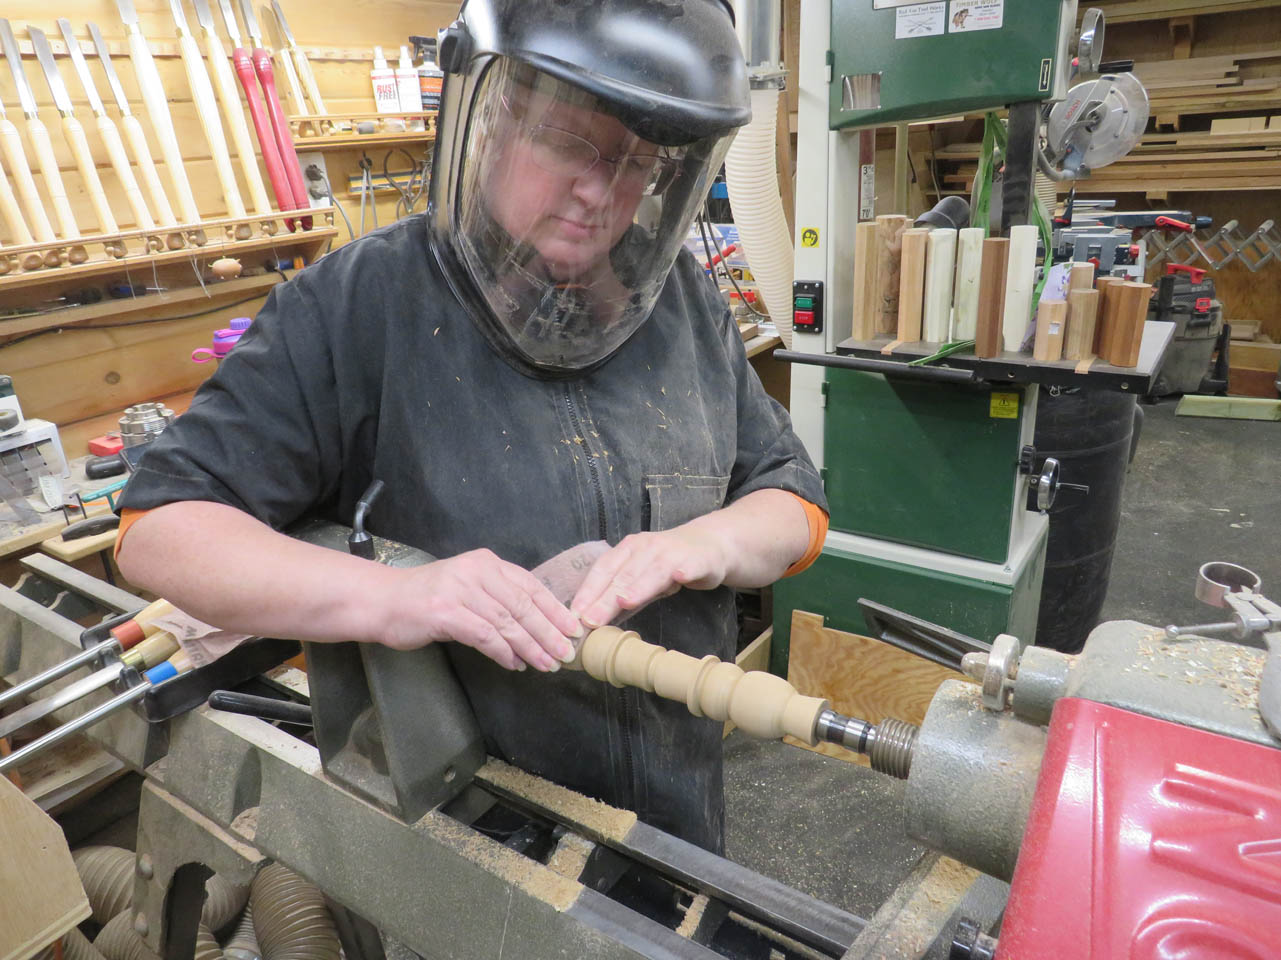
The lathe is the one tool in my shop that my wife likes to use so she was in charge of turning all the piggies.

The most efficient way for her to make them was two at a time. So she shapes and sands them.
Then I take over.

I use my pull saw to separate the individual snow-piggies.

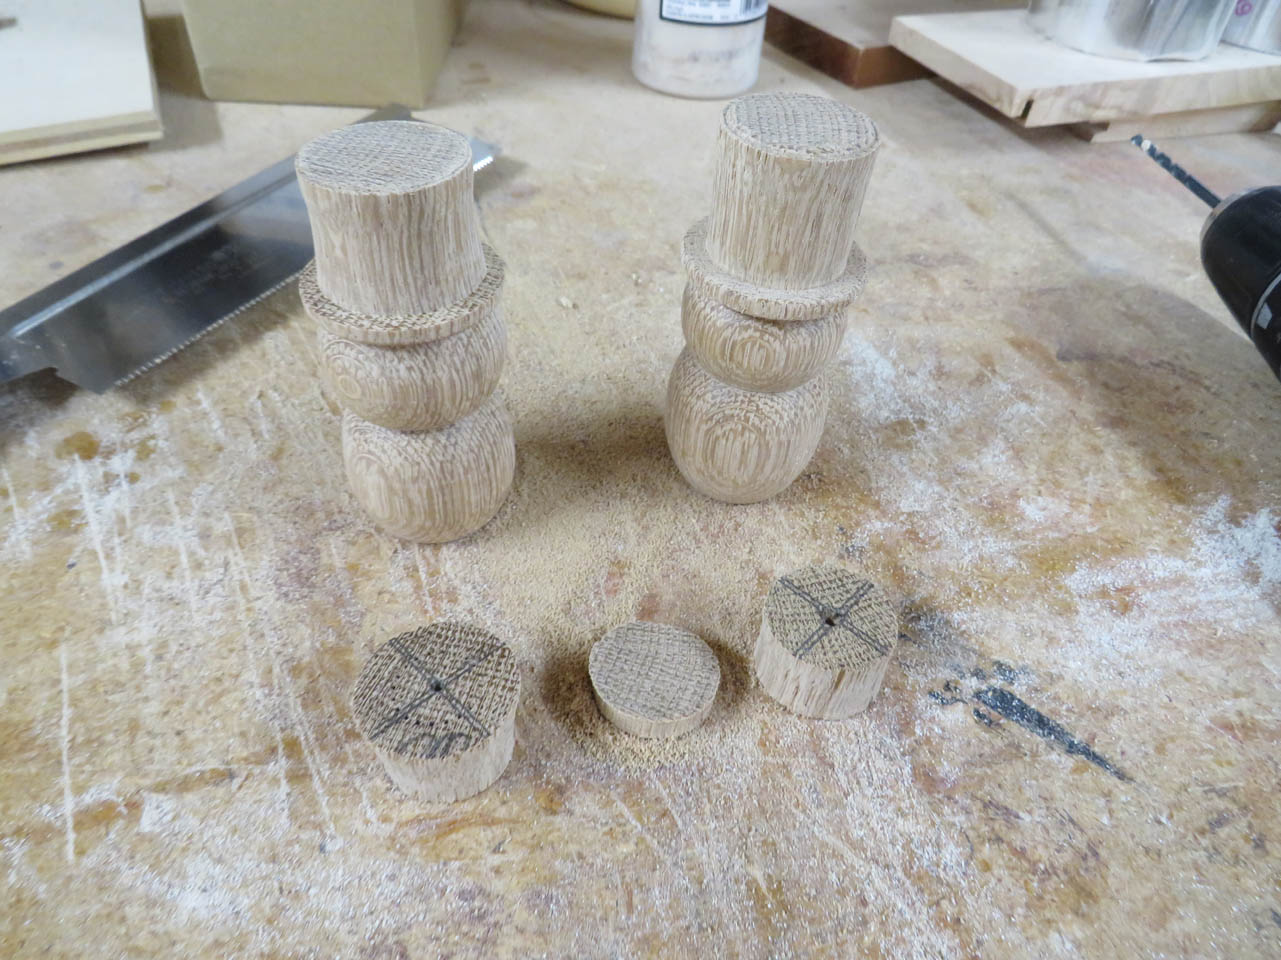
Then I sand the top and bottom of each flat.

This leaves a very sharp edge so I hand-sand the top and bottom to break the sharp edges.


Even though these are all free-hand cut and unique, Tracie roughly marks each using the previous one as a guide.
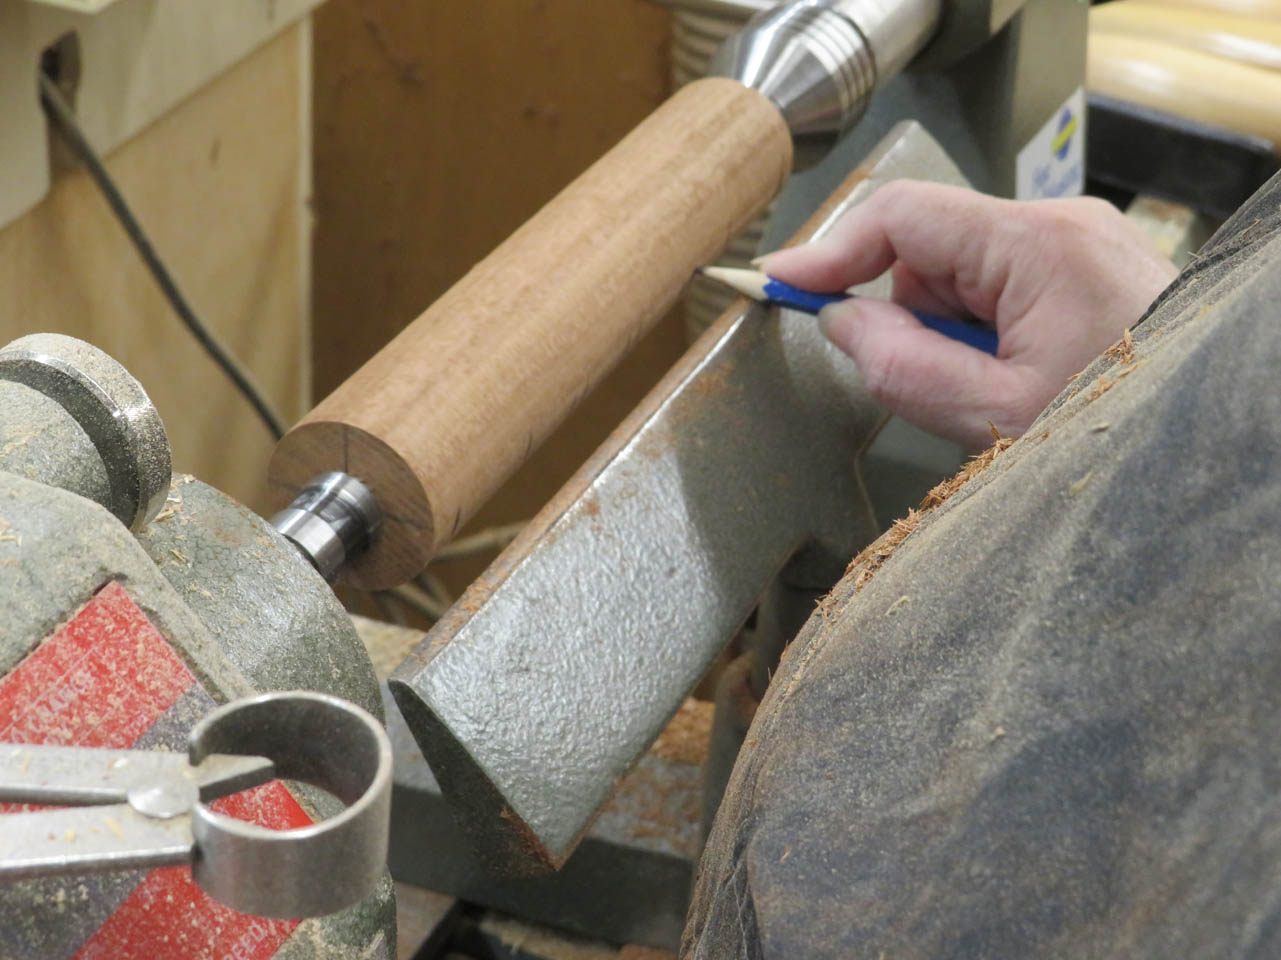
Some are taller and some are shorter because my blanks were not all the same length, but they will all still look somewhat related in the end.

While she was turning 60 plus piggies, I got to work on the rest of the body parts.
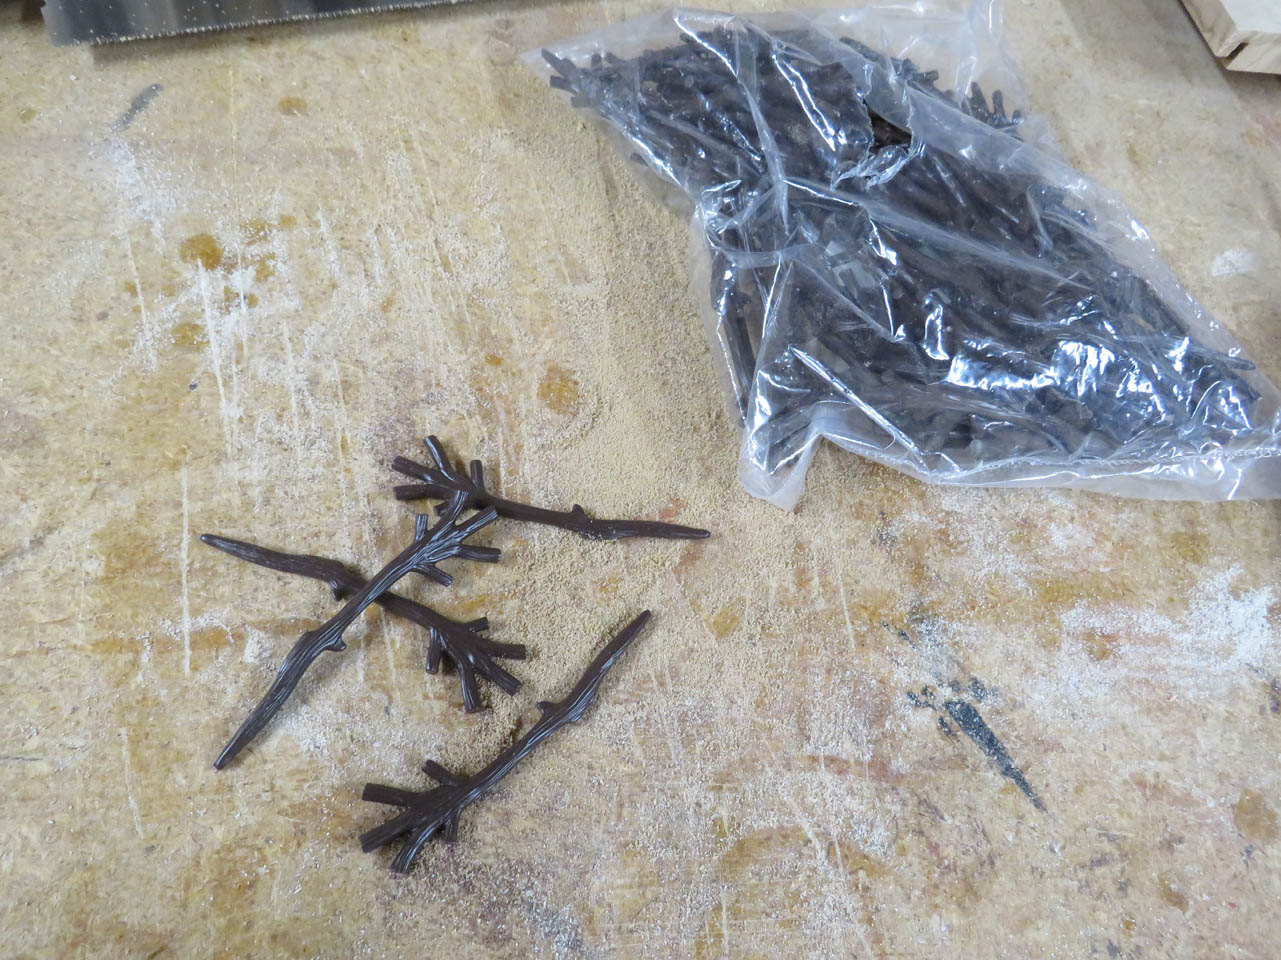
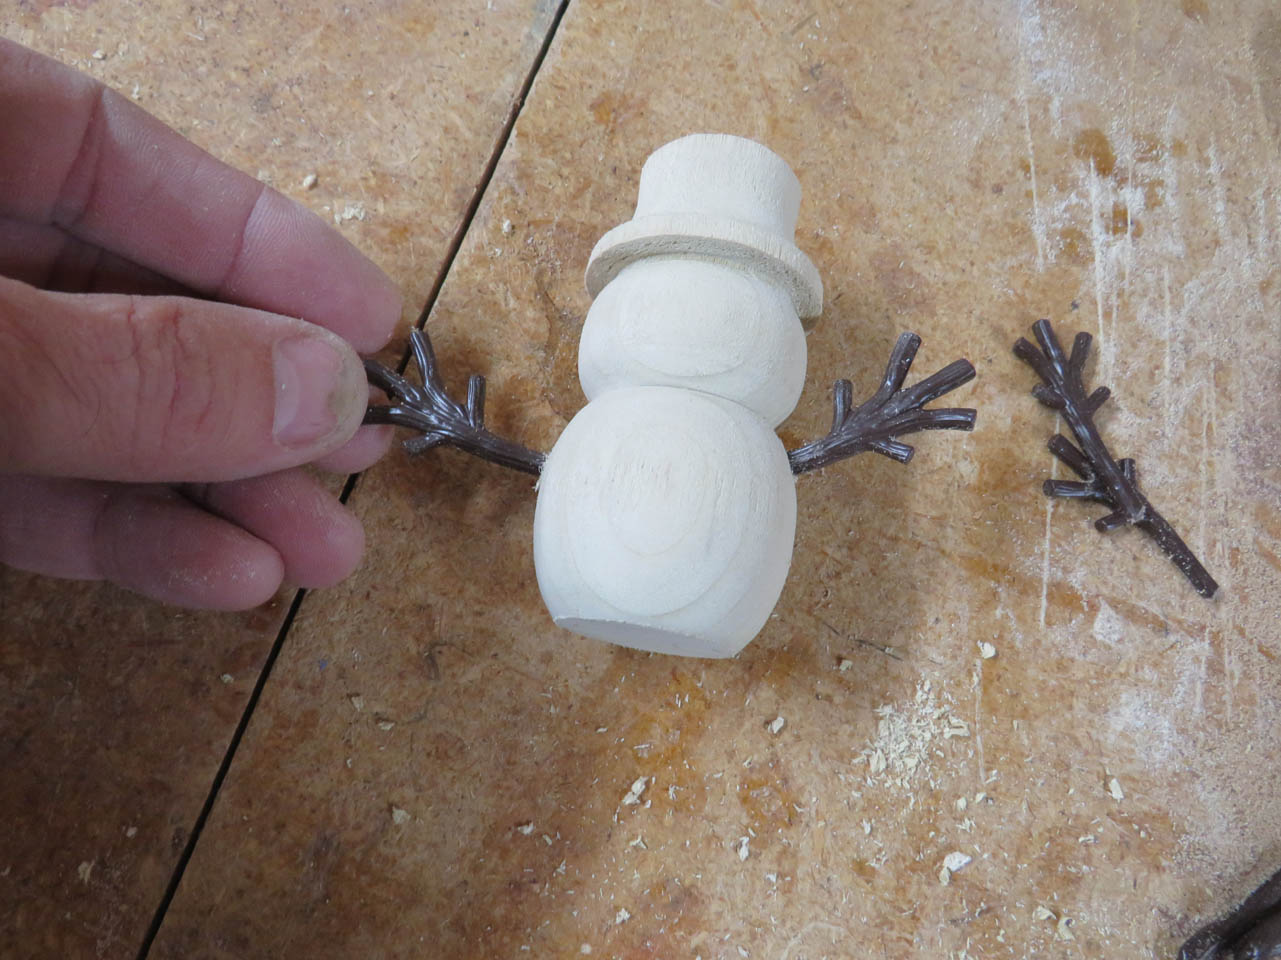
I confess that I could not reproduce tiny twig arms well so I bought a bag of them for making Christmas crafts, then cut them to length.

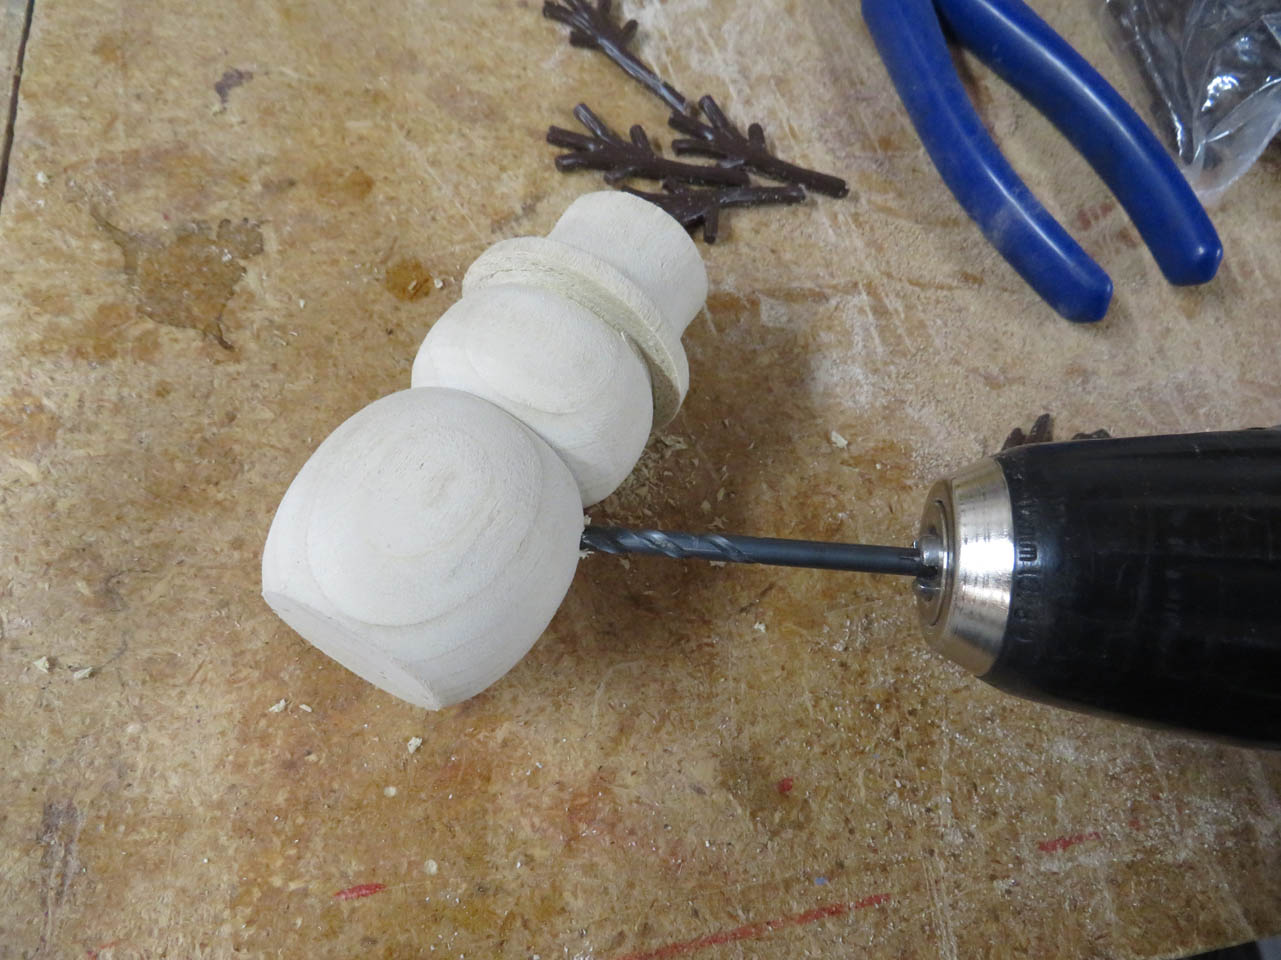
I drilled a slightly undersized hole on each side so that the arms would be a nice friction fit in case the glue didn’t hold as well as I hoped.
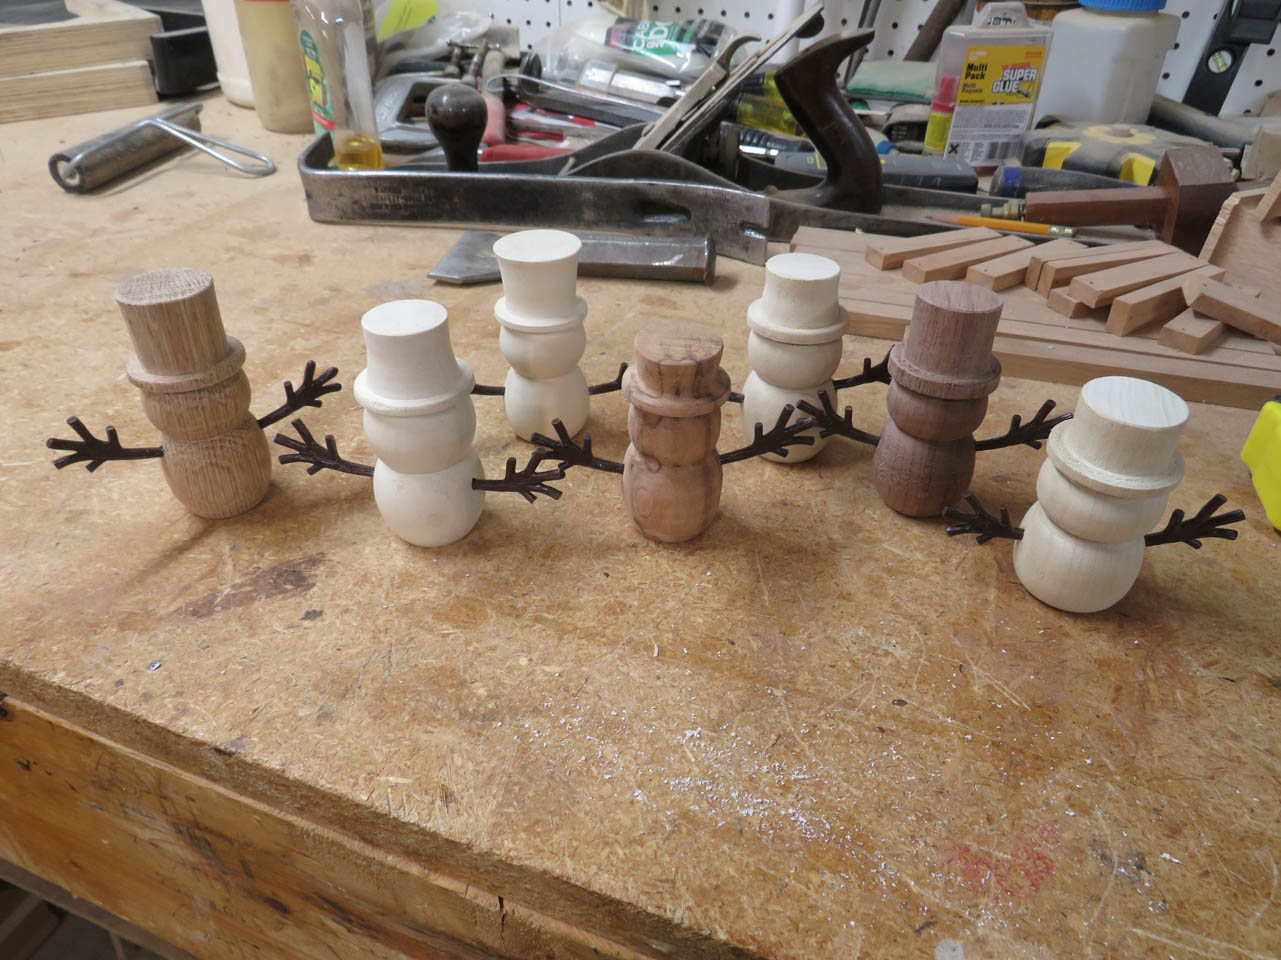
And, the army of snow pigs started to take shape.

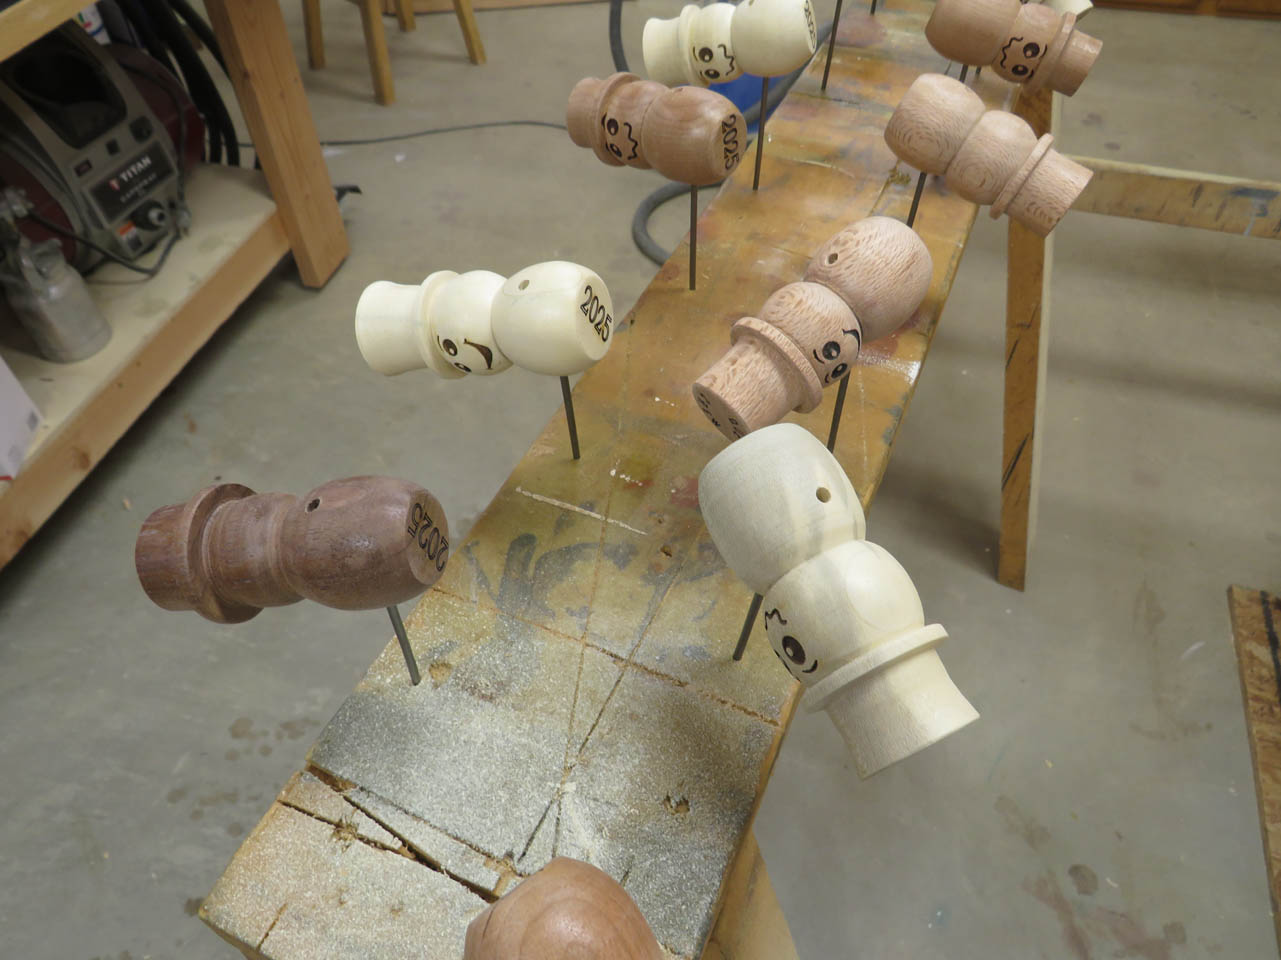
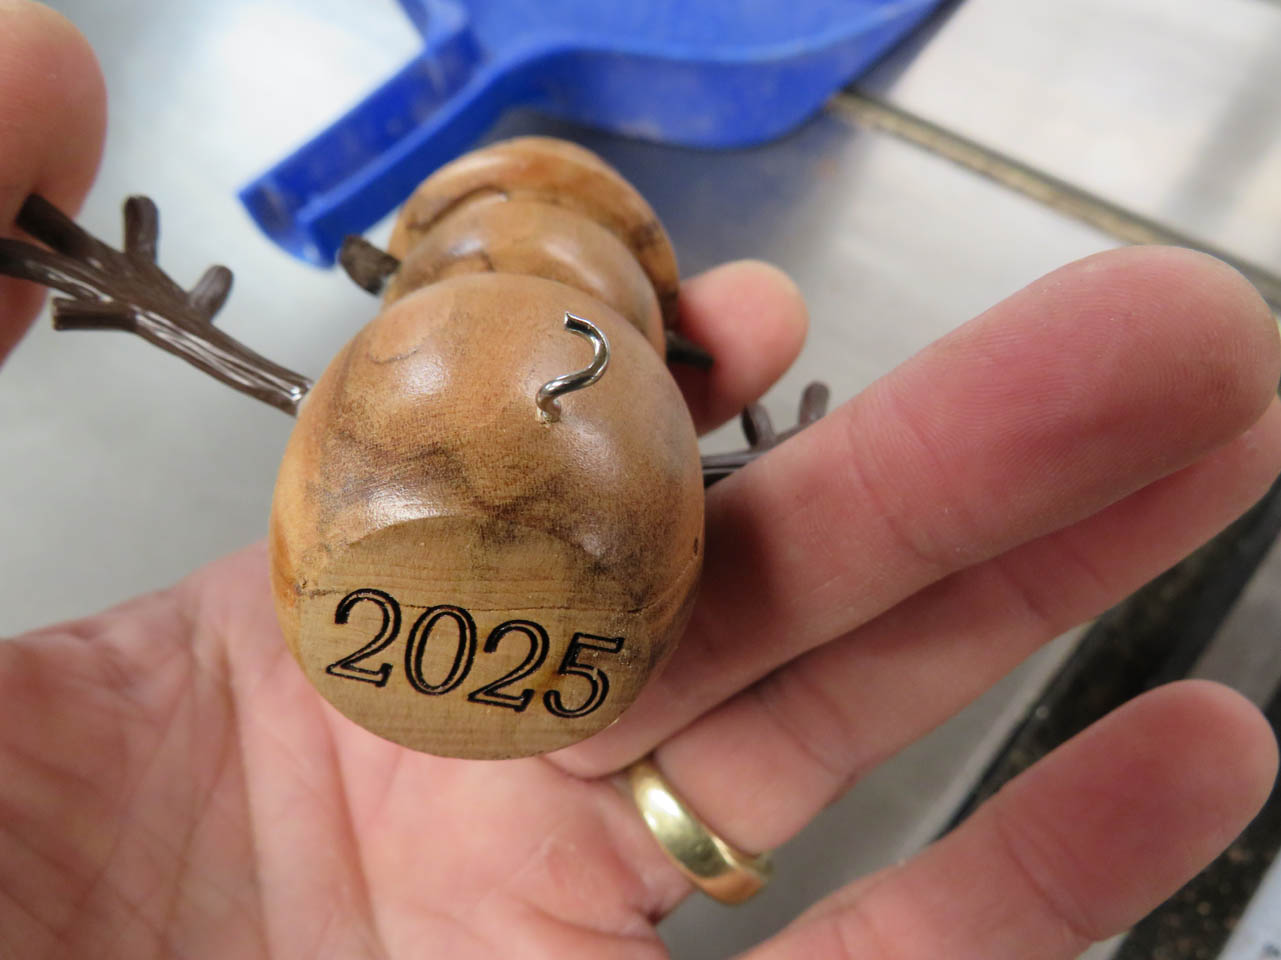
Before applying finish, I spent a lot of time at the laser individually applying the faces as well as the date on the bottom and “CUE CREW” to the top. Of course, I forgot to photograph that part…
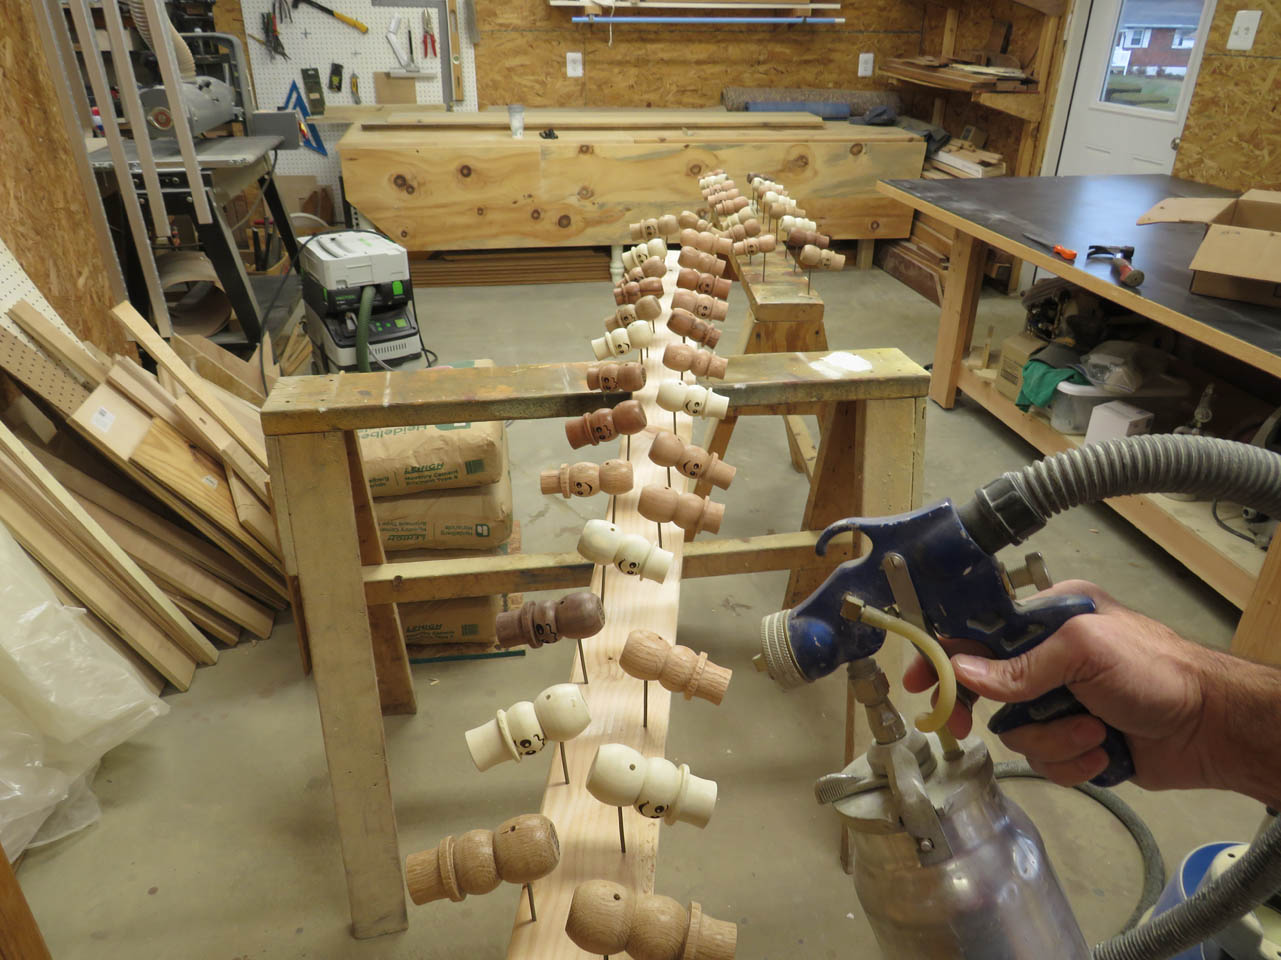
The next challenge was figuring out how to efficiently apply finish to 62, 3″ tall snowmen.
Rooting through my cabinets, I found an old bag of finish nails that were just the right size to fit into the arm holes so I spaced out a pattern of nails that would allow me to hold them all as well as spin them around and spray them. I used a water-based polyurethane , sanding between each coat. Three coats in all, and I flipped them to coat both sides. Waiting an hour between each coat, it was an all-day affair.
Between coats, I had tome to get working on the ears.
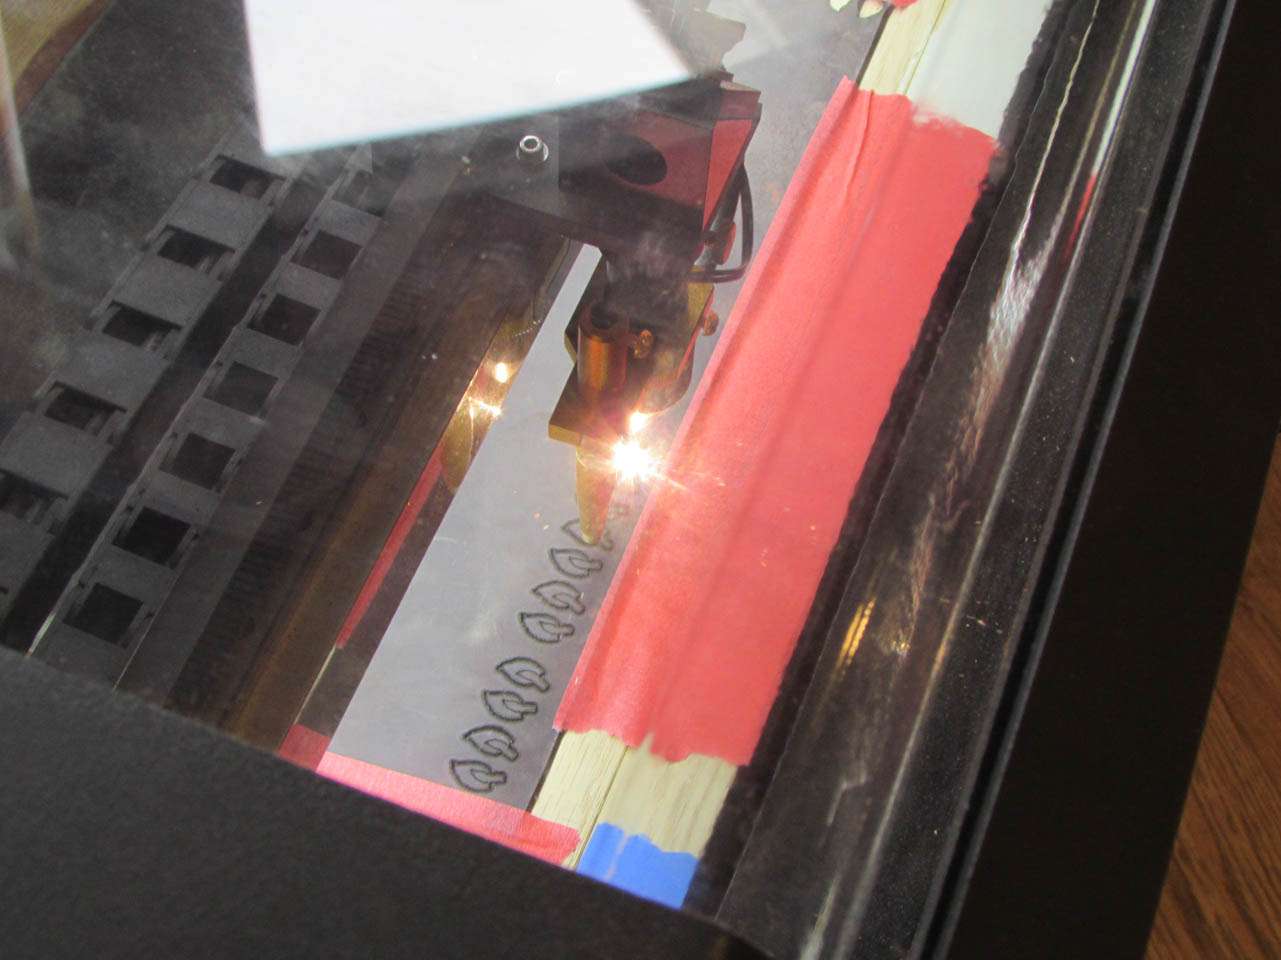
I have to make 62 sets of ears so I loaded a sheet of leather into my laser to cut them out. I had to experiment a bit to get the power and speed settings just right to engrave the inner ear lines while cutting the outline.

I spent a lot of time cleaning away the charred edges but they turned out nicely.

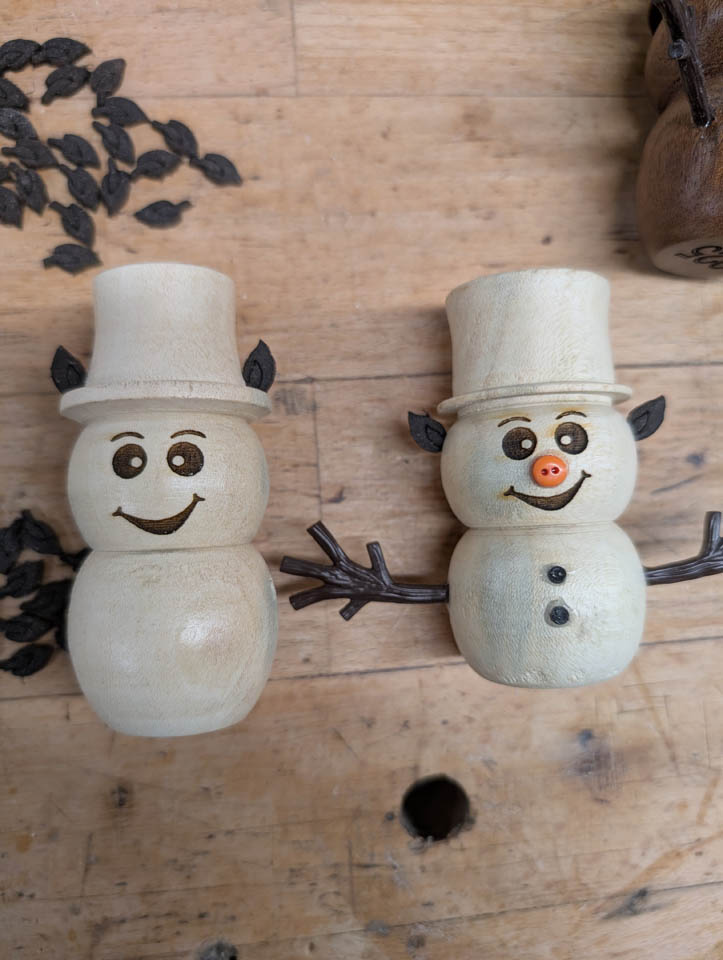
I drilled a small hole in the side of the head and glued in the tab on the end of the ears. I tested placing the ears in the rim of the hat but it didn’t look quite right so the rest went just under the brim of the hat. So one of these guys will be special (and quite valuable one day) with his ears up high. The rest will all have anatomically correct ears (boring, I know). The tab on the bottom of the ear was dipped into CA glue then inserted in the ear-hole. The arms were glued in place using a 2-part epoxy. I think that will hold the slippery plastic better.
Working with CA glue is messy and tedious so I forgot to photograph adding the buttons for the chest and nose. I used forceps to keep the glue off my fingers. I made a puddle of gel CA glue and dipped the button in, then gently placed it on the body. I use a quick set glue so it was set after 30 seconds or so.

We also drilled tiny holes in the head and bottom for hook eyes. The top one was for the ornament hook and the bottom was twisted out with pliers to make a curly tail.
One down, 61 to go…
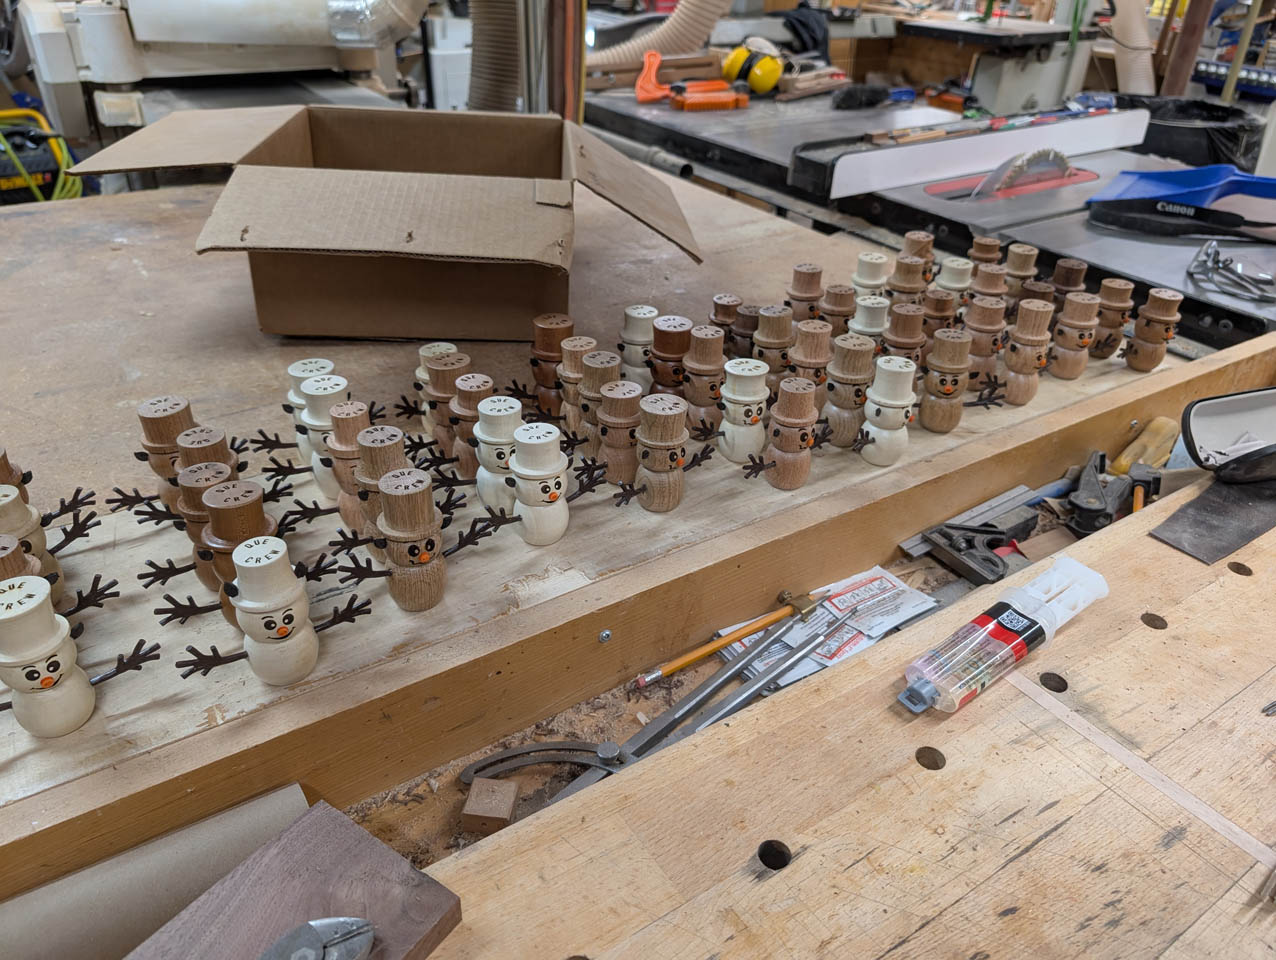


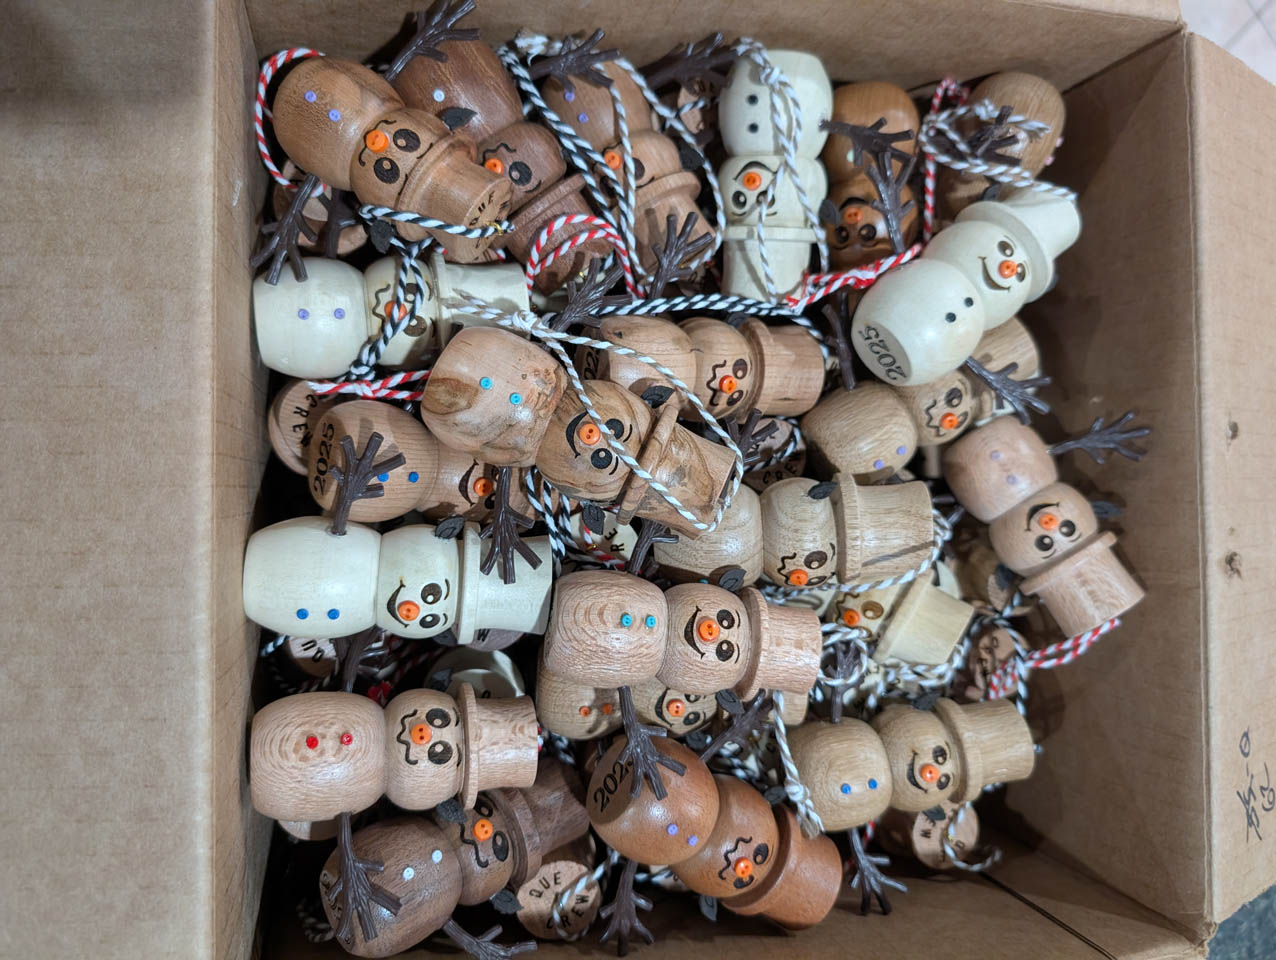
Tracie thought it would be fun to have two different facial expressions so people could select their favorites and have a bit more variety. So while some look quite happy others look a bit constipated…

These little guys are done and ready for delivery. Hopefully they will all find happy new homes this Christmas.