
My new wood shed
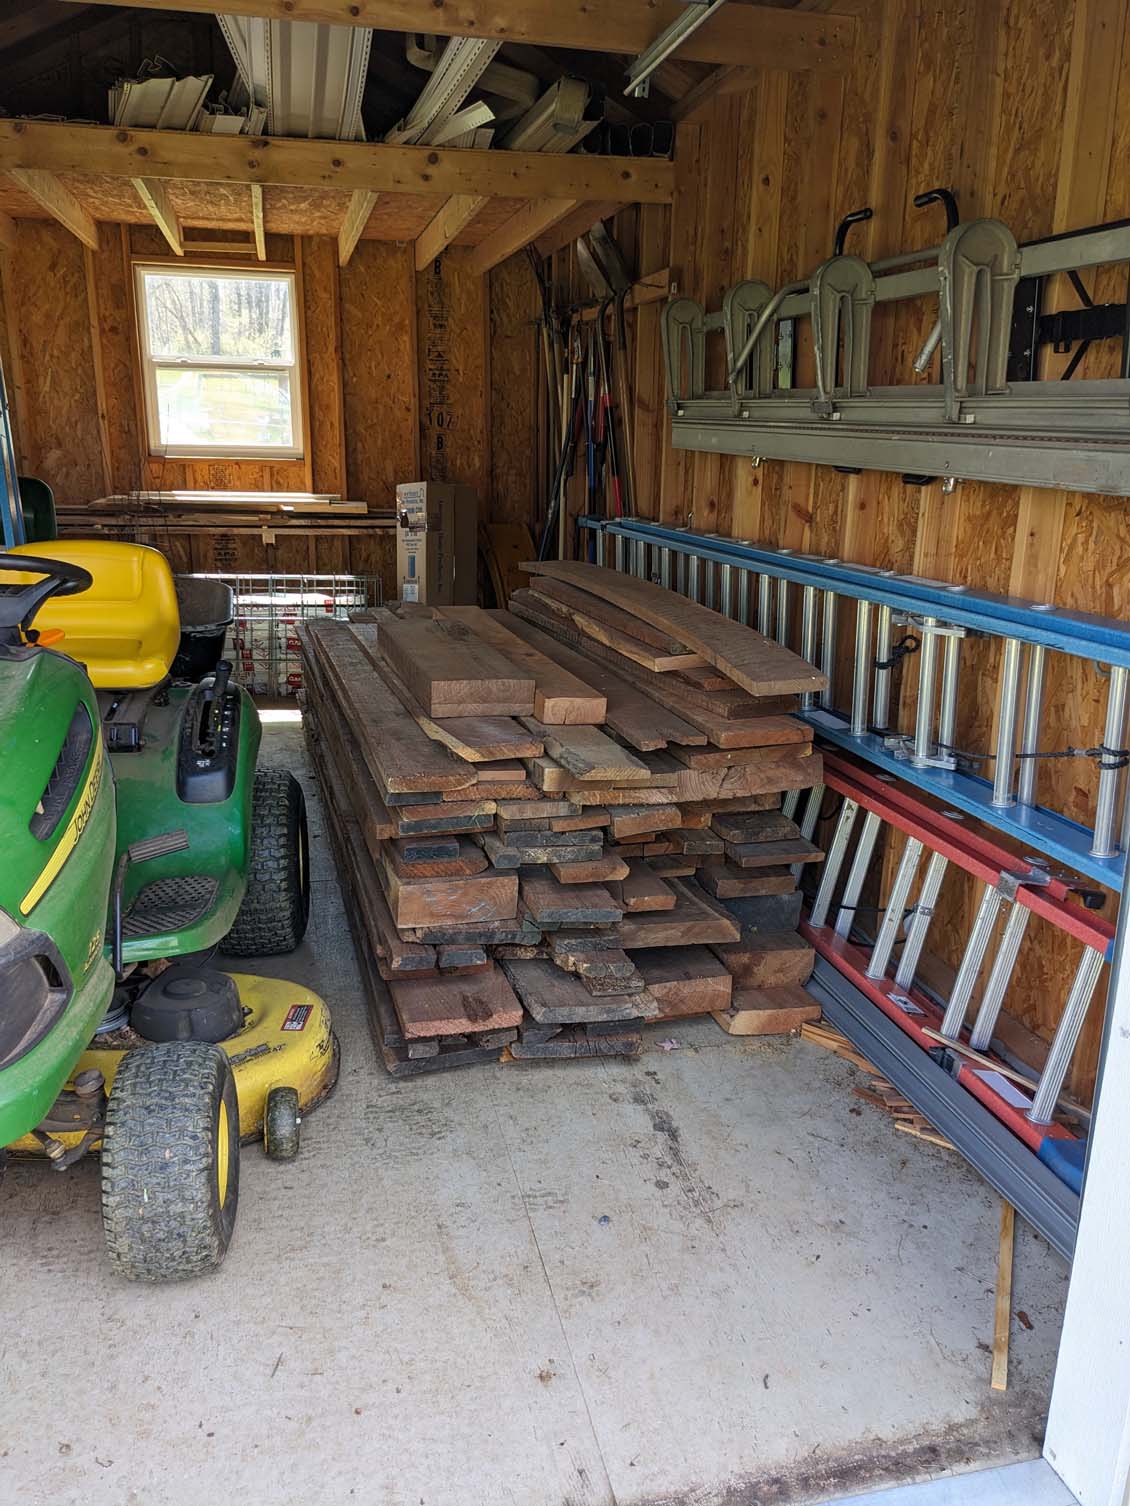
It’s been a weird year for me. I haven’t had very many woodworking projects to post about as I normally do. Since my schedule had been quite busy and my projects kept getting larger, I had started considering increasing the size of my garden shed to add a few square feet of shop space for the projects that were larger than a 36″ entry door… Things came to a head when my good friend Rocky past away and left me a pile of cherry and walnut that he had cut down and milled several years ago. Some boards were small with a lot of old bug damage, but there are also some very good boards and some large beams. Unfortunately, the only dry storage location I had for these boards was the remaining space in my garden shed…
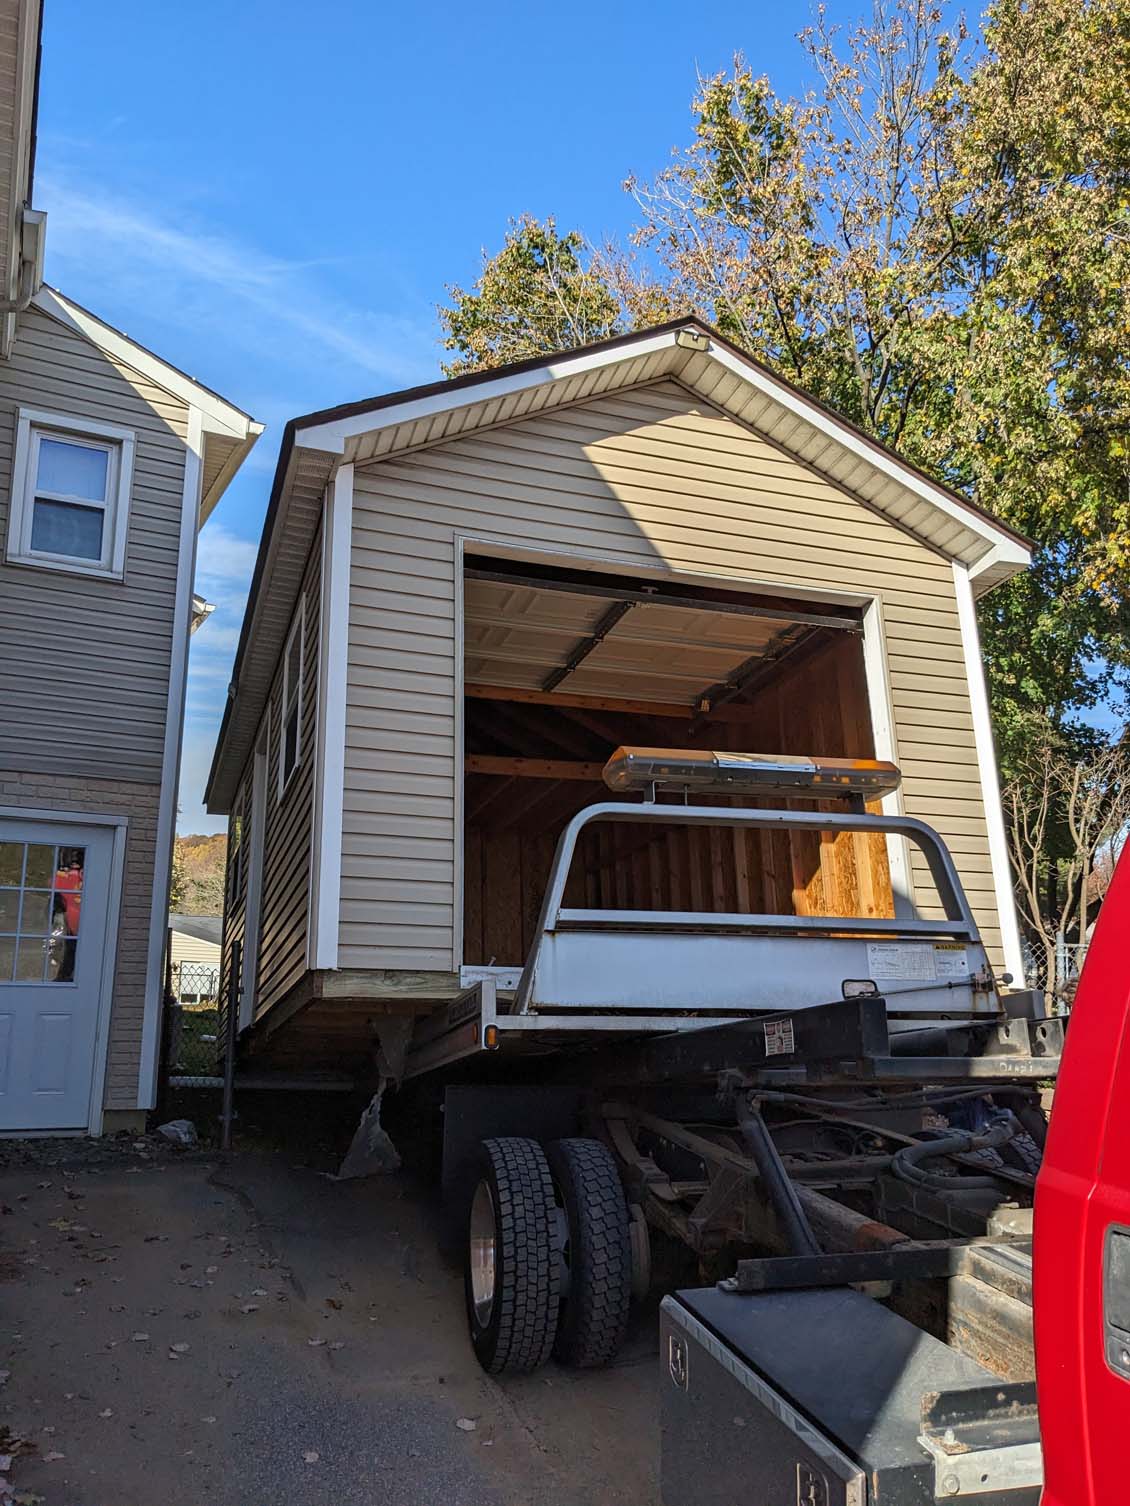
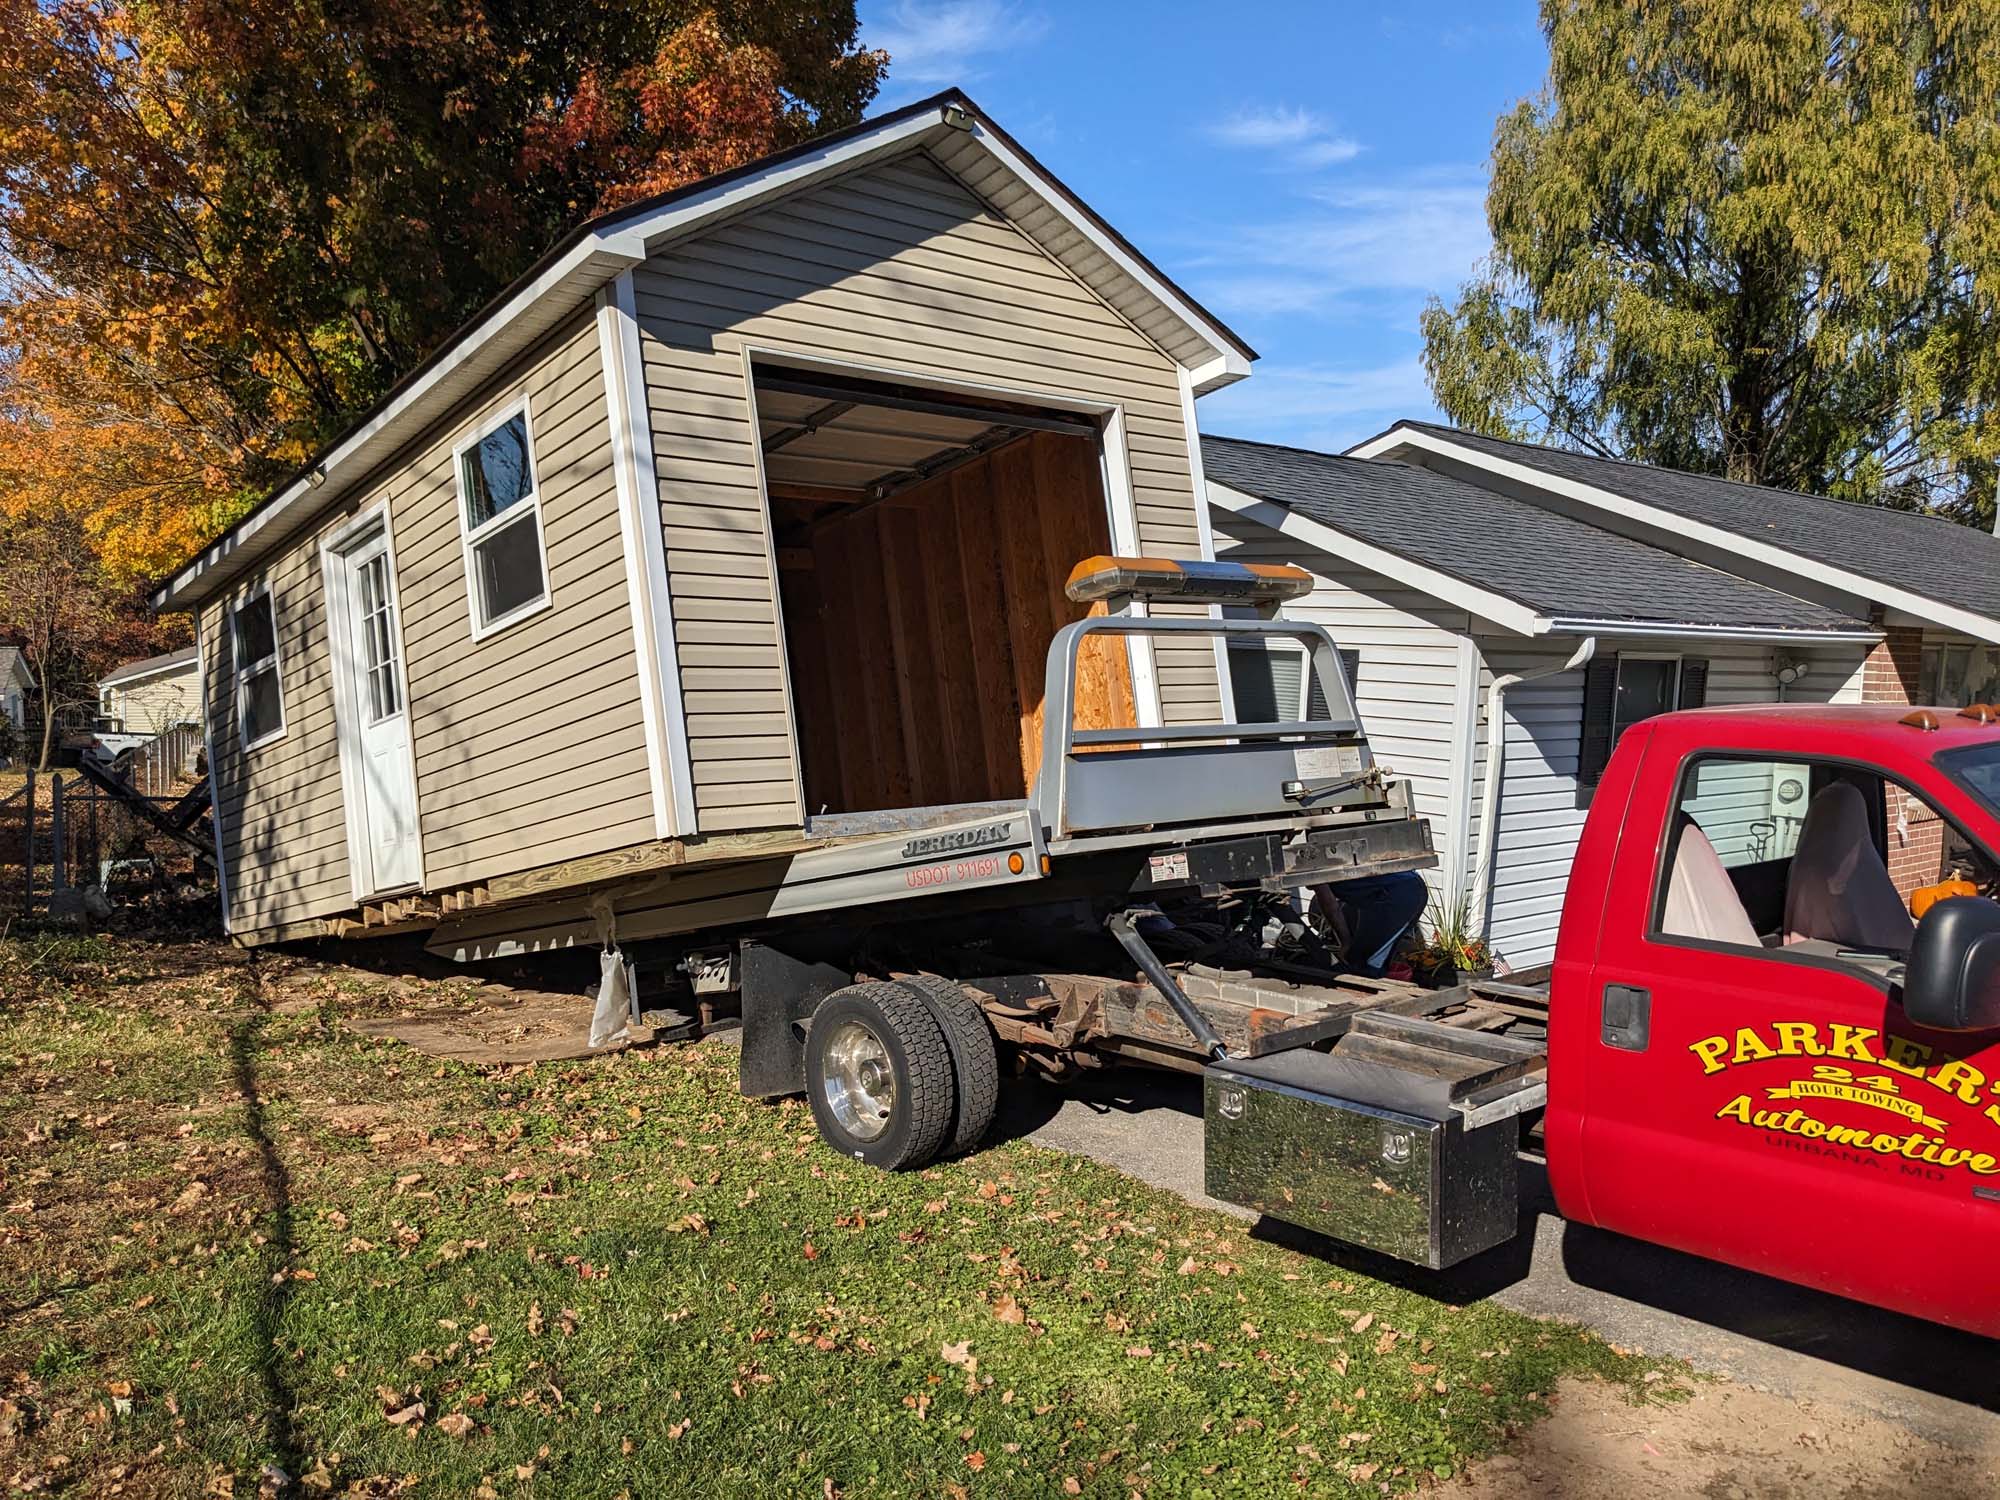
My first 8’x10′ shed was outgrown when the children took it over so that got donated to a neighbor and my current 12’x20′ shed was built.

With the help of a friend’s skid loader and a flat-bed tow truck, this one was donated to another neighbor.
Permits were pulled about a year ago for the new “Shed”.

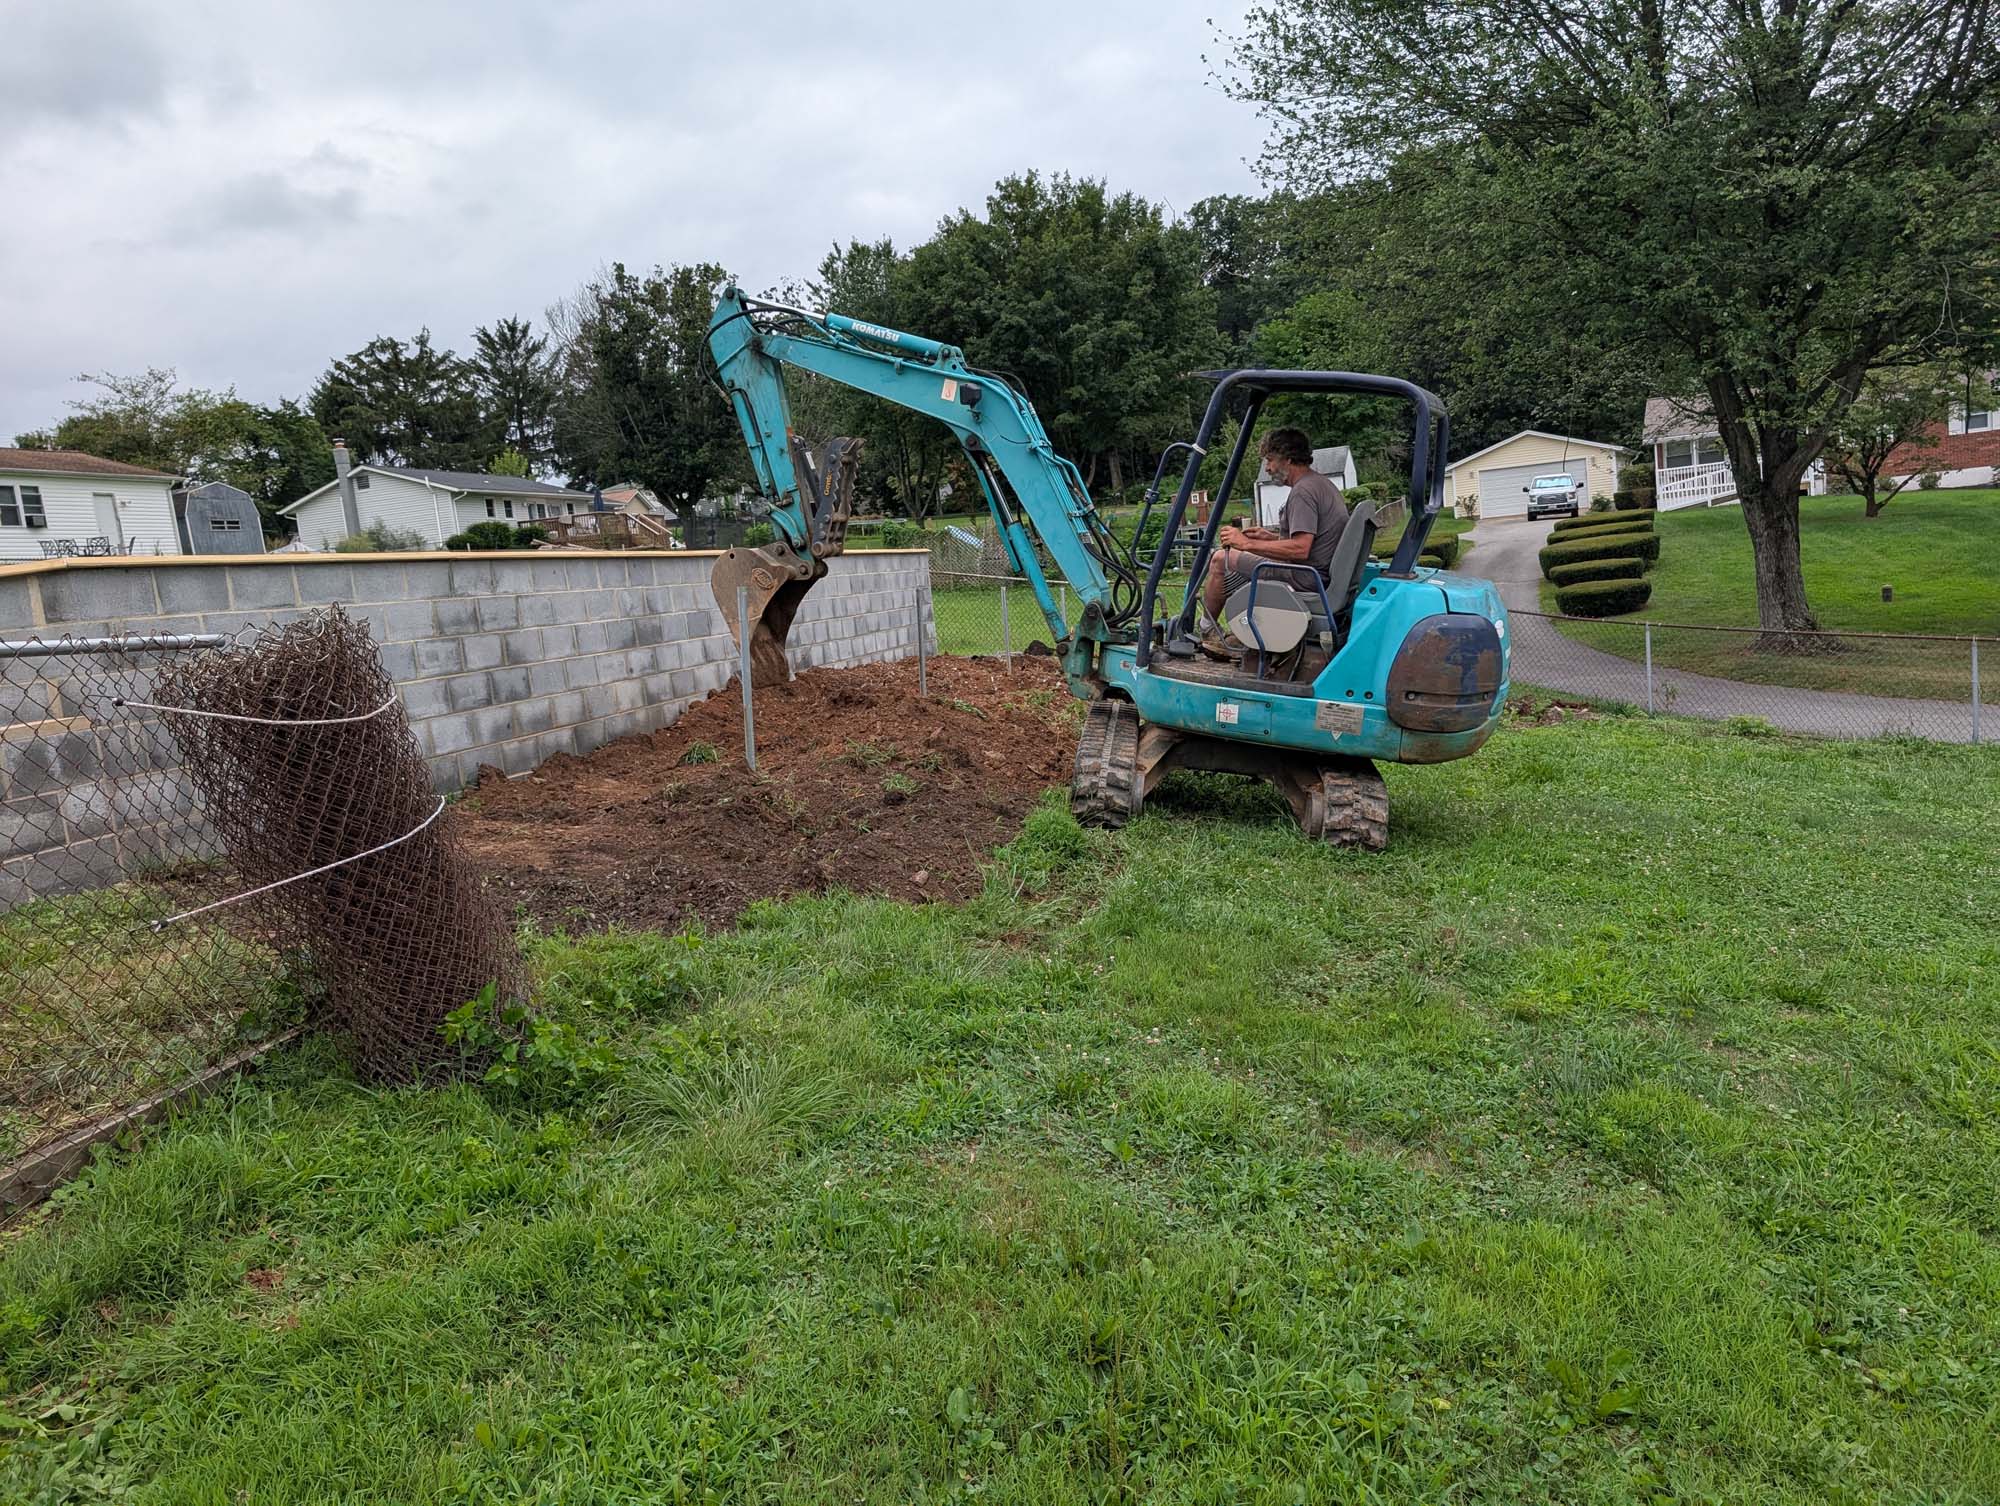
It took about 6 months to get my buddy Tony out to start digging footings but it finally happened.

The new building will be built in the same back corner of the property but will be more permanent.
The plan is a 24’x30′ wood shed with a 10’x12′ garden shed attached to one side. The wood shed will be insulated and have a heated floor with two garage on either side of the garden shed part to create an air-lock to keep the worst of the wind and weather away from the insulated, inner door.

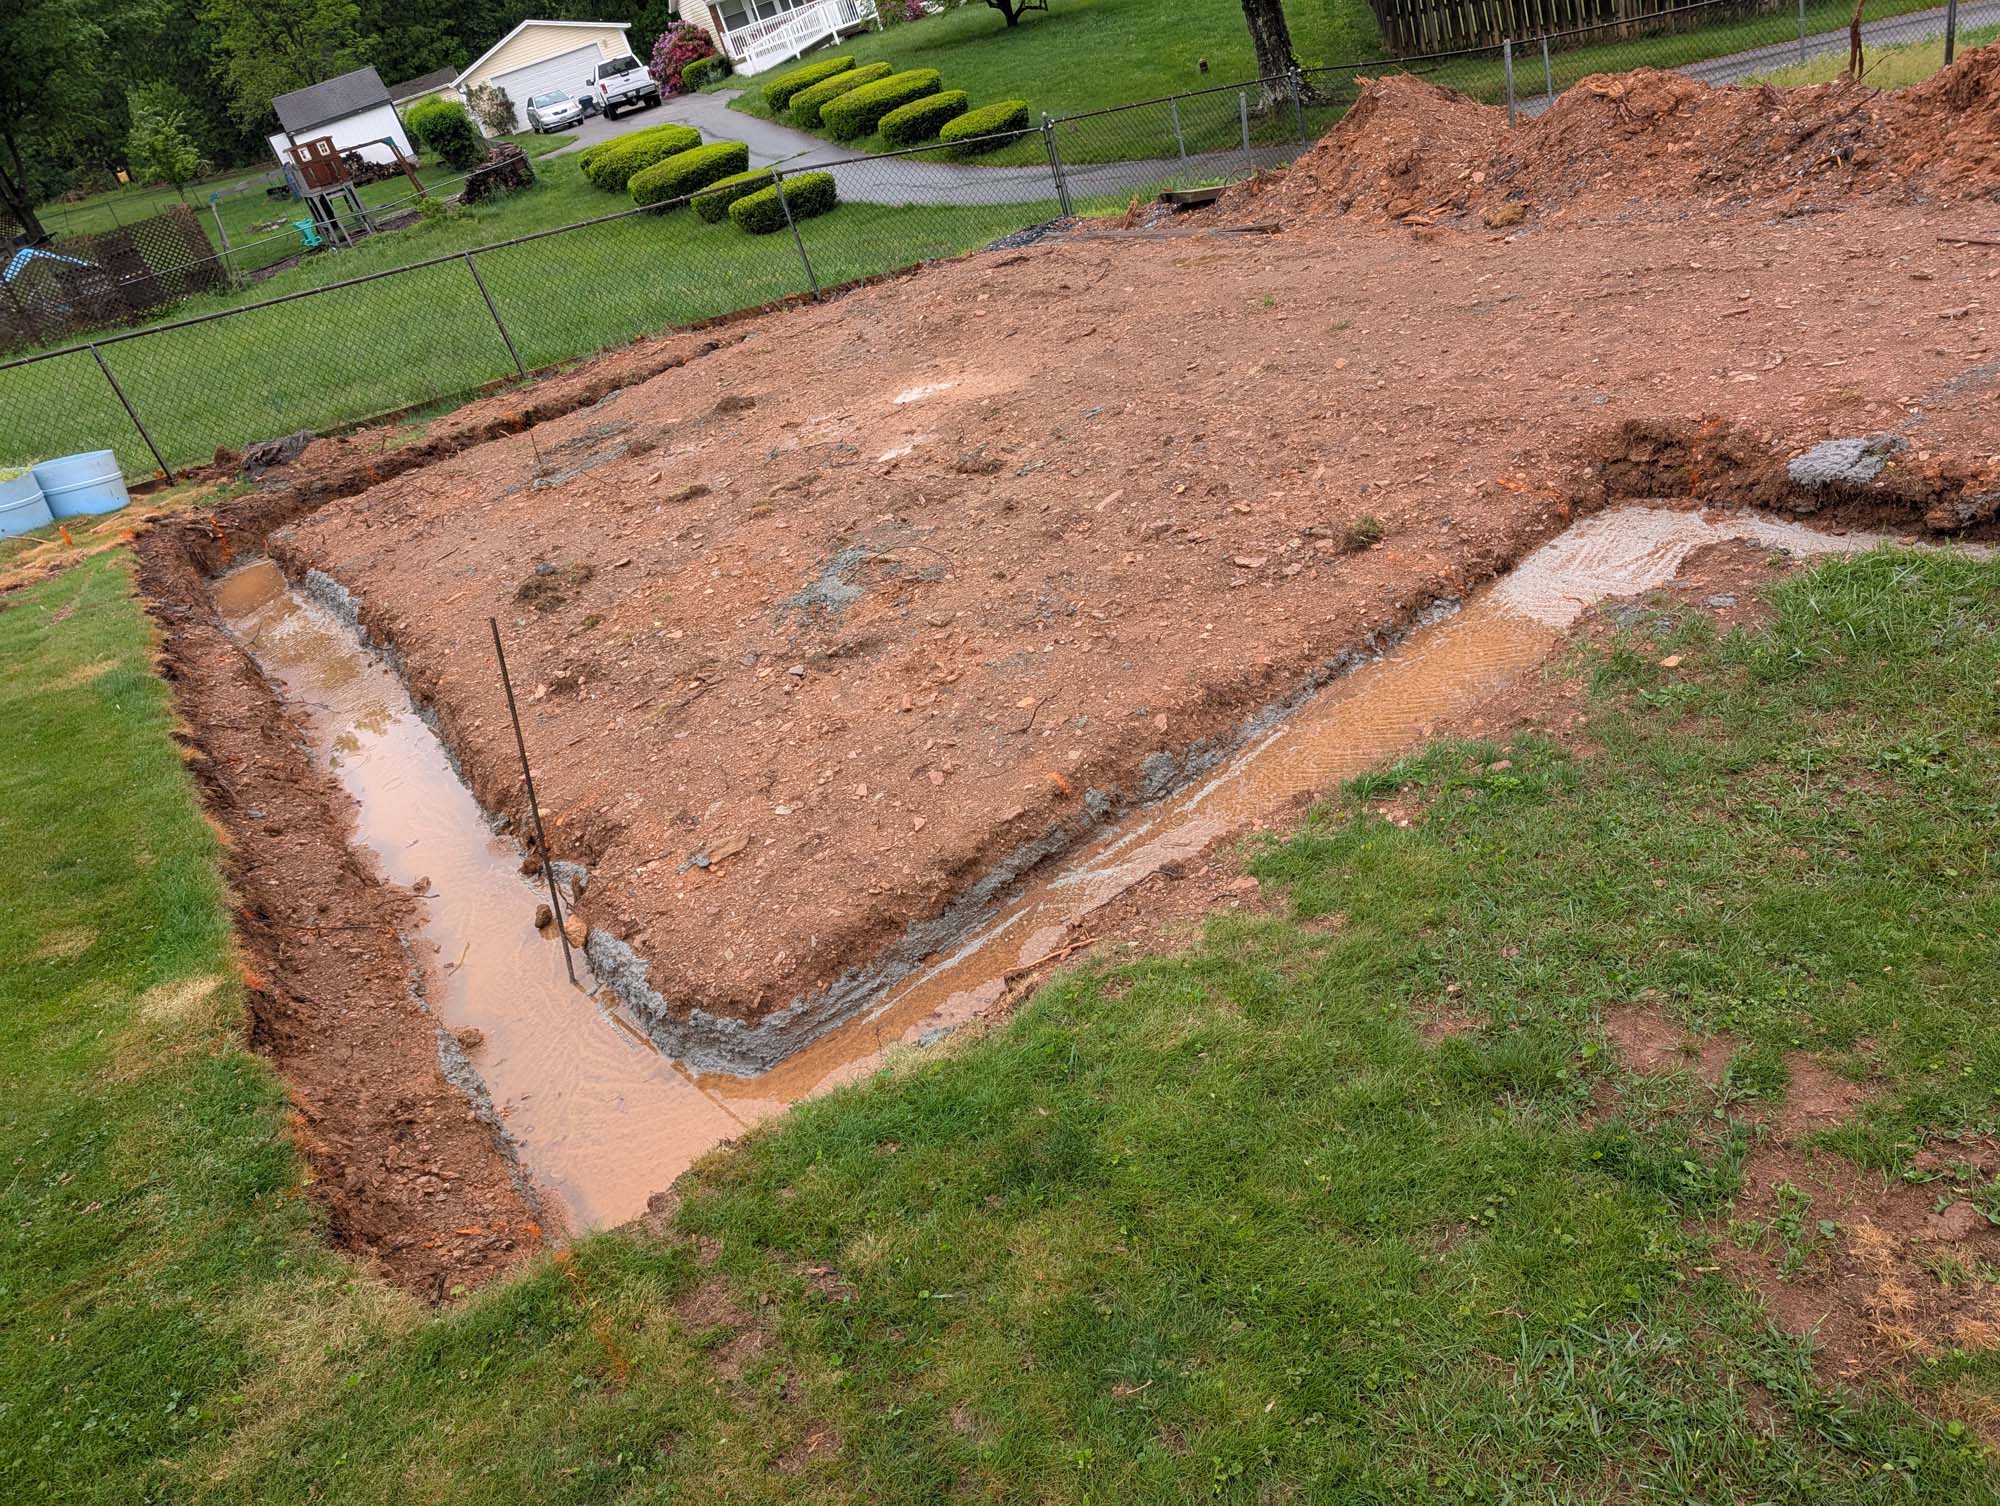
After six months or so of waiting, I finally got the footings dug and poured.
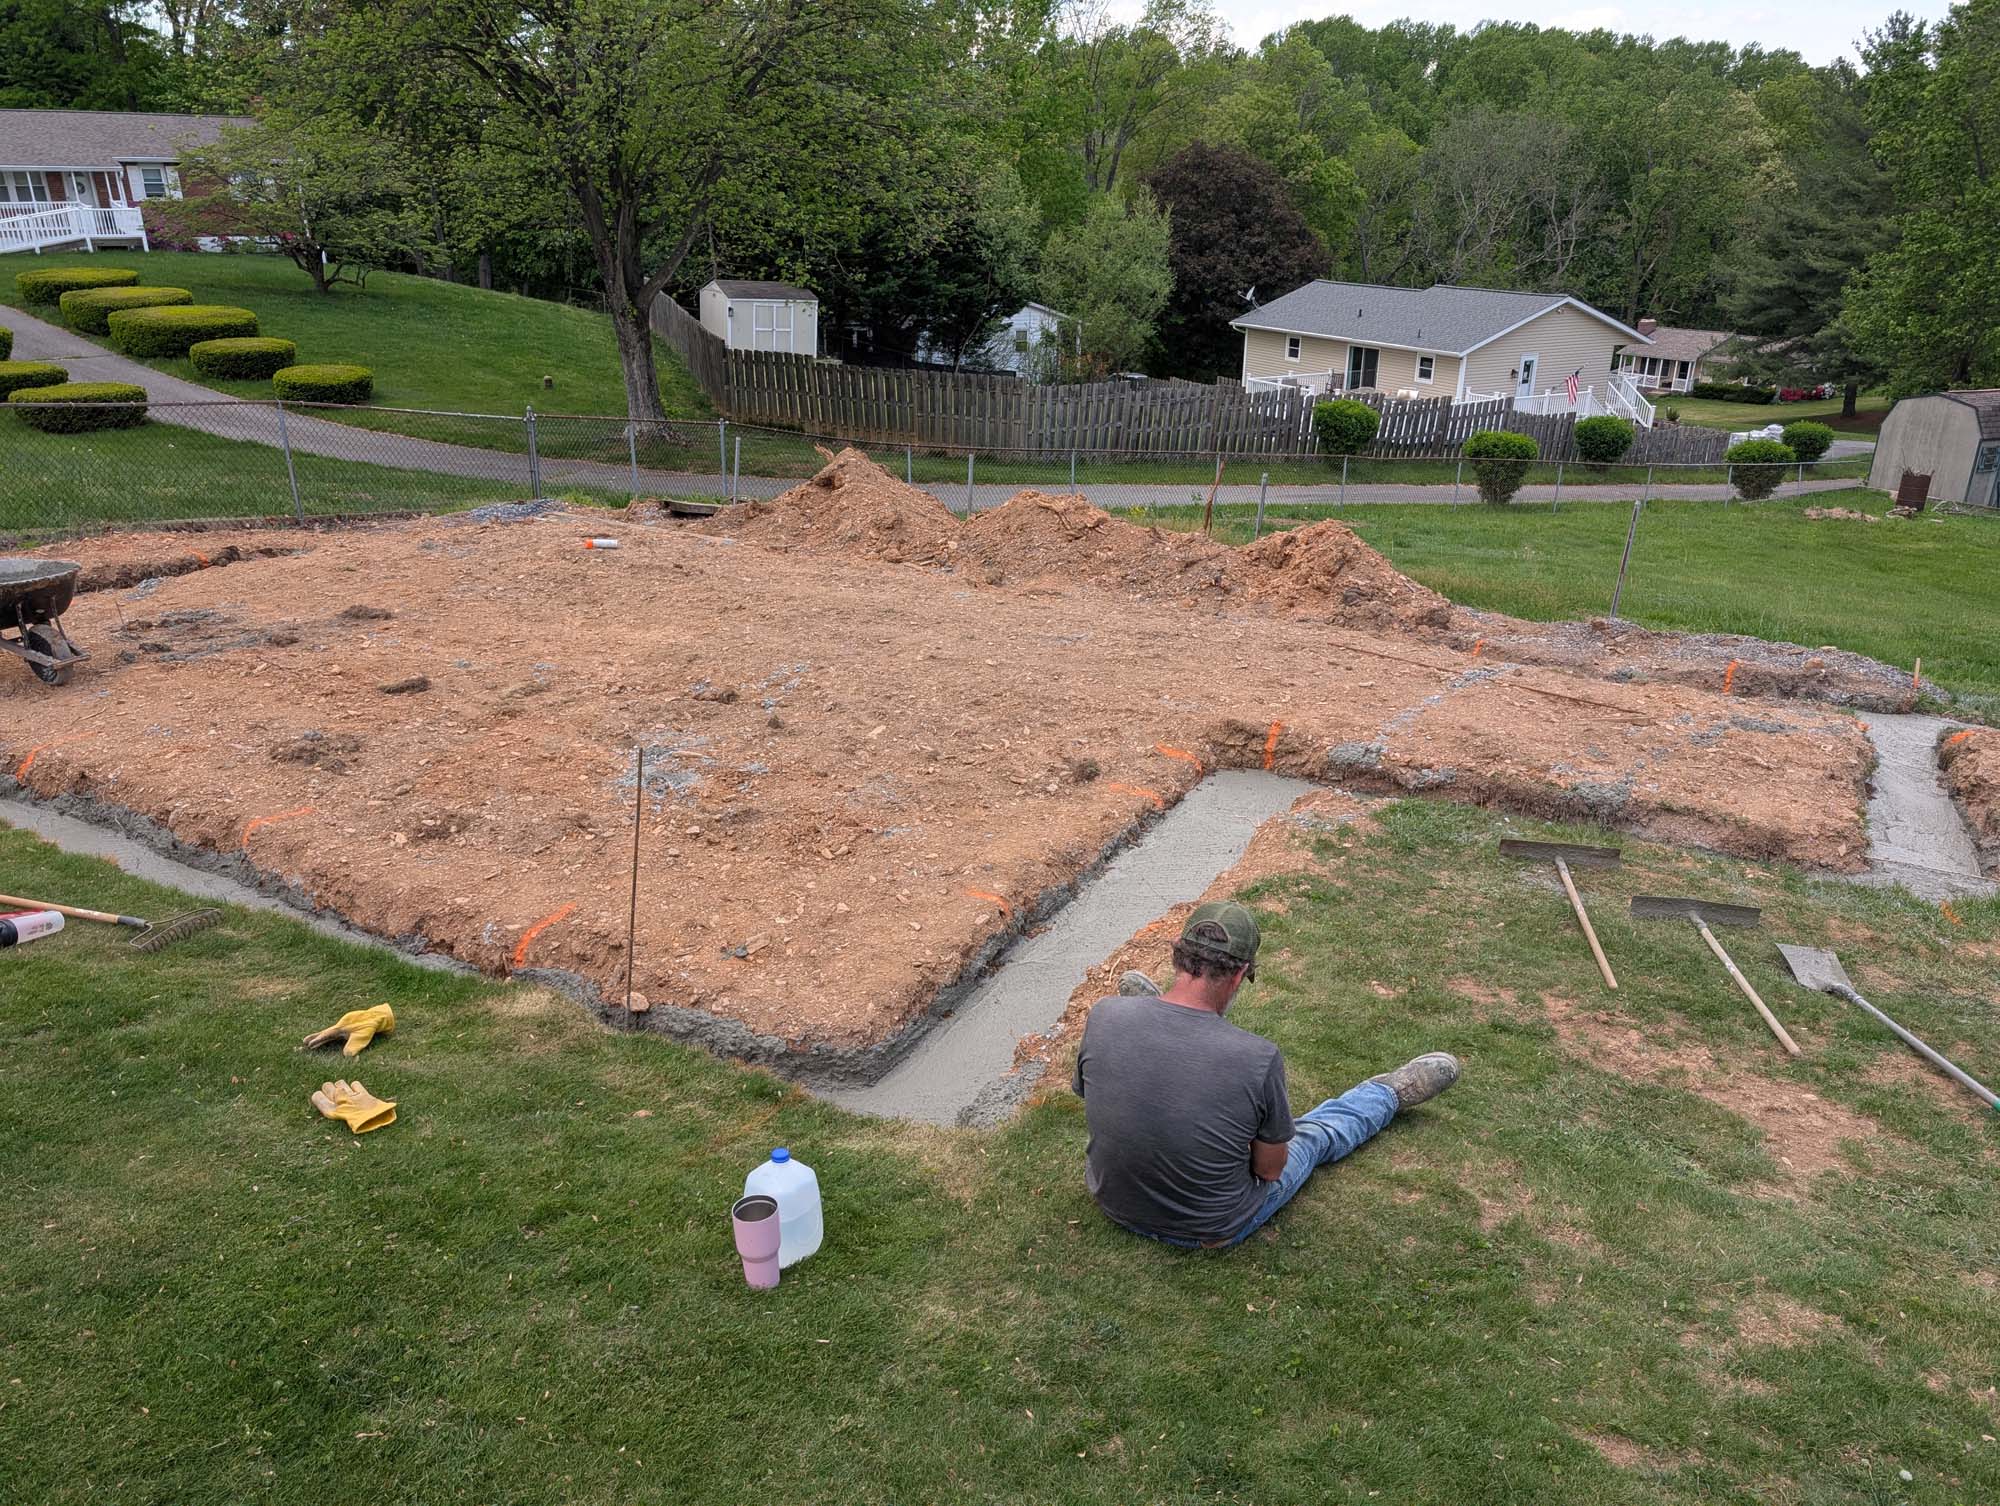
Then it rained and covered them with mud again…

After the spring rains settled down a bit, I spread some gravel and offloaded about 600 concrete blocks.


After a little more waiting, my masons arrived.

I could have done this part myself but it would have taken a lot longer and looked a lot worse…
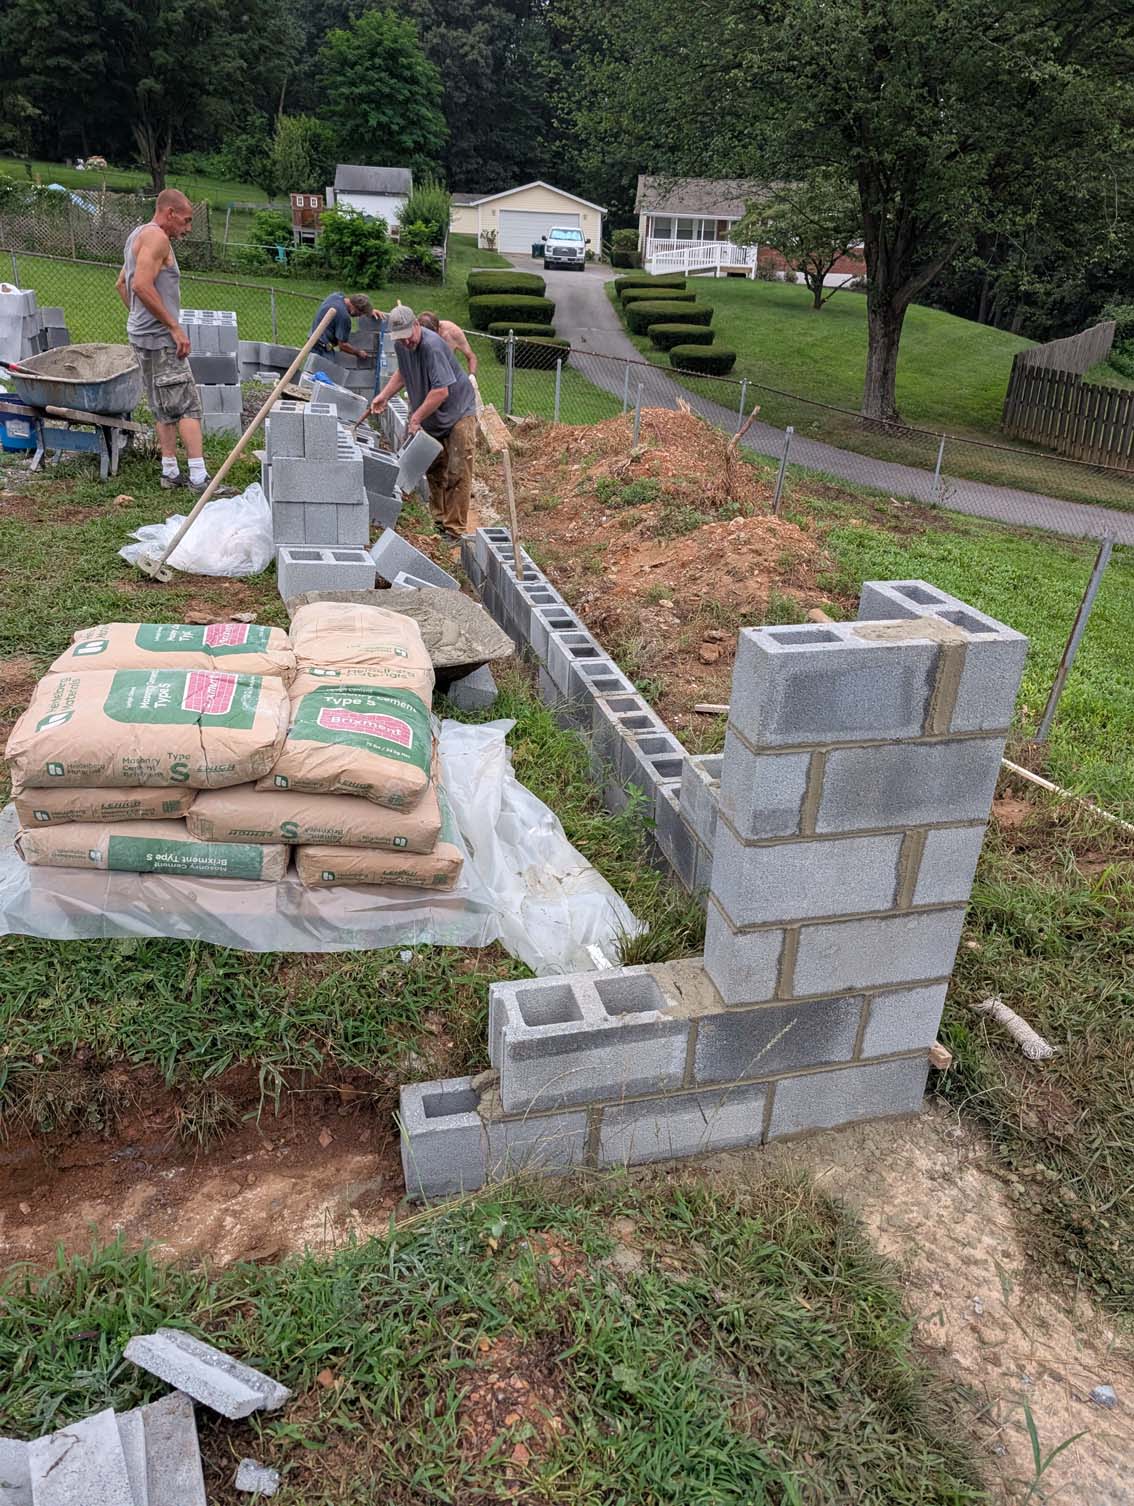
Two block layers and some laborers laid 600 block in 6 hours. I was impressed.


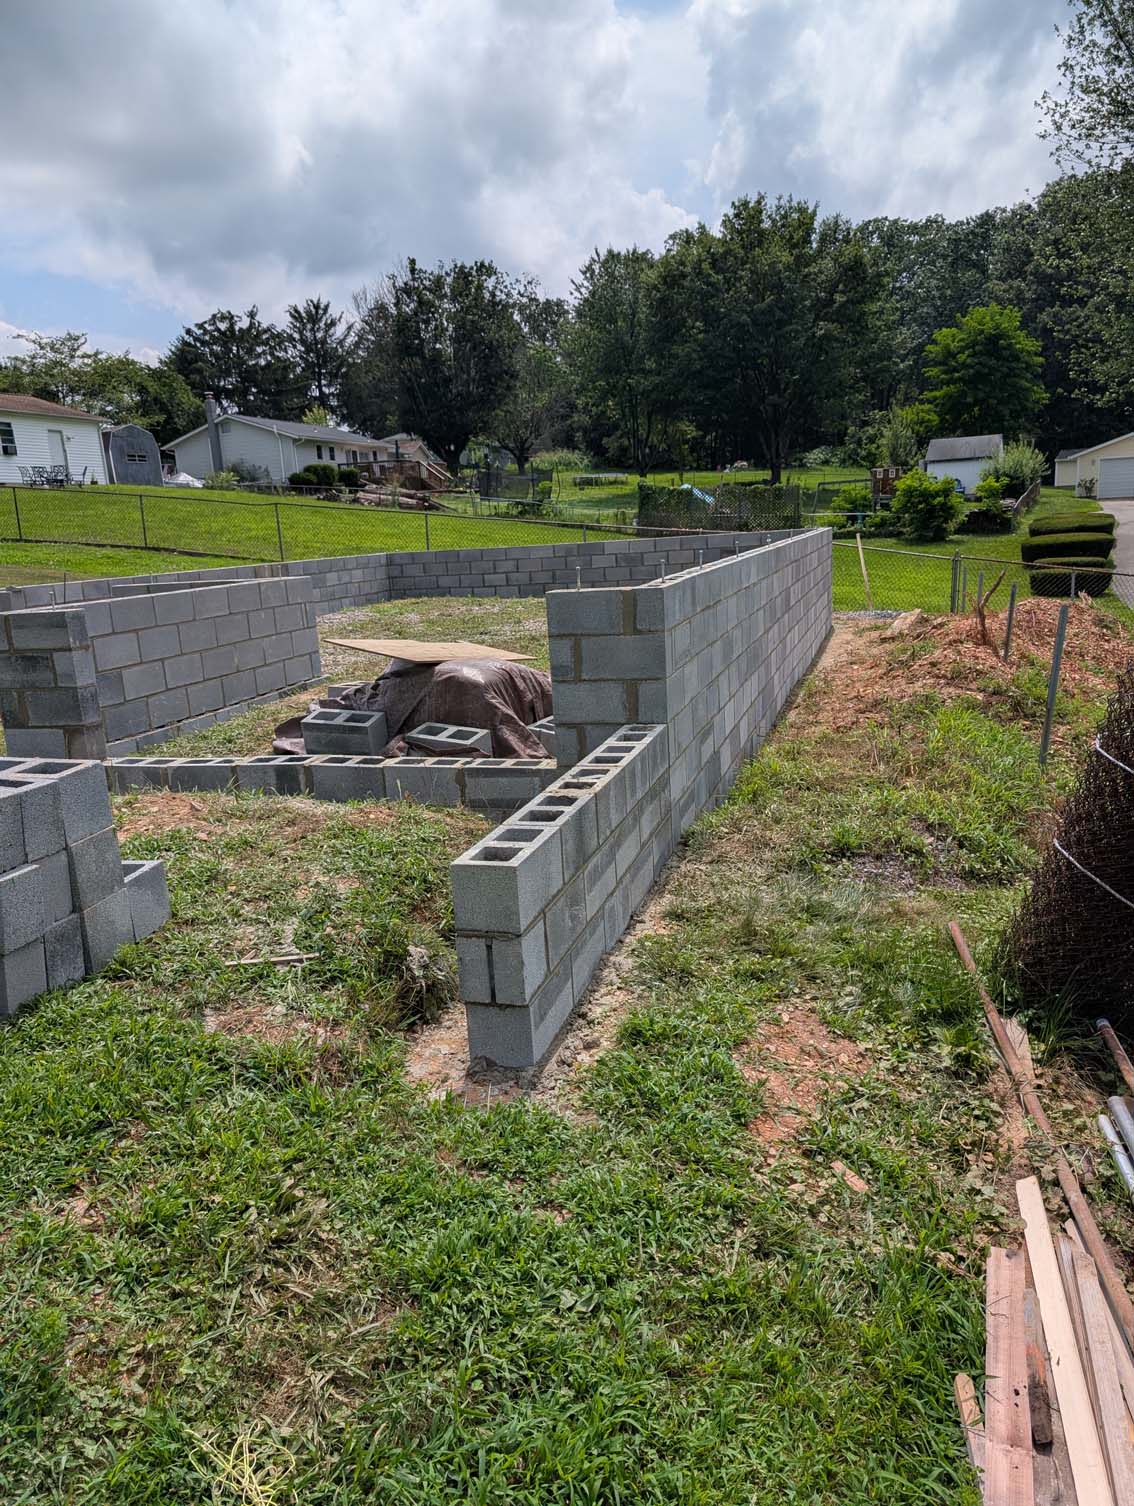
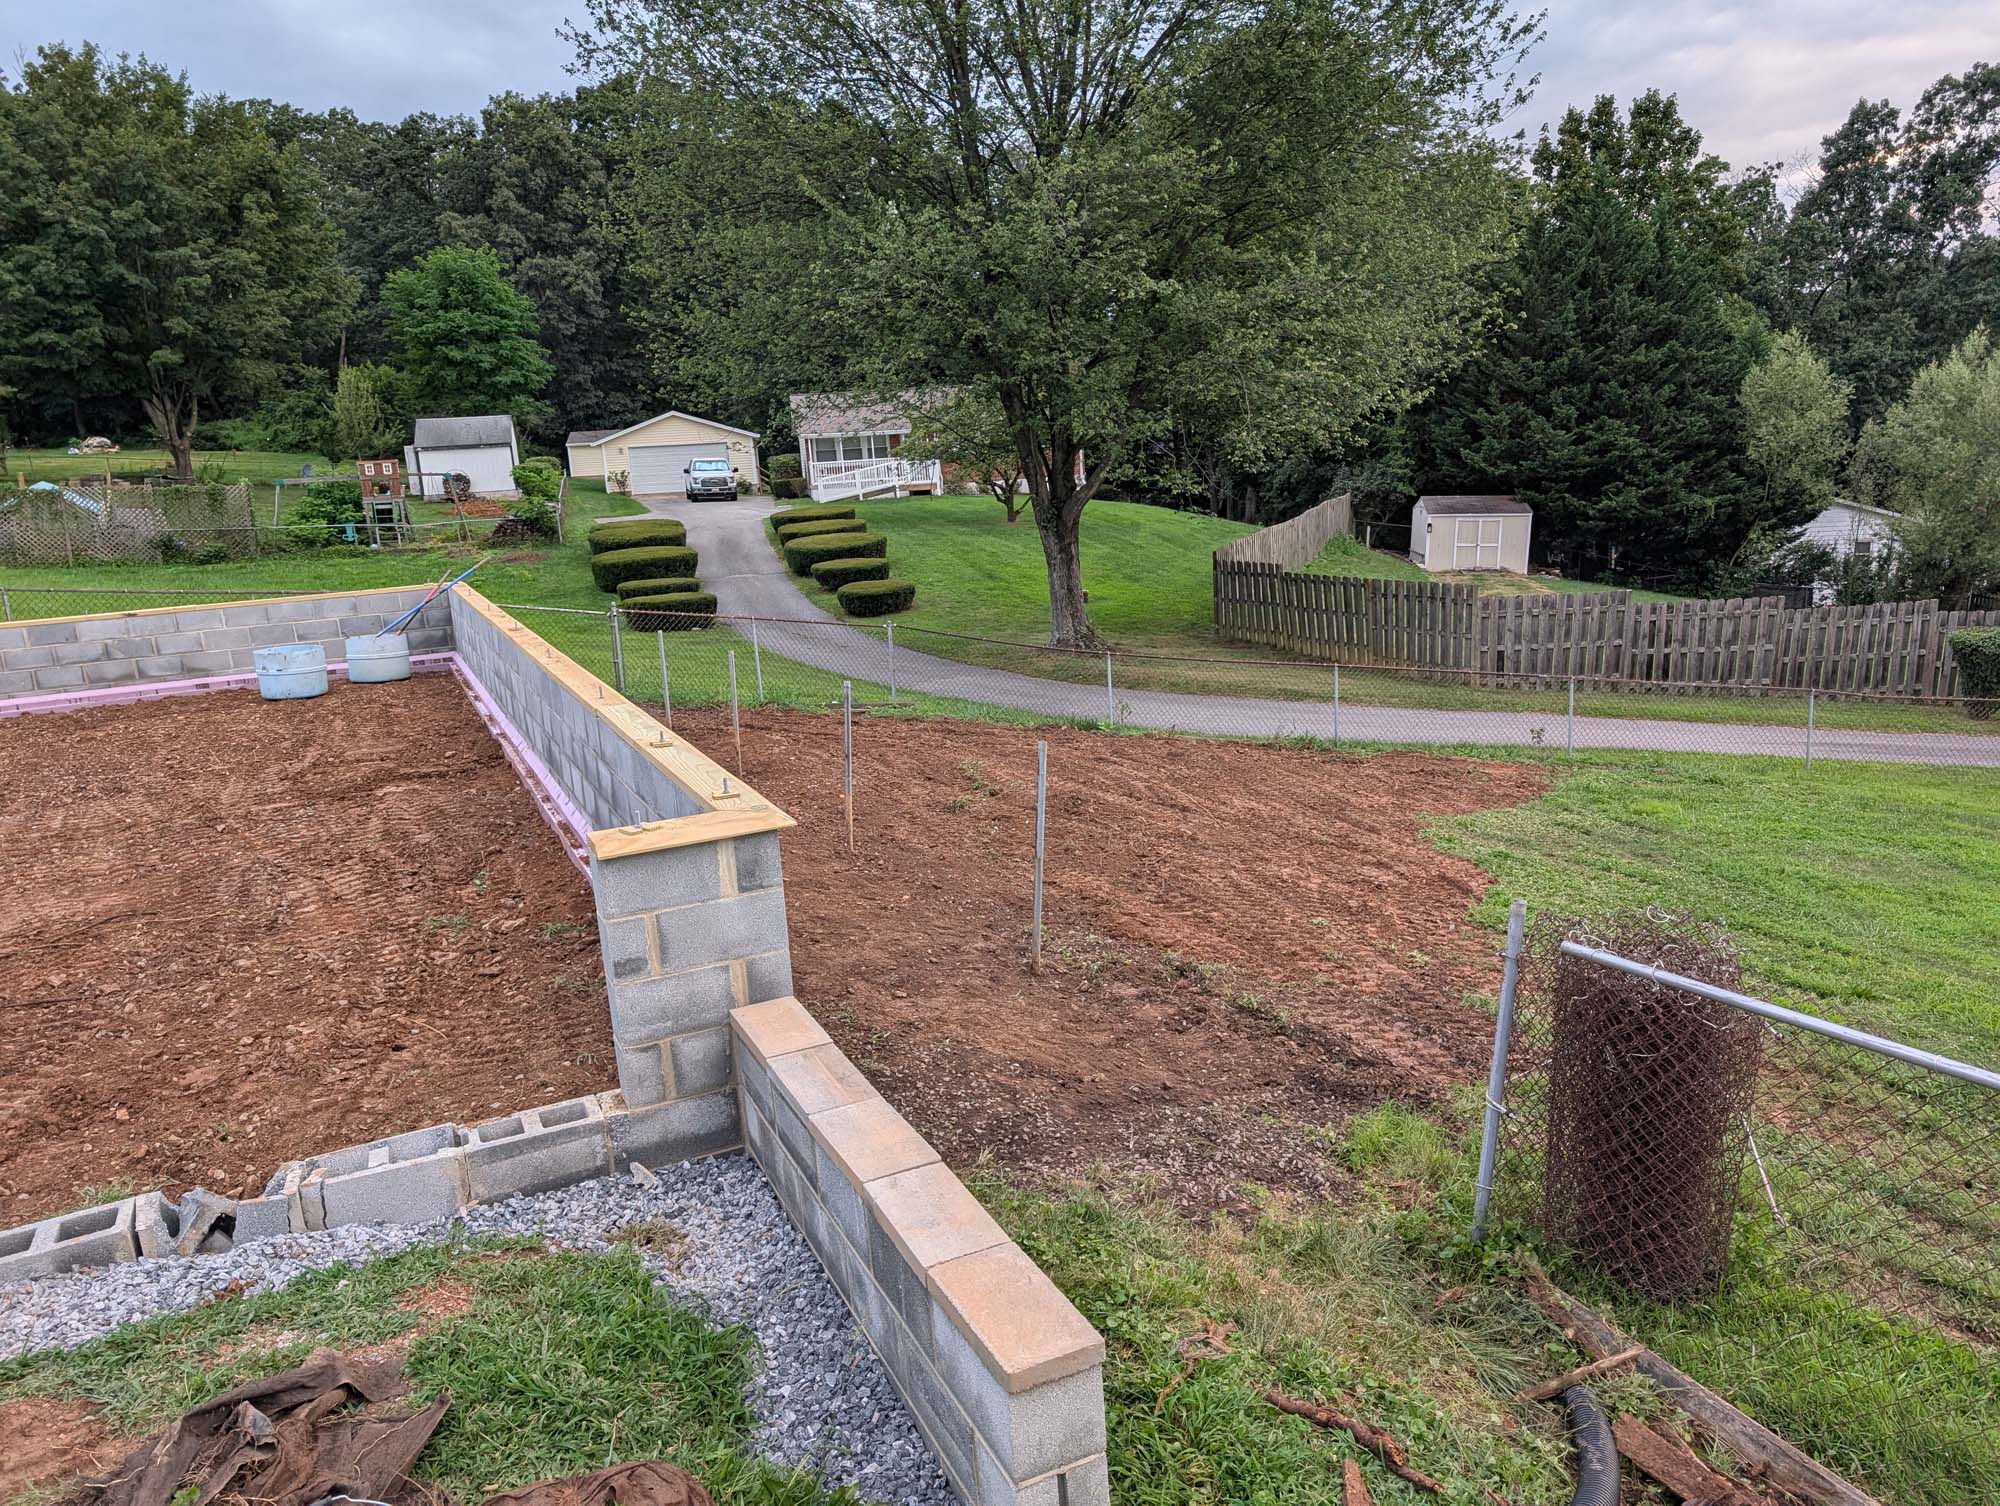
Now that the foundation is finally out of the ground (9 months later) I can get rolling.

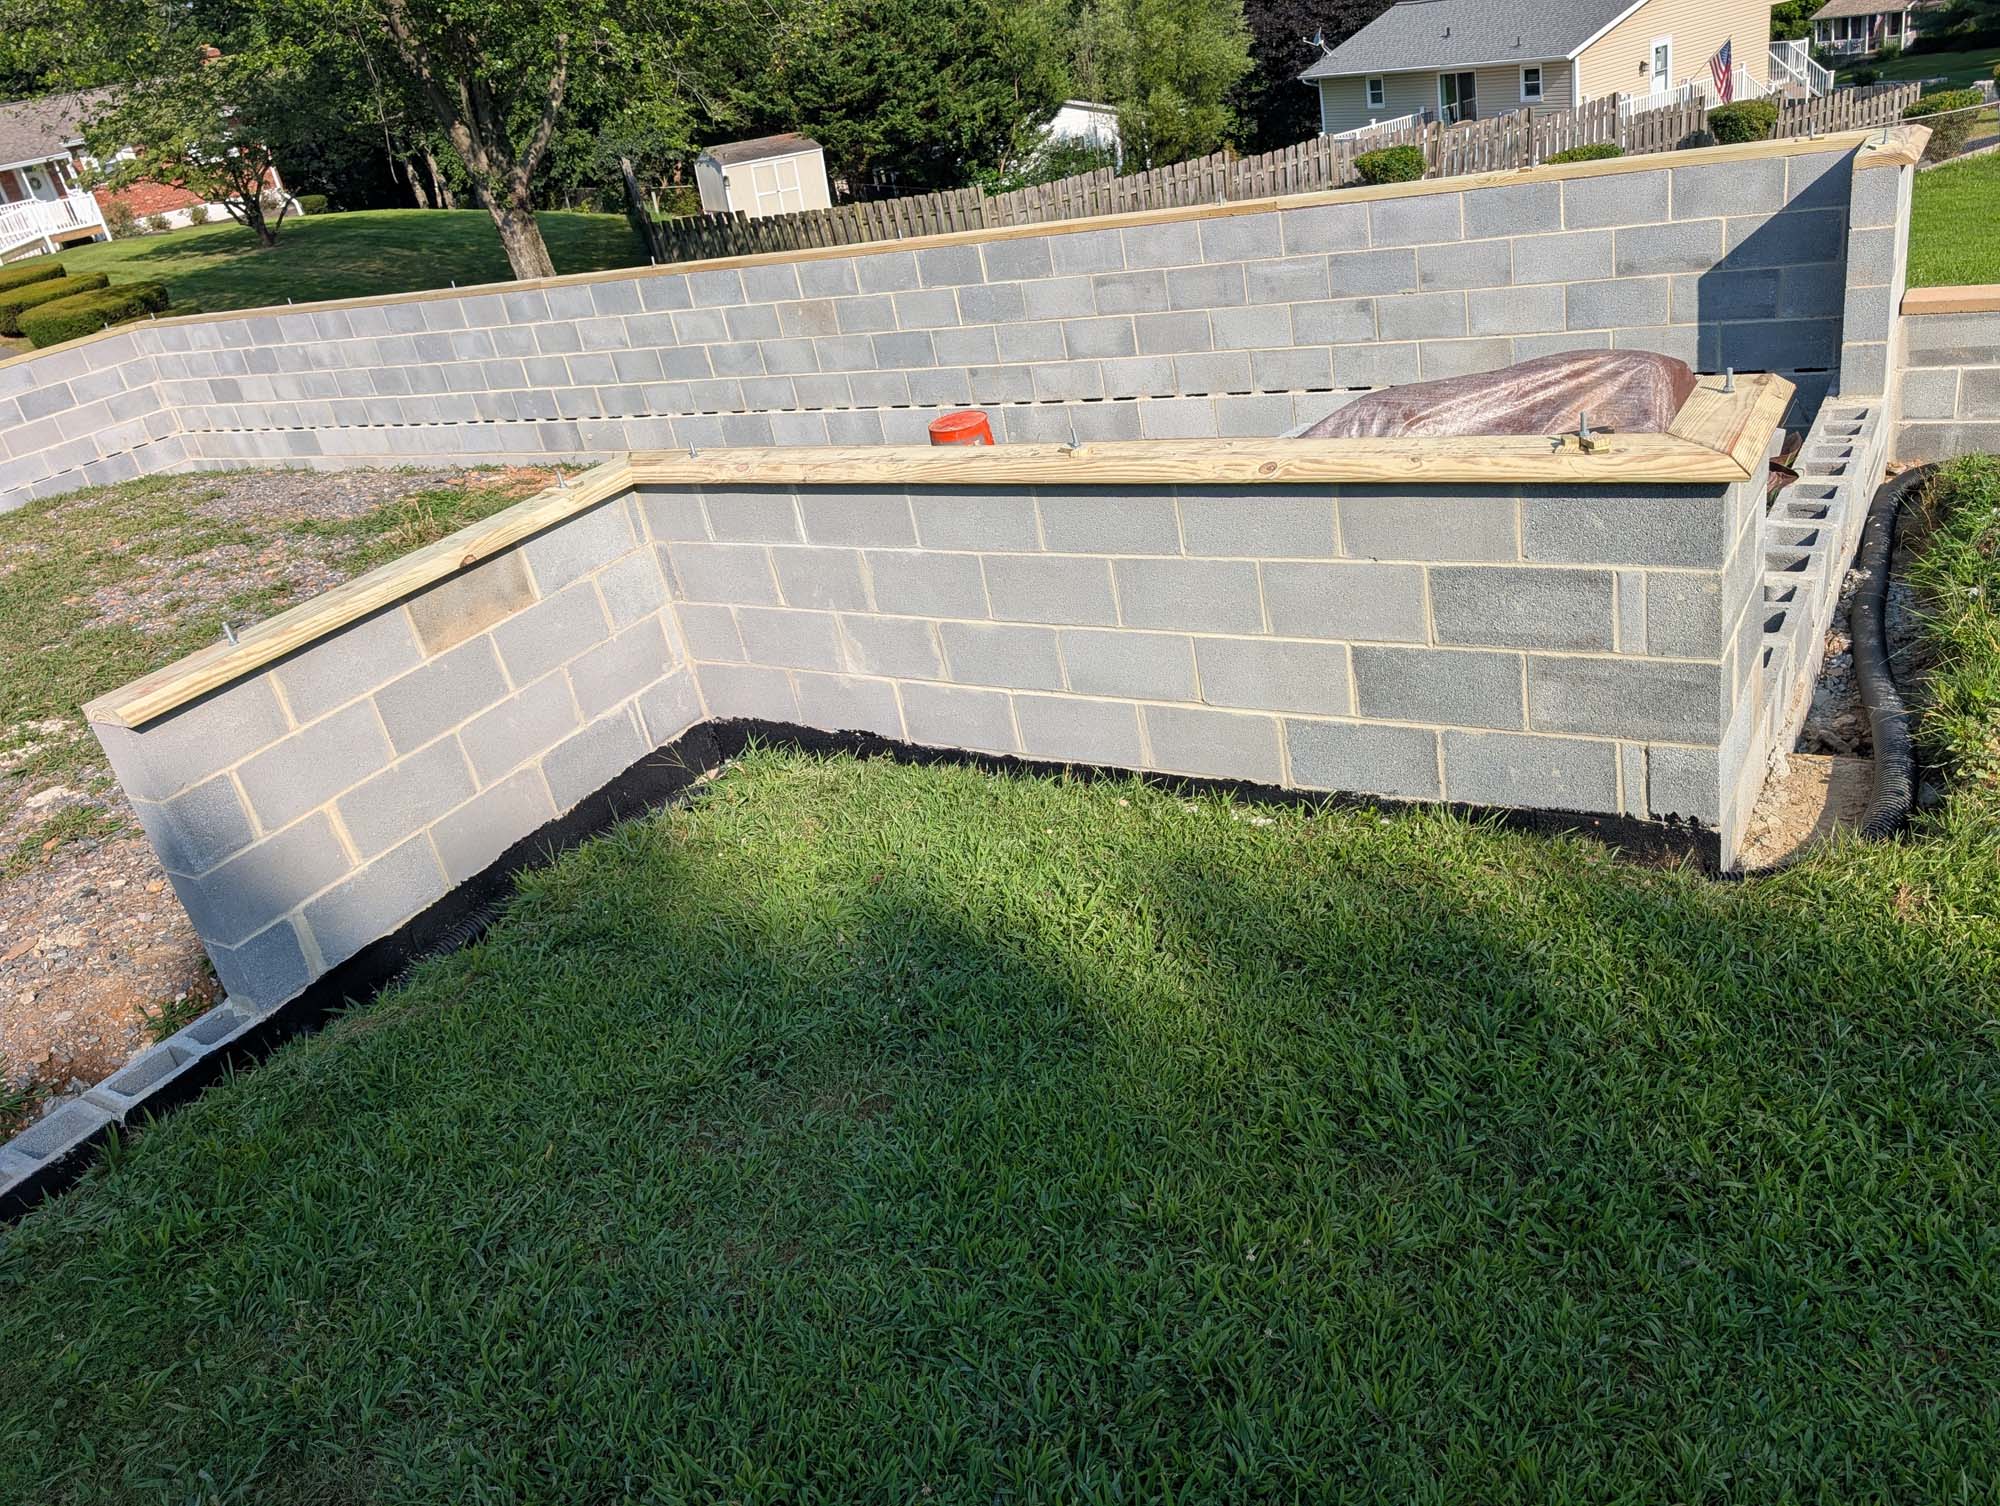
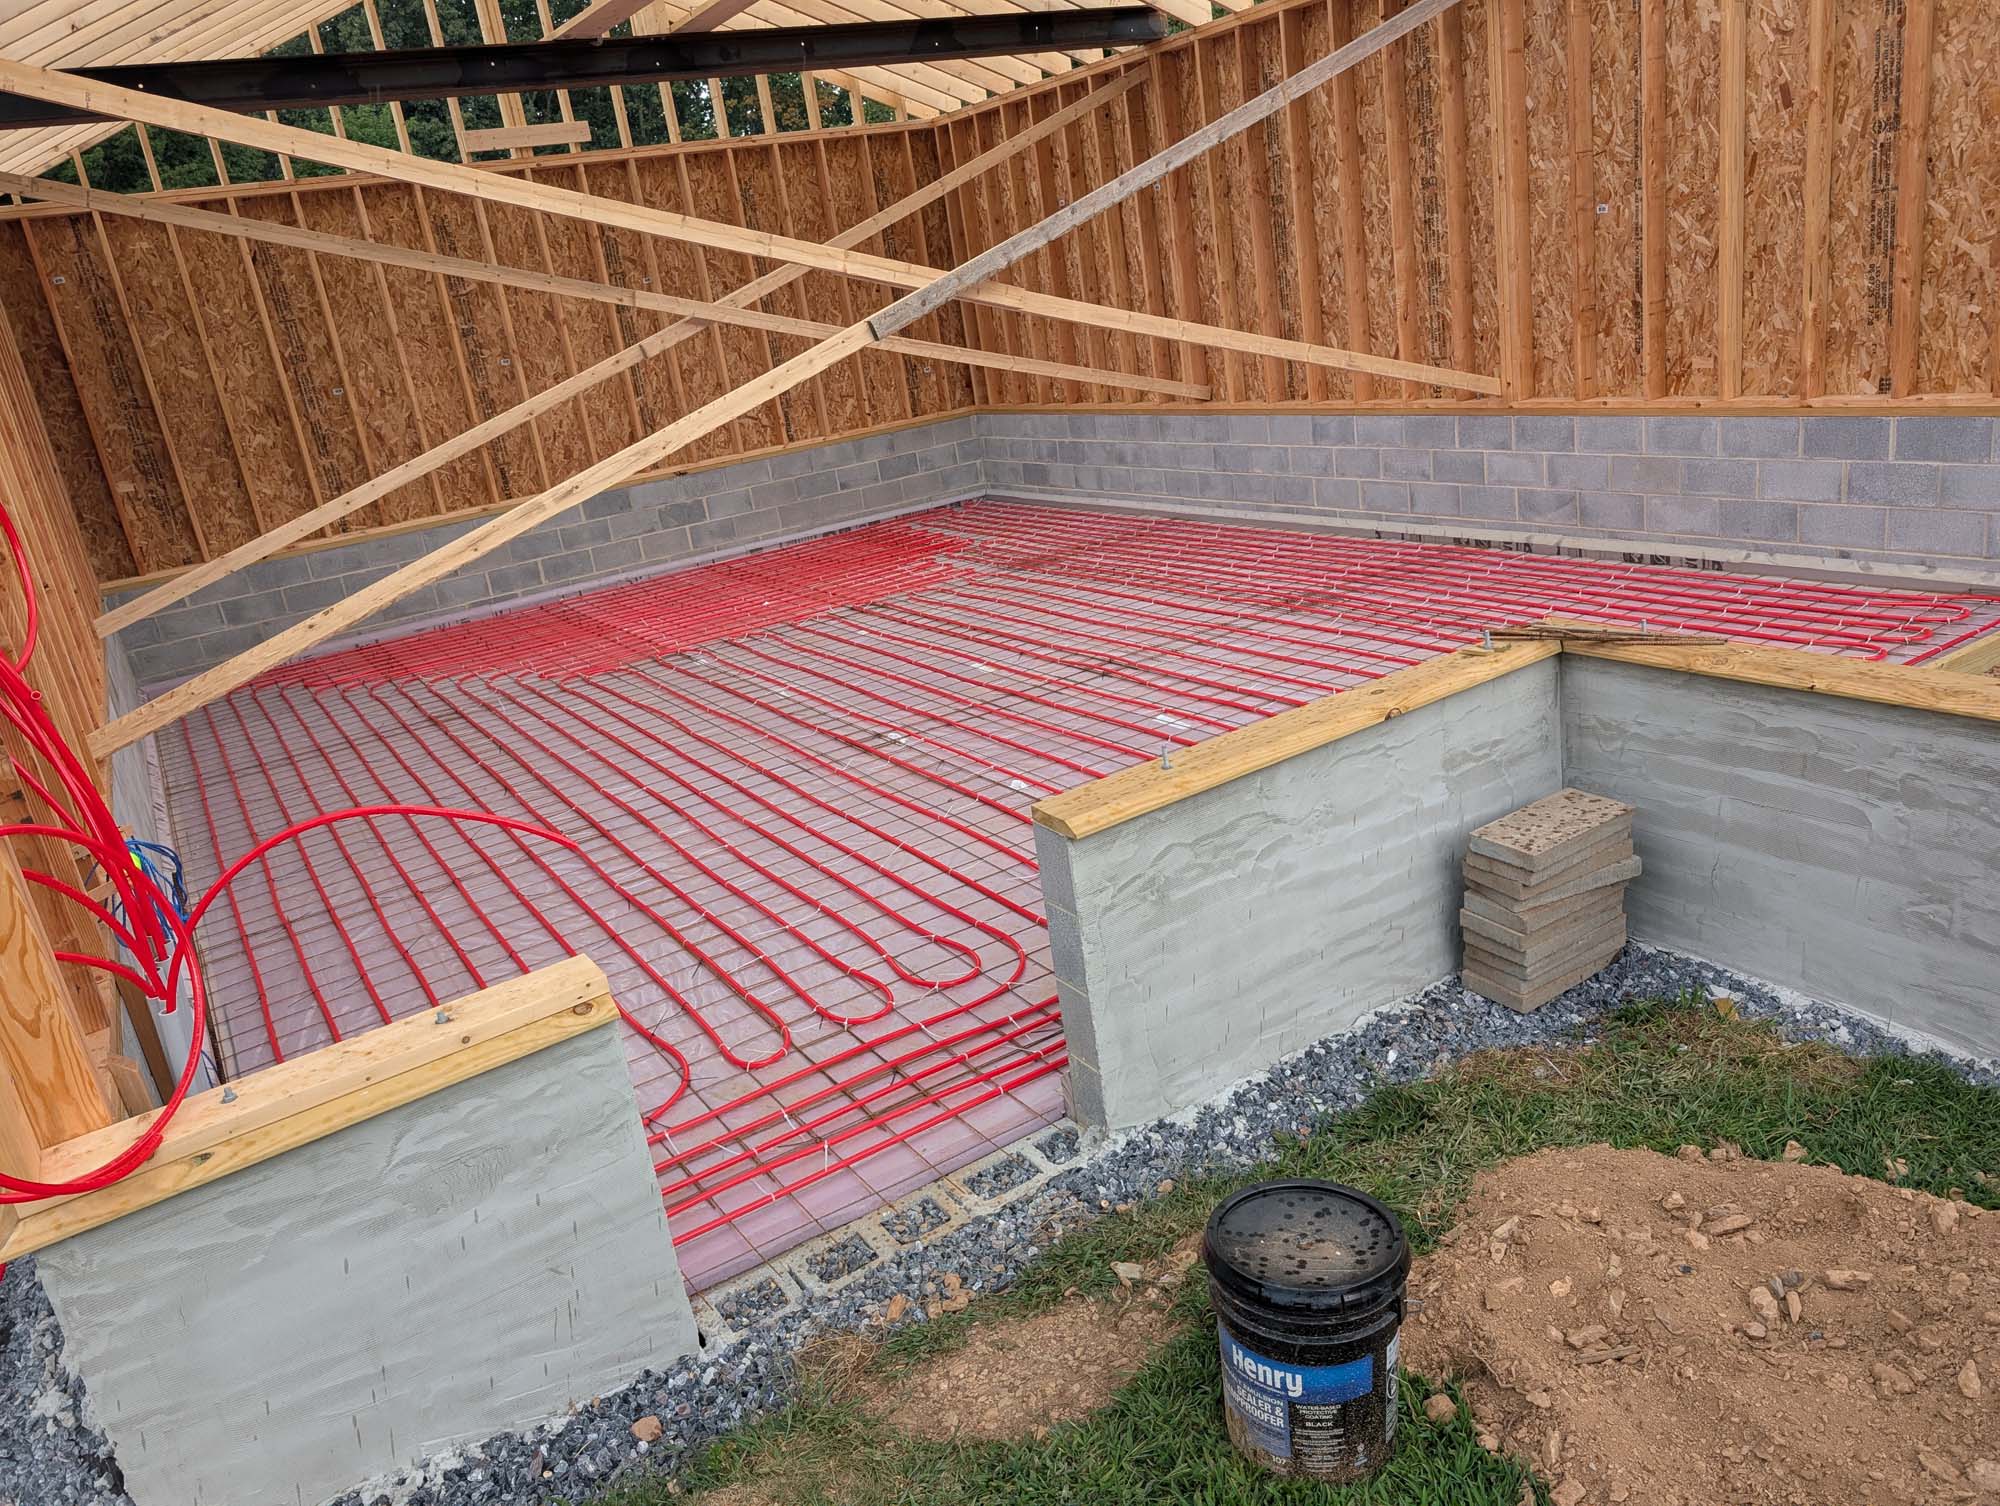
First up was water-proofing the foundation and laying drain tile. I plan to add a veneer of stone to the foundation so I bolted pressure treated 2″x8″ boards to the 6″ block to create a roughly 2″ overhang to shed water away from the wall.
To prepare for the in-floor radiant heat, I insulated around the inside perimeter of the wood shed.

Then Tony could re-grade the area.
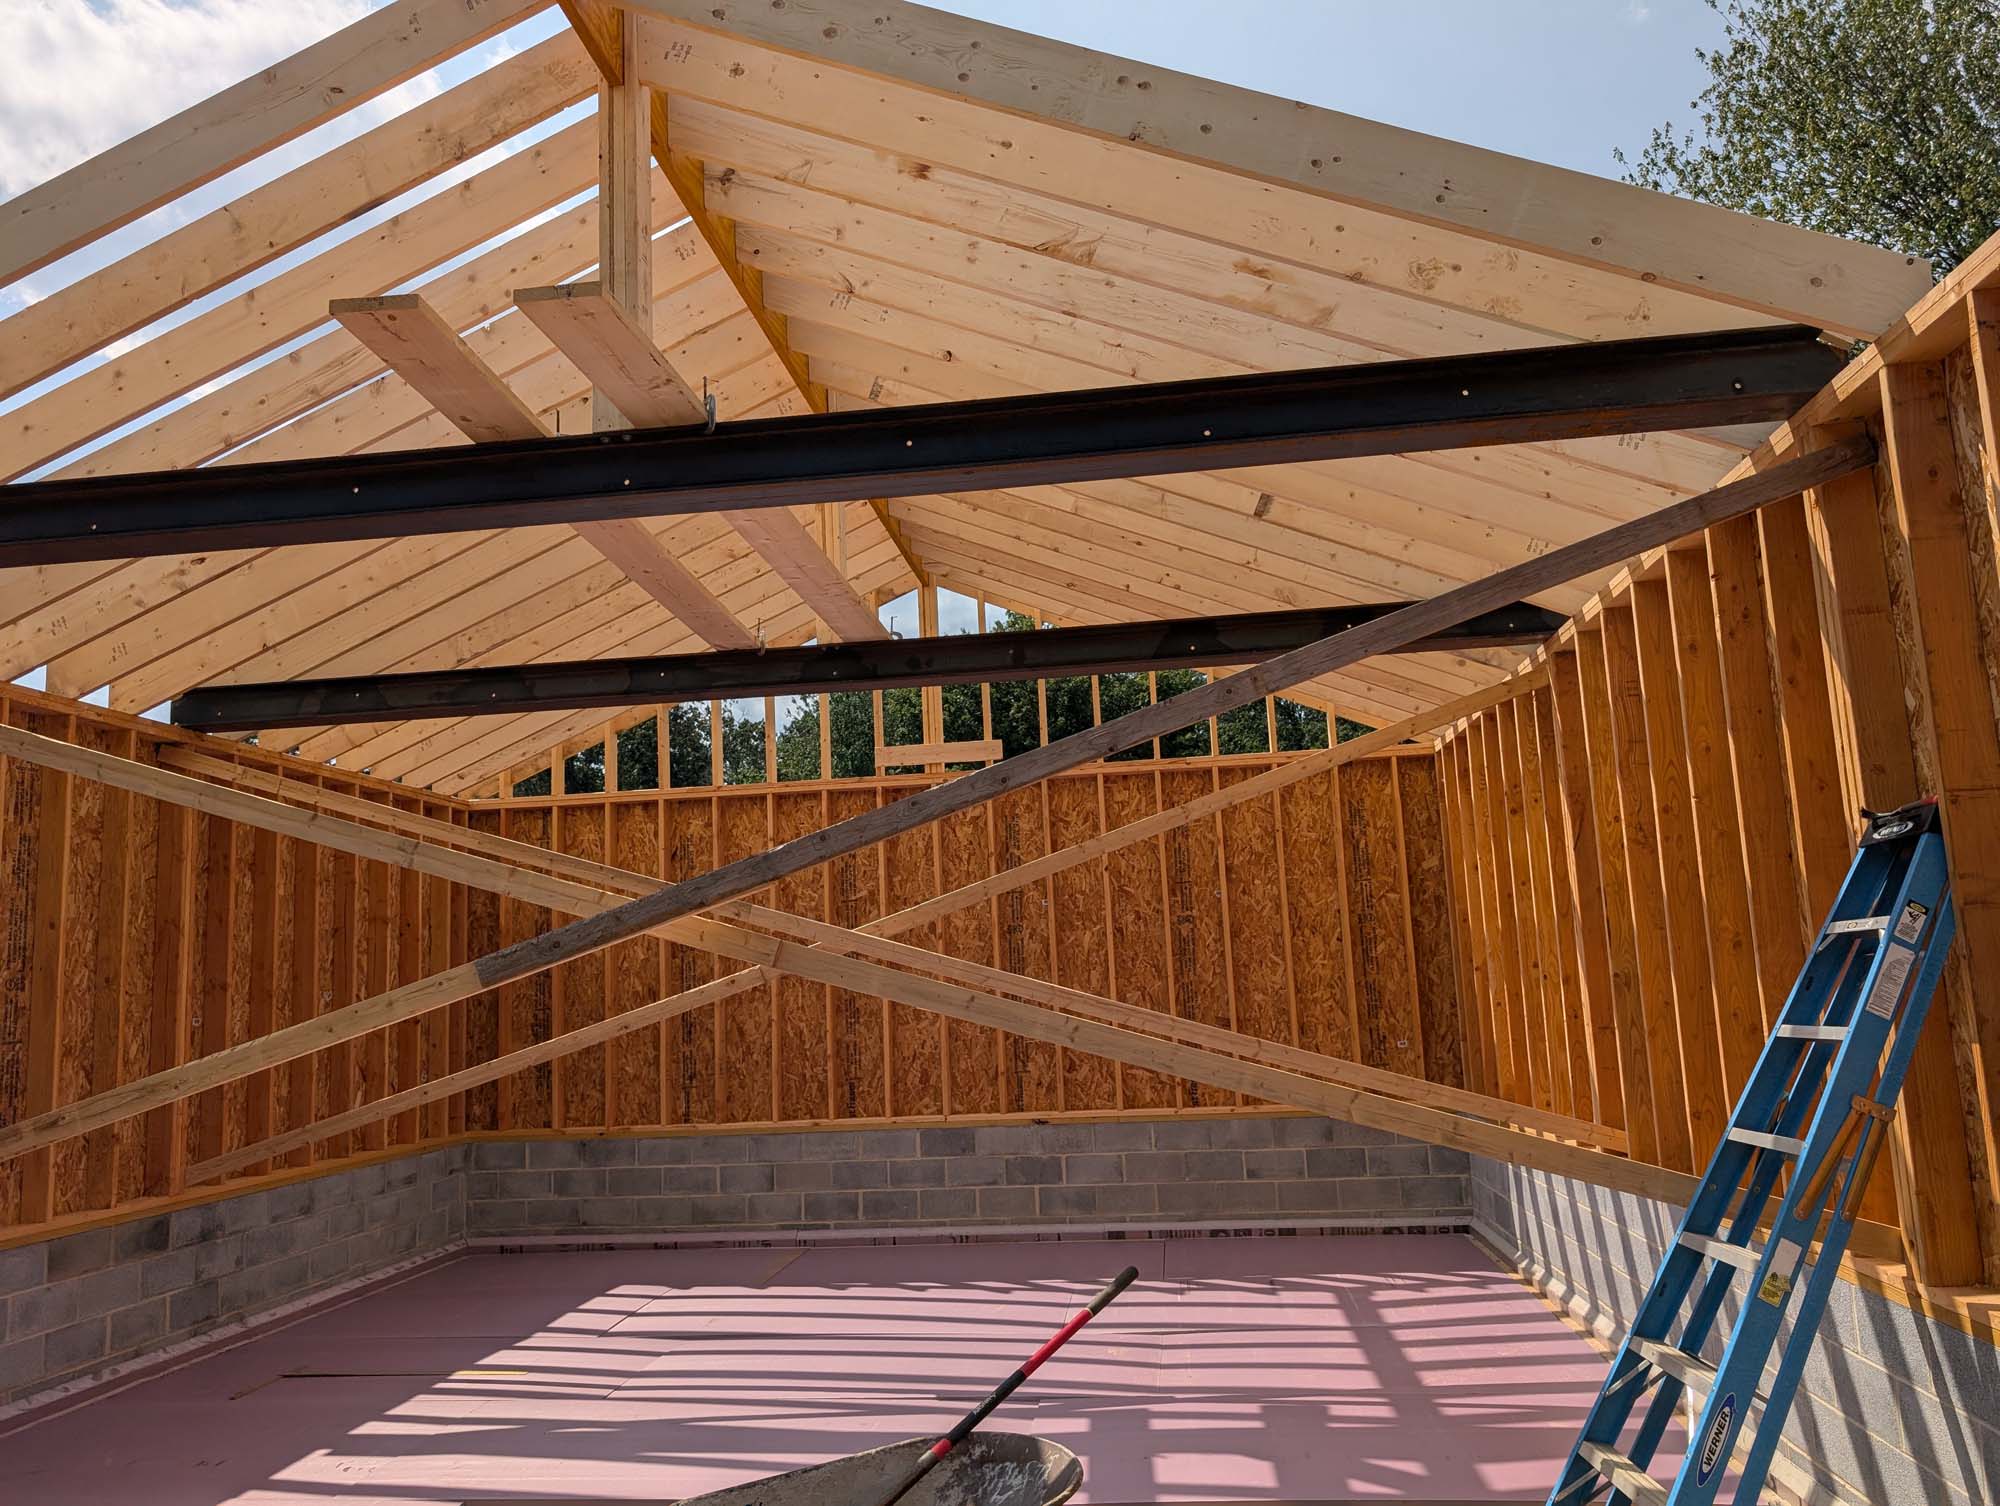
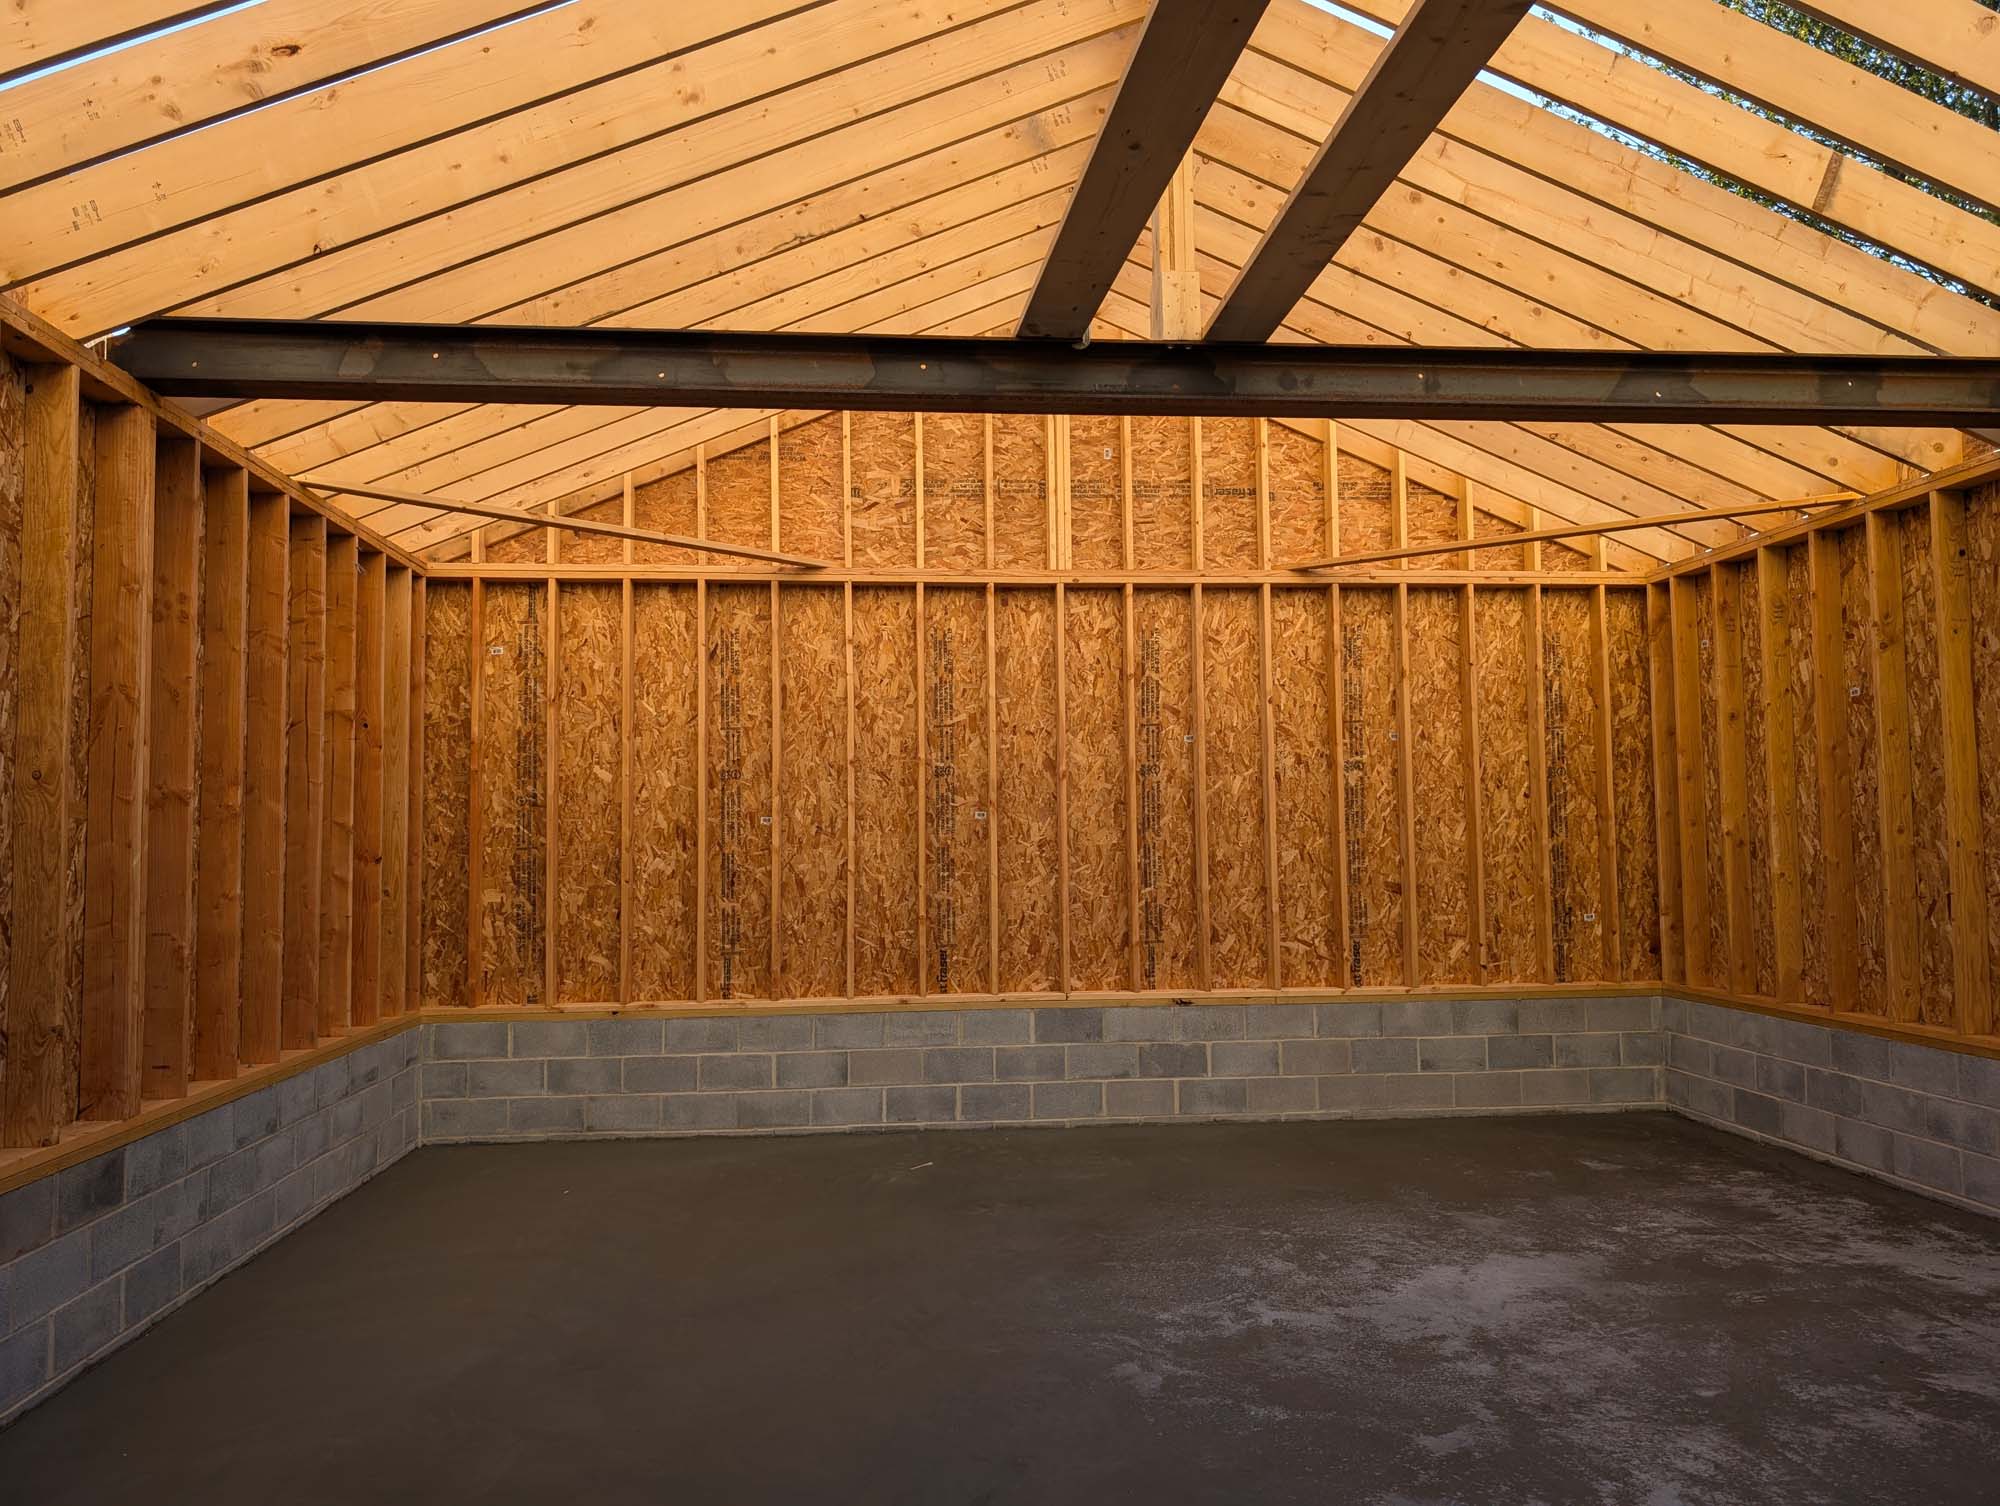
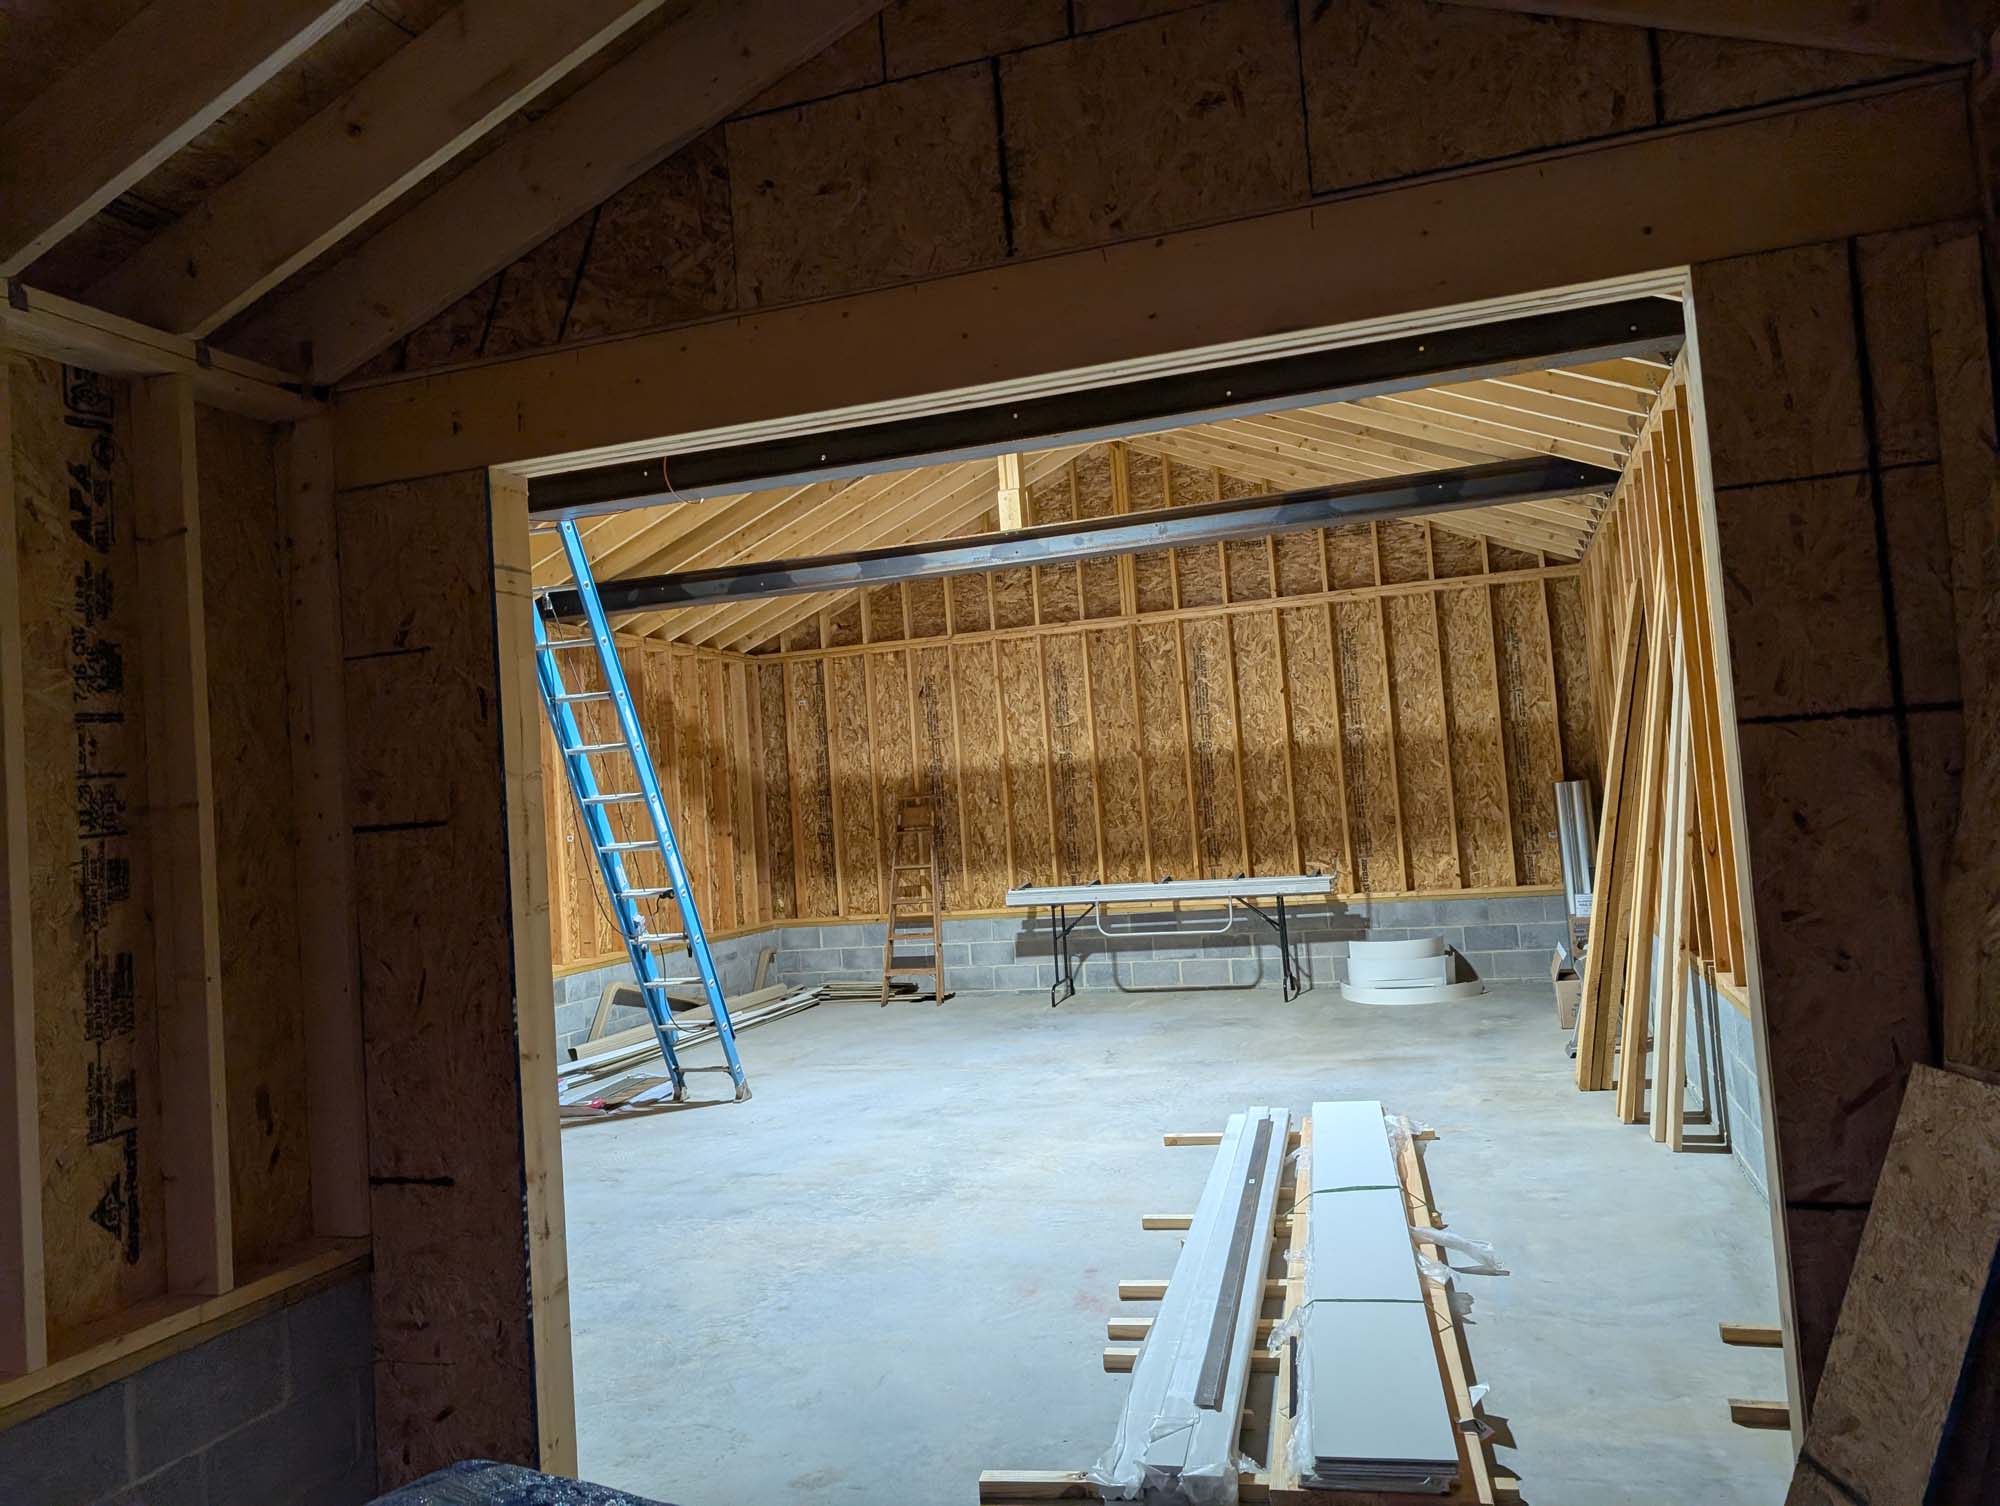
I know the next logical step would be to pour the concrete but I want some heavy steel beams set for future crane/winch/chain-fall possibilities. The beams weigh 1,000 pounds each so I want them set before the concrete goes in so we don’t risk damaging a newly poured floor.
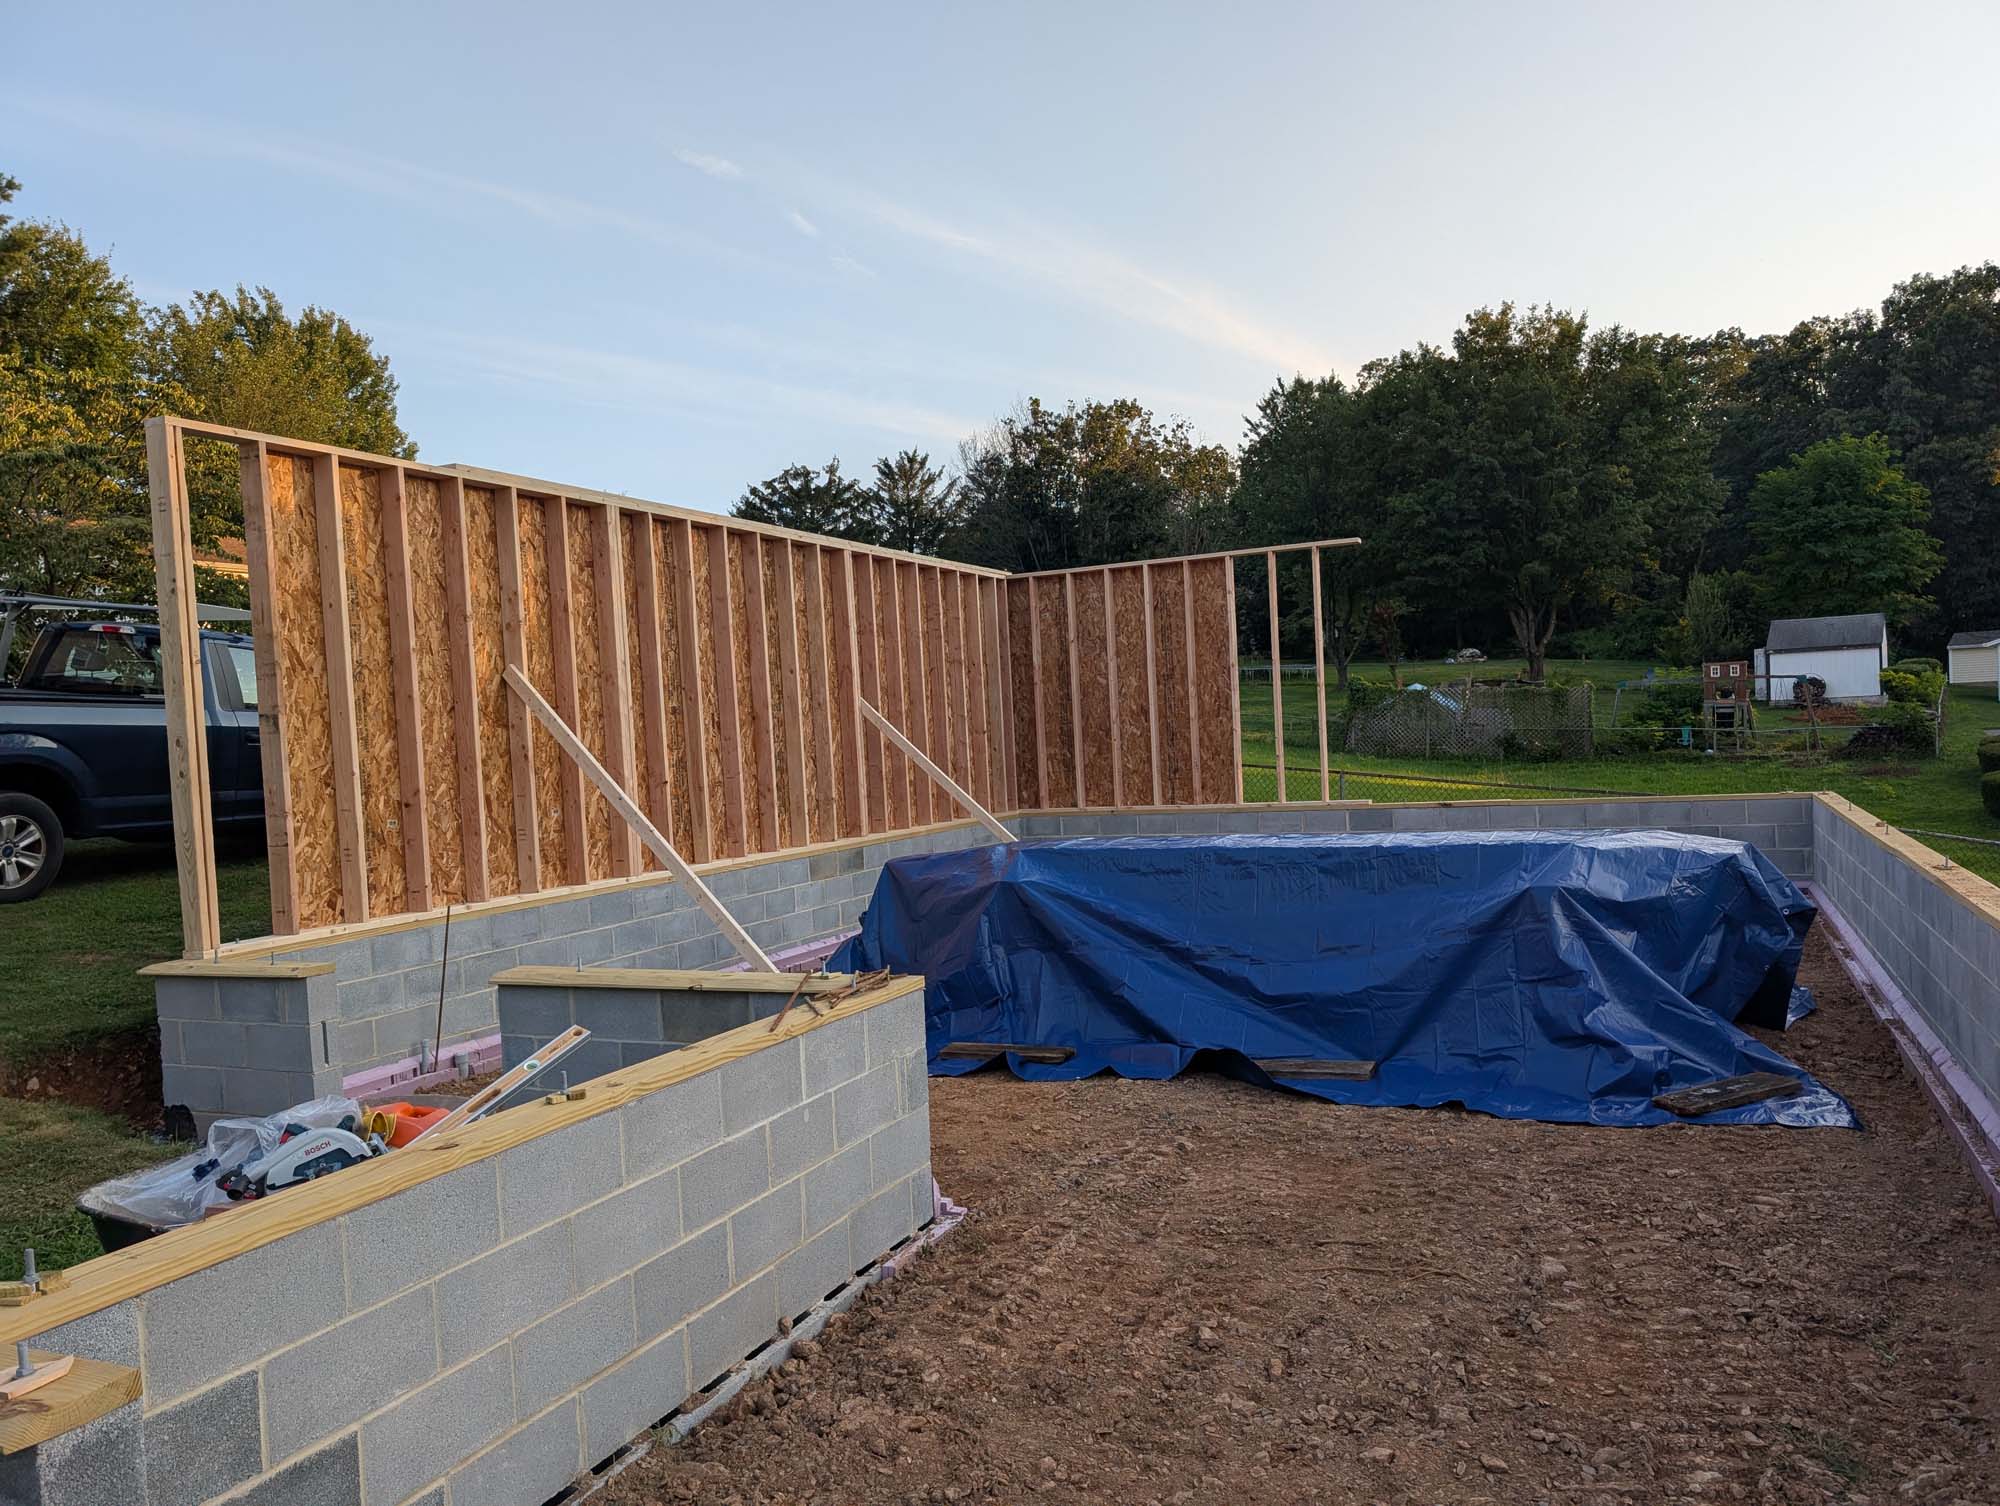
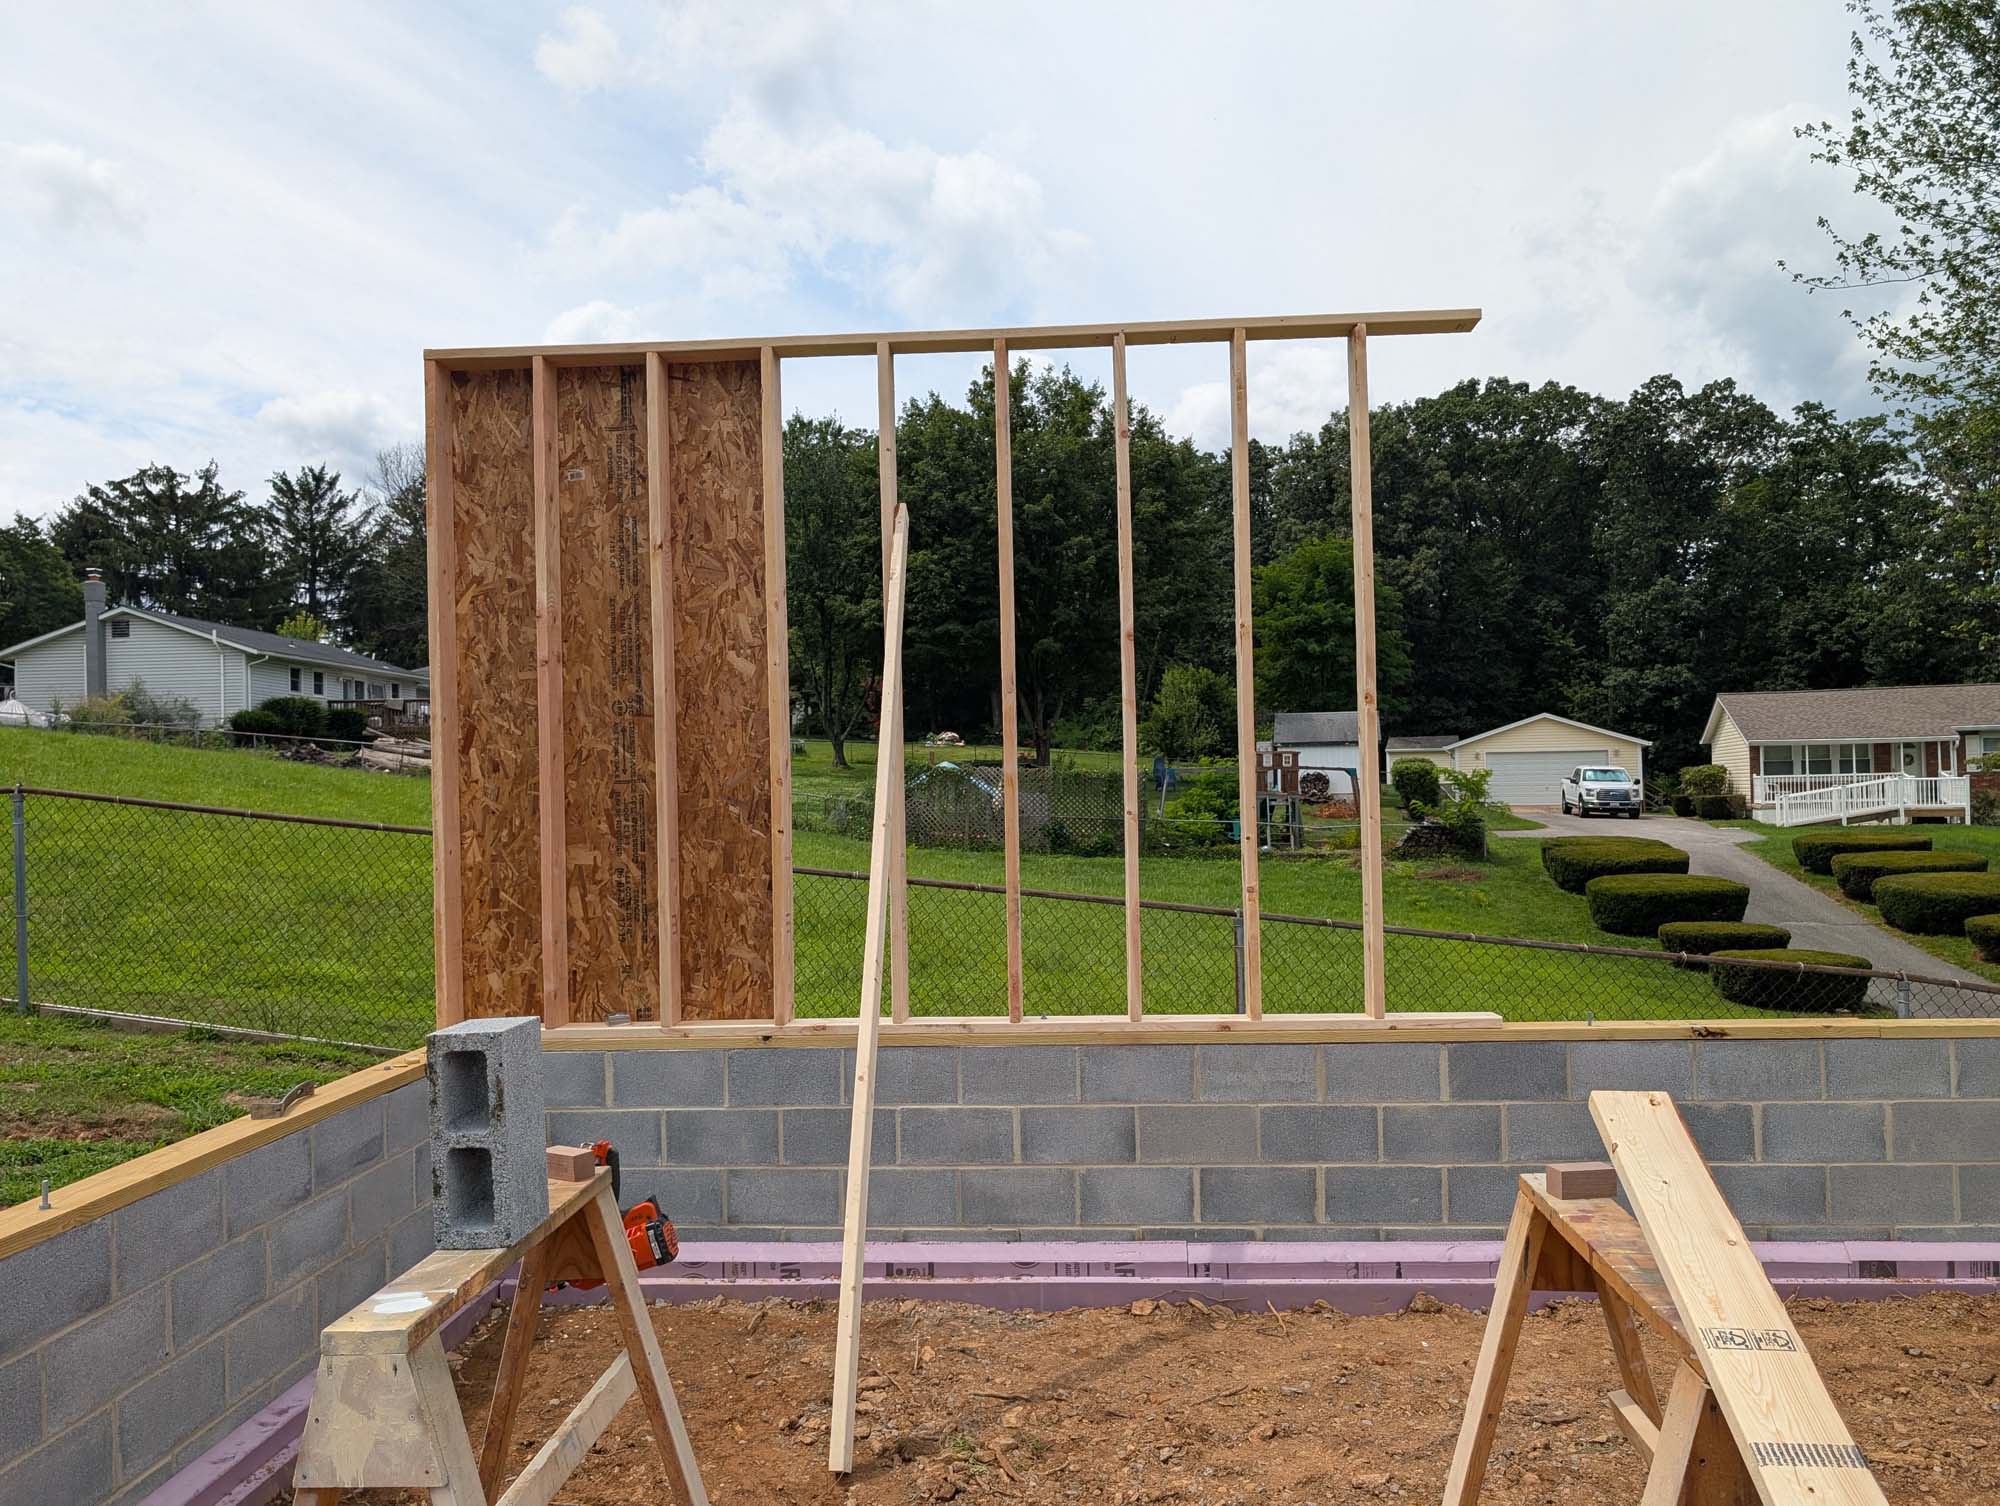
It was interesting setting 2″x6″ walls by myself. for the most part I built the stud walls in 12′ to 16′ lengths then added the osb skin after they were squared and leveled.
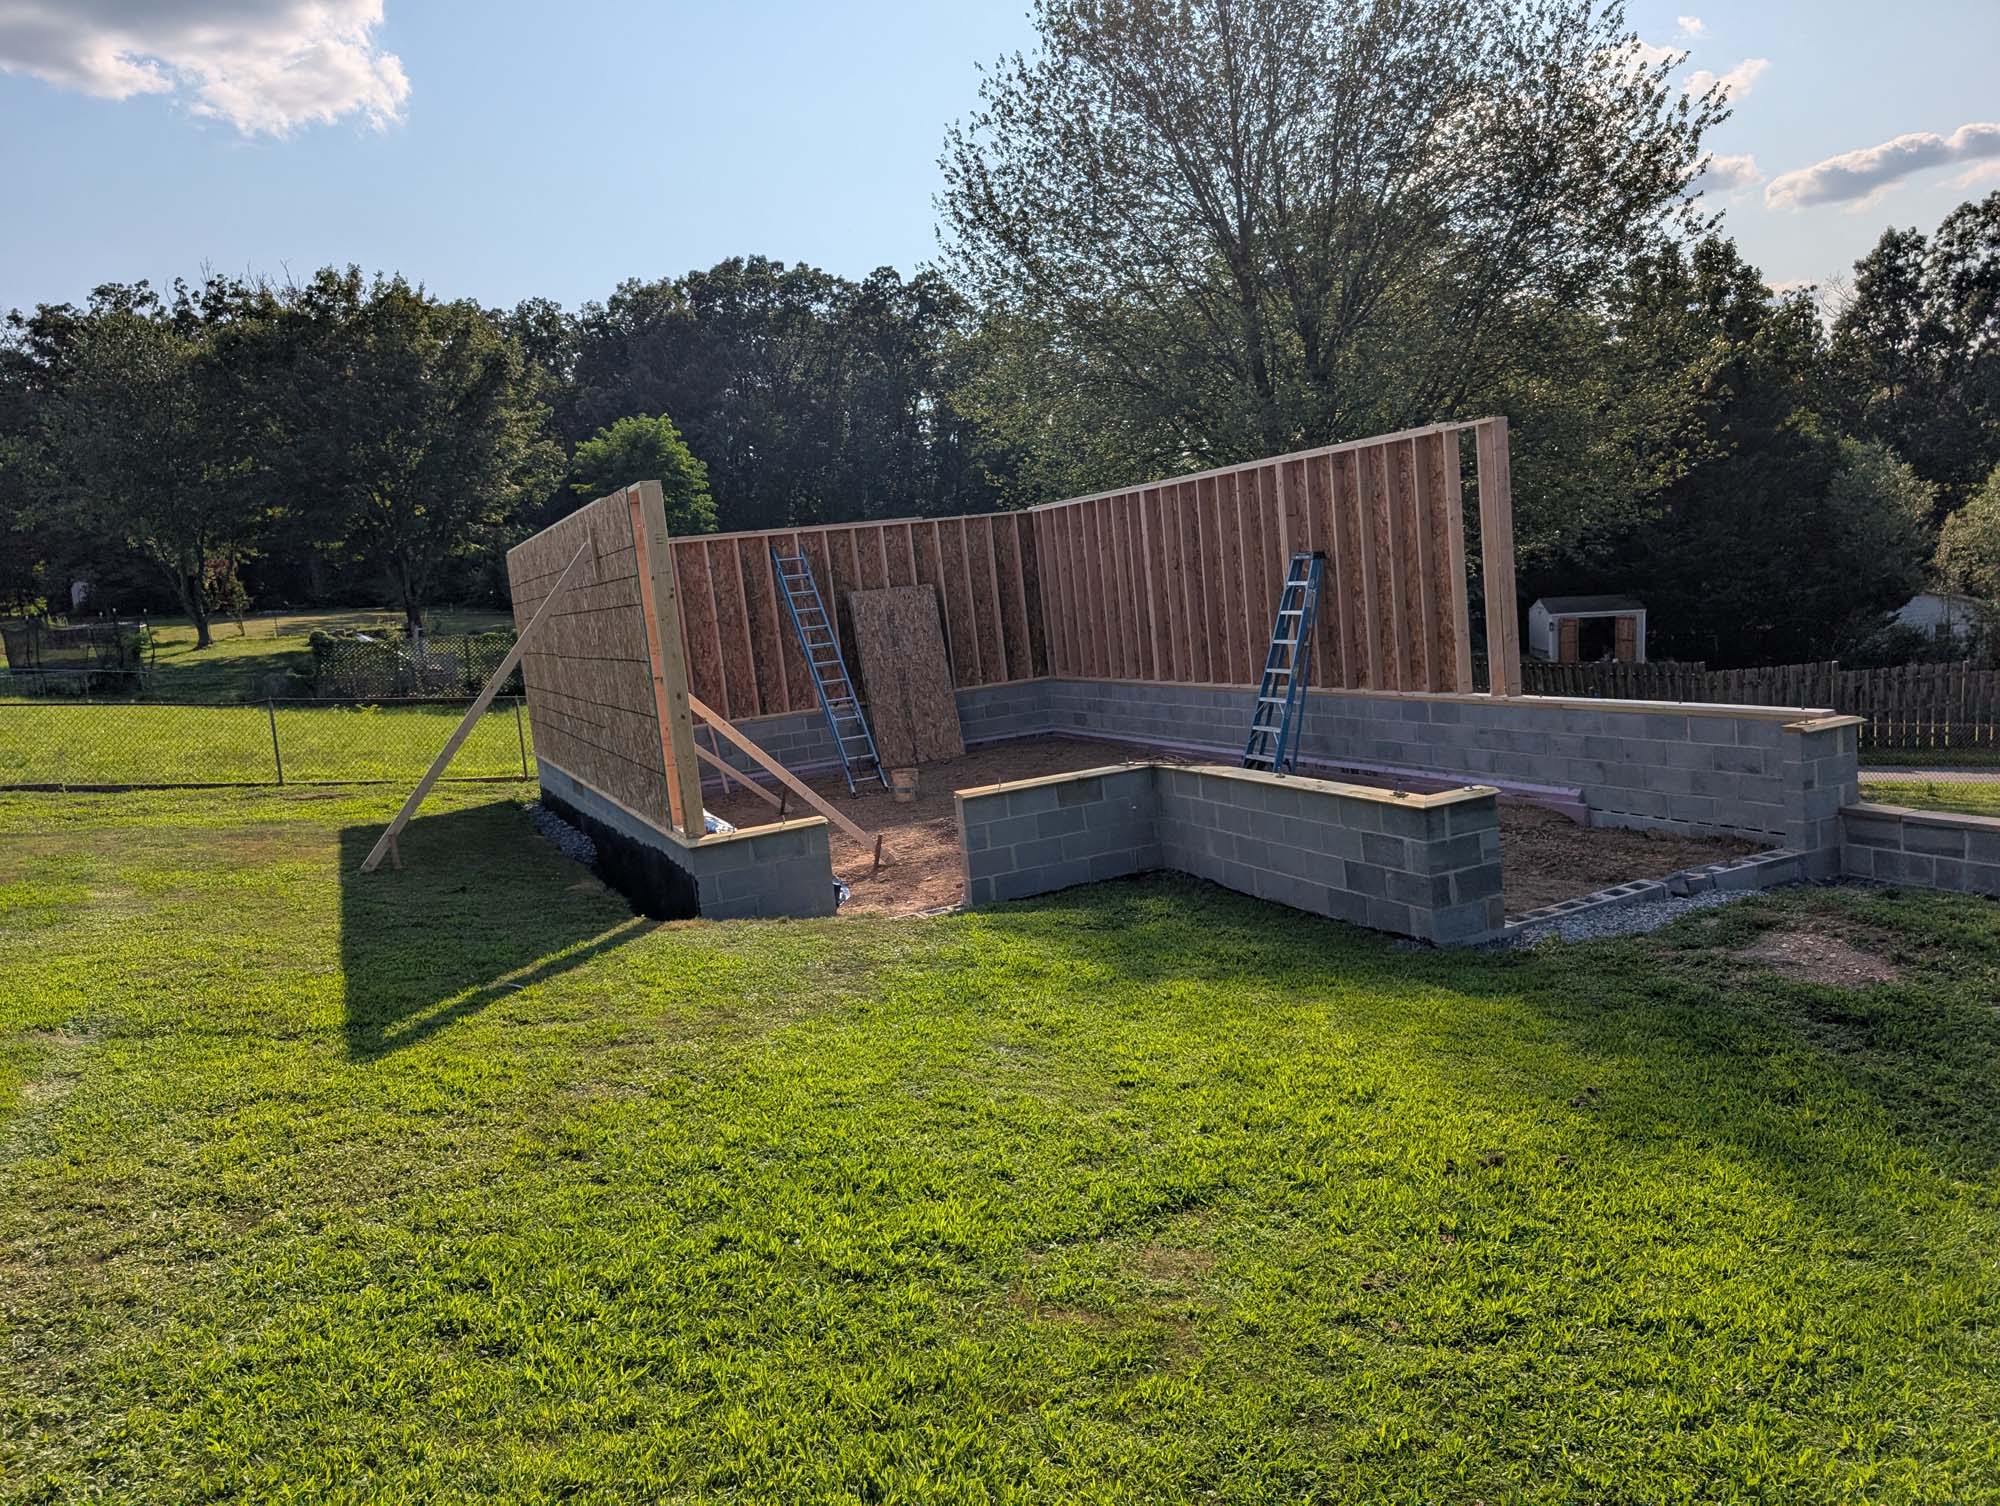
I built 3/4 of the walls and left the front open. Now I am waiting for the steel delivery and the concrete to be poured before I can finish the front walls.

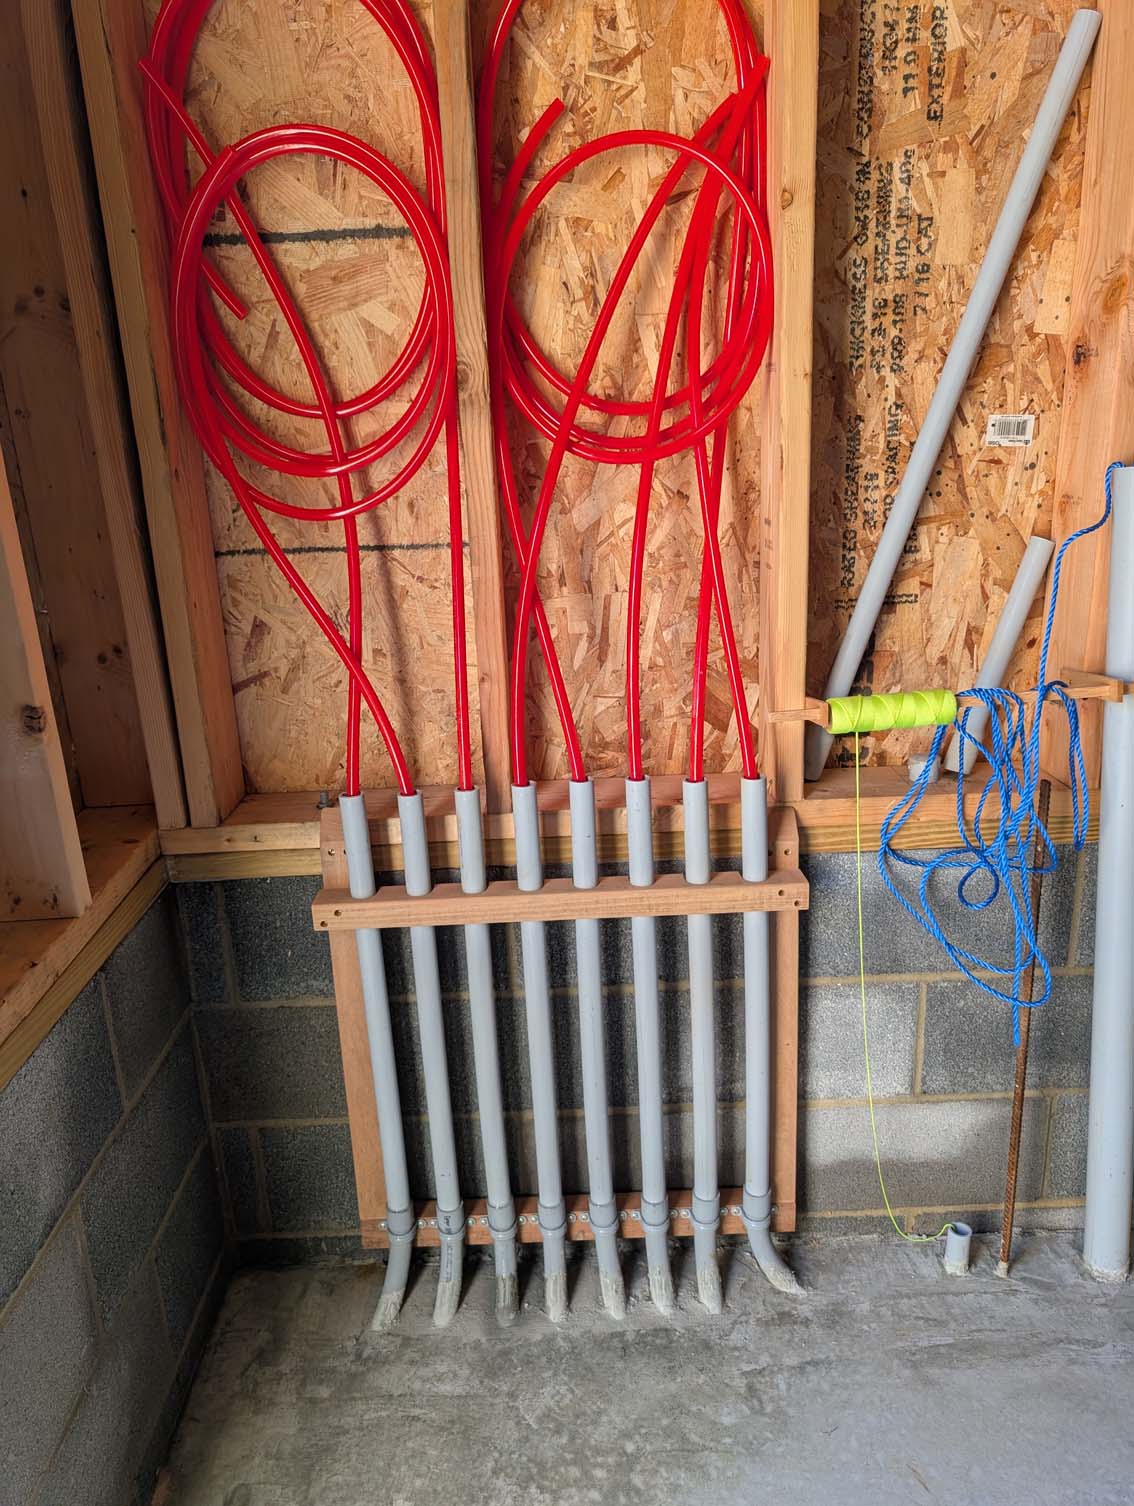
While once again waiting on others, I started some of the smaller details like prepping for the heated floor and buying materials.

I want one of these Moffit fork lifts, It can actually turn it’s wheels 90° and crab sideways through my gate.

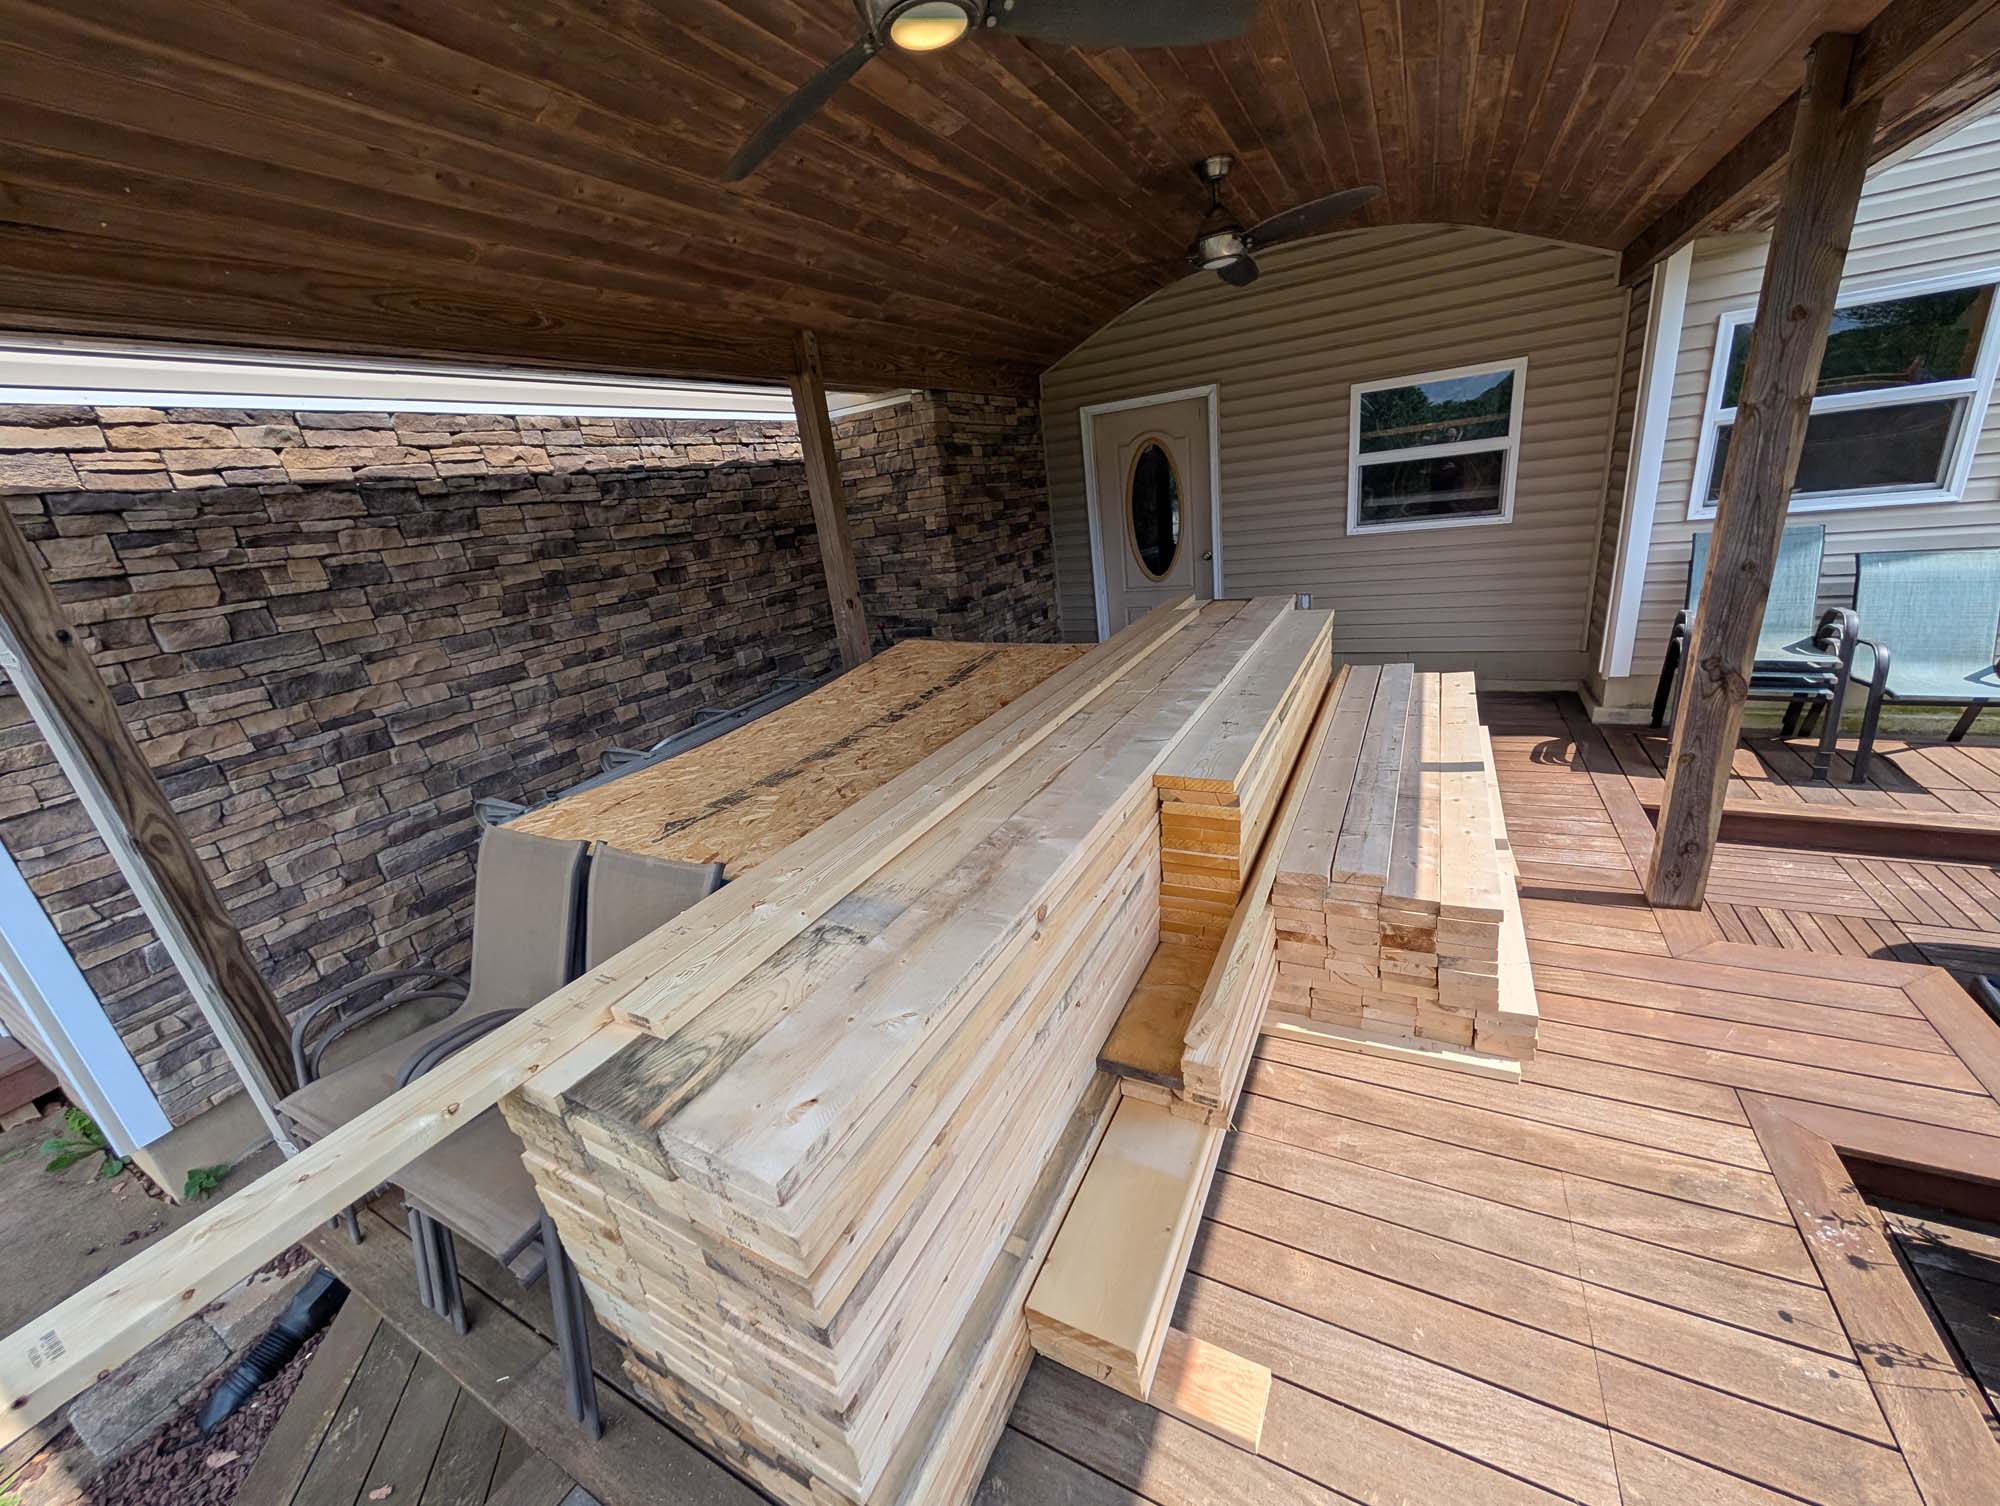
I stacked the wood under my back porch to keep out of the rain. Smart because, once again I was delayed waiting for others. Dumb because I now will have to haul all of this wood 100′ down to the shed when I need it. Oh well, I can use the exercise.

My buddy Dave volunteered to help me trench conduit down to the shed for future power.

Took all day but we got it done.

I spent the rest of the weekend tamping and refilling once the conduit was laid, but it’s done!

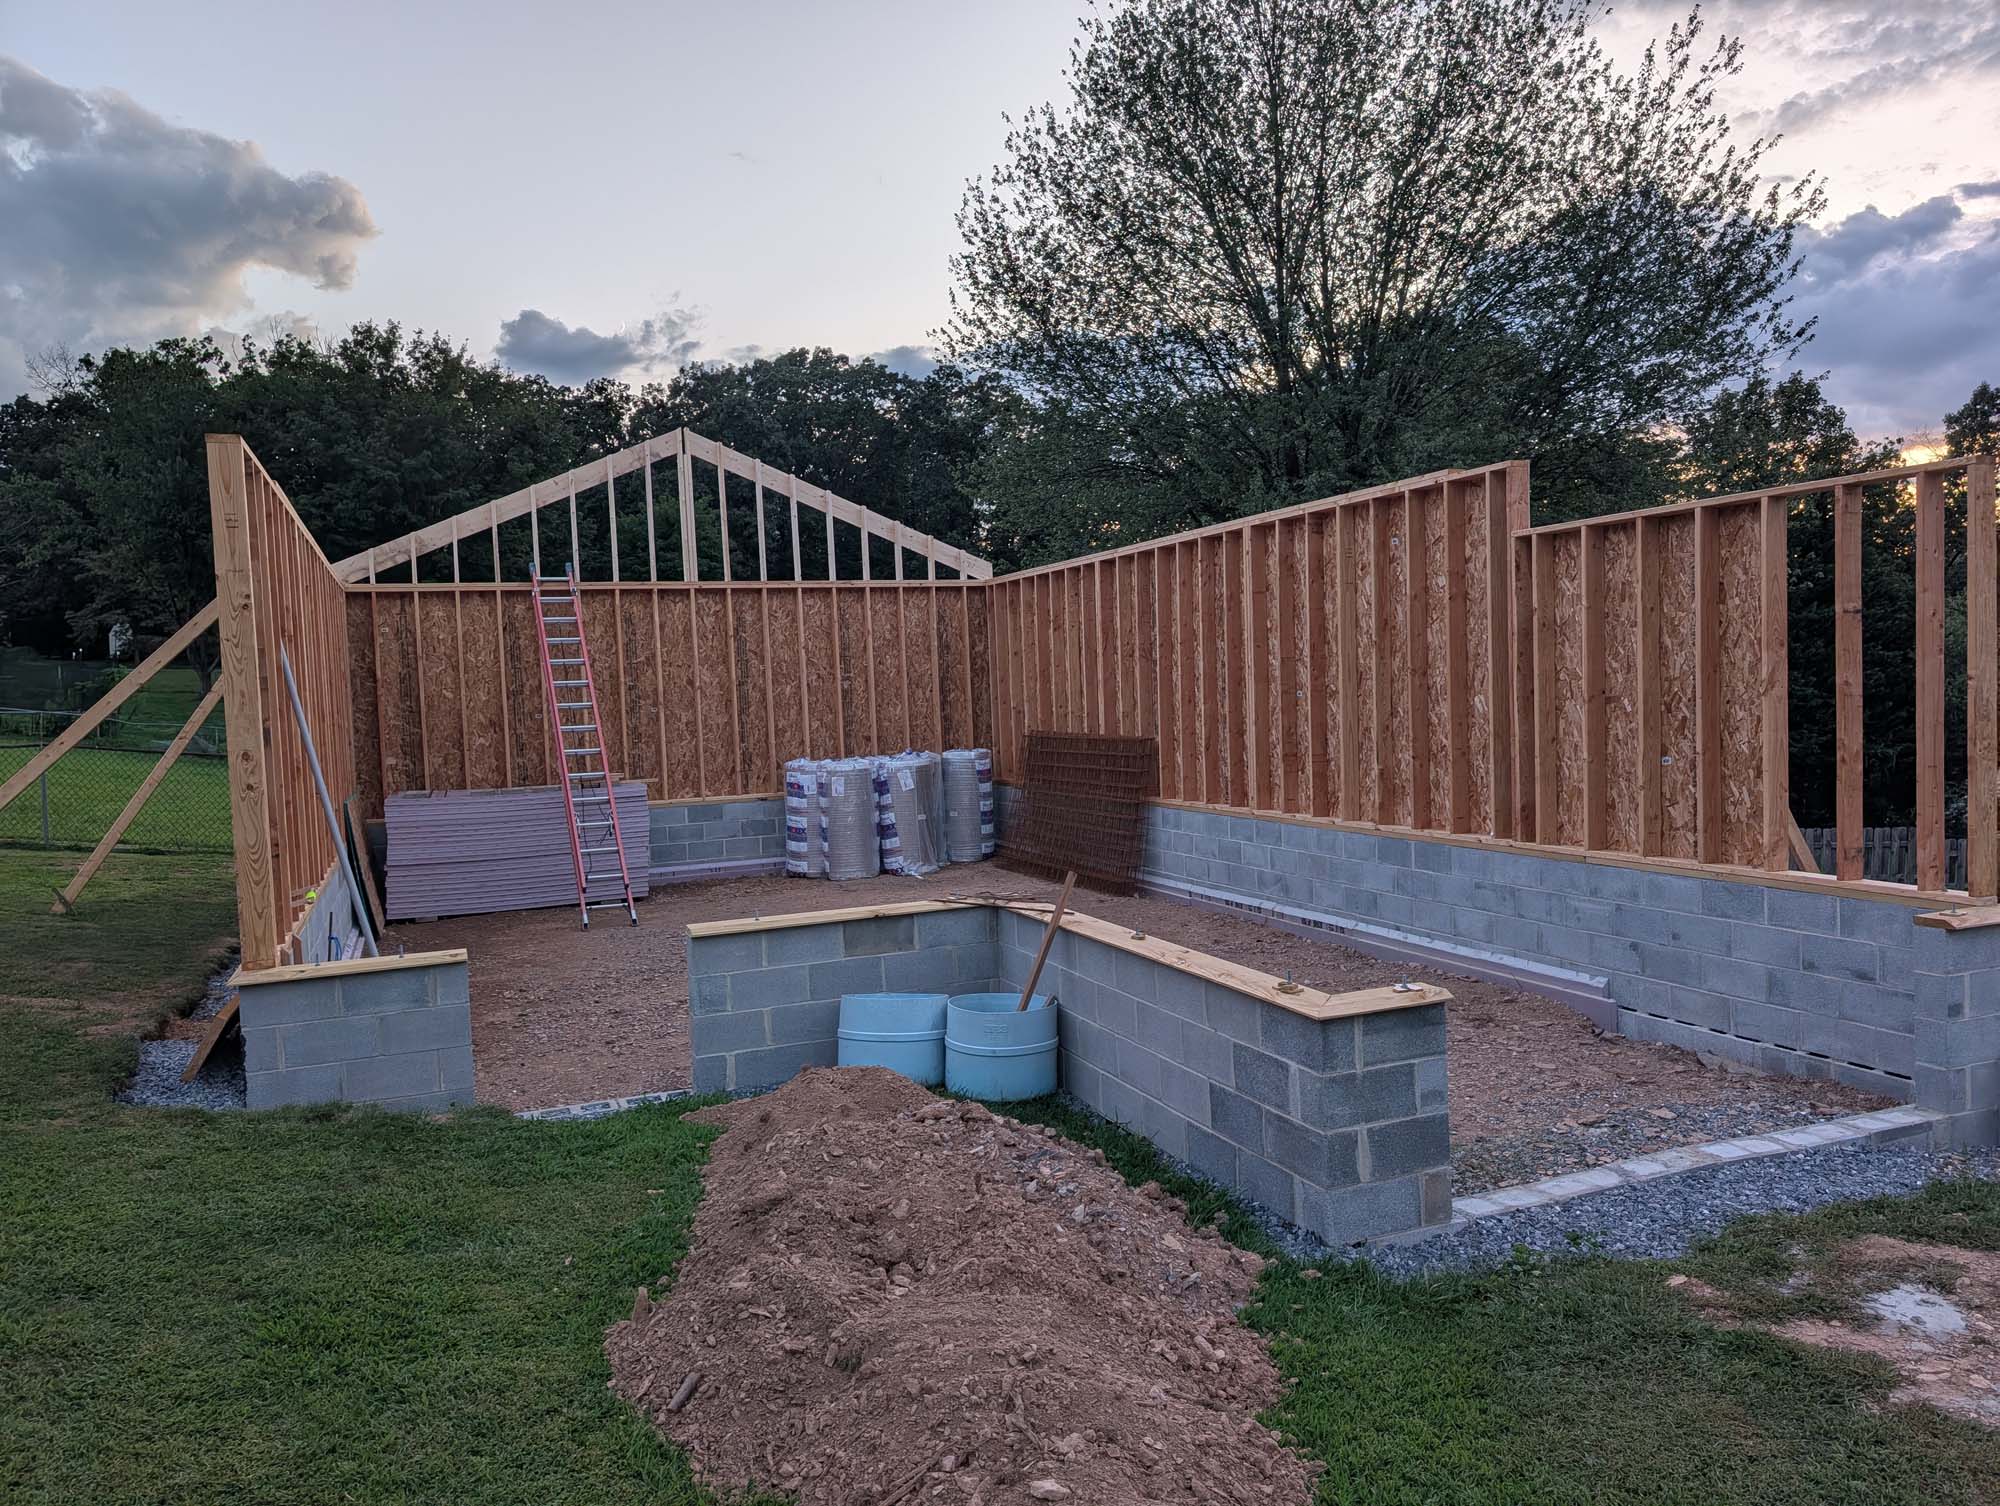
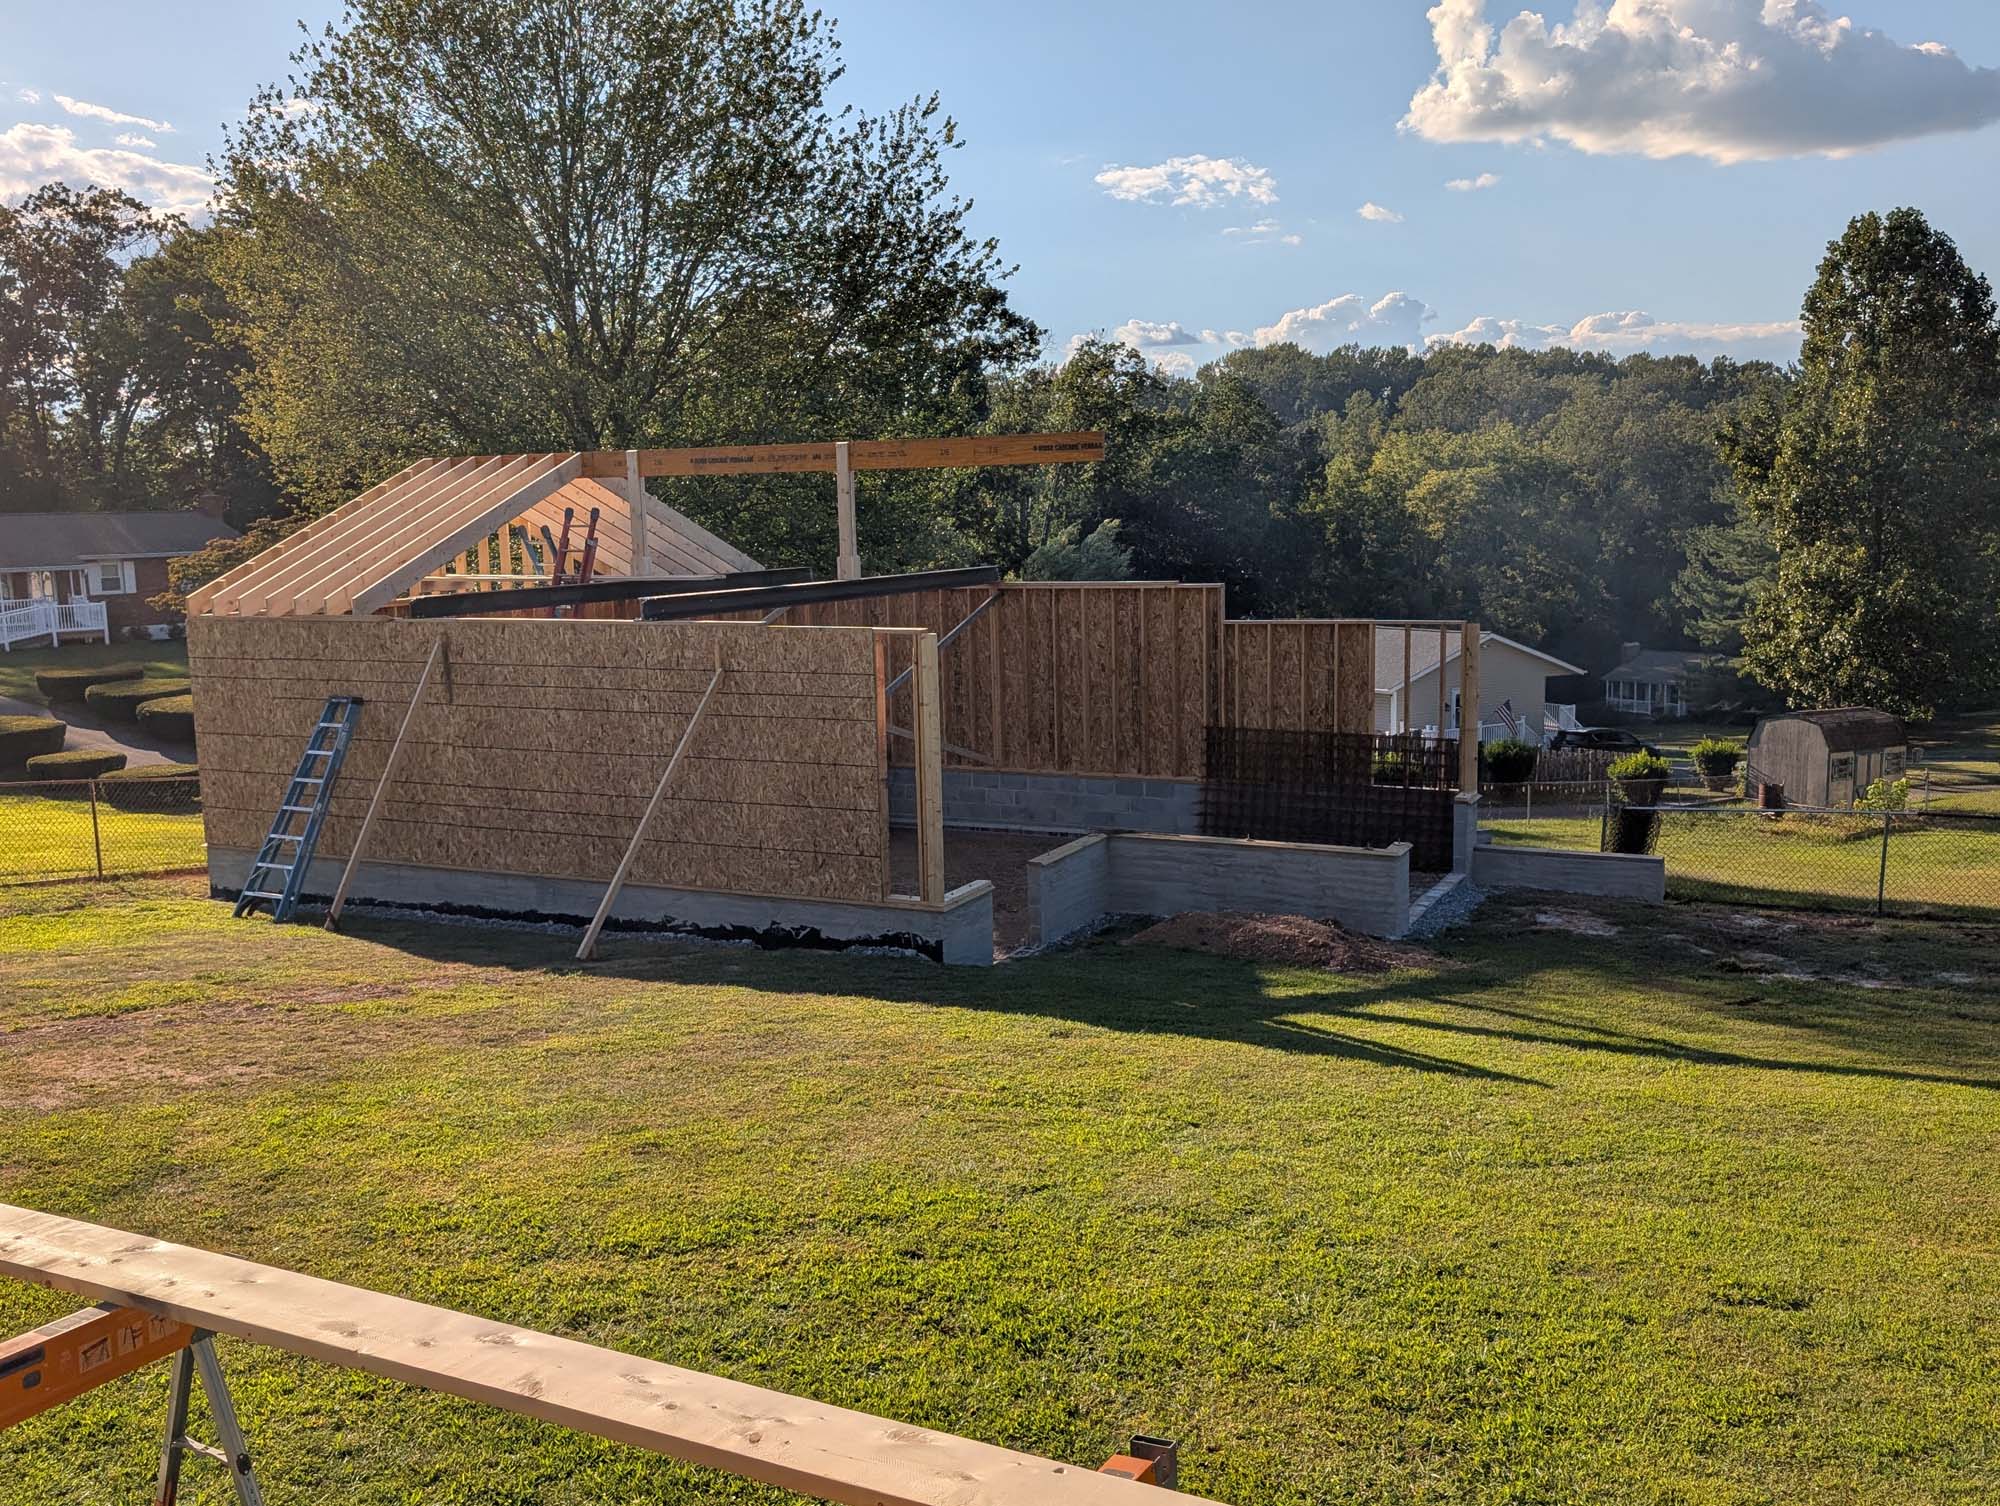
Since I have my wood to build the roof and I am just waiting of the steel beams, I decided to build the first gable wall and get all the insulation and steel for the foundation.
I also got the block walls parged to prep for the stone veneer.

Then the steel finally arrived! Setting two 1,000 pound W8x40 beams was a little sketchy. we had to chain them to one fork on a skid loader to get them high enough to get above the walls. They were set roughly in place.
And, I had to micro adjust their location with a sledge hammer…


Beams are in place.
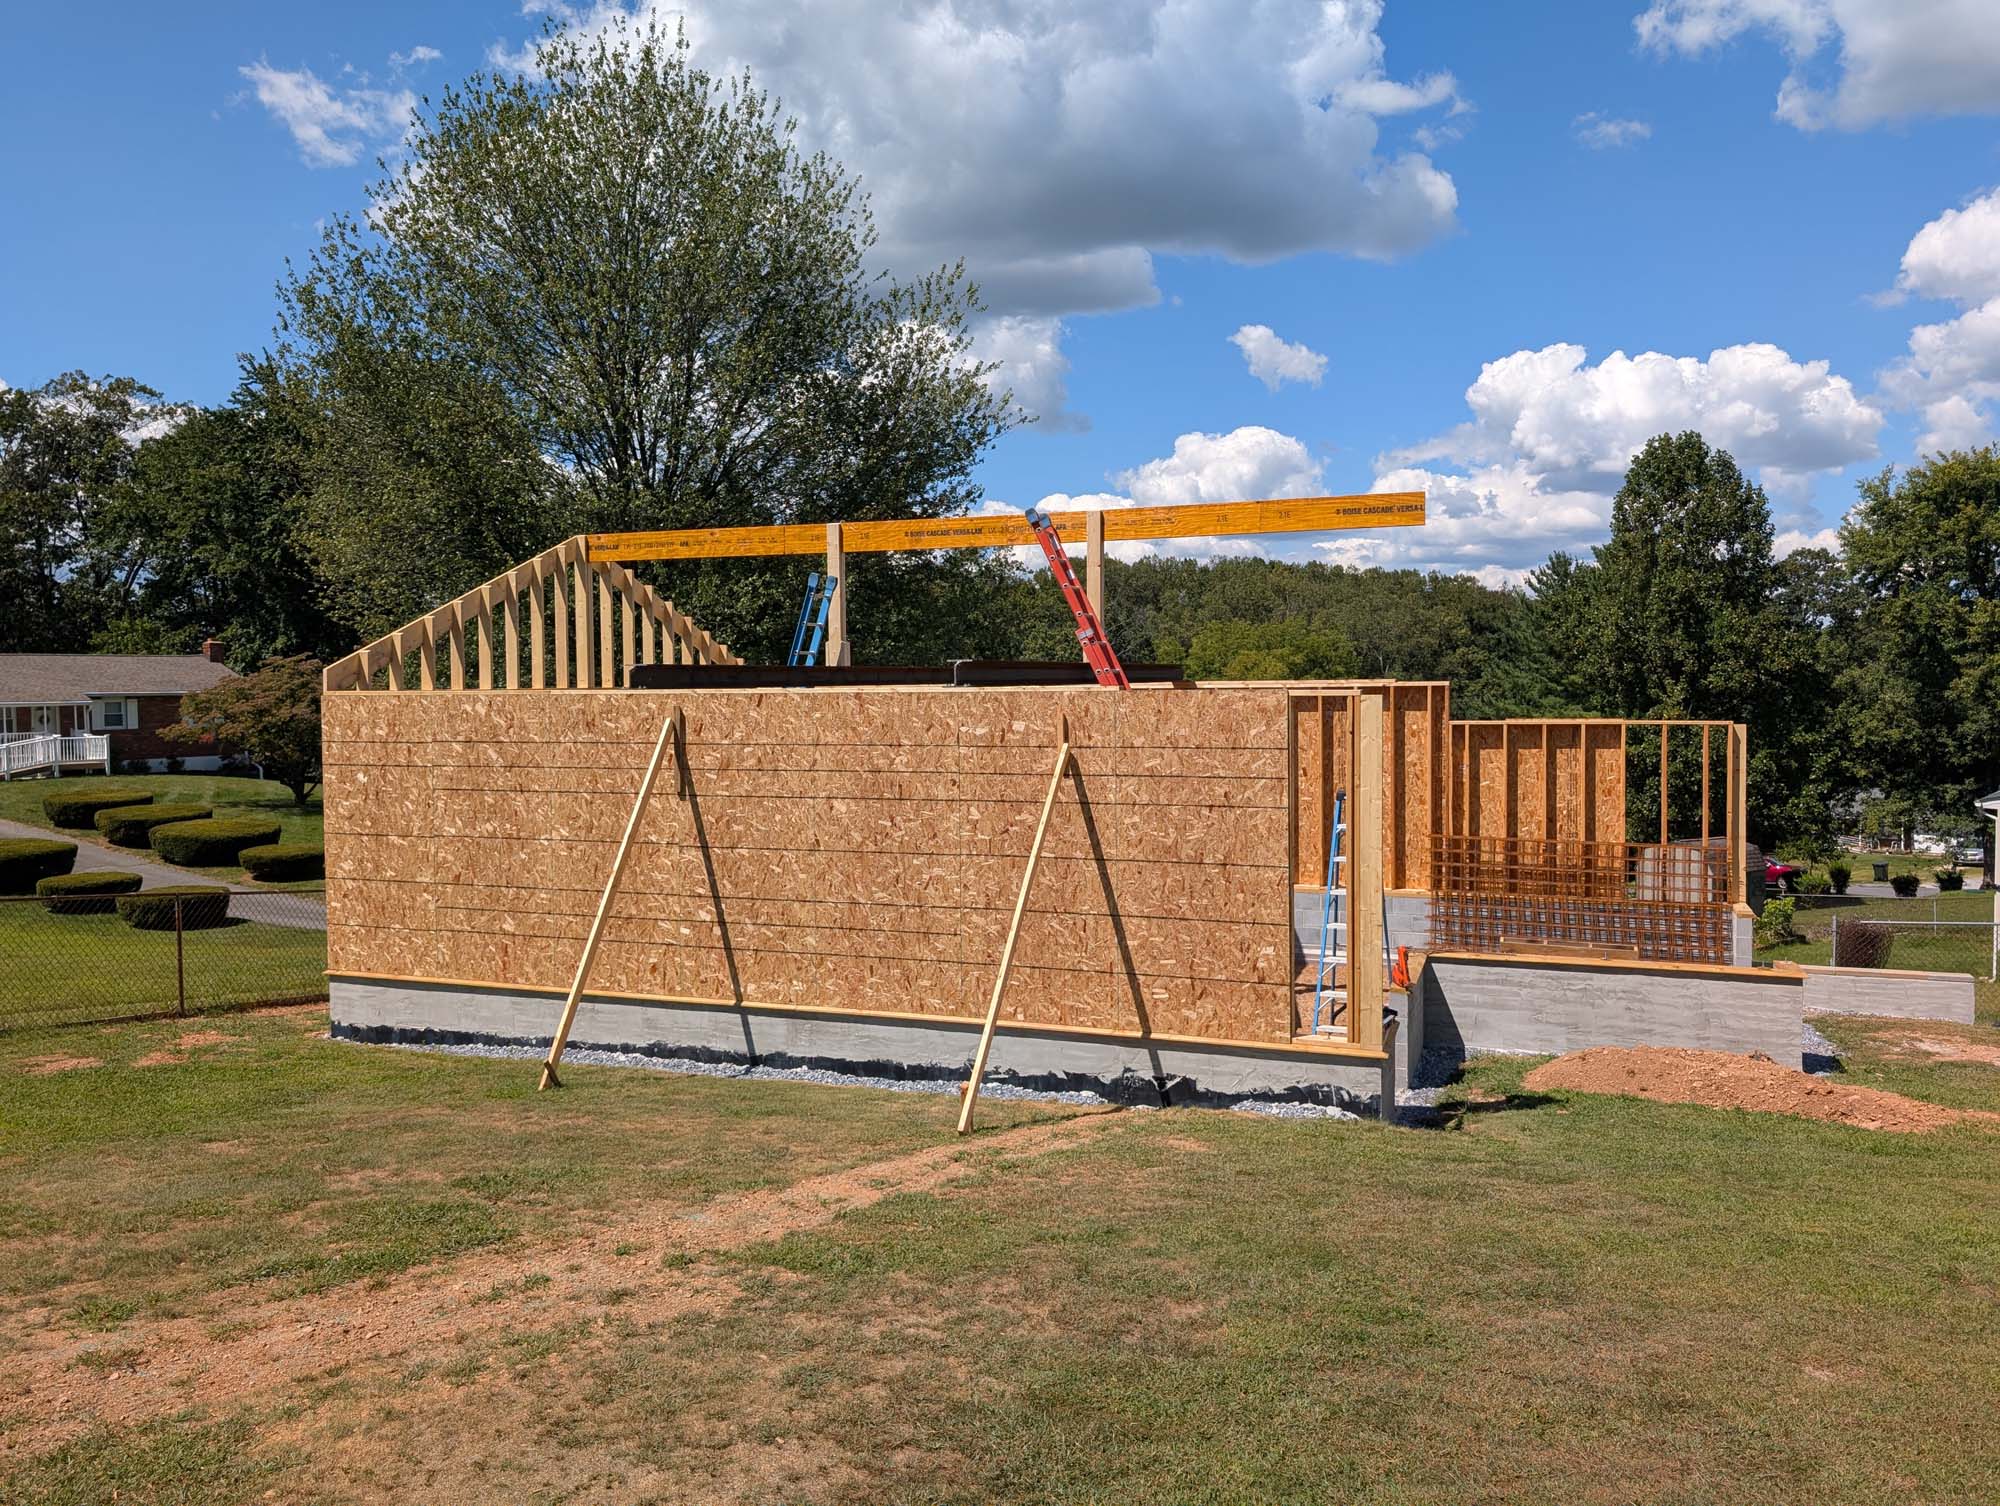
I bolted them down and lagged some posts to their centers to support the ridge beam. I did not get a picture of how I managed to set ridge beam by myself, let’s just say it wasn’t pretty. I think it weighed between 200 and 300 pounds. My shoulder was bruised for a few weeks.
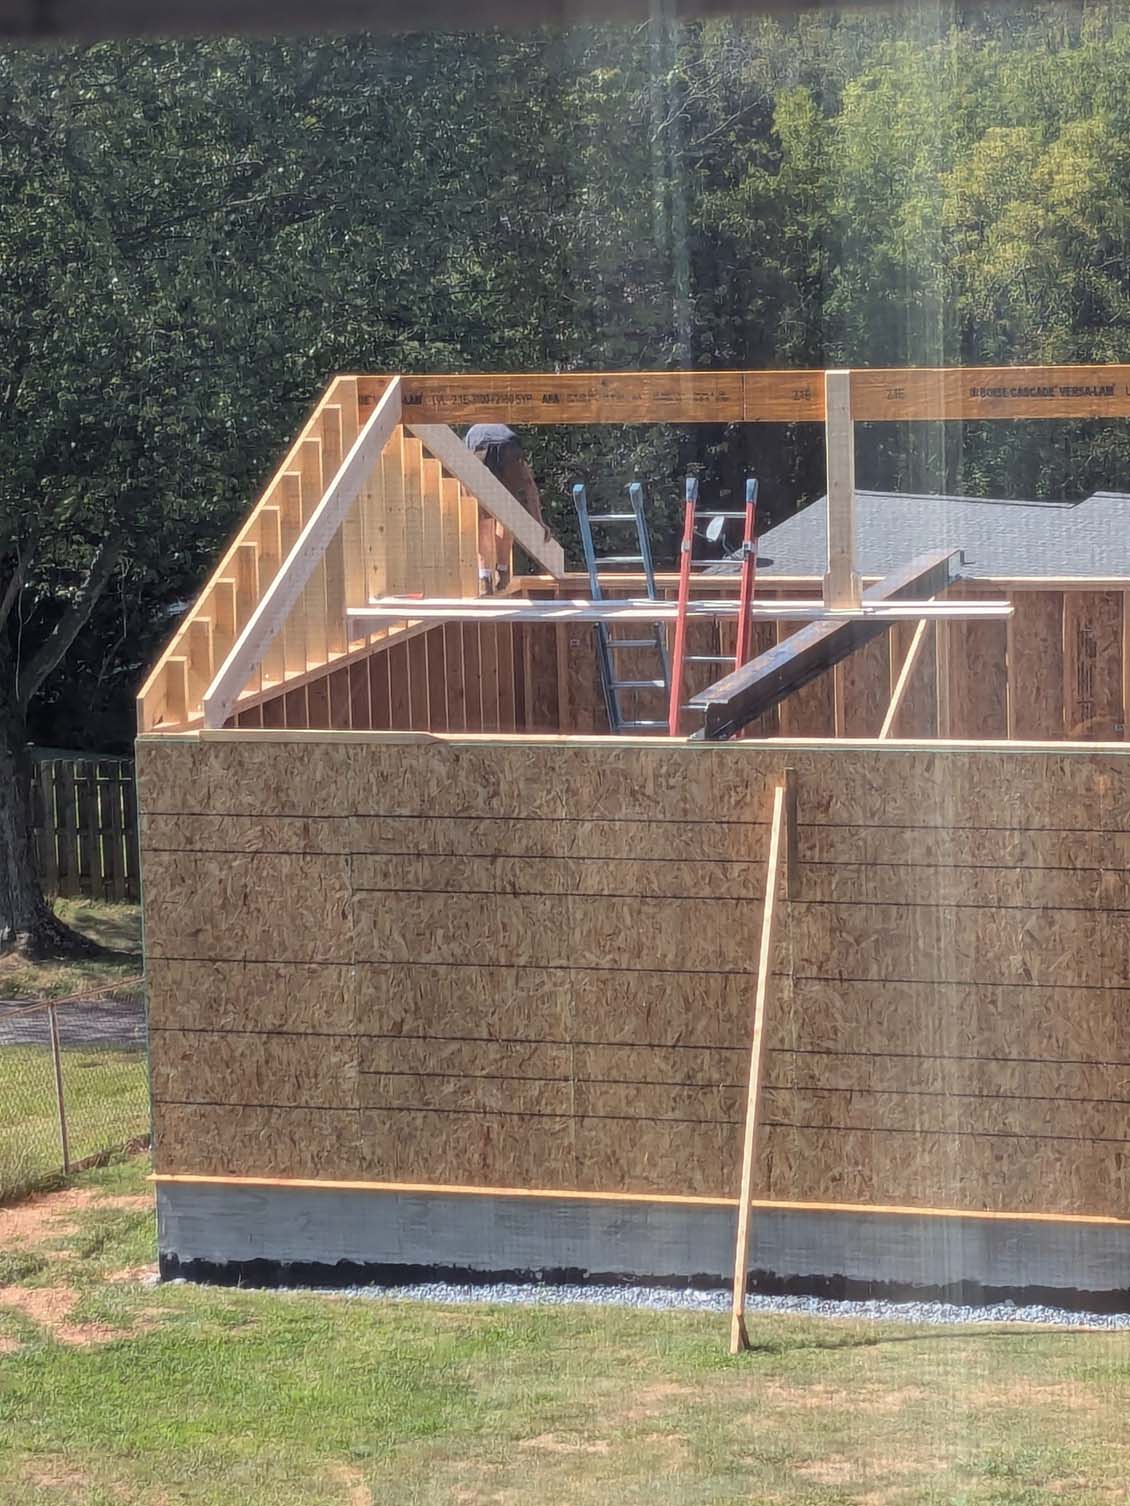
I clamped down a couple of 2″x10″ rafter boards to act as walk boards and started setting rafters.
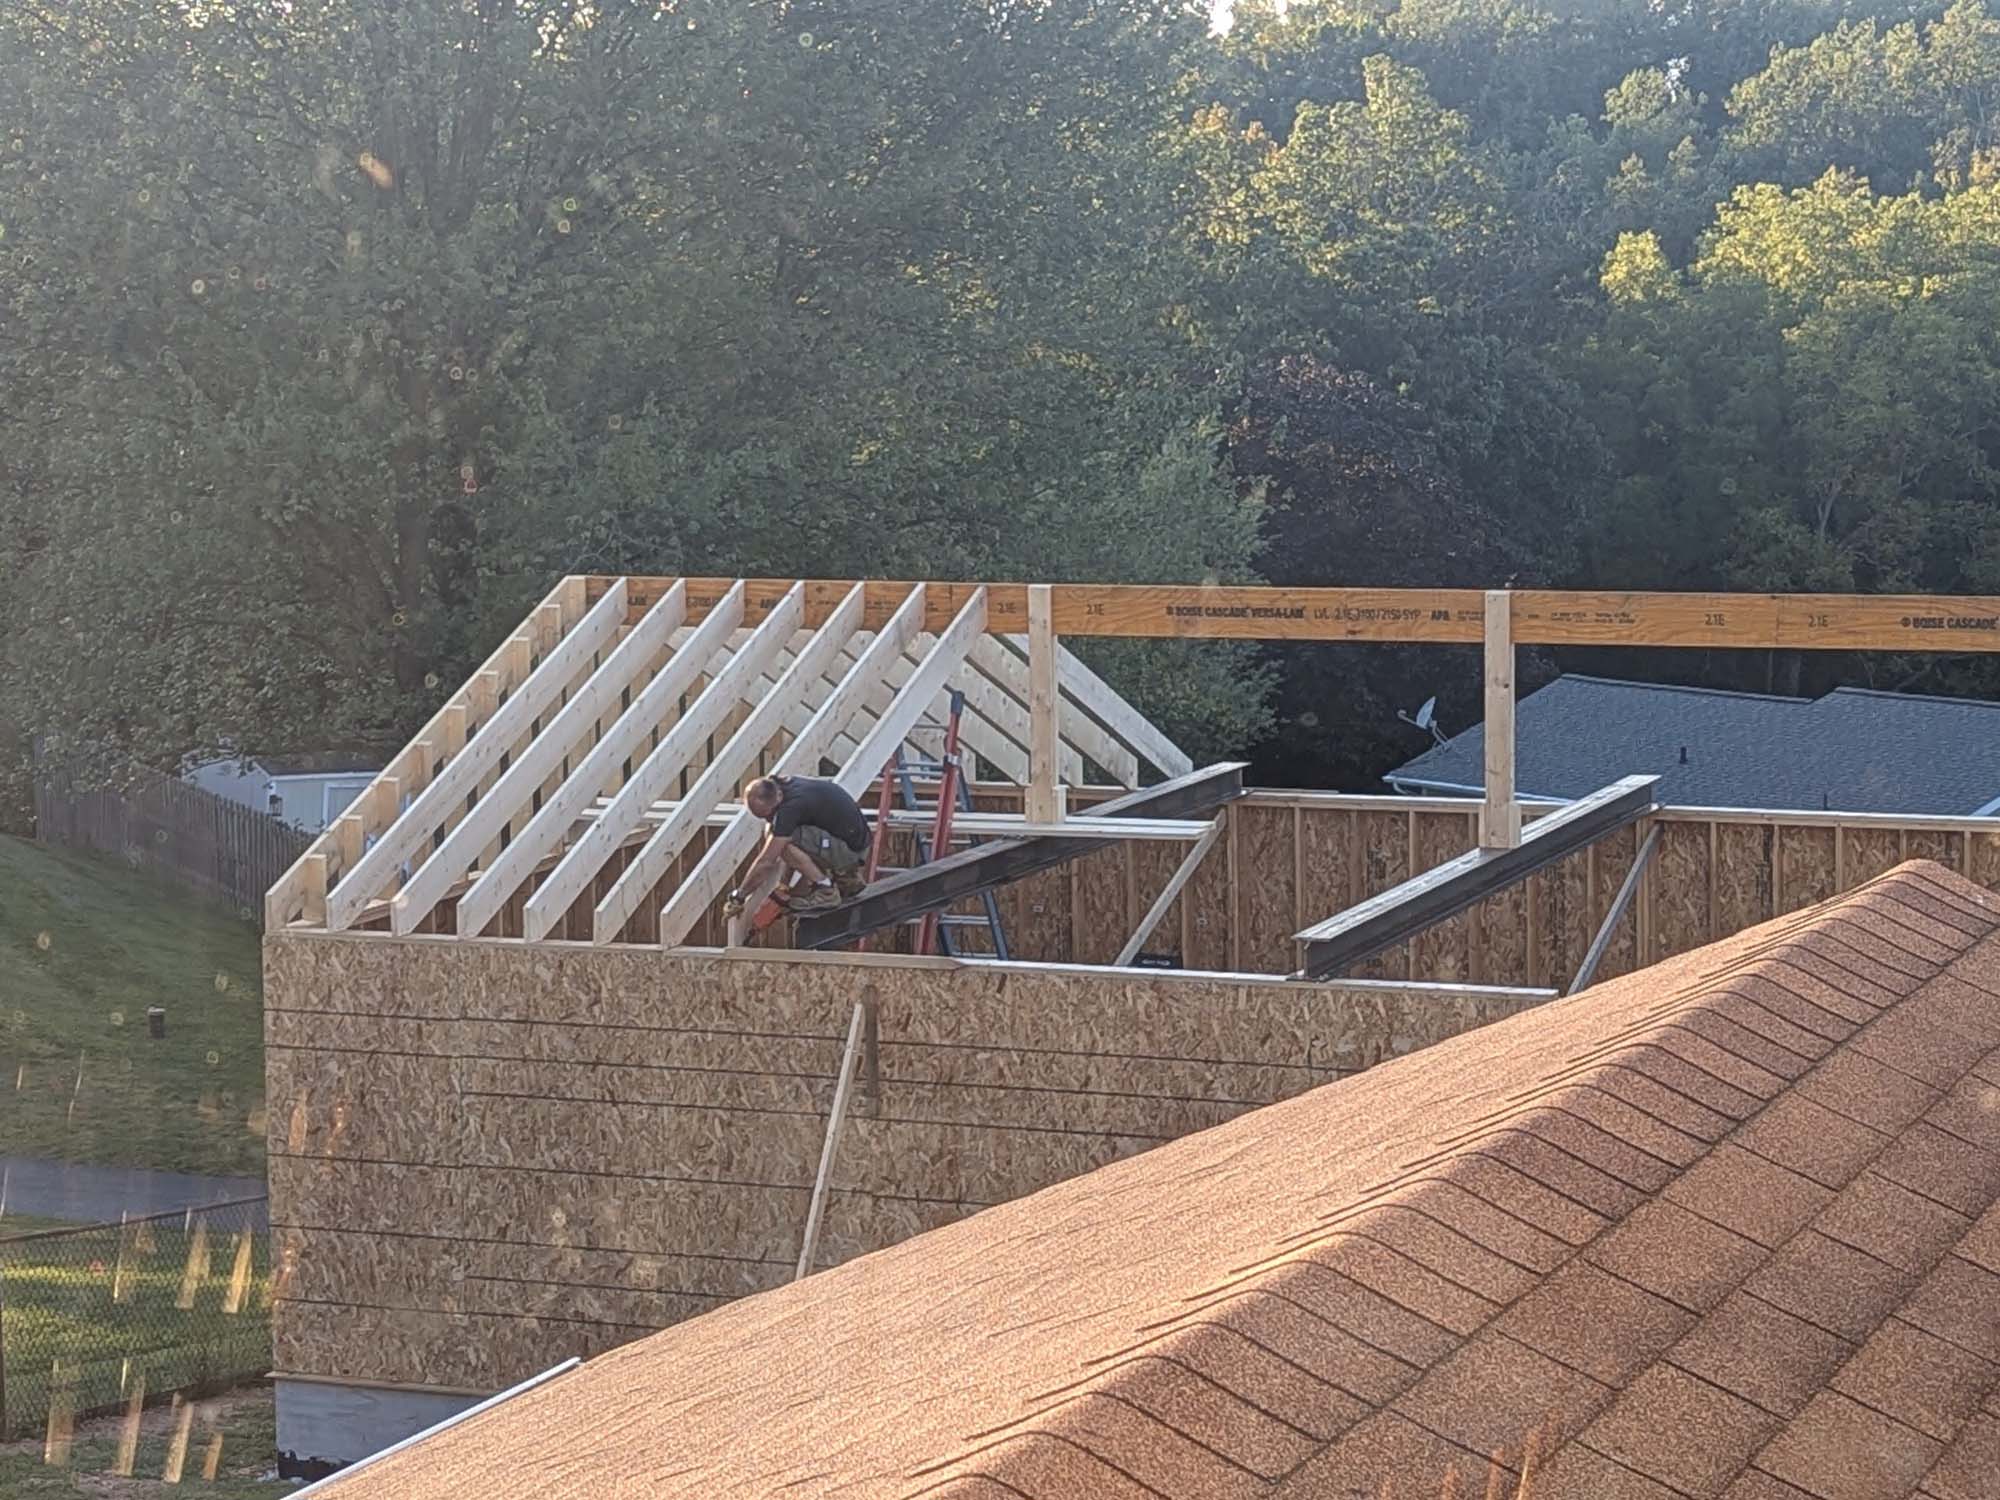
These were challenging and also a bit sketchy to watch.
my wife took a couple of pictures but didn’t want to get too close in case I fell…


Took me all weekend but I got rafters set to the second beam. I don’t want to go any farther until the front gable is in place.

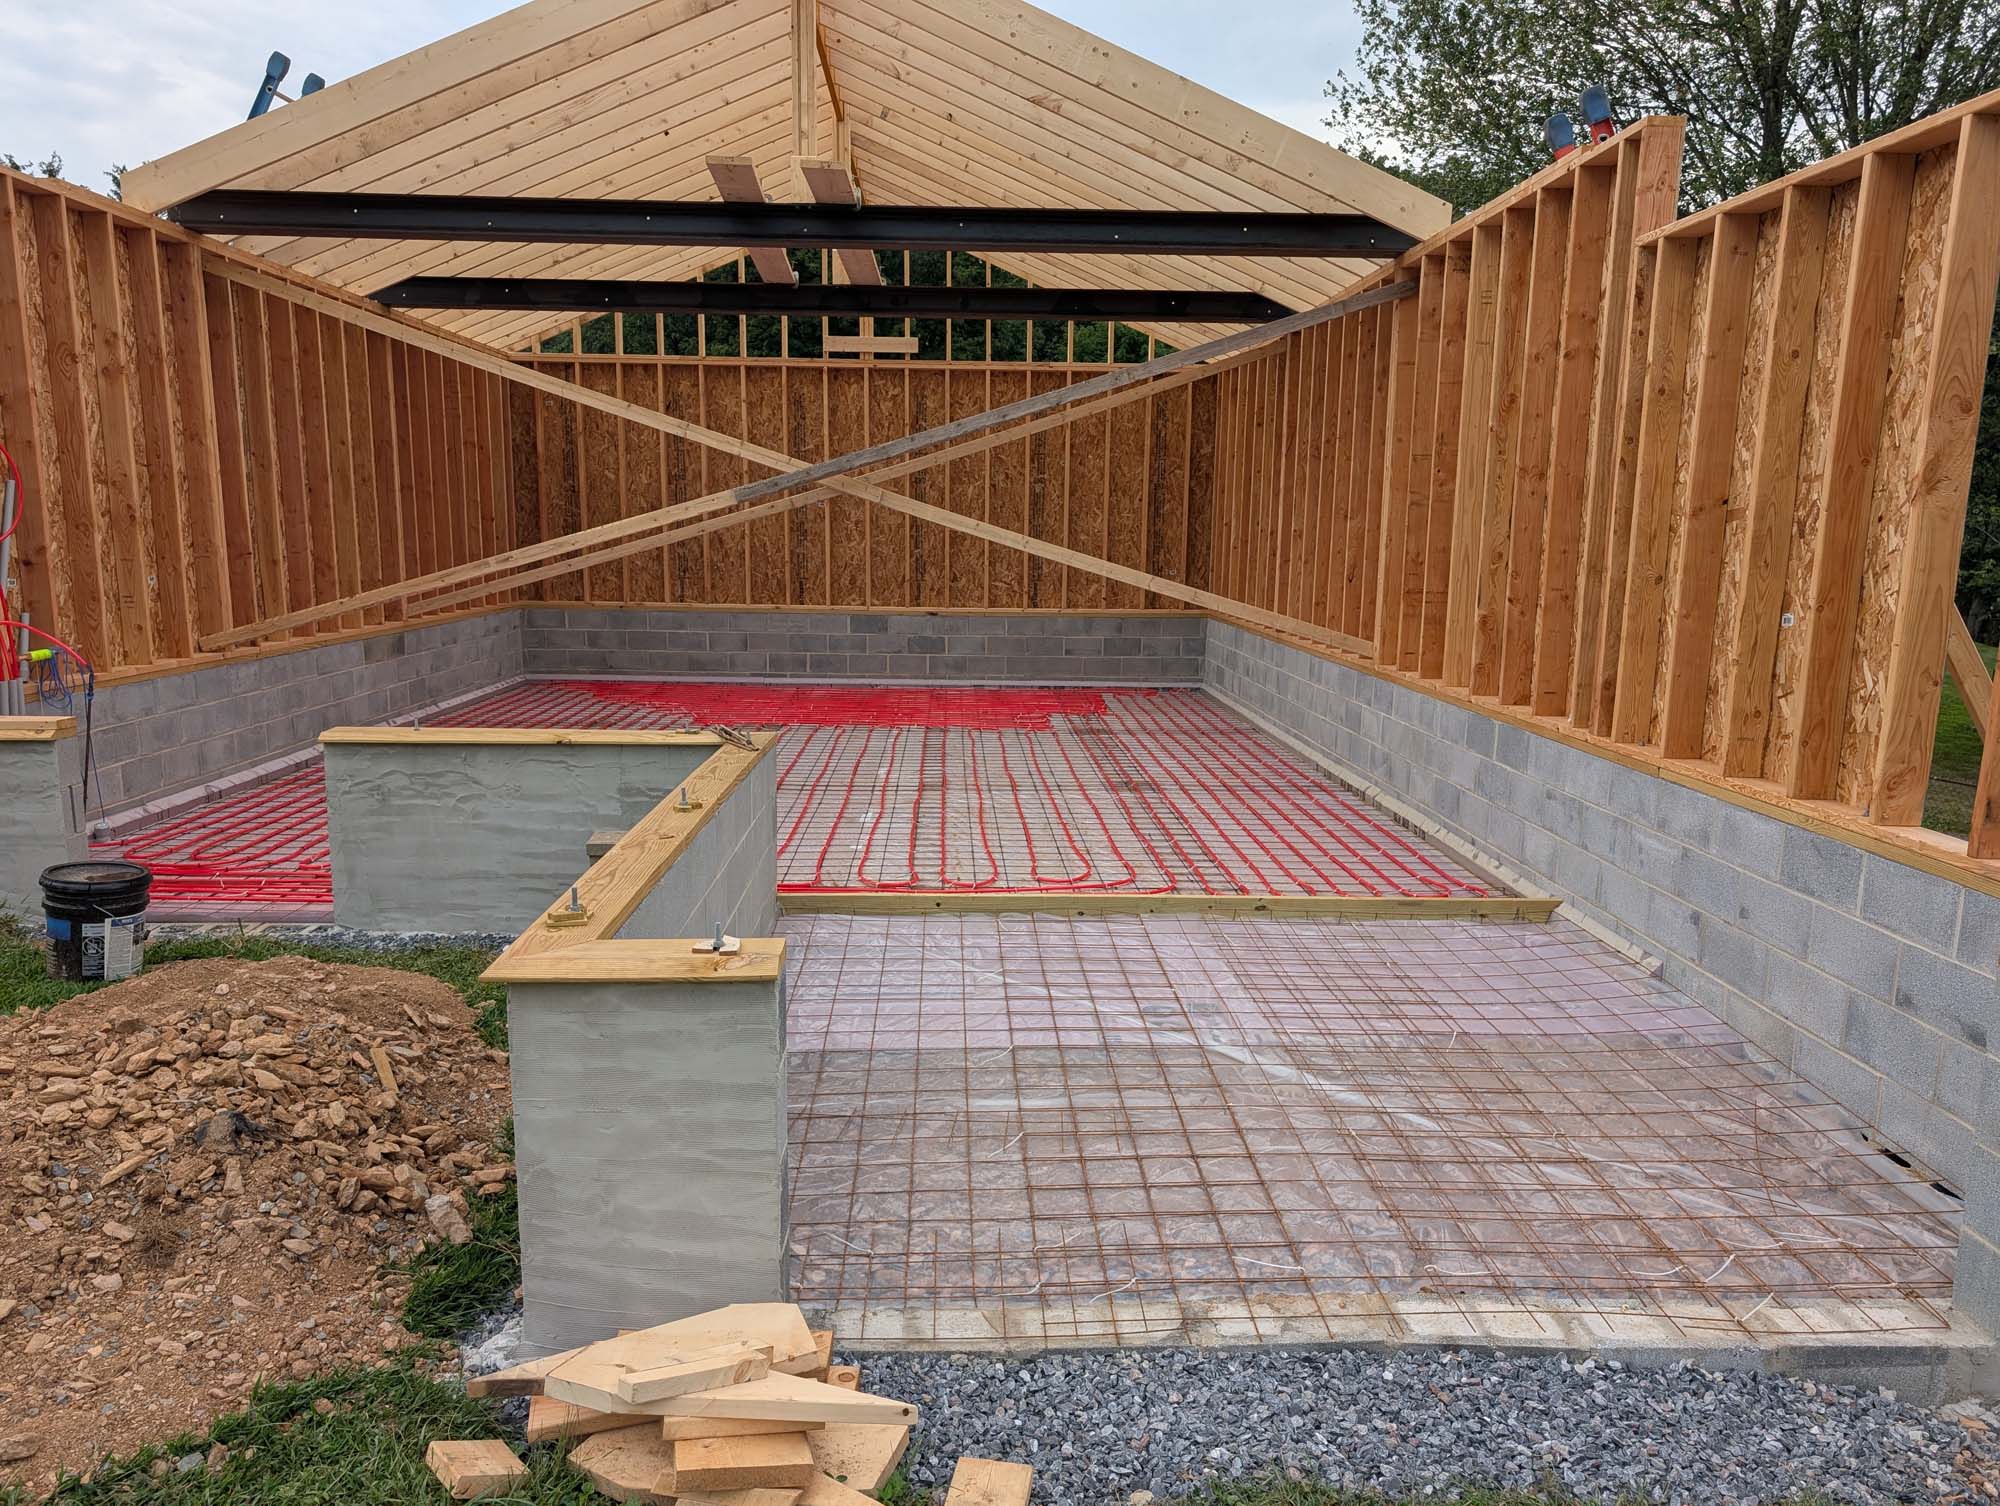
Now I was planning on waiting 3 more weeks for the concrete guys but one of their jobs fell through and they could come out Monday so I changed gears and got the floor prepped.

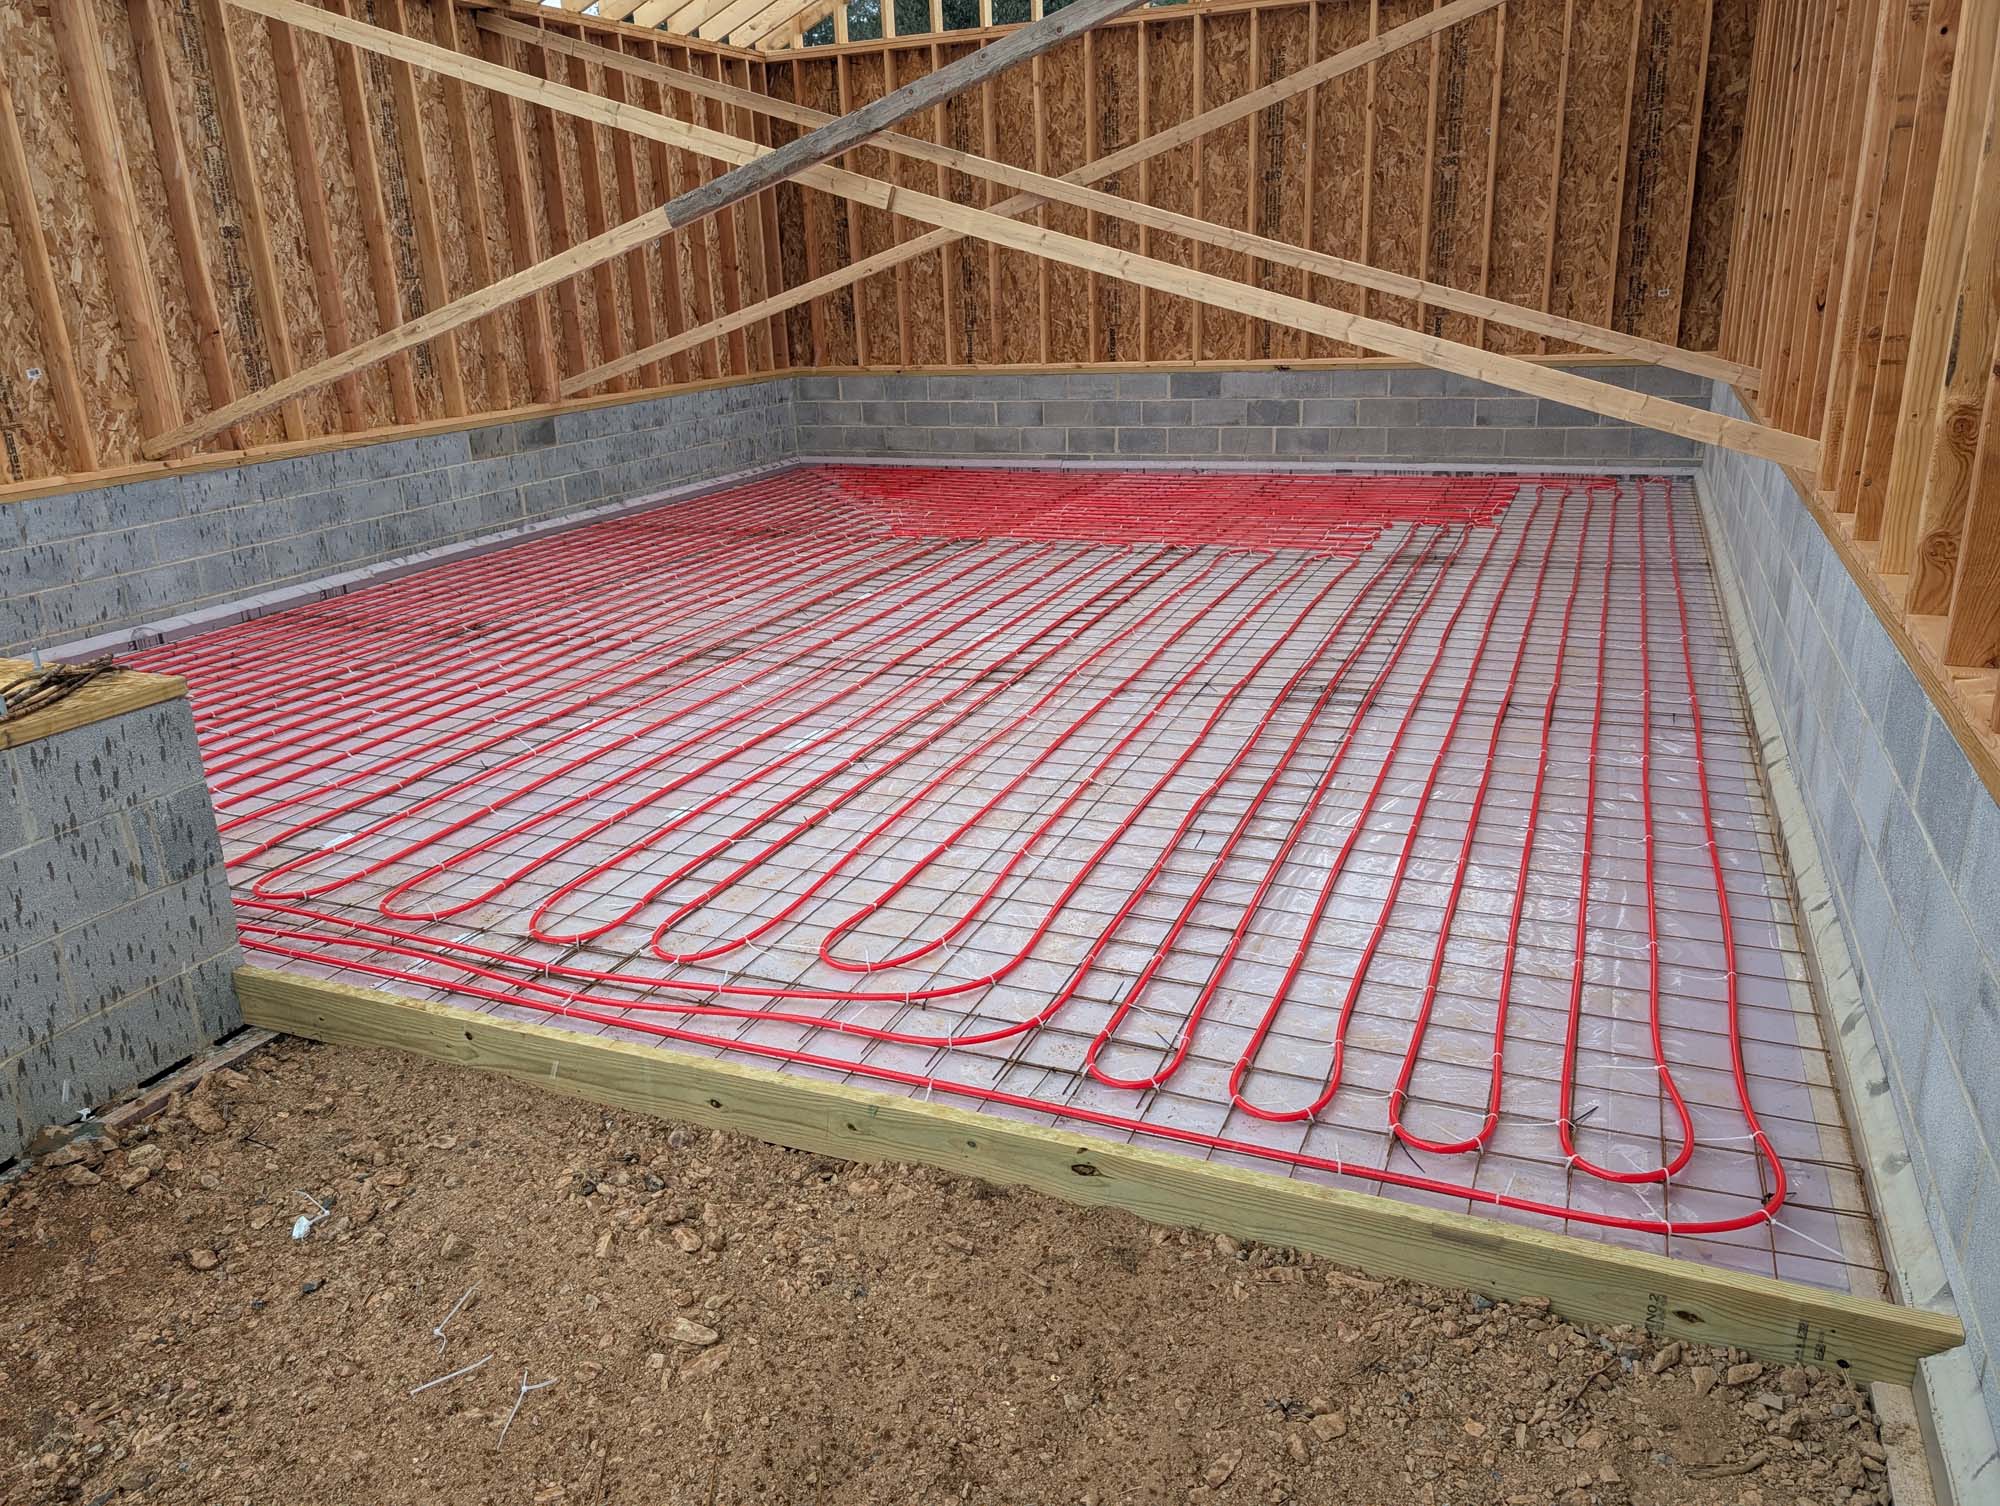
2″ insulation went down first, then a 6″x6″ metal mesh. I borrowed an un-coiler for PEX tubing and with the help of my wife, laid 1,200 feet of PEX for the in-floor heat. To hold it all in place, the PEX is zip-tied every foot or so. The most painful part of this entire build was attaching 800 zip ties in about 2 hours. For some reason my wrists felt sprained the next day and they still do several months later.

Oh well, it got done in time…

The left-over foam and plastic went in the garden shed area even though it isn’t heated, it might still help.

Concrete day!
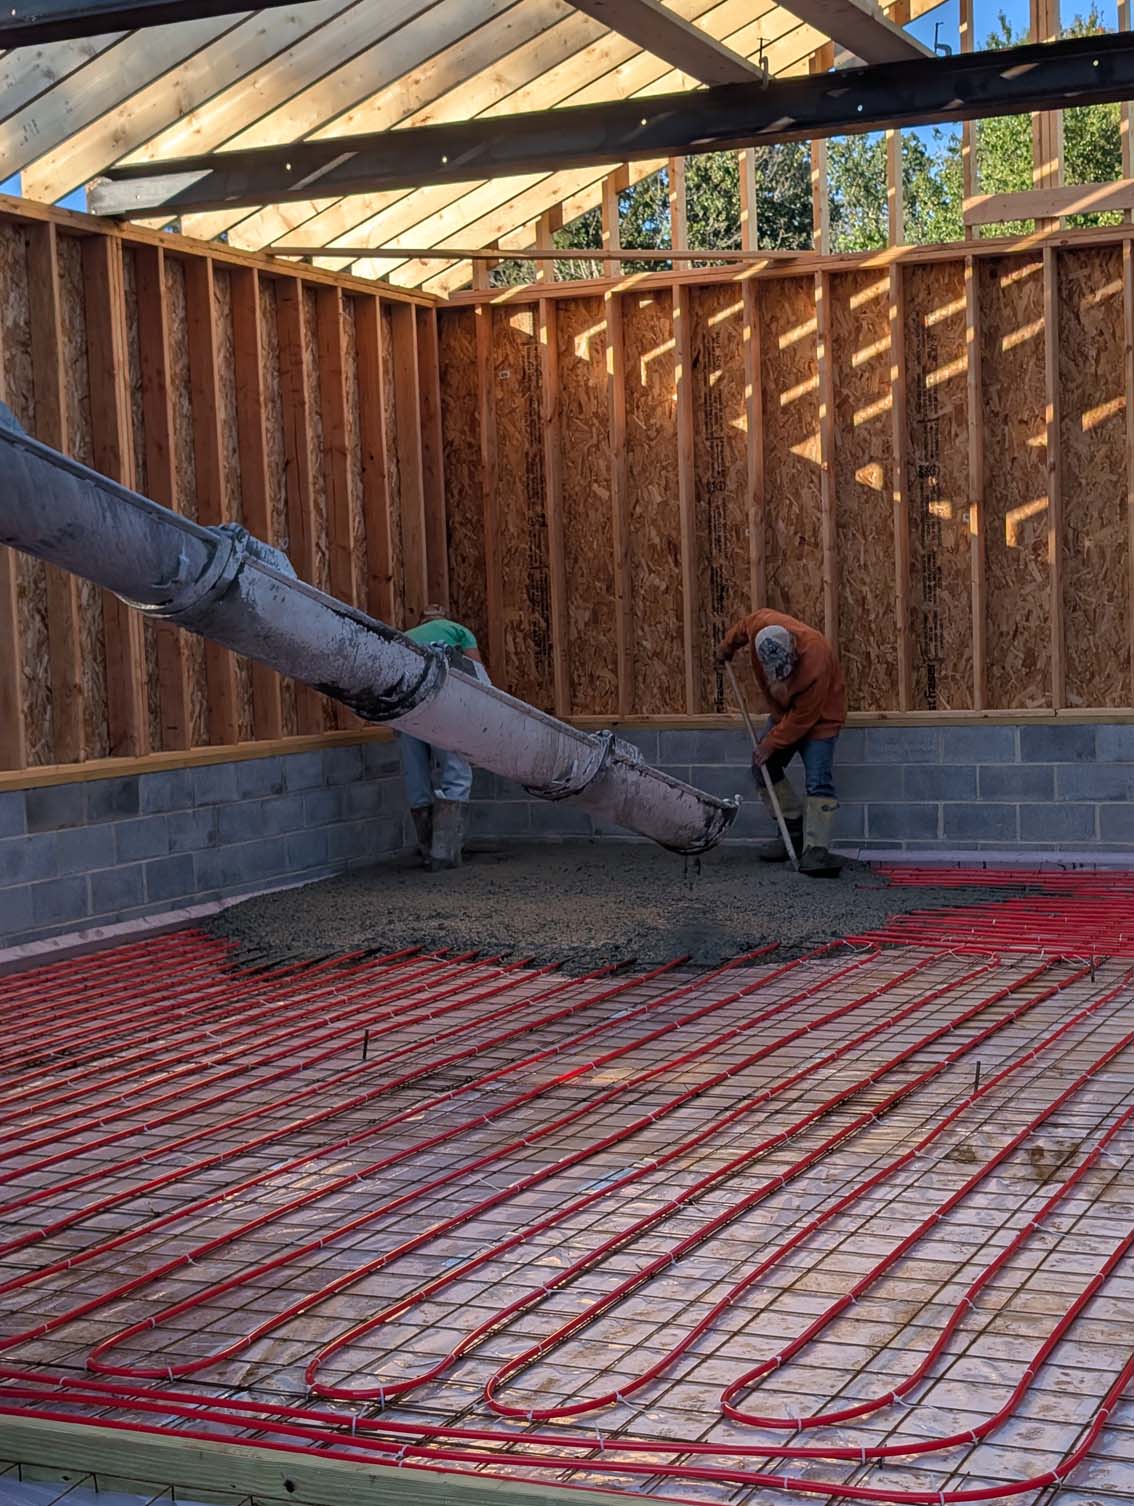
Concrete always wears me out so I try to get professionals to do it instead.
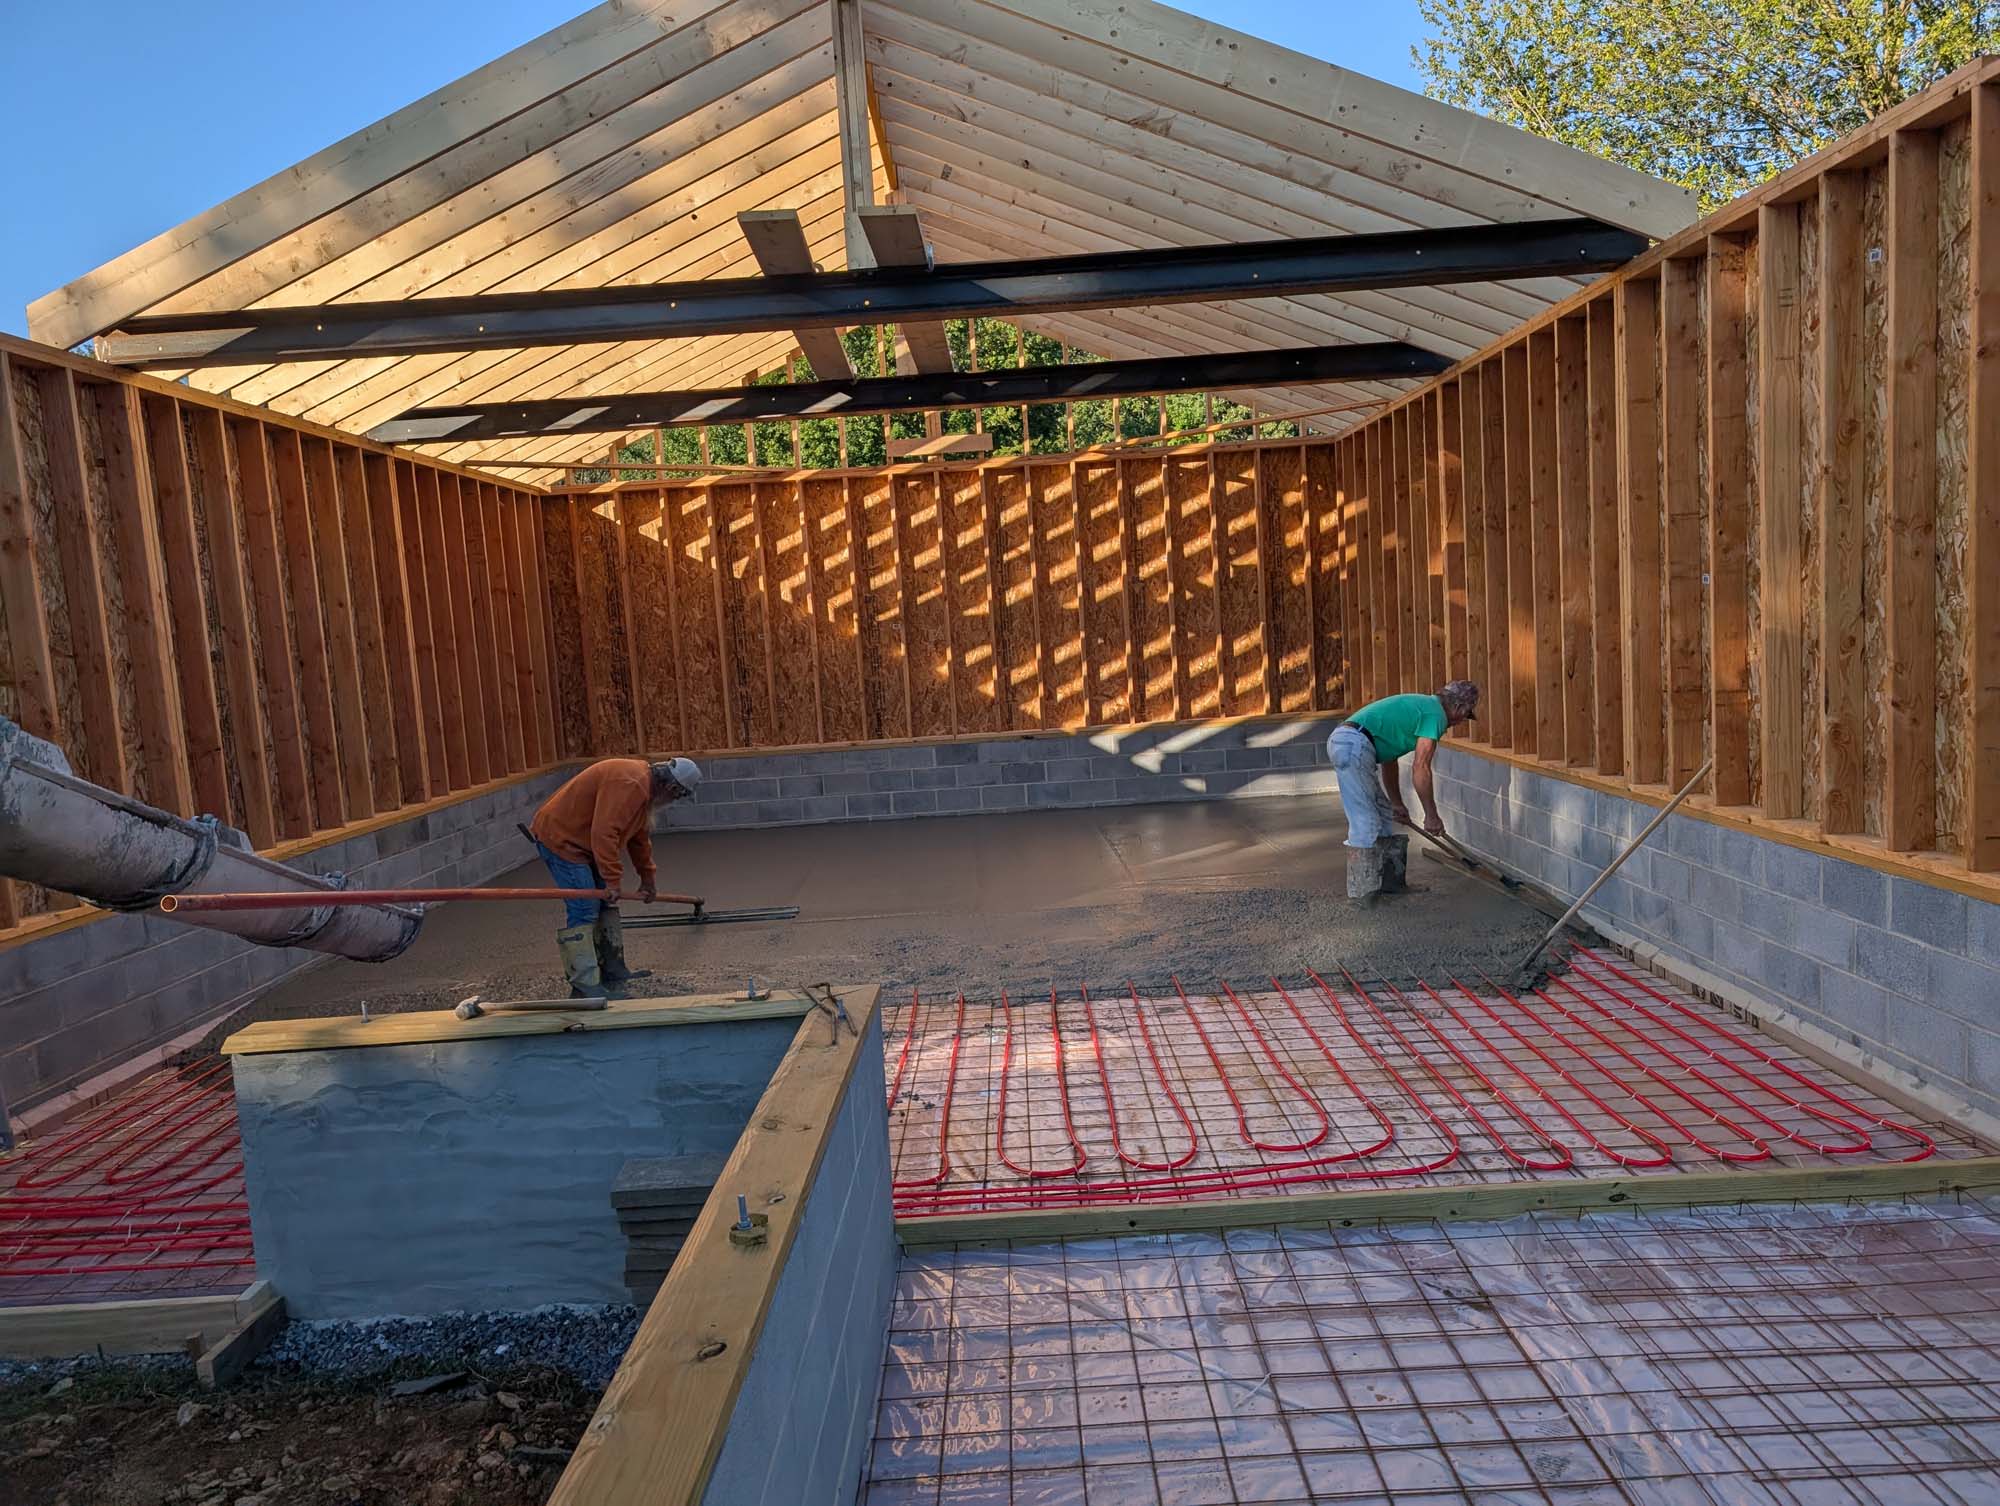
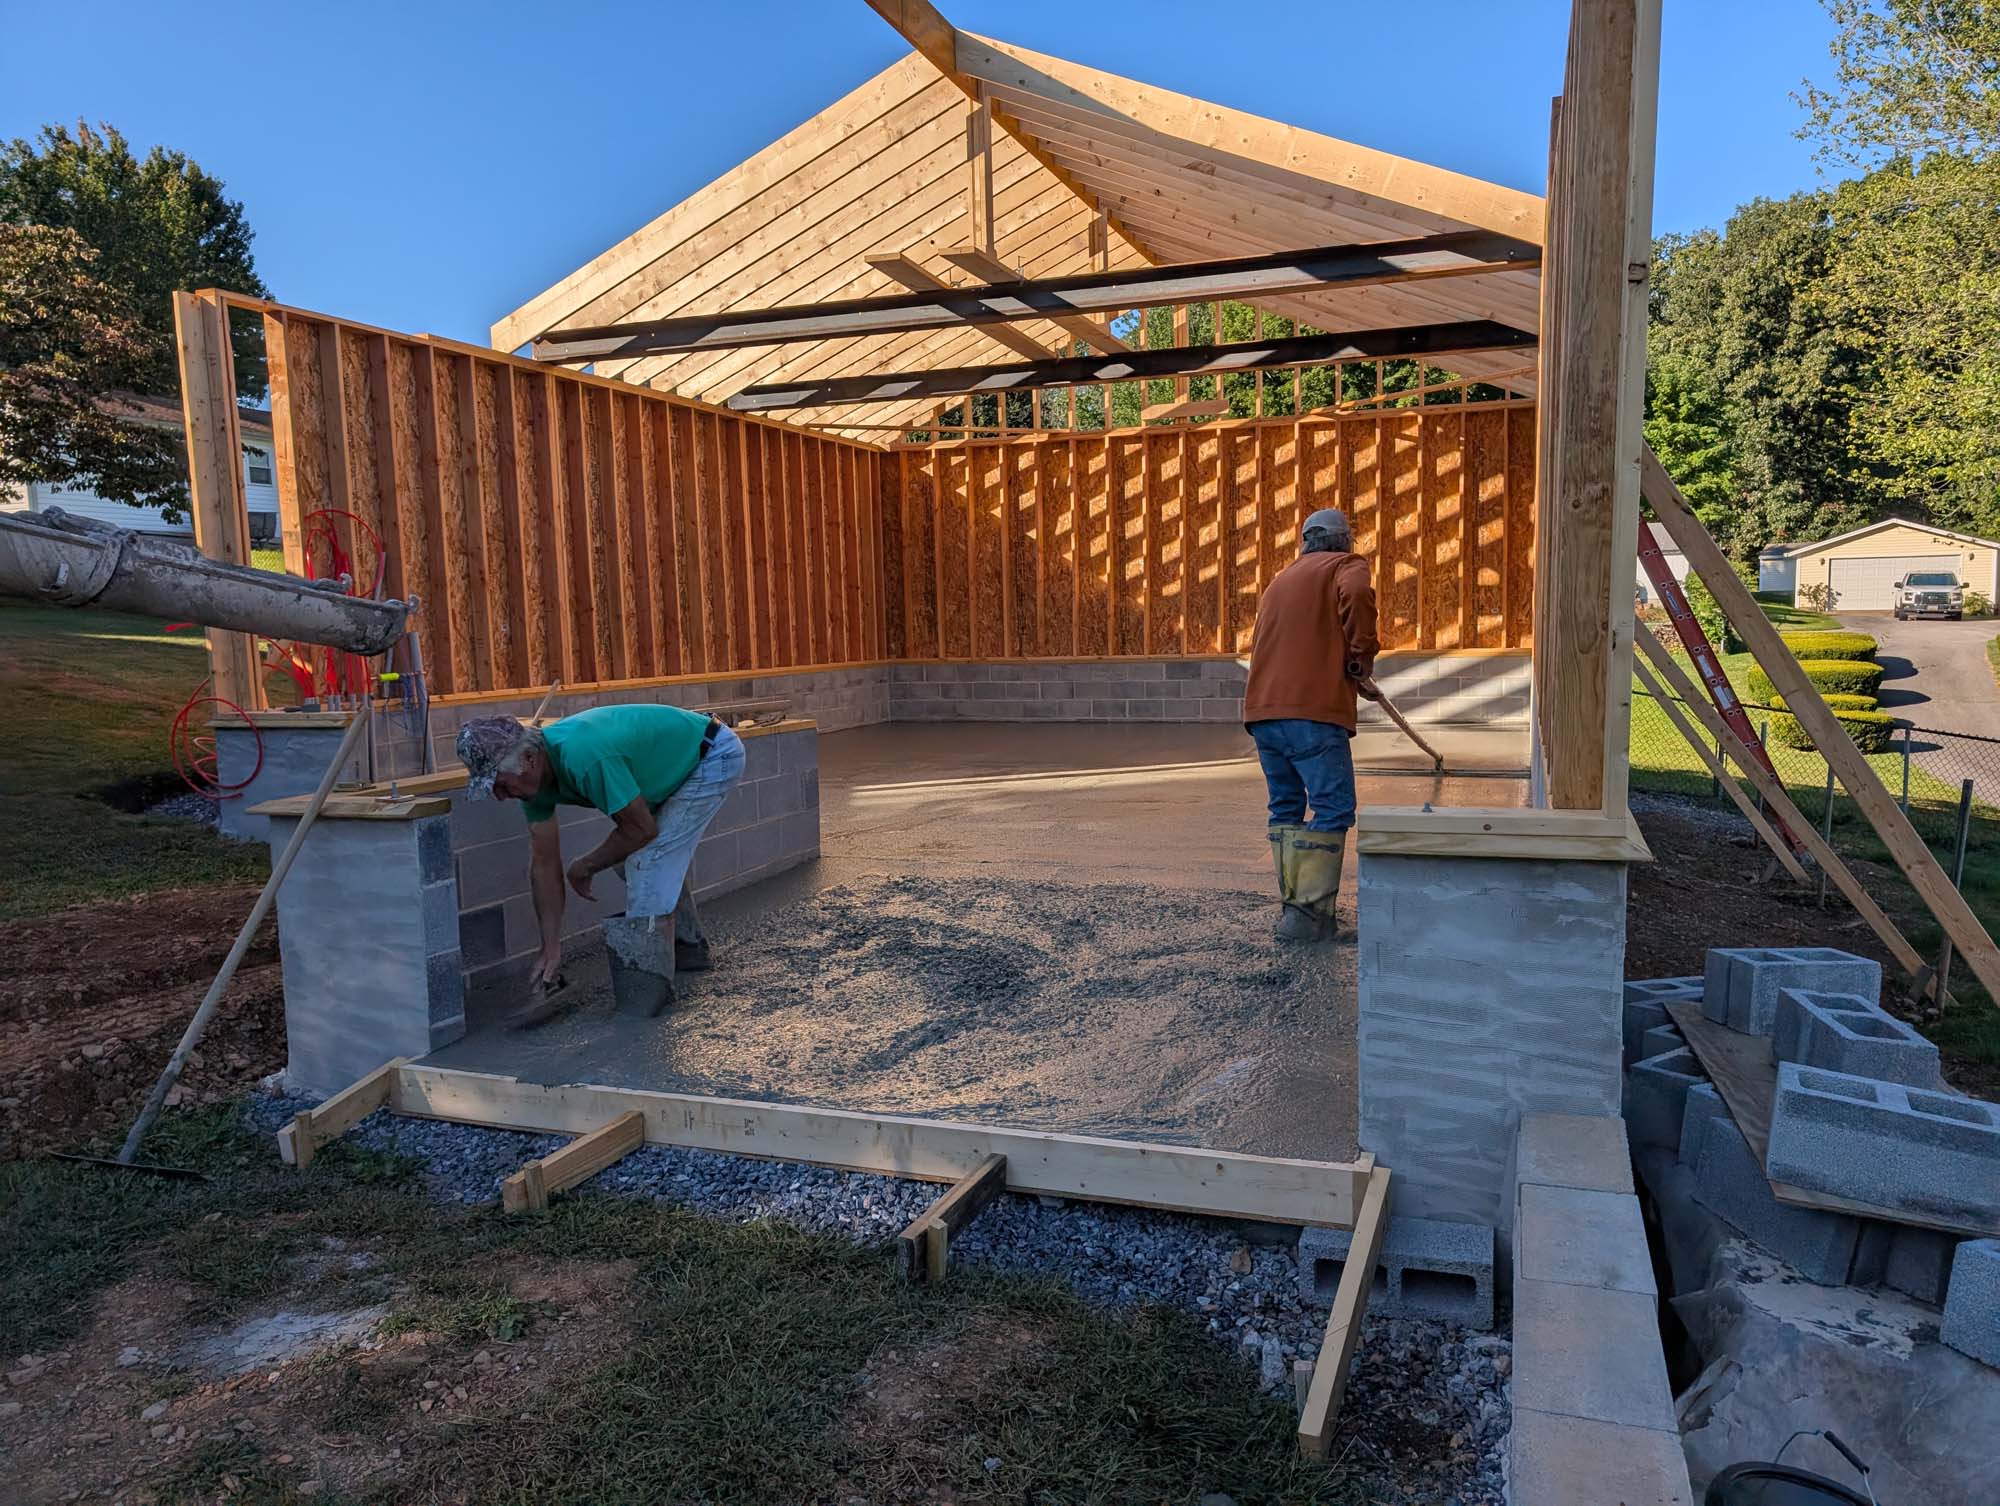
These two gentlemen put me to shame, the lead guy was 74 years old and his partner wasn’t too far behind.
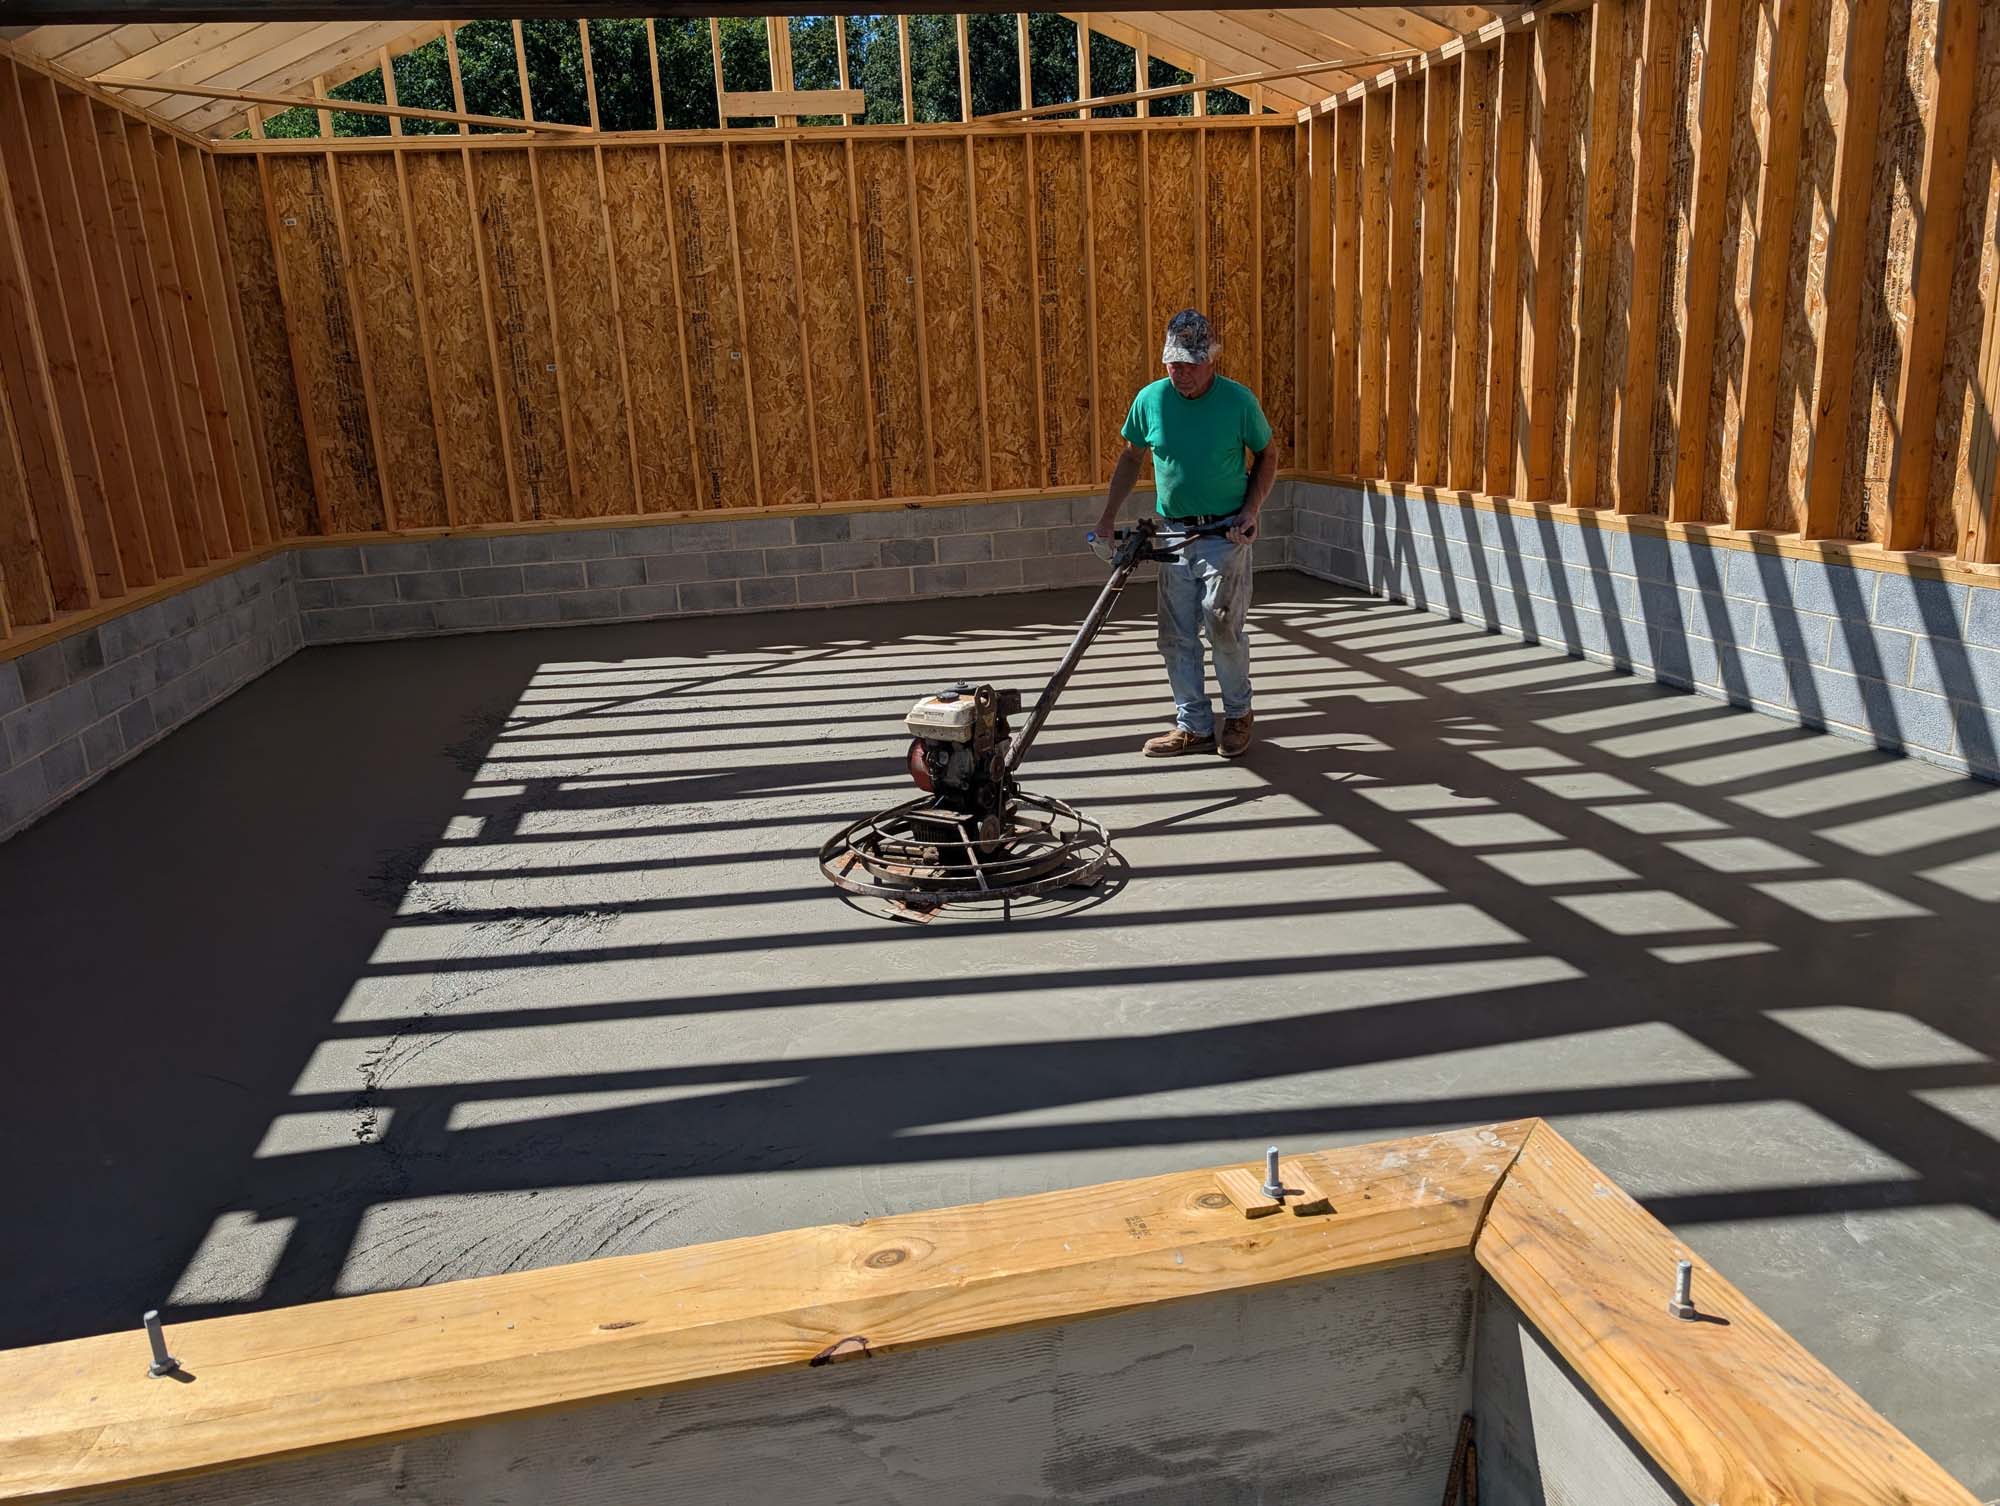


They hung around half a day and did a fantastic job.
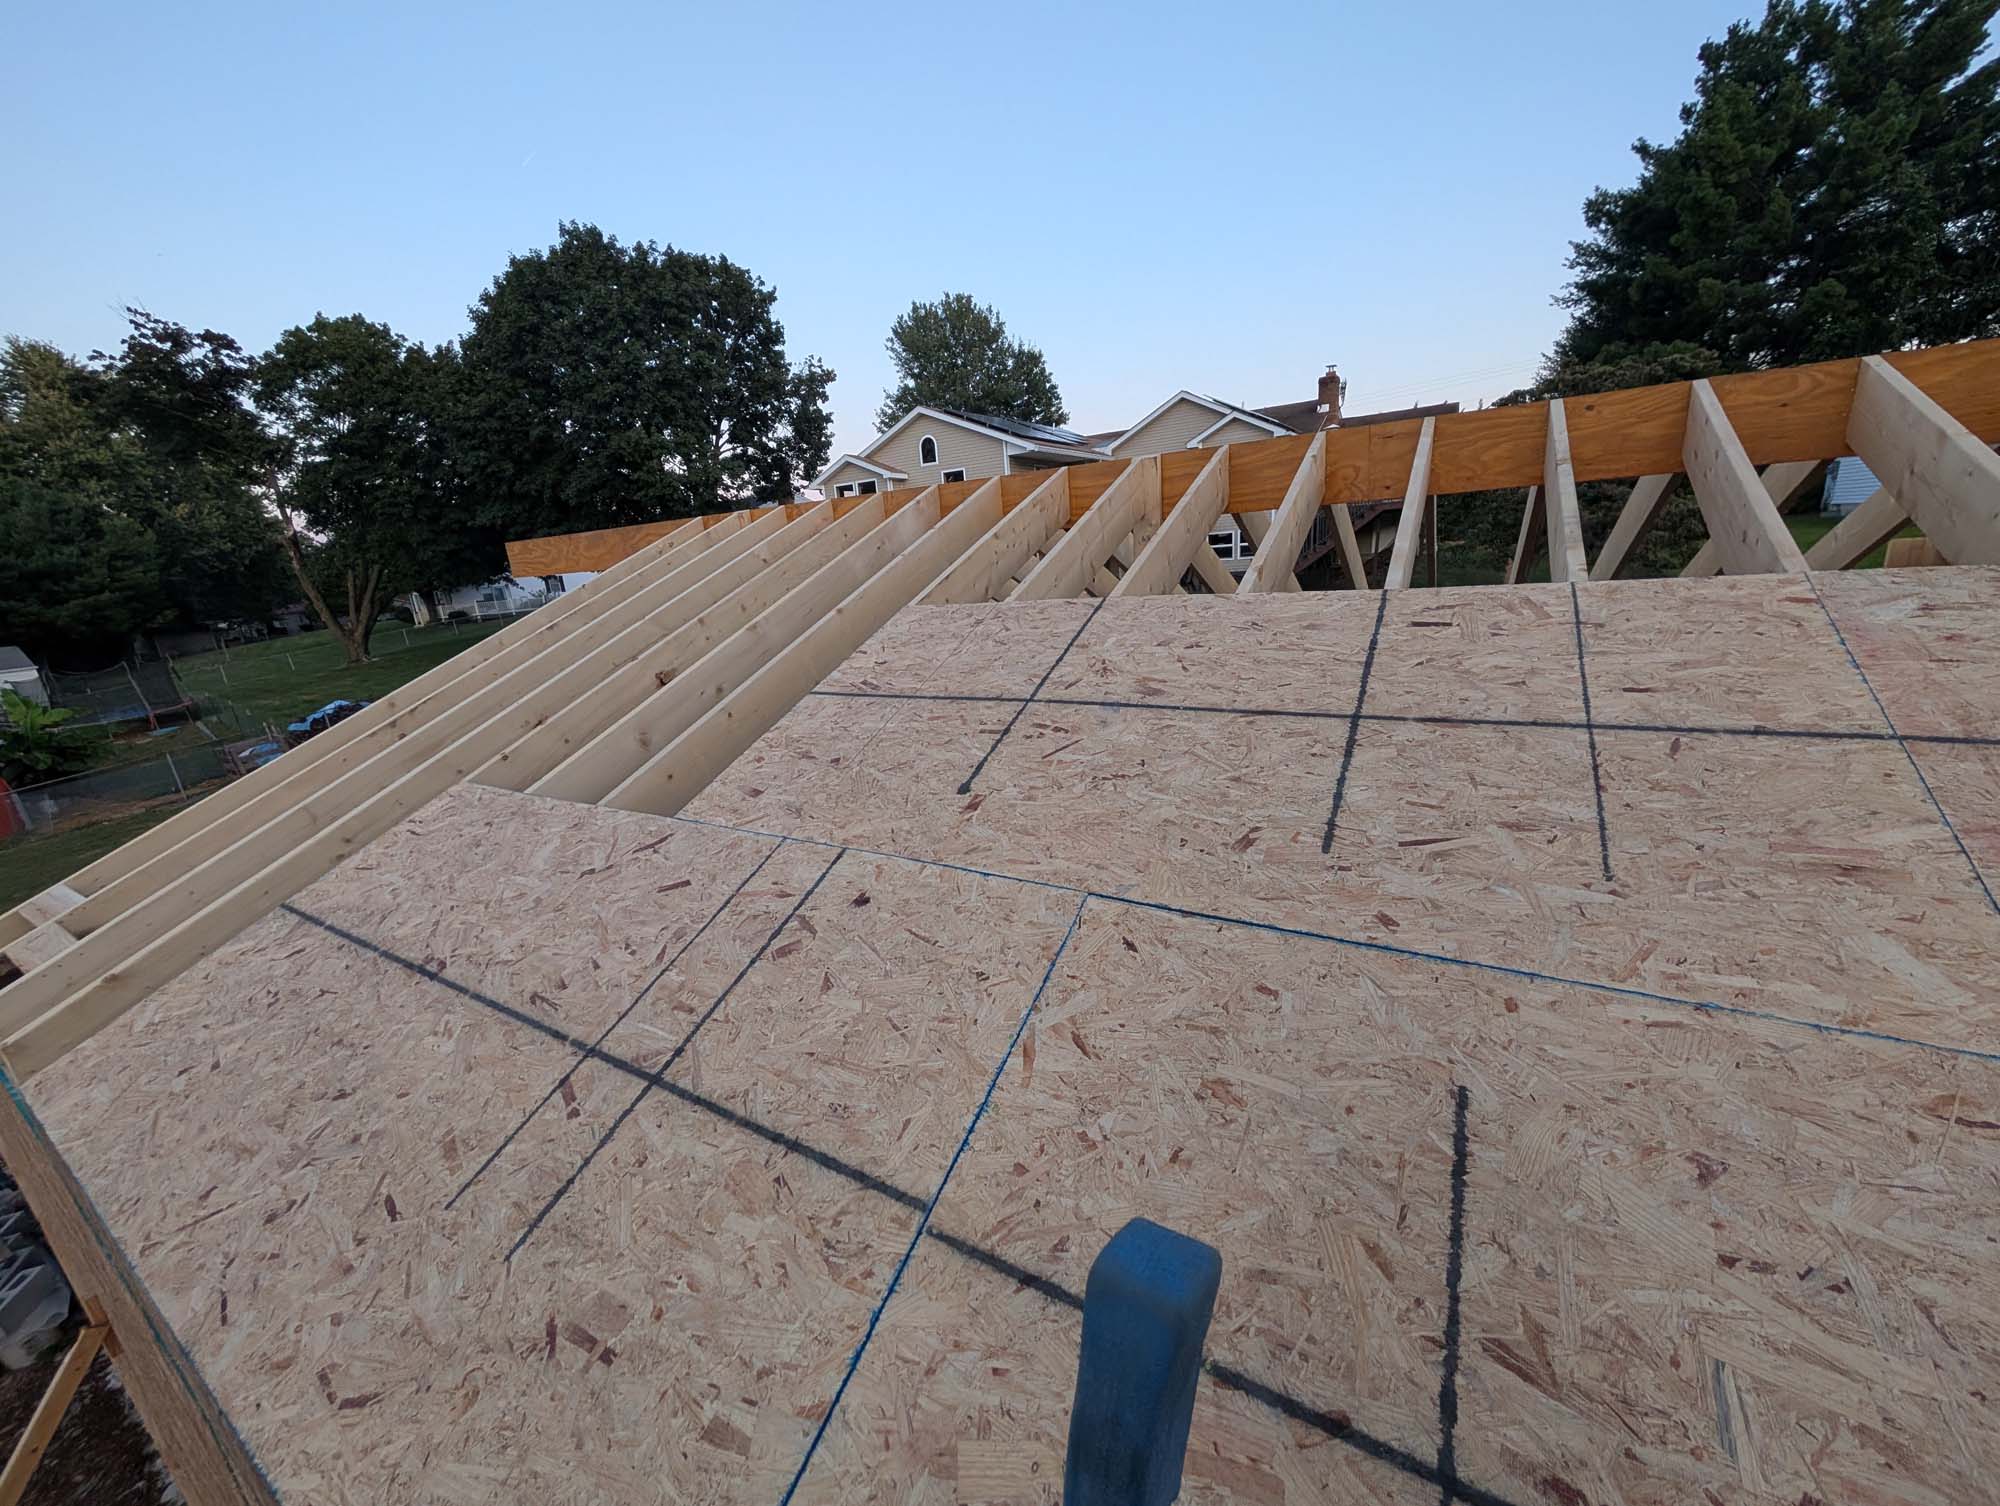
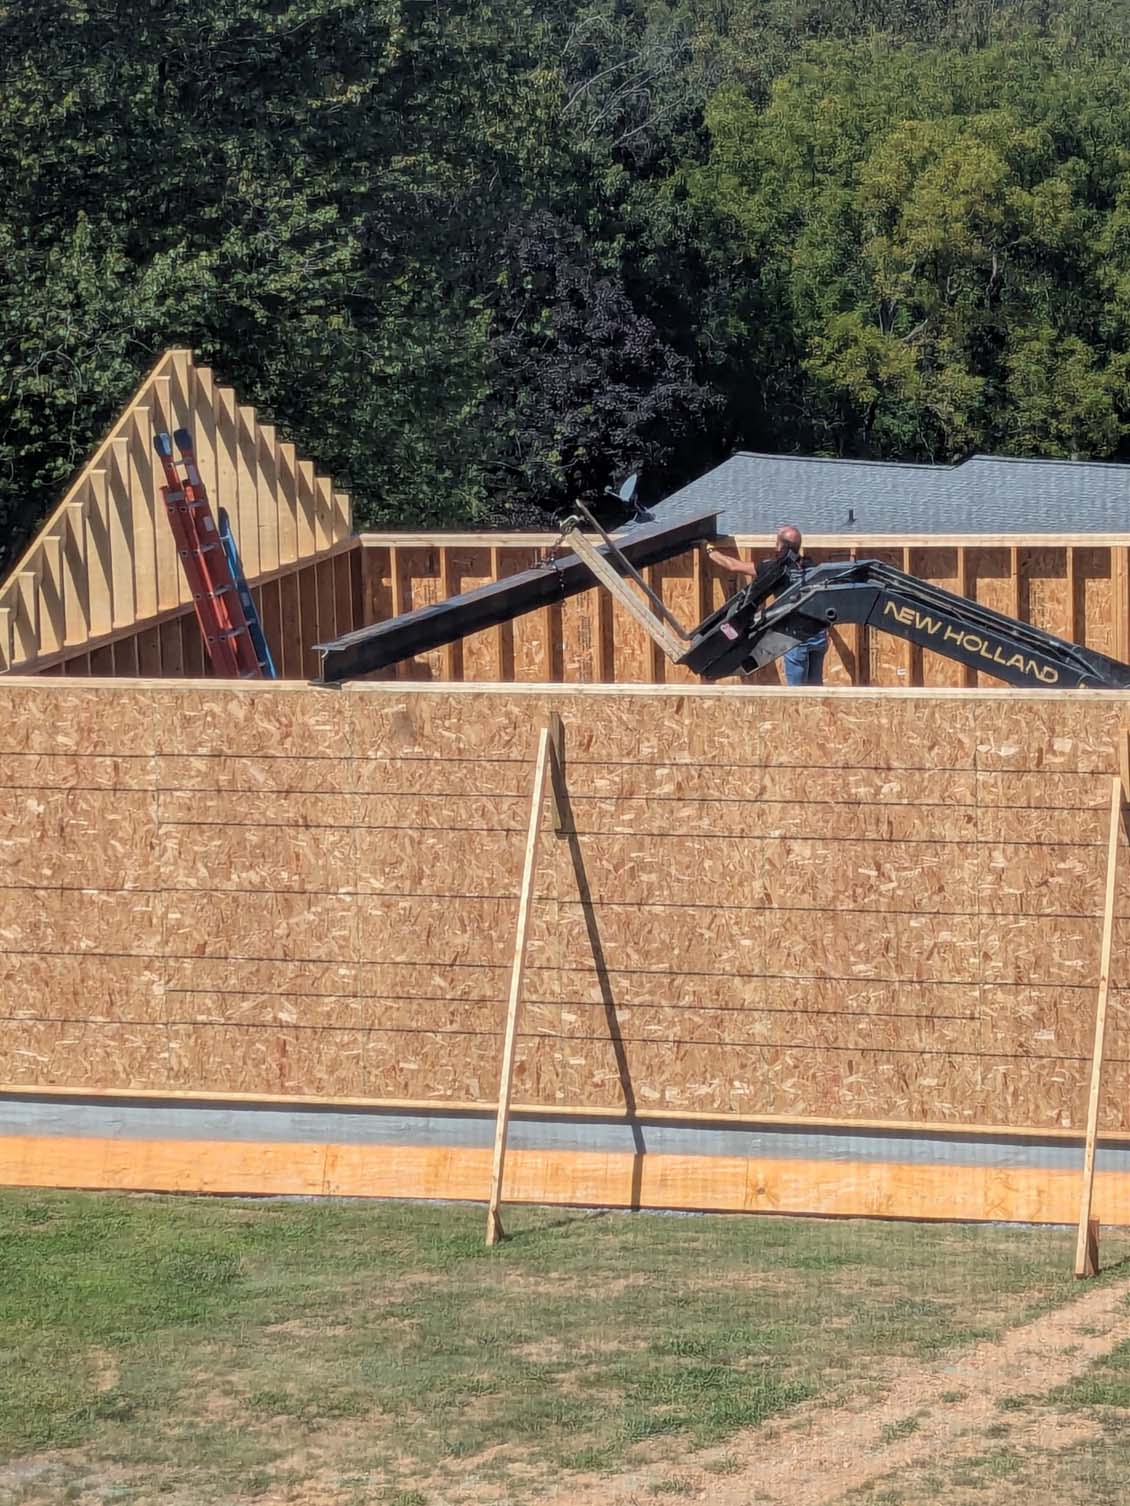
One of my son’s stopped by to help so we got some of the OSB up on the roof.


After he left, I went back to working on the ground trying to close in the front and get the rest of the rafters up.

I got the front done and my son came by to help get the rest of the plywood up on the big roof. It really helps having two people for that task.

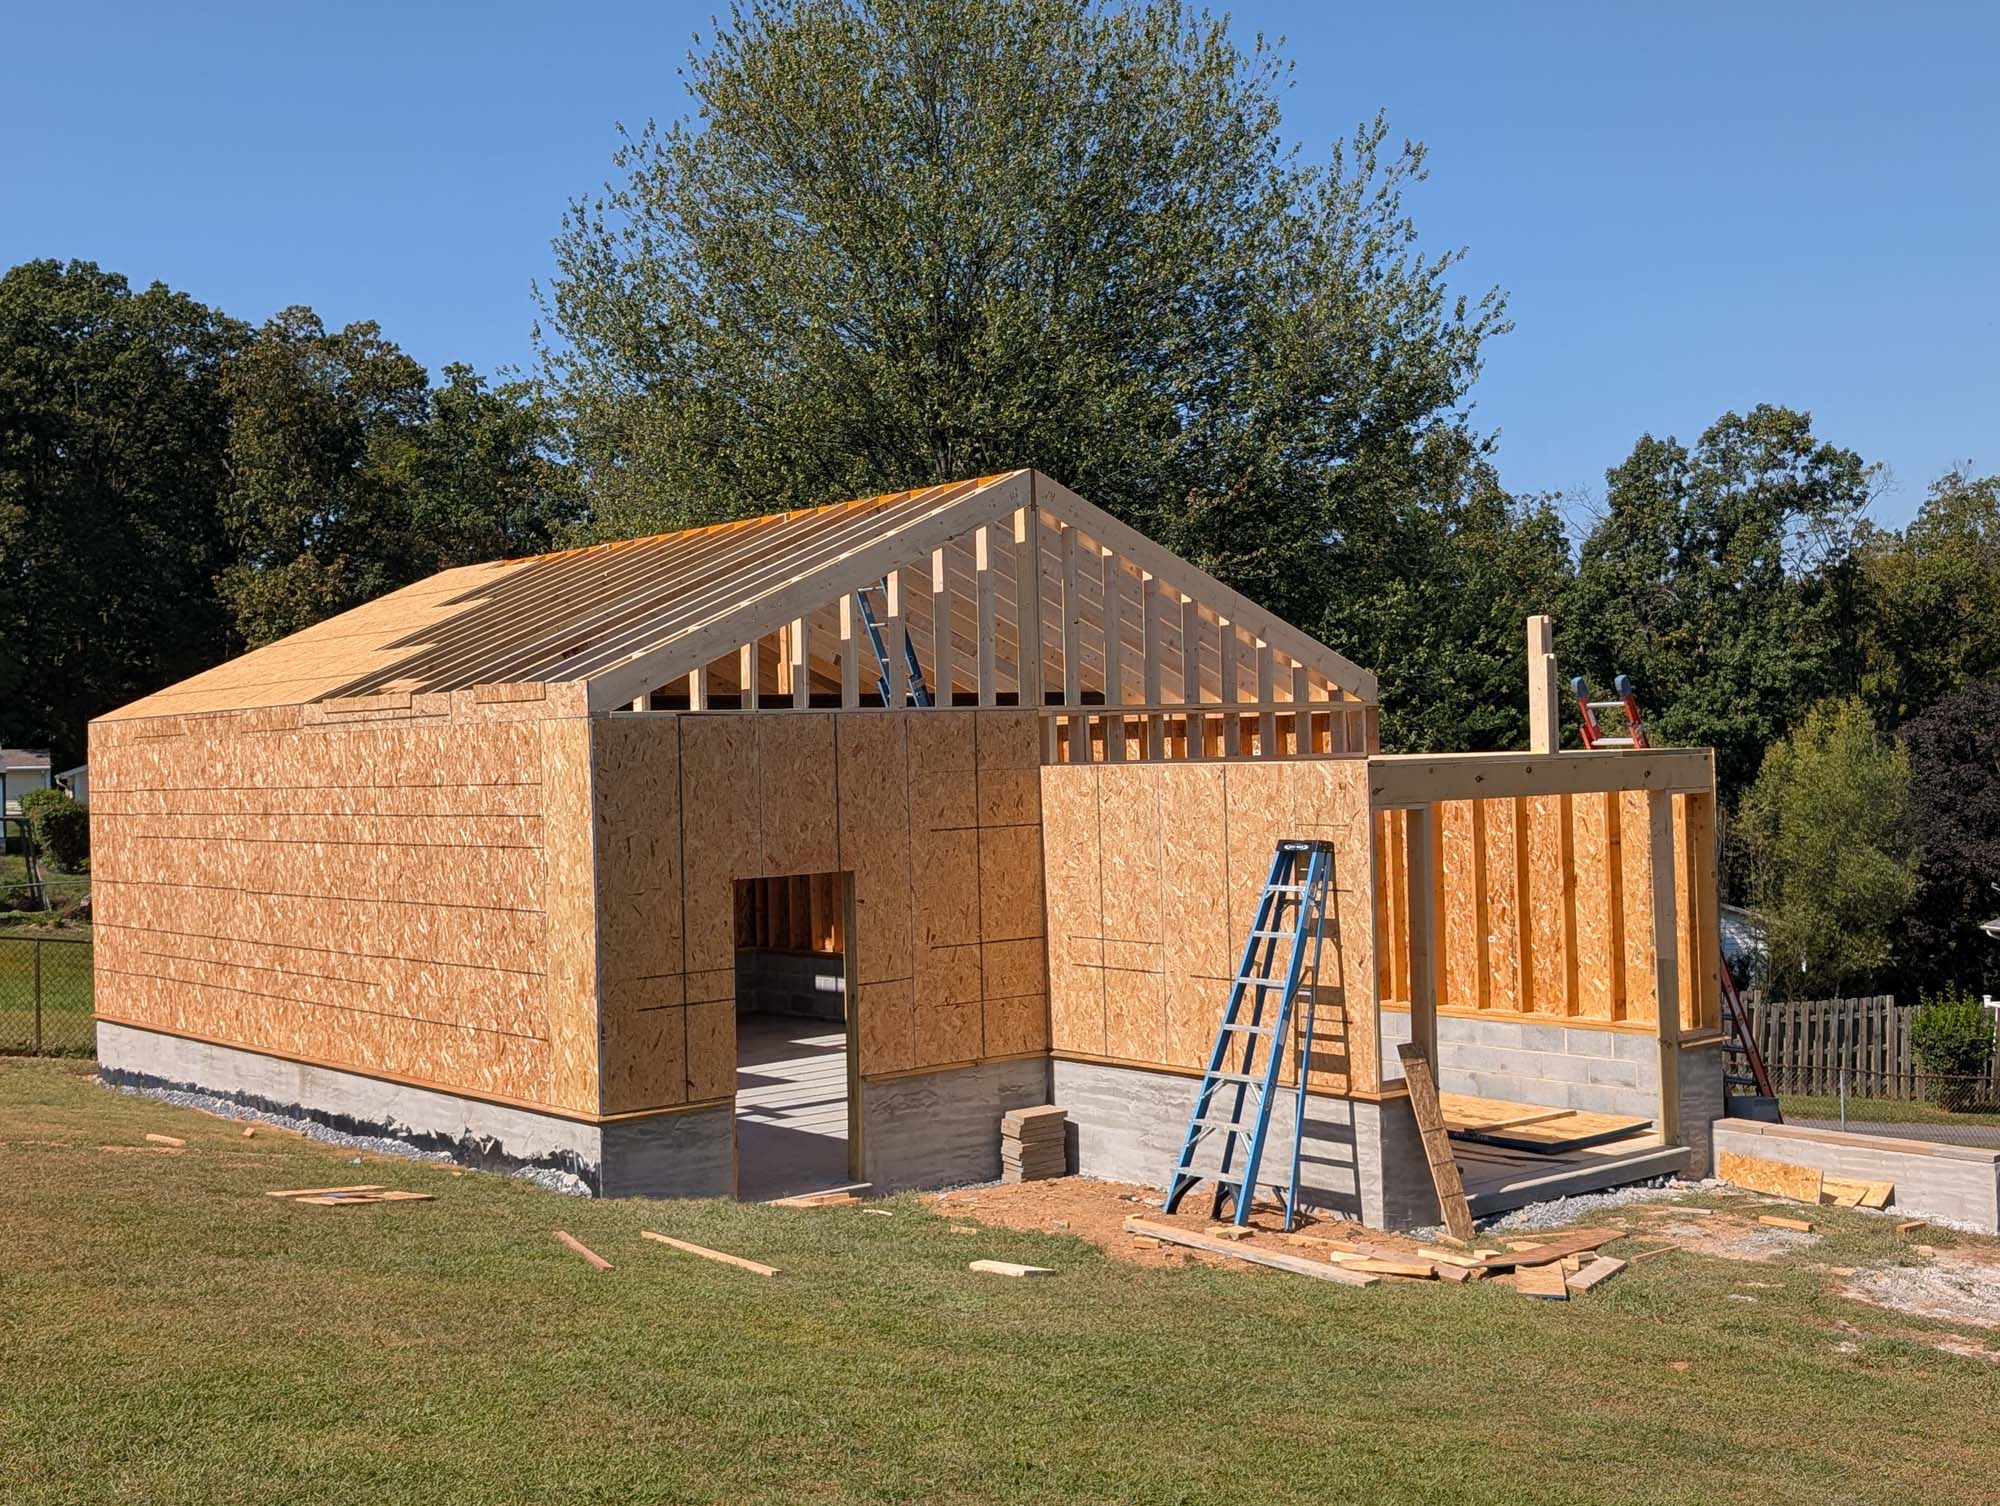
While designing and planning this build, I came across Prodex insulation. I think it was designed for pole barns but it is just over 3/8″ thick and is supposed to be R-22. I figured I would try wrapping the entire building with it to air-seal and insulate. If it isn’t as effective as I want, I can always add batt insulation later.
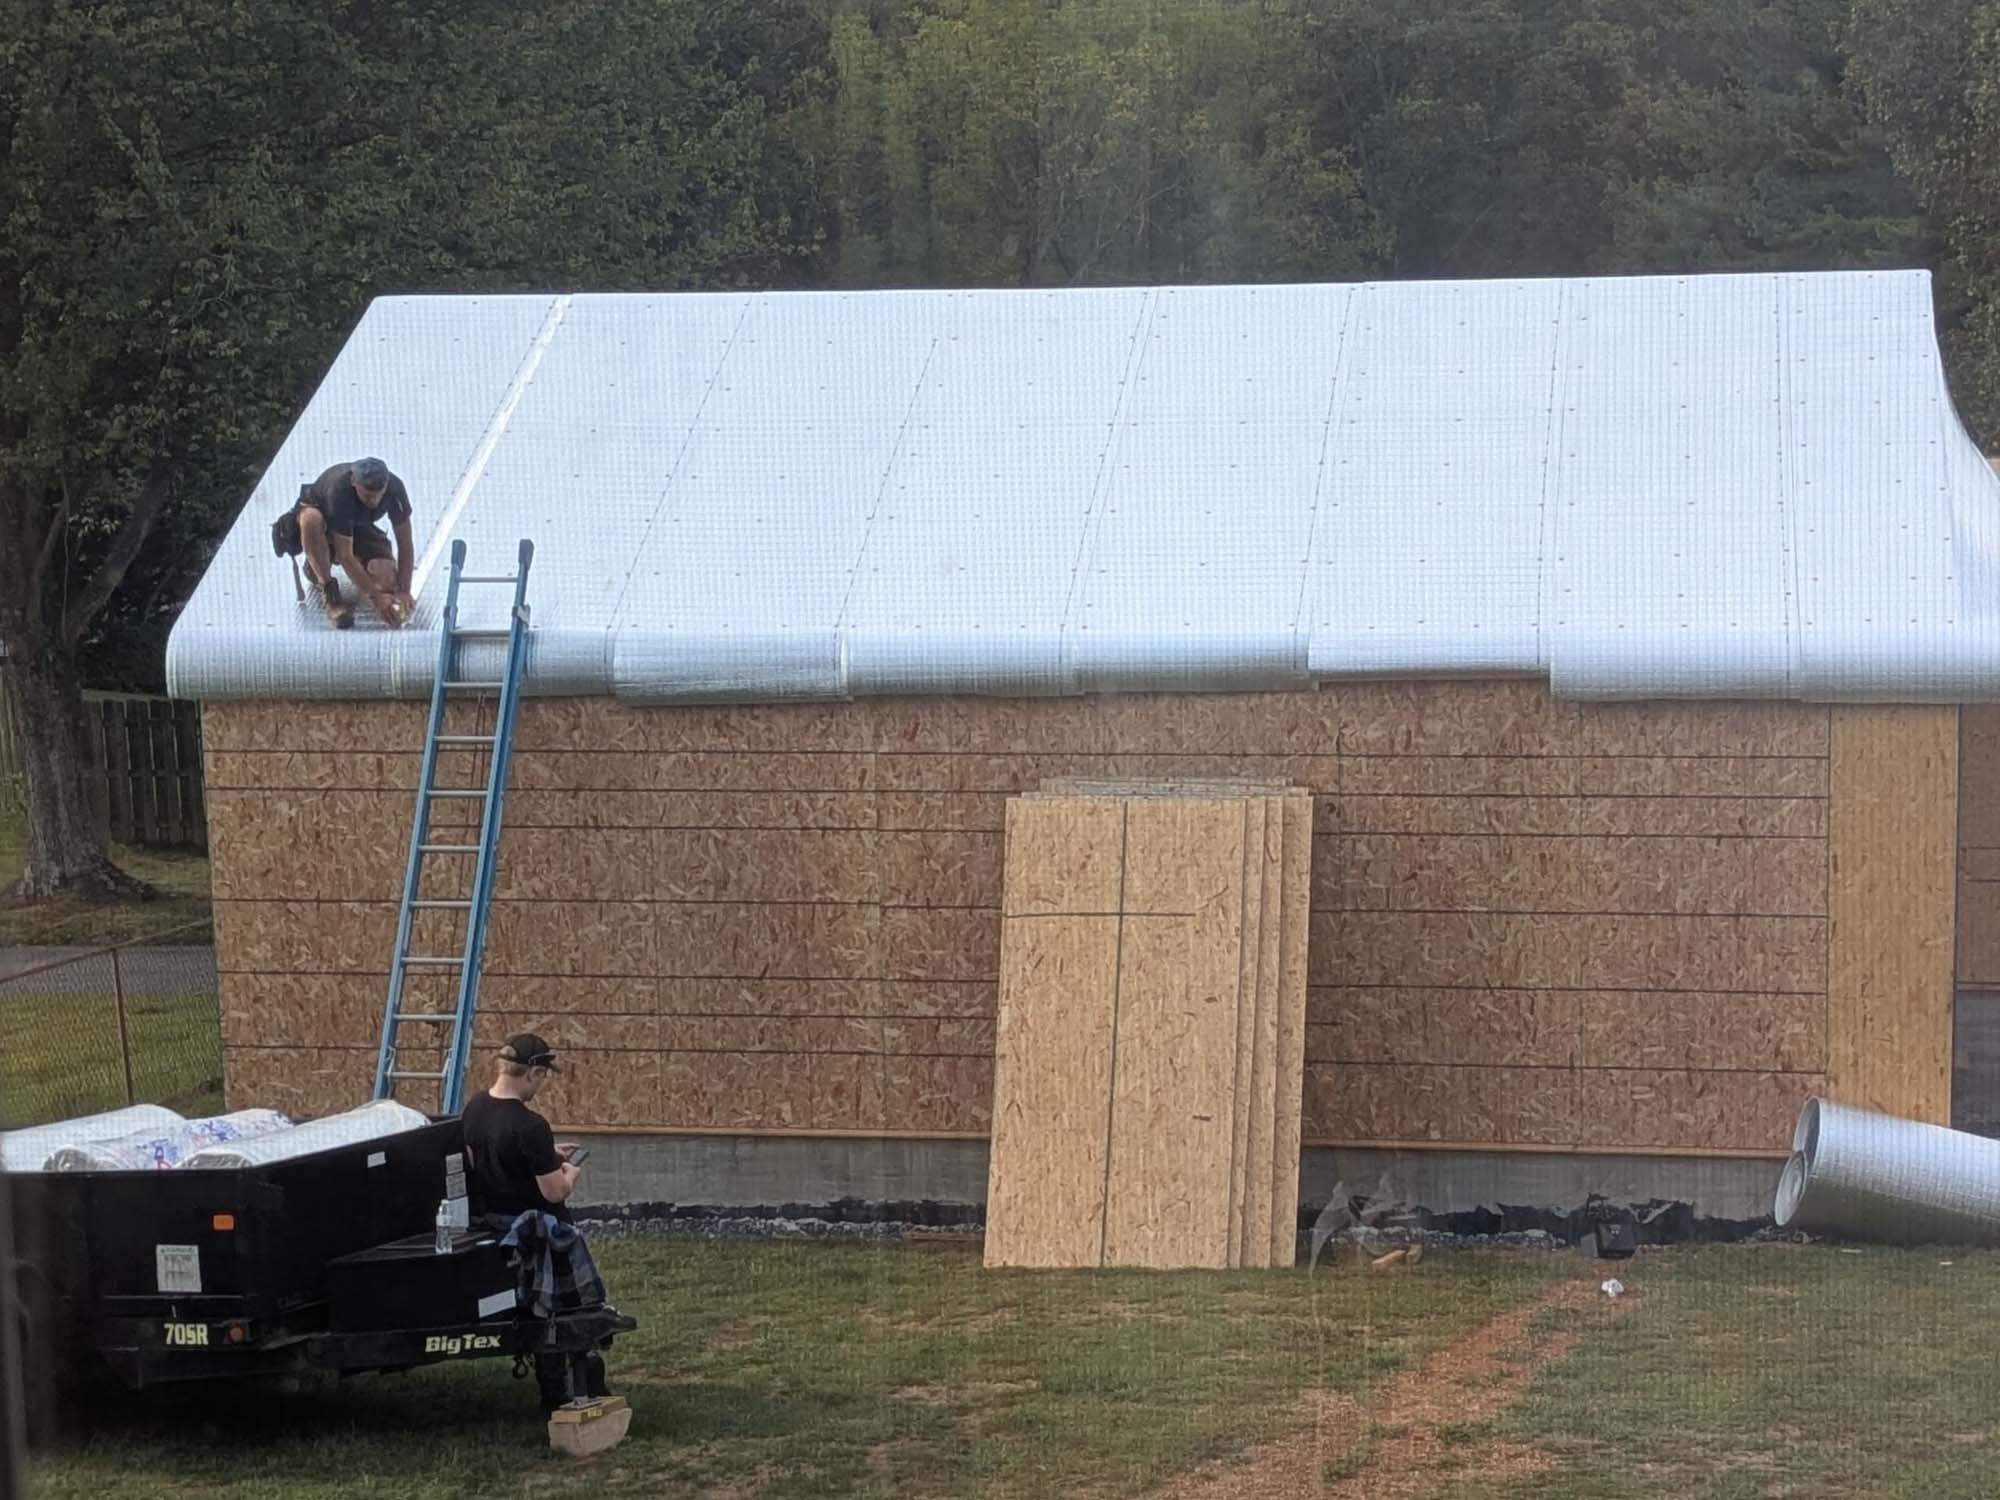
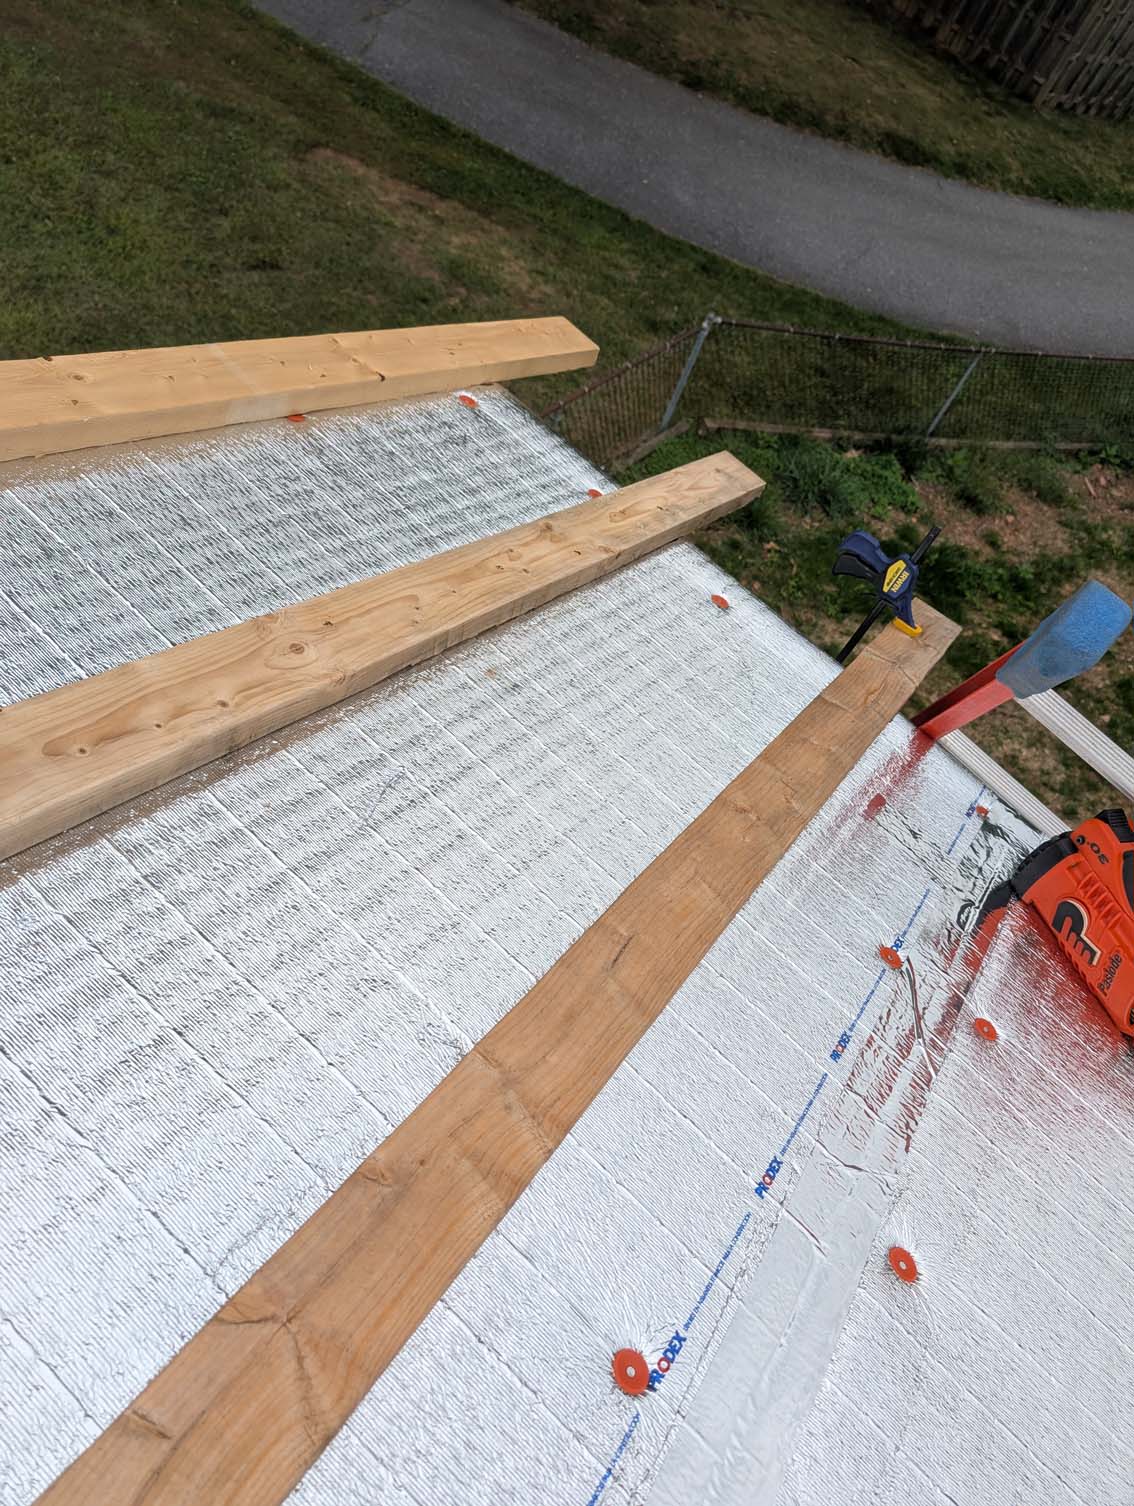
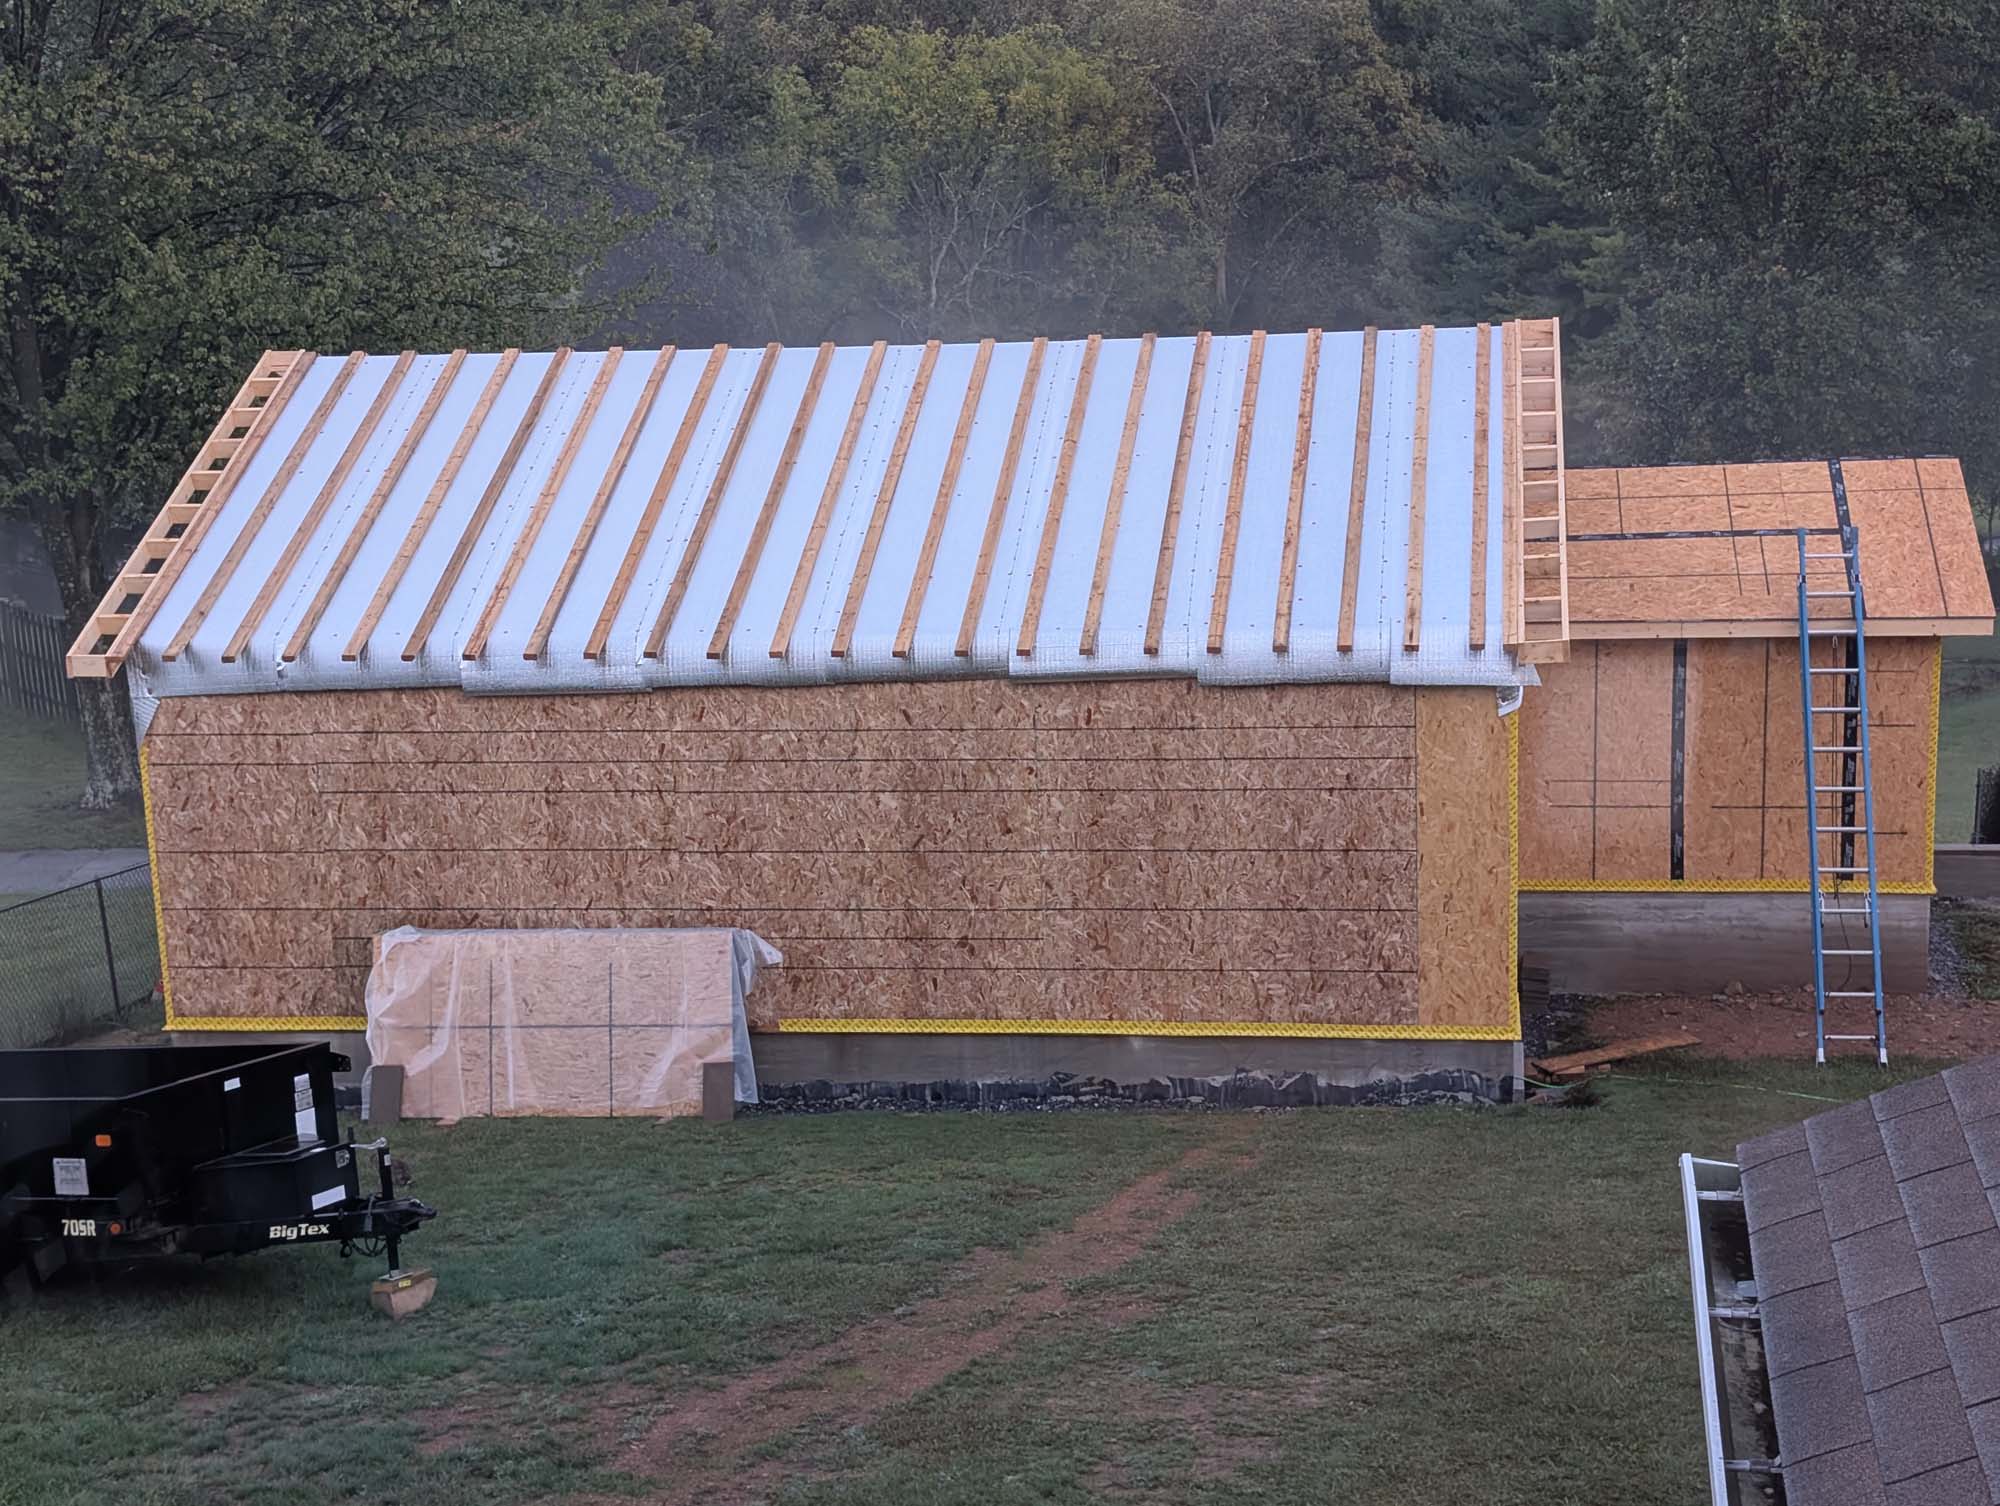
To separate the heated inside from the cold outside, I am adding a second layer of roof sheathing above the insulation. 2″x4″s laid flat on their side are attached to the rafters through the insulation.

I clamped a block to the end of each to give me my 12″ overhang.

Then I attached the insulation to the walls as well, taping all the seams.

I added rake ladders to each gable end, then I could attach fascia boards to the overhangs.
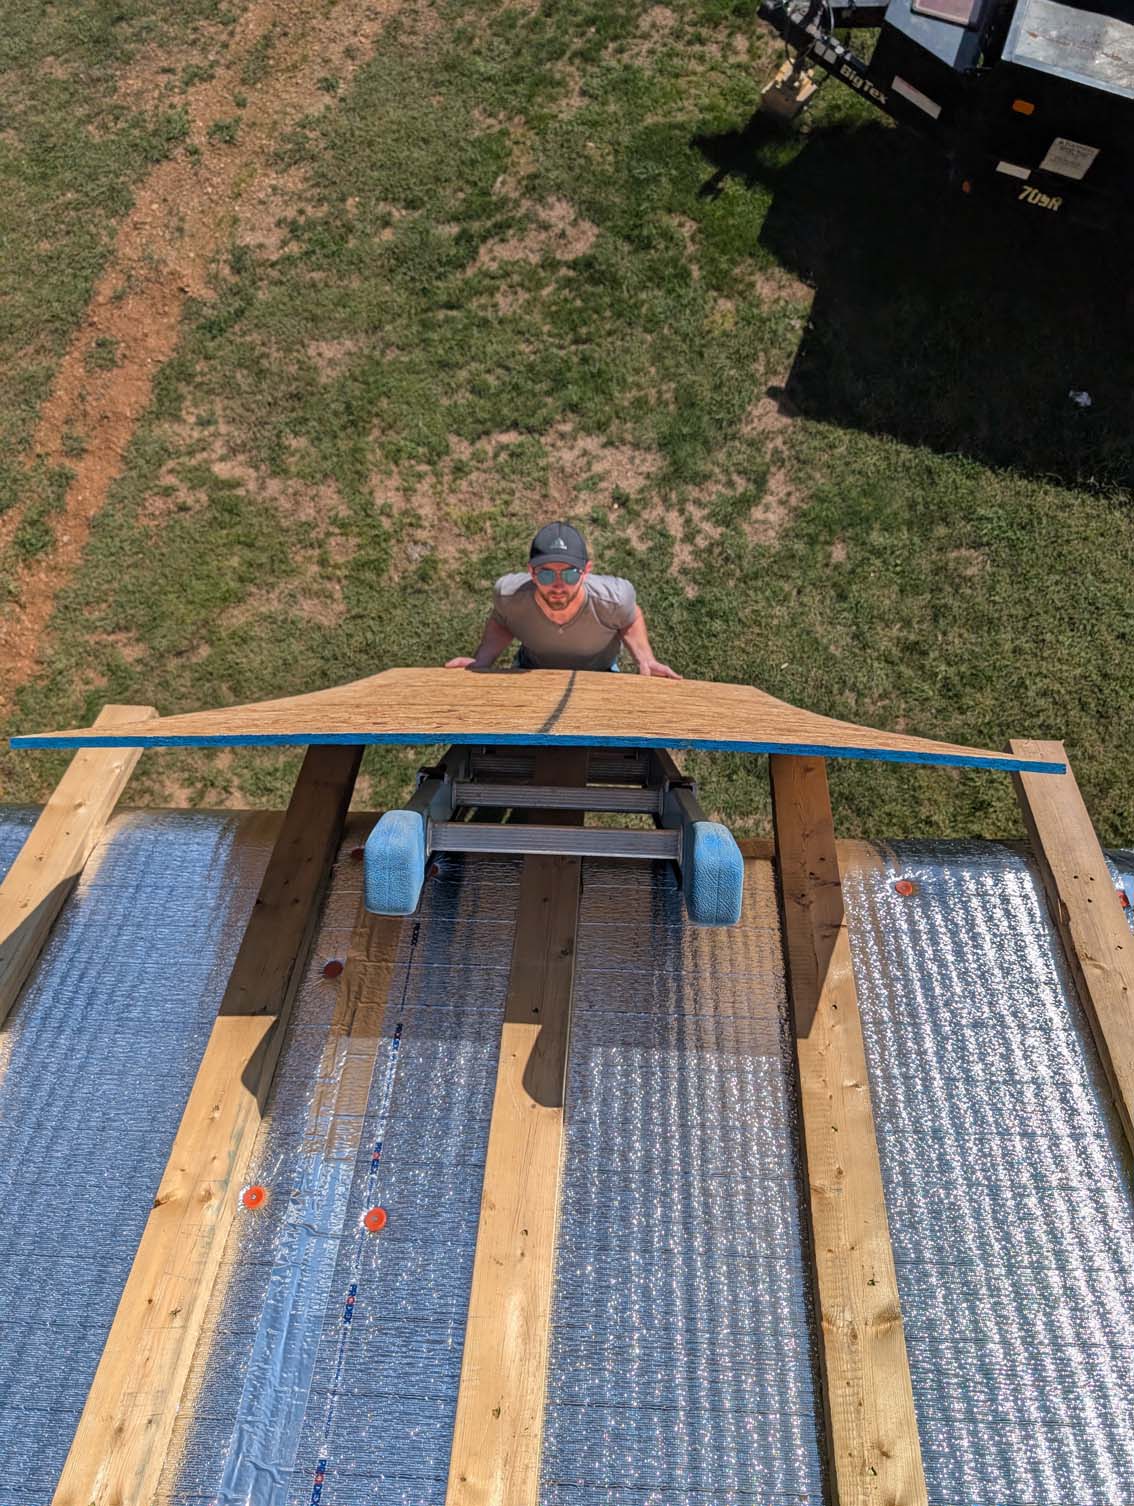
I got one of my other sons to come help push the second pile of OSB onto the roof.


Then nailed that down too.

Flashing tape was also applied to the base of the wall and the unheated garden shed section.


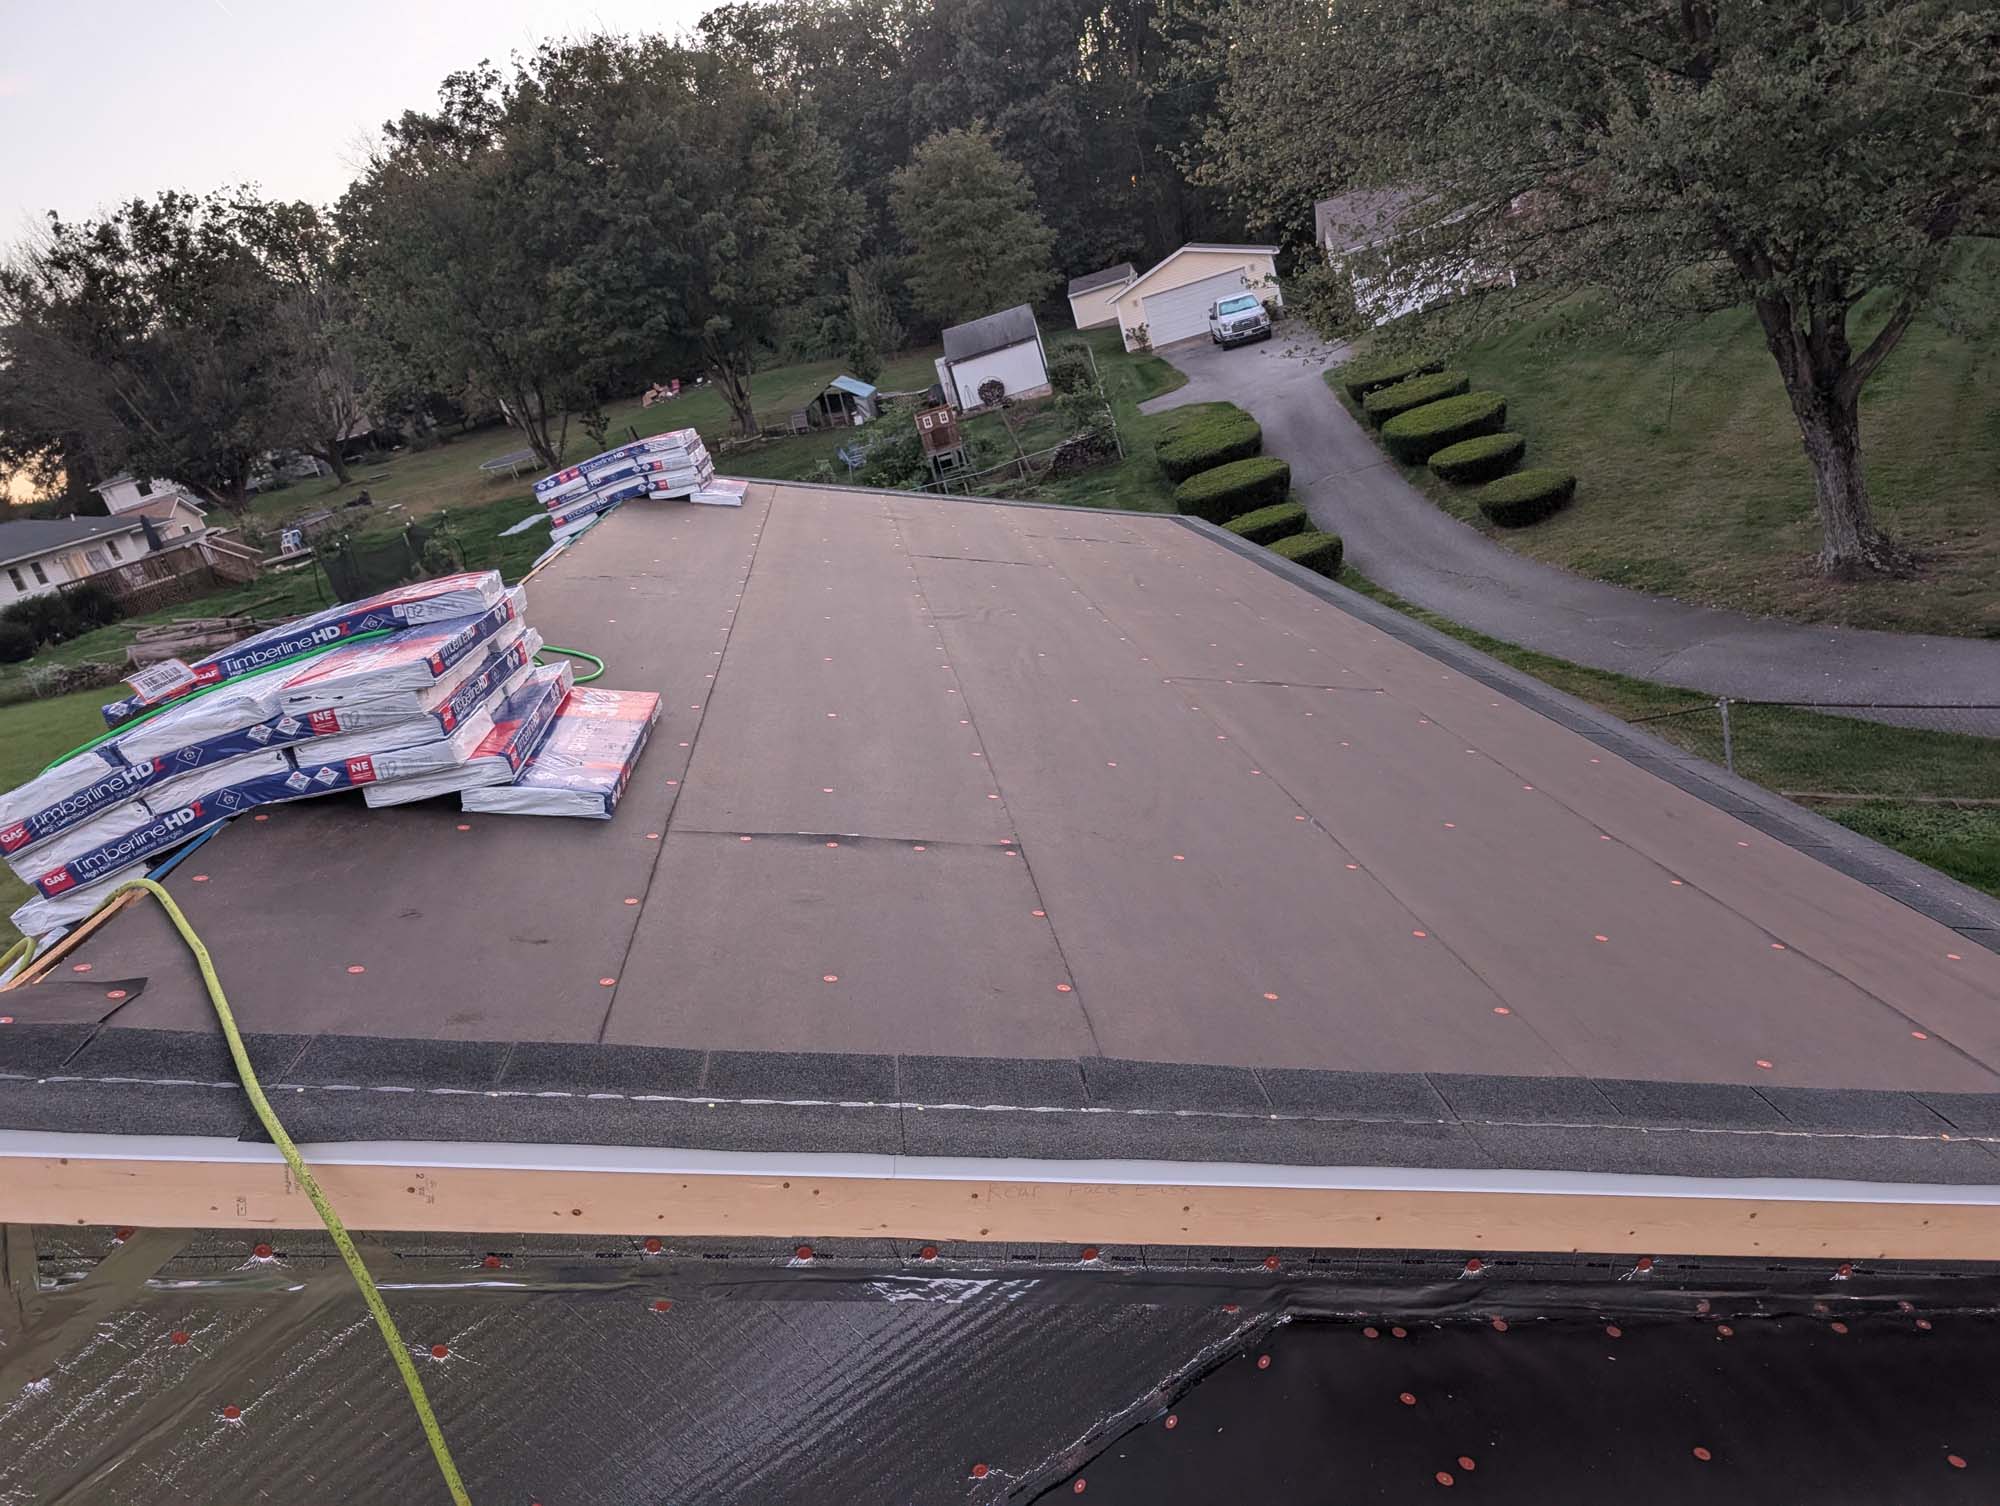
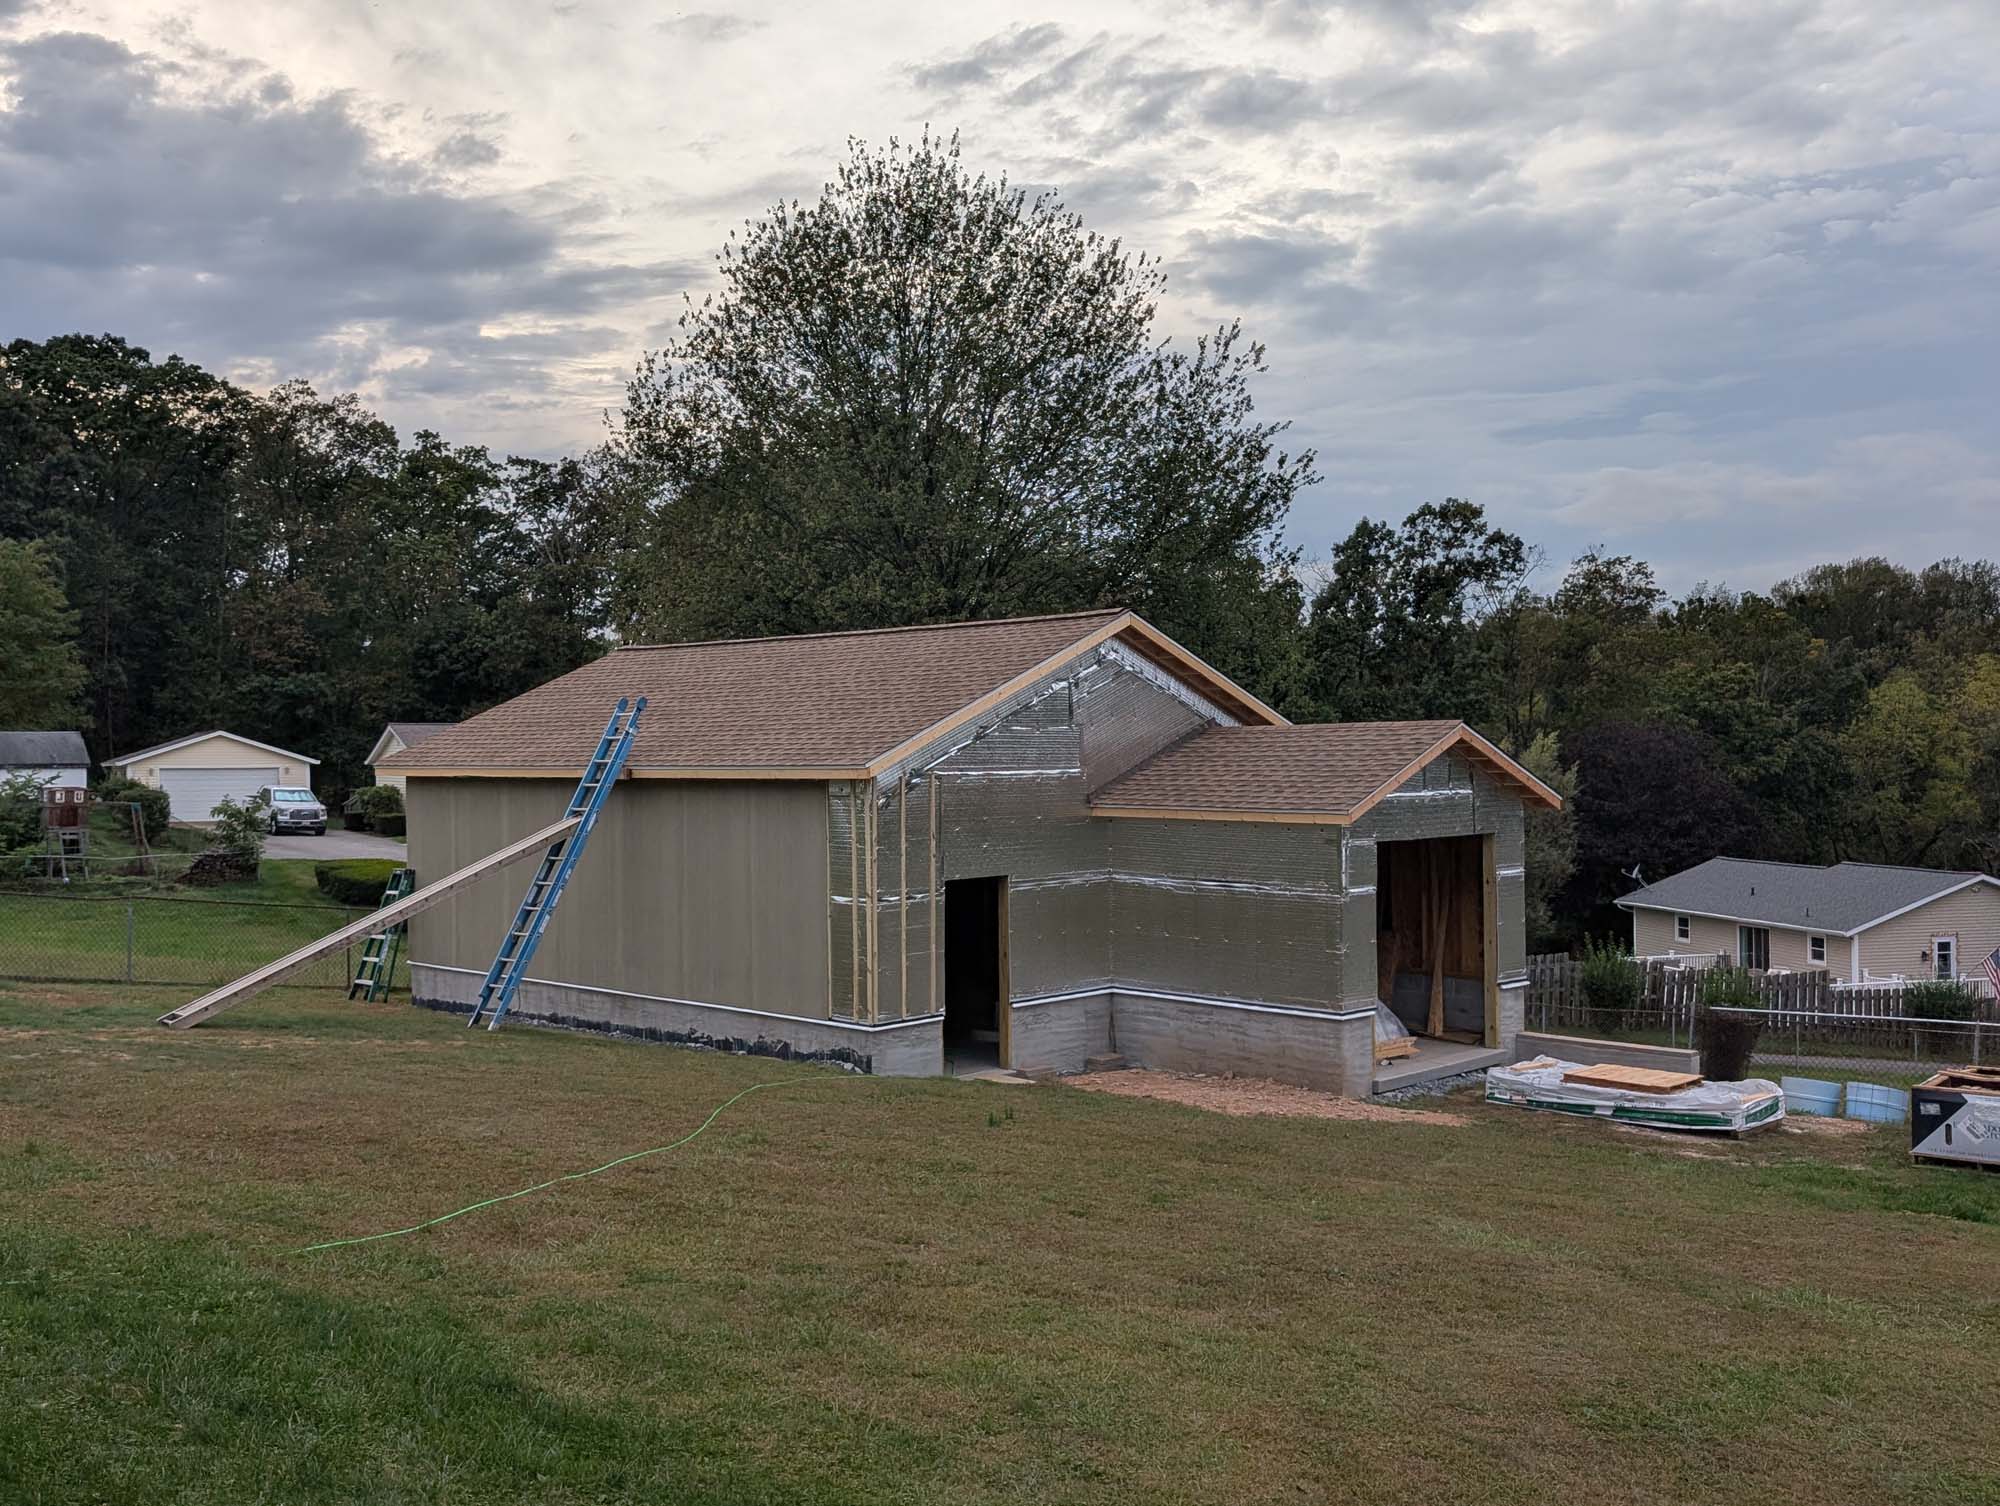
With the insulation on I got the roof underlayment on and carried up the shingles. Roof is now water-tight and the shingles will go up next week when a friend has offered to help.
Since we had supply chain shortages a few years back, they stopped making the shingles on my house and parts of the siding that is on my house. That keeps me from matching this building exactly to the house. I decided on different shingles and siding but the same stone and colors so that they would accent each other. I wanted to go with a vertical board and batten look since the house siding is horizontal. We decided to do James Hardie siding when I thought it would be 16″ wide pieces but apparently they were 48″ wide and the sheets I was using were over 80 pounds each. I had to come up with a way to hold it perfectly in place while attaching it.
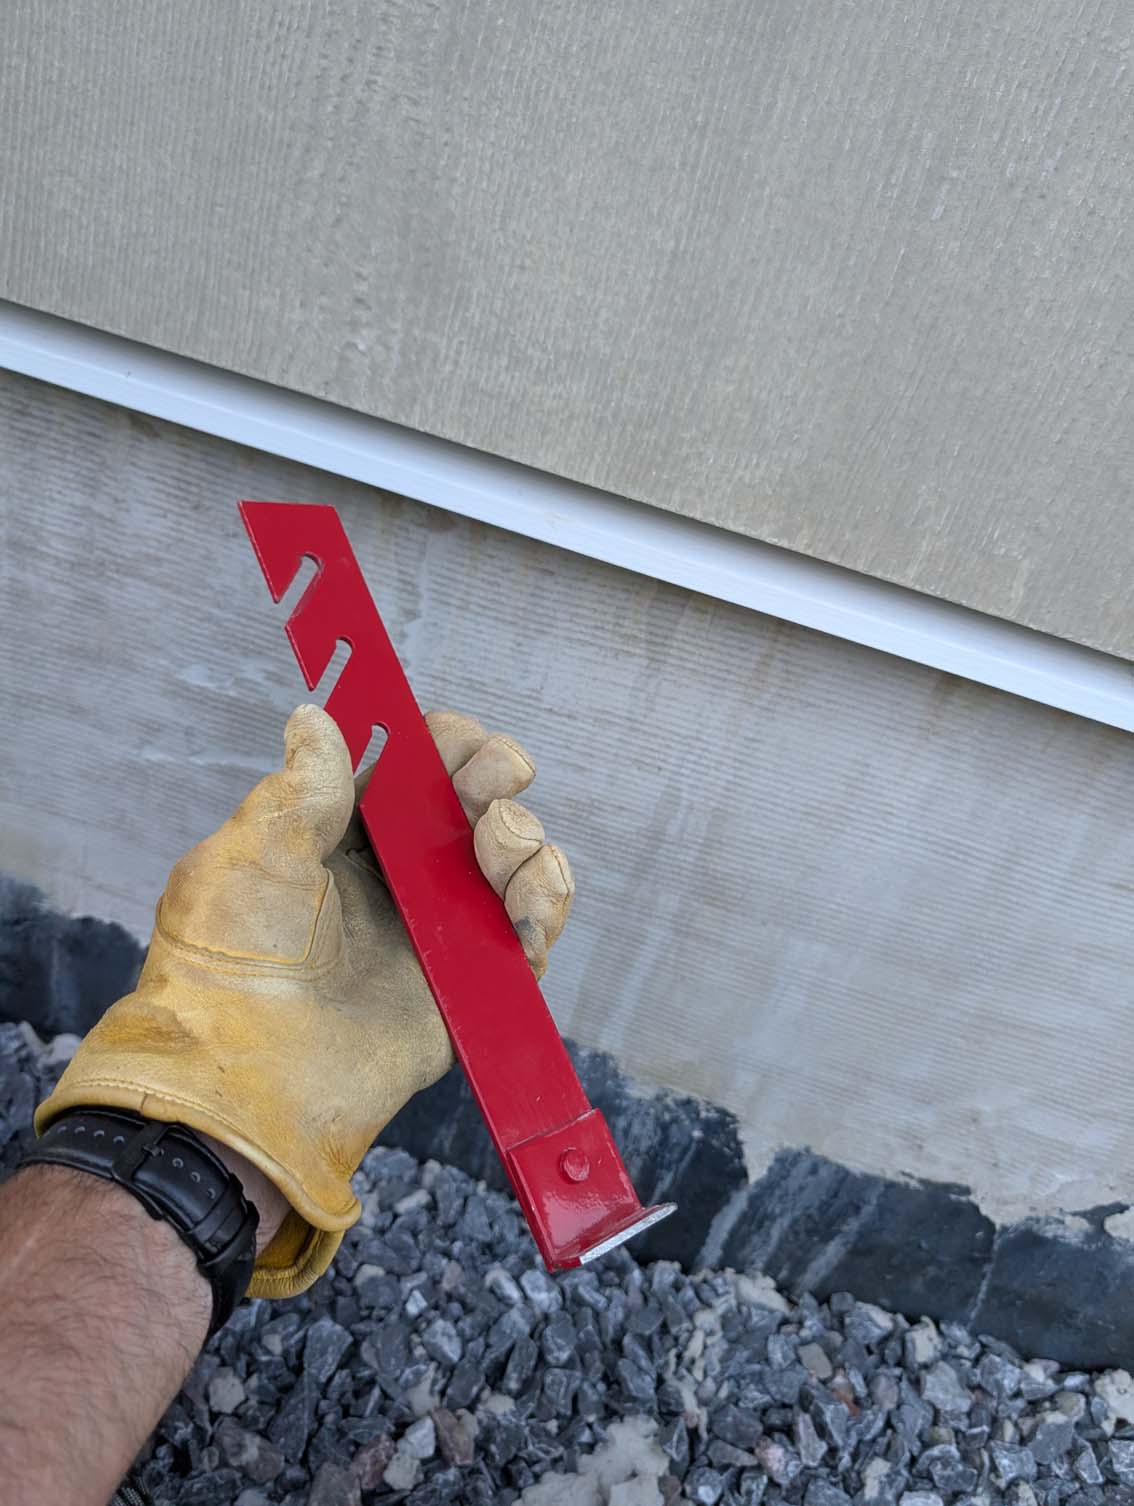
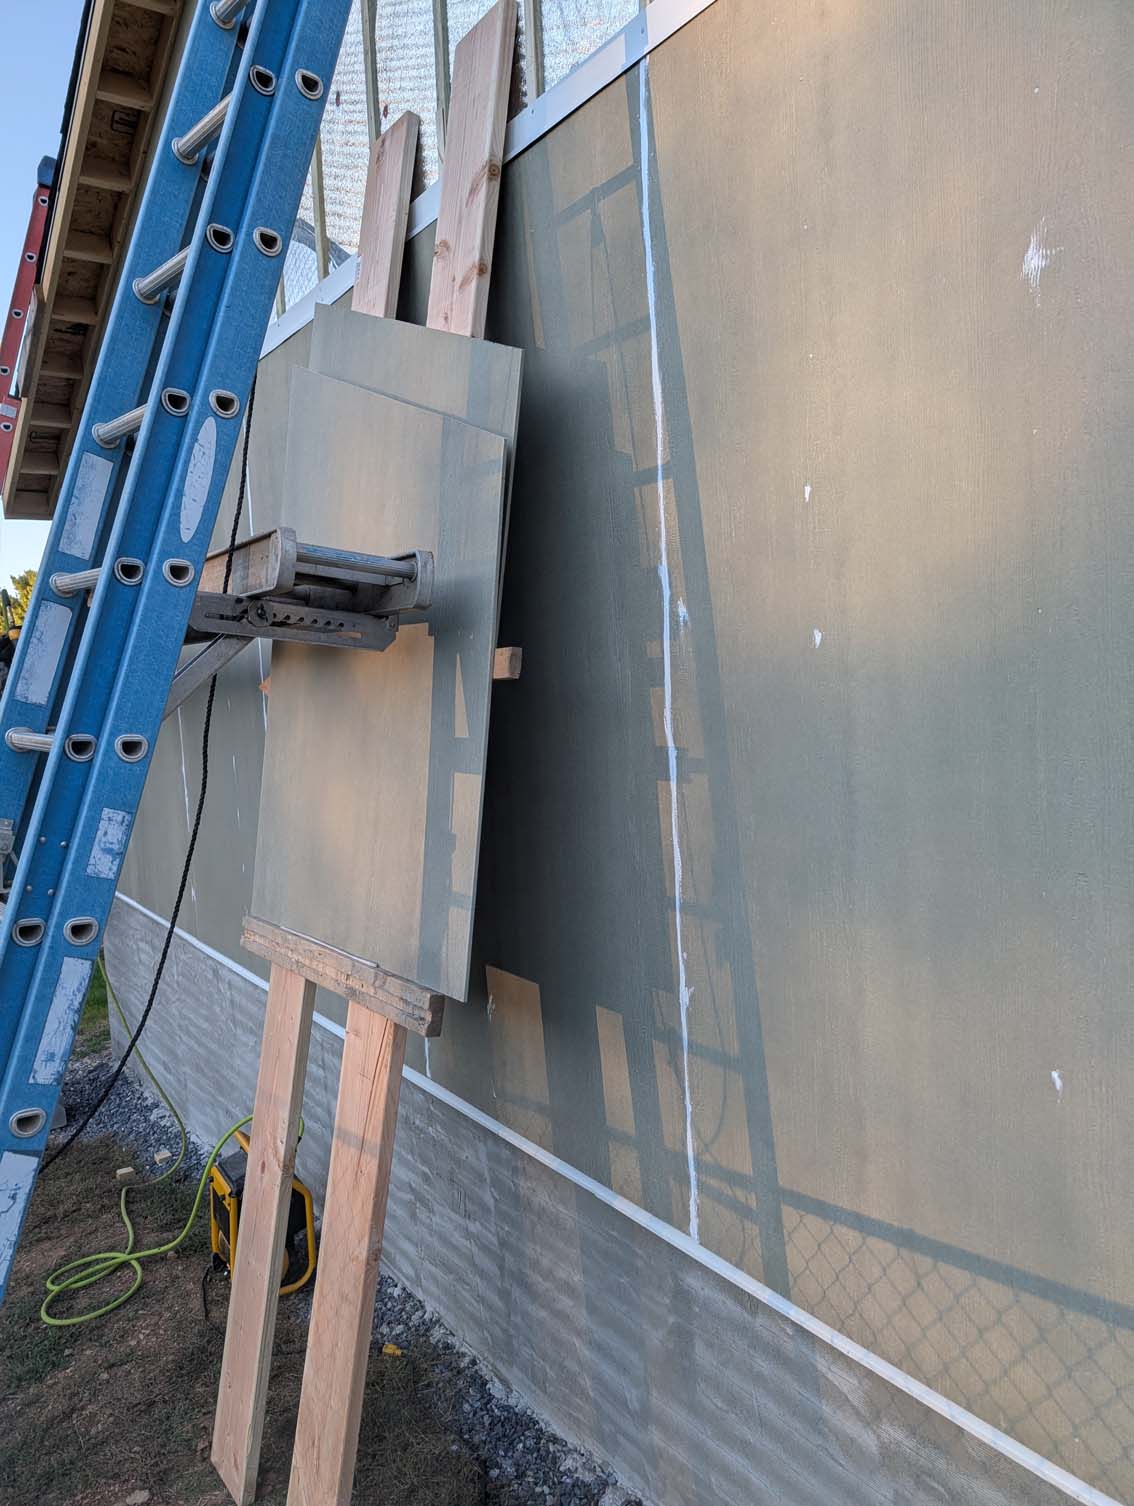
The method I came up with worked but was possibly less than safe. My solution involved a $10 roof bracket, cut down to be a low profile ledge with slotted hooks.
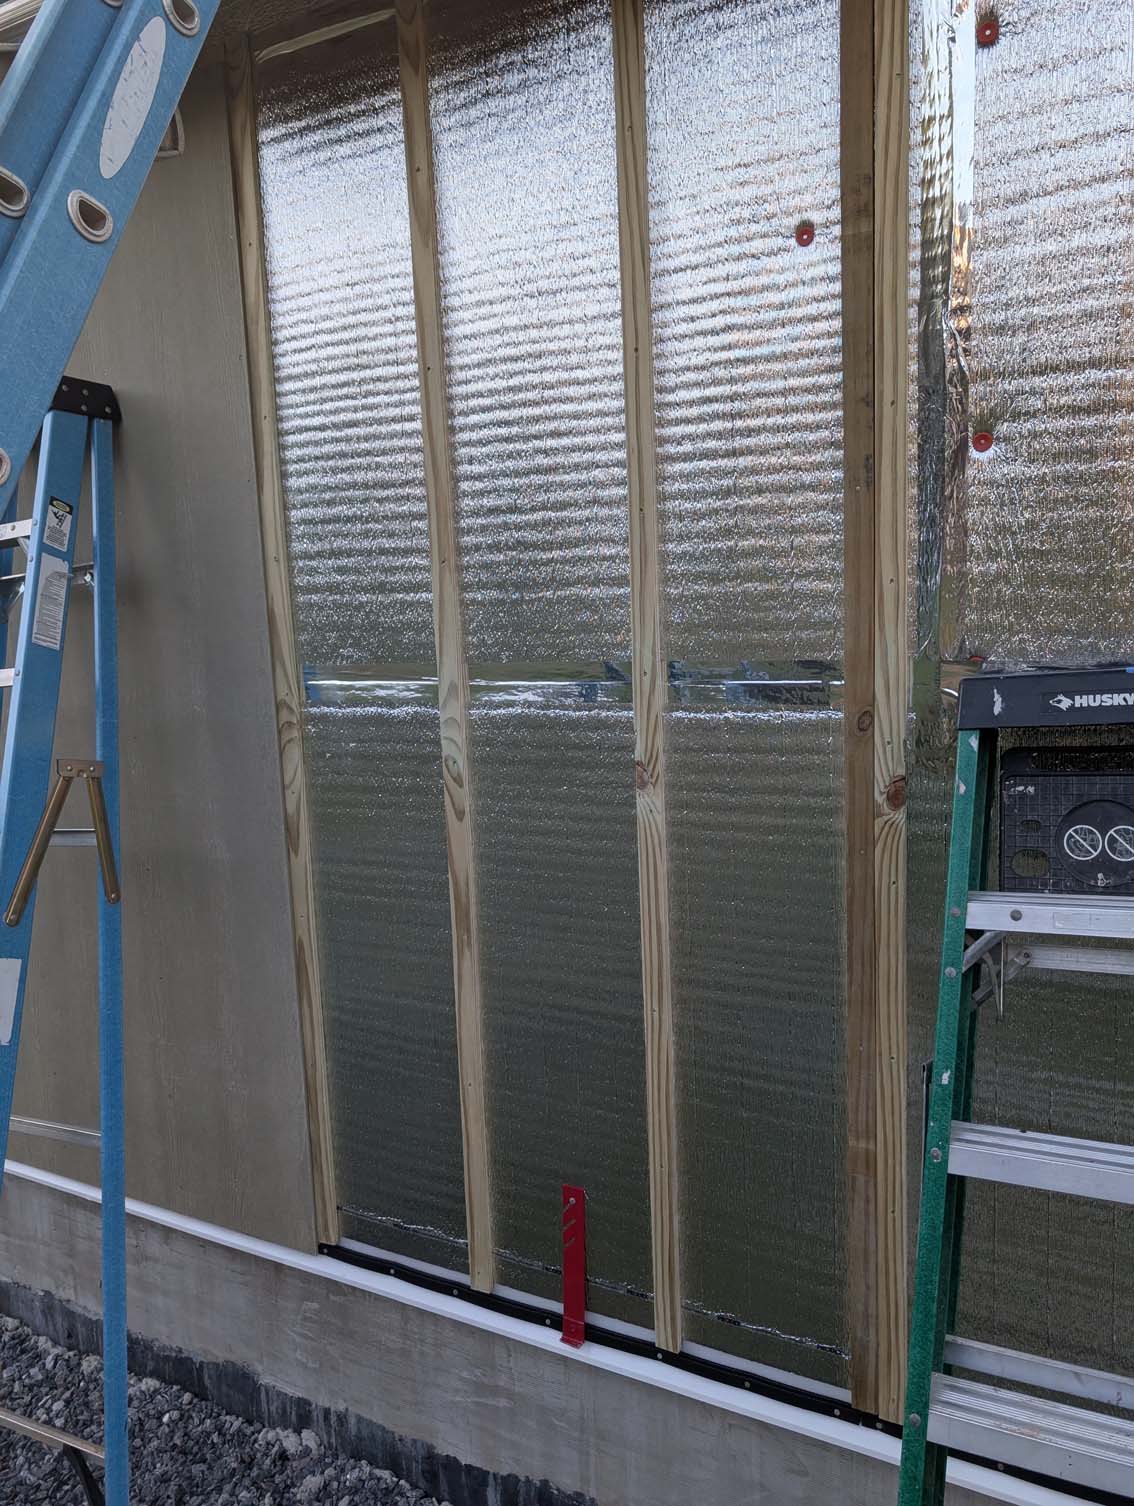
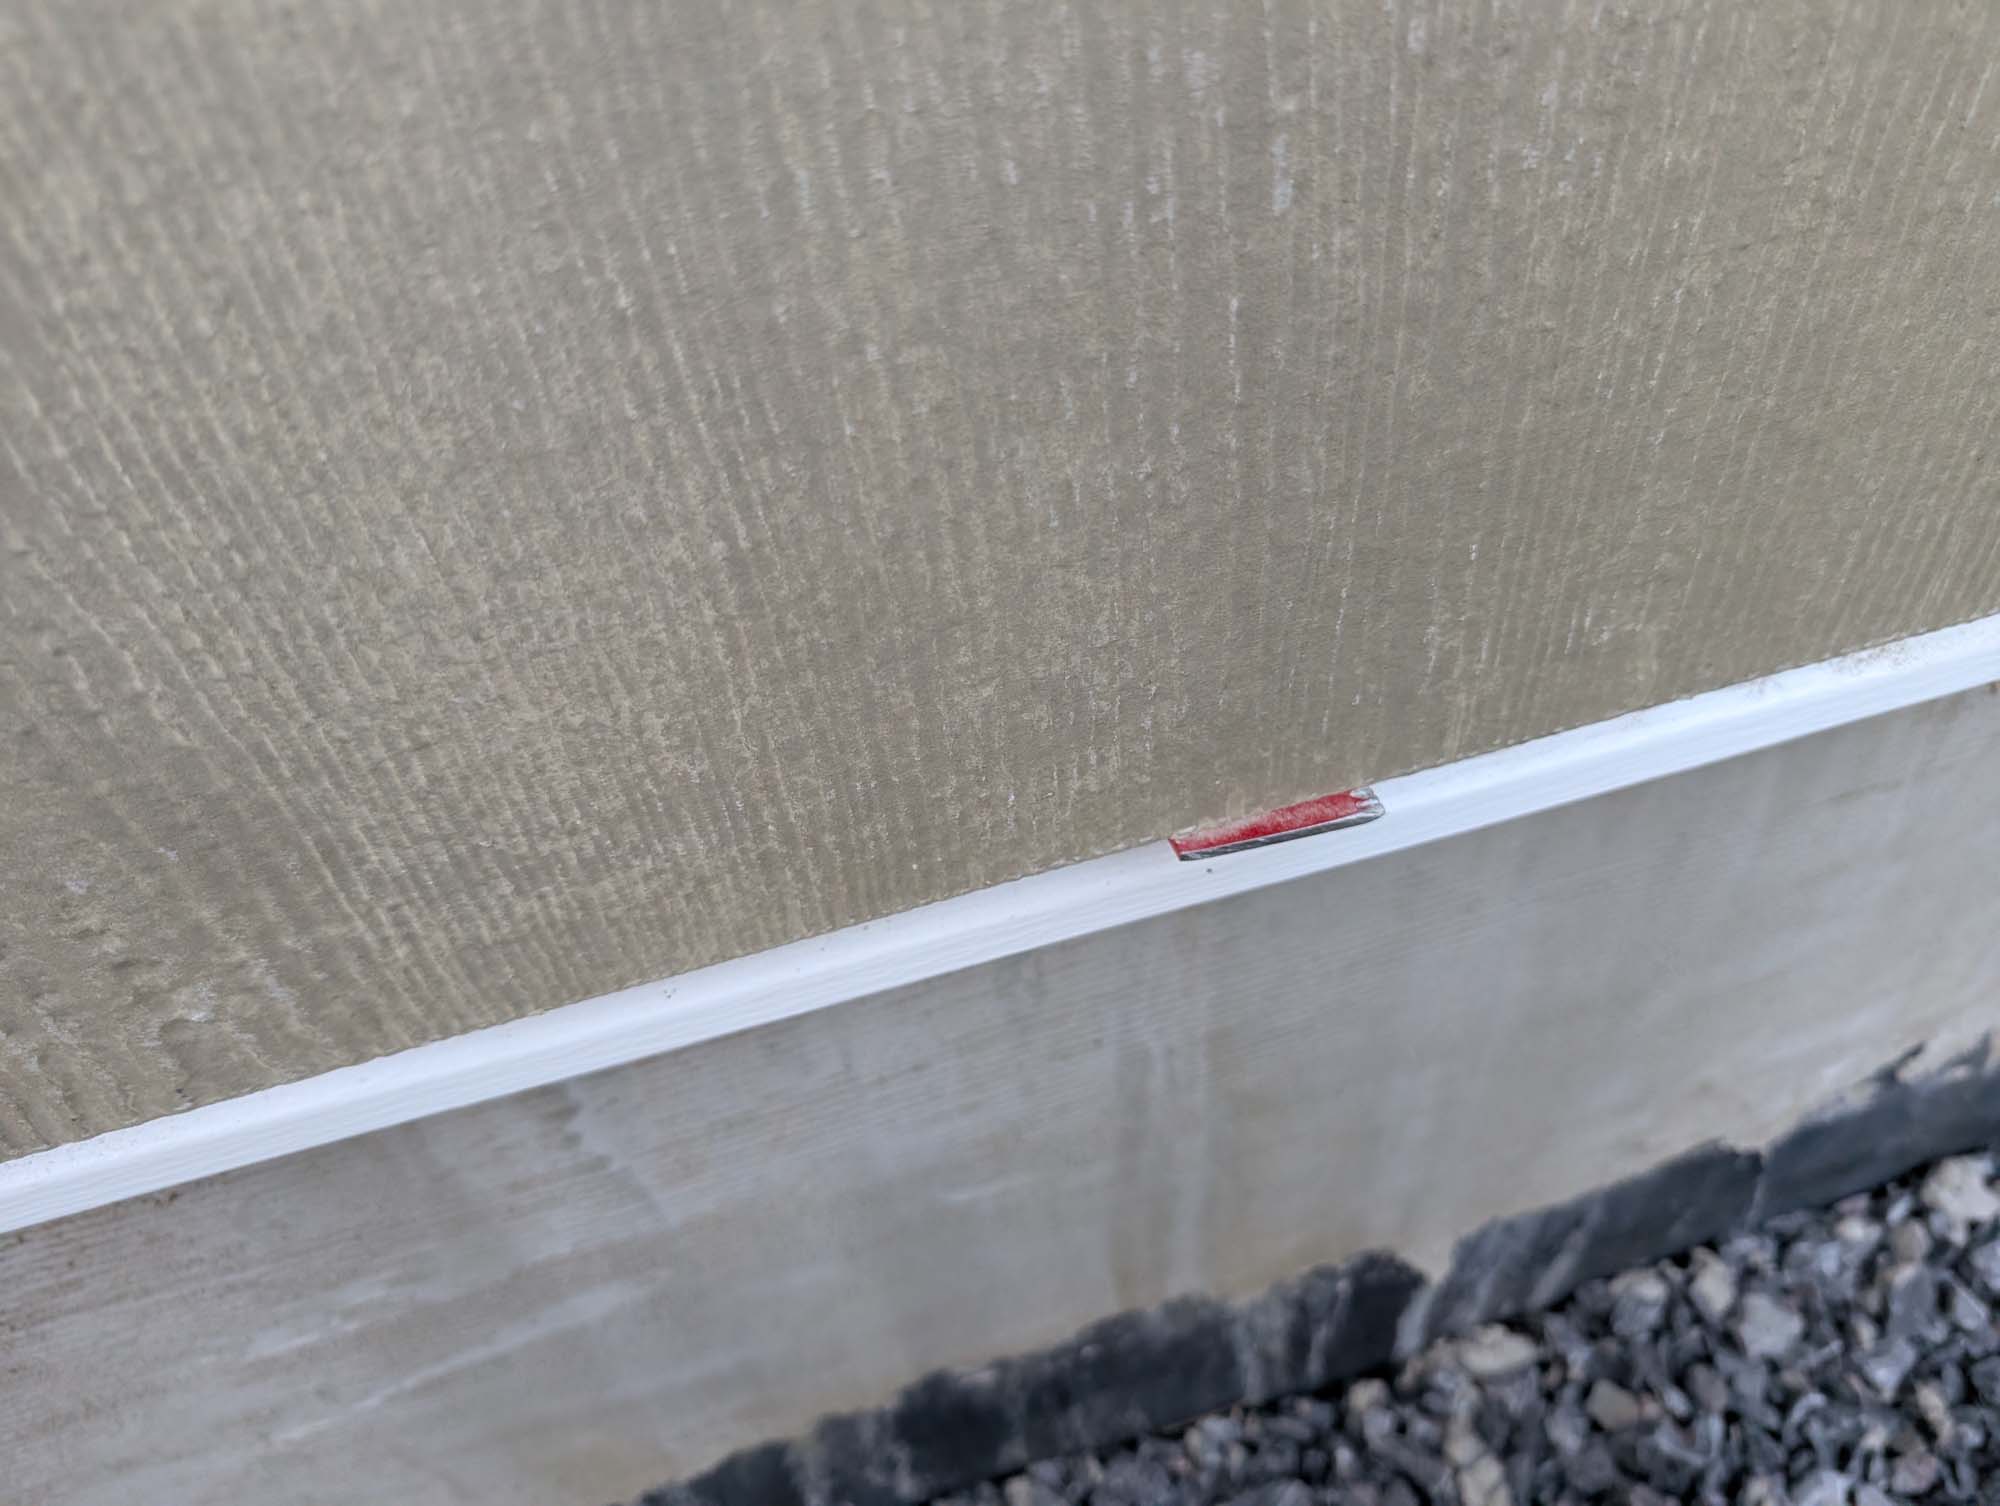
First I installed furring strips on all the walls, then added vented furring strips along the bottom to allow air and moisture to flow behind the cement board. Then I carefully measured up from the bottom and screwed in a 3/4″ long screw to hang the hook from.

I carefully rested the 80 pound cement sheet on the hook and set the sheet in place, then nailed on the top half of the cement board. Now I can peel away the bottom half of the cement board and carefully remove the hook, leaving the screw behind. The screw was short enough that it did not poke through the OSB. Occasionally the screw broke loose and caused the sheet to drop, but the damage was minimal and the technique was effective enough that I could install all 36 sheets by myself. (Don’t get me wrong, it sucked but it got done)
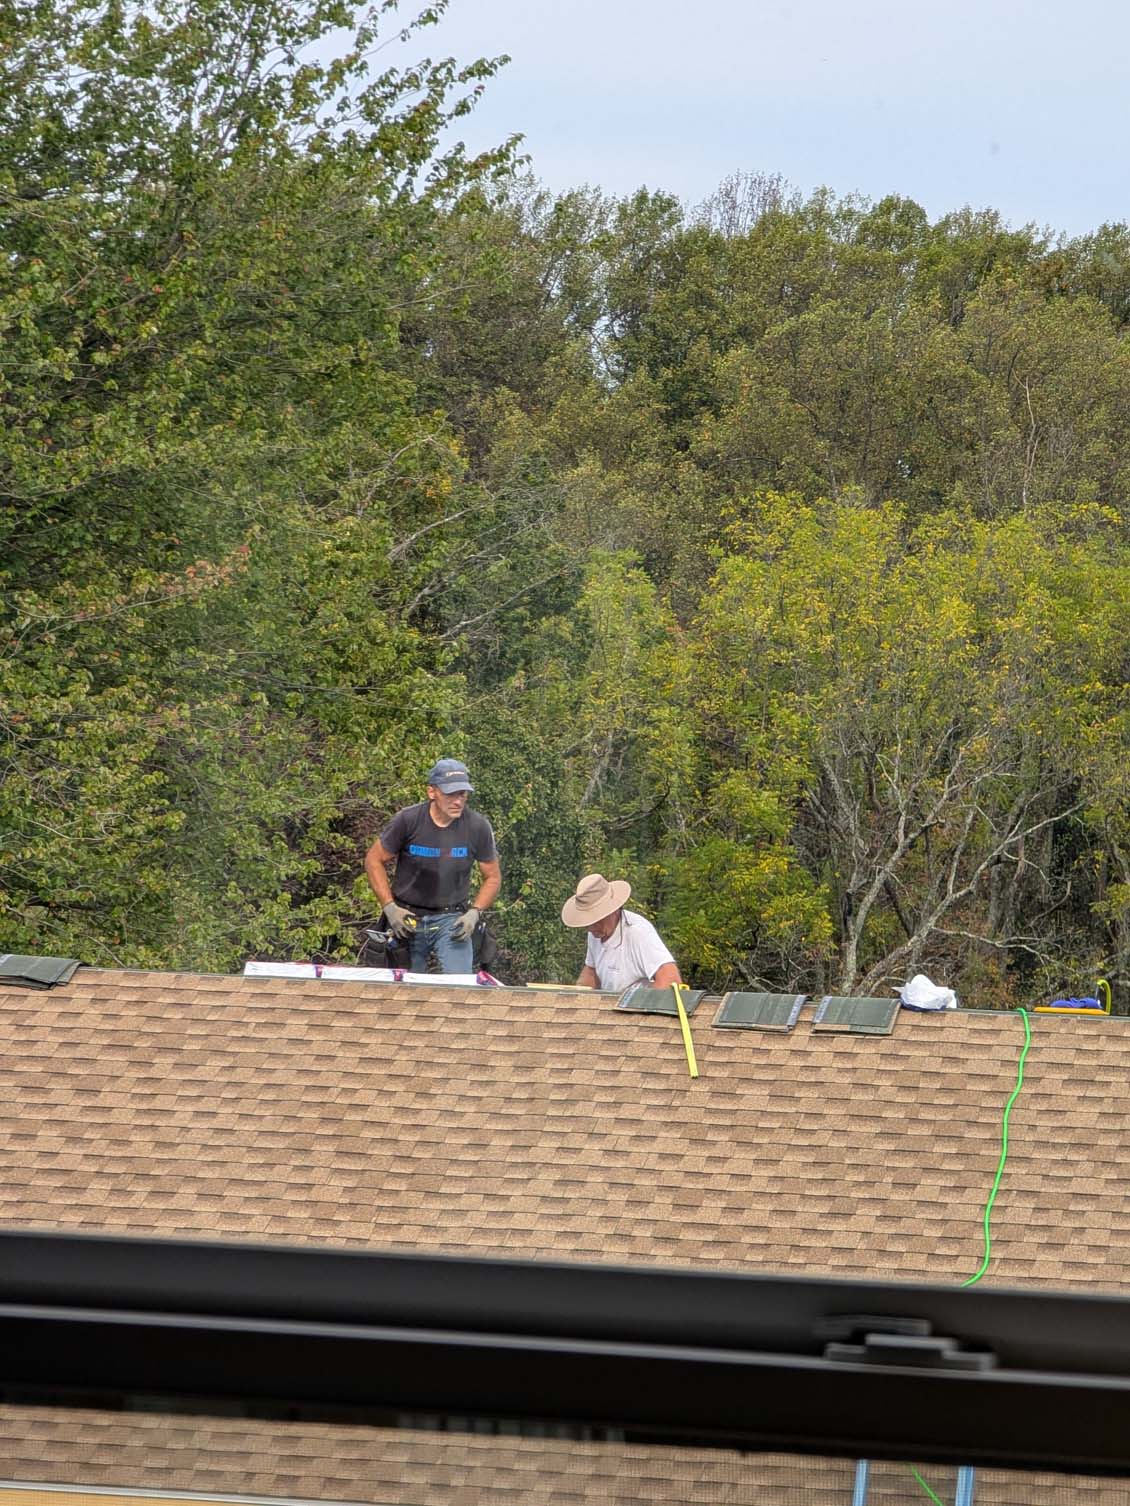
My good friend Don popped over to help me install the shingles. 36 packs (1,100 sq. ft) took us two half days. We didn’t push ourselves too hard, and it went smooth with no problems. Thanks Don!
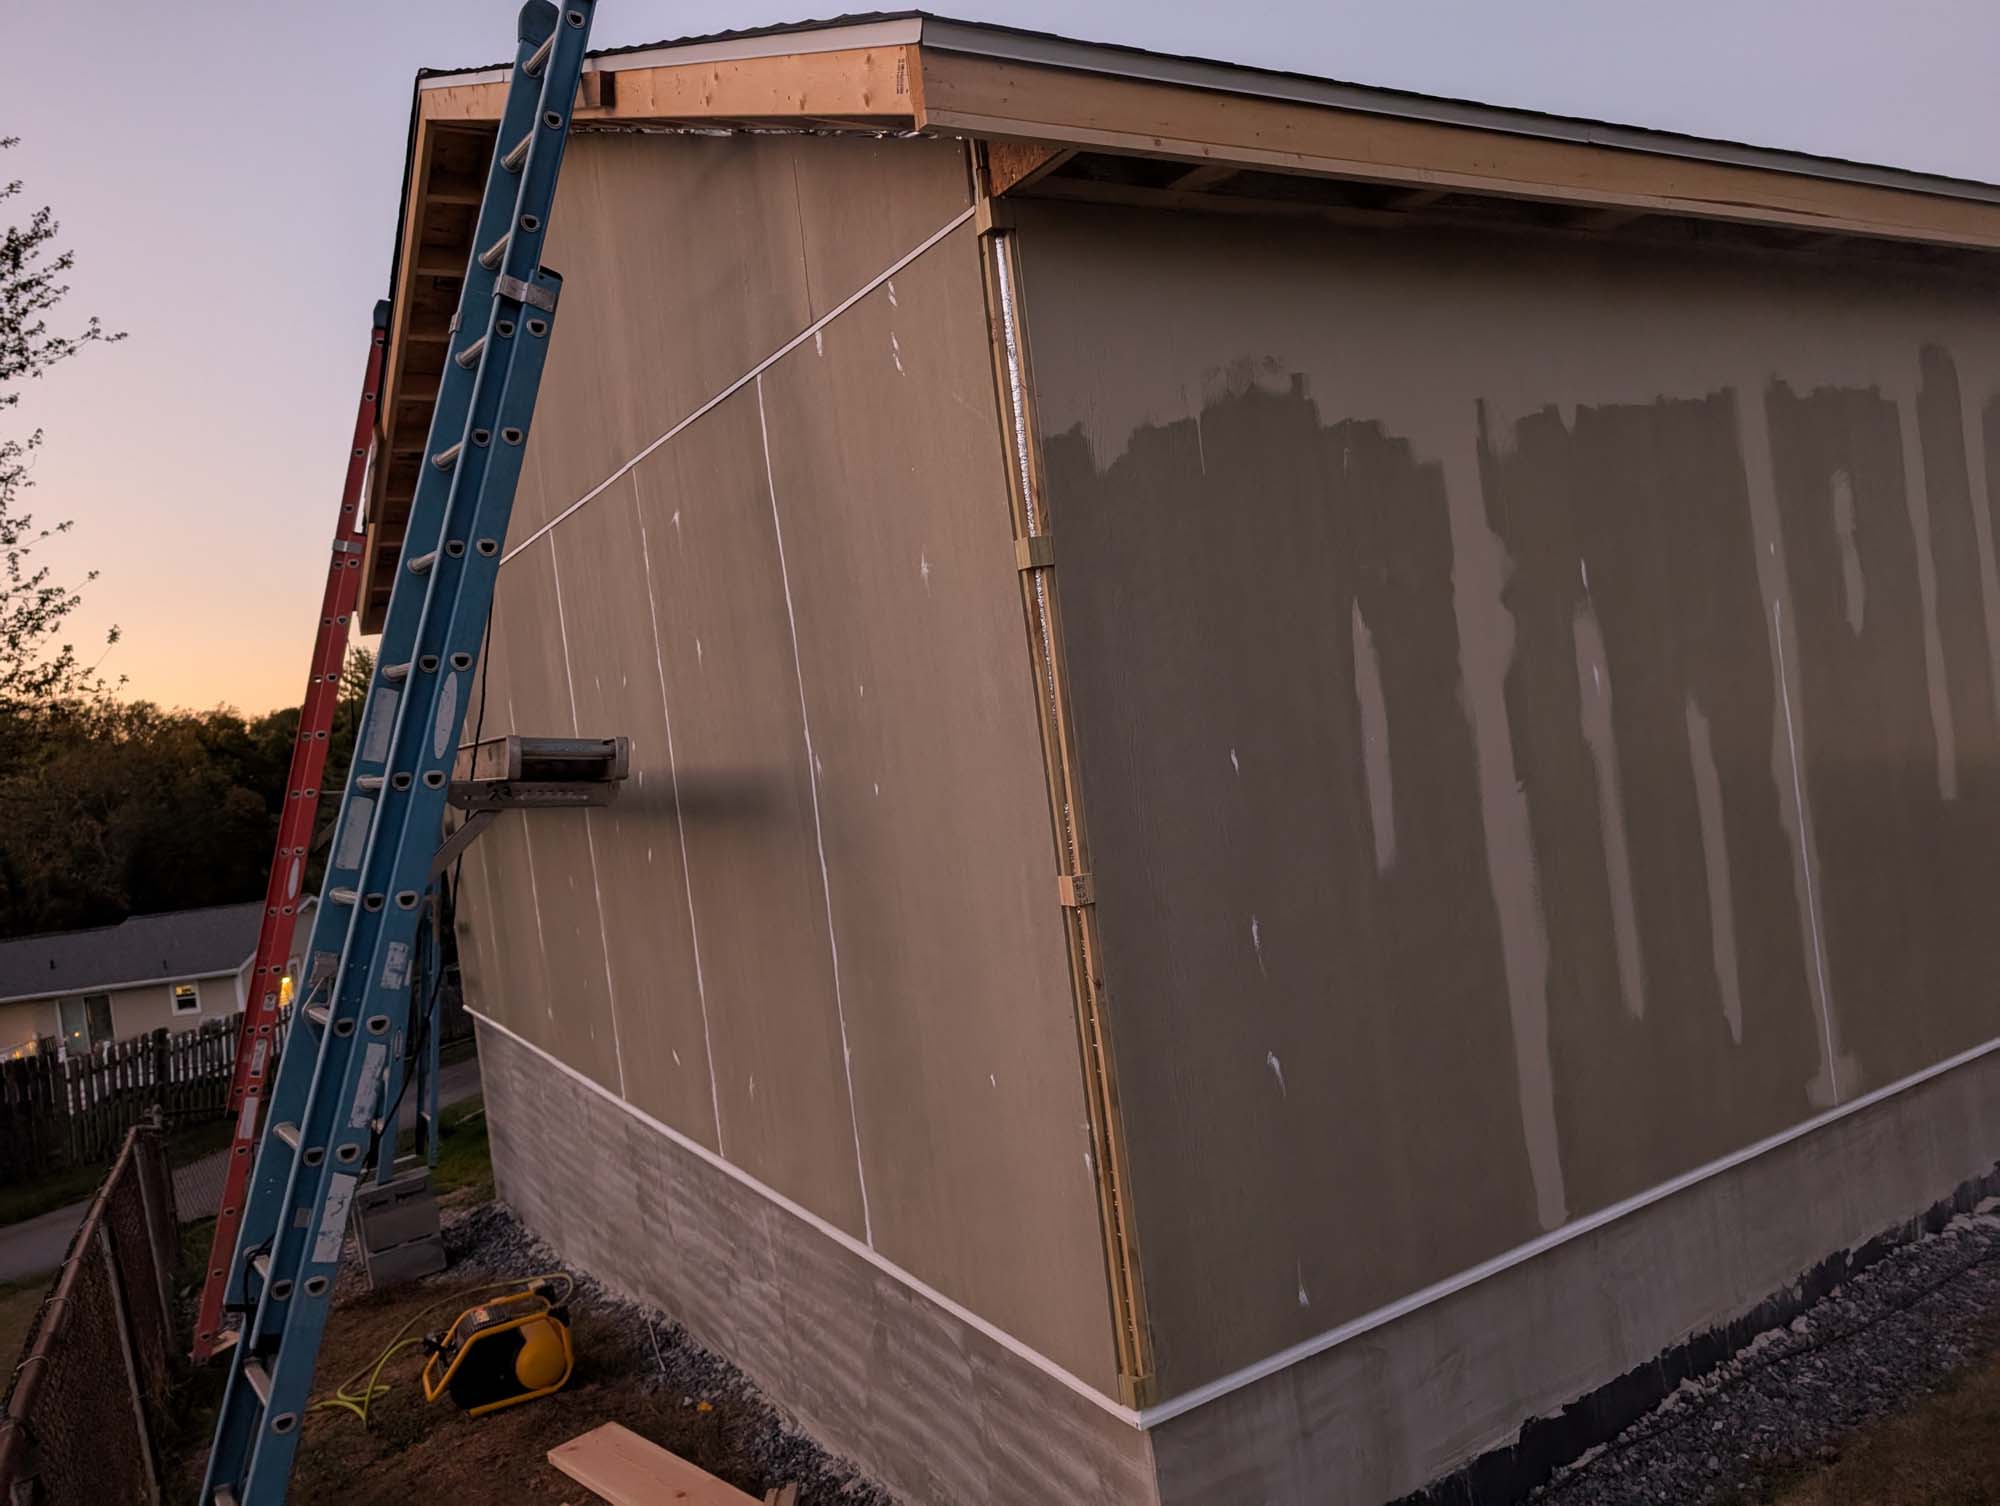
Then it was back to installing siding for me. I caulked all the seams and any sunken nail heads just to smooth it out for painting.


I also started adding trim and soffit as I went. The soffit butts against the siding allowing air to flow up from the bottom behind the siding all the way up to the ridge vent on the roof. This will help prevent moisture from collecting behind the siding of condensation from forming within the building, theoretically…


The walls were heavy and difficult but the gables were harder.
I built a ladder-like construction to set the big pieces on so that I could climb up to the walk board and pull them up to install.
I got there eventually, and started painting the siding as I went so I could also attach the trim.


Its starting to look nice. Perhaps a bit larger than my wife thought it would be though…

And, I was almost done when I thought to order doors, not realizing the 4-6 week wait for doors at the local big box store.

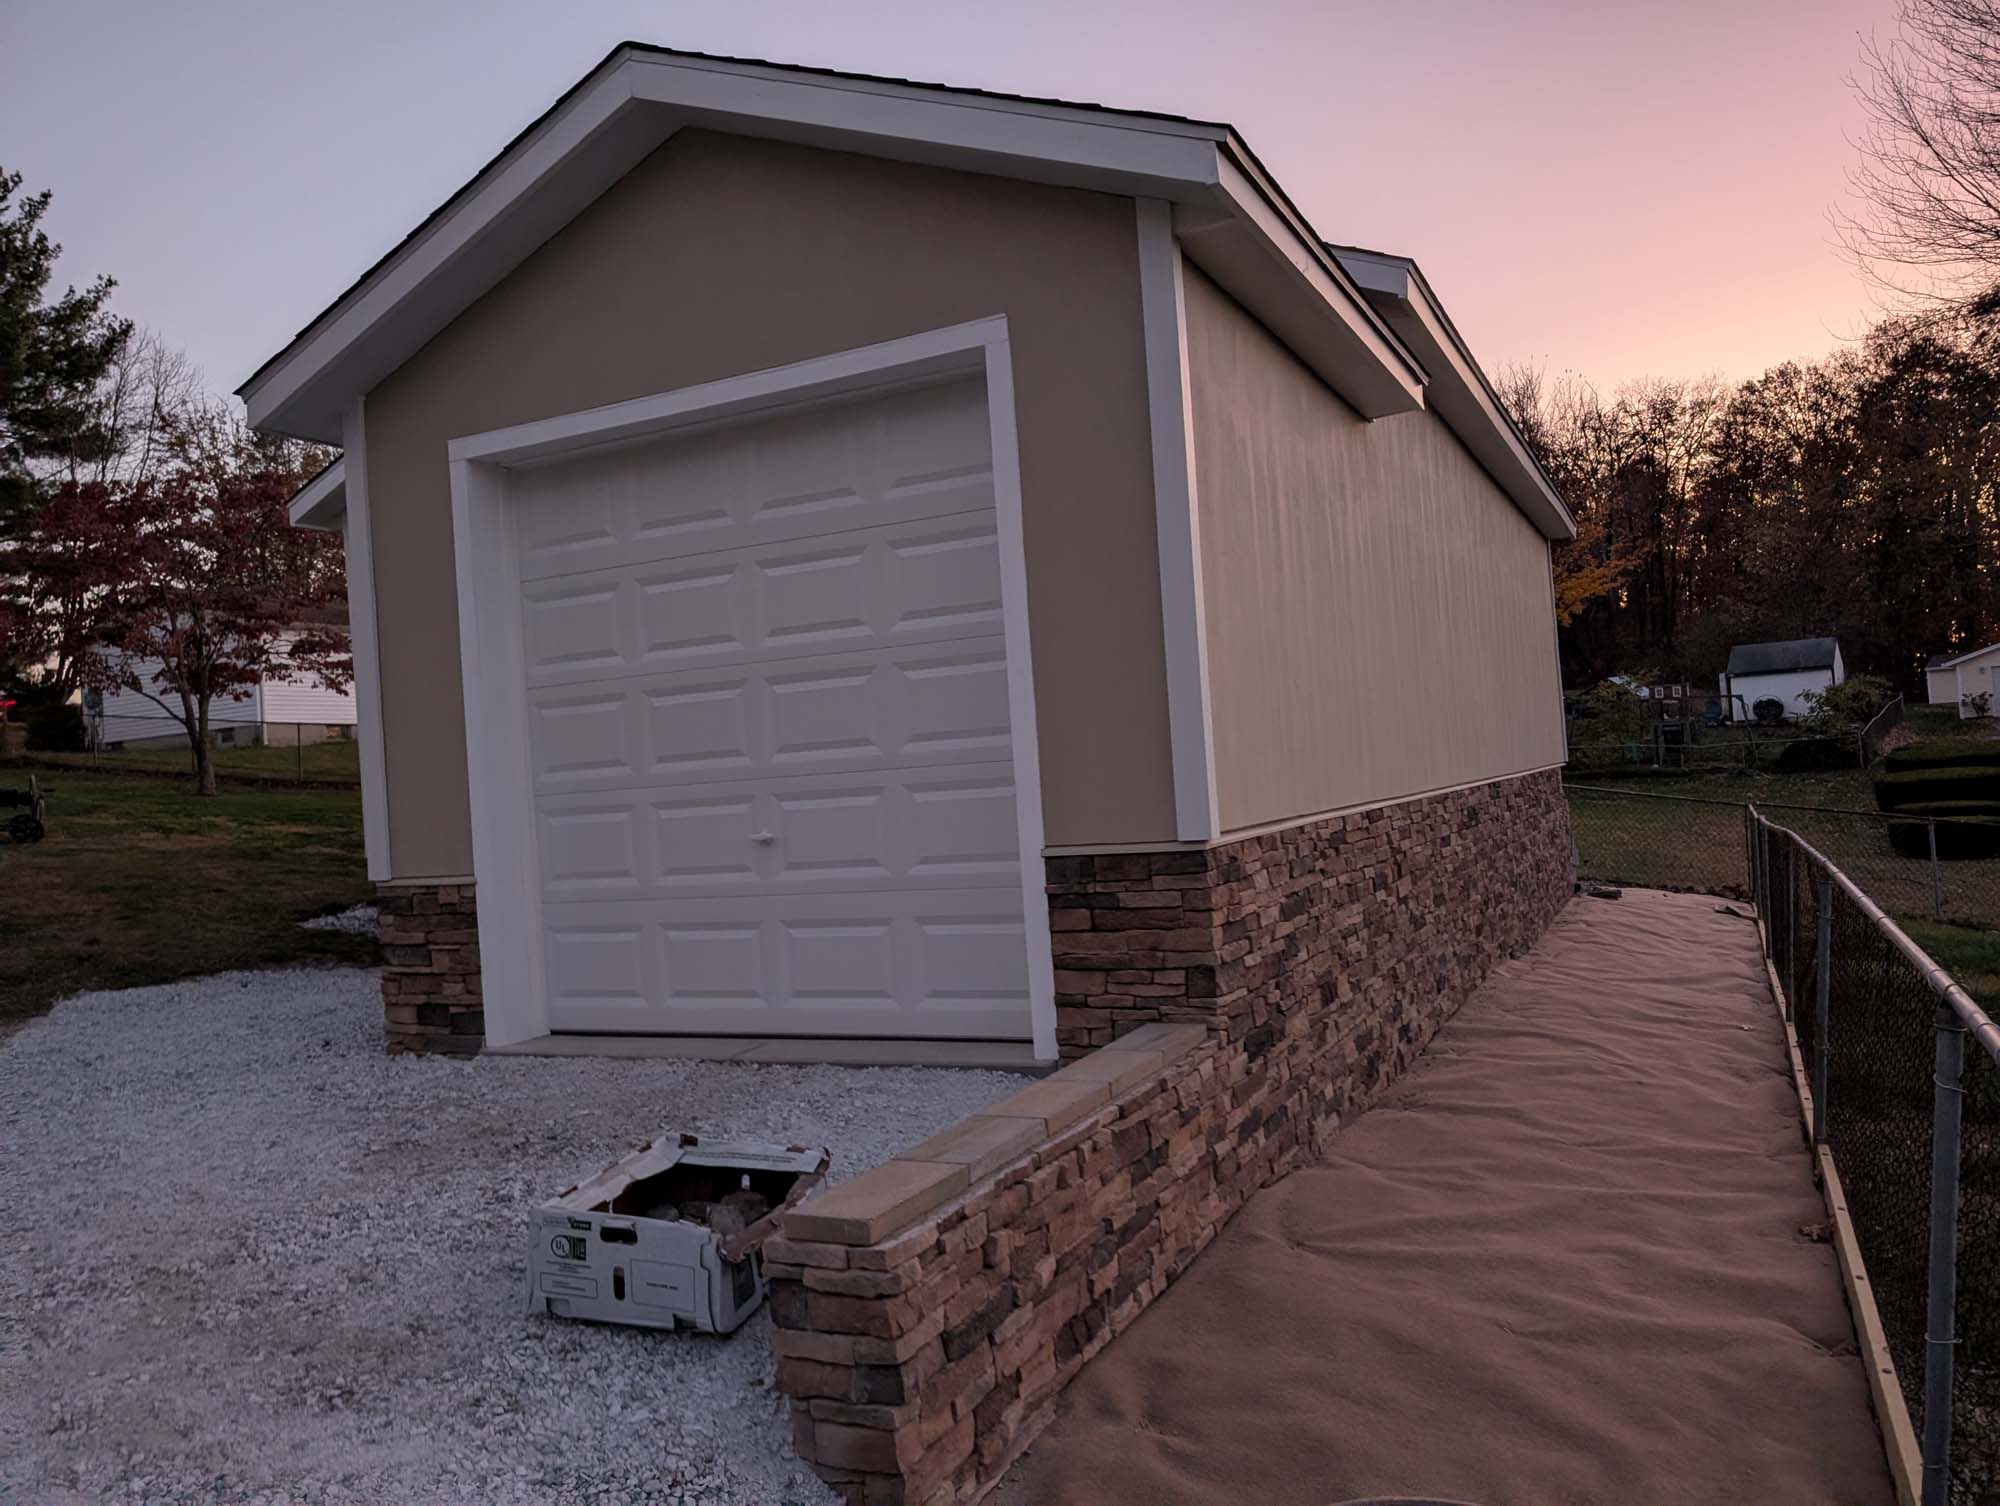
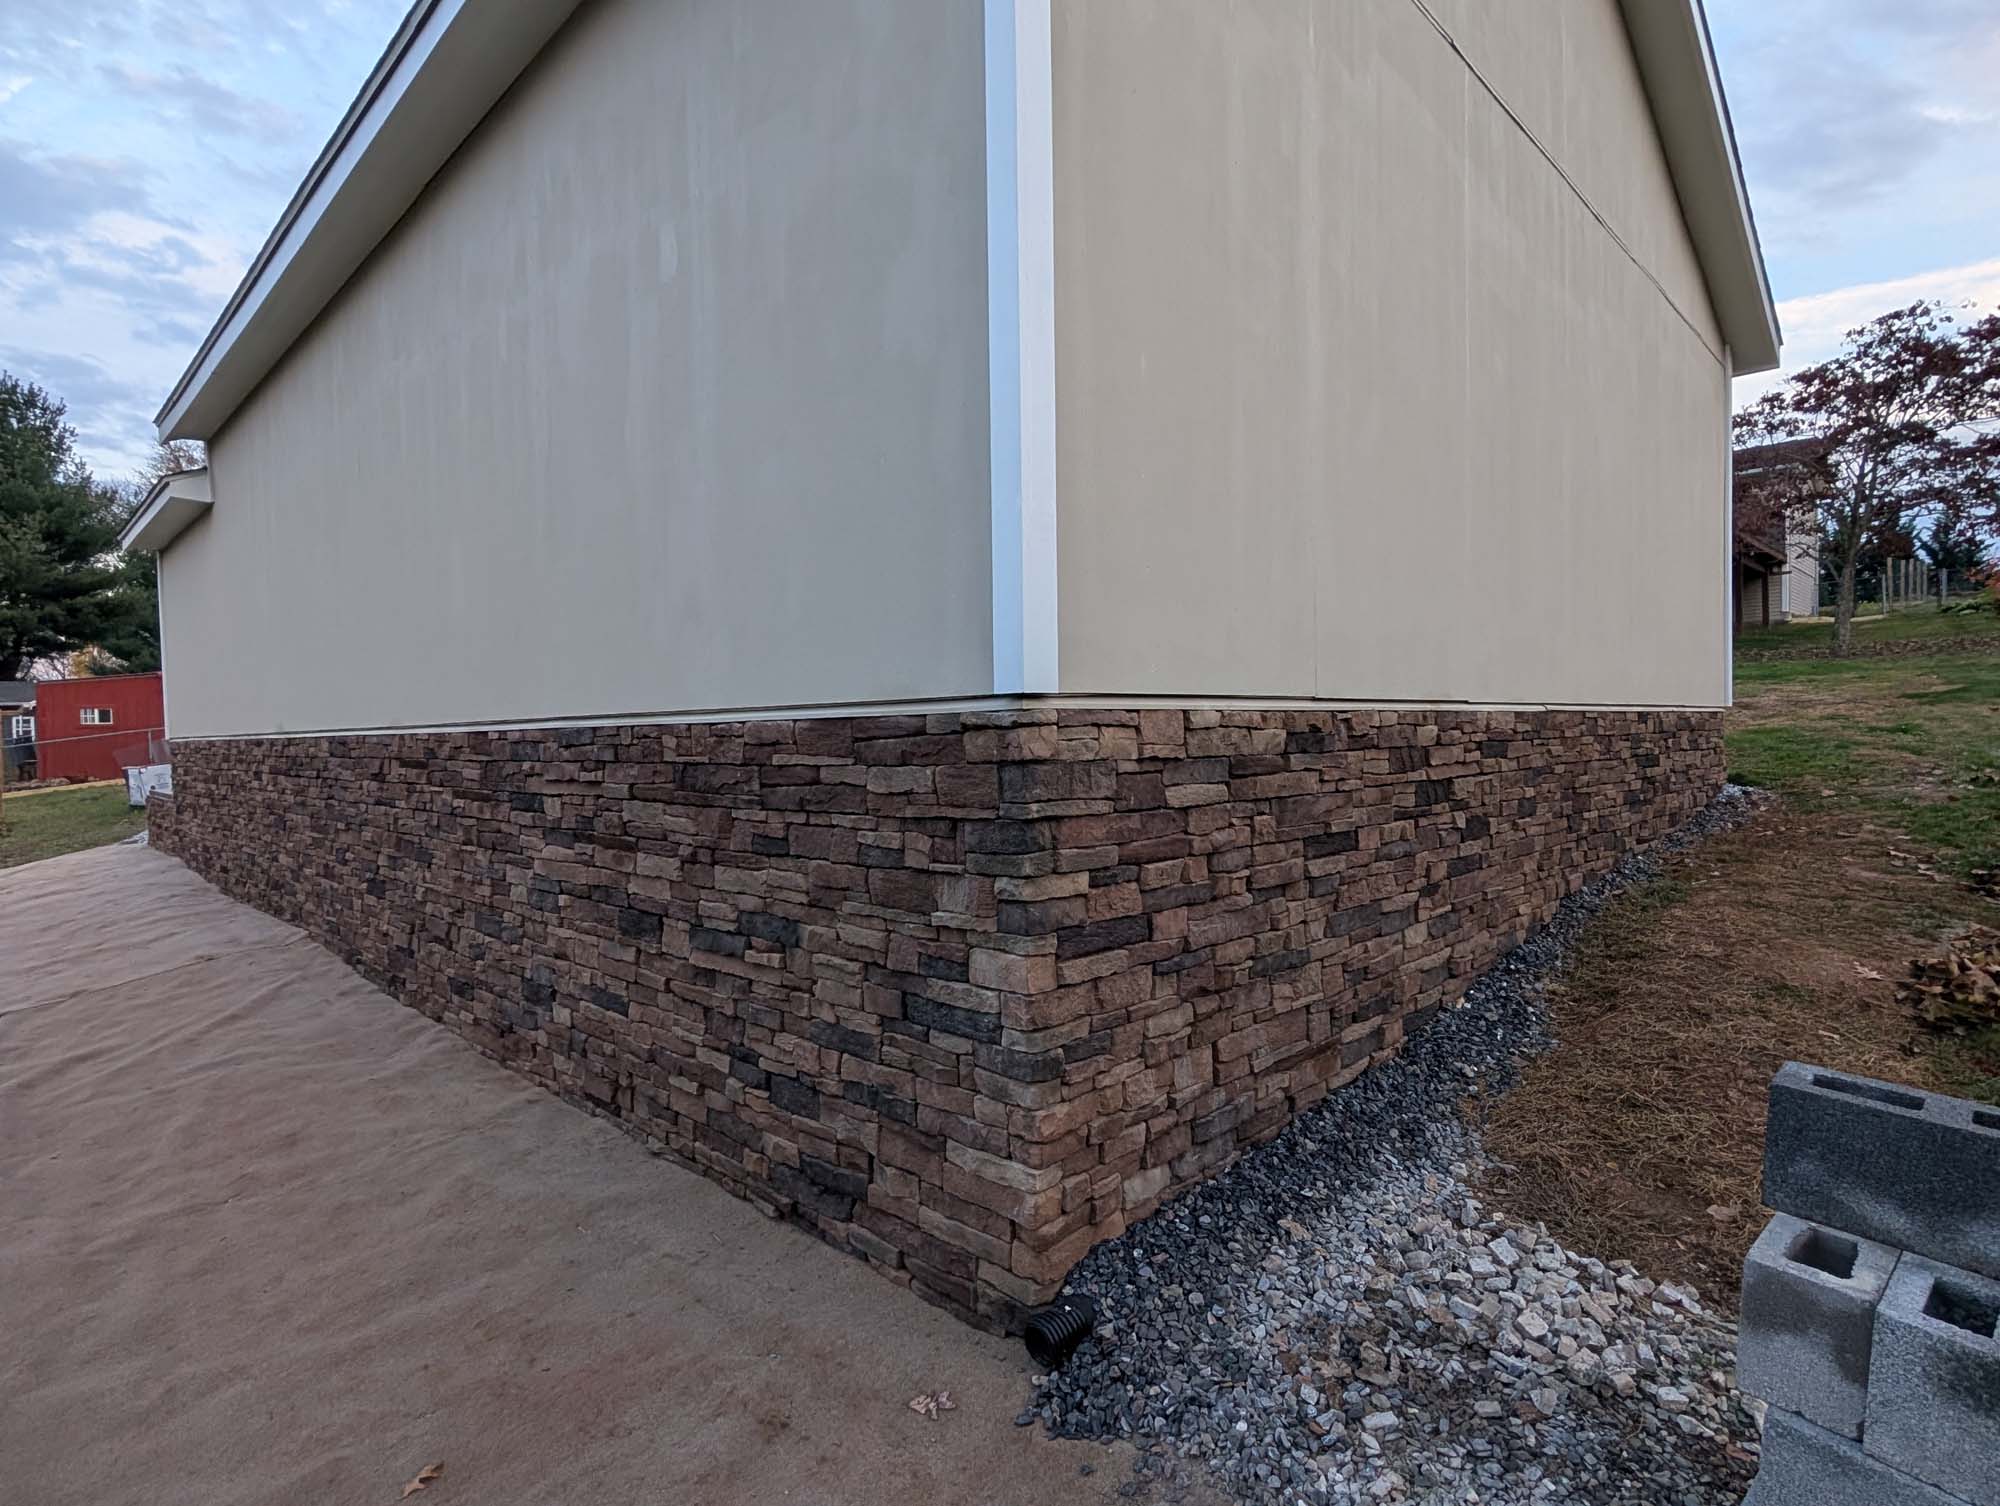
So I started attaching the Eldorado stone.
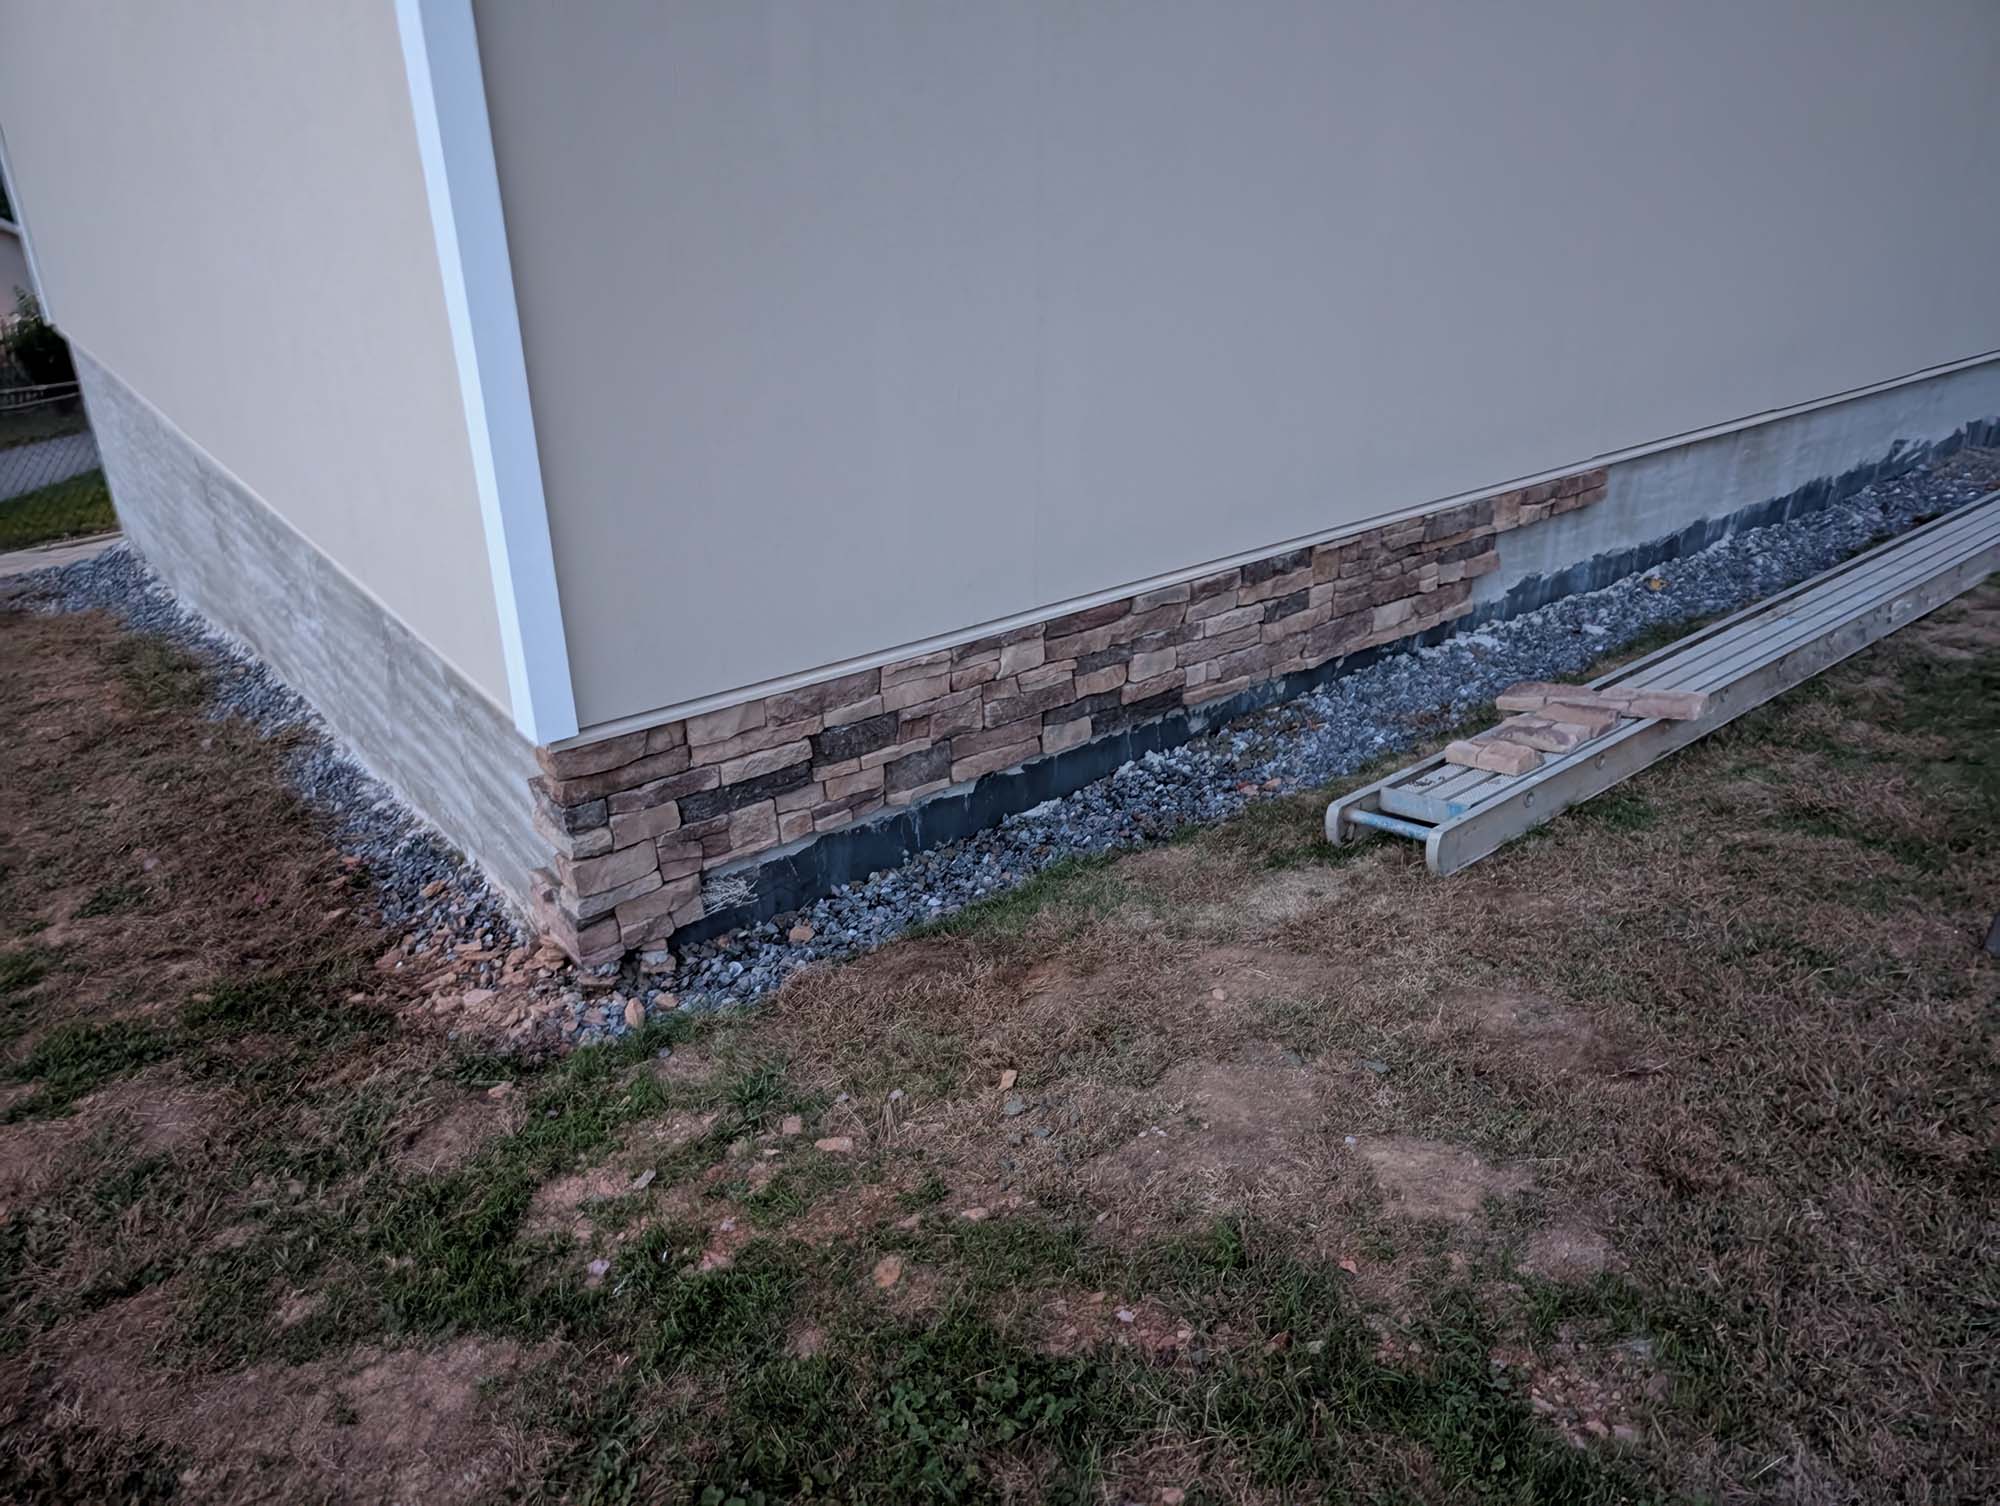
Of course the water-proofing tar was too high on the front so I had to find a grinding wheel that could remove it so that my stone would stick on the front. That only took a few hours of sitting on the wet ground getting covered in stone dust…

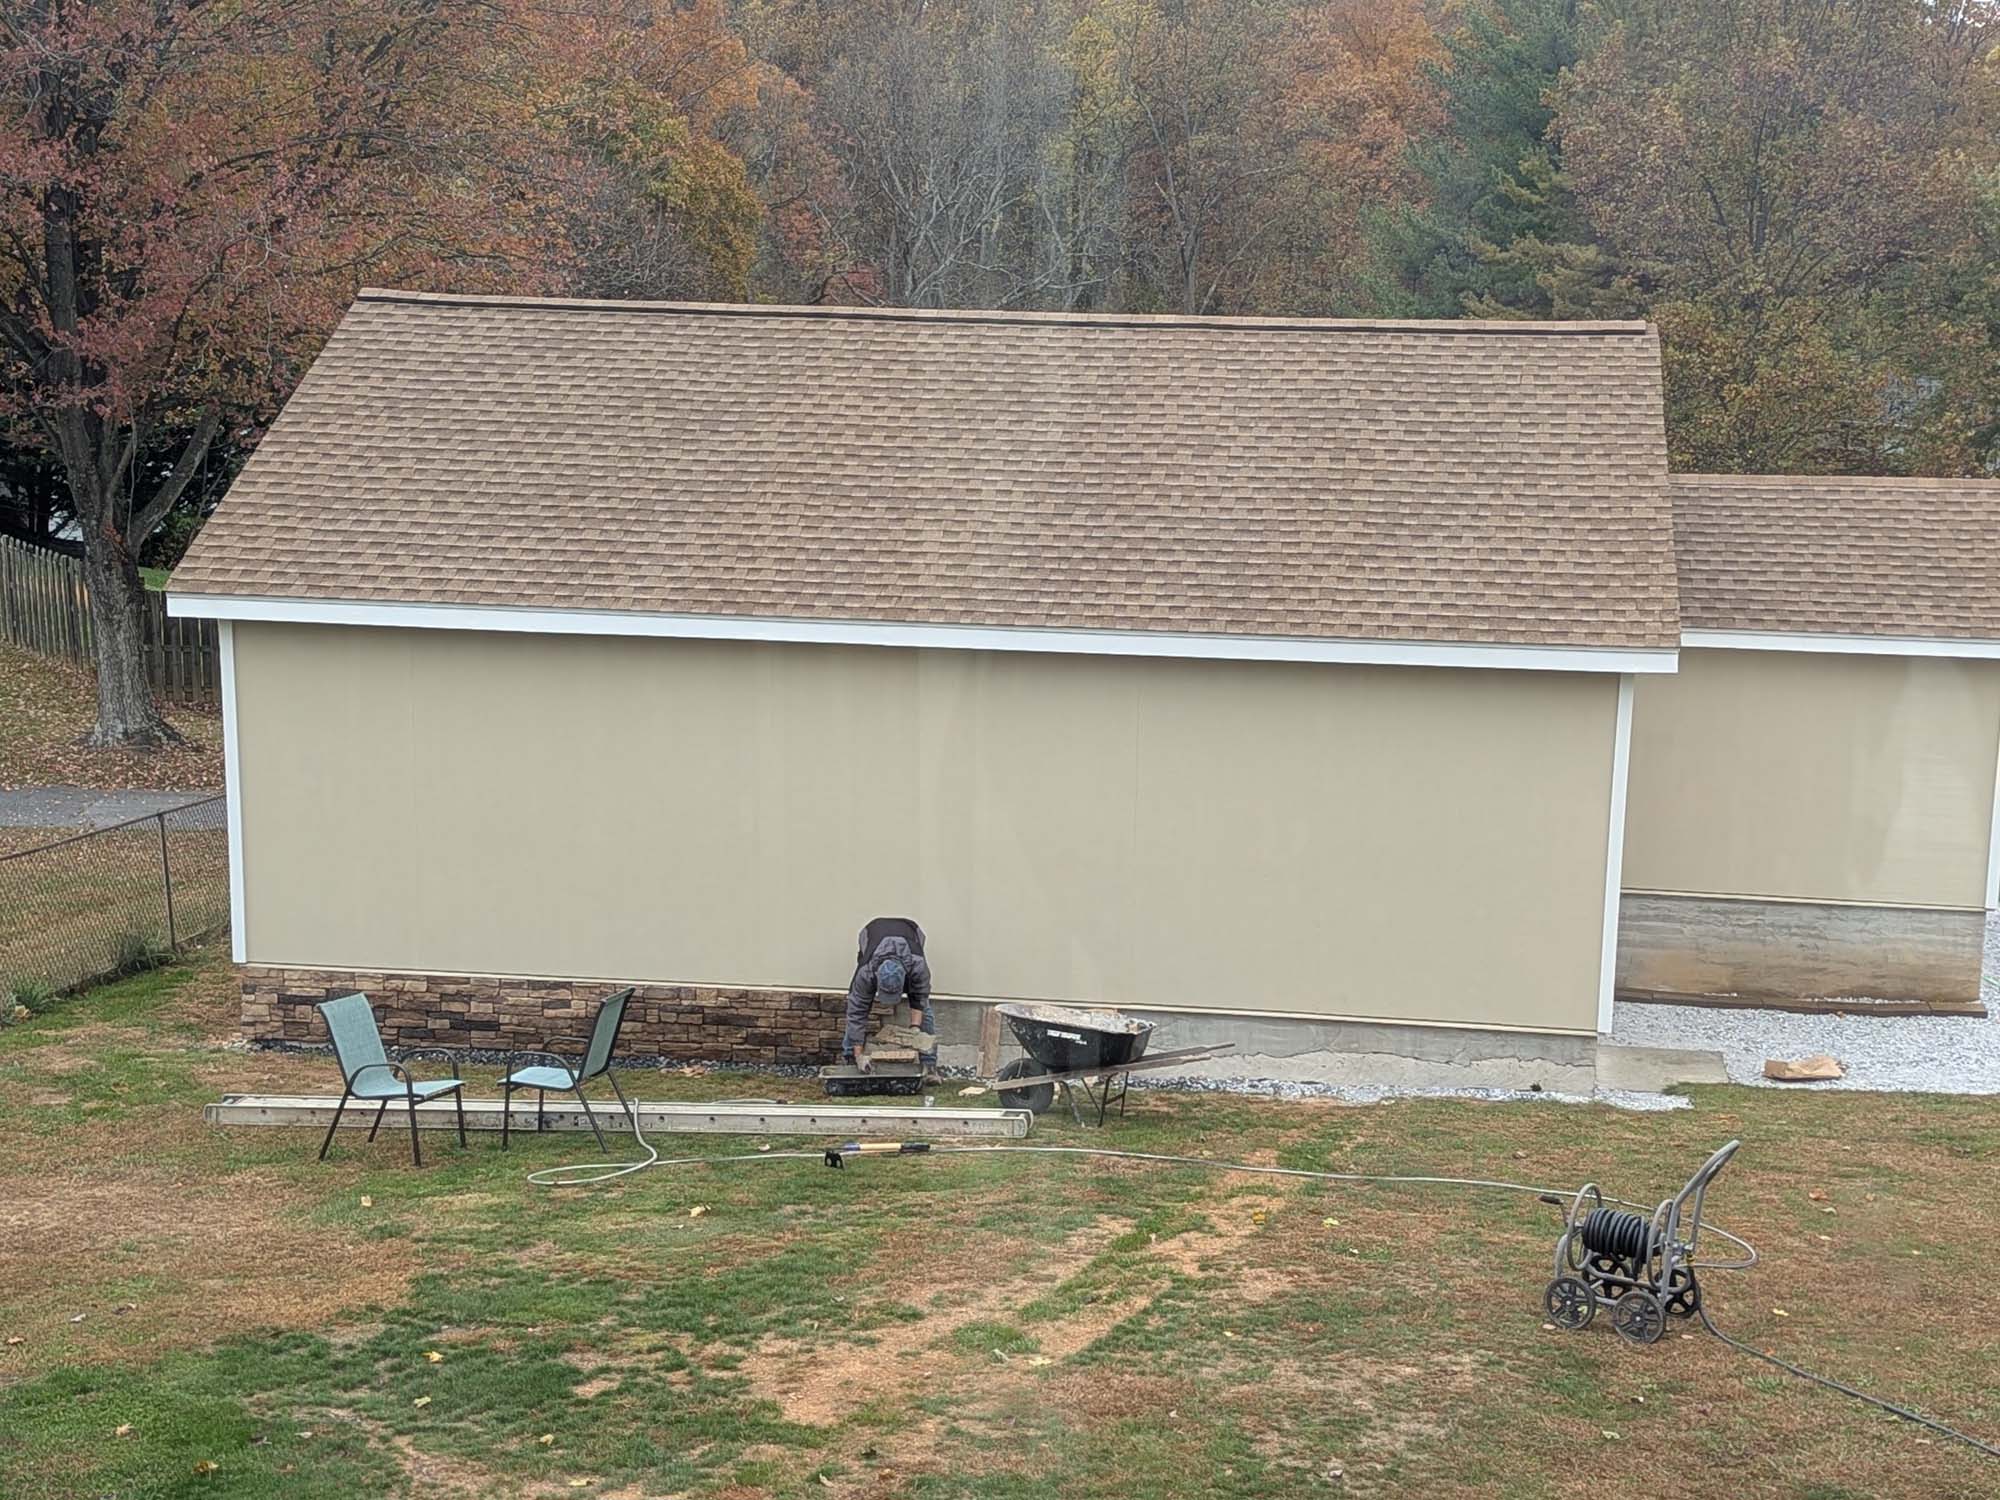
But eventually I got rolling. I started trying to attach the stone at the top and working down but I had to hold it in place too long. Eventually I gave up and started working from the ground, up. It was easier on this front section where there were only a few rows, but everywhere else, I had to calculate and snap chalk lines to get close to a full piece at the top. As my old friend Rocky always said “Everything is an F***ing project!”

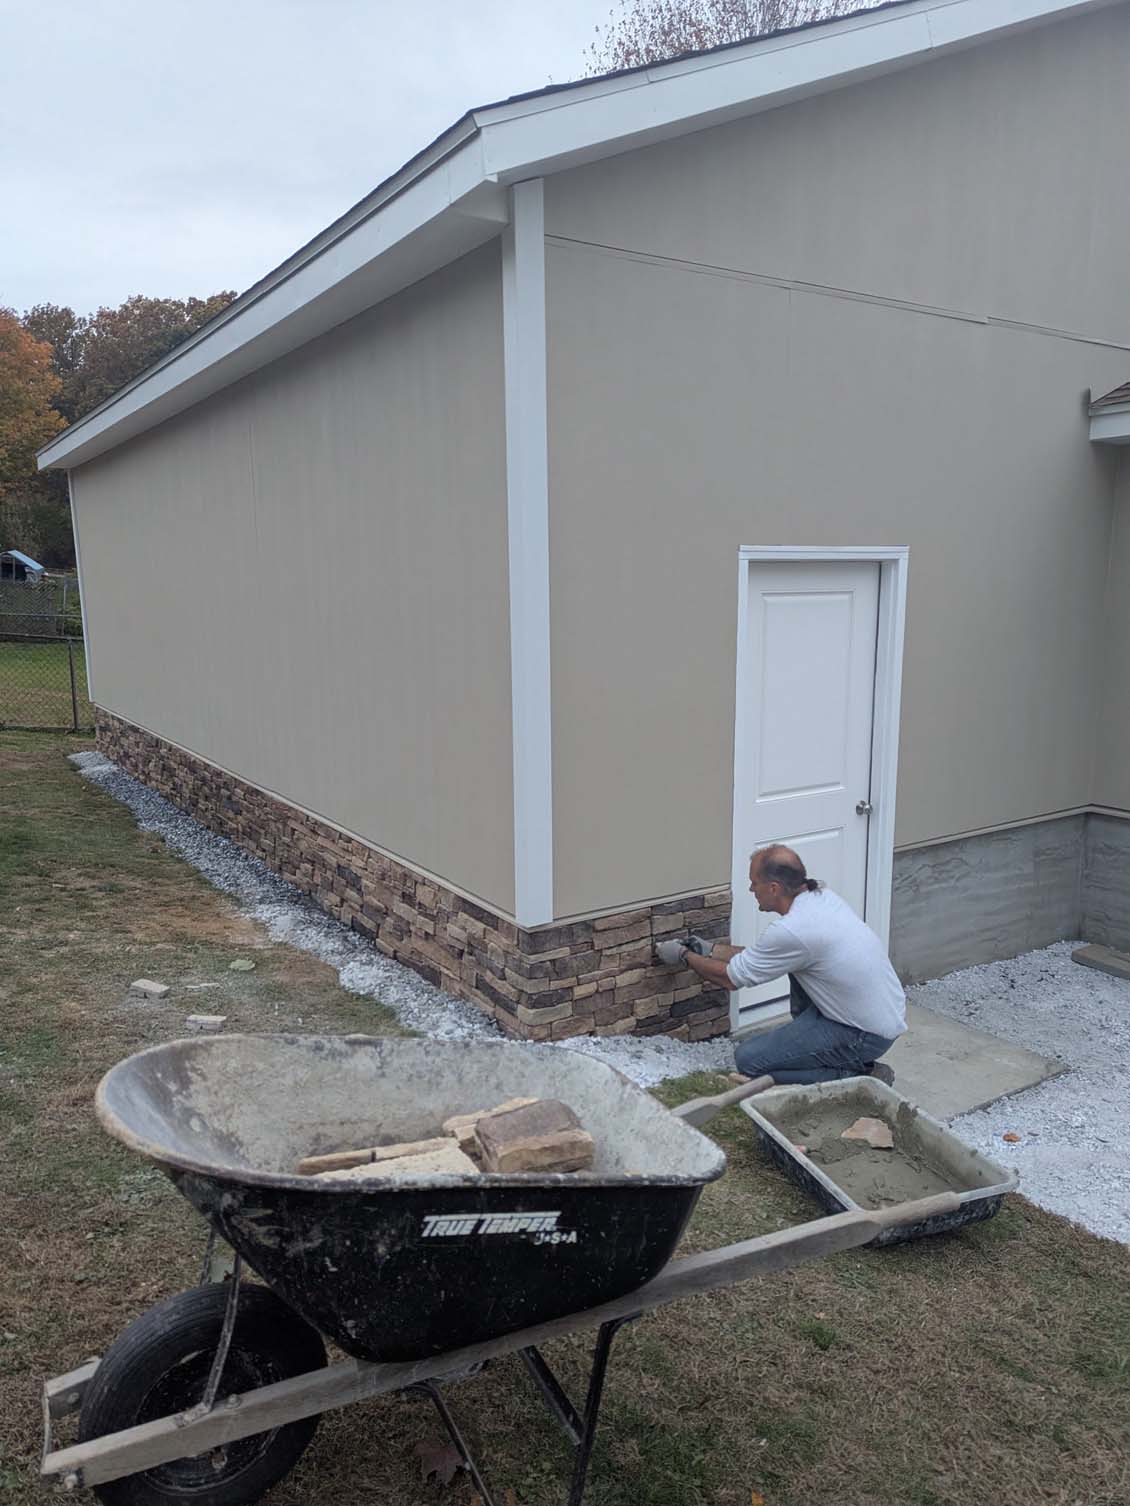
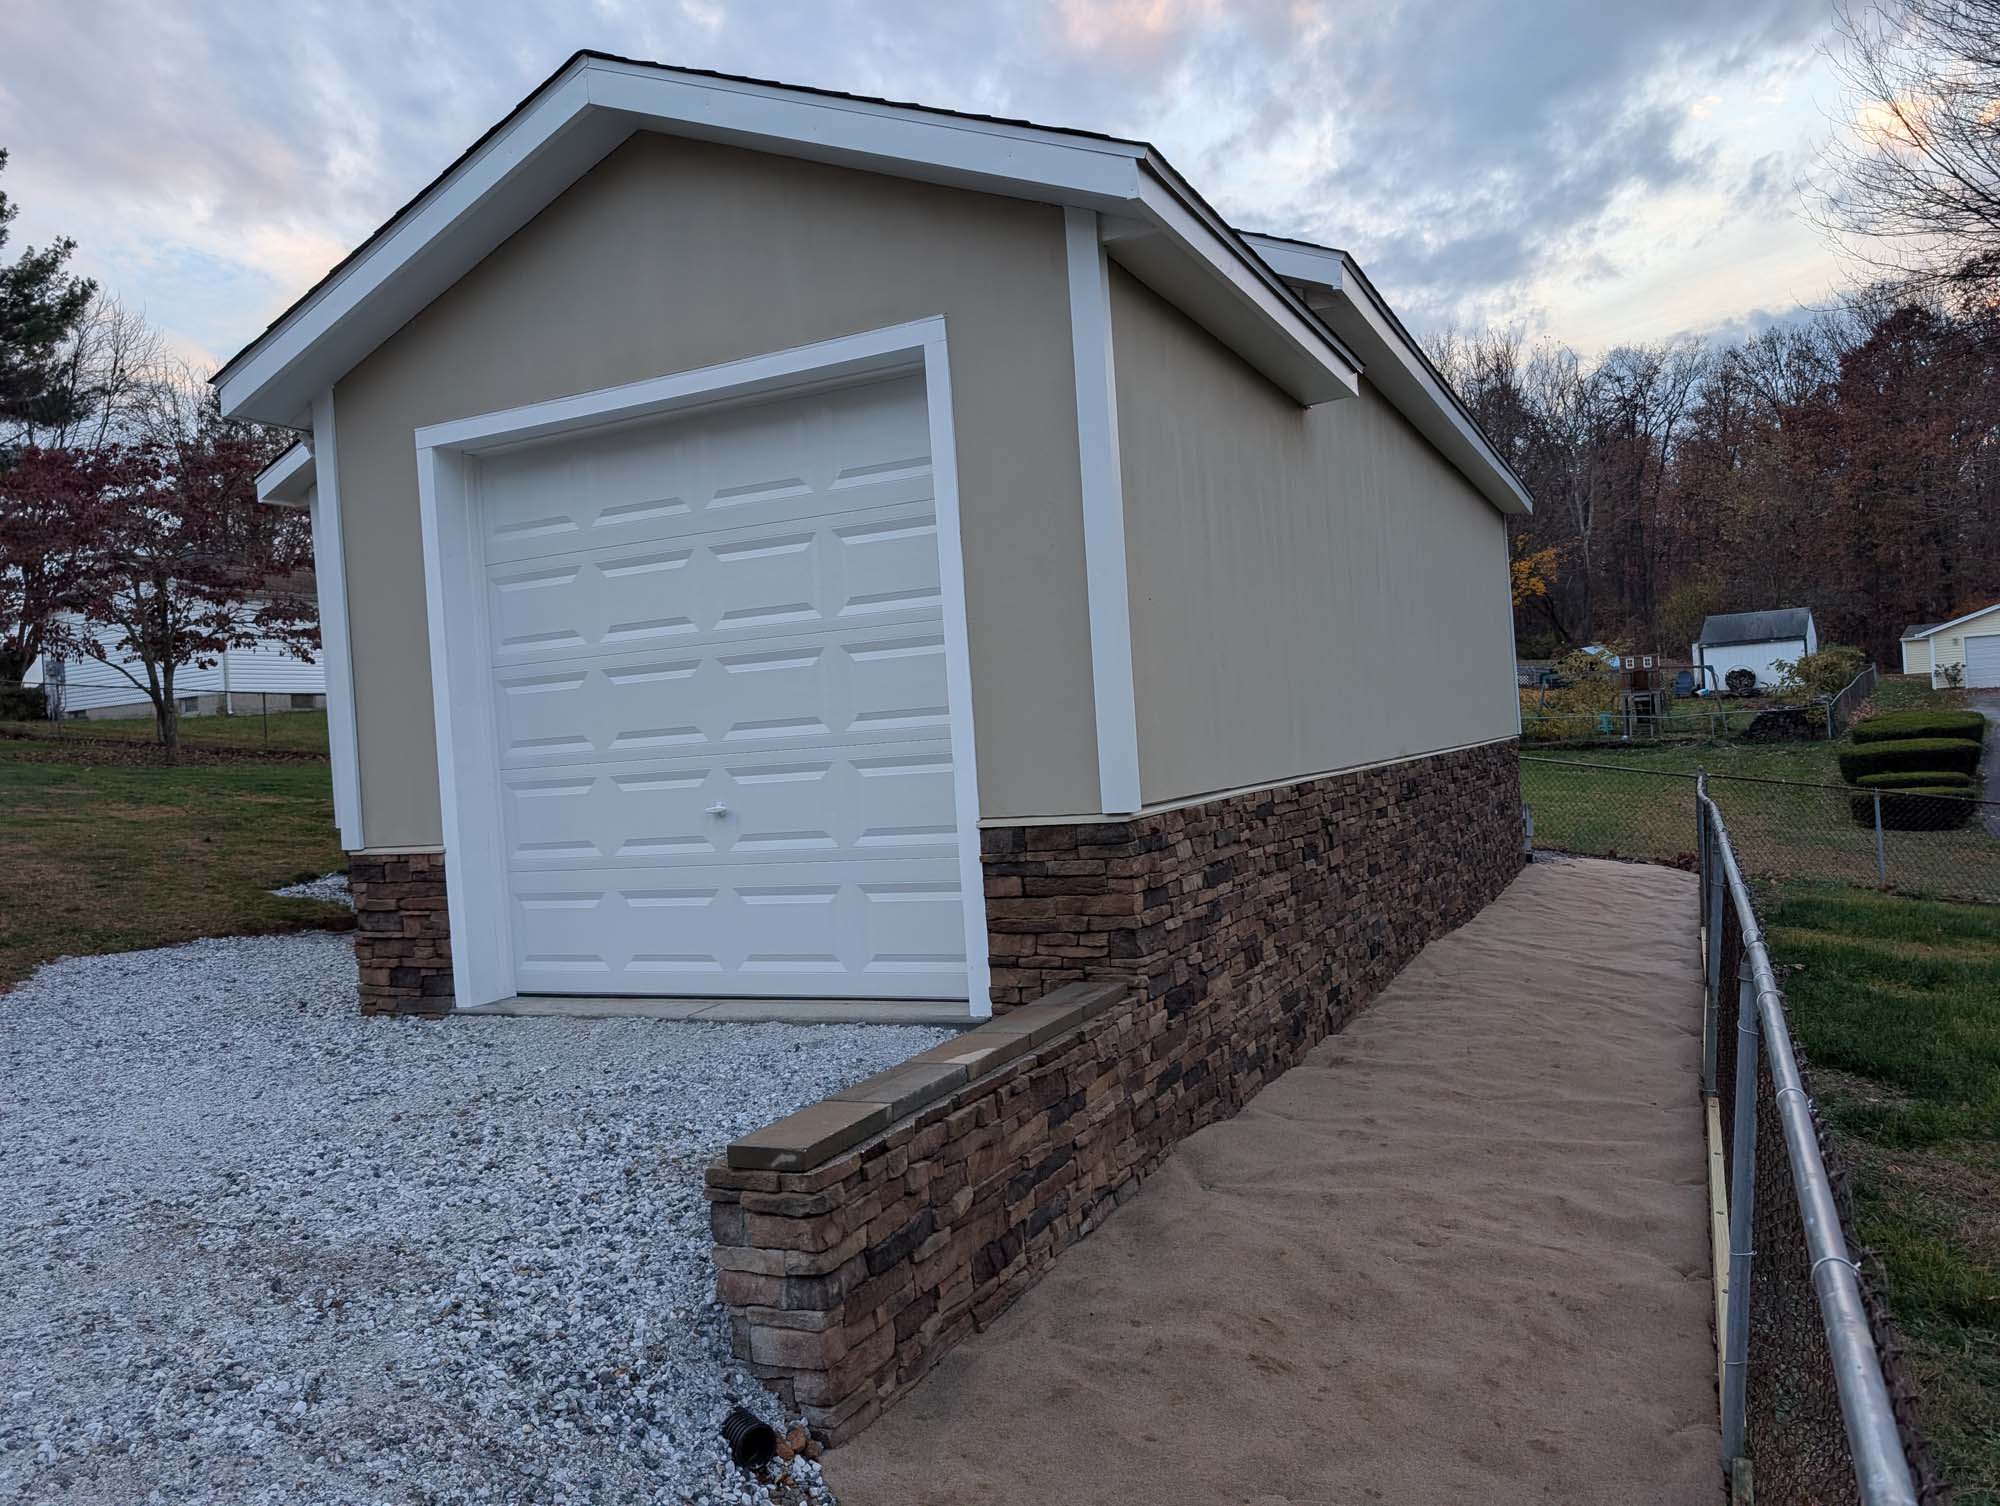
As I finished up the first corner, the entry door arrived so I could finally install the last two pieces of siding around the door trim. I was able to pre-trim for the garage door so I can finish the stone while I wait for the garage doors to arrive.


Surprisingly though, the garage doors arrived two weeks early and I installed the outer one so that I could get my final inspection.
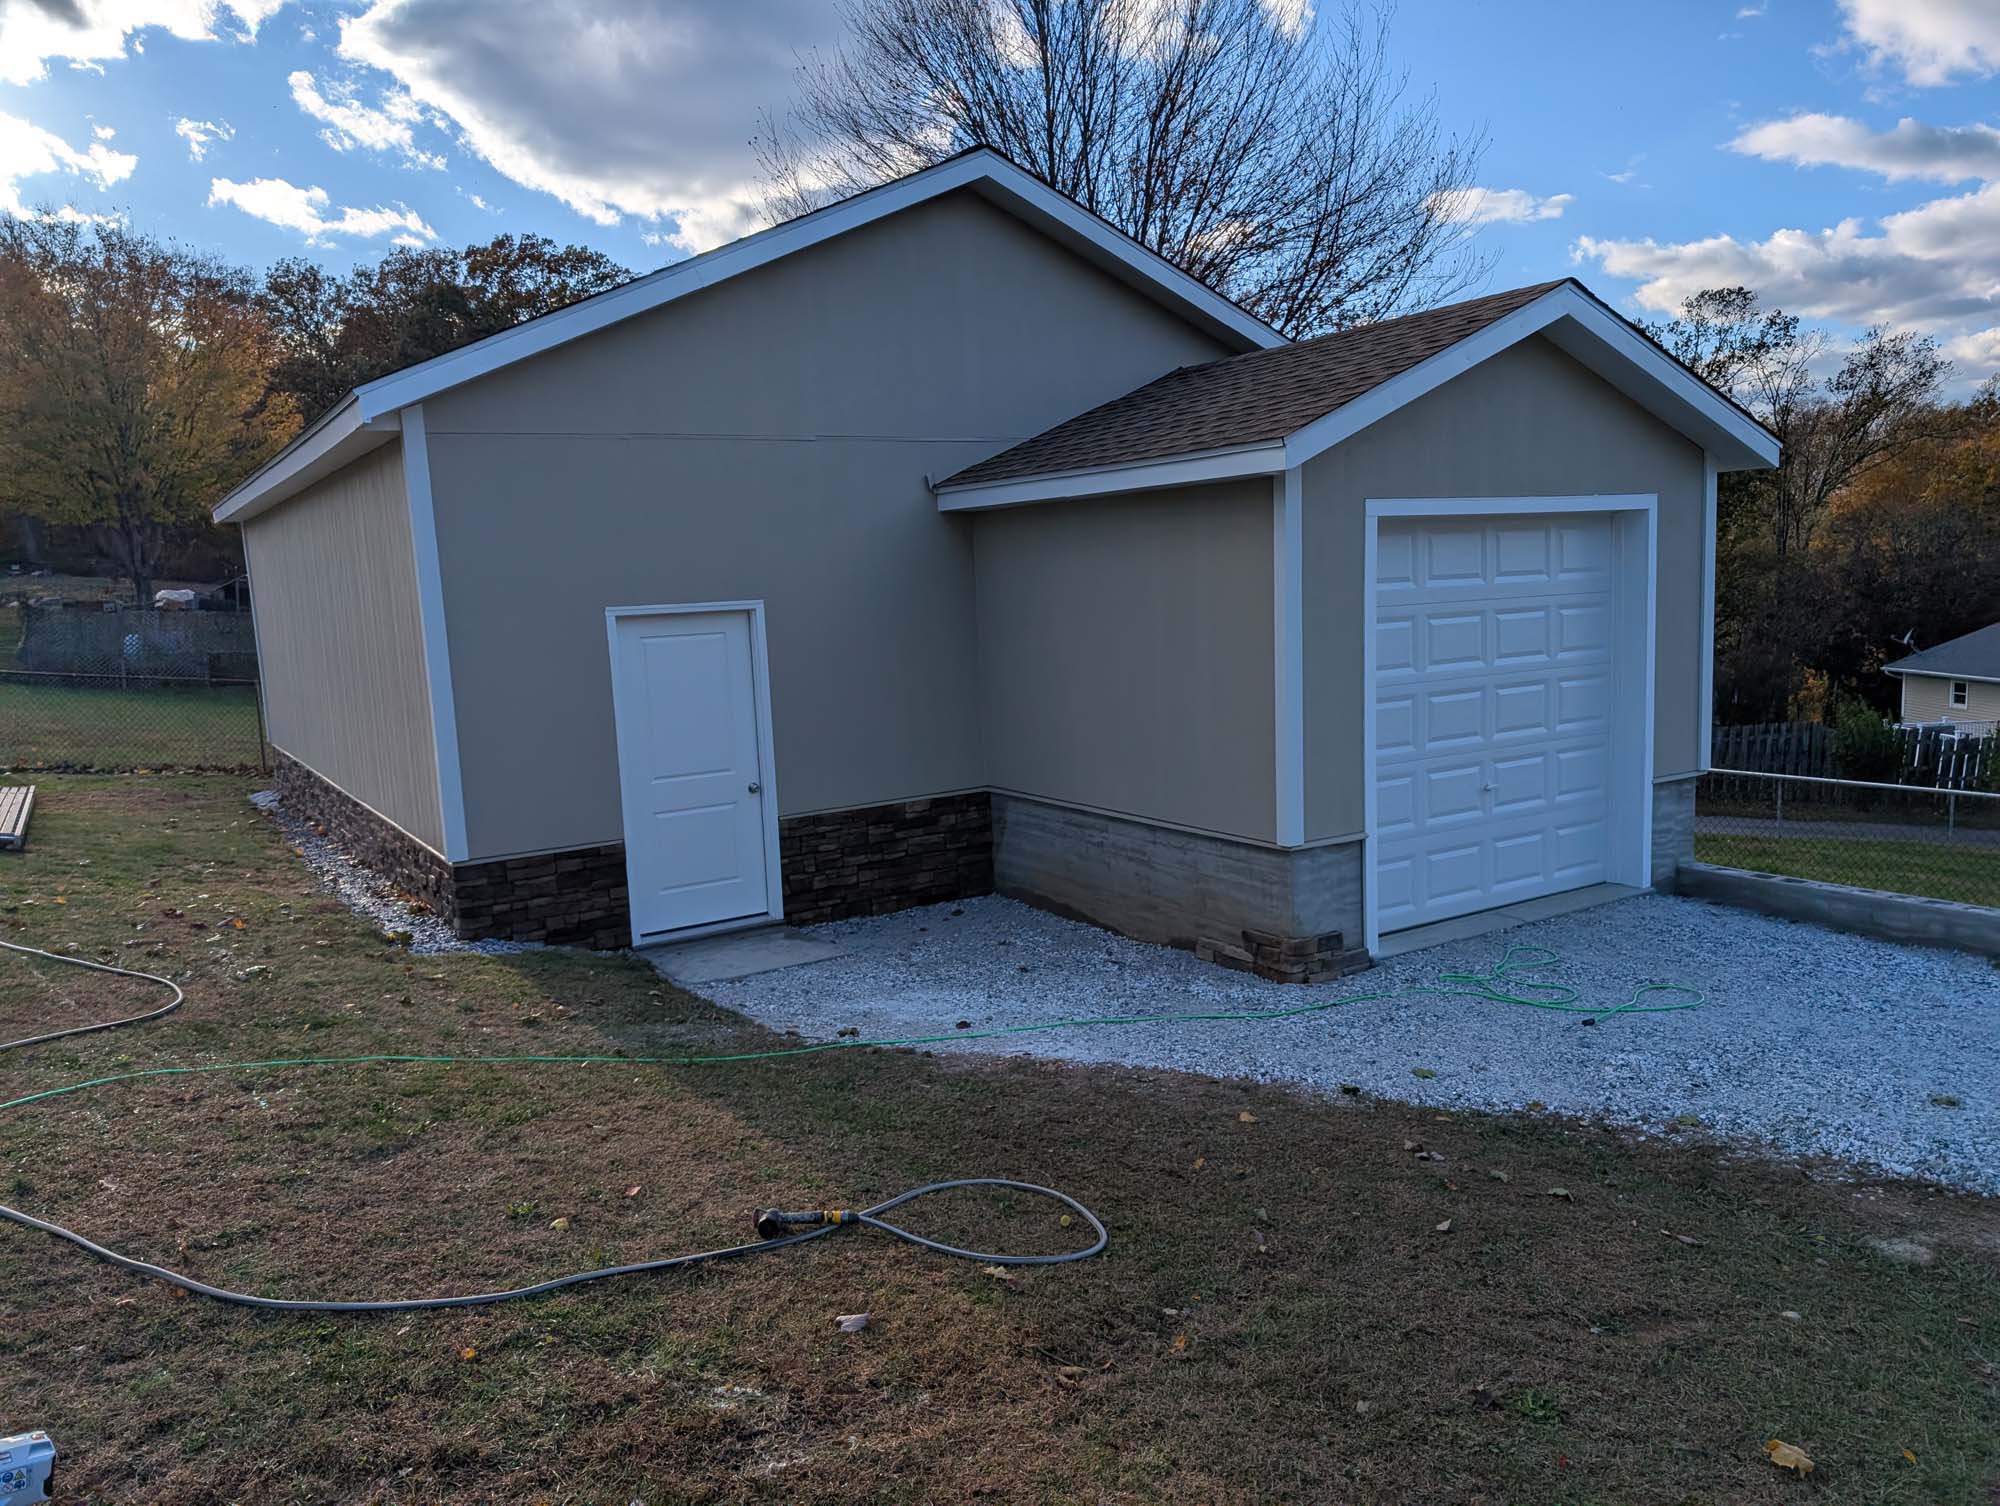
Somewhere along the way, I wrapped all of the fascia boards with white aluminum then, regraded the front and added some crushed stone as well. Forgot to take pictures though.


After I passed my final, I went back to laying stone veneer.
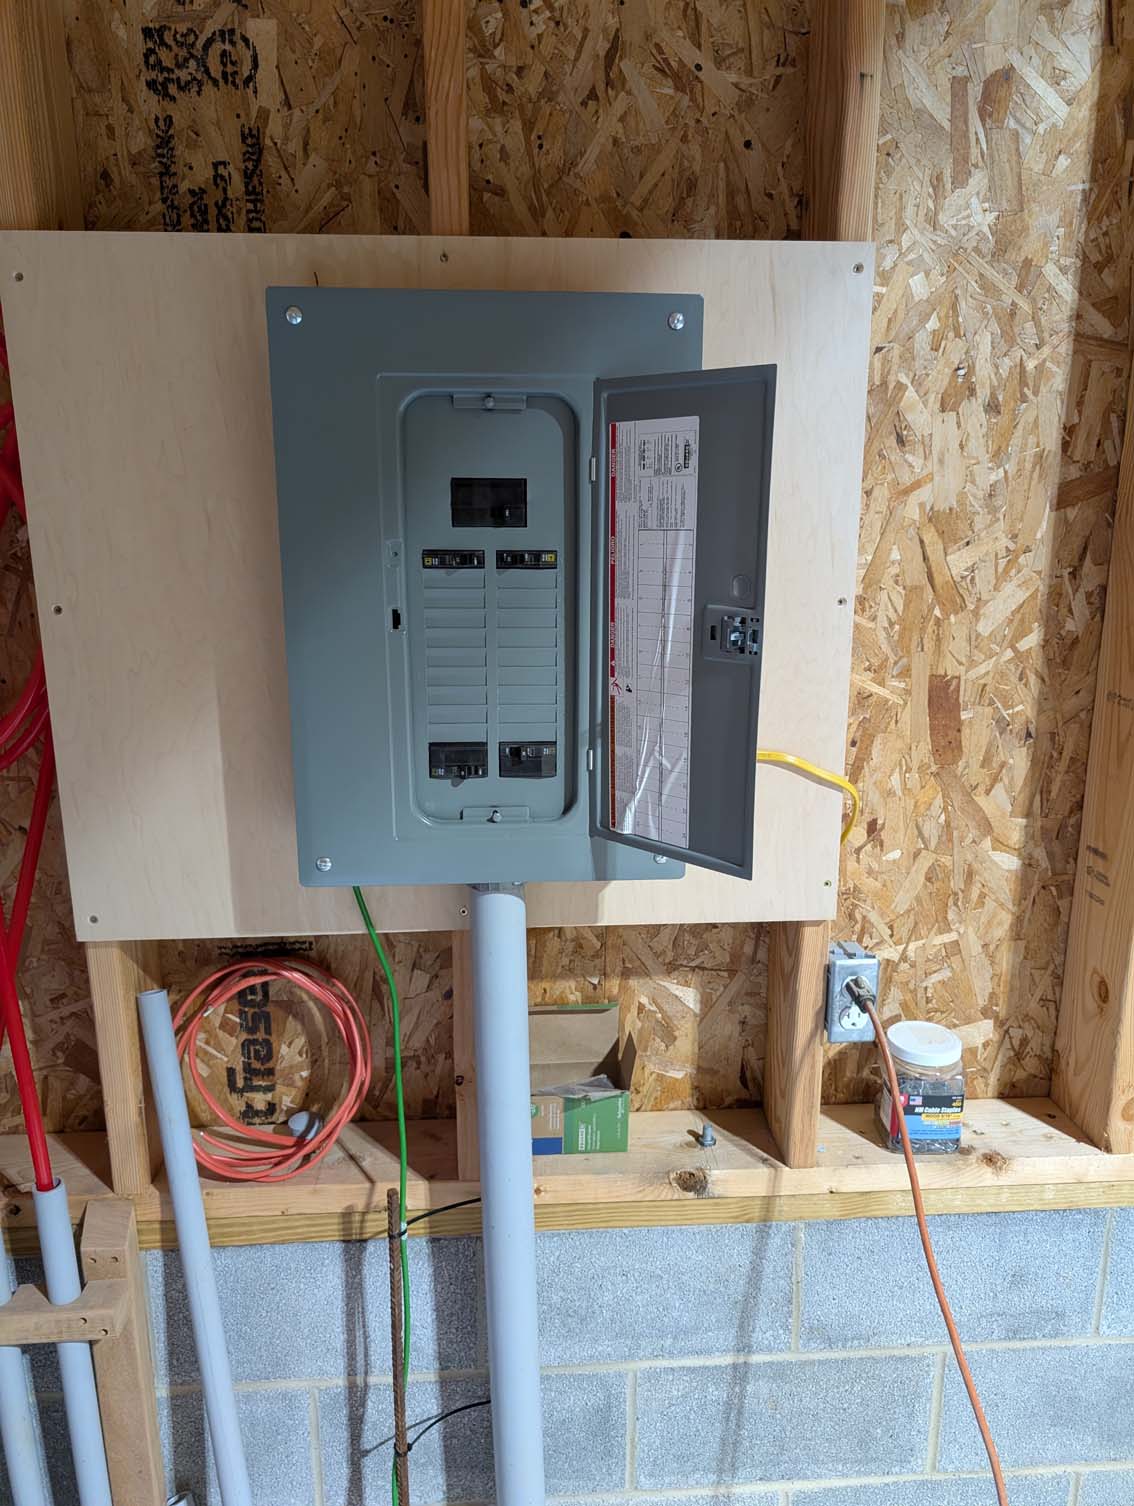
An electrician friend popped over one day to help me pull wire through the conduit and hook up my electric panel.
Now I have lights that don’t require a couple of daisy-chained extension cords running down the hill.


I took my time with the stone, mixing one to three bags of mortar each day, depending on how much time was available or if my back could take it… Took me about two weeks in total working a couple hours a day.
And what you see on the ground is indoor\outdoor carpet. I have found it to be a great weed block that can be exposed for years while letting the water pass straight through without erosion, and it can also eventually be covered with stone when that is in the budget…
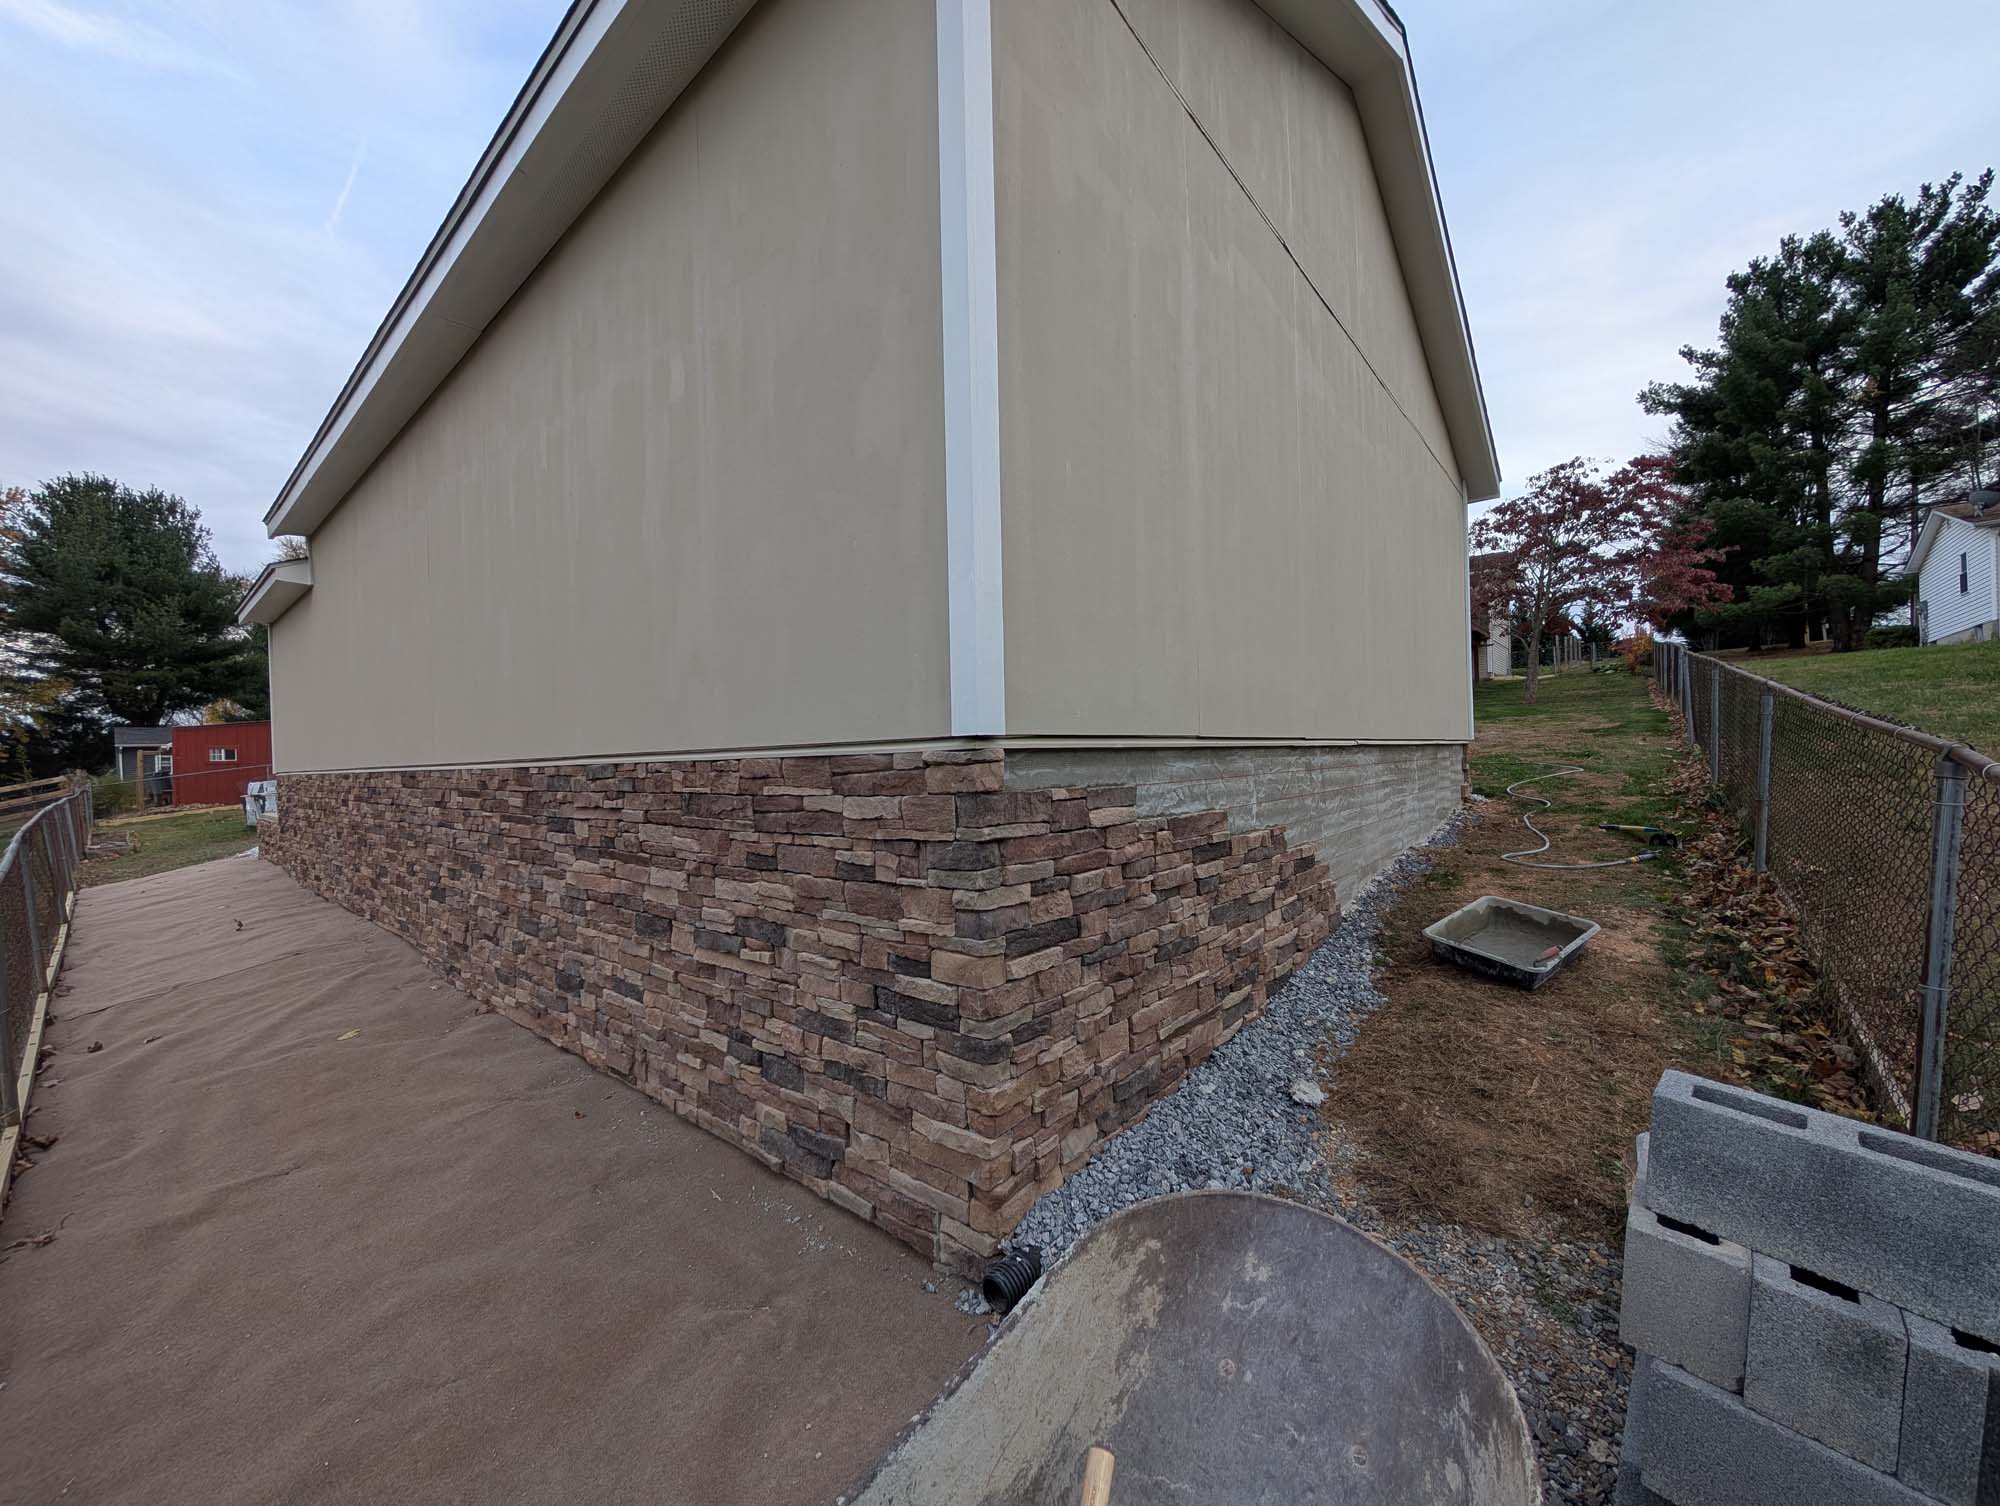
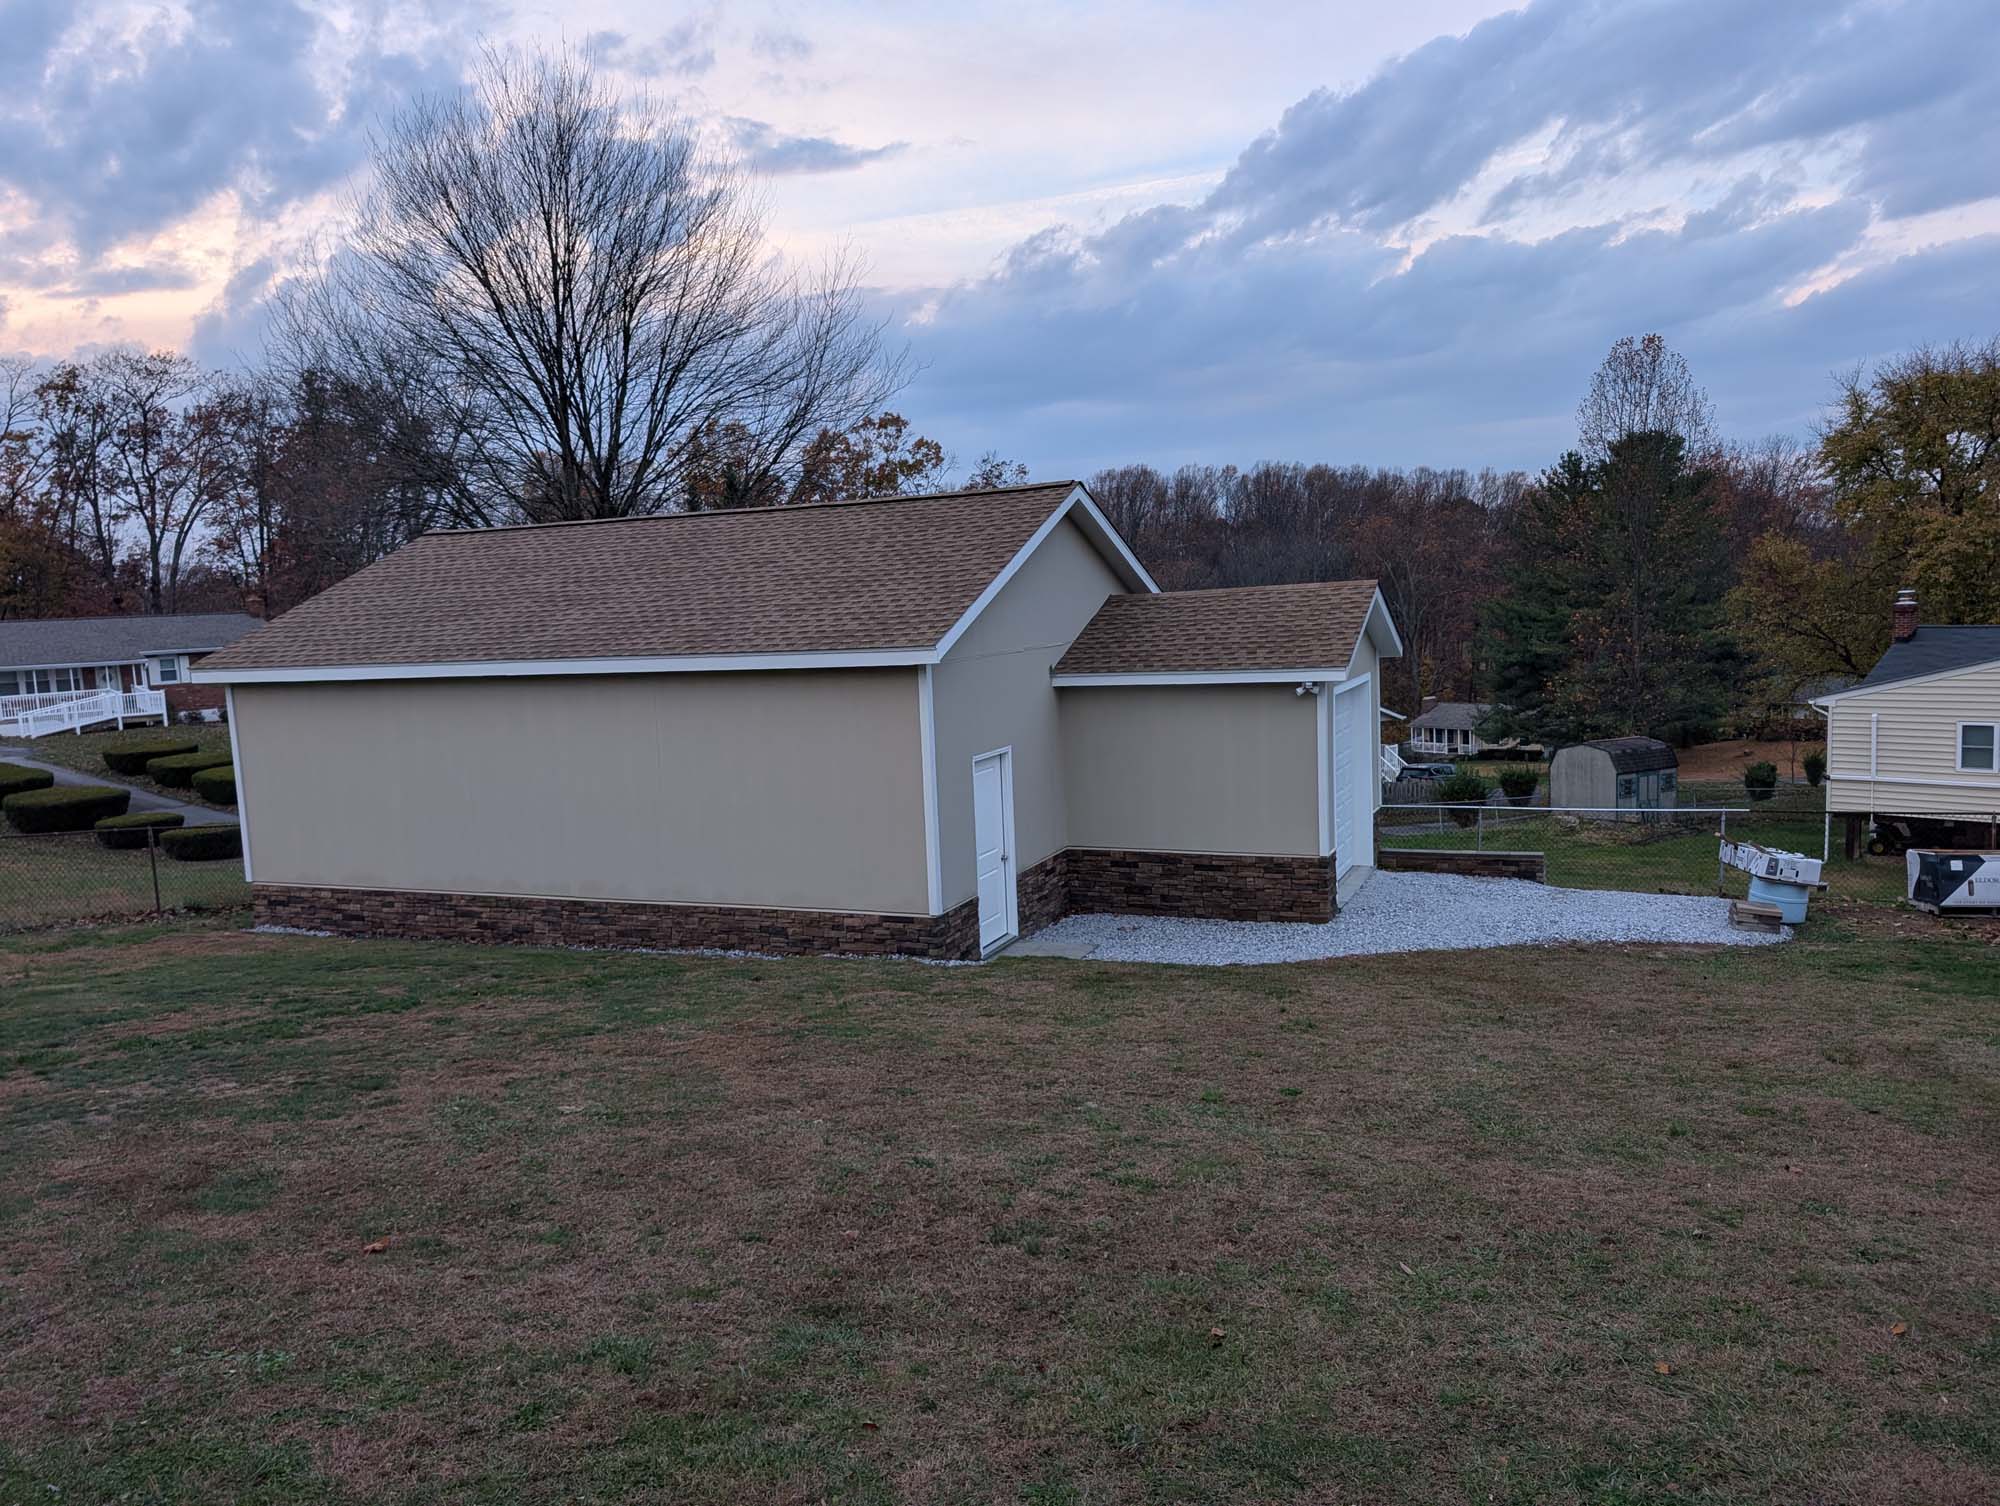
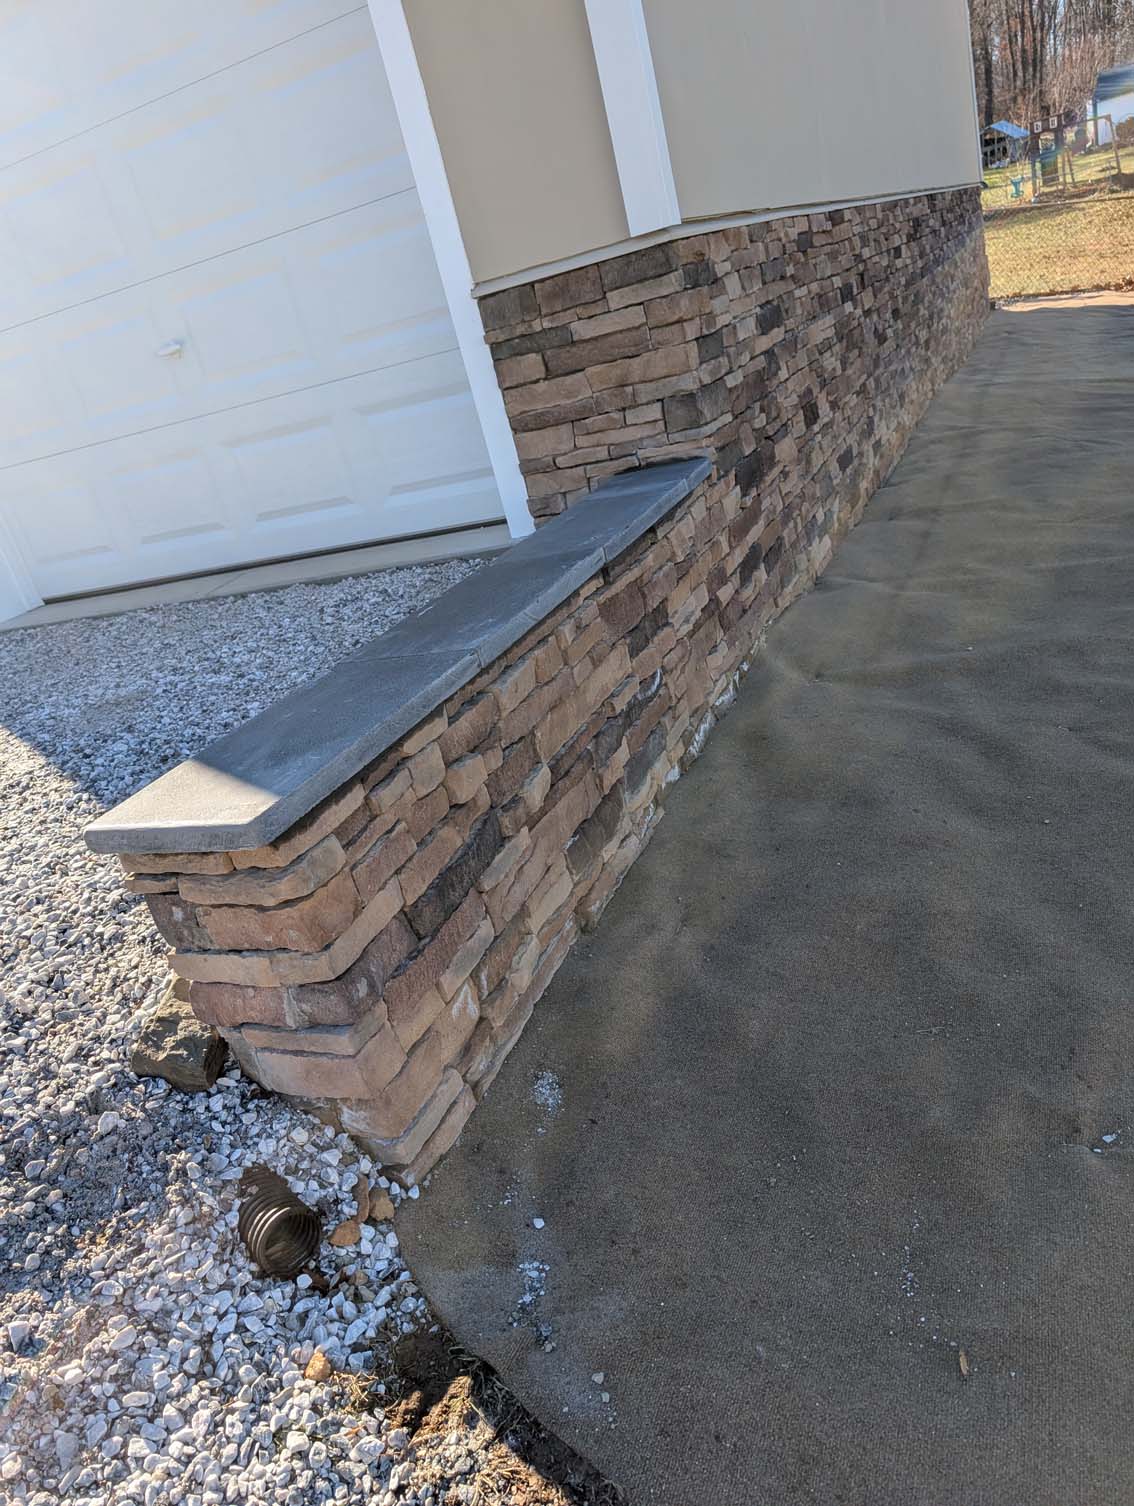
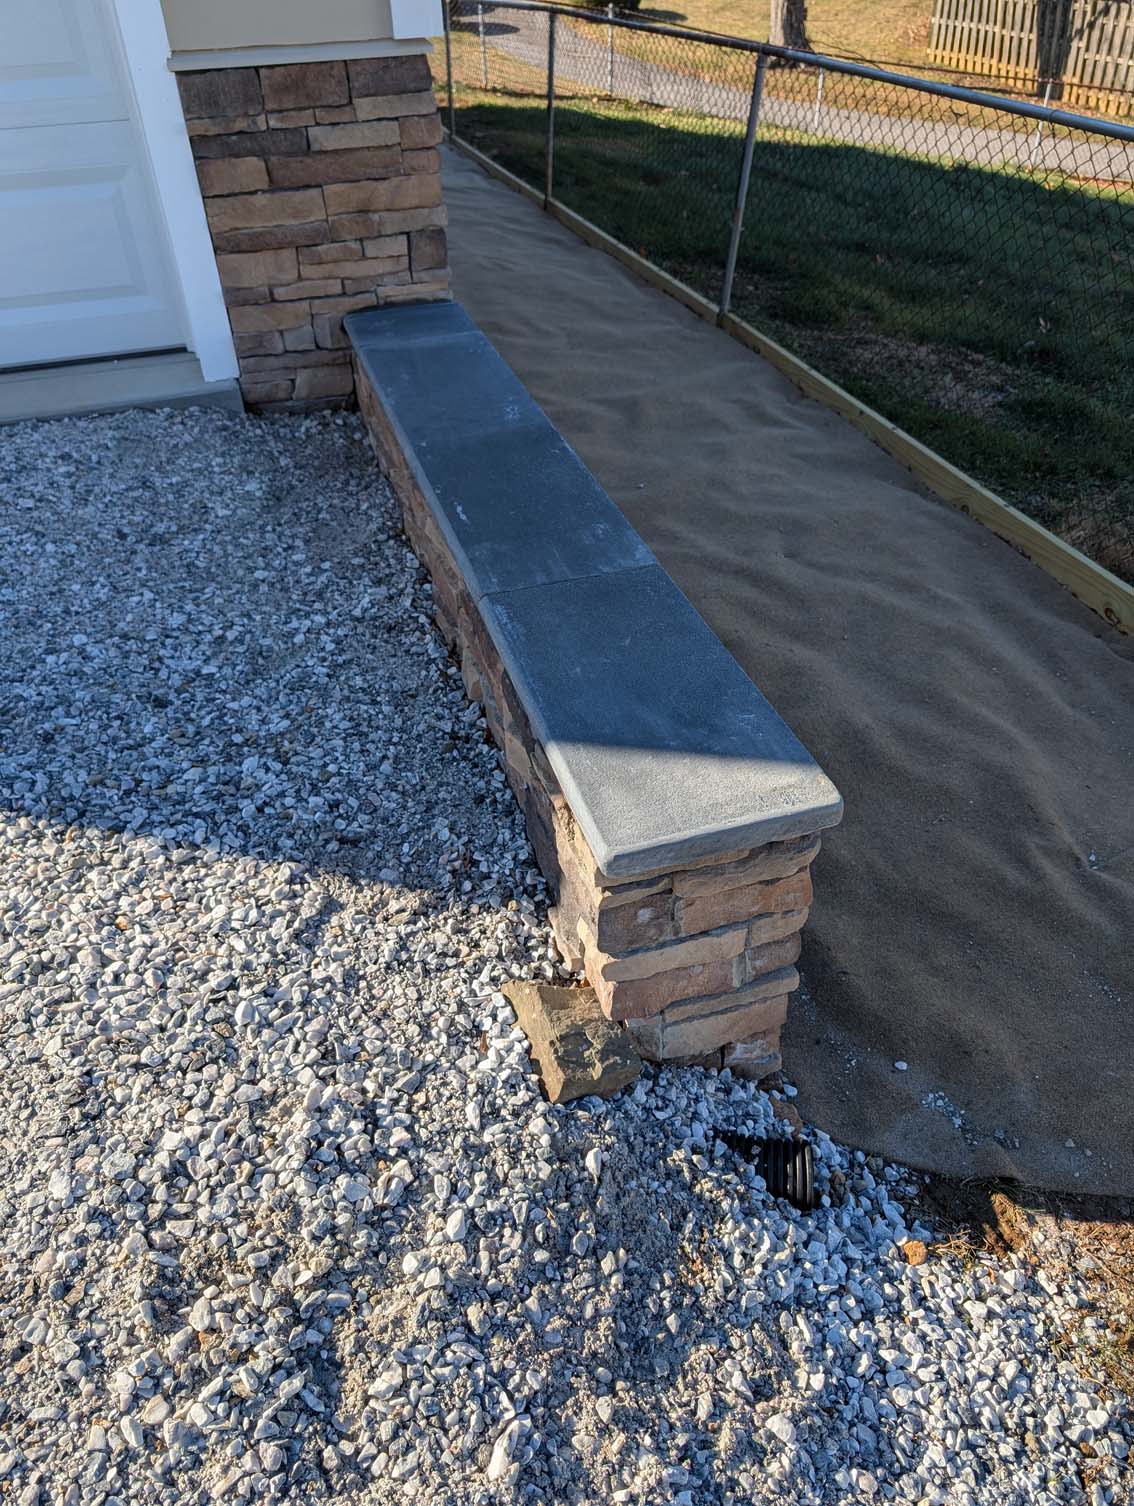
Permits have passed and the exterior is done. I have four bullnosed cap stones on order for the top of the retaining wall. That will only take a few minutes to install whenever they come in.

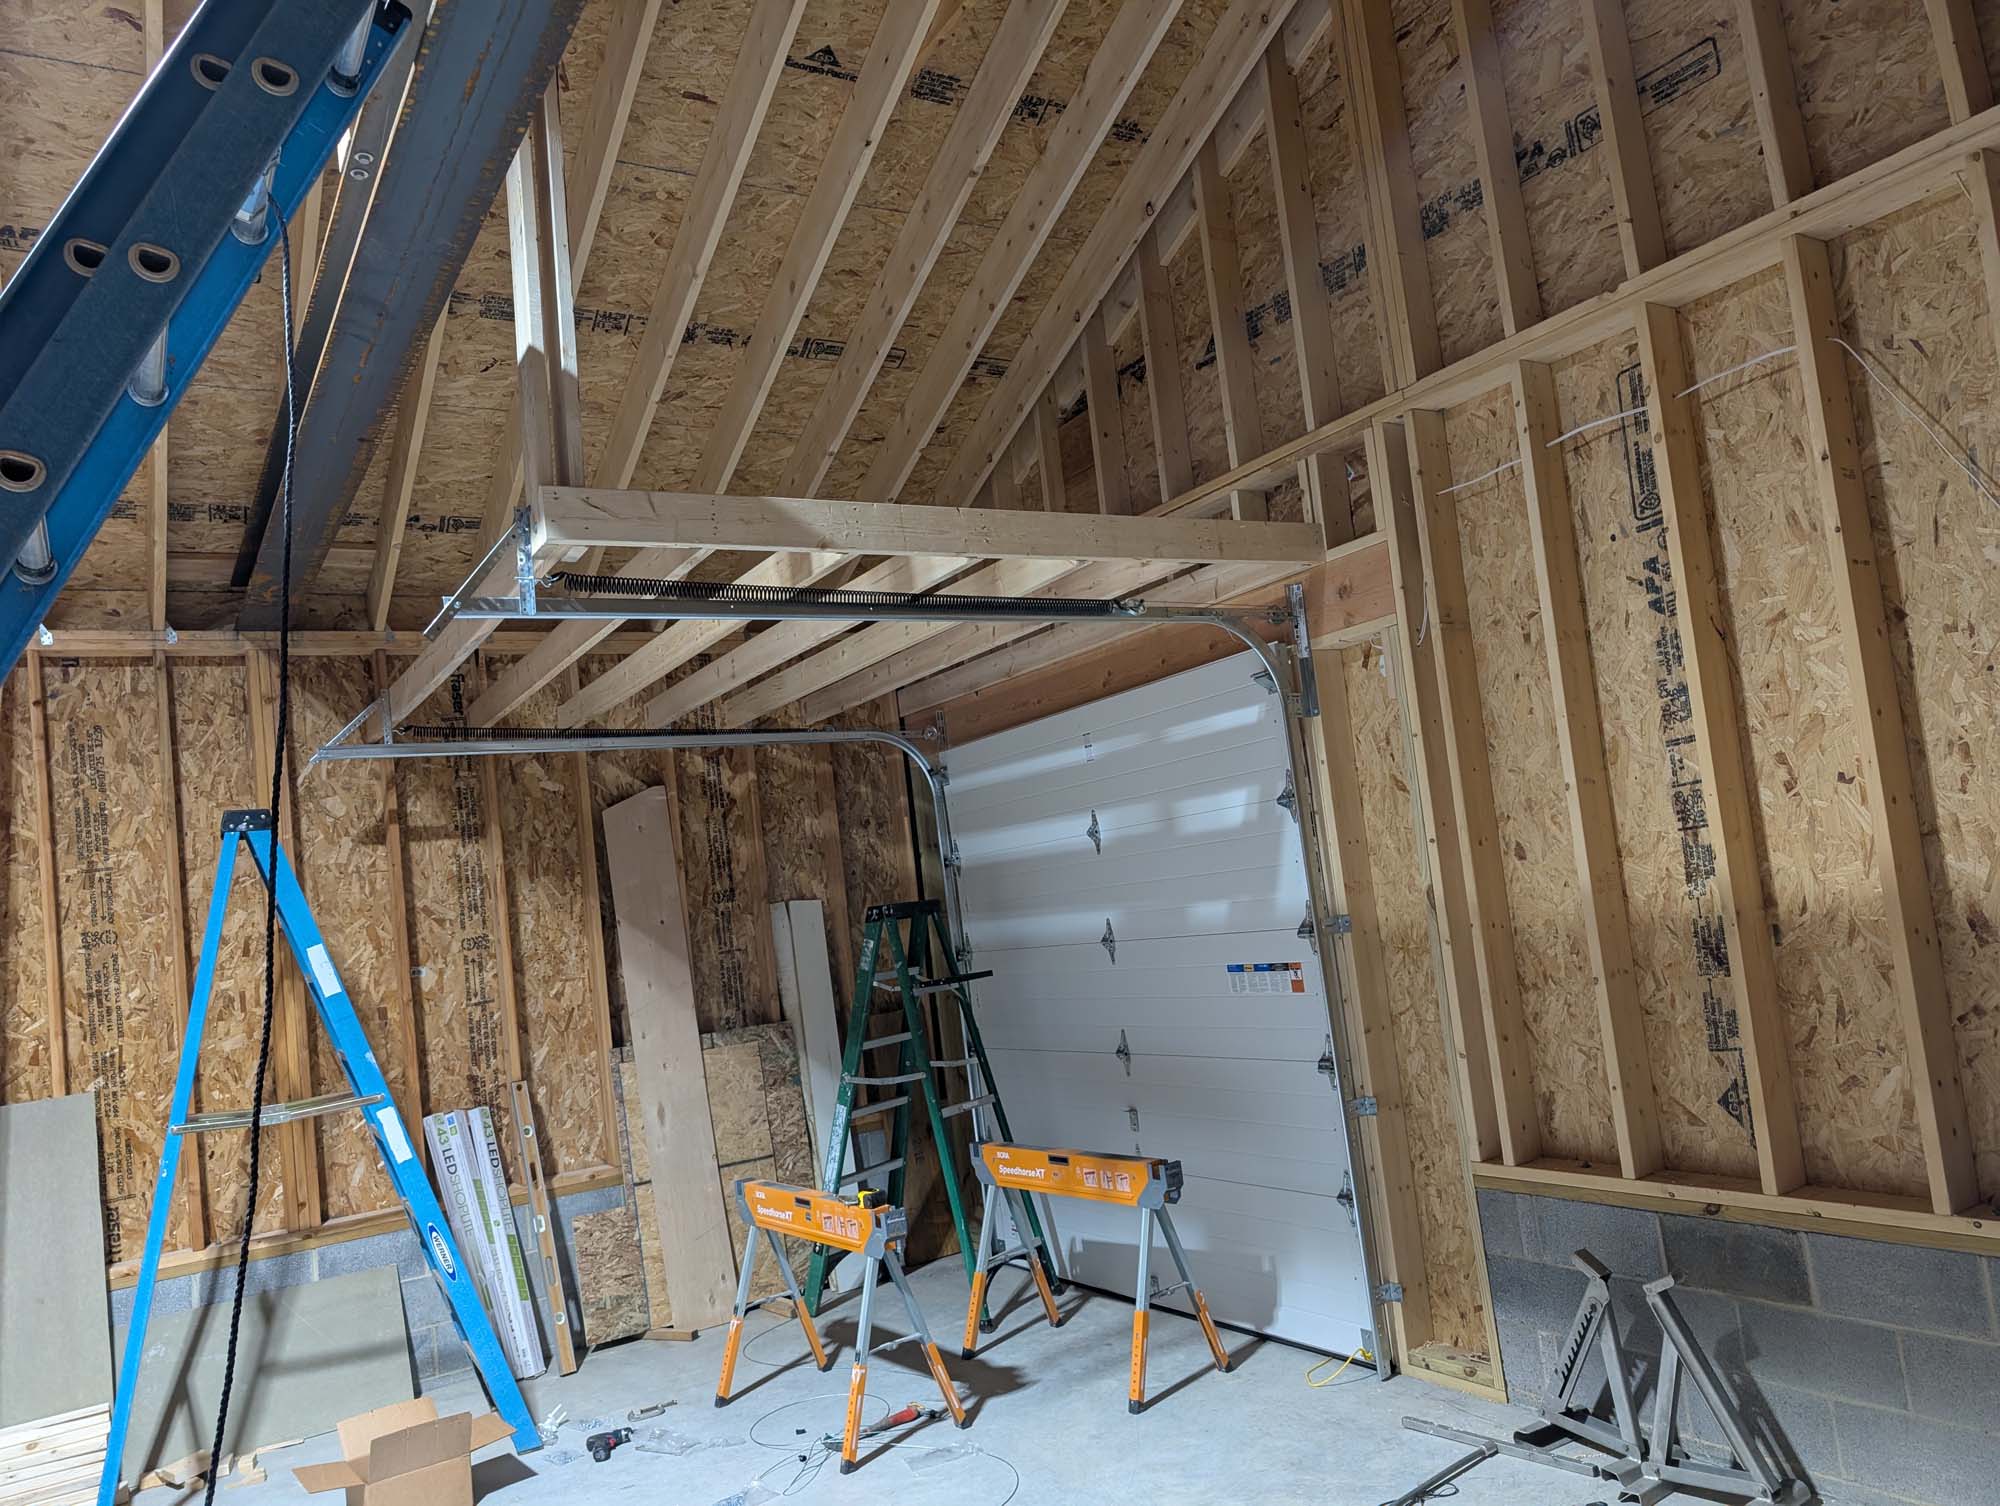
I had to build some structure to suspend the inner, insulated garage door from. This will eventually become loft storage as well. Finishing up the radiant flooring will also require waiting for a side job to cover the final costs. For now, I can start moving wood in here to free up space in my shop and get my tractor and other equipment out of the garage.
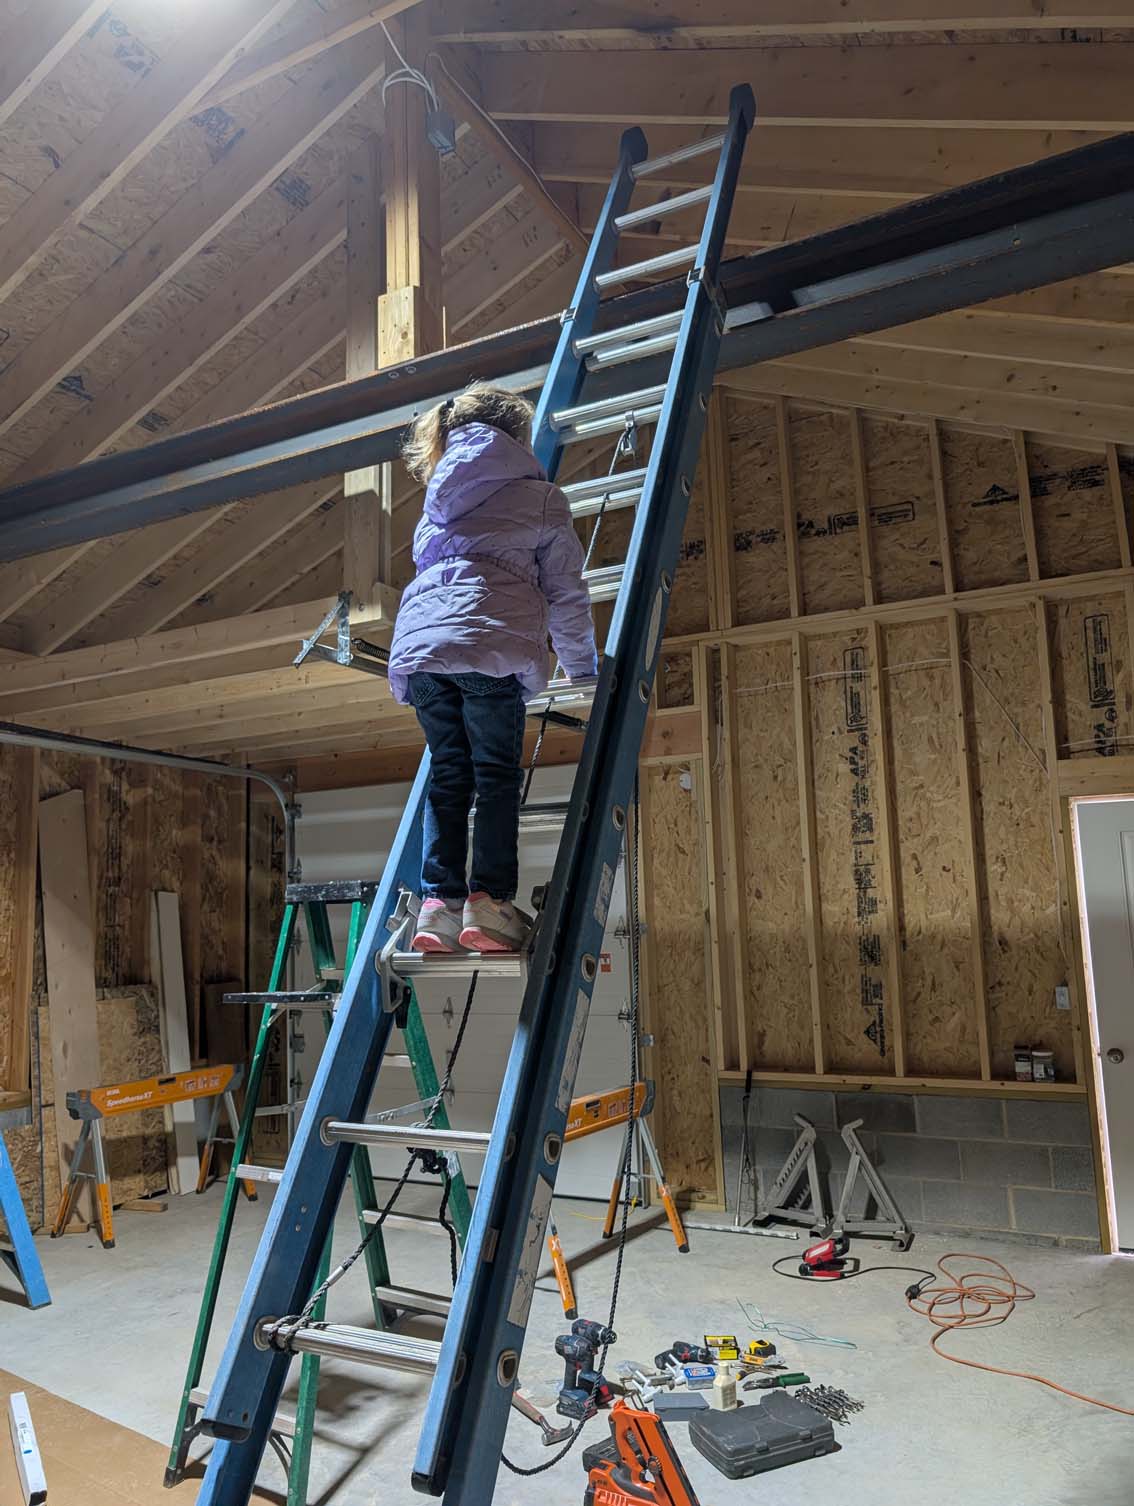
The only thing left for now is the final inspection from my granddaughter…

She seems to like it.
UPDATE:
Finally got in the cap stones that I ordered to finish off the knee wall.
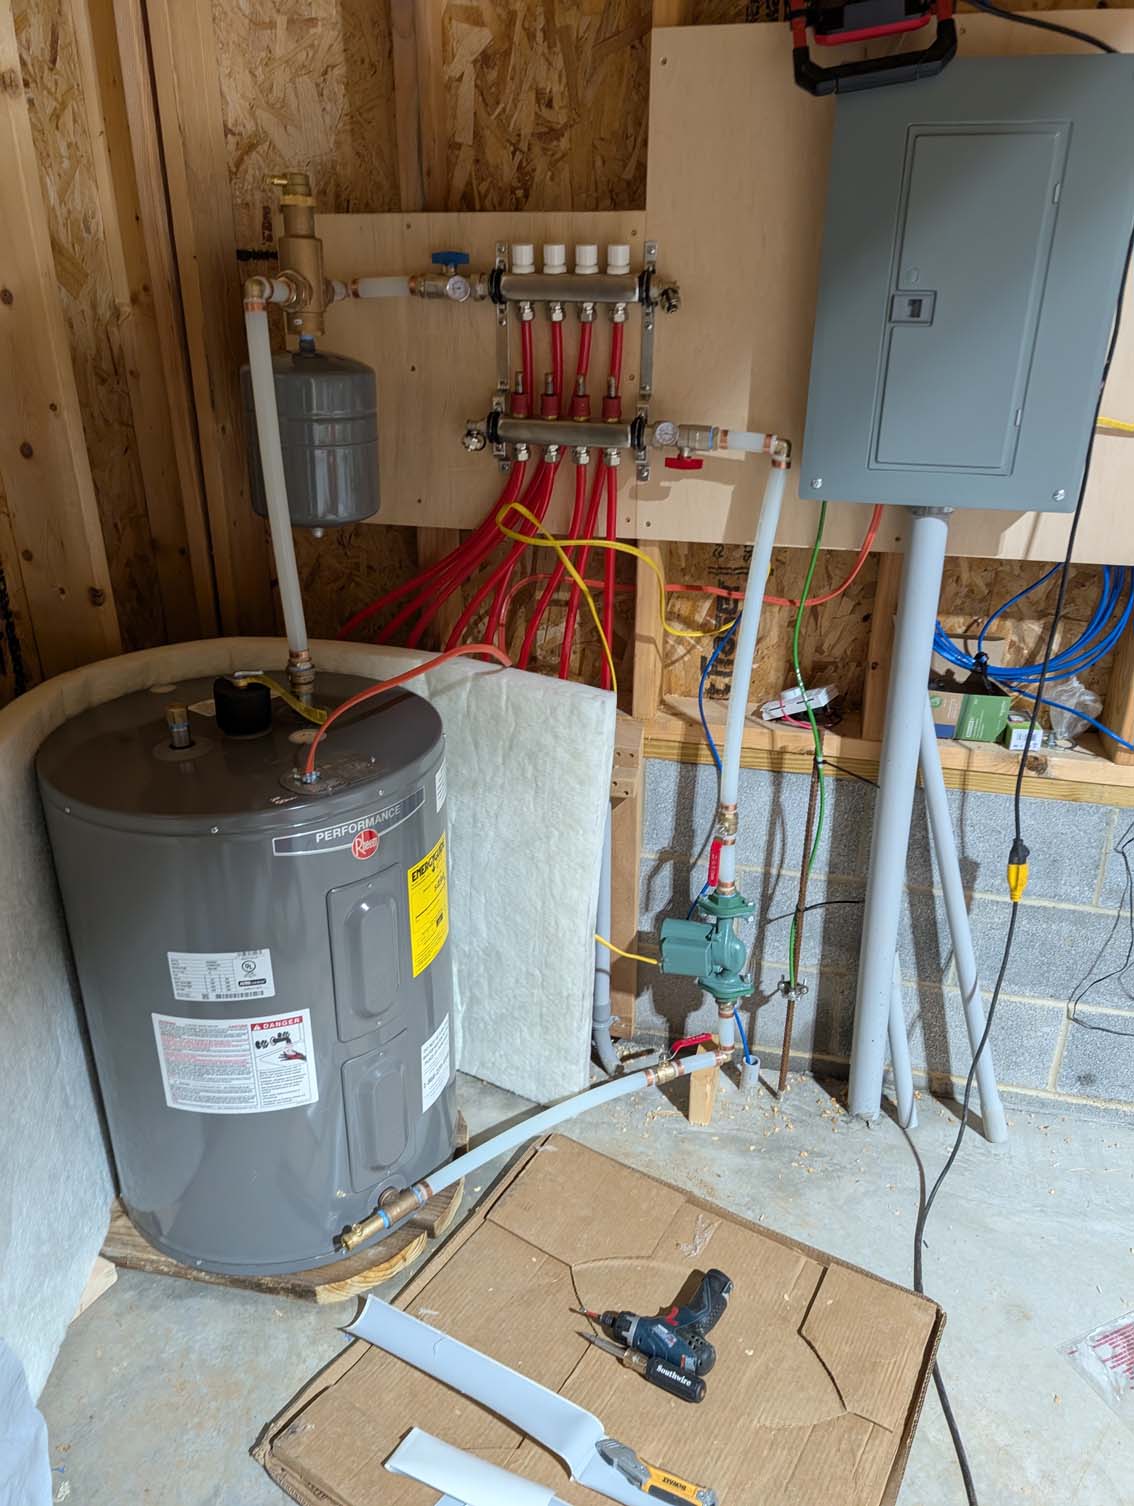
I also had my heating system installed. I am using a 40 gallon electric hot water heater along with a circulation pump. The system was installed by a friend, I am not an expert… Winter has set in and I wanted to see how well the system works.
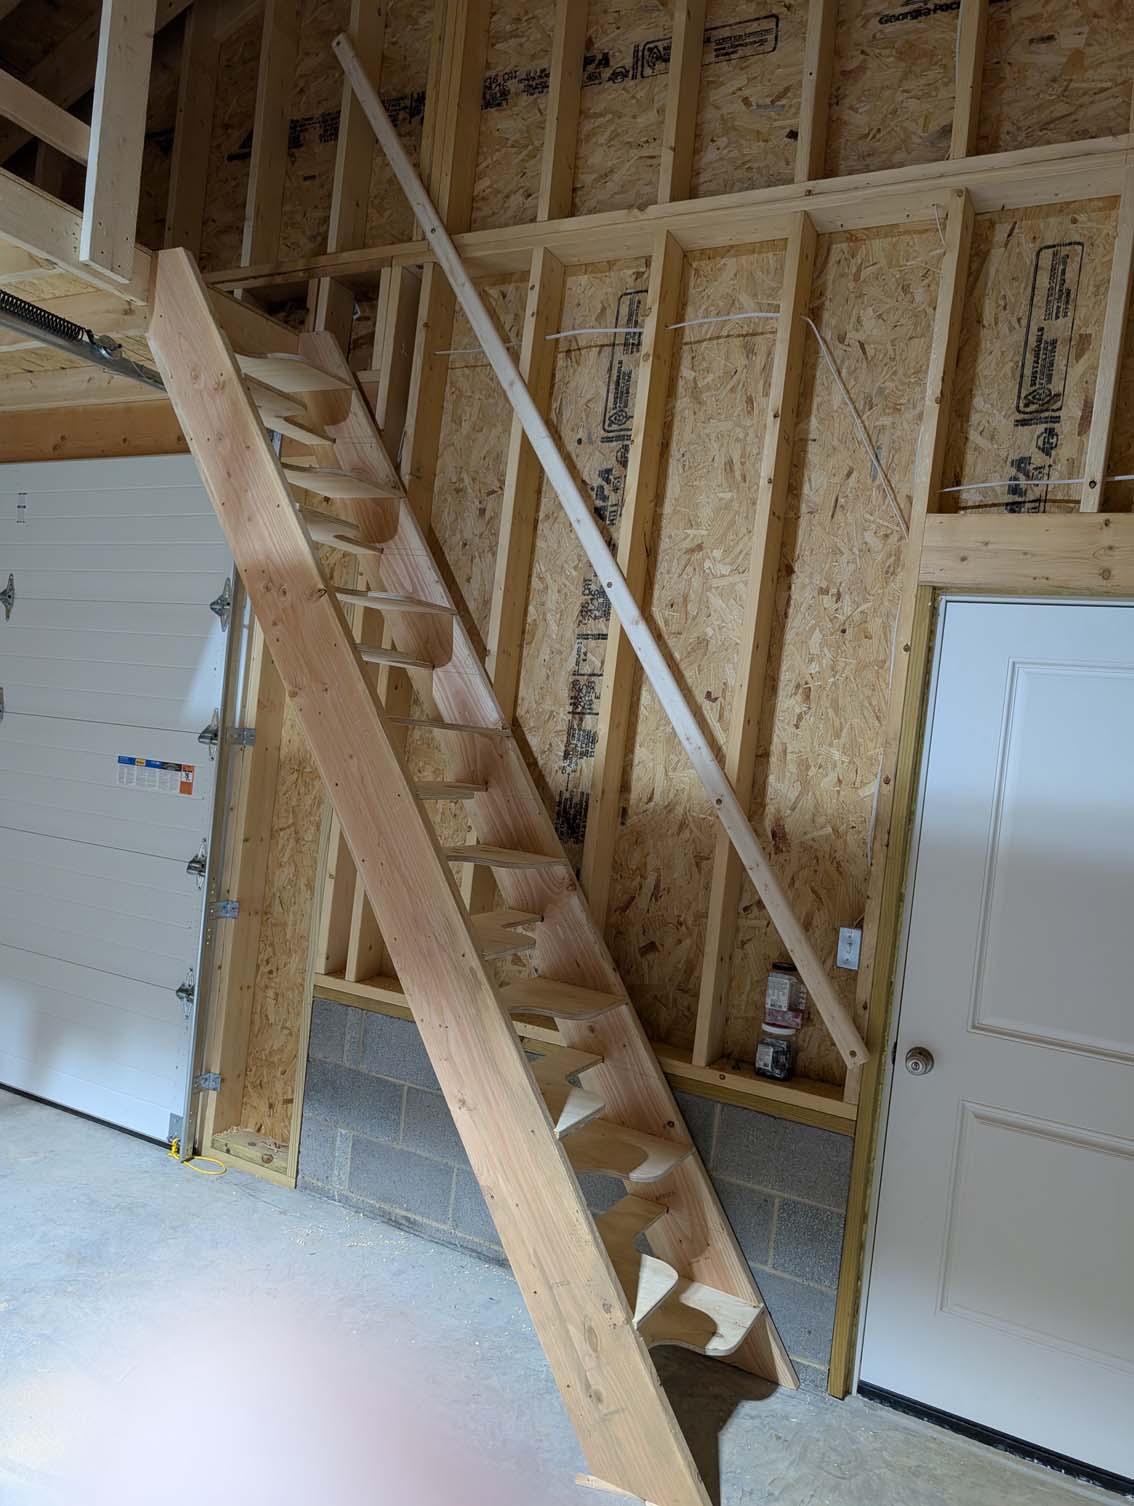
While waiting for the slab to warm up, I decided to experiment with installing some access to the small loft area.
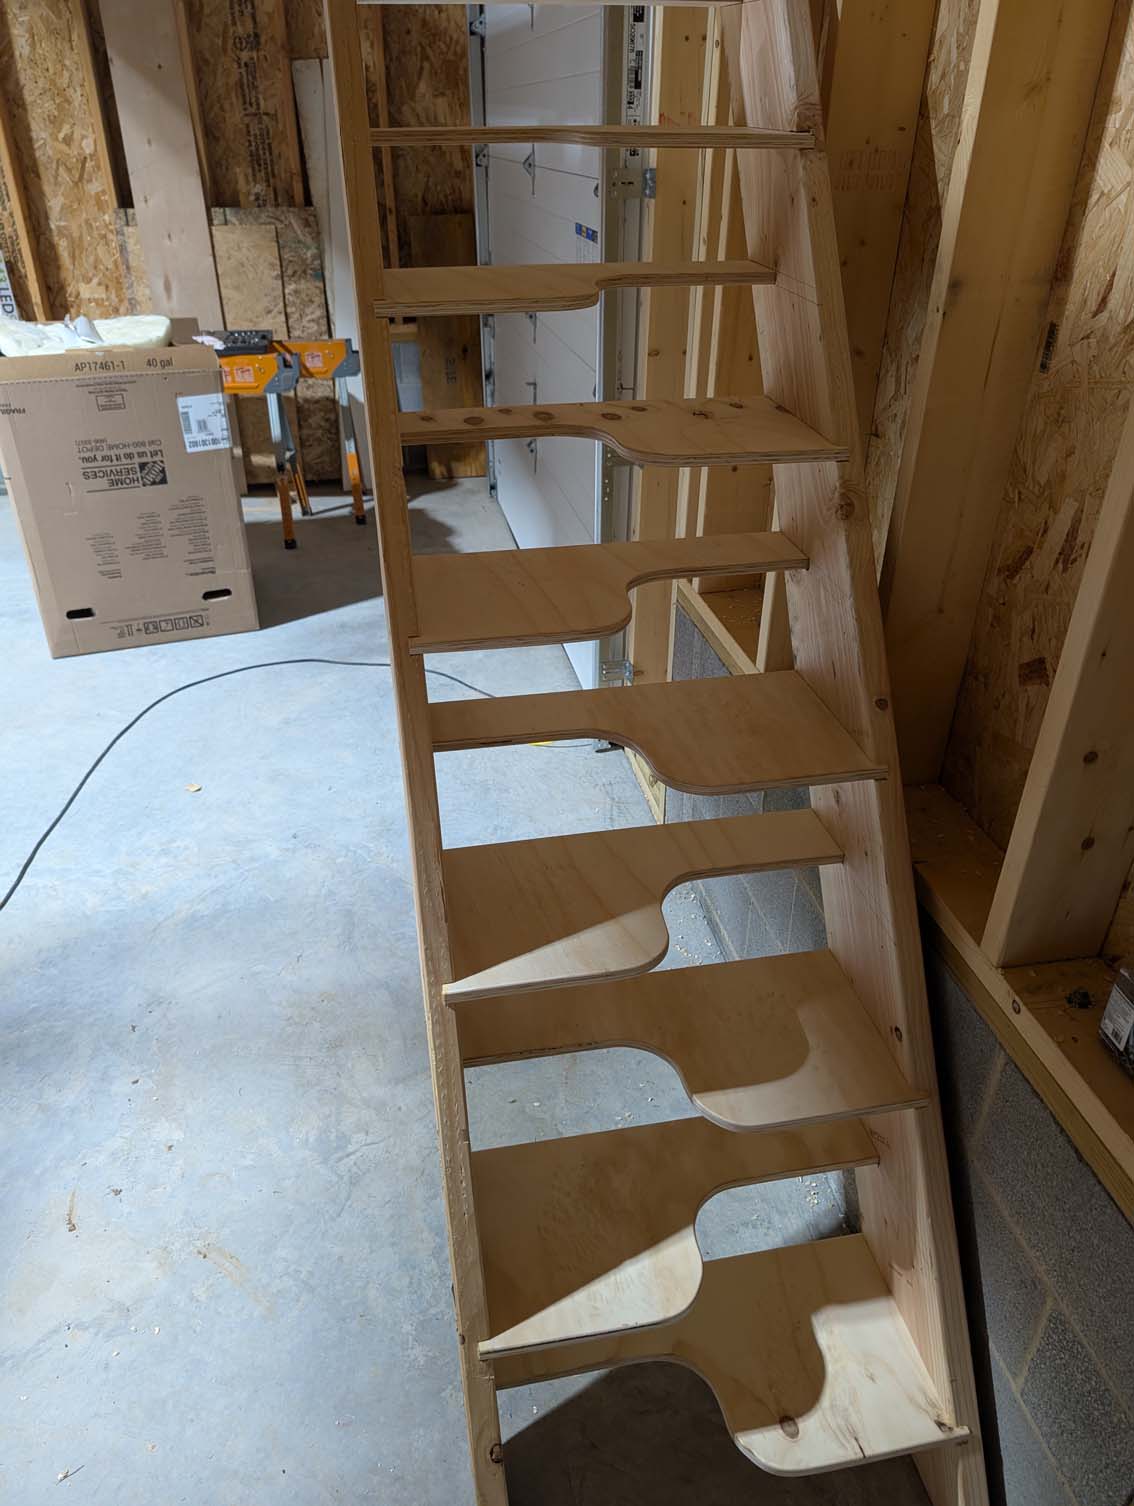
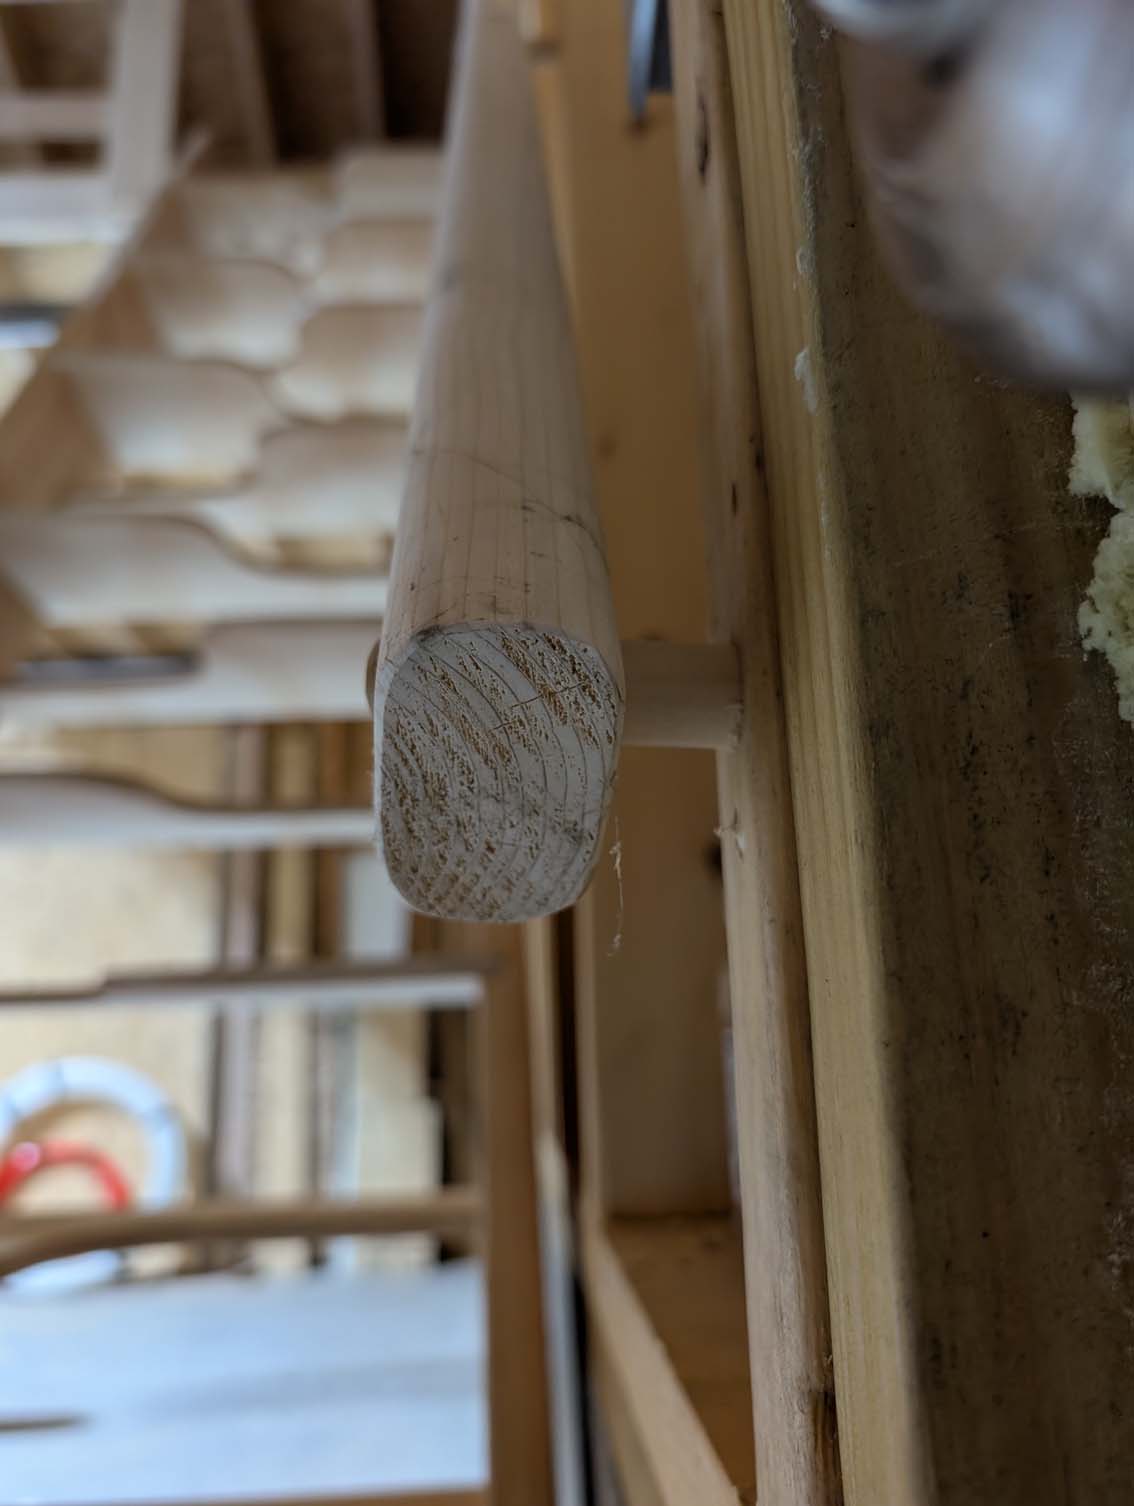
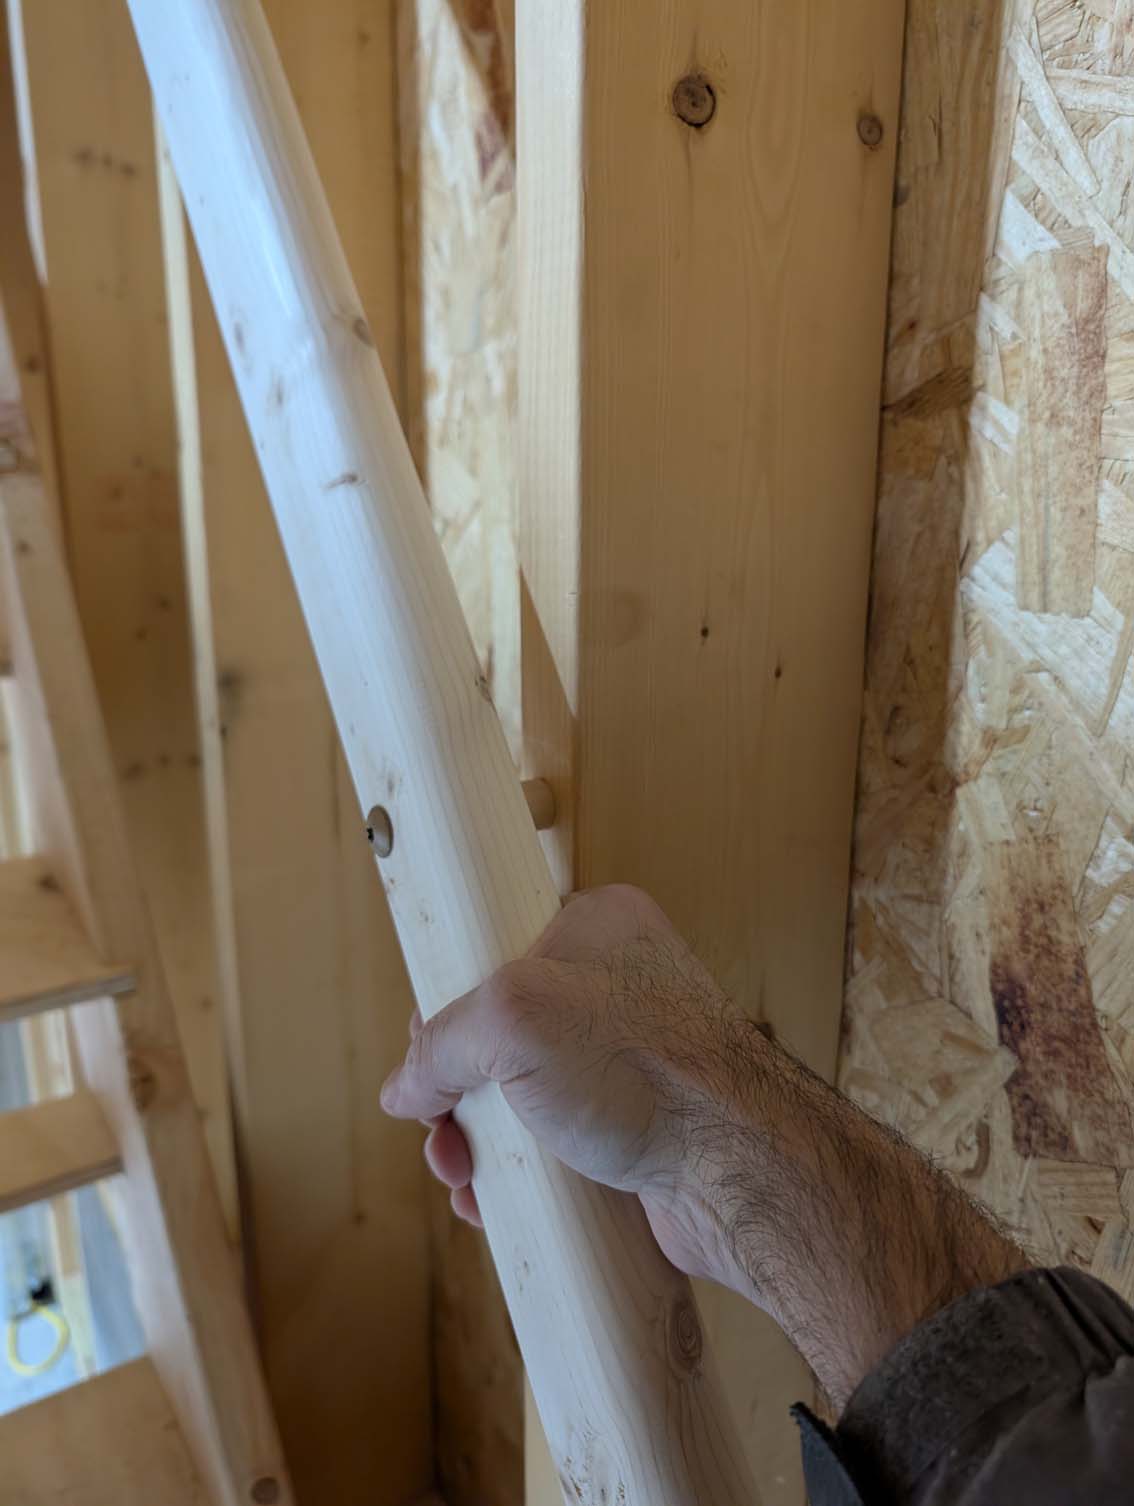
I Went through my left-over materials from the build and built some alternating steps. The treads are 12″ deep and the risers are 7″ so it is a comfortable step. Each tread is 4″ past the previous one but you still feel like you are taking a normal step. Kind of neat and it fits perfectly into the space available. I also modified a left-over 2″x4″ to make a handrail. I drilled a few 1/2″ dowels as standoffs and used some 4″ lag screws through the stand-offs to hold the rail in place.
The rail works great, held firmly to the wall with just four screws.
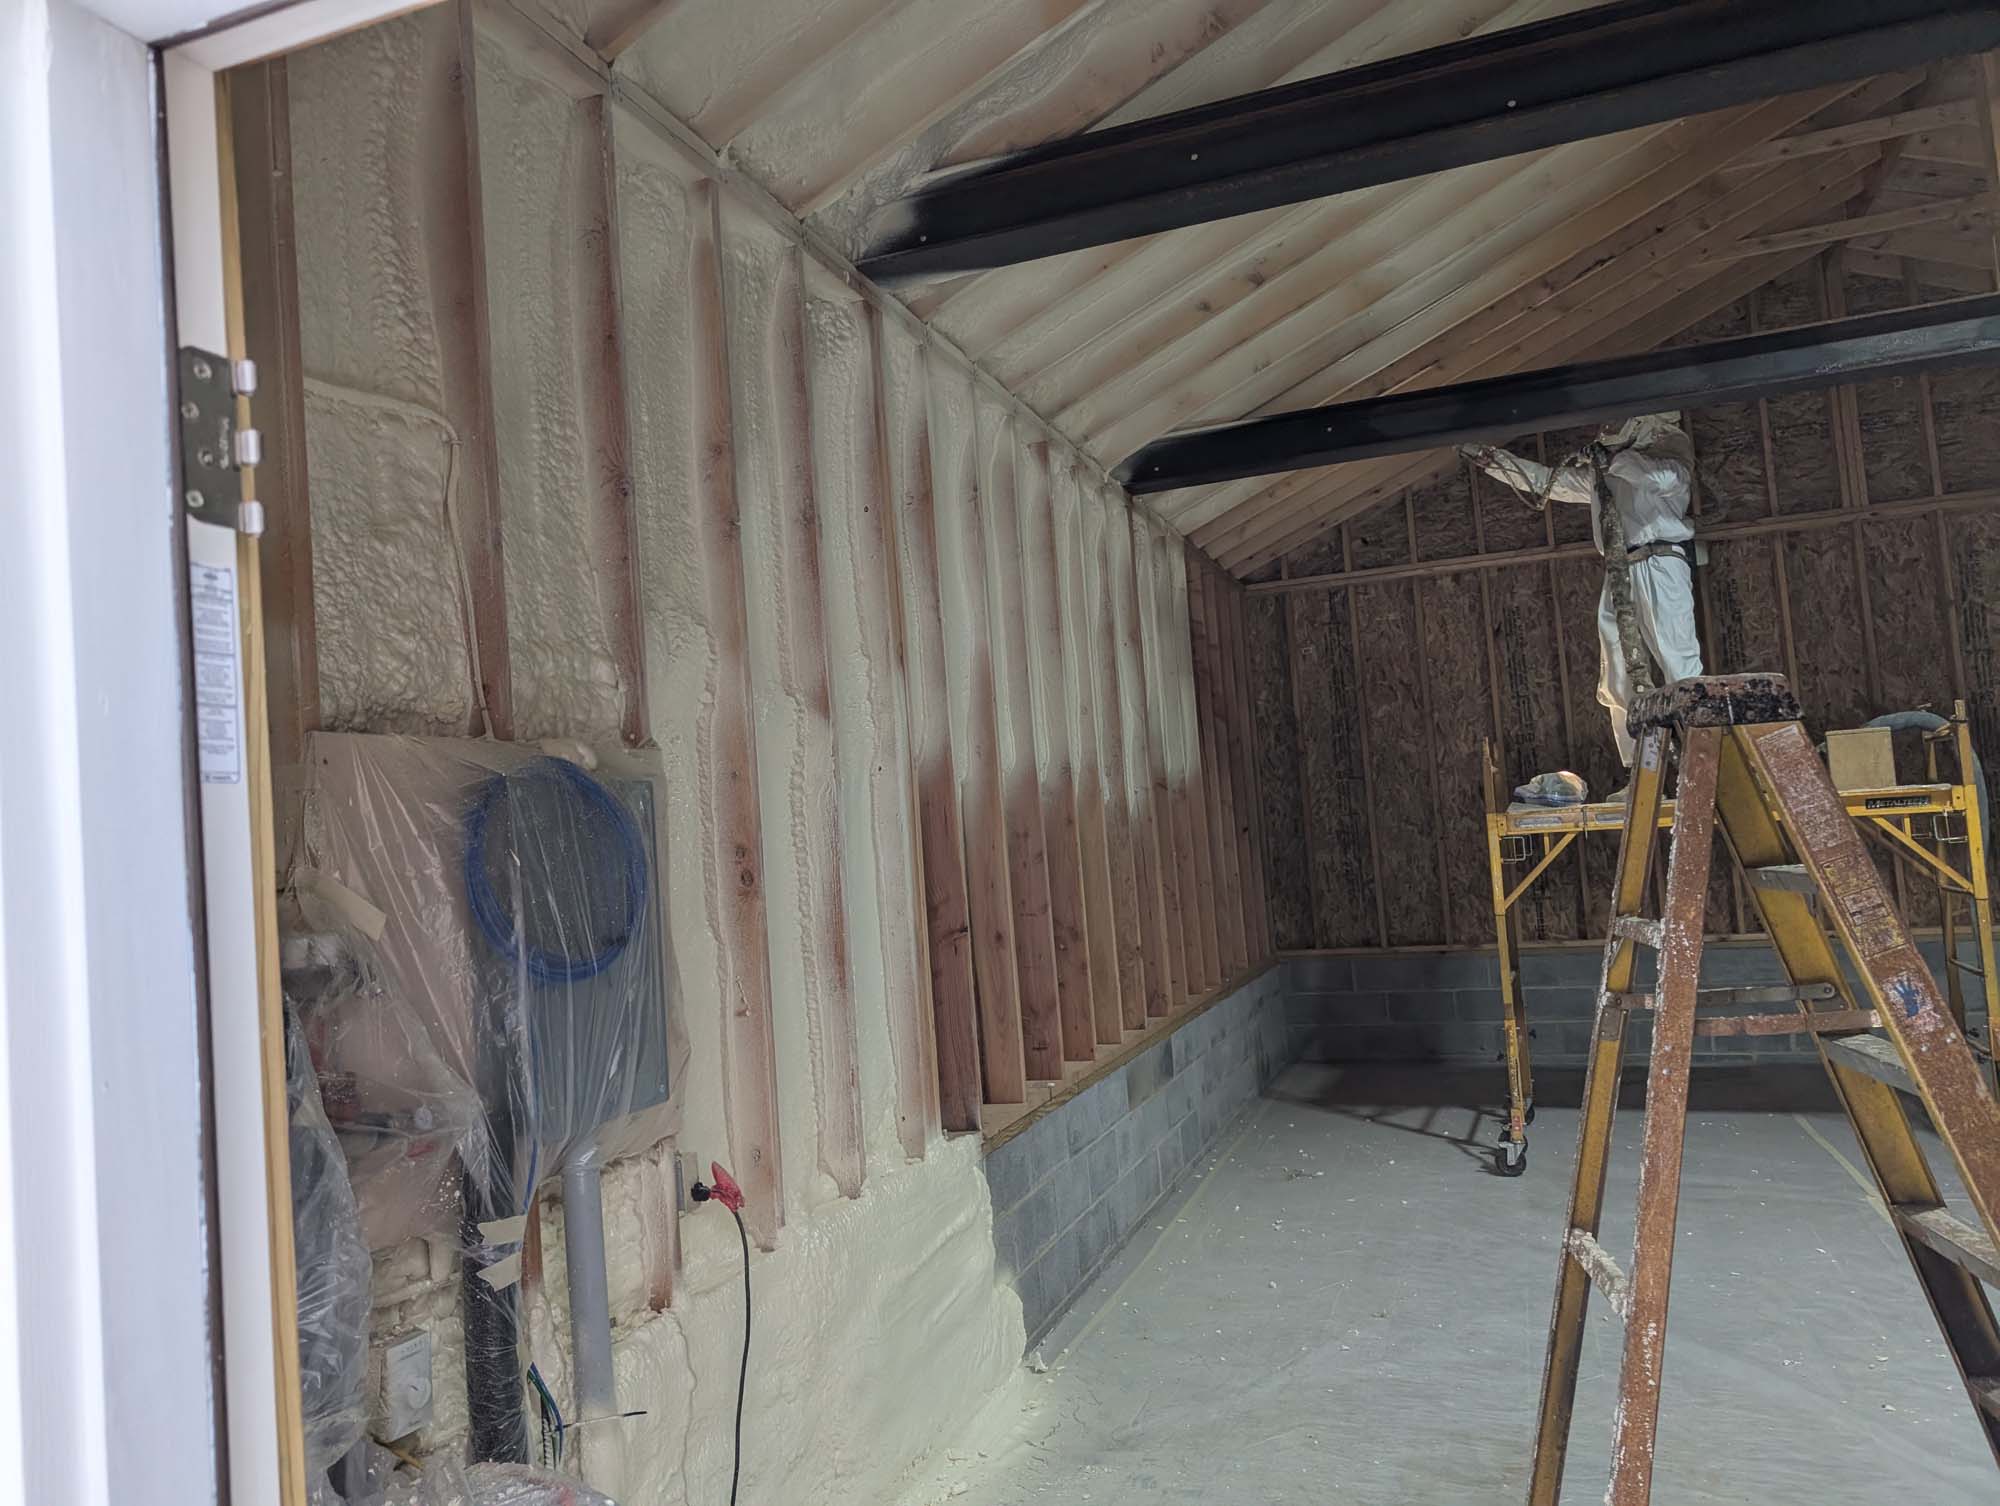
The bad news is the exterior PRODEX insulation is not preforming as well as I had hoped. The slab has come up to temp but the building is staying in the 50’s when it is freezing outside. It felt good inside but I realized that was because the humidity rose to 70% which was unacceptable since my primary intent was to store wood in here. I also discovered that my walls were condensatig severely at the corners and the wood was soaked. After talking to a few experts, I had to bite the bullet and get the inside sealed and better insulated. I bought a dehumidifier and ran it 100% of the time for two weeks, removing 2 gallons of water a day. I pointed fans into the corners to dry out the wood, then I had two gentlemen come in and spray closed cell foam insulation on the walls and ceiling. 2″ on the walls and 3″ on the ceiling.
Immediately after the insulation was installed, the temperature dropped to the single digits.
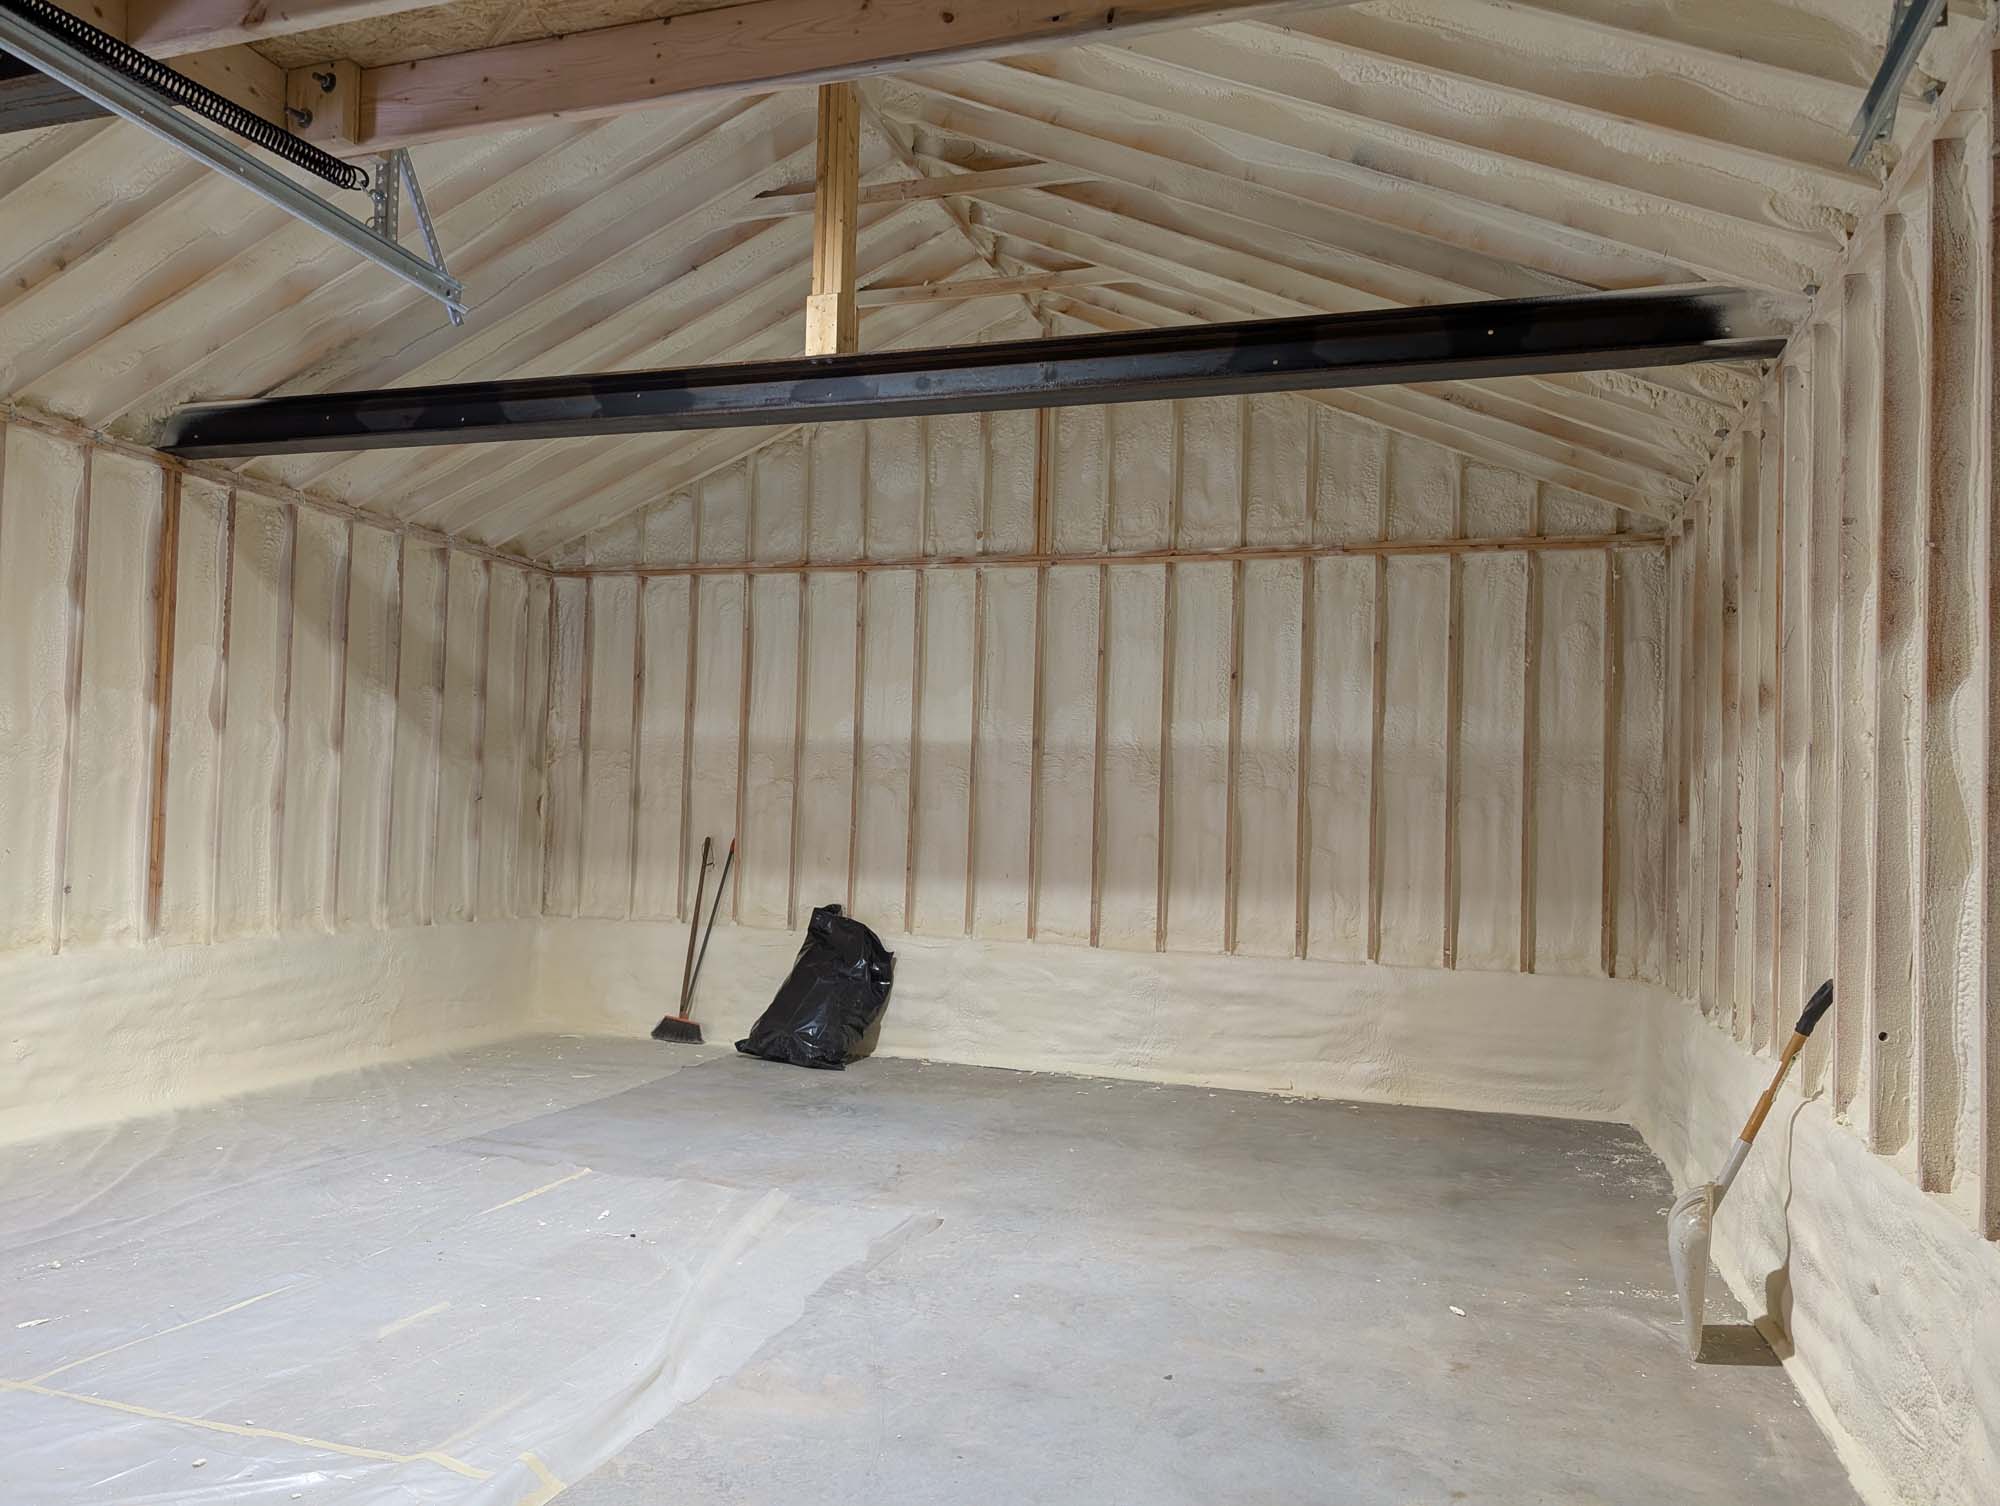
It has been insulated for 3 weeks now with the temperature outside ranging between 8°F & 25°F. I am happy to report that the temperature, within the building, is staying at a stable 65° at the lowest temperature setting (on the hot water heater) and the humidity is steady at 30-35%. I only emptied the dehumidifier once in 3 weeks.

Unfortunately, there is a foot of snow\ice outside so I cannot start outfitting the new space. I look forward to stocking a lot of wood in here and freeing up space in my main shop.

Great job and it turned out well. The Prodex may be R22 in an atmospheric vacuum 🙂 but probably something like R2 in your application. Its primary benefit is repelling radiant heat. What are your plans for heating?
I need to post an update on that. I have a 40 gallon hot water heater and 1200 feet of PEX in the floor. As expected when I fired it up, started getting condensation inside. I have since had close cell spray foam added. 2″ on the walls and 3″ on the ceiling. At the lowest setting, the building stays at 62 – 65 degrees Fahrenheit even with it 8-10 degrees outside. I was expecting more from the Prodex but it’ll probably be more useful in the summer…