
Mid-century Modern coffee table
I have a client who asked me if I could build her a coffee table. She really liked the style of this mid-century modern coffee table that had three separate round tops with some interesting curved supports below. The one she found online was close to what she wanted but it was extremely overpriced as well as only 13″ tall.
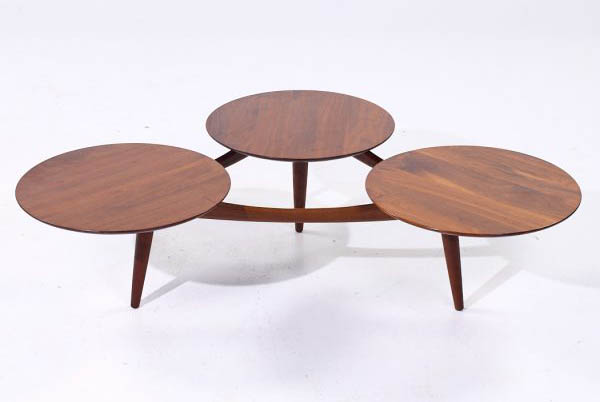
I created a design based off of the 53″ wide x 37″ deep table above but I made mine 19.5″ tall so that it would be a comfortable height for a couch. I also moved the legs out further to the center of the round tops to increase stability. This is the design that I came up with: MM COFFEE TABLE.pdf
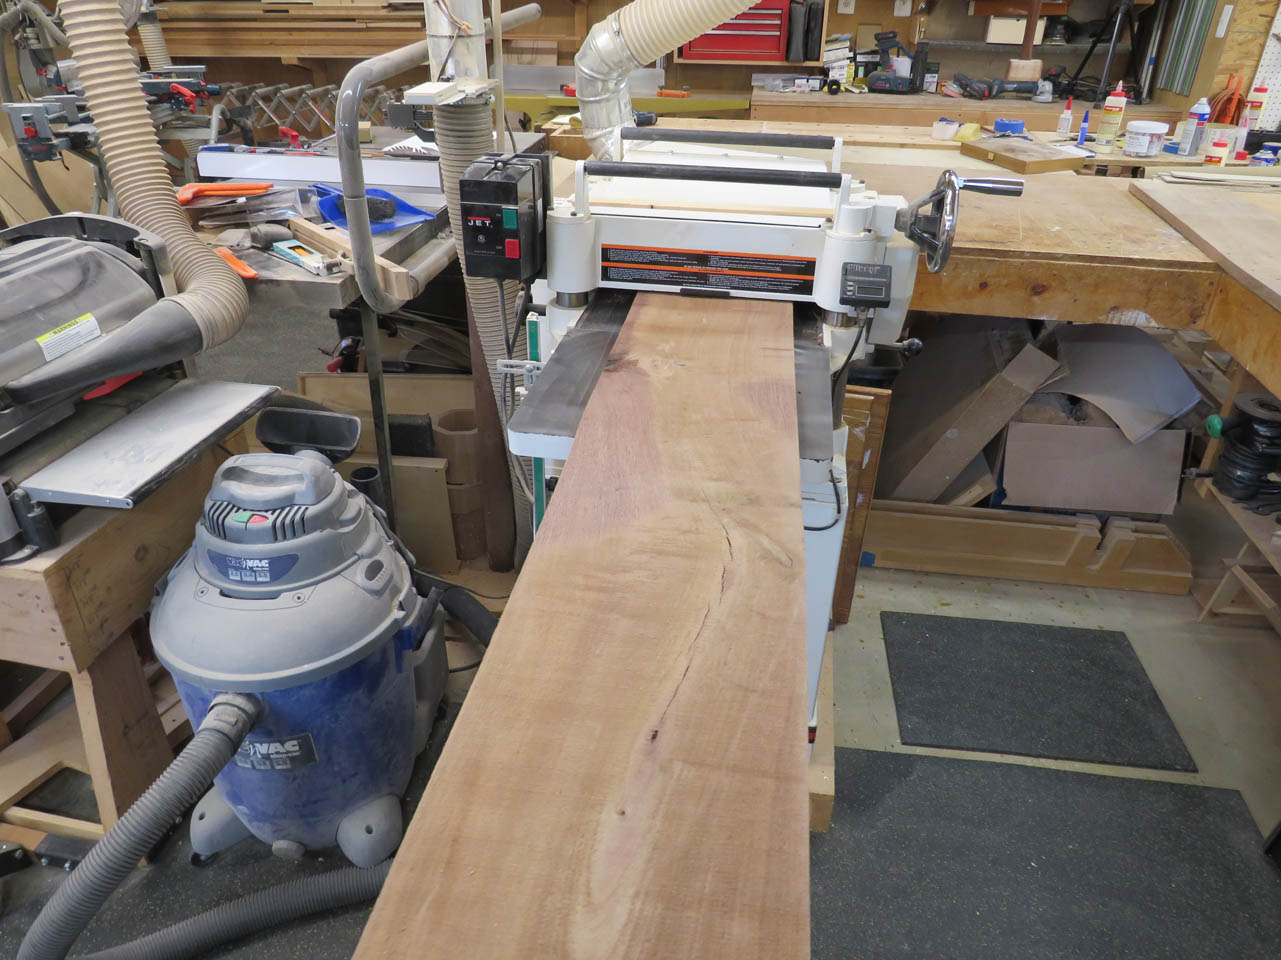
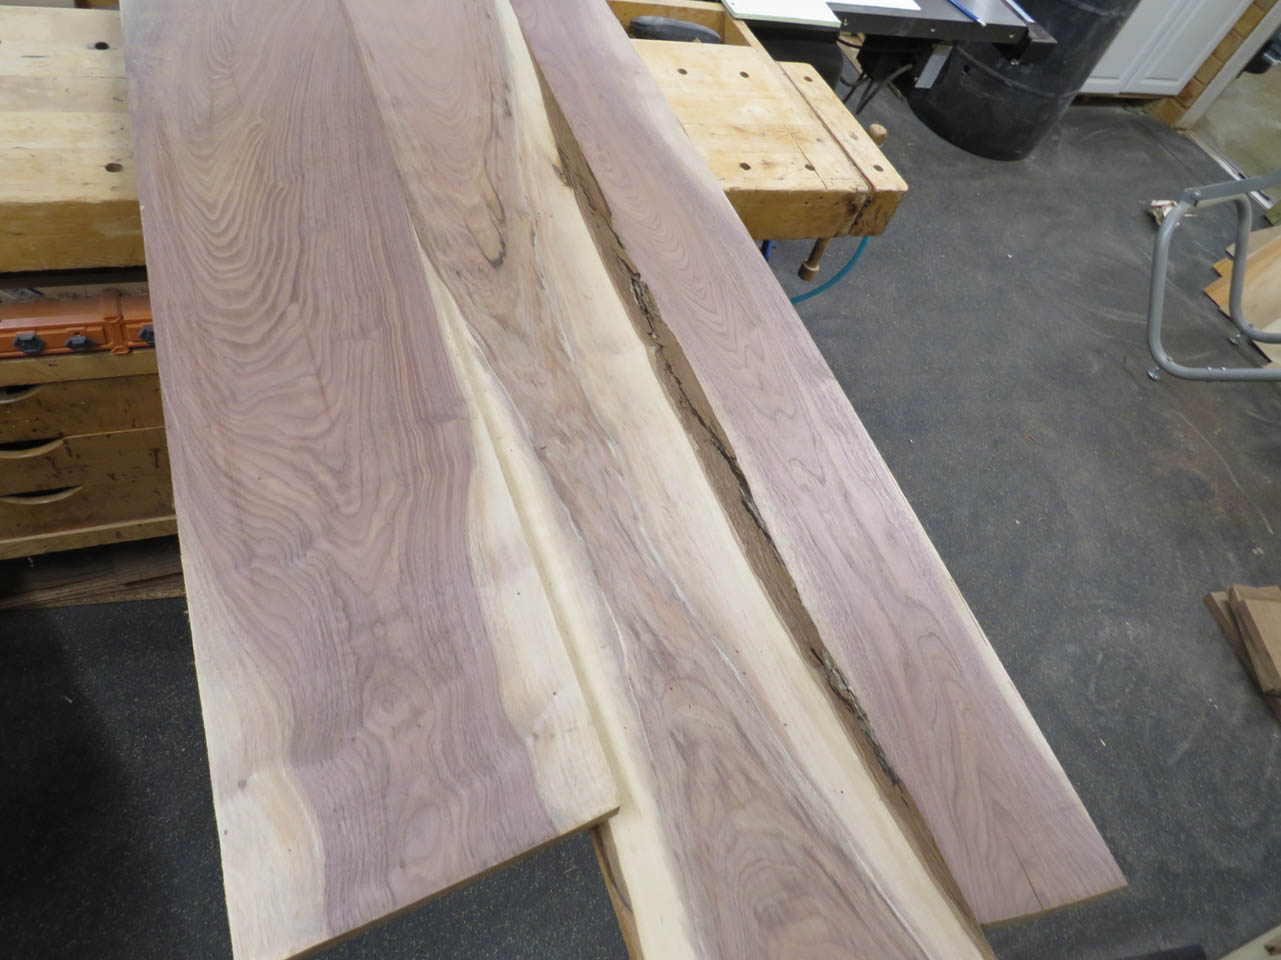
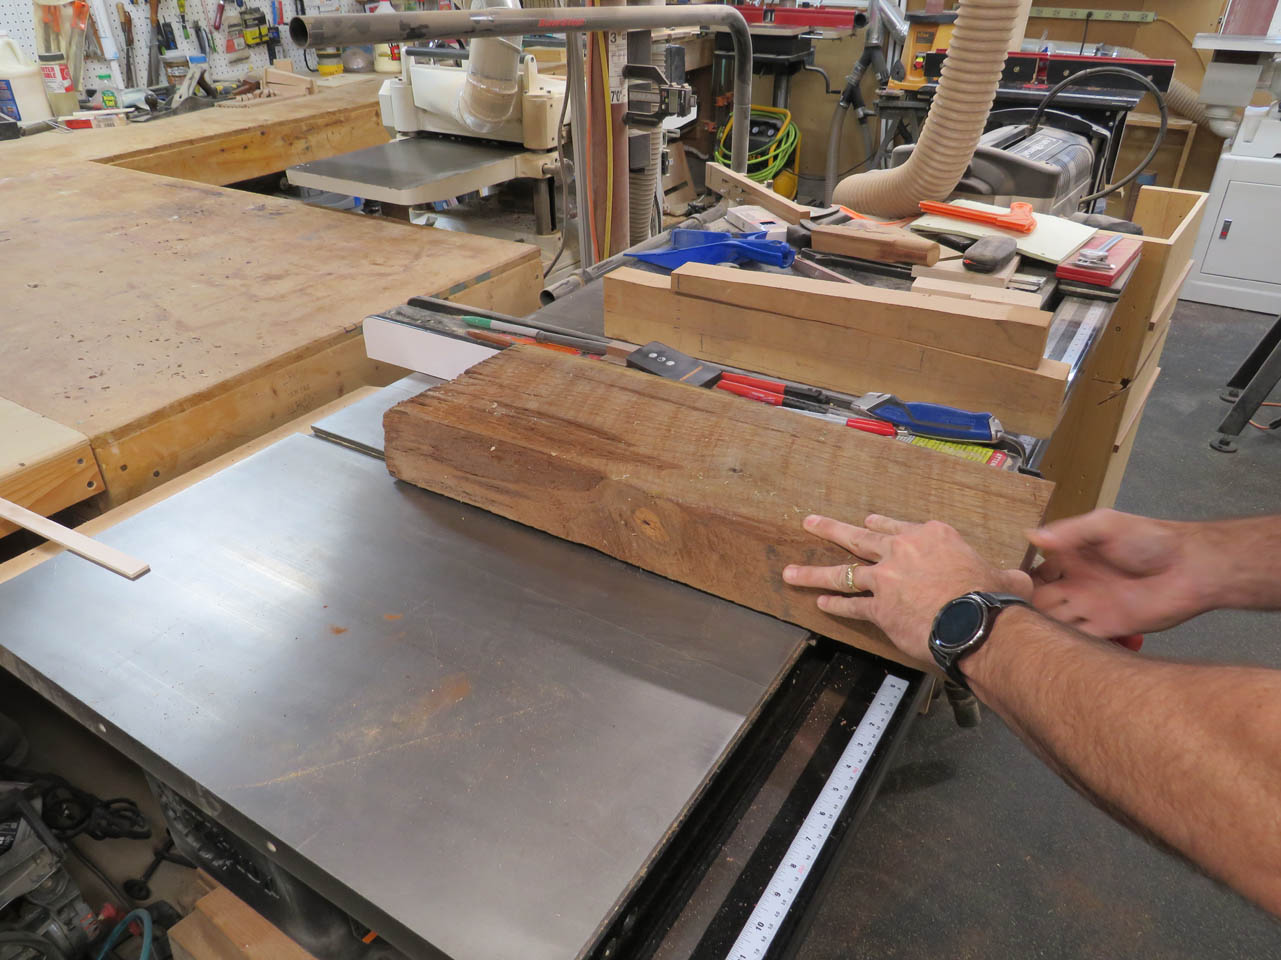
I started by planing the walnut boards that I had in my shop.
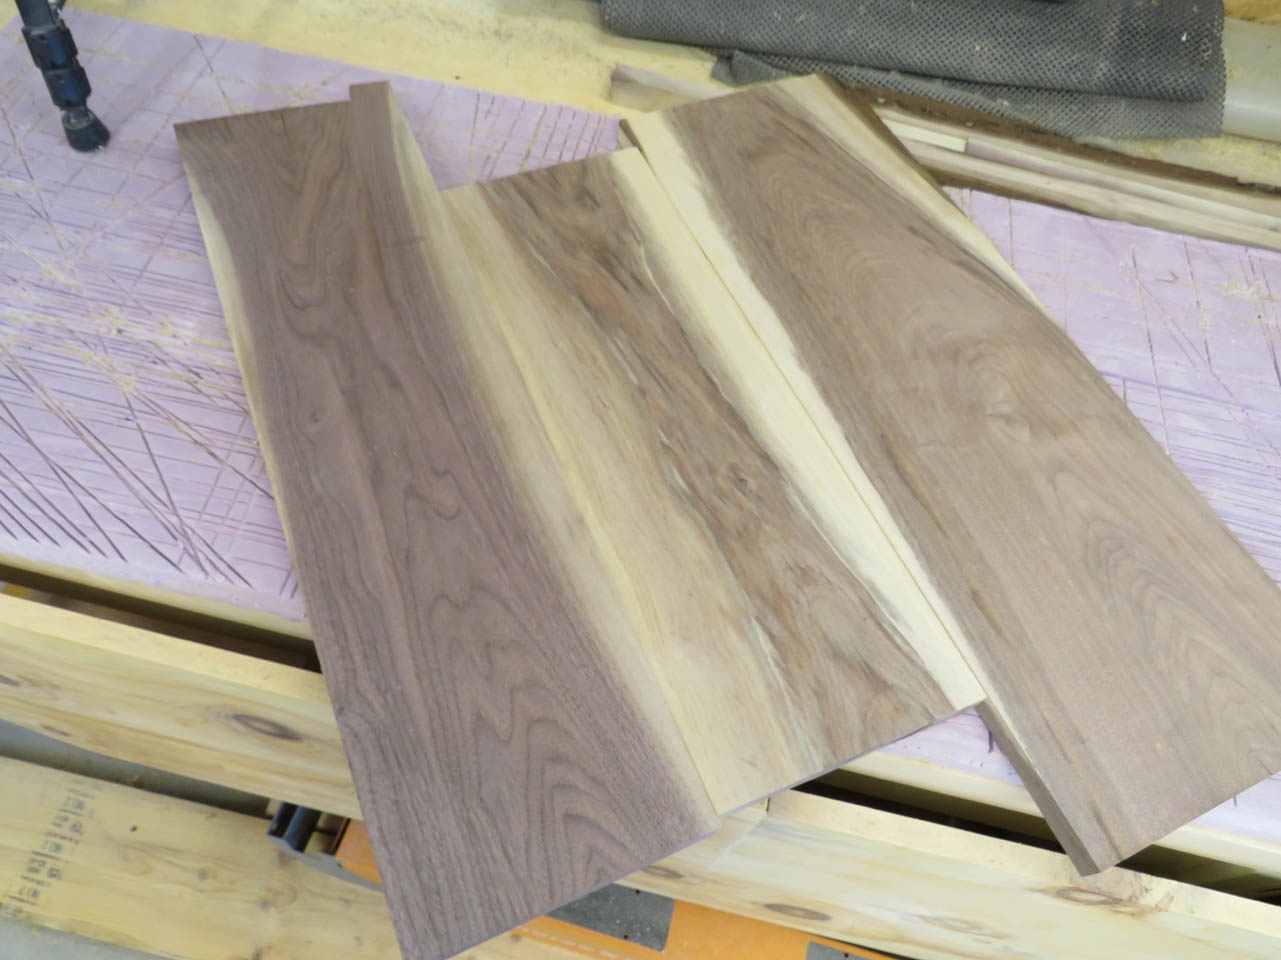
Half of my boards were solid, brown heart wood. The other half had some sapwood.
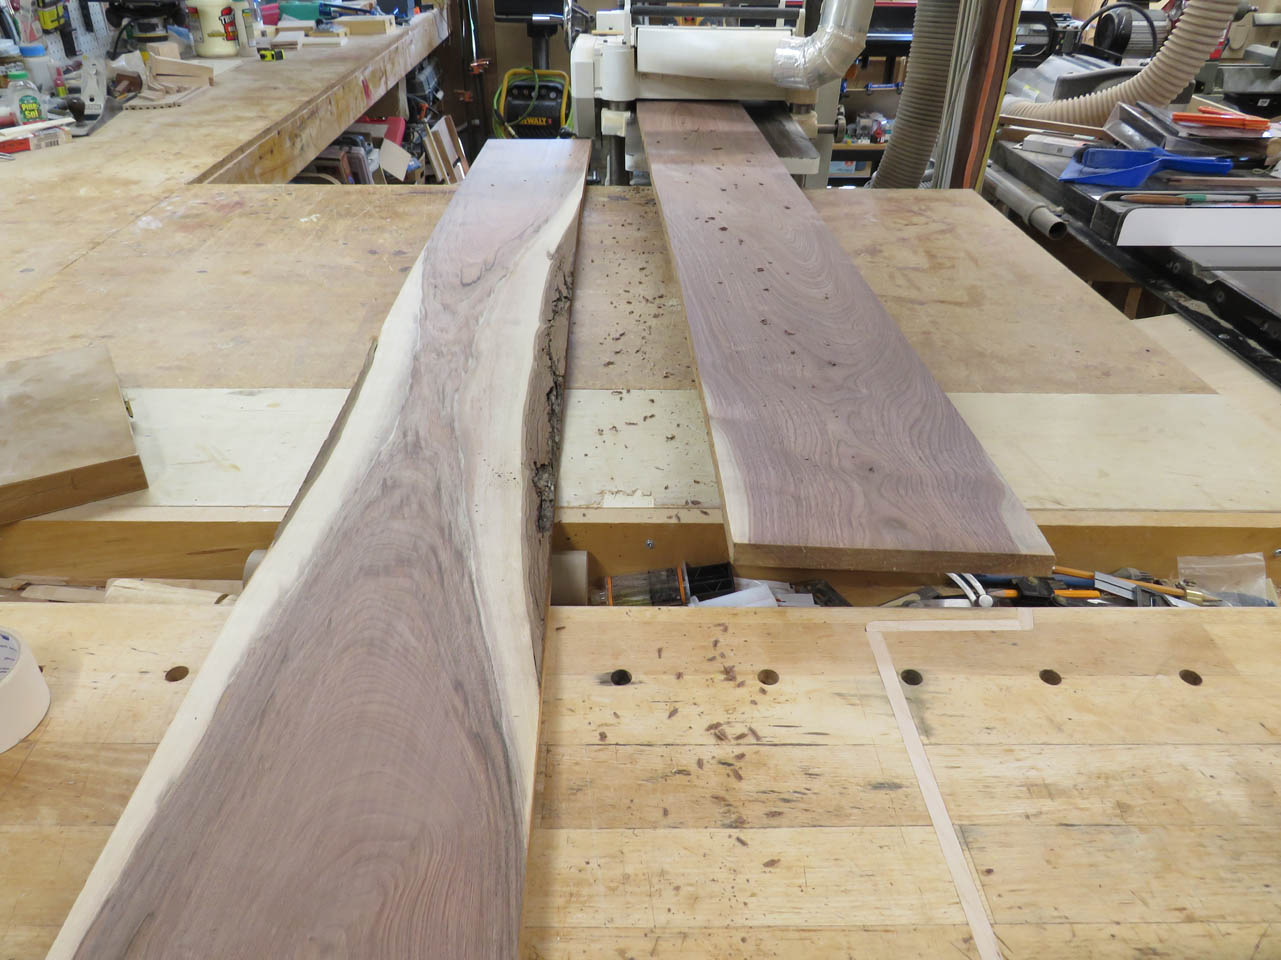
I sent some pictures to my client and she preferred the sapwood.

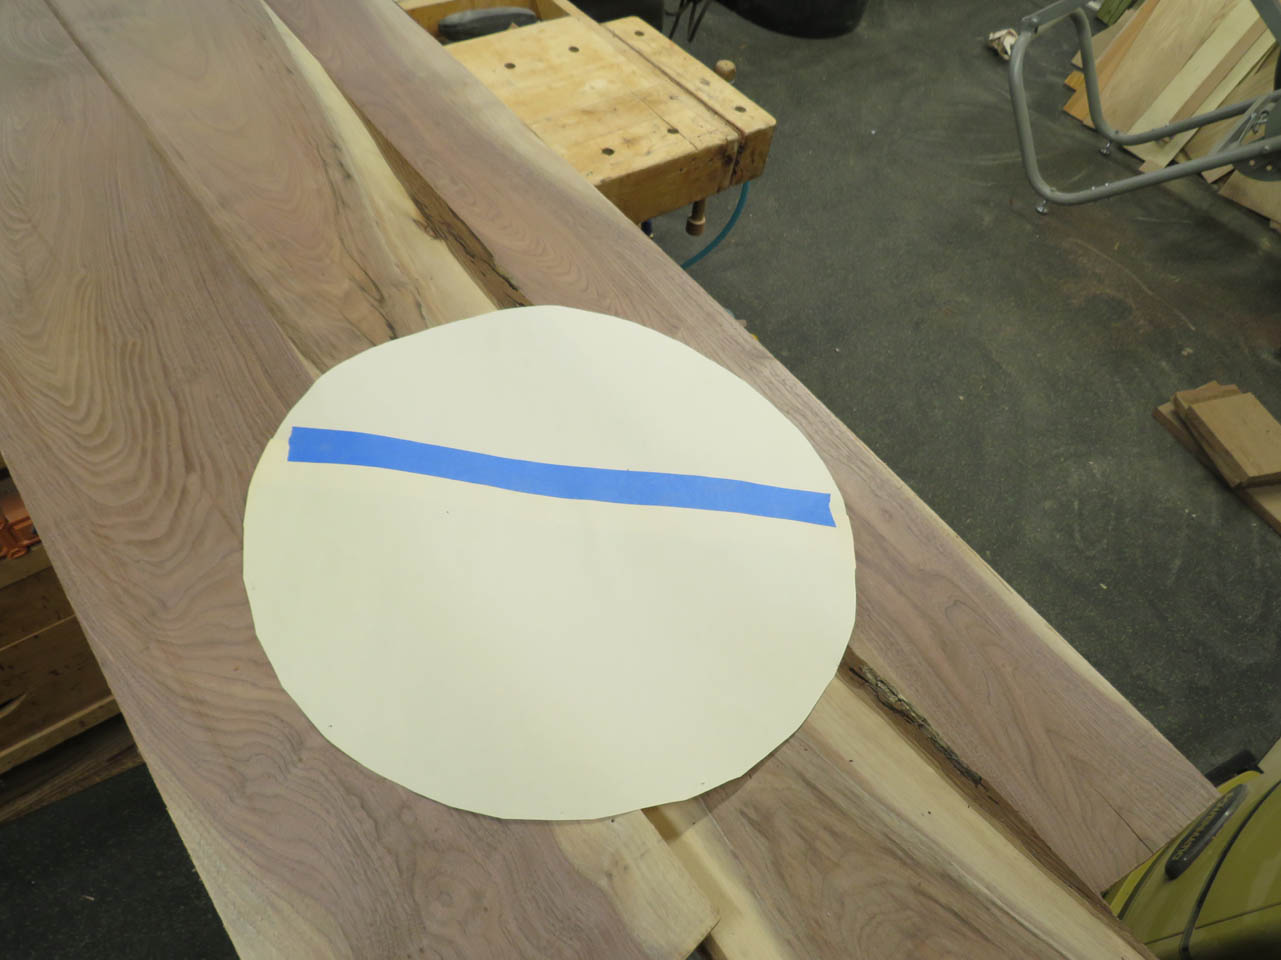
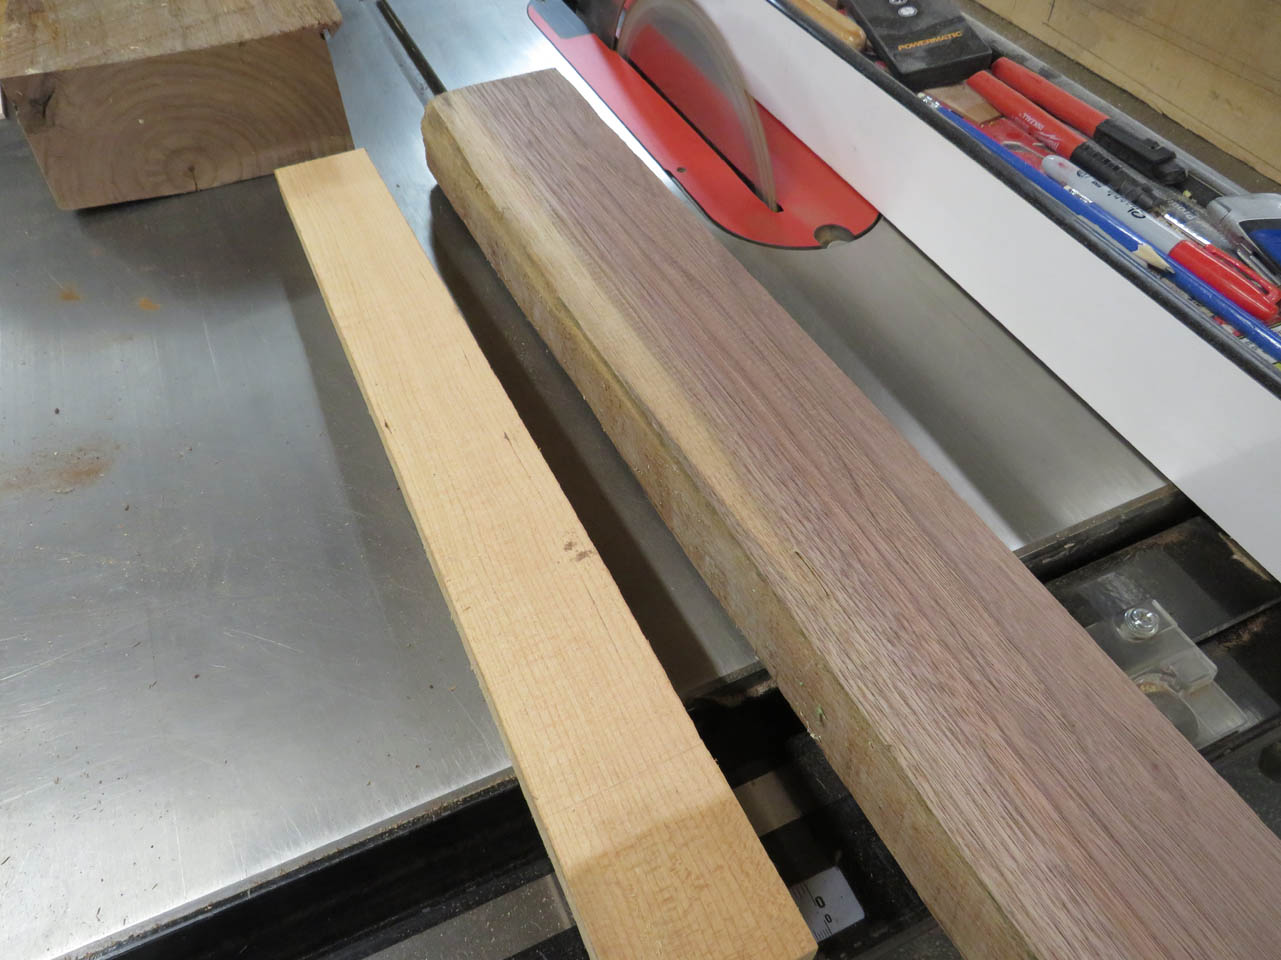
I moved the boards around to attempt to match the grain. I cut out a 20″ diameter circle to help me rough-cut the boards to a shorter length.
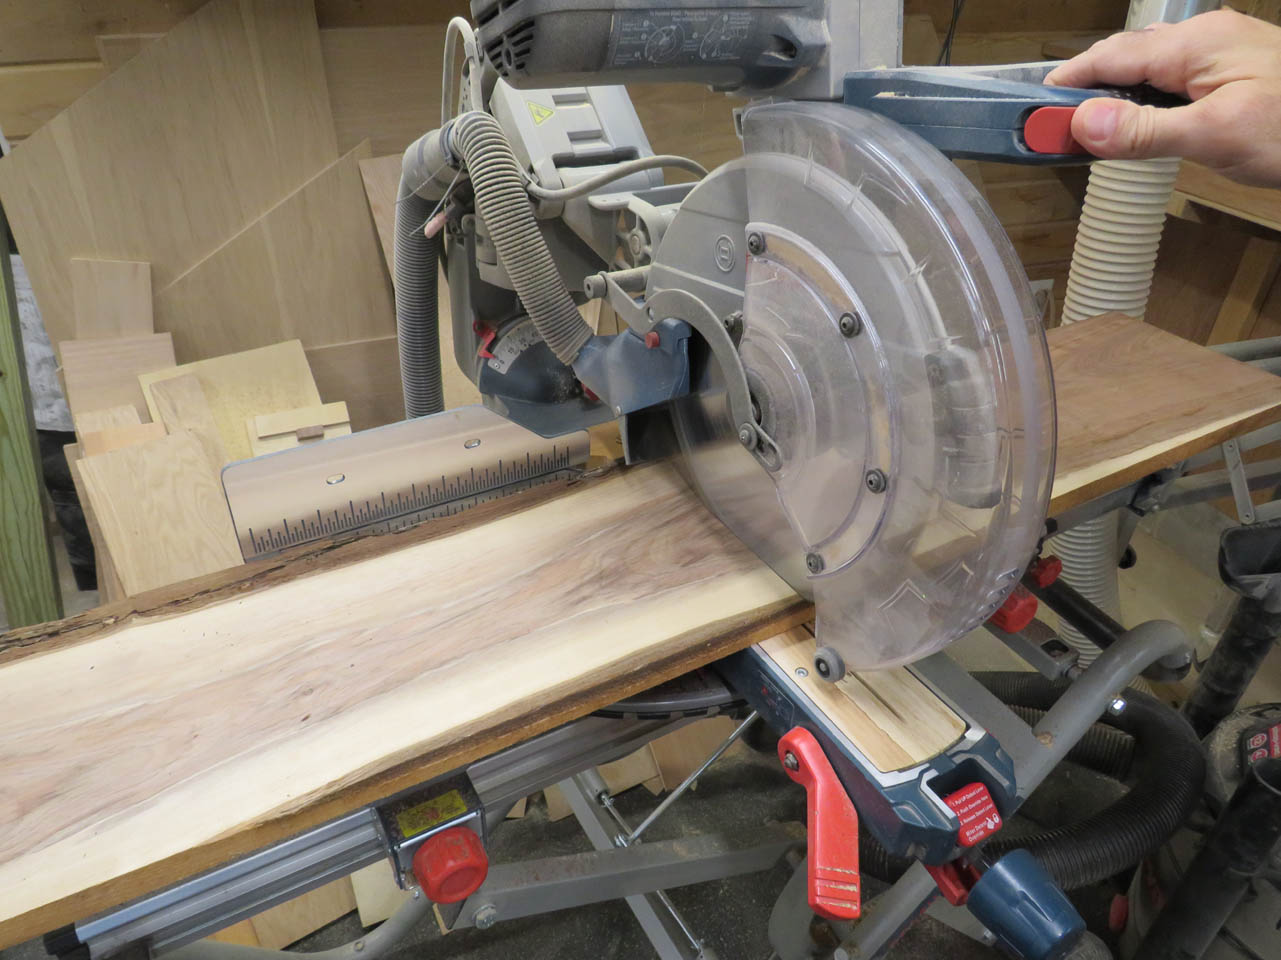
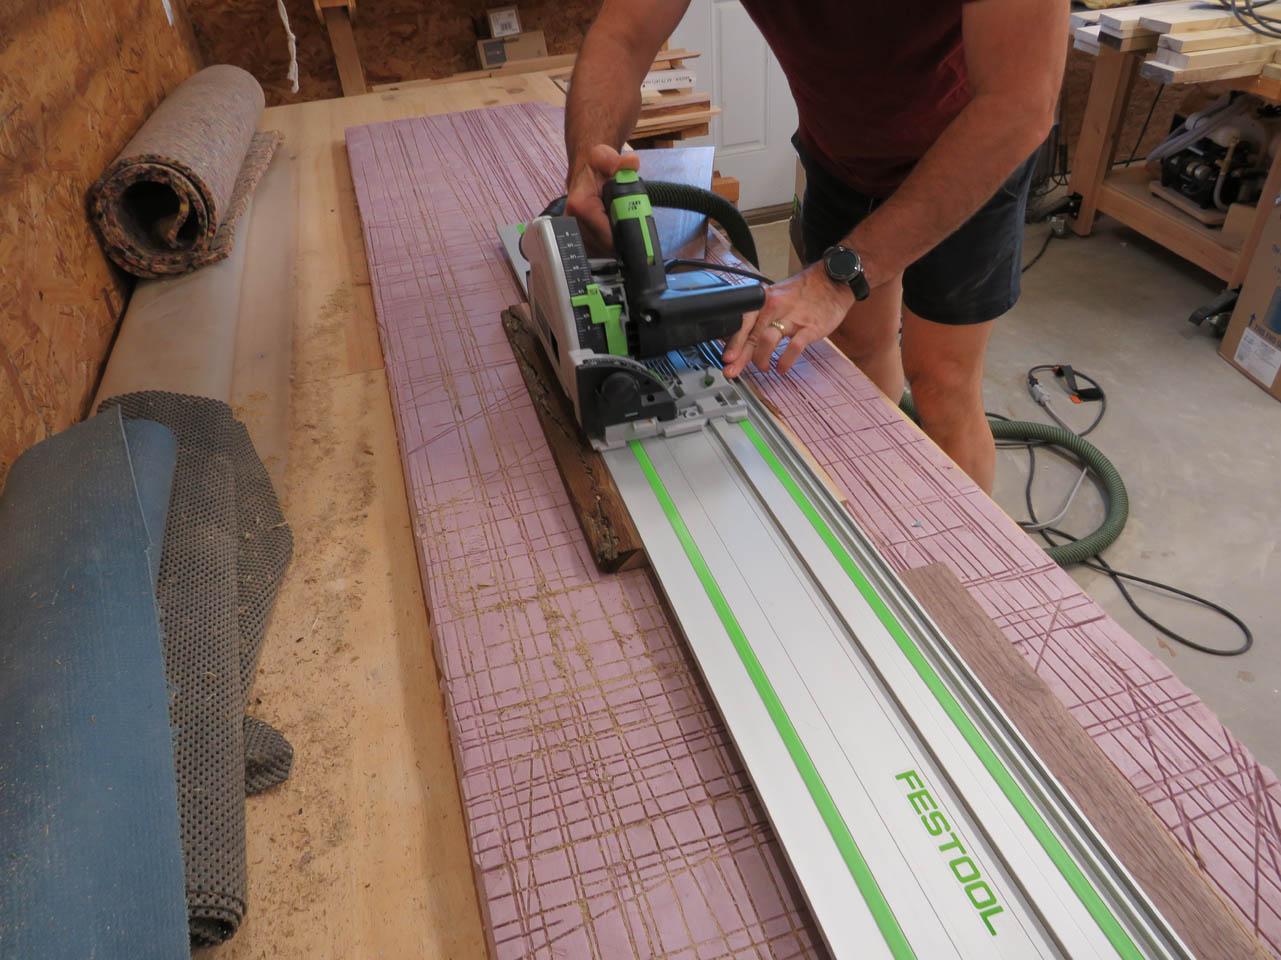
I used the miter saw to shorten the boards and my track saw to cut off the bark that edged the sapwood.
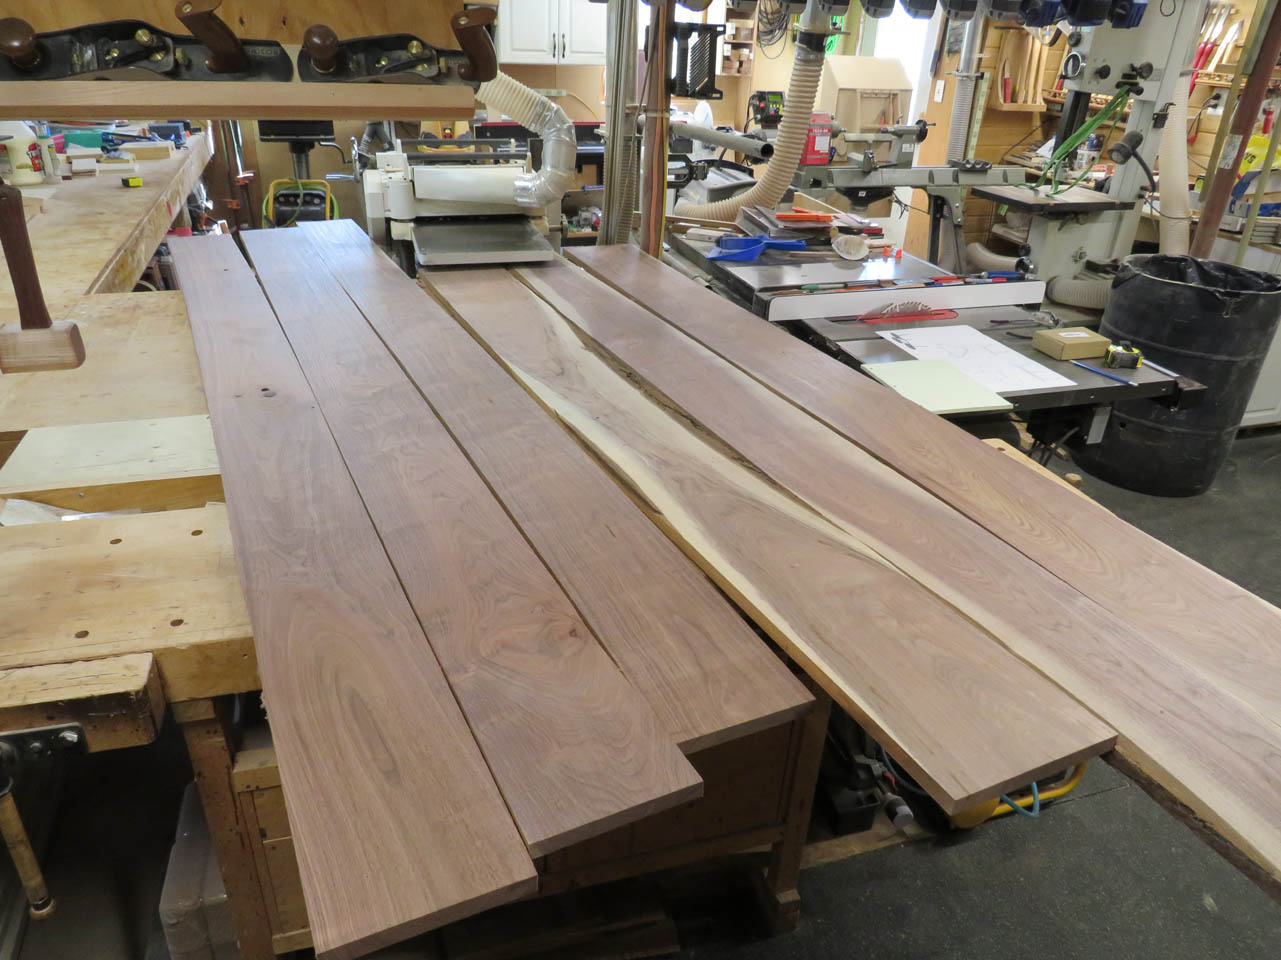
Now I can slide the boards around to get exactly the look I wanted.
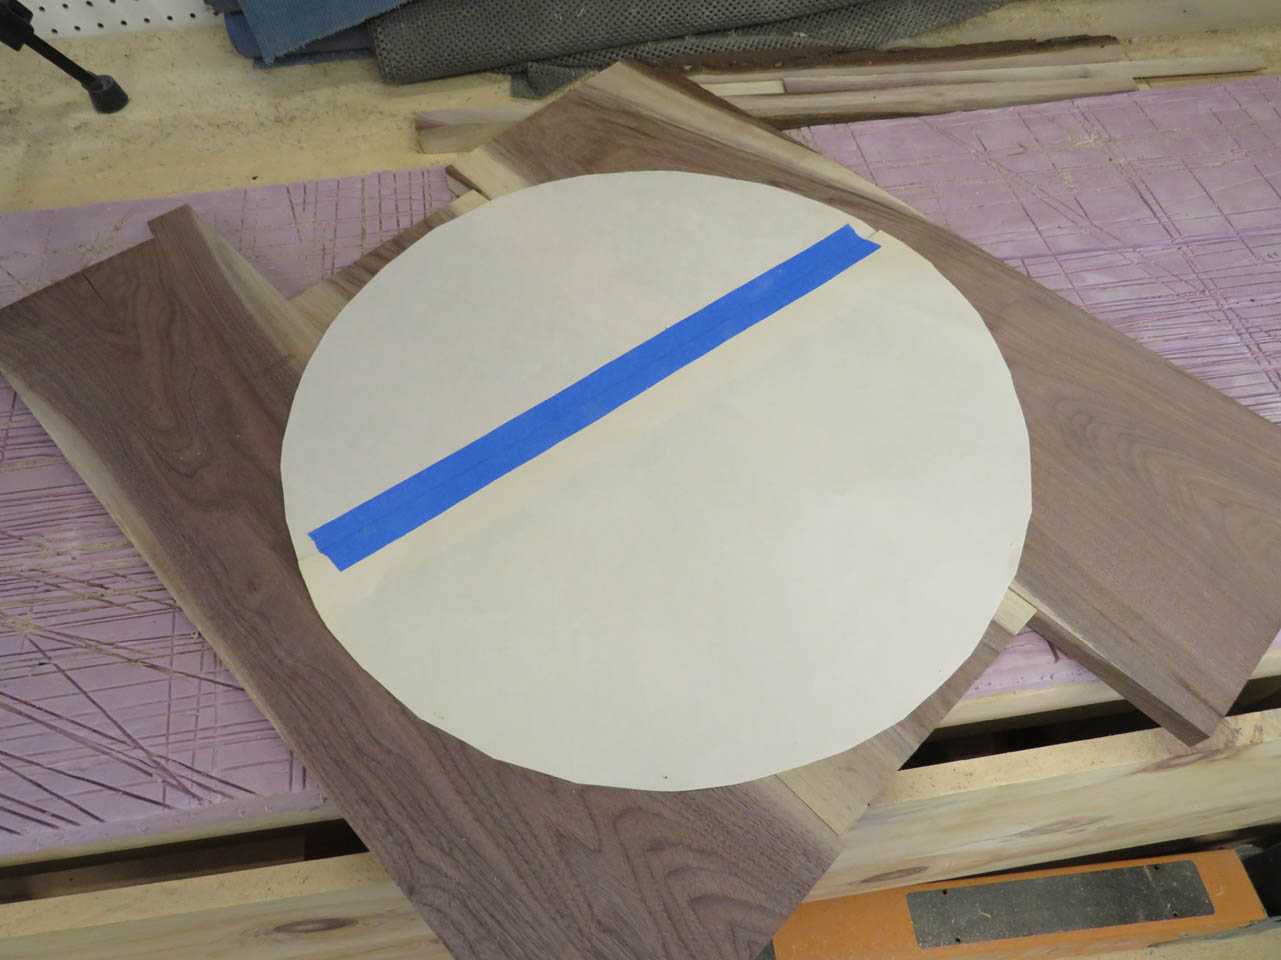
If I can sort of book-match the sapwood together, the transition looks more natural.
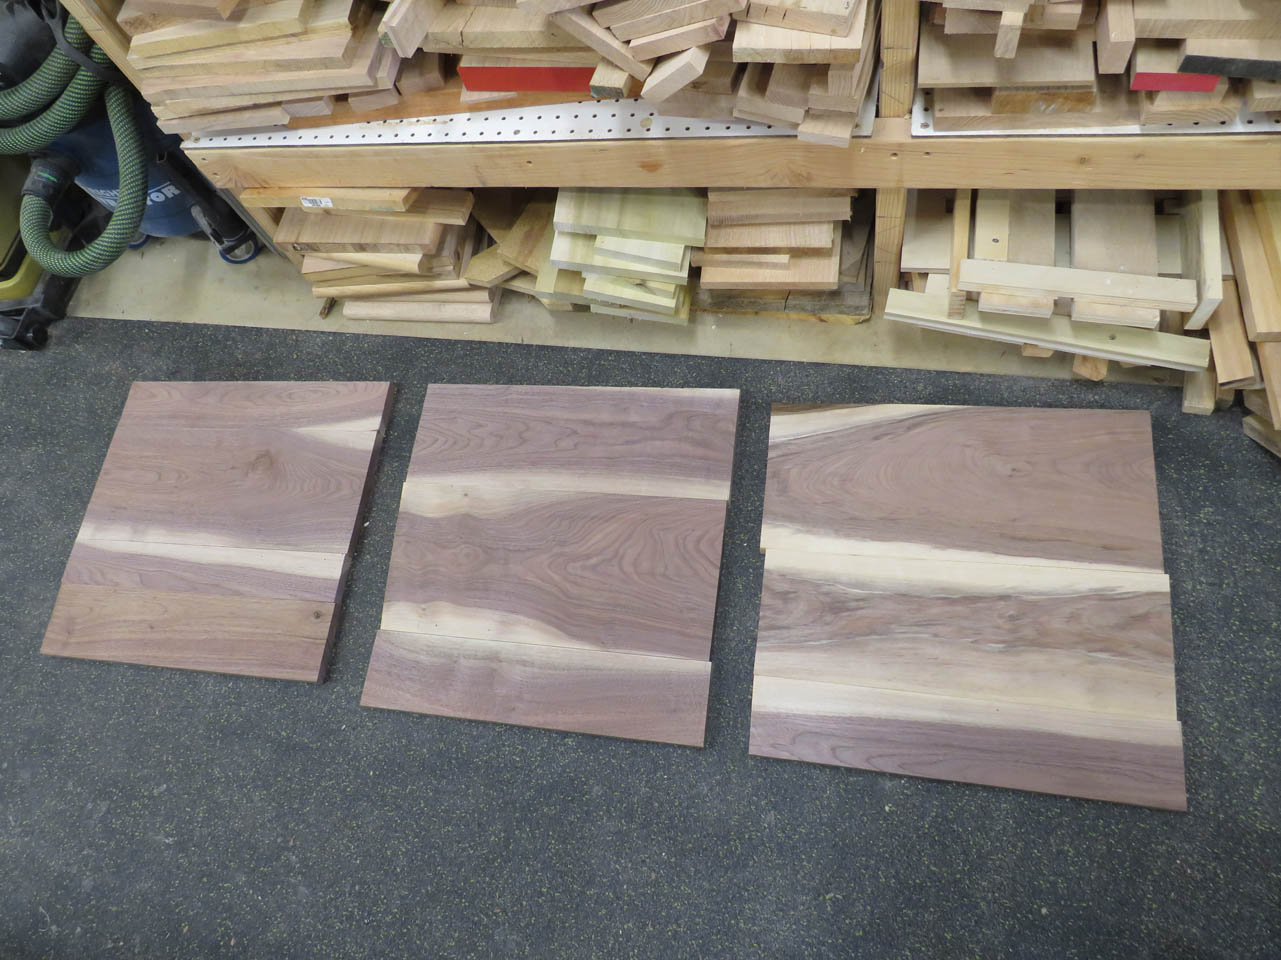
Once I laid out all three panels, I ran the edges of the boards across my jointer to give me a perfectly straight edge for joining.
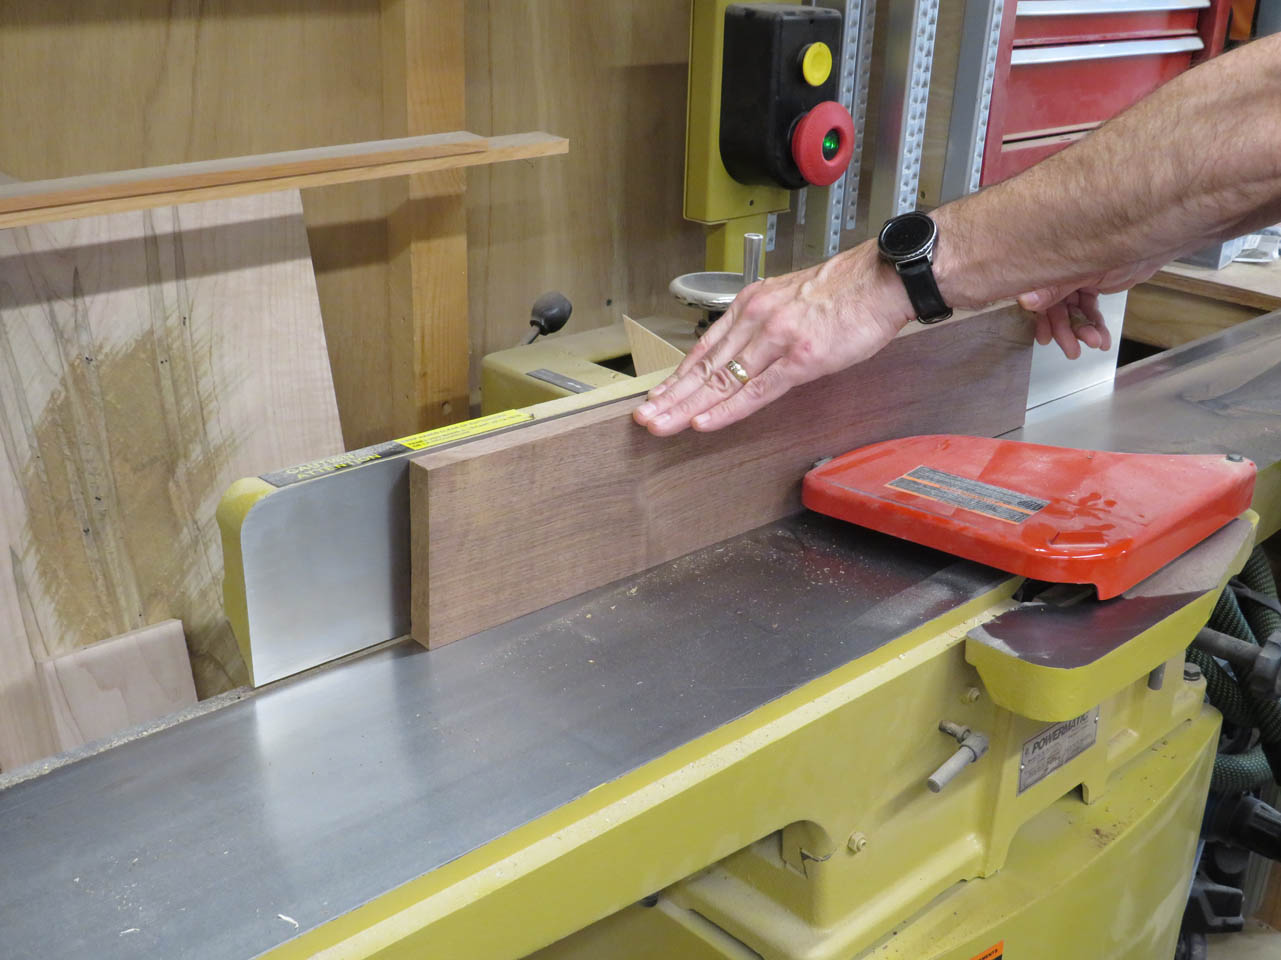
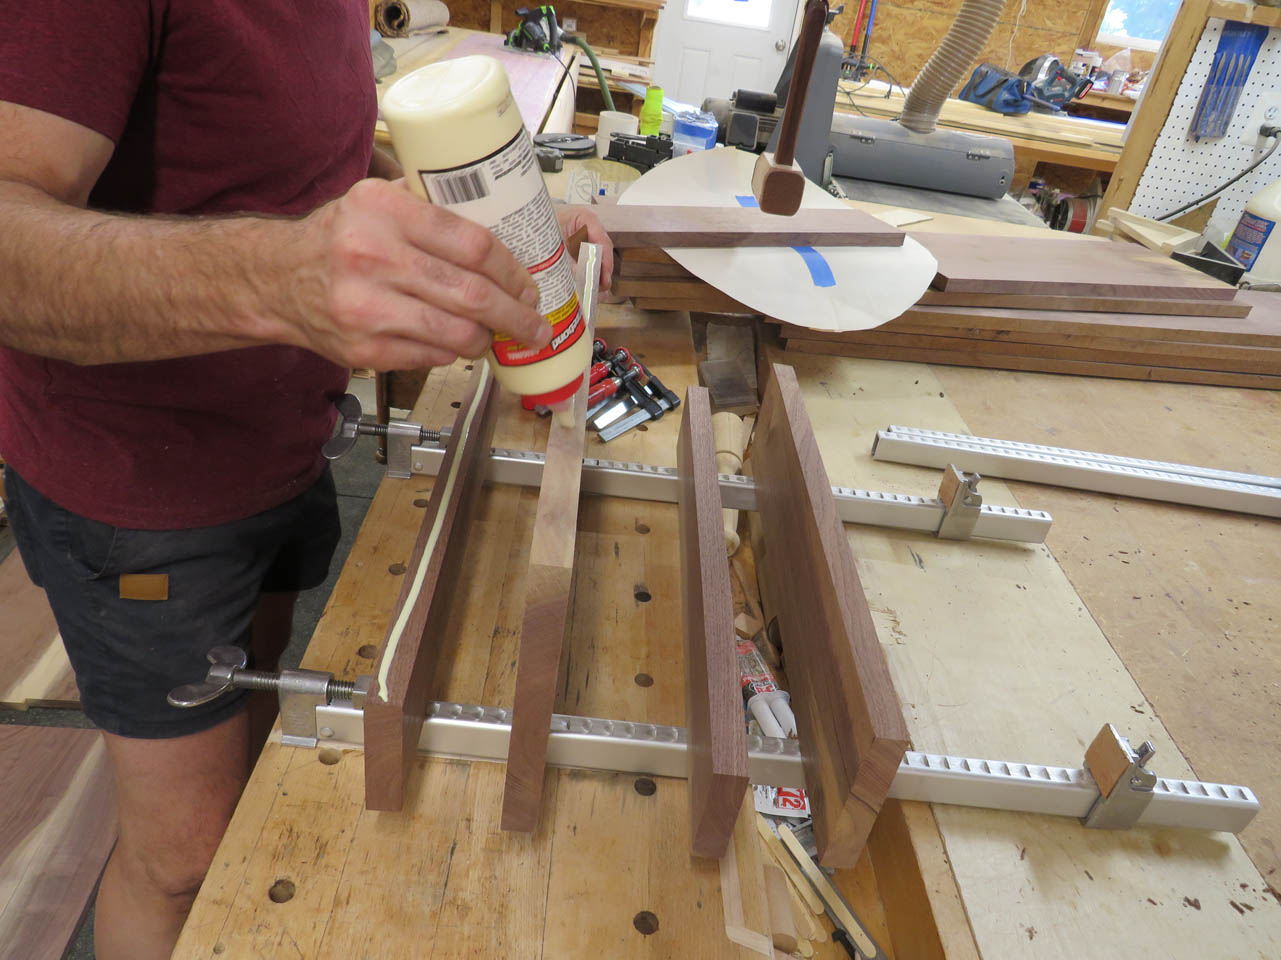
Then I applied wood glue to each adjoining edge and clamped them together.
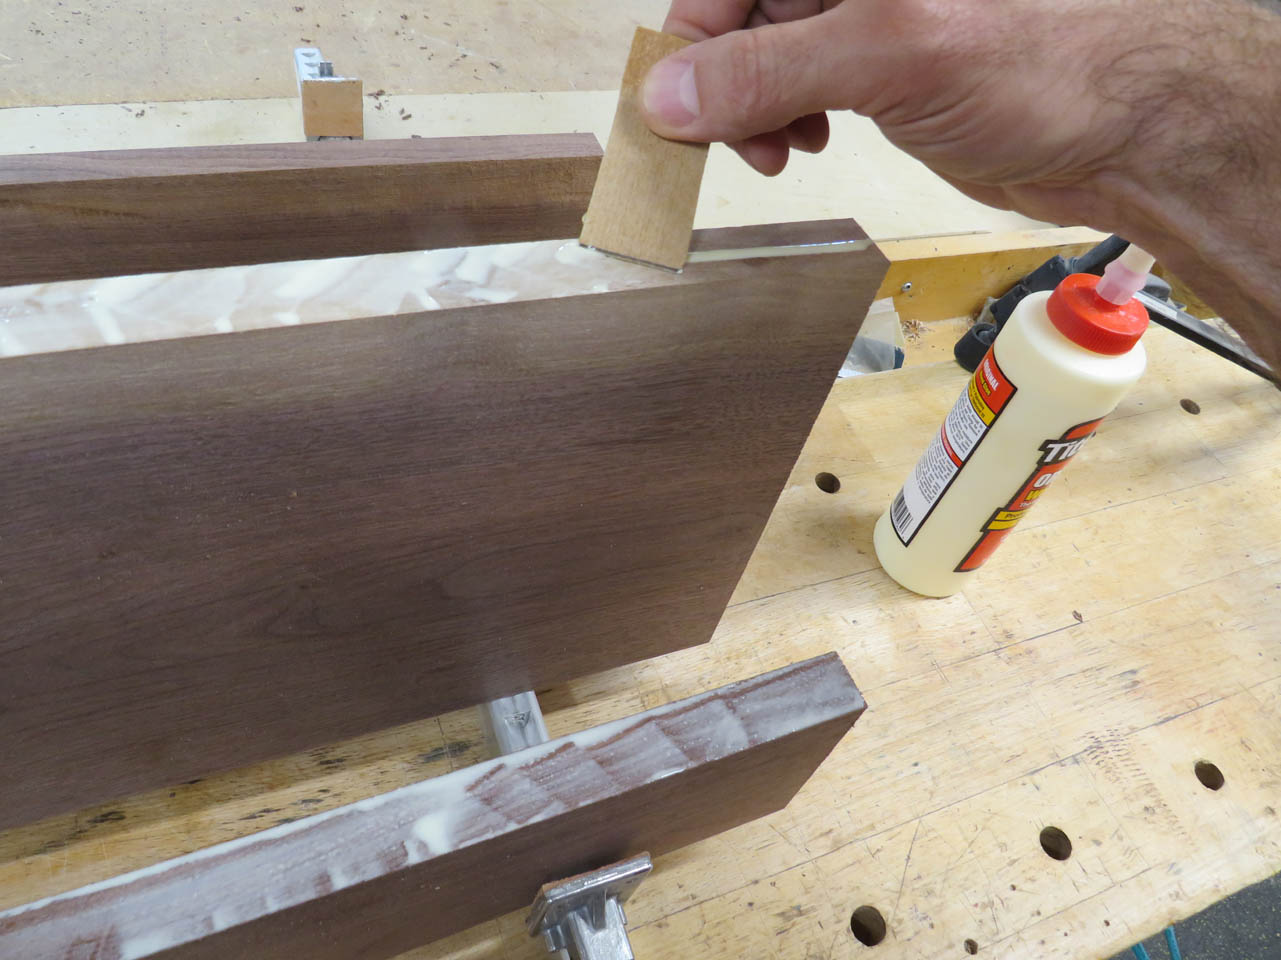
I use clamps on the ends to hold the faces flush at each joint to encourage the joints to be as flat as possible since they are now too wide to fit through my planer.

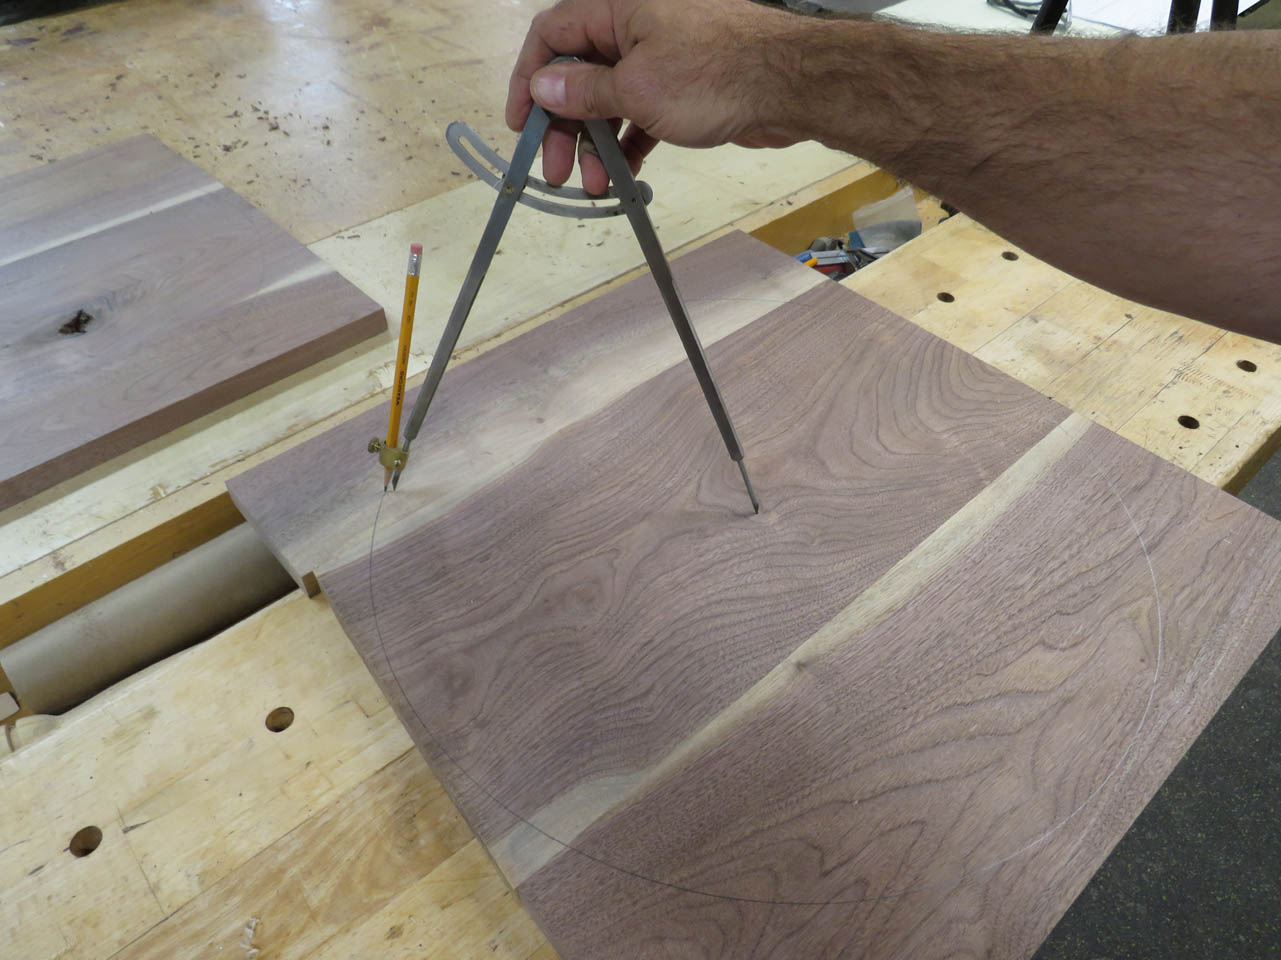
After the glue dried, I pulled the clamps and laid out the 20″ diameter circle with a large compass.
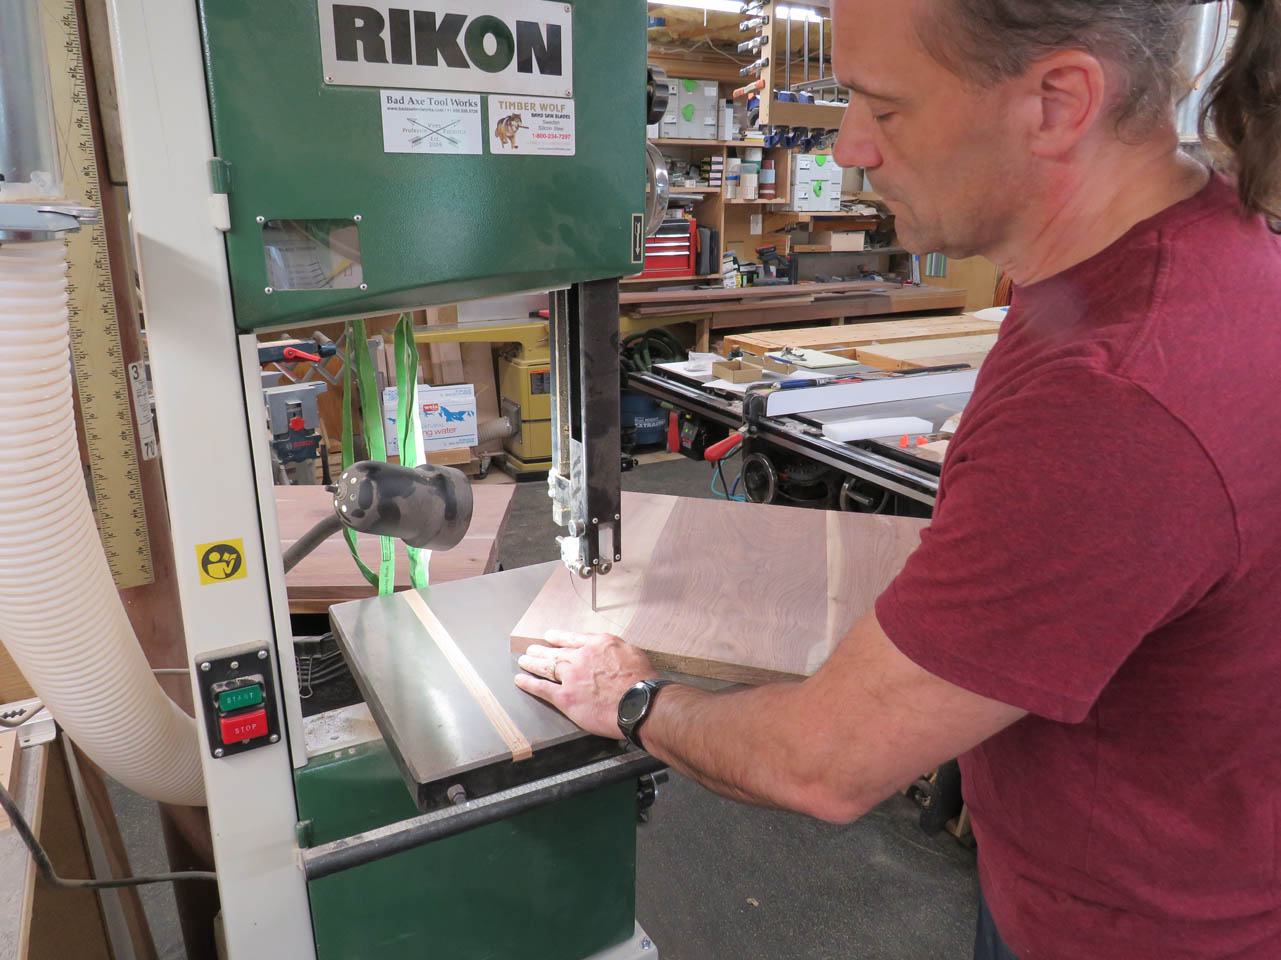
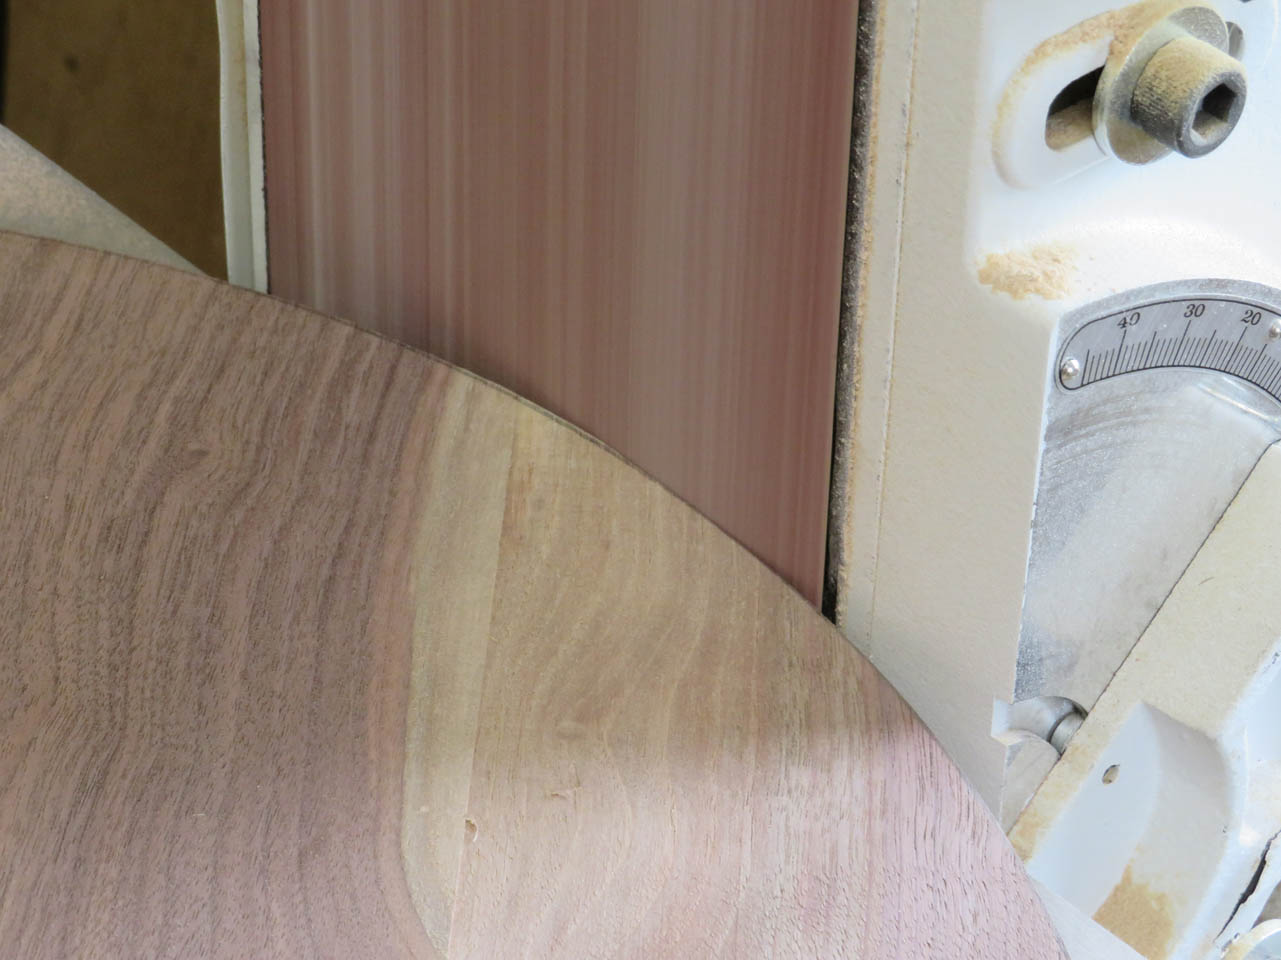
Then I cut out the circle on my bandsaw. Carefully staying just outside the line.
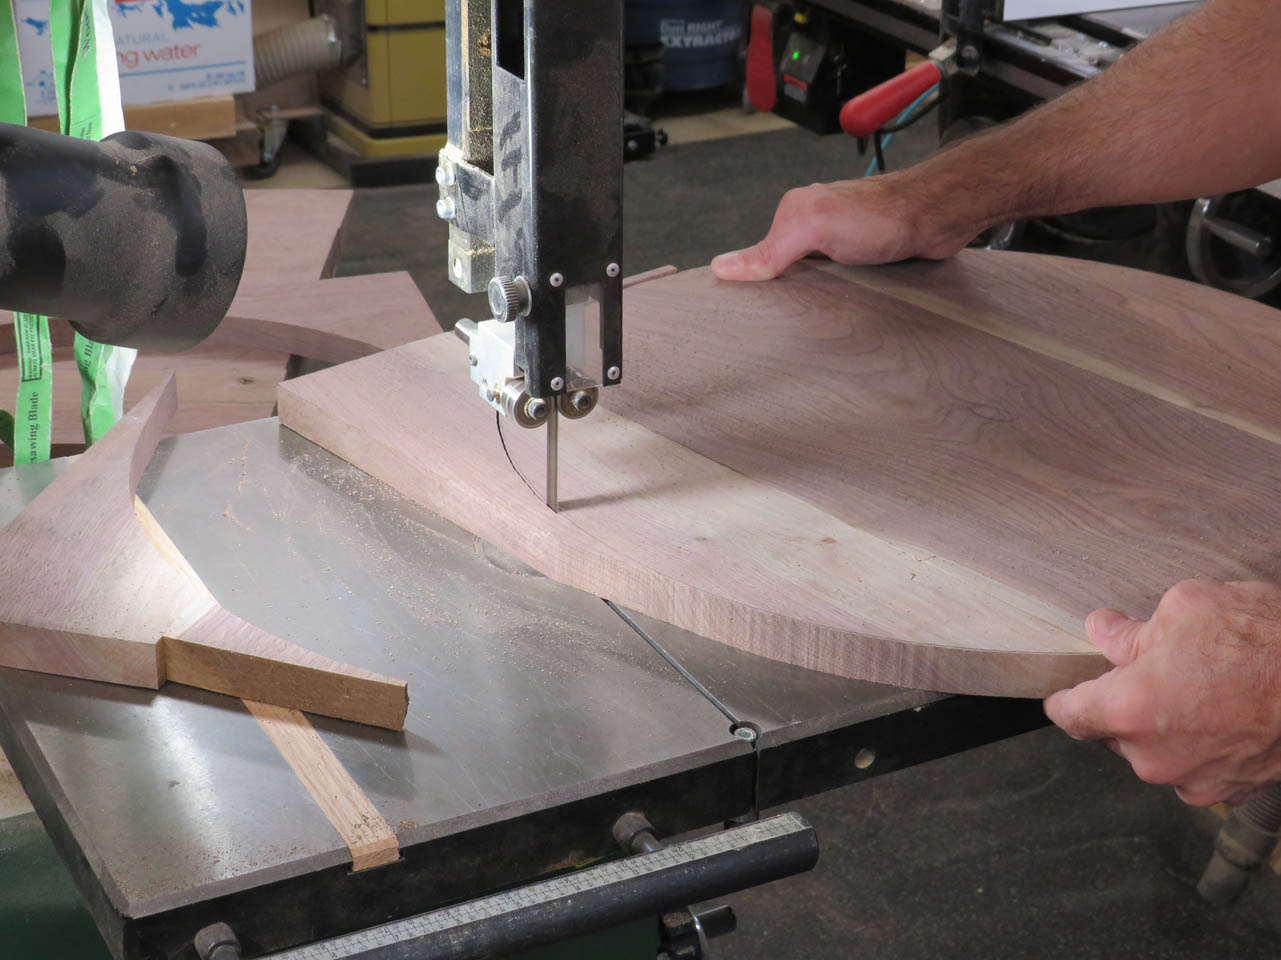

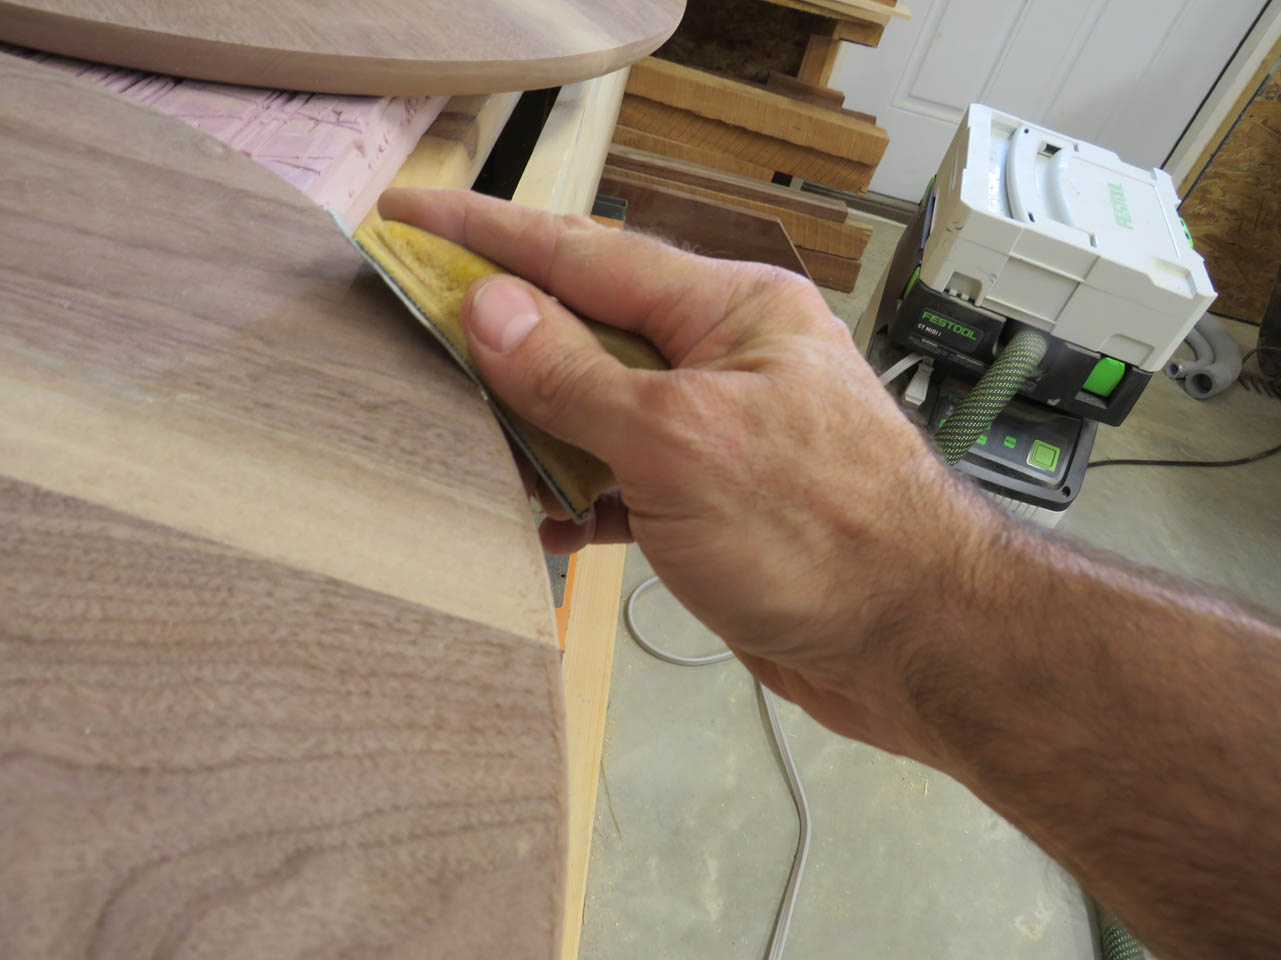
I can then sand down to the line on my 6″ wide belt sander.
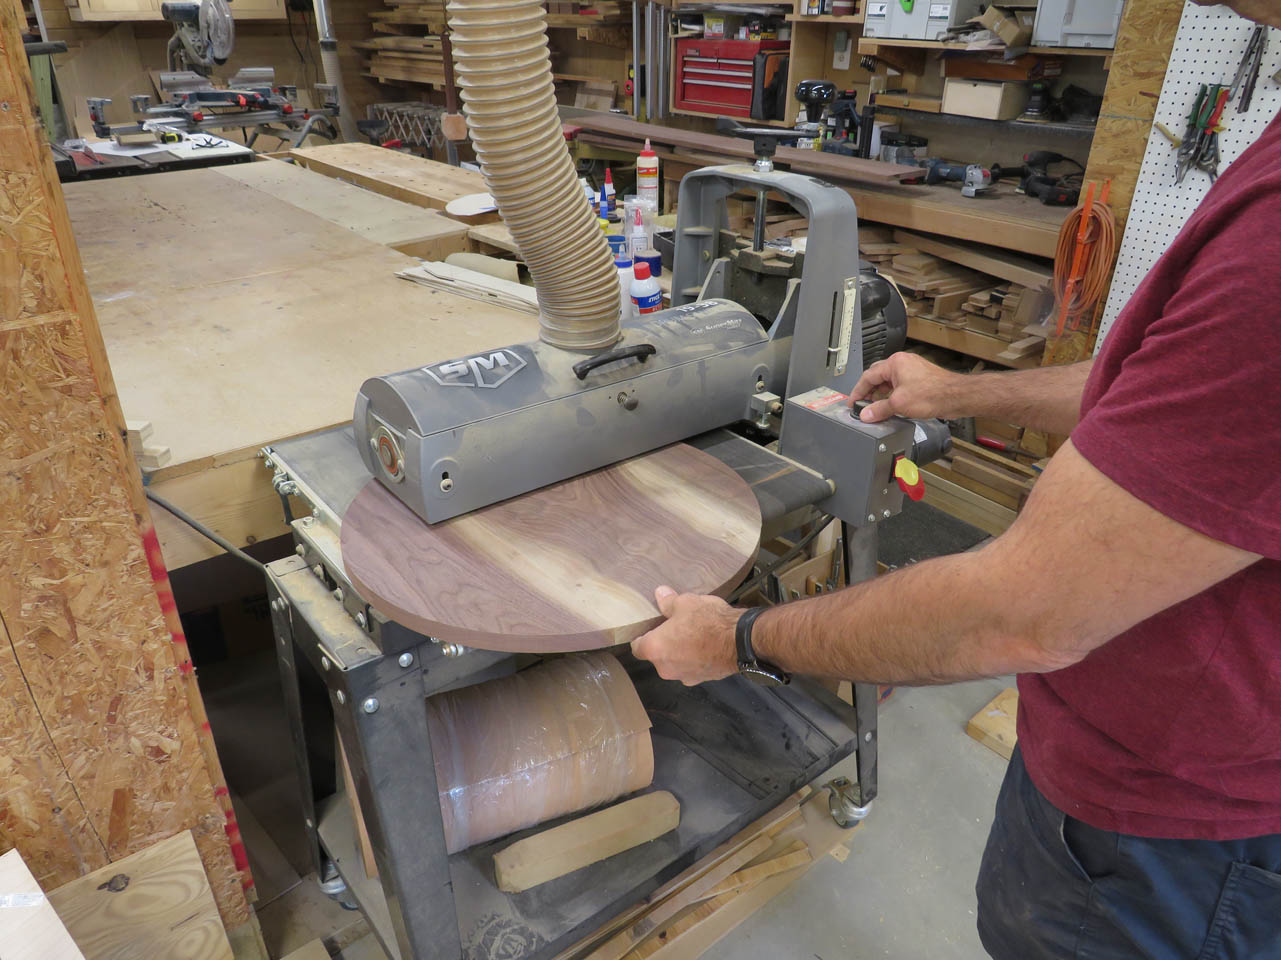
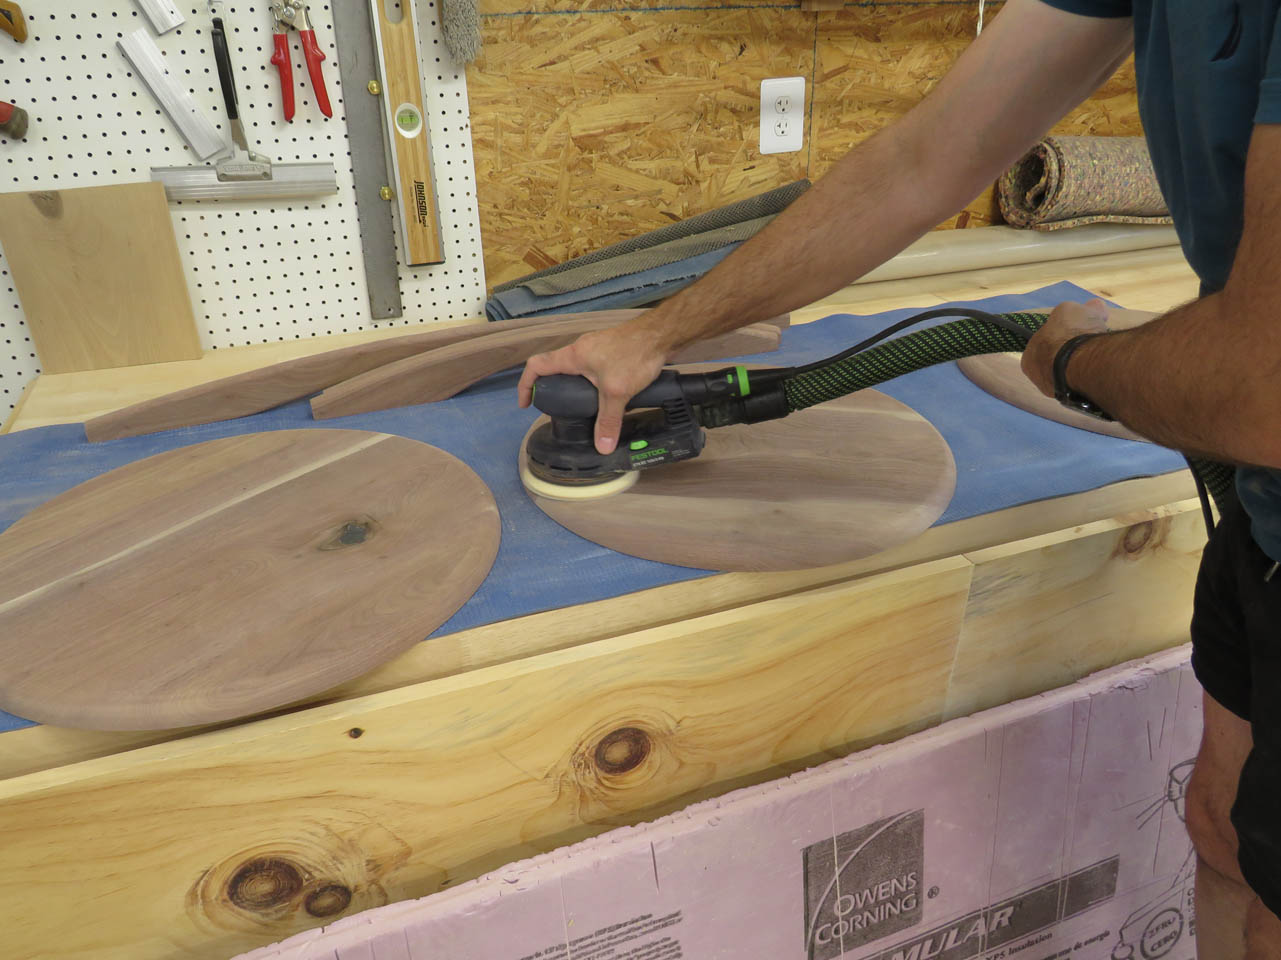
To smooth out the joints, I first sent the discs through my drum sander, then finish sanded the faces by hand with the random orbital sander.

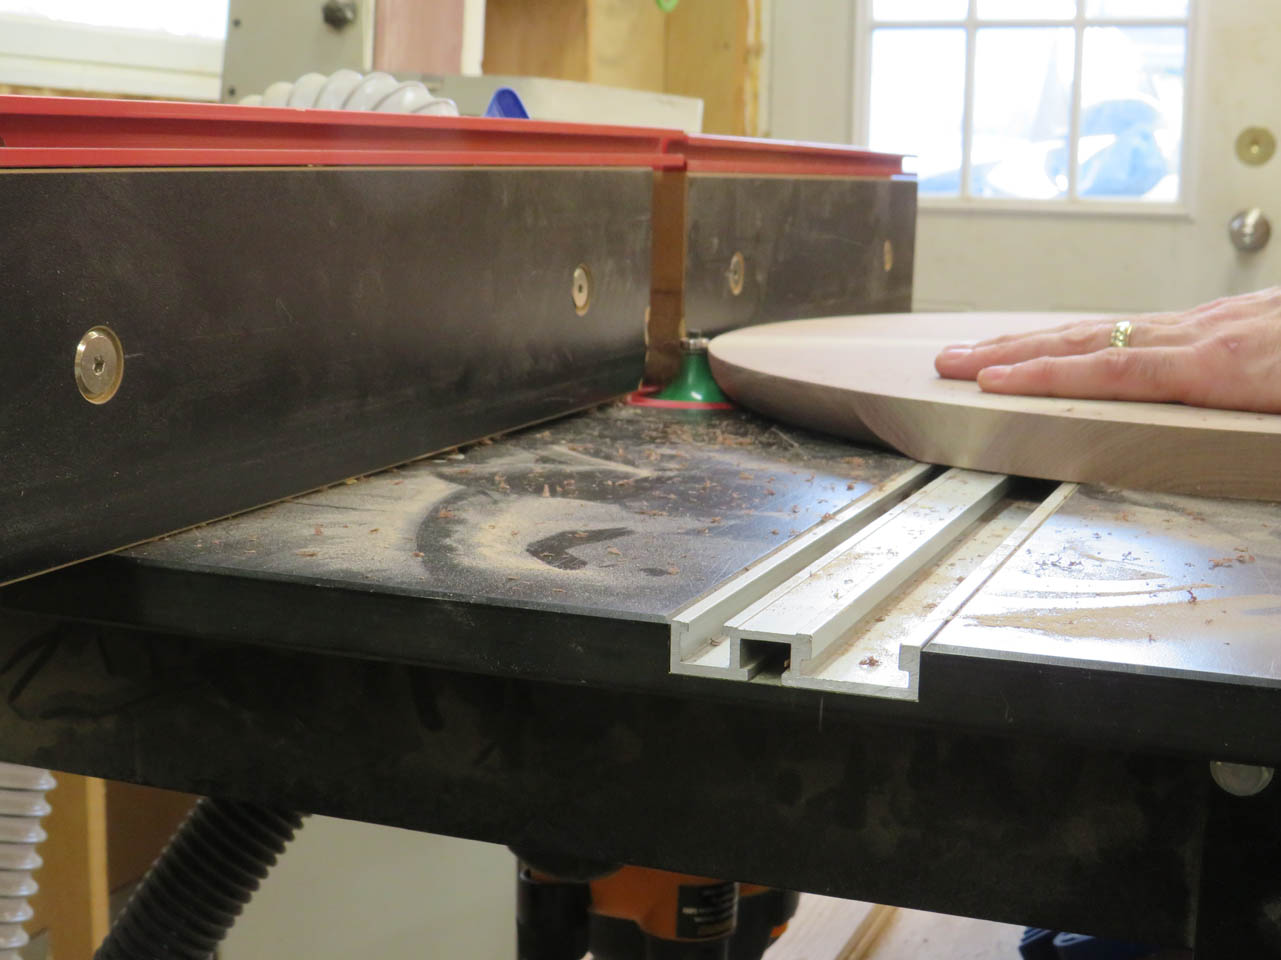
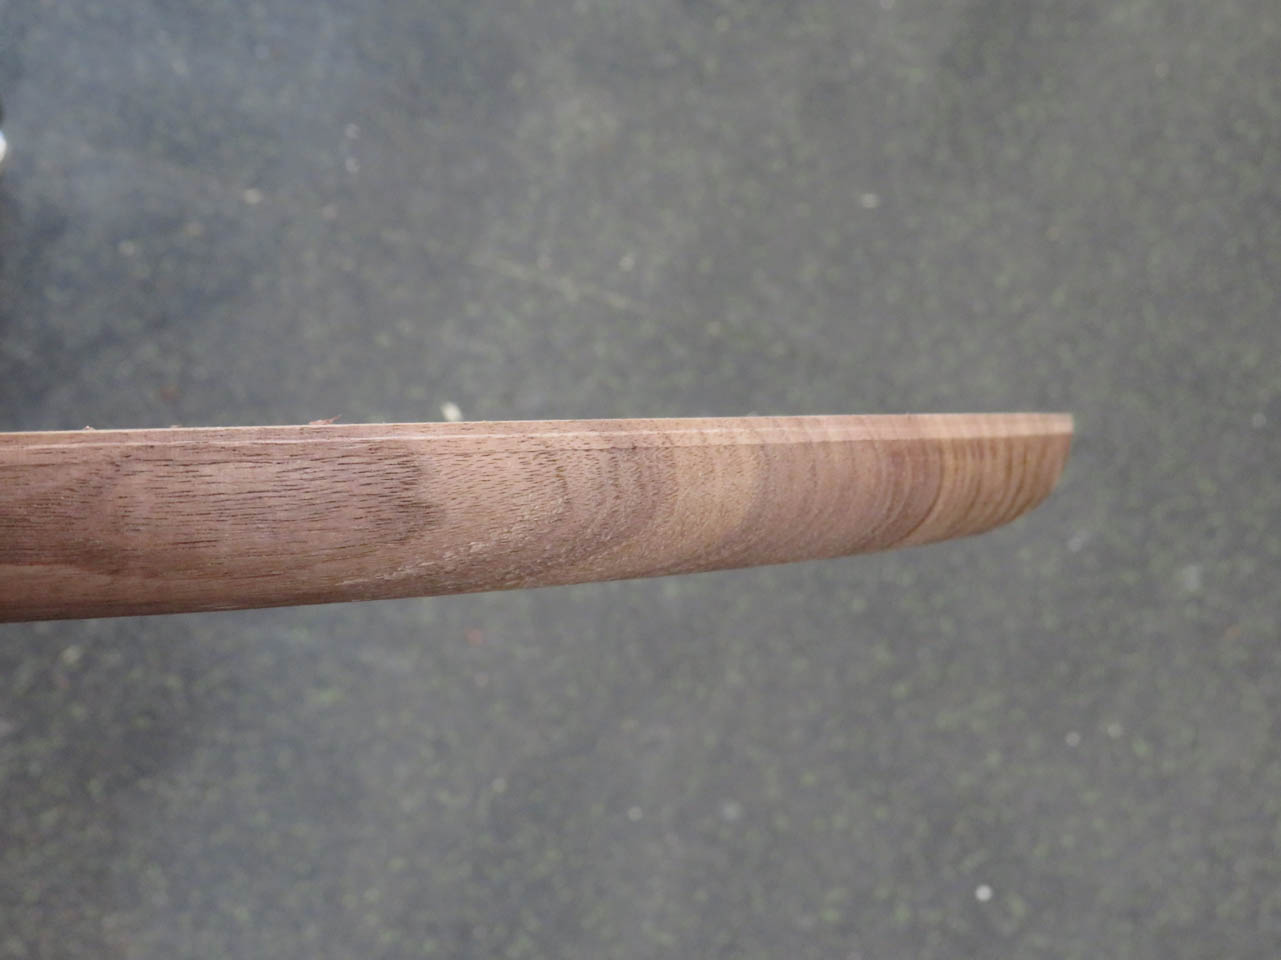
The next step is to round over the bottom edge. I made the tops about 7/8″ thick so I grabbed a 3/4″ round-over bit to cut the radius. That will leave 1/8″ at the top for the bearing to ride along.
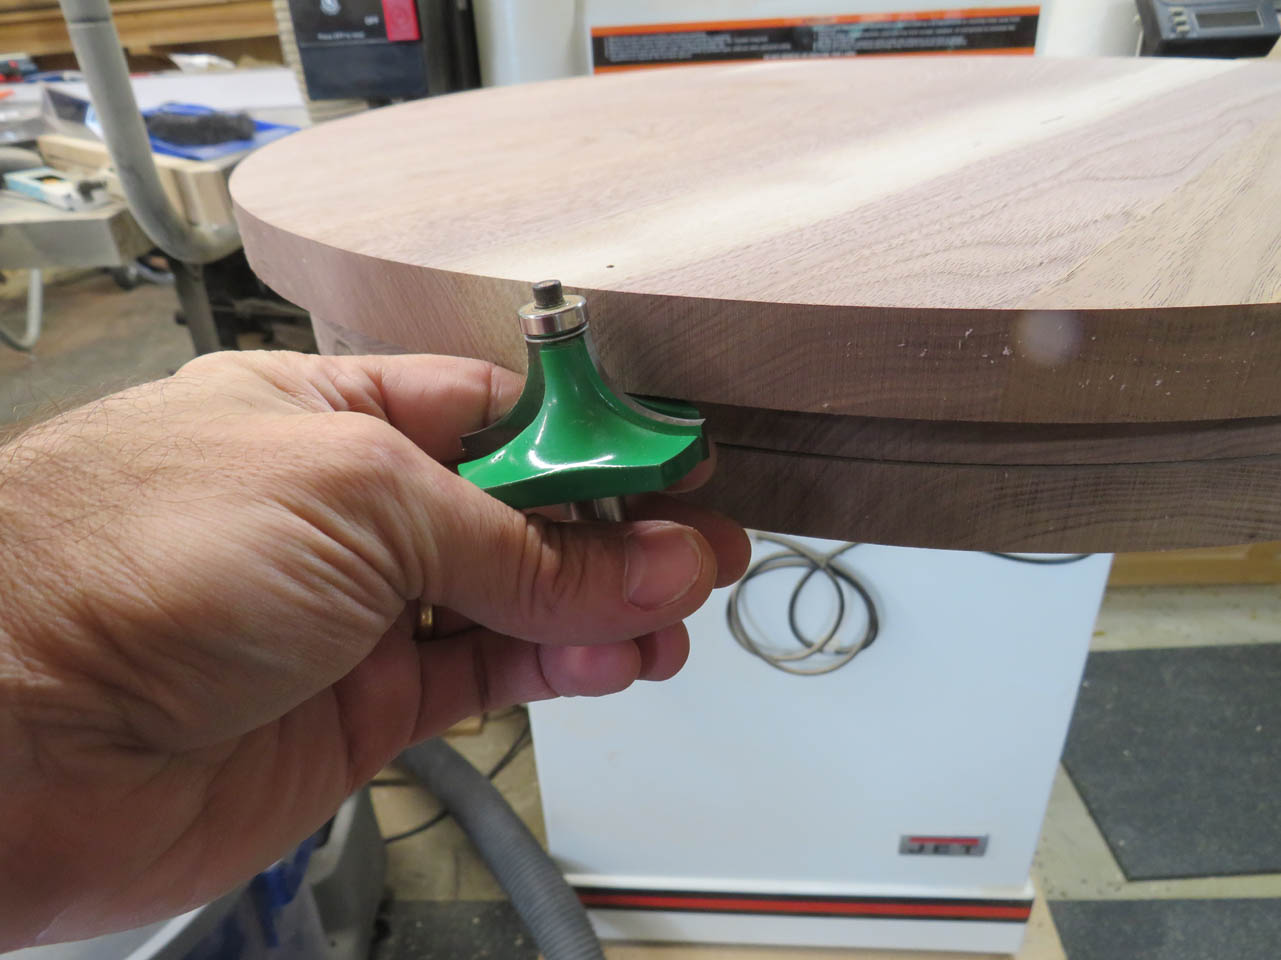
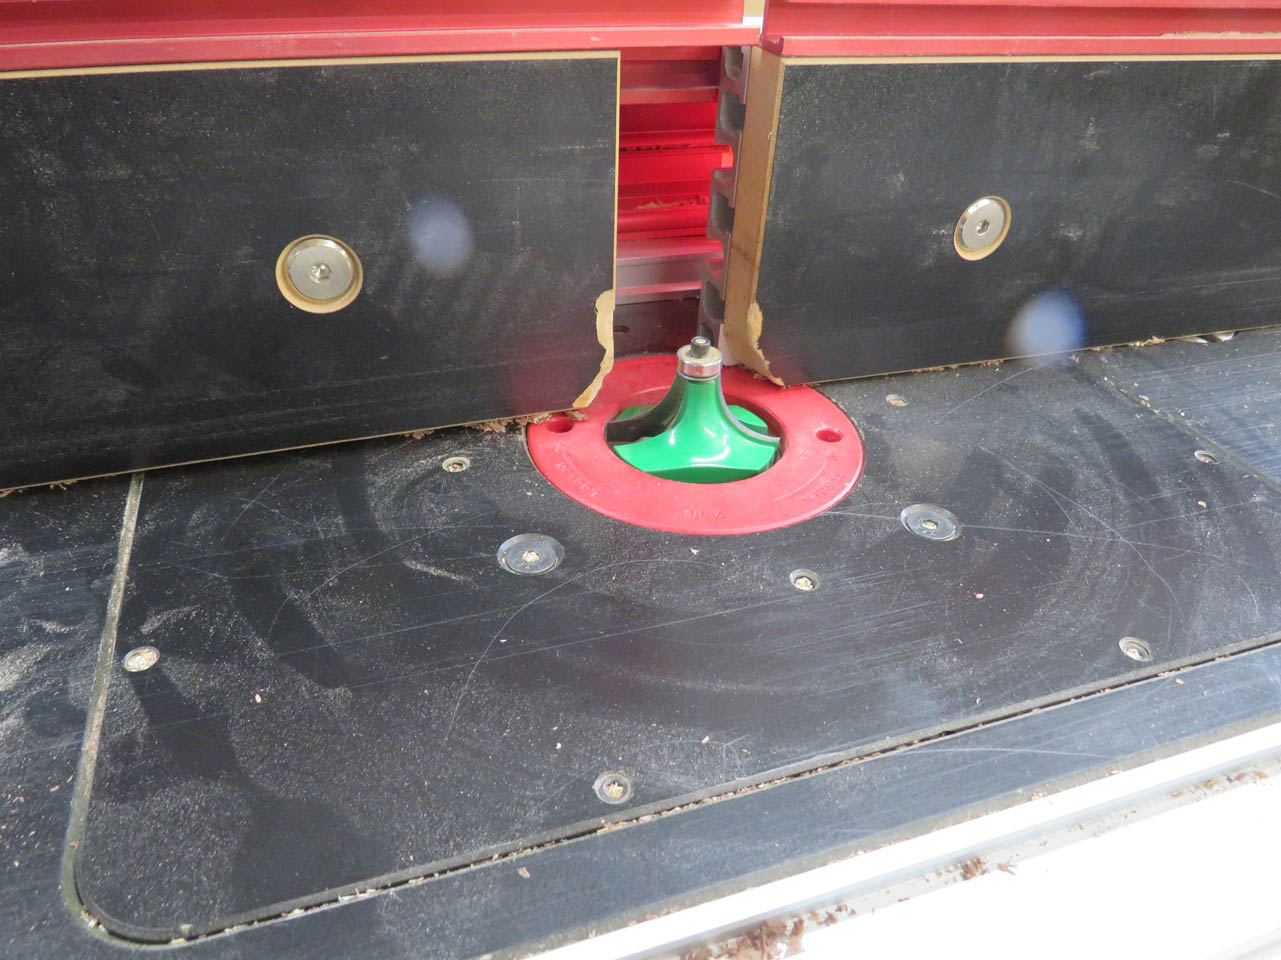
I set the bit in my router table and cut the radius all the way around all three tops.
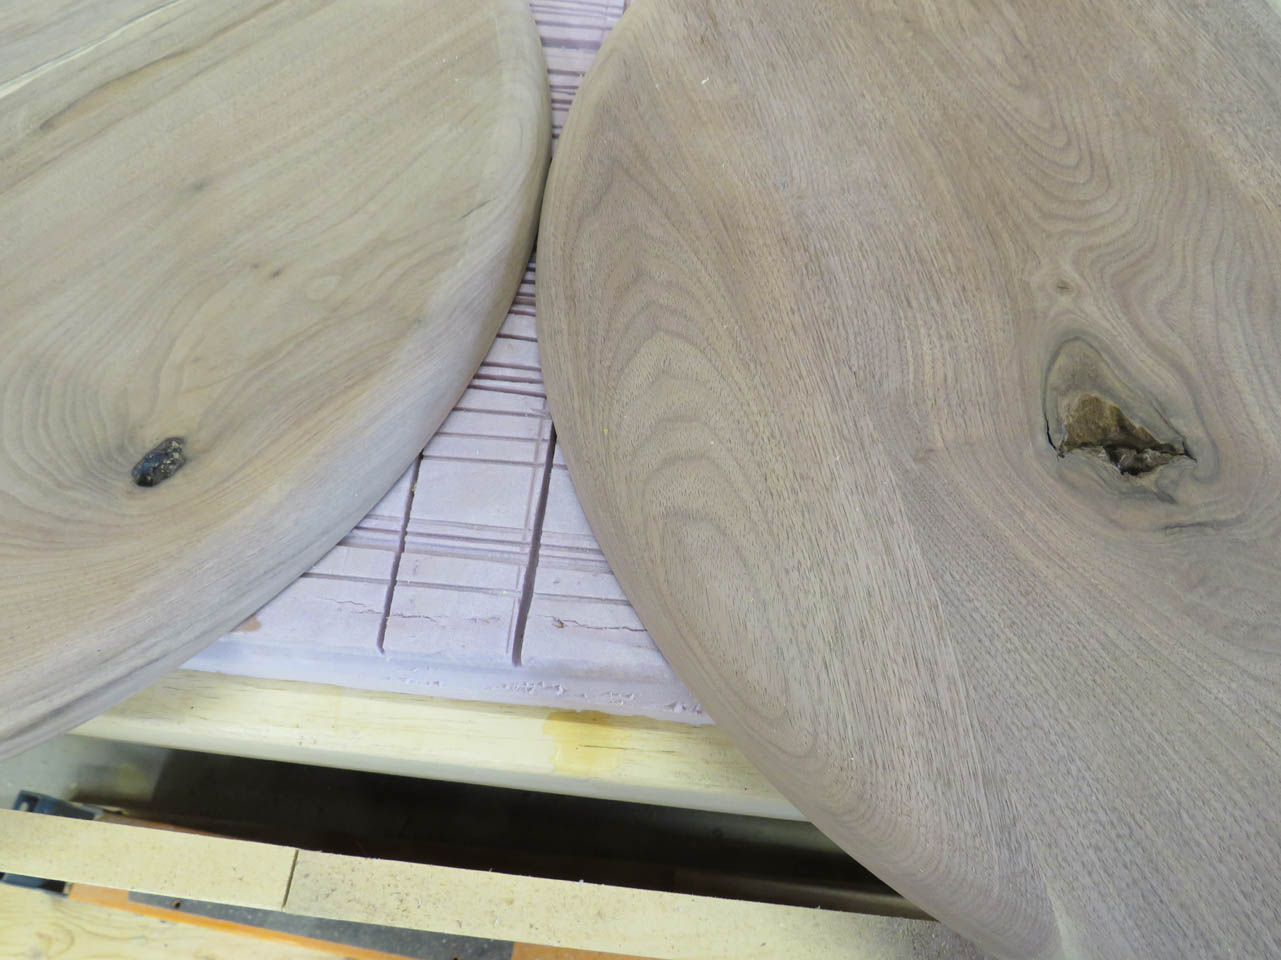
The client likes character in the wood so I left a few powder-post beetle holes visible. I filled these with CA glue so that they would be visible, but smooth and flat as the rest of the table tops.
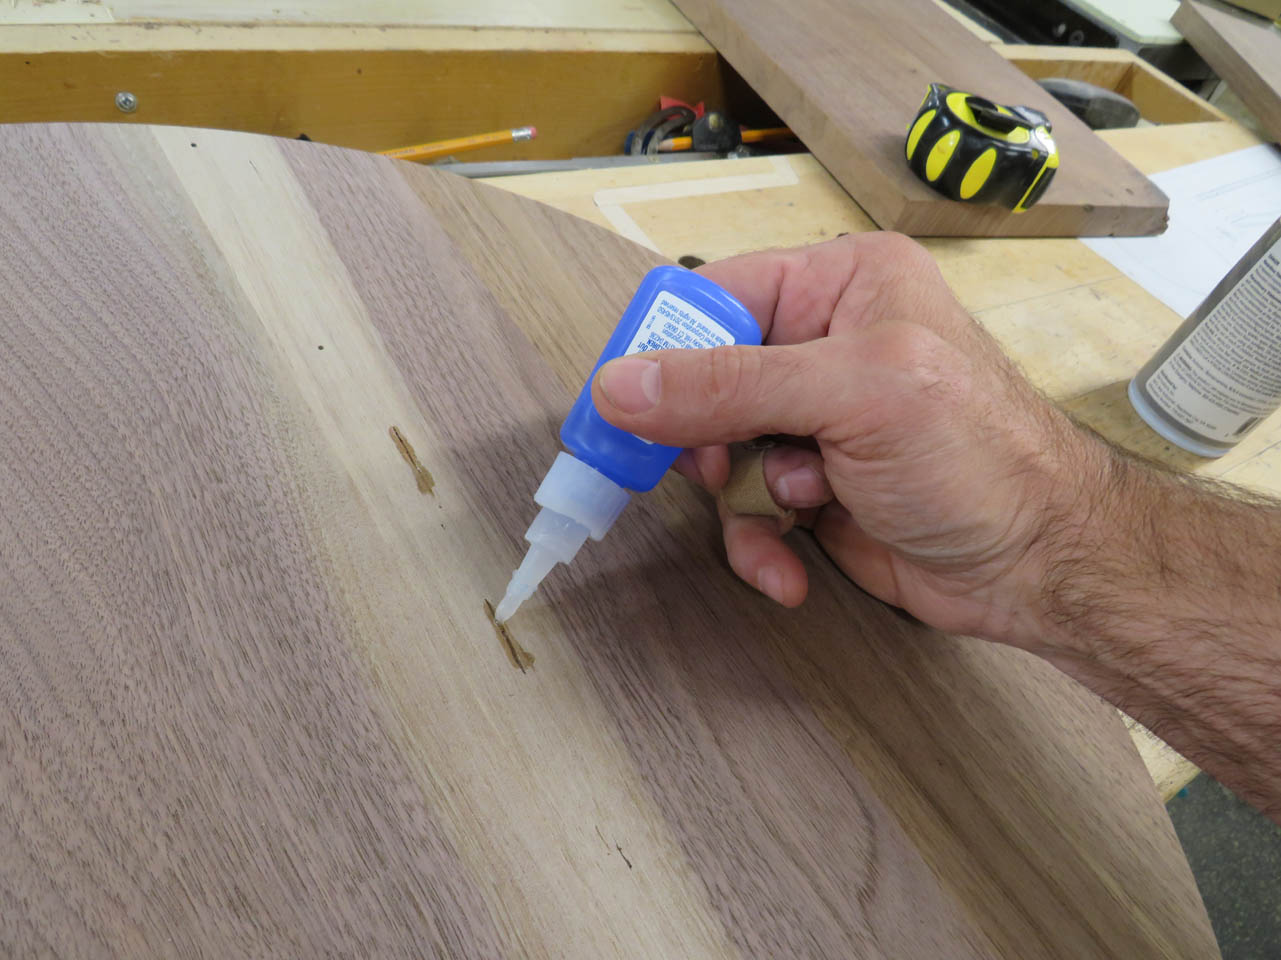
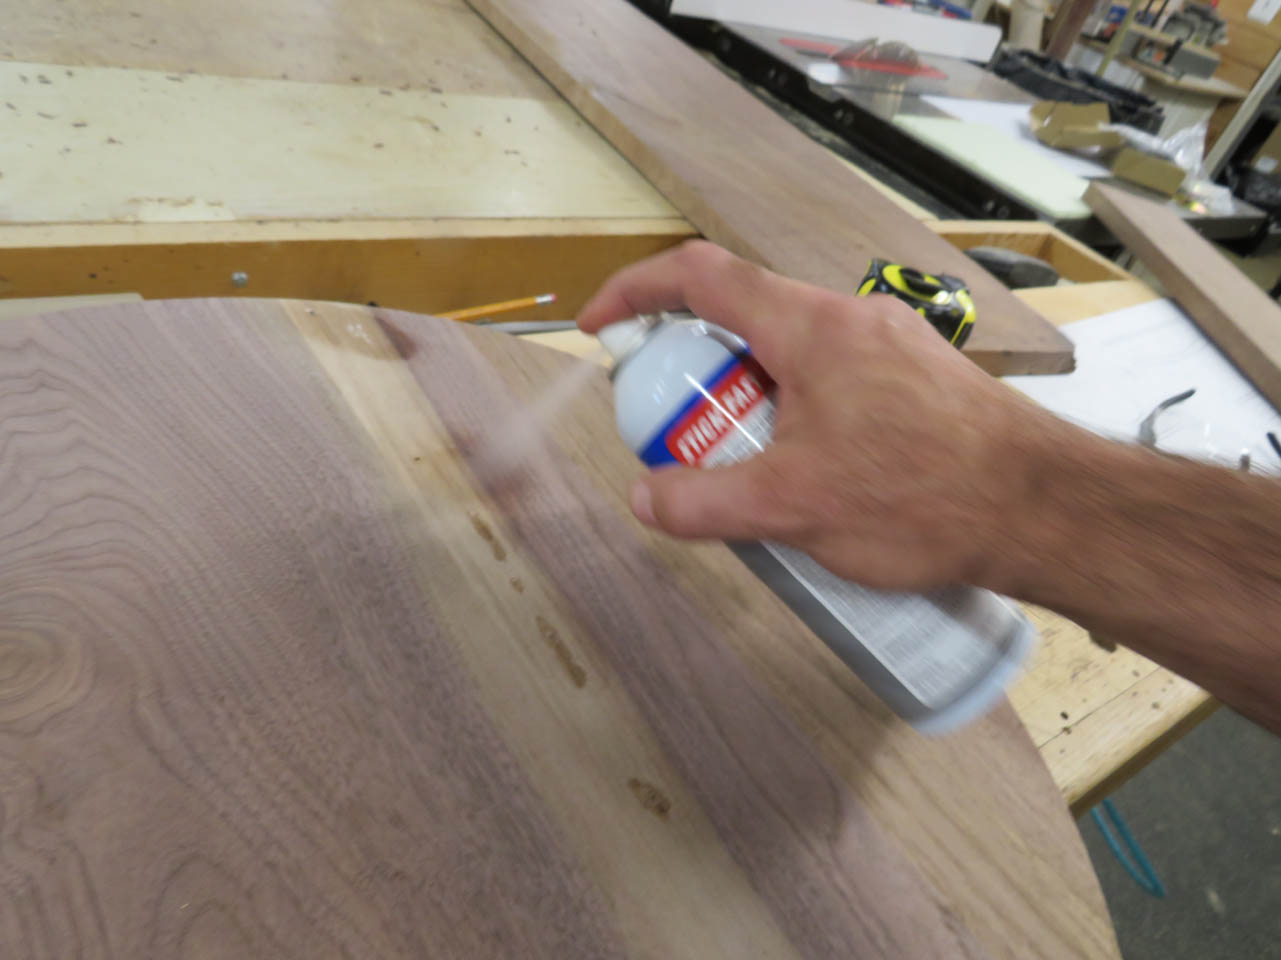
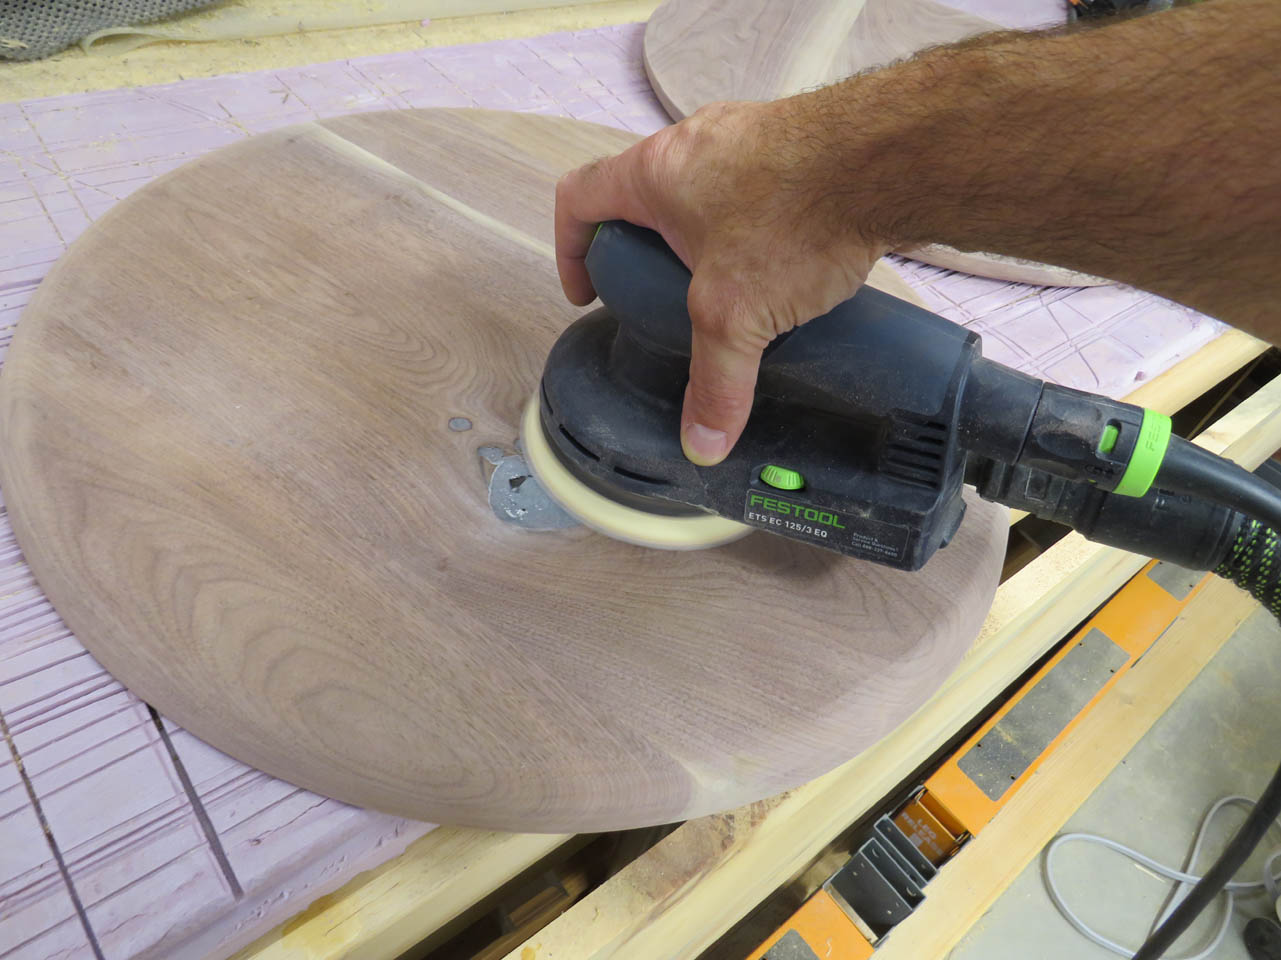
Once the glue was hardened with accelerator, I can sand them smooth along with the rest of the table tops.
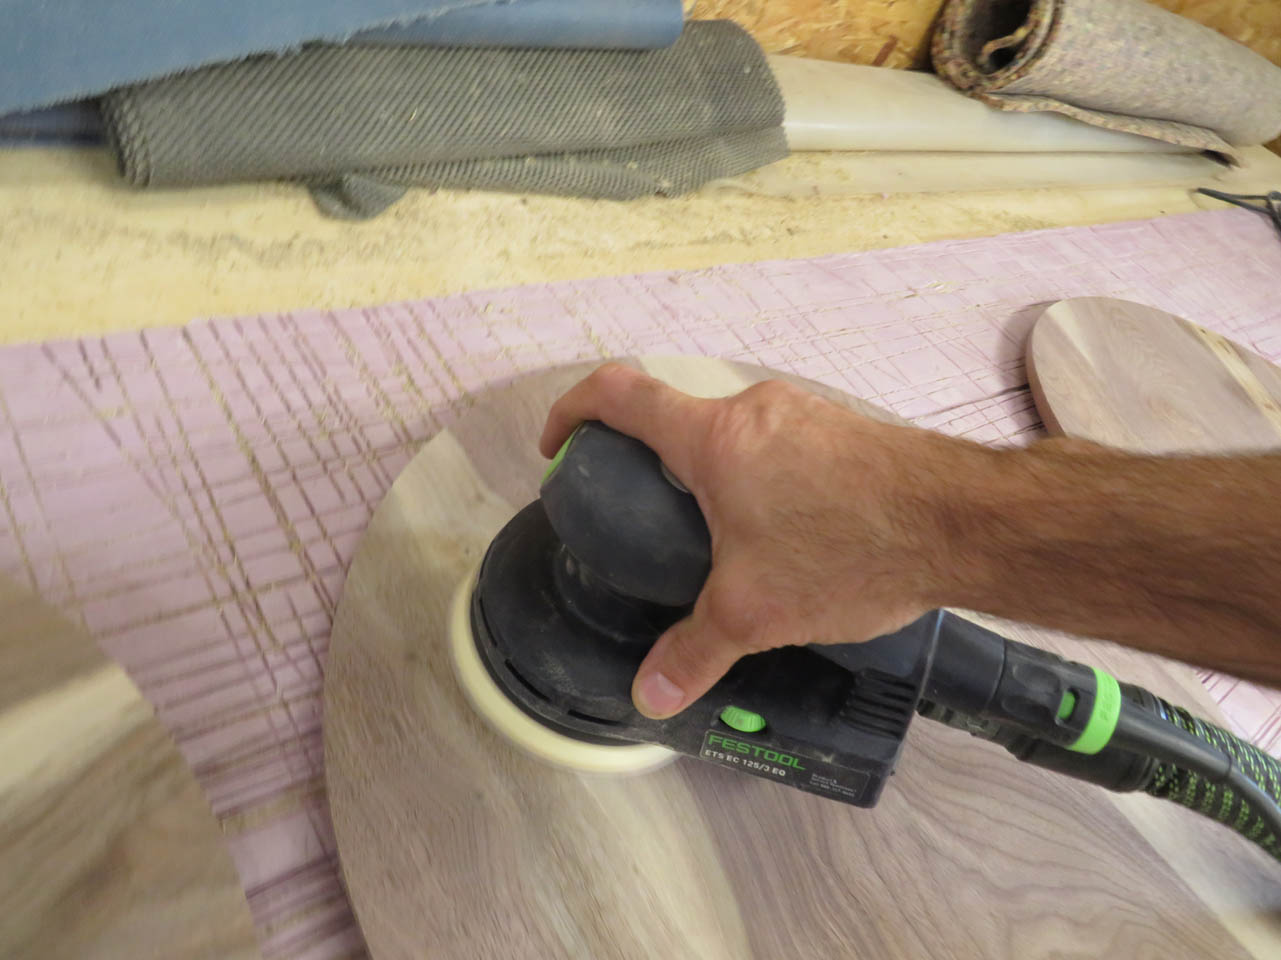

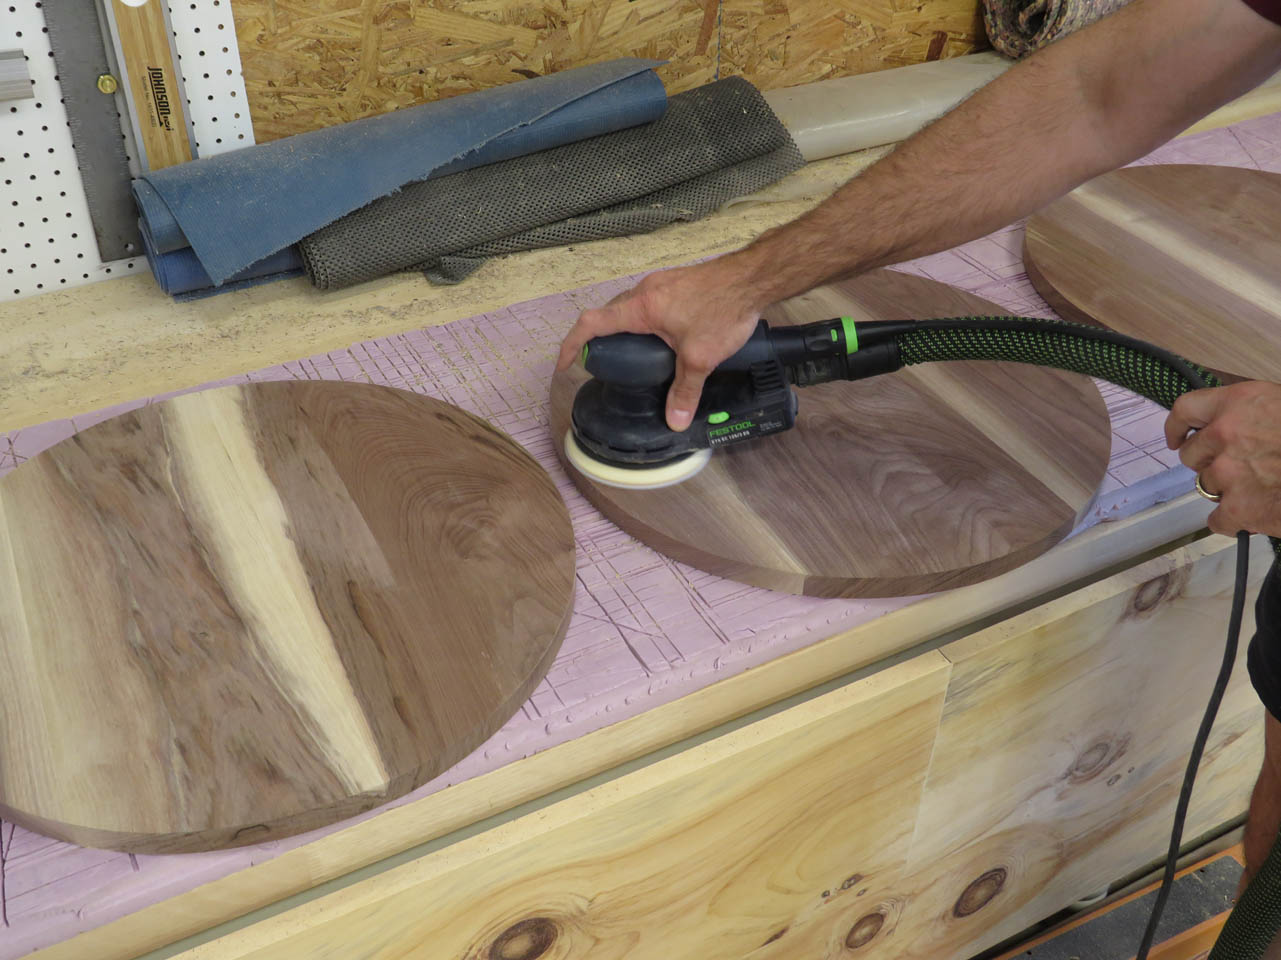
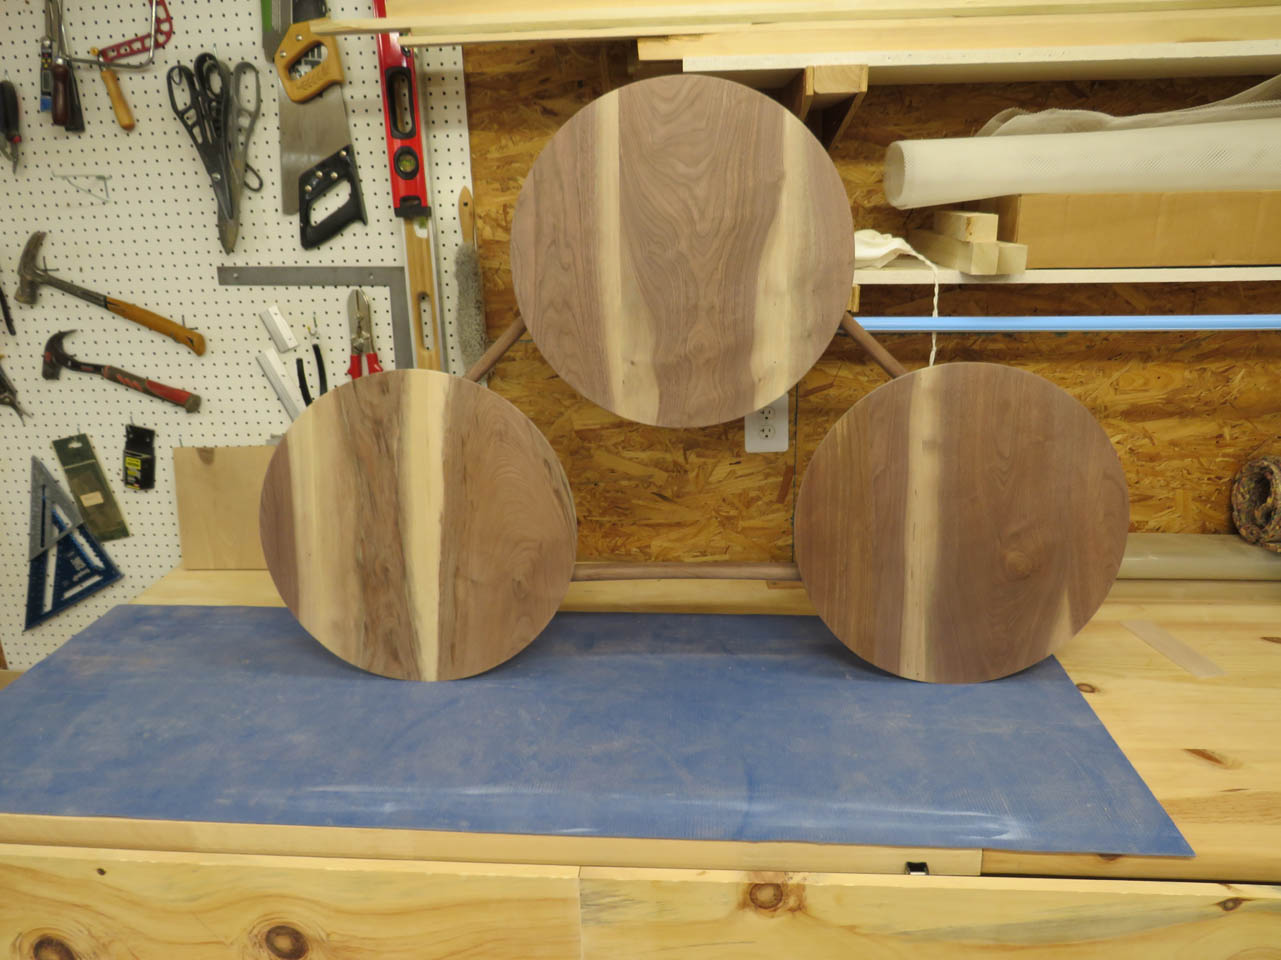
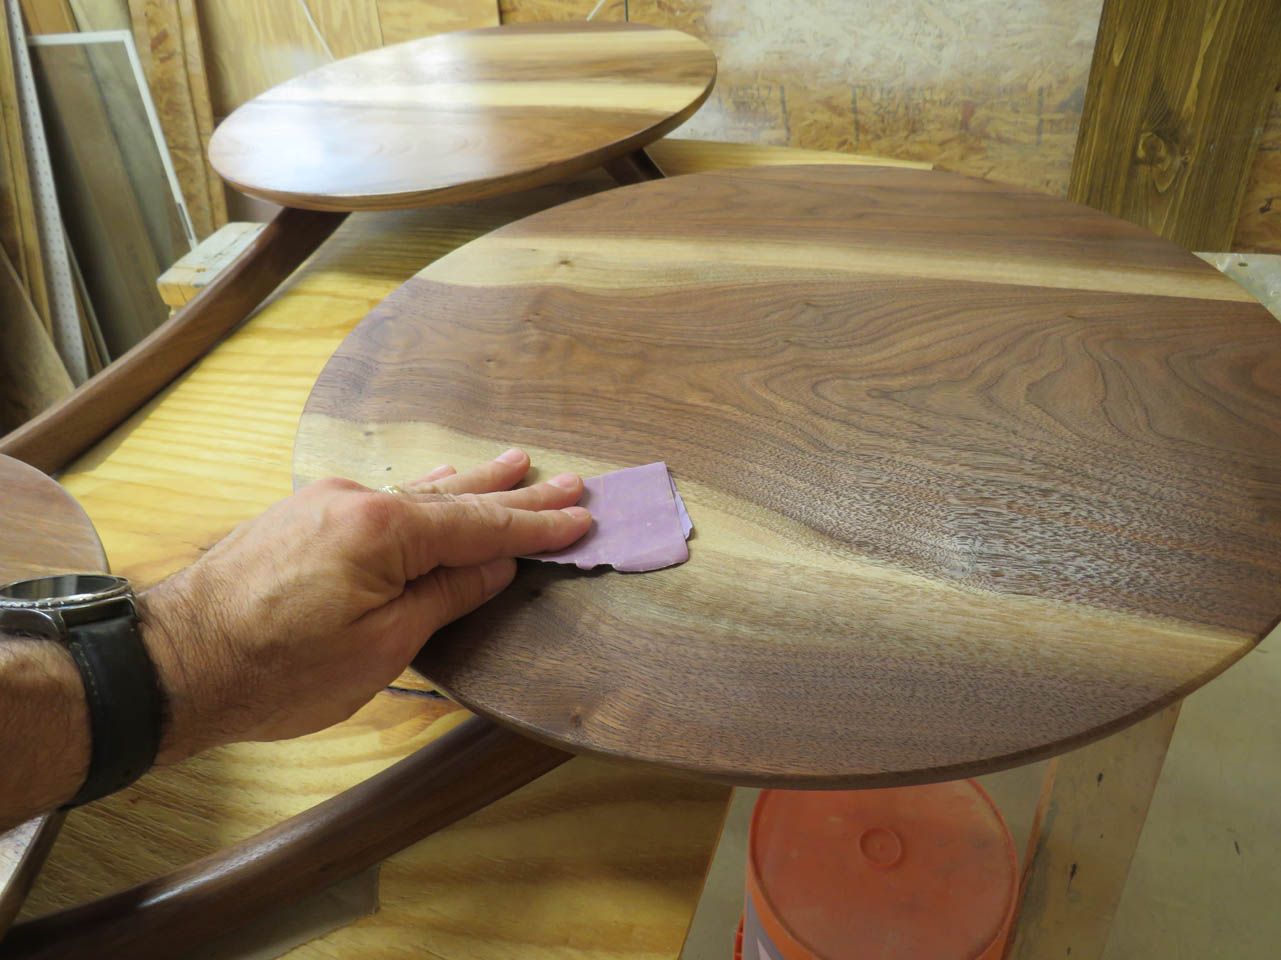
All surfaces were sanded from 80 grit down to 220.
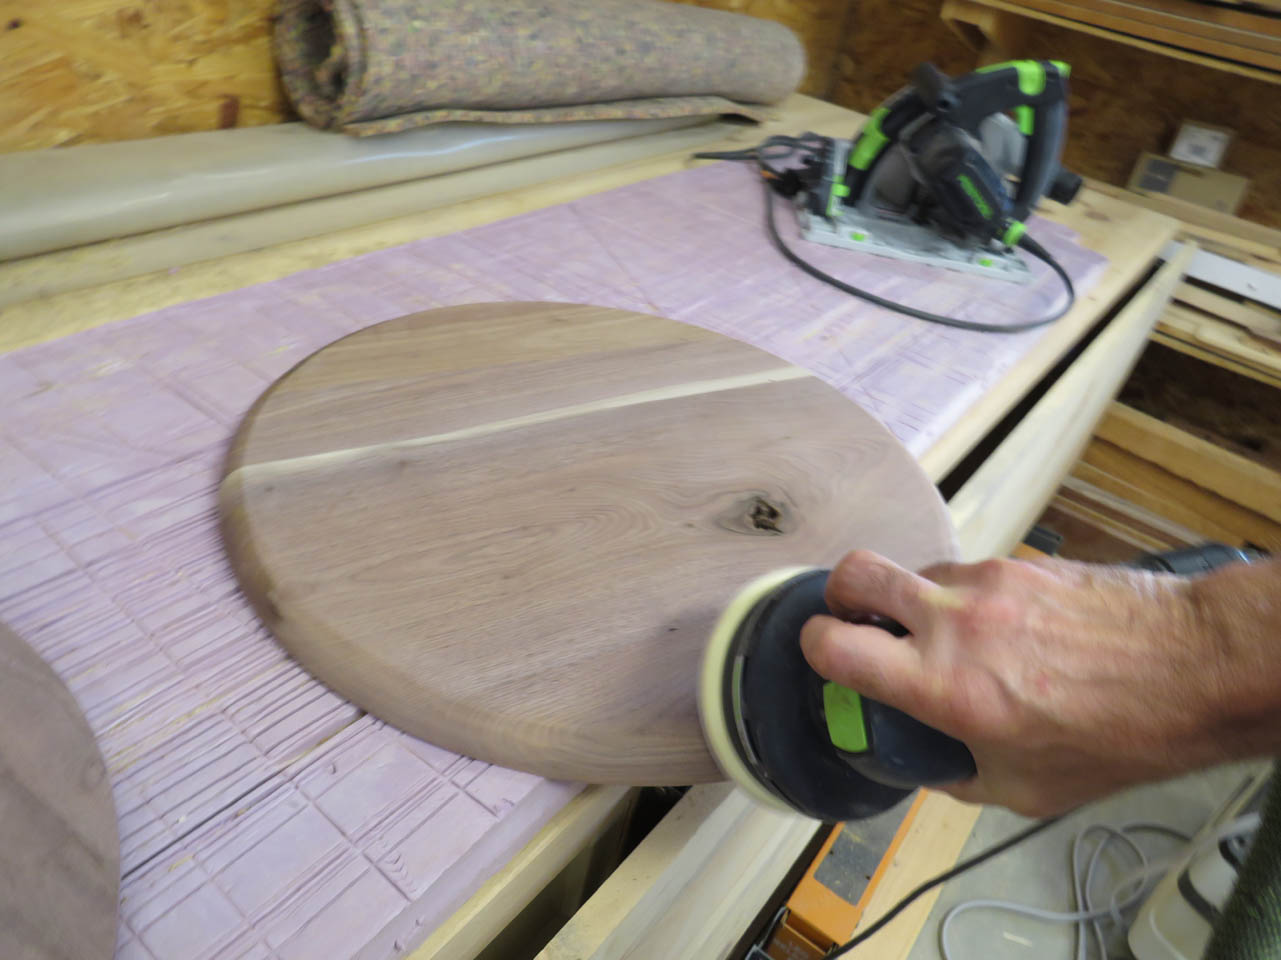
I also hand-sanded the top edge to make sure it wasn’t sharp.
There are two knot holes on the bottom that are probably fine, but I prefer to fill them as well.

I mixed up an ounce of two-part epoxy and filled the knot holes.
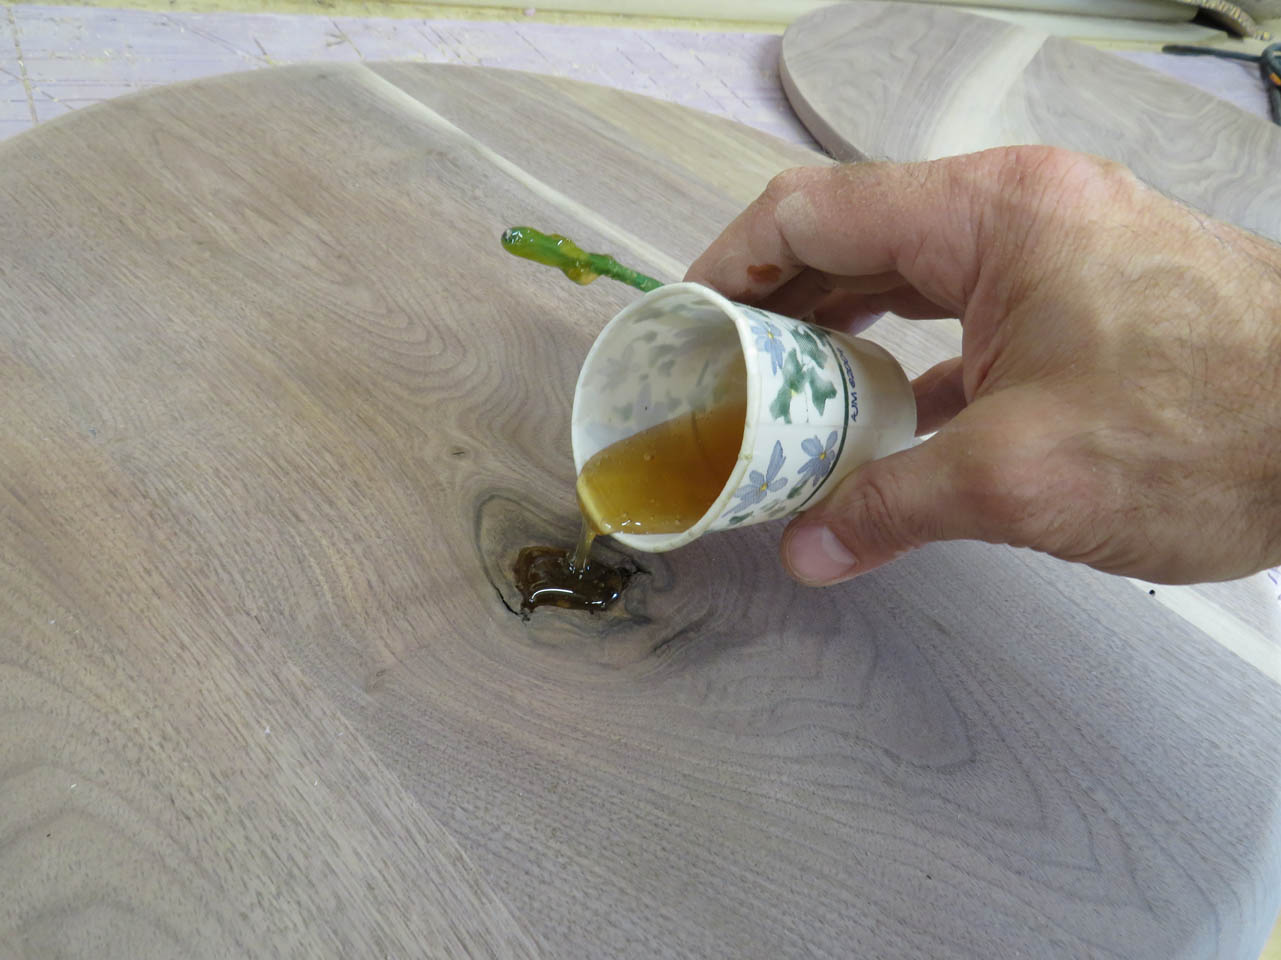

I let them cure until the next day, then sanded them flush to the surface of the wood.
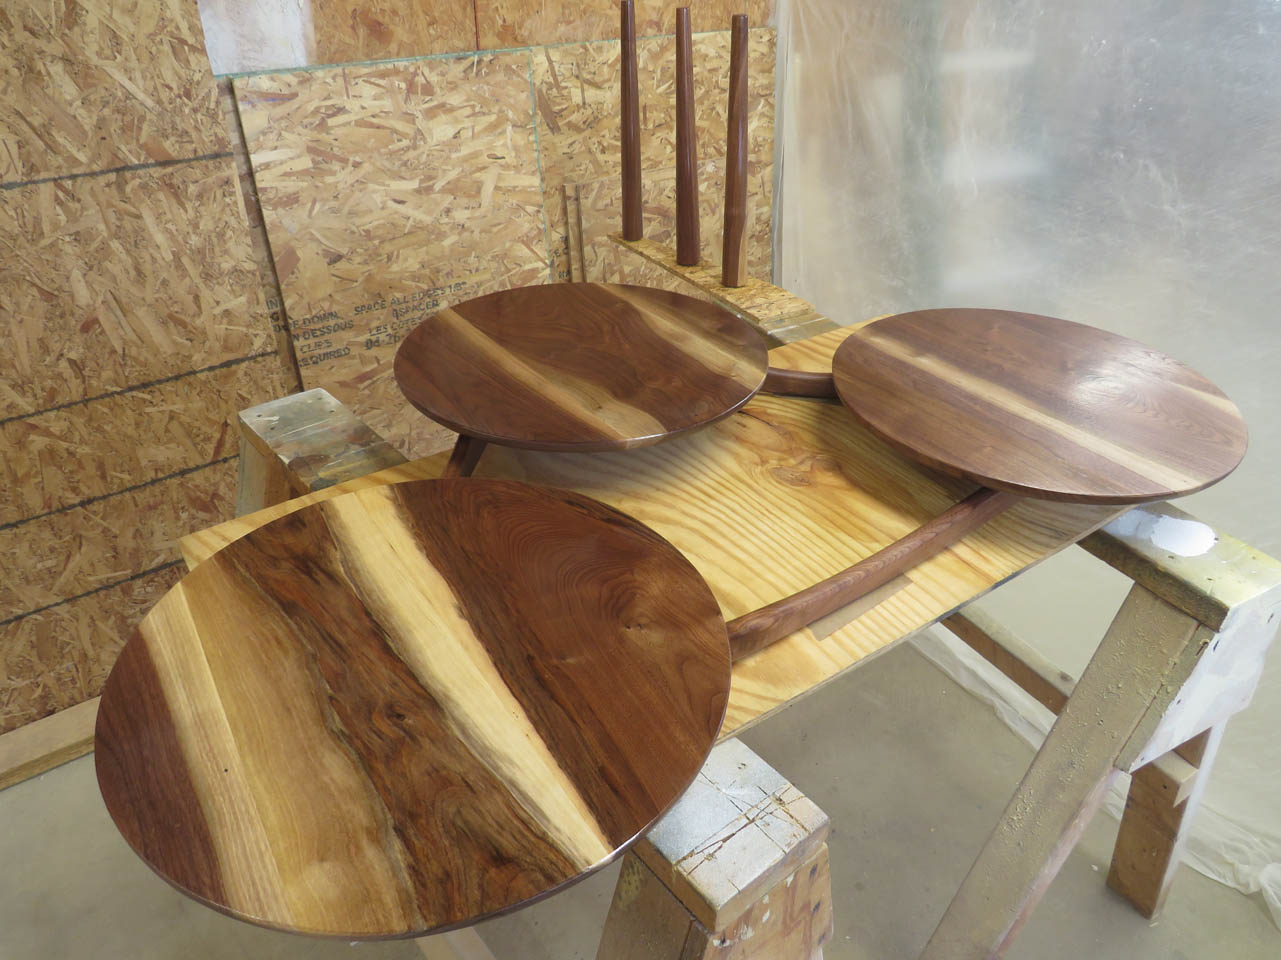
The tops are pretty much done, so it is time to move on to the structure below.
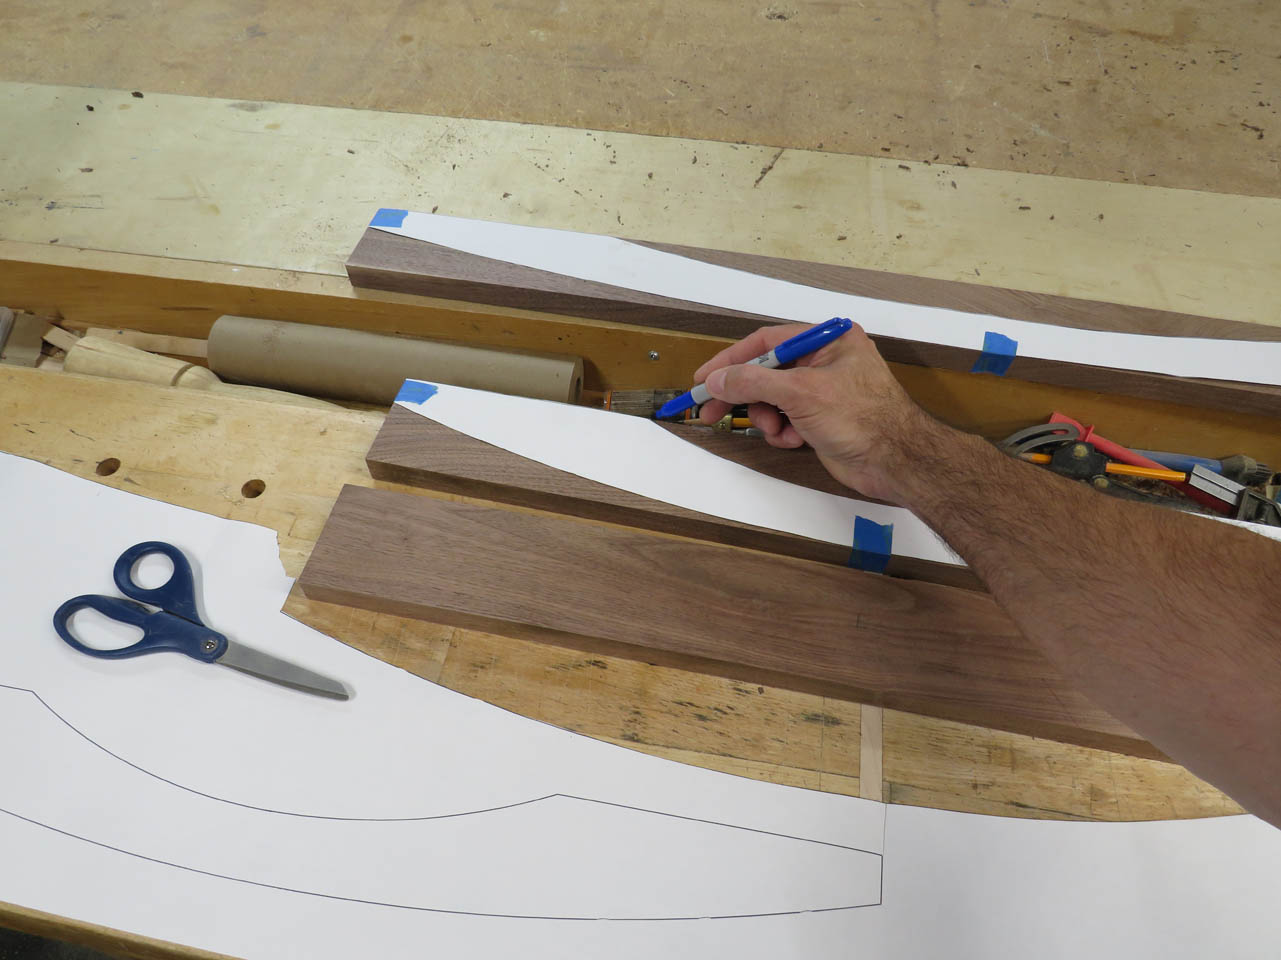
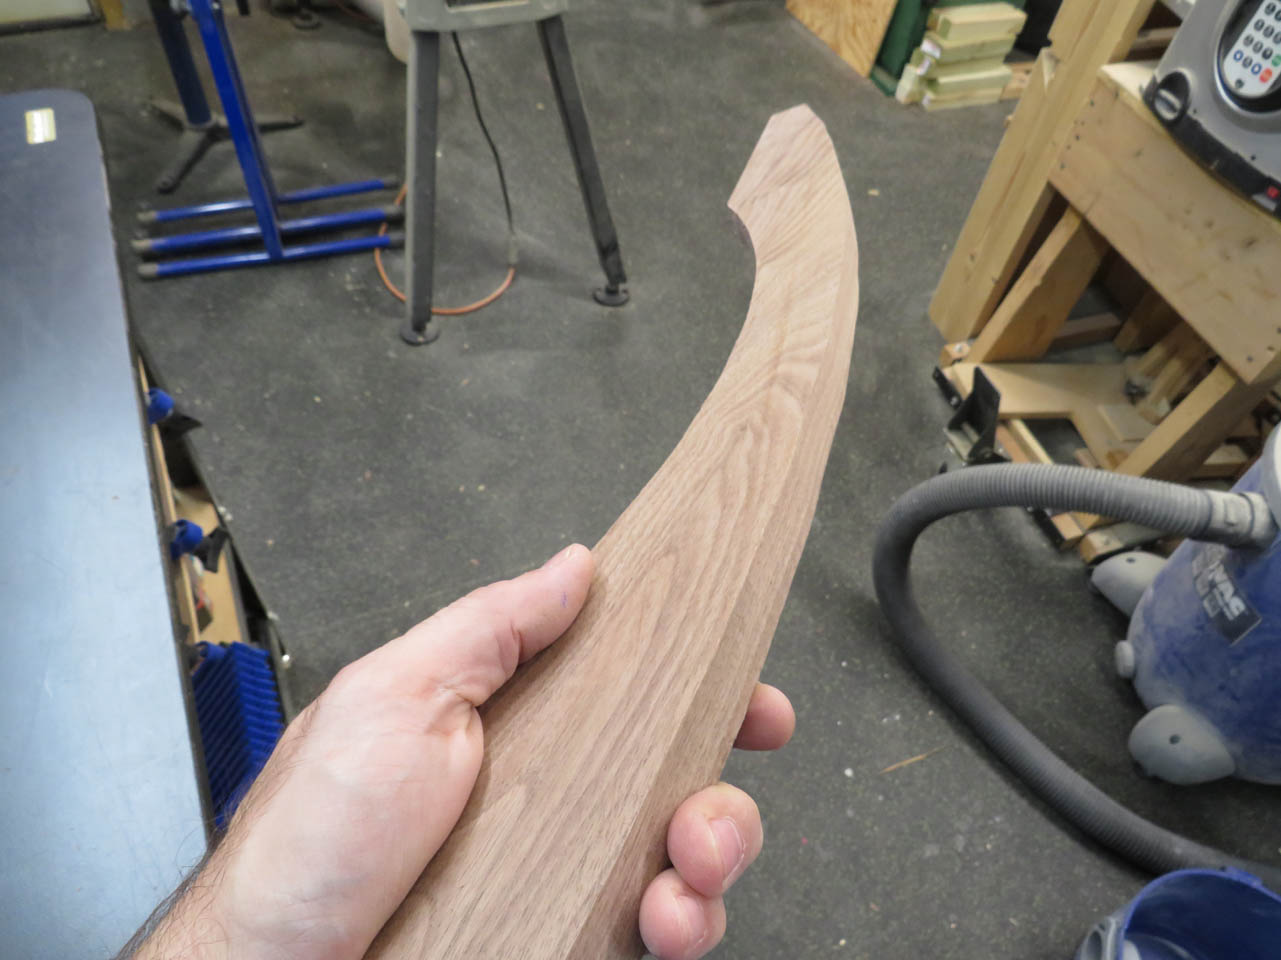
I was originally trying to lay these curves out with a thin piece of wood that could be bent to the proper radius, then I remembered that I had a large format printer so I just printed templates instead…
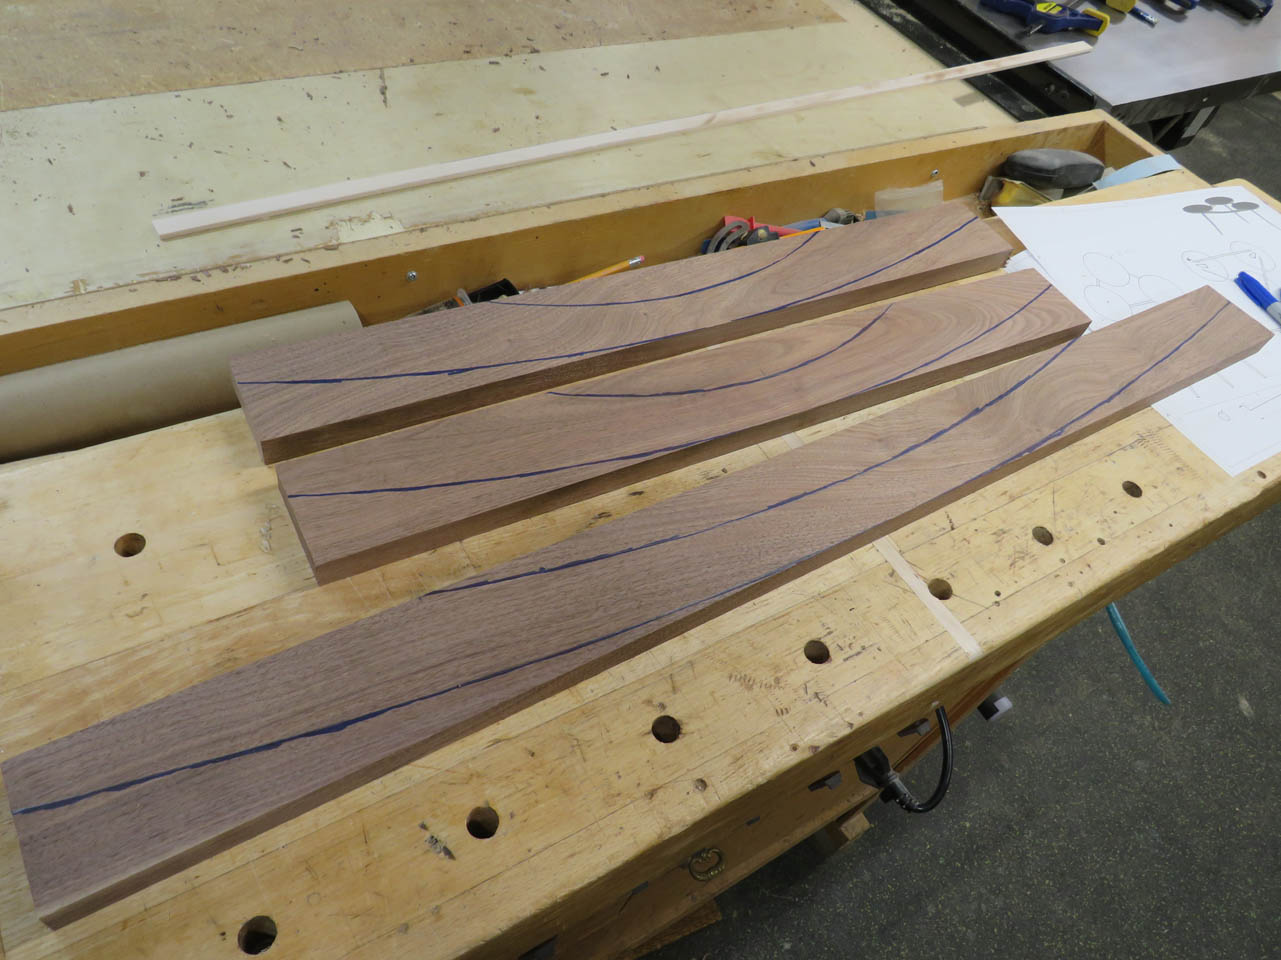
I just traced them with a magic marked onto some more 7/8″ walnut and cut them out on the bandsaw as well.
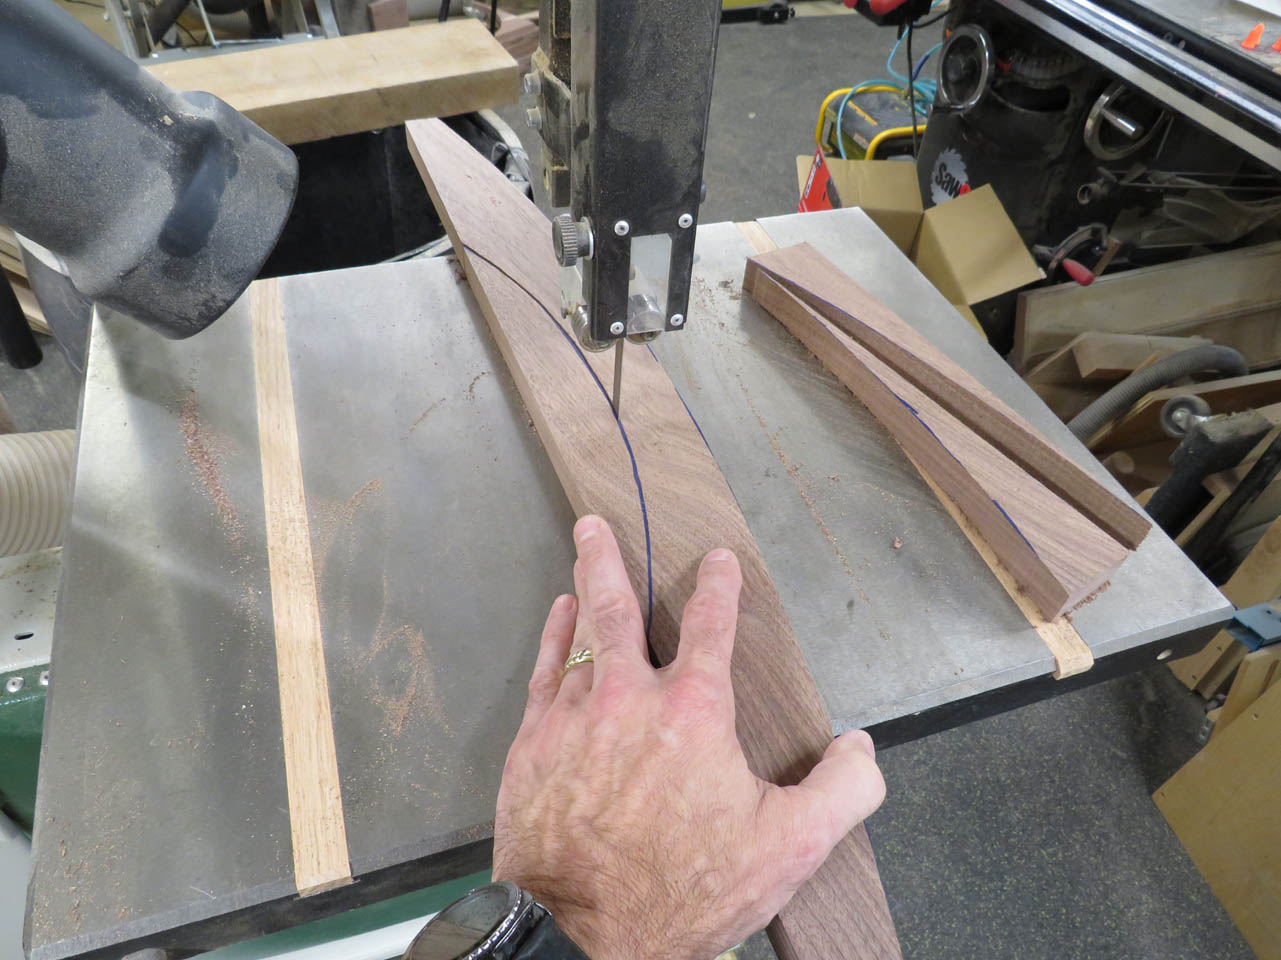
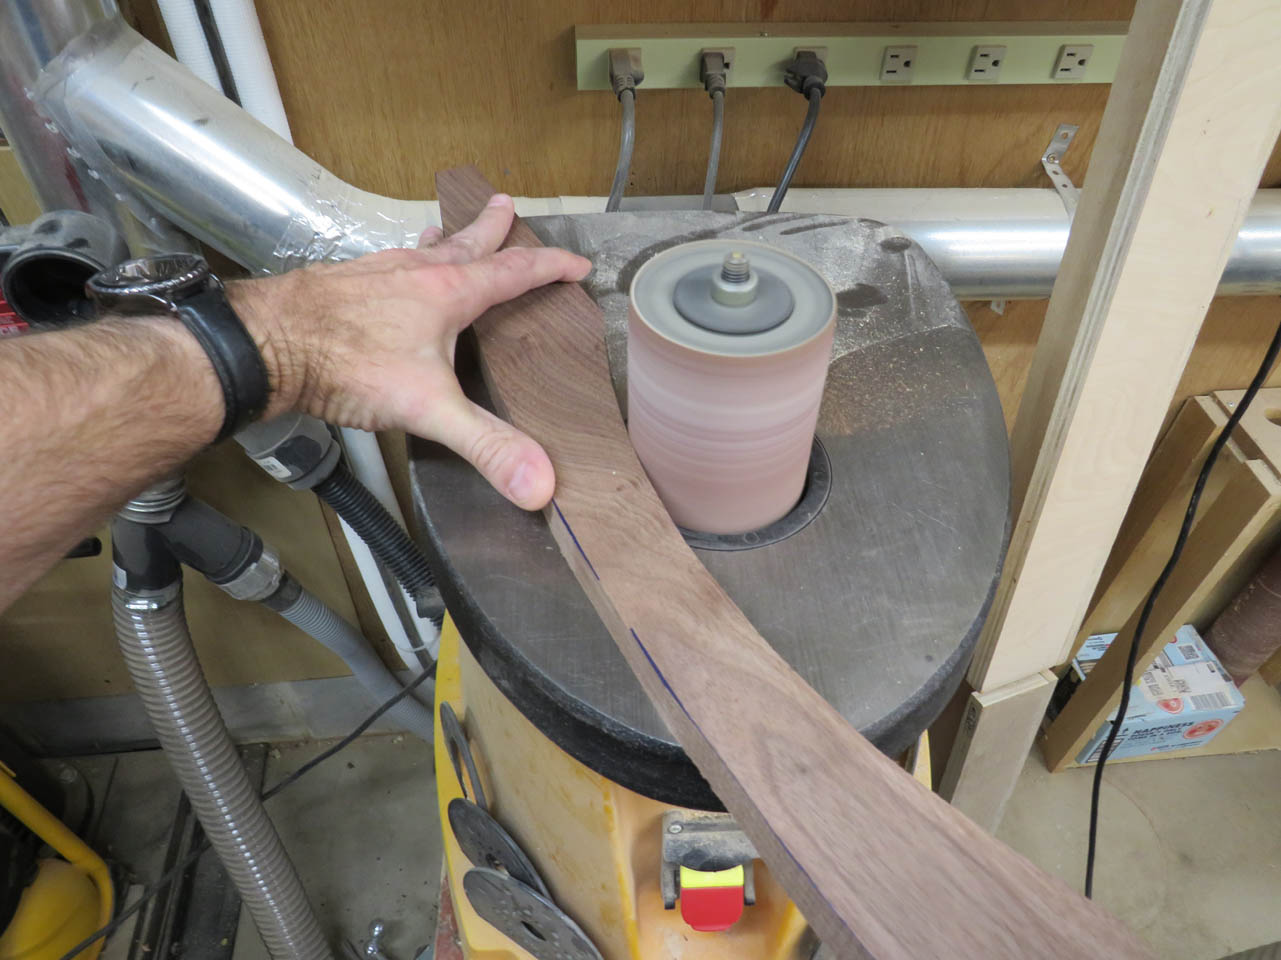
These inside curves were easier to sand on the spindle sander.
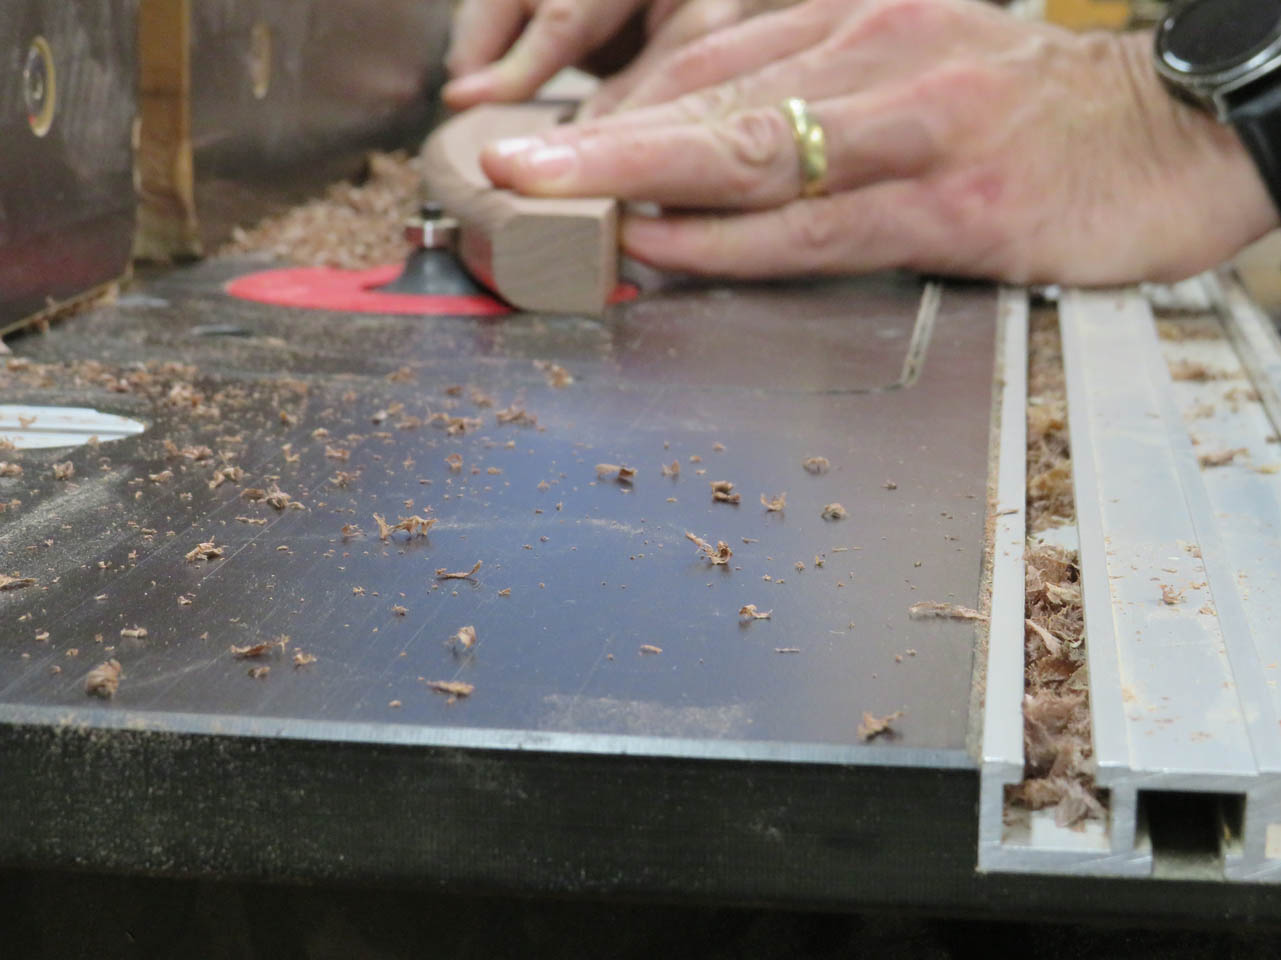
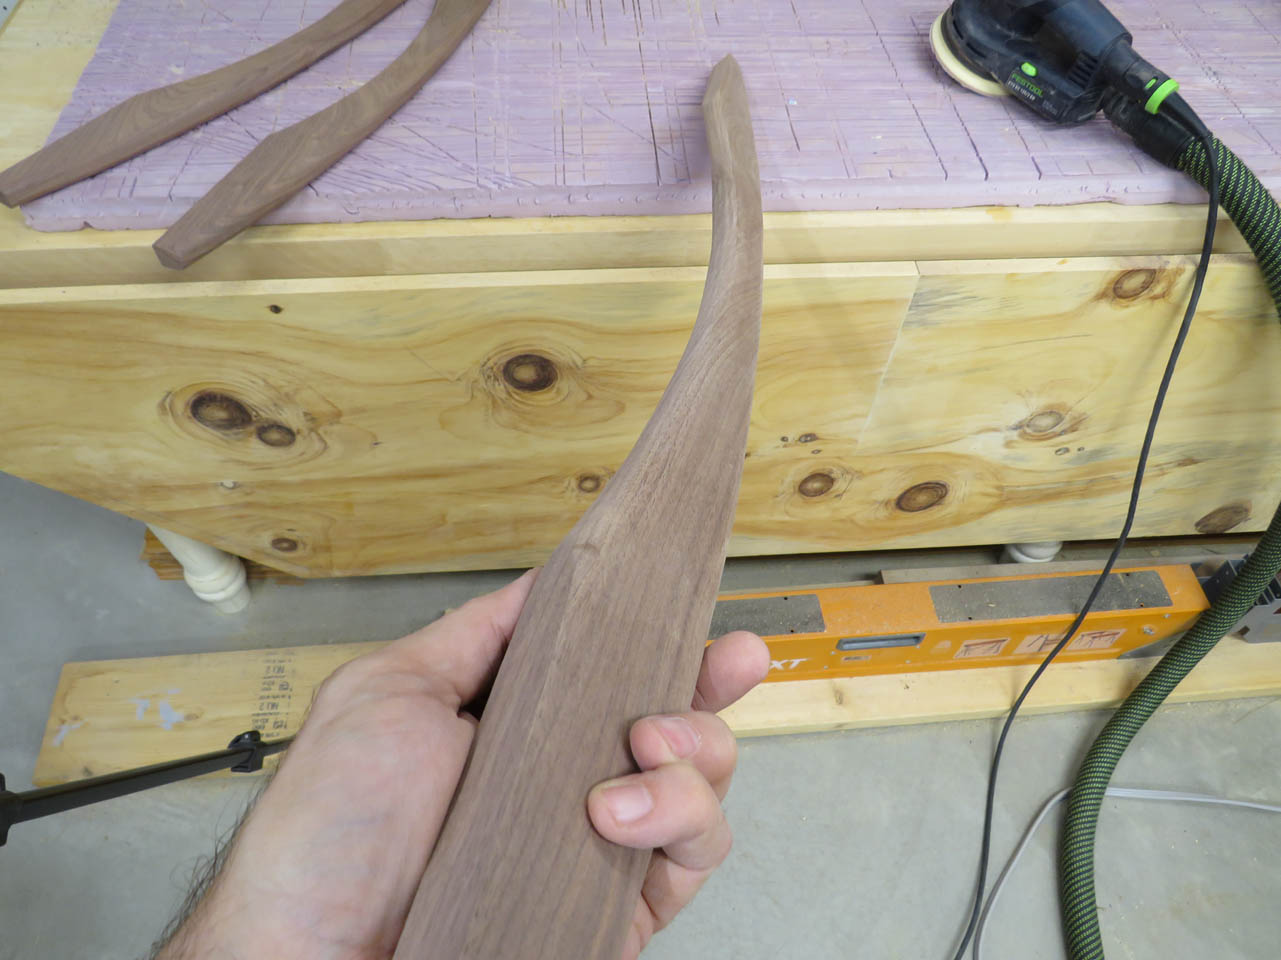
Curved arms are cut, time to radius all of the edges.

I set a 3/8″ round-over bit in the router table and cut all four sides.

Once all the edges were rounded over, I sanded all the support arms down smooth.
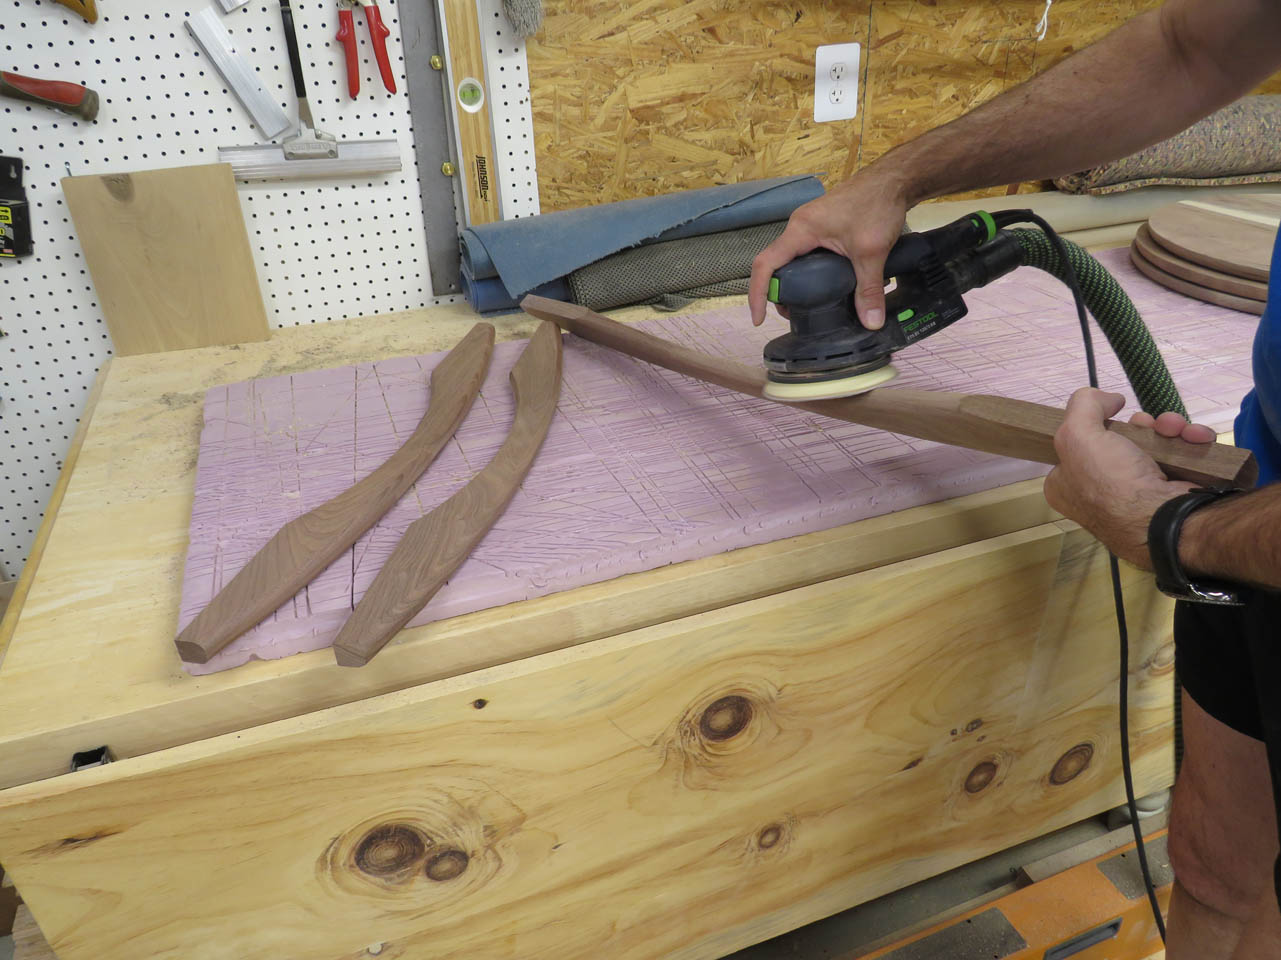
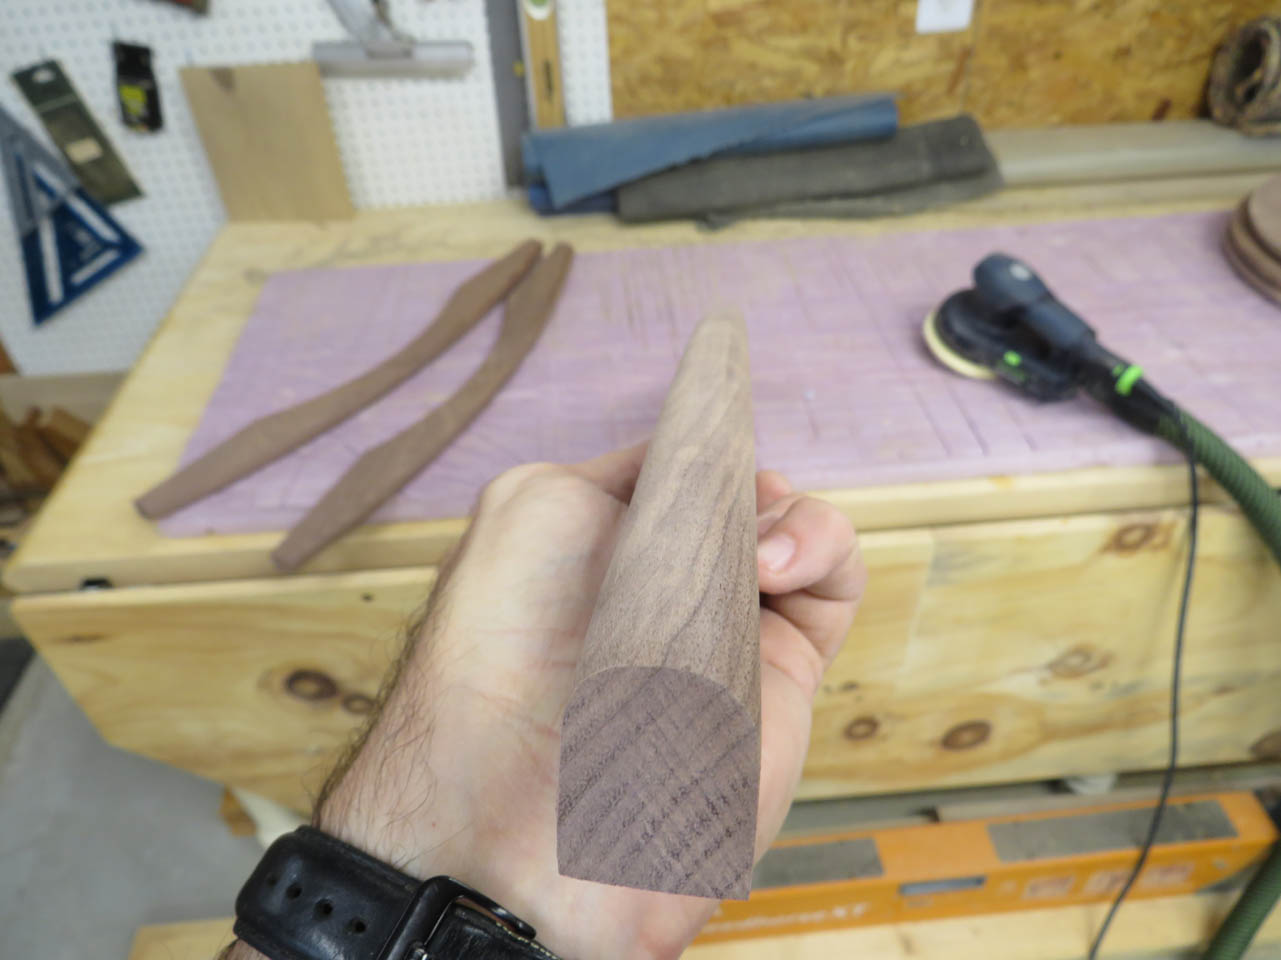
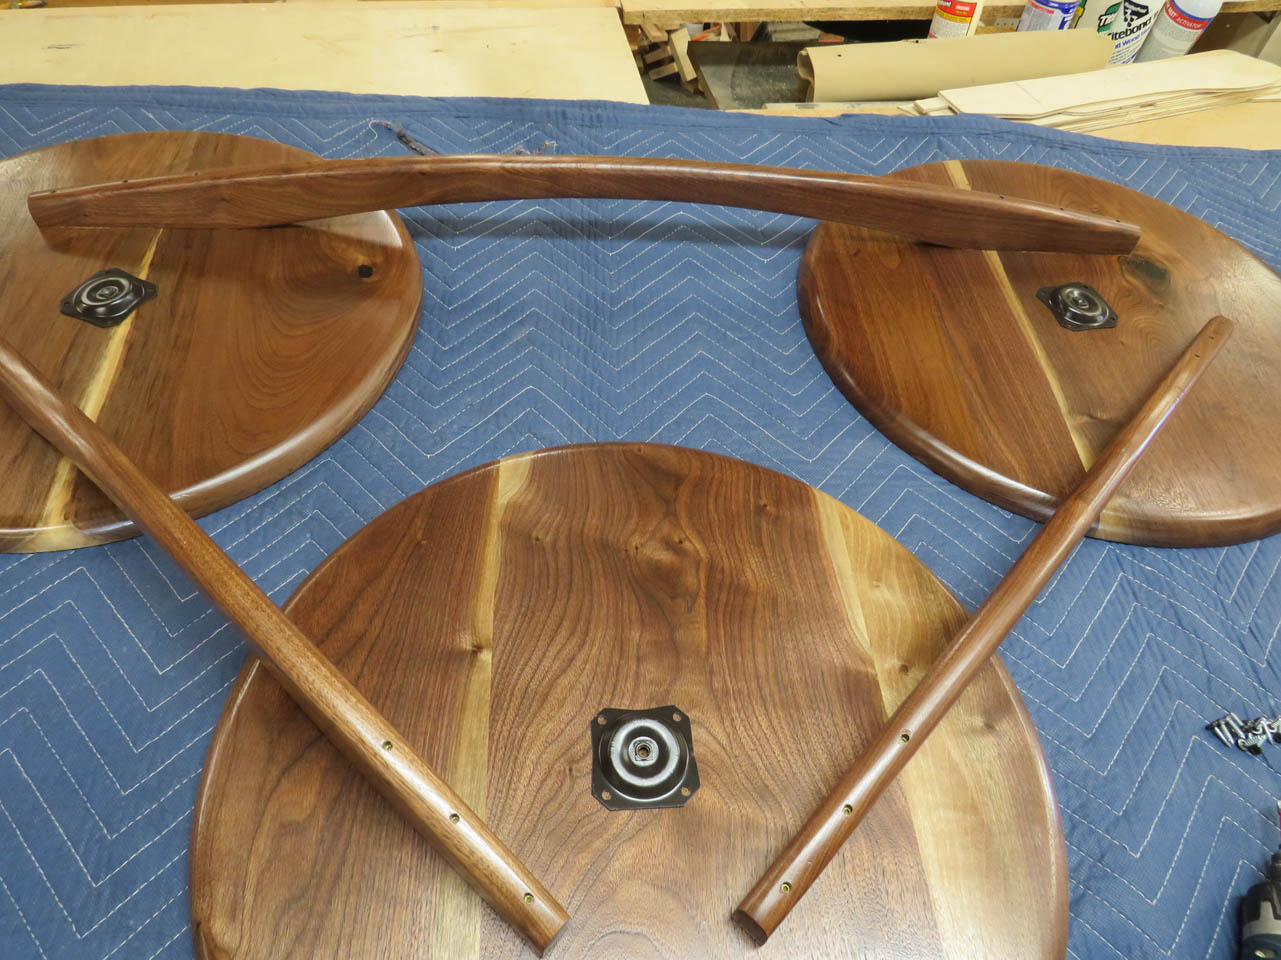
They look pretty good.
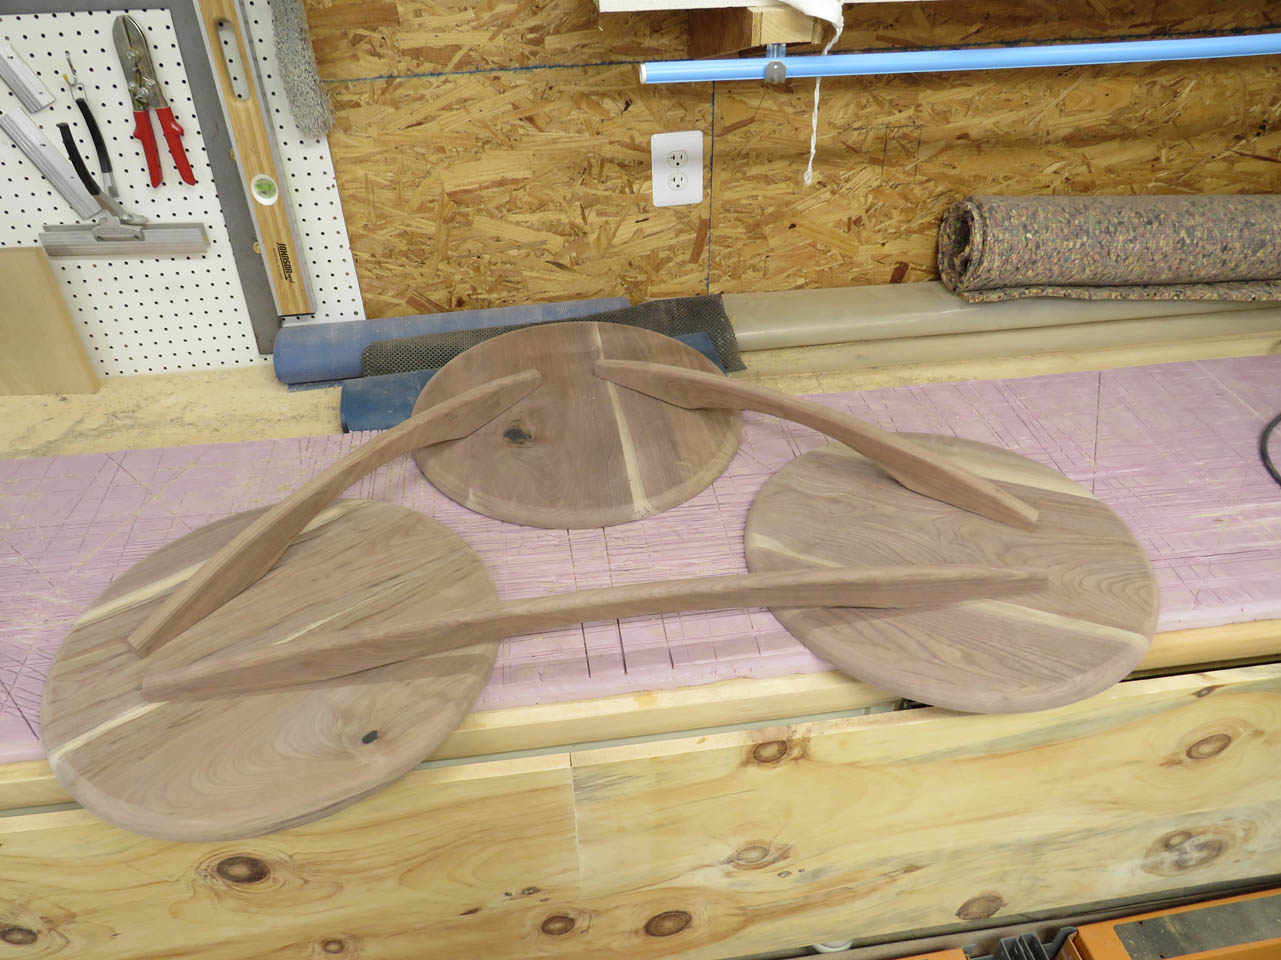
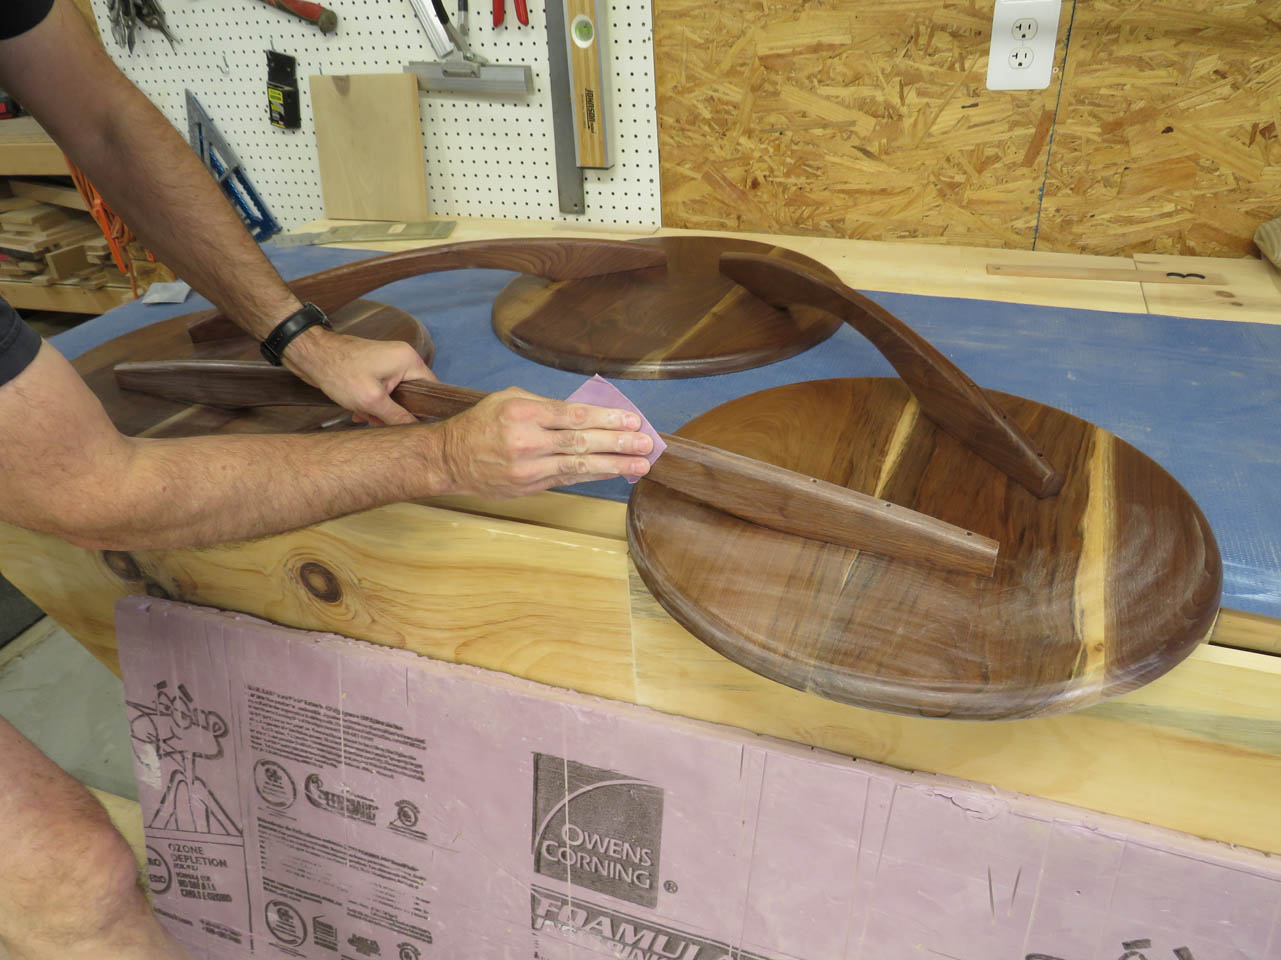
I did a dry-fit to see how it all fit up.
After a final sanding, I cleaned all of the surfaces with Naphtha to remove all the fine dust and get a feel for how it would look with finish on.

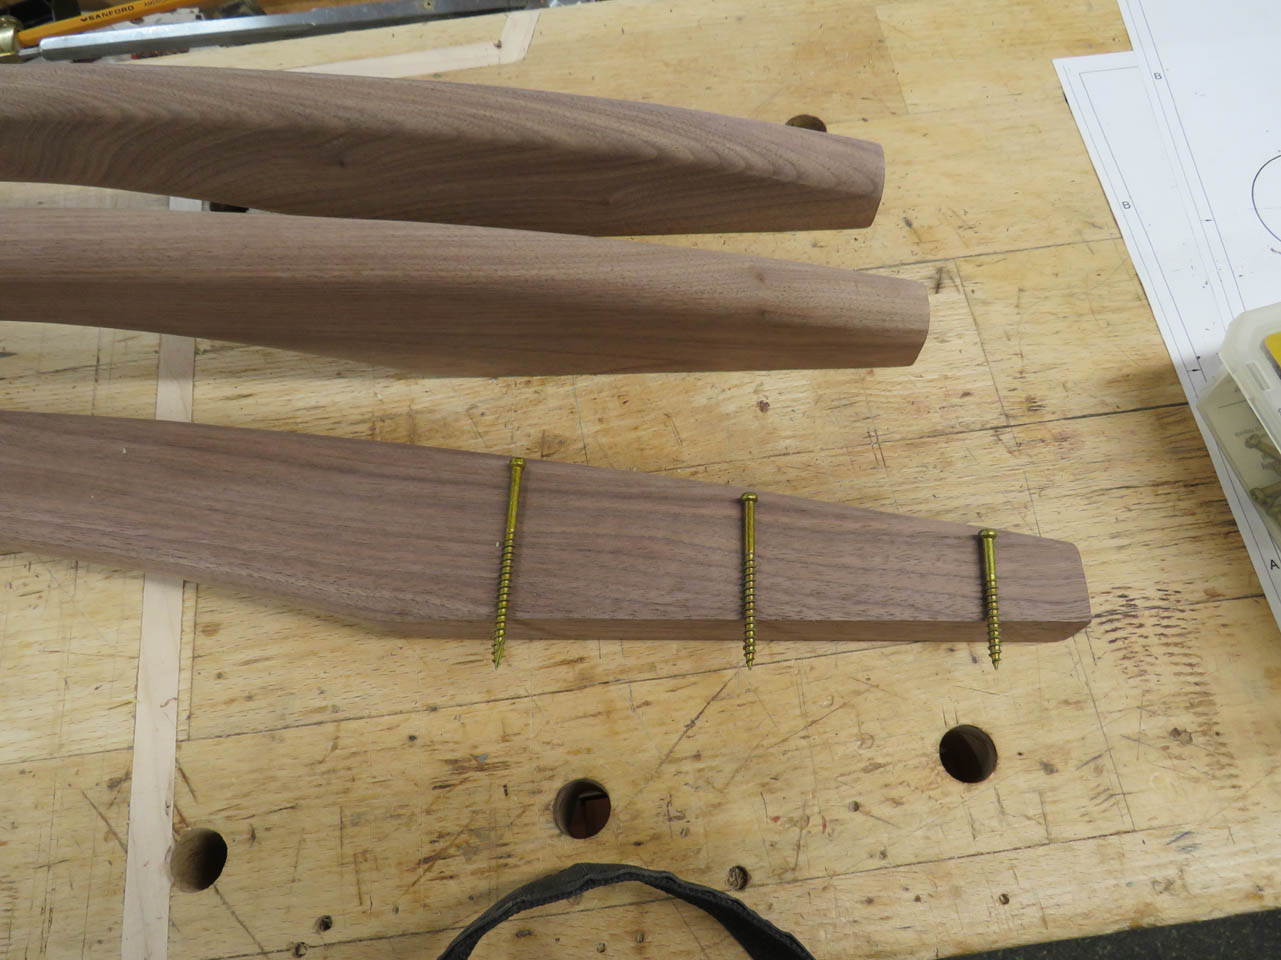
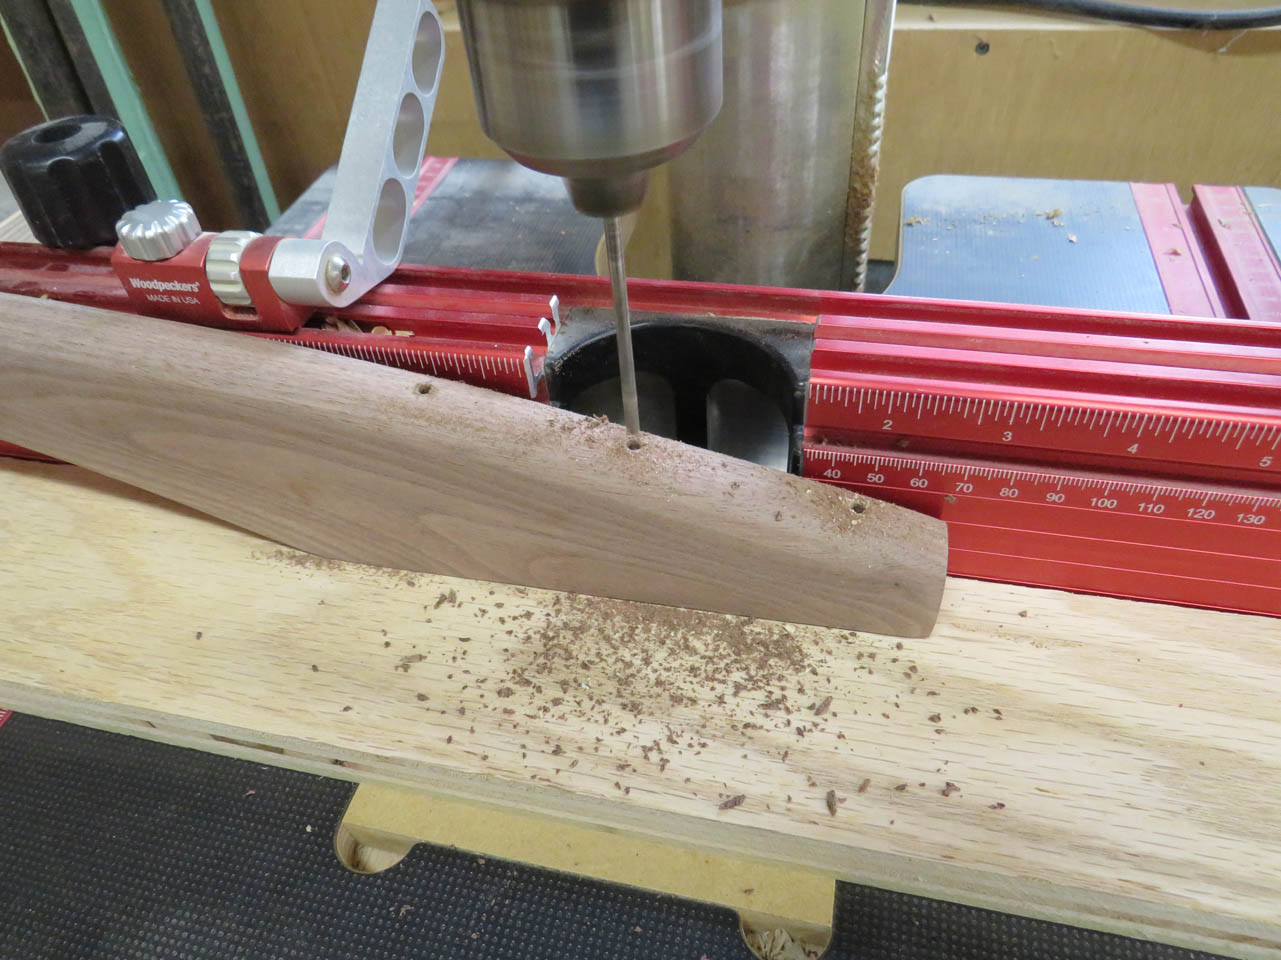
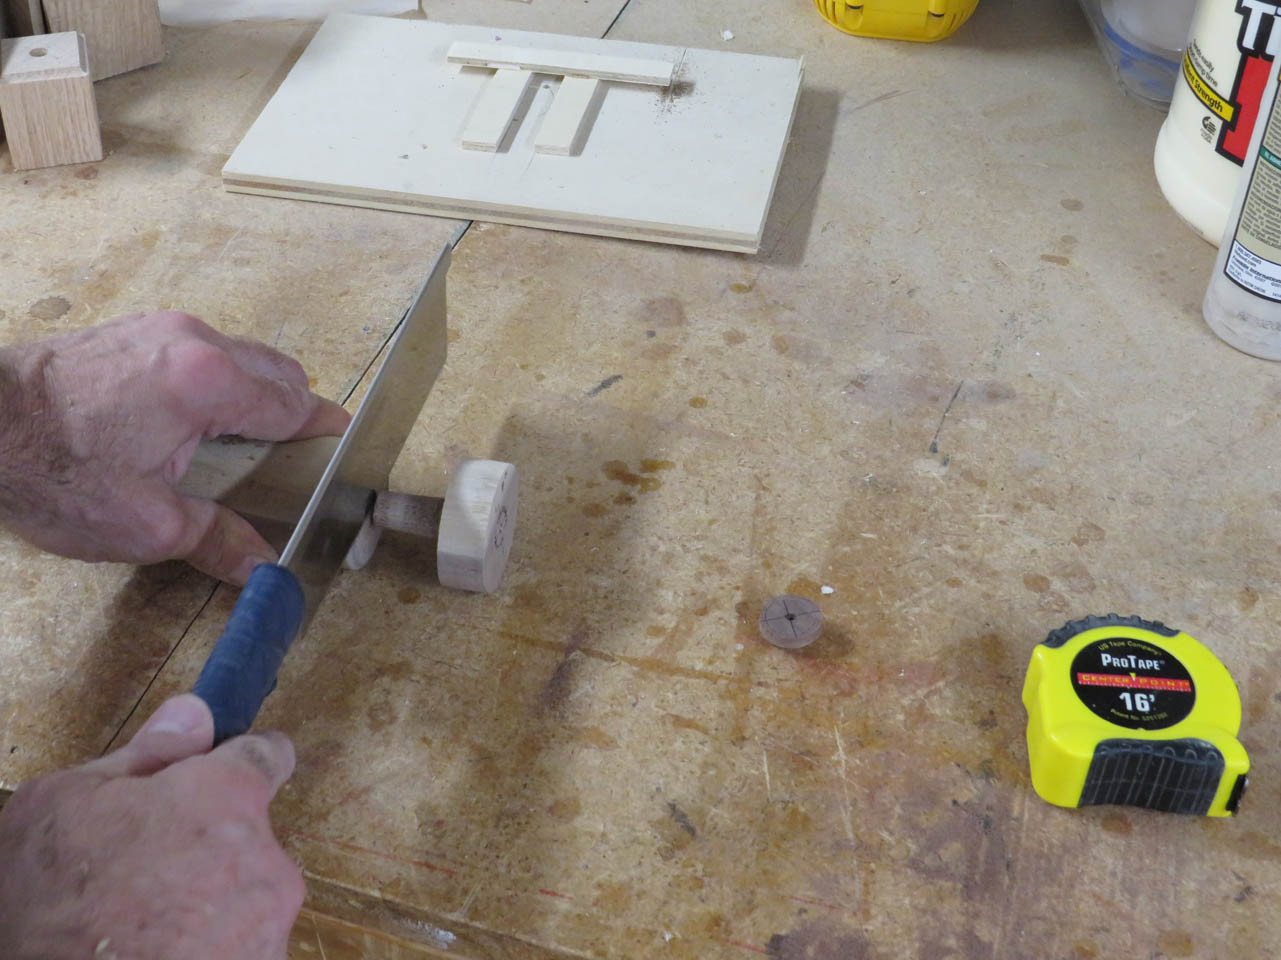
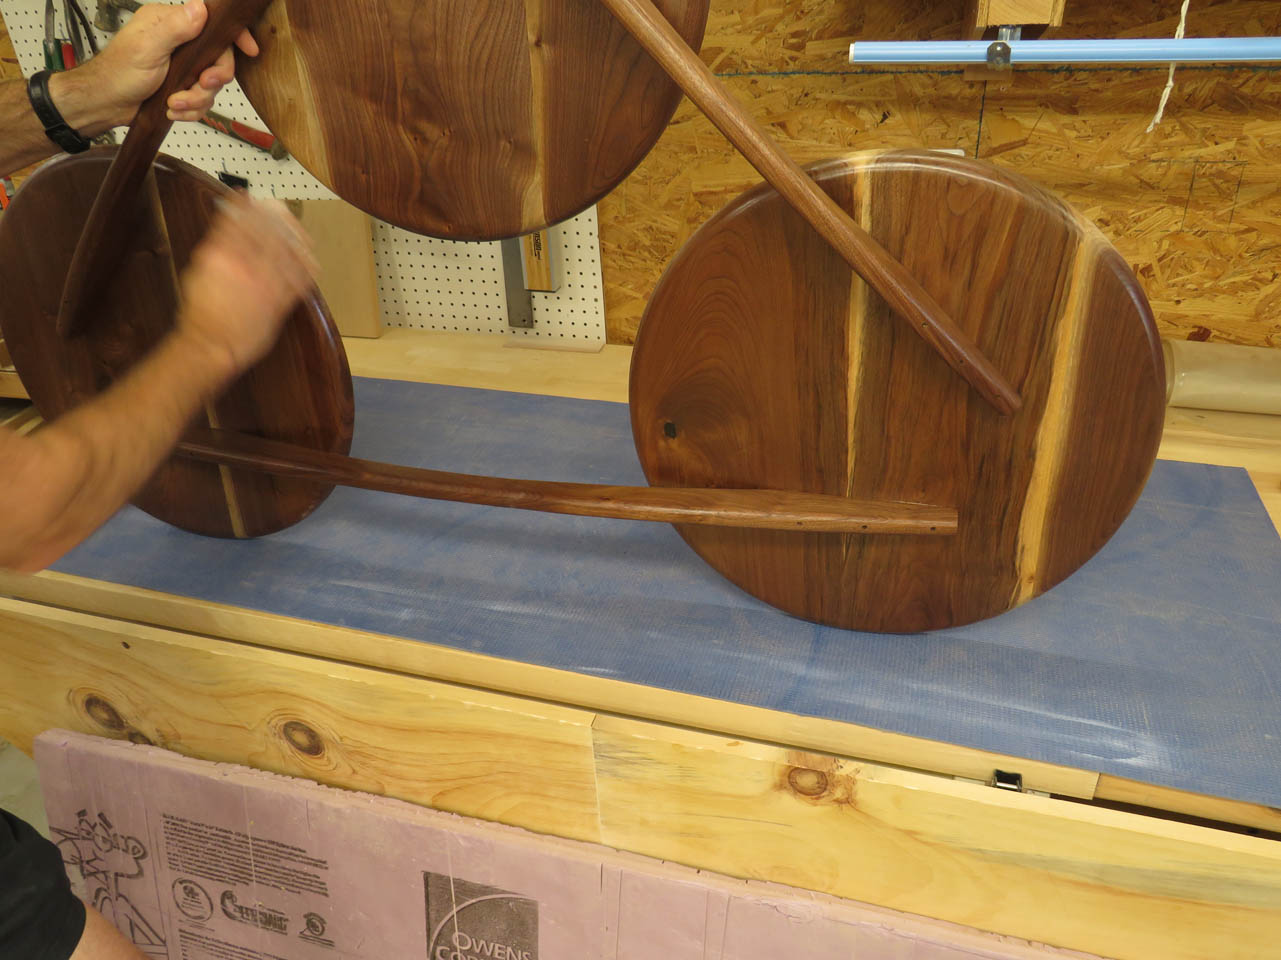
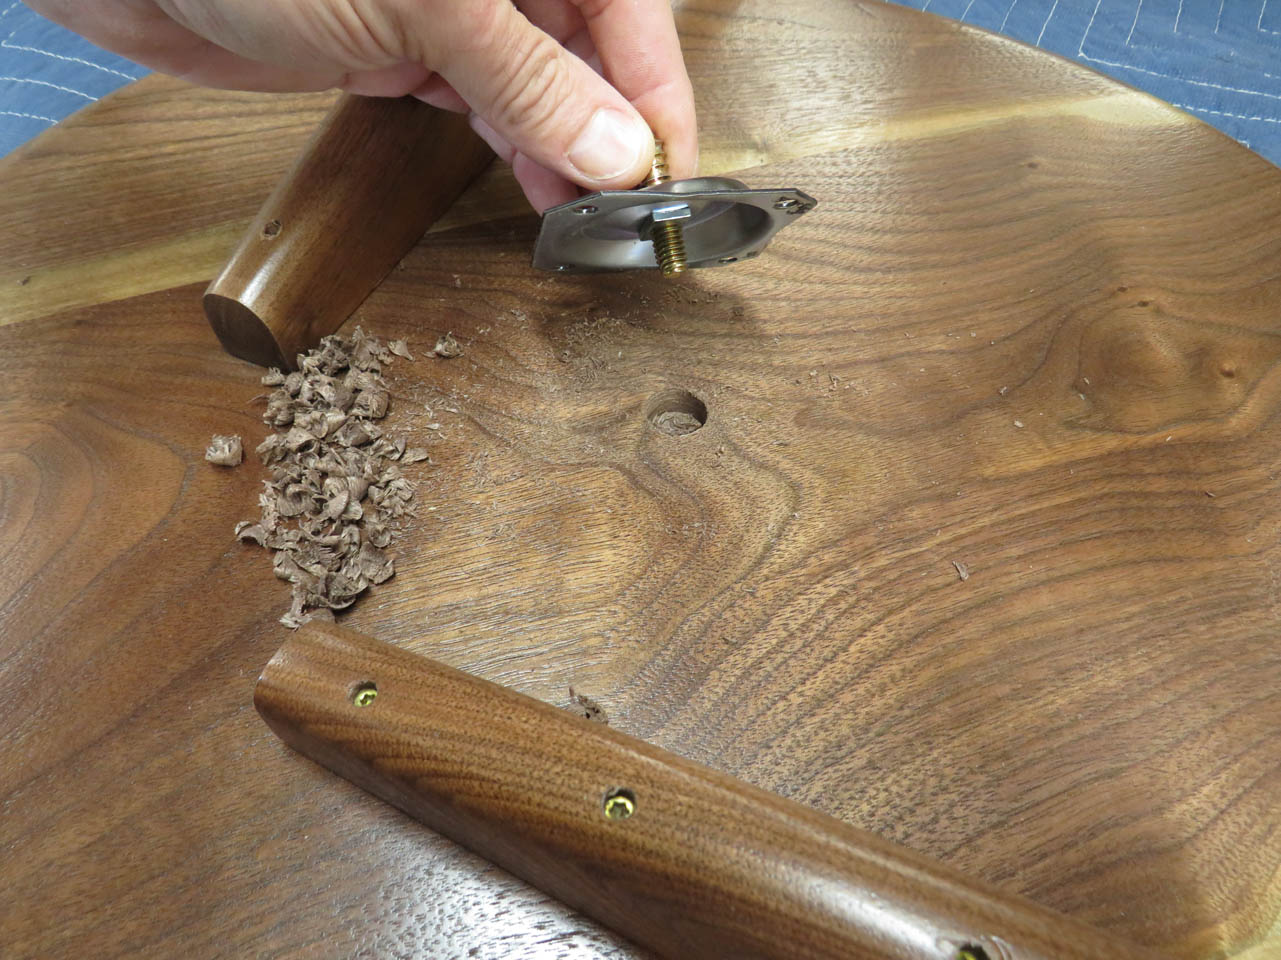
The support arms will be glued and screwed to the table tops so I found three different length finish screws to do the job .
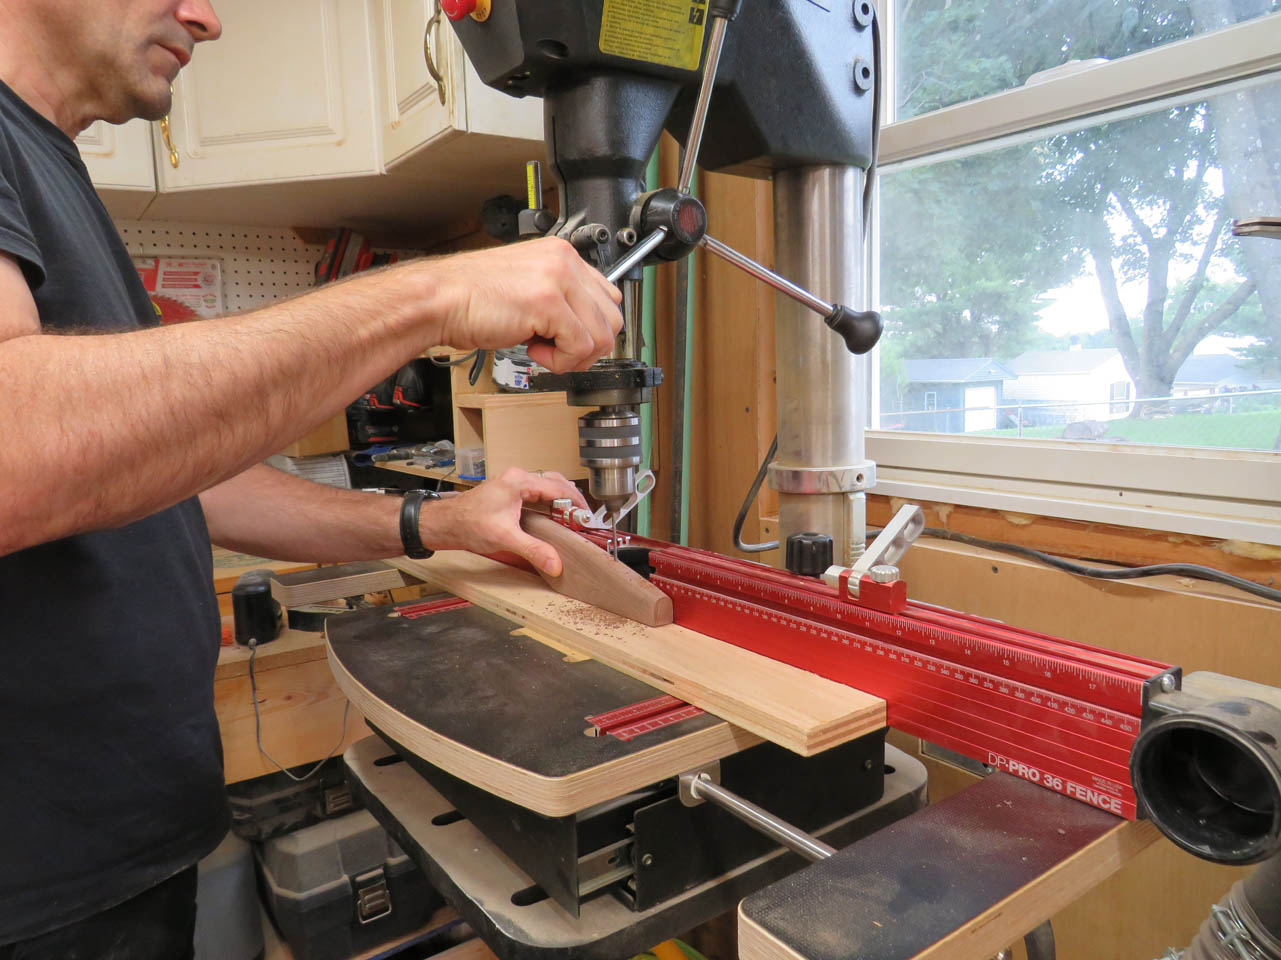
I pre-drilled the through holes for each and a small counter-bore for the head of the screws
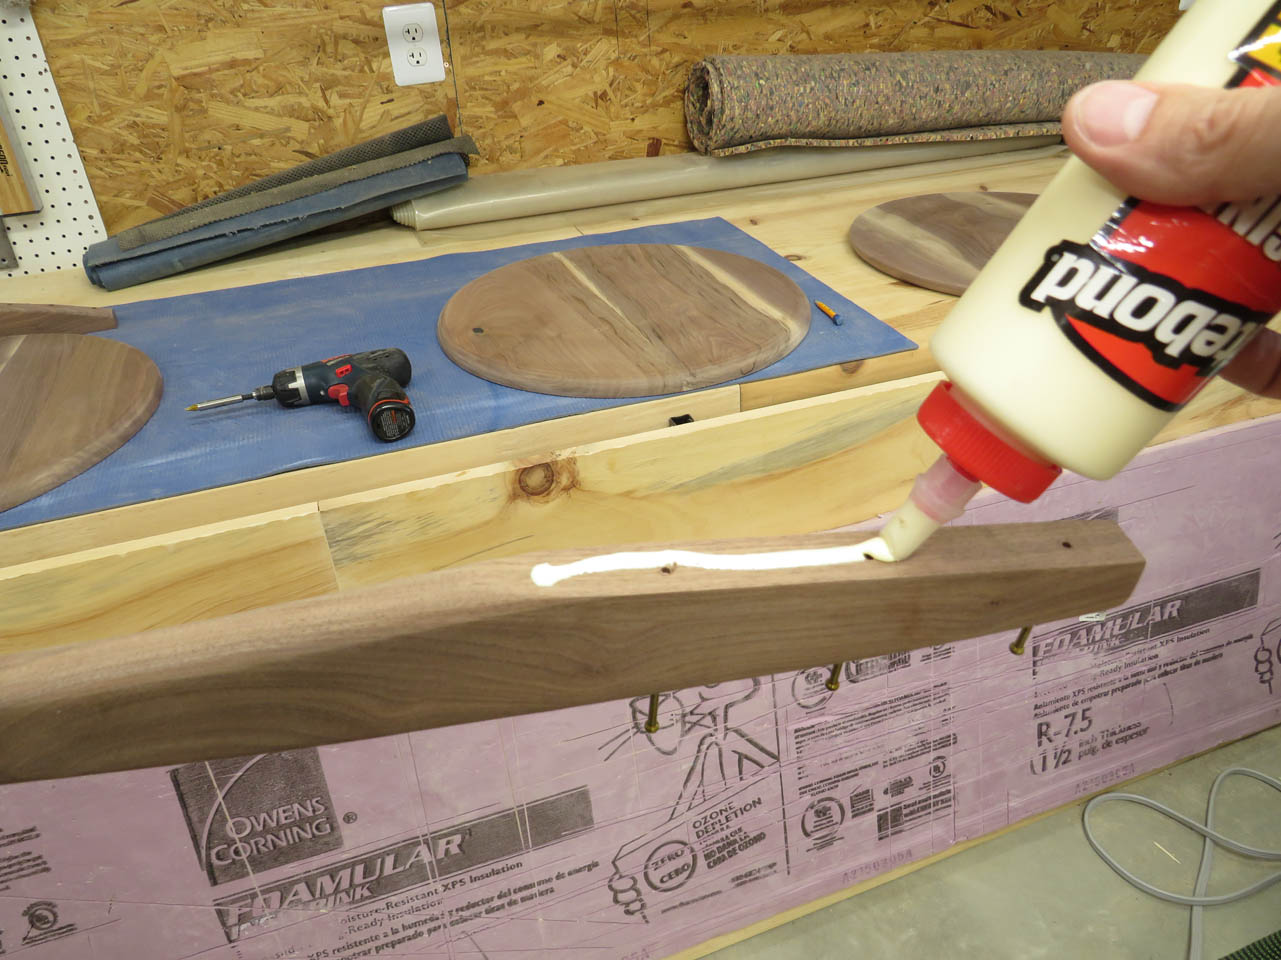
Then I applied glue and screwed down the arms.
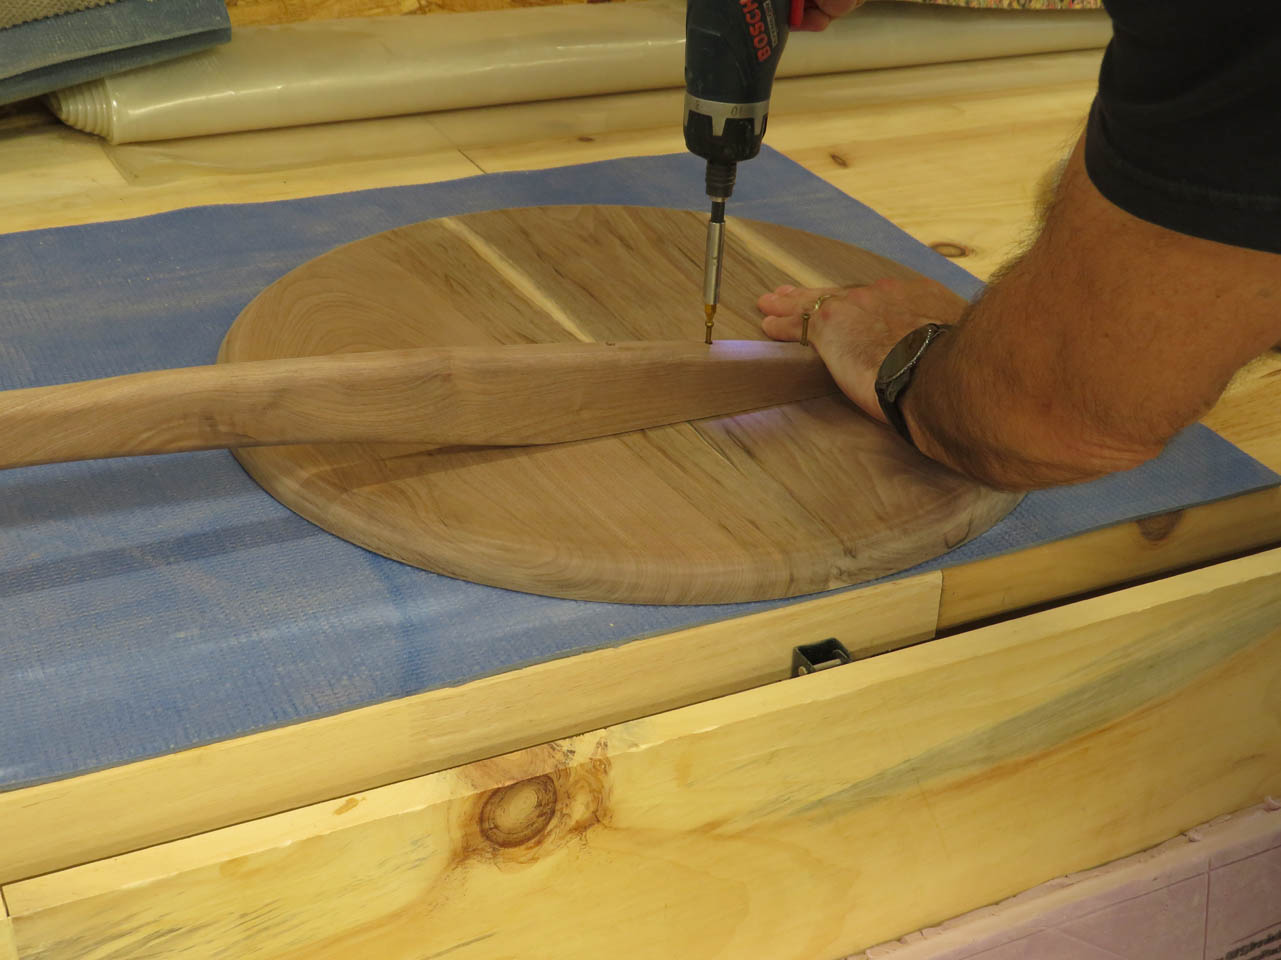
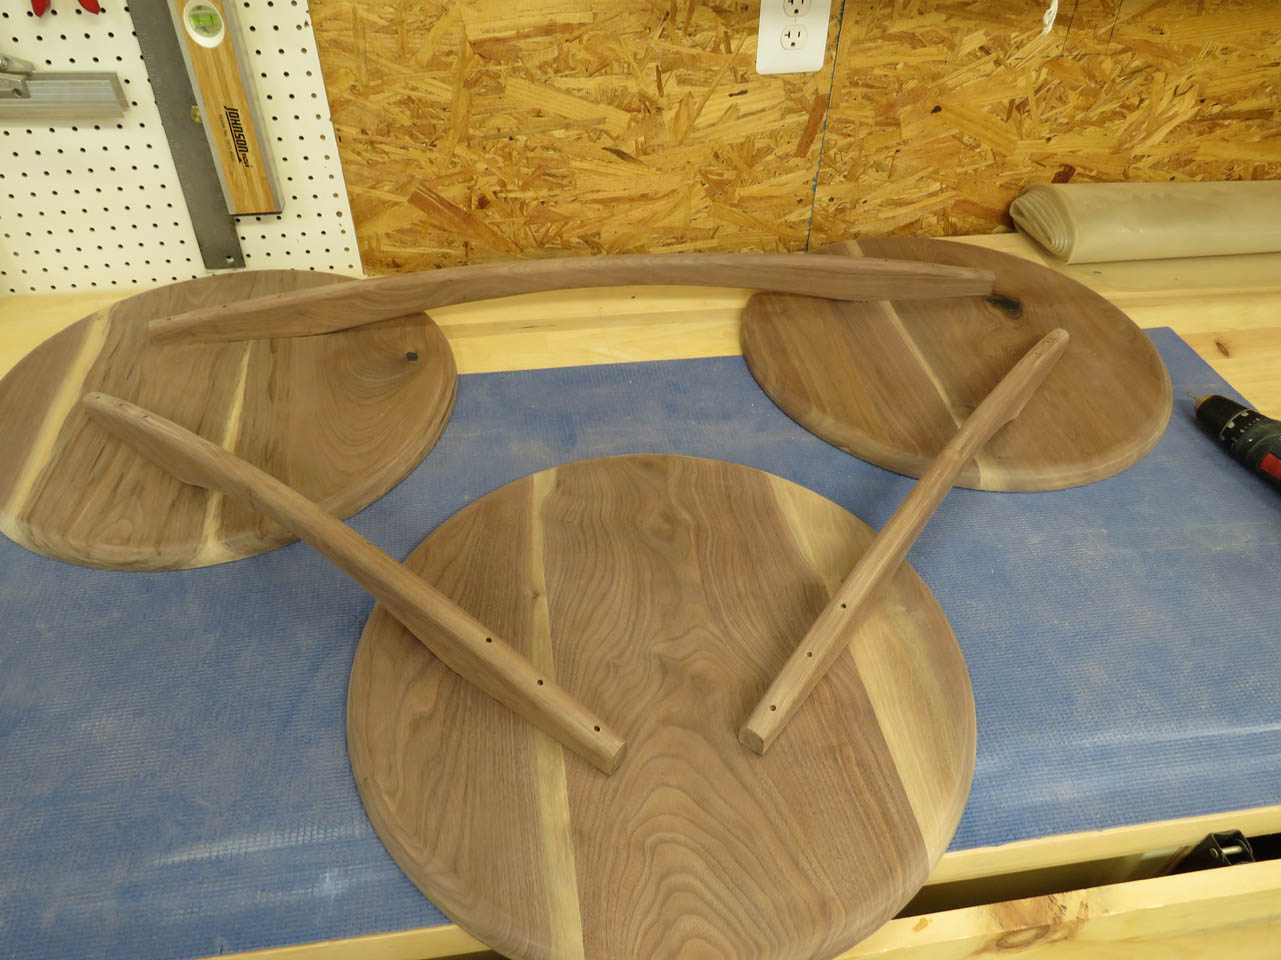
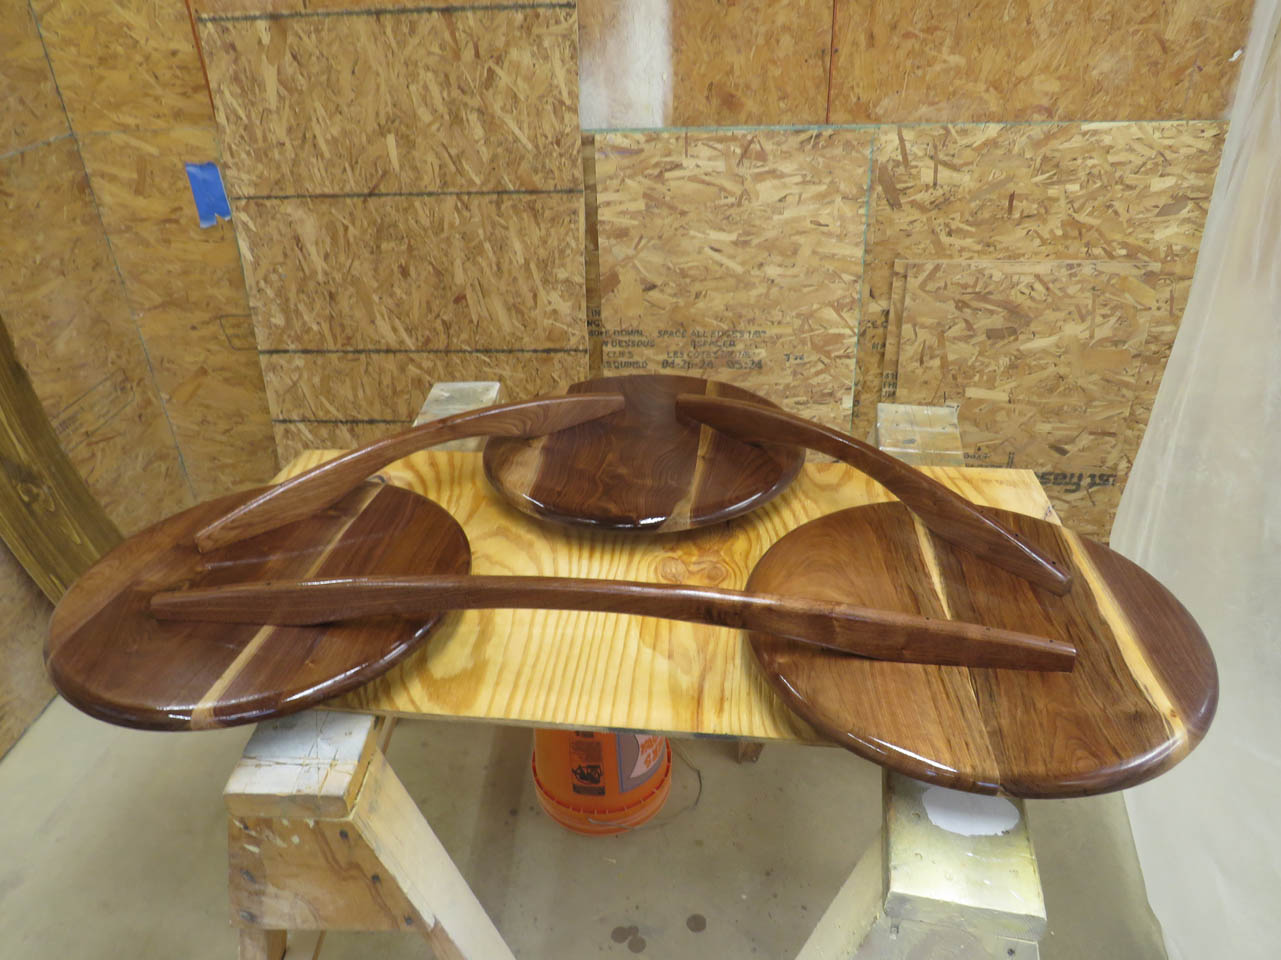
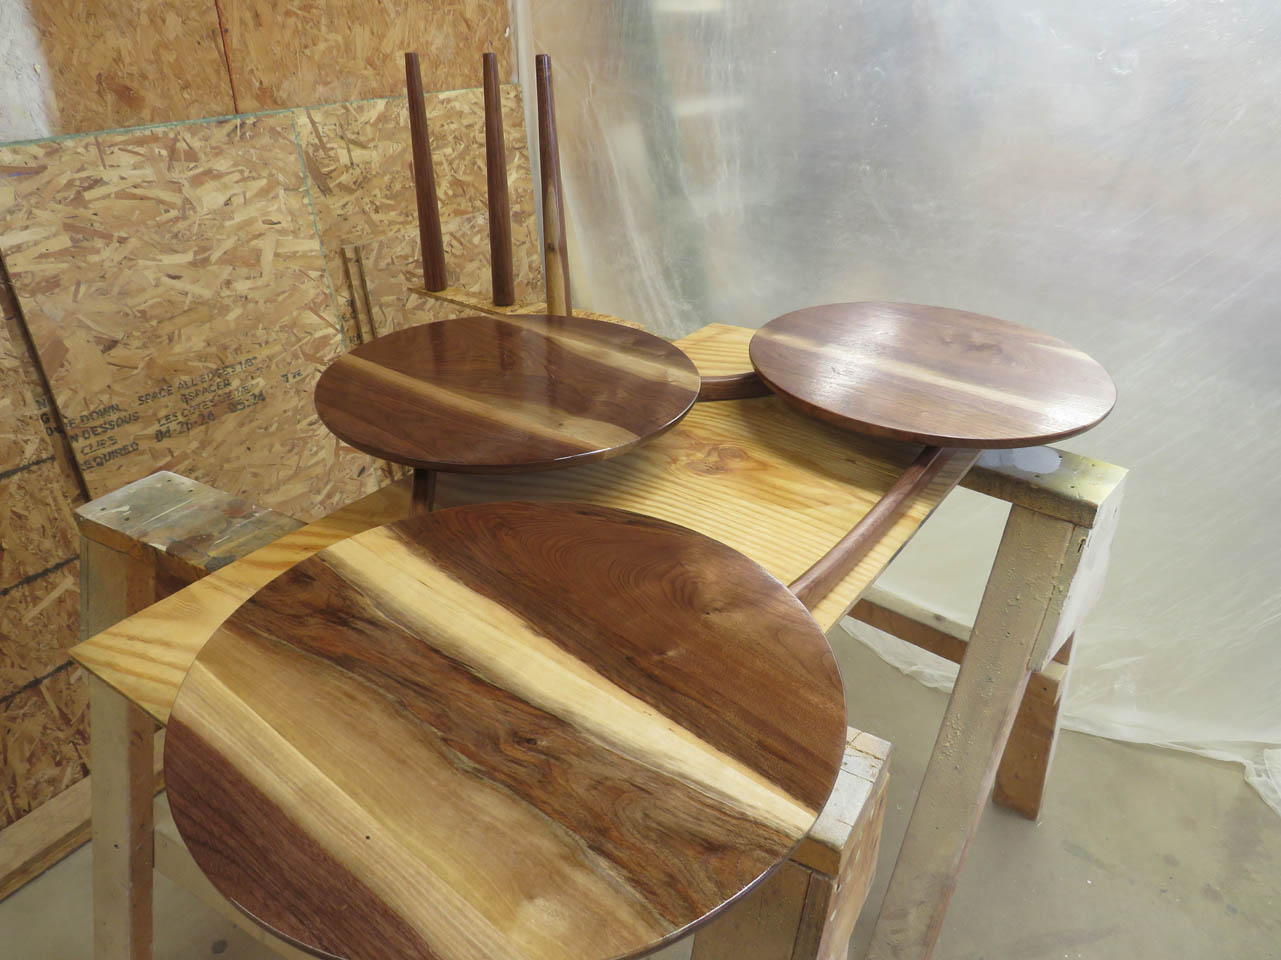
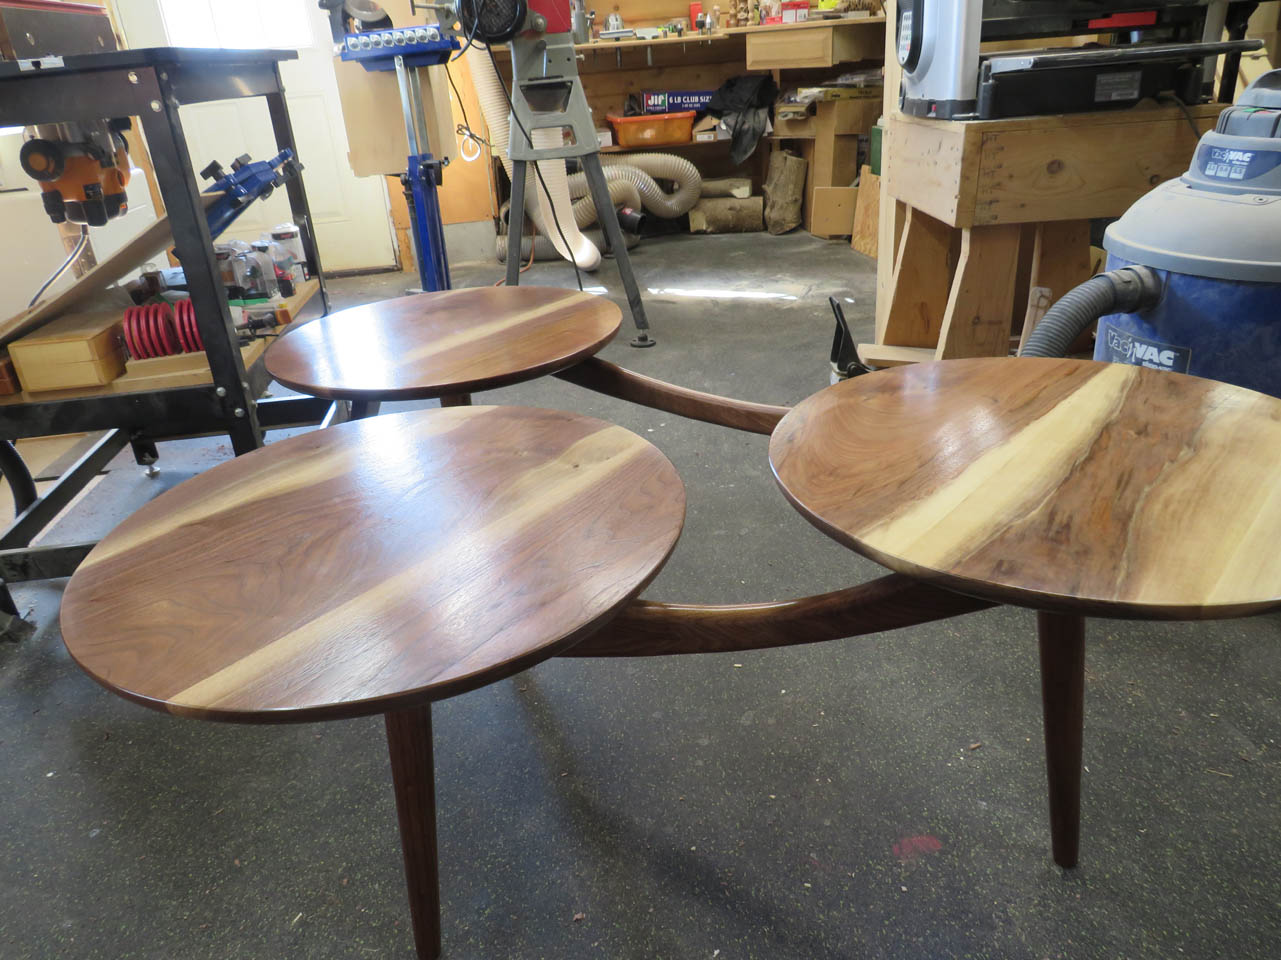
All three were attached and everything seems to fit together nicely.
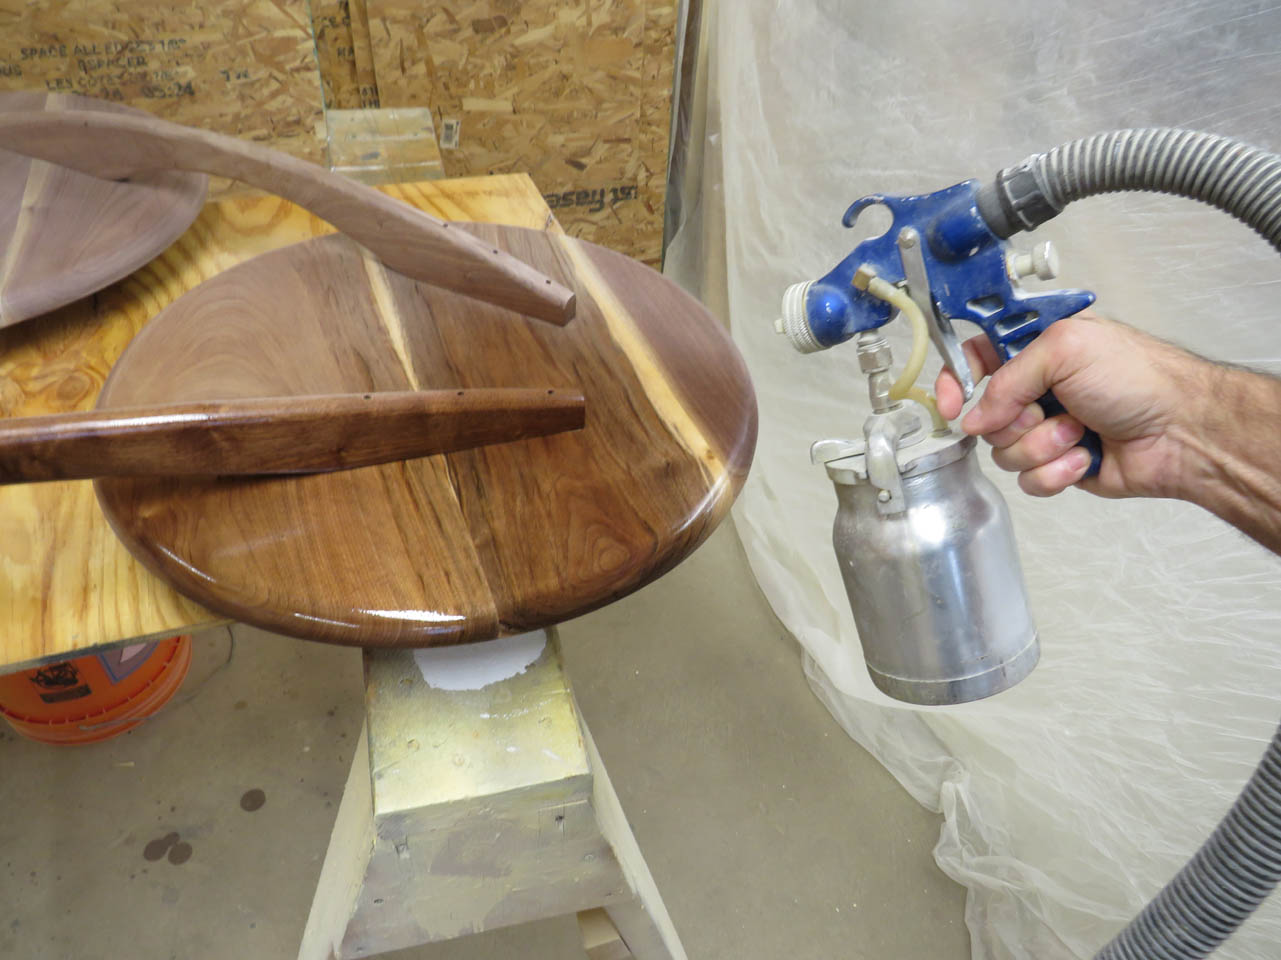
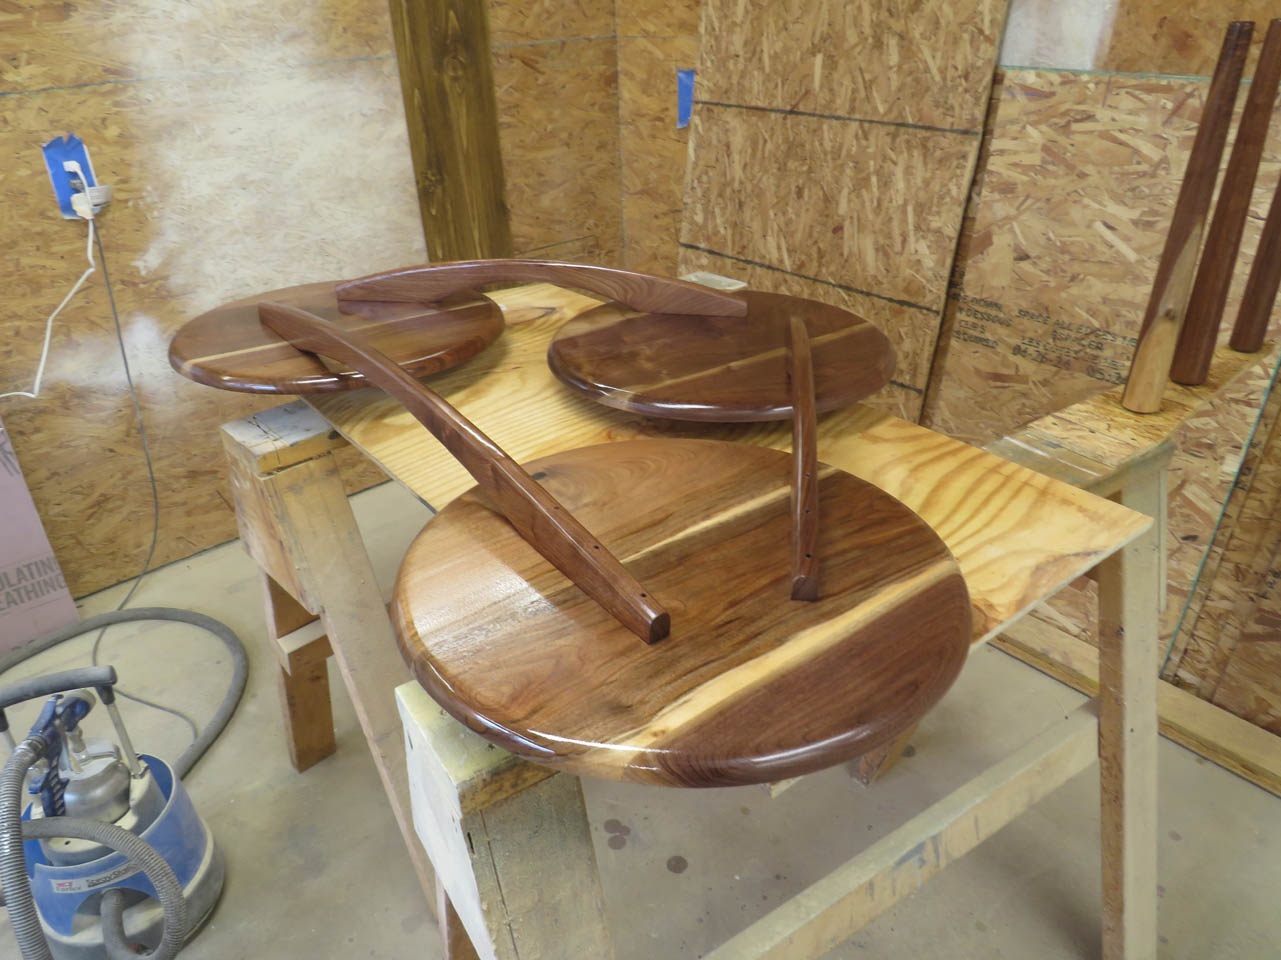
The top is assembled so I figured I would get some polyurethane sprayed on while I start on the legs.
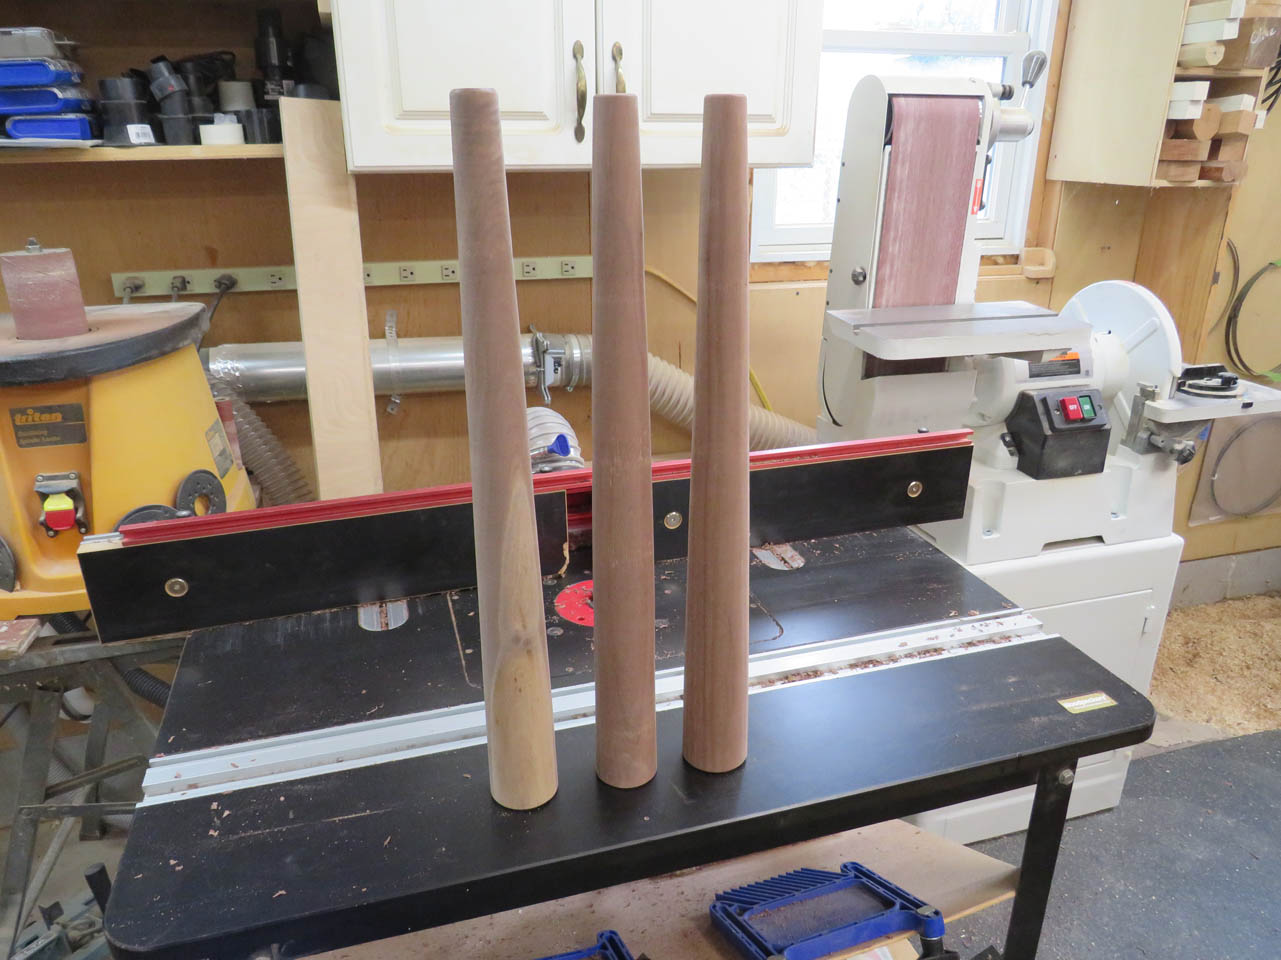
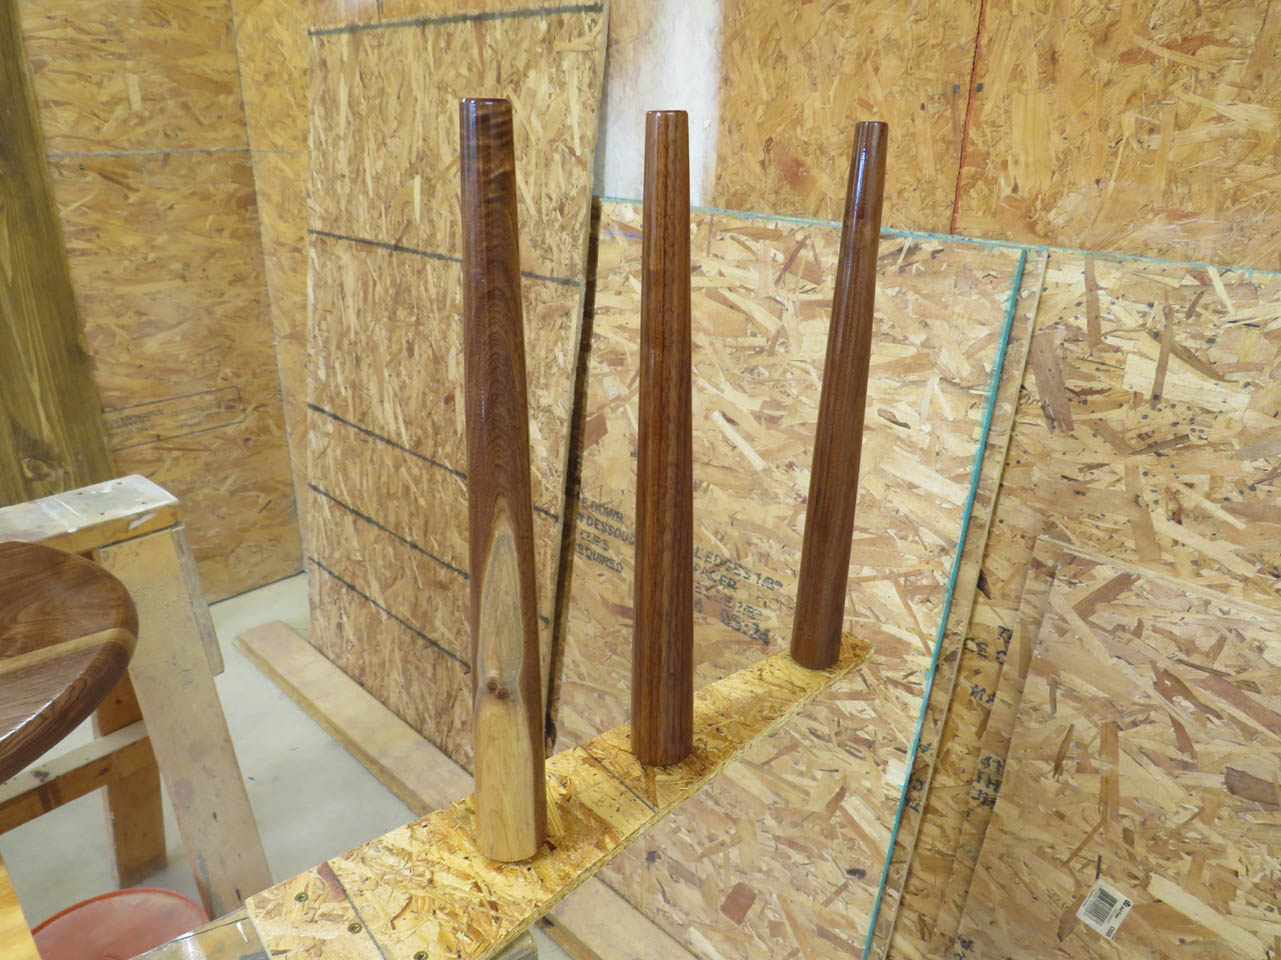
The legs will be 18.5″ long and tapered from 2″ at the top, down to 1″ at the bottom.

I cut some 2″ square stock, a couple inches longer than my final dimension, then placed it between my lathe centers.
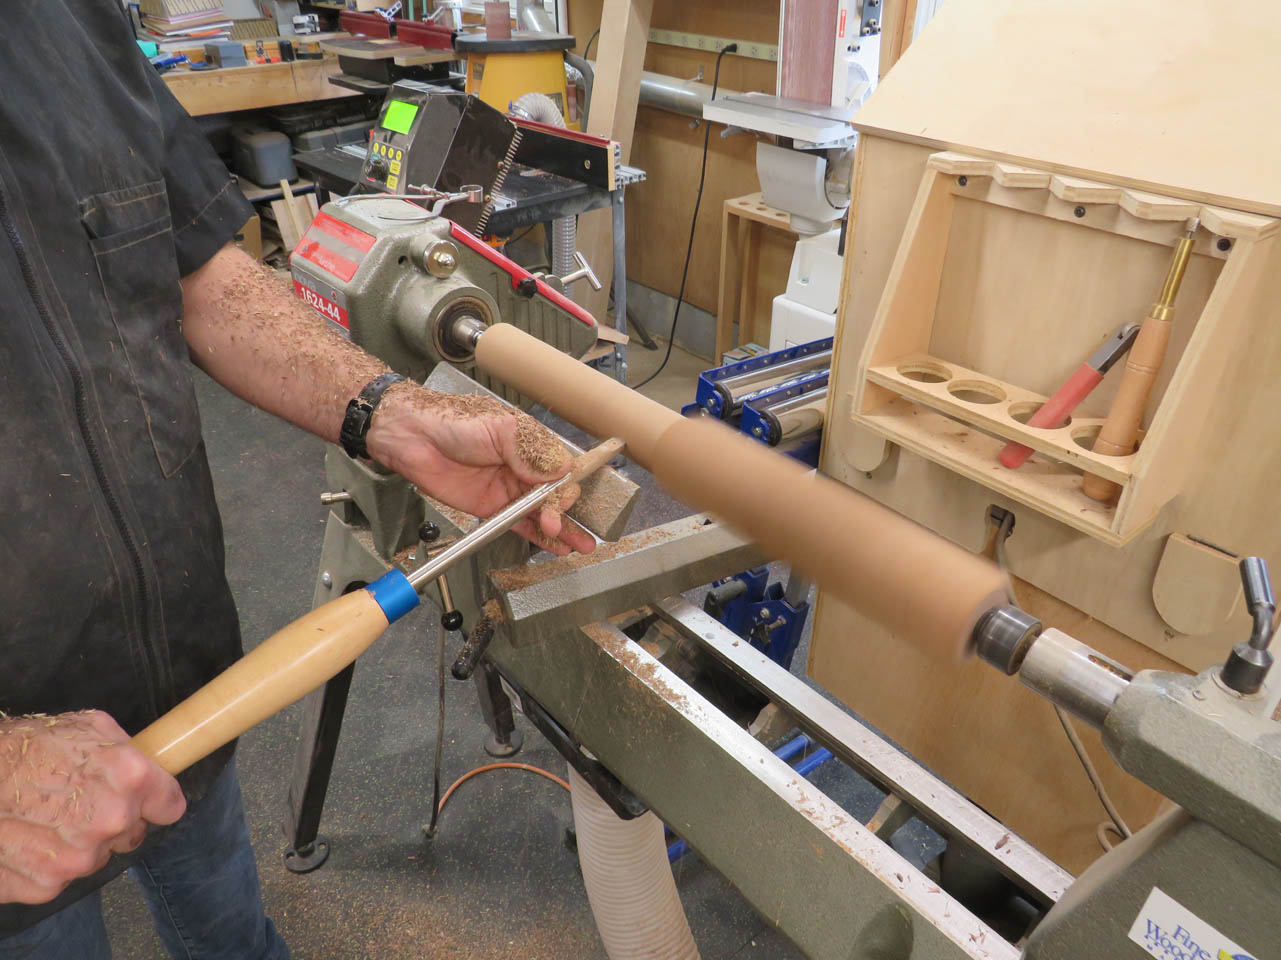
Step one was to rough-cut the blocks into 2″ diameter spindles.
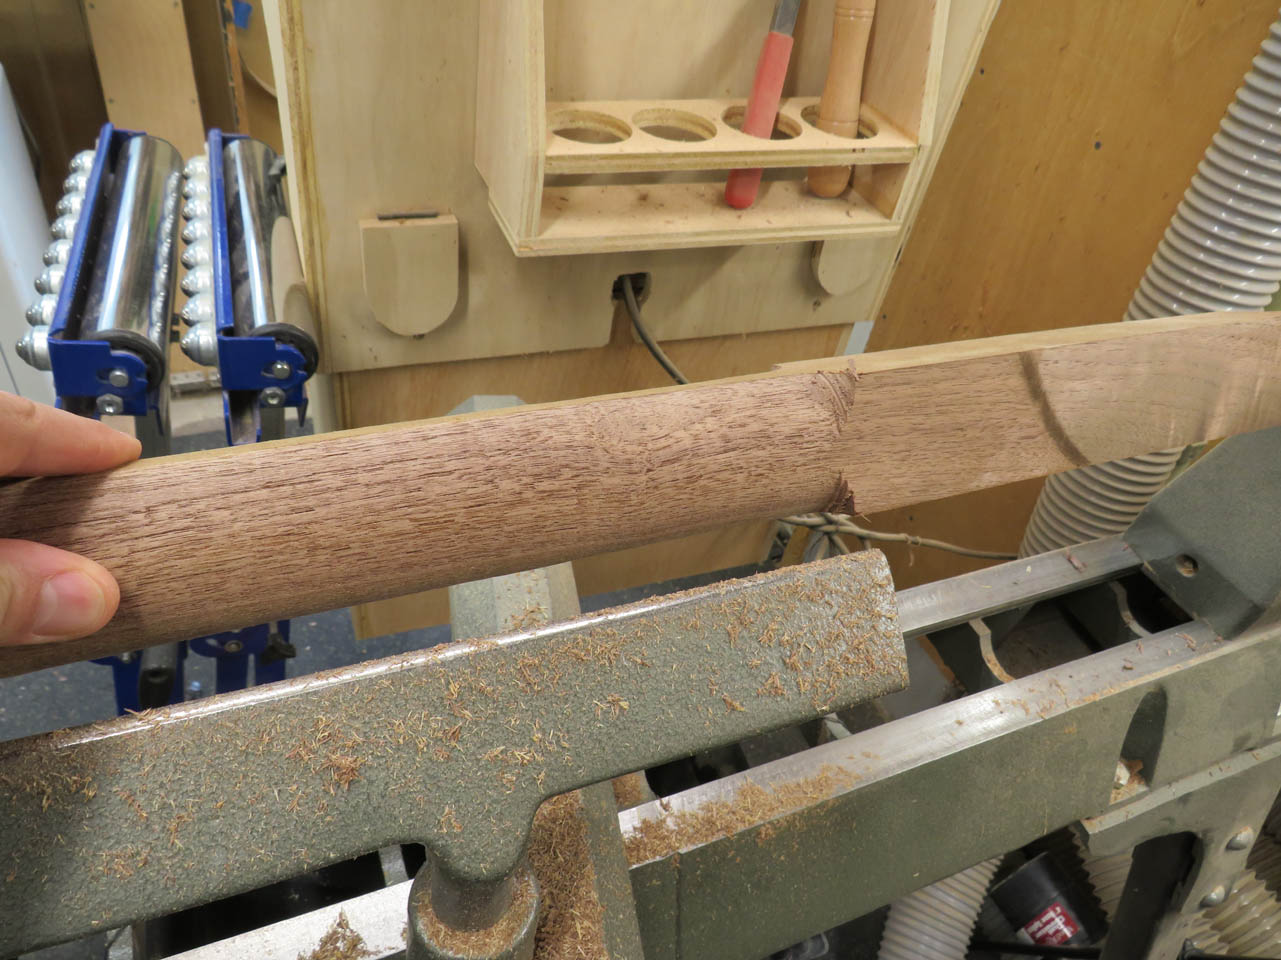
Then I divided the leg evenly into four sections and marked the diameter at each of those points.
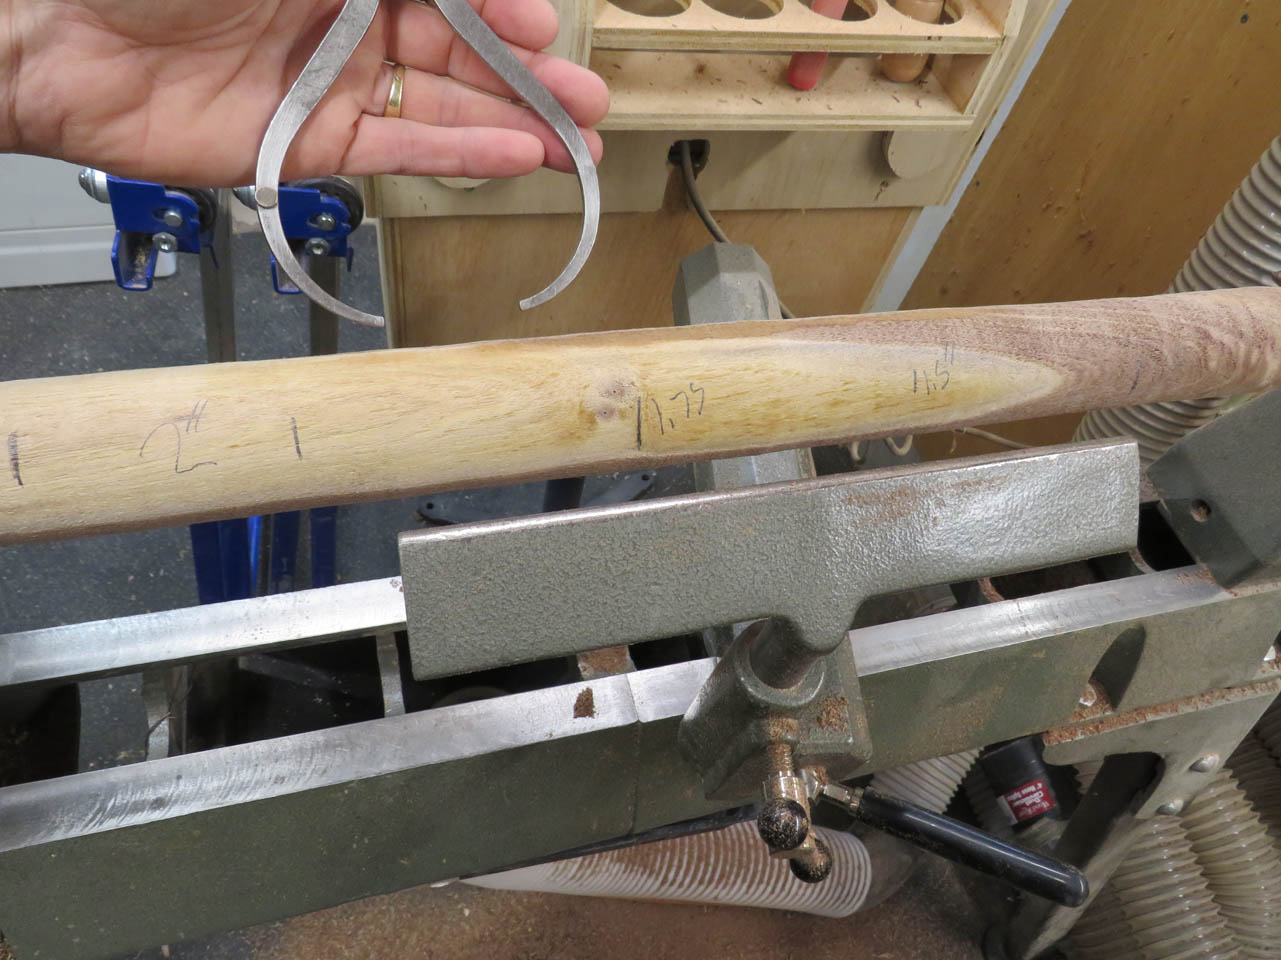
I set my calipers to those diameters and used a parting tool to cut to that diameter at each point.
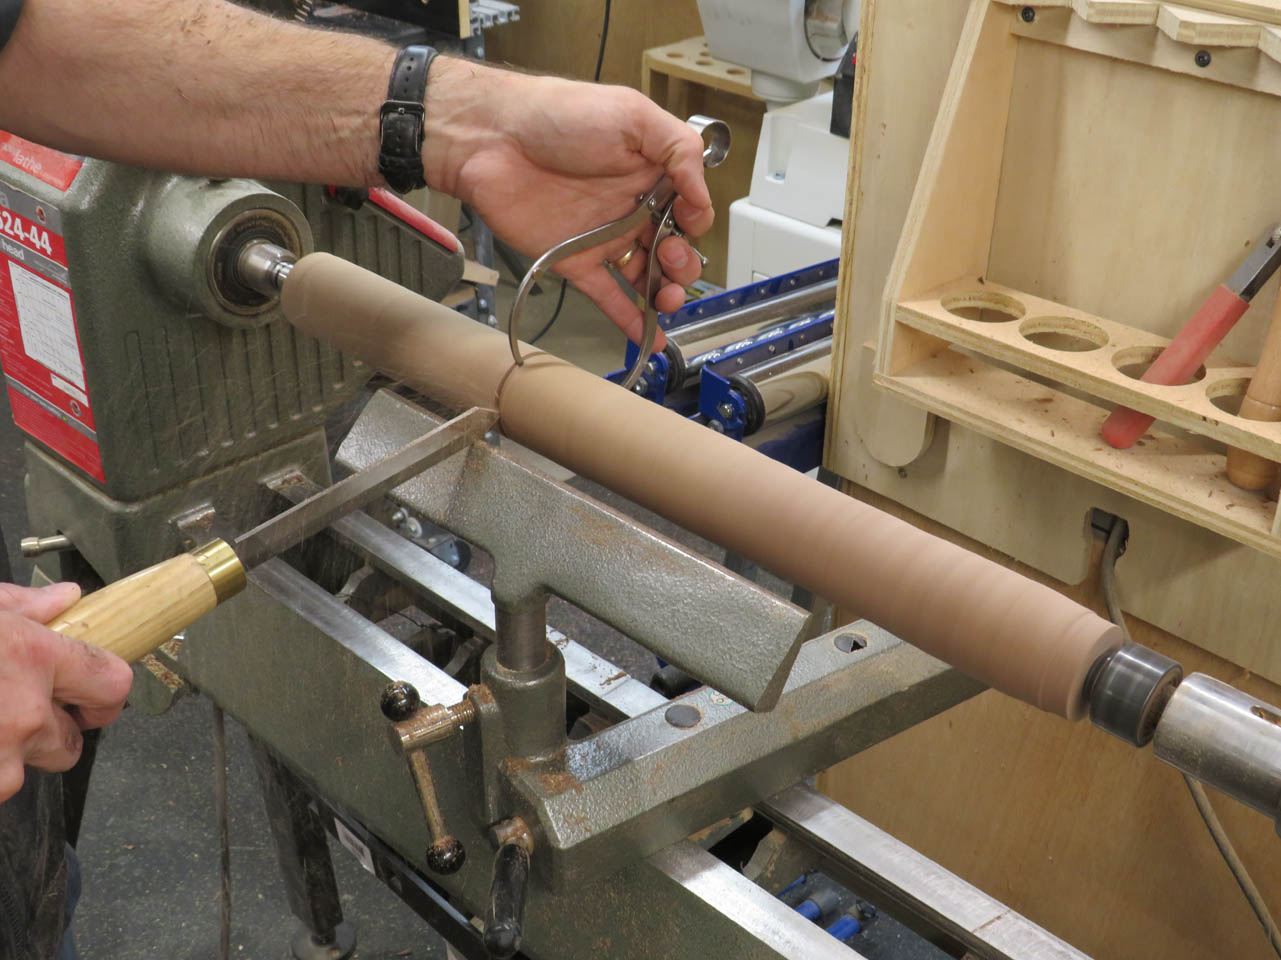

Next, I used the scraper to cut a taper from one section to the next.
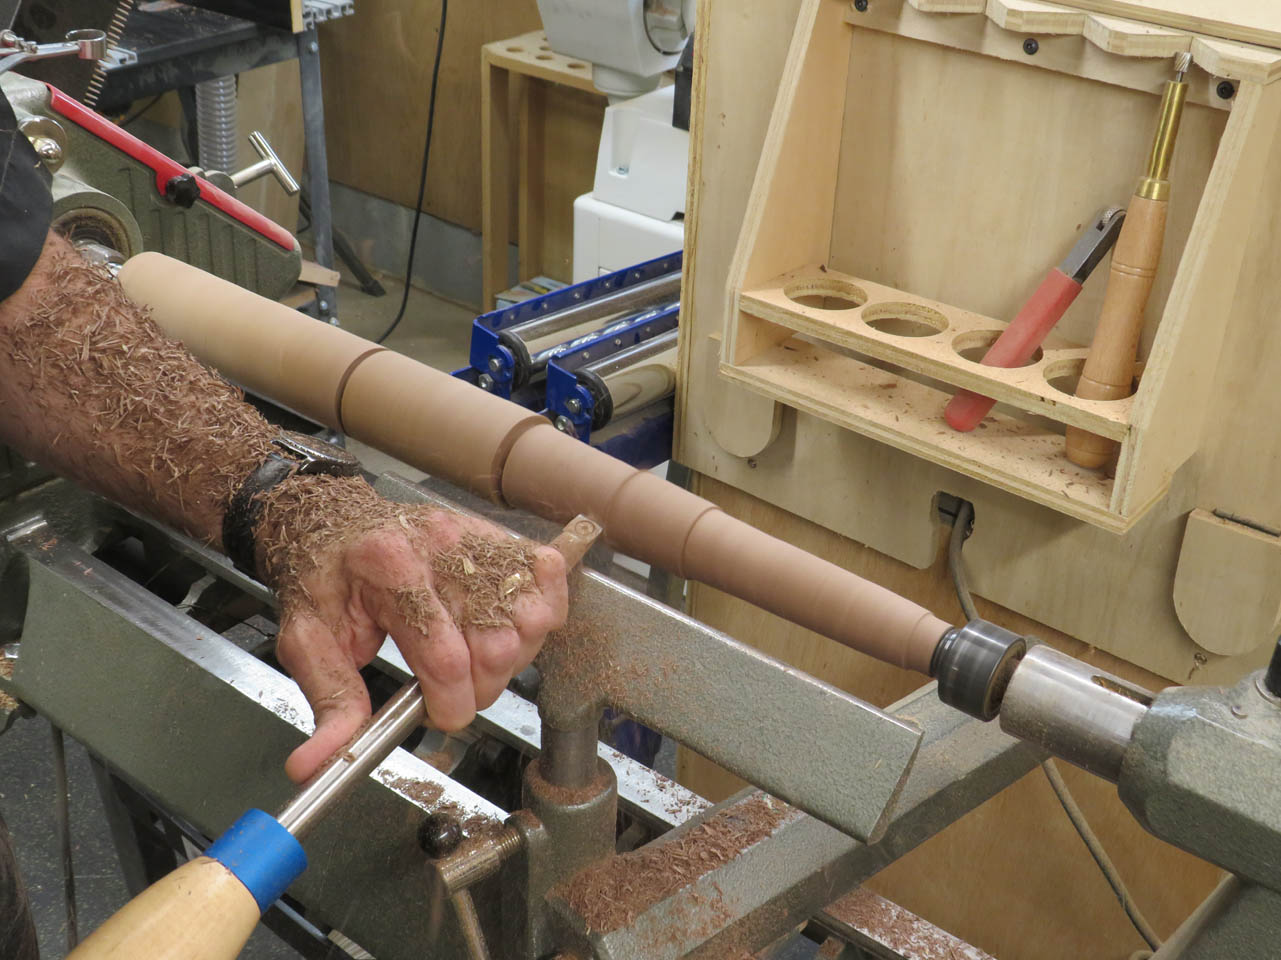
Easy to create a long, straight taper by hand this way.
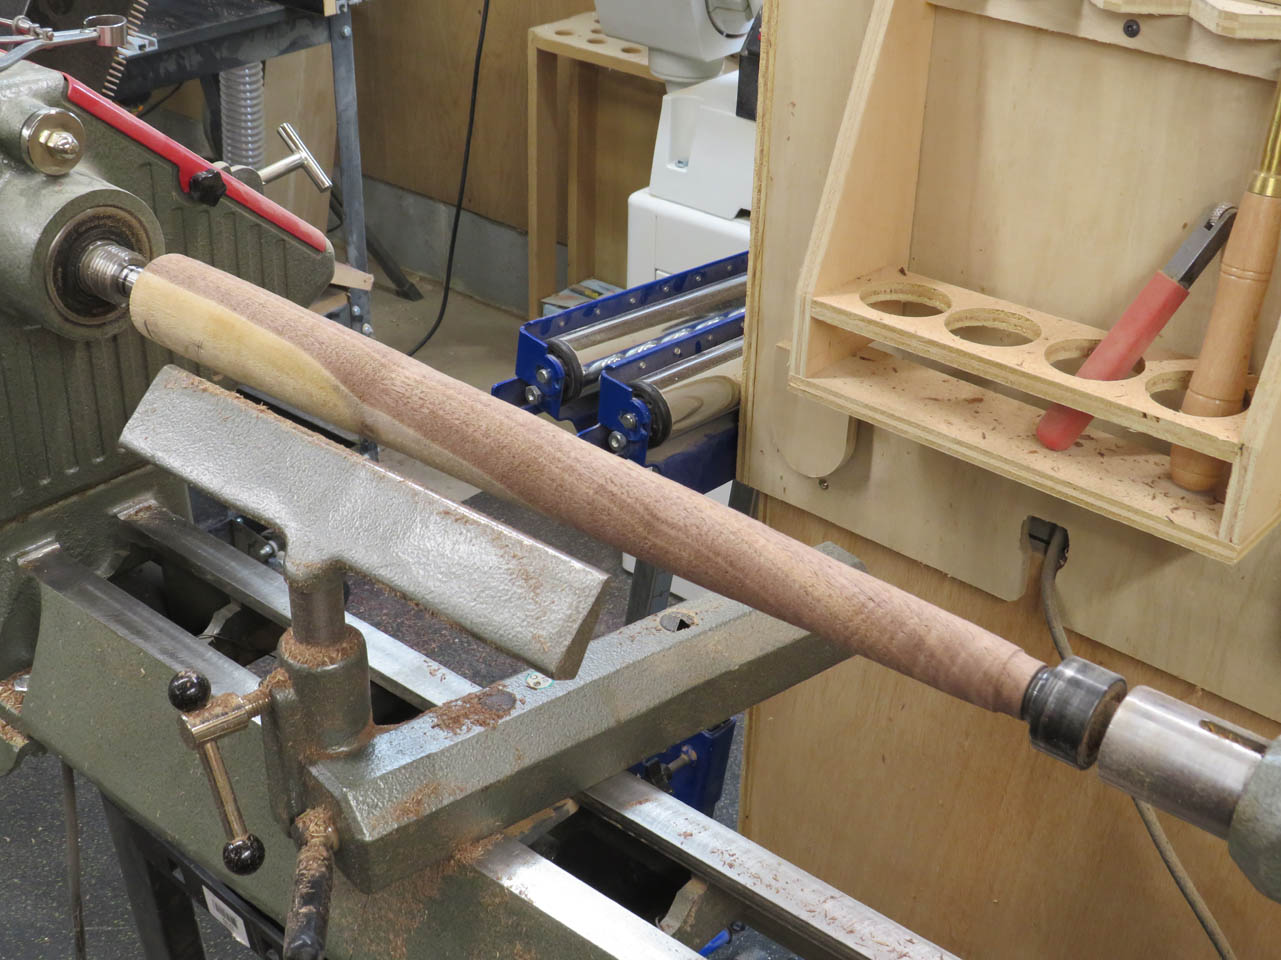
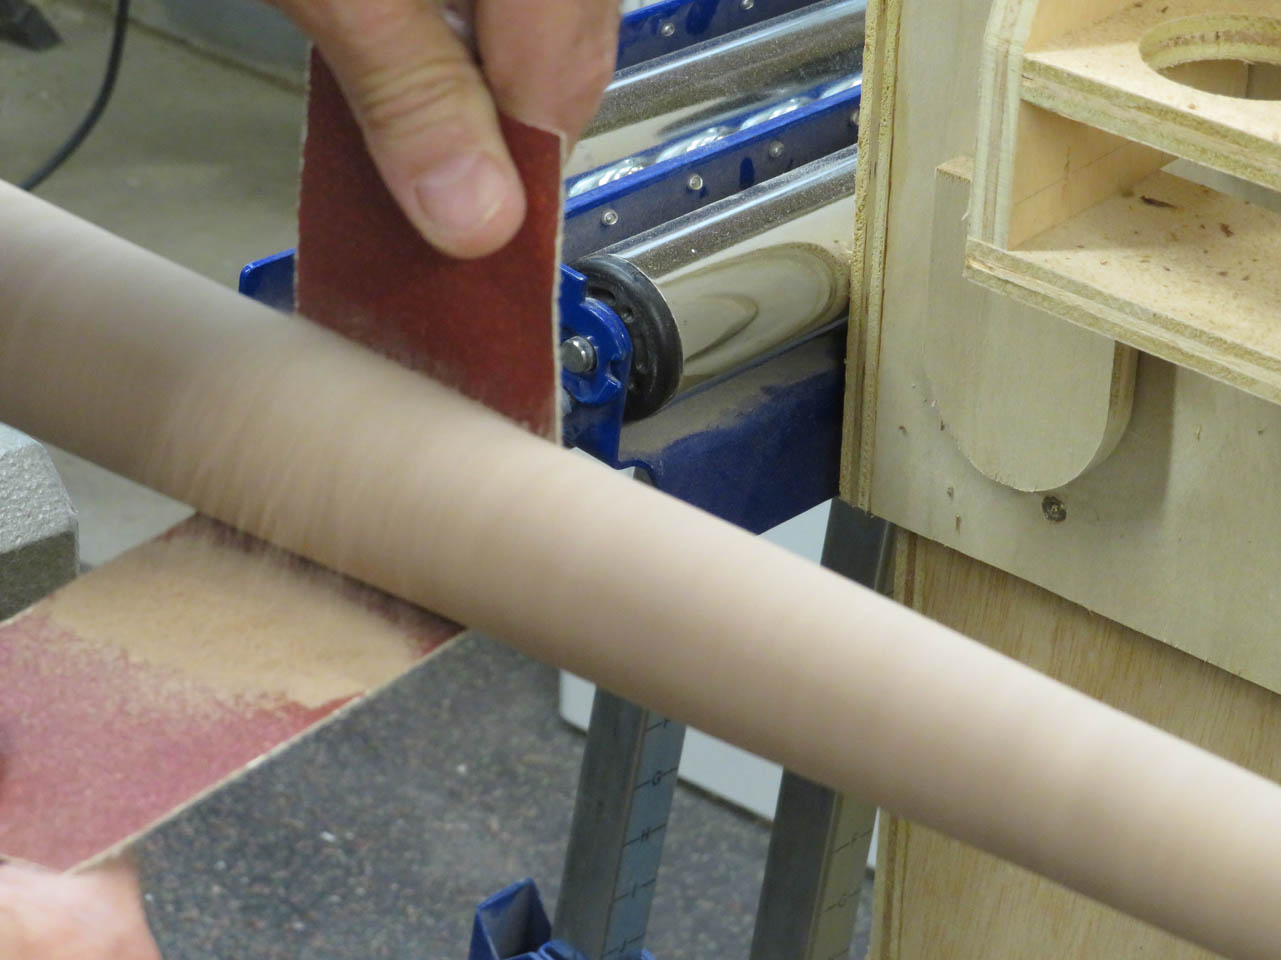
I got it as smooth as I could with the scraper, then slowed the lathe down and sanded the legs smooth.
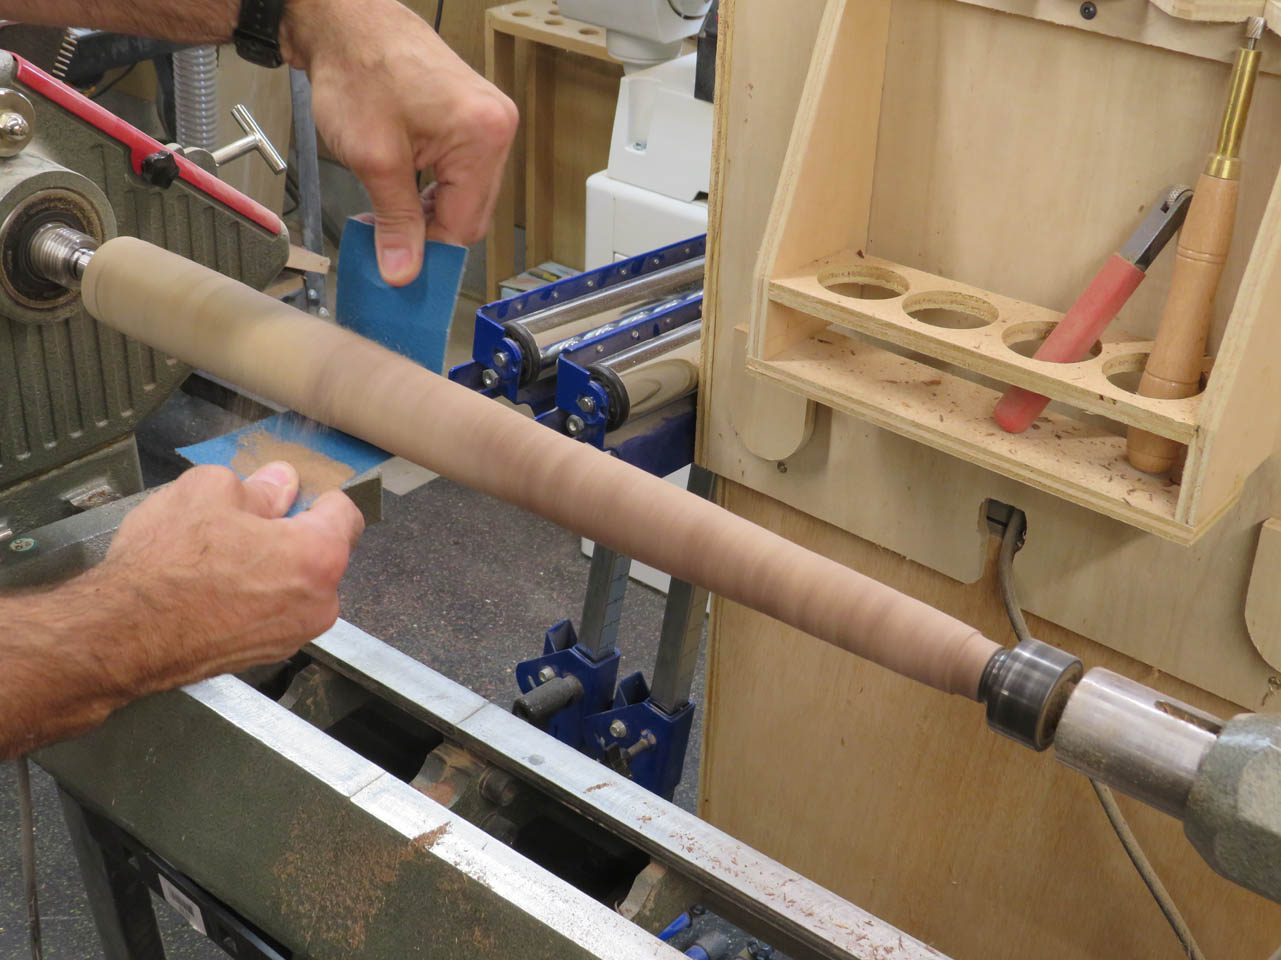
I worked my way through the grits from 80 all the way up to 320.
This gave me some smooth tapered legs.
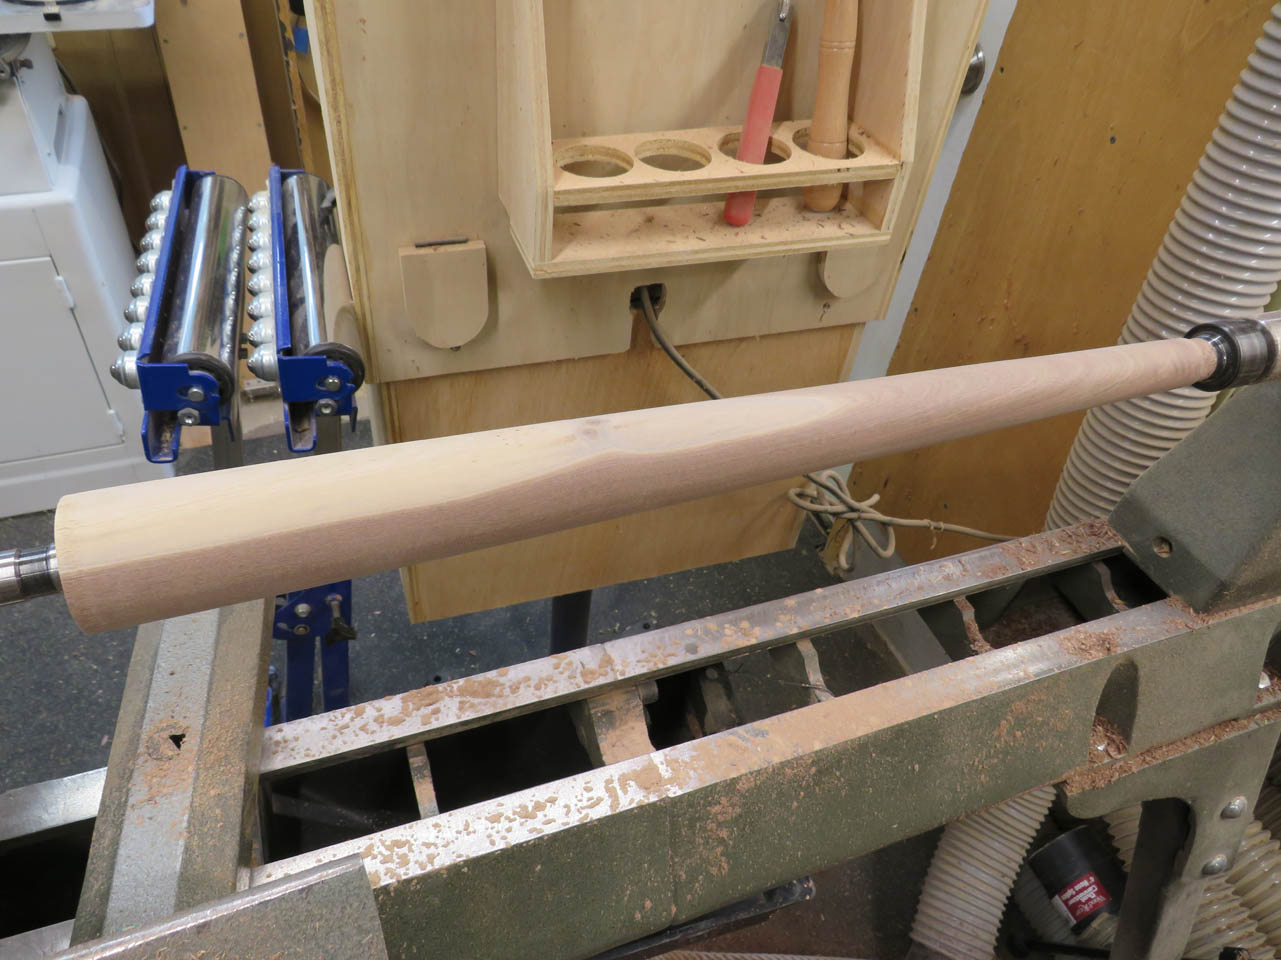
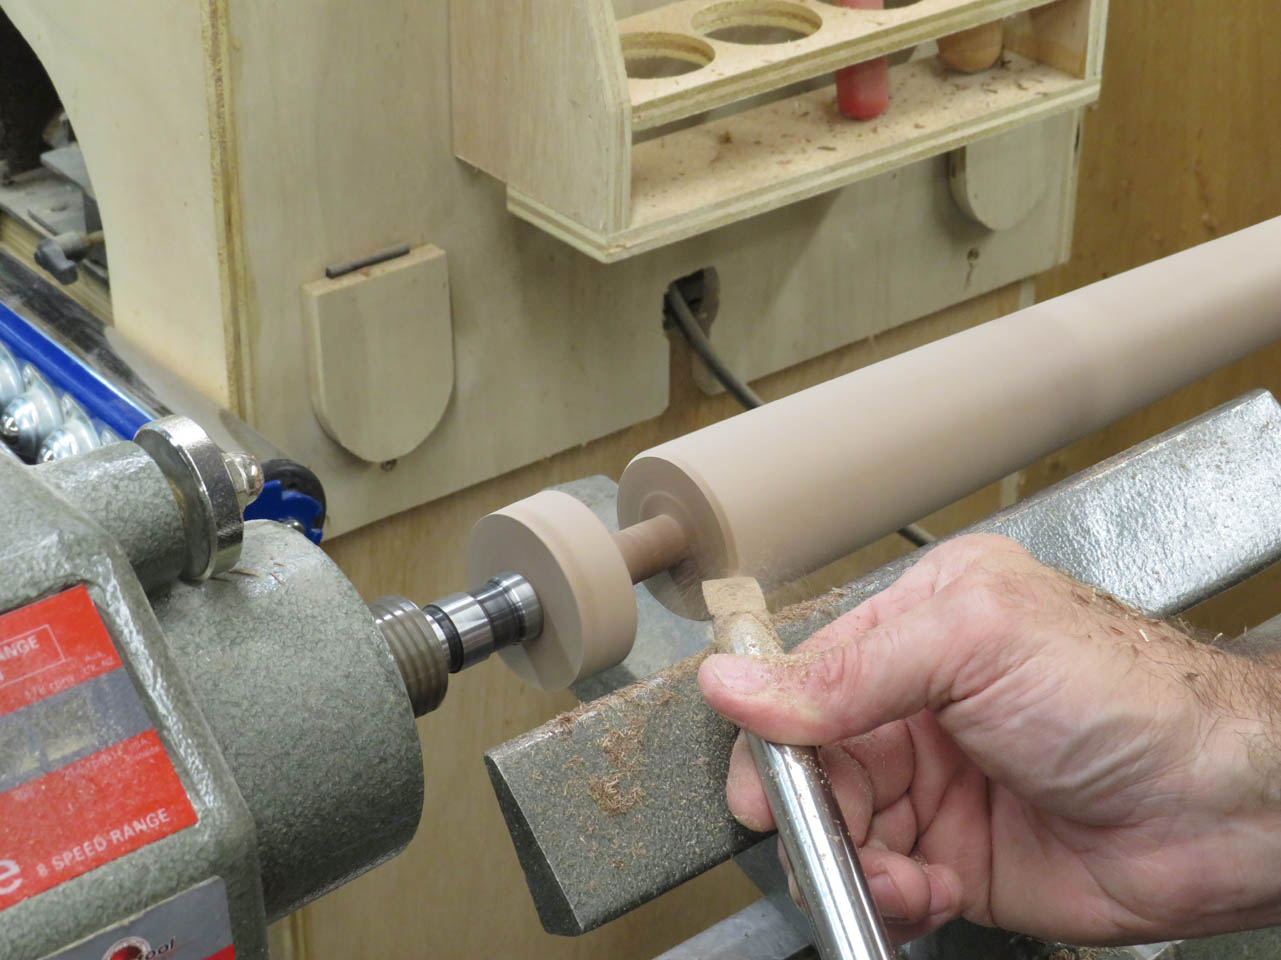
I marked the top and bottom of the legs and removed a good bit of wood from each end, then cut a small bevel on each end, just to remove the sharp edges.
Then I simply cut off the last little bit by hand and sanded the ends.

Nice legs!
I drilled a small pilot hole at the center of the wide end, and screwed them to a board to hold them vertical for finishing.
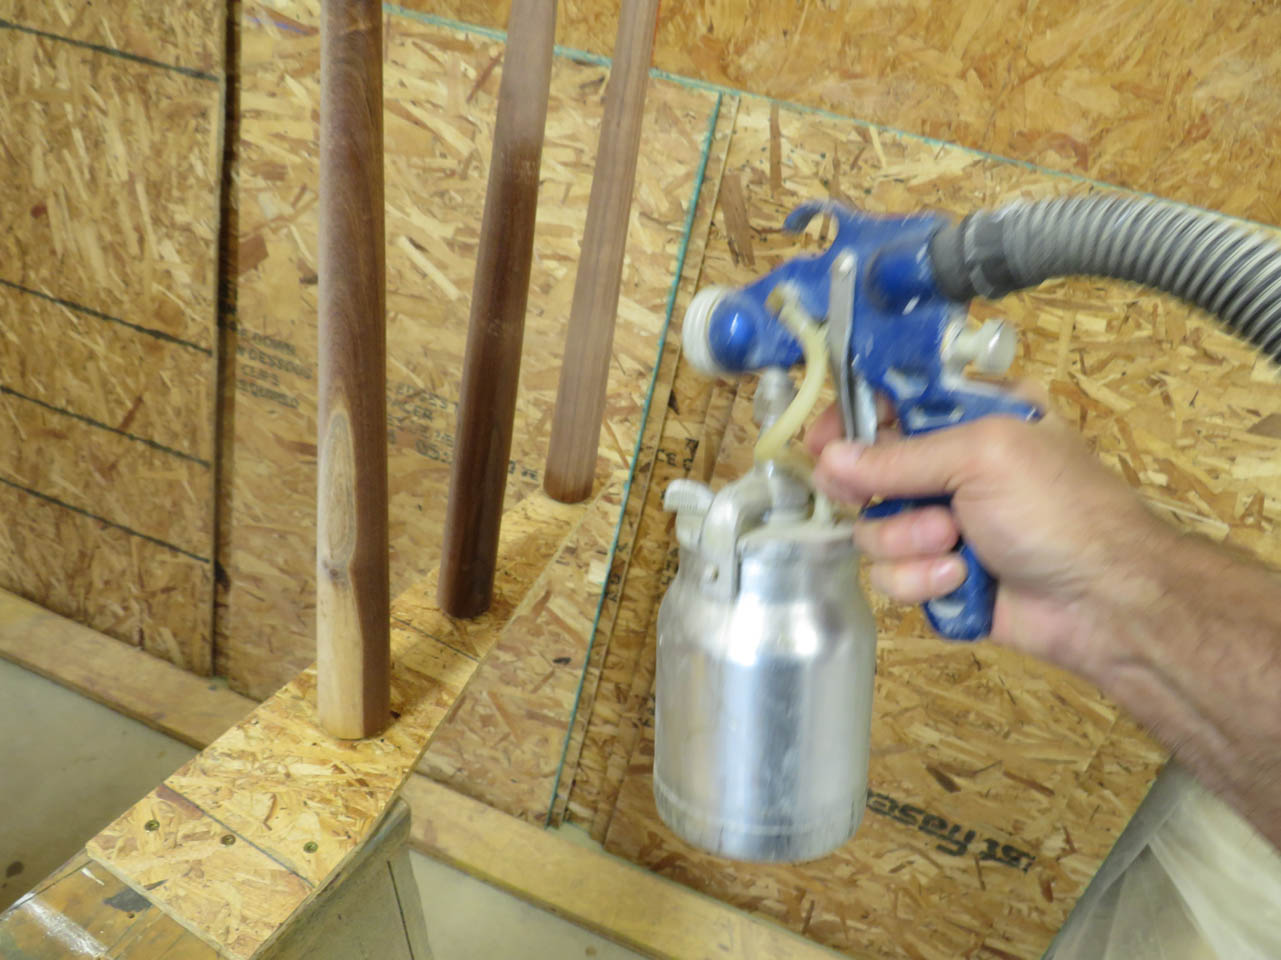
Now, as I sand and spray the top, I can hit the legs as well.
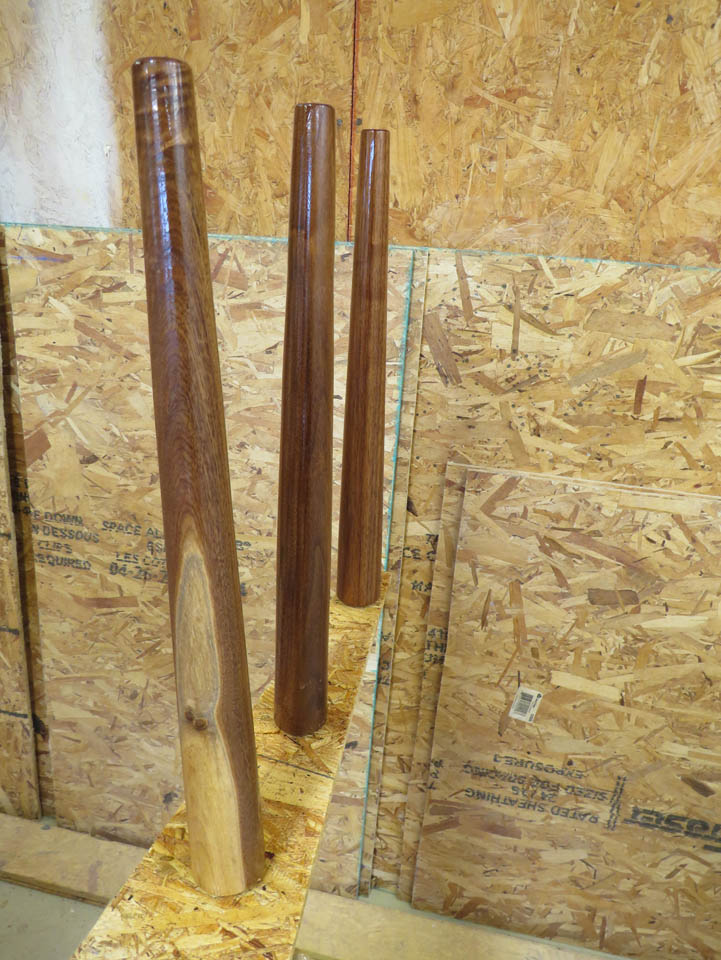
After the first coat of finish on the bottom was dry, I sanded it all back with 400 grit sandpaper to smooth out the finish.
Then applied the next coat.

I repeated this process three times.
Then flipped the top over and applied three coats to the tops as well.
Sanding with 400 grit between each coat.
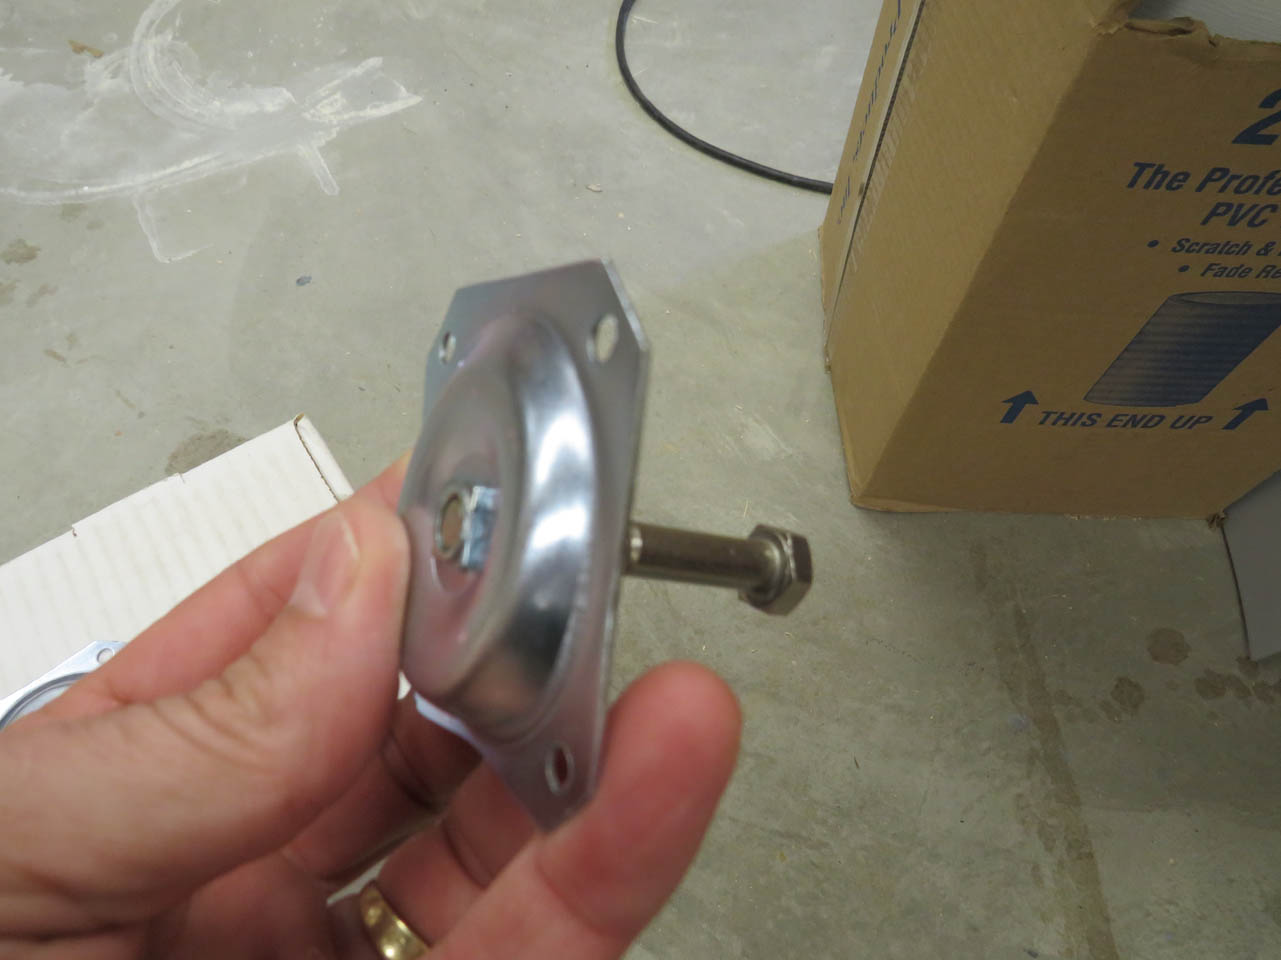
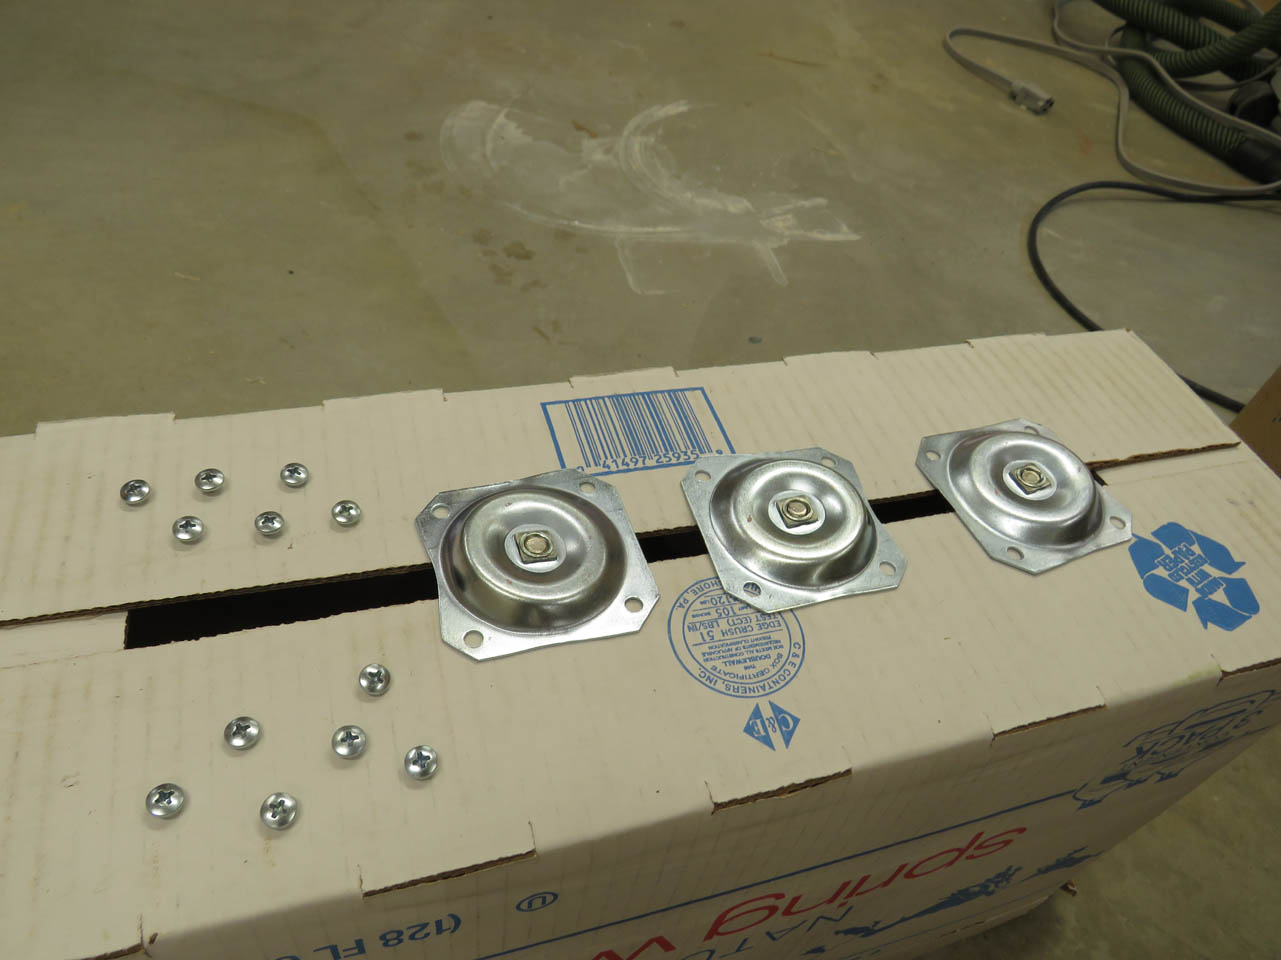
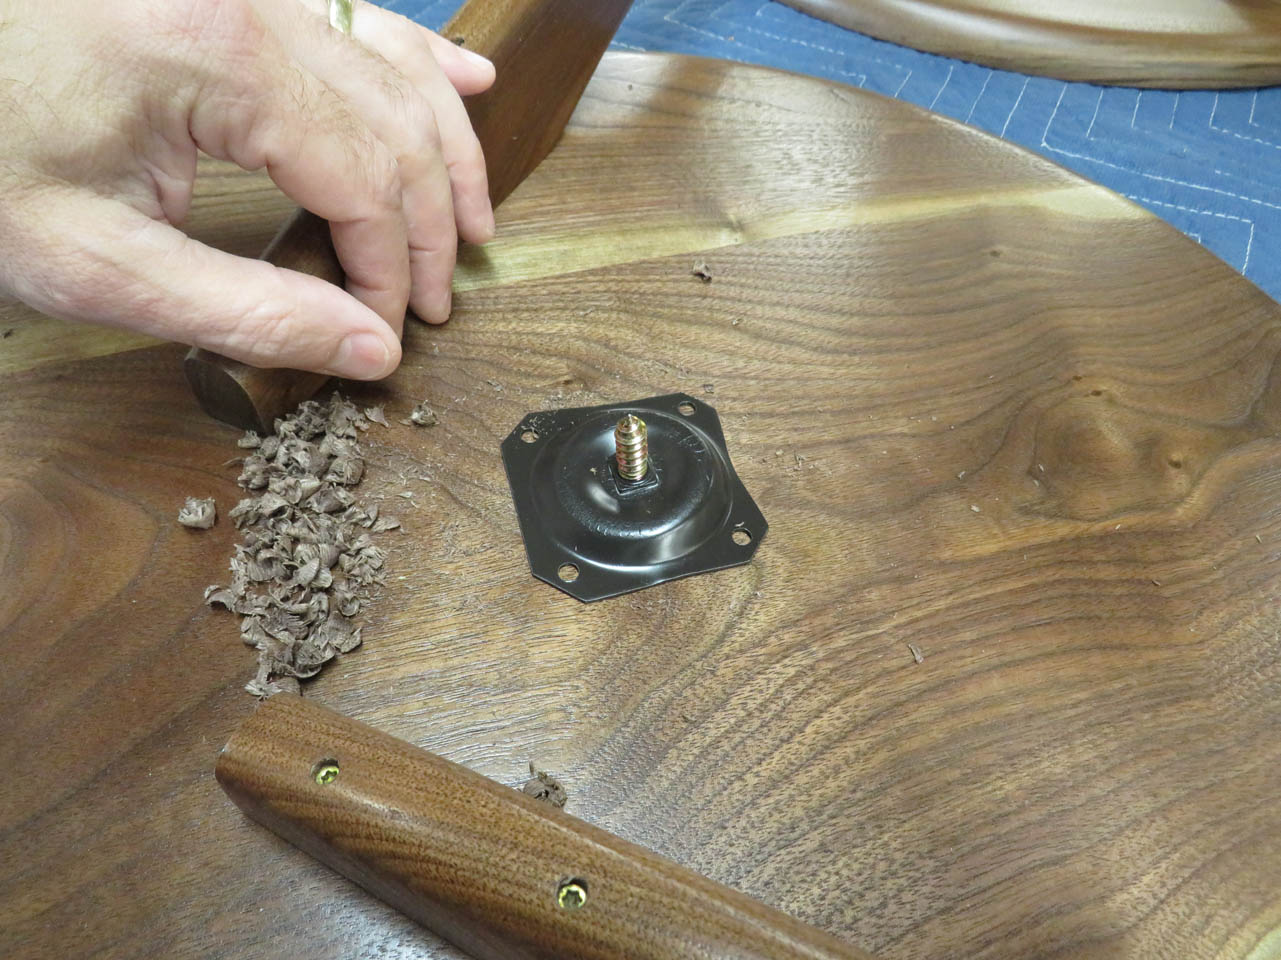
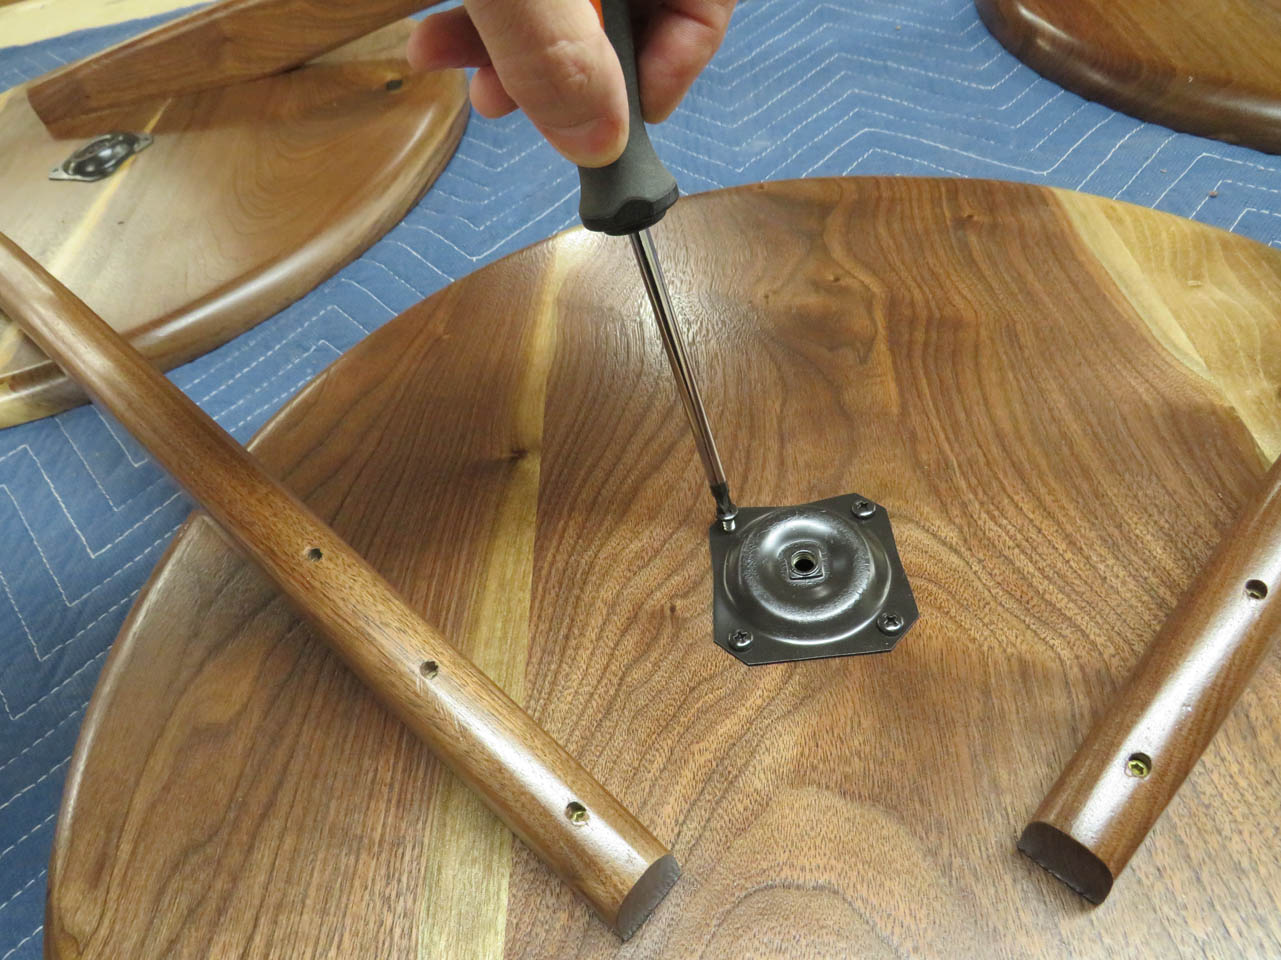
The mounting hardware finally arrived. I ordered three different sets before I found a set that was the right size and seemed durable enough. These actually have a nut welded in the center. The only problem is that I don’t like the shiny silver color. I placed a bolt in the threads and set the screws and brackets in the bottom of a cardboard box so that I can spray paint the exposed surfaces.
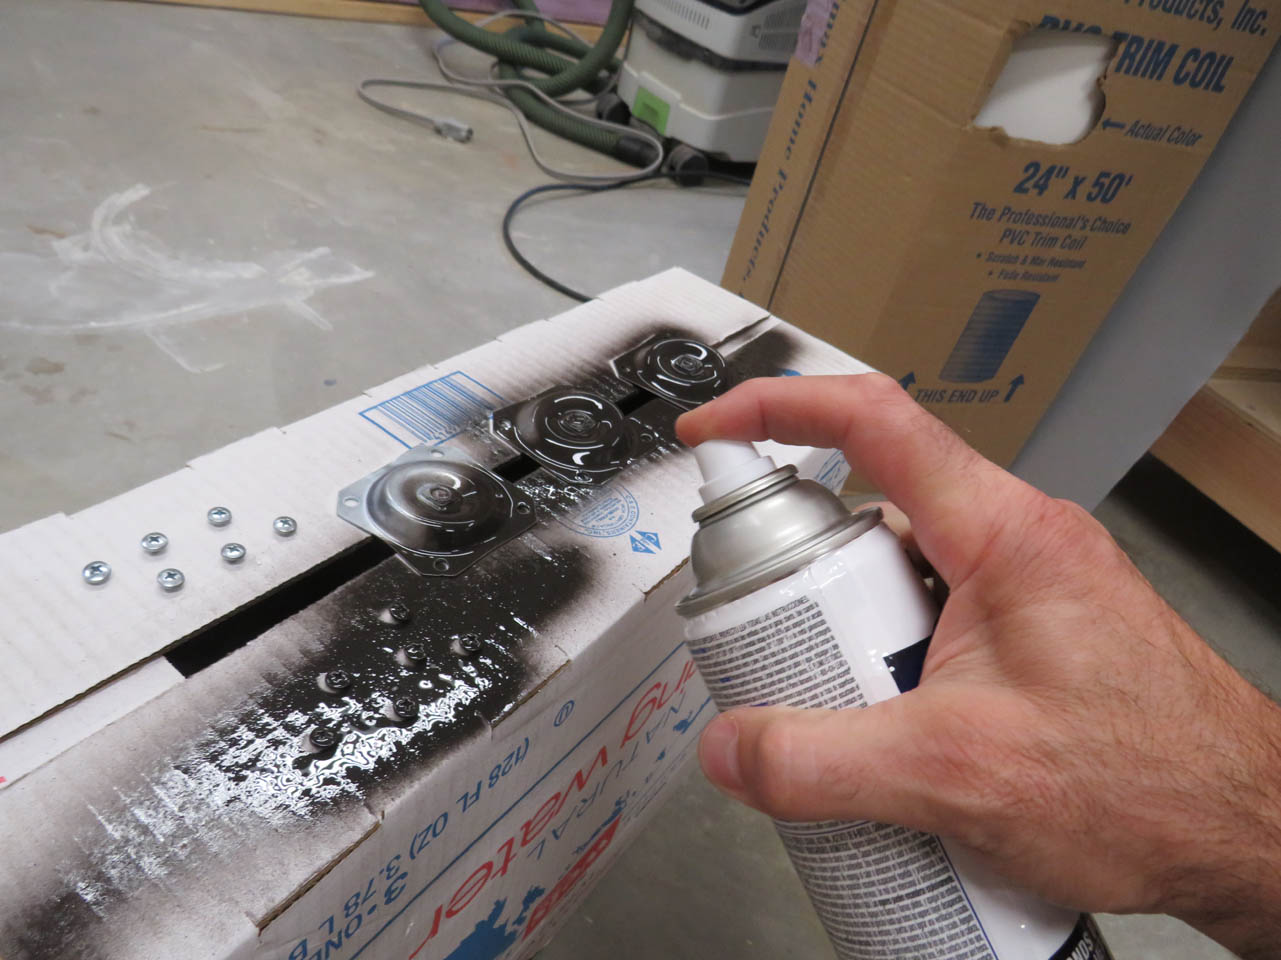
I am using a matte black metal paint, two coats.
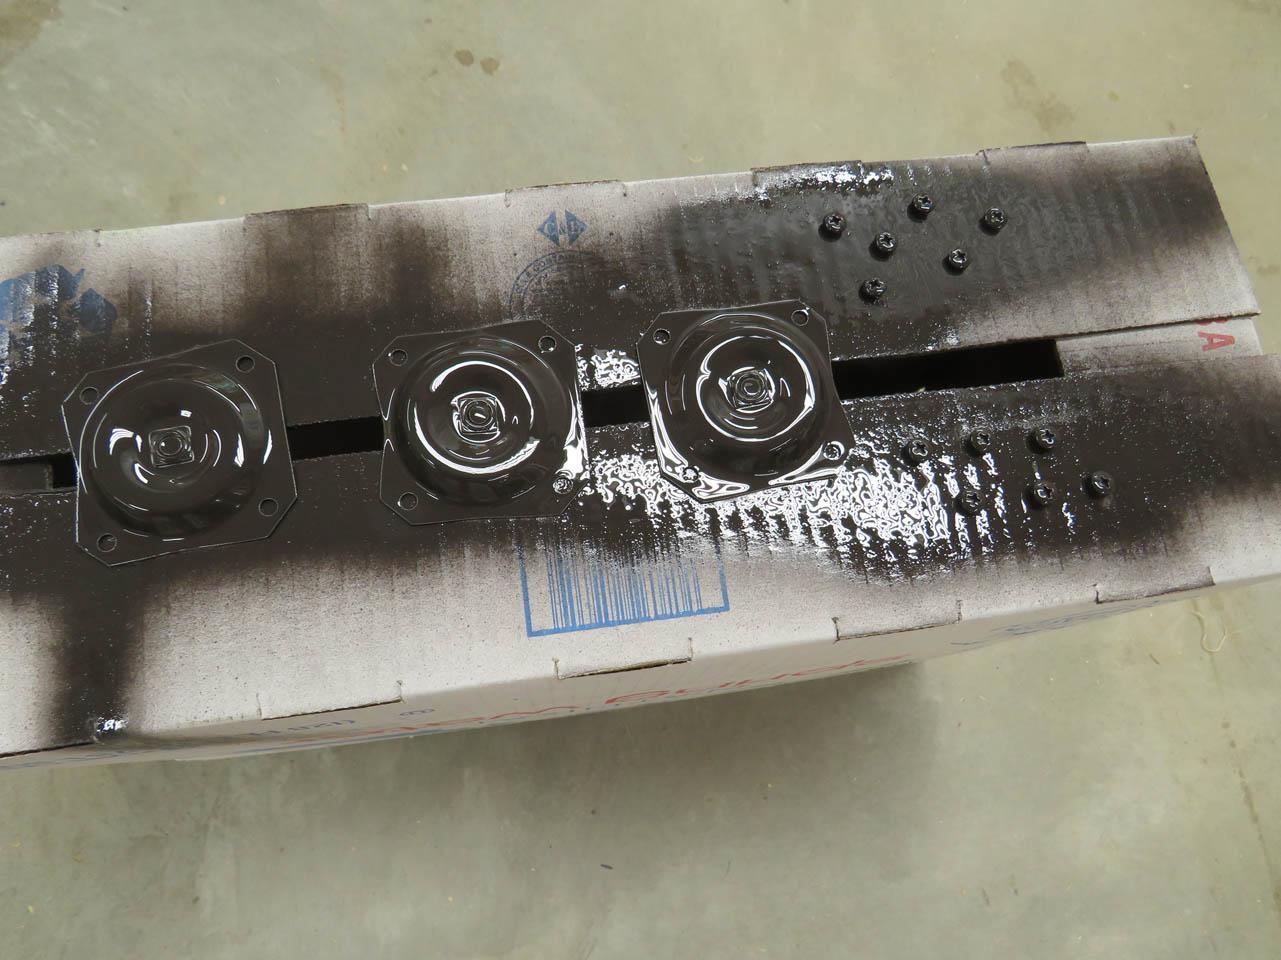
I think they turned out really nice.
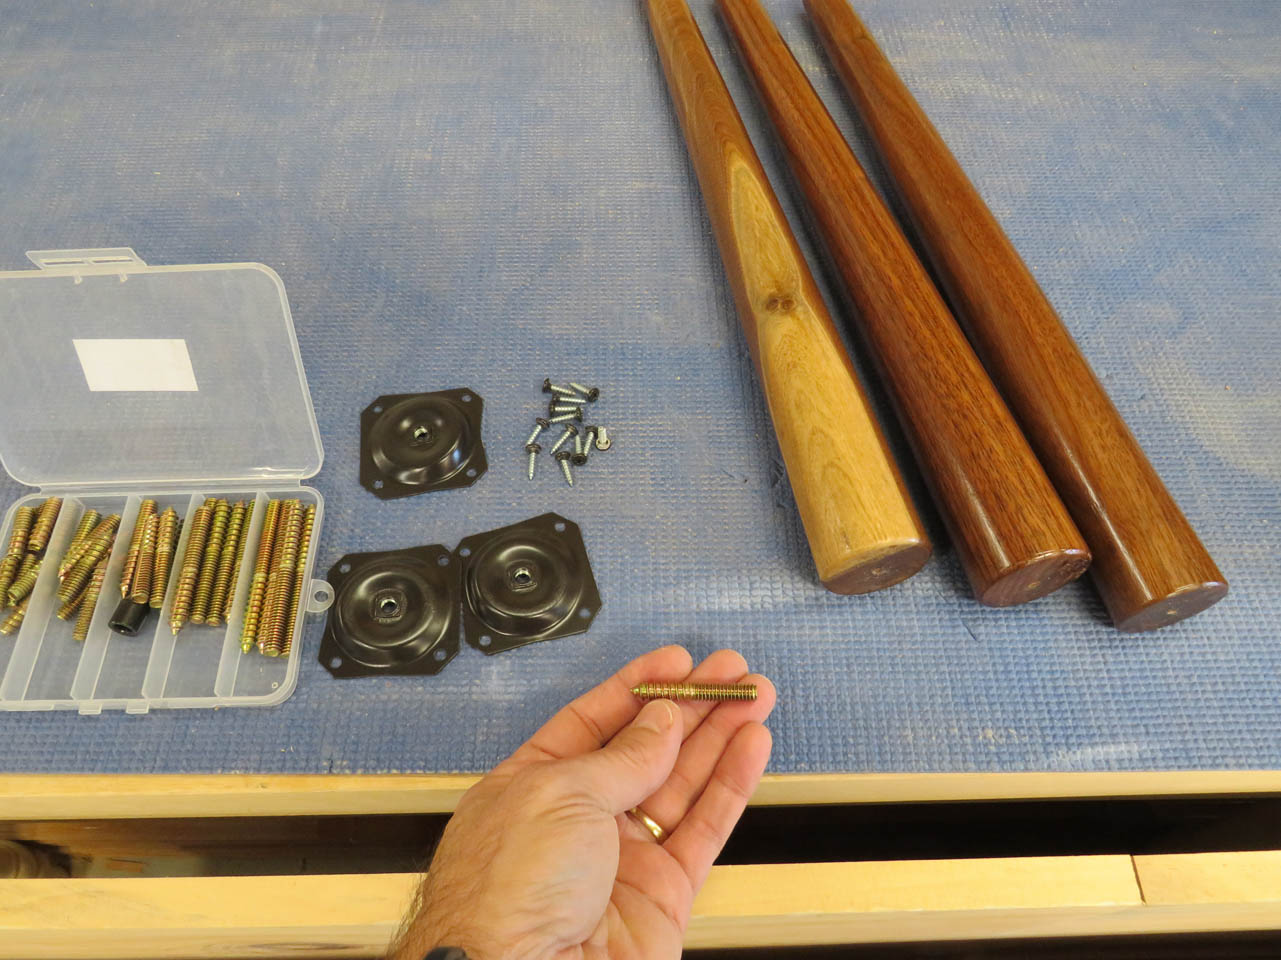
To attach the legs, I picked up an assortment of hanger bolts that have a machine thread on one half and a wood thread on the other.
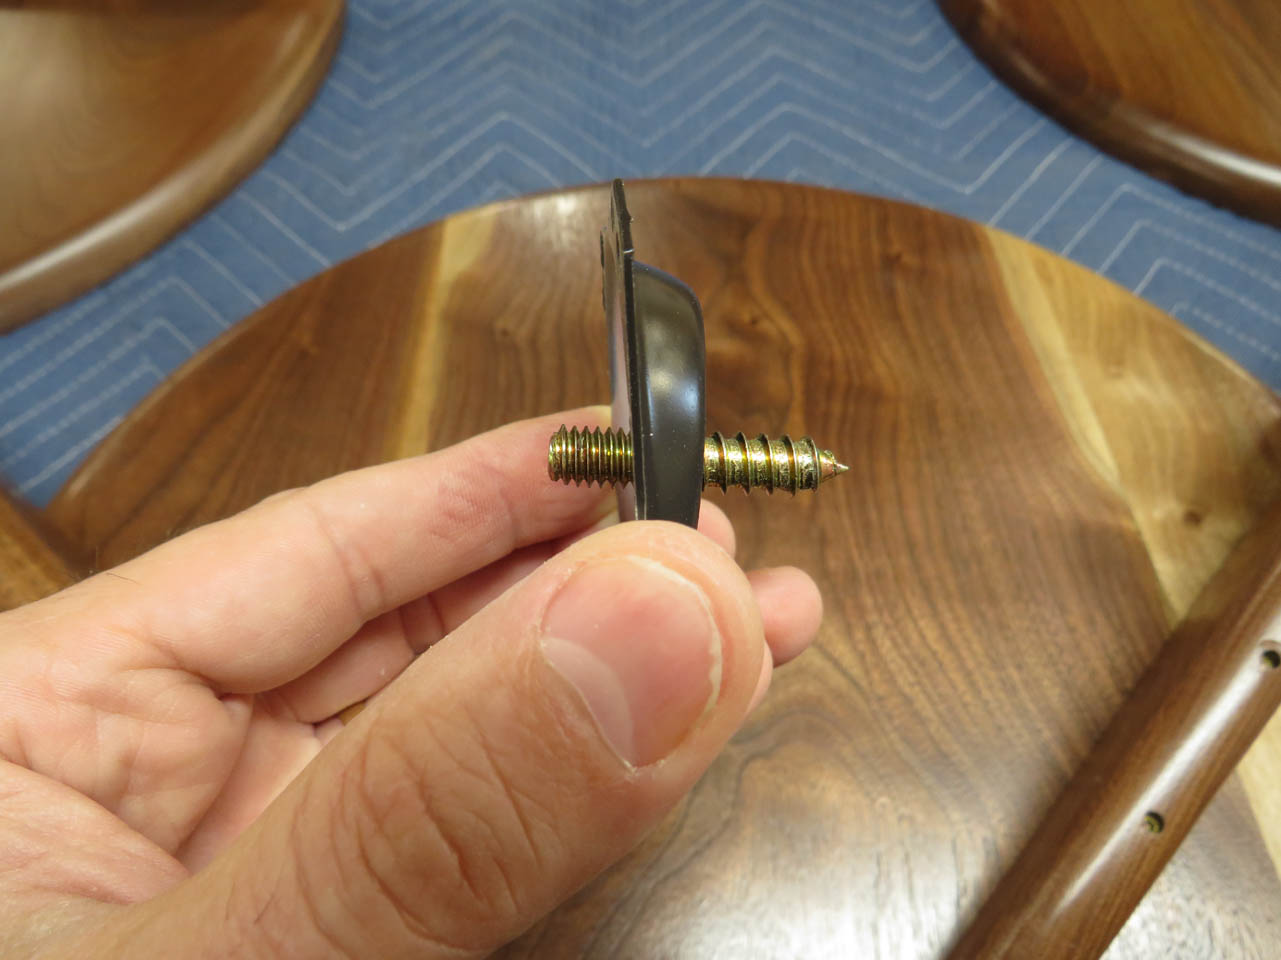
I found a length that I like, but they are a bit too long on the machine thread side.
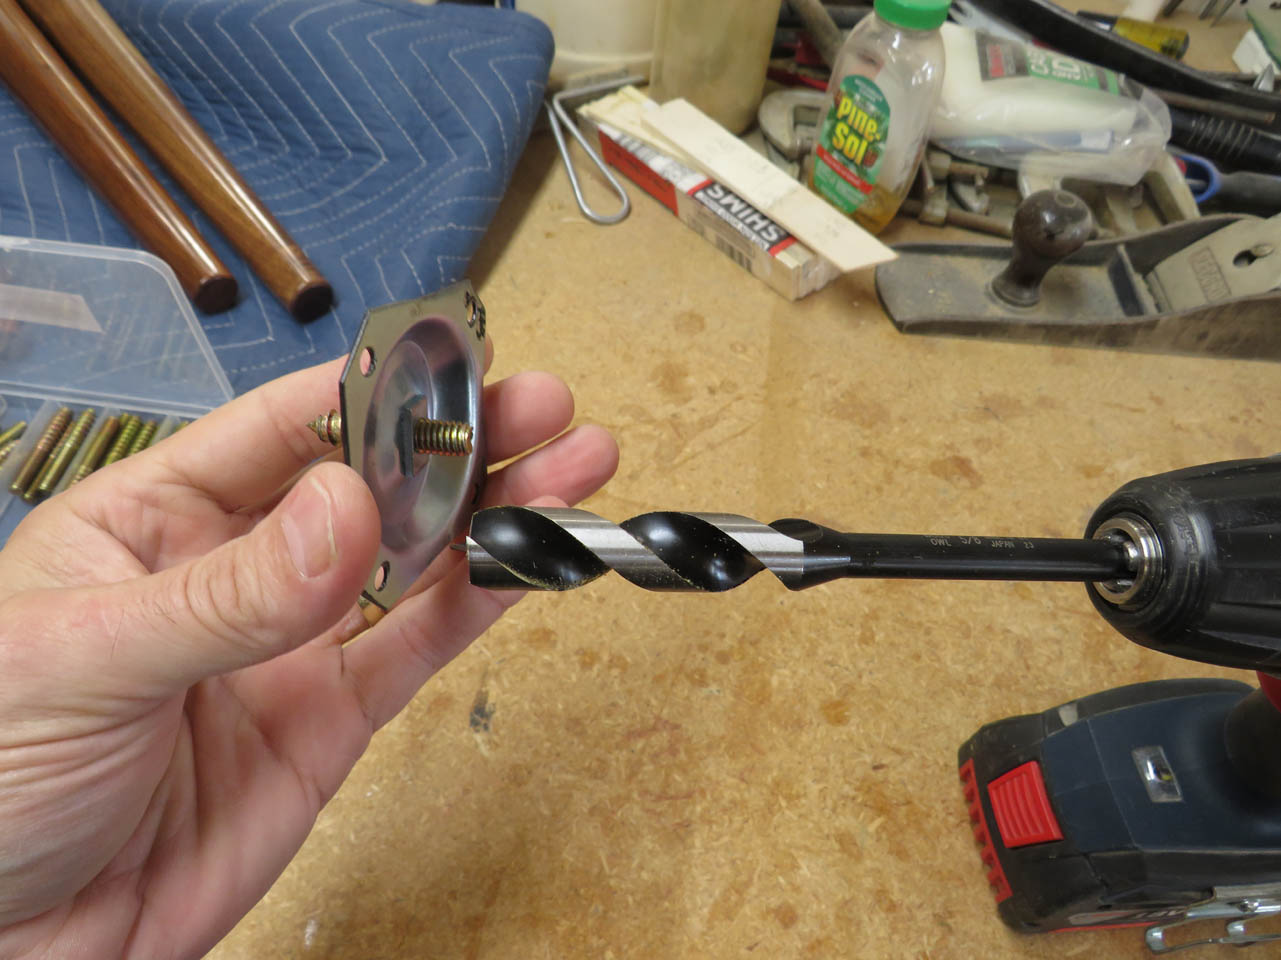
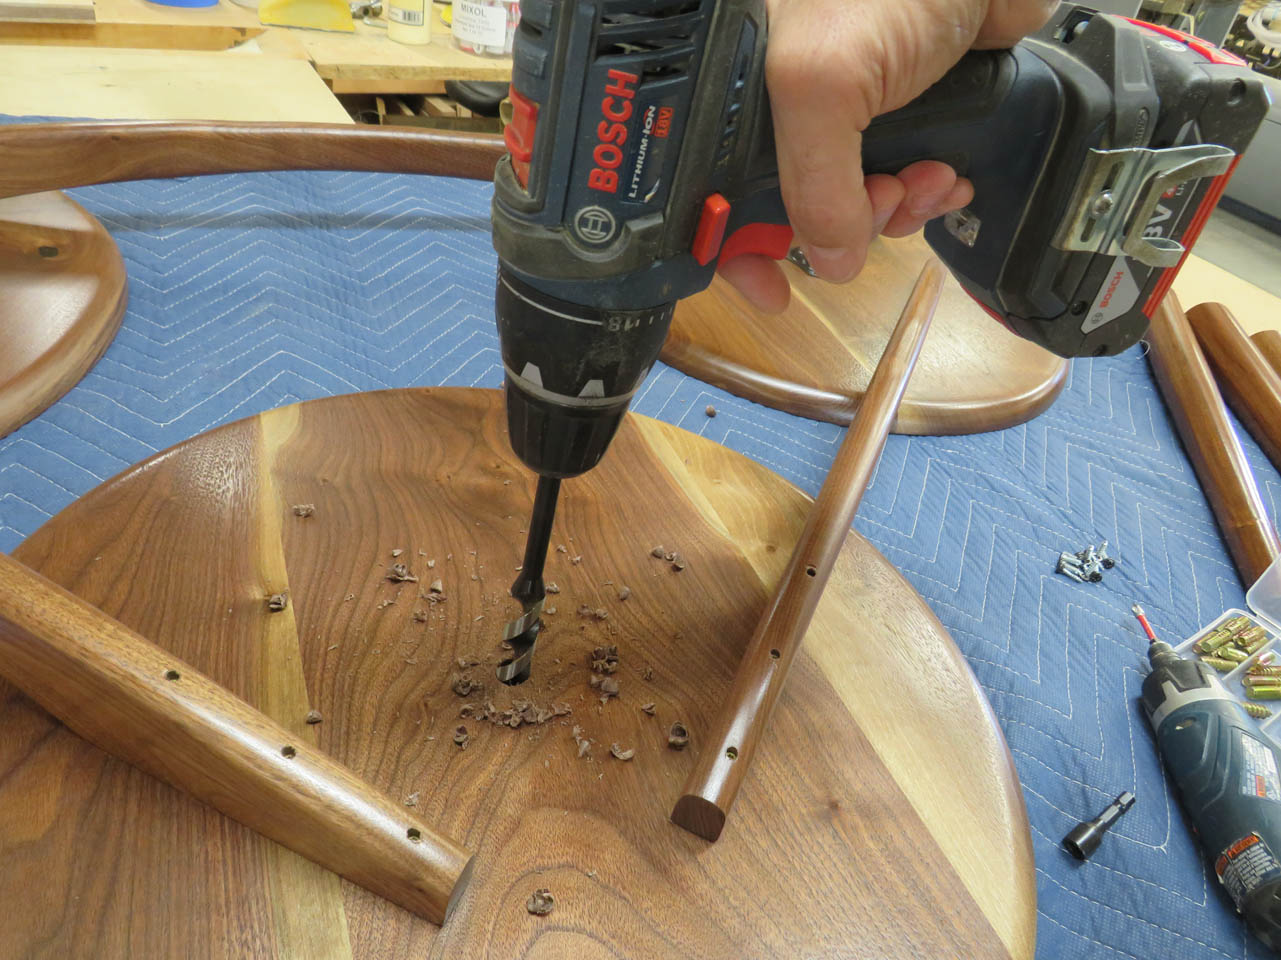
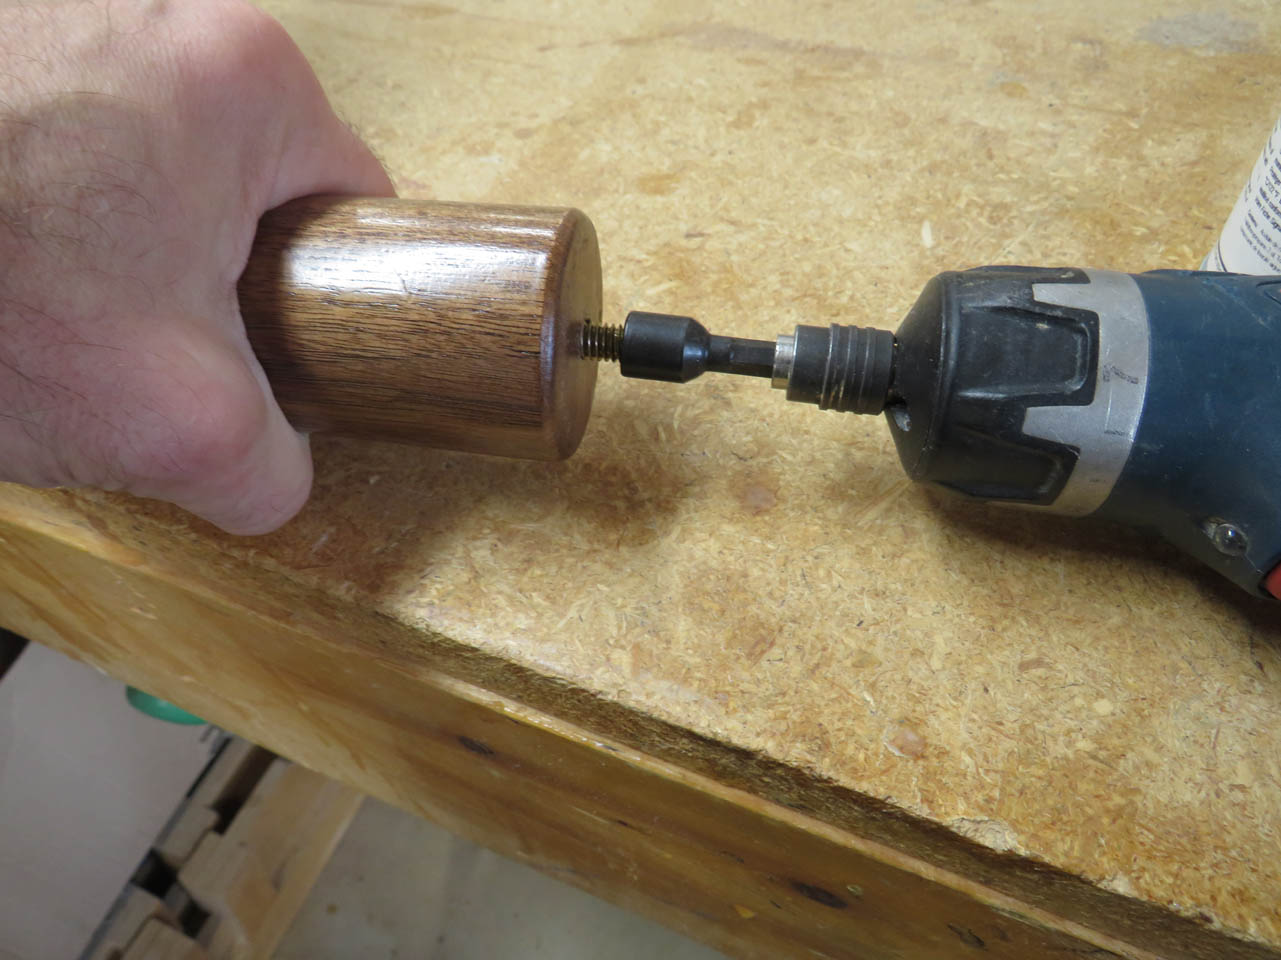
To accommodate this, I drilled a 5/8″ pocket in the center to the circle.
Now there is room to thread the bolt all the way in.
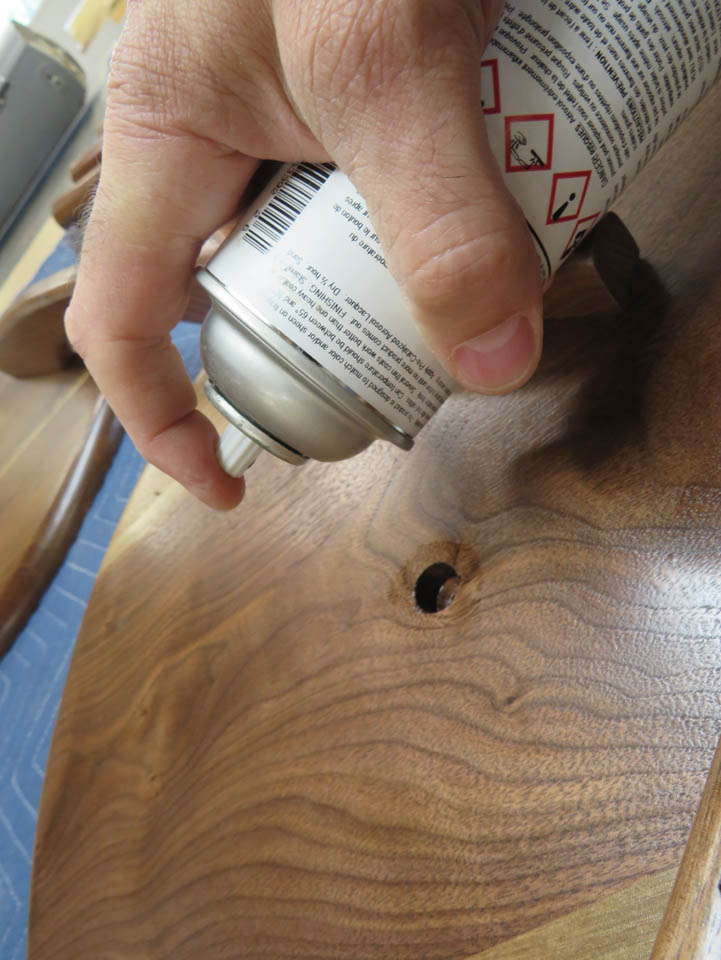
To seal the bare wood, I sprayed a coat or two of spray lacquer in each hole.
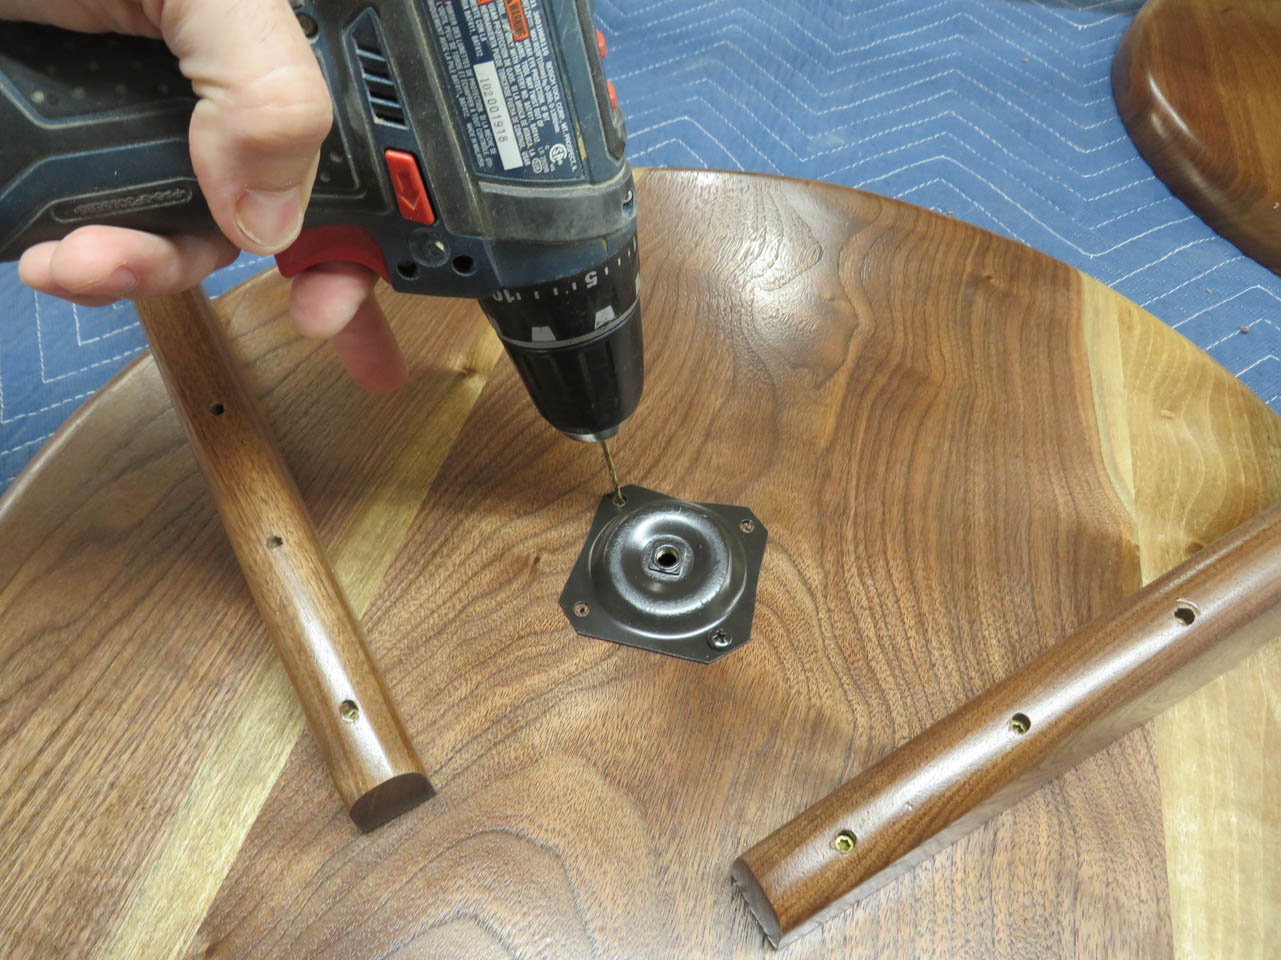
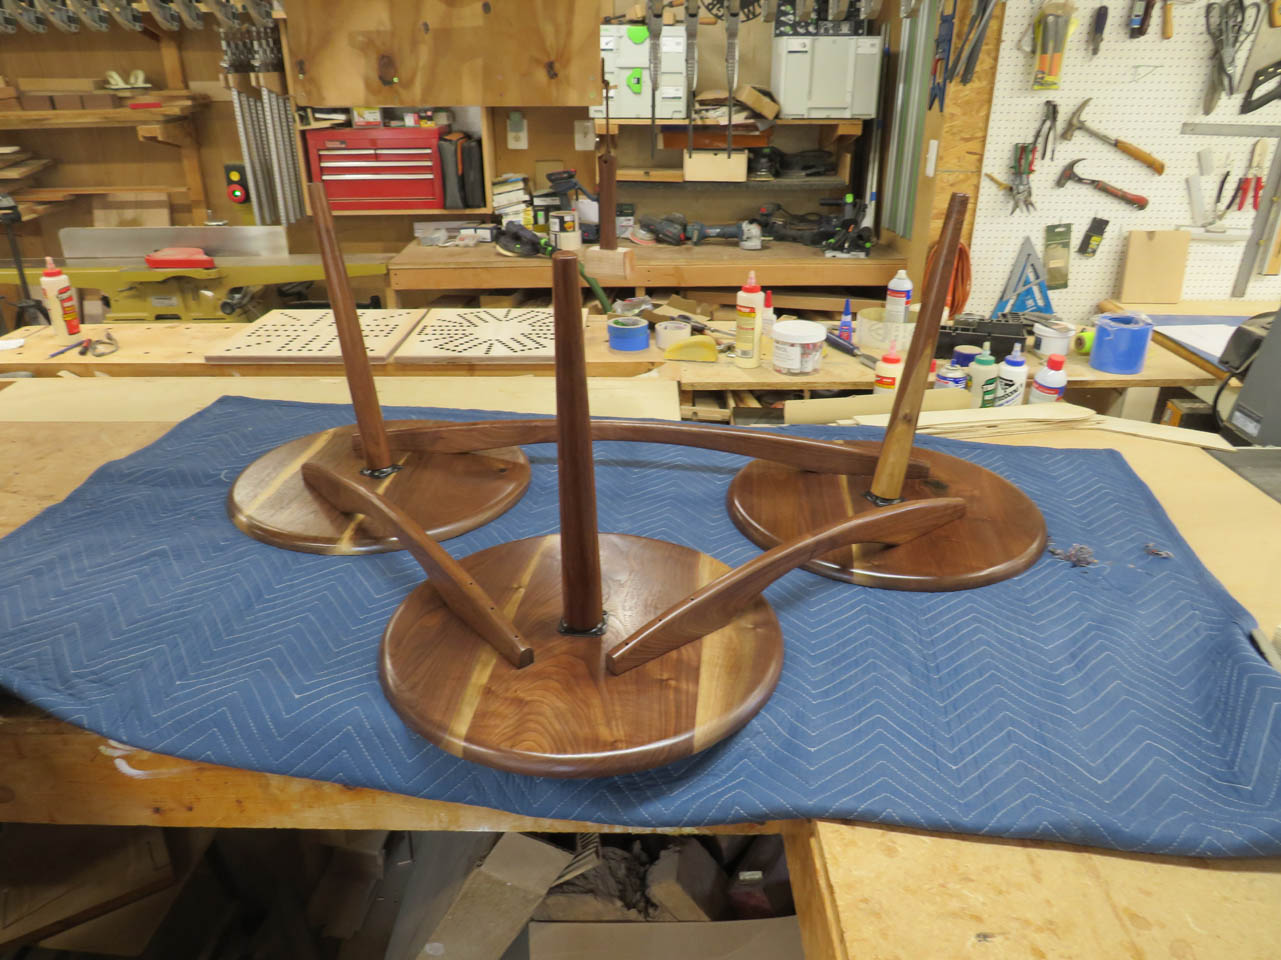
Now I can orient each mounting plate so that the legs will point away from the center and screw each one of them down.
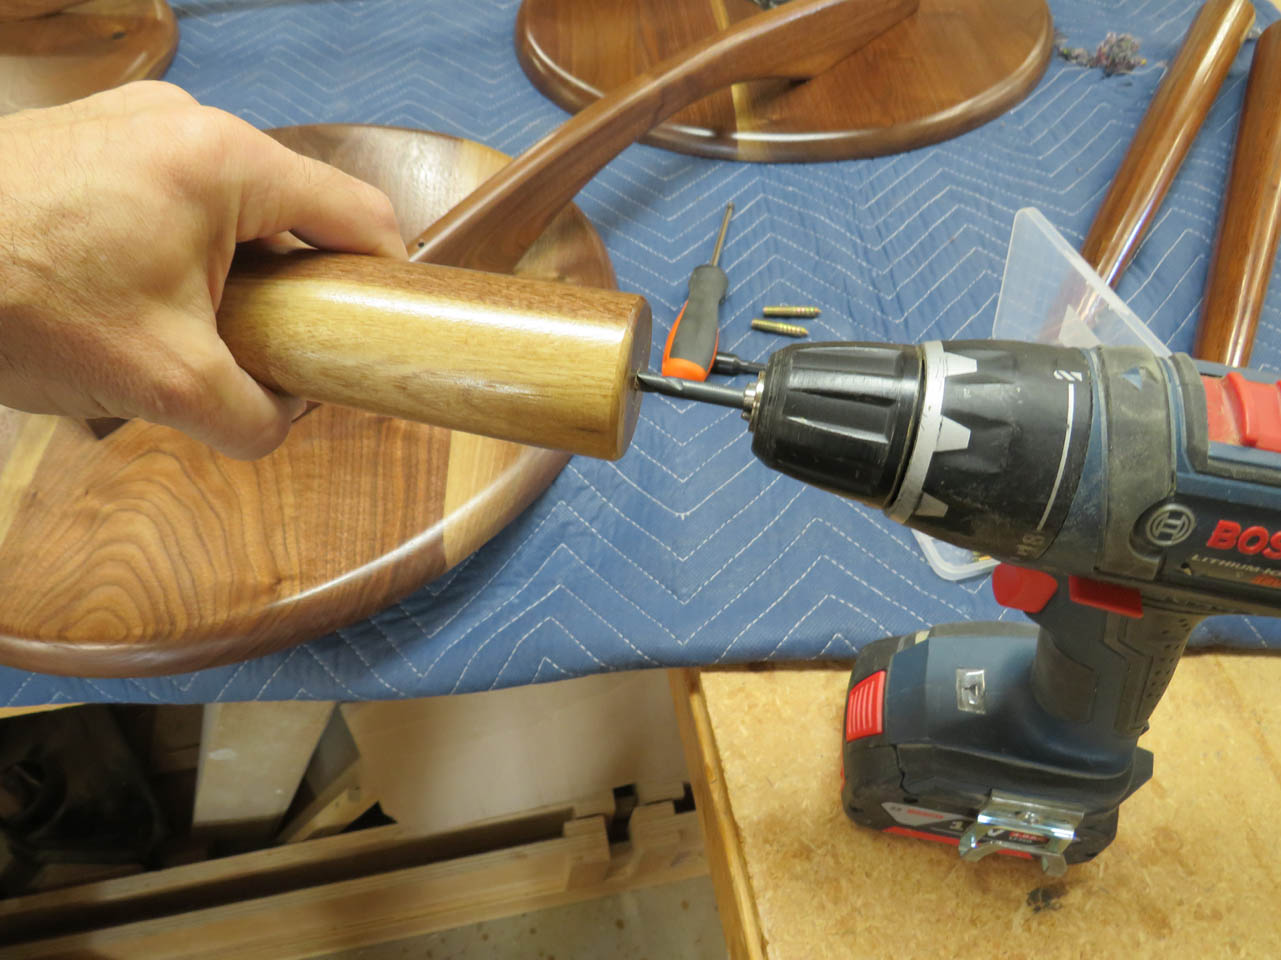
I also drilled a hole down the center of each leg, at the wide end, to install the hanger bolts.

Now each leg can be screwed into place, but still be removable if needed.
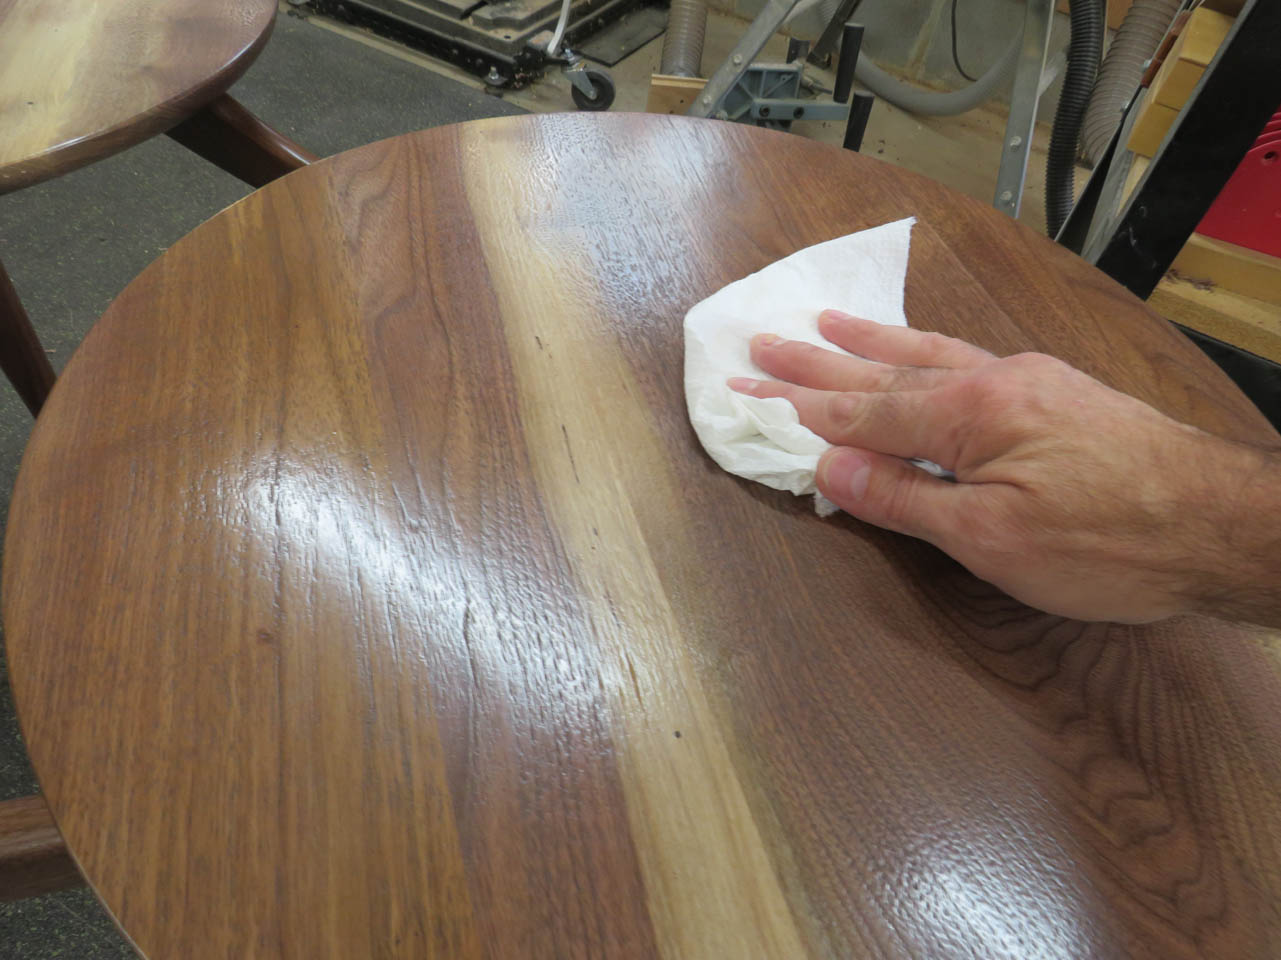
While the table is laying upside down I took the opportunity to buff out the finish and remove any dust nibs that may have settled while the finish was drying.

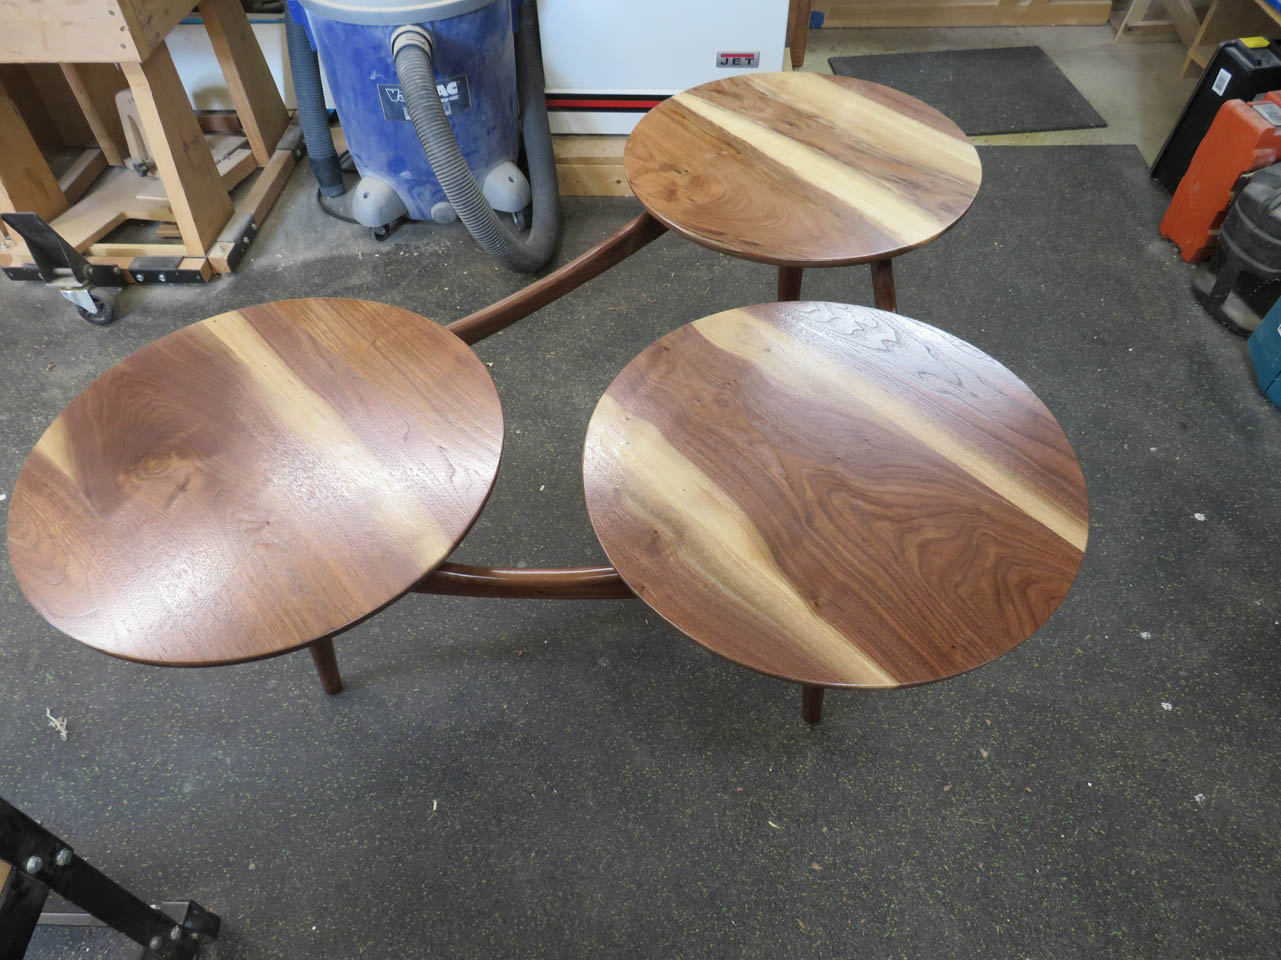
I flipped the table over to see how it stood. Not bad, pretty stable.
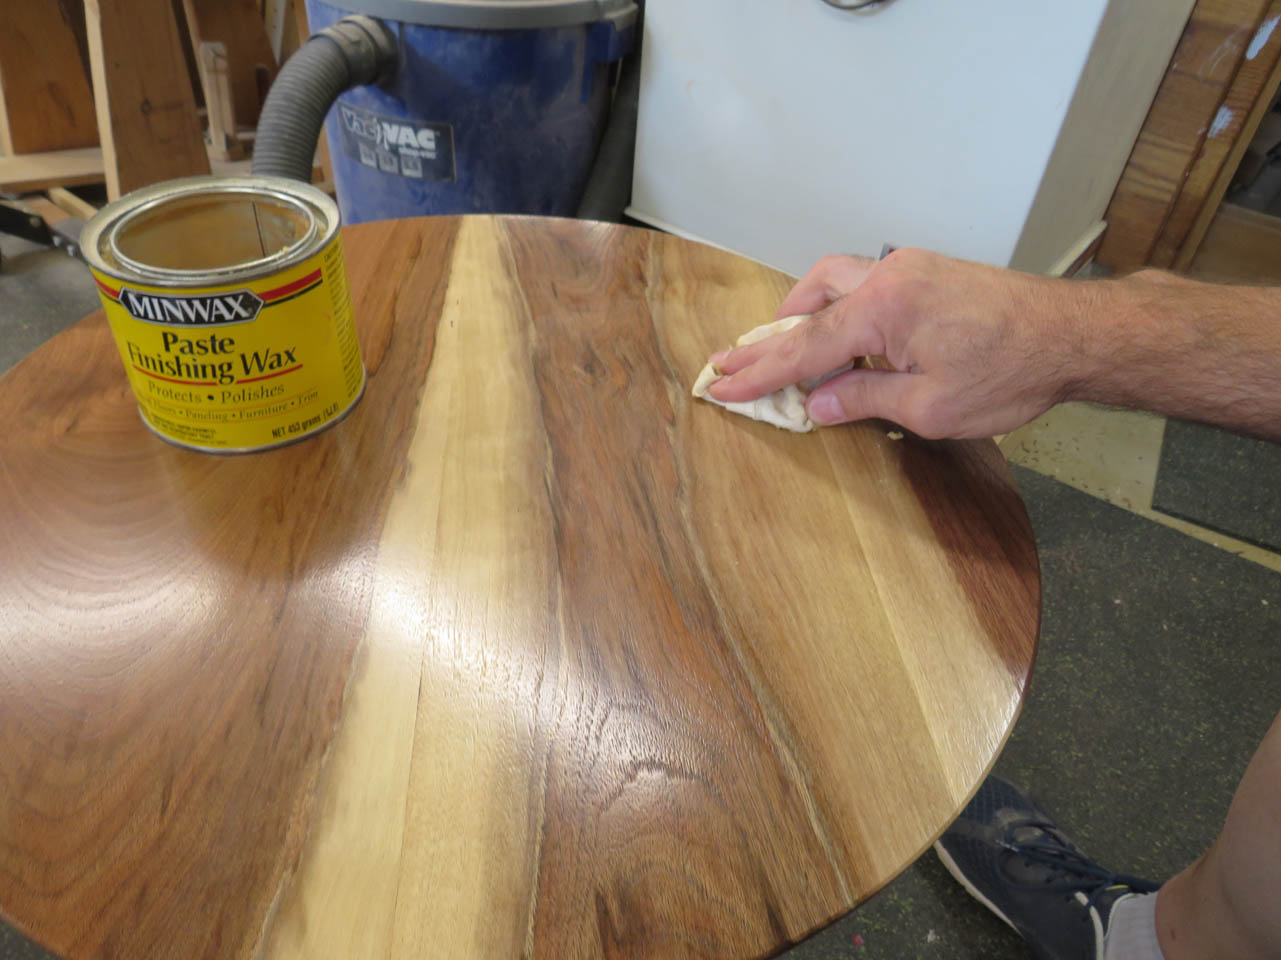
I also like to apply a coat of paste wax to the top, just to give the finish a softer feel.
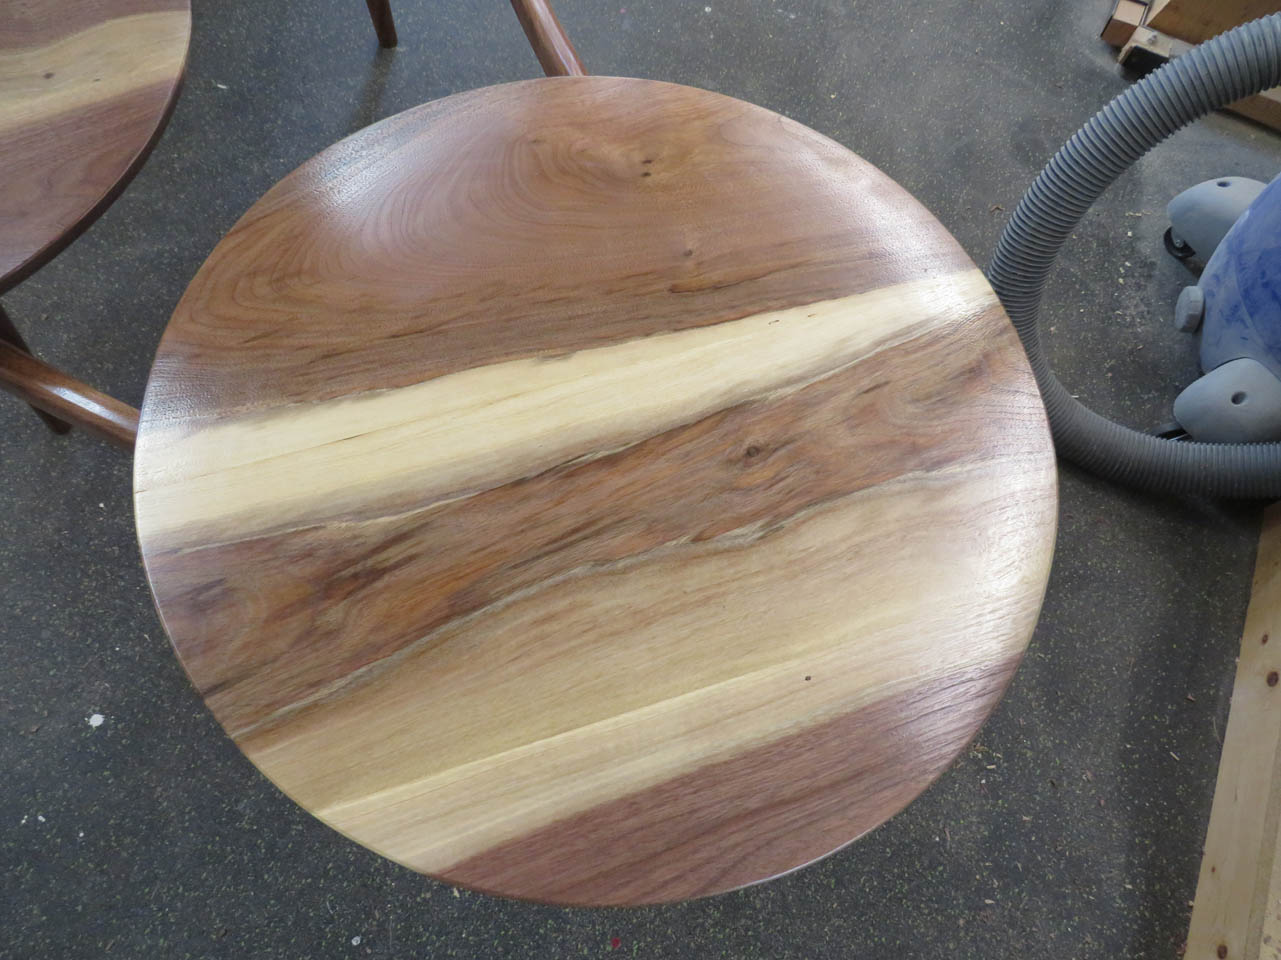
Check this one’s grain out, it looks like Jupiter to me. I love the sapwood.
The table was finished so I brought it over to the clients to see how it looked in their living room. They were very happy with it.
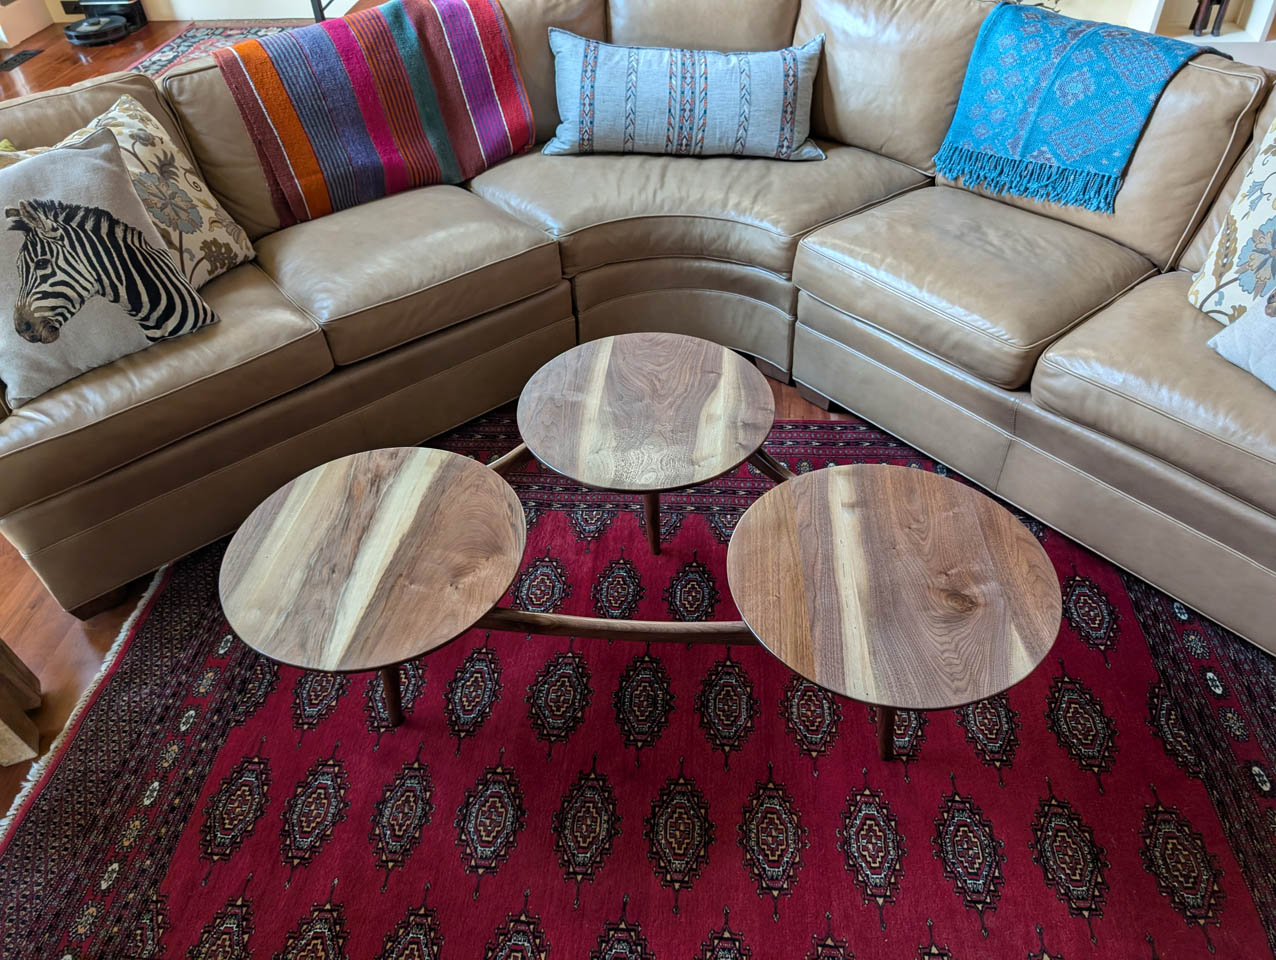
I like this project. Mid-century modern is not usually my taste but this project was fun because it had a lot of different challenges.
