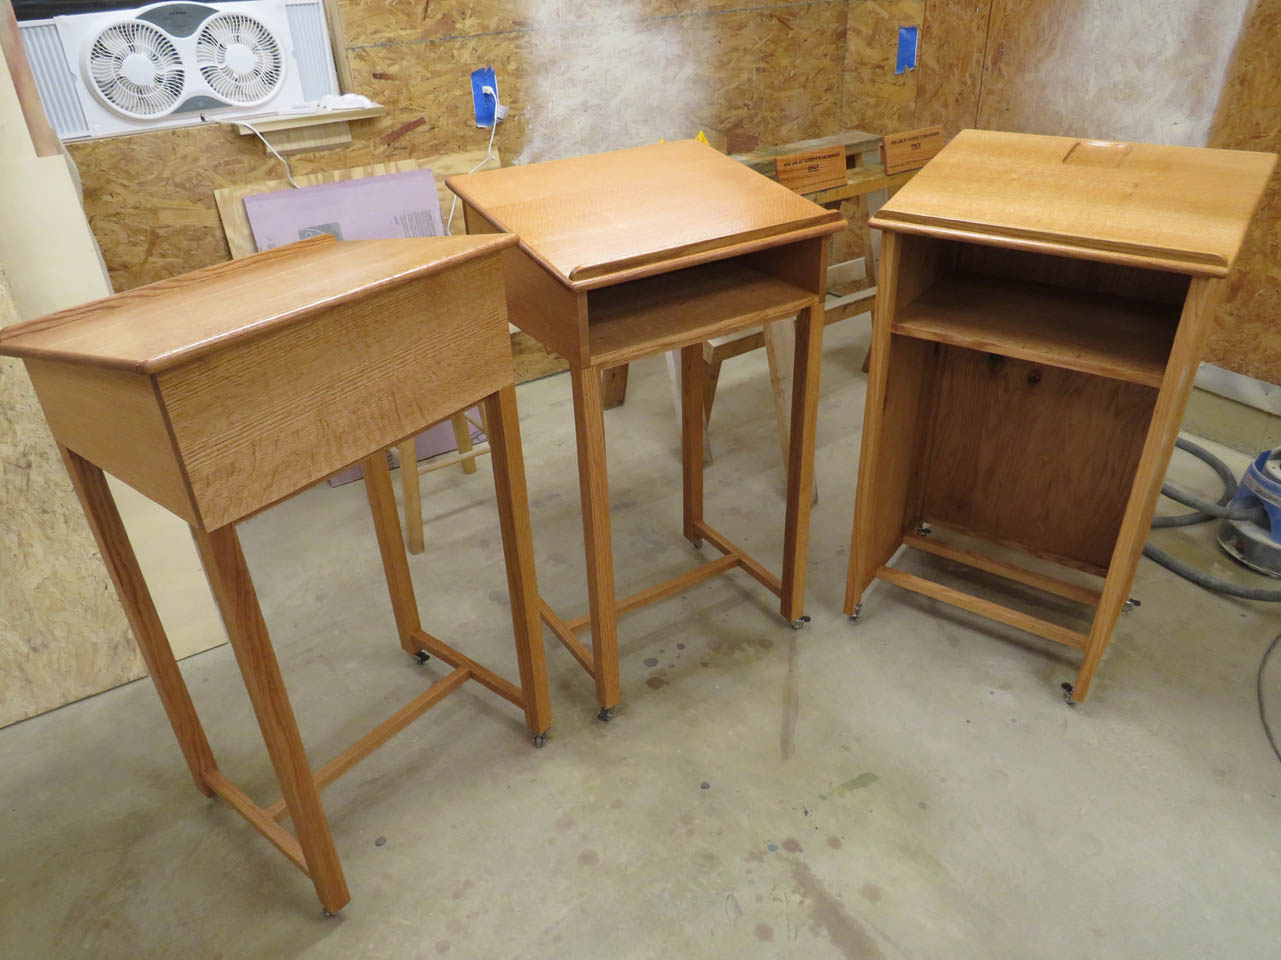
Guestbook stands & lectern for Holy Spirit Church – part 3
While the stain was drying on the guestbook stands, I started marking the legs for the lectern.

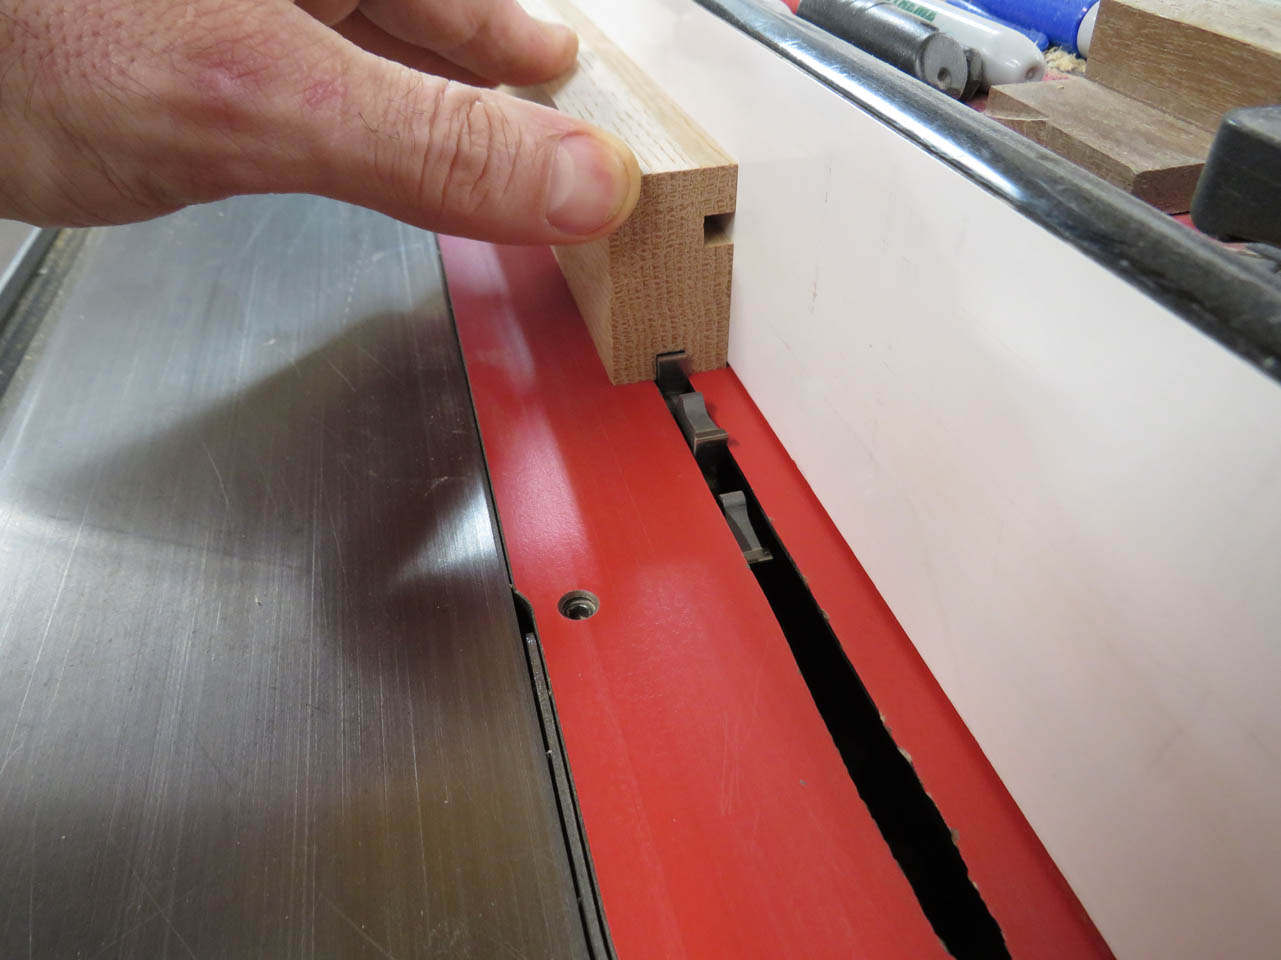
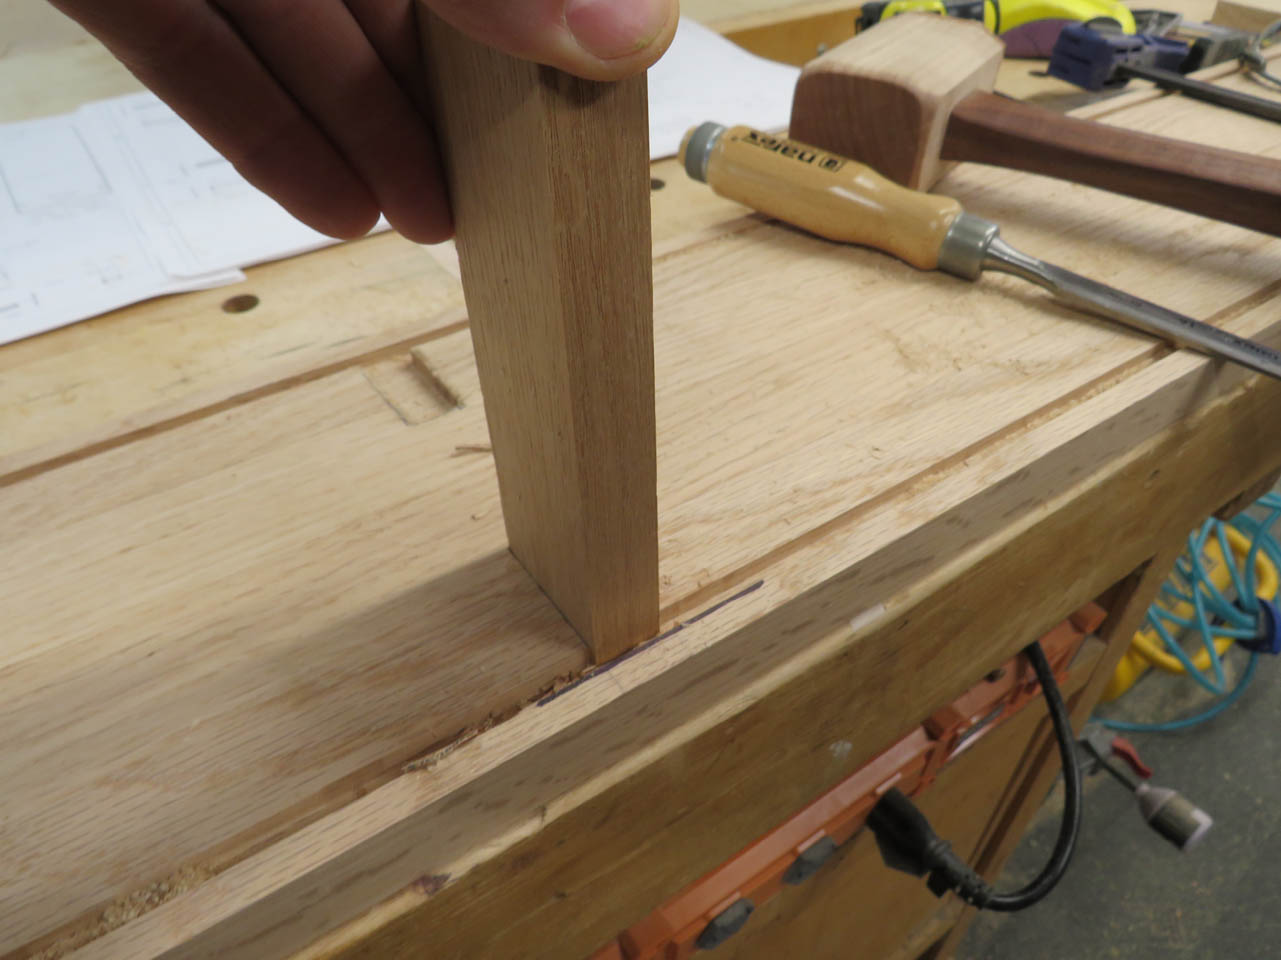
I need a couple of stopped dados on the legs for the tenons on the cross-bars as well as the oak plywood. I used a 1/4″ wide dado blade to cut them. I need to stop the dado 1-1/2″ from the bottom of each leg but it will be far easier to cut the full dado, then fill in the bottom section later.

I also needed to mark and cut notches to hold the shelf. I set my trim router to the desired depth and freehand cut their notches.

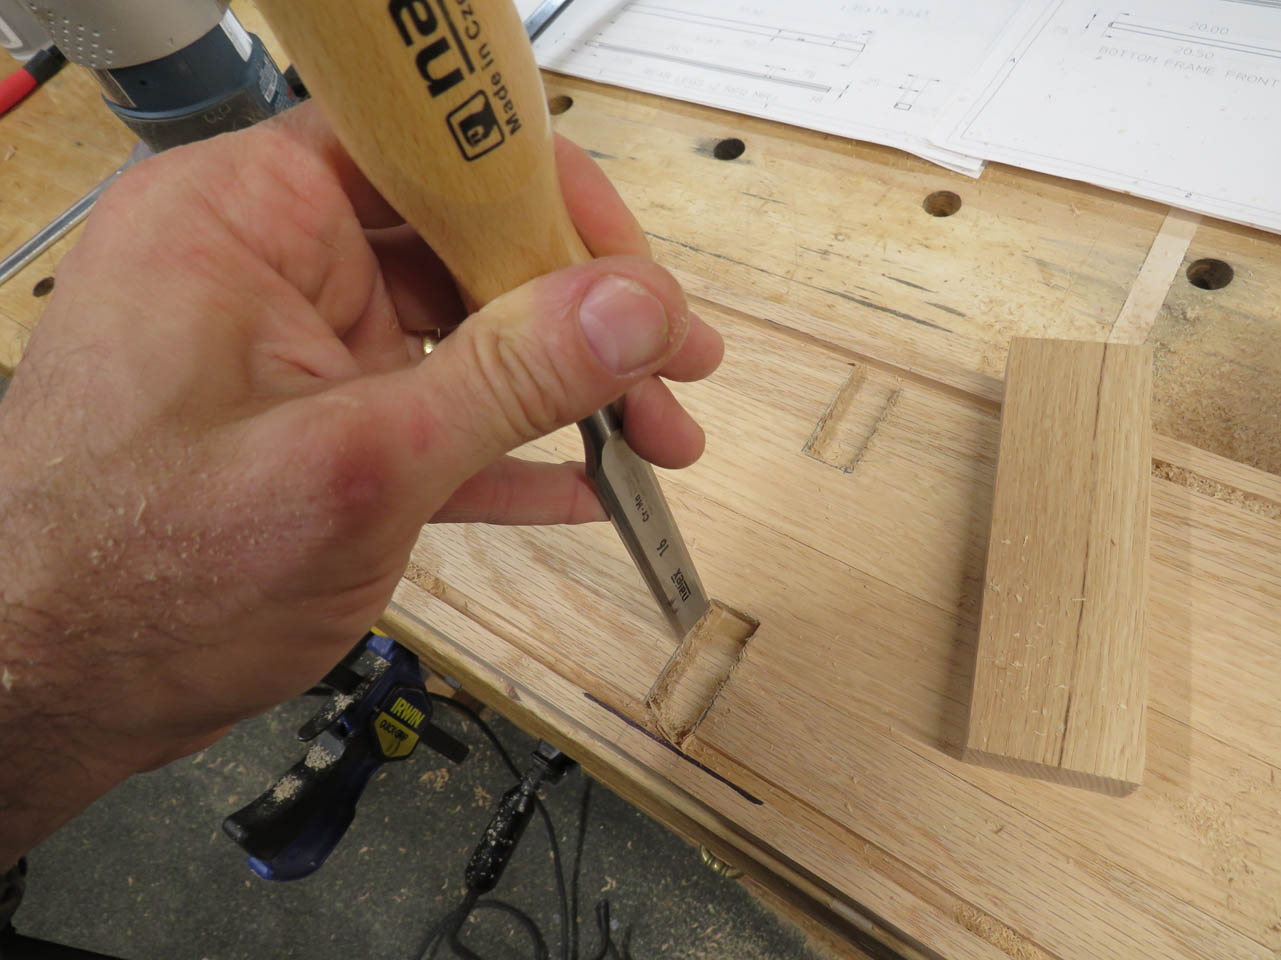
Then I used a chisel to straighten the edges and cut the corners square.
After test-fitting the notches, I moved on to plugging the end of the dados.

I cut some 1/4″ blanks that matched the grain orientation, then applied glue and clamped the blanks into place.
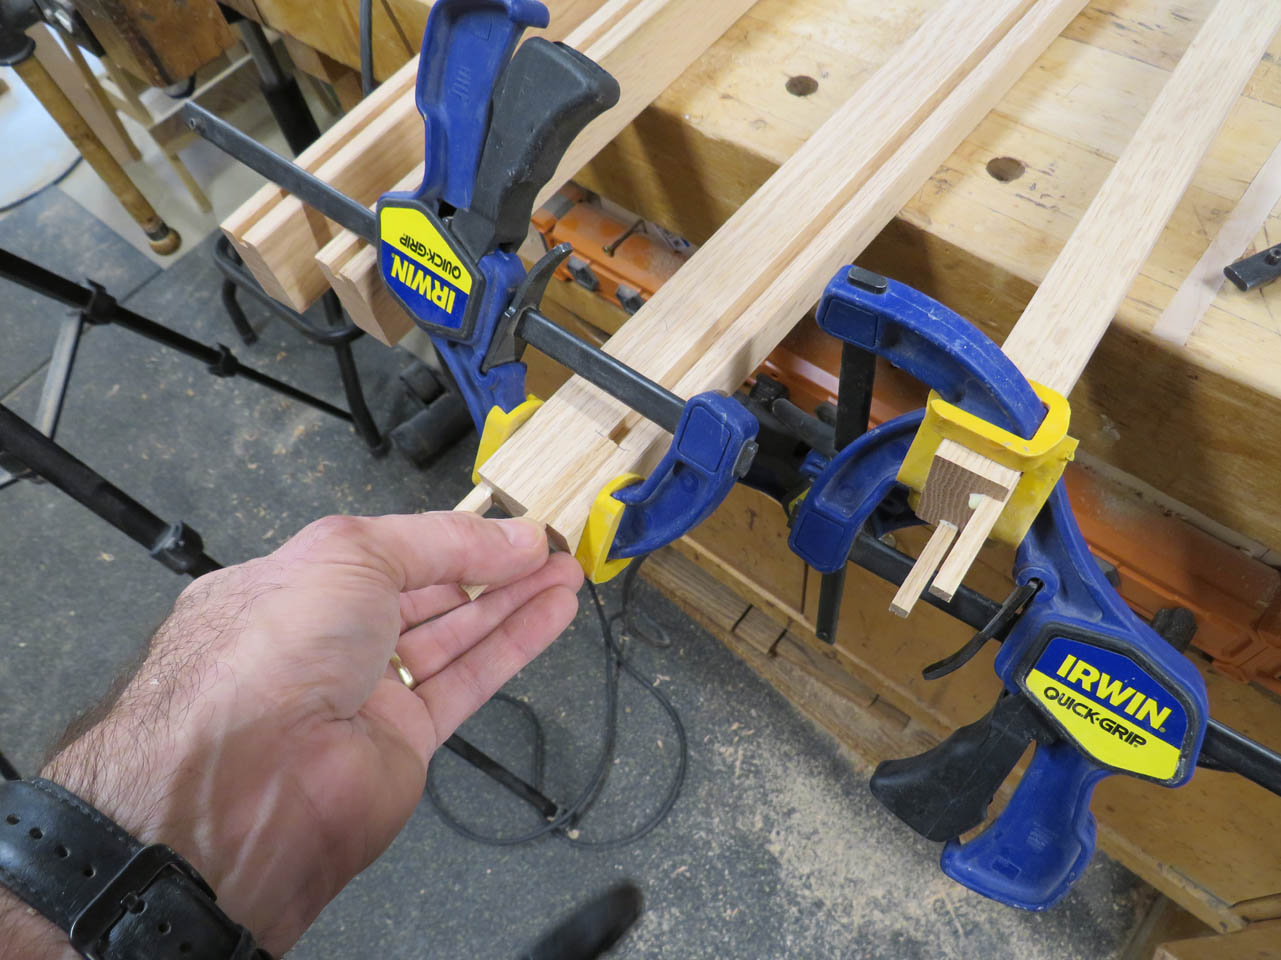
After the glue had dried, I flush-cut the excess away.

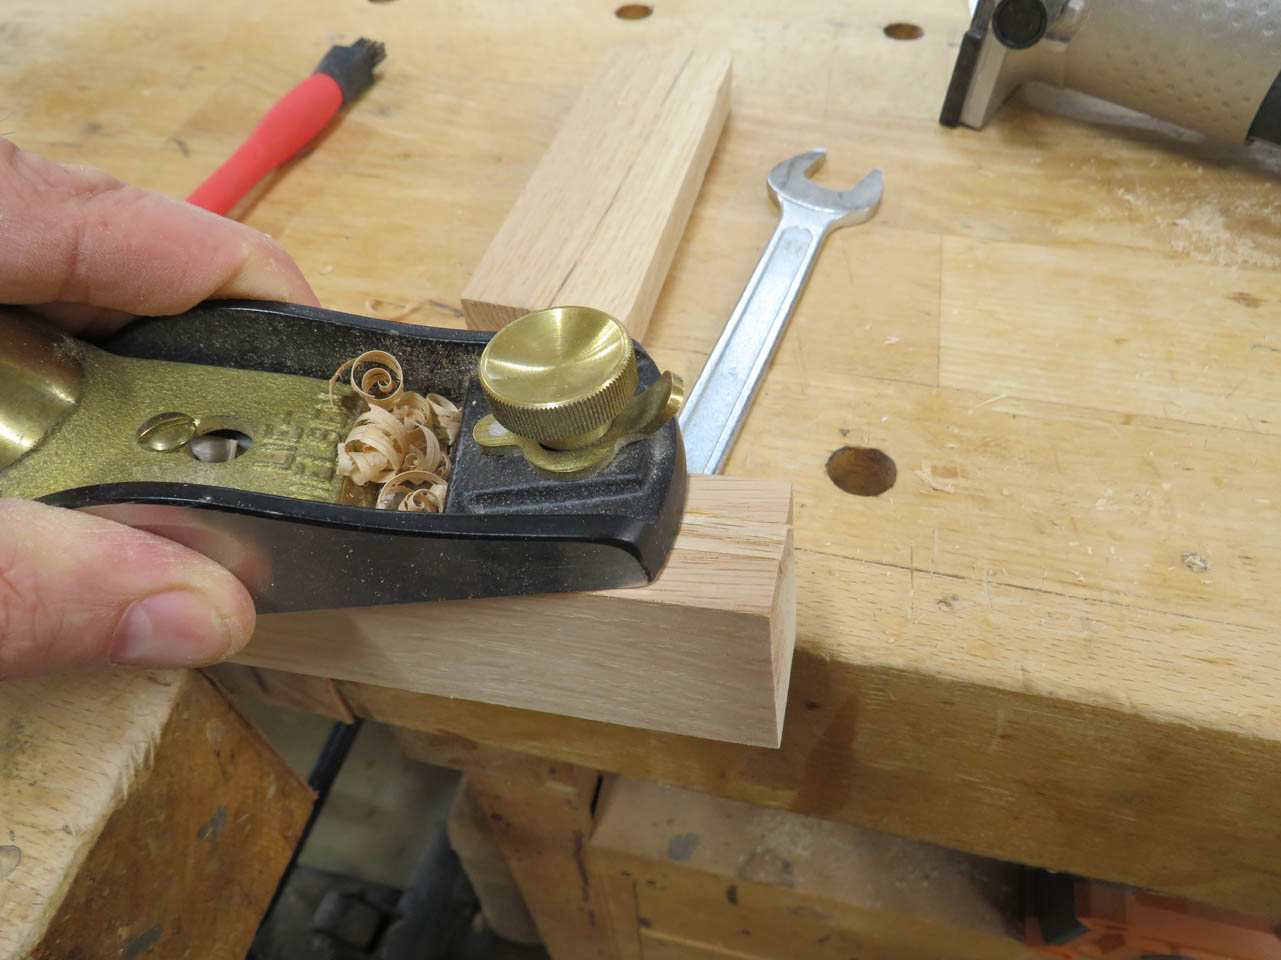
I used my block plane to plane the surface flush and the plugs were done. If you match the grain, they are practically unnoticeable after finish is applied.


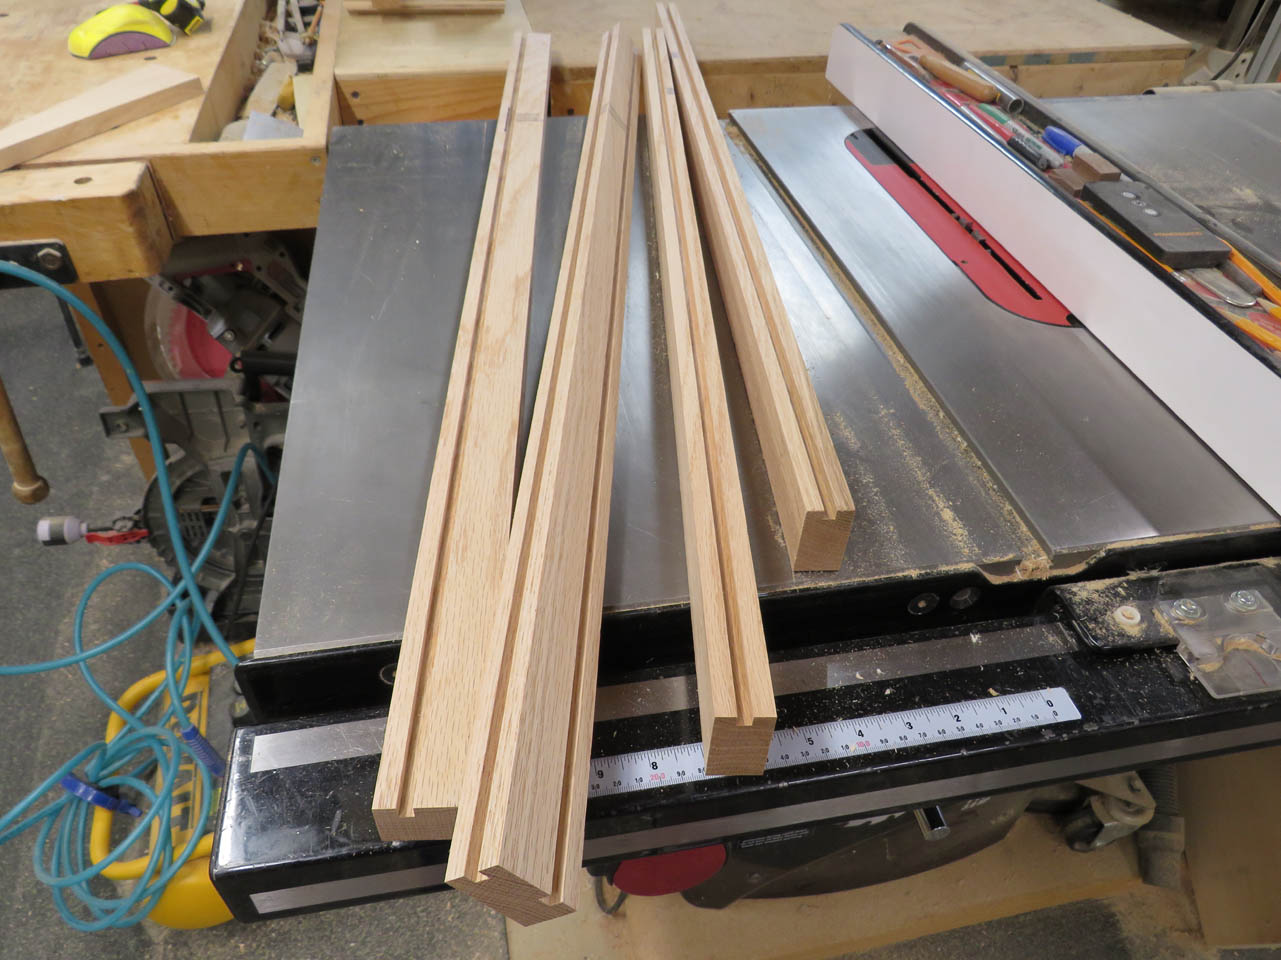
For the top and bottom frame of the plywood, I cut 1/4″ grooves as well as 1/4″ tenons so that they could also be glued into the same dado as the plywood.

These tenons were cut on the cross-cut sled, with the 1/4″ dado blade on my table saw.

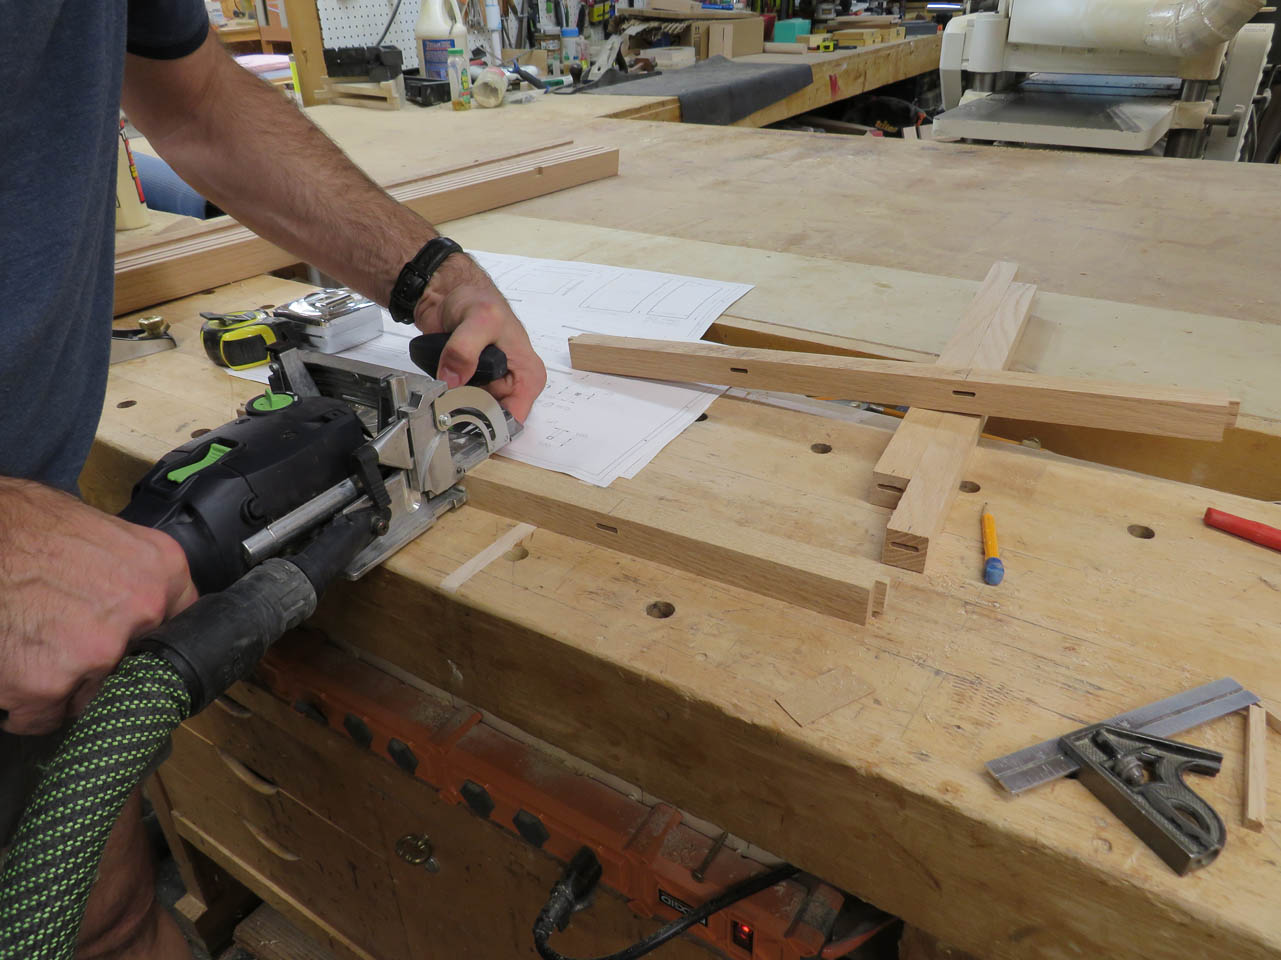
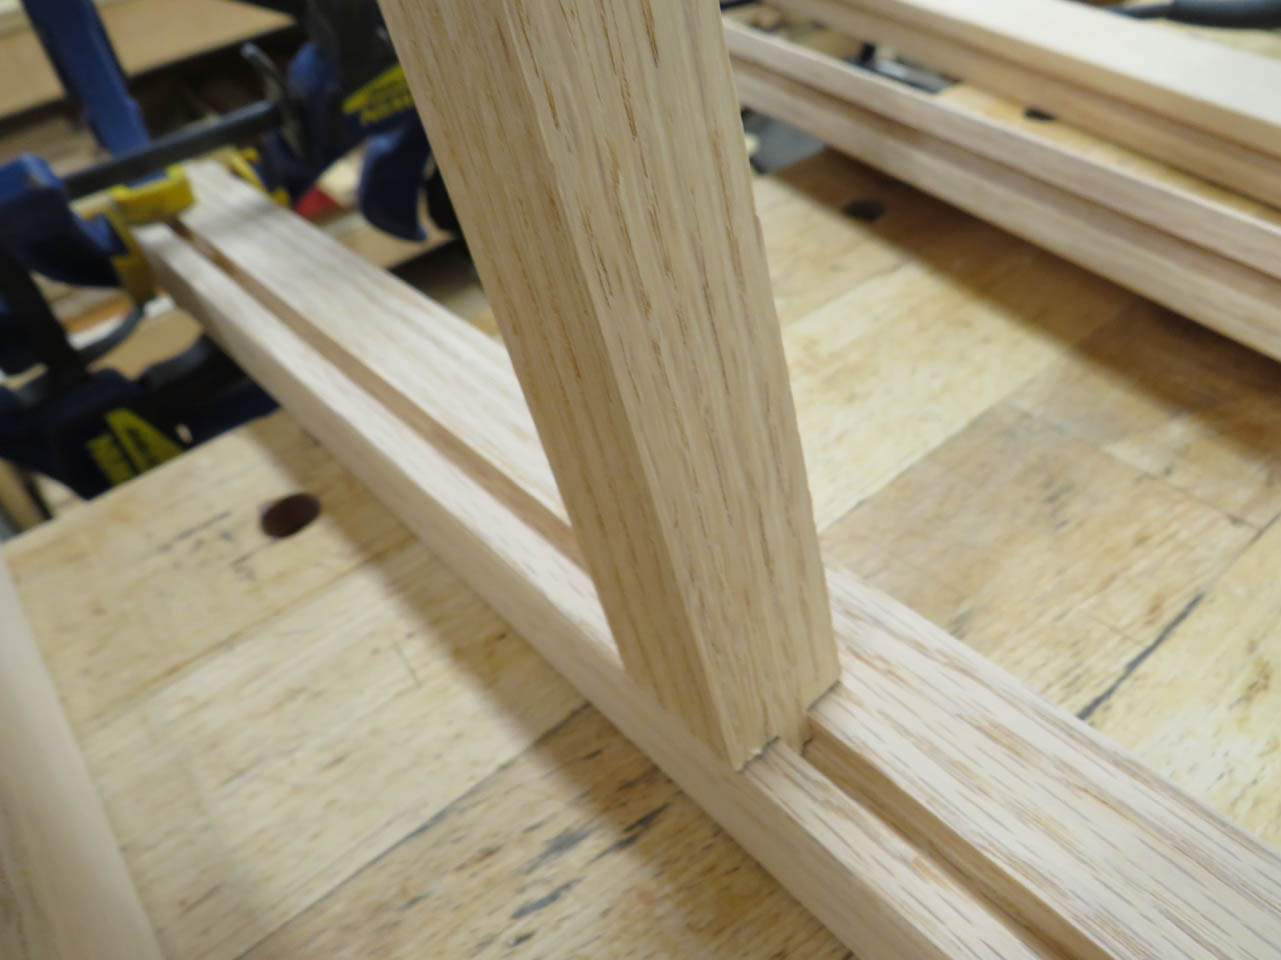
To attach the cross-bars at the bottom of the lectern, I am using loose tenons, cut by my Domino jointer.

A quick dry-fit shows that they will work fine.

All of the framework is now cut, all that is left is the 1/4″ plywood.

That I can cut with my track saw, and give it a quick sanding with the orbital hand sander.
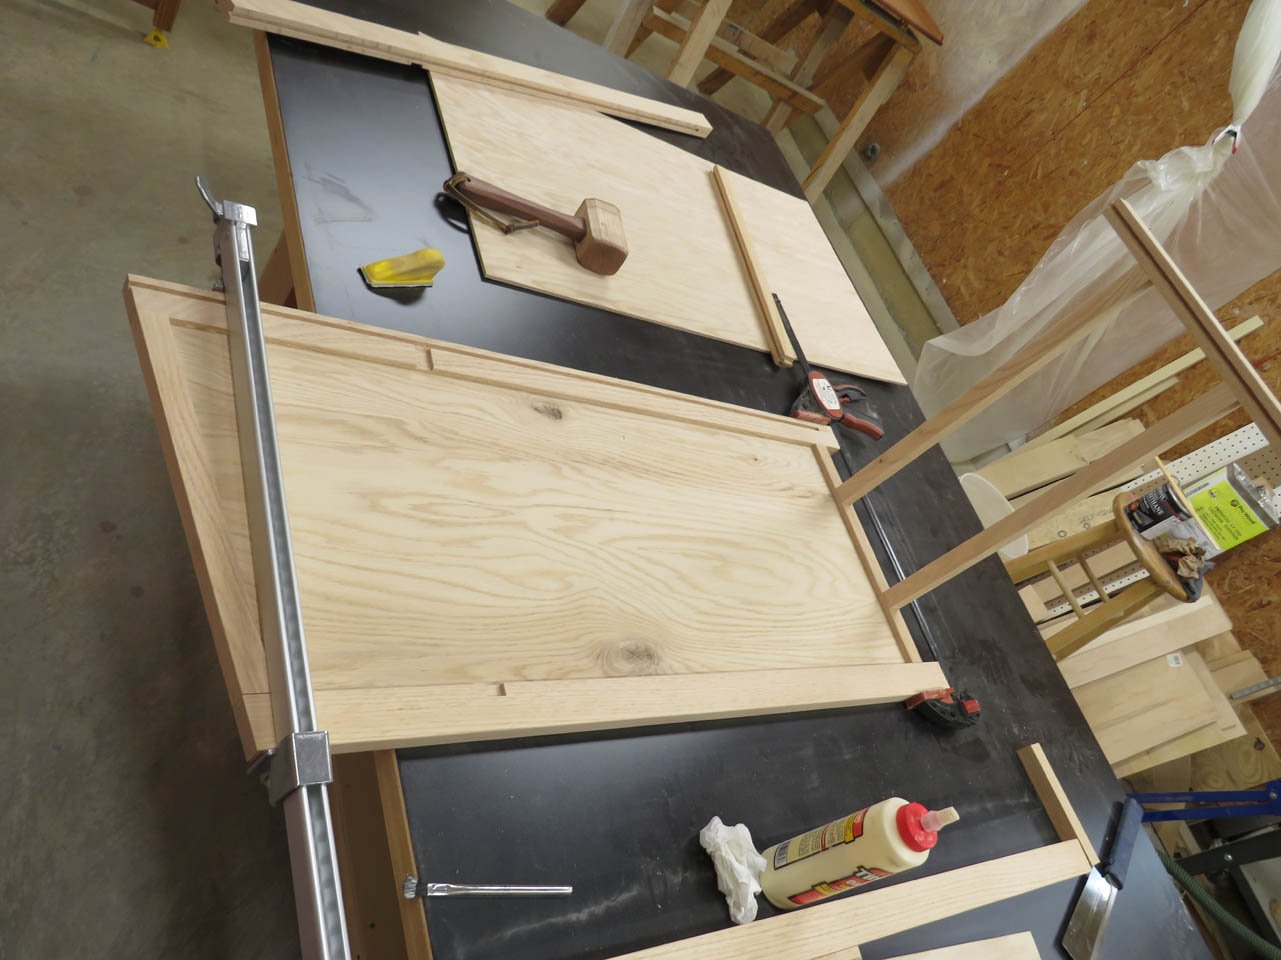
Now it is time to start gluing and clamping.
I did the sides and bottom first and let them dry.

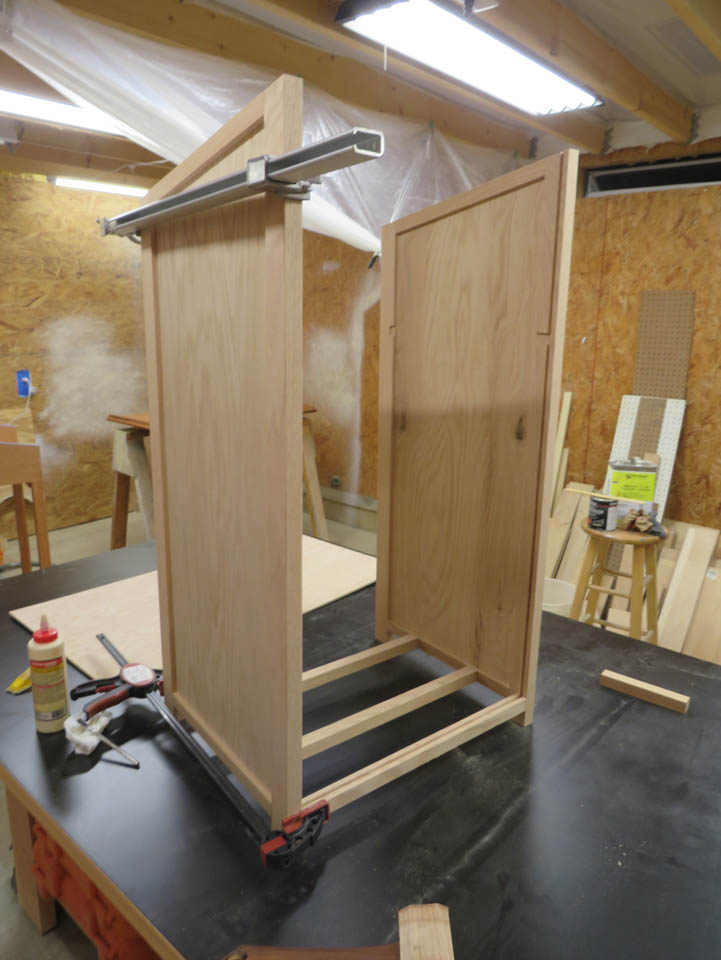
Next, I slid the front panel in the dados and added the shelf and top frame piece.

Once these dried, I could hand plane the 10° angle onto the top frame piece to make it flush with the angled top of the side pieces.


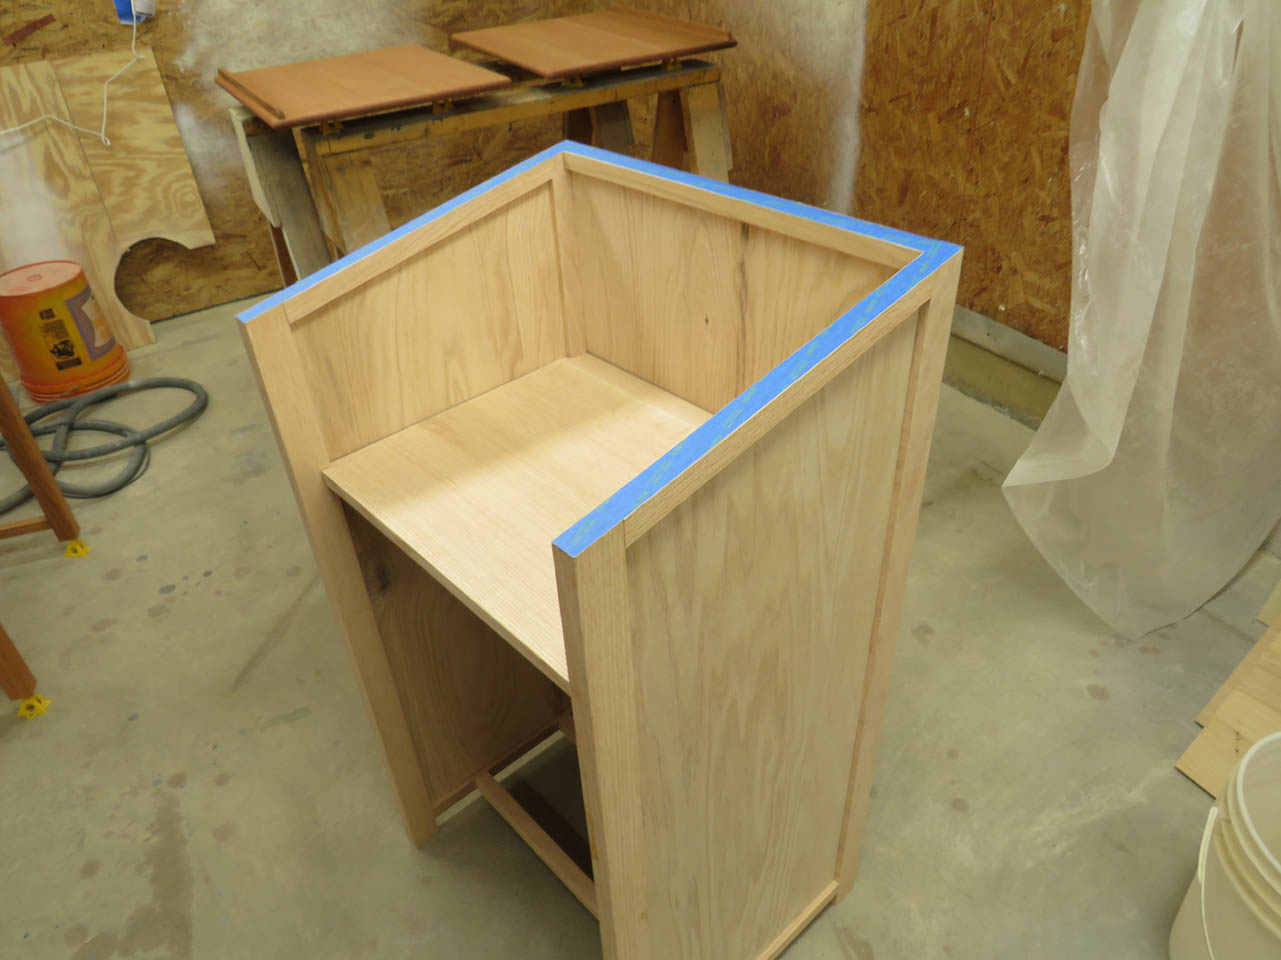
After that was done, I could locate and mark the top.


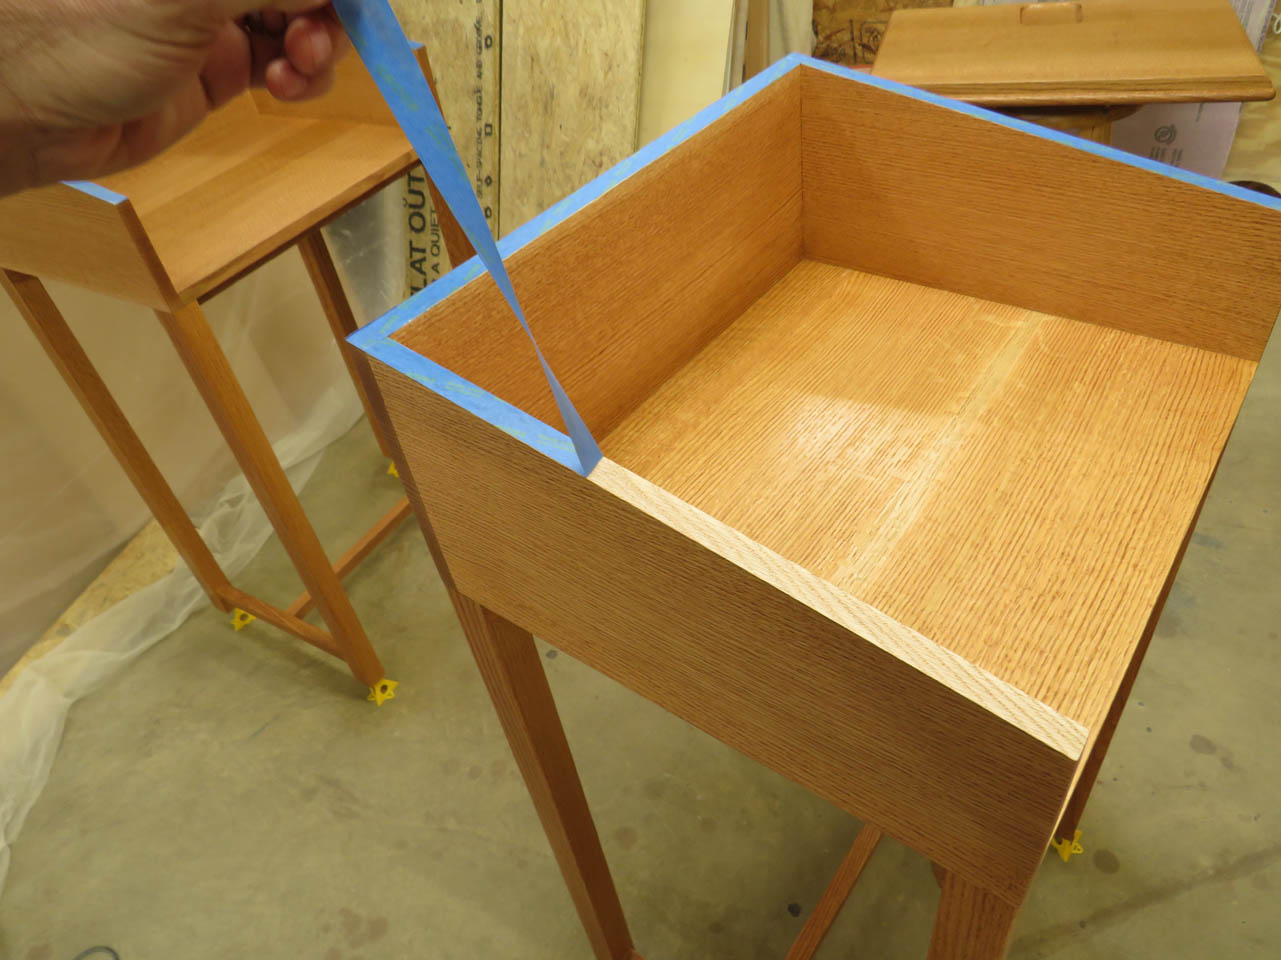
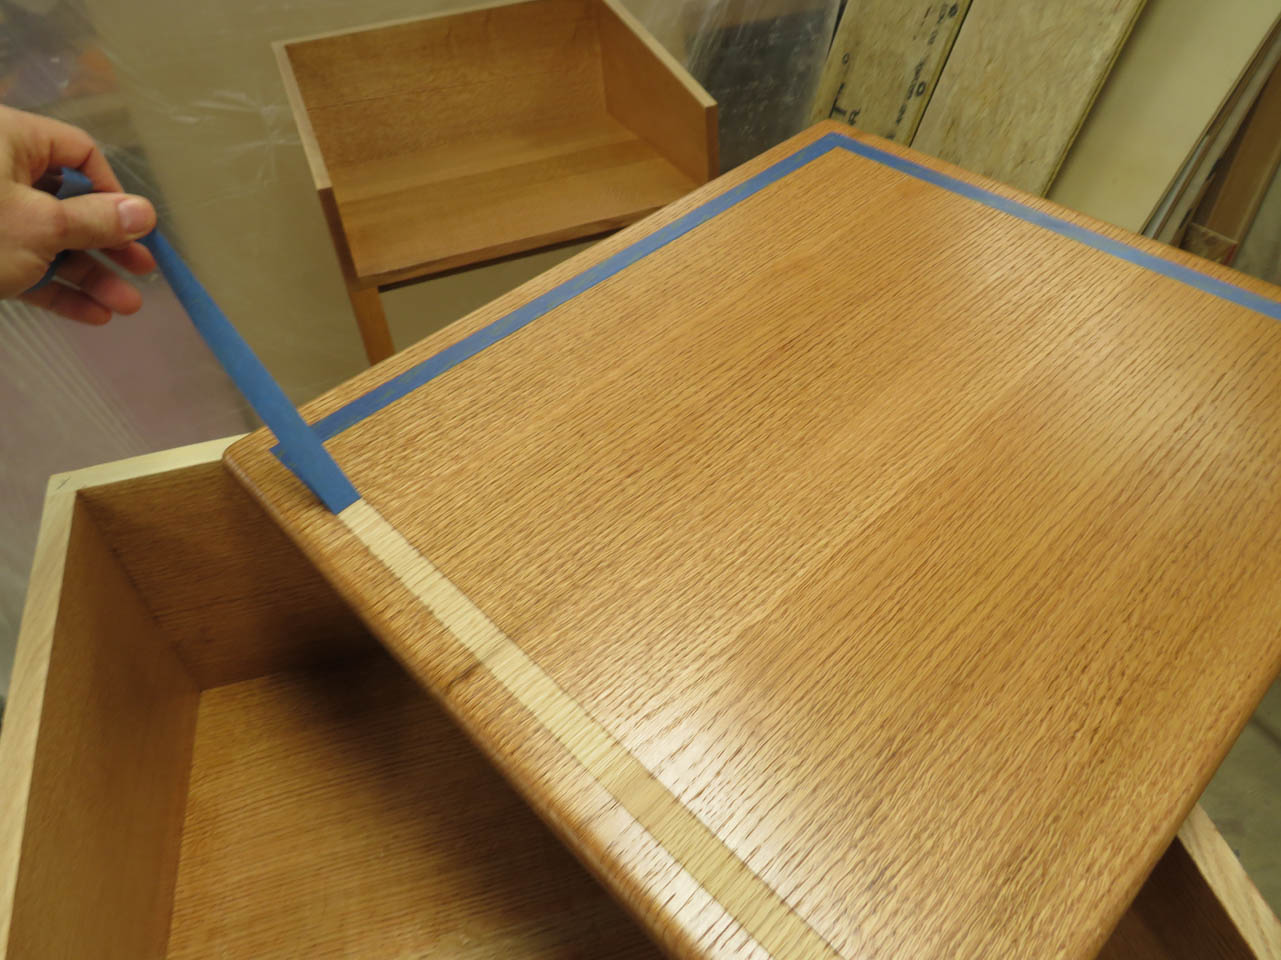
The marked area on the bottom of the top panel as well as the top of the lectern were masked off for finishing. This will leave a strip of bare wood for the glue to stick to for final assembly.

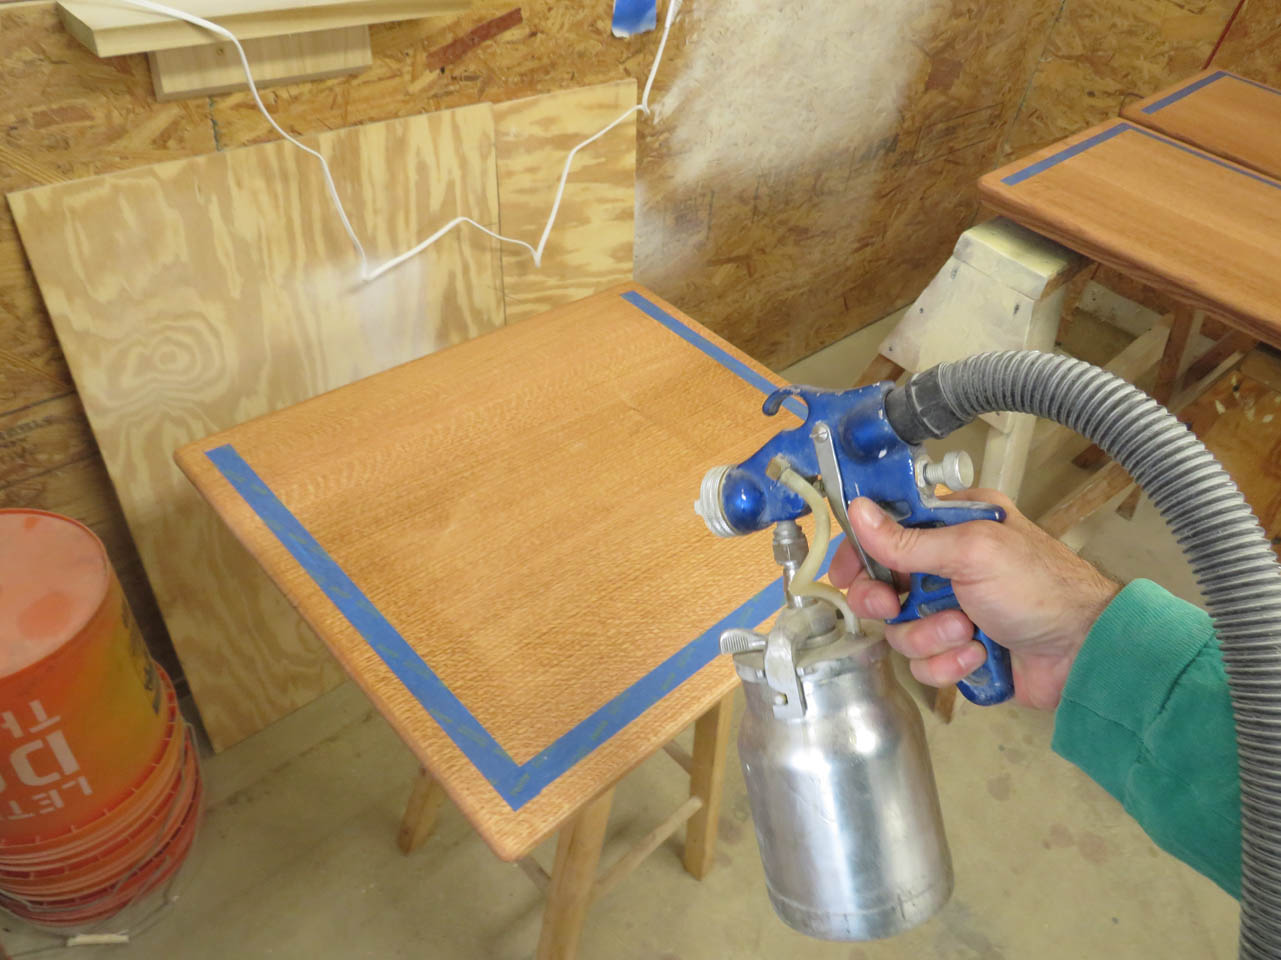
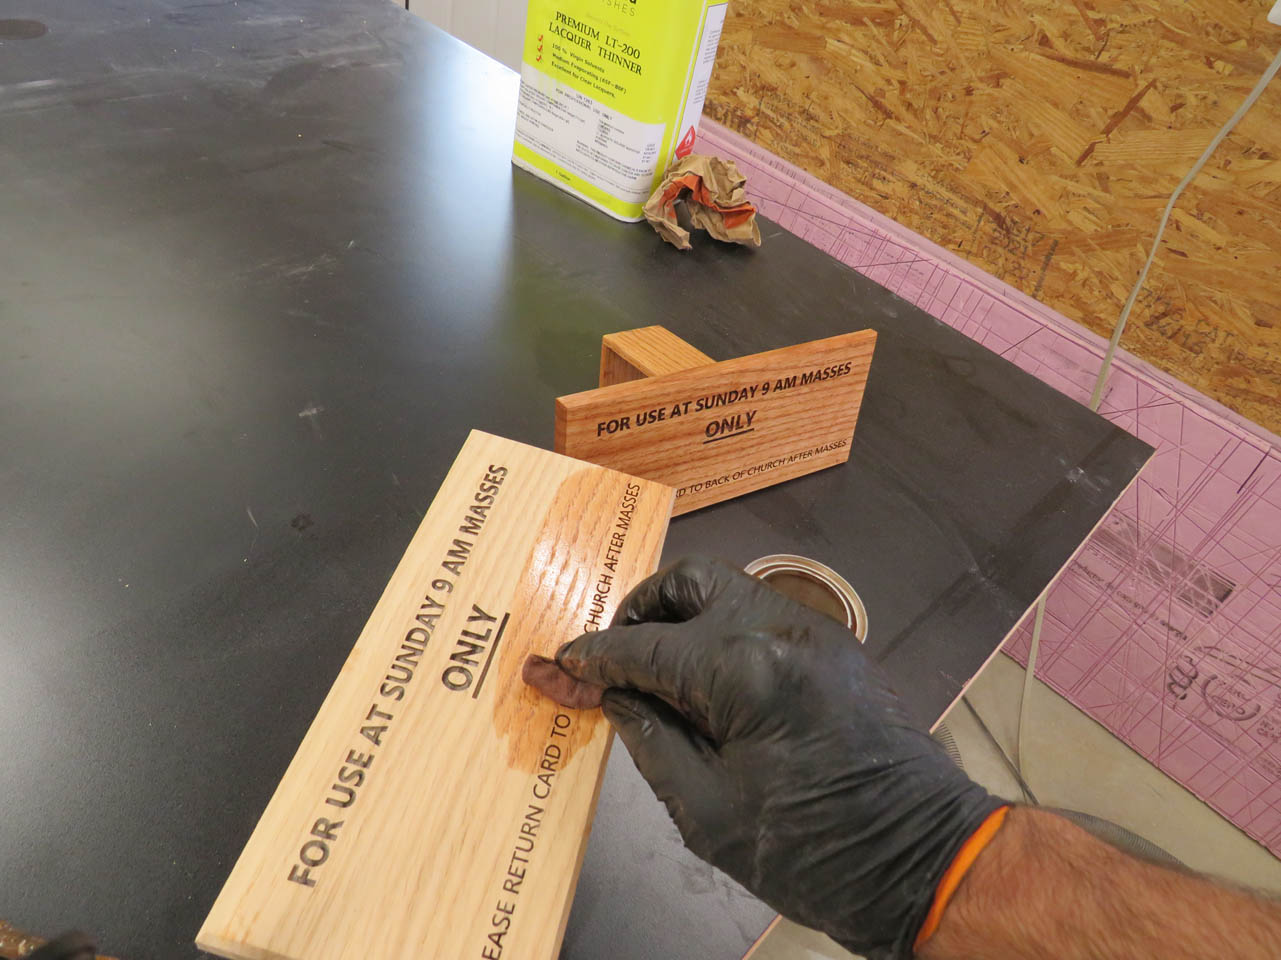
Then I could apply the cherry stain.

I let that dry overnight then got set up to spray polyurethane on all three stands.

I have started filtering all the stuff I spray anymore. There always seems to be something in the cans. Whether it has been opened for a while or sitting on the shelf at the store, there is always something that wants to clog my sprayer.


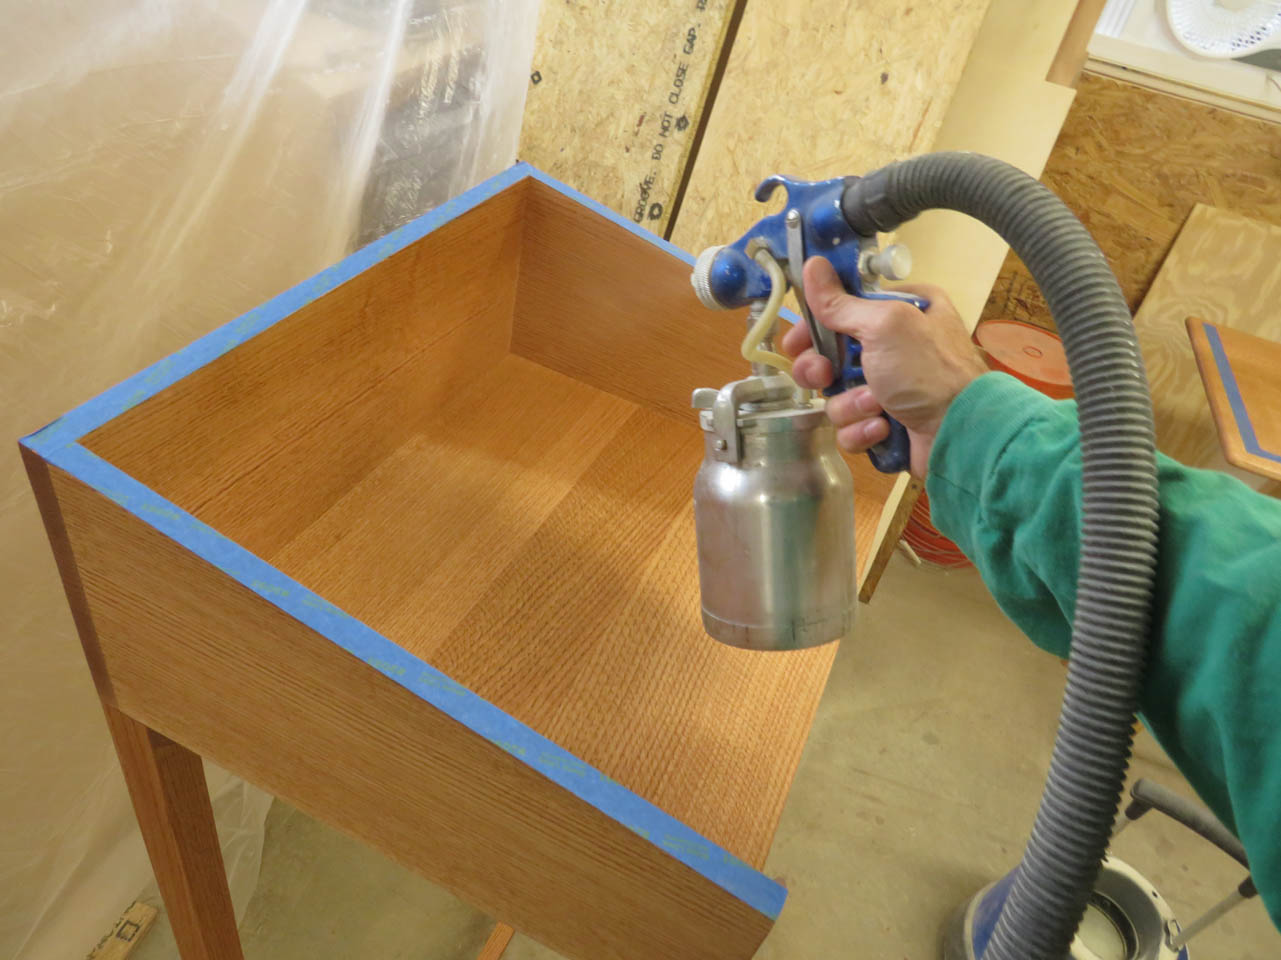
I start by spraying the bottoms of the stands, then I set them up on painter’s pyramids.
I also spray the tops the same way, bottoms first, then I flip them over onto pyramids.
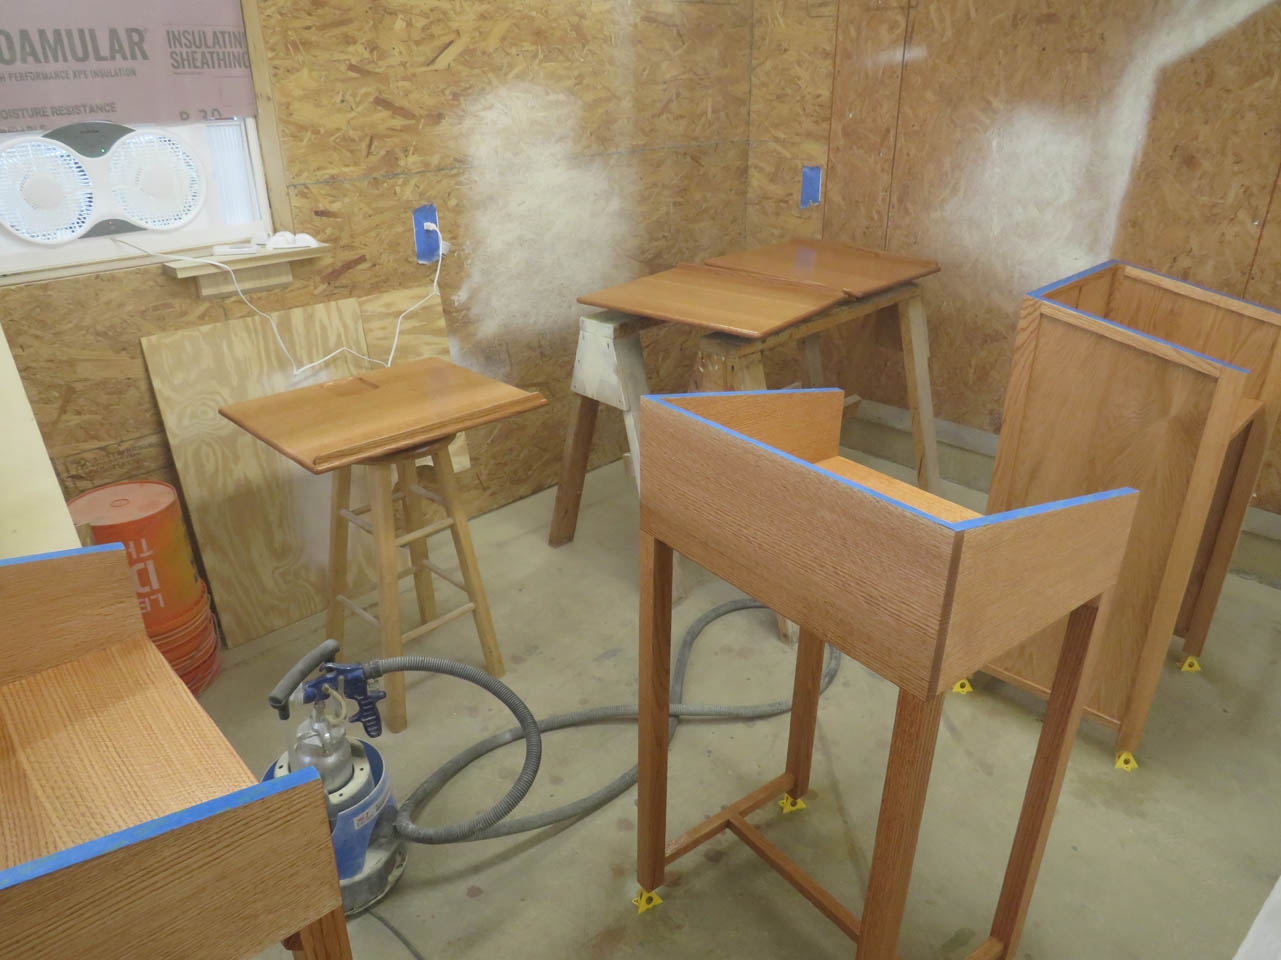
After letting the polyurethane dry overnight, I sanded all the surfaces with 400 grit paper and sprayed it all again.


Getting close to finishing this large project. All I have left is two signs and four picture frames to build.

While everything is drying, I can laser-engrave the two signs.

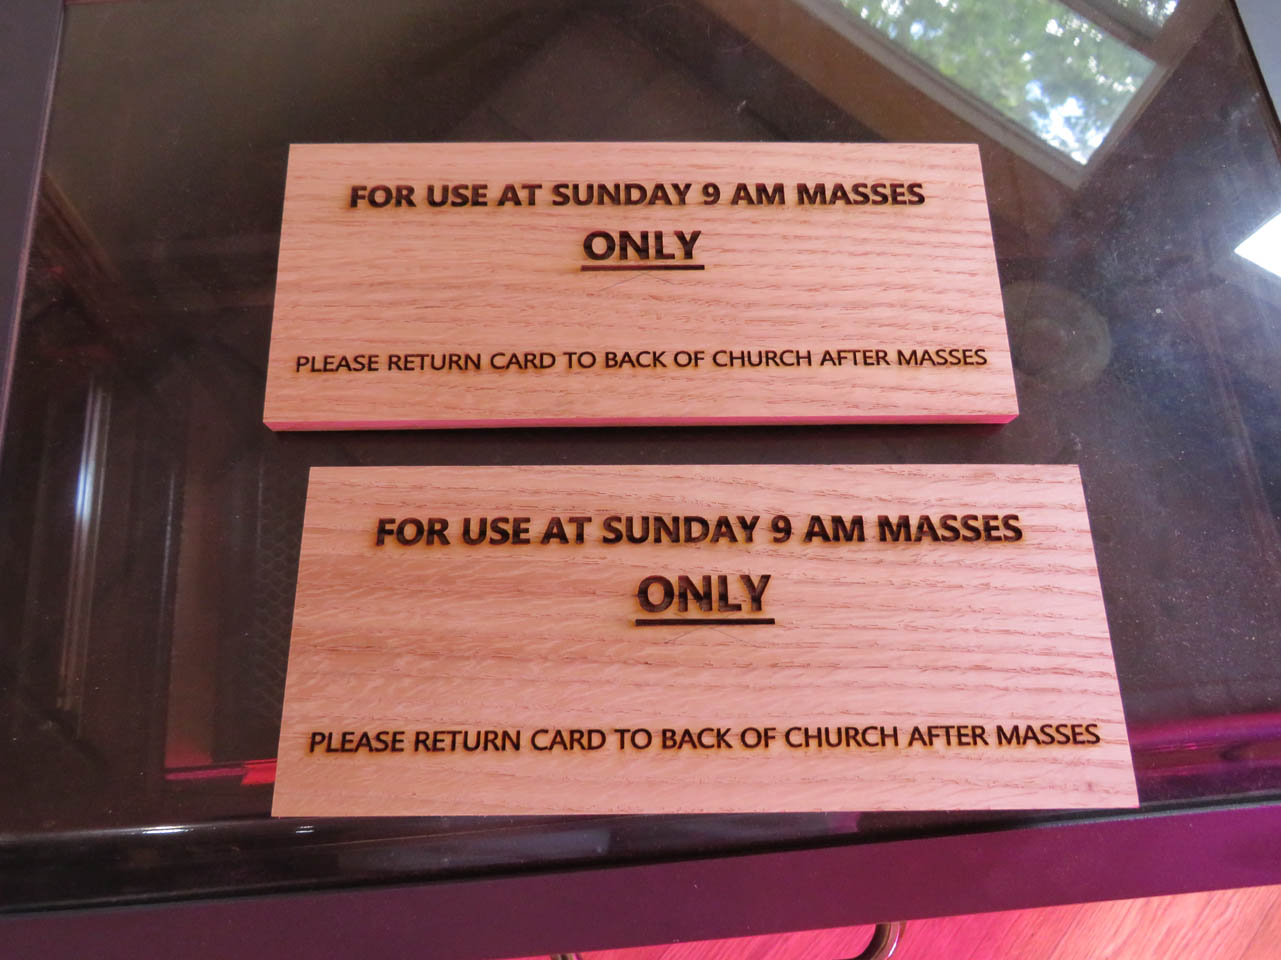

Once engraved, they get beveled edges applied on the router table.


Then a good sanding before getting glued to the wall brackets that I made earlier.


A couple of pin nails hold the bracket in place so it doesn’t slide away when I clamp it in place to dry.

These get a coat of stain and get set aside to dry.

The polyurethane is now dry so I can remove all of the masking tape.
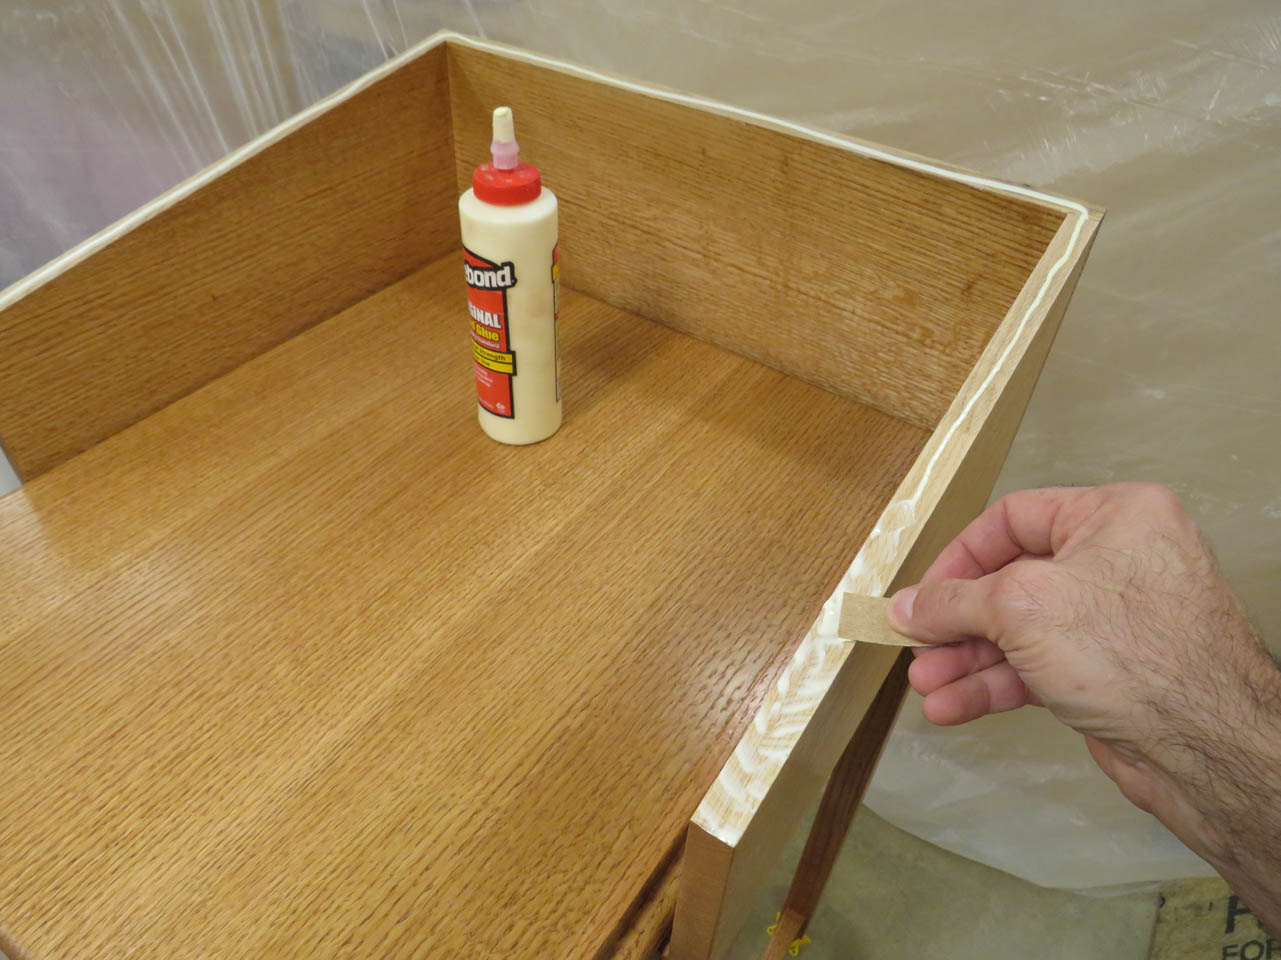
I apply glue to the top of the guestbook stands and clamp the tops in place to dry.


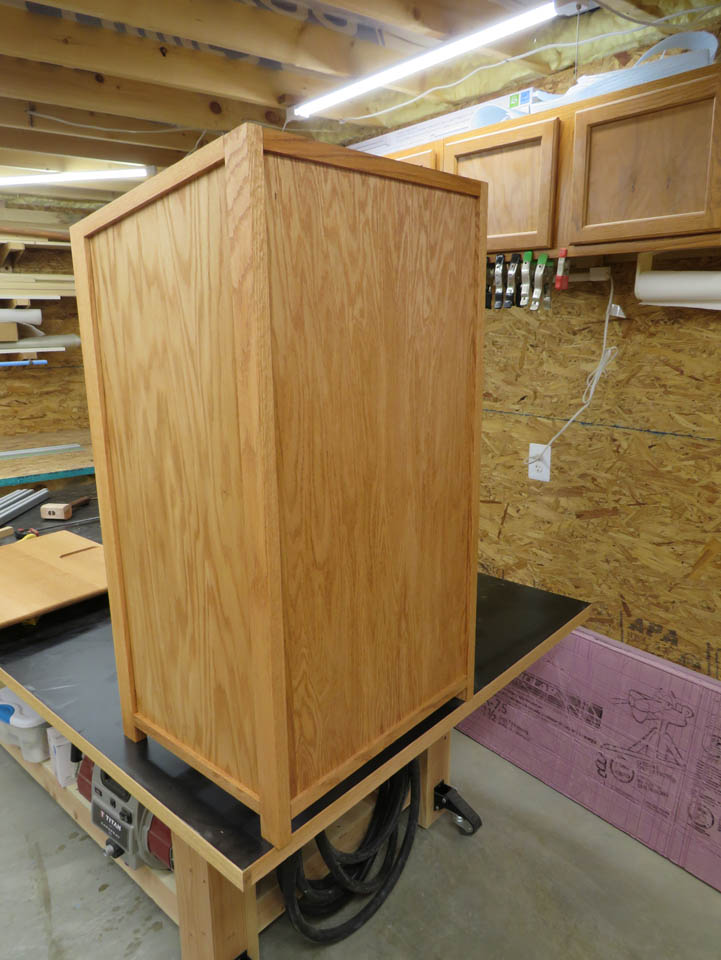
The lectern is similarly glued and clamped, but it is a bit more awkward. I also used a couple of pins to hold the top in place, then used longer clamps to hold it together. I also used an off-cut 10° pieces to give me a flat plane to clamp to.


I left them to dry and over the next day sprayed the signs with two coats of polyurethane as well.

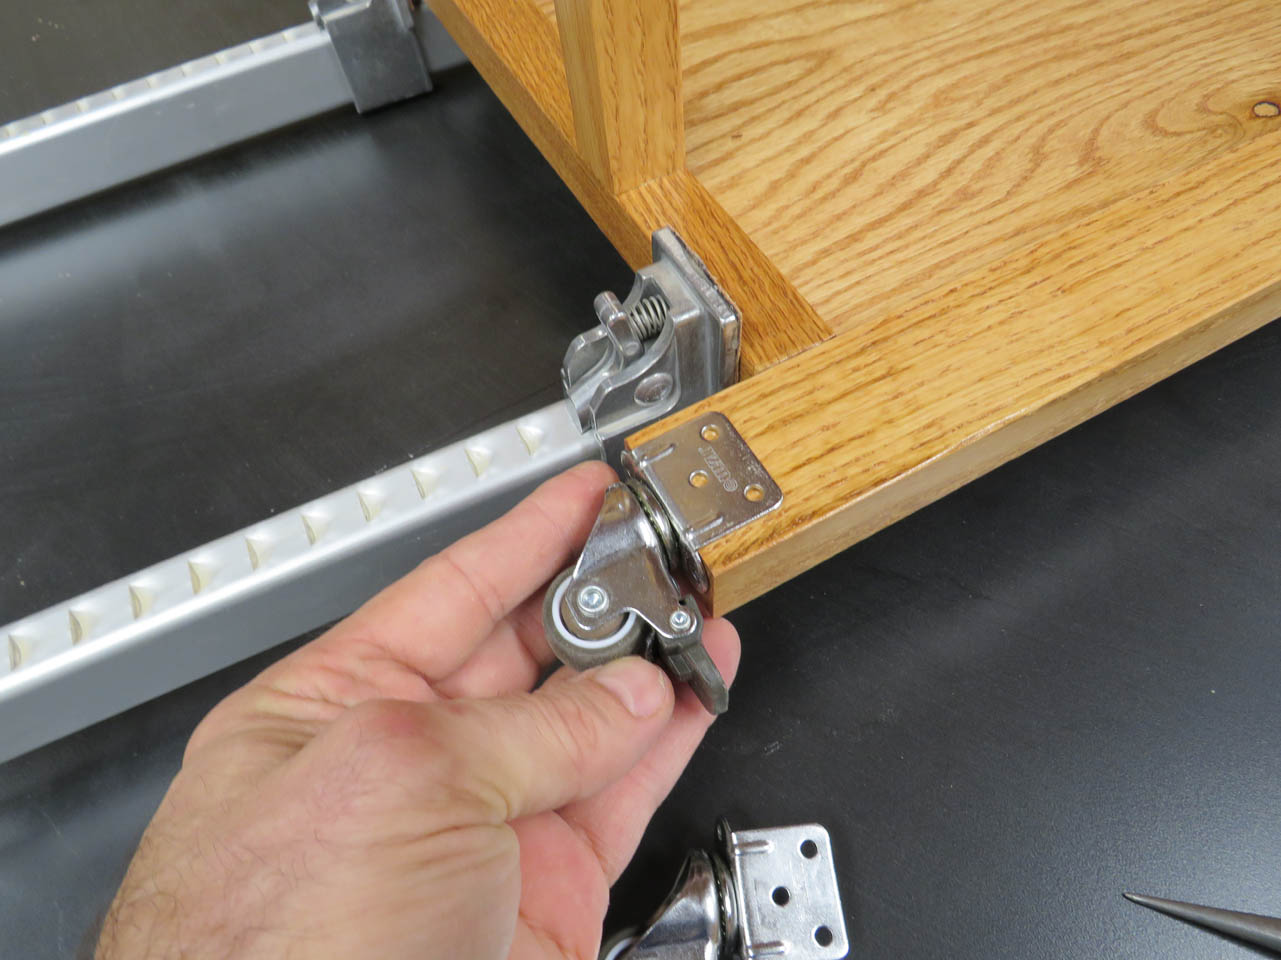
The last thing to do is add casters to the bottom of each stand.
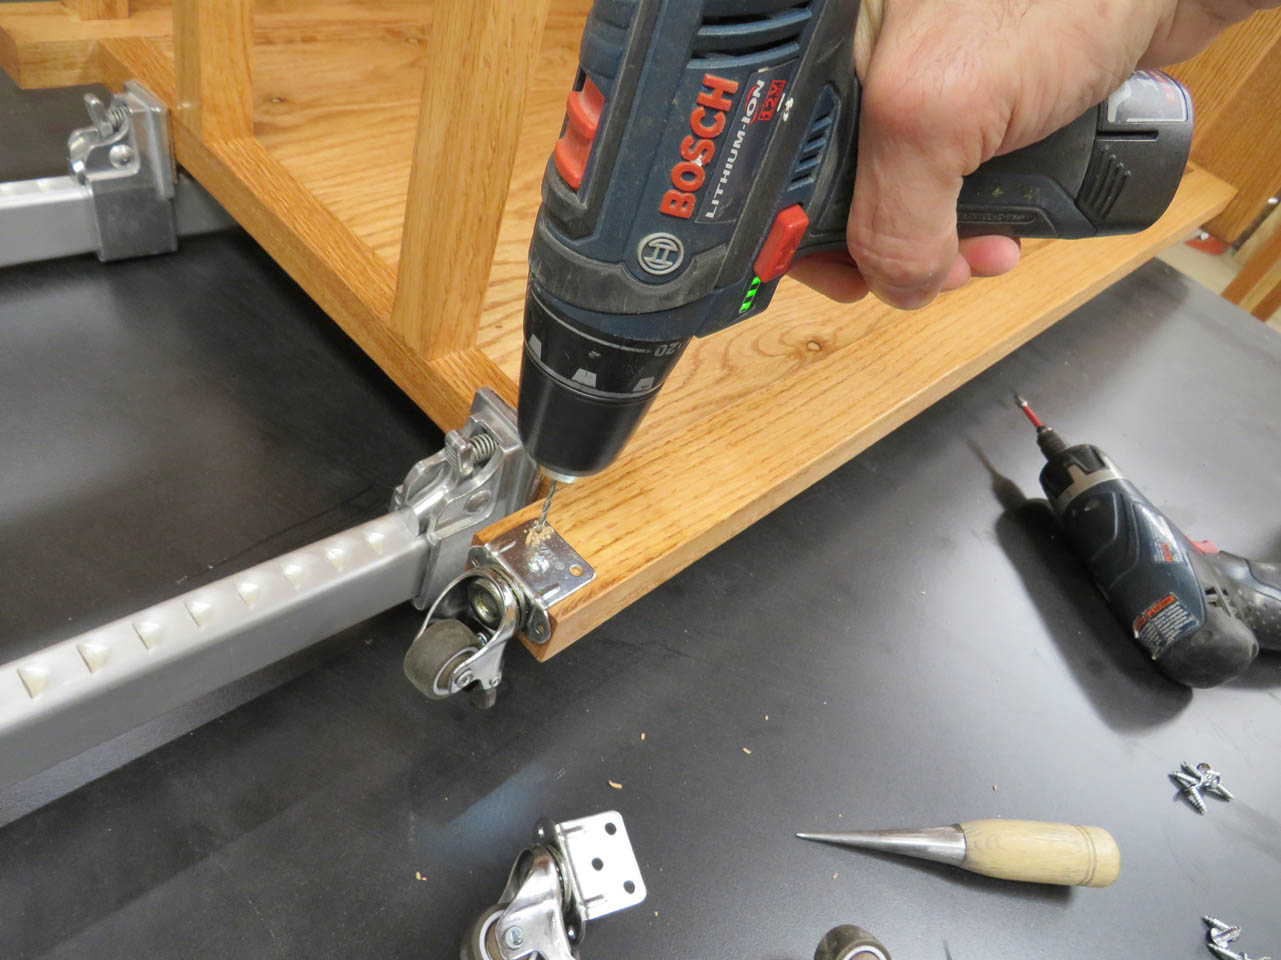

The legs of the two different stands are different shapes so I used two different types of casters. The lectern has all swivel casters with only two of them locking.


The guestbook stand has swivel casters as well but all four on each is locking. The lectern is mainly used for reading and probably won’t need to be locked in place, but I reasoned that the guestbook stands needed to be locked in place since people would be leaning on them to write.

The two guestbook stands and the signs are now complete. Next up will be four picture frames.